Altenew Educators “Style it with Stencils” Blog Hop and Linky Party + Giveaway

Altenew Educators “Style it with Stencils” Blog Hop and Linky Party + Giveaway

Hello everybody!!! It’s so nice to be with my co-educators again for another blog hop. šŸ˜Š If you just came from Maryam Sharara‘s blog, then you’re on the right track. Make sure you drop by the Altenew Blog for complete details of the hop.

This blog hop is all about stencils. Altenew has quite a number of beautiful stencils. Here are some creative ways on how you can make some backgrounds using stencils to create some CAS and dimensional cards. I also included some tips on how to fix mistakes, too.


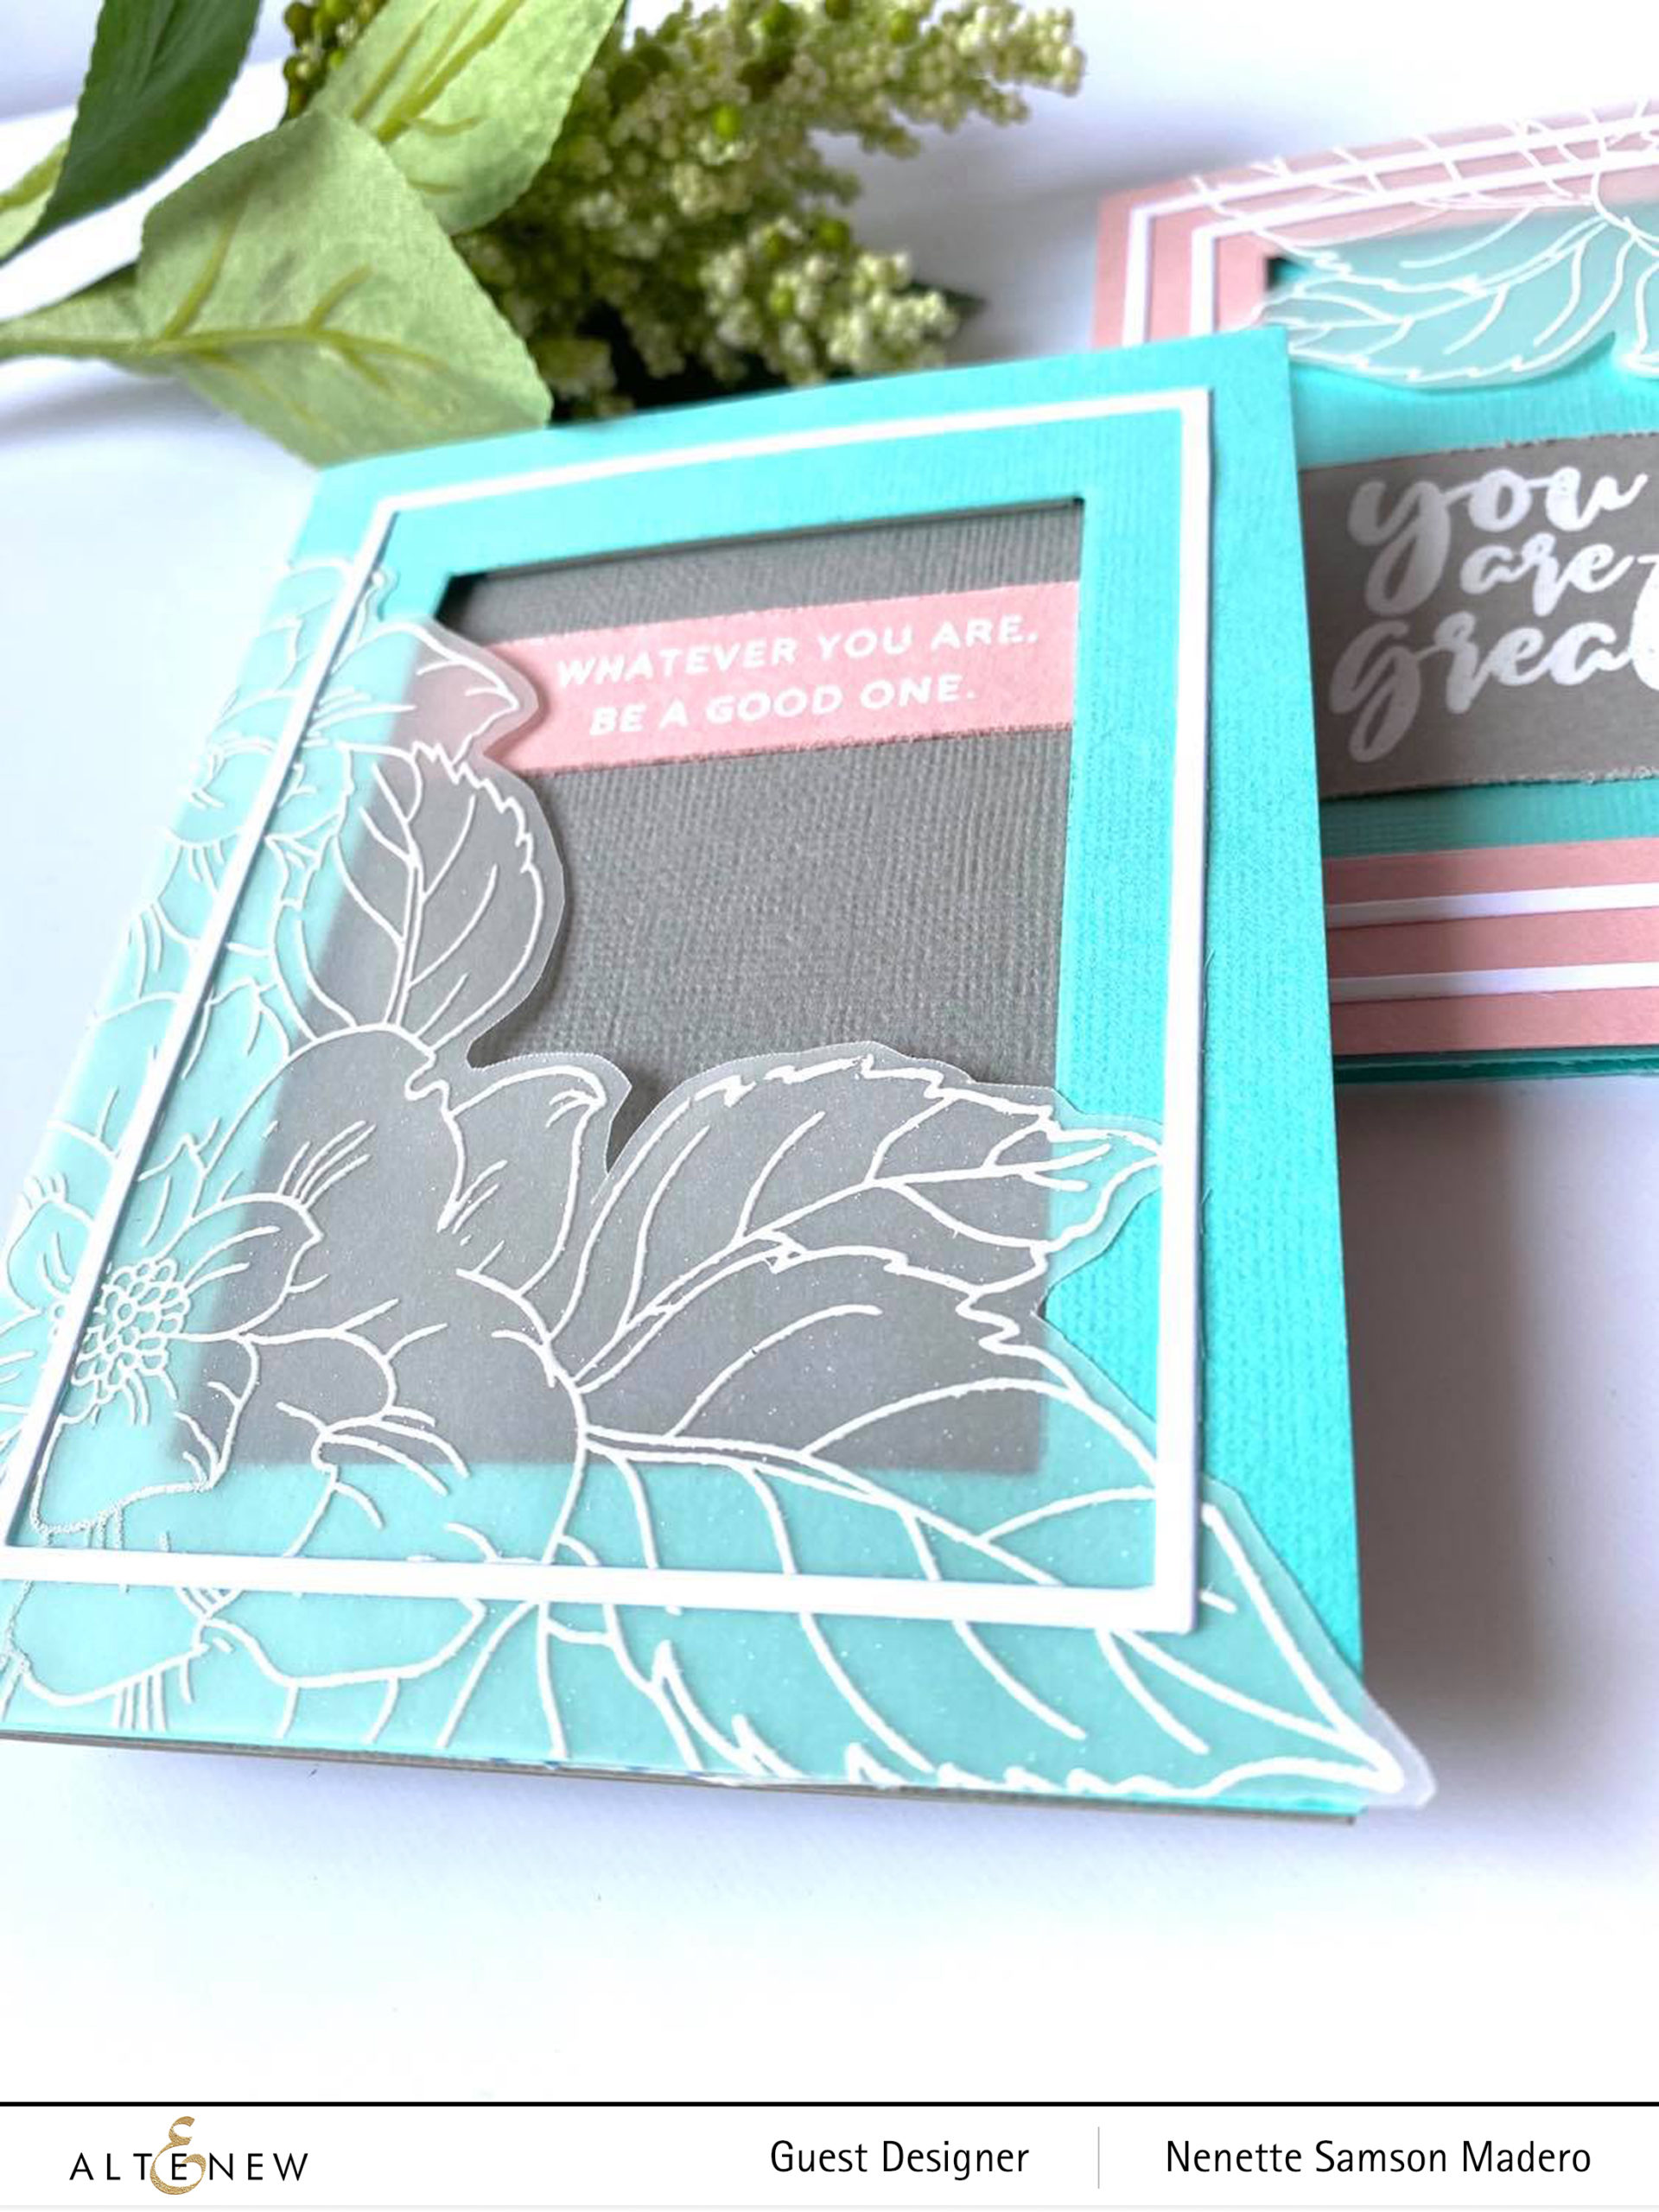
BE OUR OWN KIND OF BEAUTIFUL


MATERIALS: Bursting Dahlia Stencil, Fine Frames Cover Die, Paint-a-Flower:Paeonia Japonica, Distress Oxide Inks- Broken China, Picked Raspberry, Fossilized Amber, Foam Squares

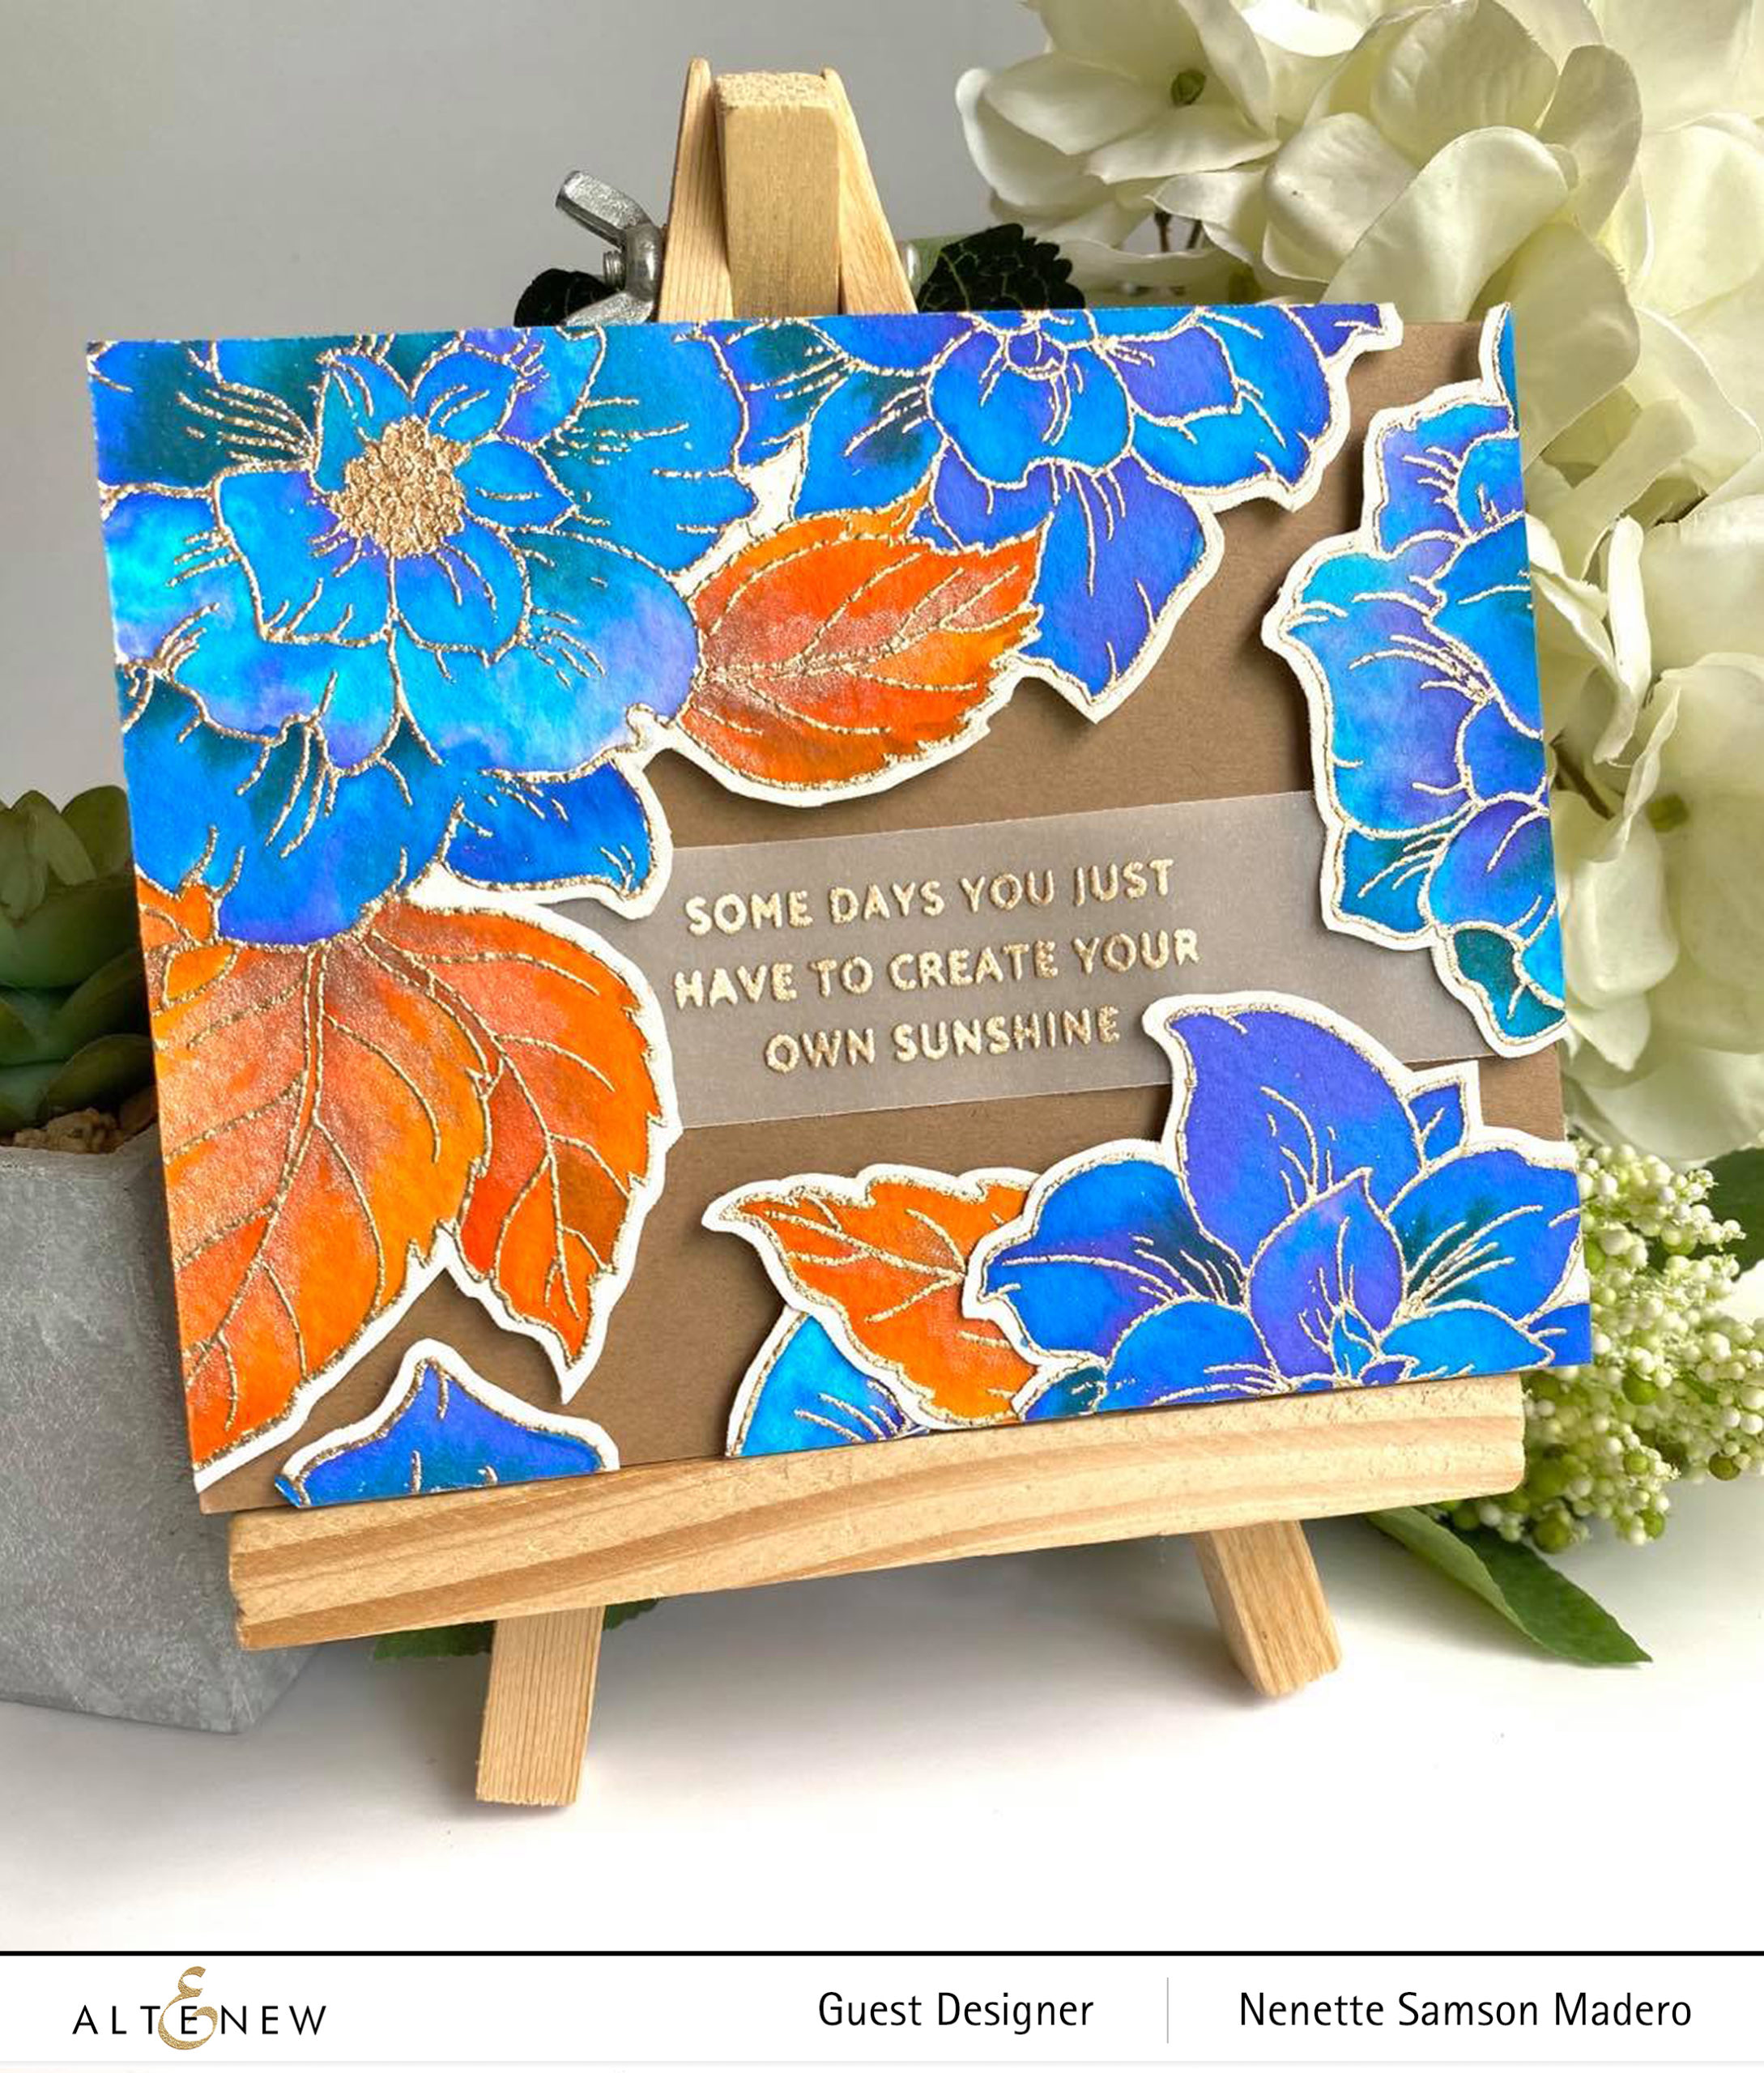
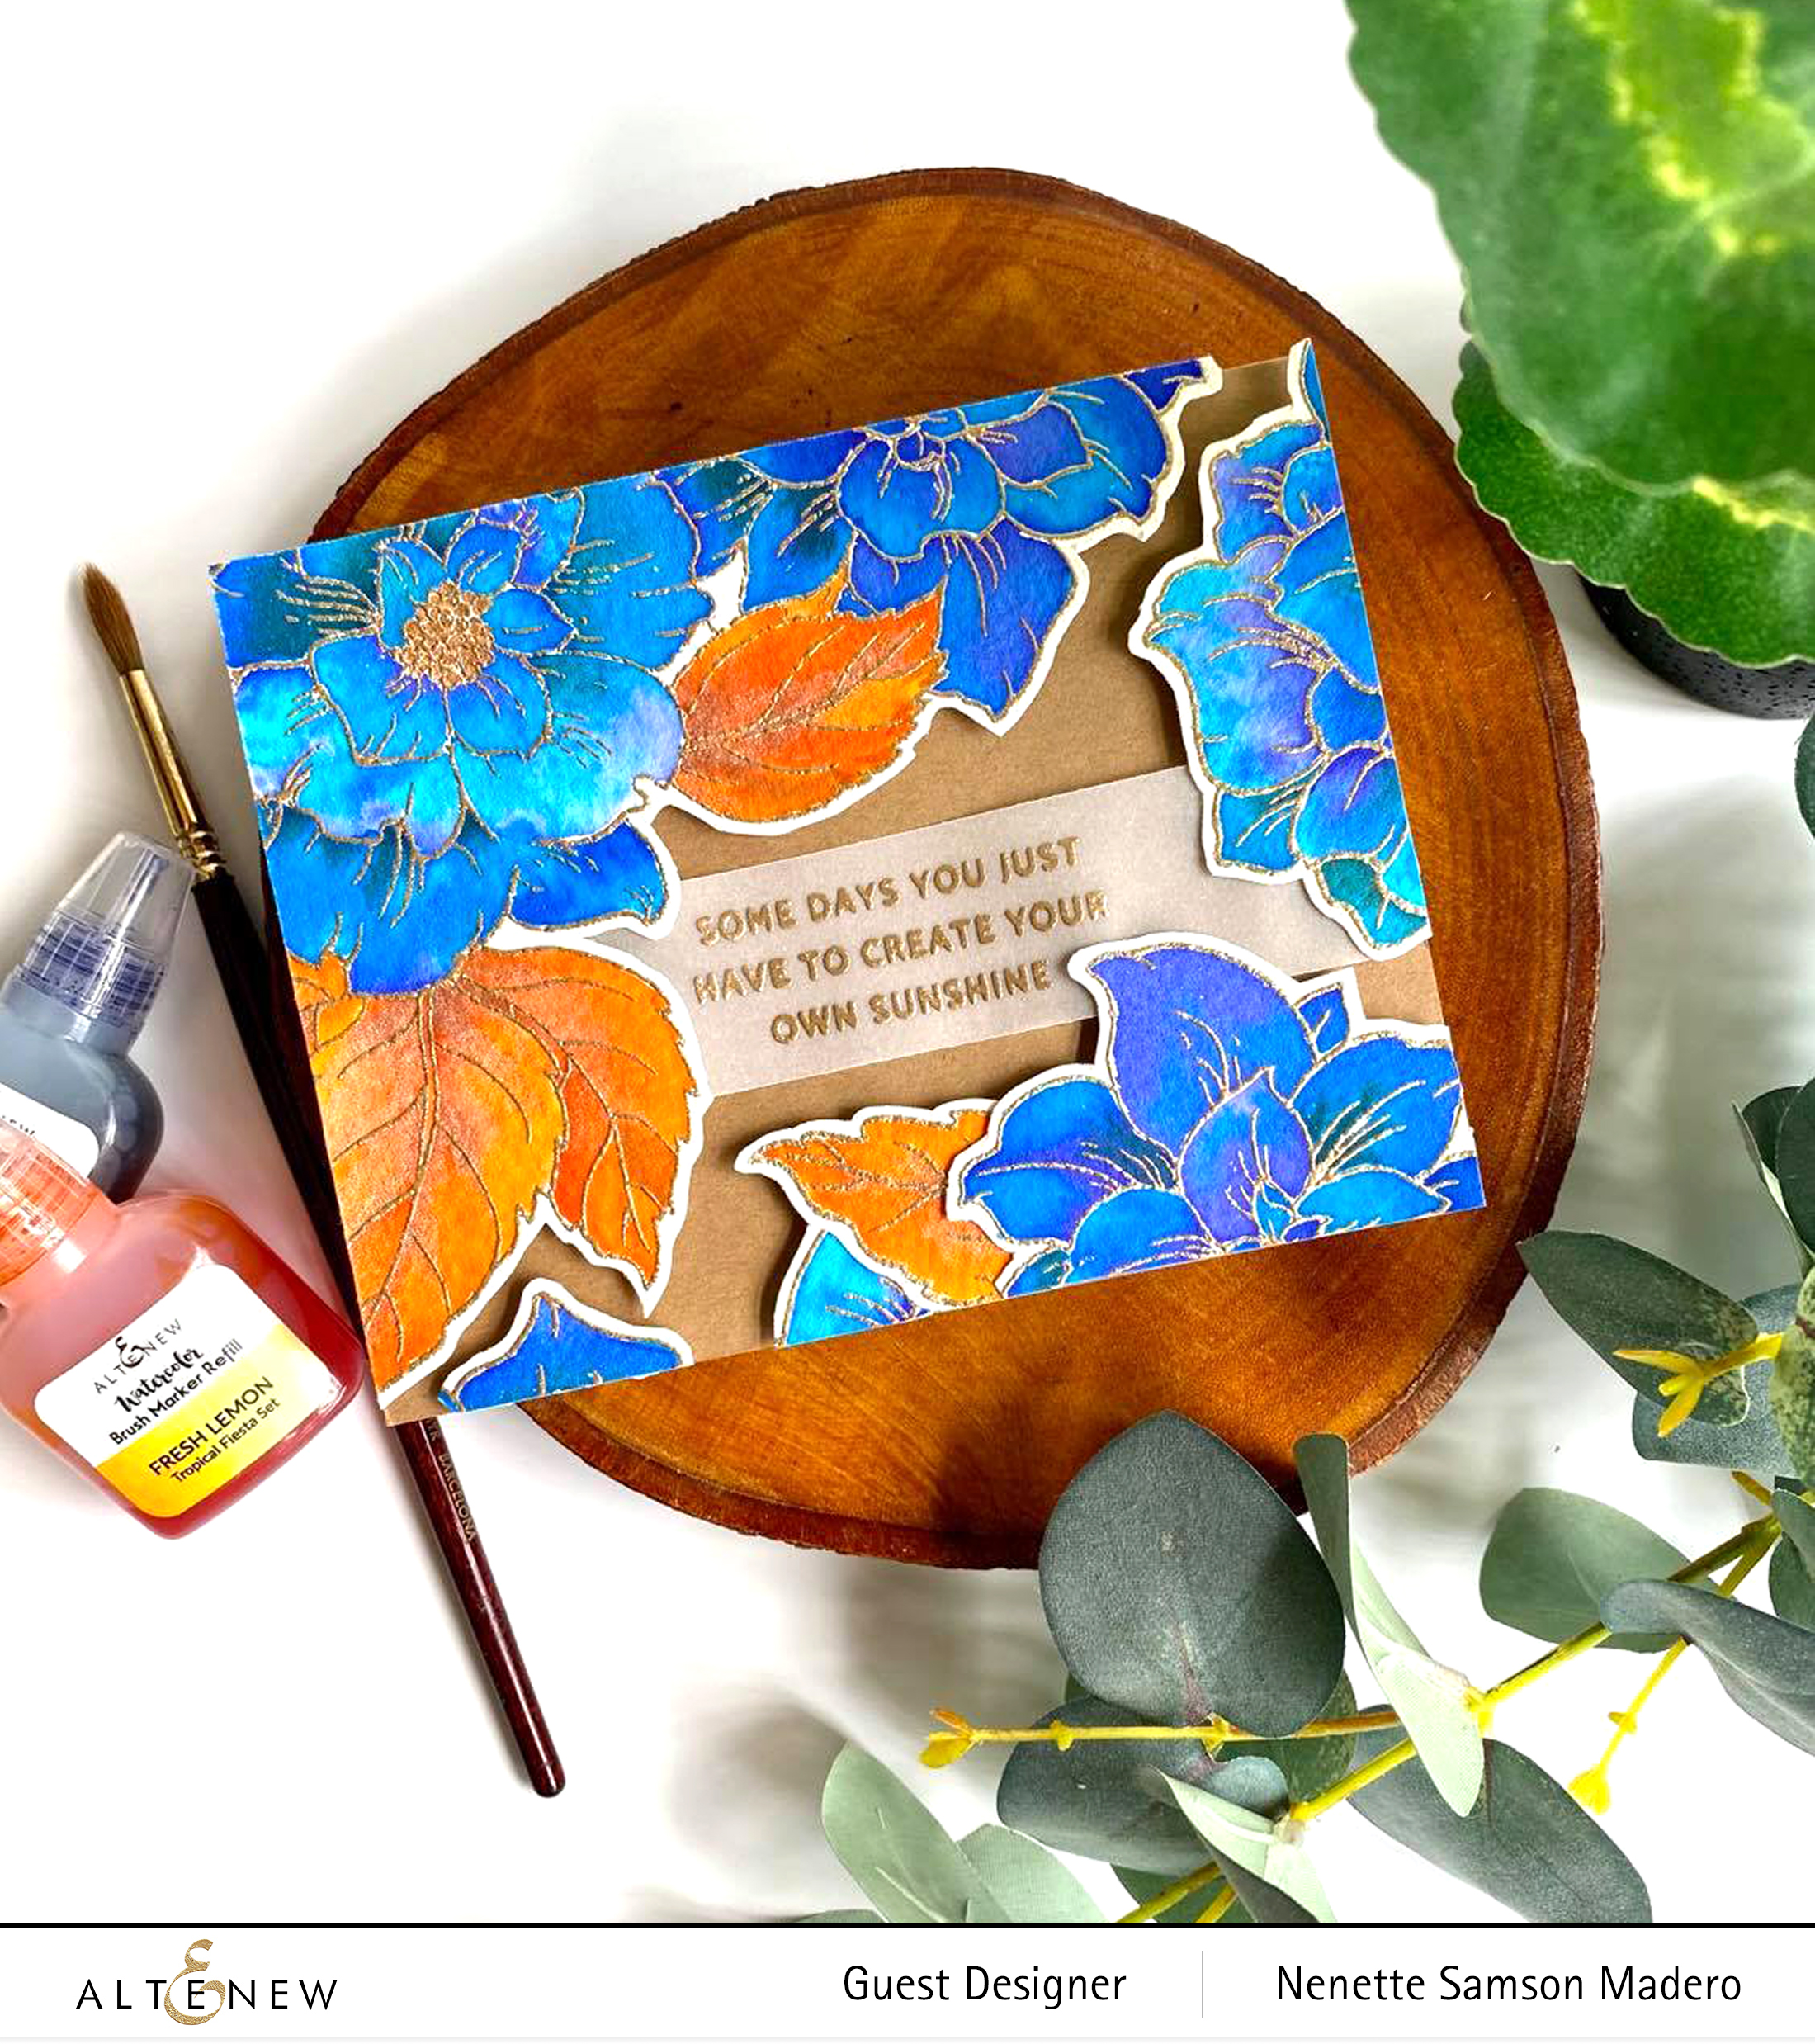
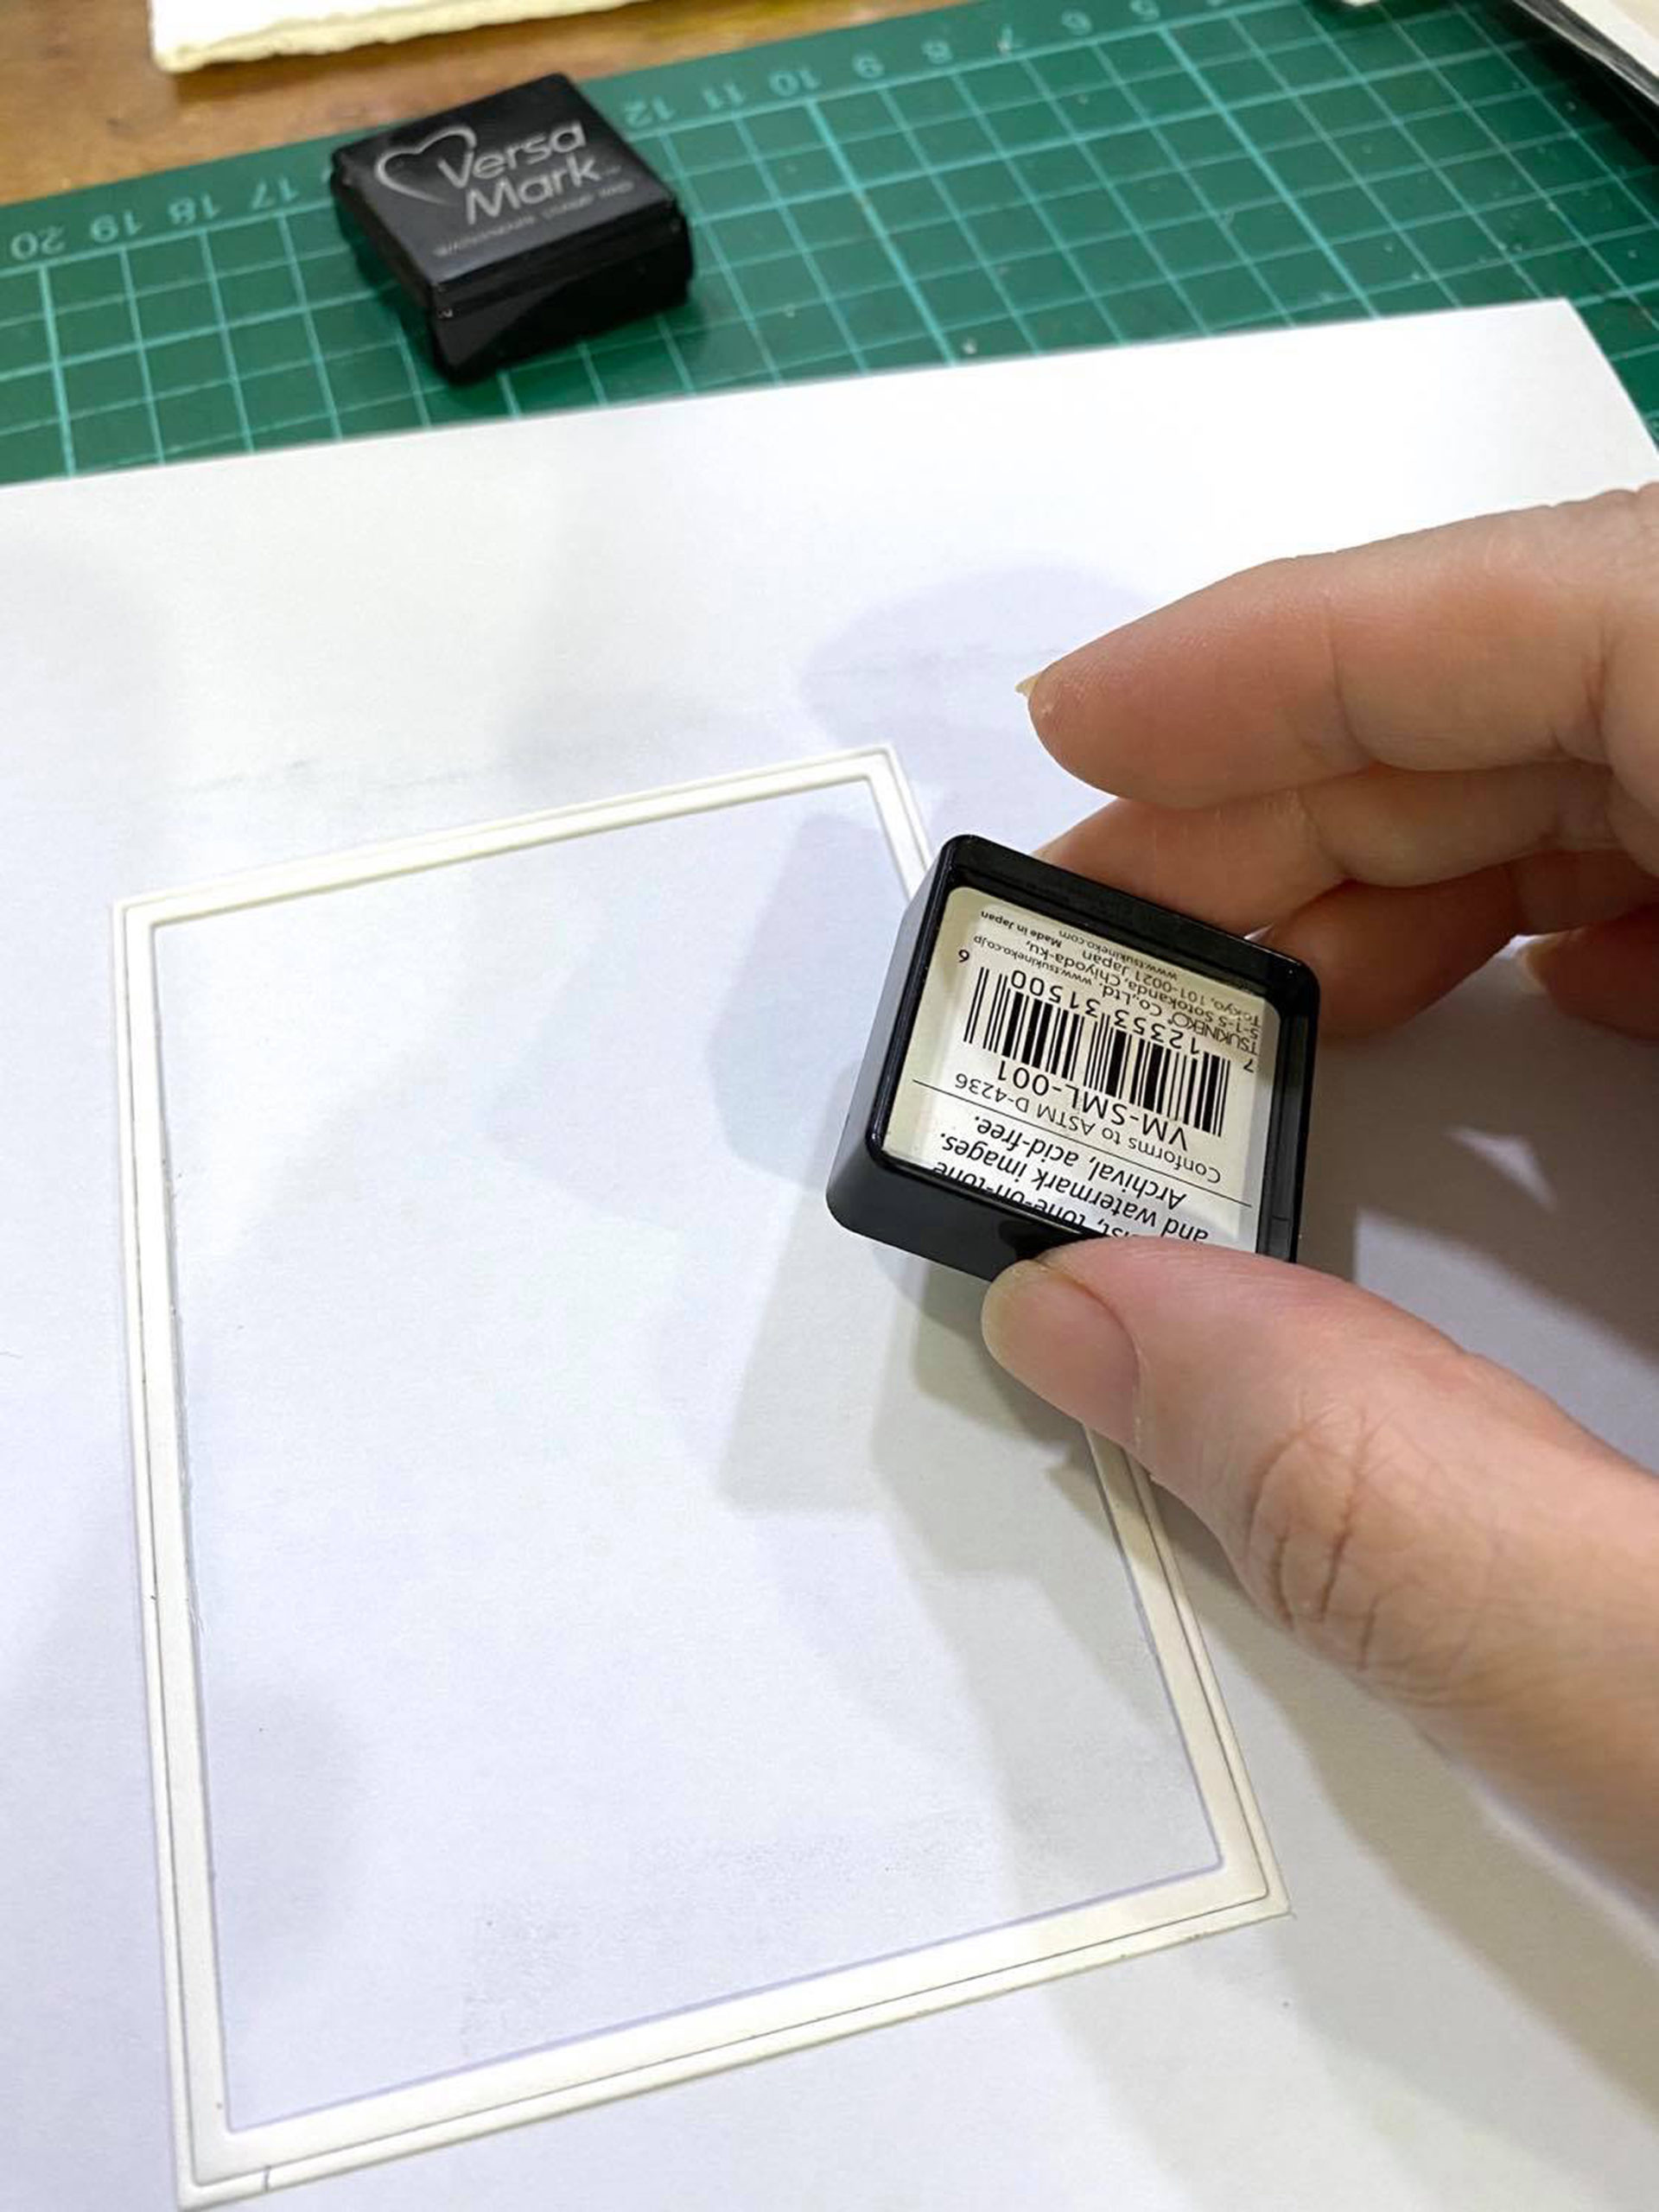
I made a lot of backgrounds for this blog hop. For this first card, watercolor paper was colored using distress inks. I love how oxide inks are easy to blend together. Water splatters were added to create some texture. When this was dry, the Bursting Dahlia stencil was placed on top then Versamark Ink was pressed through the openings of the petals.

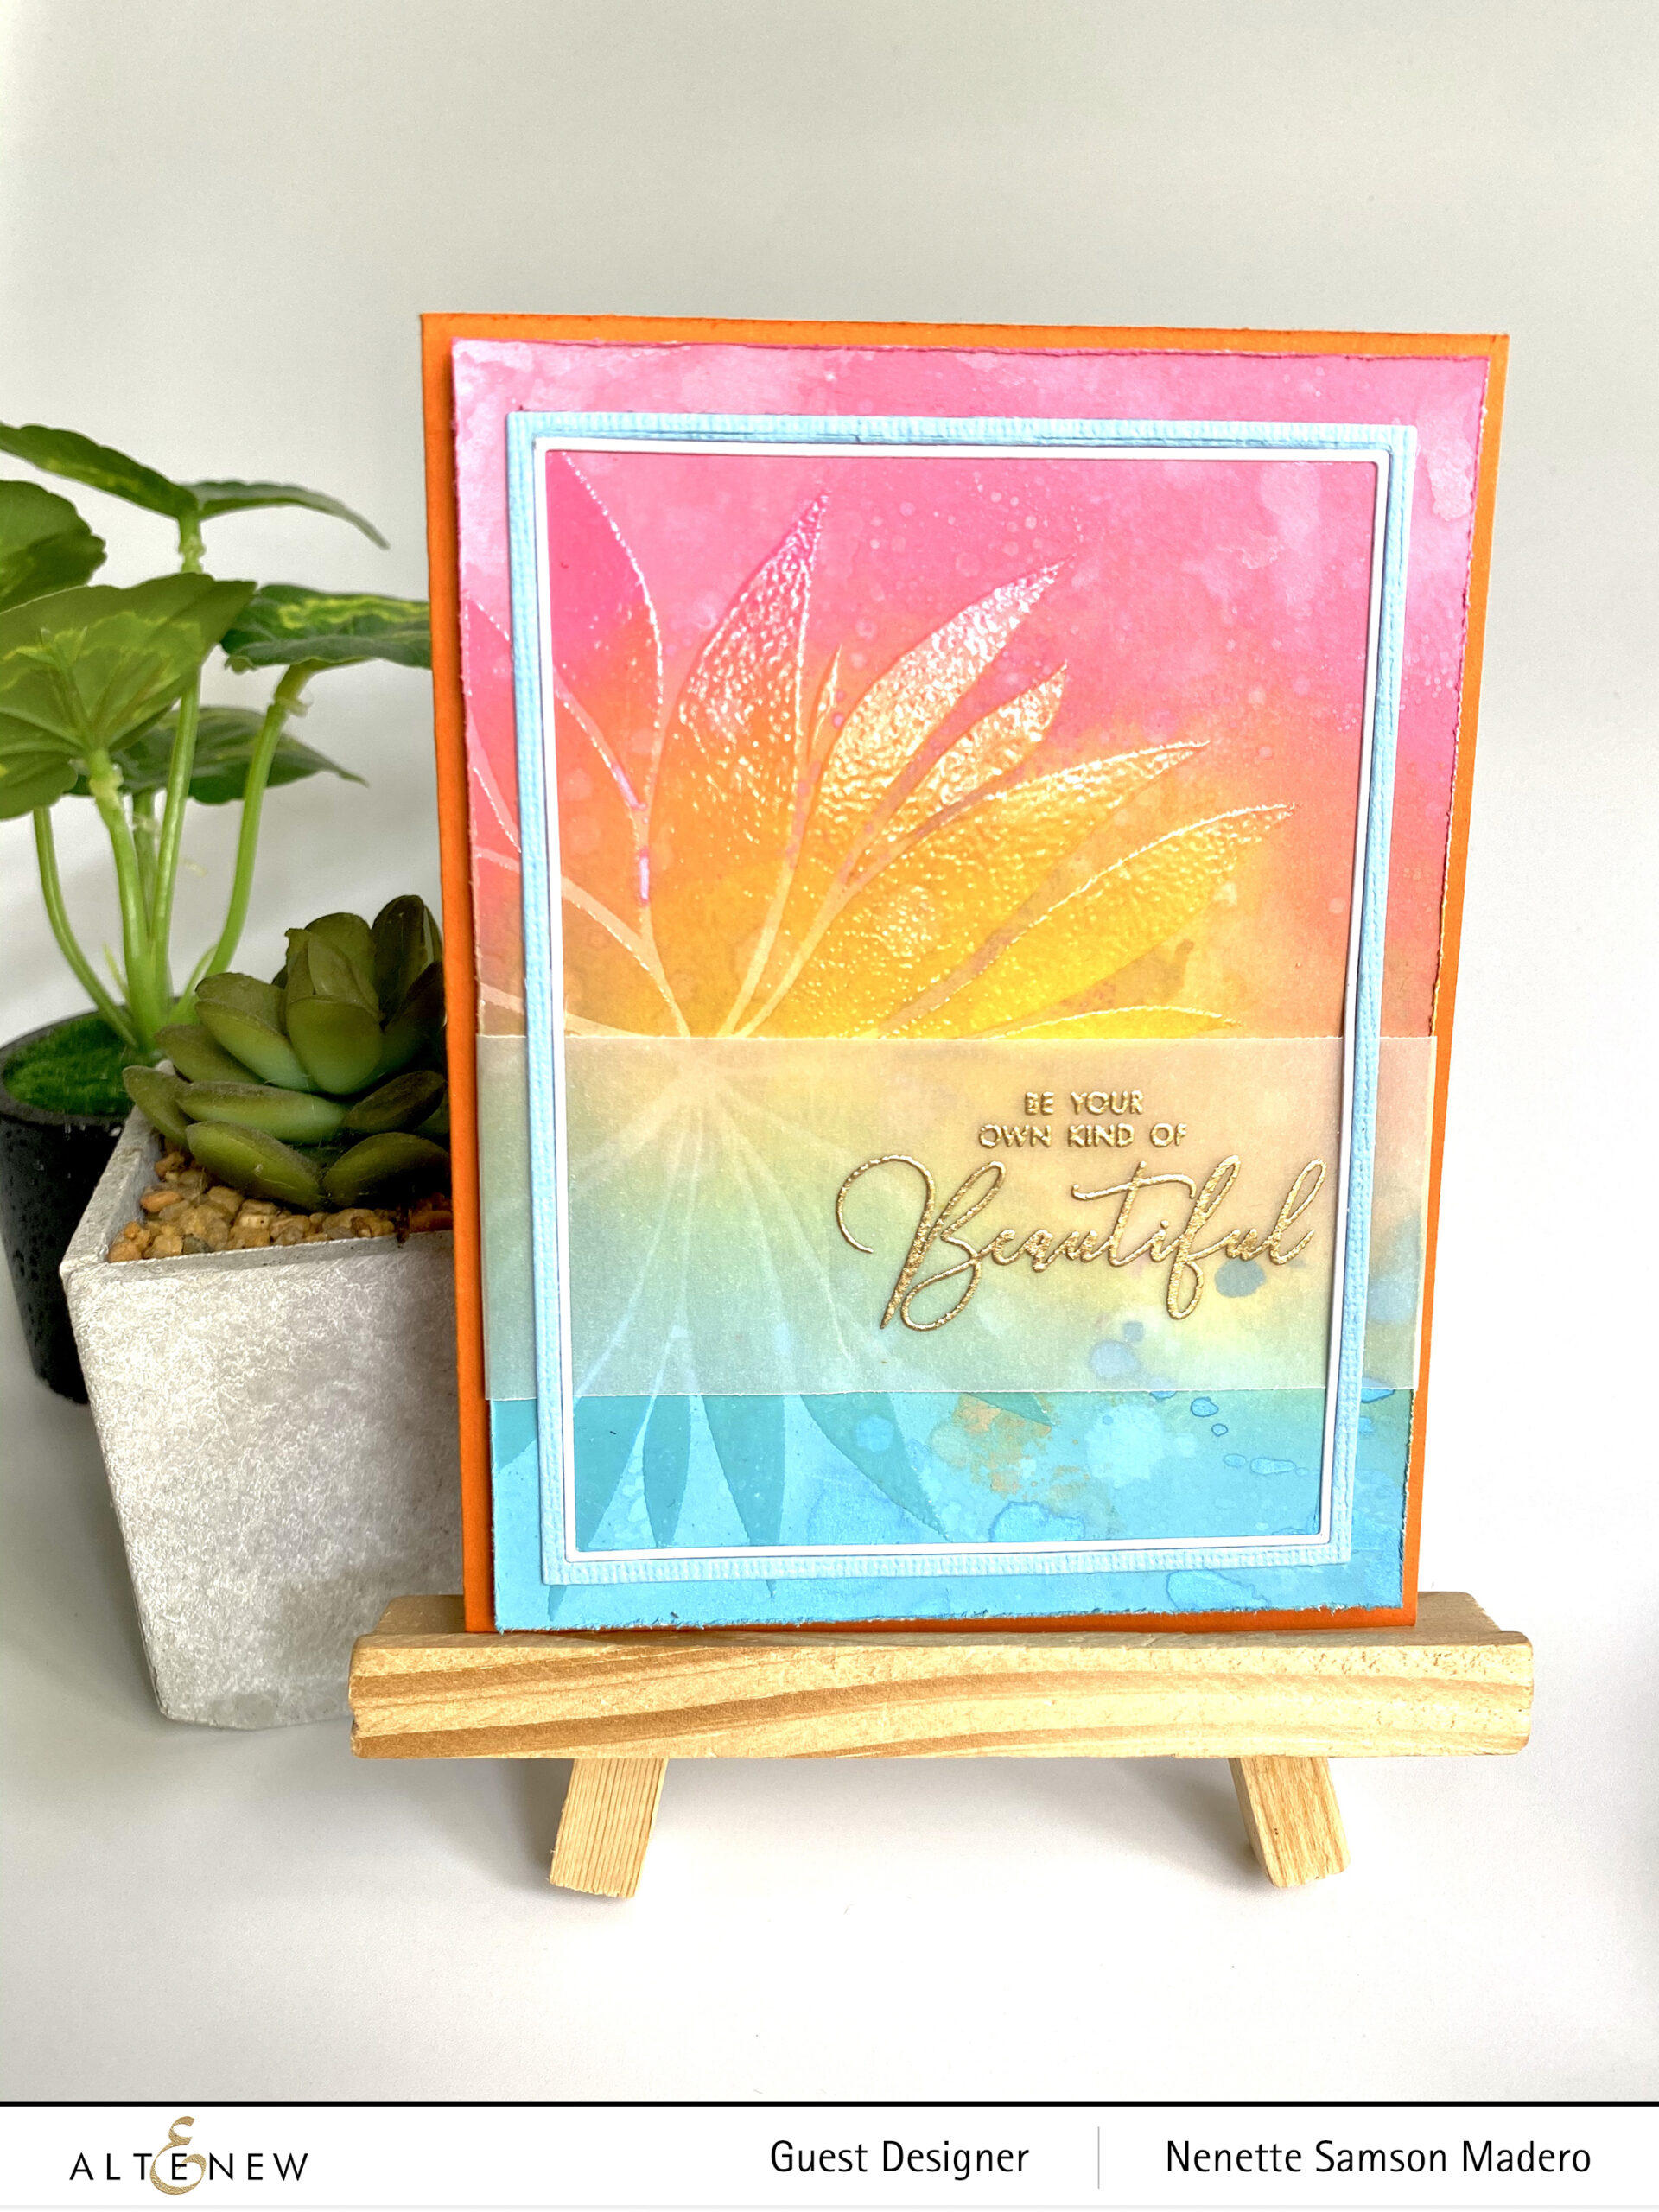
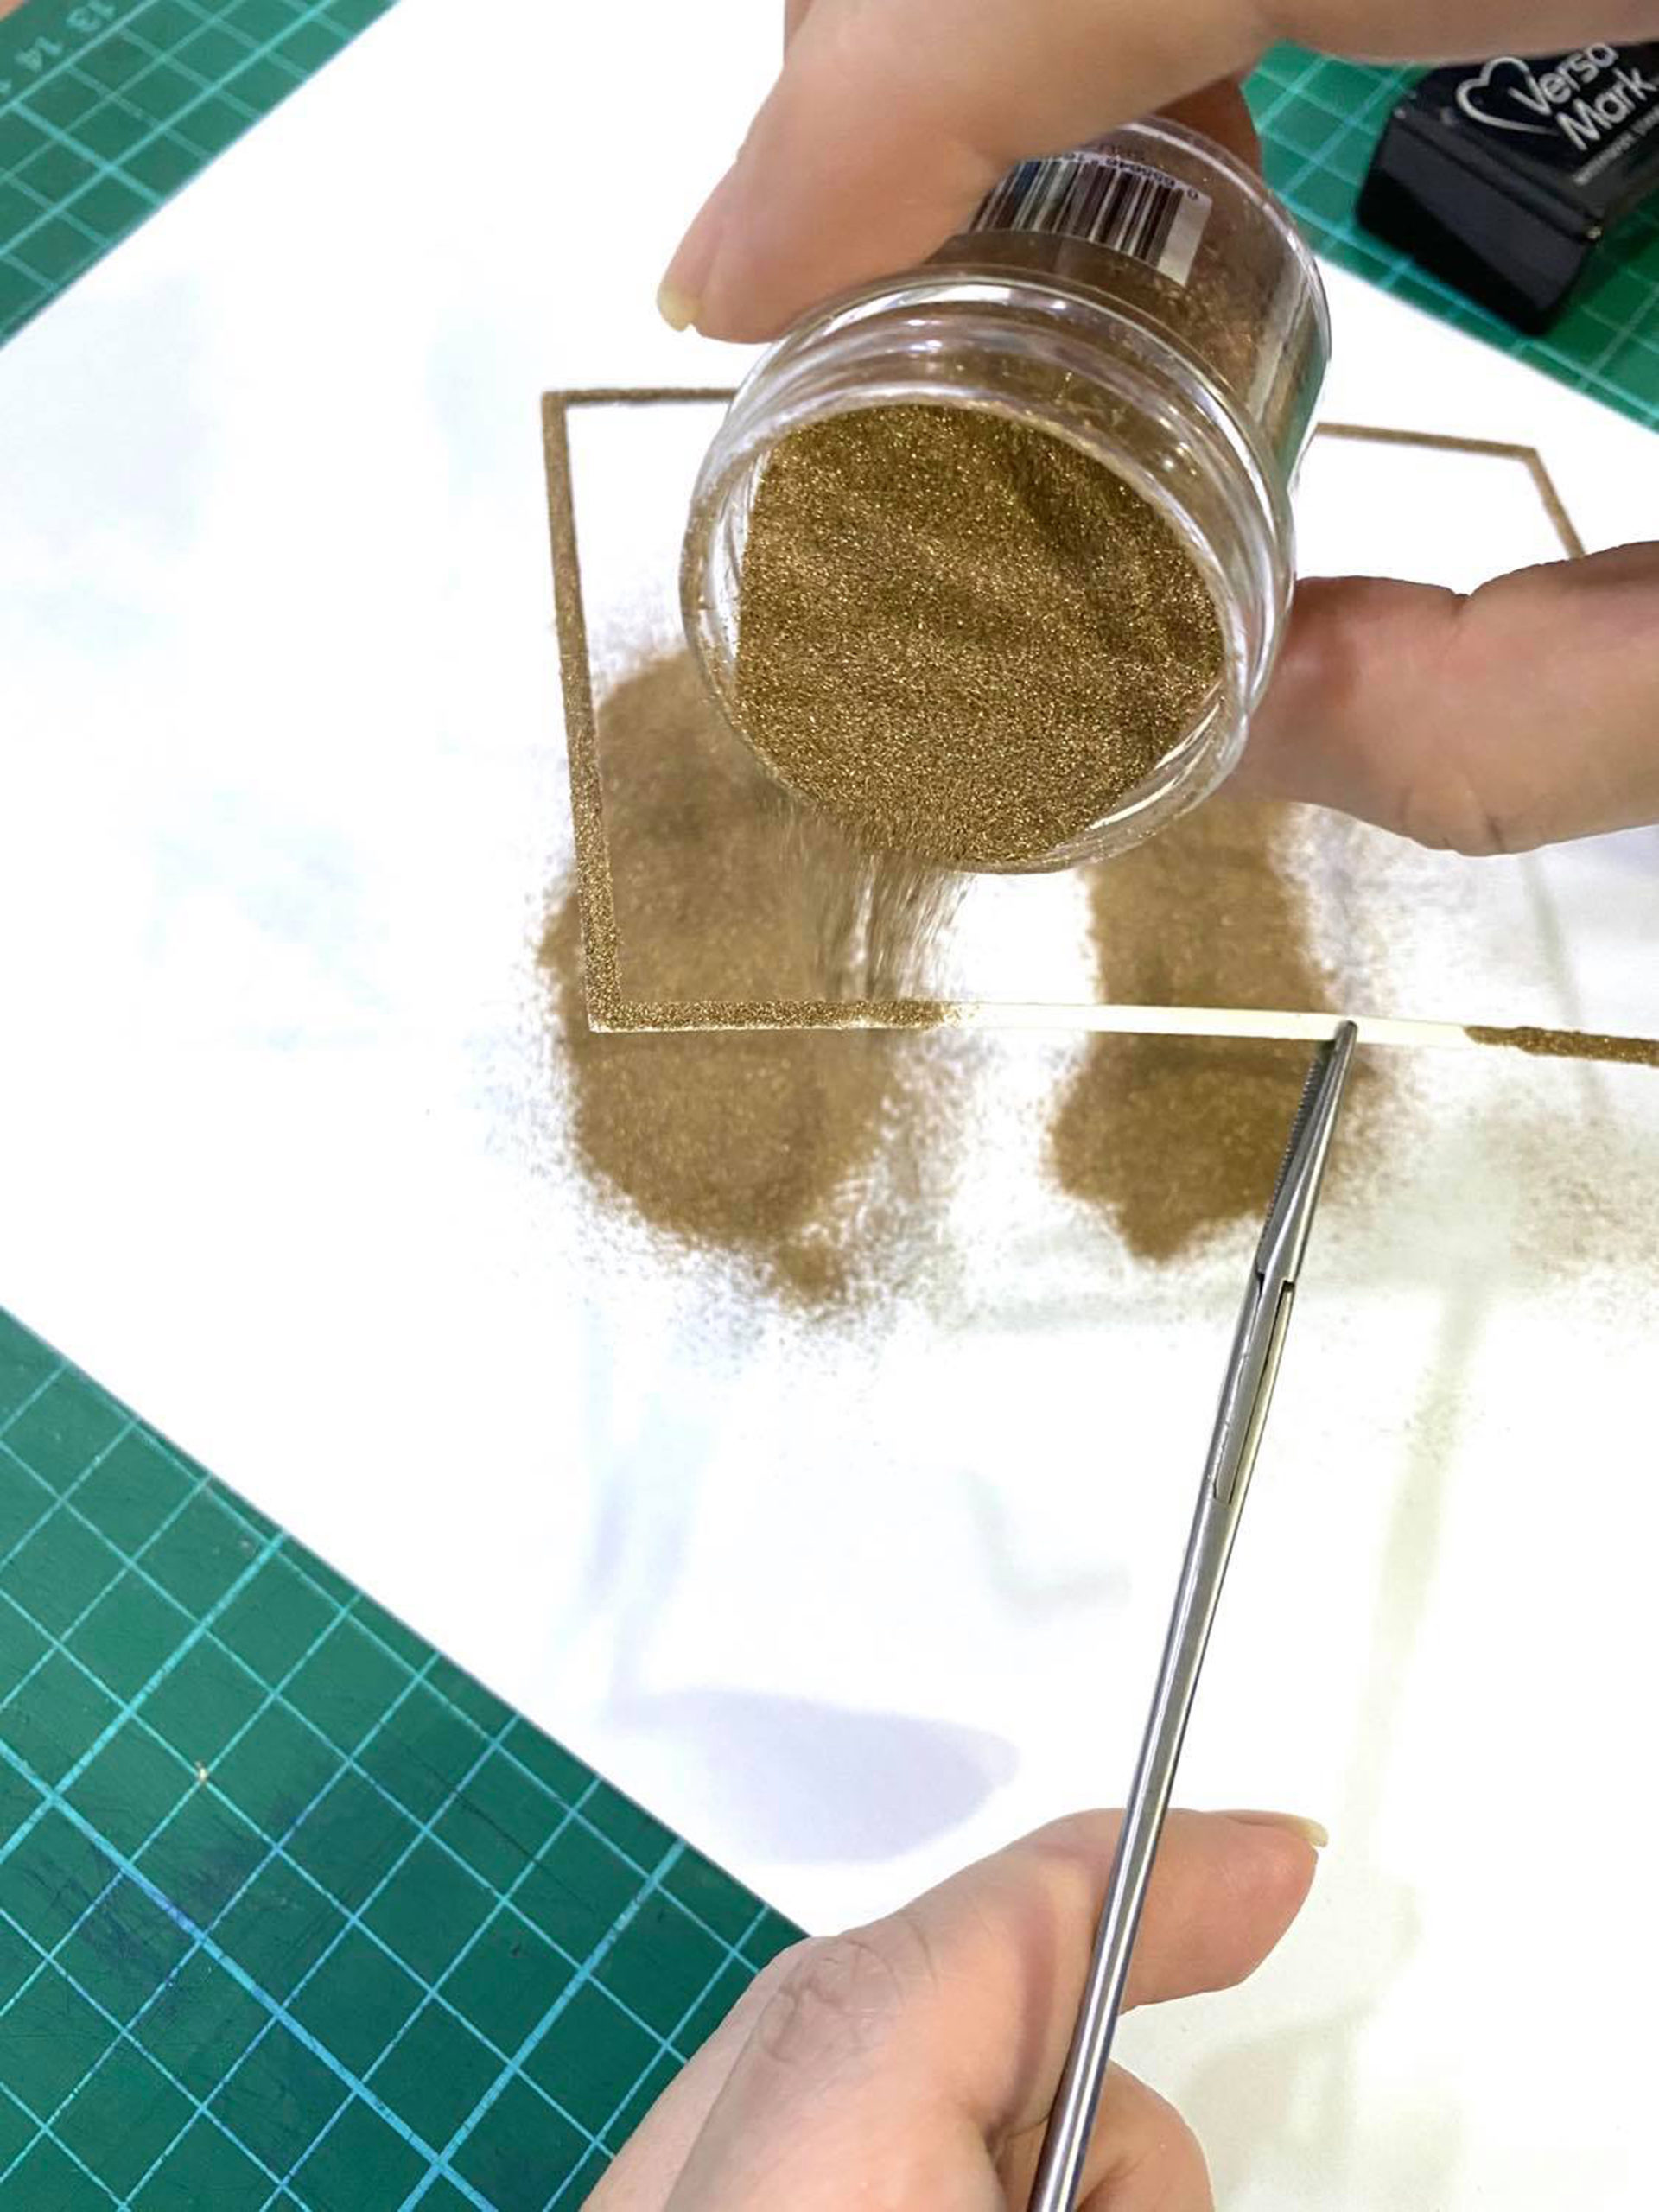
The image was embossed using Crystal Clear embossing powder and this automatically made the image darker than the background. The sentiment from the Paint-A-Flower: Paeonia Japonica was stamped on vellum and embossed using my all-time favorite gold embossing powder- the Rose Gold embossing powder. I added frames to finish the card. The edges of the panel were distressed using a paper distresser then this was mounted on a card front using foam squares.
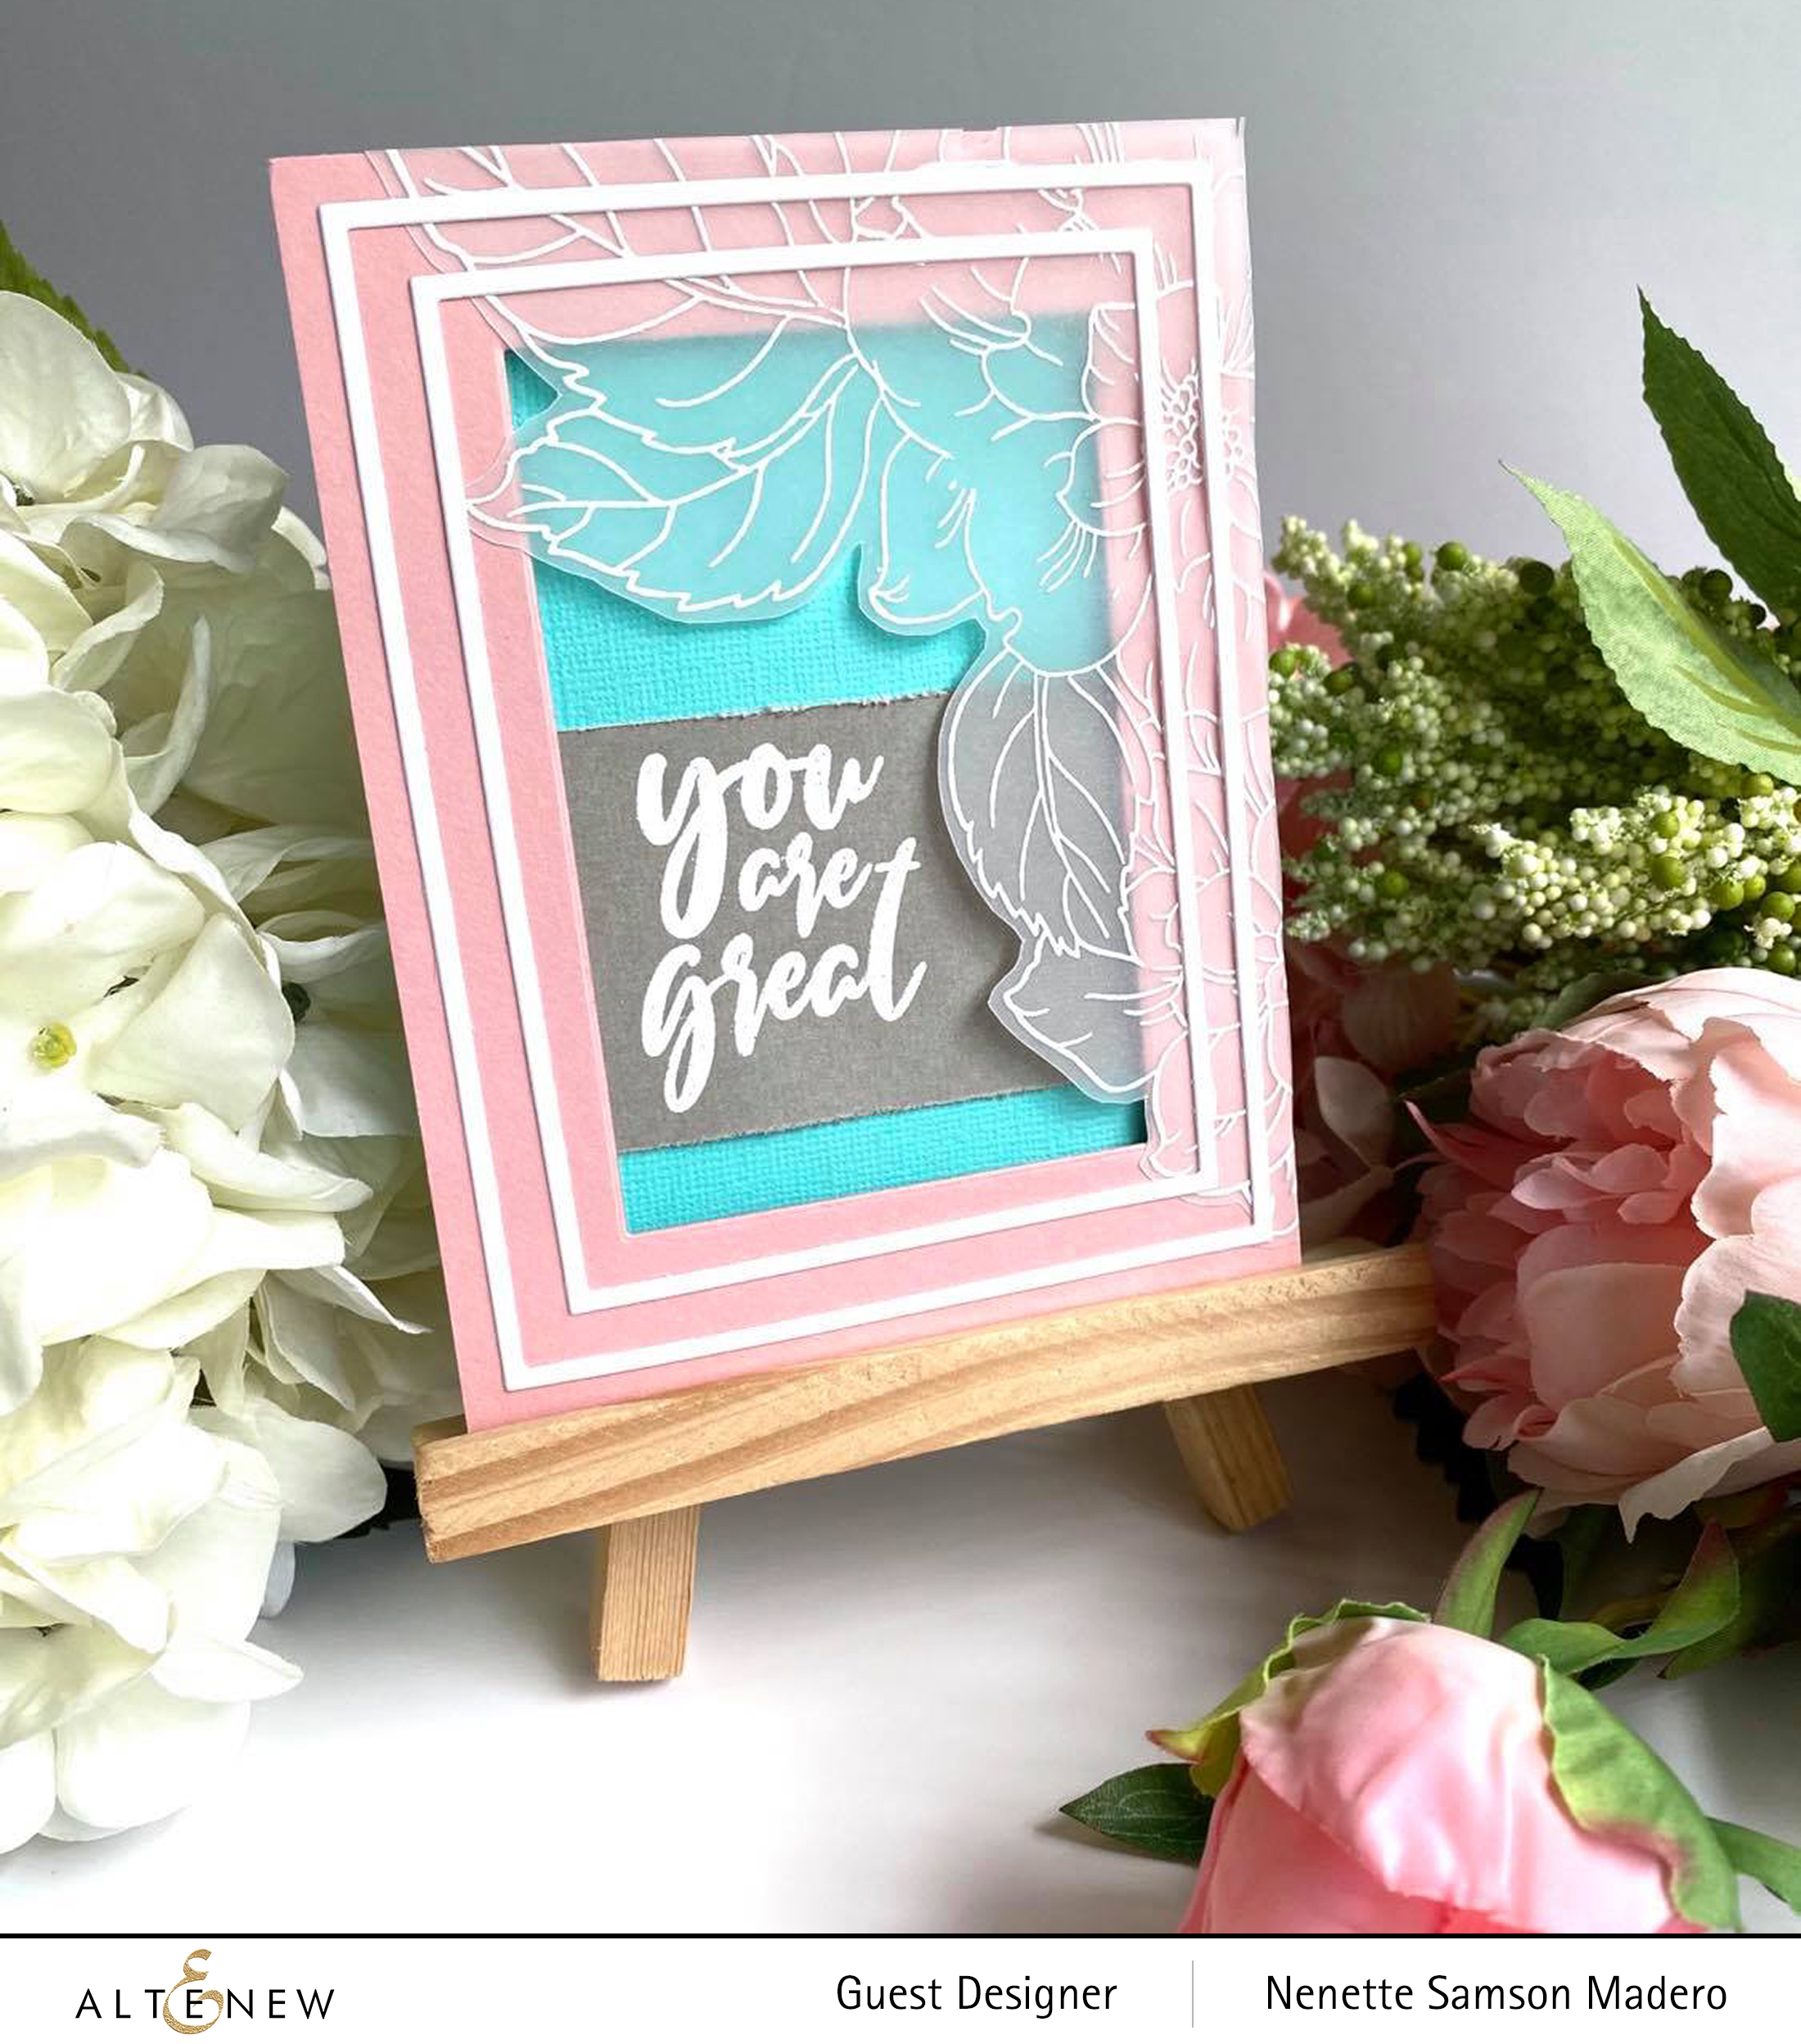

I’M HERE FOR YOU


MATERIALS: Dog Rose Panel A die, Distress Oxide inks-Frayed Burlap, Broken China and Carved Pumpkin

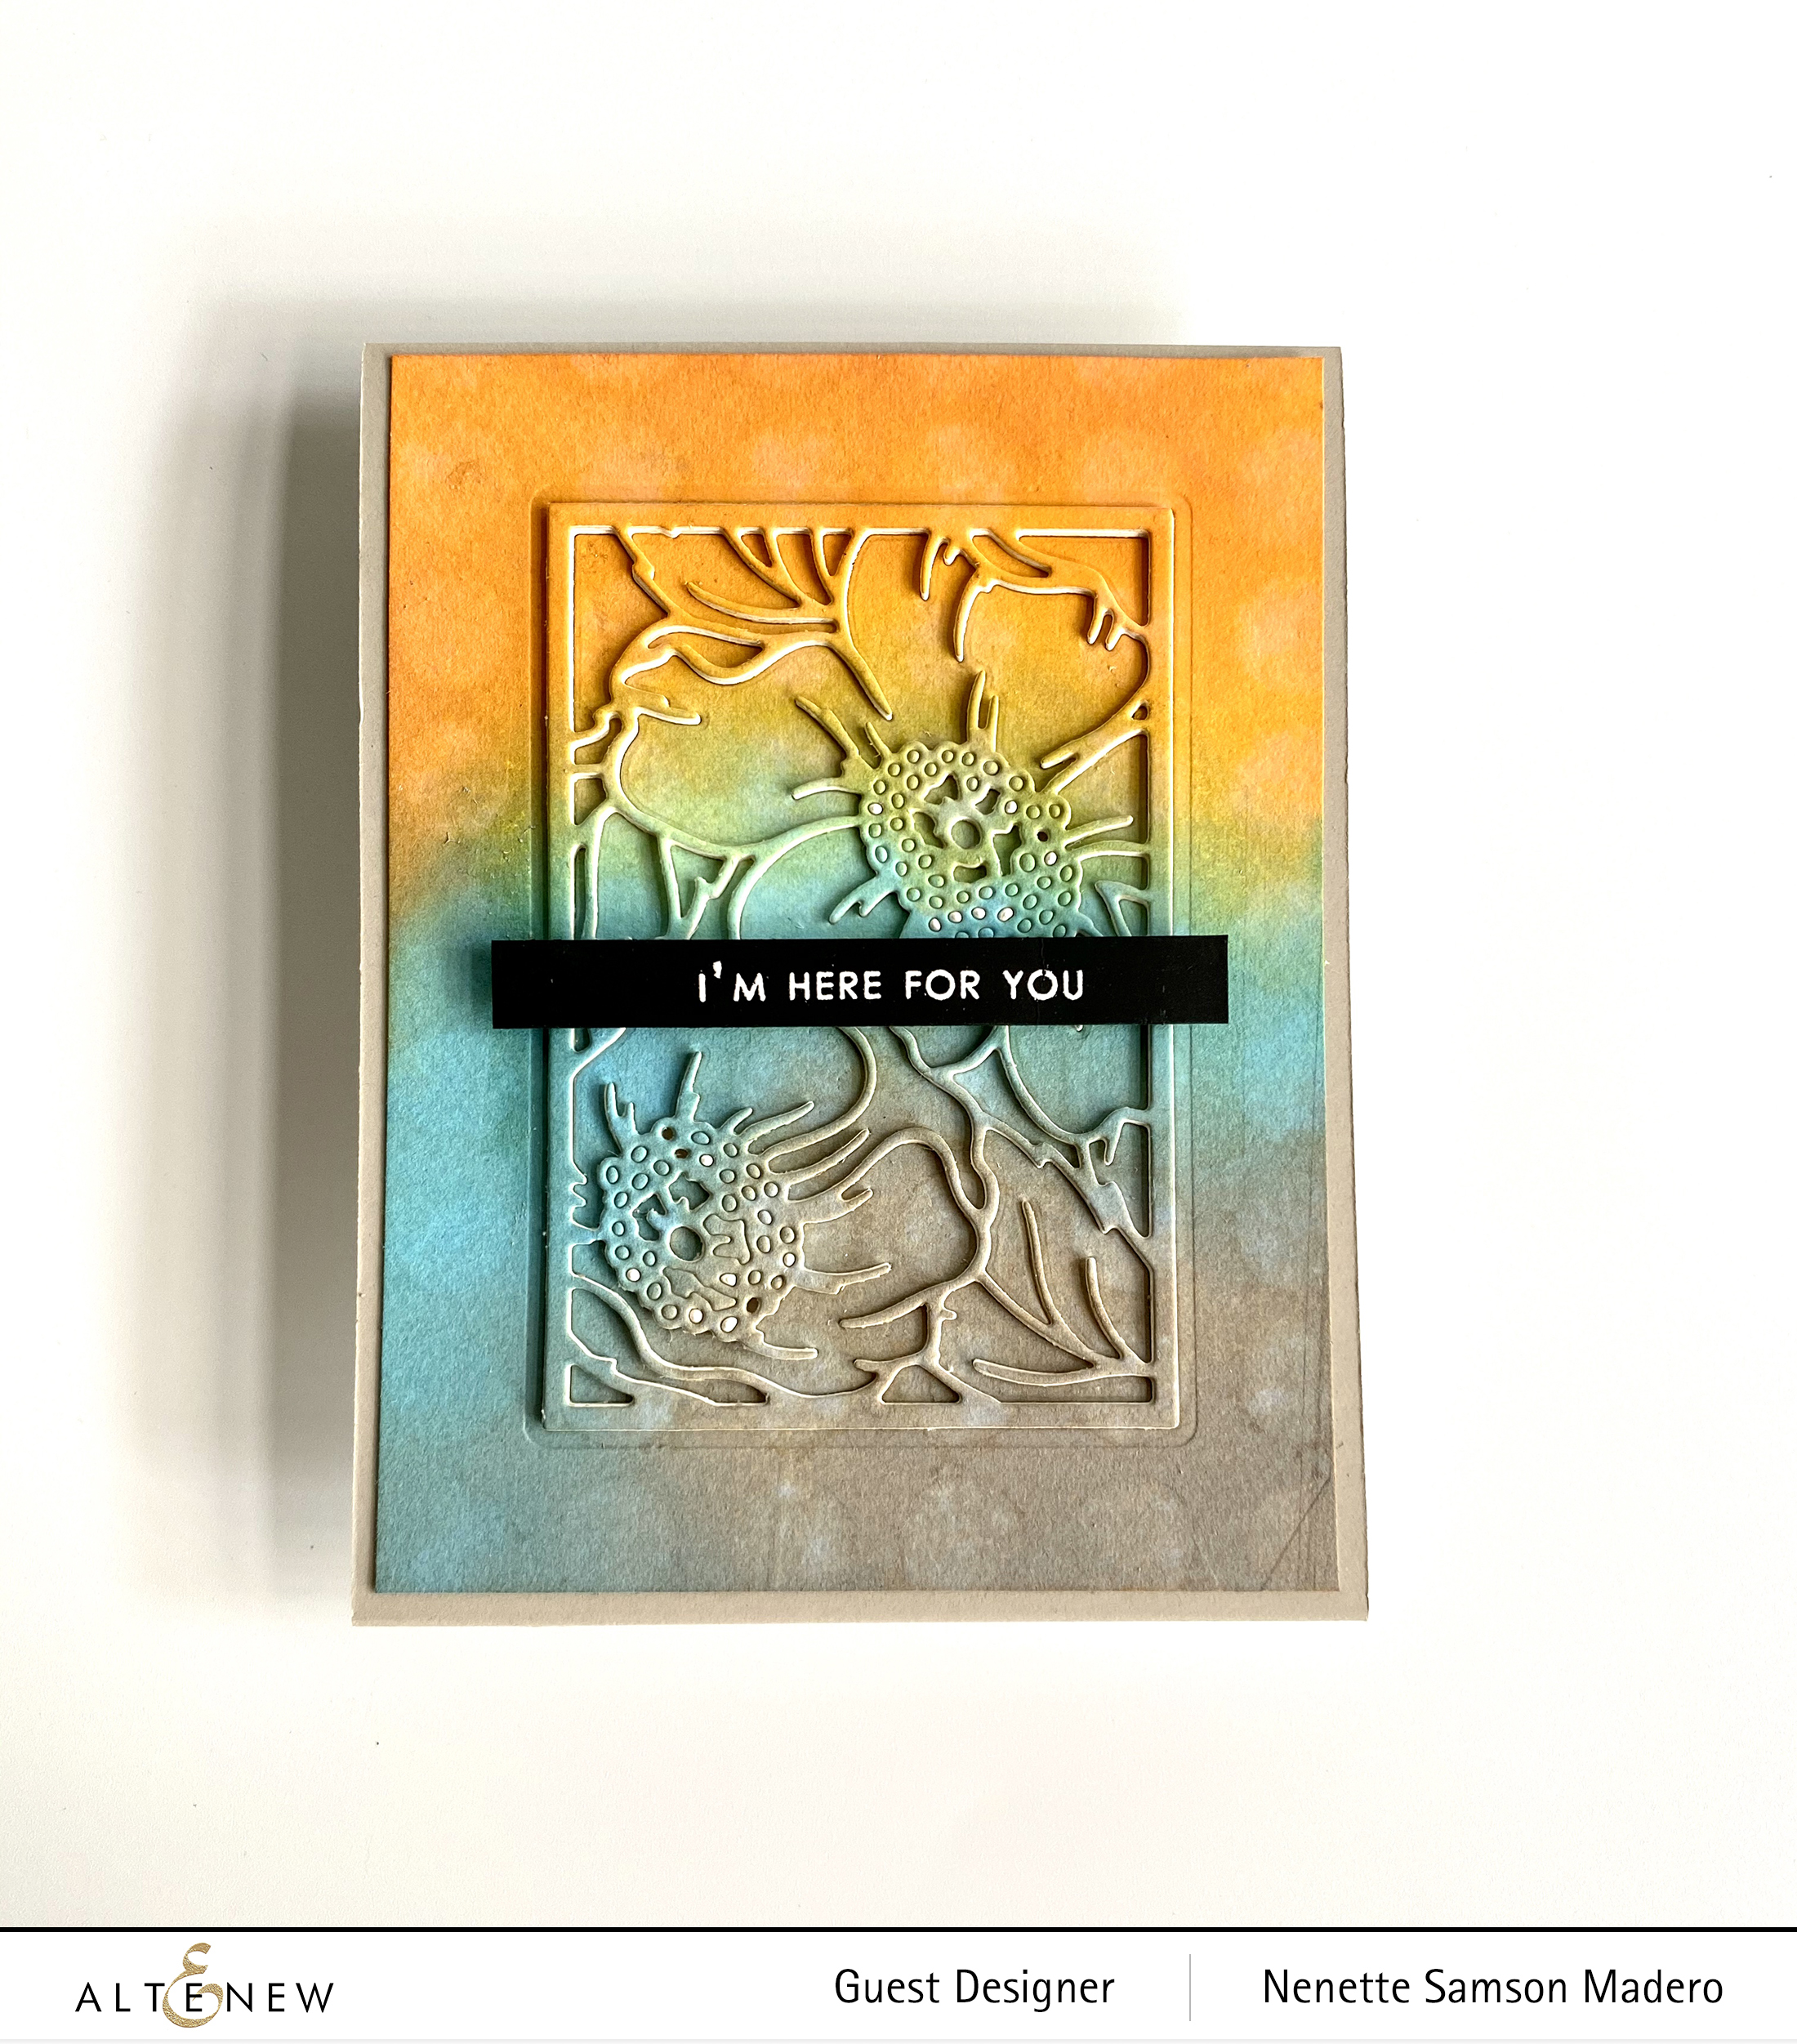
Here’s another background I made using distress inks. After applying the inks onto Neenah solar white cardstock, I placed the bubble wrap stencil on top and sprayed over with water using light mist only. Then I used a baby wipe to go over the stencil and remove some ink. This is called the ghosting technique and I love the subtle effect of the dots. I learned this technique from Dyan Reaveley.

When the panel was dry, I used the Dog Rose Panel A to die cut the floral image. The sentiment was stamped on black cardstock using Versamark Ink and white embossing powder then mounted using foam tape.
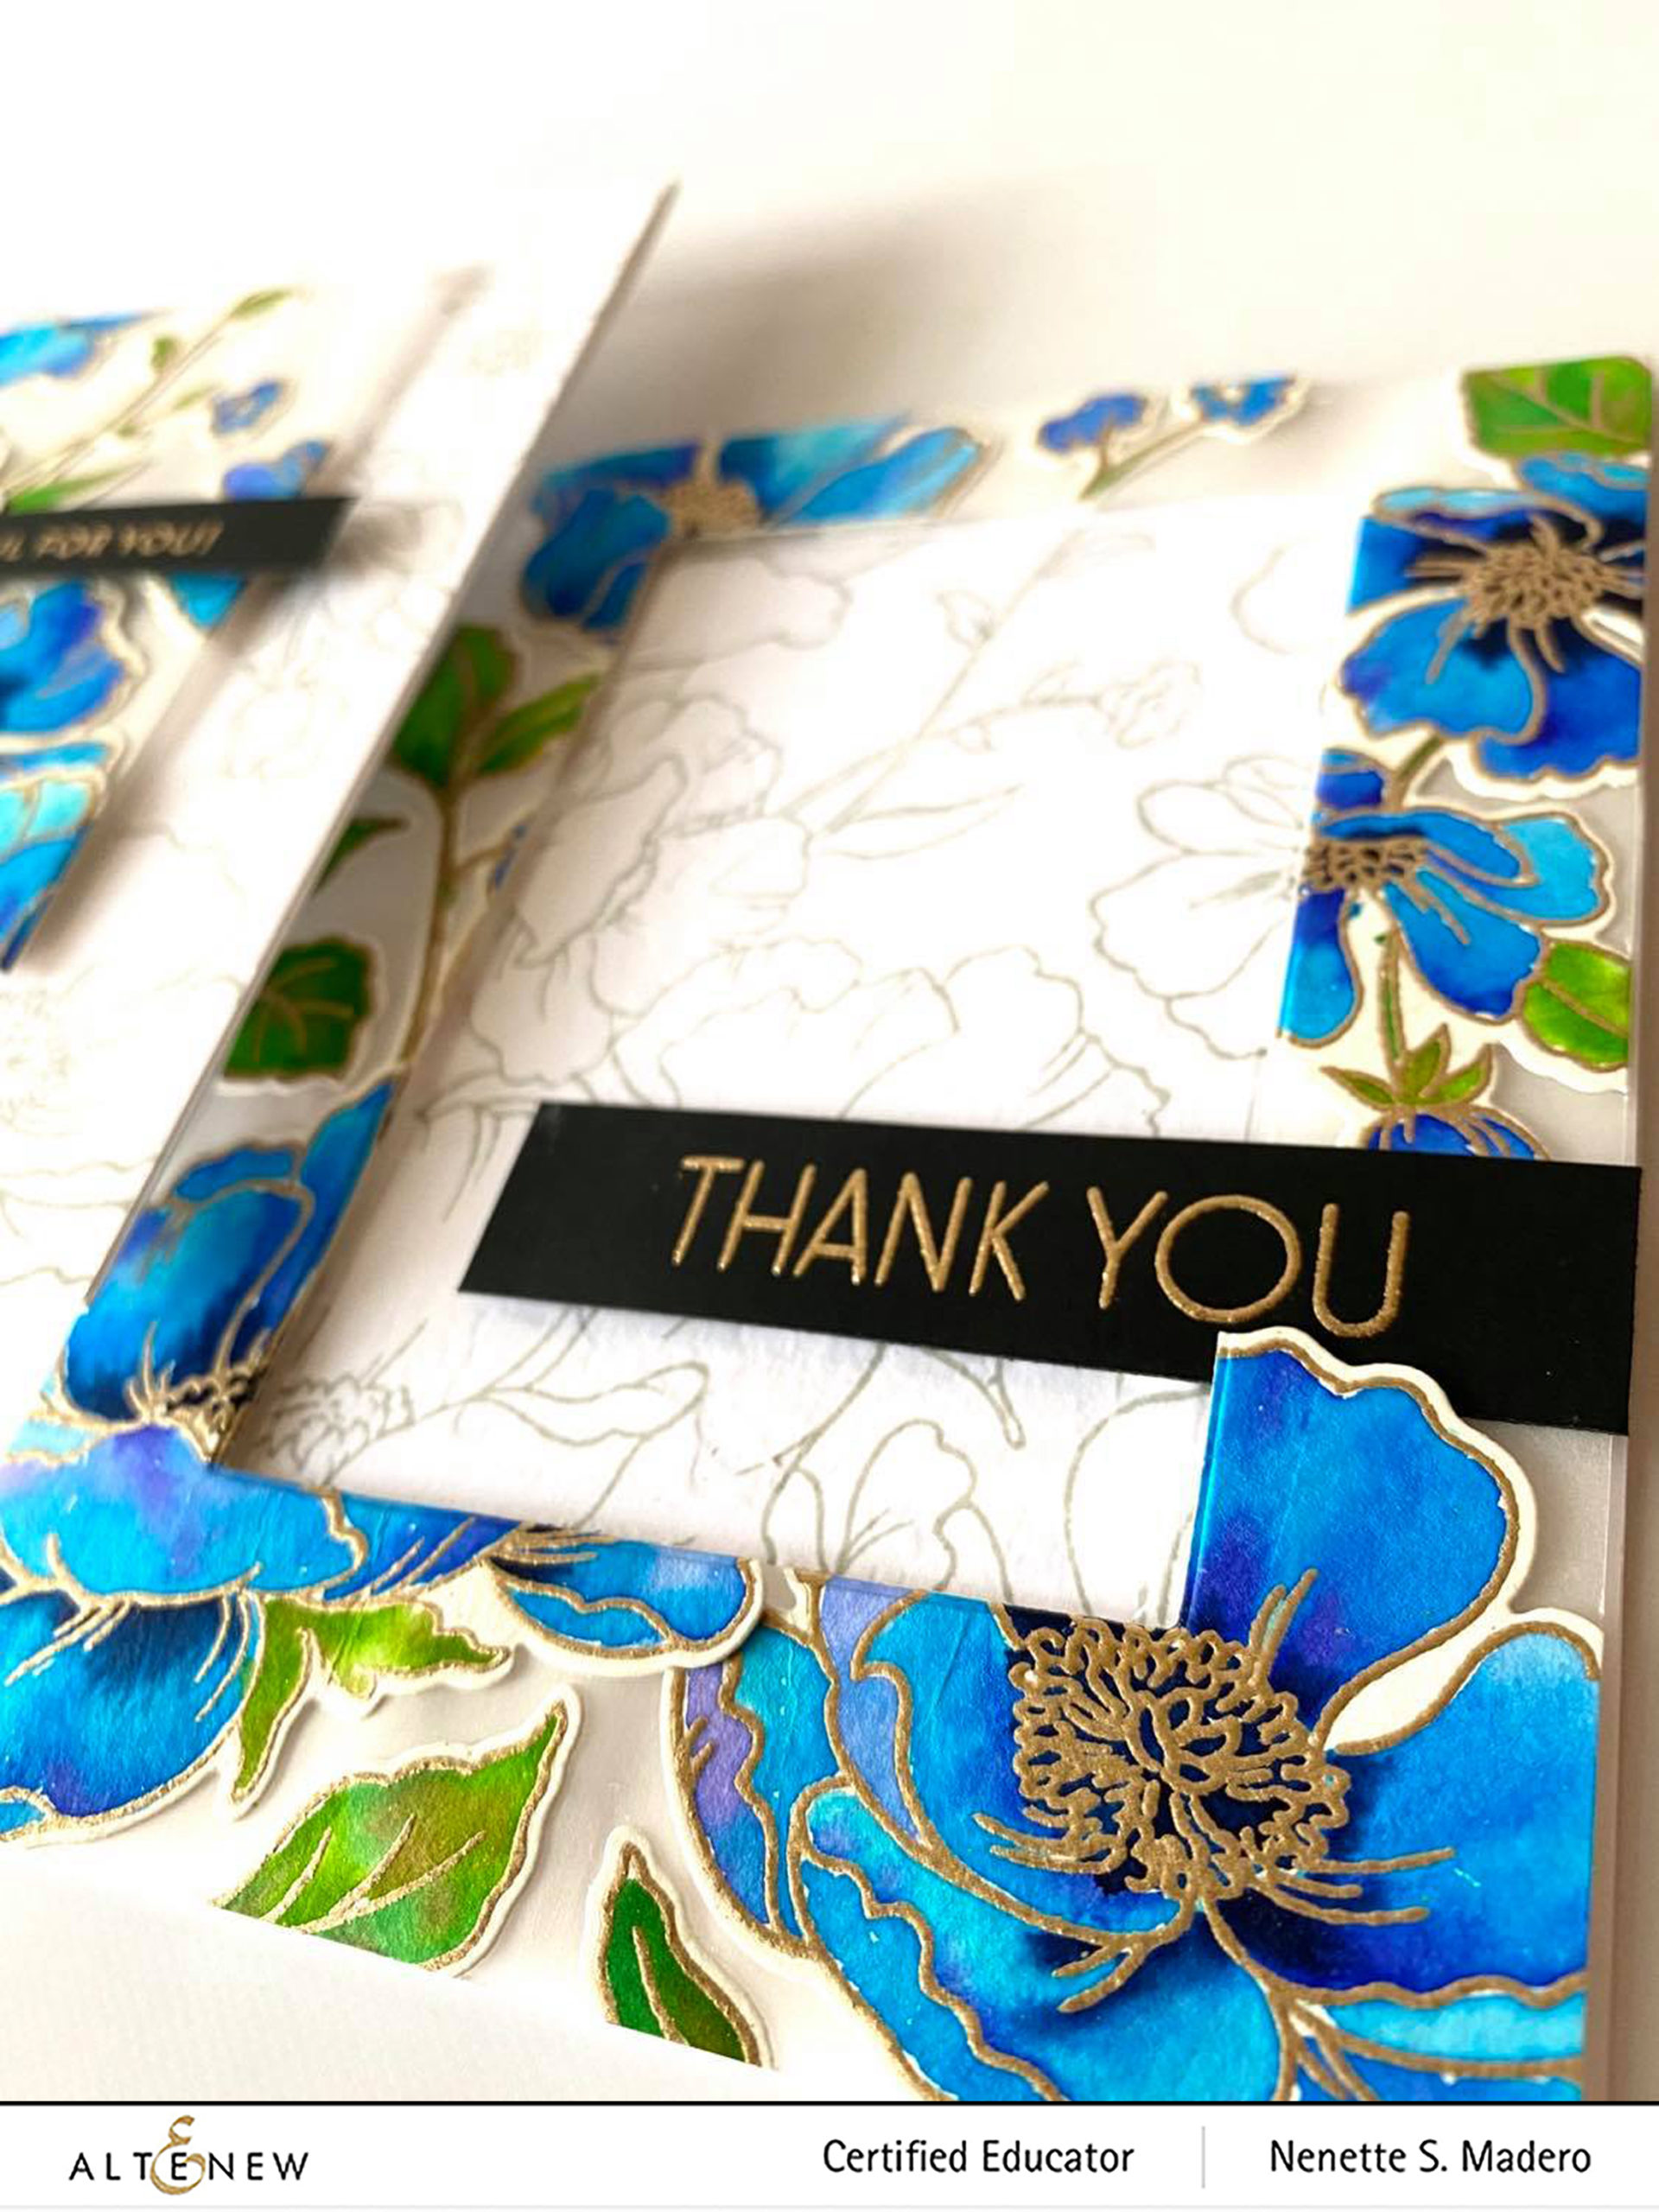
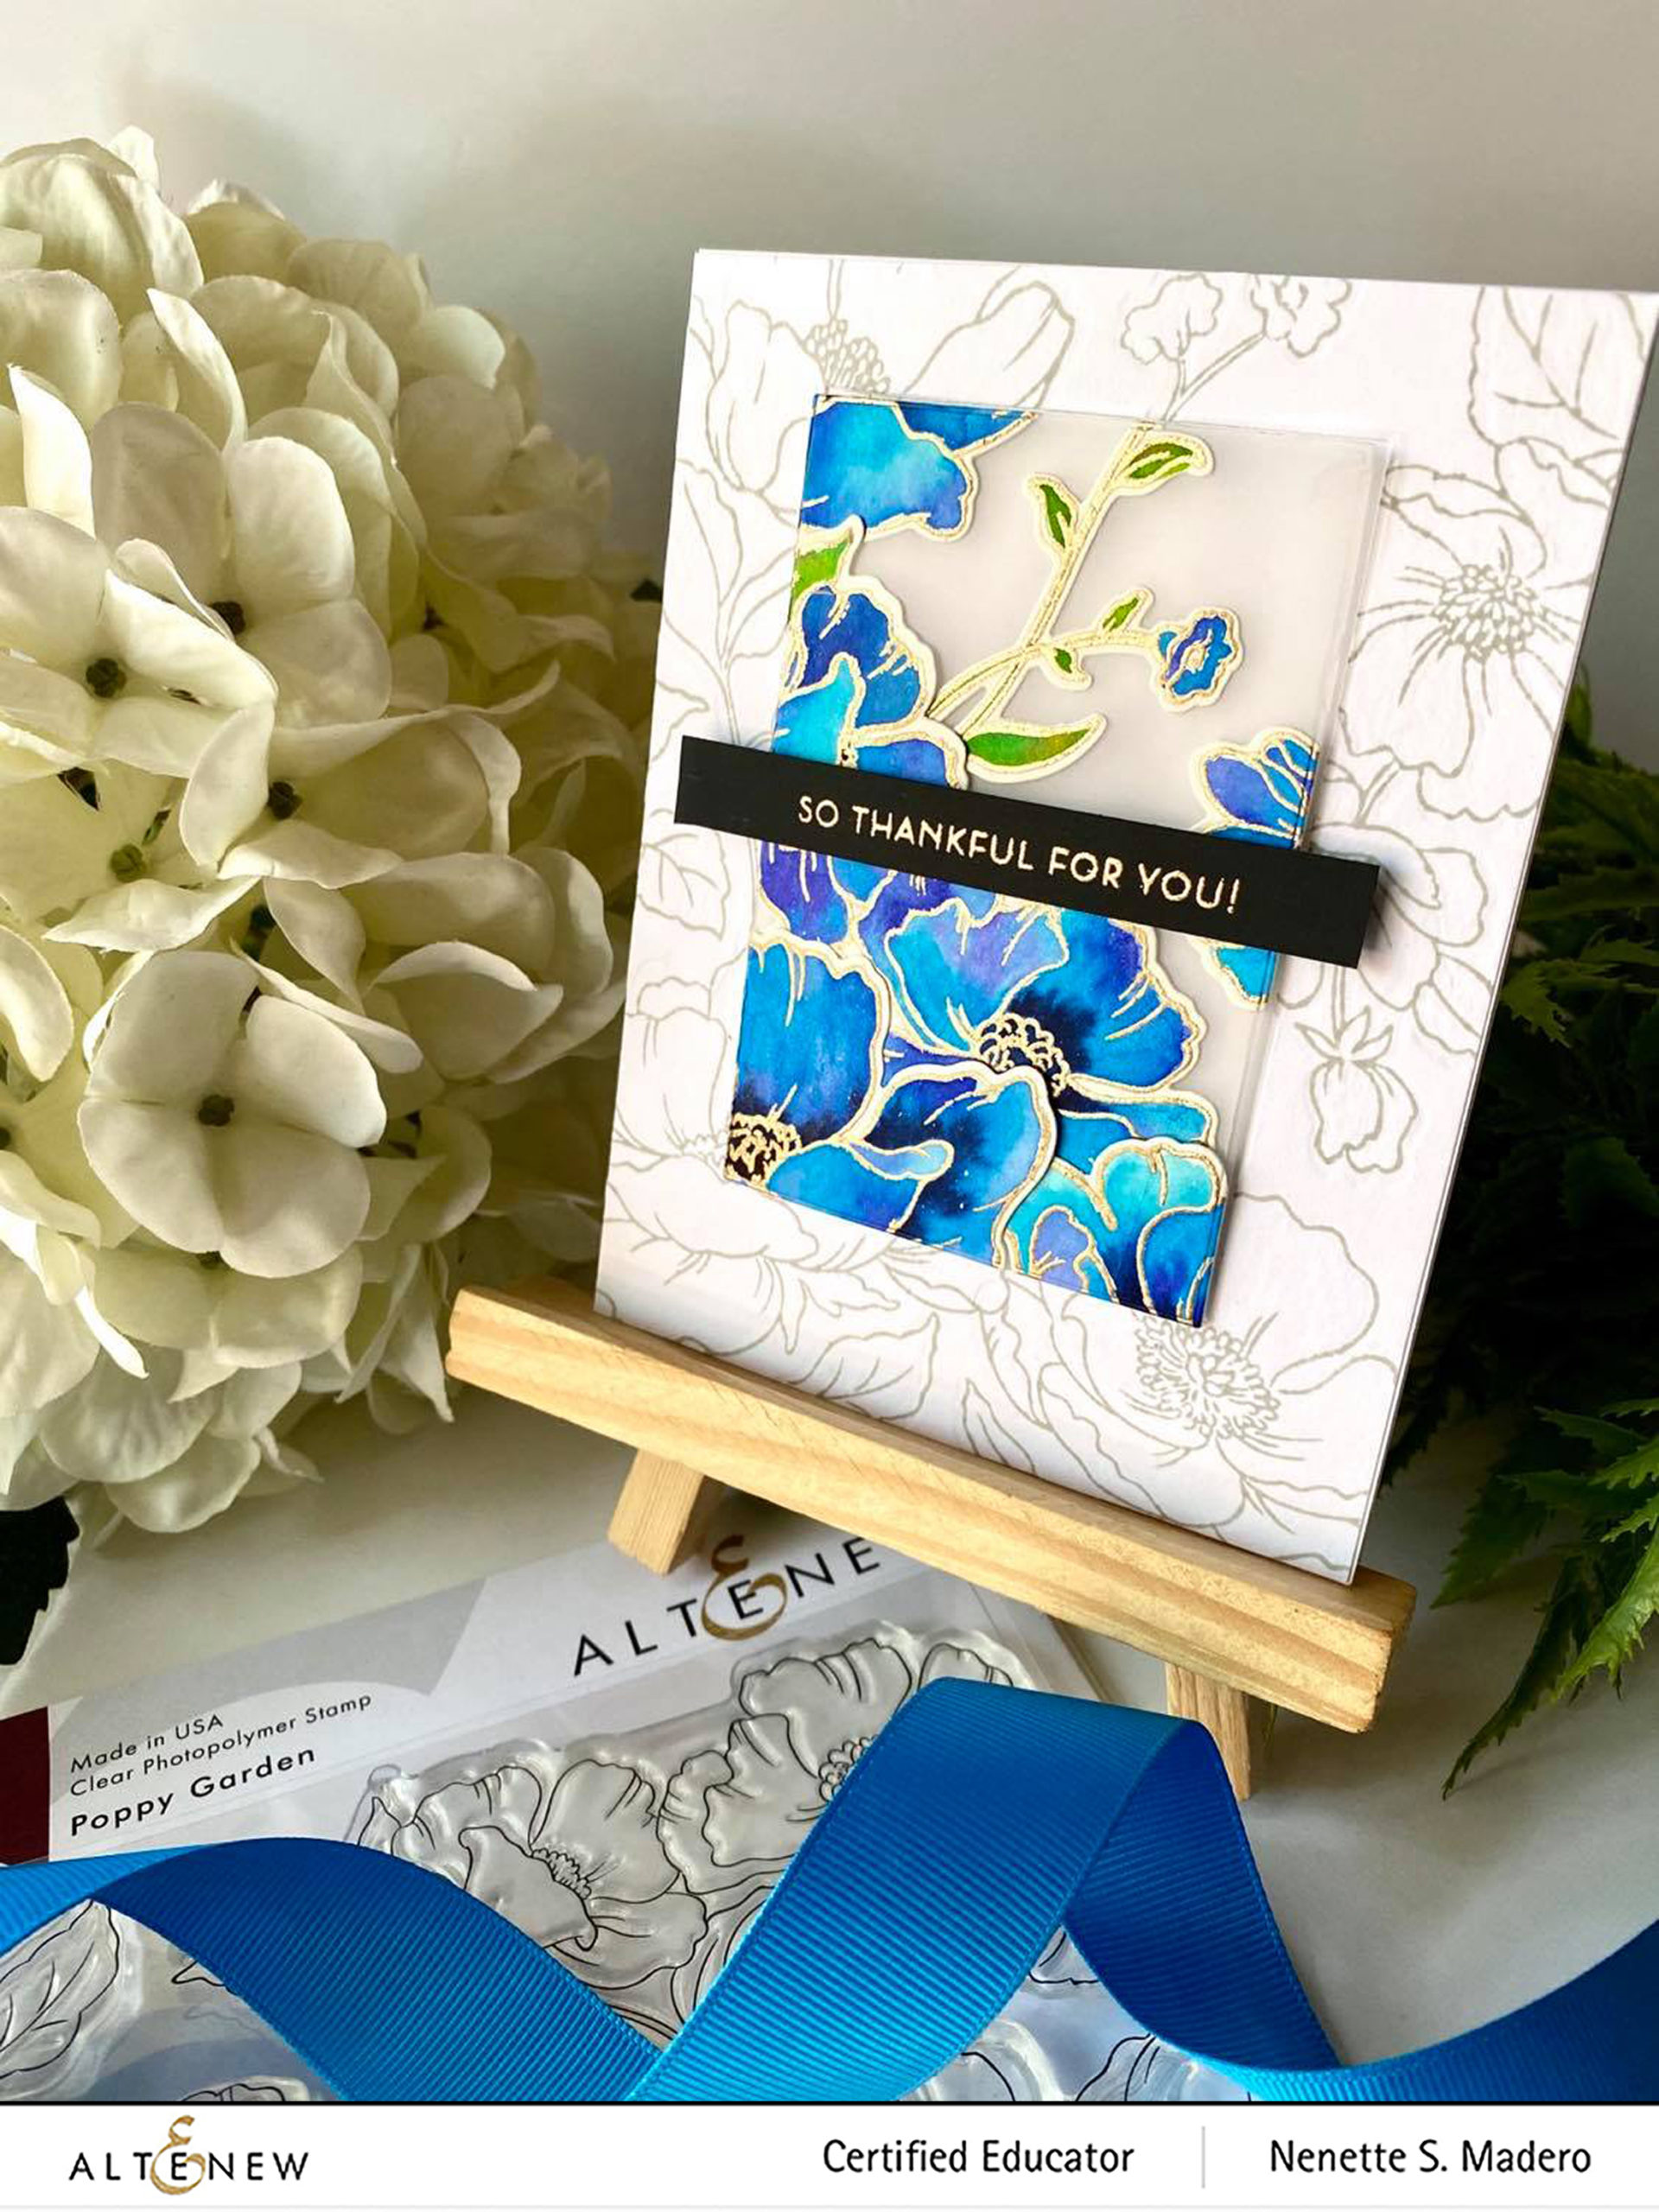

THANK YOU


MATERIALS: Feathery Stencil, Simply Thank You die, Distress Oxide inks-Peacock Feathers, Broken China, Tumbled Glass

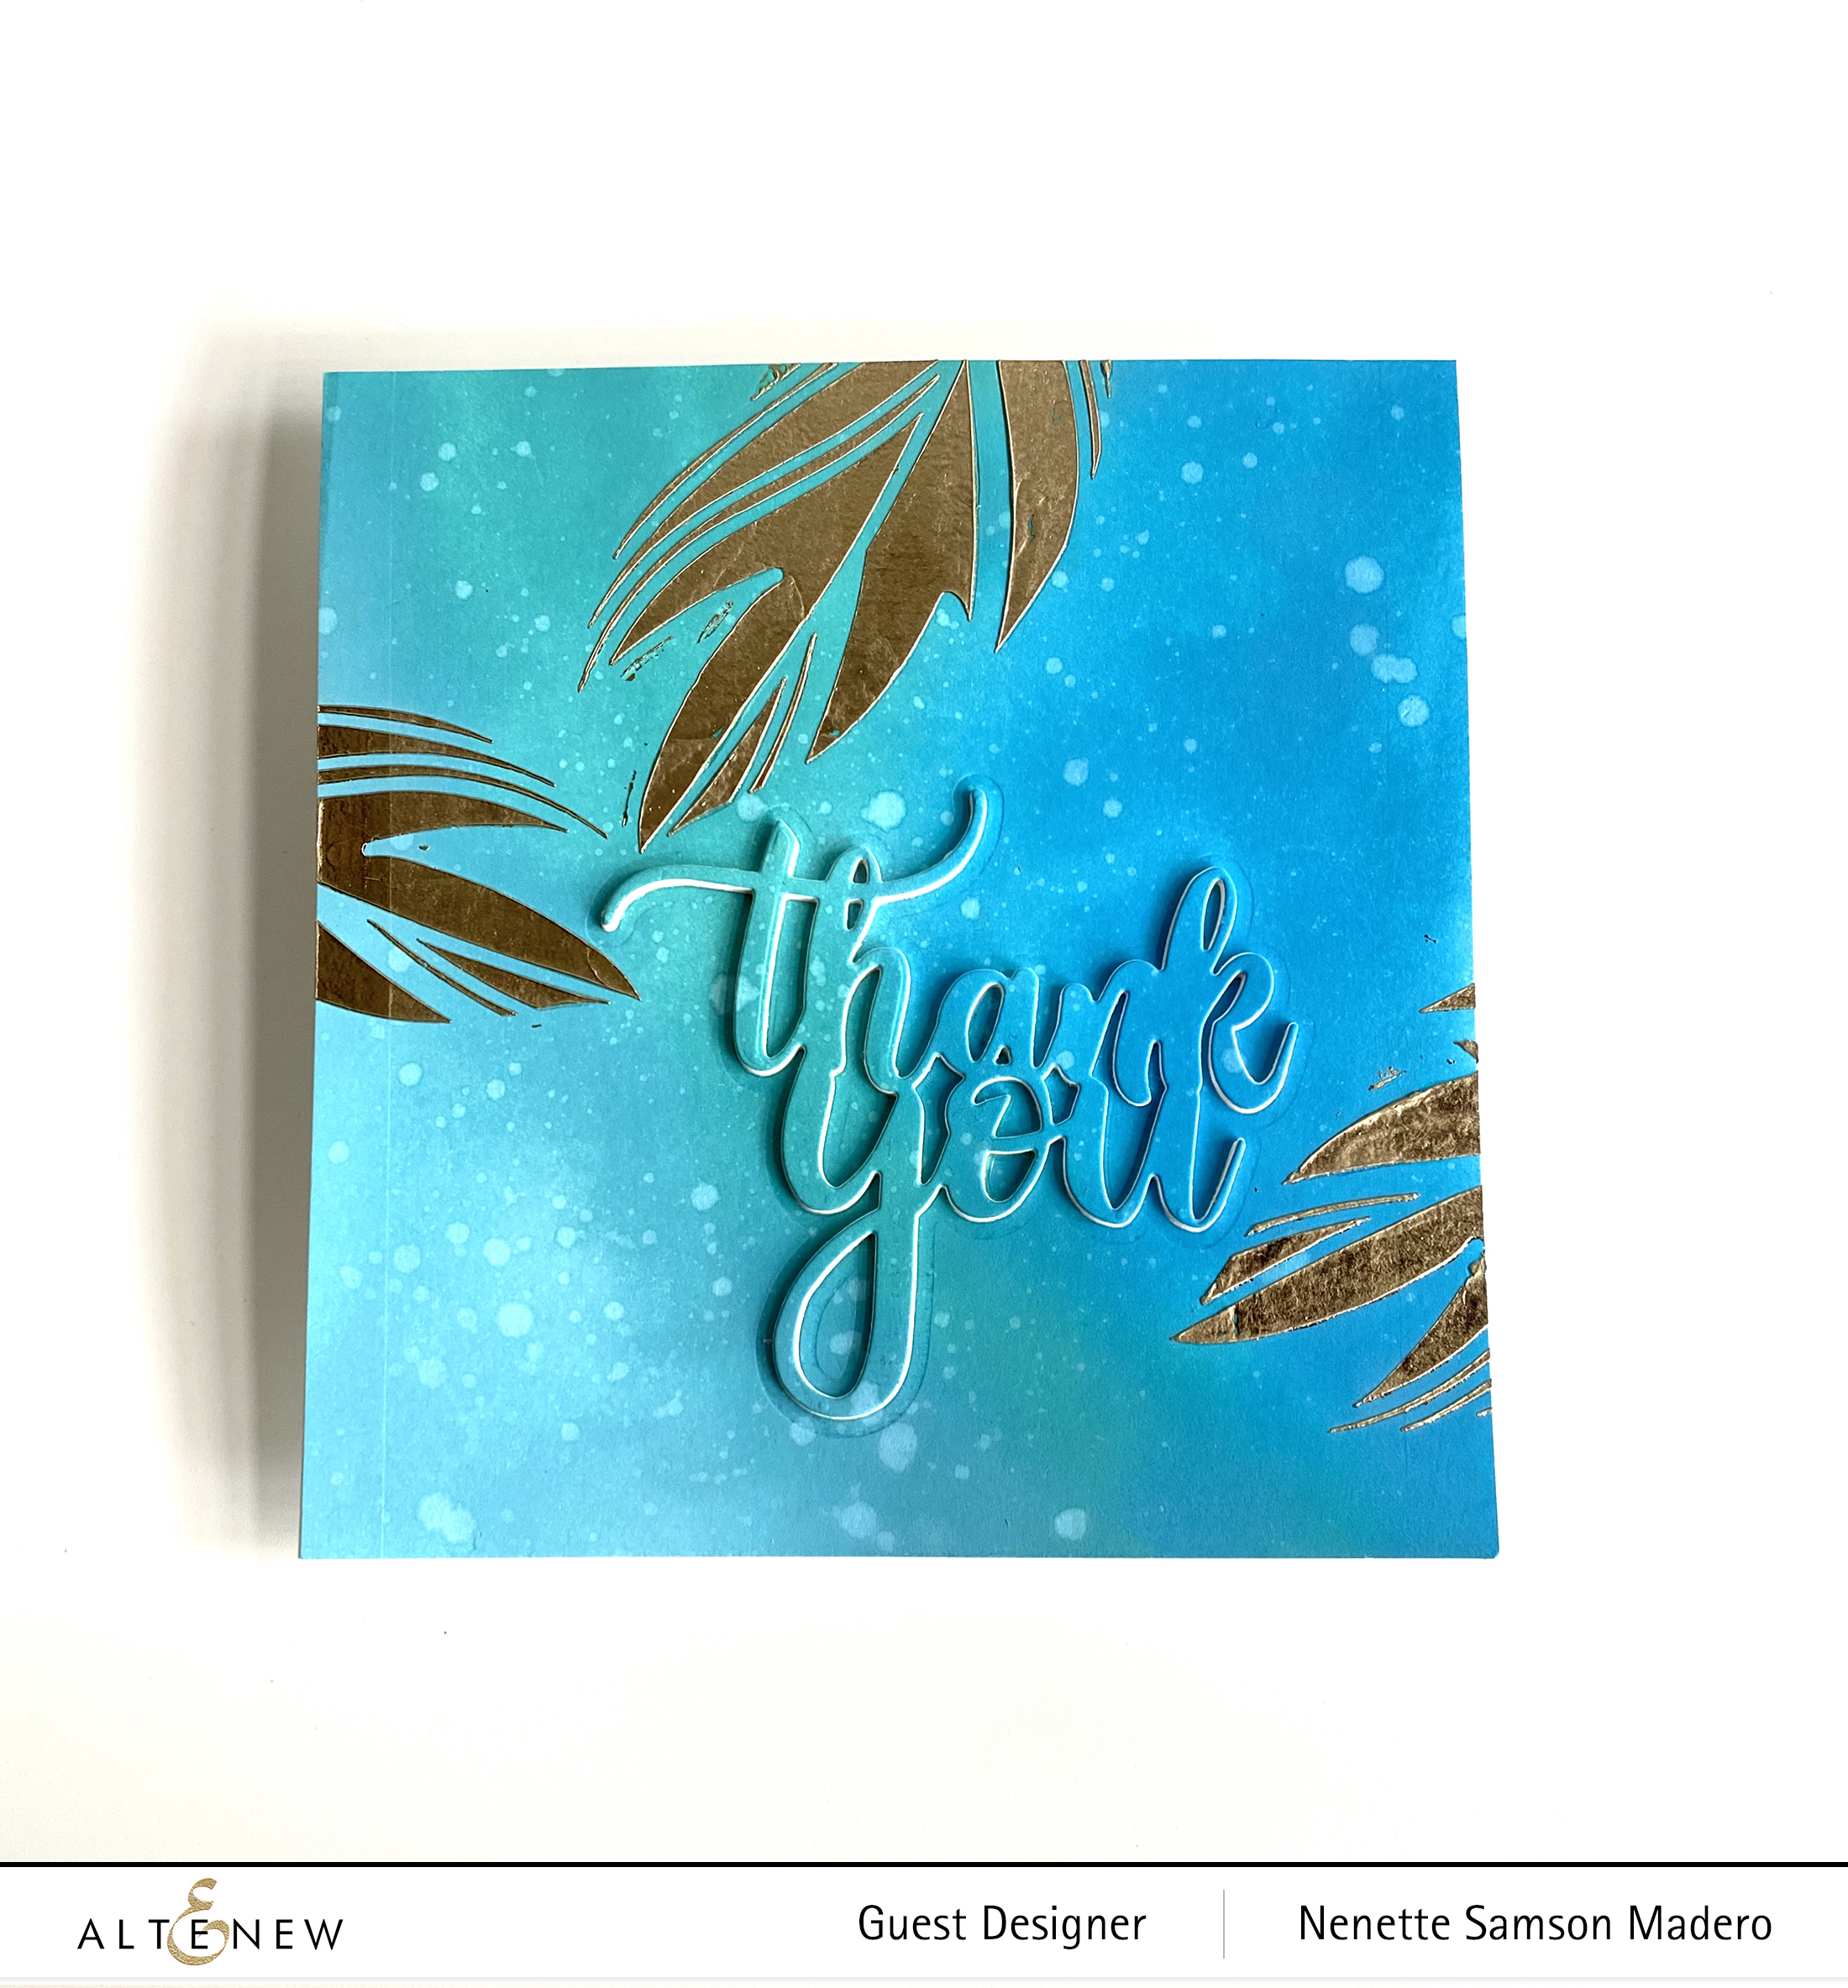
Here’s a simple card using foil. The background was colored using shades of blues then I selected only certain parts of the stencil to add the transfer gel. The rest of the stencil was covered with post-it notes to prevent the gel from going to the other areas of the stencil.

I should have die cut the thank you sentiment before applying the transfer gel cause when I ran it through the die cutting machine, the shininess of the foil became dull. šŸ˜„ So next time, I’ll make sure to do the foiling last.


TRUE FRIENDS ARE EVERYTHING


MATERIALS: Feathered Leaves Stencil, Bubble Wrap Stencil, Fine Frames Square Die set , Fine Frames Cover die, Gelli plate, acrylic paints, Versamark Ink, Crystal Clear Embossing powder

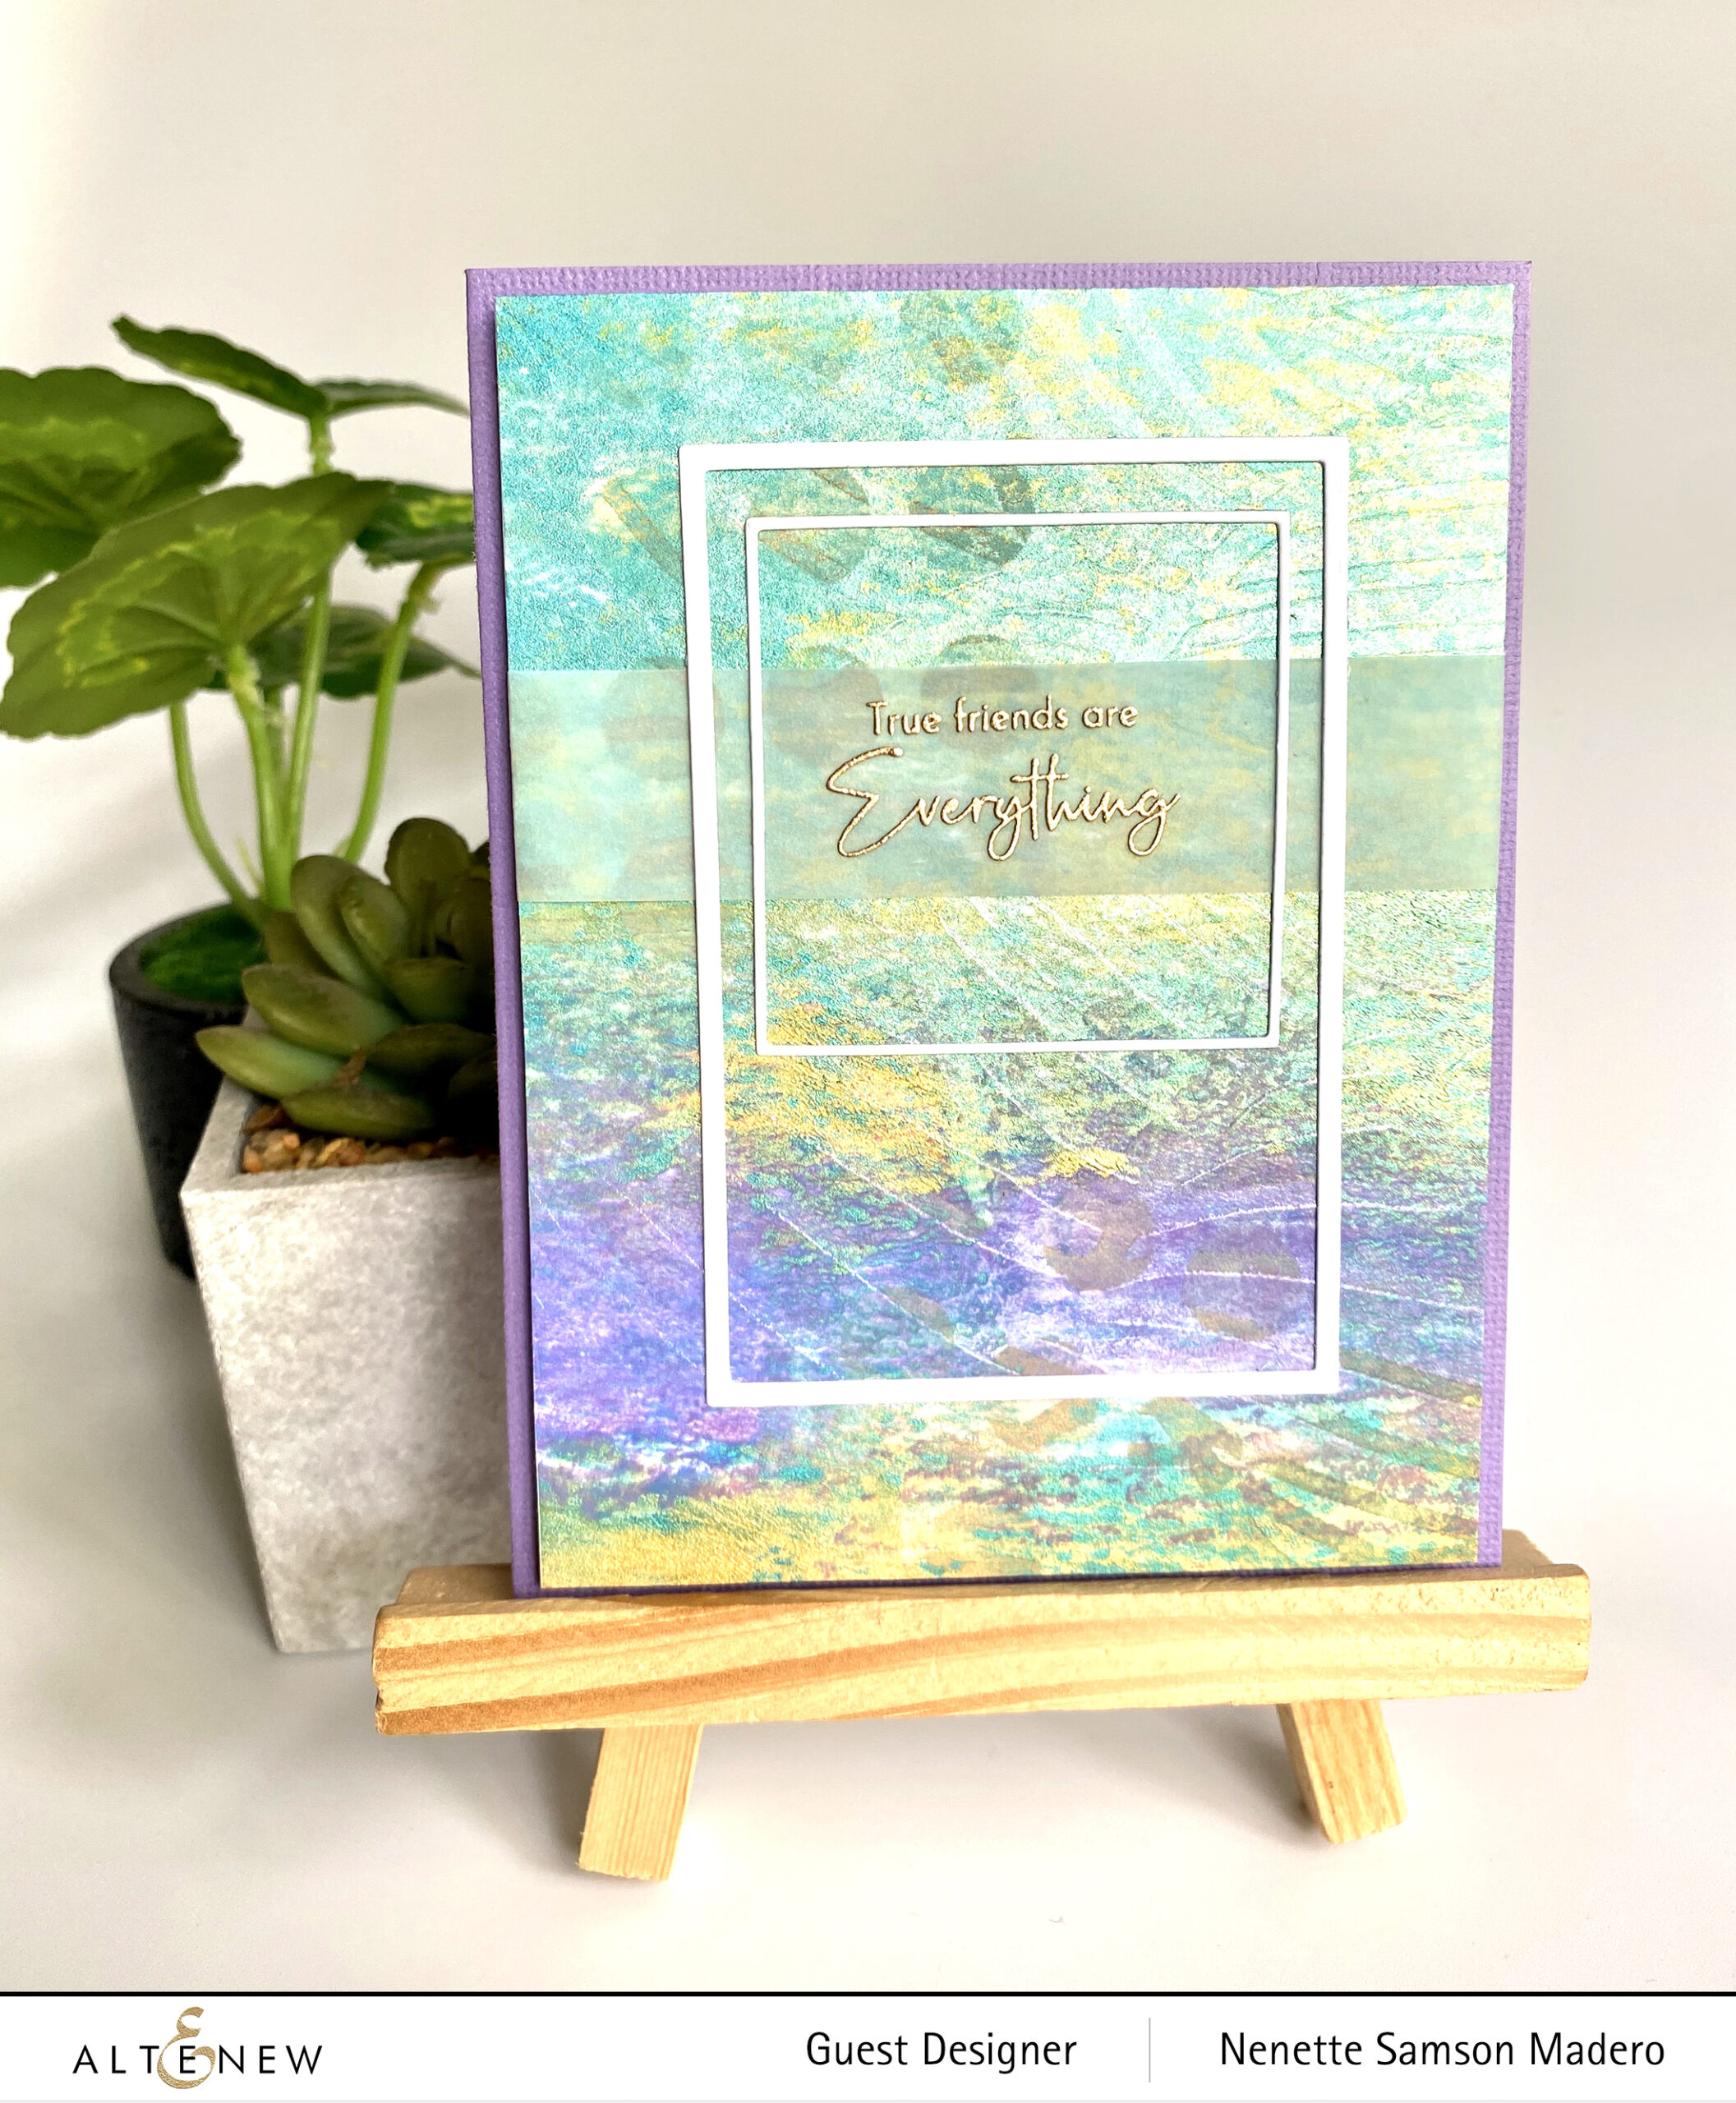
I had my Gelli plate out since I recently used it for my last blog hop so I thought of creating more monoprints using stencils. First, I added dots of assorted acrylic paints on the Gelli plate. I made sure to use colors that will go well together. A brayer was used to spread the paint on the plate. This was allowed to dry then a thin coat of white acrylic paint was added. Neenah solar white CS was used to pick up the monoprint.

When this was dry, I used the bubble wrap stencil to add some circles here and there using a distress ink tool and frayed burlap oxide ink. The Feathered leaves stencil was then put on top then Versamark ink and clear embossing powder was used to create another layer. I love the layers on this card and the subtle texture the stencil added.

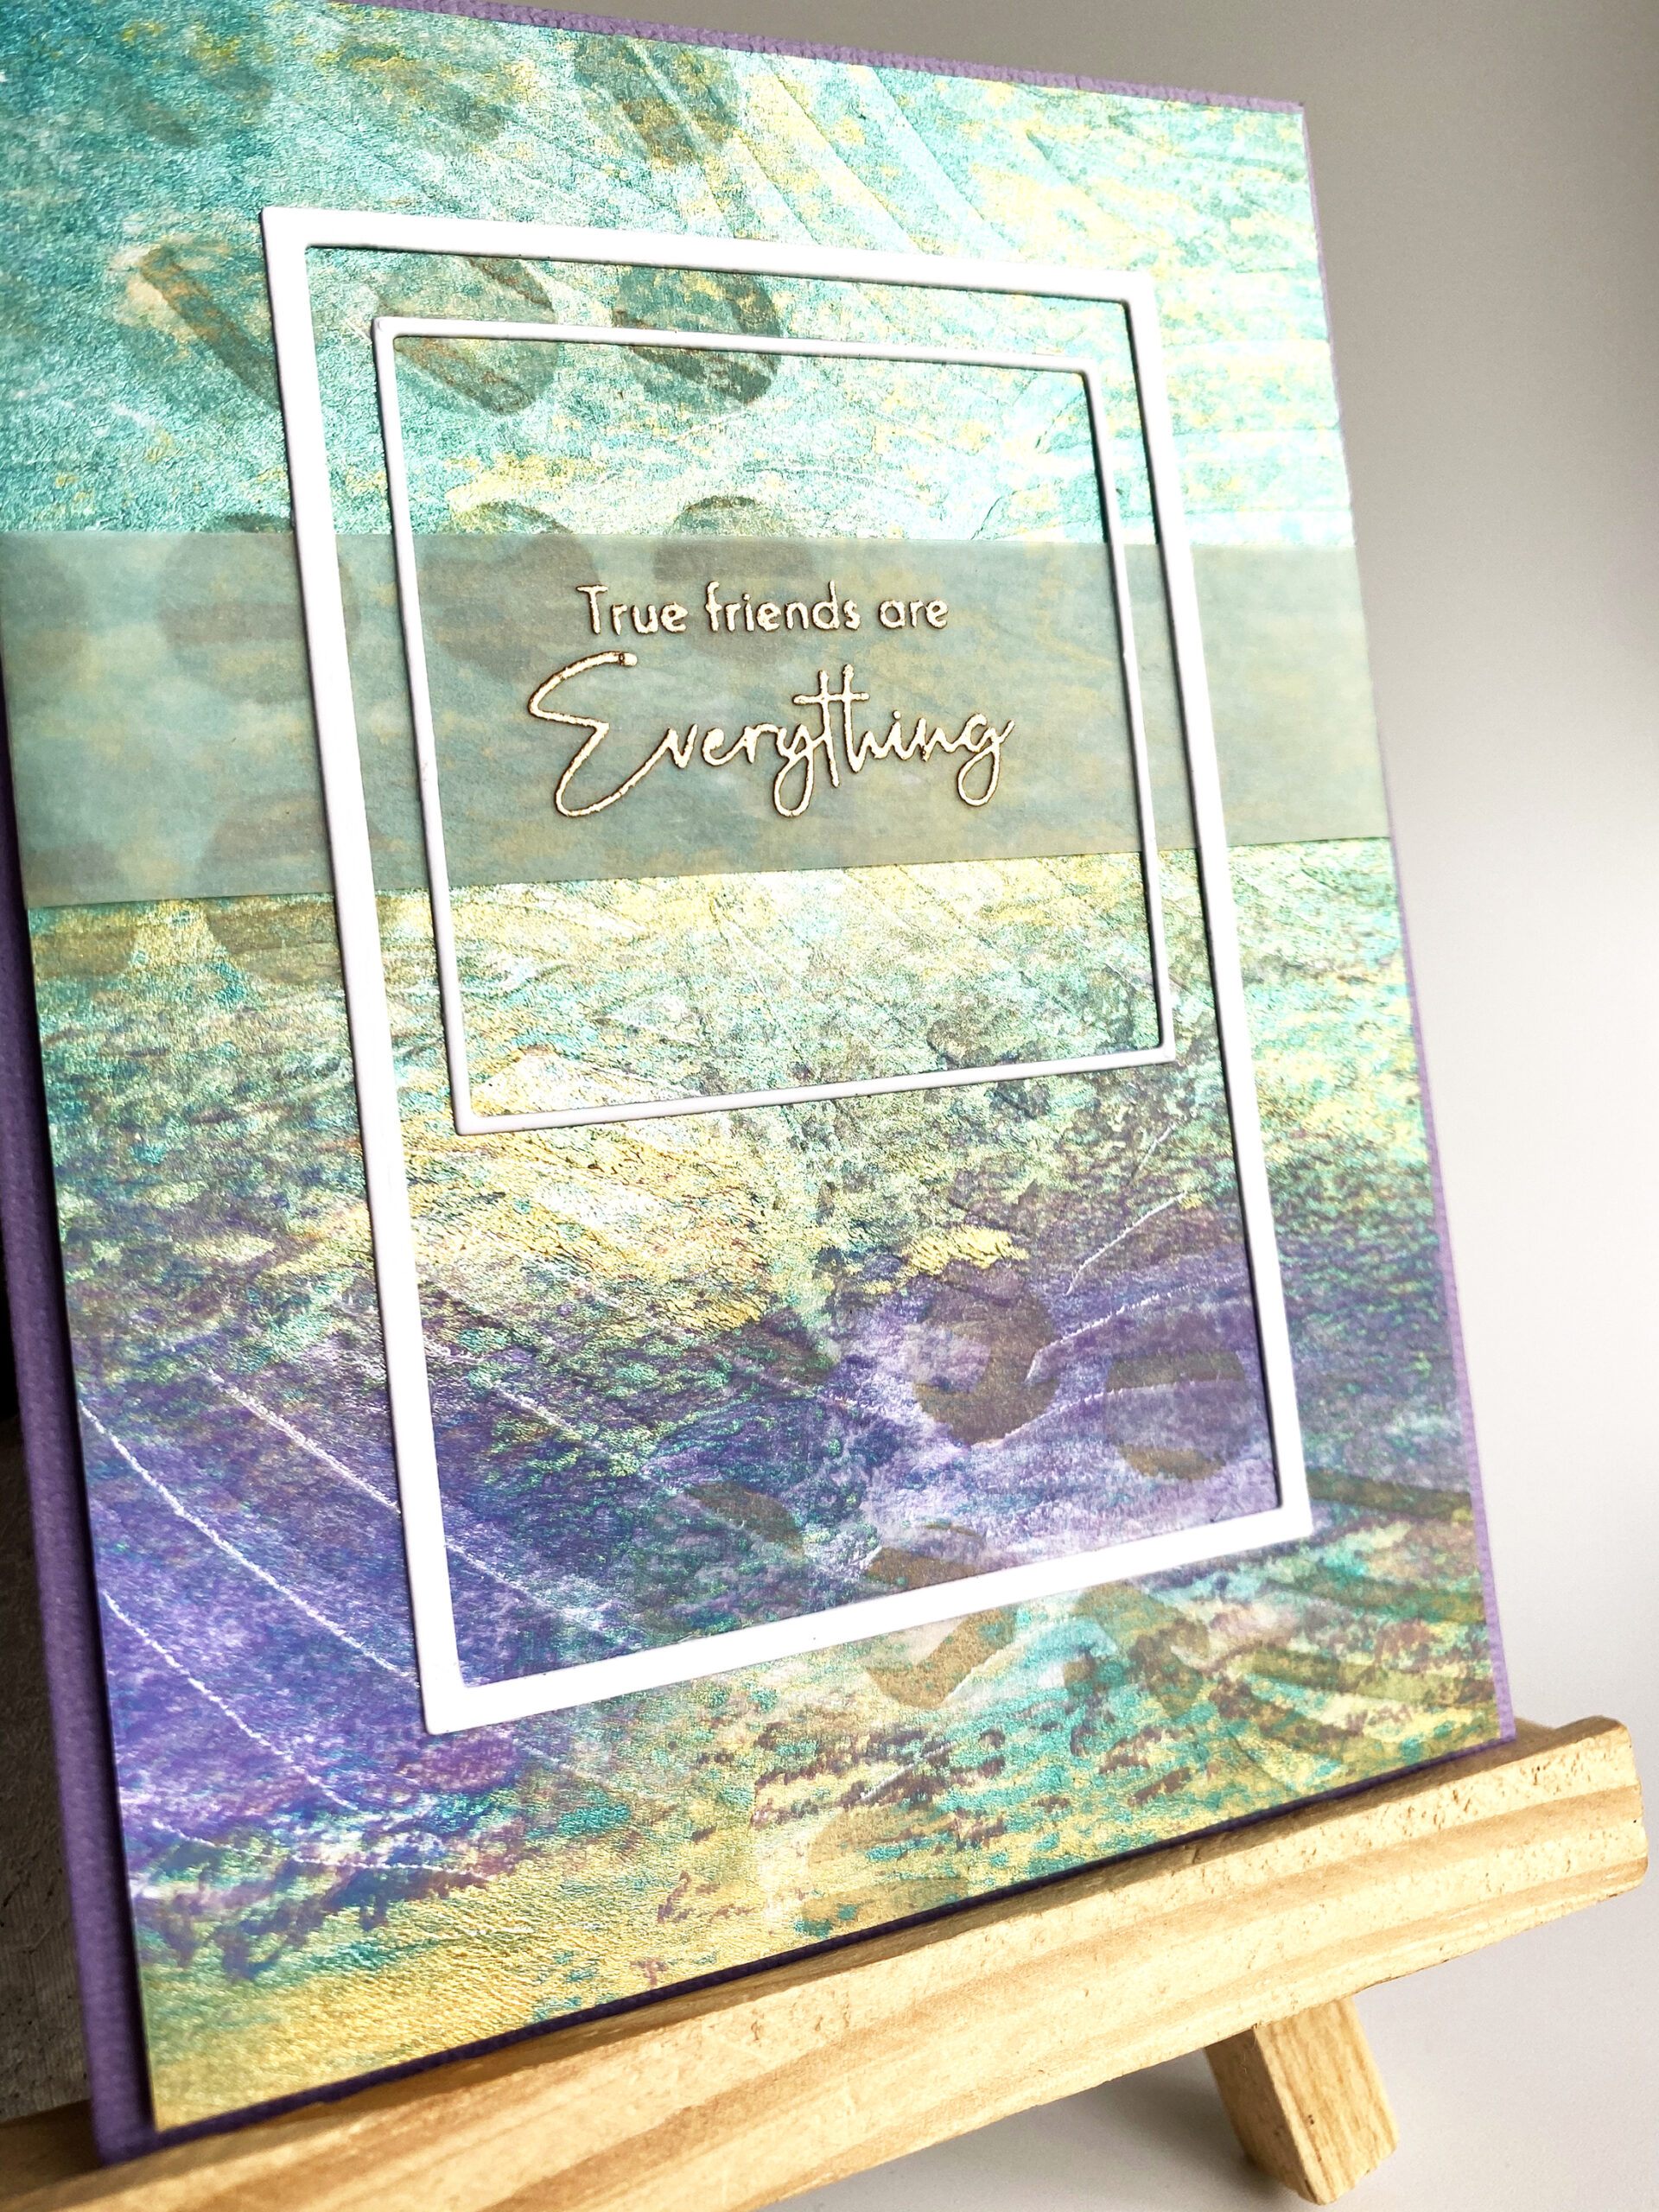
The sentiment was stamped on vellum then I used 2 different sets of frames to highlight the sentiment.


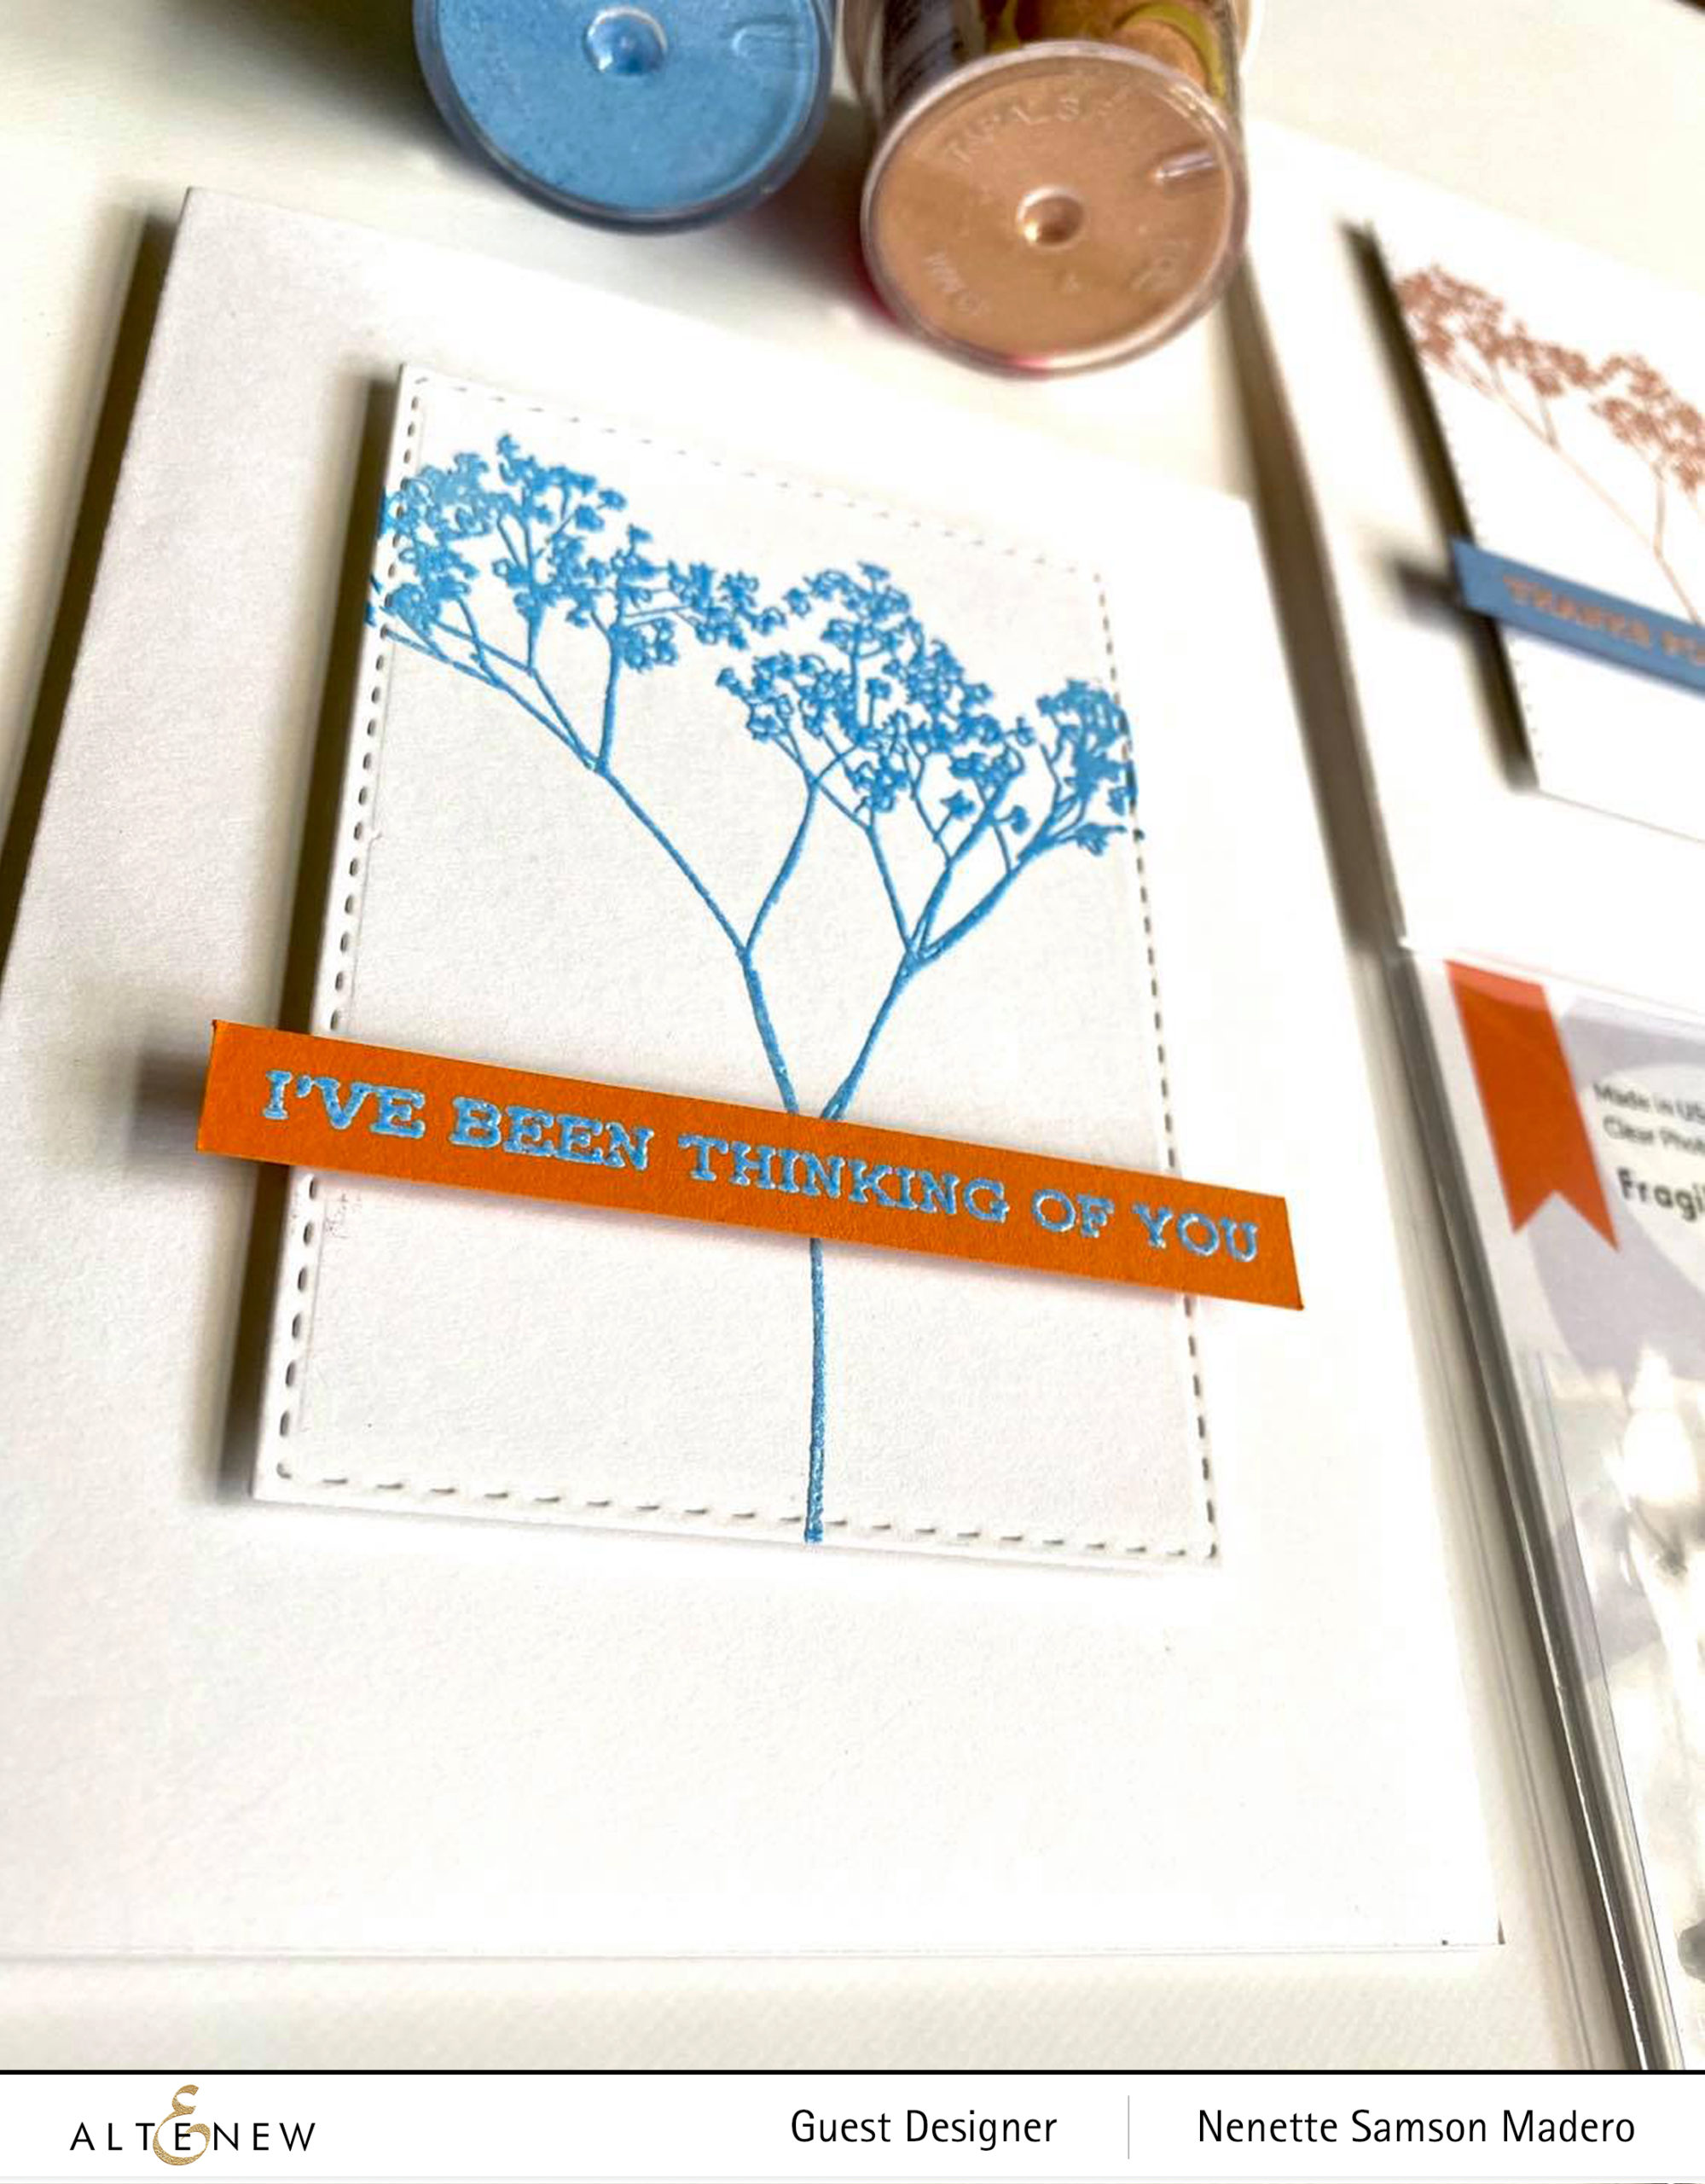
I HAVE BEEN THINKING OF YOU


MATERIALS: Geometric Landscape Stencil, Poppy Garden Stamp and die, Garden Picks 3D die, Nuvo Embellishments Mousse Aquamarine, Pure White Embossing powder, Rose Gold Embossing Powder, Versmark Ink , Uniball Signo White gel pen

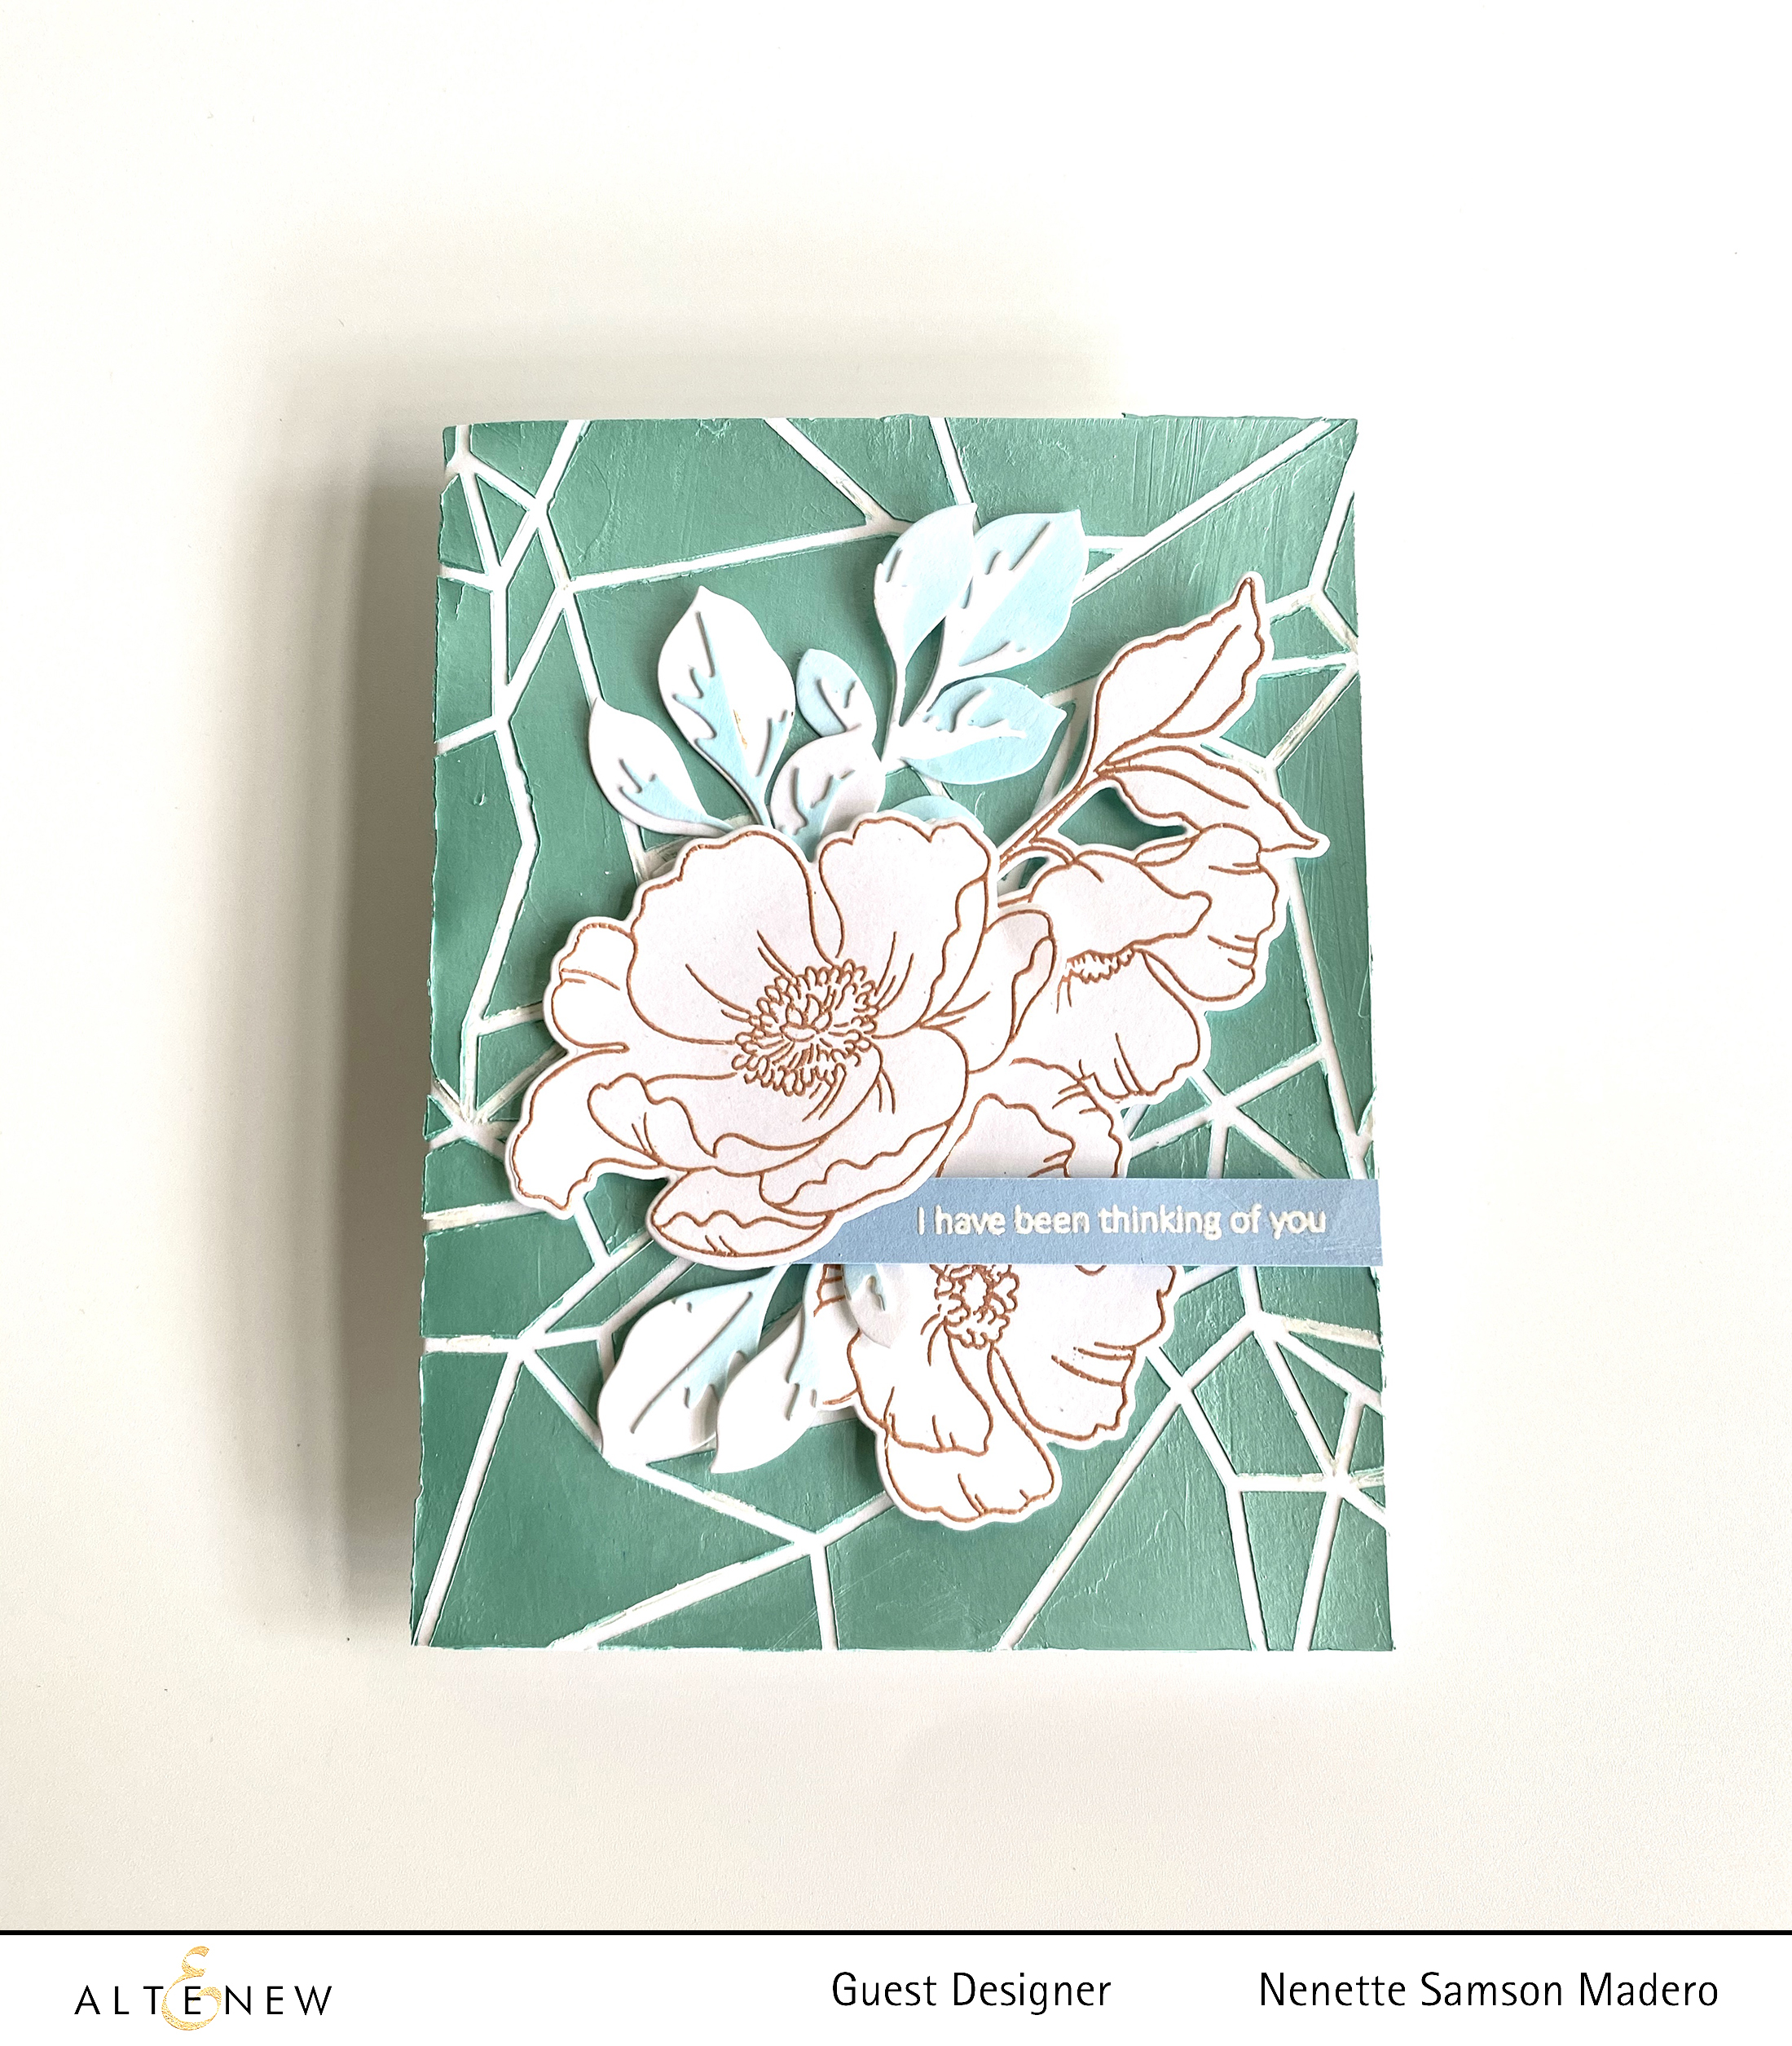
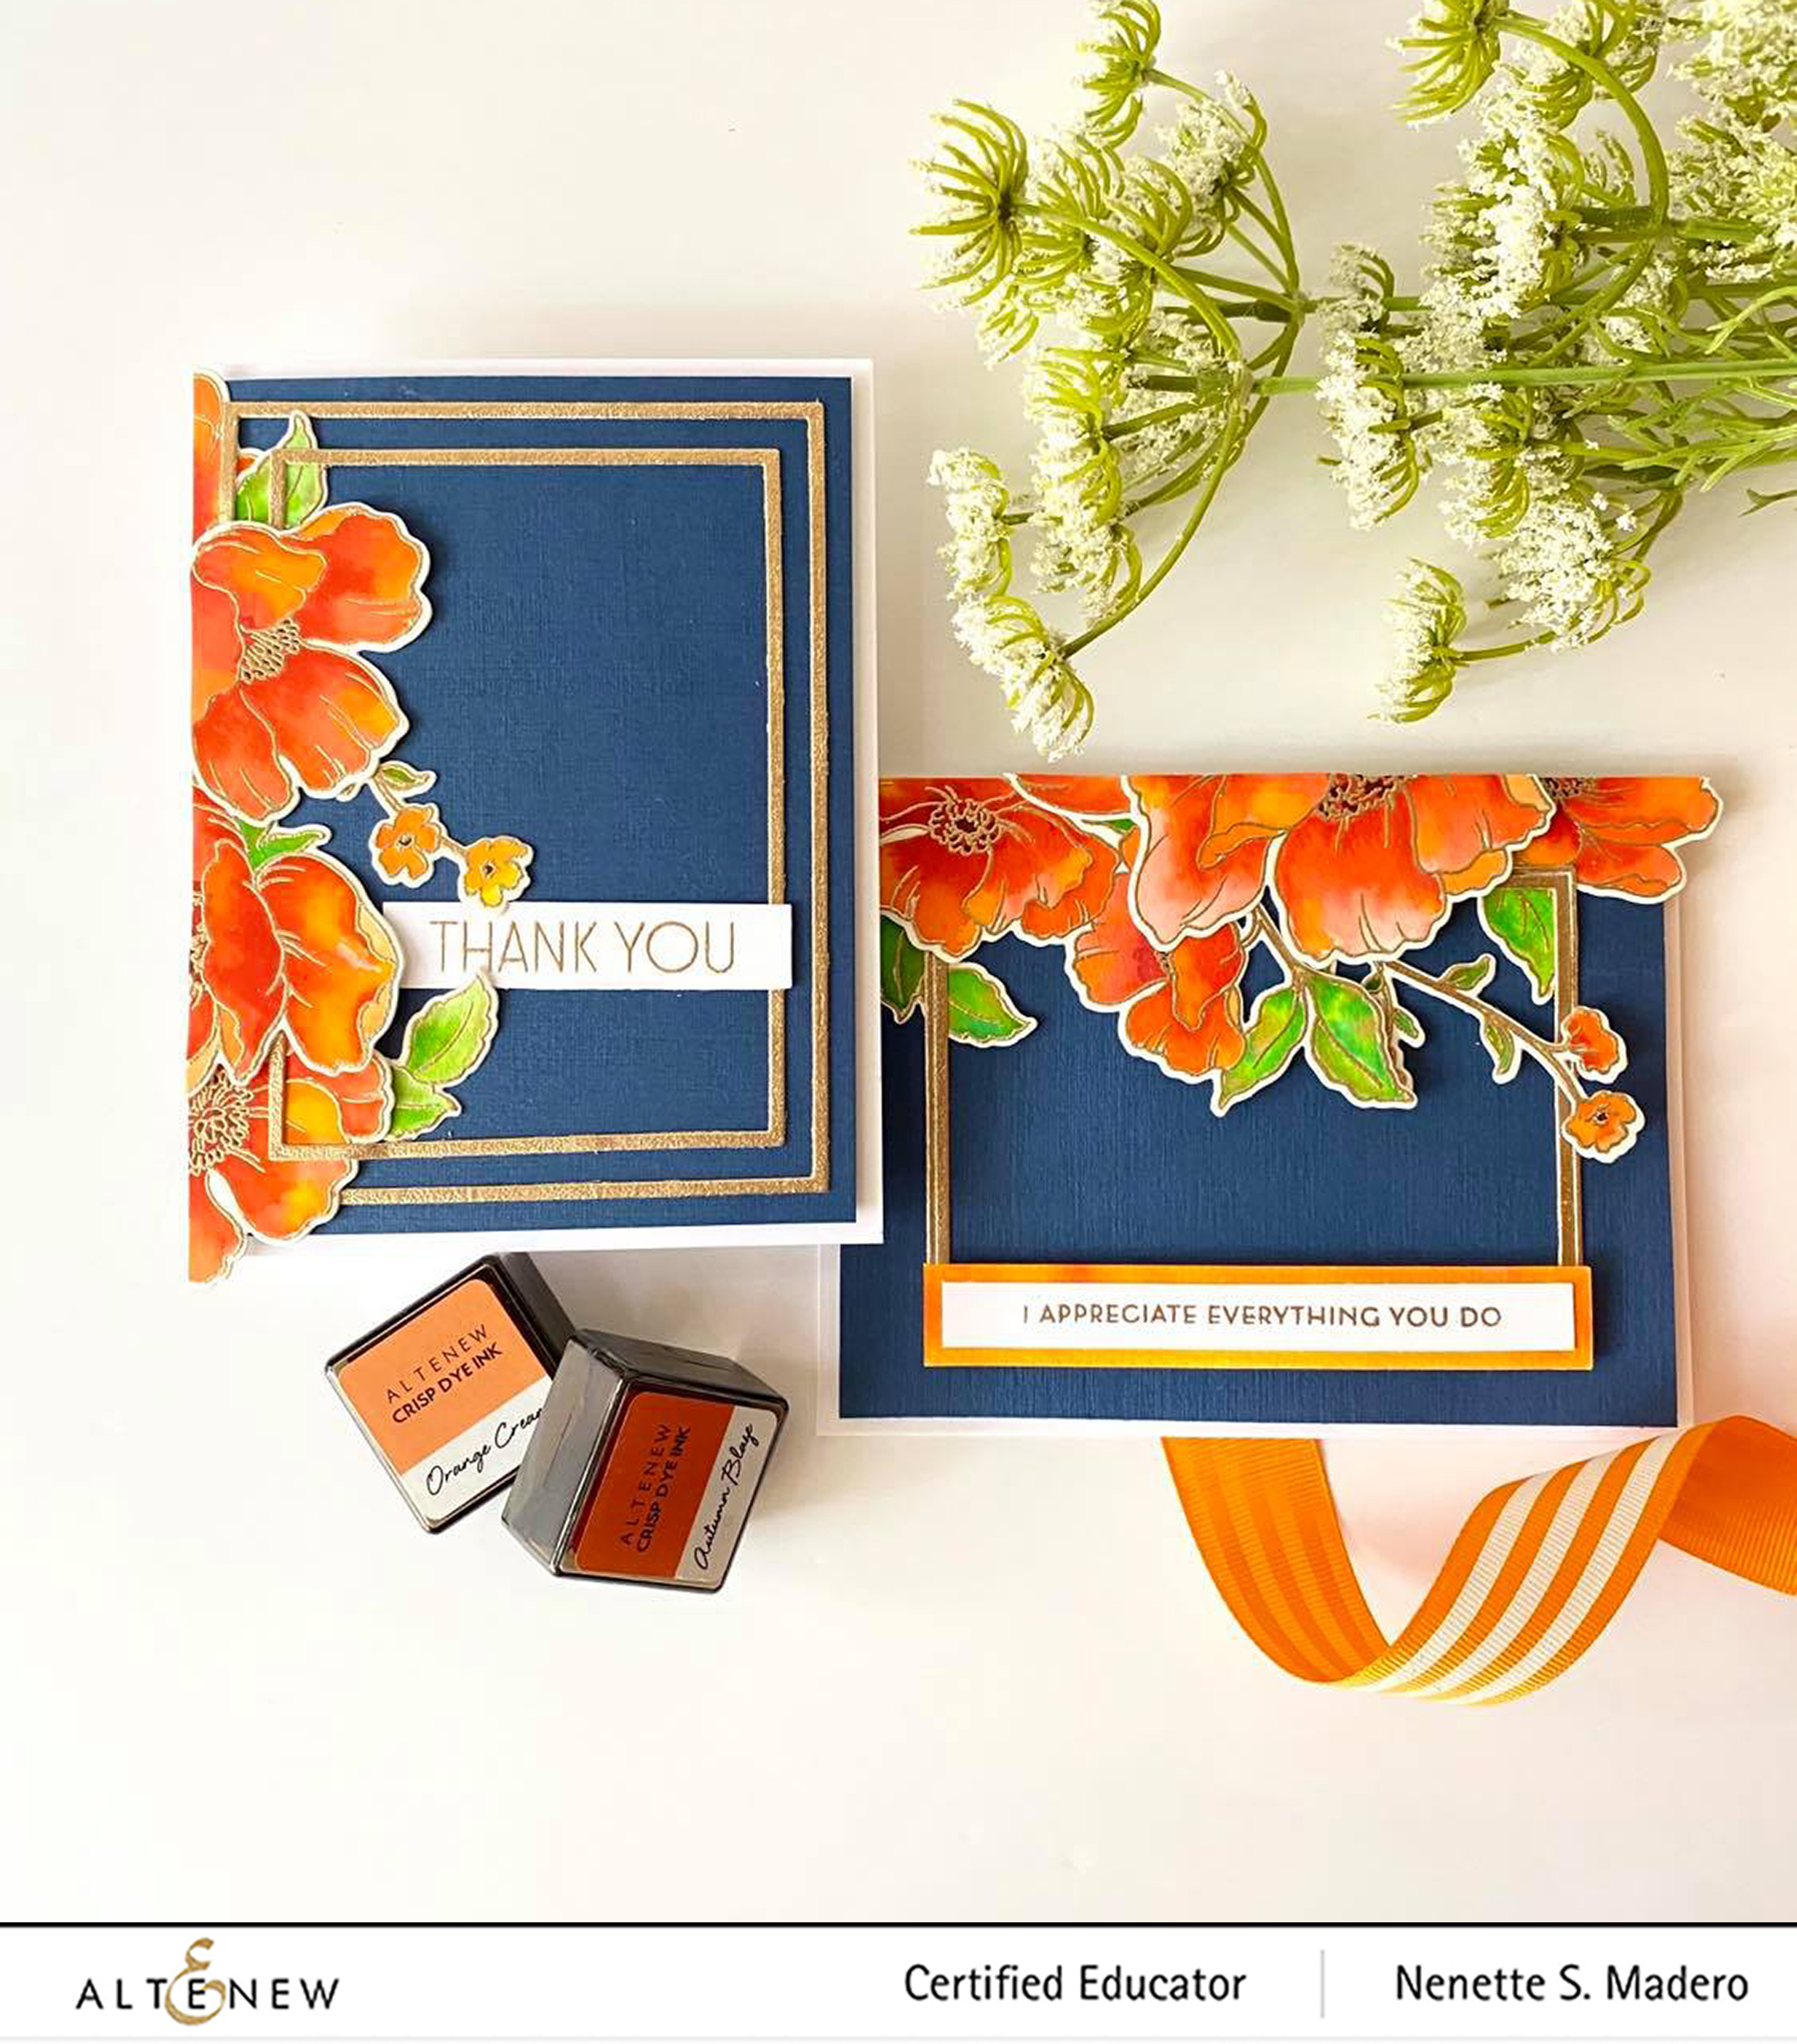
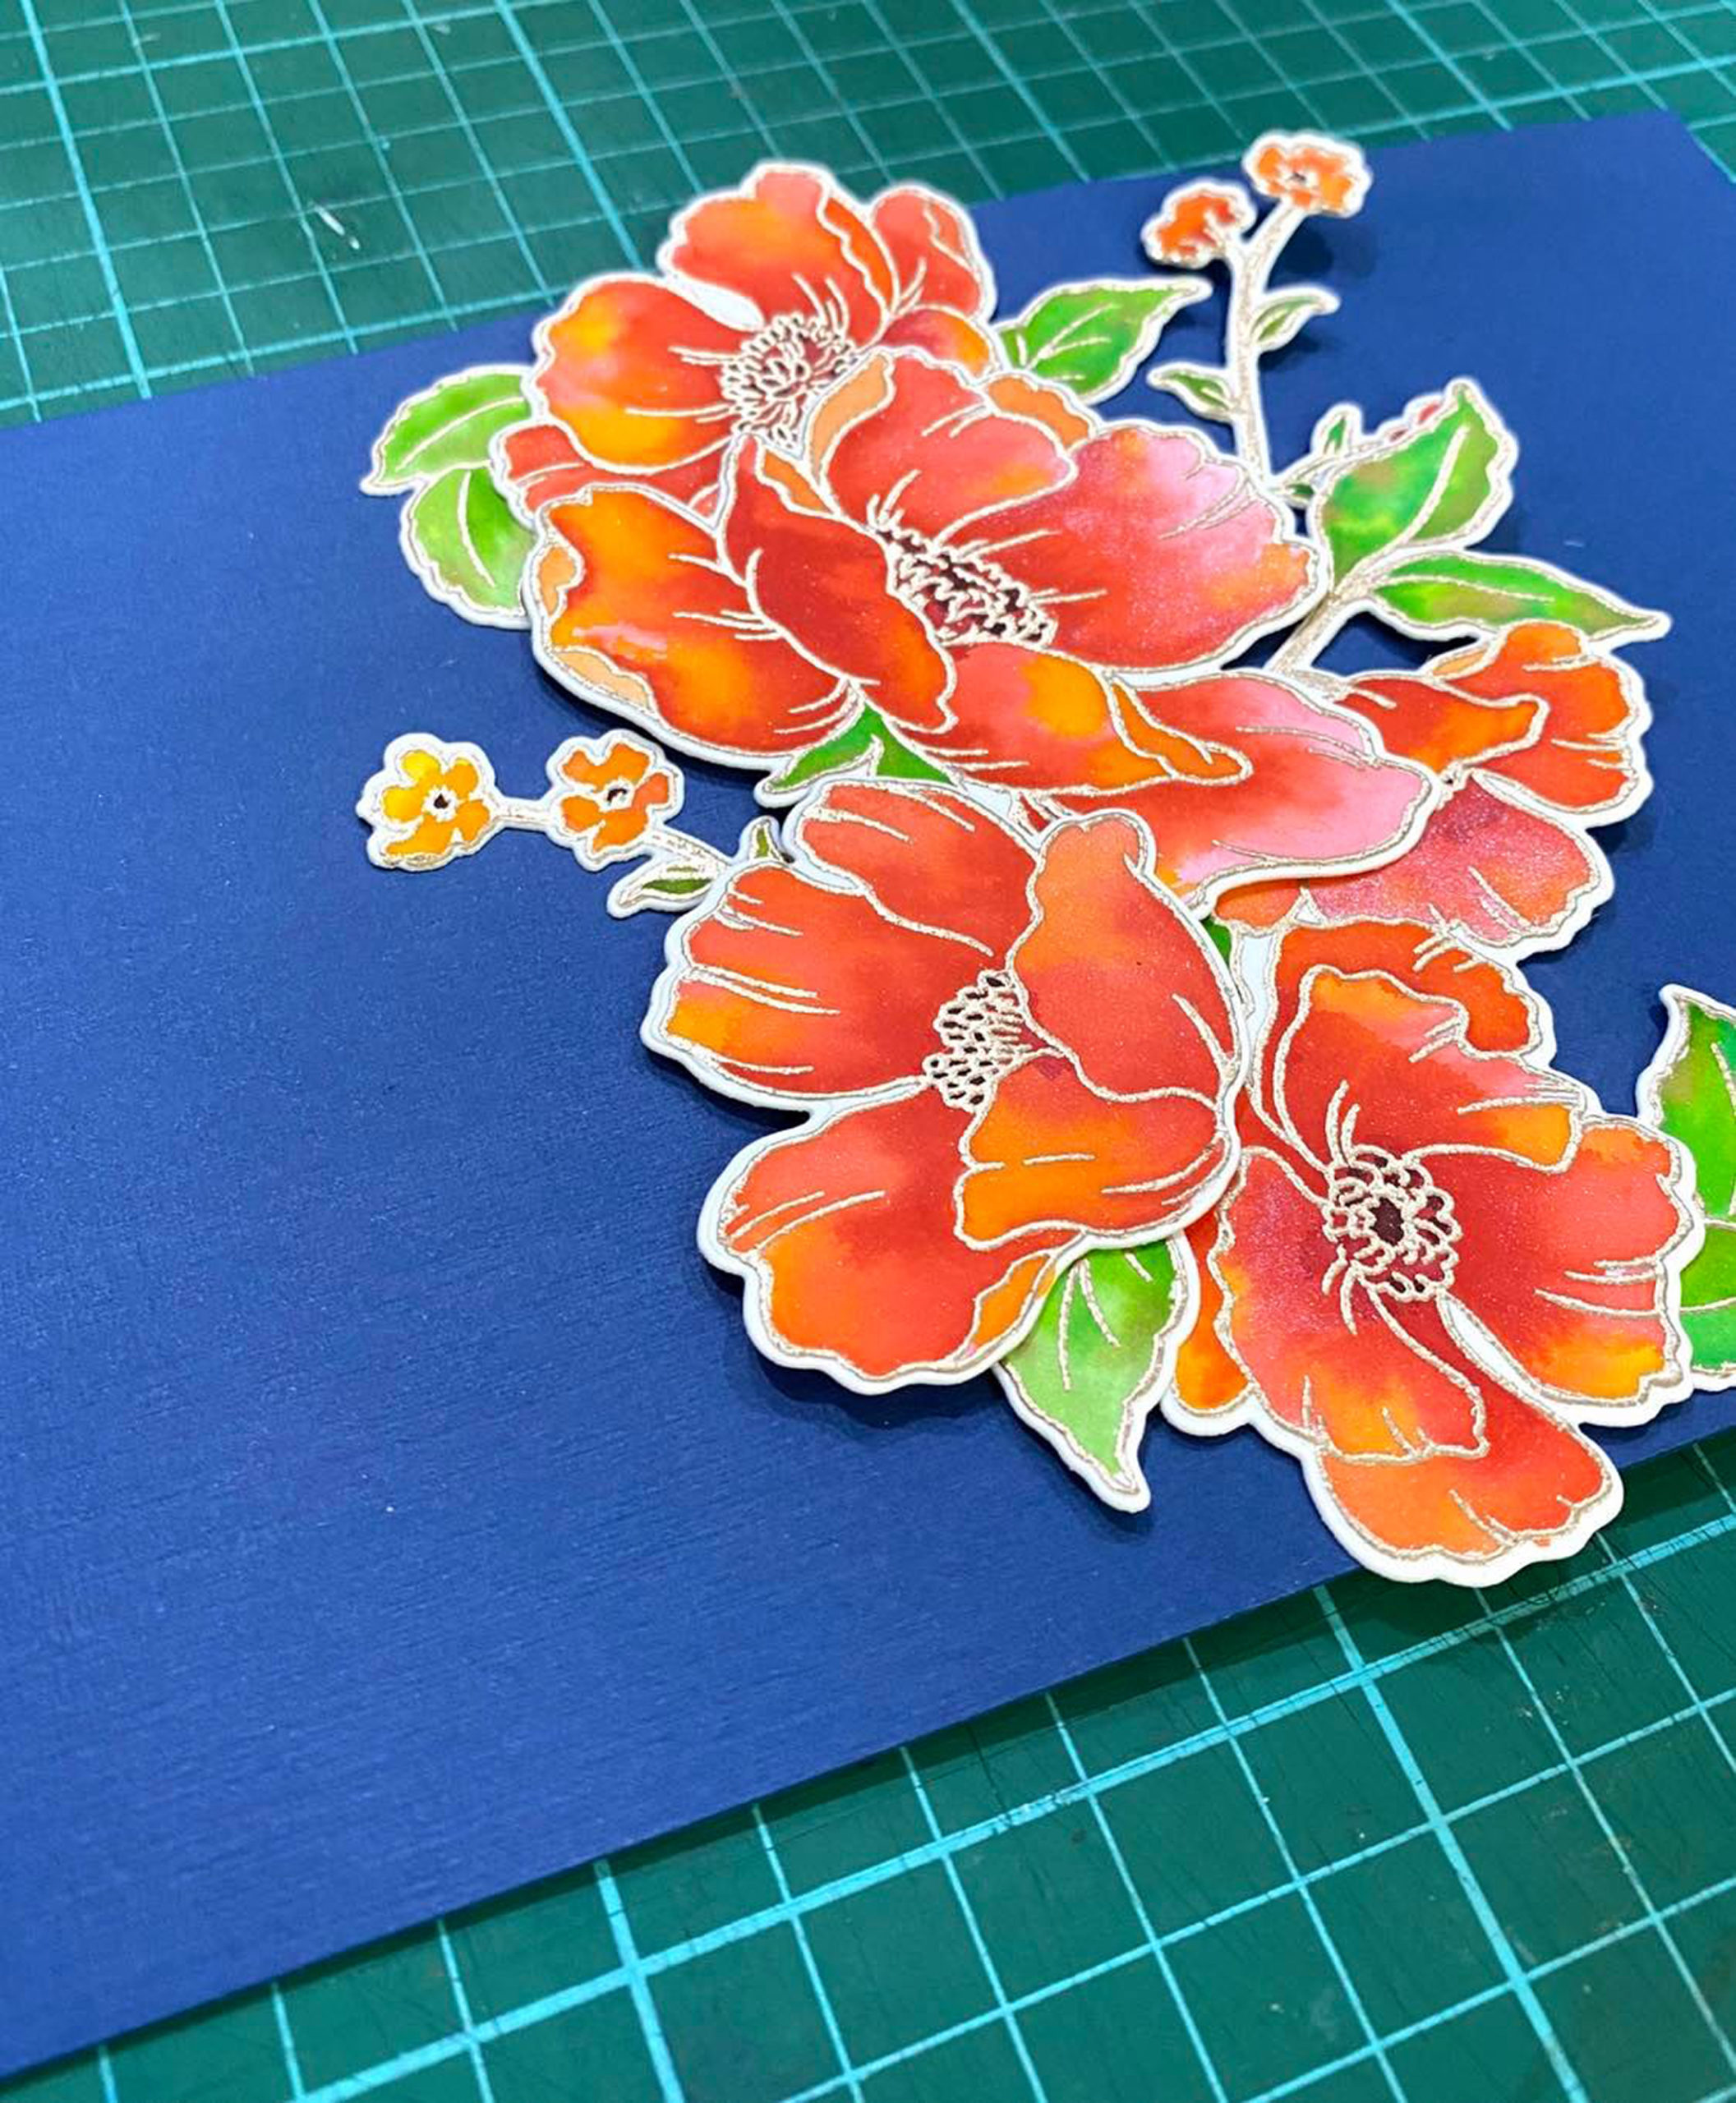
I made another background using the Geometric Landscape Stencil and the Nuvo mousse for added dimension. I allowed it to dry while stamping and embossing the flowers from the Poppy Garden stamp set. I also die cut the leaves from the Garden Picks 3d die. The sentiment from the Poppy Garden set was embossed using white embossing powder while the flowers were embossed using Golden Peach embossing powder.

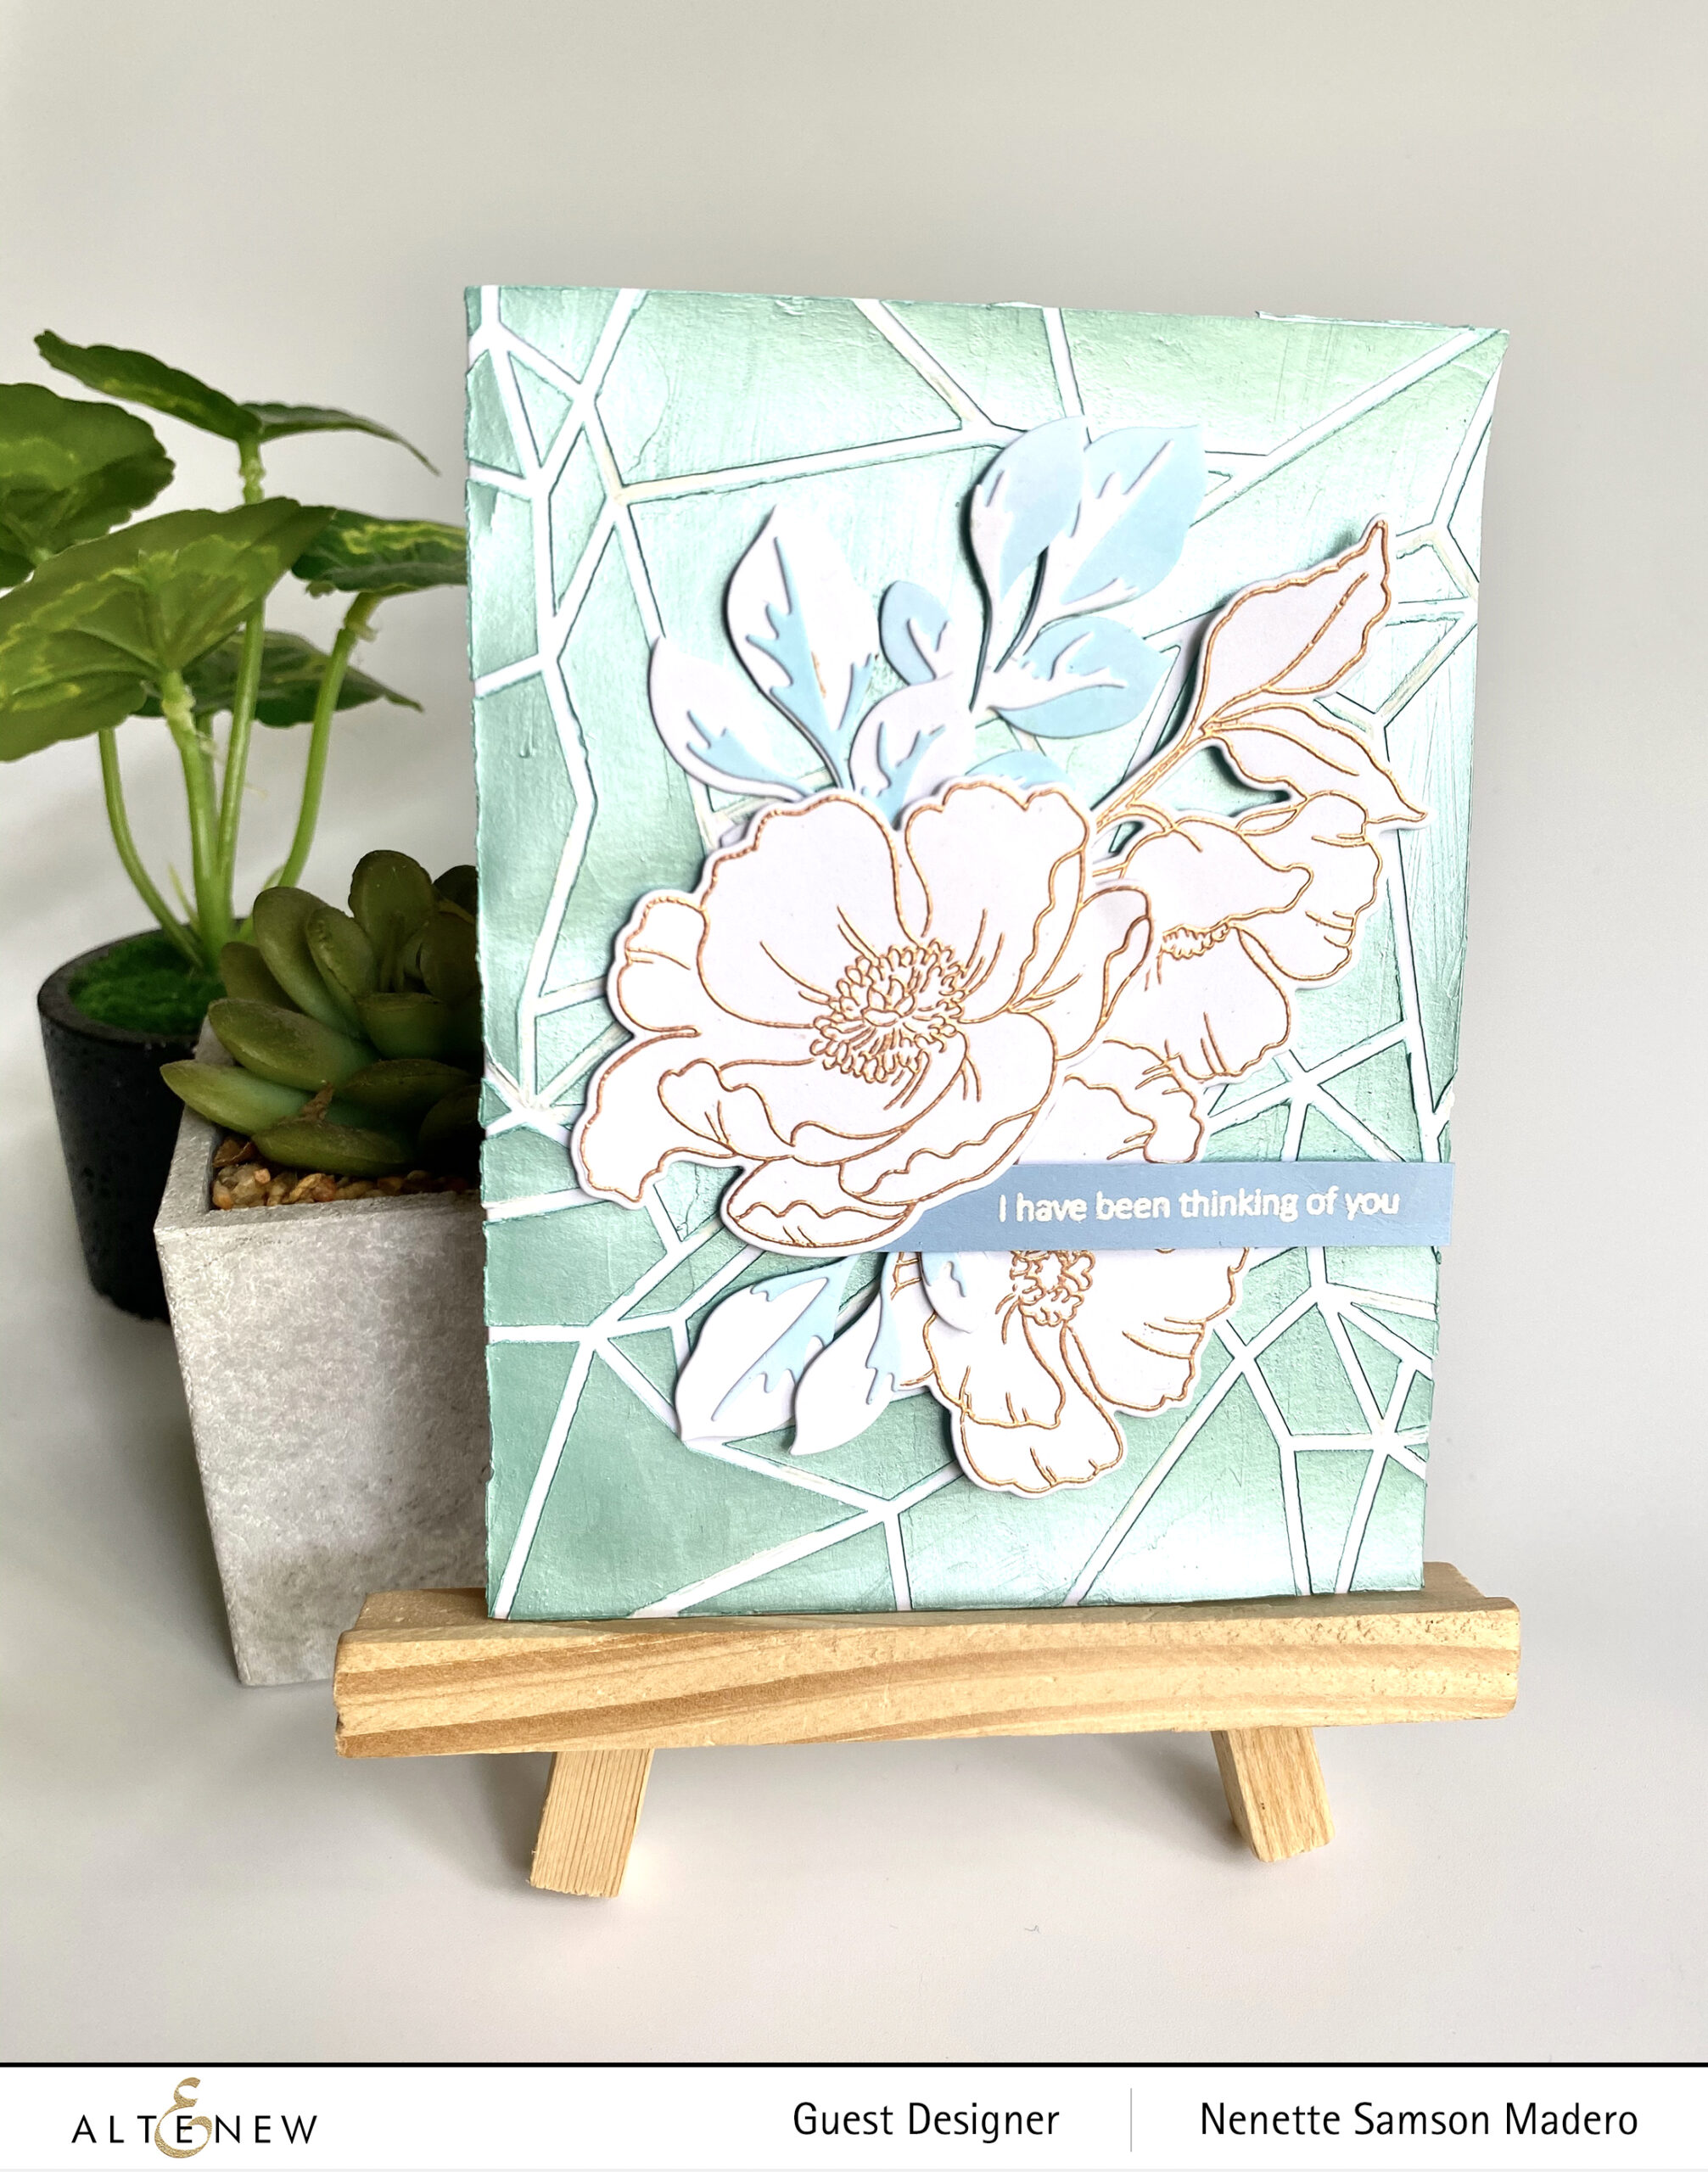
All of the embellishments were arranged using foam squares for added dimension. By the way, when I pulled up the stencil from the paper, I noticed some of the mousse went under the stencil. After it dried, I just used a Uniball Signo white gel pen to cover up the areas. That way, I didn’t have to repeat the whole process and waste material. šŸ˜Š


YOU INSPIRE ME TO BE BETTER


MATERIALS: Poppy Garden Mask Stencil, Distress Oxide-Mermaid Lagoon, Pure White Embossing Powder, Versamark Ink, 1/8″ double-sided tape, Rose Gold Embossing Powder, Foam Squres

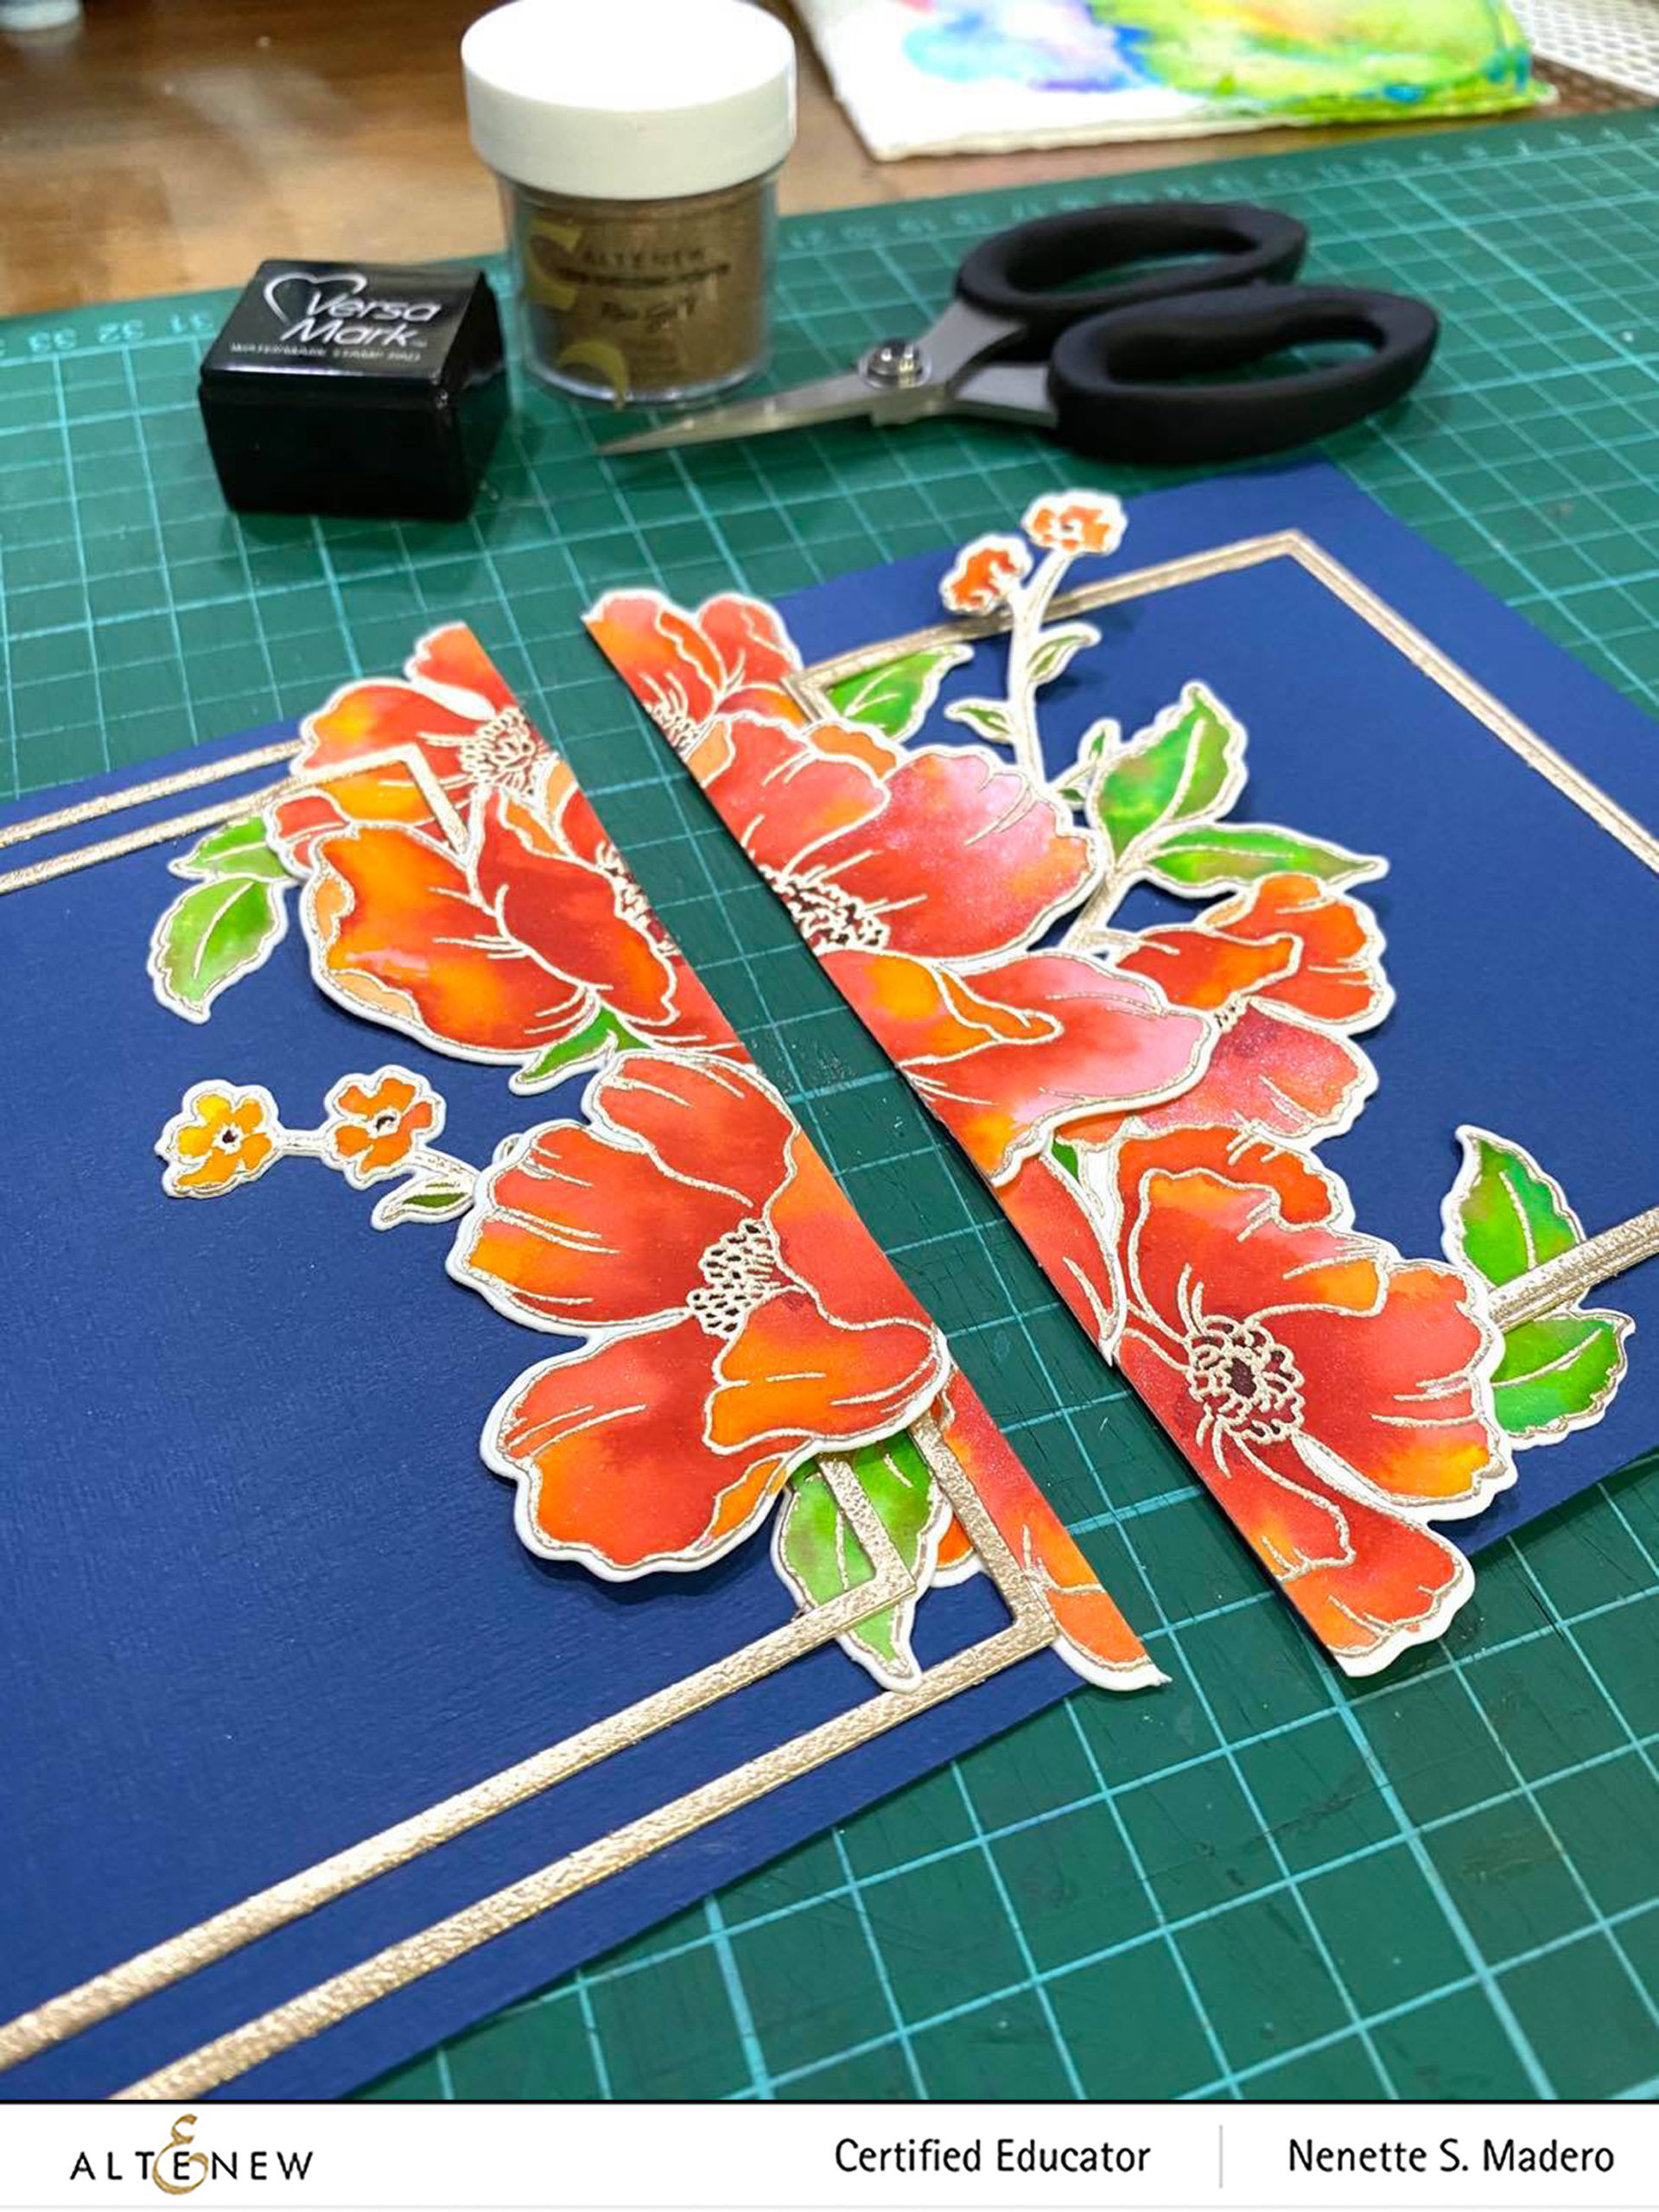
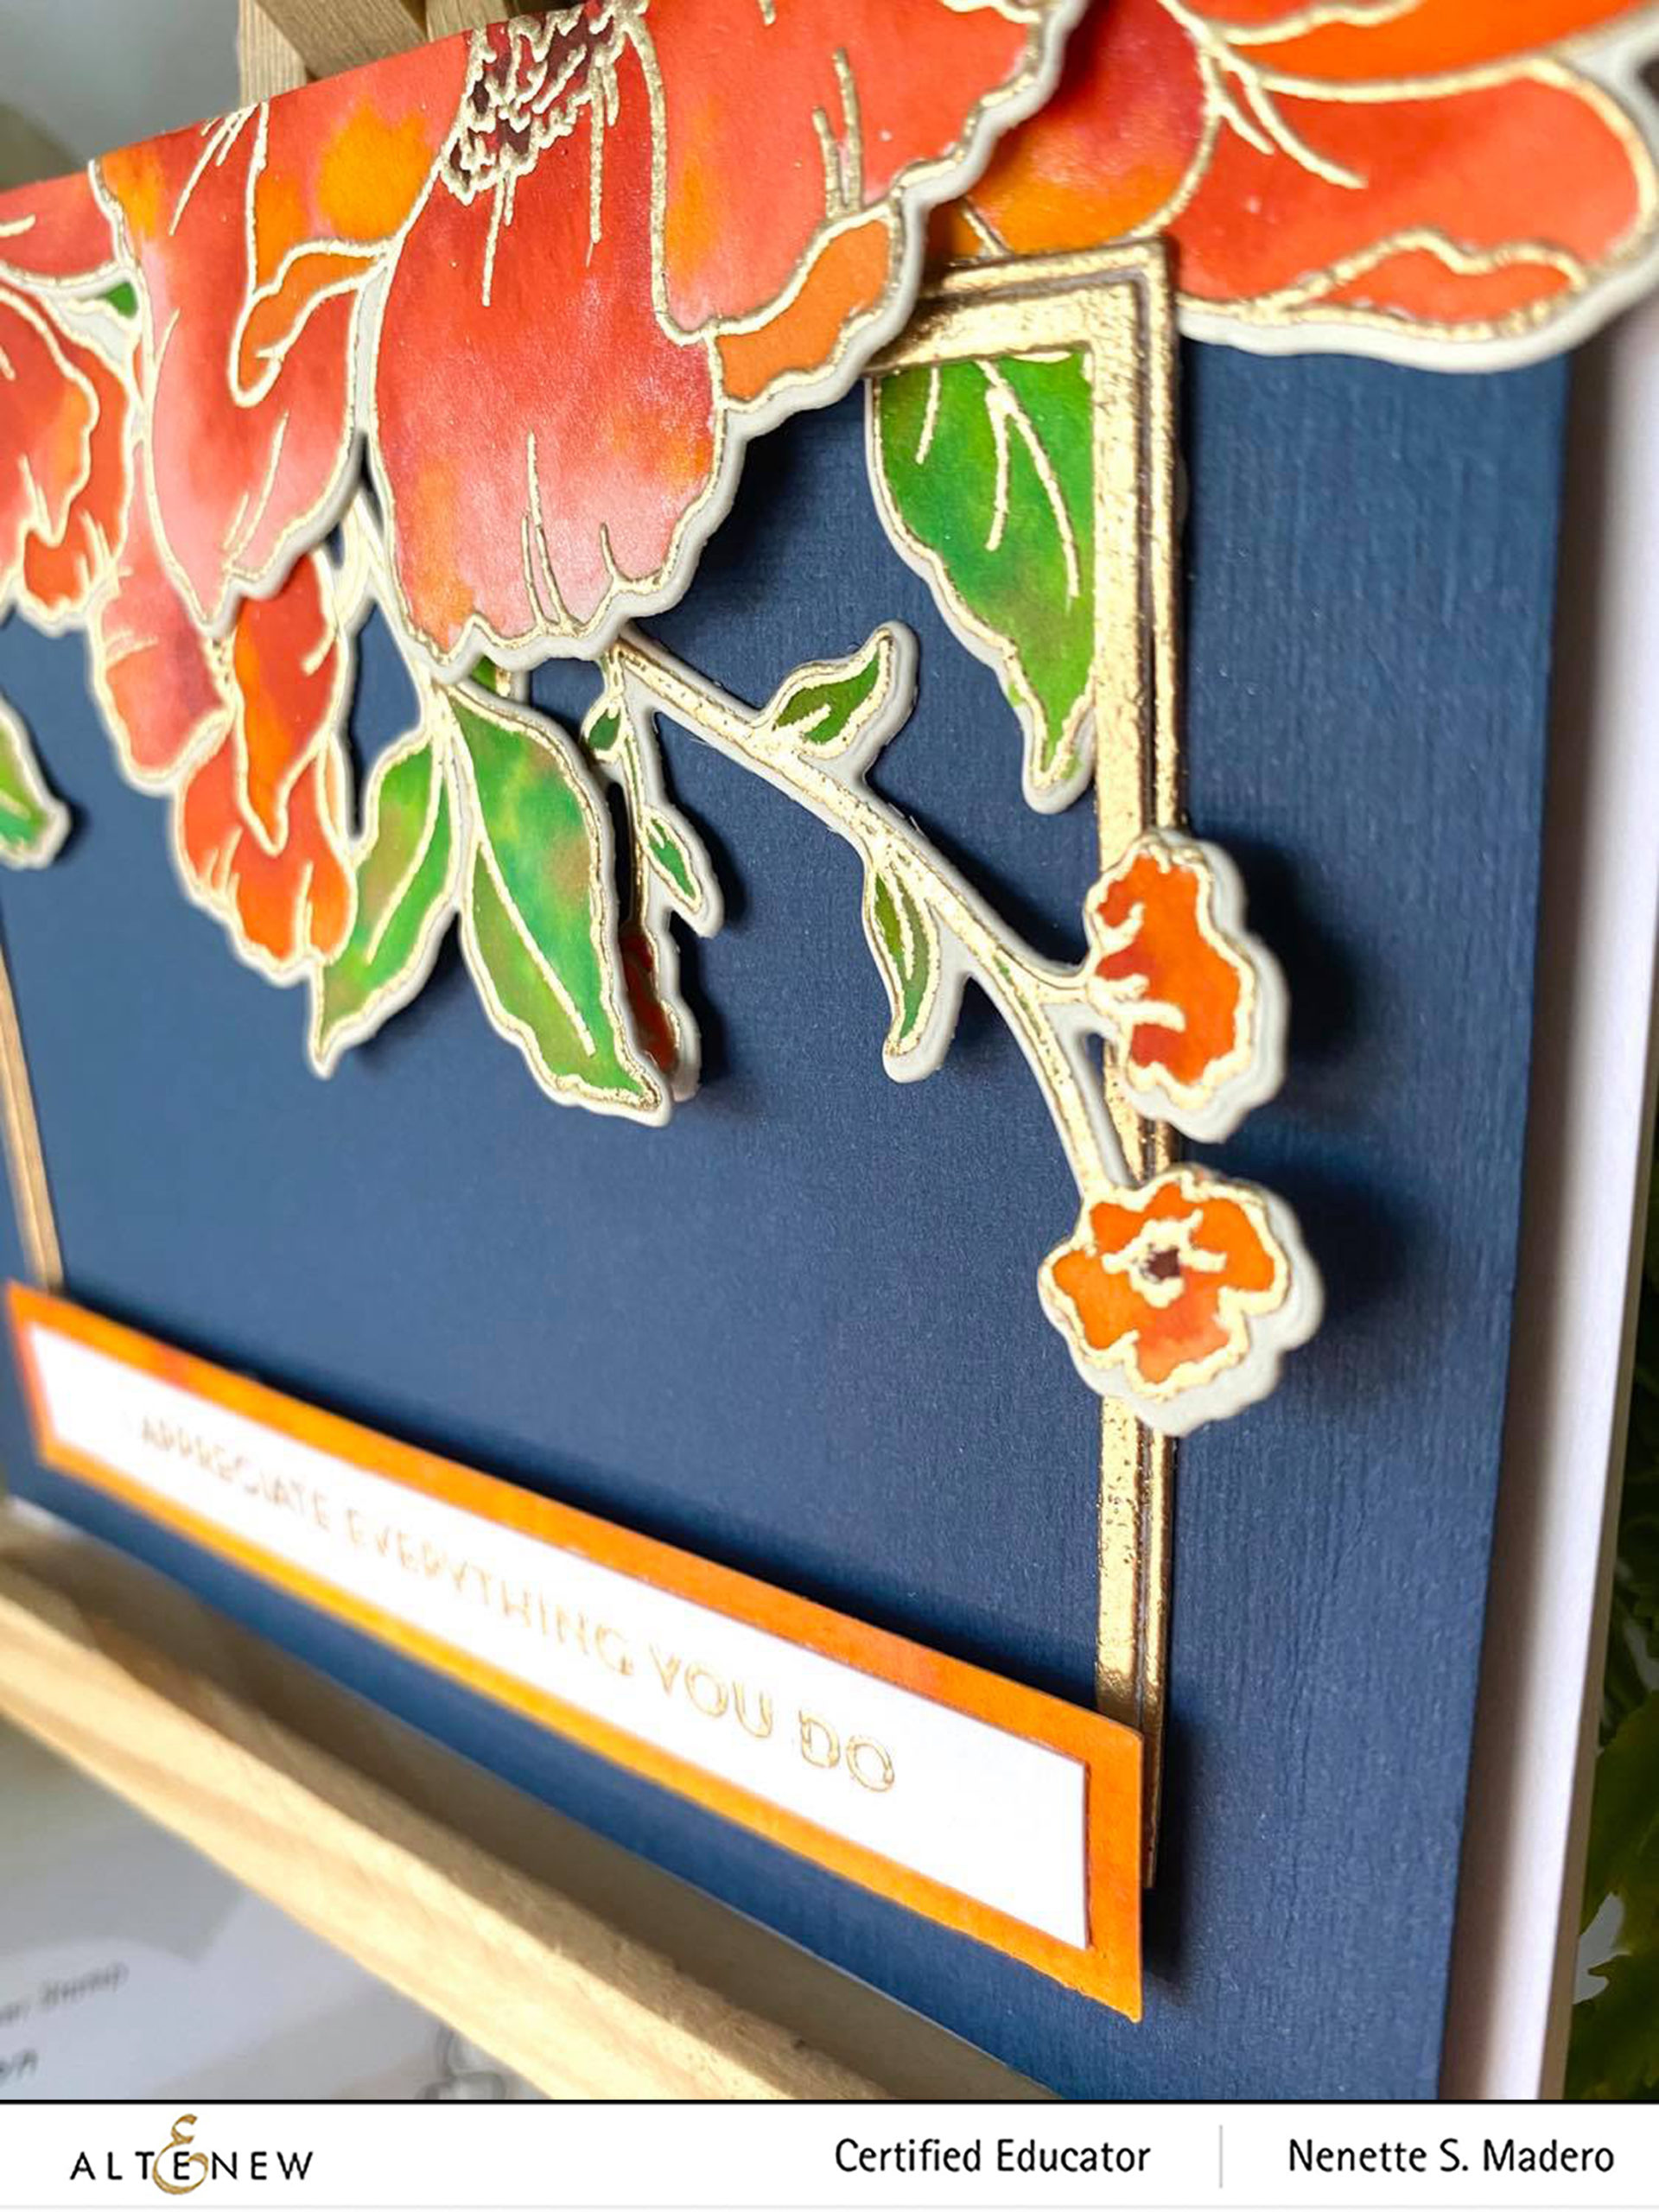
For my last card, I wanted to make use of the Poppy Garden Mask stencil. I laid the stencil on a Neenah Solar white cardstock then used a round distress tool to add Mermaid Lagoon distress oxide ink to the edges of the floral images using a swiping motion from outside going in. This way, the middle of the flower remained white while the edges were dark. This is a fun way of coloring images quickly. I like the steaks that the foam created. Just make sure to follow the direction of the petals when applying the ink. When all the mask images of the flowers were colored, I stamped the outline images using Versamark Ink and embossed them with Pure white embossing powder.

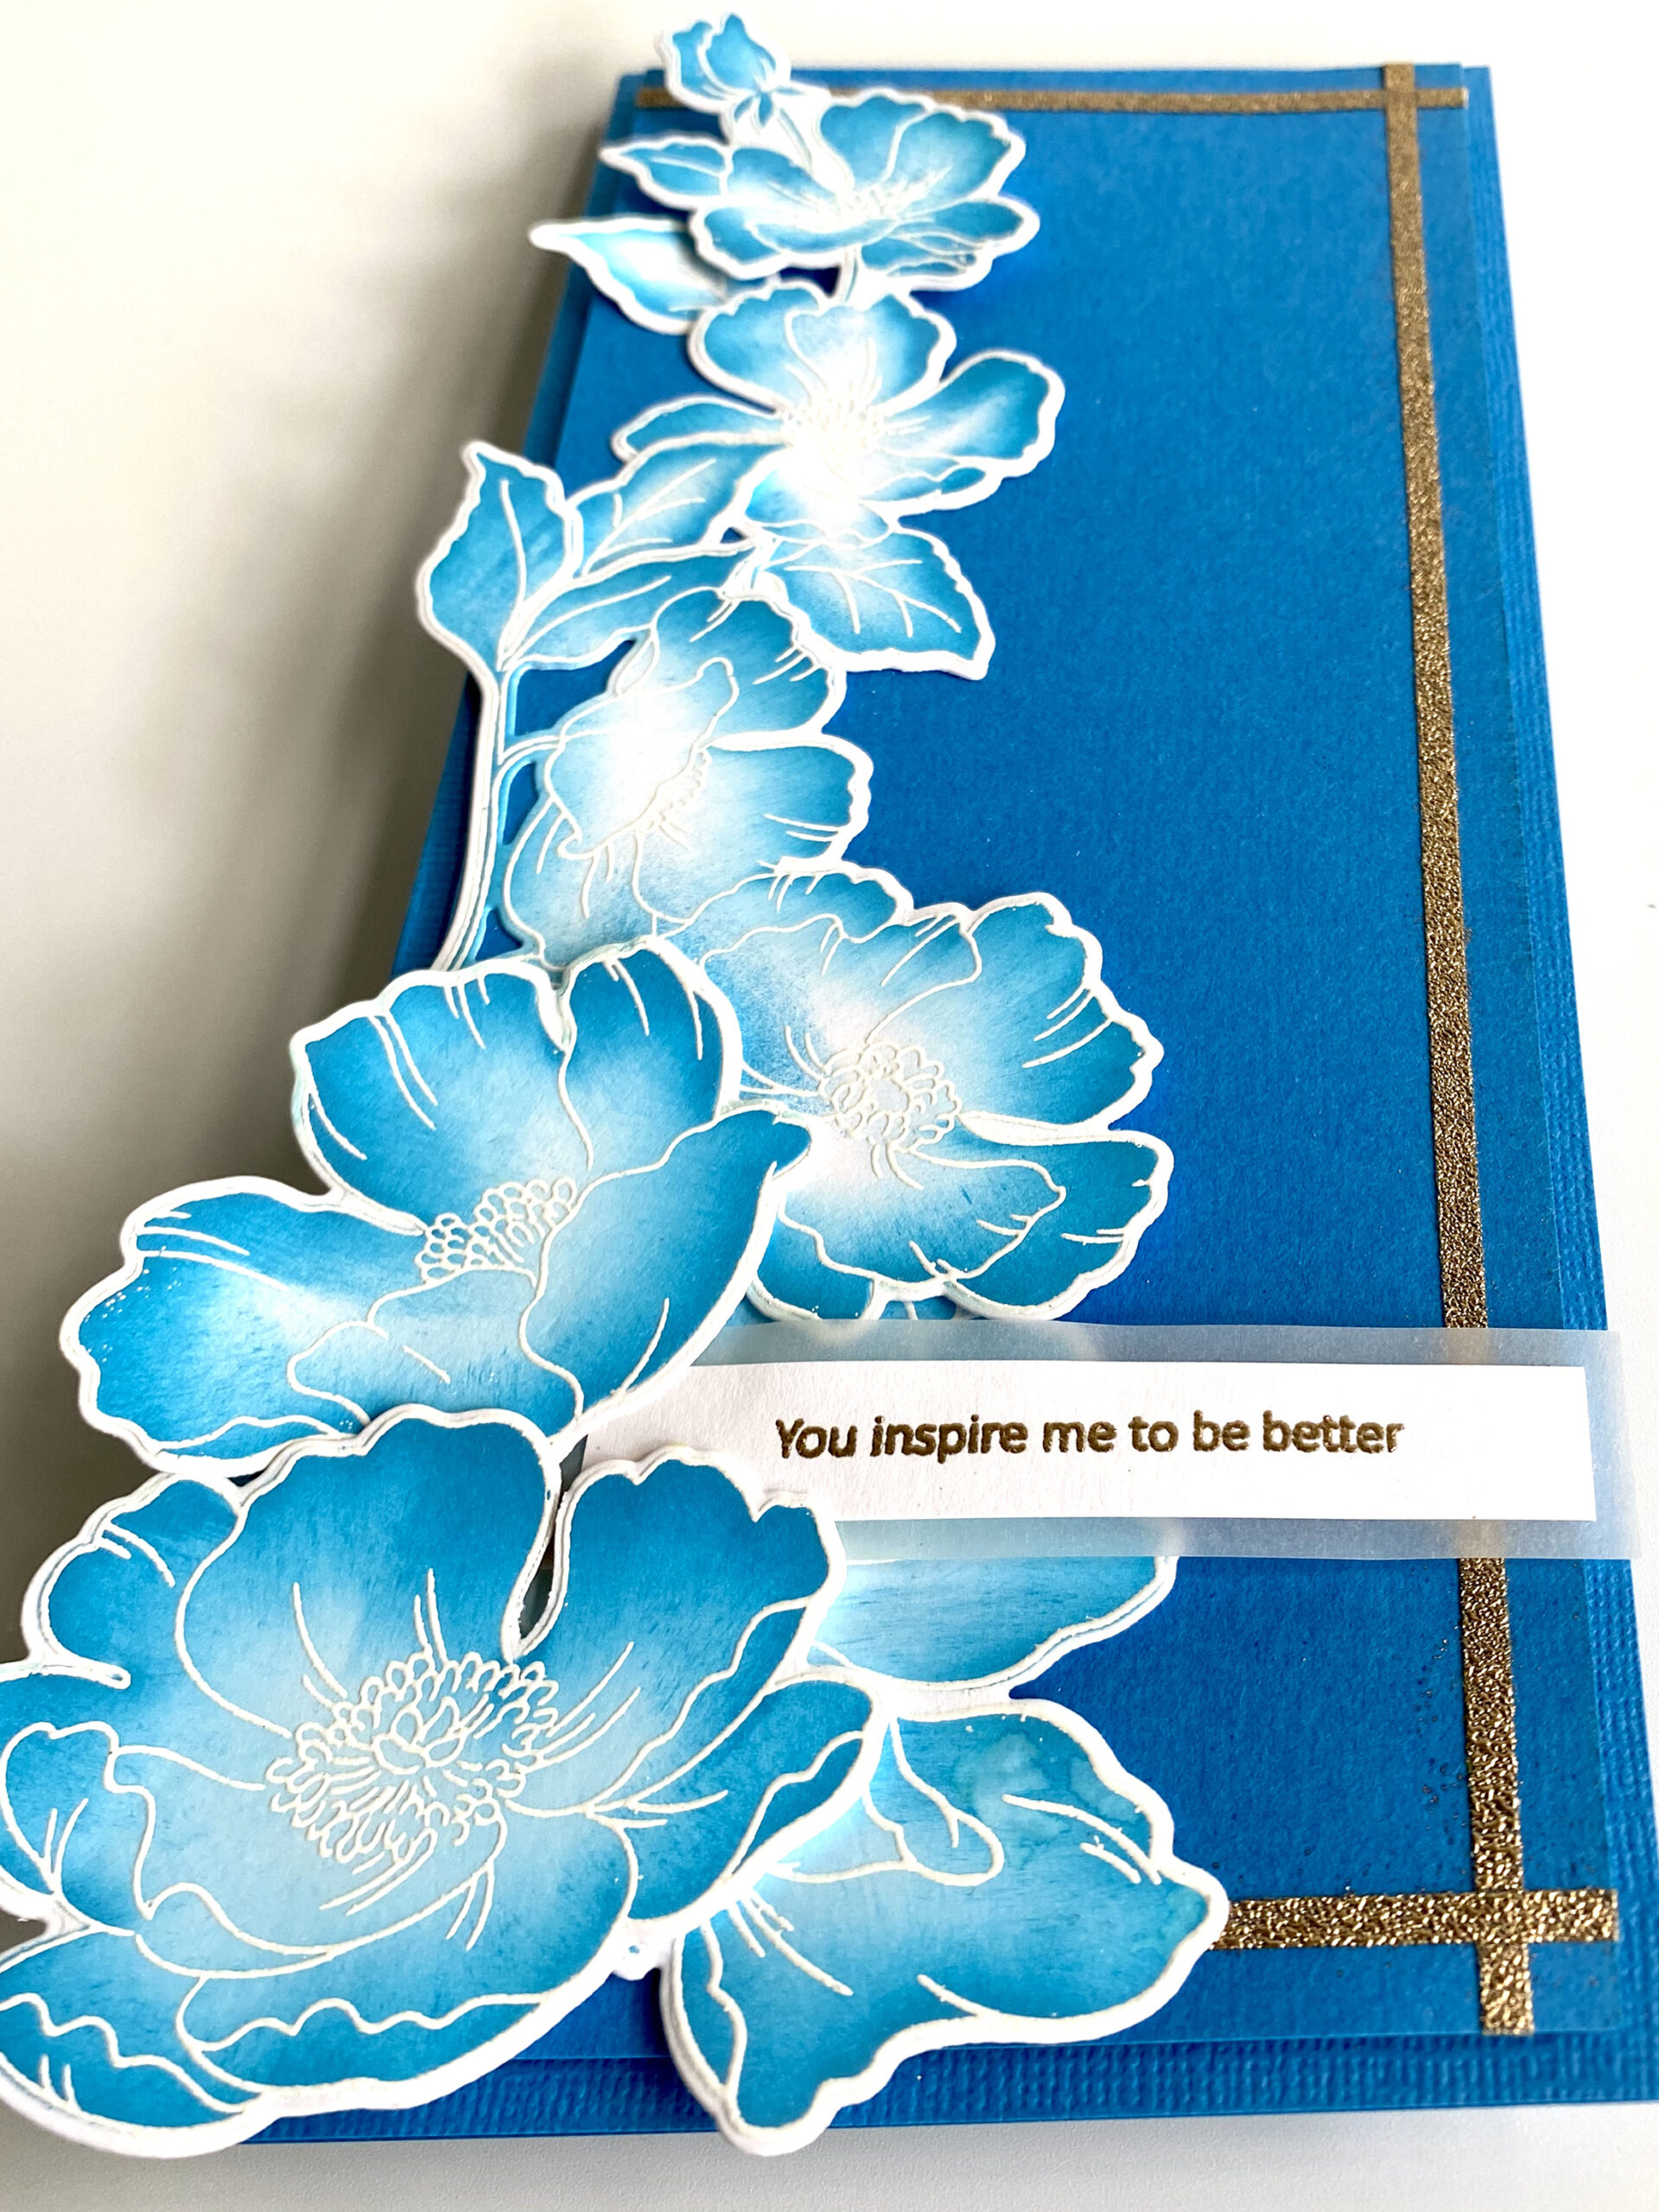
I needed a frame for this slim card so an easy way to do this is to use 1/8″ double-sided tape and heat emboss it using Rose Gold embossing powder. The flowers were arranged on one side and adhered to the card front using glue and foam squares. For a more organic look, just add foam squares to the edges of the petal then glue down the middle of the flower. You can also bend the edges of the flowers and leaves so that they won’t look so stiff.

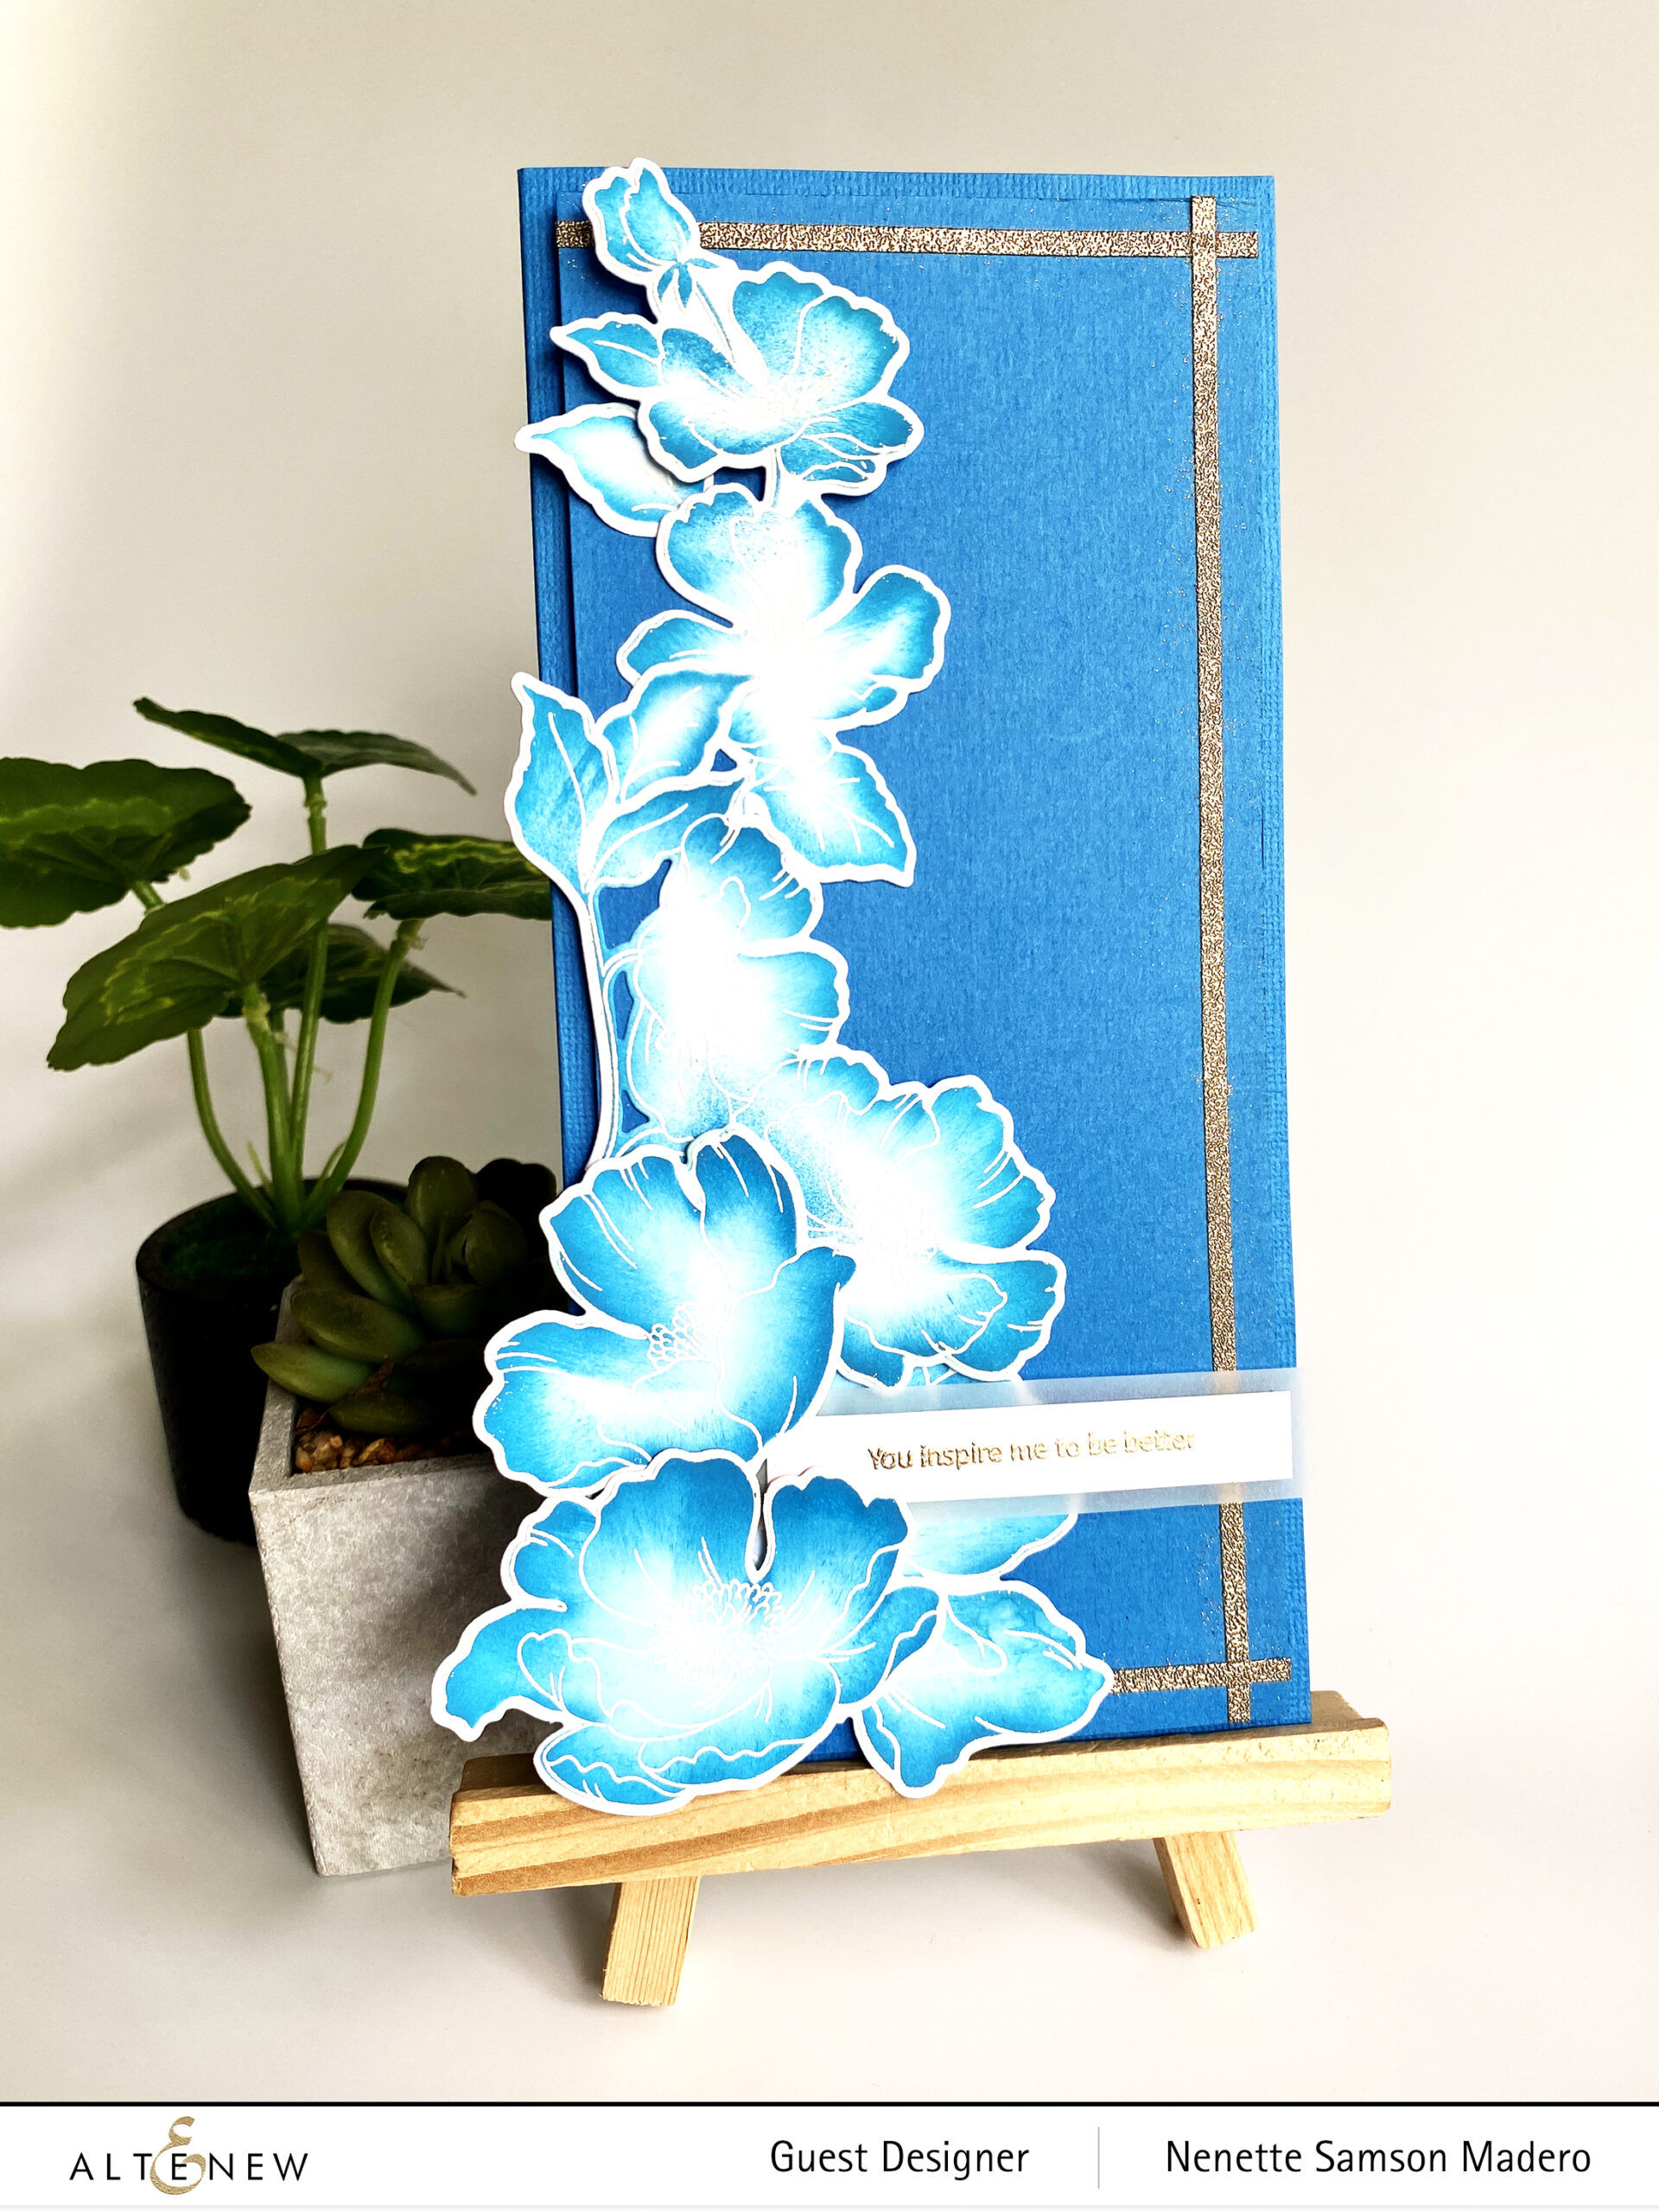
You can watch a video on how to create these flowers by clicking this link: https://youtu.be/AORyc3Rr2hs . I’m very new at making videos so please bear with me. šŸ˜„ Do let me know if the video is helpful so that I can plan to include more videos in the future.


PRIZES


Altenew is giving away a $20 gift certificate to 5 lucky winners! Please leave a comment on the Altenew Card Blog by 9/19/2020 for a chance to win.

Altenew will also draw a winner to receive a $15 Altenew gift certificate from the comments left on each designerā€™s blog on the blog hop list below so don’t forget to leave a comment! I truly love hearing from all of you. All winners will be announced on the Altenew Winners Page on 9/22/2020.

Thereā€™s MORE! Altenew will pick 2 of their favorite handmade creations from those who joined the linky party and they will each receive a $15 Altenew gift certificate!

Next stop is Irina Fonina’s blog. For real-time updates, please follow me on IG: My Little Attic Studio. I also host some giveaways there once in a while so hope to see you there, too. šŸ™‚ Thanks so much for dropping by and please stay safe and well. Take care, everyone! Until my next blog post!

BLOG HOP LIST: ALTENEW CARD BLOG | AMBER RAIN DAVIS | NEHA AGGARWAL | NICOLE WATT | ERIN THOMPSON | TERI WILSON | HELEN KALB | RACHAEL SHEDEED | TERRI MARIE KOSZLER | ROSIE NEUSTAEDTER | AMY HILL | NANDINI KARMARKAR | MARYAM SHARARA | NENETTE S. MADERO | IRINA FONINA | VICKI FINGER | VIRGINIA LU


IG: MY LITTLE ATTIC STUDIO | FB: MY LITTLE ATTIC STUDIO | WWW.MYLITTLEATTIC.COM


Altenew July 2020 Stamps/ Dies/Stencils/ Inks Release

Altenew July 2020 Stamps/ Dies/Stencils/ Inks Release

Hello everyone!!! Altenew has a wonderful July release and I made a couple of cards to showcase this new release. Take a look at these gorgeous products!!!

https://altenew.com/collections/new/products/summer-fun-full-release-bundle

I read all your comments on my blog and truly appreciate your kind words. I’ve noticed that there are quite a number of people who are new to cardmaking so this blog post will be a mixture of simple, fun and easy to make cards/tags and some that need a little more time to create. Do let me know which one is your favorite in the comment section, ok? I really love hearing from all of you. <3


WHATEVER YOU ARE, BE A GOOD ONE | YOU ARE GREAT


Don’t you just adore the Courageous You stamp set!?!?! I love huge images that can be colored using different kinds of coloring mediums. For these cards though, I thought of stamping and embossing the image on vellum for a soft and dainty look. I used the Fine Frames cover die to add borders around the card front. Light colors were chosen to match the soft look of this card.

When embossing on thin papers like vellum, just make sure that you heat up your heat gun first. I also heat it from the back to prevent the paper from warping.


THINKING OF YOU | WITH GRATITUDE


Here’s another set of CAS cards using the Geometric Elements stamp. When I saw this stamp set, the first thing that came into my mind was the geometric terrariums that I used for my daughter’s party a few years ago. šŸ™‚

I used the stems on the Fragile Foliage Stamp set as strings for these “terrariums”. My youngest daughter Andrea helped me with the drawings of the mini succulents ( I will need a magnifying glass in order to do that!!! Thanks so much, Dea! <3 ) The succulents were colored with the Altenew alcohol artist markers. Strips of papers from the Blushing Blooms paper pack were added to finish off these cute and simple cards. The card front was also mounted onto foam sheets for added dimension.


YOU ARE WORTHY


This next card was created using the Floral In and Out Border die, the Wild Flora washi tape, the Terrific Tags die and the sentiment from the Courageous You stamp set. I wrapped a panel with the washi tape then die cut the Floral in and out border die. I did the same to 4 layers of white cardstocks so that I can stack them up to create some dimension.

I just had to fit them like a jigsaw puzzle then added a sentiment stamped on one of the tags from the Terrific tags die. A green brad was added as an accent to this simple card. You really don’t have to do much because the washi tape is already so beautiful.


HUGS


Here’s another pair of quick cards to make. I got some paper scraps from the Shades of Purple gradient cardstock set and cut them into strips. My apologies if I can’t remember who I saw this technique from– must be from the amazing Laura Bassen or Jennifer Mcguire or maybe even from Kristina Werner or the wonderful Cathy Zielske. They are my go-to cardmakers where I get my inspirations from.

I covered the entire card front with double-sided tape then adhered the strips. Both positive and negative elements from the Circled Greetings: hugs die were used to create 2 cards so nothing went to waste.


SOME DAYS YOU JUST HAVE TO CREATE YOUR OWN SUNSHINE


Would you believe that this card was made using only 1 stamped image? šŸ™‚ The sentiment was stamped and heat embossed on vellum. The floral image from the Courageous You stamp set was stamped on 140 lbs Arches watercolor paper using Versamark ink then heat embossed with Rose gold embossing powder. I used colors from the Altenew watercolor brush makers. I love how highly pigmented these watercolors are! A little goes a long way.

The image was placed in one corner and the excess was cut off. Foam tape was used to create dimension. The leftover pieces were also adhered to the card front to fill the other edges of the card.


THANKS


Here’s another set of CAS cards using bold colors. I die cut 3 different colored cardstocks using the Circled Greetings: thanks die. To vary the background, I placed the Feeling Dotty Stencil over the background then added Versamark ink over it.

White embossing ink was poured over it and heat embossed to create a dotted background. I also added a sentiment from the Hello and Hugs stamp set for variation. This is a quick way to create multiple cards with a single die– just vary the cardstocks and backgrounds.


THANK YOU TAG


Here’s another quick project using the masking technique. For these tags, I used the sentiments from the Geometric Elements and the Fragile Foliage image. The biggest tag from the Terrific Tags dies was perfect to make the packaging for the monogram cards I made for a friend look pretty. I love the simplicity of the image which ties up with the modernity of the font.

The sentiment and border were stamped and embossed first using rose gold embossing powder. Then I masked the area so that I can stamp the foliage image over it.

If you have been following my previous blog posts, you’ll notice that my style leans heavily towards layering and lots of embellishments. Restraining myself from adding more to a card is truly a struggle for me. I have a hard time creating clean and simple cards because I tend to cover up all of the white space. That being said, I’ve always been a huge fan of Cathy Zielske‘s CAS style ever since my scrapbooking days in the early 2000s. From her, I’ve learned the basics in design principles. She’s my rockstar when it comes to CAS layouts and cards. And just recently, she sent me a video message full of sound advice on how to deal with certain types of people. I am so humbled that she took time out of her busy schedule to personally send a message and make me feel better. So in honor of this amazing human being, this post showcases a number of CAS cards and from this post onwards, I will step out of my comfort zone and try to include a card that reflects her style. Thank you, Cathy! Truly appreciate what you did. ā¤ļø Below is a set of CAS cards inspired by her style using the Fragile Foliage stamp set.


I’VE BEEN THINKING OF YOU|THANKS FOR EVERYTHING


The image from the Fragile Foliage image was stamped on a rectangular die cut cardstock. This was adhered on the card front using a foam sheet. Golden peach and Caribbean sky embossing powders were used to emboss the sentiments from the Sentiment Strips stamp set.

Thank you so much for dropping by!!! As I’ve said earlier, I truly enjoy reading all your wonderful comments. Do say hi and let me know which card is your favorite! Would love to see you too in my other social media platforms. To see my latest projects, you can follow me on Instagram and Facebook . Thanks again for dropping by and keep on crafting!!!

“We rise by lifting others.” — Robert Ingersoll

Altenew Educators “Giving Thanks” Blog Hop and Linky Party + Giveaway

Altenew Educators “Giving Thanks” Blog Hop and Linky Party + Giveaway

Welcome everyone to Altenew Educators Giving Thanks Blog hop and linky party + giveaway!!! I’m so excited to be a part of this blog hop with my co-educators!!! The hop starts at the Altenew Card Blog. The complete blog hop list is at the end of this post in case you get lost.

We are in this unprecedented crisis. Yet so many doctors, nurses, technicians, scientists, policemen, grocery storekeepers, pharmacists, food delivery crew, bank tellers, couriers, garbage collectors, hospital cleaning staff etc. work tirelessly to keep us all safe and so that we can continue to live our new normal lives. I truly appreciate that the theme for this blog hop is thankfulness. In our own little way, we can express our appreciation and gratitude to these everyday heroes for their dedication and selflessness through our cards.

I love the idea of coming up with 2 cards using the same stamped images. I sometimes call it my yin and yang cards. The following pairs were done using the same stamp sets. I just varied the looks by using the negative and positive die cuts, changing up the placement of the flowers, or by cutting the die cuts in half (the split card trick was inspired by Jennifer Mcguire). Here are my samples:


THANK YOU AND SO THANKFUL FOR YOU CARDS


I loved coloring the Poppy Garden stamp images so I used it in 4 of my cards– warm colors for one set of die cuts and cool colors for the other set. I stamped all the images on watercolor paper with Versamark Ink then embossed with Rose gold embossing powder. The Tropical Fiesta and Winter Wonderland watecolor brush markers were used to color the stamped and embossed images. The images where then die cut using the coordinating dies.

Next, I stamped the biggest image onto Neenah Solar White CS using the Silver lake dye ink. I chose a lighter color instead of black so that the watercolored images will stand out more. Then I used the coordinating stencil to mask the stamped image so that I can overlap and stamp the second image. Always remember that whatever you stamp first will be the image that will look closest to you. Everything else will be behind the masked image so plan your stamping accordingly. I continued until I covered the entire paper using all the different stamp images.

I then temporarily adhered vellum over the stamped panel using washi tape so that I can glue the die-cut flowers on top following the placement of the stamped images. You can also use transparency as an alternative. Make sure you secure the two together using washi tape so that the vellum with the die cuts and the stamped panel will not shift when it goes through the die-cutting machine. Both sheets were then die cut using a rectangular die to create a frame.

The negative die cut frame was adhered onto an A2 card front using foam squares. The middle portion of the stamped panel was glued to the center of the card then the sentiment from the Ornamental Bliss stamp set was stamped on black cardstock and embossed with Rose Gold embossing powder. This was mounted onto the card front using foam squares.

The same thing was done for the 2nd card. I just made sure that the flowers aligned when I adhered the middle panel using foam squares. Sentiment for this card was from the Needlework Motif stamp set.


THANK YOU AND I APPRECIATE EVERYTHING YOU DO CARDS


For these cards, I watercolored the flowers using the wet on wet technique using warm colors. I loved the split card idea of Jennifer Mcguire wherein she adhered the elements in the middle of an 81/2 x 5 1/2 cardstock just like the photo below.

I then used a guillotine cutter to cut right at the center thus dividing it into two panels. I wanted a gold border for both panels to define the edges so I went ahead and embossed the fine frame die cuts with rose gold embossing powder.

First, I inked up the frames with Versamark Ink then I poured the embossing powder and embossed it with a heat gun.

Now I have frames that match perfectly with the embossed flowers.

I made sure to use foam squares to adhere some of the flowers for added dimension. I also did not put glue at the tips of the leaves and small flowers for a more organic look. To finish it off, the card fronts were adhered to top folding and side folding A2 white cardstocks.


I APPRECIATE EVERYTHING YOU DO AND WHAT A BEAUTIFUL BLESSING YOU ARE TO ME CARDS


For these two cards, I used the Regal Beauty Stamp and die set, Rose Flurries 3D dies, and Garden Picks 3d dies. The layers of the flowers and leaves were stamped using Altenew dye inks then these were die cut using the coordinating dies.

Leaves from the Rose Flurries and the Garden Picks 3D die sets were used for these cards as well.

Sentiments from the Needlework Motif stamp set were stamped using the Platinum crisp embossing powder. I used similar ink colors from the brush markers to create a mat for the sentiment.


PRIZES


Altenew is giving away a $30 gift certificate to 3 lucky winners! Please leave a comment here on the Altenew Card Blog by 6/17/2020 for a chance to win.

Altenew will also draw a winner to receive a $15 Altenew gift certificate from the comments left on each designerā€™s blog on the blog hop list below. All winners will be announced on the Card Blog on 6/21/2020.

Thereā€™s MORE! We will pick 2 of our favorite handmade creations from those who joined the linky party and they will each receive a $15 Altenew gift certificate!

Special offer:
FREE U.S. shipping with code HAPPY6T or $5 OFF international shipping with code SHOPPING6T at checkout on orders over $29. Offer valid from 6/10/2020 at 12:01 am EDT through6/11/2020 at 11:59 pm EDT. Shop HERE! Not valid on prior purchases. Cannot be combined with other promo codes. Not valid on Altenew Academy Classes and Virtual Workshops.

This is no ordinary hop! Altenew wants you to join in on the fun as well. There is a Linky Party going on at the Altenew Card Blog. All you have to do is link up your creations based on the theme of the hop, which is, ā€œGiving Thanksā€ and mention that you are taking part in the Altenew Educators Blog Hop and Linky Party. So what are you waiting for?! Link up!

There are many more card examples from the other amazing certified Altenew educators so please make sure to drop by their blogs, too! Next up is Christine Pennington. Thank you so much for dropping by and do leave a comment to get a chance to win! I always love hearing from my readers. Stay safe everyone! Until my next post. Happy crafting!!!

FB & IG: MY LITTLE ATTIC STUDIO | WWW.MYLITTLEATTIC.COM


BLOG HOP ORDER