Hello, everyone! Welcome to my blog! I was invited to be a guest designer at Altenew’s mixed media blog, and I wanted to share with you what I made. I used 3D embossing folders to create these mixed media tags. For more info, check out the Altenew Mixed Media Blog for all the details.
I’m attaching a video on how I created these tags. Enjoy!
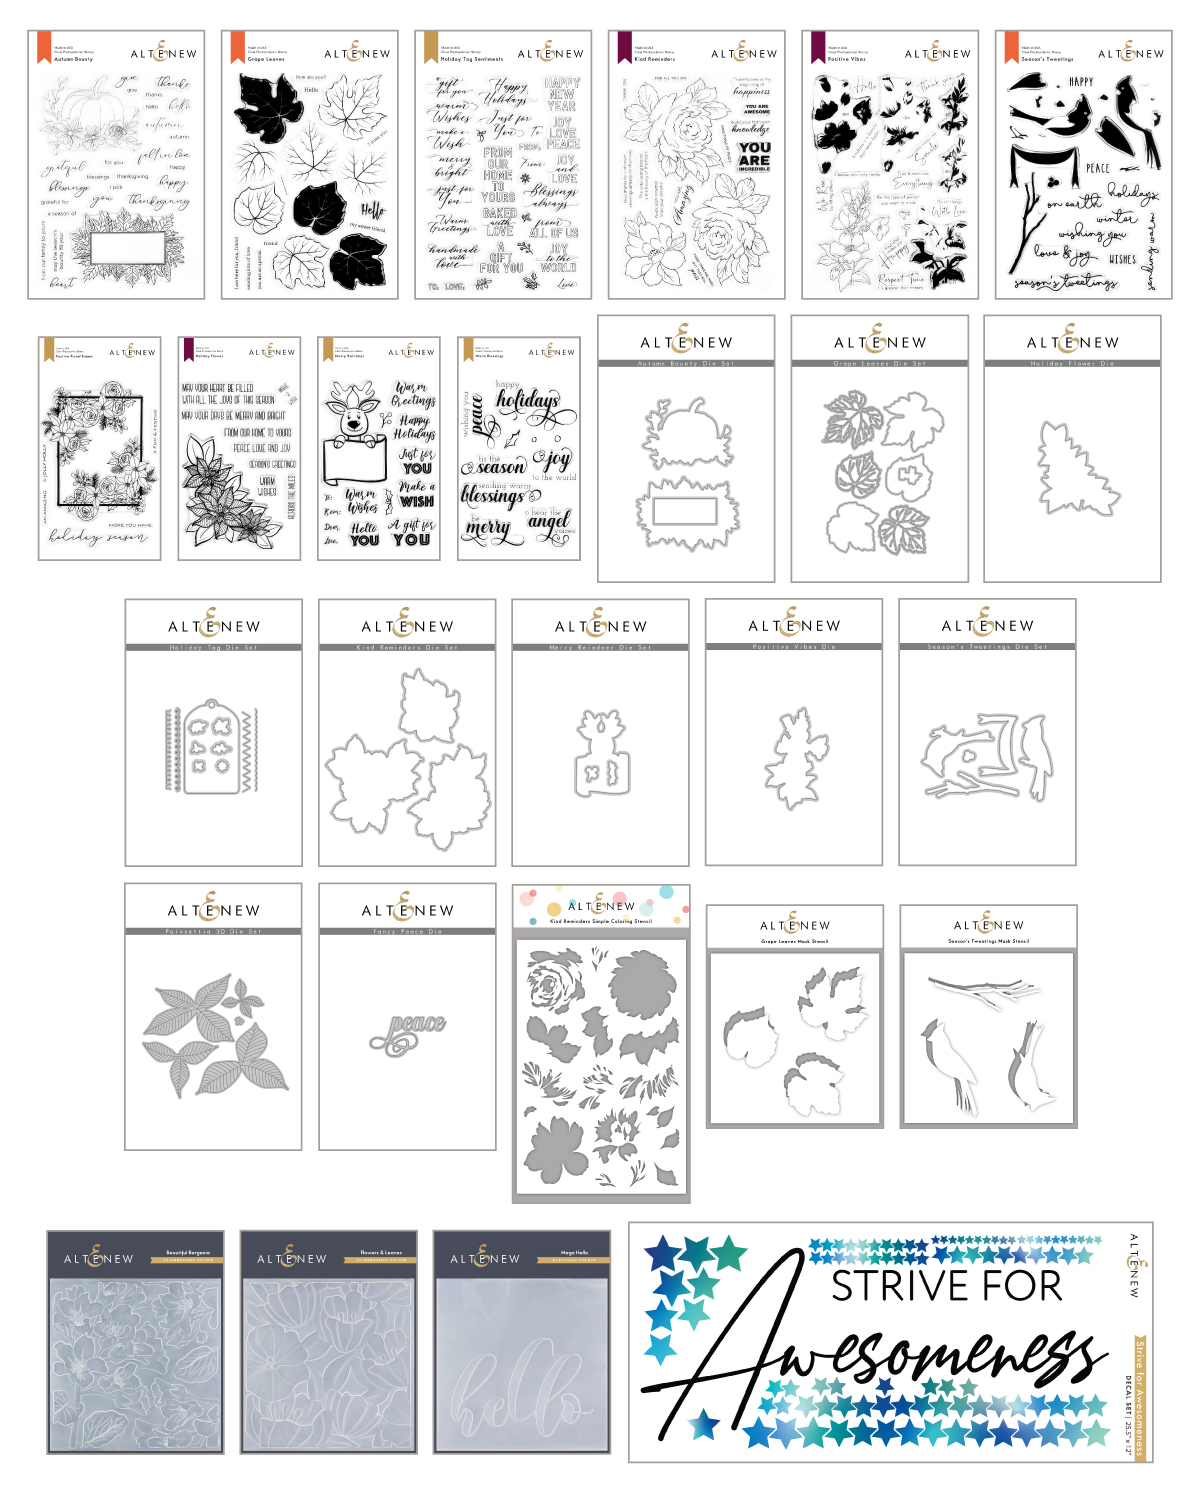
Hello everyone! I hope you are all safe and well. I’m thrilled to be a part of the September release from Altenew. If you just came from the blog of the talented Norine Borys, then you’re on the right track. This release is filled with beautiful stamps, dies and stencils that can be used for seasonal cards or everyday cards. Take a look at the September 2020 Beauty of the Season release!!!
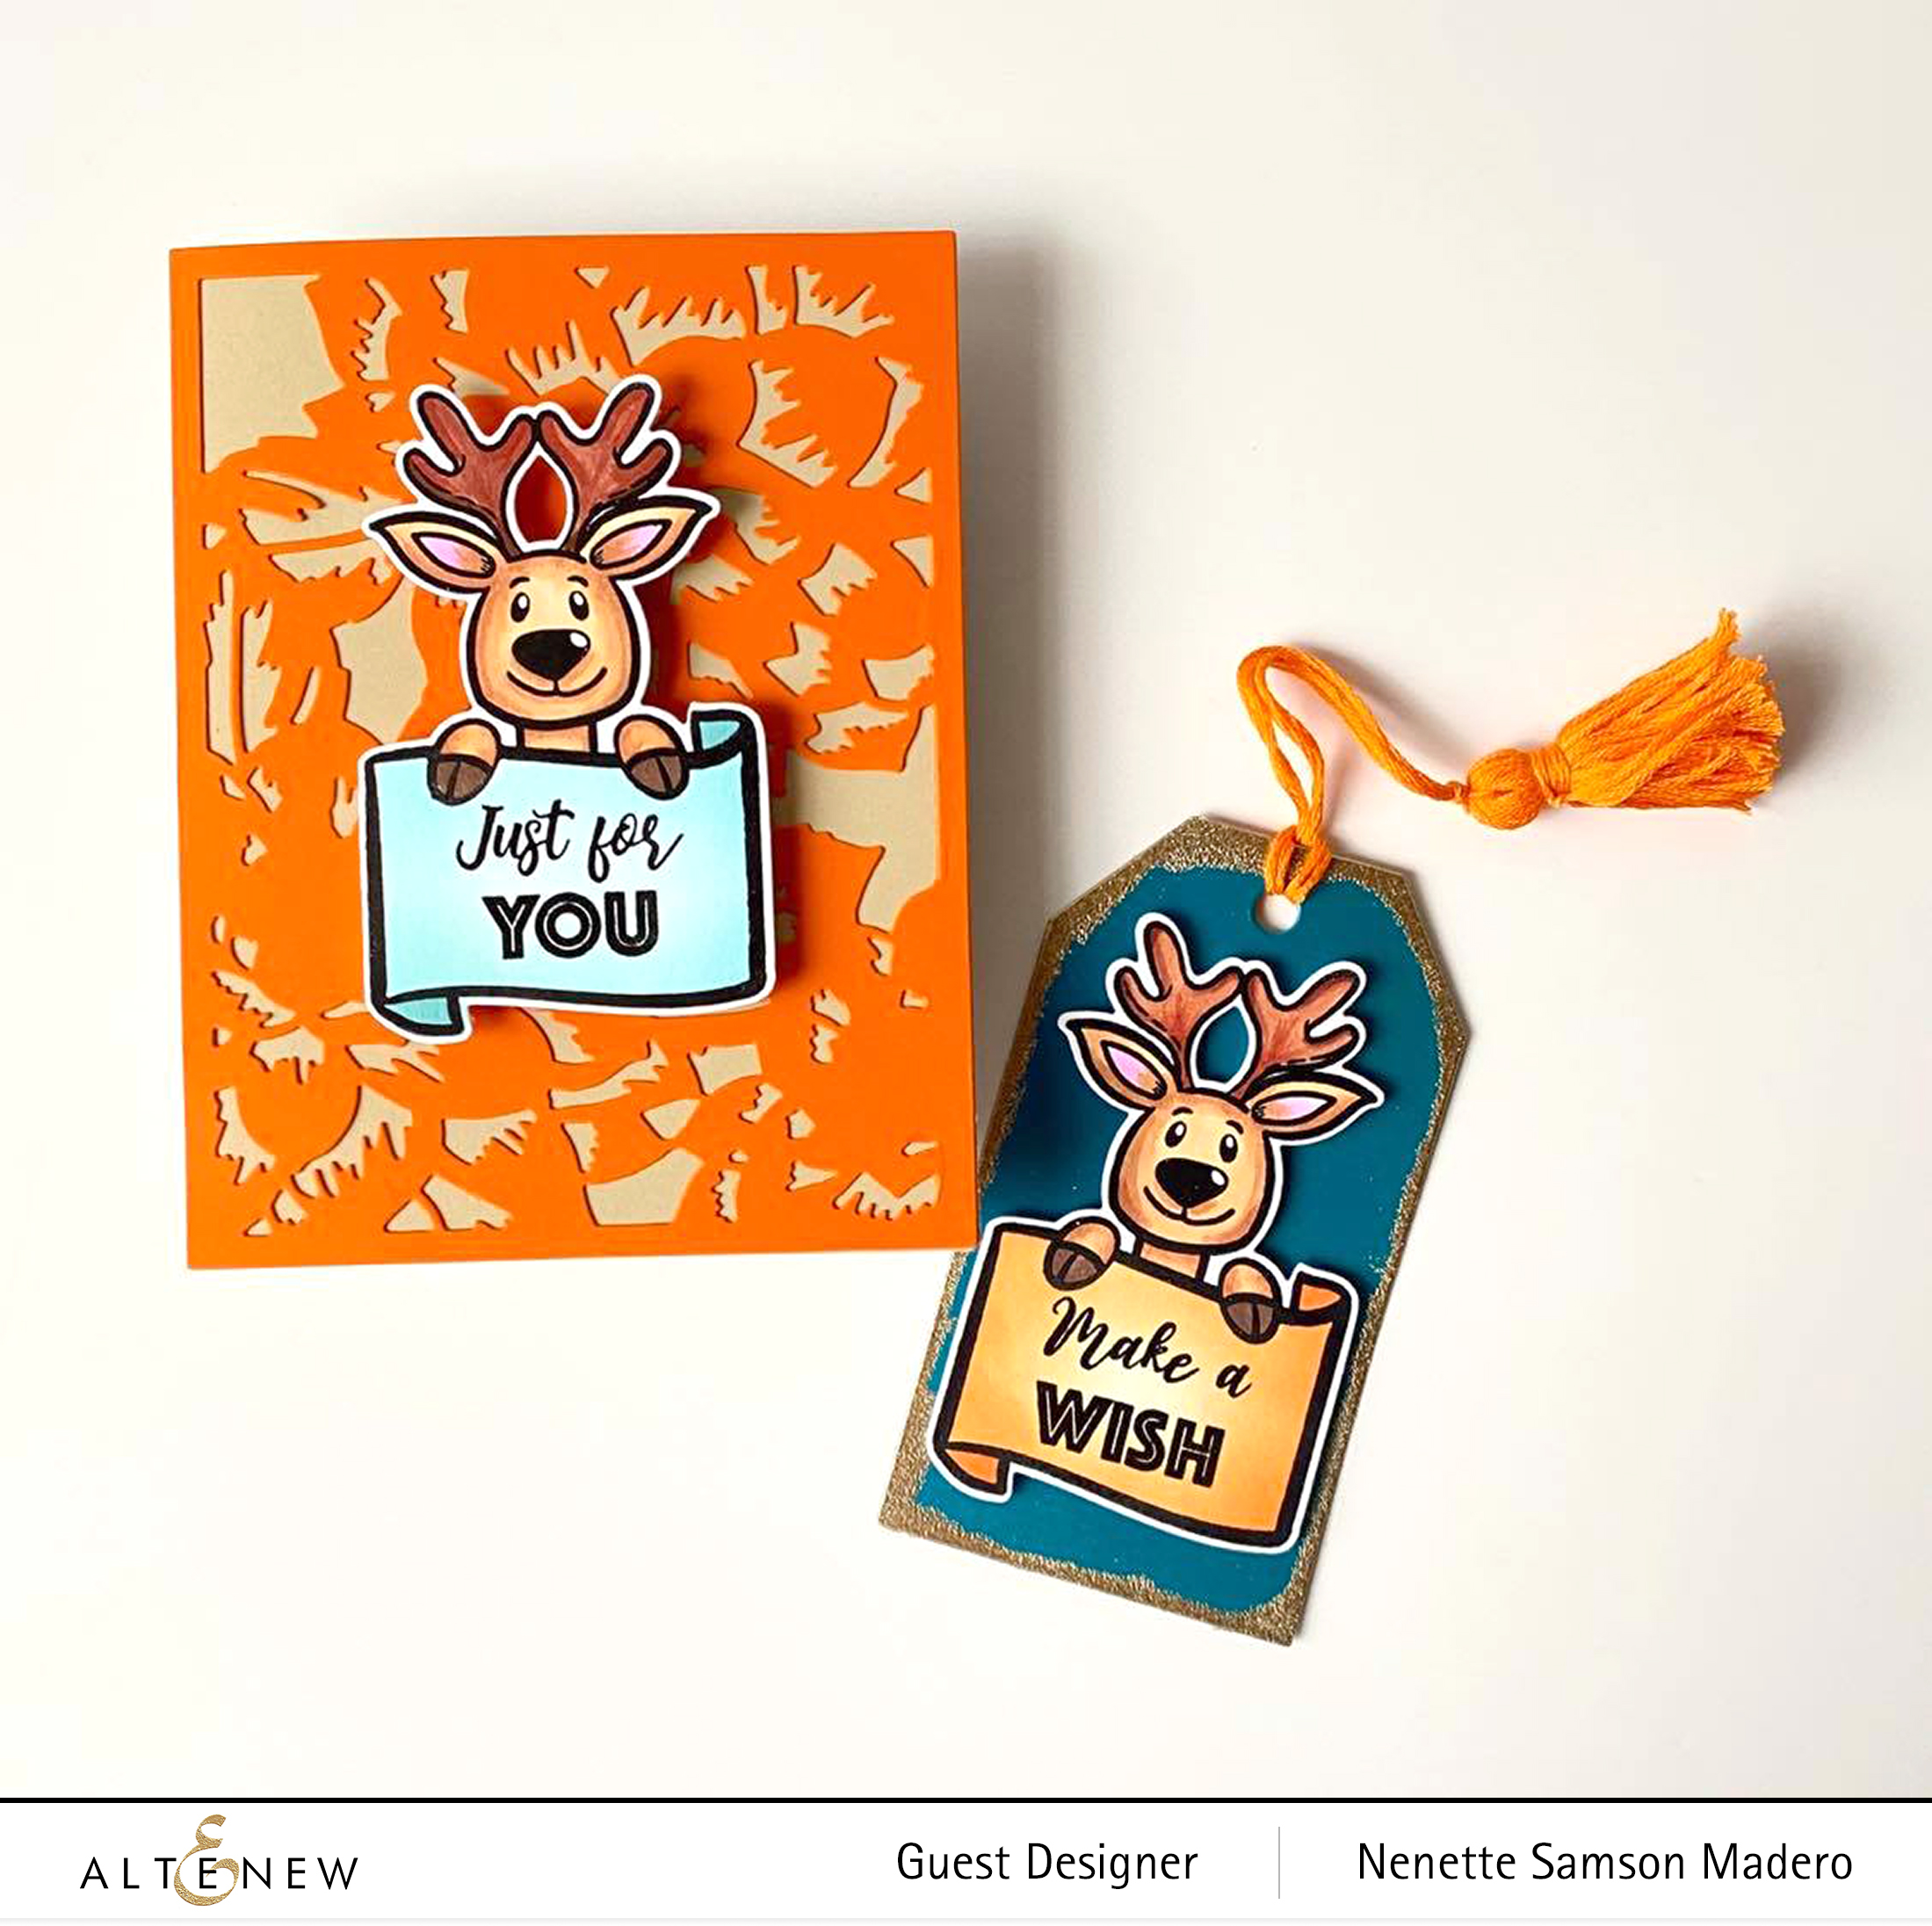
I love that Altenew released some Christmas themed stamp sets this early!!! Year after year, I vowed to start my Christmas cards/tags early so that I won’t get stressed out come December so the timing of this release is perfect. ❤️ Below are some samples using the Merry Raindeer stamp and die. This is an adorable stamp set with lots of greetings that you can mix and match. Below are samples on how you can use it on a card or as a tag.
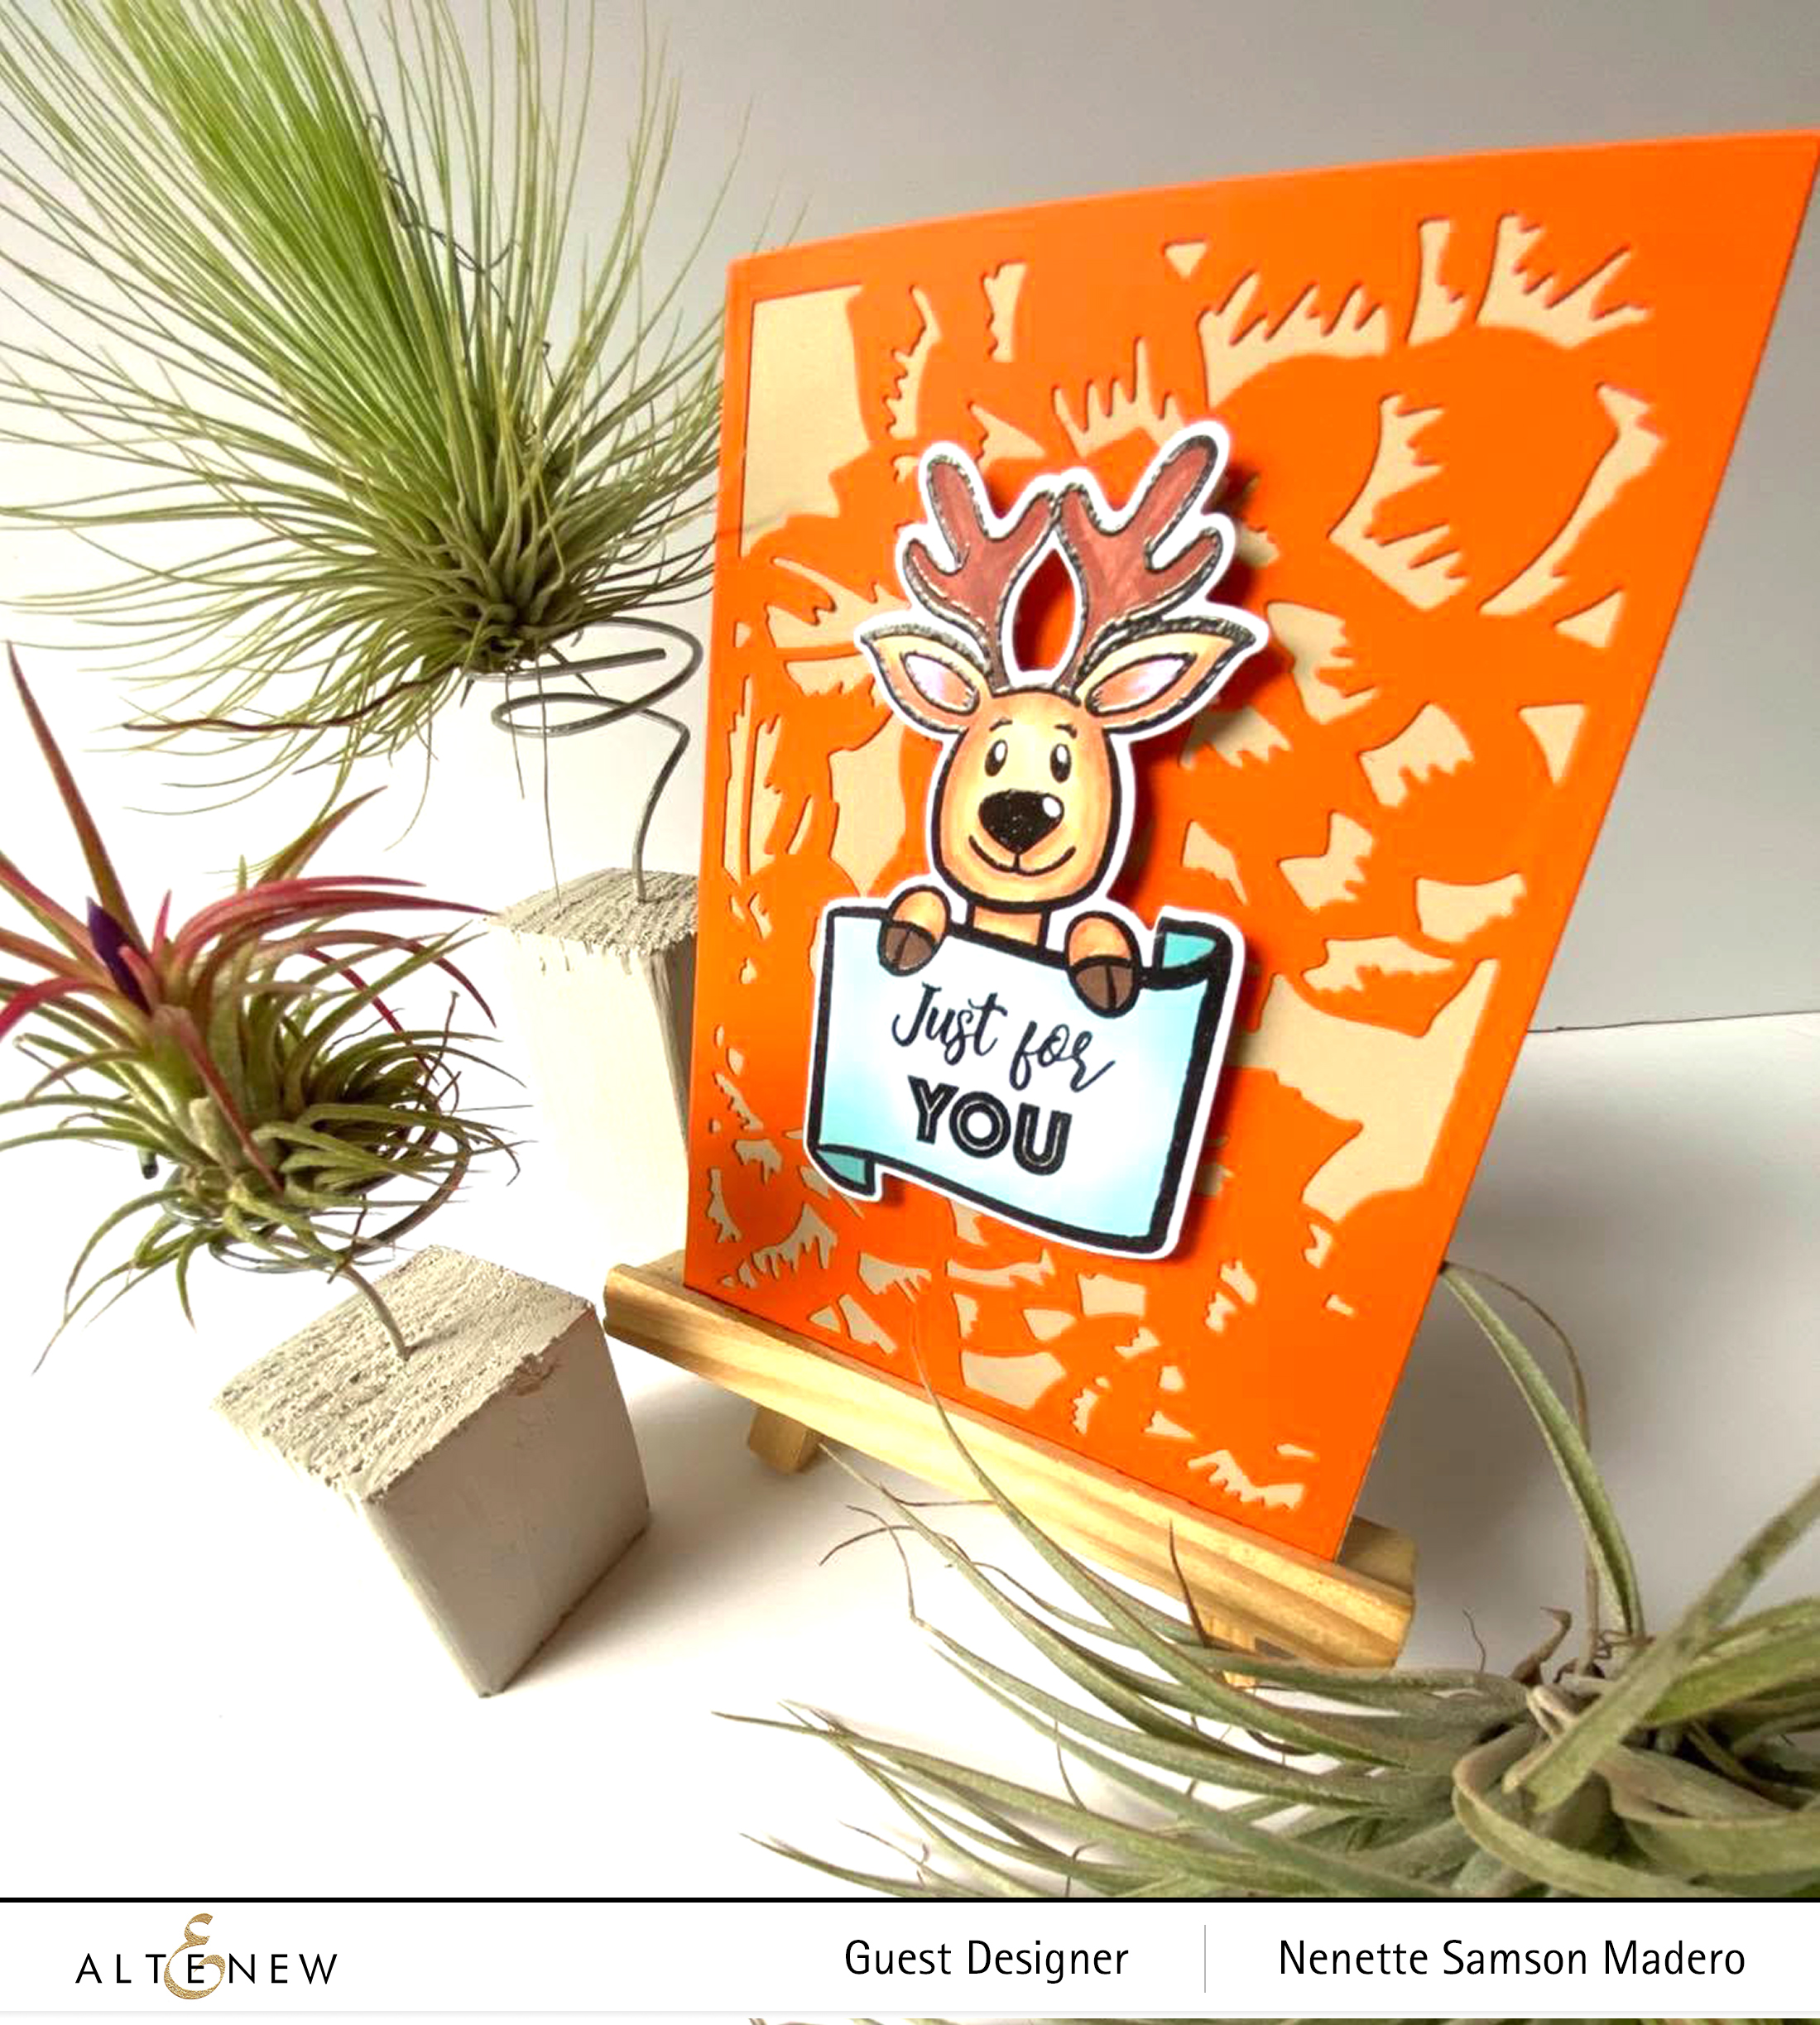
JUST FOR YOU/MAKE A WISH
I stamped the reindeer image twice using the Obsidian ink then embossed with clear embossing powder. The following colors were used to color the head, antlers and hooves–COPIC MARKERS E-53,33,13,18,17,47,29 AND RV 63. After coloring, the reindeer was masked so that the banner can be colored using Altenew inks and a blender brush.
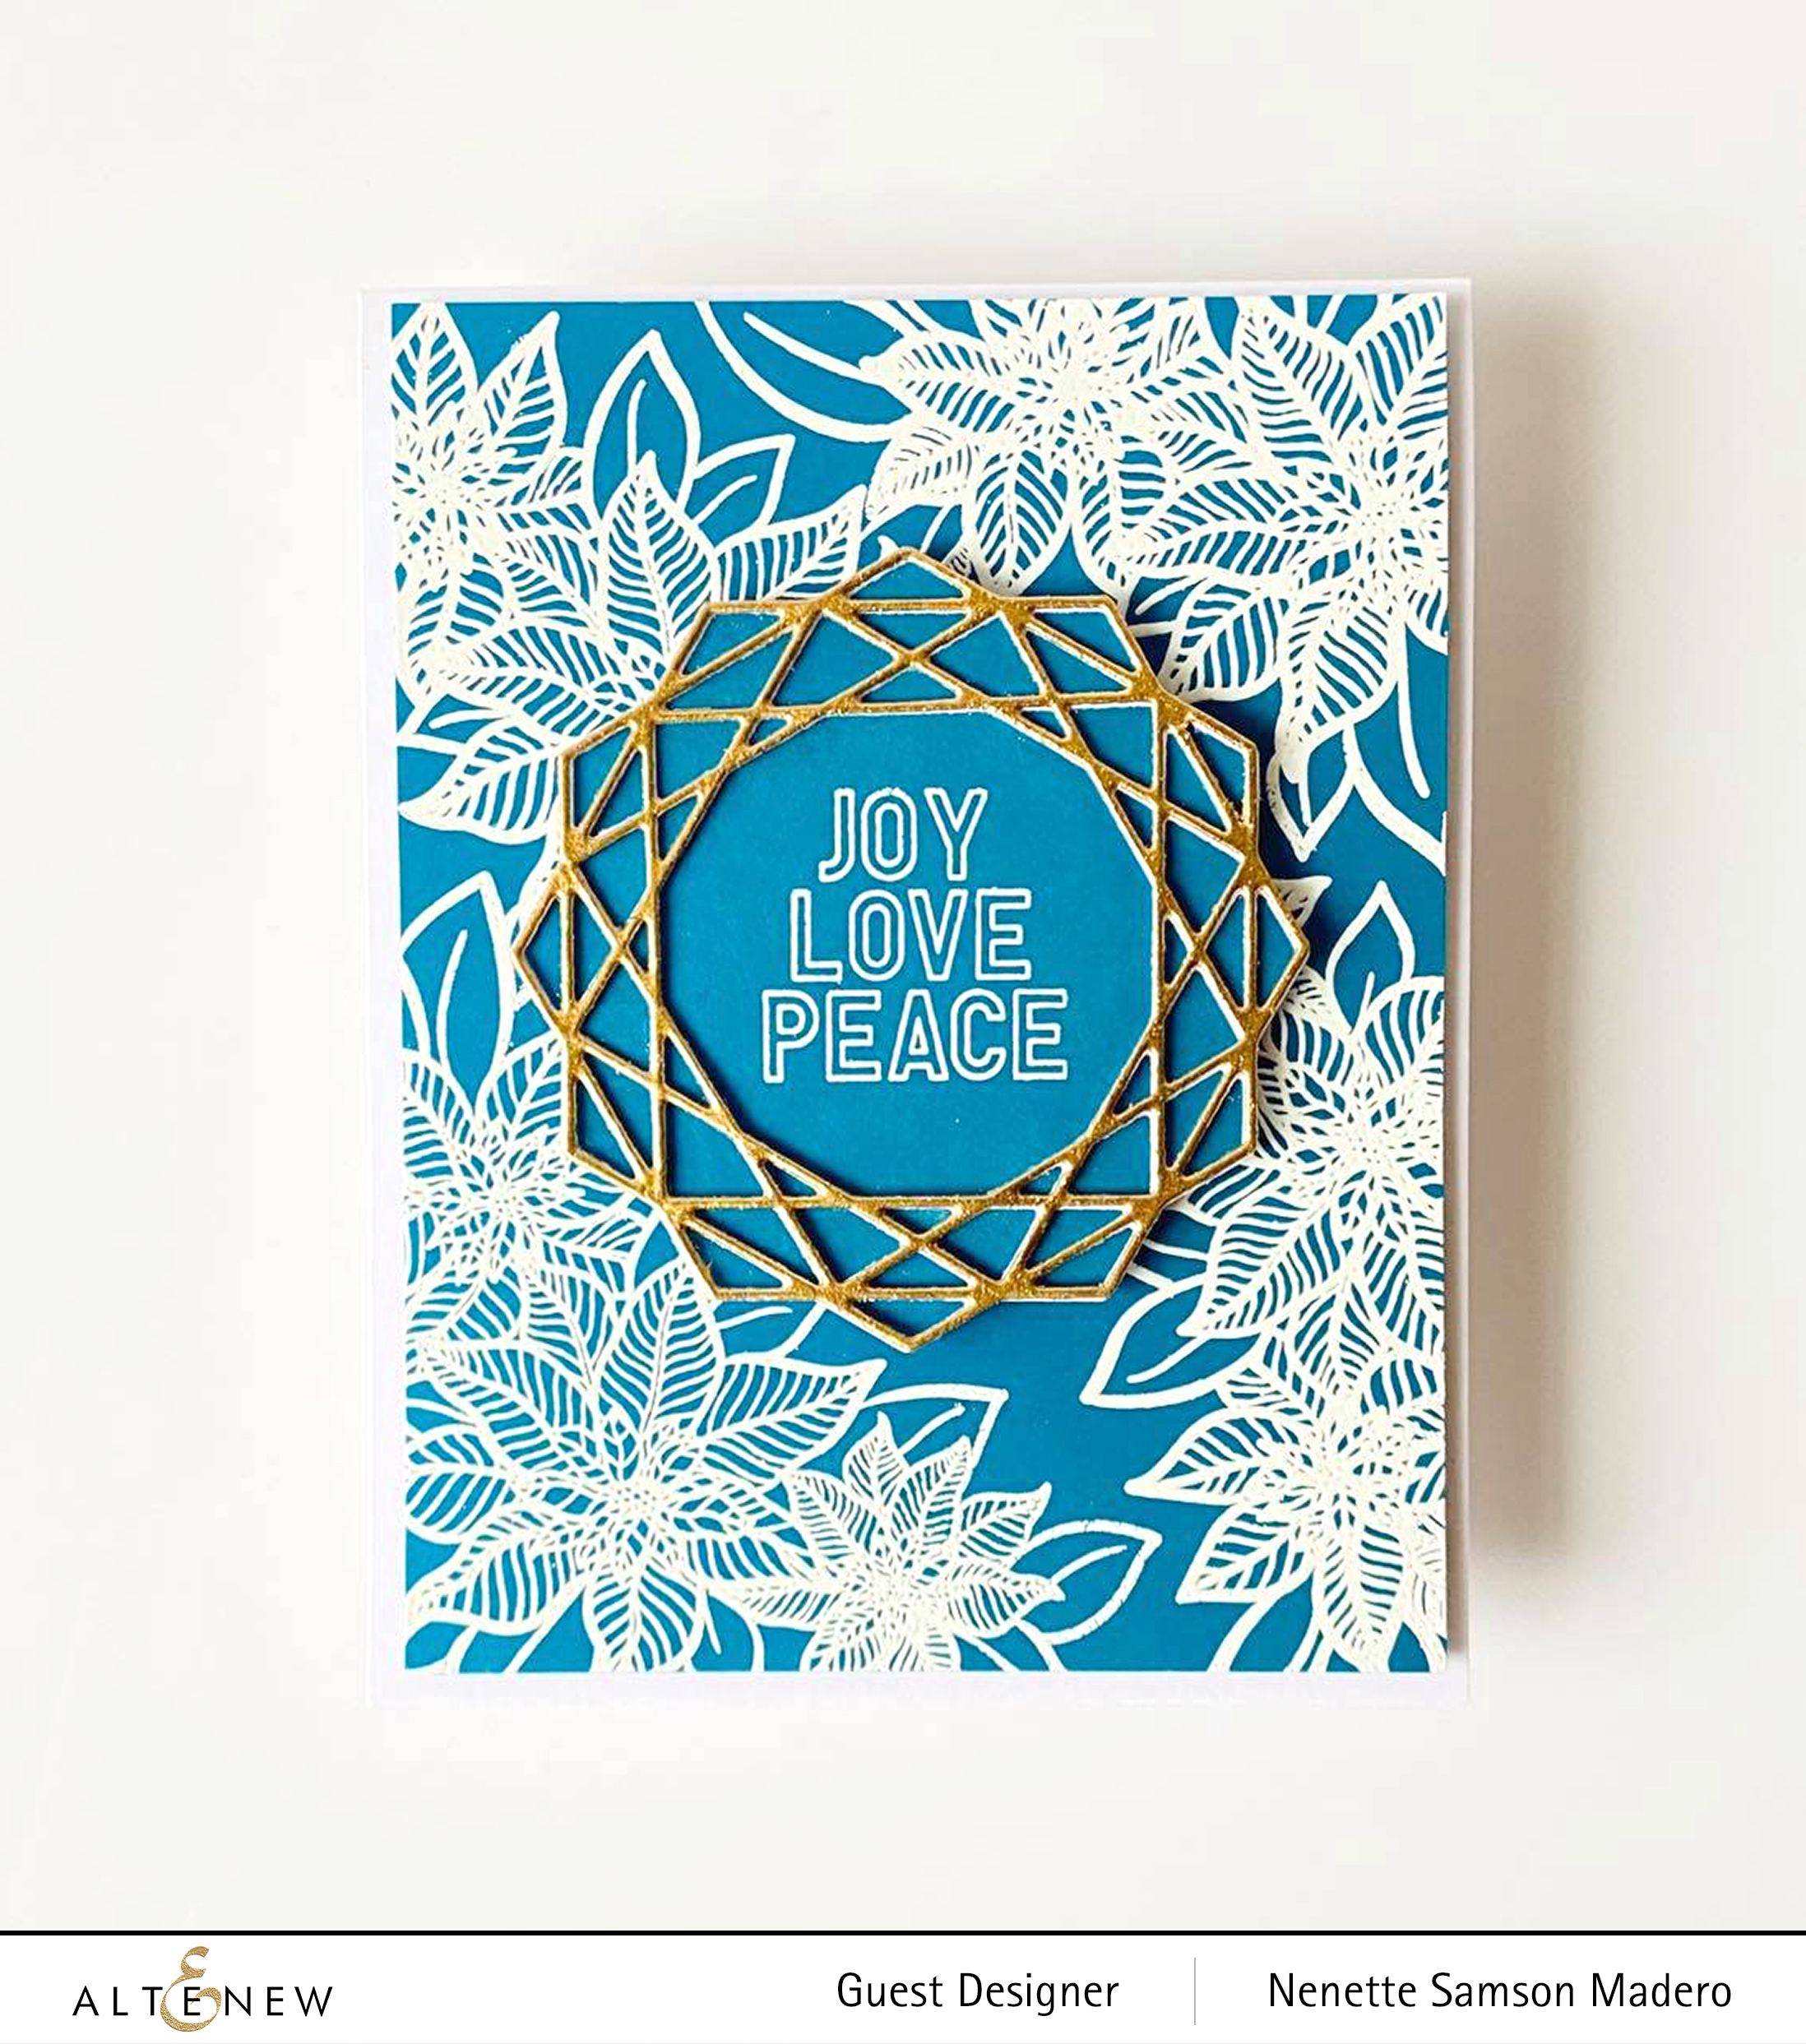
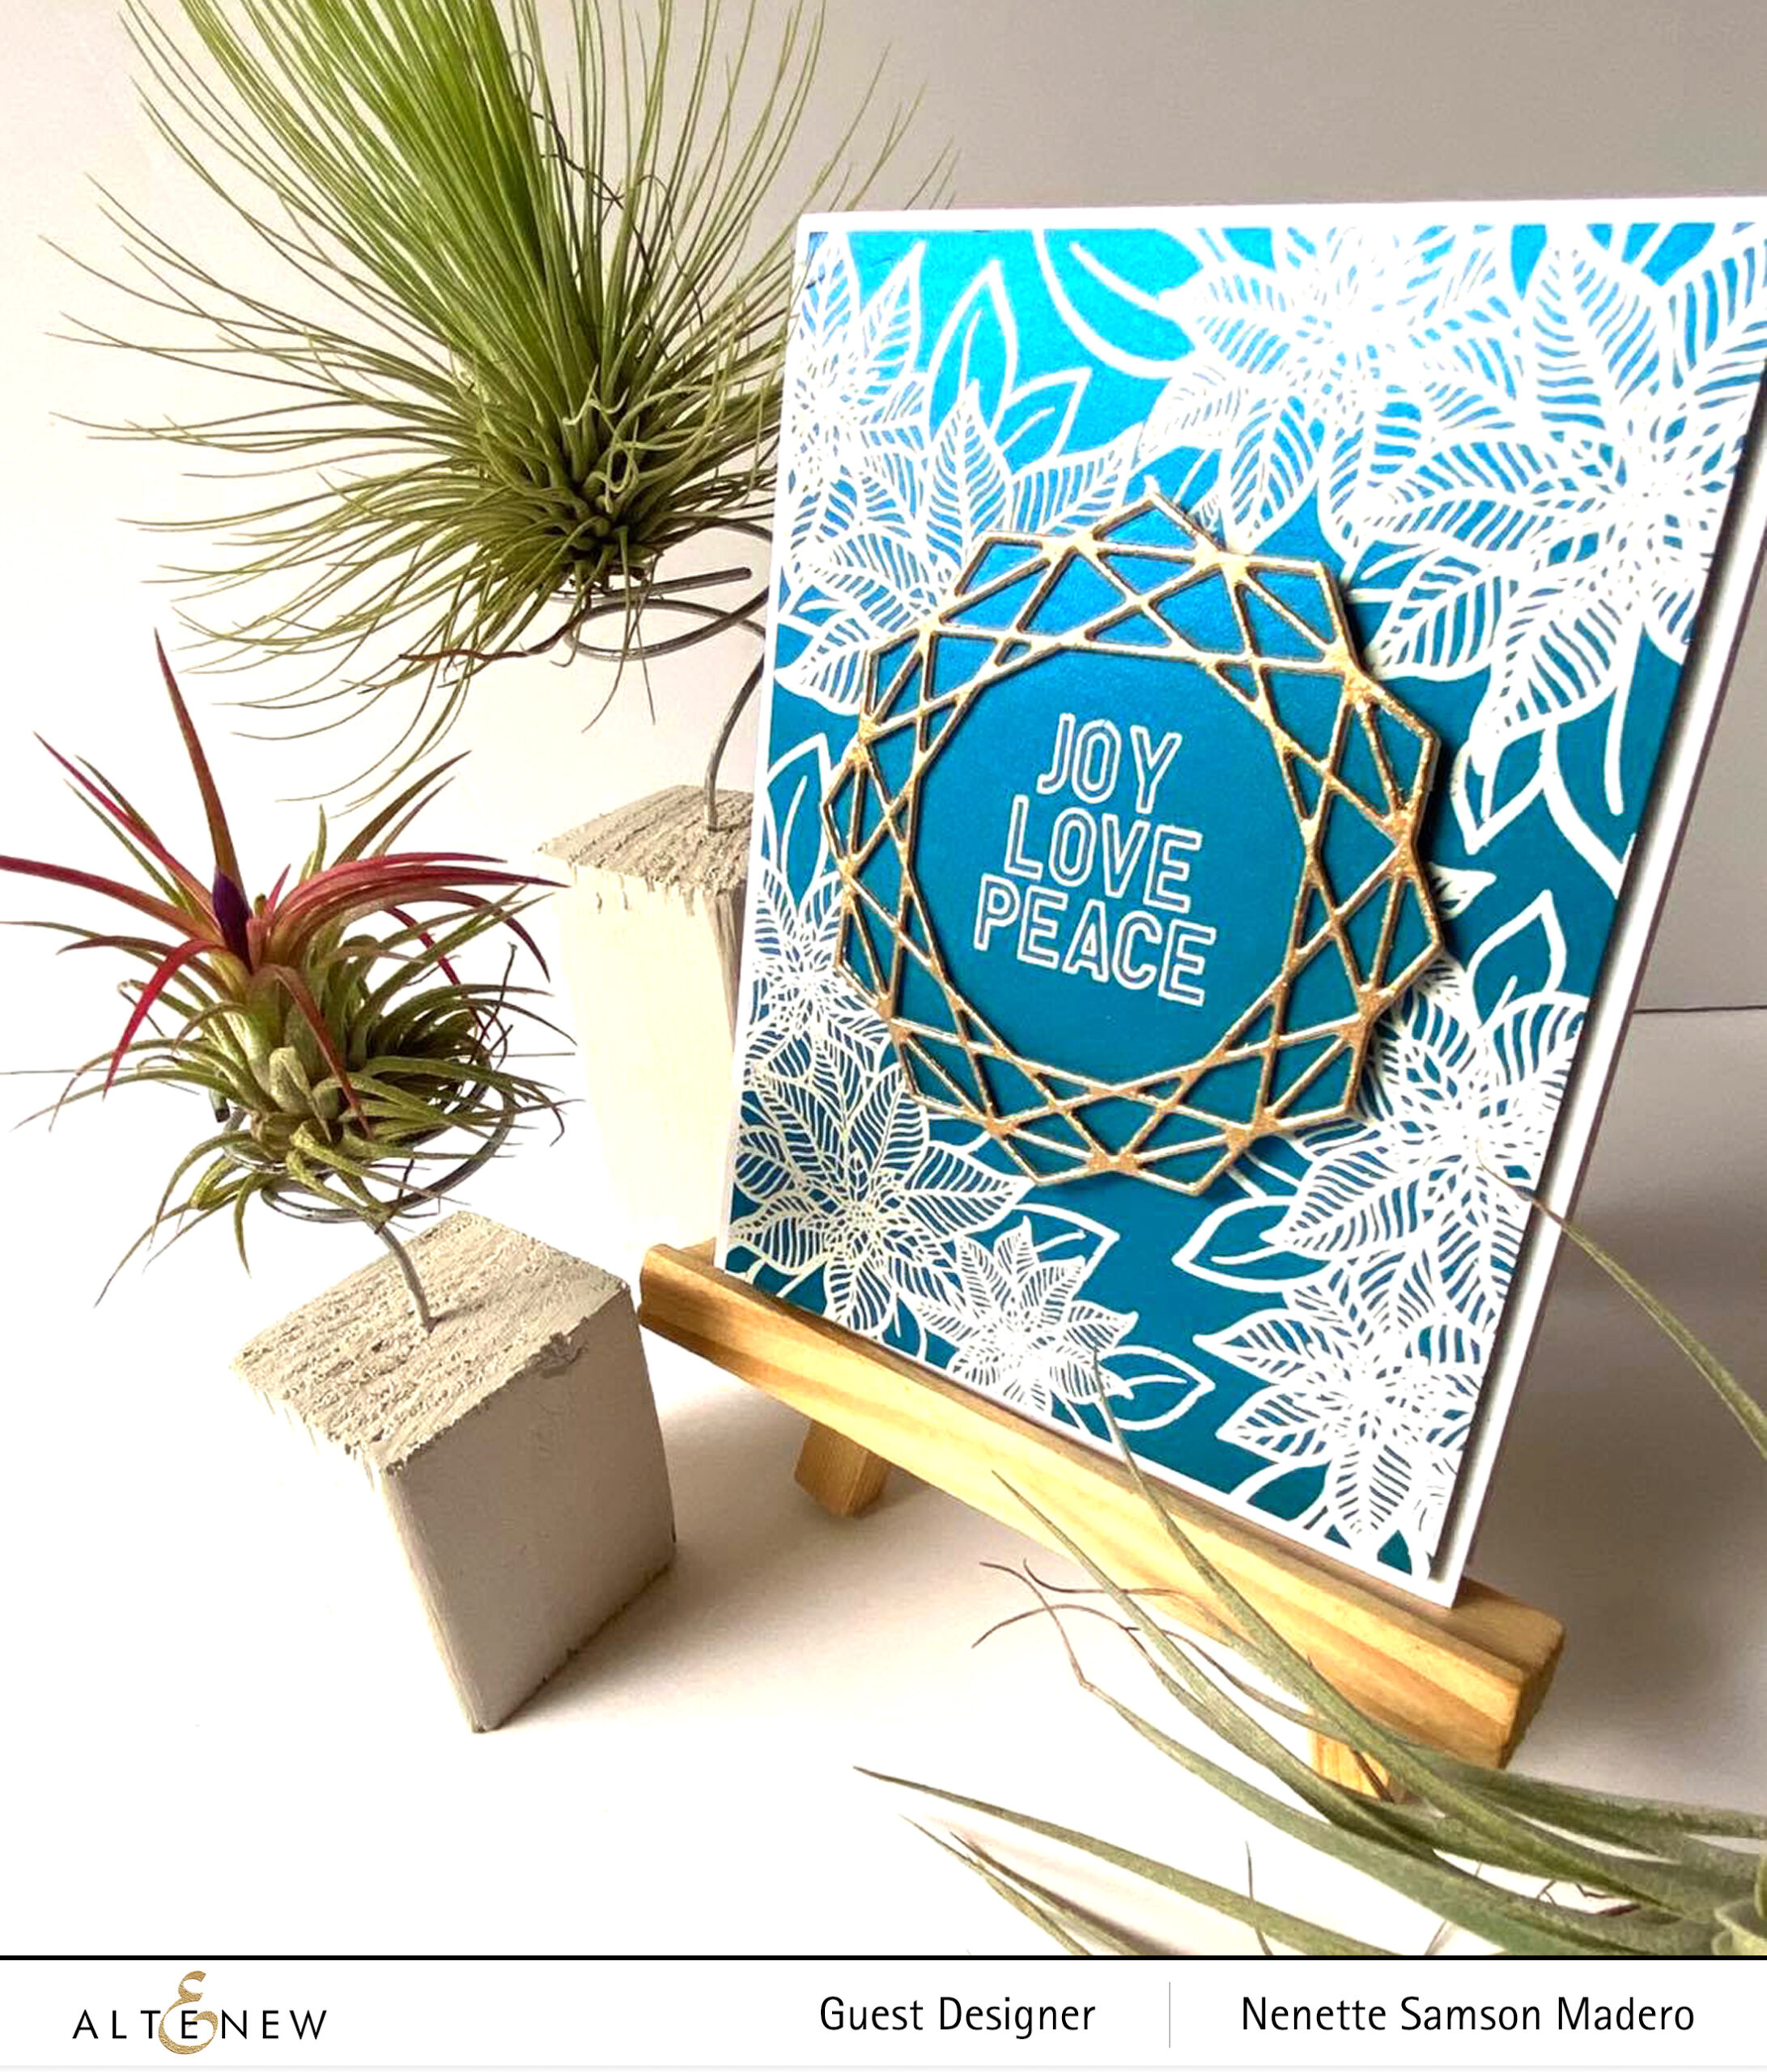
The Holiday Flower stamp set was used to create the background for this card. I used Versamark ink to stamp the poinsettia clusters then heat embossed it using white embossing powder. The gem frame die fitted perfectly on top one of the soda top nesting dies.
I wanted some contrast so I inked up the gem frame die with Versamak Ink then embossed it using Rose Gold embossing powder. The sentiment from the Holiday Tag Sentiments stamp set was stamped and embossed then the gem frame was adhered using glue. Foam tape was used to adhere the sentiment to the card front for added dimension.
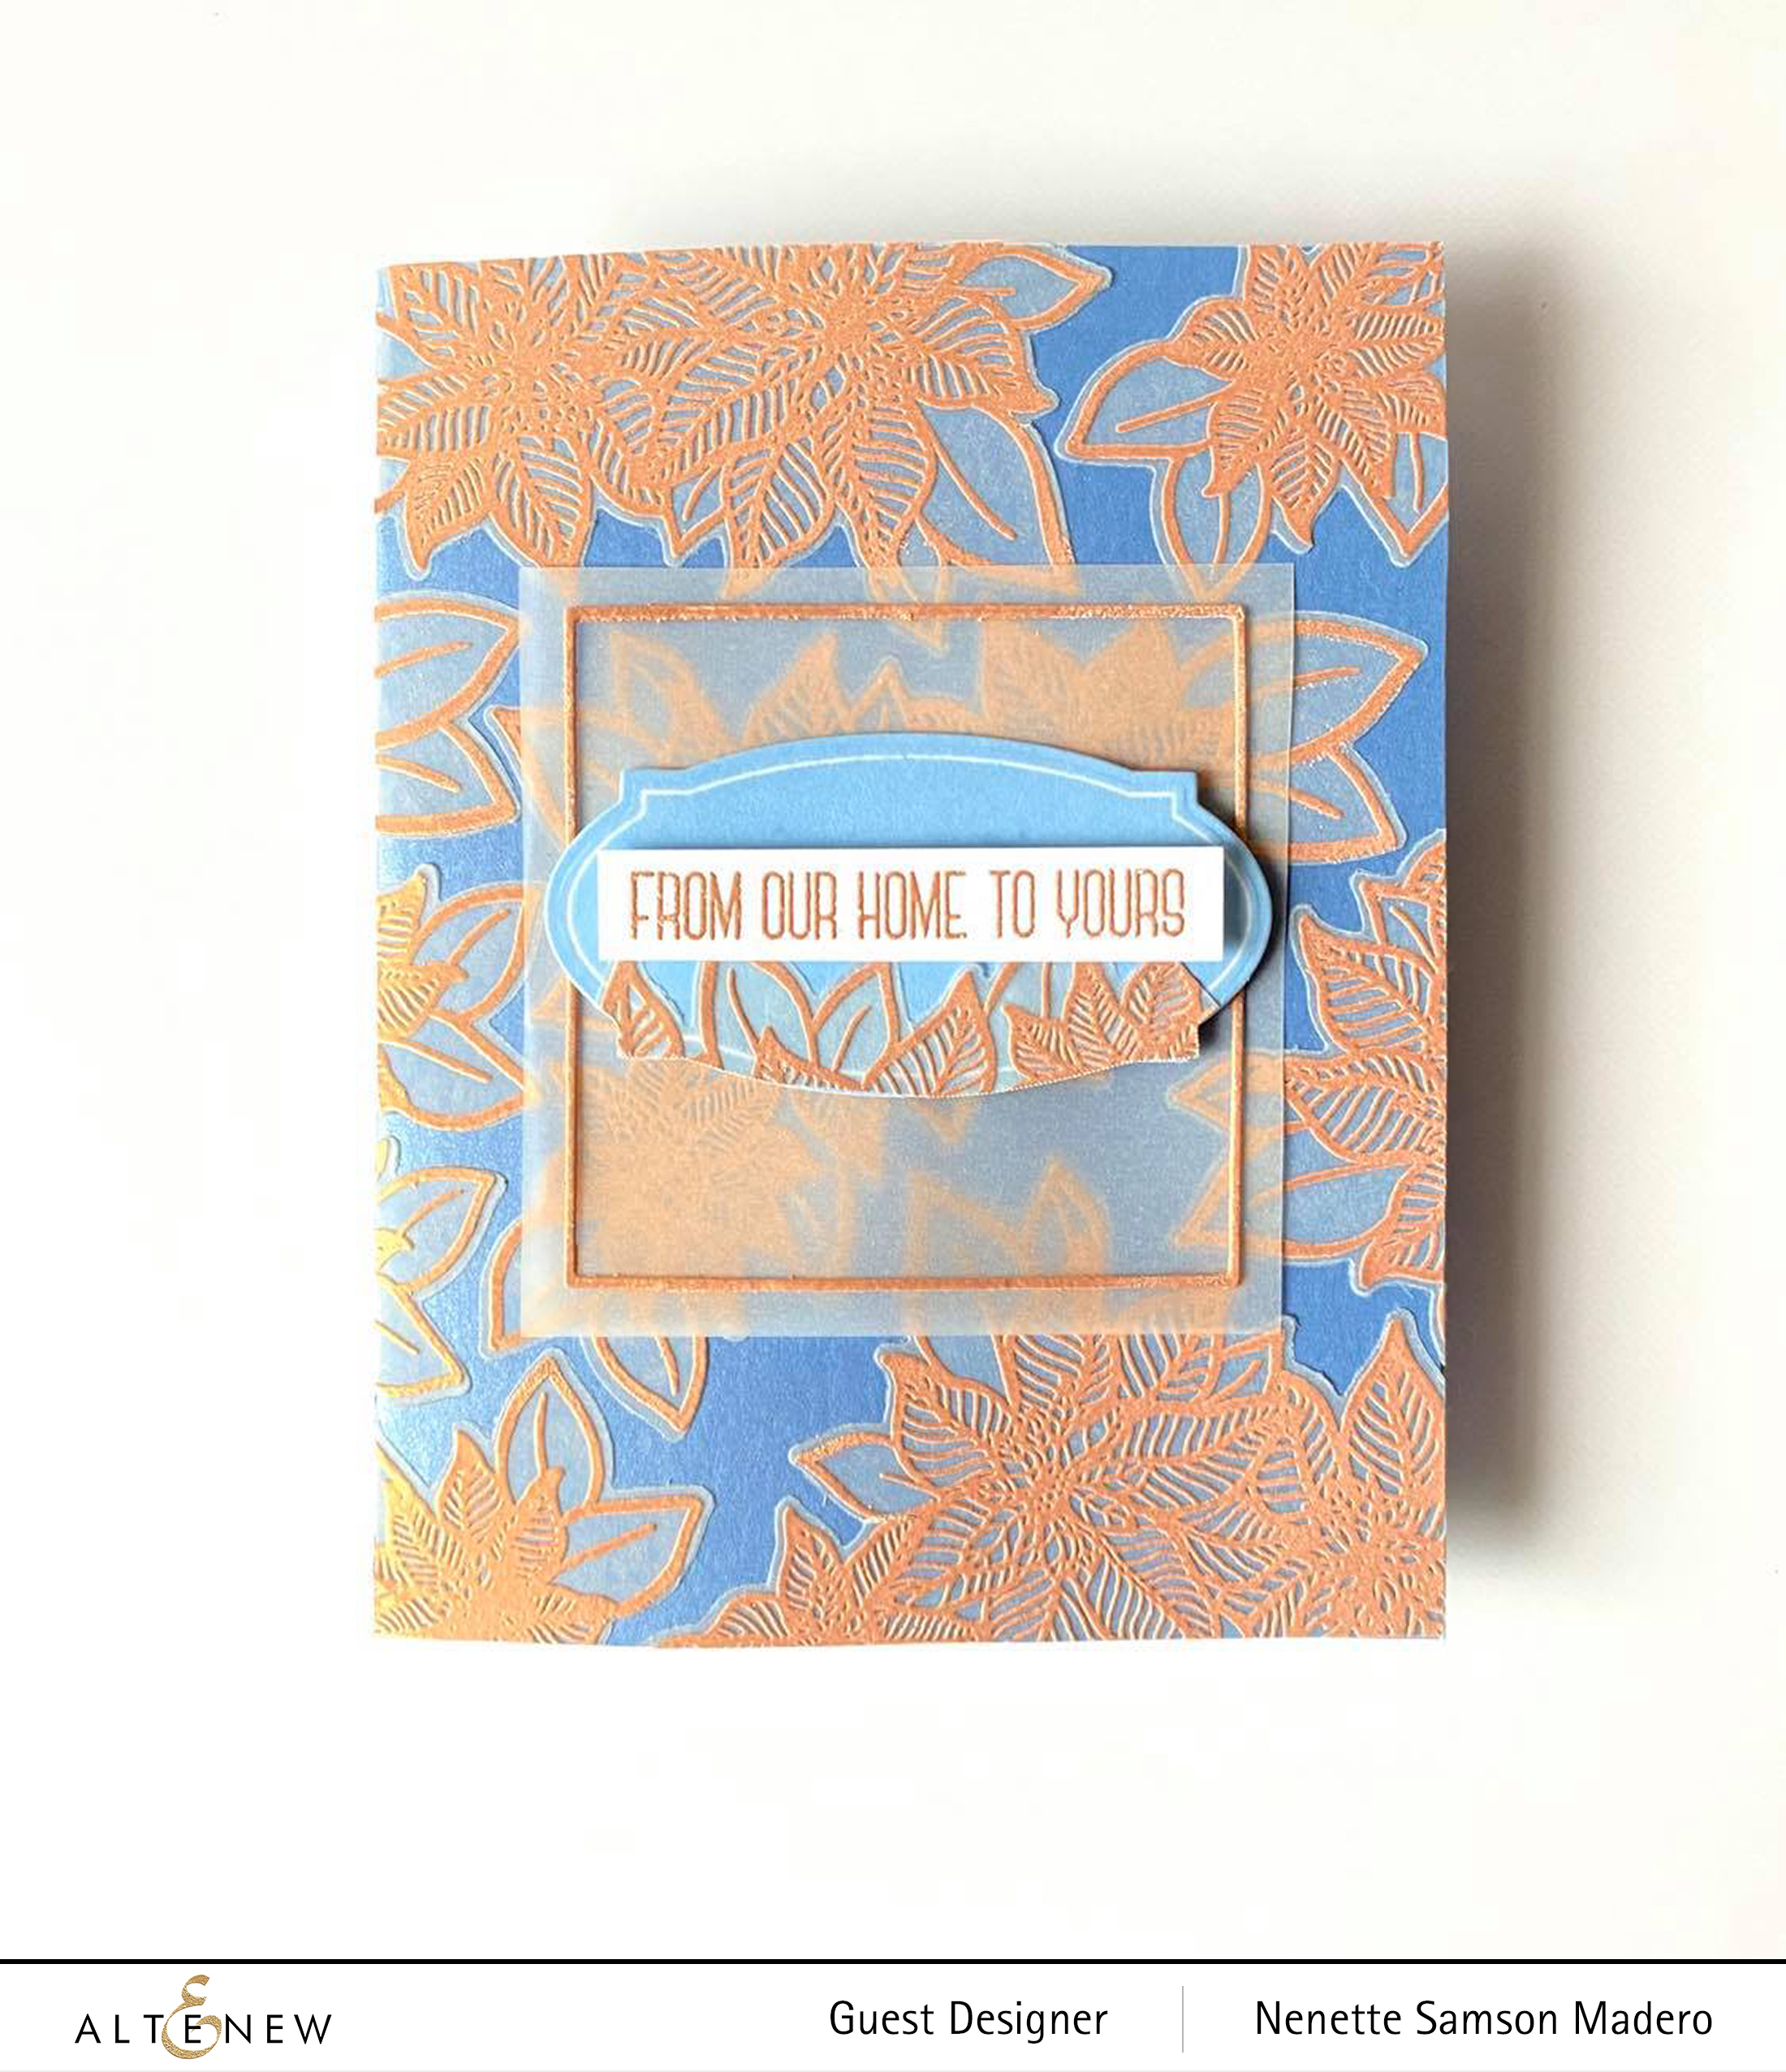
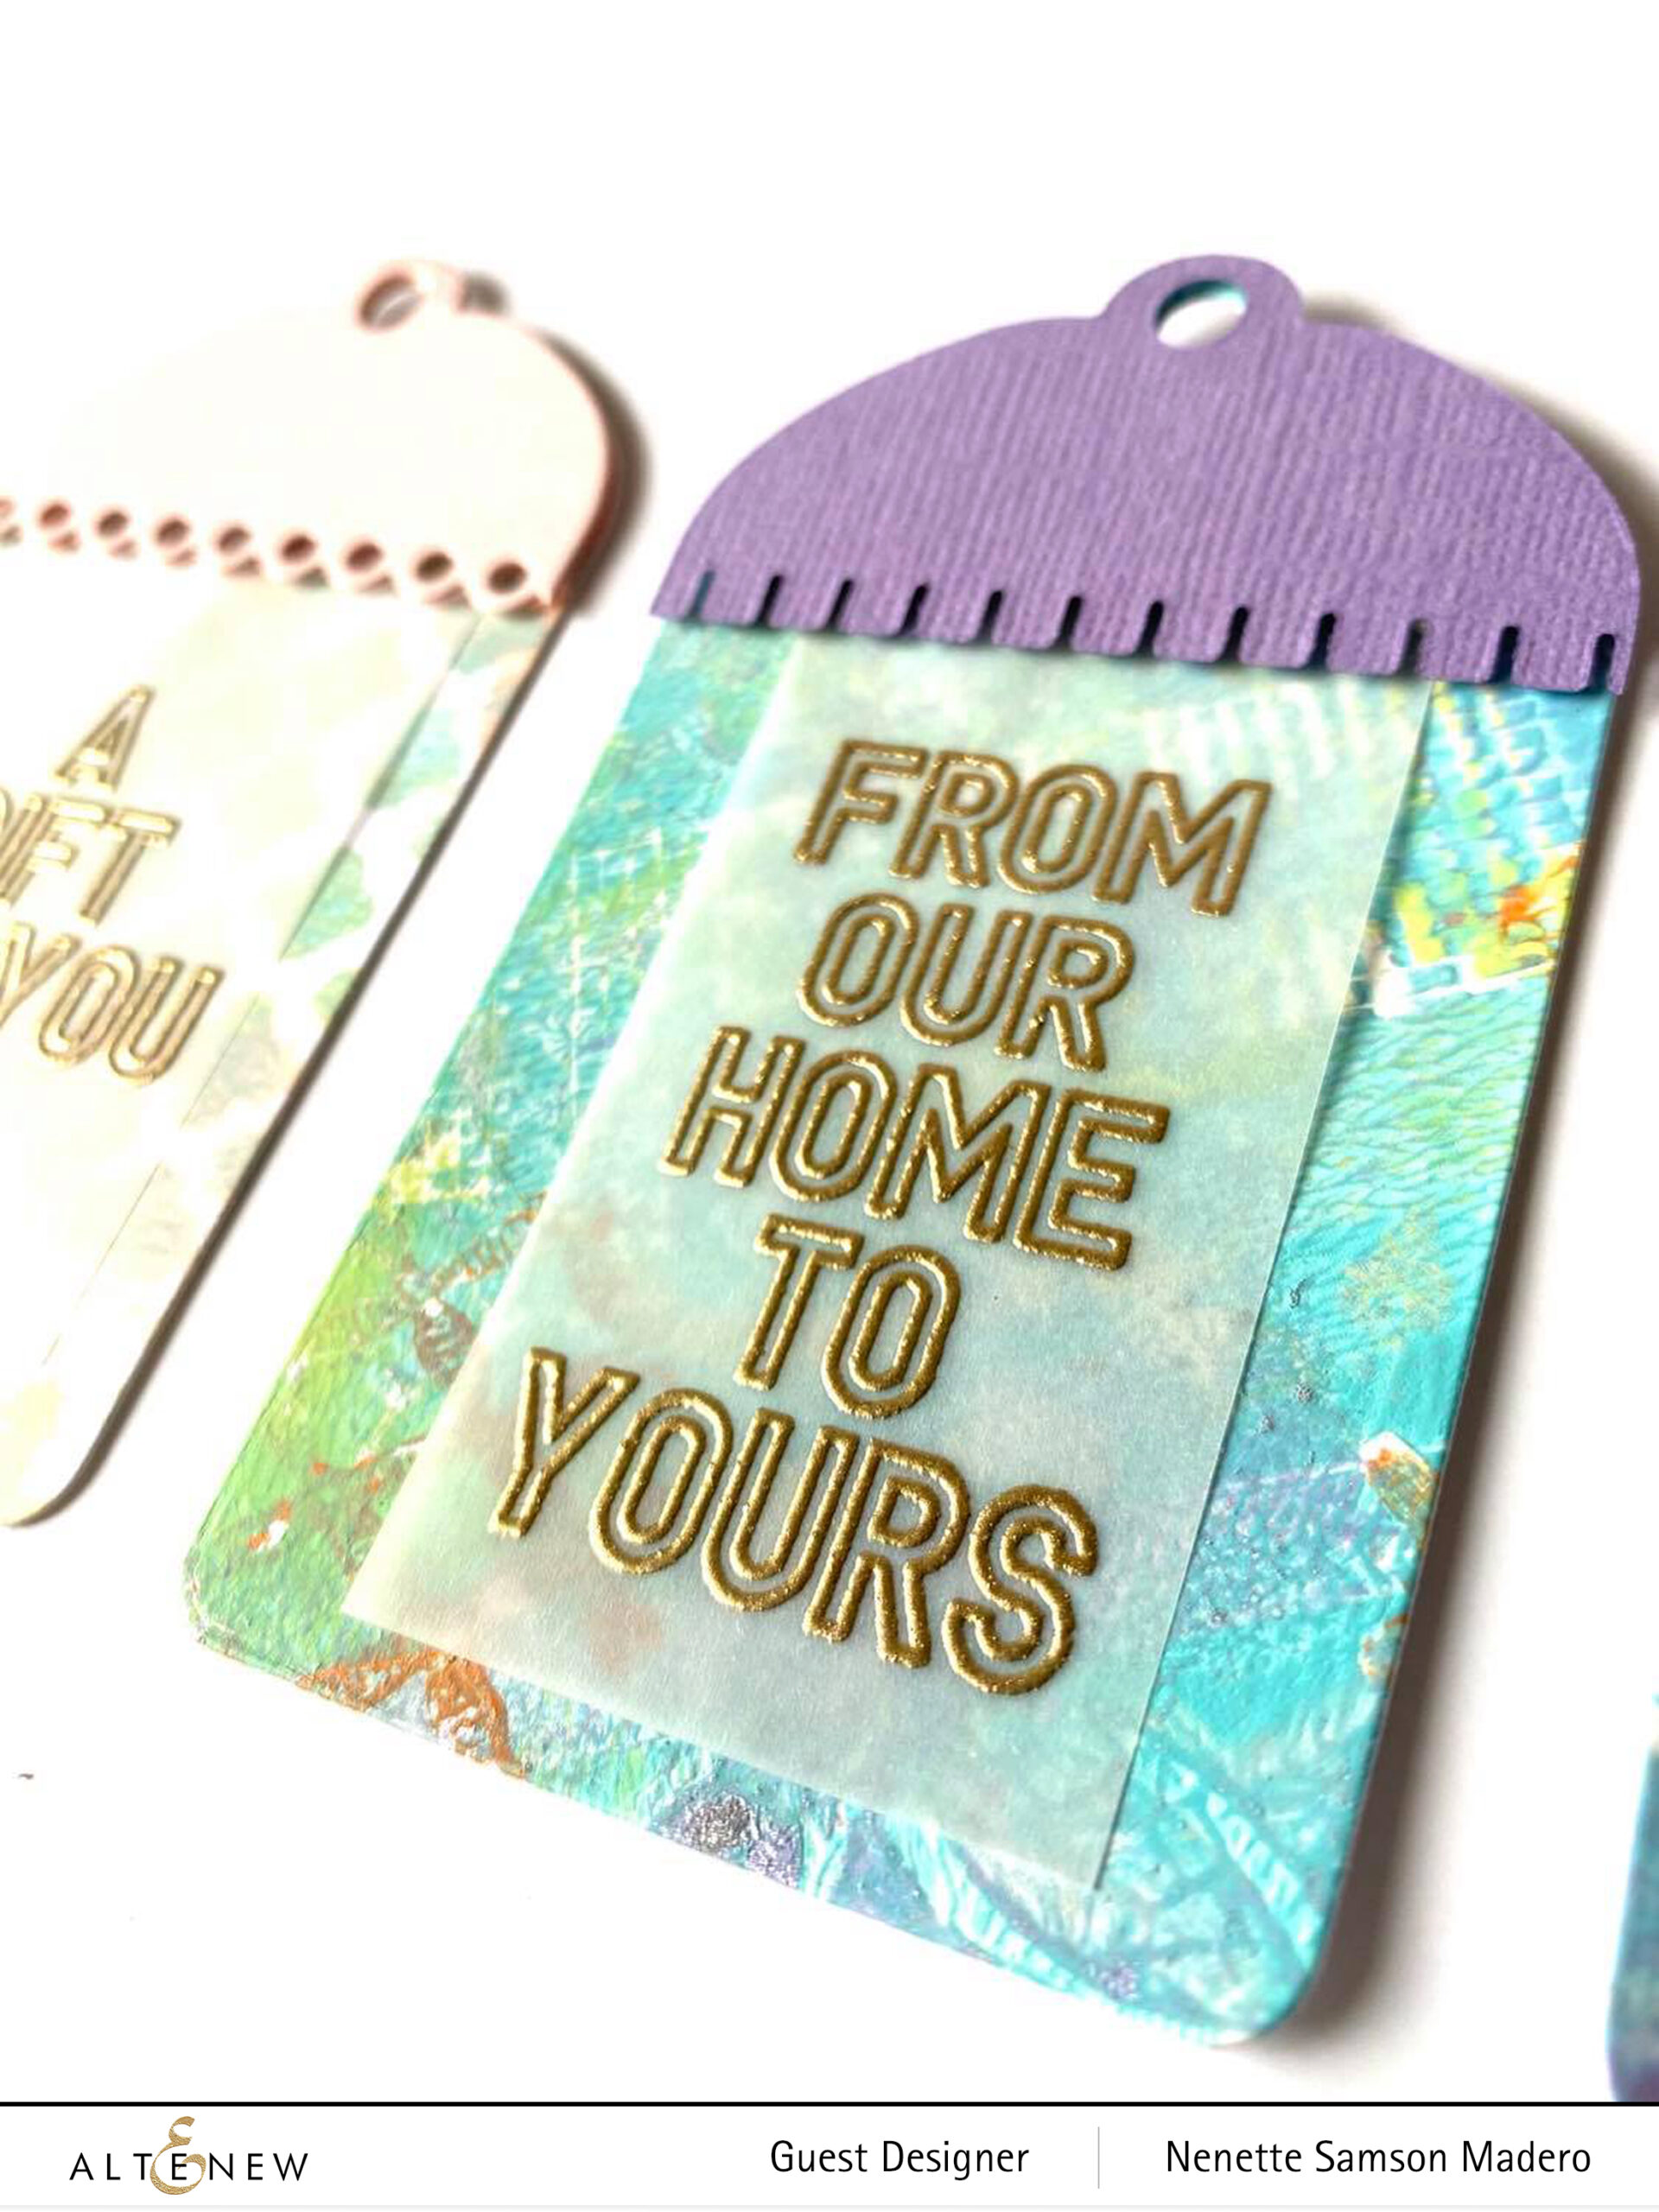
FROM OUR HOME TO YOURS
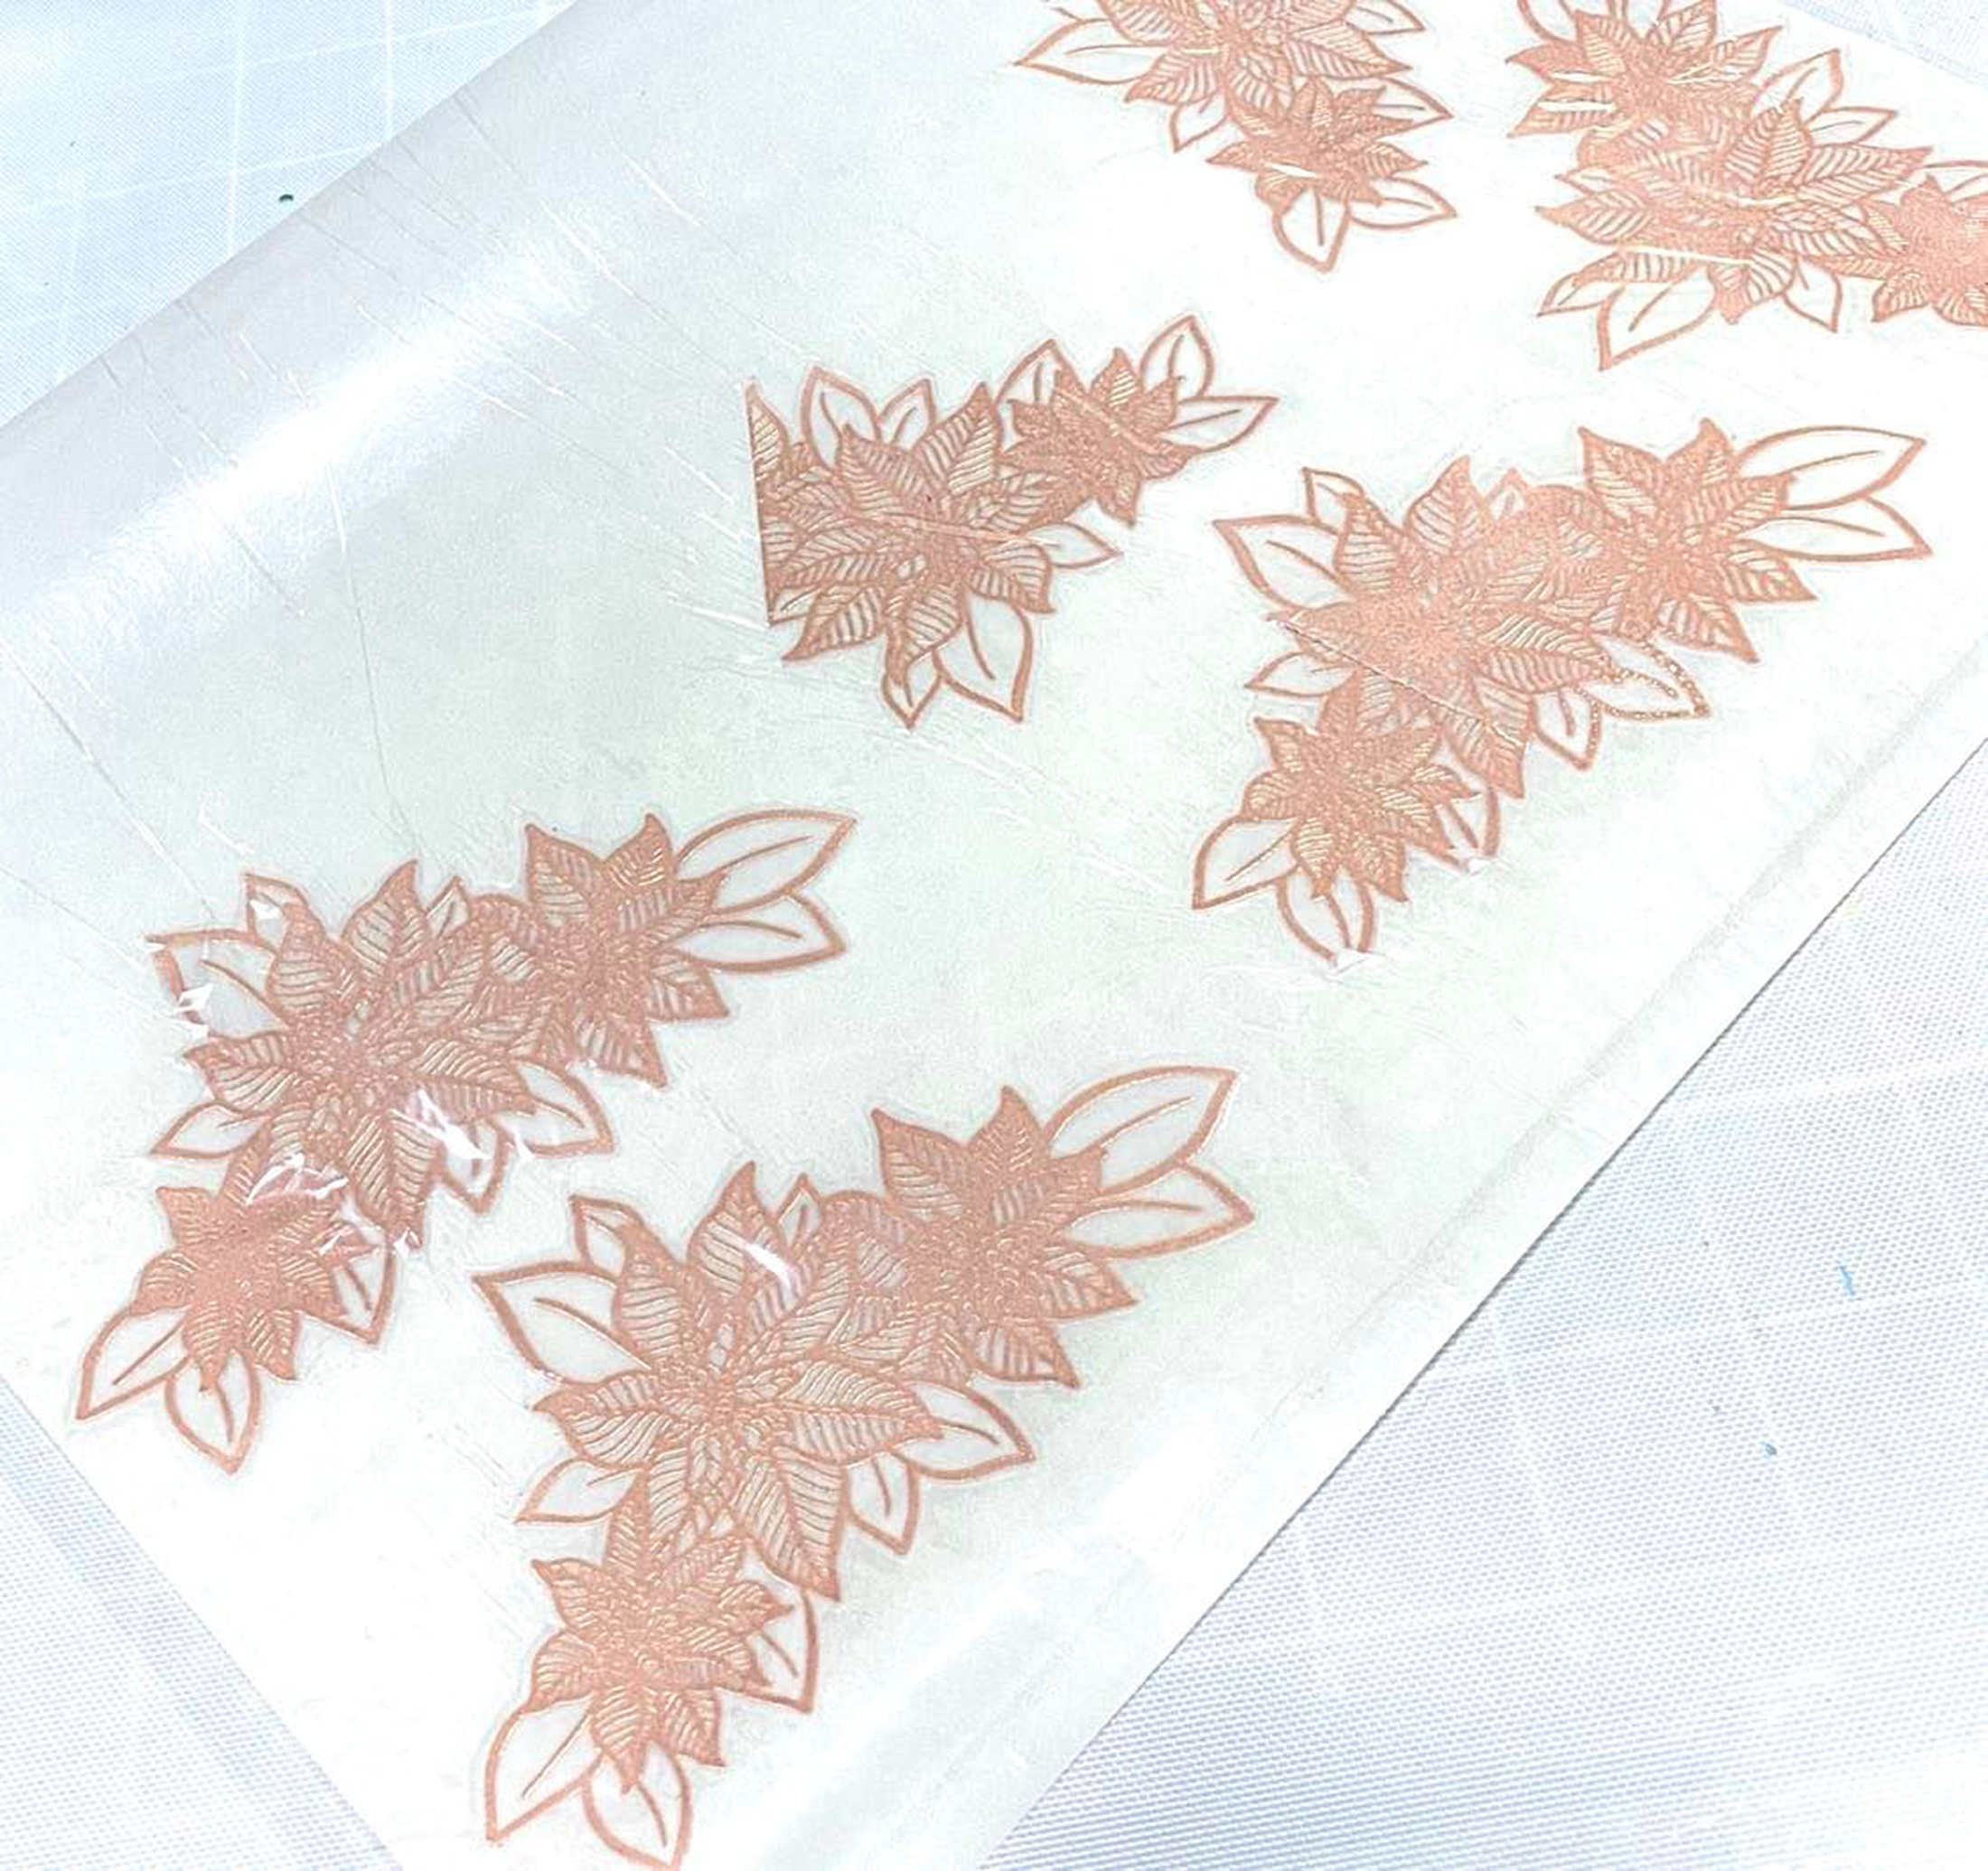
I love the look of sheer lace and stamping the image from the Holiday flowers stamp on vellum gives this effect. I stamped several images on vellum then heat embossed using Golden Peach embossing powder. These were then die cut using the coordinating die. A good way to adhere vellum onto cardstock is to use the Zyron sticker maker.
After embossing the image and die cutting the vellum, I ran them through the zyron machine and made the die cuts into stickers. This way, you don’t get to see the adhesive behind the vellum. I also used the Apothecary Labels stamp and die set for the tag and the Fine Frames Square die to add a frame around the tag. Versamark Ink was added to this thin frame then embossed with Golden Peach embossing powder to match the flowers. These were added to the card front using foam squares.
WE RISE BY LIFTING OTHERS
The Positive Vibes stamp is easy to align. The image was stamped then partially die cut. The Rounded rectangle die was used to cut the other side of the stamped image. The card front was embossed using We R Memory Keepers Quilted embossing folder for added texture. The sentiment was stamped and embossed using Rose Gold embossing powder.
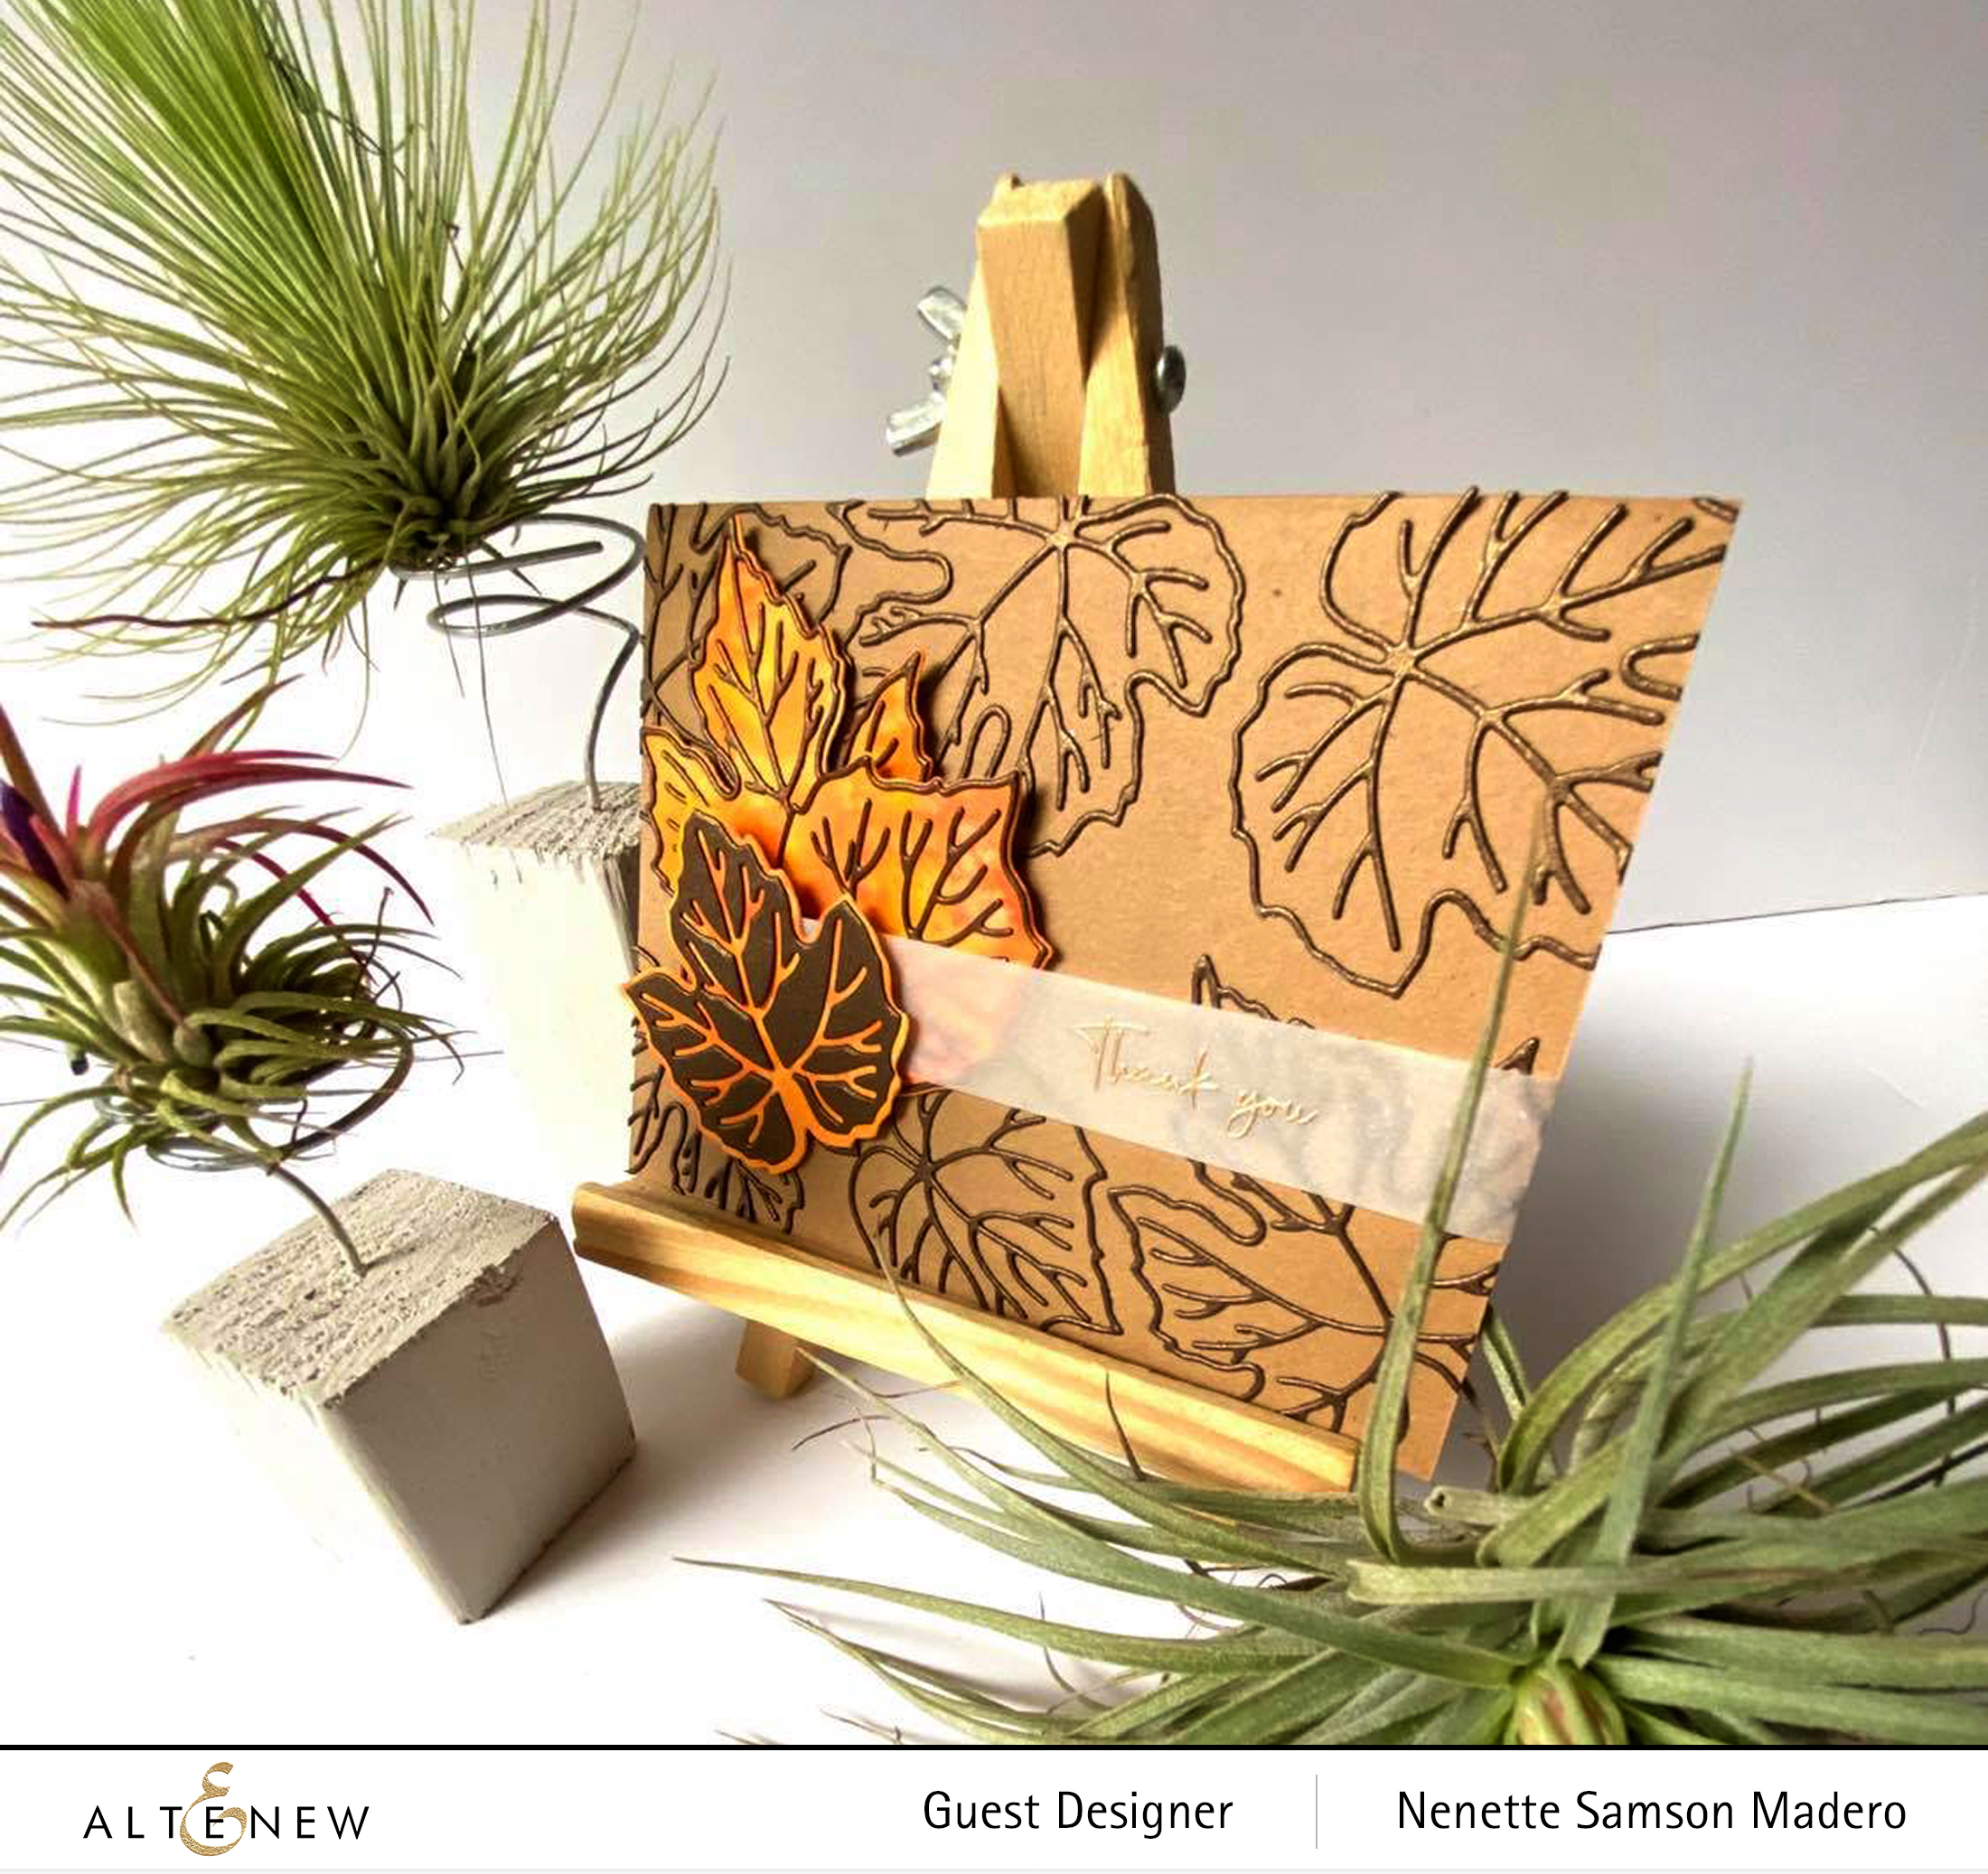
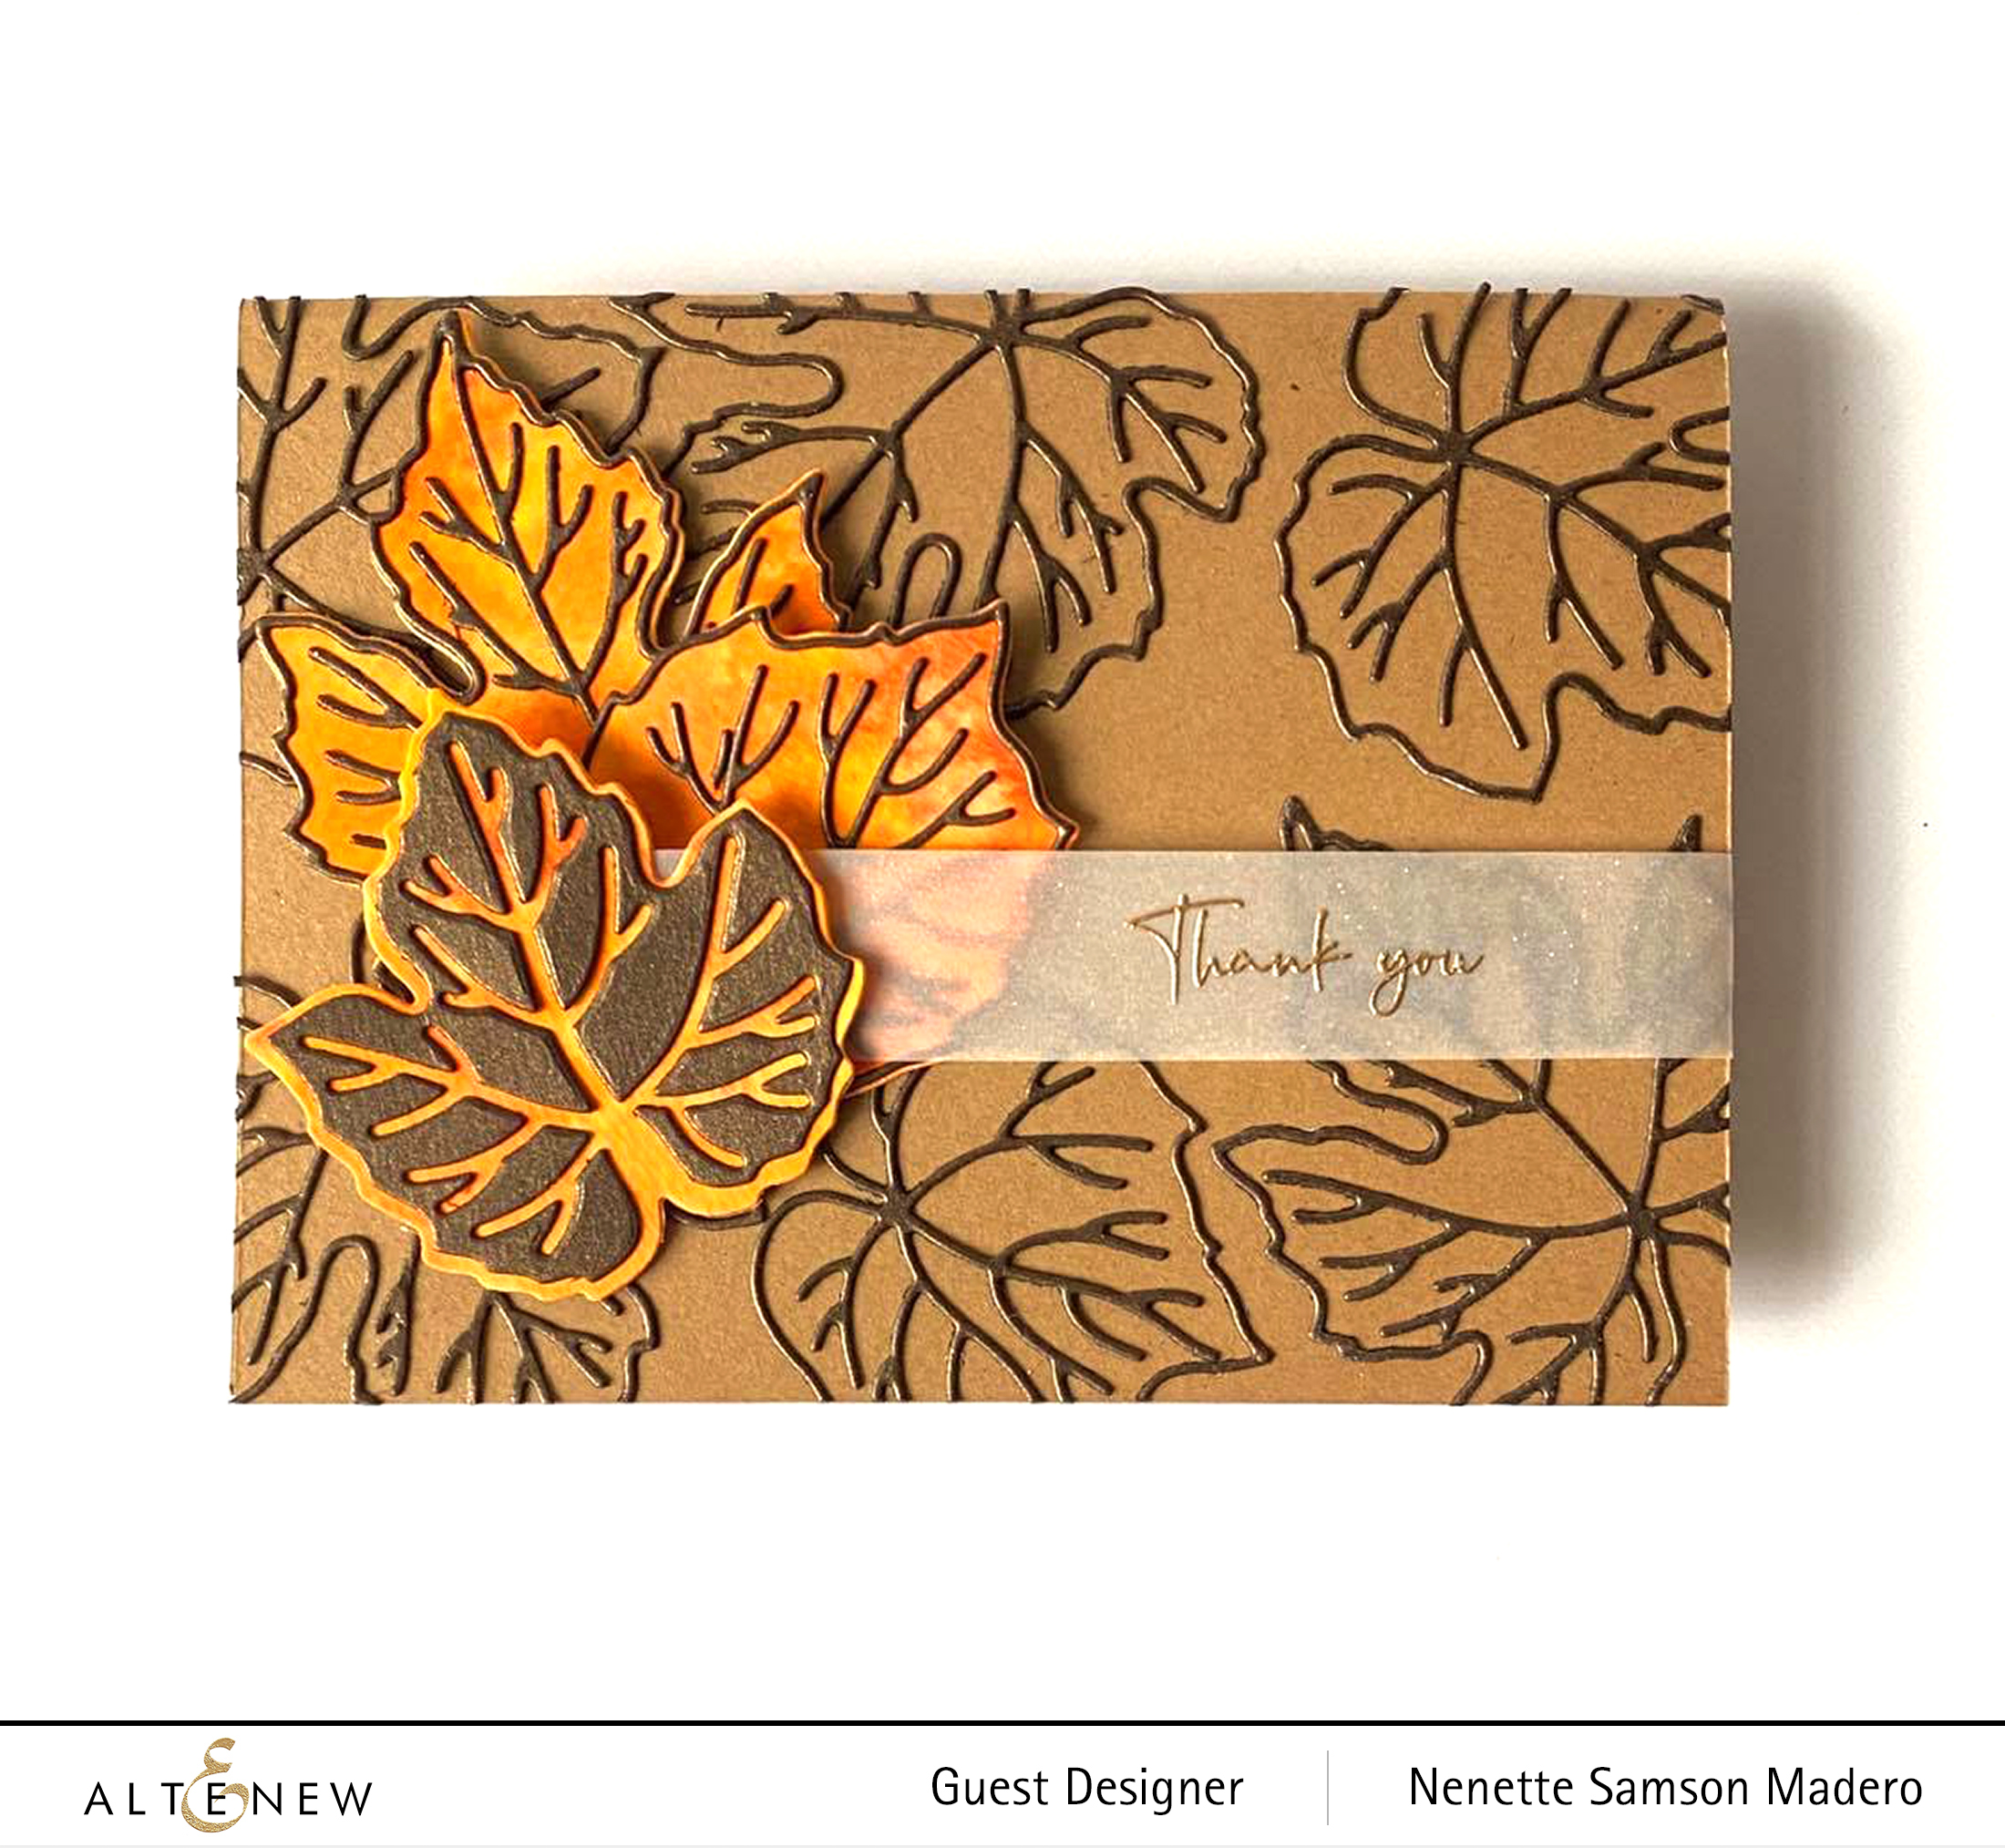
THANK YOU
There are so many ways to use the Grape Leaves die set. For this card, I used all the elements of the die-cut. First, I watercolored a sheet of watercolor paper with different shades of orange using the wet on wet technique.
After drying, I used the solid die-cut to cut out the background of the leaf. Brown glitter paper was used for the vines and outline of the leaf. These were adhered to the card front using glue then the rest of the leaves were clustered together using both negative and positive parts of the leaf die-cut. Foam squares were used to adhere them to the card front for added dimension. The sentiment was heat embossed on vellum.
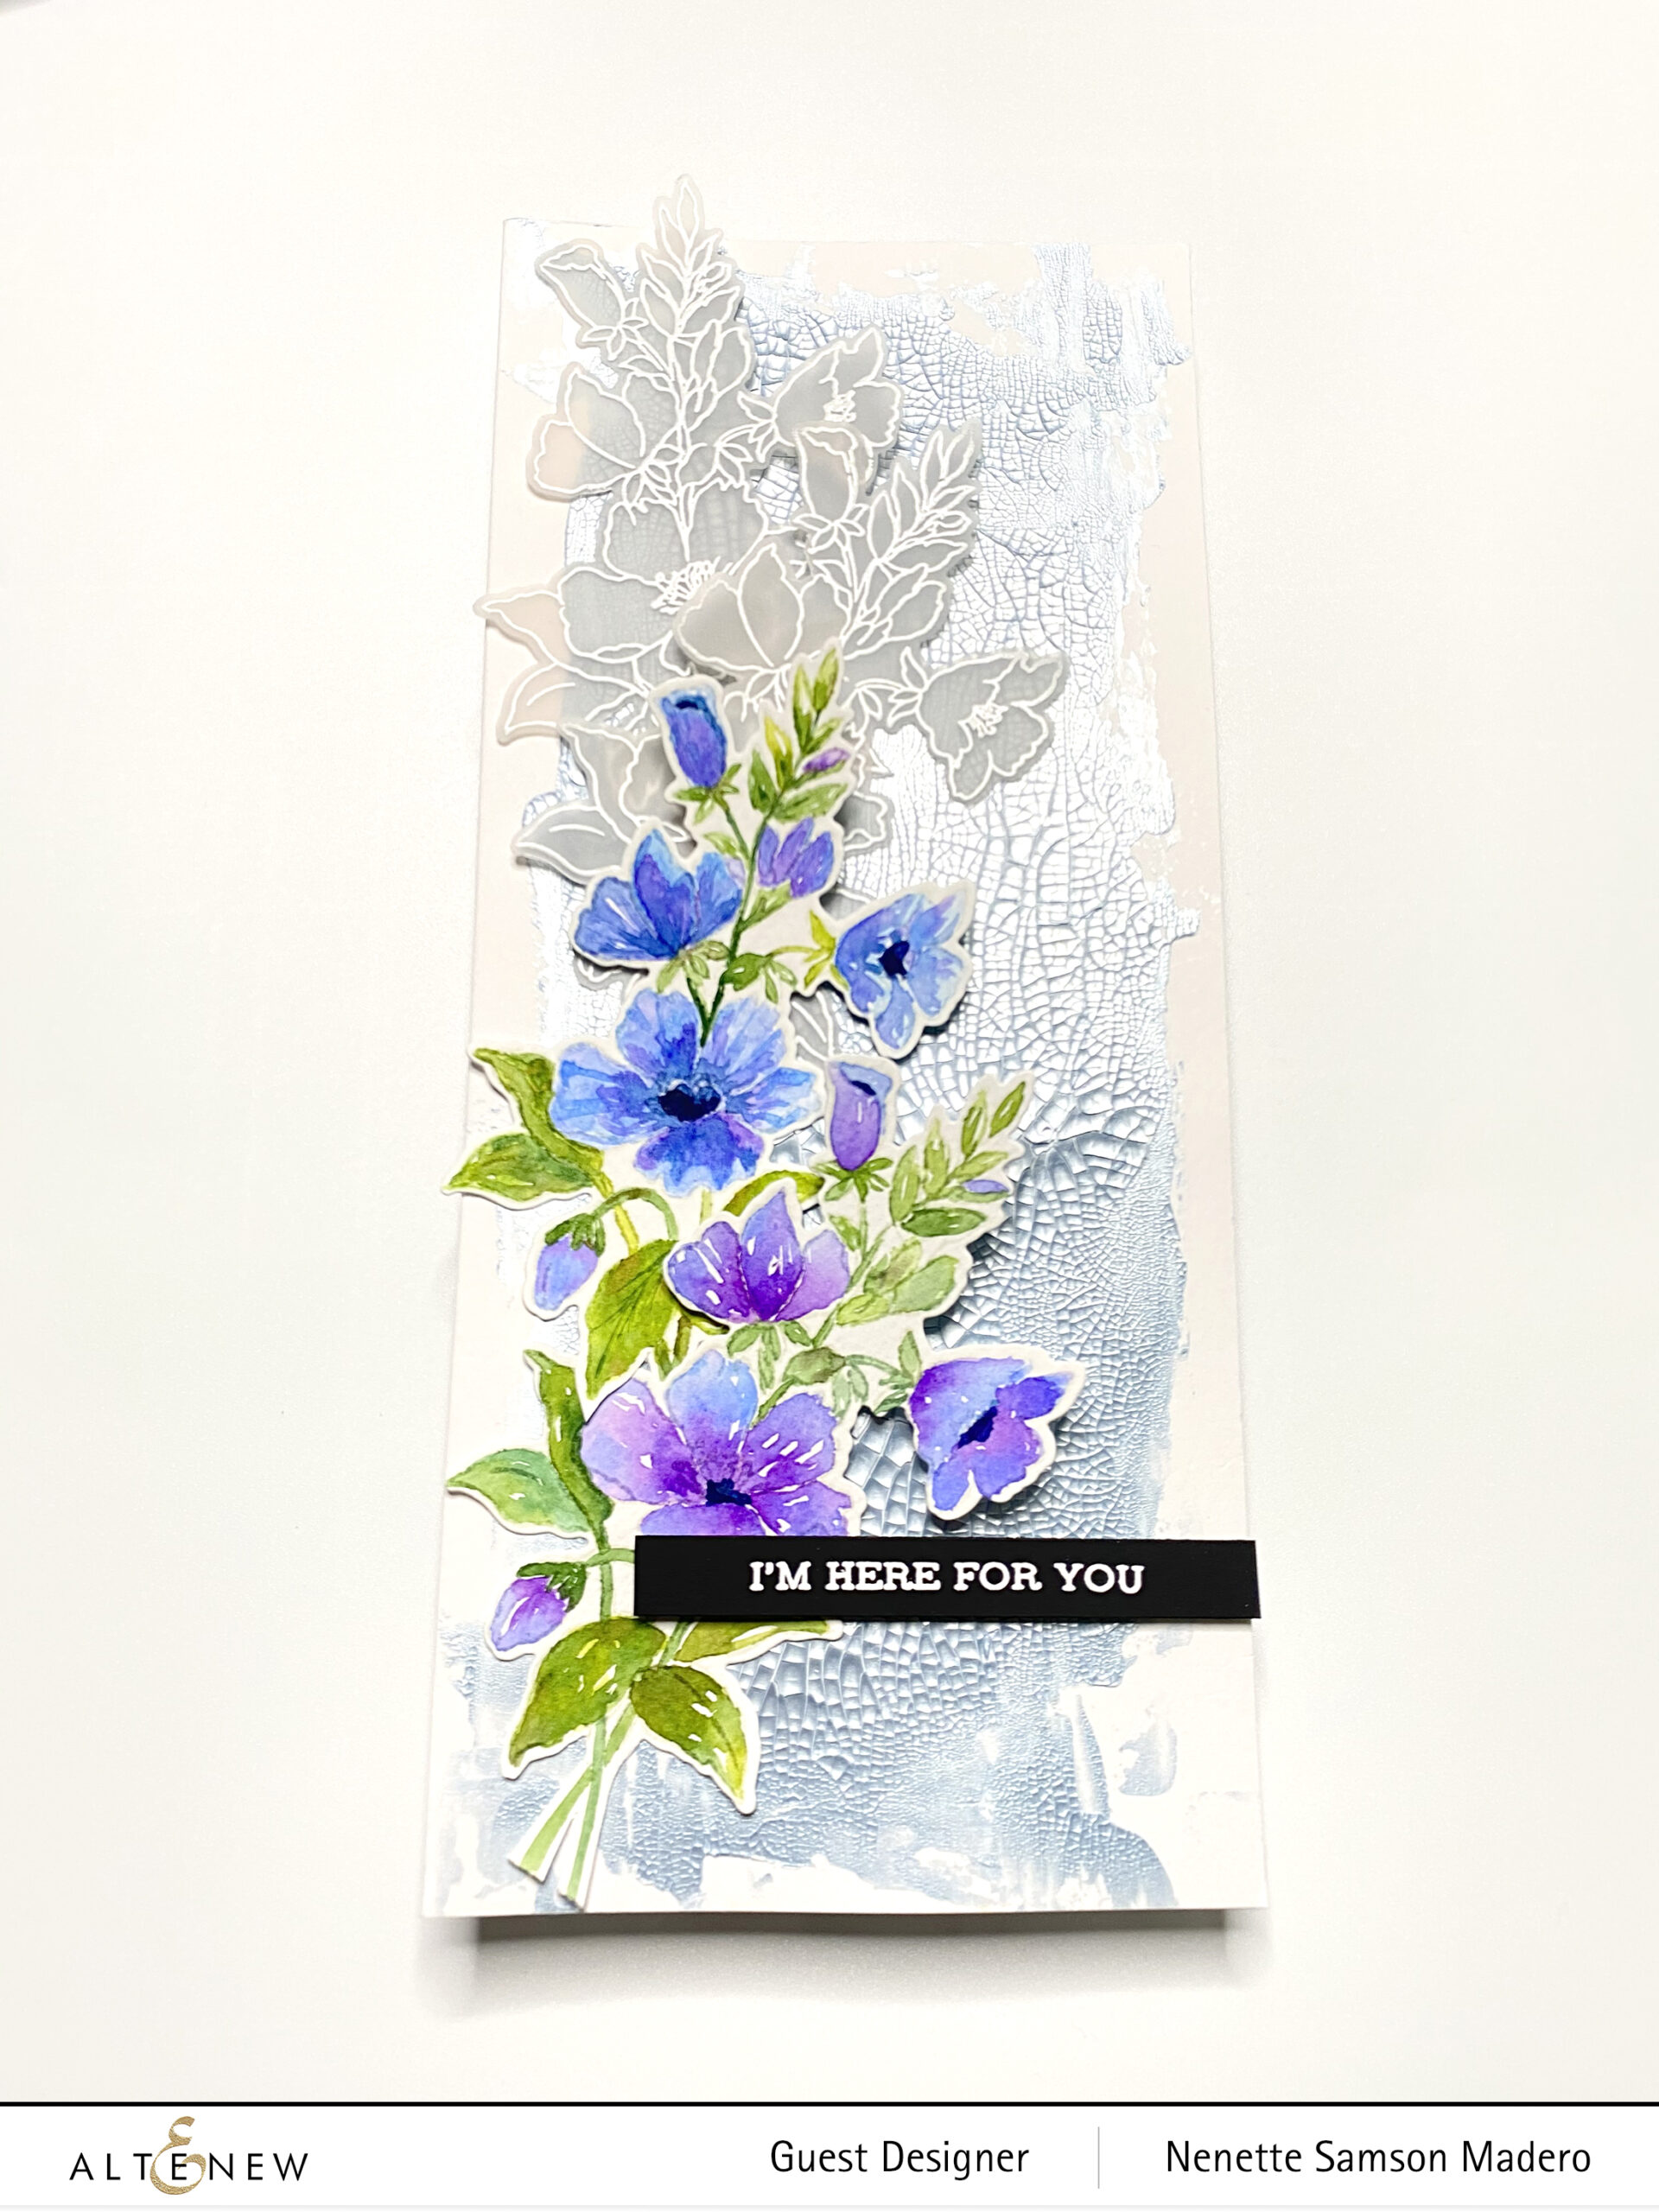
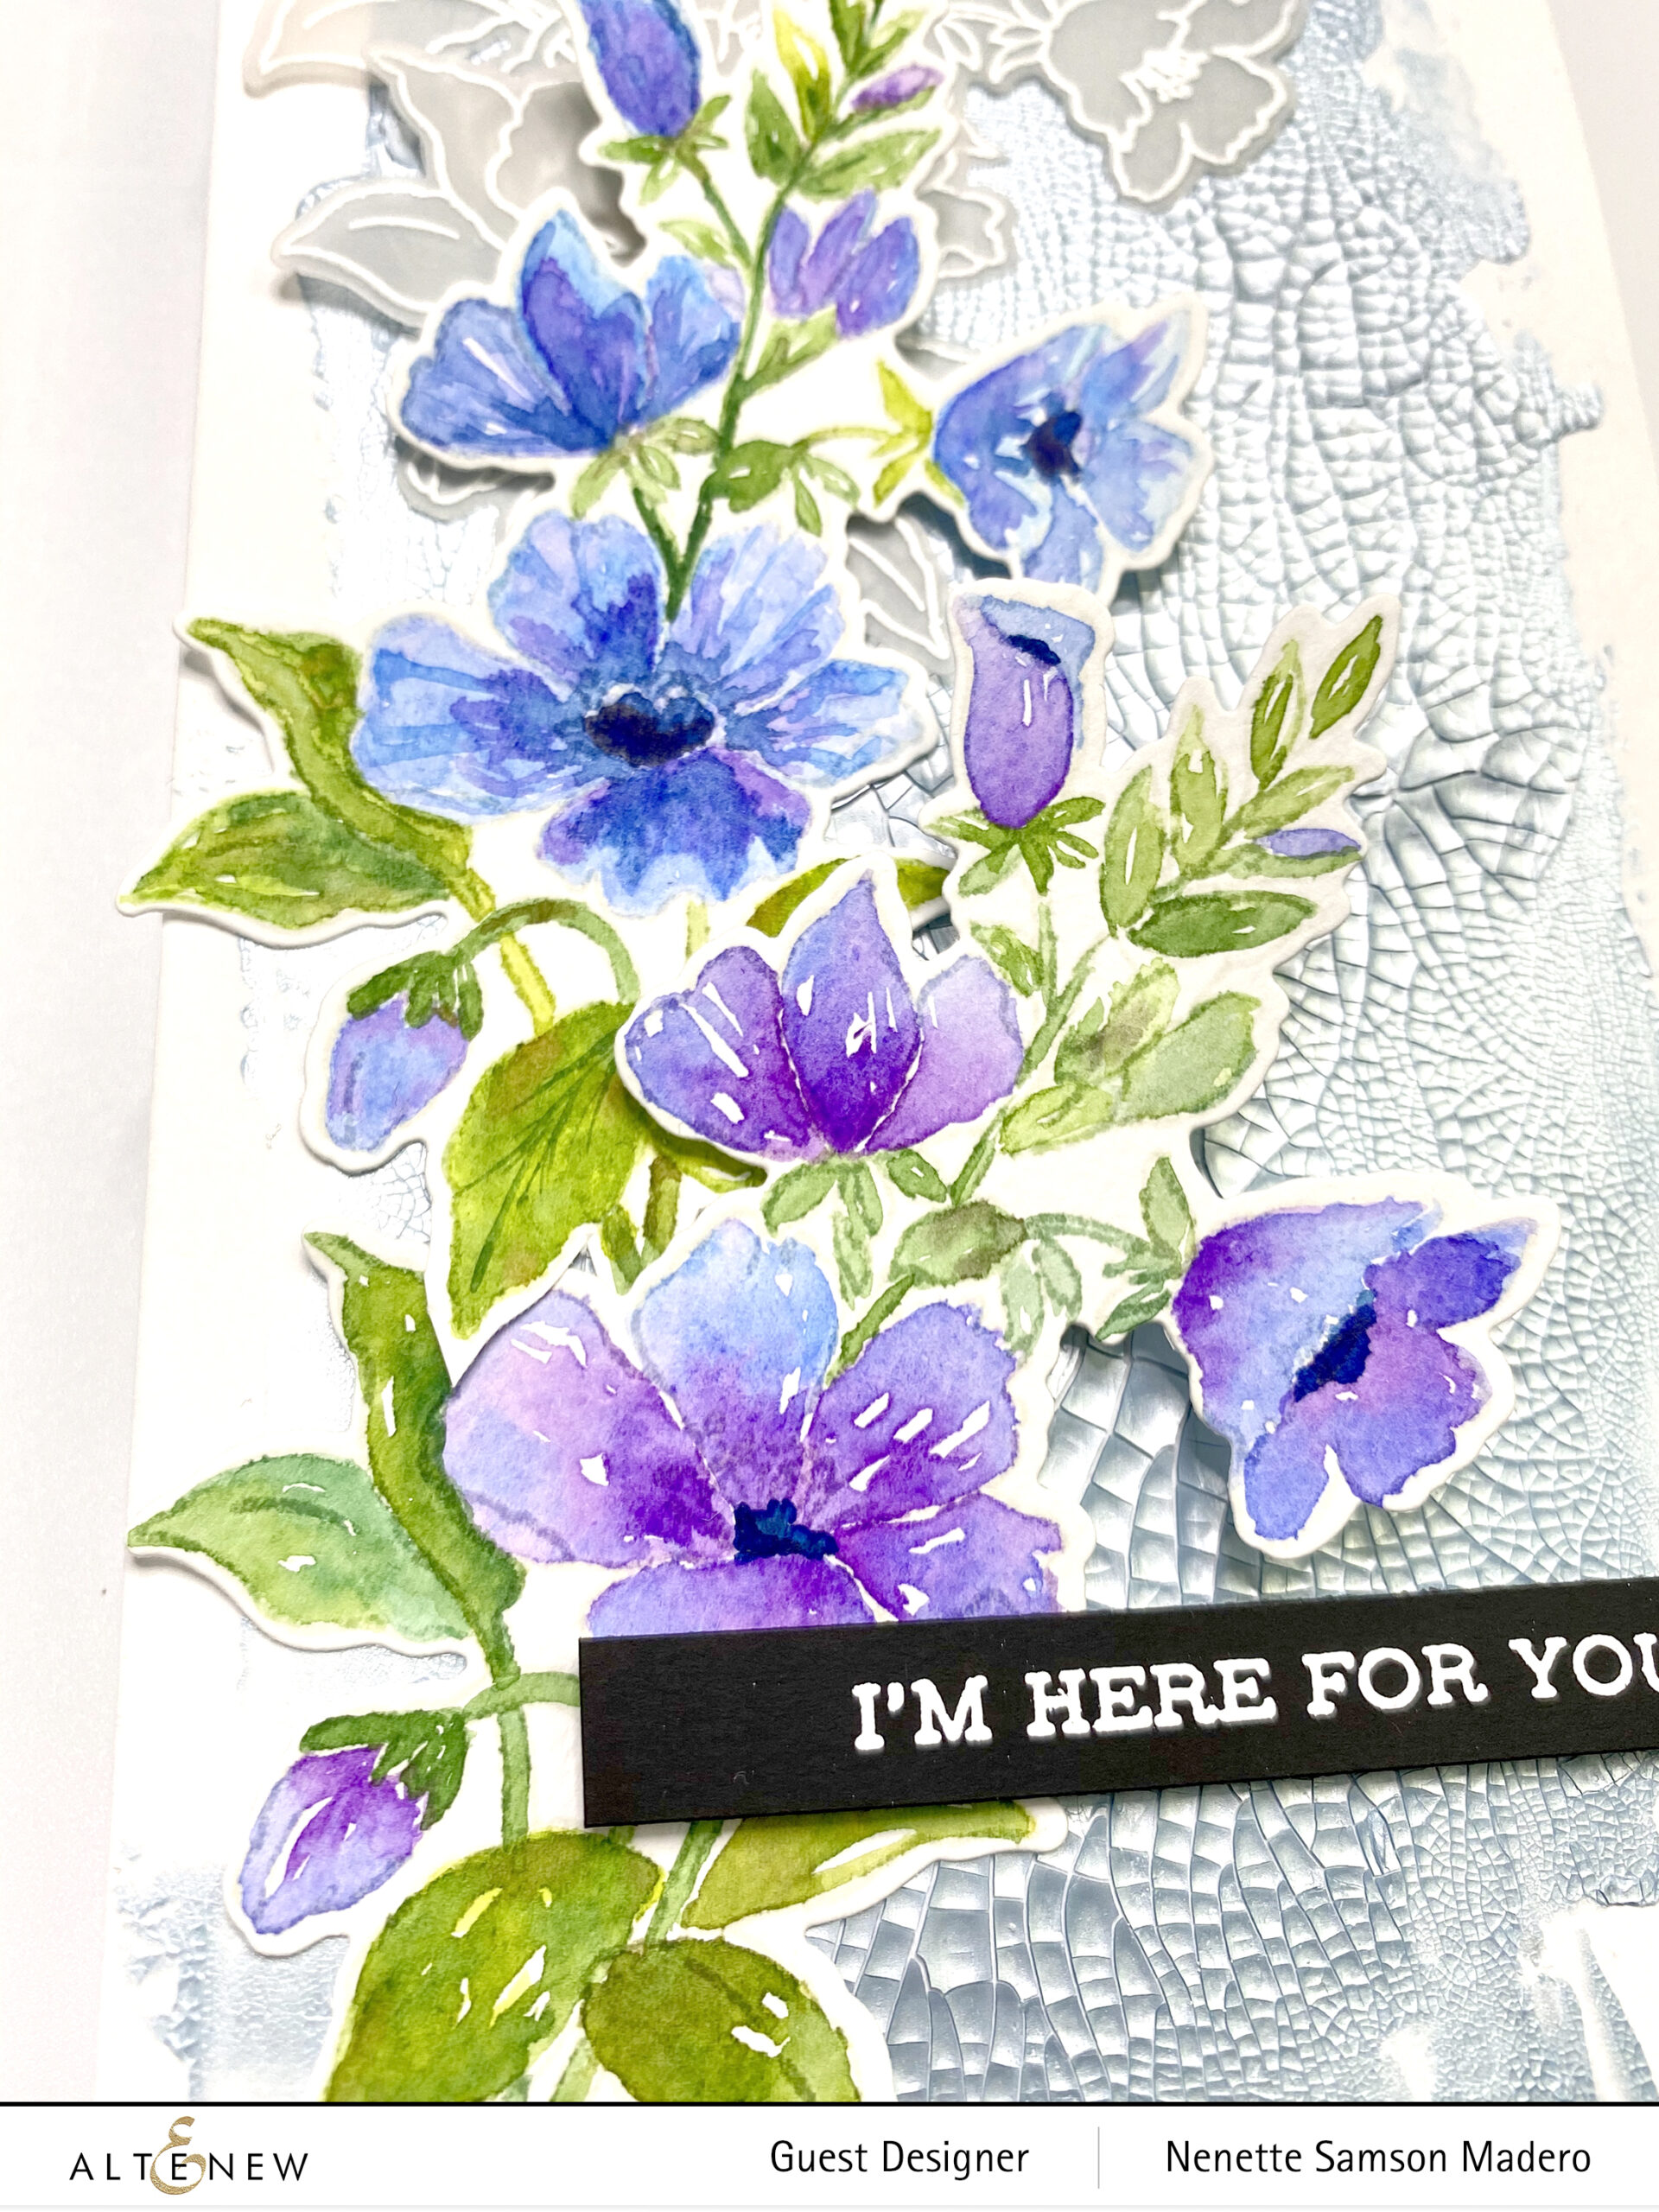
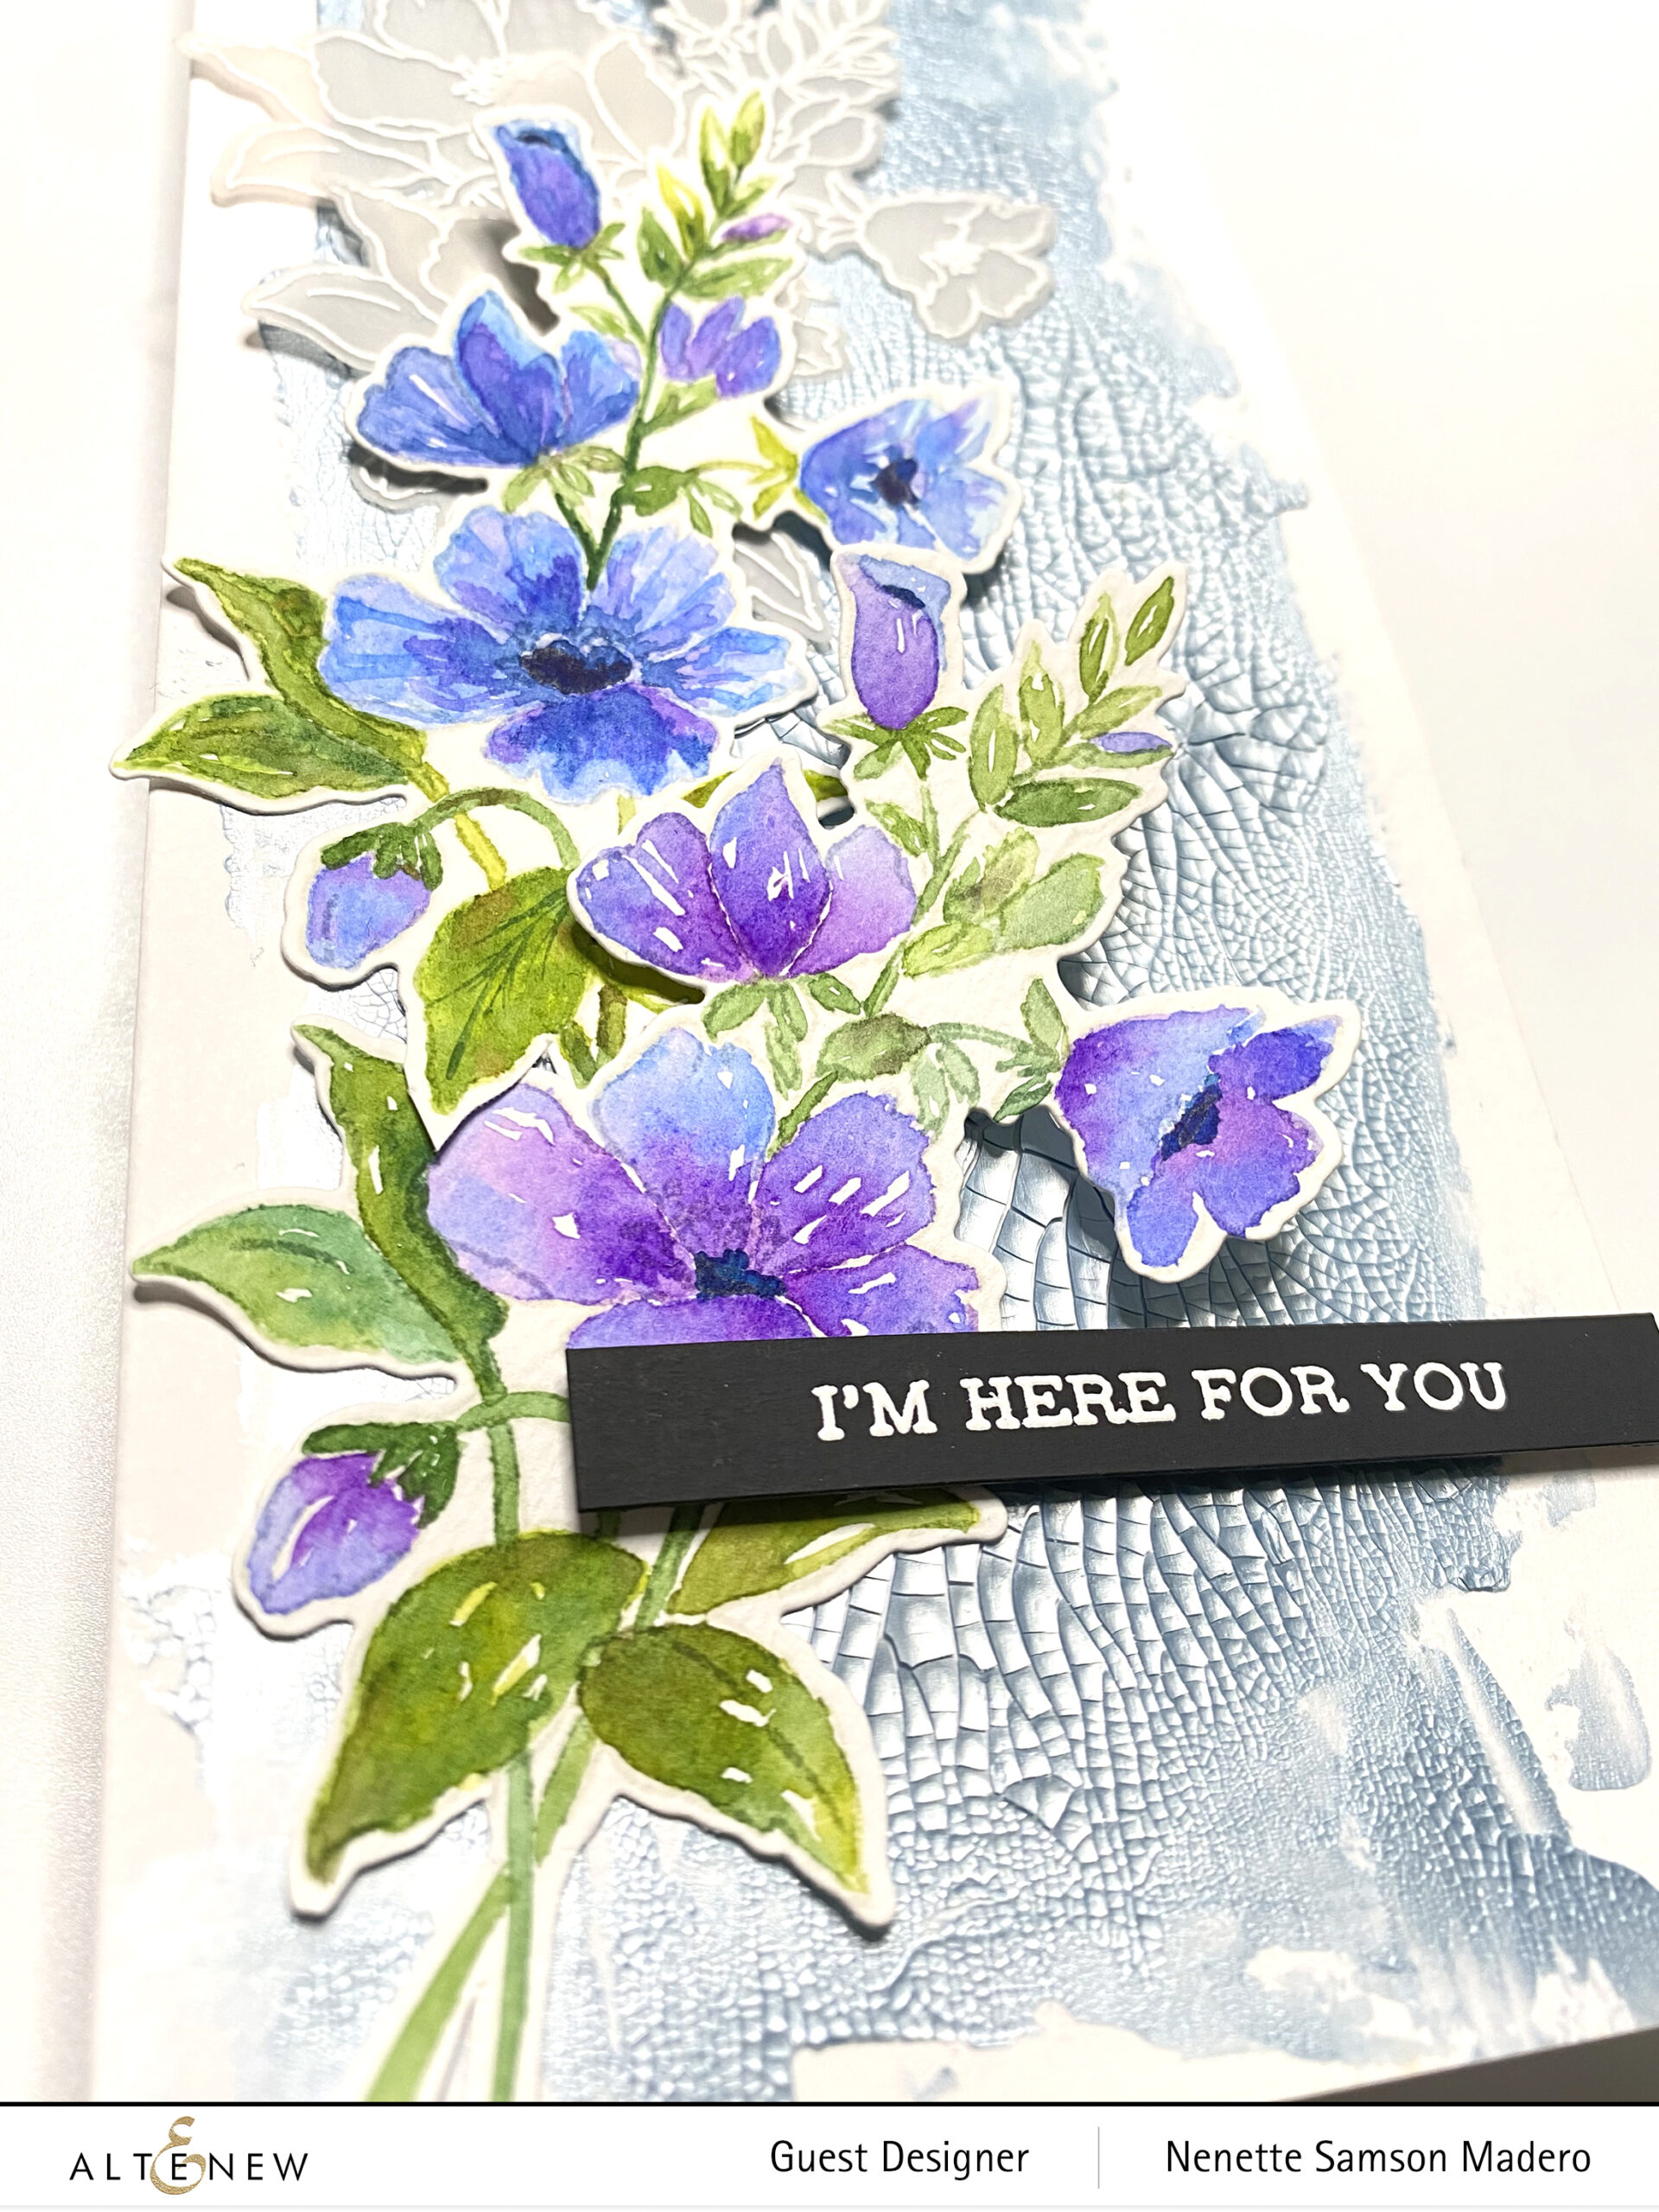
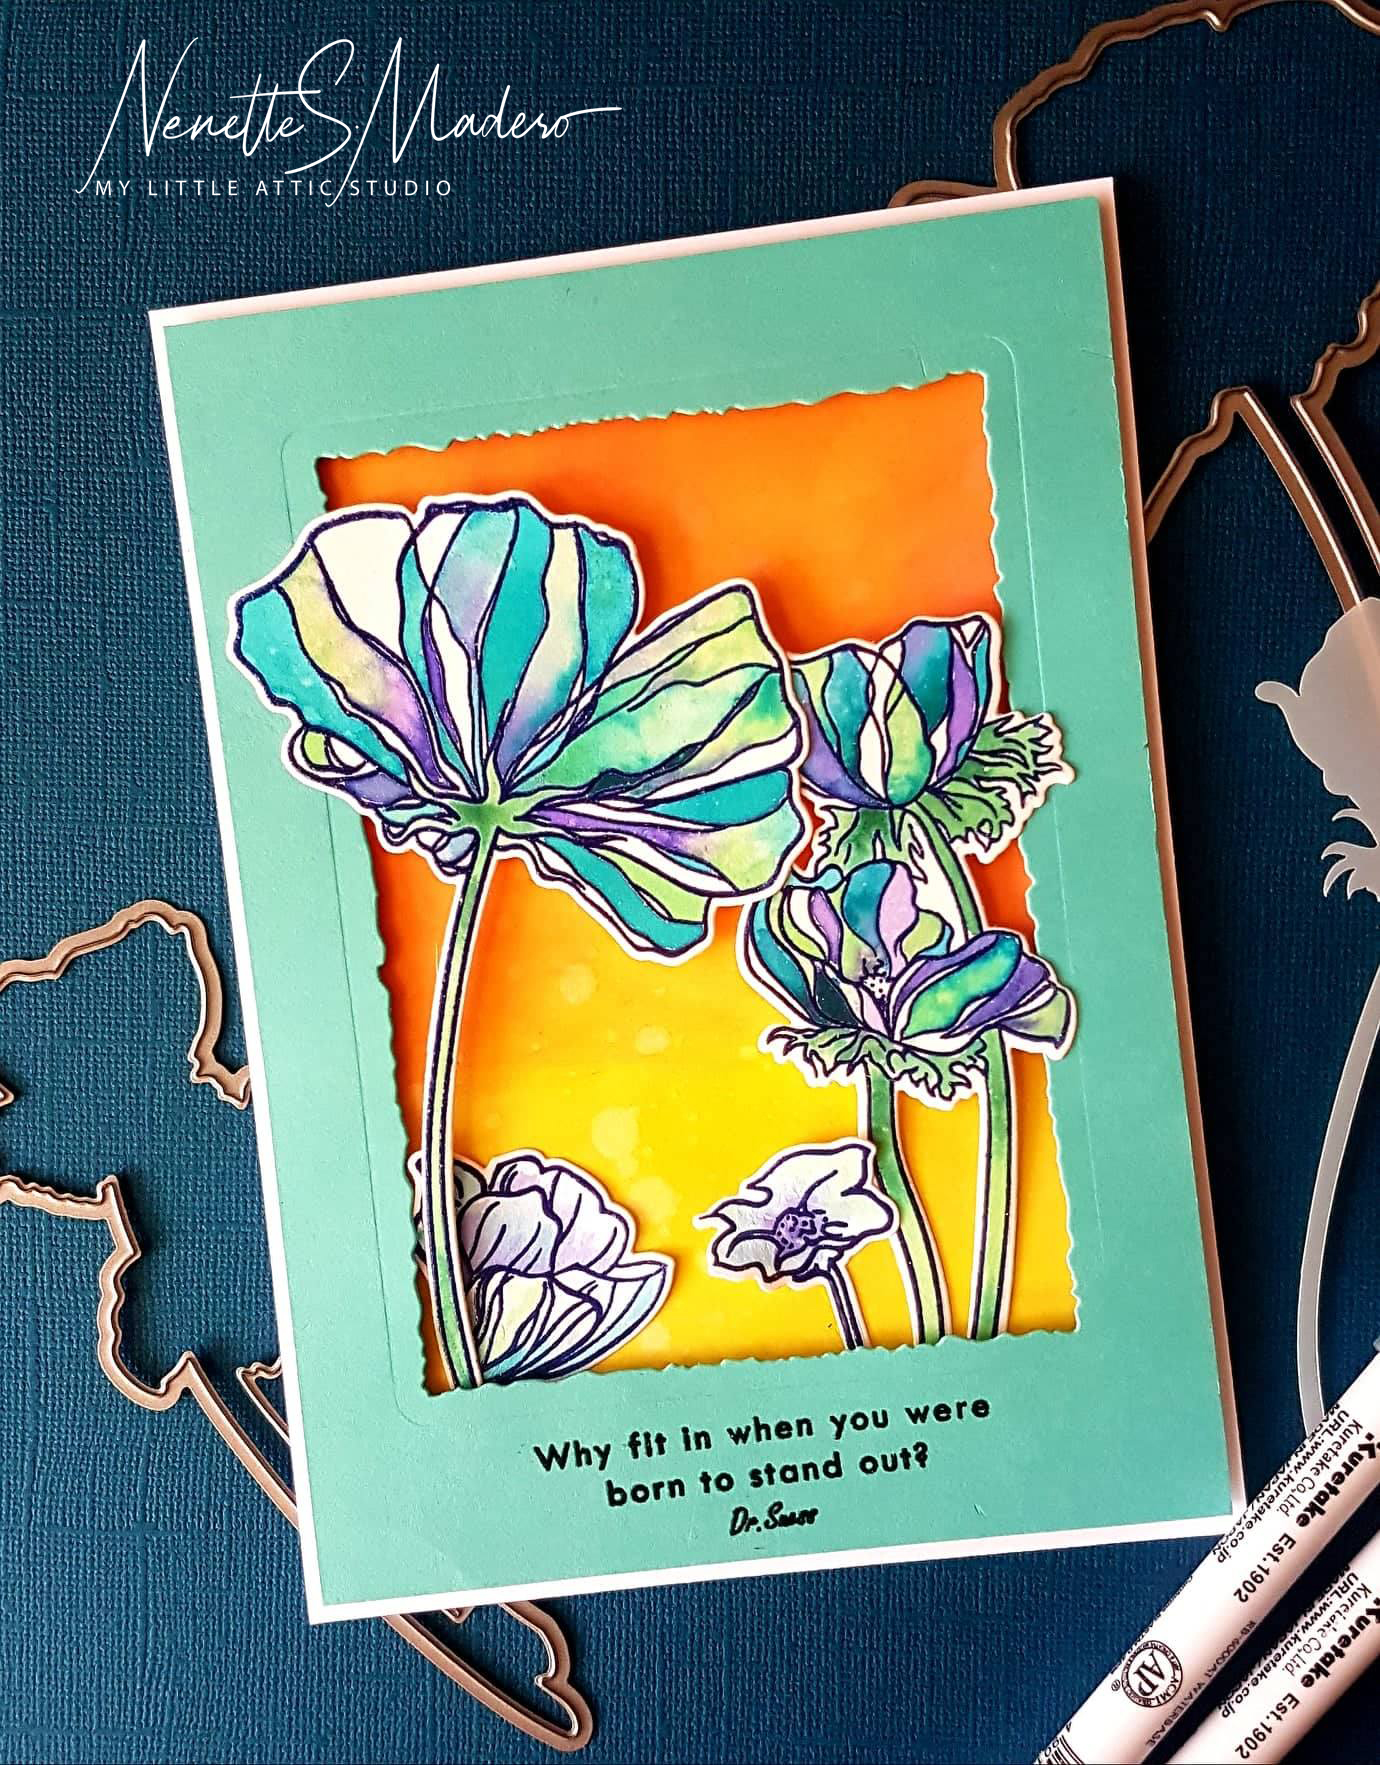
I did some no-line watercoloring with the Positive Vibes florals using the Artist Watercolor pan set. This was the first time for me to try this watercolor pan set and the pigments reacted differently compared to the watercolor brush markers. With the pan set, I noticed that the pigments didn’t flow as much as the brush markers did so there was more control. The colors were also muted and not as bright as the brush markers which I liked for this particular card.
I first applied the Nuvo crackle mousse on thick mixed media paper and allowed it to dry. I stamped the floral images from the Positive Vibes stamp set twice and watercolored them using the artist pan set. I started with a light wash of Lapis Lazuli mixed with Deep Blue Sea. While it was still wet, I mixed shades of purple and Starry Night.
For the leaves, I used a light wash of Green Hills mixed with Fall Harvest then I layered Green Meadows mixed with Tropical Forest, Rain Forest, Sea Shore, Delectable Delights and Coffee Break. I made sure to leave some parts white to act as highlights. I also stamped 2 images on vellum them embossed them with pure white embossing powder.
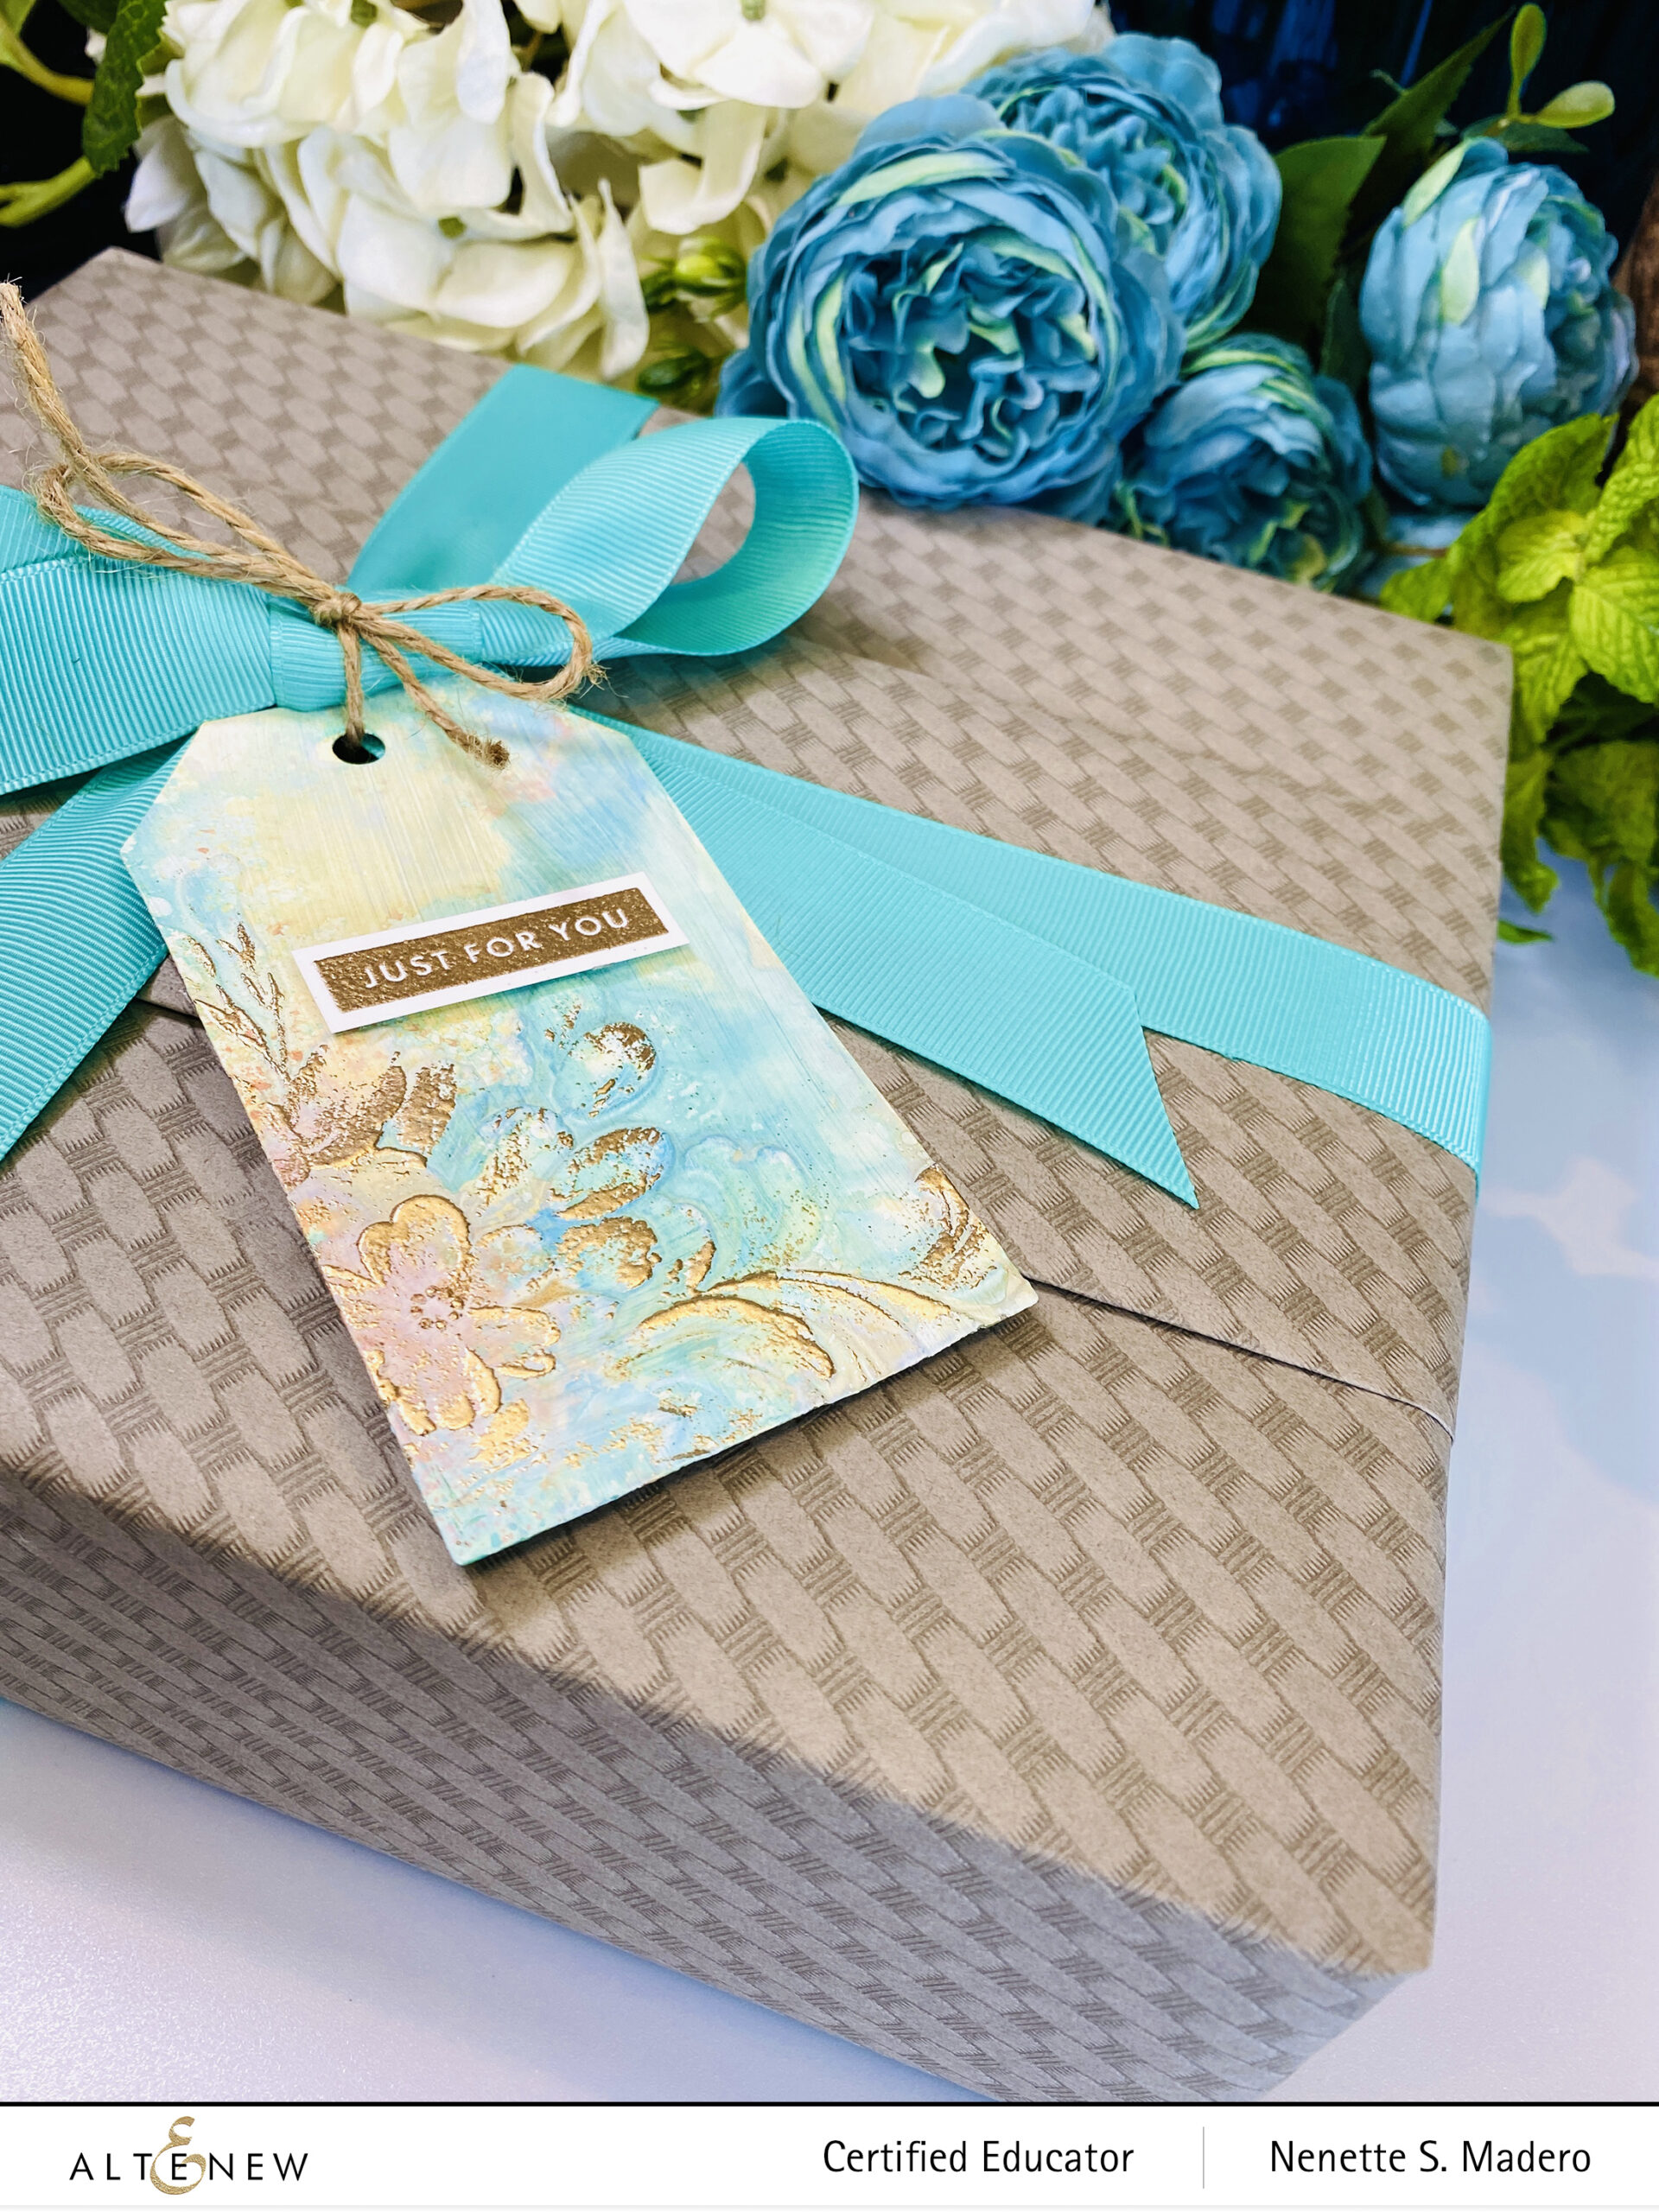
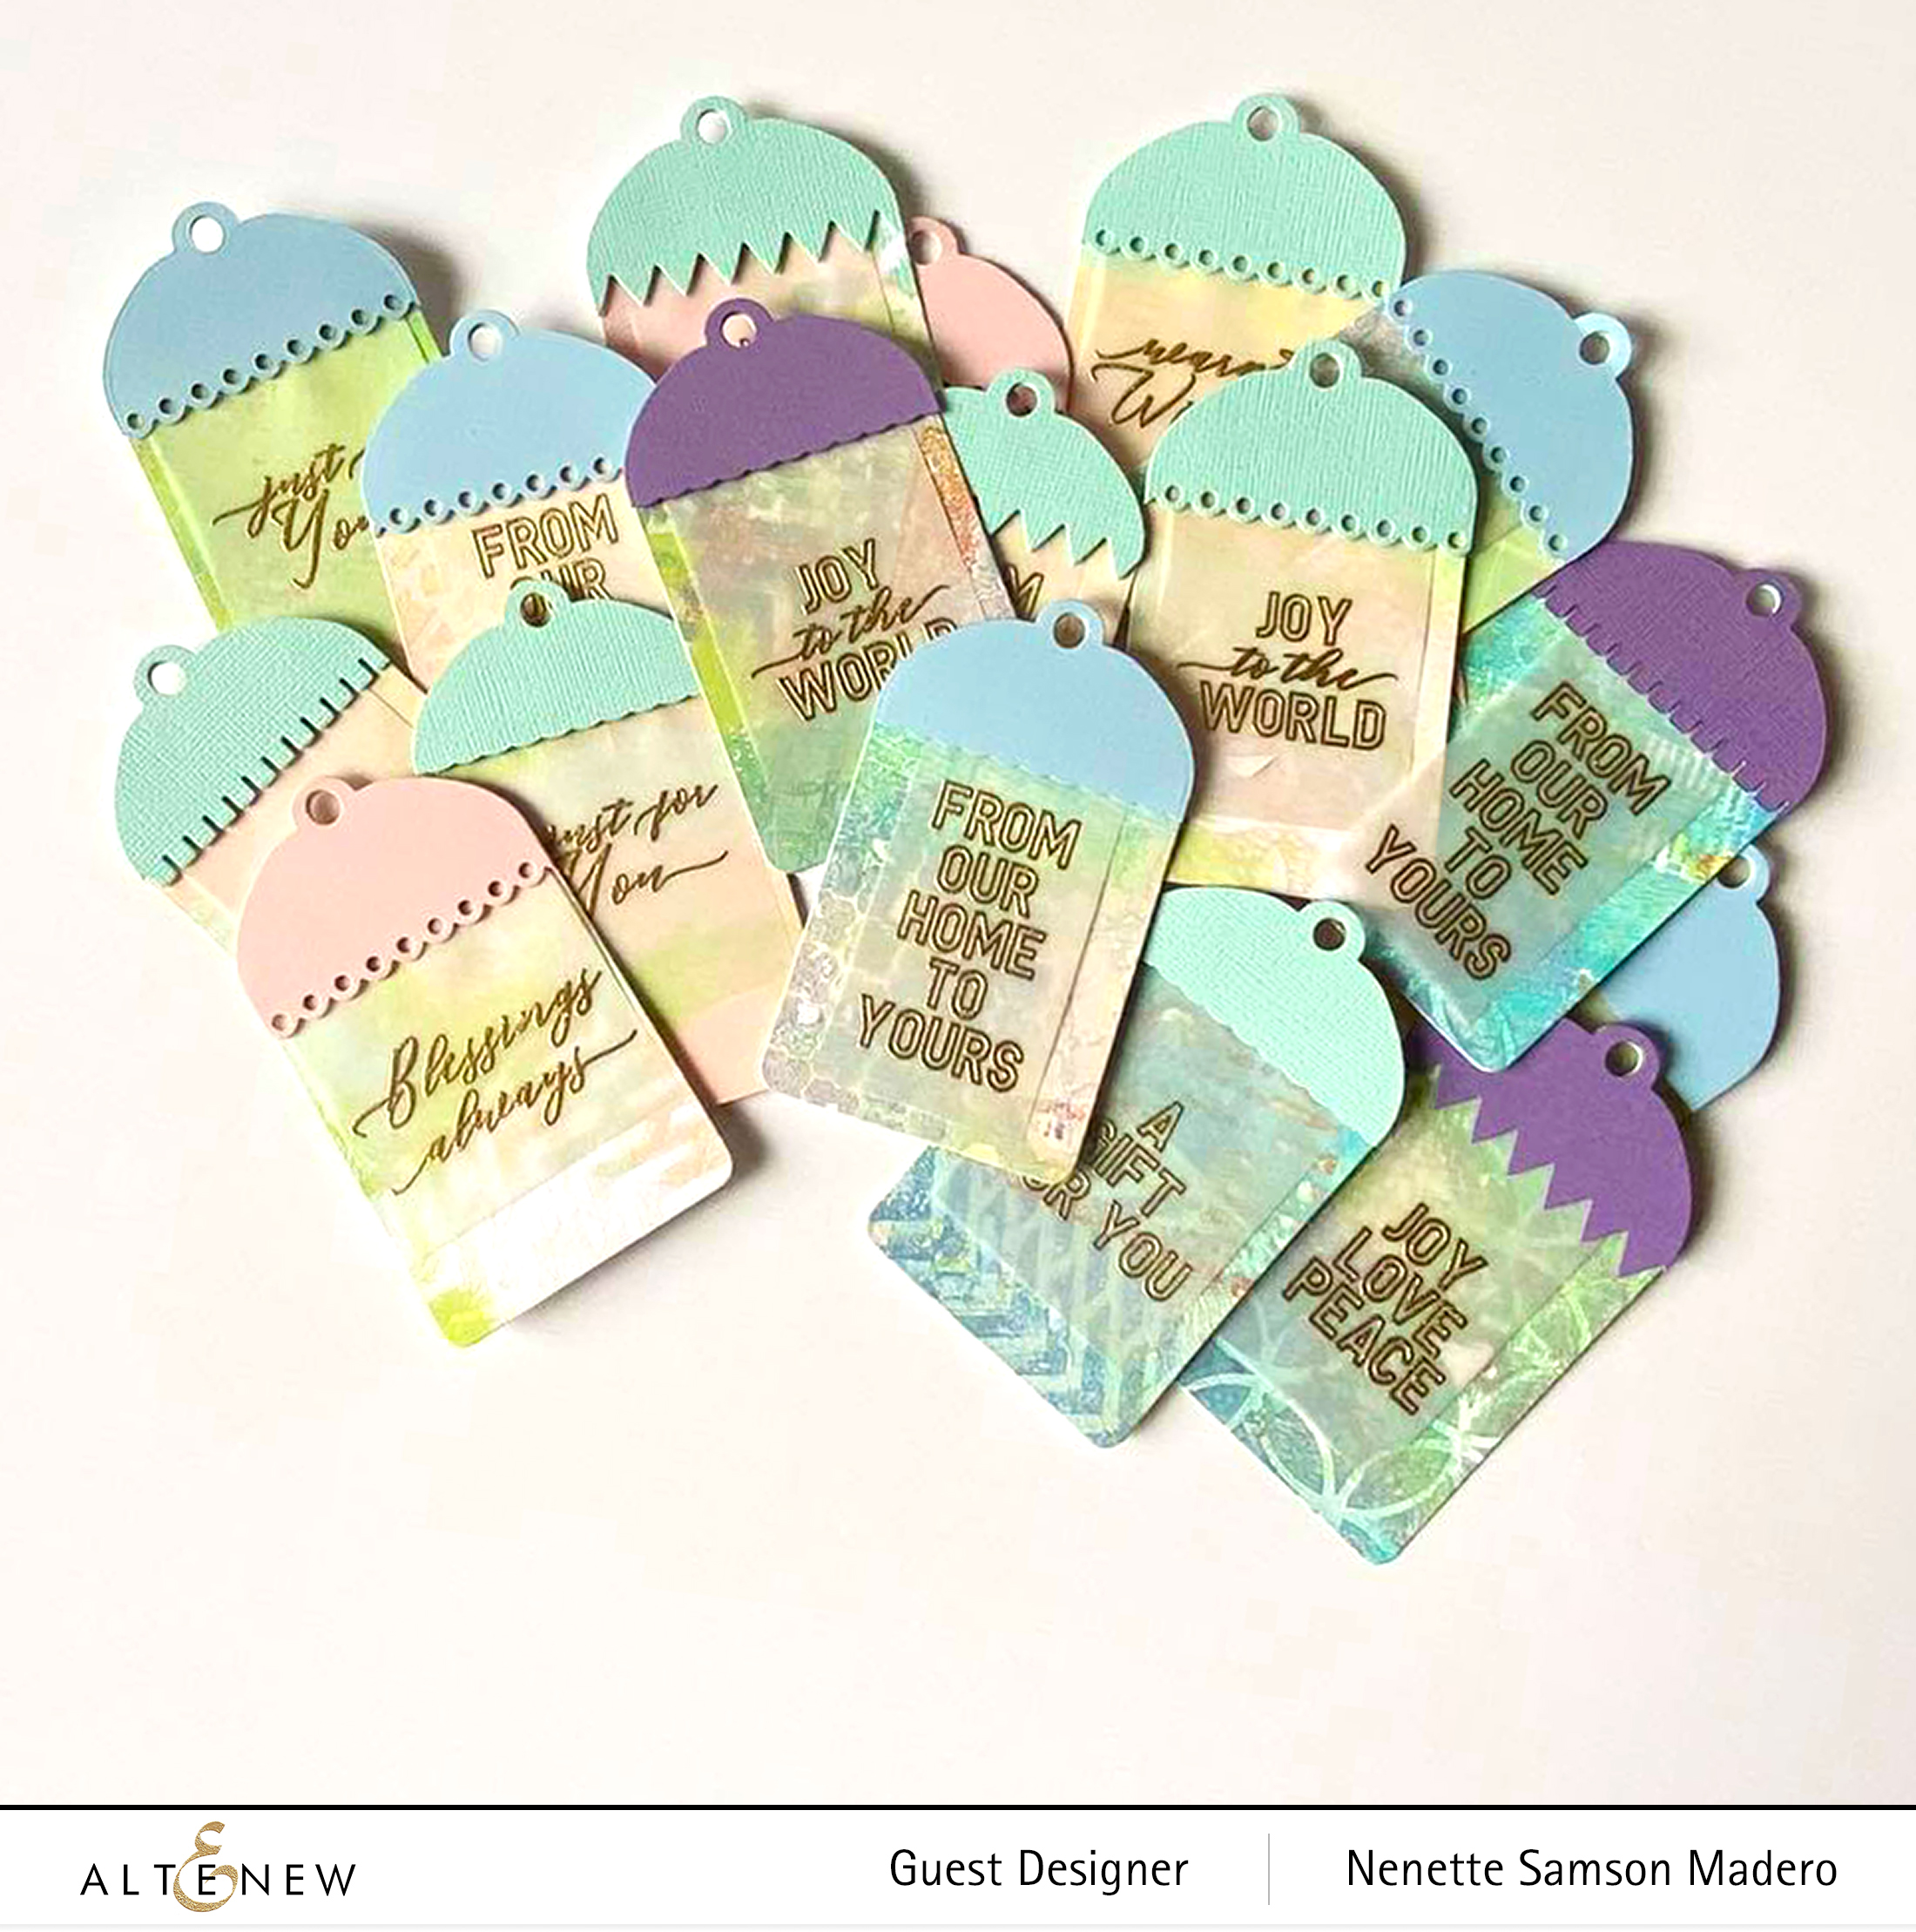
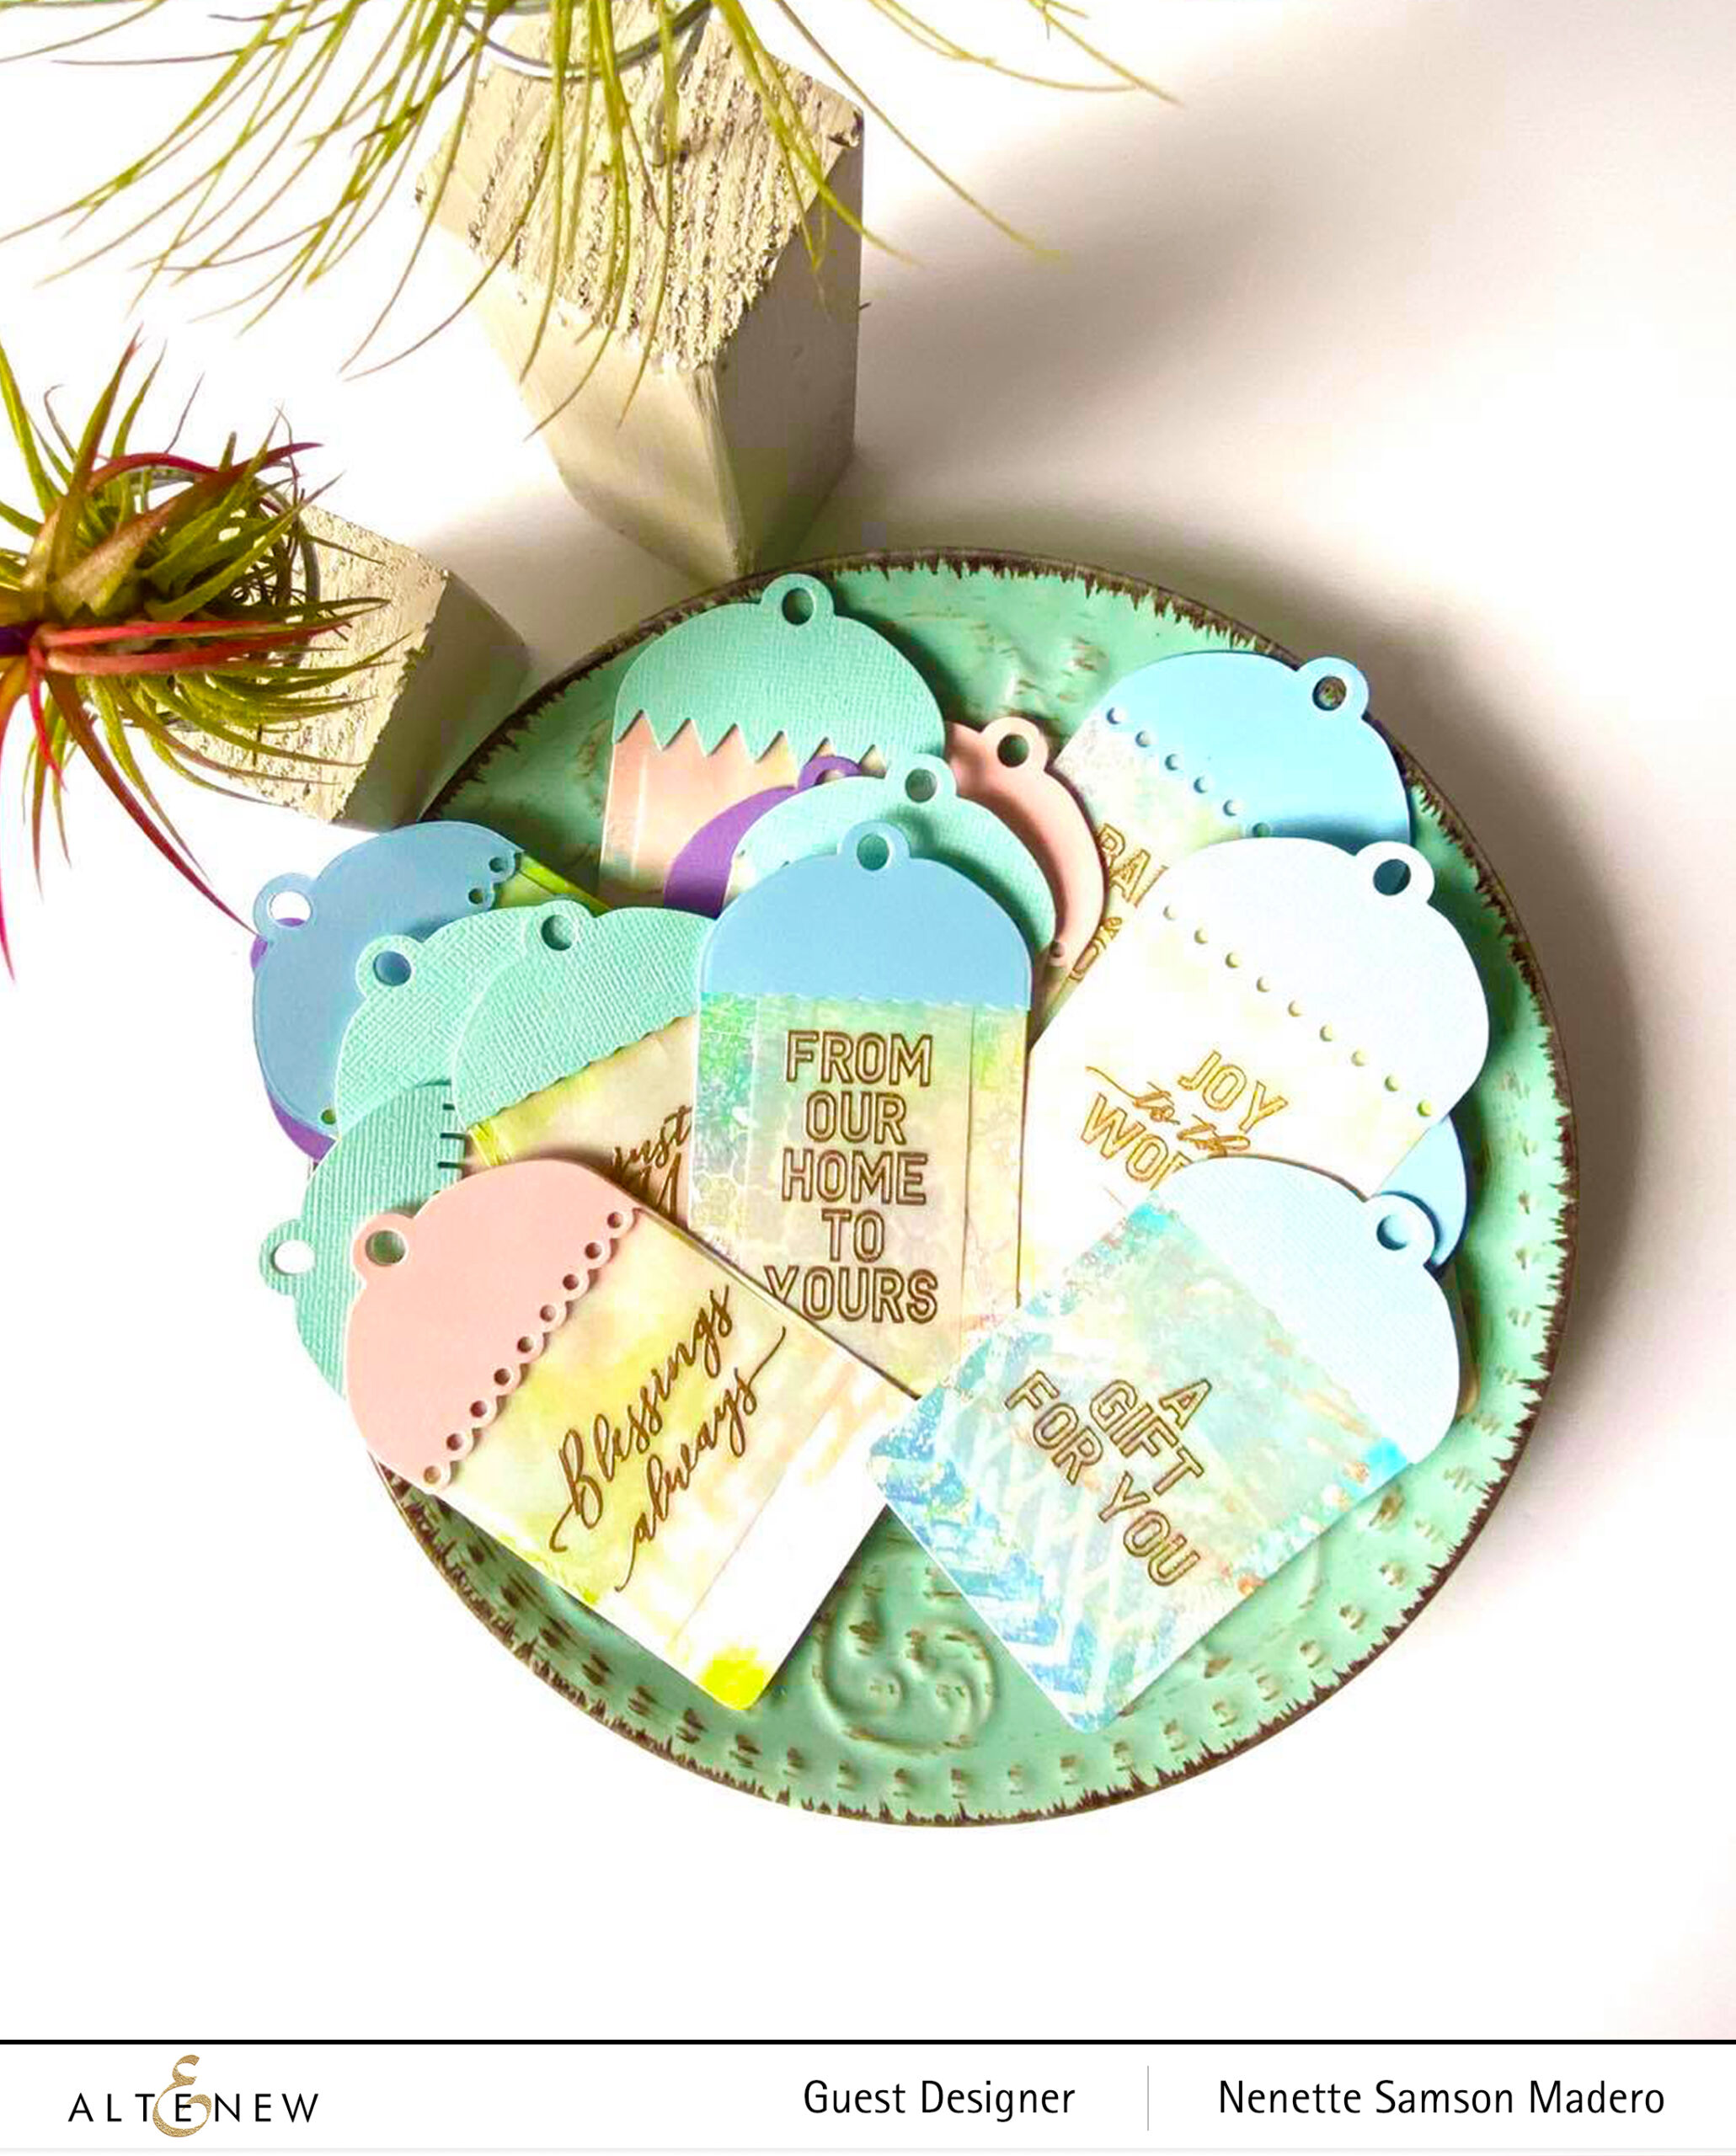
ASSORTED CHRISTMAS TAGS
I love the Holiday Tag Sentiments stamp and die set! It is loaded with a variety of sentiments with a mix of beautiful script and sans serif fonts. It’s also not limited to Christmas sentiments only — such a versatile set that can be used alone or in conjunction with other stamp sets.
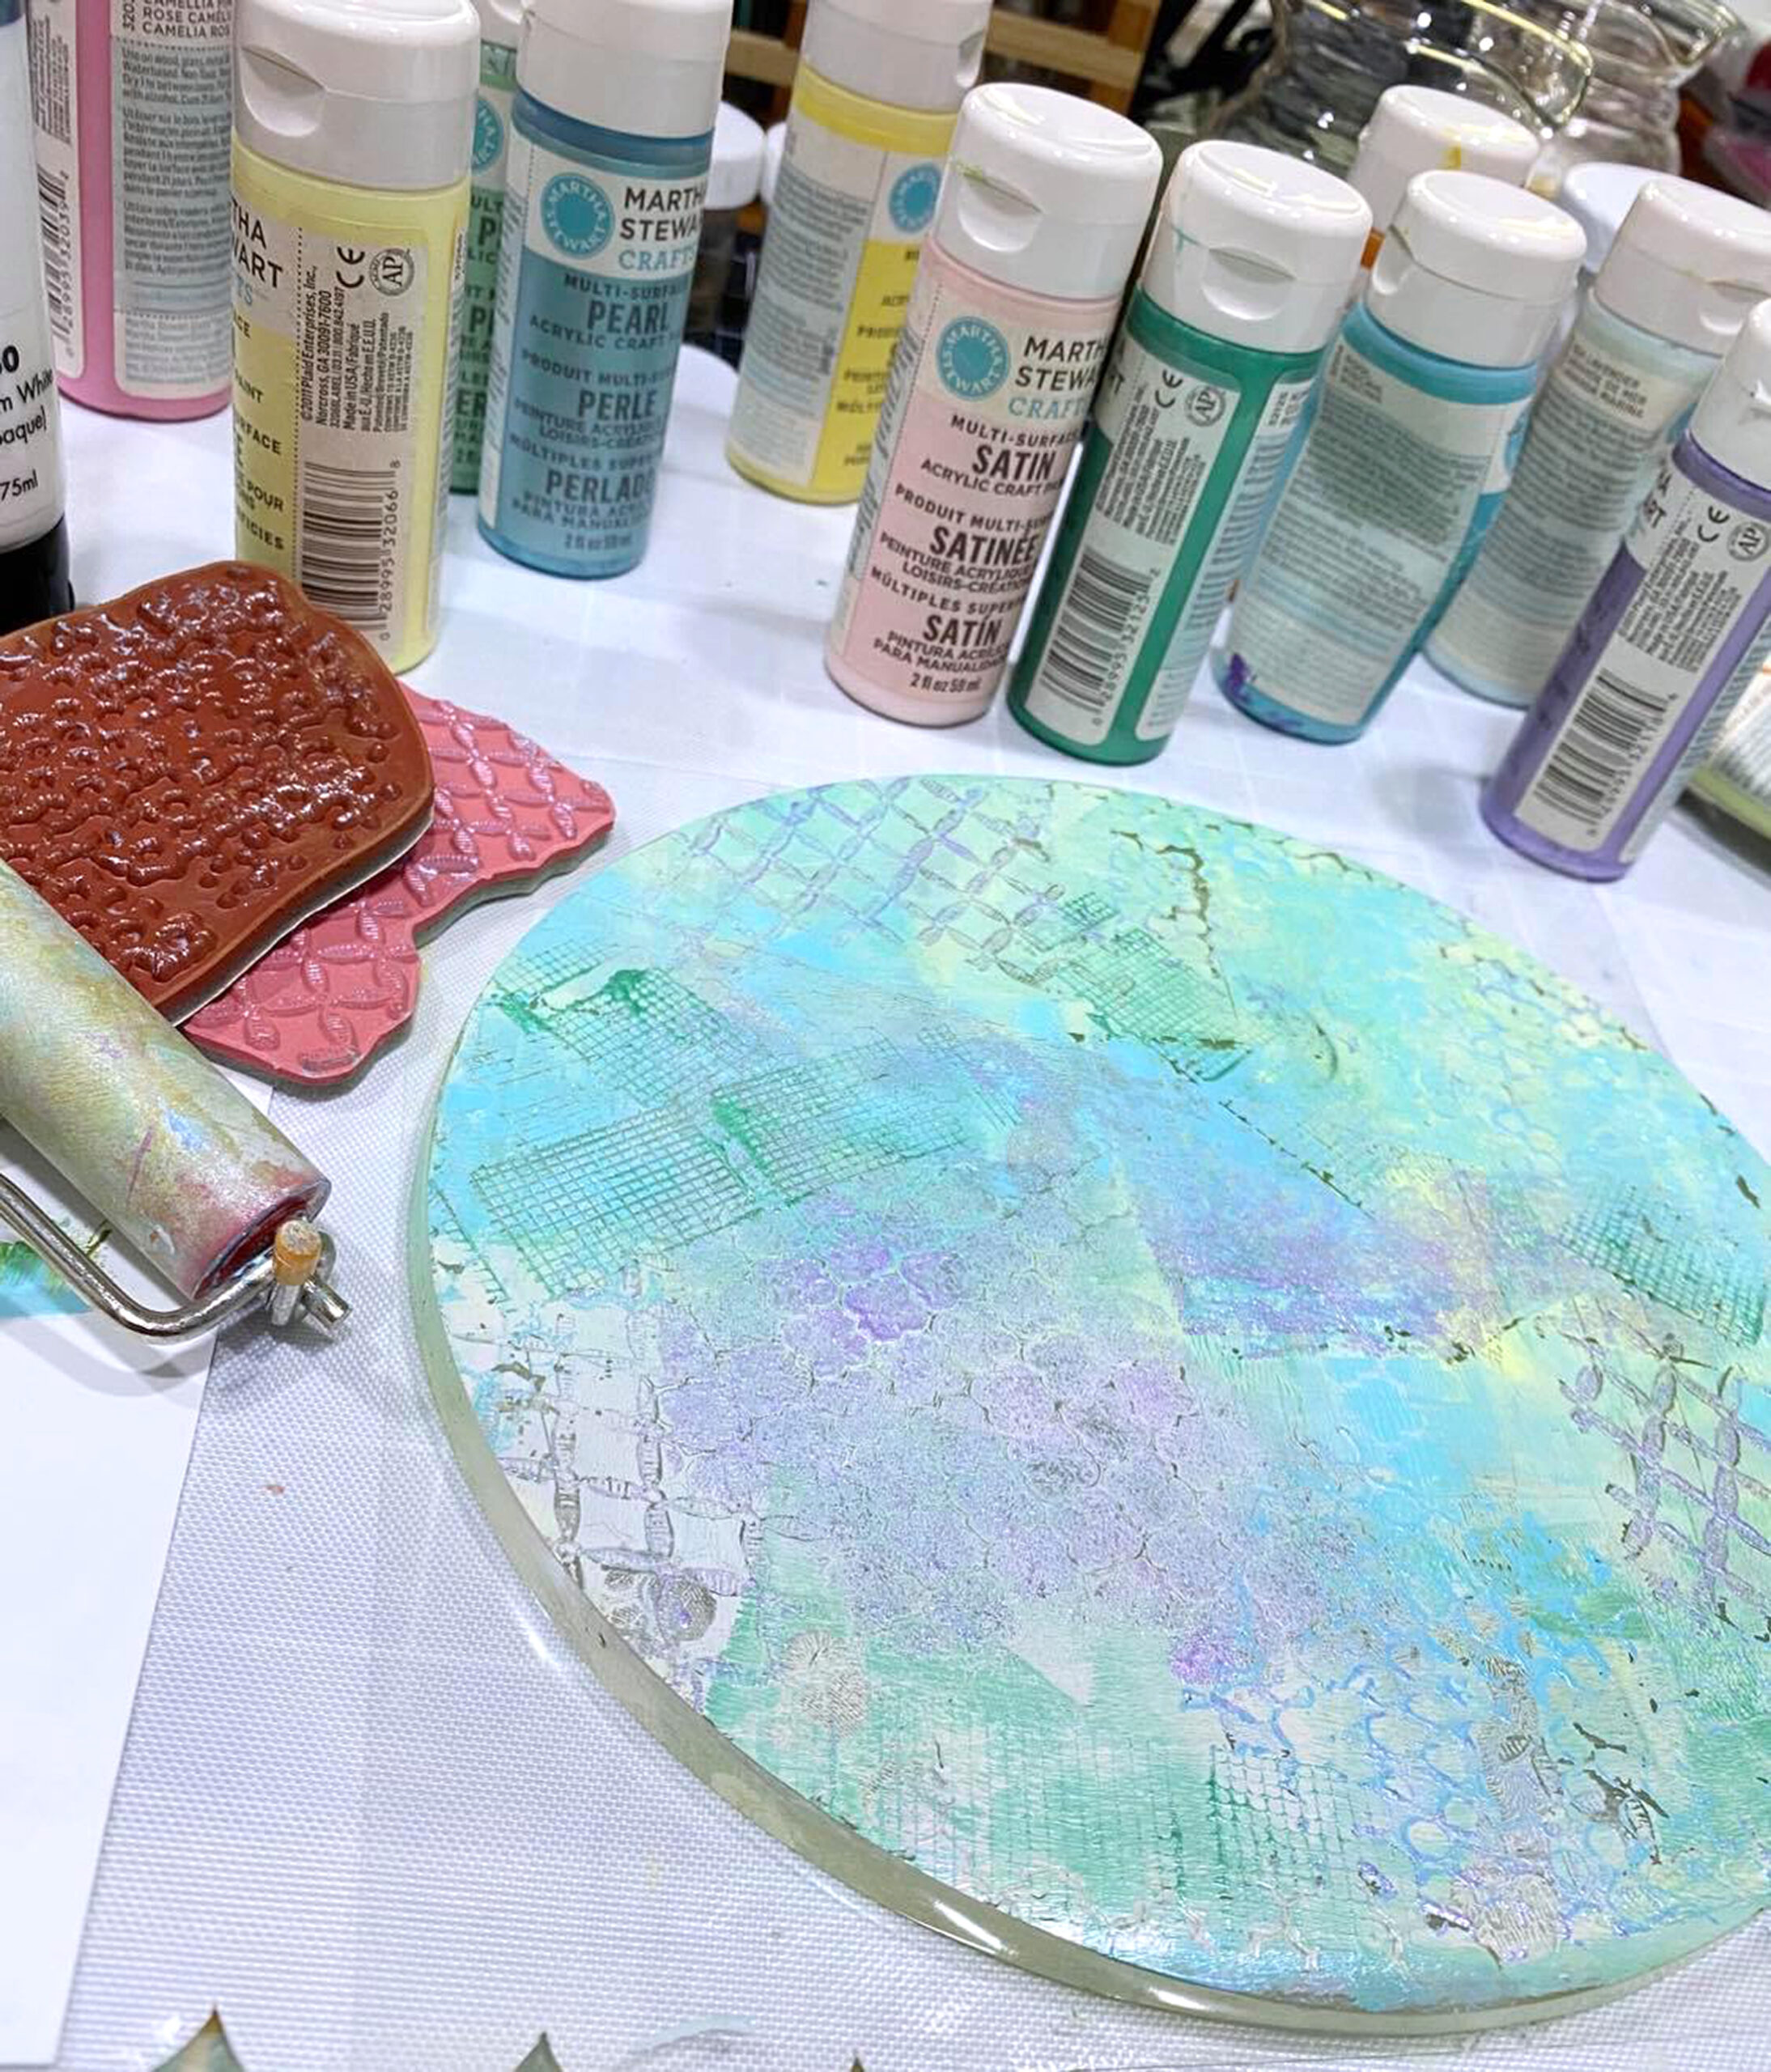
For the background, I brought out my Gelli arts gel printing plate and some pastel colored acrylic paints.
Paints were added to the surface using a brayer than layers of stencils and stamps were used to add more layers for more texture. The whole gel plate was allowed to dry before adding a thin white coat of acrylic paint. A clean white cardstock was then placed on top to pick up all the layers of paint to create a monoprint.
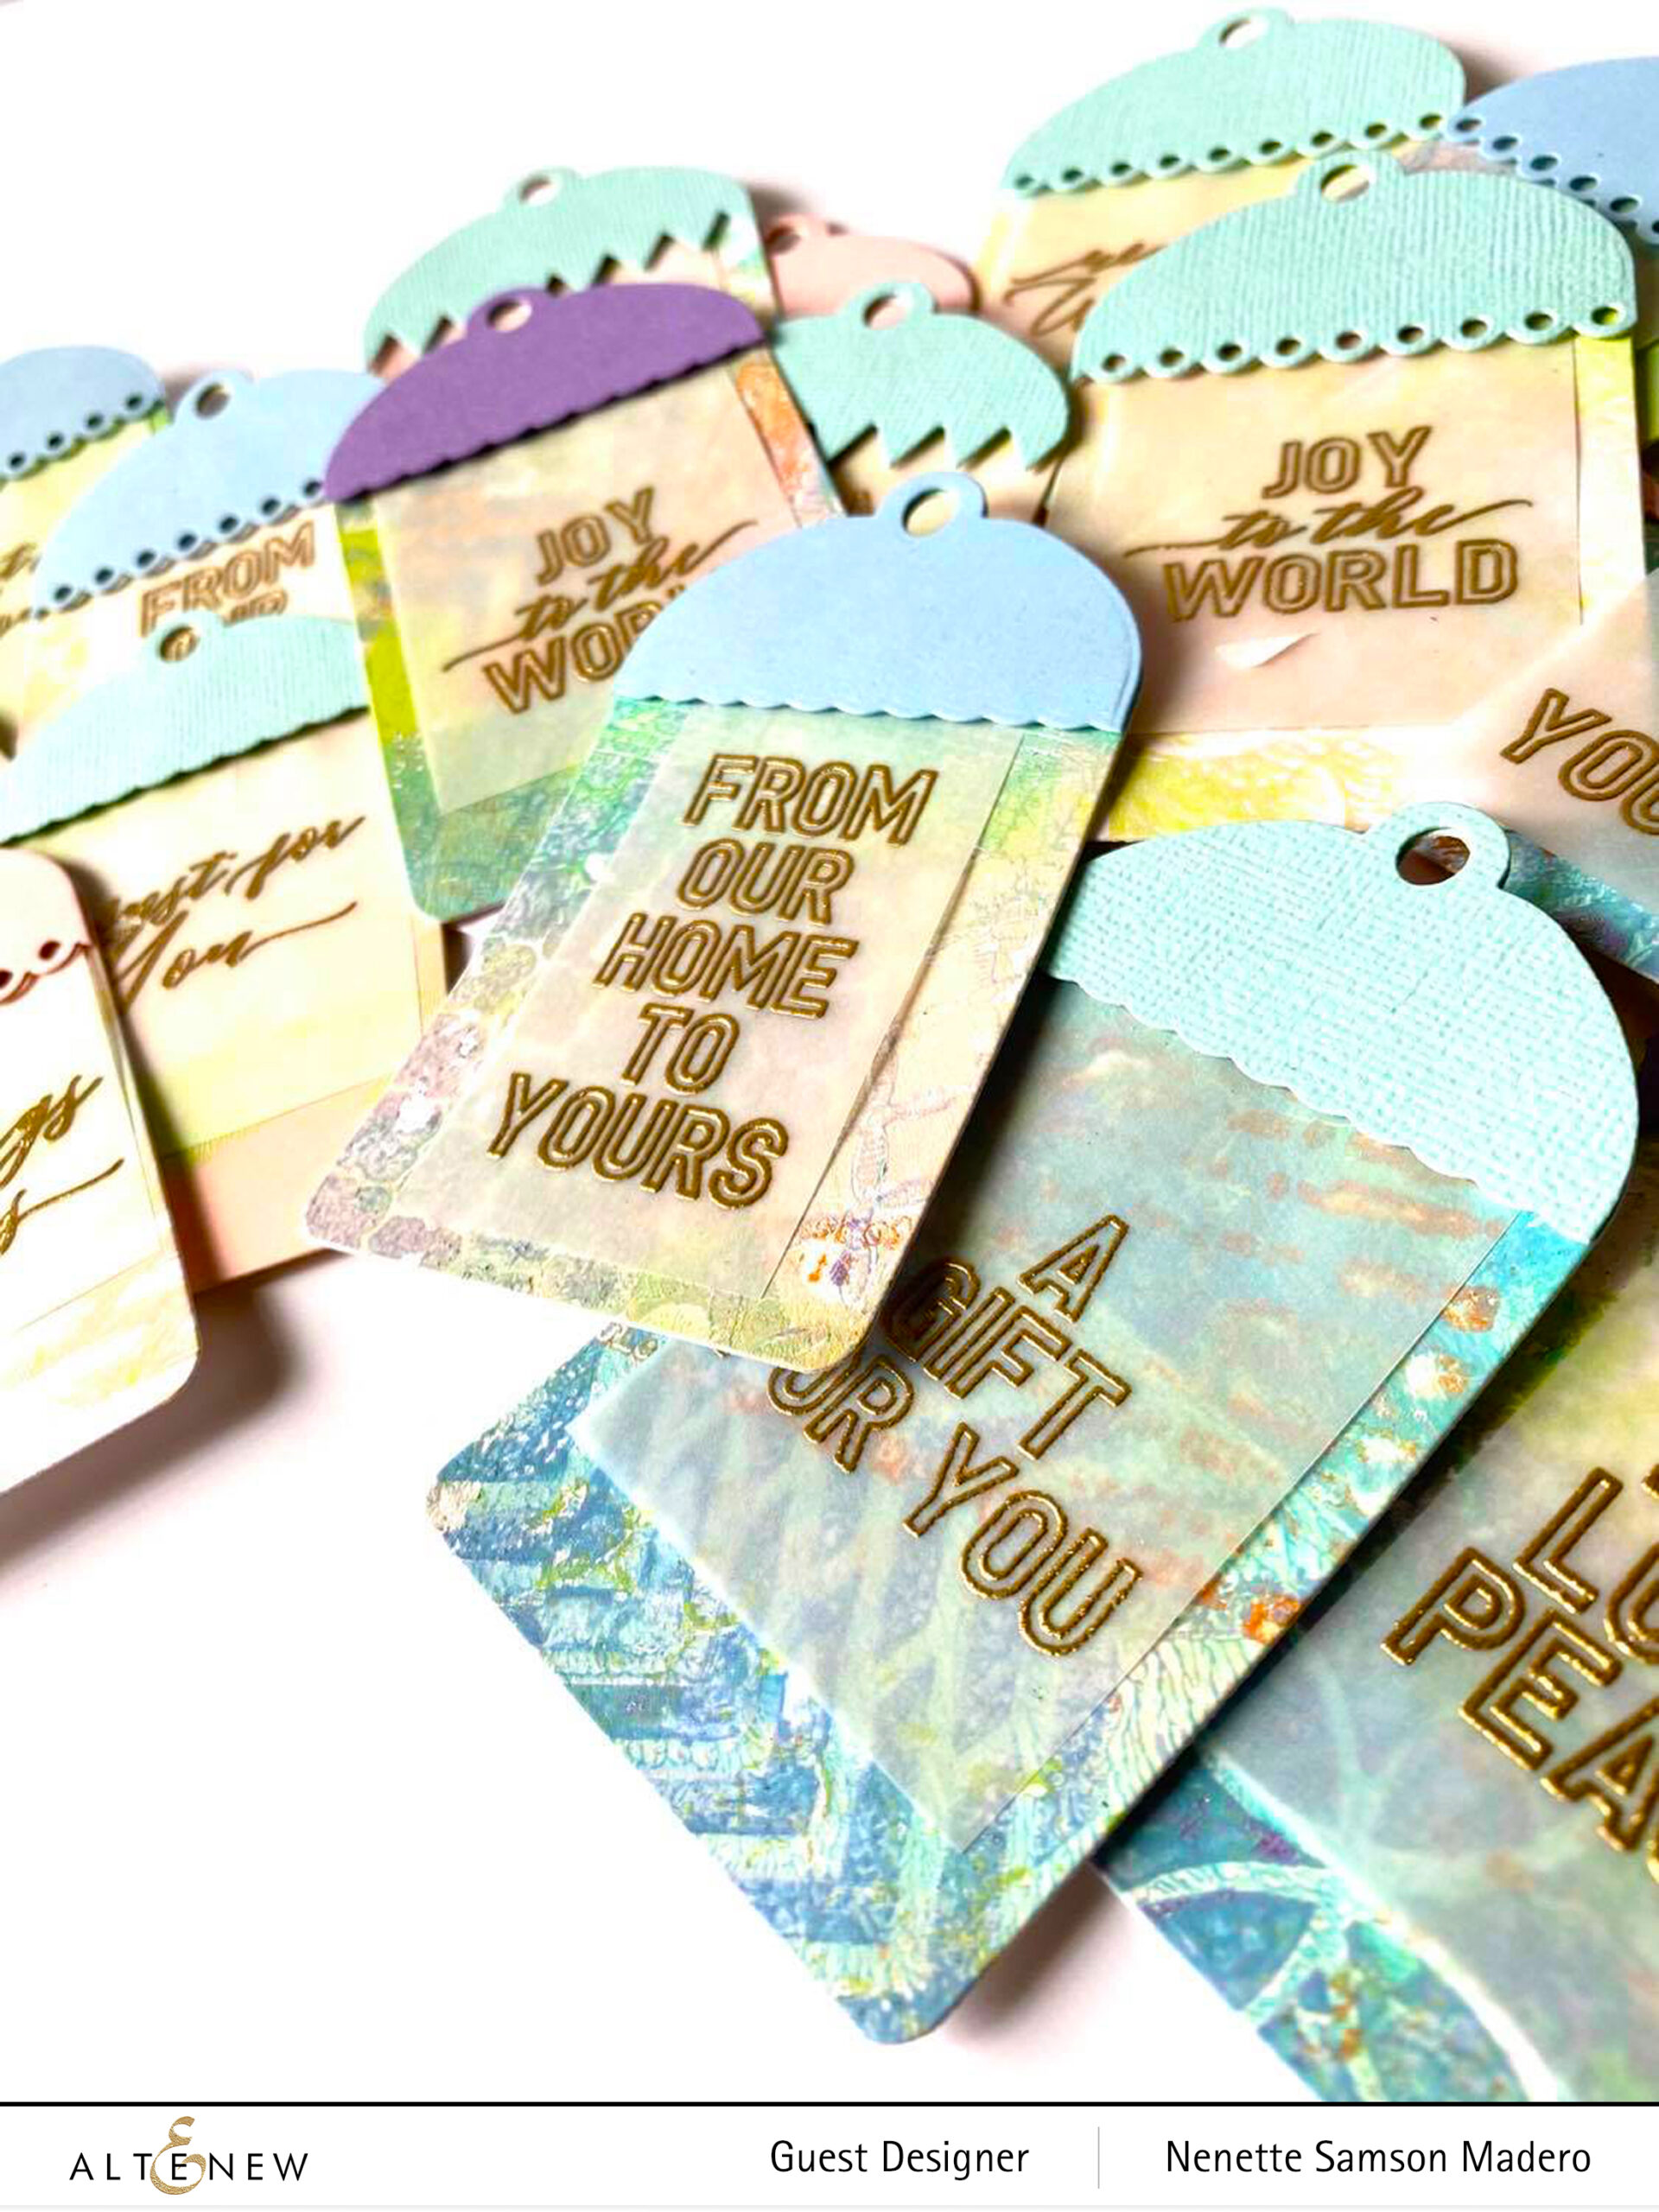
The Holiday Tag Die was used to cut out the tags. Sentiments were stamped on vellum and embossed using Rose Gold Embossing powder. I love the translucency of vellum cause it allows the background to still be seen.
Here’s a time-saver tip–I partially die cut the tag on cardstock a few times so that I can die cut the different borders all at the same time.
Different colors of cardstocks were chosen to match the background. I really enjoyed making these tags. It’s a great feeling knowing that I already have tags made for this coming Christmas season. 😄
GIVEAWAY PRIZES
To celebrate this release, Altenew is giving away a $50 gift certificate to 3 lucky winners! Please leave a comment on the Altenew Card Blog by 9/15/2020 for a chance to win.
Altenew will also draw a winner to receive a $15 gift certificate from the comments left on each designer’s blog on the blog hop list below. All winners will be announced on the Altenew Winners Page on 09/18/2020.
I hope you liked the cards/tags I made for this release. Next stop is my uber-talented friend, Jaycee Gaspar. Make sure you check out his blog… for sure you will be blown away by his talent.
I always love hearing from you so please drop a line in the comment section. By doing so, you also get a chance to win some fab prizes from Altenew! For real-time updates, do follow me on IG @mylittleatticstudio. Thanks for dropping by. Please take care and be safe!
Hello everyone!!! Altenew has a wonderful July release and I made a couple of cards to showcase this new release. Take a look at these gorgeous products!!!
I read all your comments on my blog and truly appreciate your kind words. I’ve noticed that there are quite a number of people who are new to cardmaking so this blog post will be a mixture of simple, fun and easy to make cards/tags and some that need a little more time to create. Do let me know which one is your favorite in the comment section, ok? I really love hearing from all of you. <3
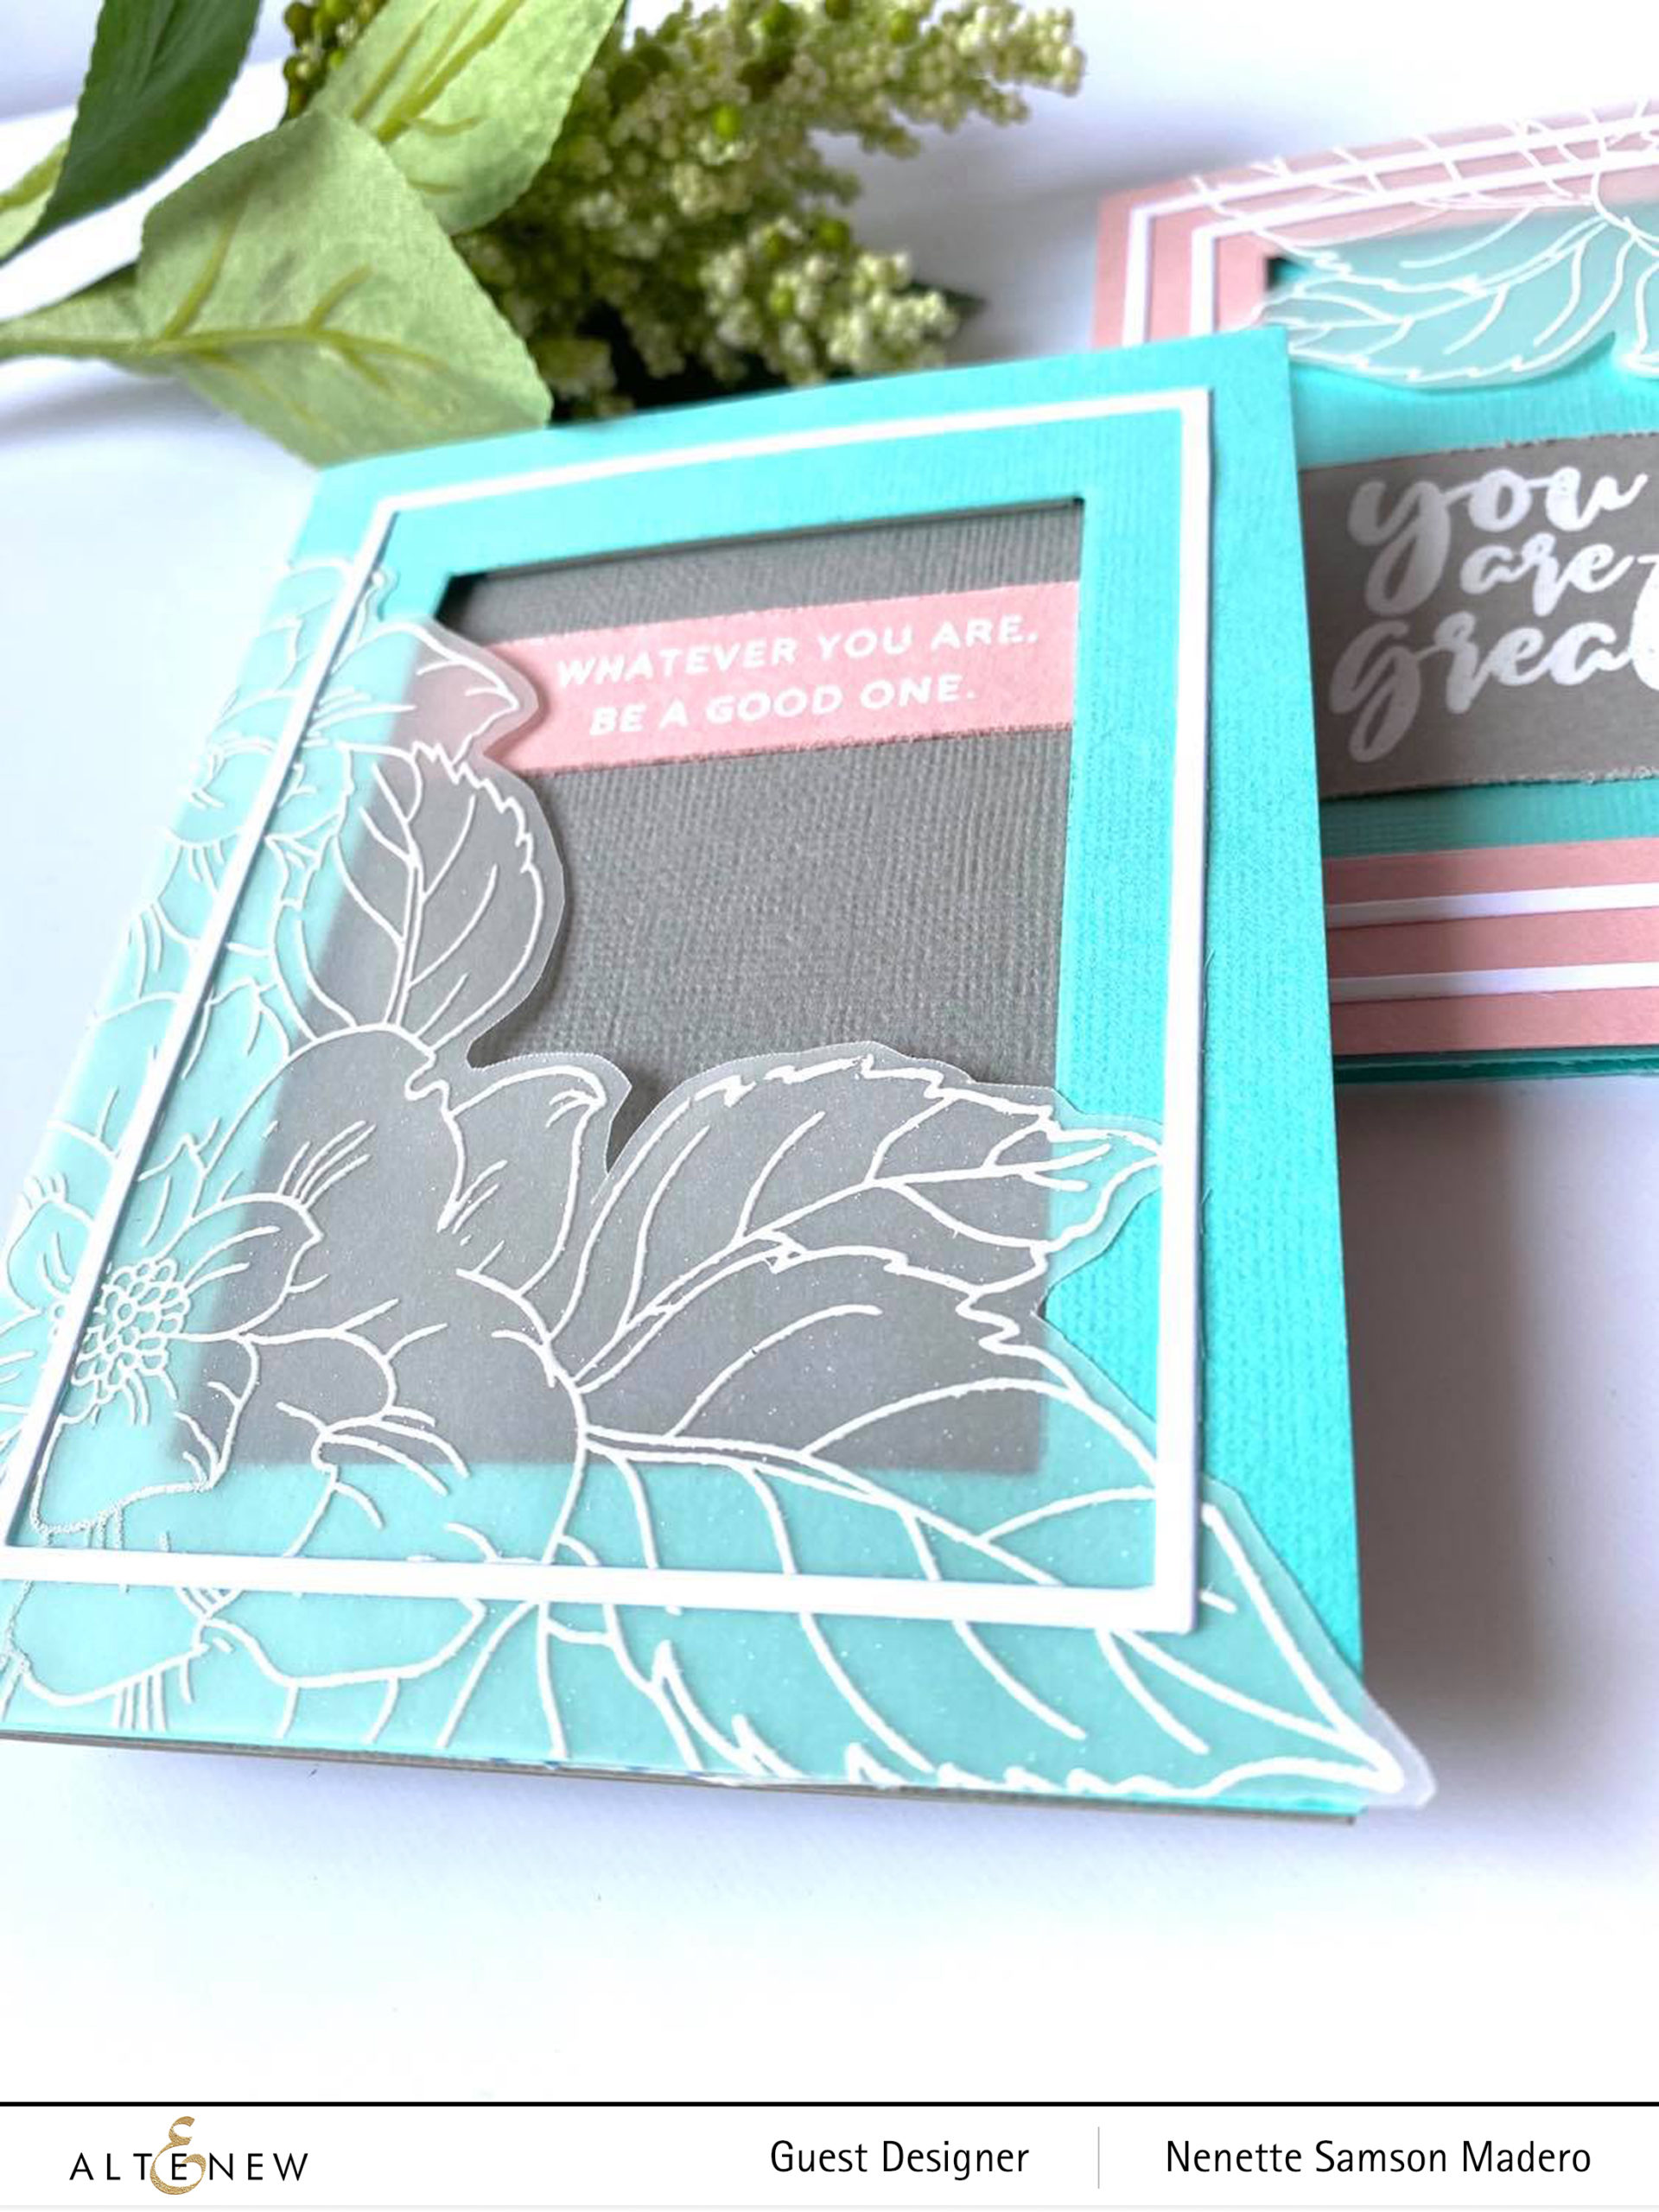
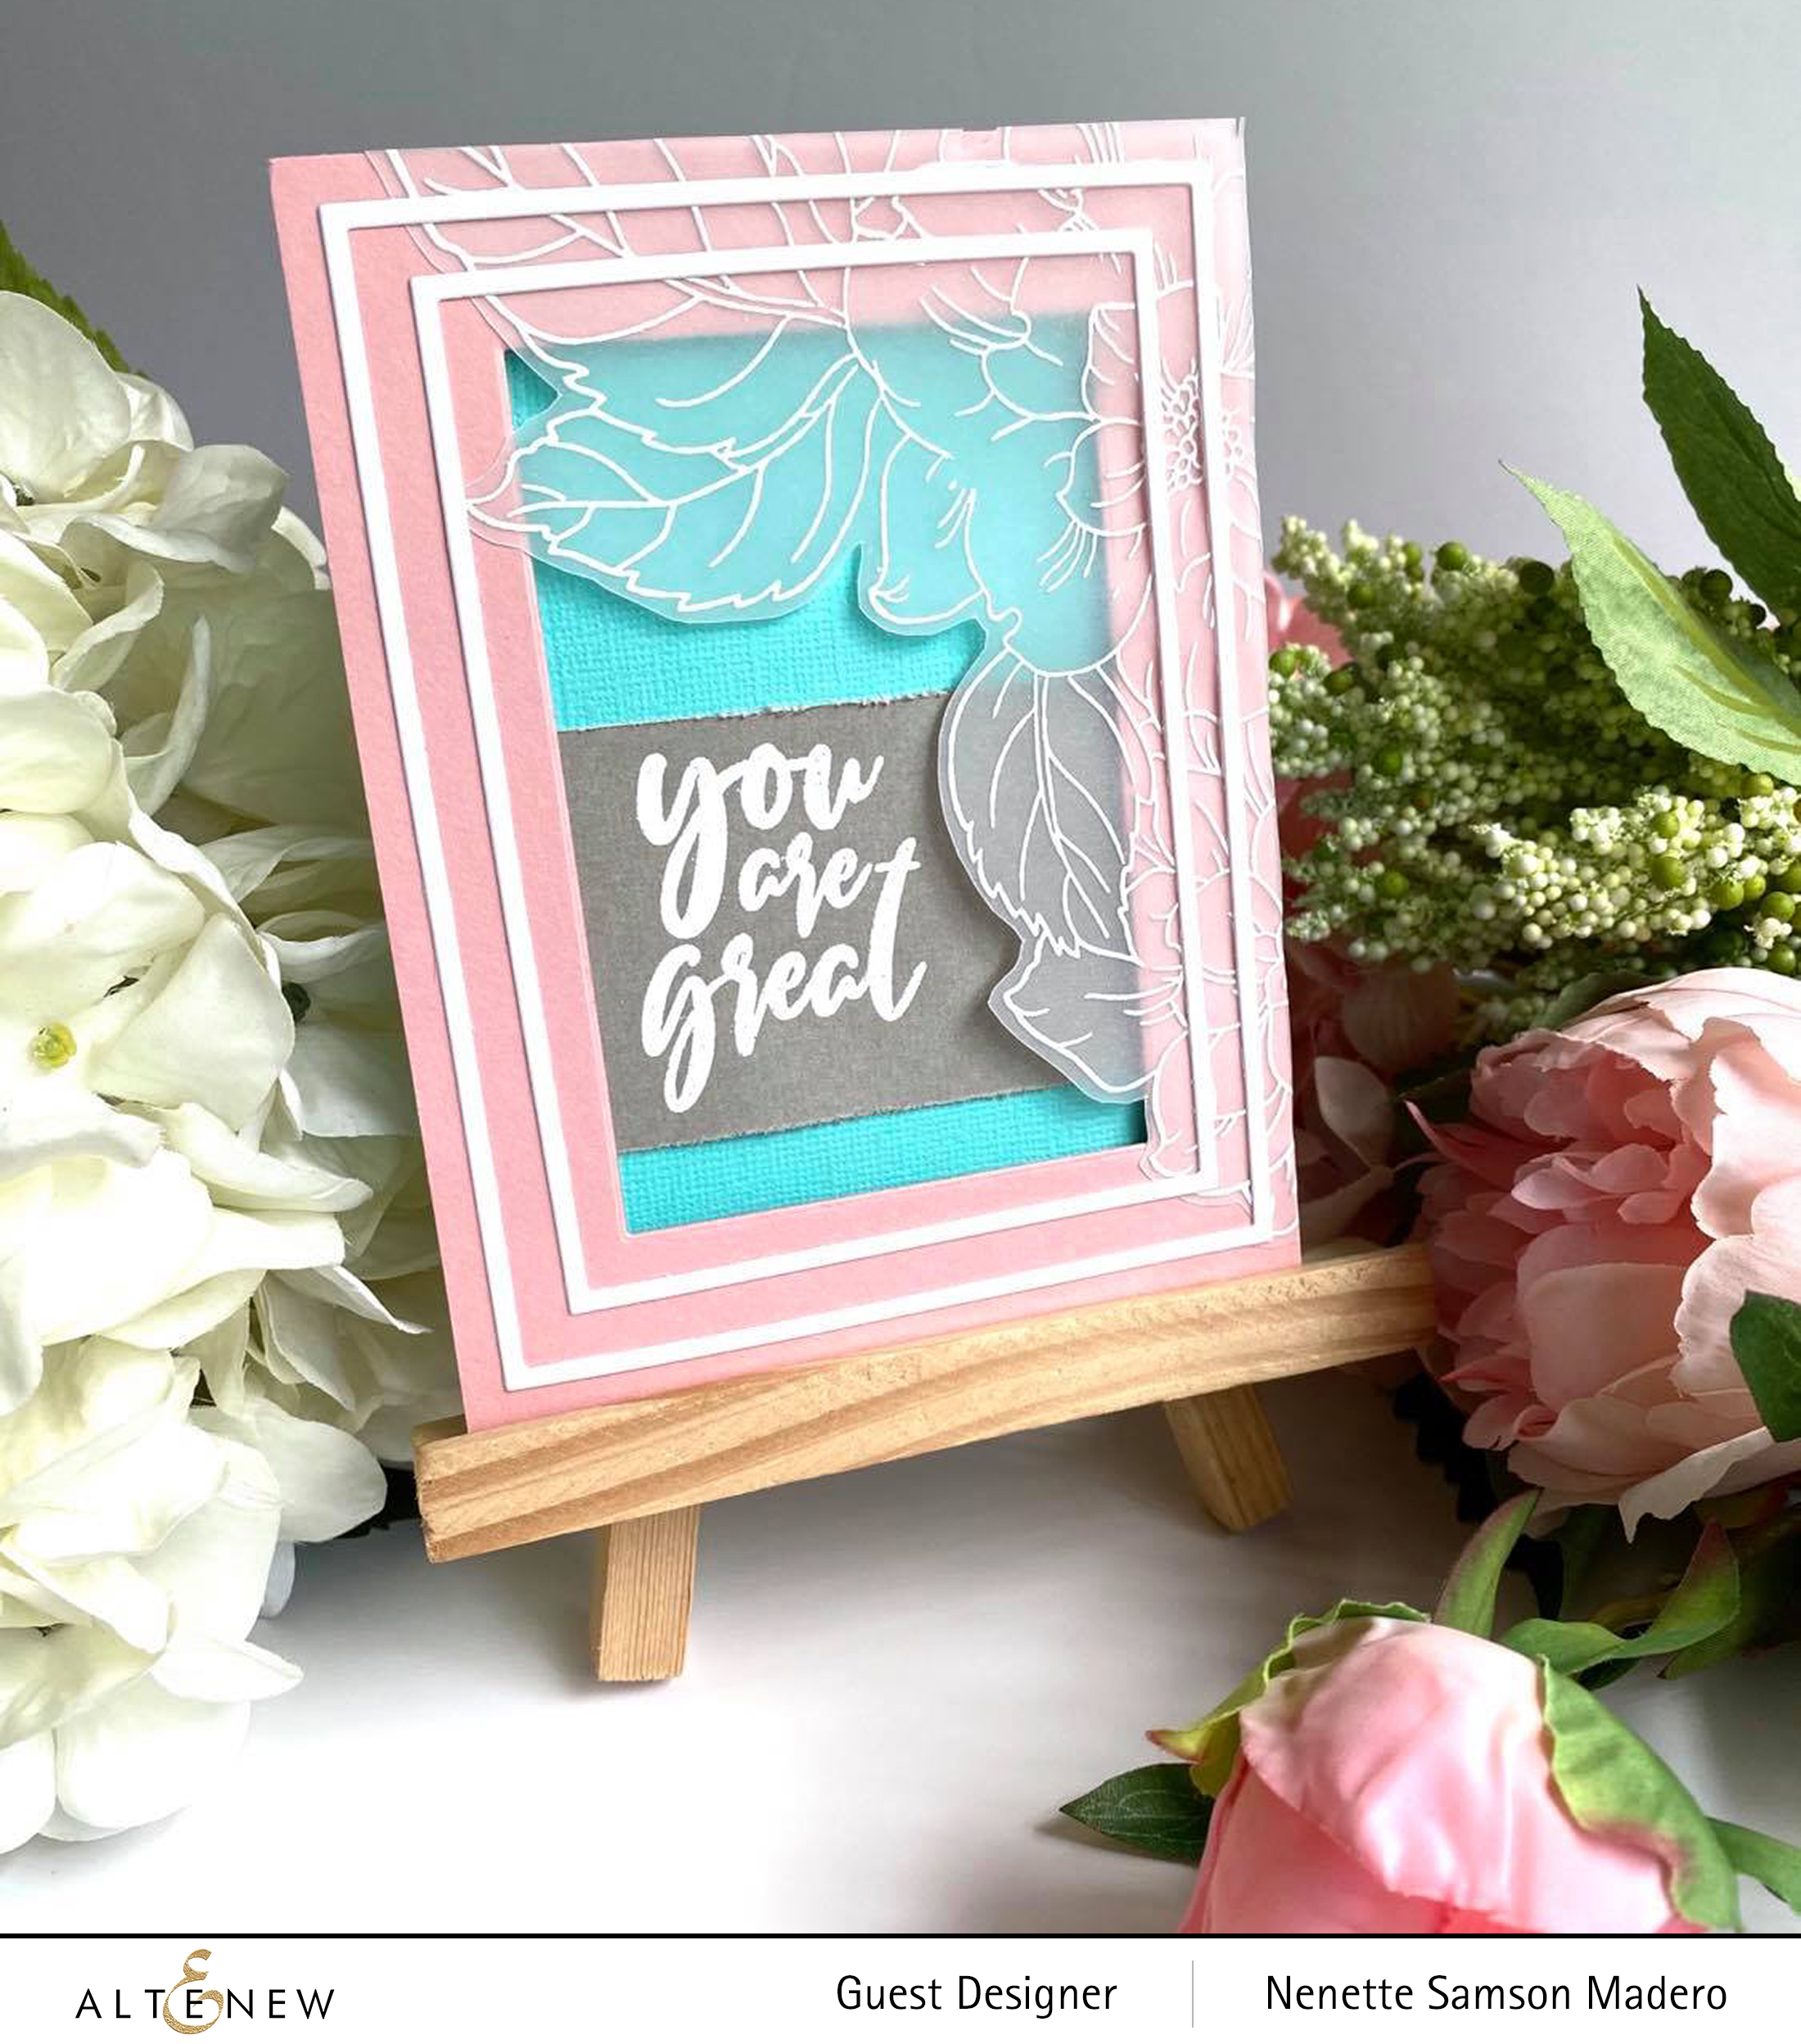
WHATEVER YOU ARE, BE A GOOD ONE | YOU ARE GREAT
Don’t you just adore the Courageous You stamp set!?!?! I love huge images that can be colored using different kinds of coloring mediums. For these cards though, I thought of stamping and embossing the image on vellum for a soft and dainty look. I used the Fine Frames cover die to add borders around the card front. Light colors were chosen to match the soft look of this card.
When embossing on thin papers like vellum, just make sure that you heat up your heat gun first. I also heat it from the back to prevent the paper from warping.
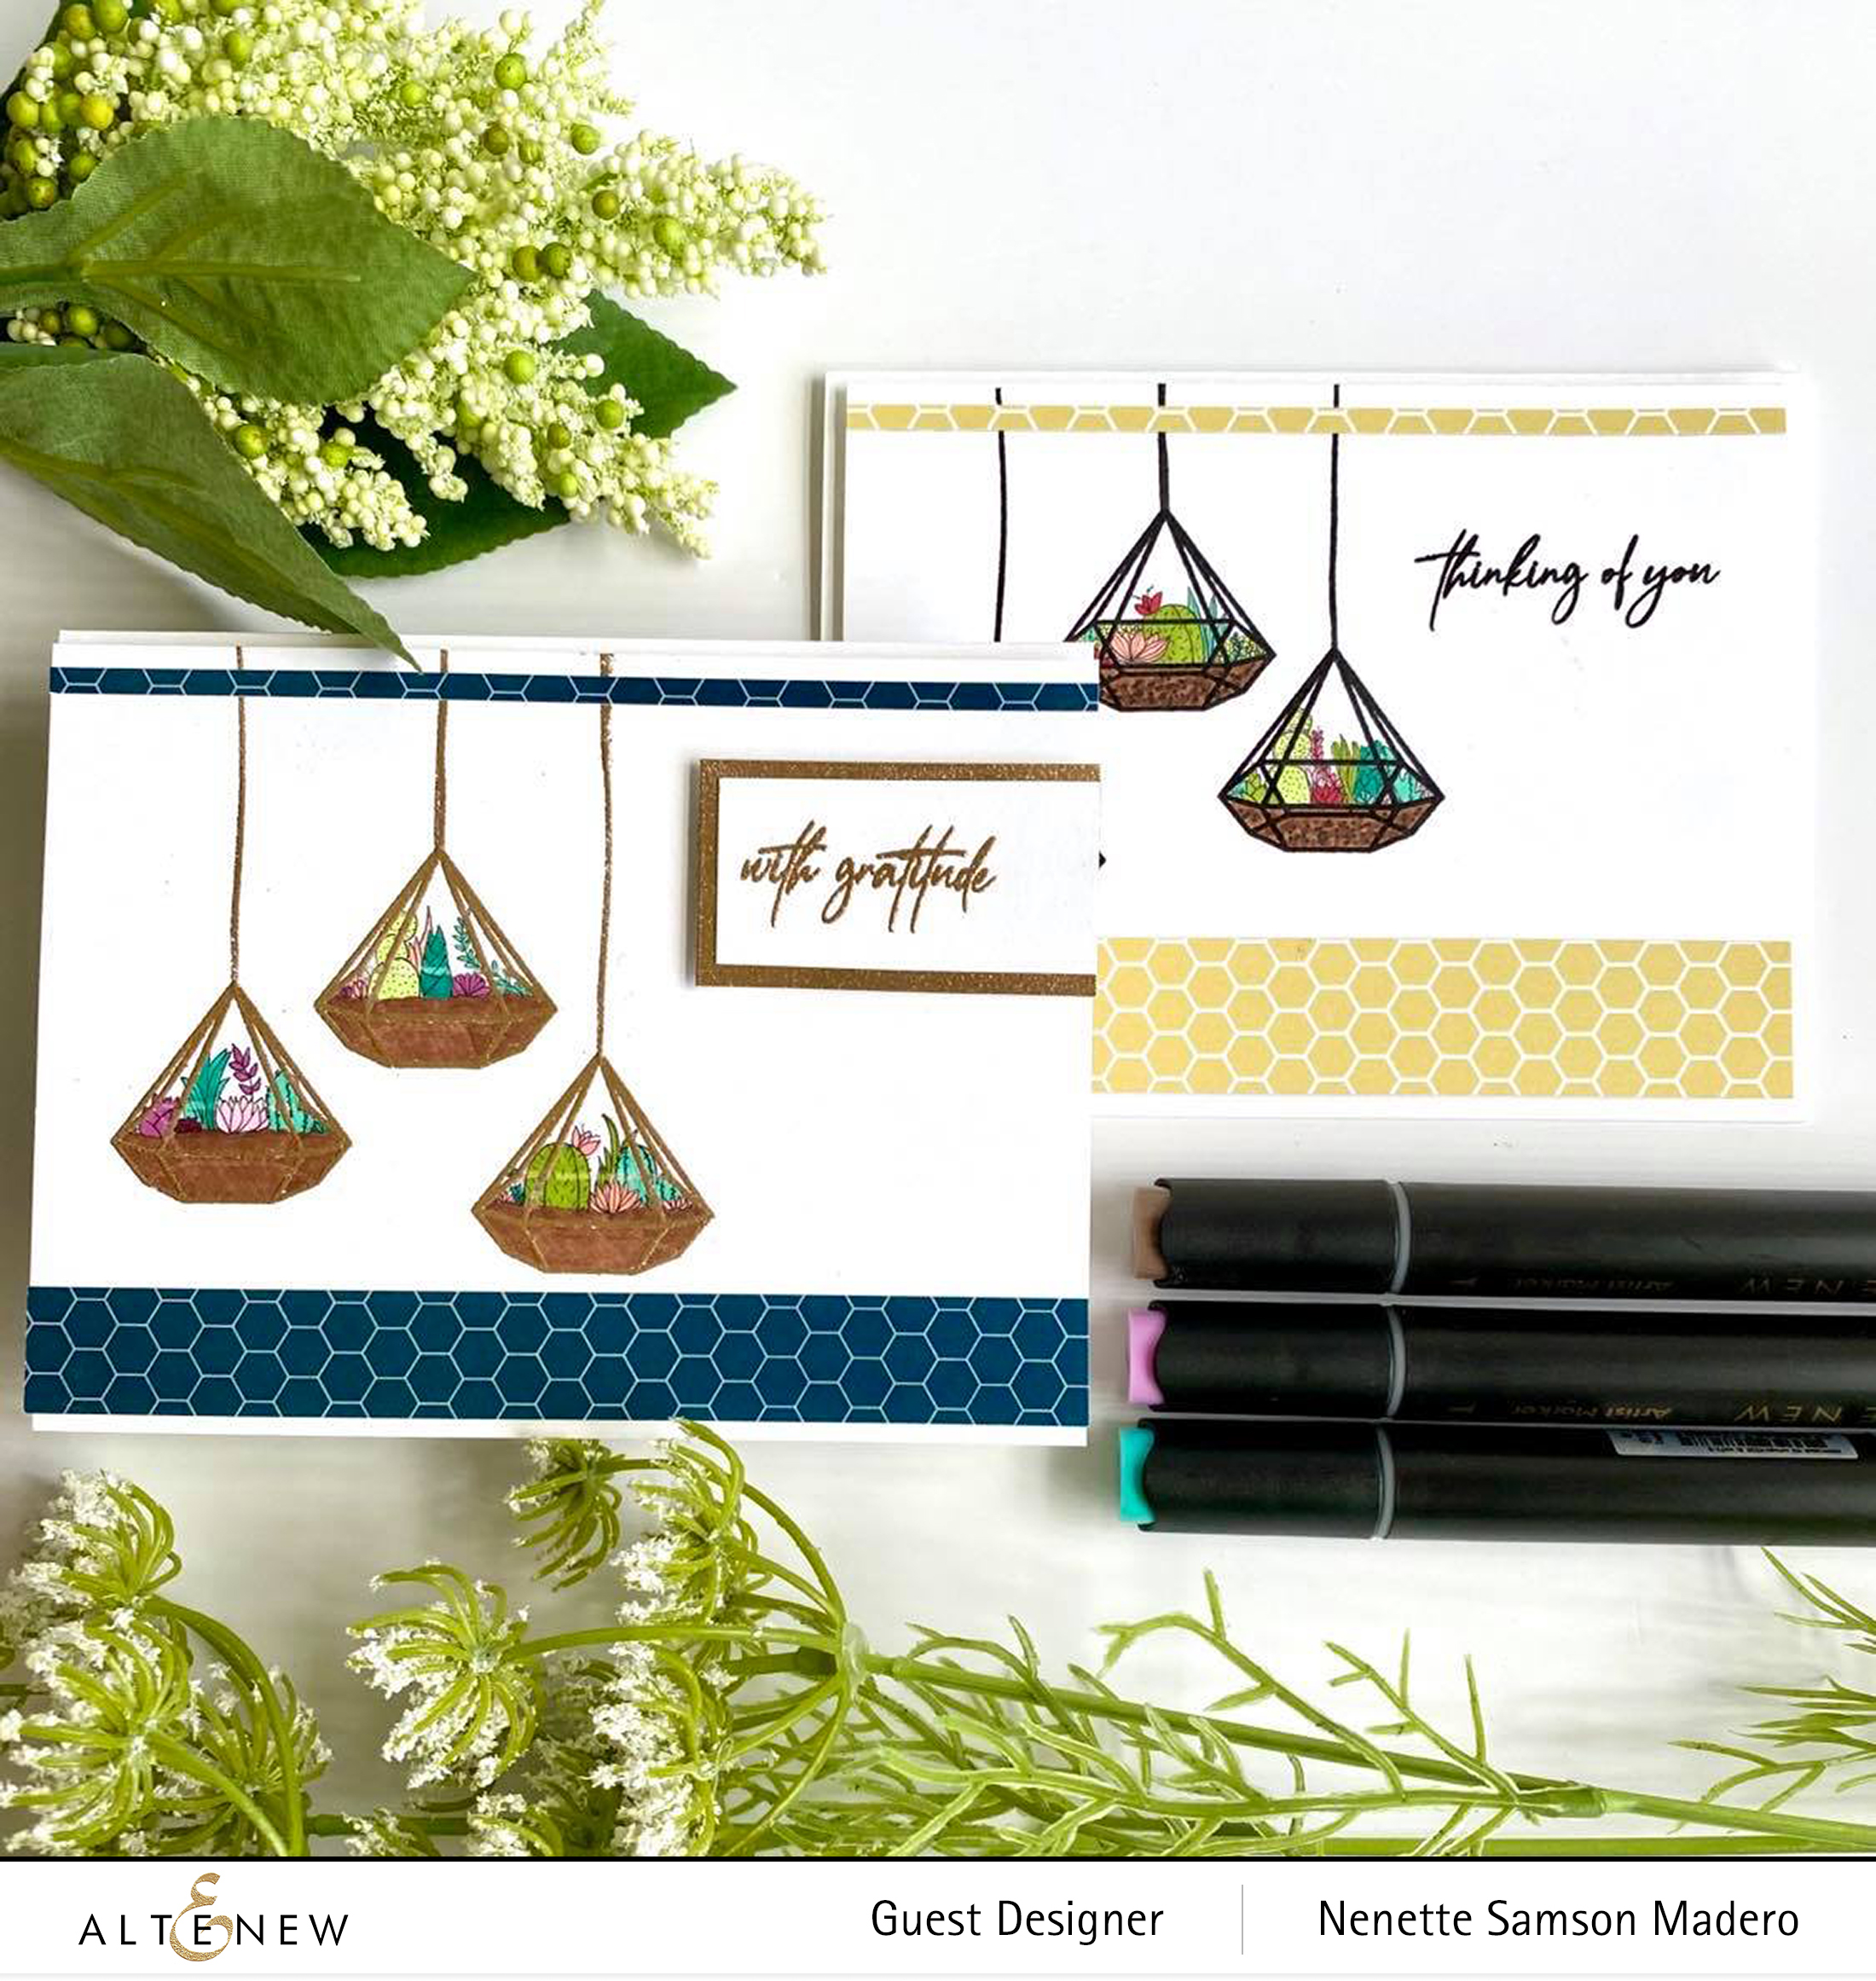
THINKING OF YOU | WITH GRATITUDE
Here’s another set of CAS cards using the Geometric Elements stamp. When I saw this stamp set, the first thing that came into my mind was the geometric terrariums that I used for my daughter’s party a few years ago. 🙂
I used the stems on the Fragile Foliage Stamp set as strings for these “terrariums”. My youngest daughter Andrea helped me with the drawings of the mini succulents ( I will need a magnifying glass in order to do that!!! Thanks so much, Dea! <3 ) The succulents were colored with the Altenew alcohol artist markers. Strips of papers from the Blushing Blooms paper pack were added to finish off these cute and simple cards. The card front was also mounted onto foam sheets for added dimension.
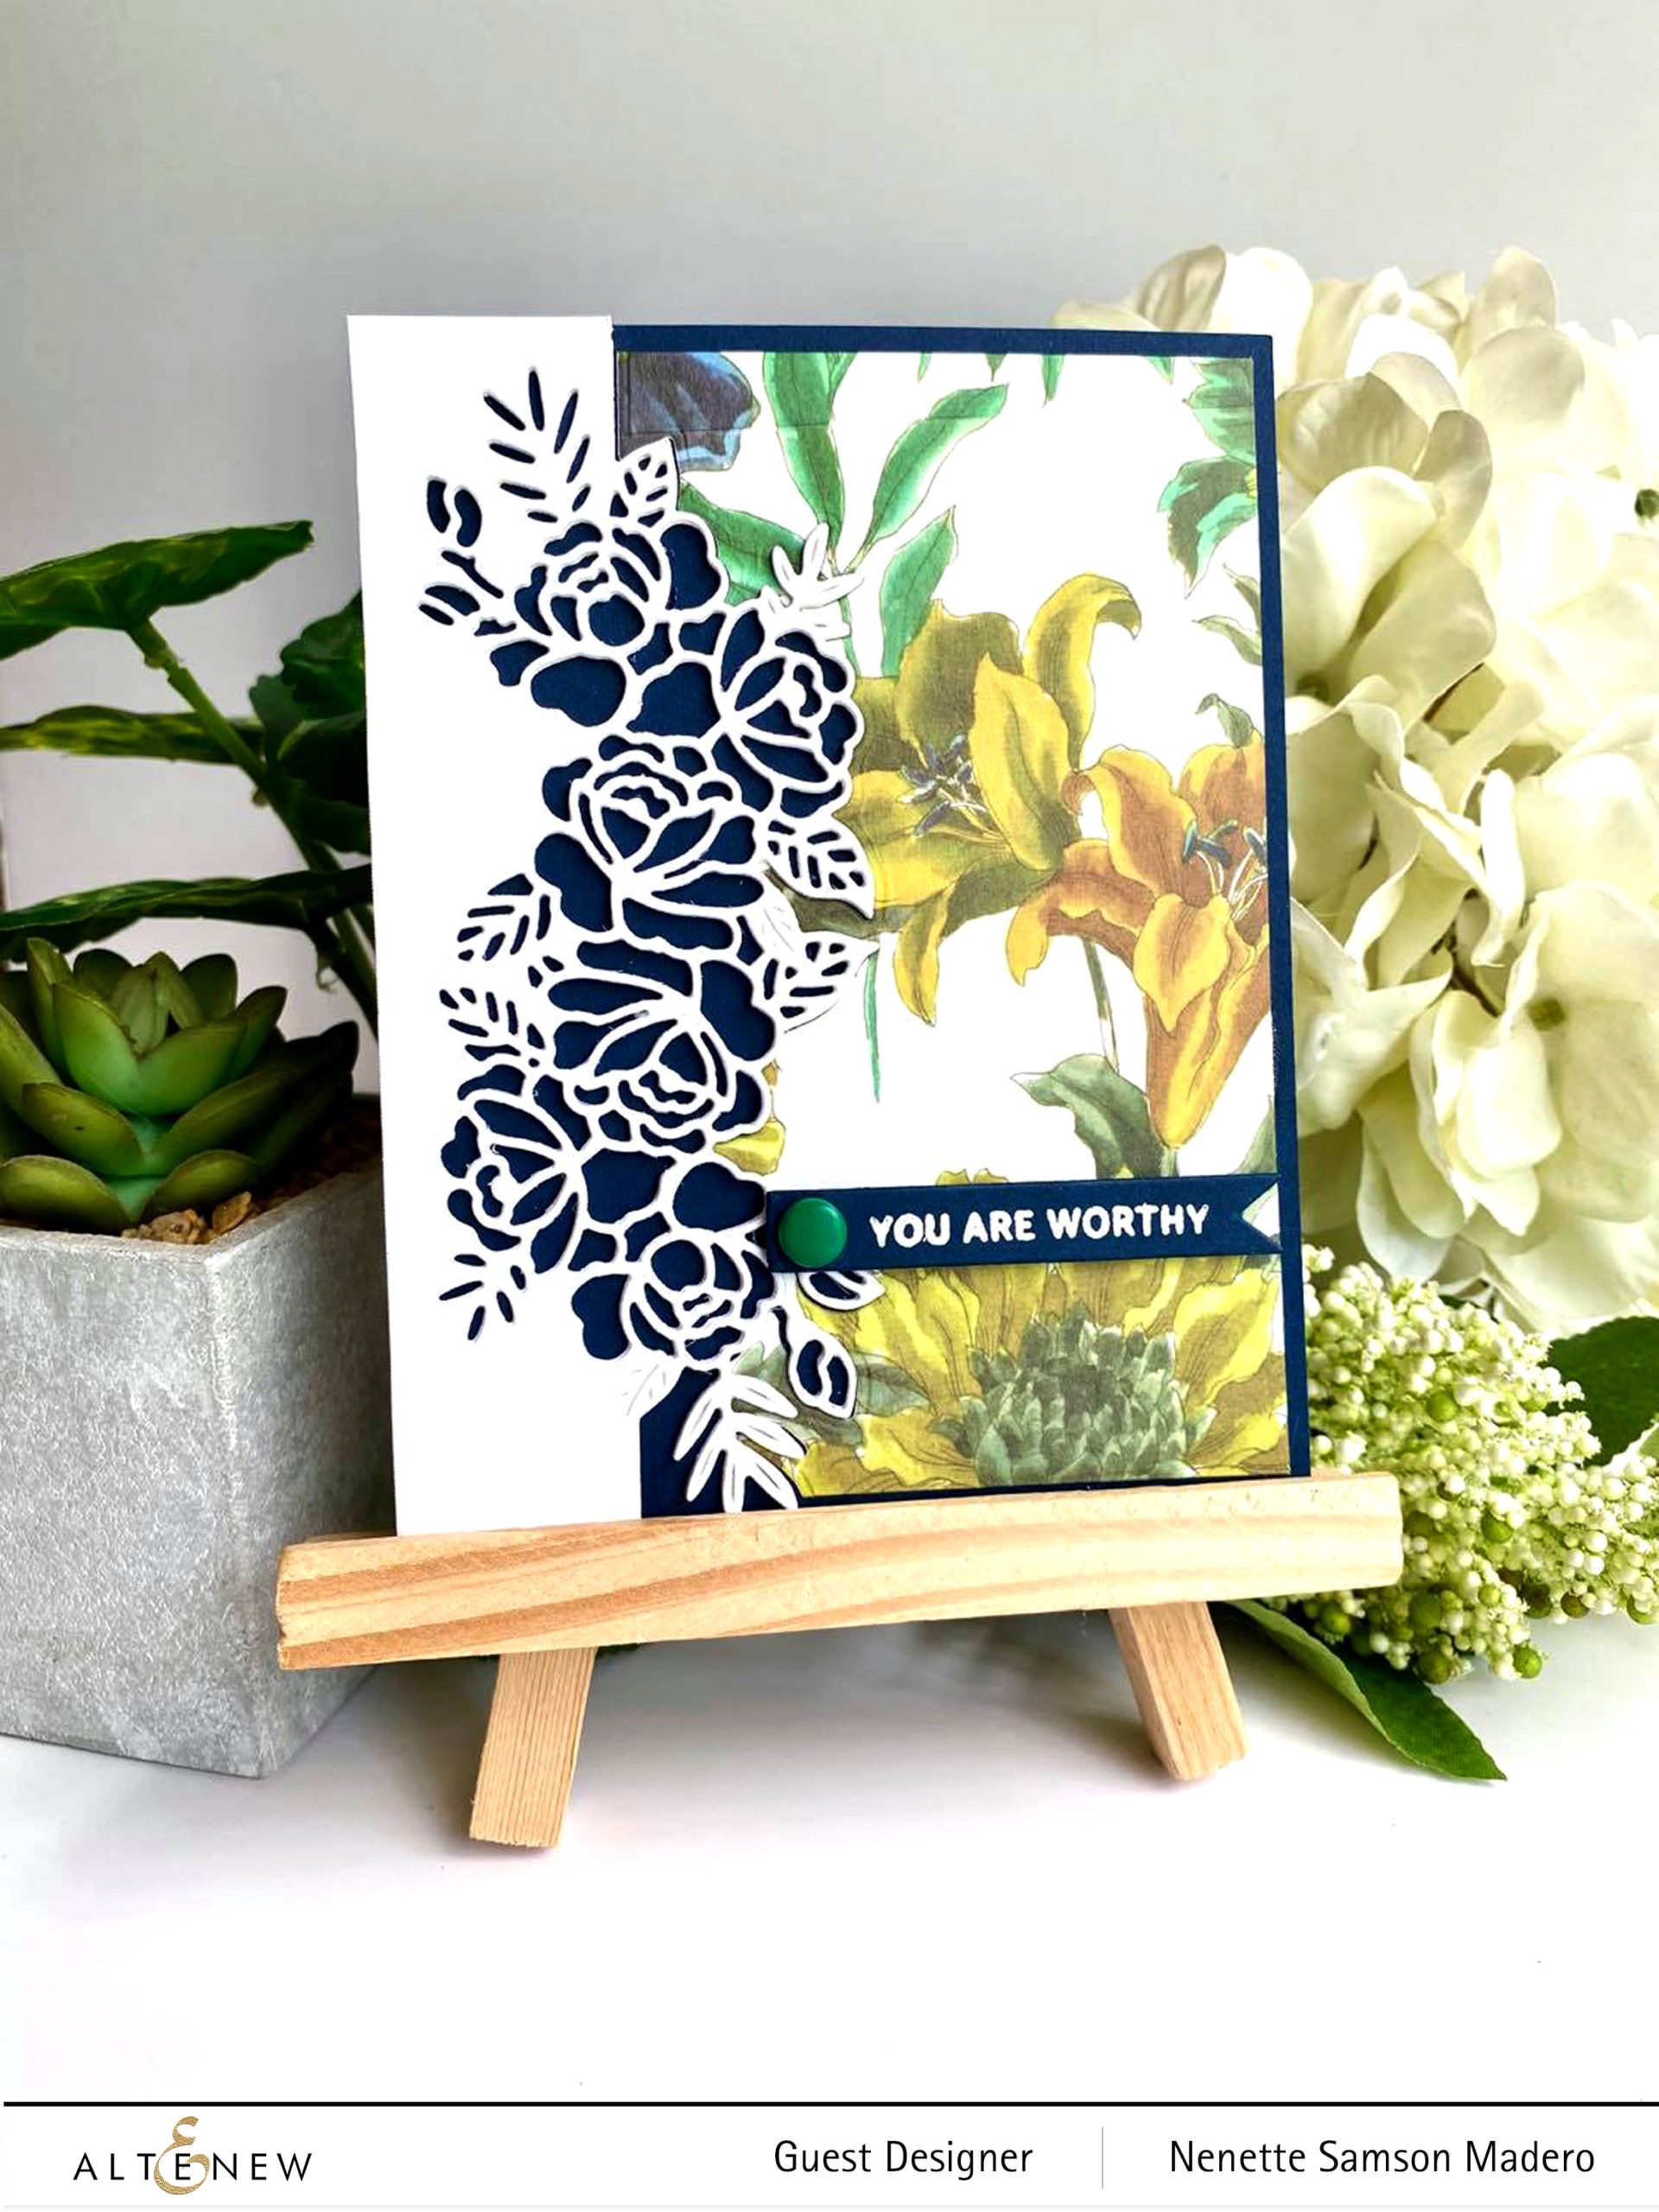
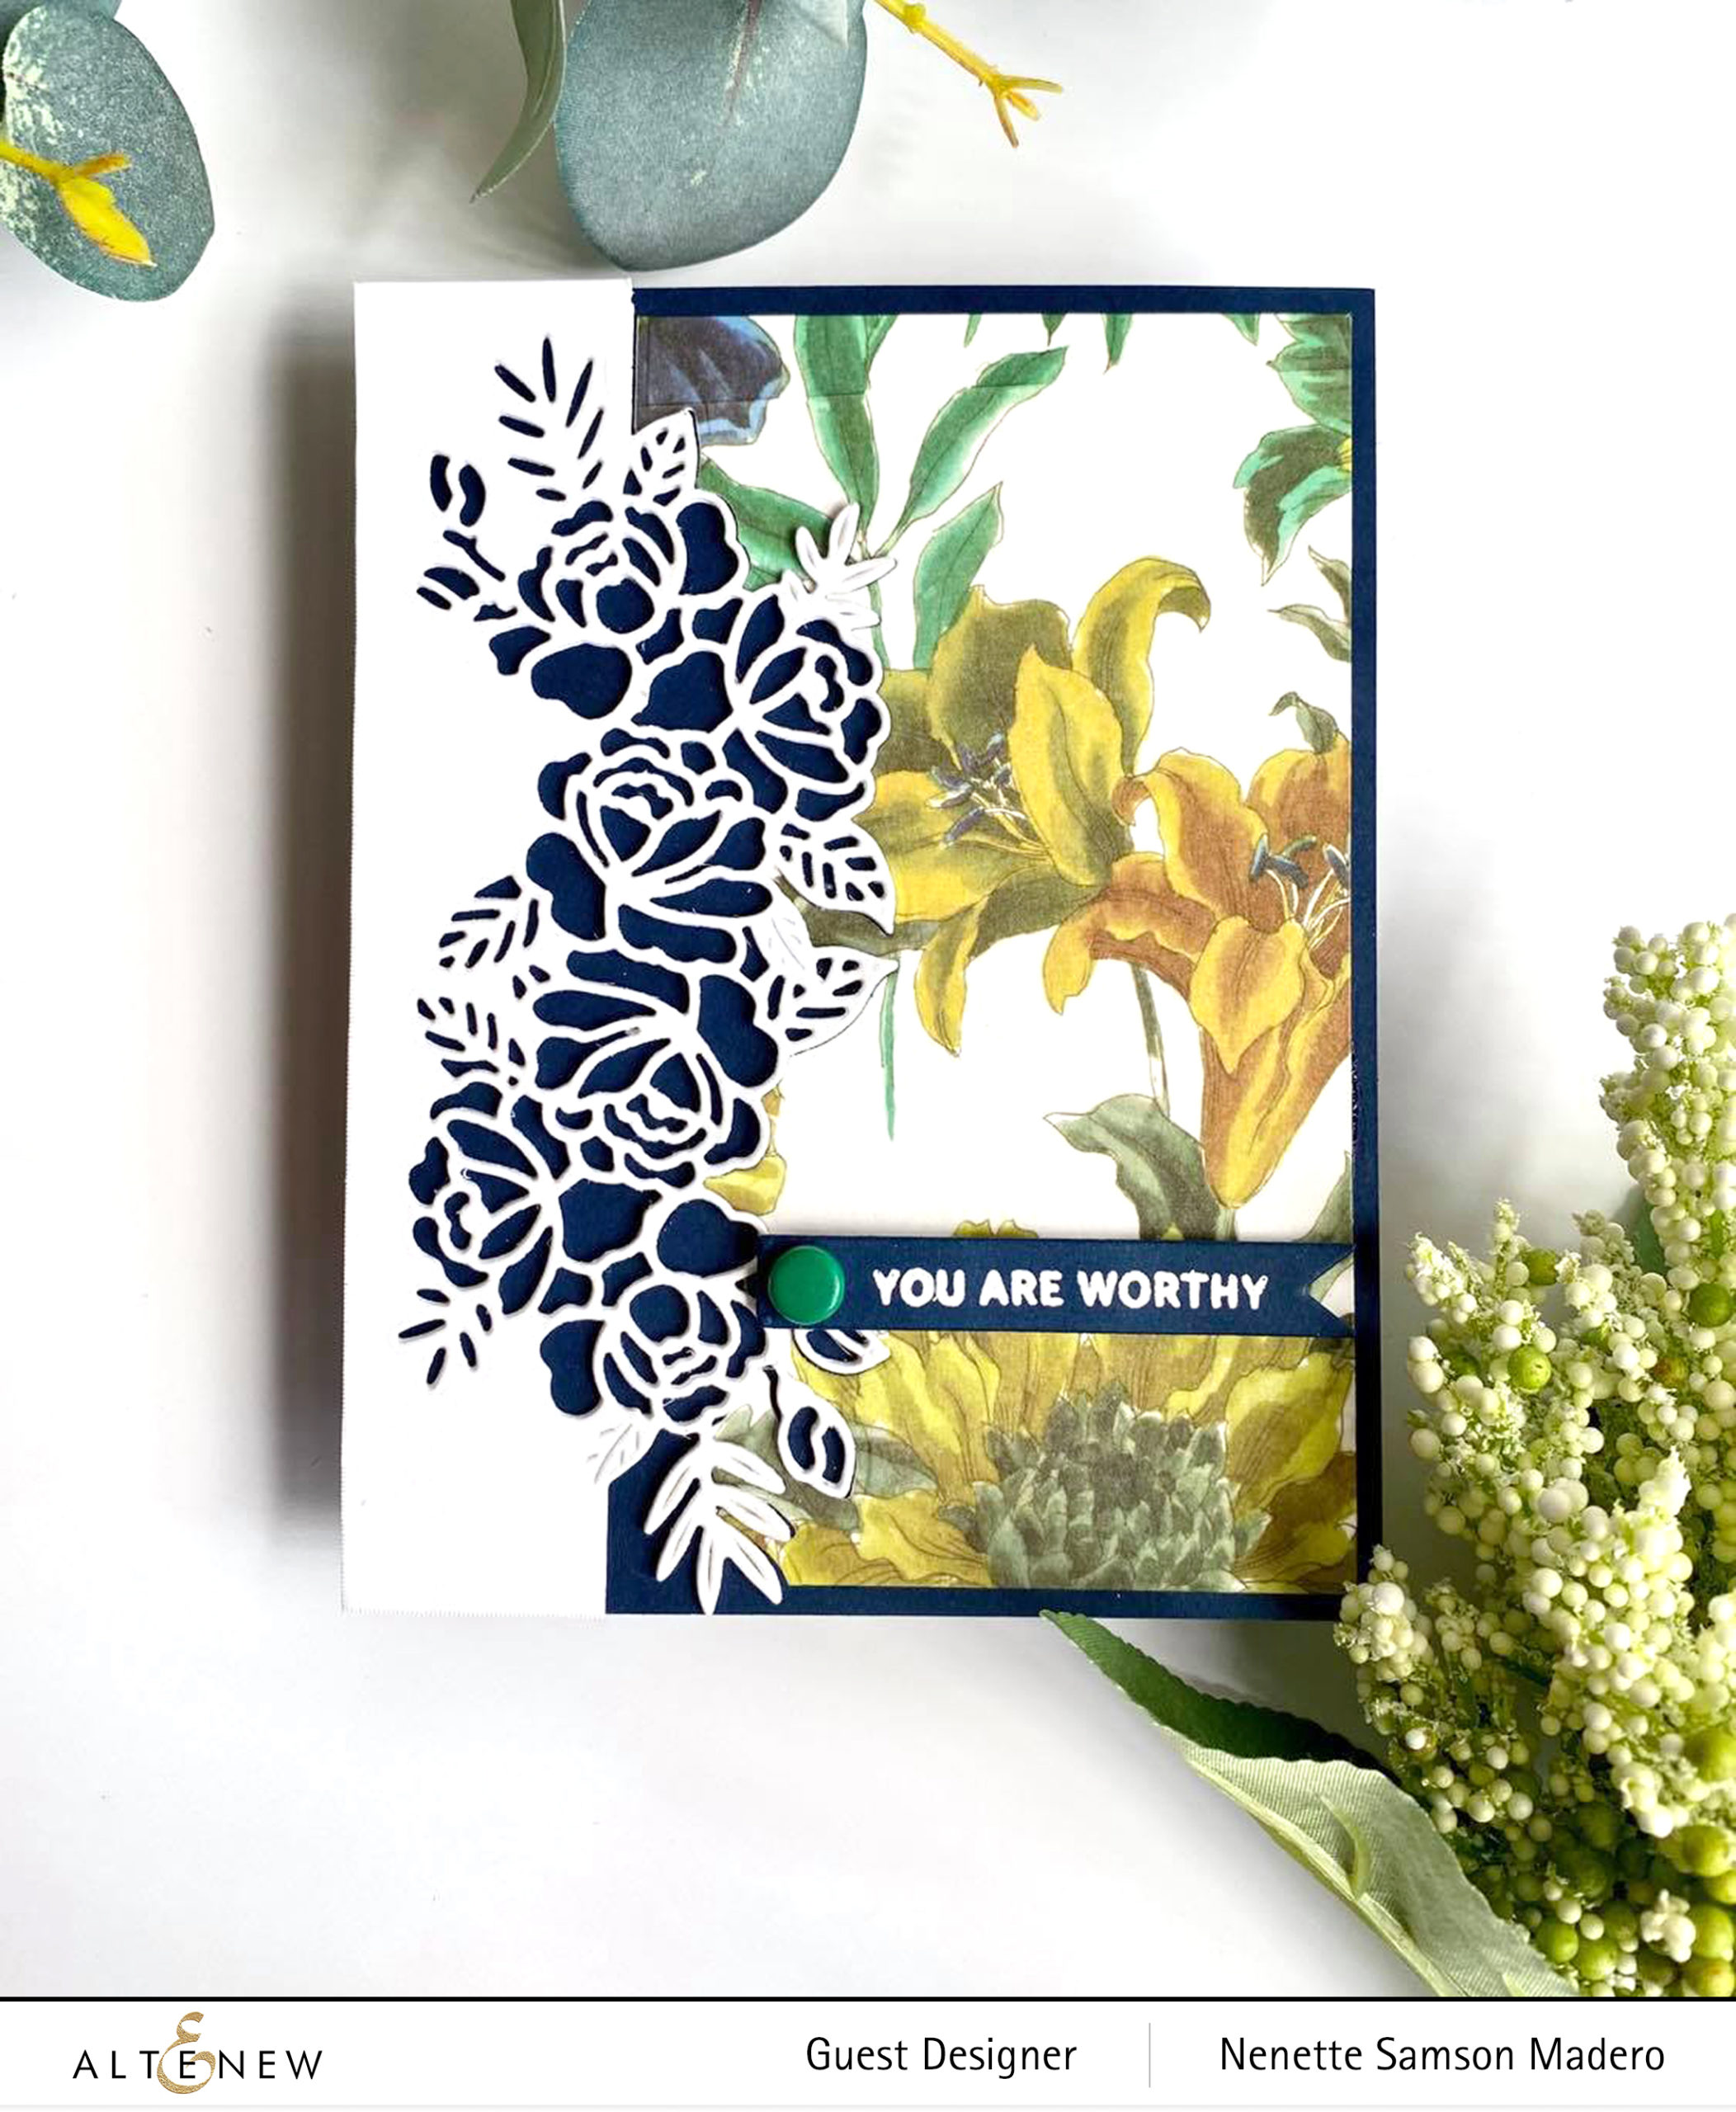
YOU ARE WORTHY
This next card was created using the Floral In and Out Border die, the Wild Flora washi tape, the Terrific Tags die and the sentiment from the Courageous You stamp set. I wrapped a panel with the washi tape then die cut the Floral in and out border die. I did the same to 4 layers of white cardstocks so that I can stack them up to create some dimension.
I just had to fit them like a jigsaw puzzle then added a sentiment stamped on one of the tags from the Terrific tags die. A green brad was added as an accent to this simple card. You really don’t have to do much because the washi tape is already so beautiful.
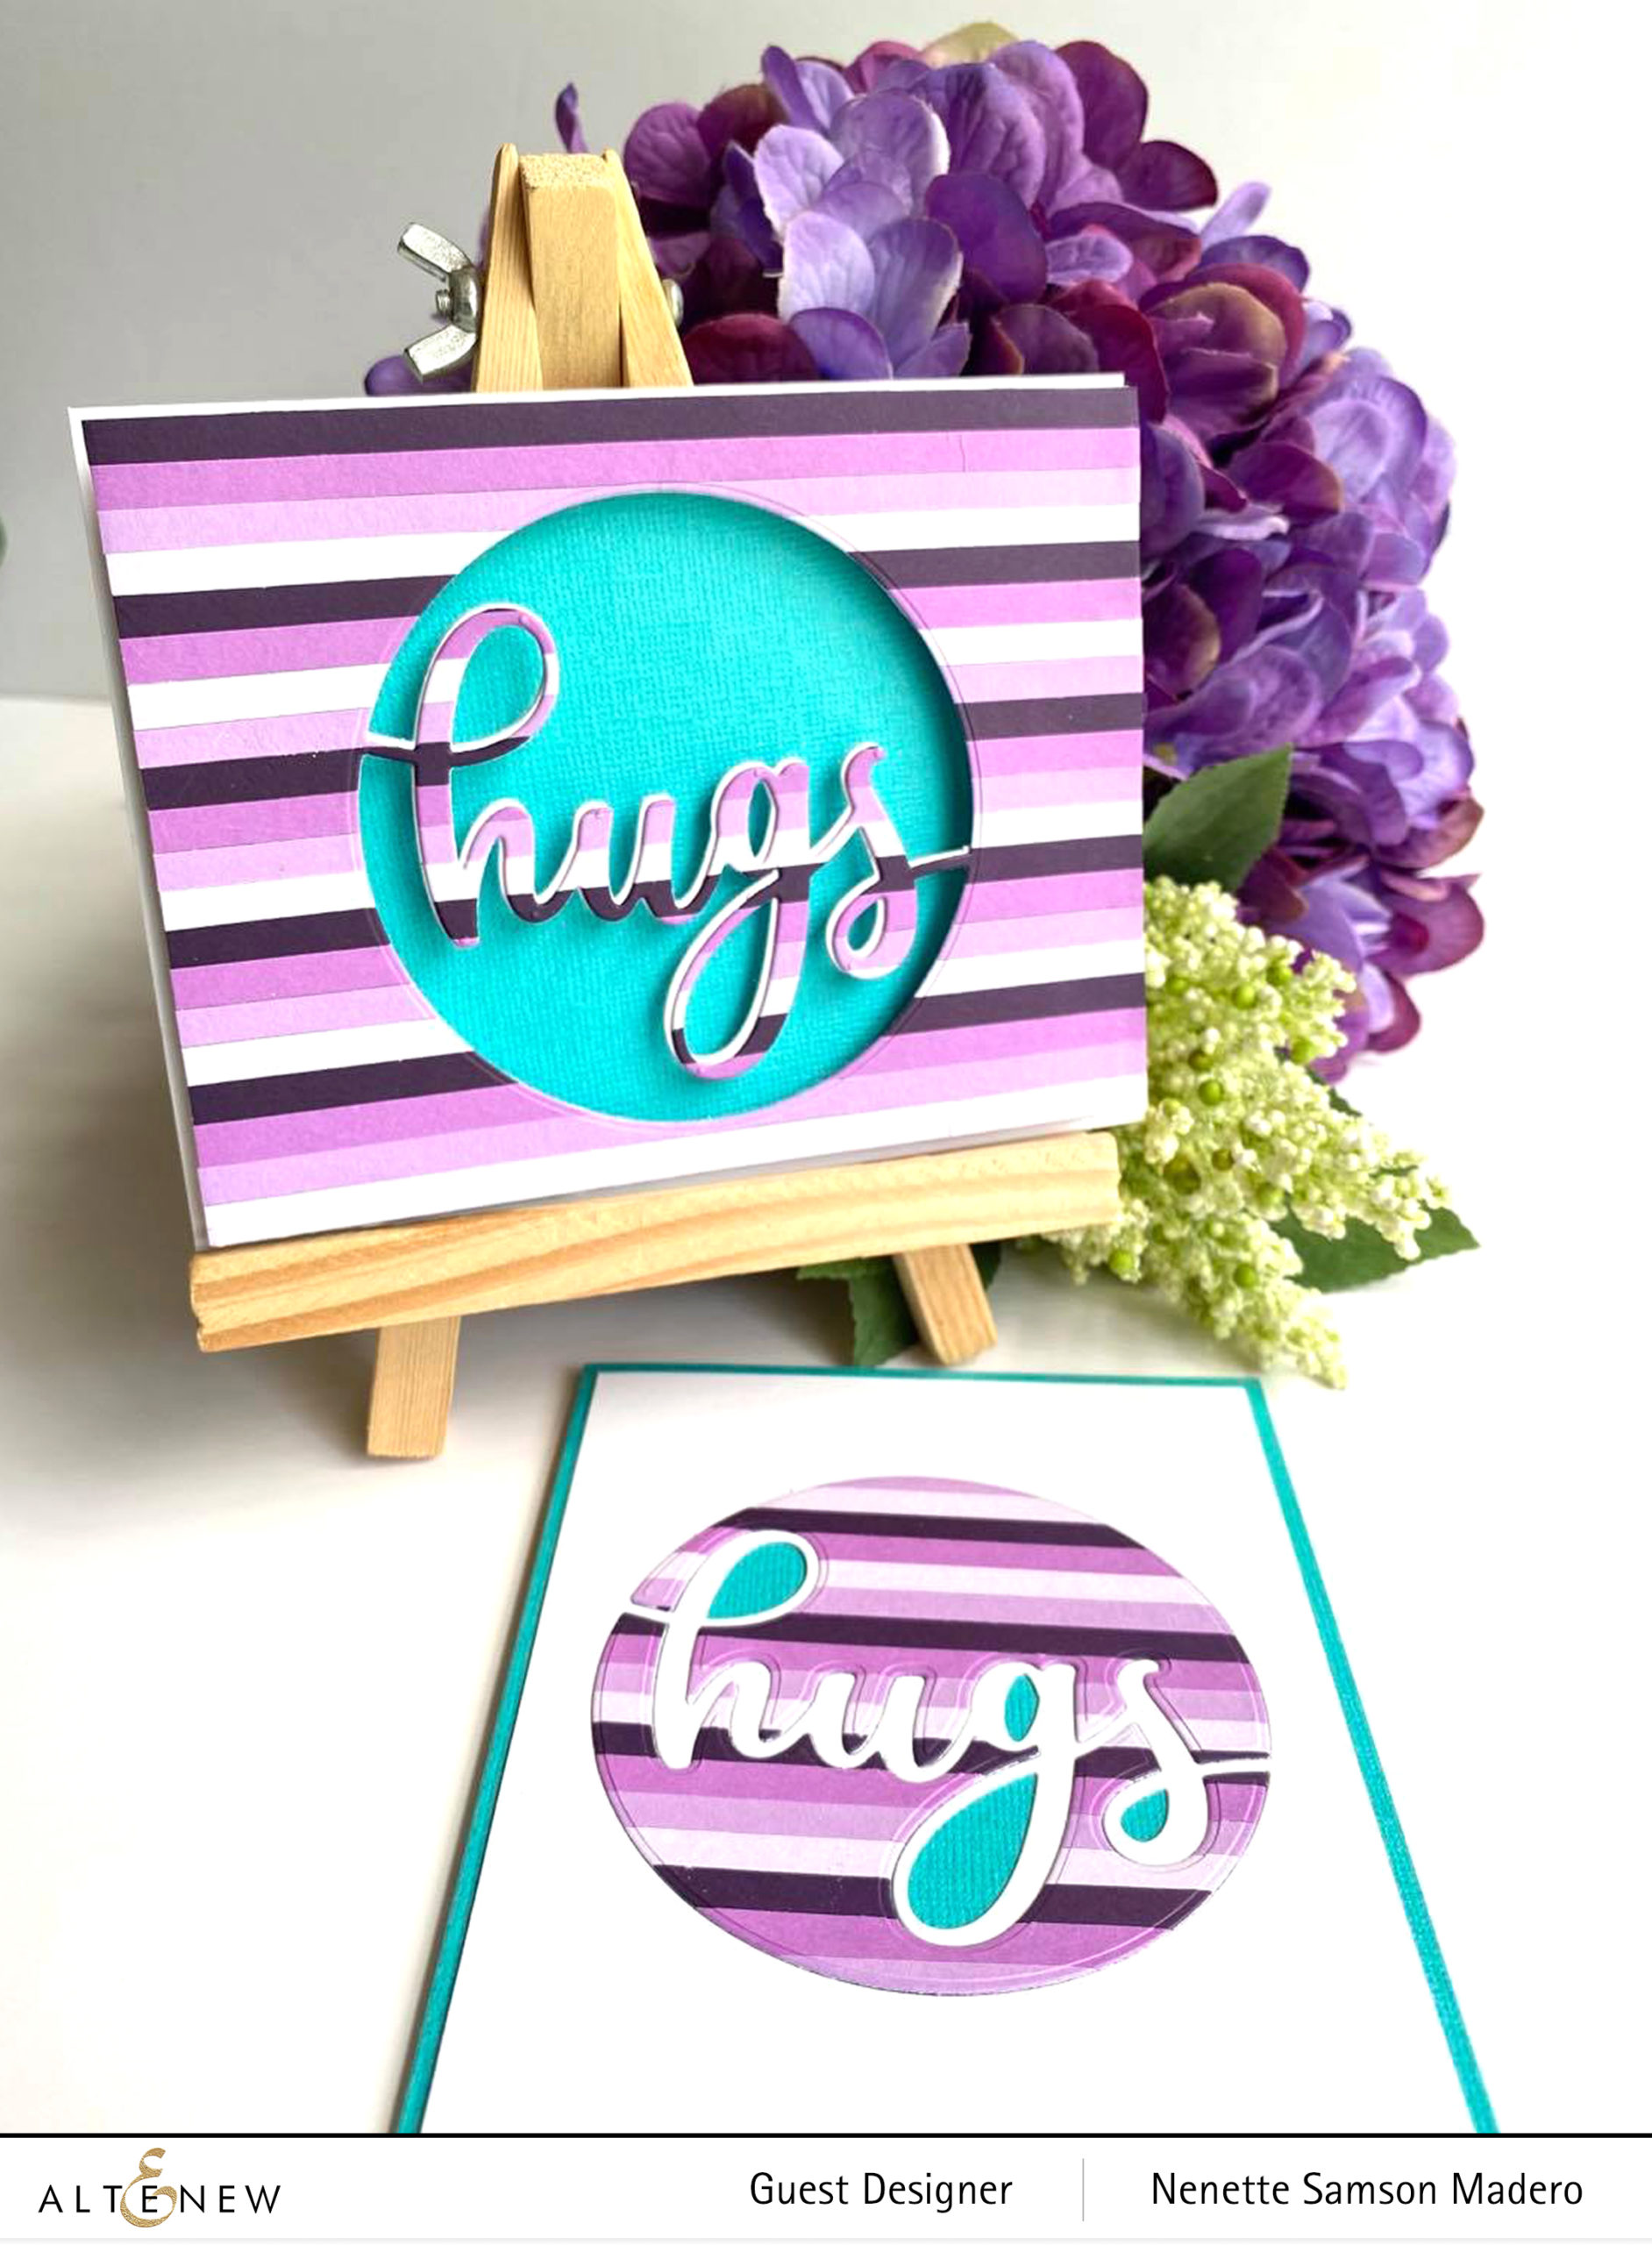
HUGS
Here’s another pair of quick cards to make. I got some paper scraps from the Shades of Purple gradient cardstock set and cut them into strips. My apologies if I can’t remember who I saw this technique from– must be from the amazing Laura Bassen or Jennifer Mcguire or maybe even from Kristina Werner or the wonderful Cathy Zielske. They are my go-to cardmakers where I get my inspirations from.
I covered the entire card front with double-sided tape then adhered the strips. Both positive and negative elements from the Circled Greetings: hugs die were used to create 2 cards so nothing went to waste.
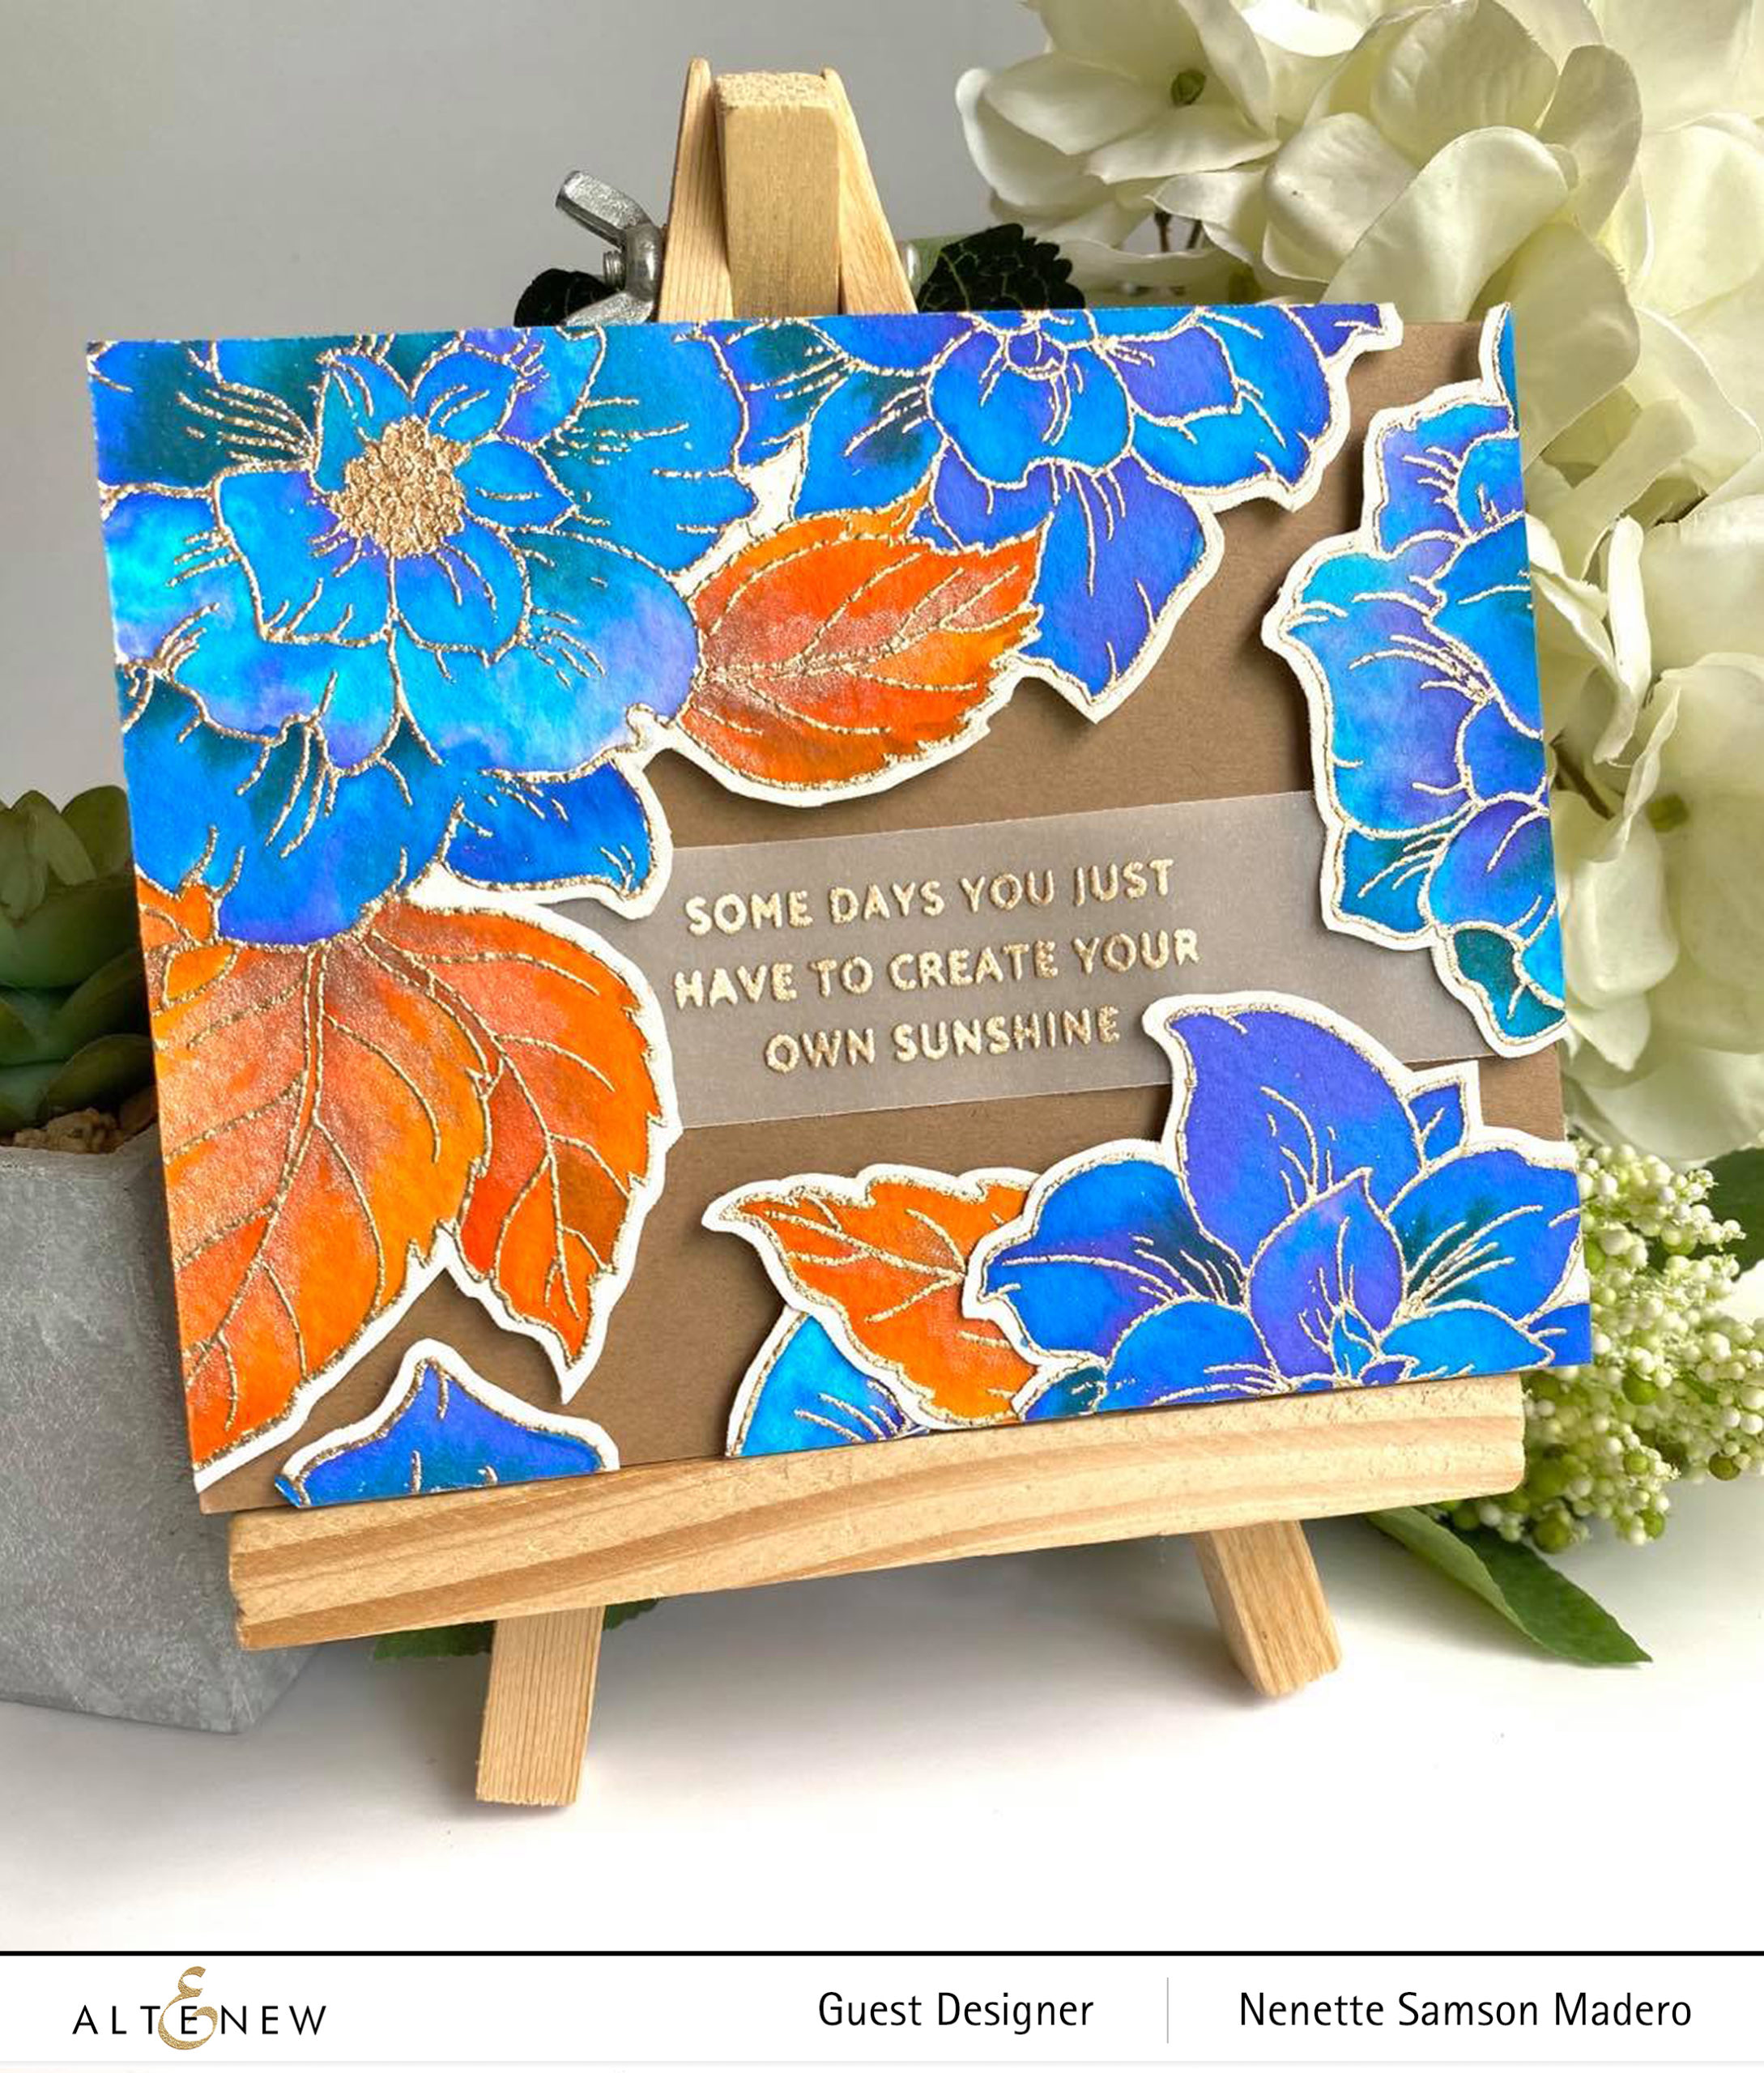
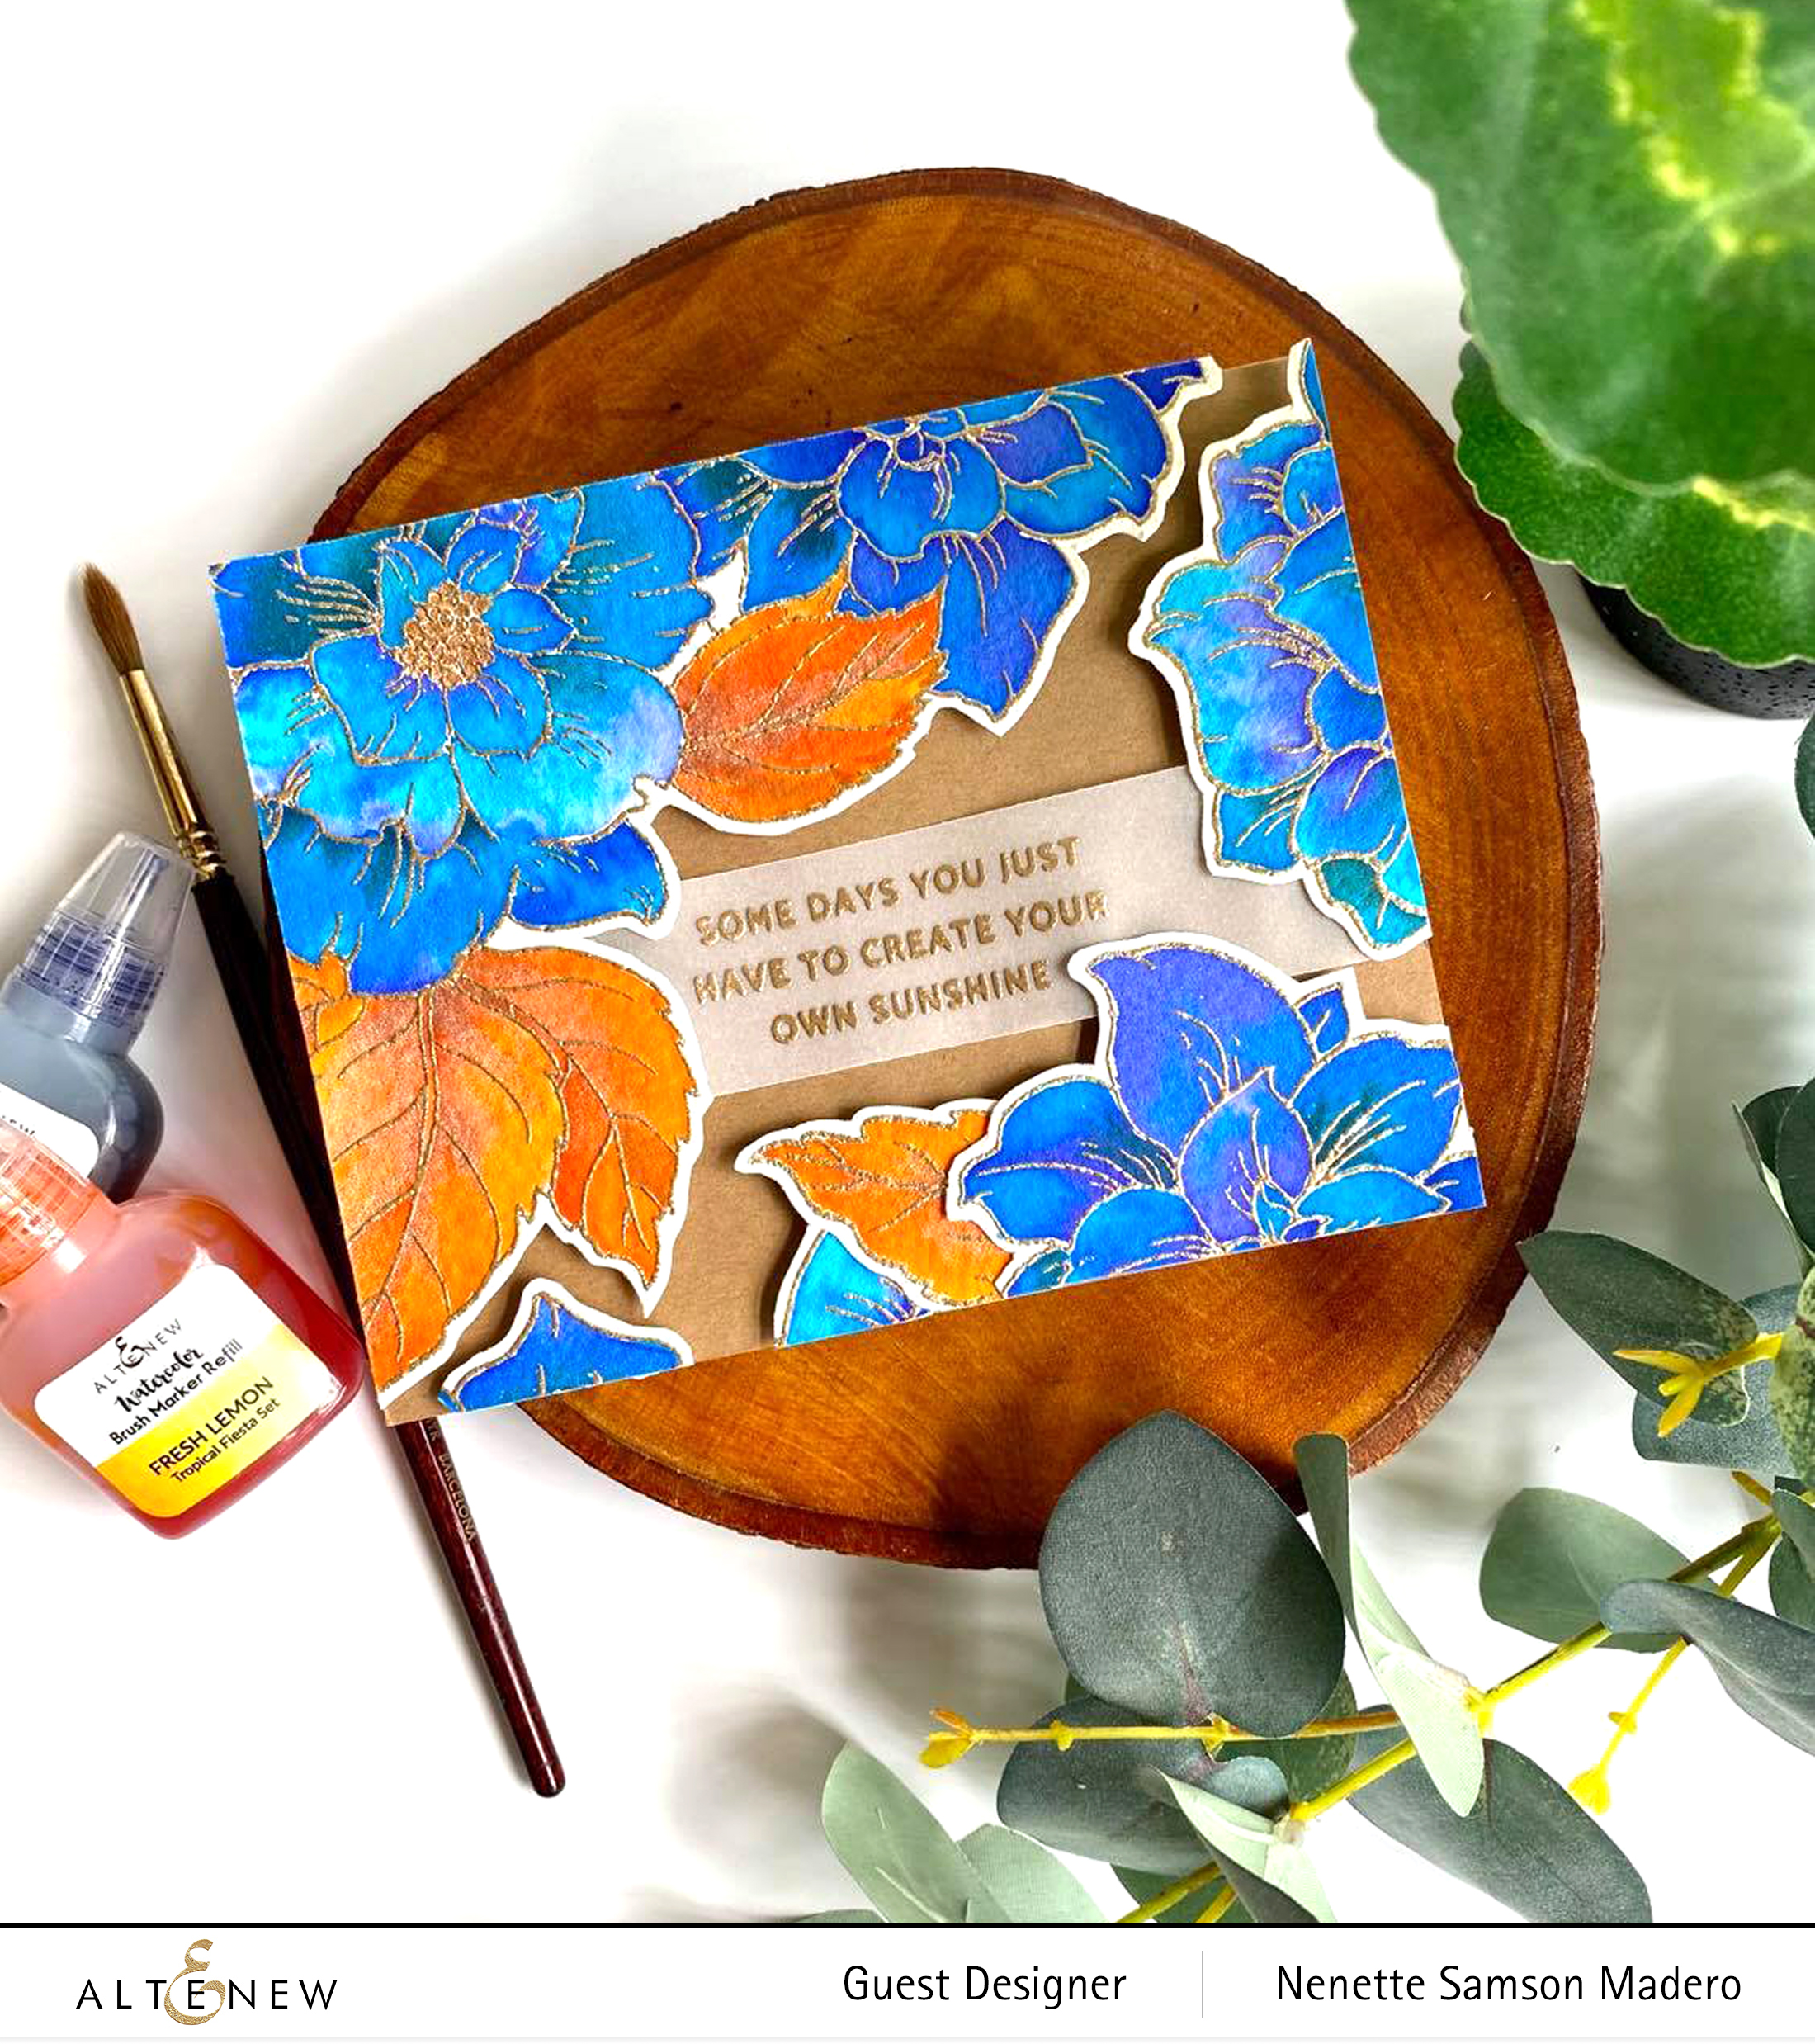
SOME DAYS YOU JUST HAVE TO CREATE YOUR OWN SUNSHINE
Would you believe that this card was made using only 1 stamped image? 🙂 The sentiment was stamped and heat embossed on vellum. The floral image from the Courageous You stamp set was stamped on 140 lbs Arches watercolor paper using Versamark ink then heat embossed with Rose gold embossing powder. I used colors from the Altenew watercolor brush makers. I love how highly pigmented these watercolors are! A little goes a long way.
The image was placed in one corner and the excess was cut off. Foam tape was used to create dimension. The leftover pieces were also adhered to the card front to fill the other edges of the card.
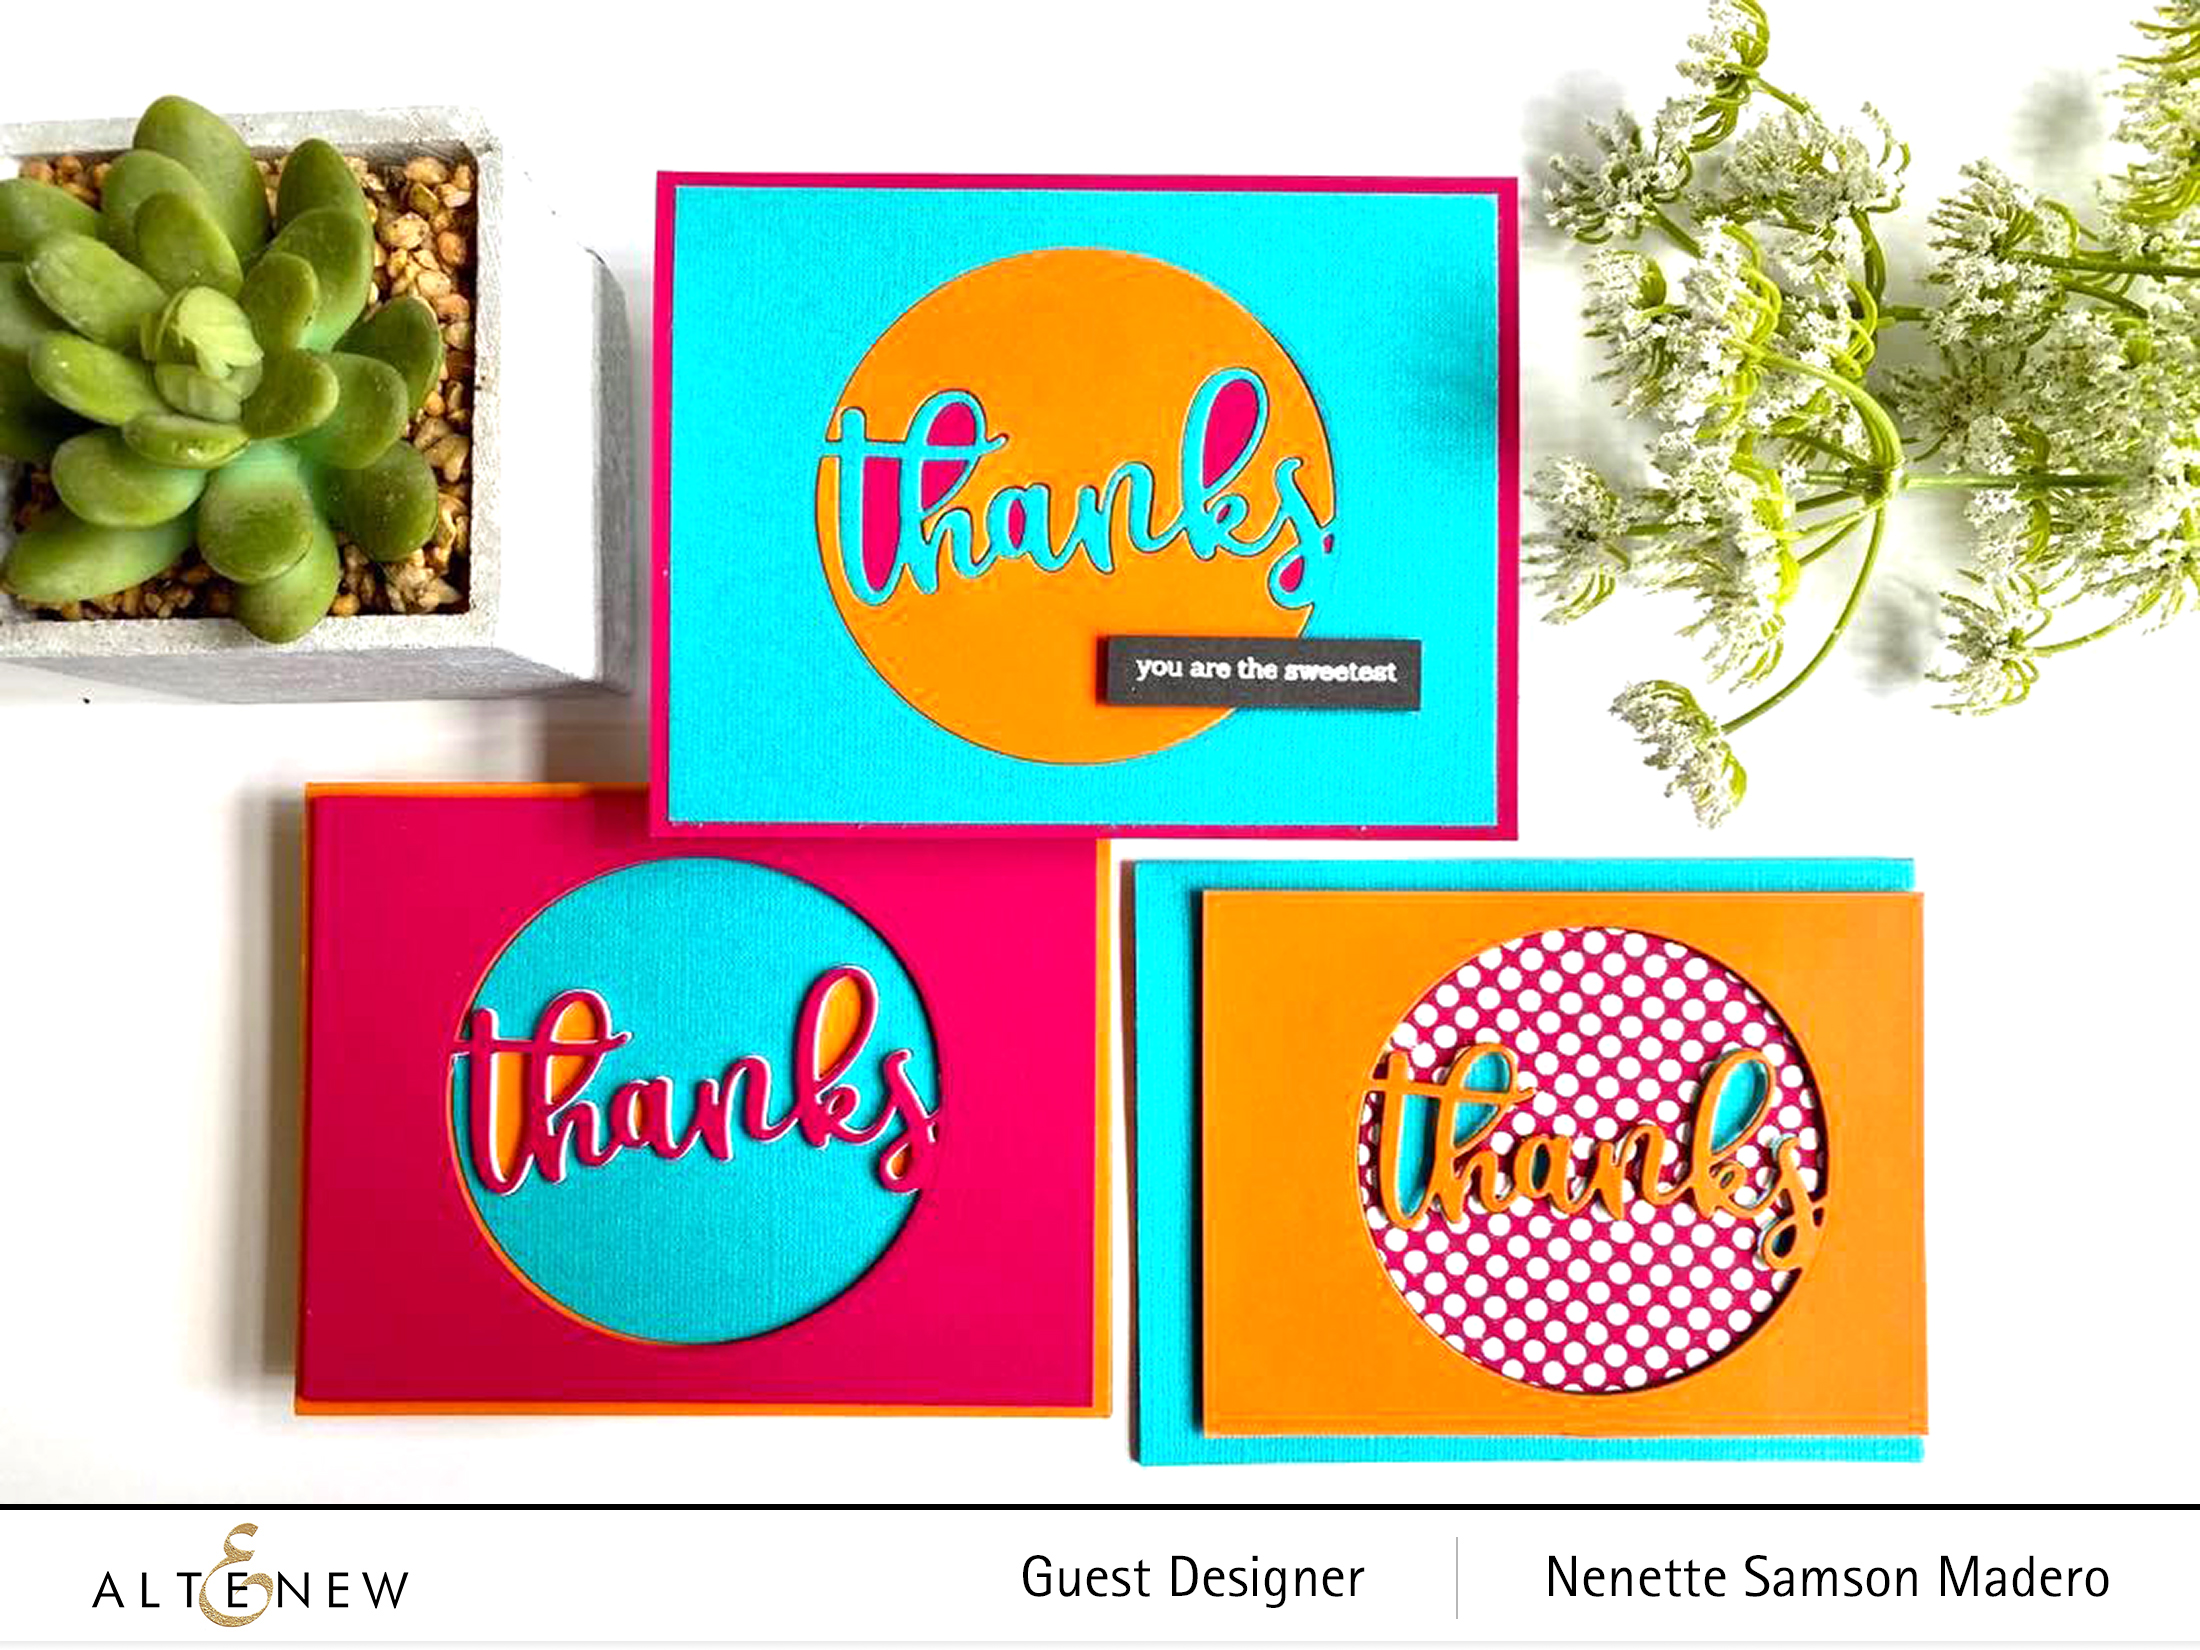
THANKS
Here’s another set of CAS cards using bold colors. I die cut 3 different colored cardstocks using the Circled Greetings: thanks die. To vary the background, I placed the Feeling Dotty Stencil over the background then added Versamark ink over it.
White embossing ink was poured over it and heat embossed to create a dotted background. I also added a sentiment from the Hello and Hugs stamp set for variation. This is a quick way to create multiple cards with a single die– just vary the cardstocks and backgrounds.
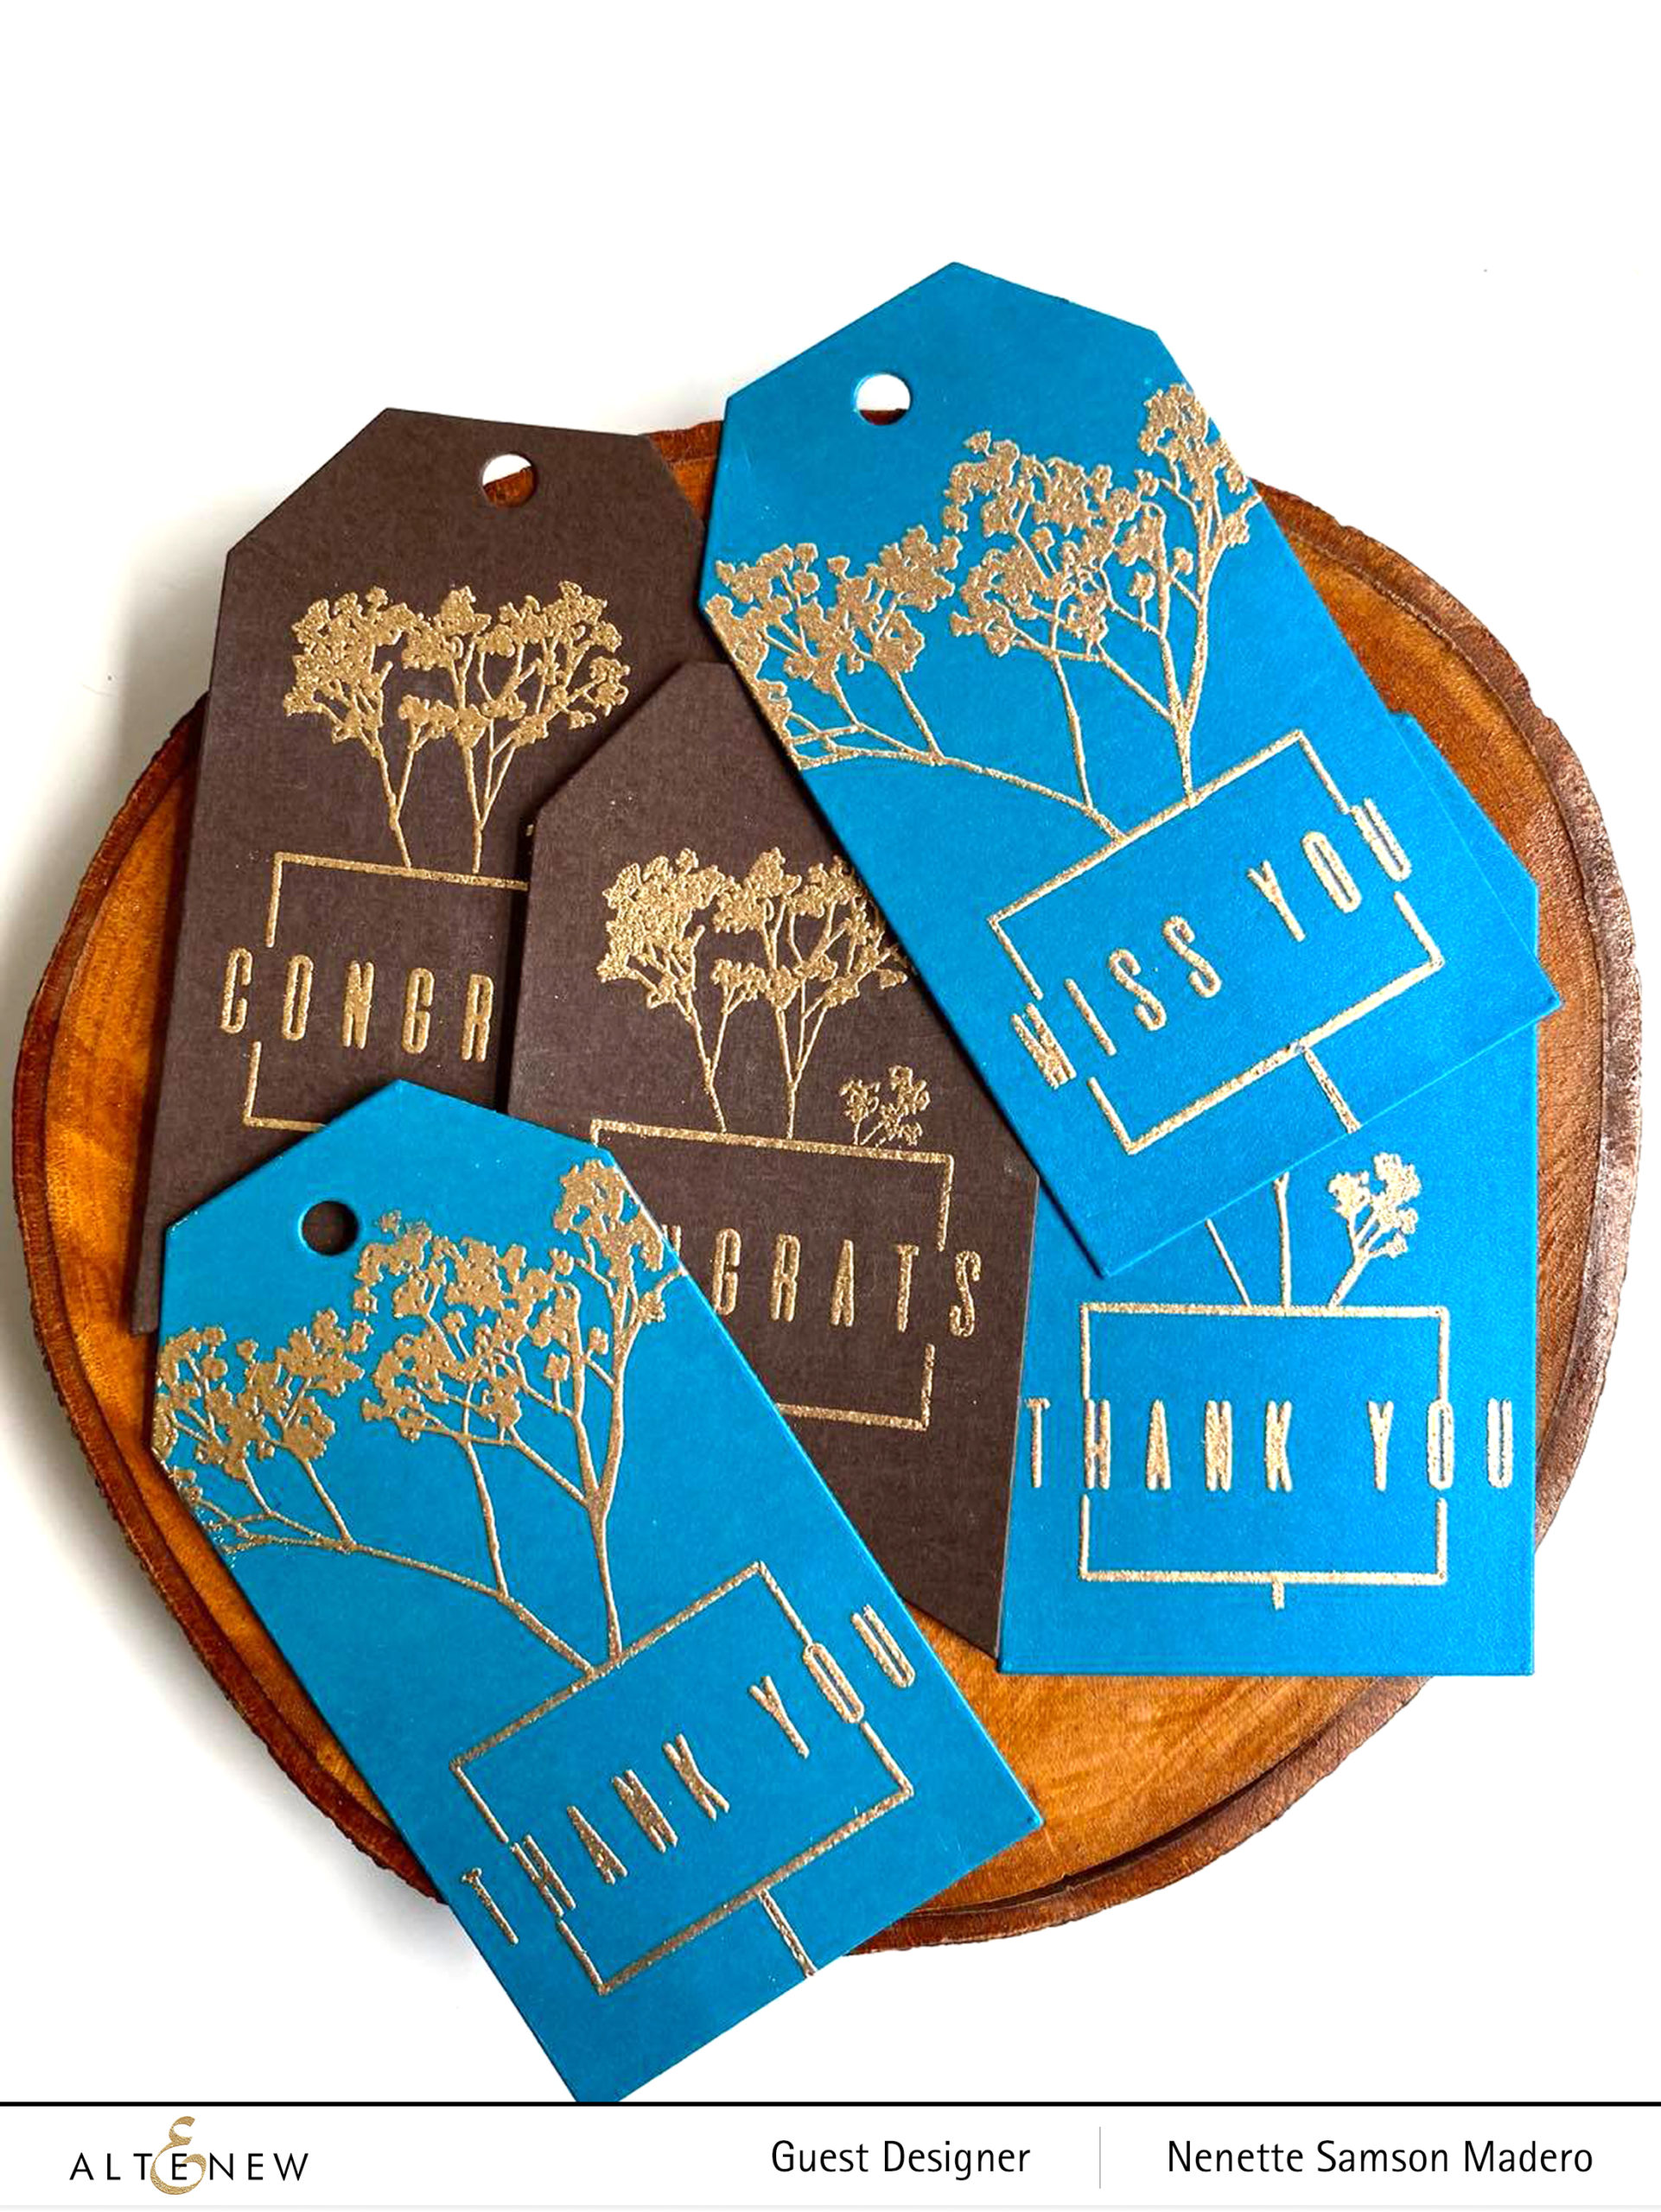
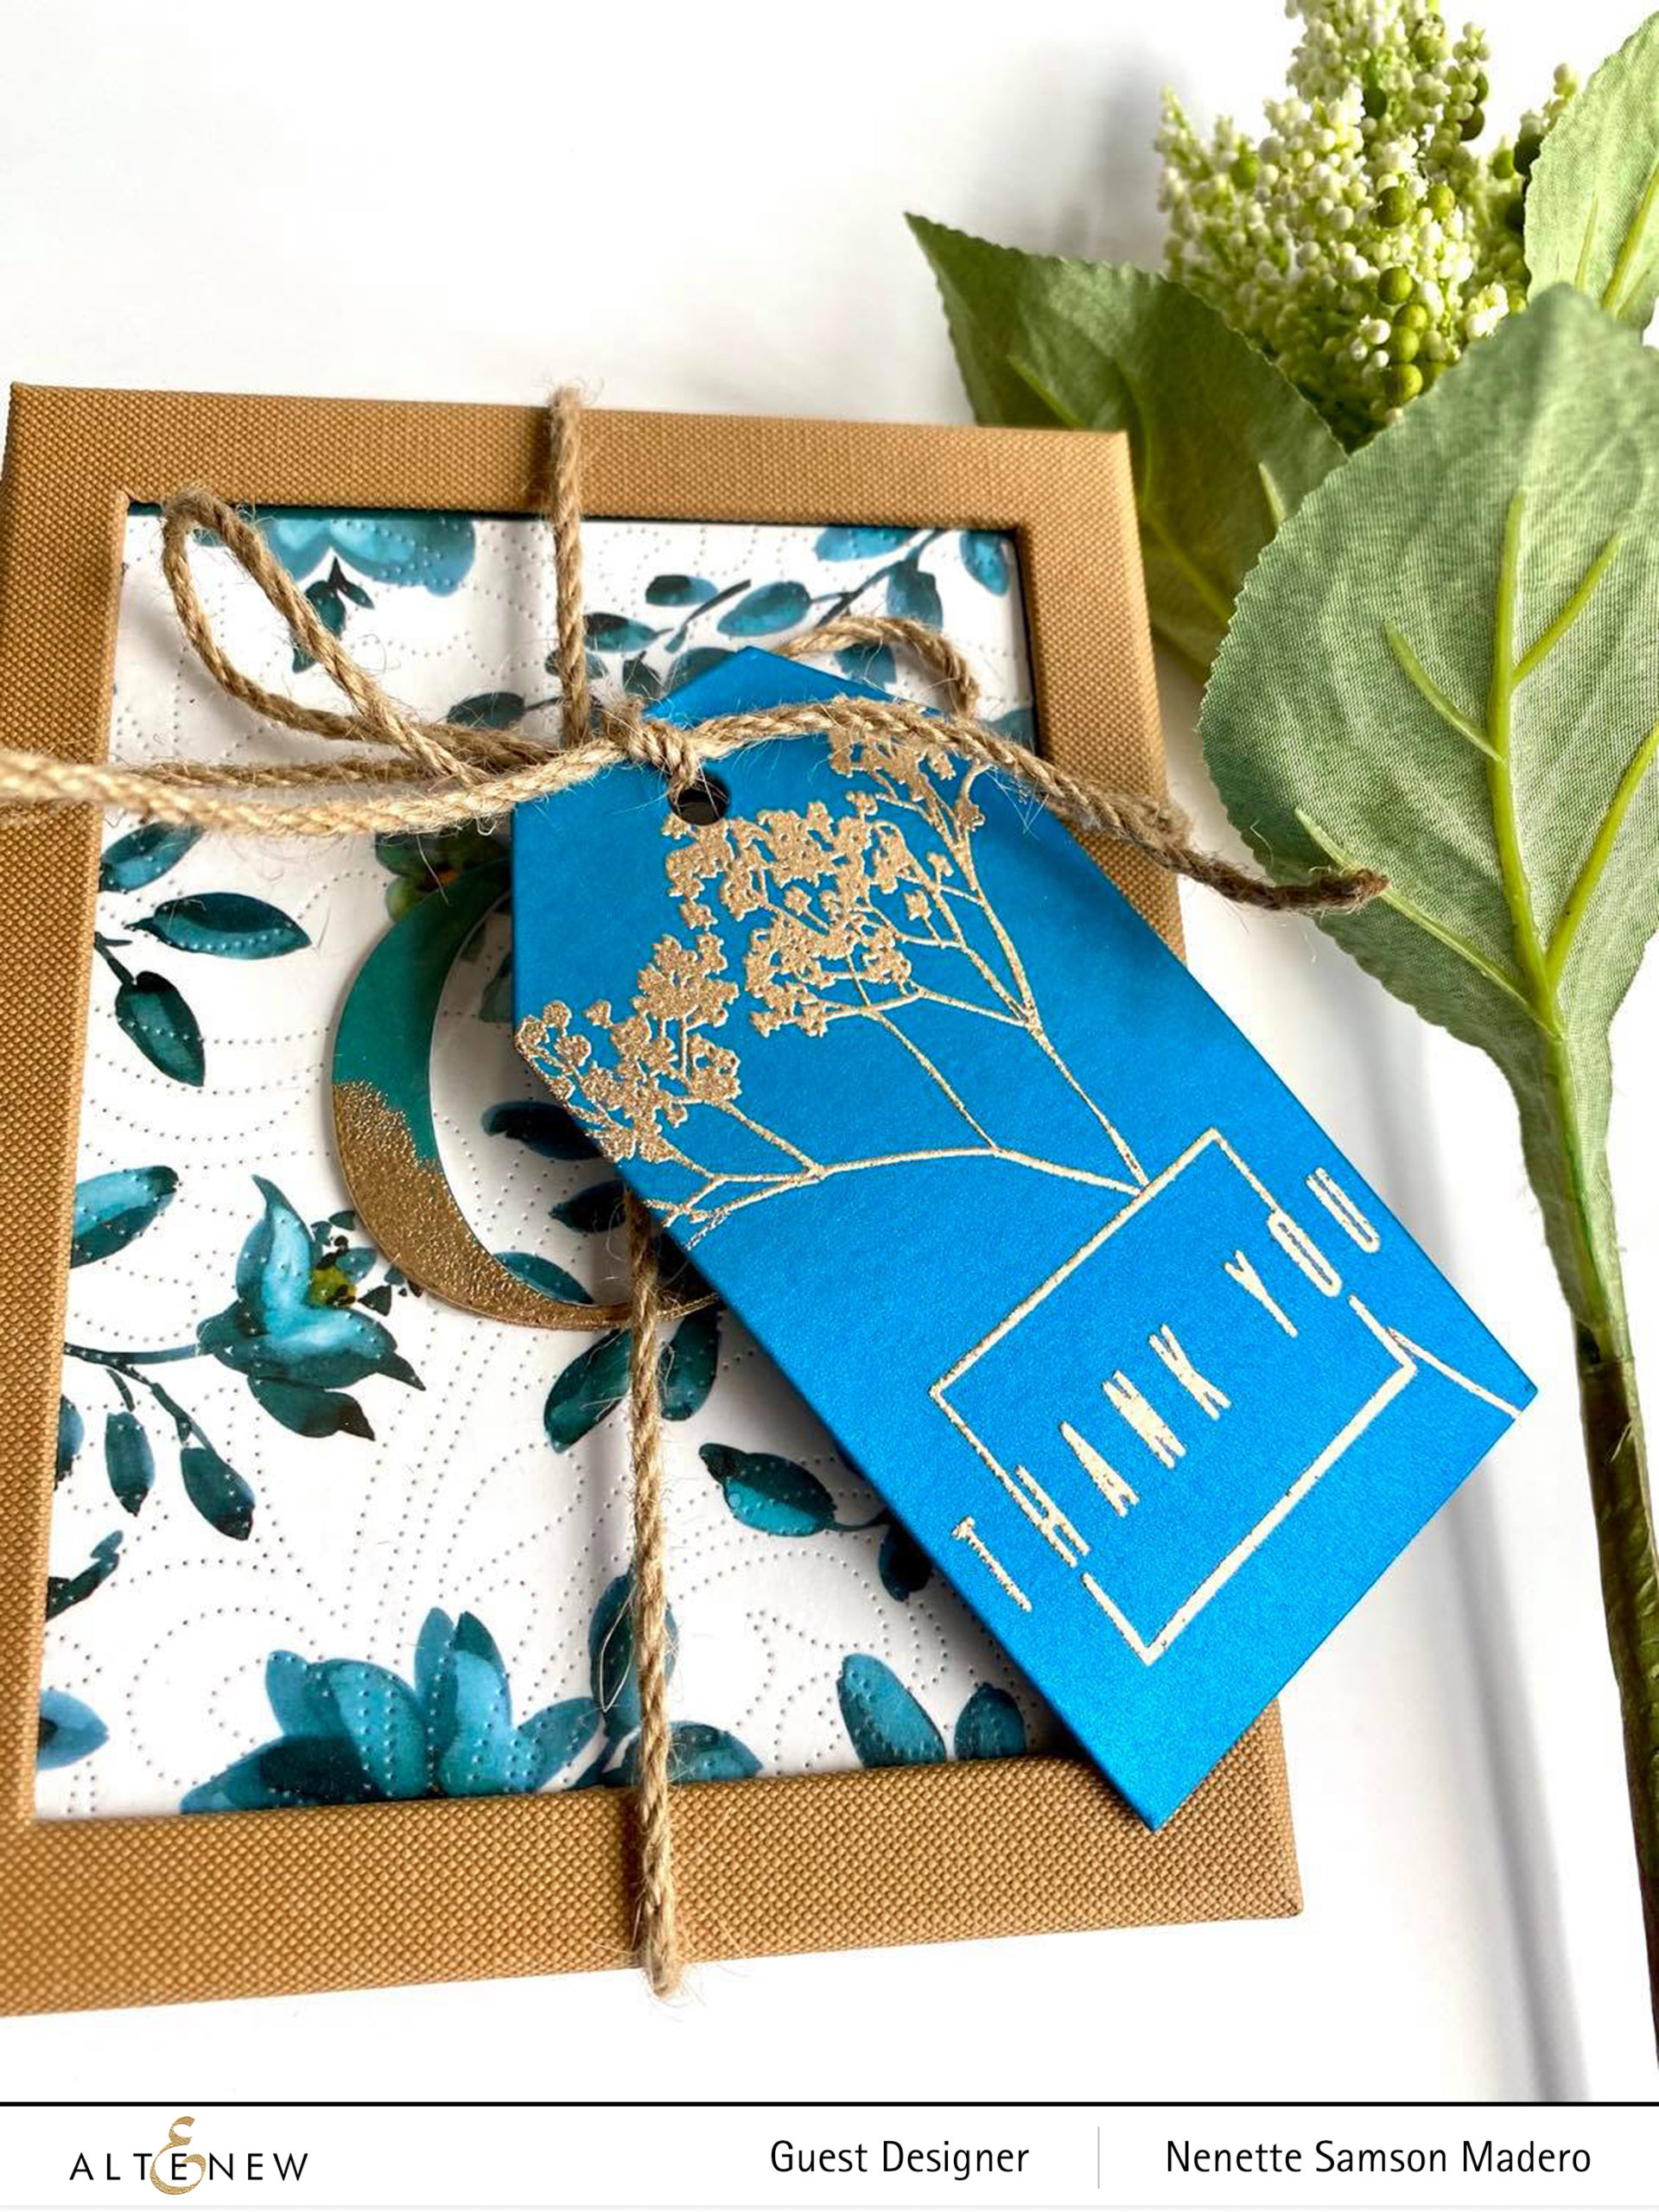
THANK YOU TAG
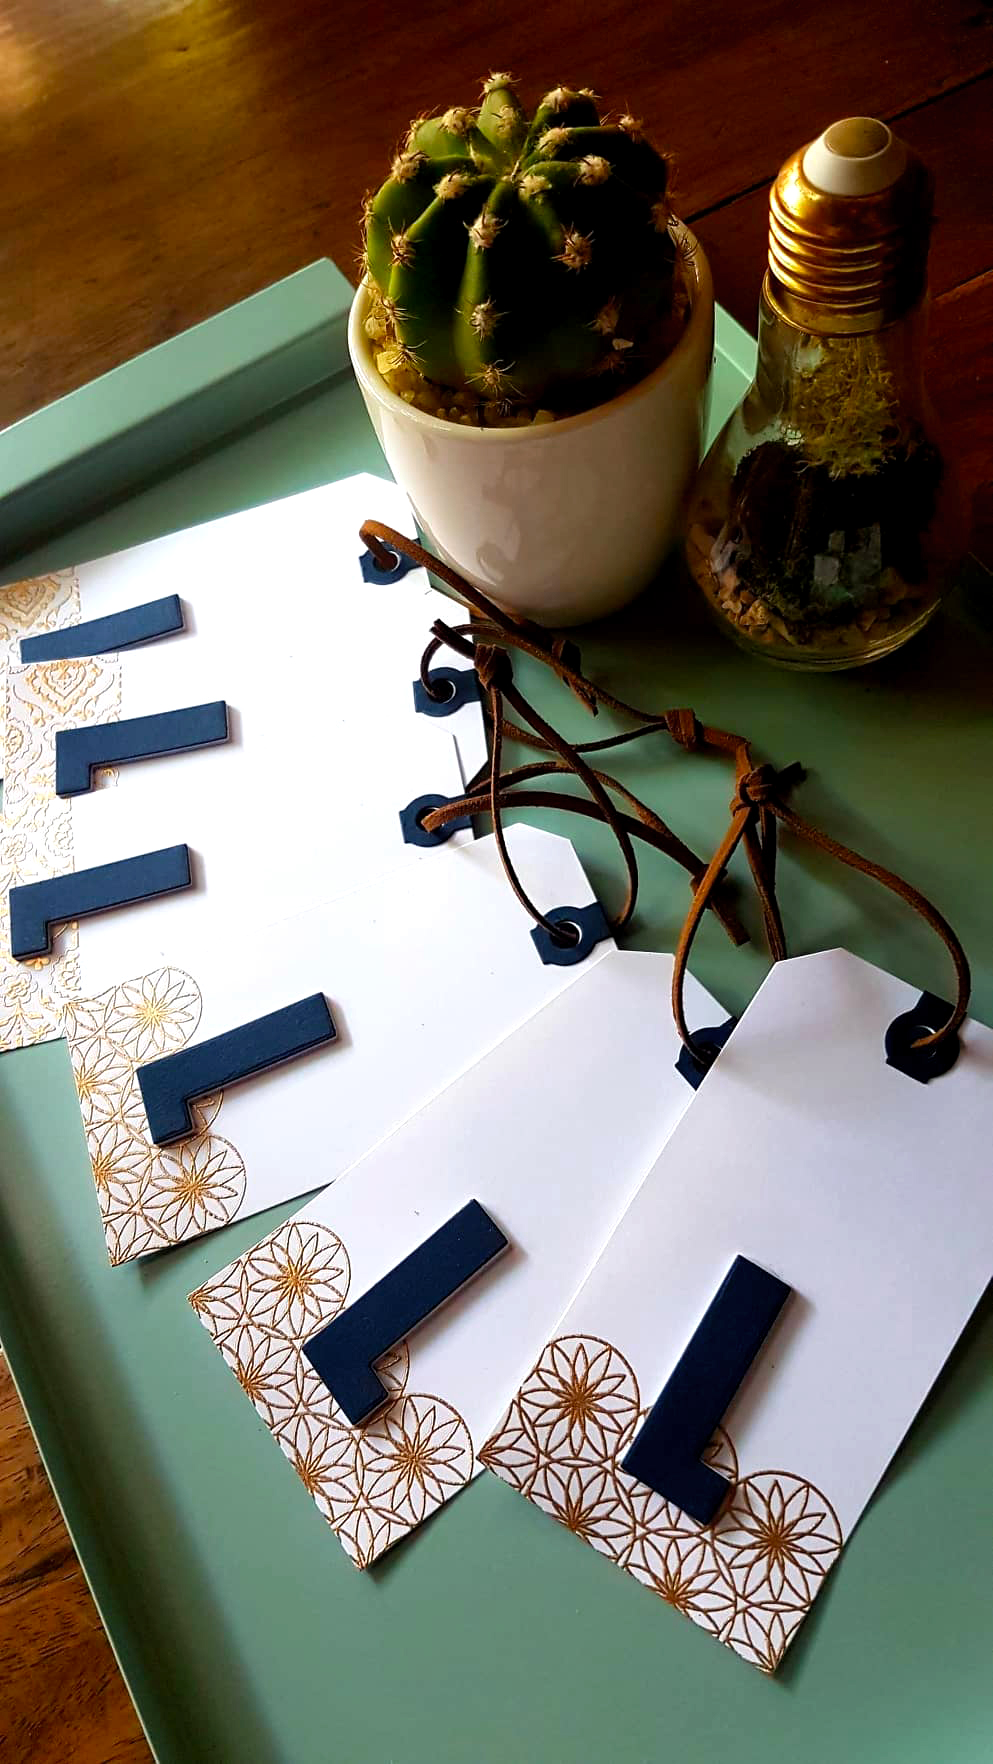
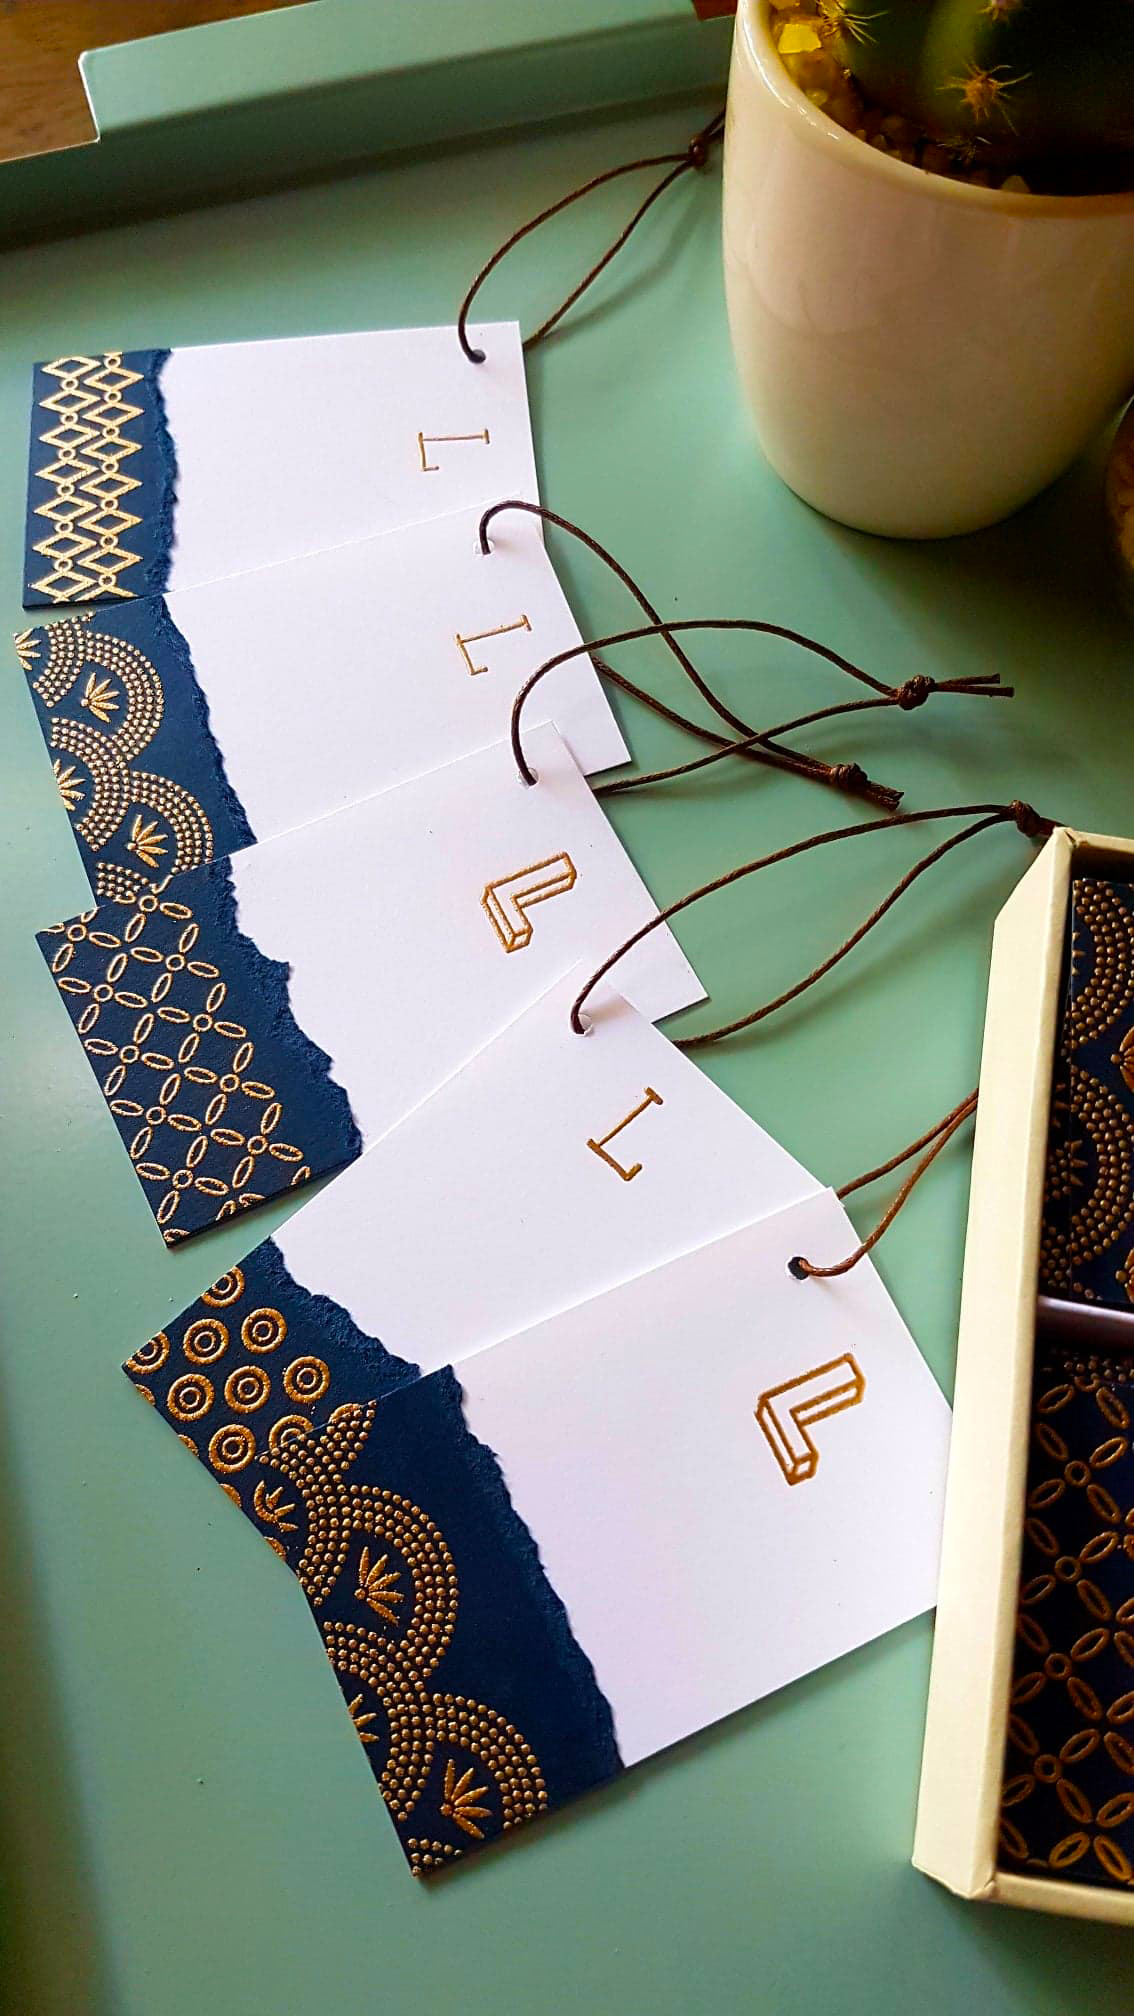
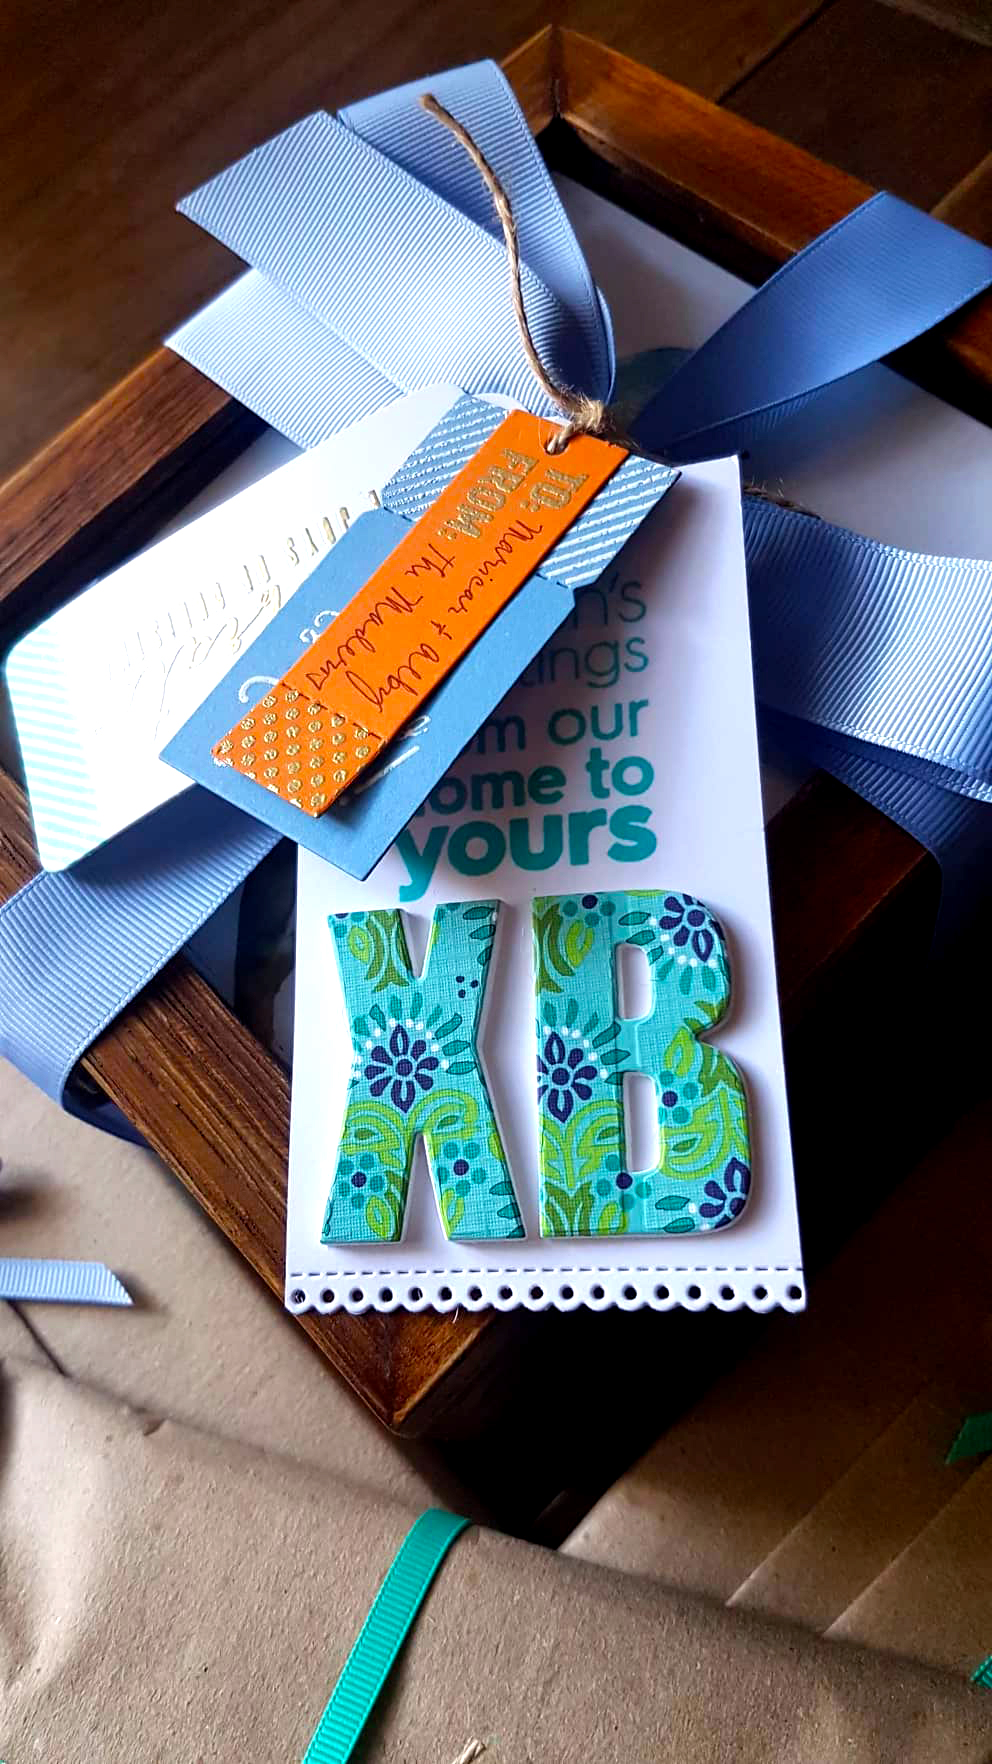
Here’s another quick project using the masking technique. For these tags, I used the sentiments from the Geometric Elements and the Fragile Foliage image. The biggest tag from the Terrific Tags dies was perfect to make the packaging for the monogram cards I made for a friend look pretty. I love the simplicity of the image which ties up with the modernity of the font.
The sentiment and border were stamped and embossed first using rose gold embossing powder. Then I masked the area so that I can stamp the foliage image over it.
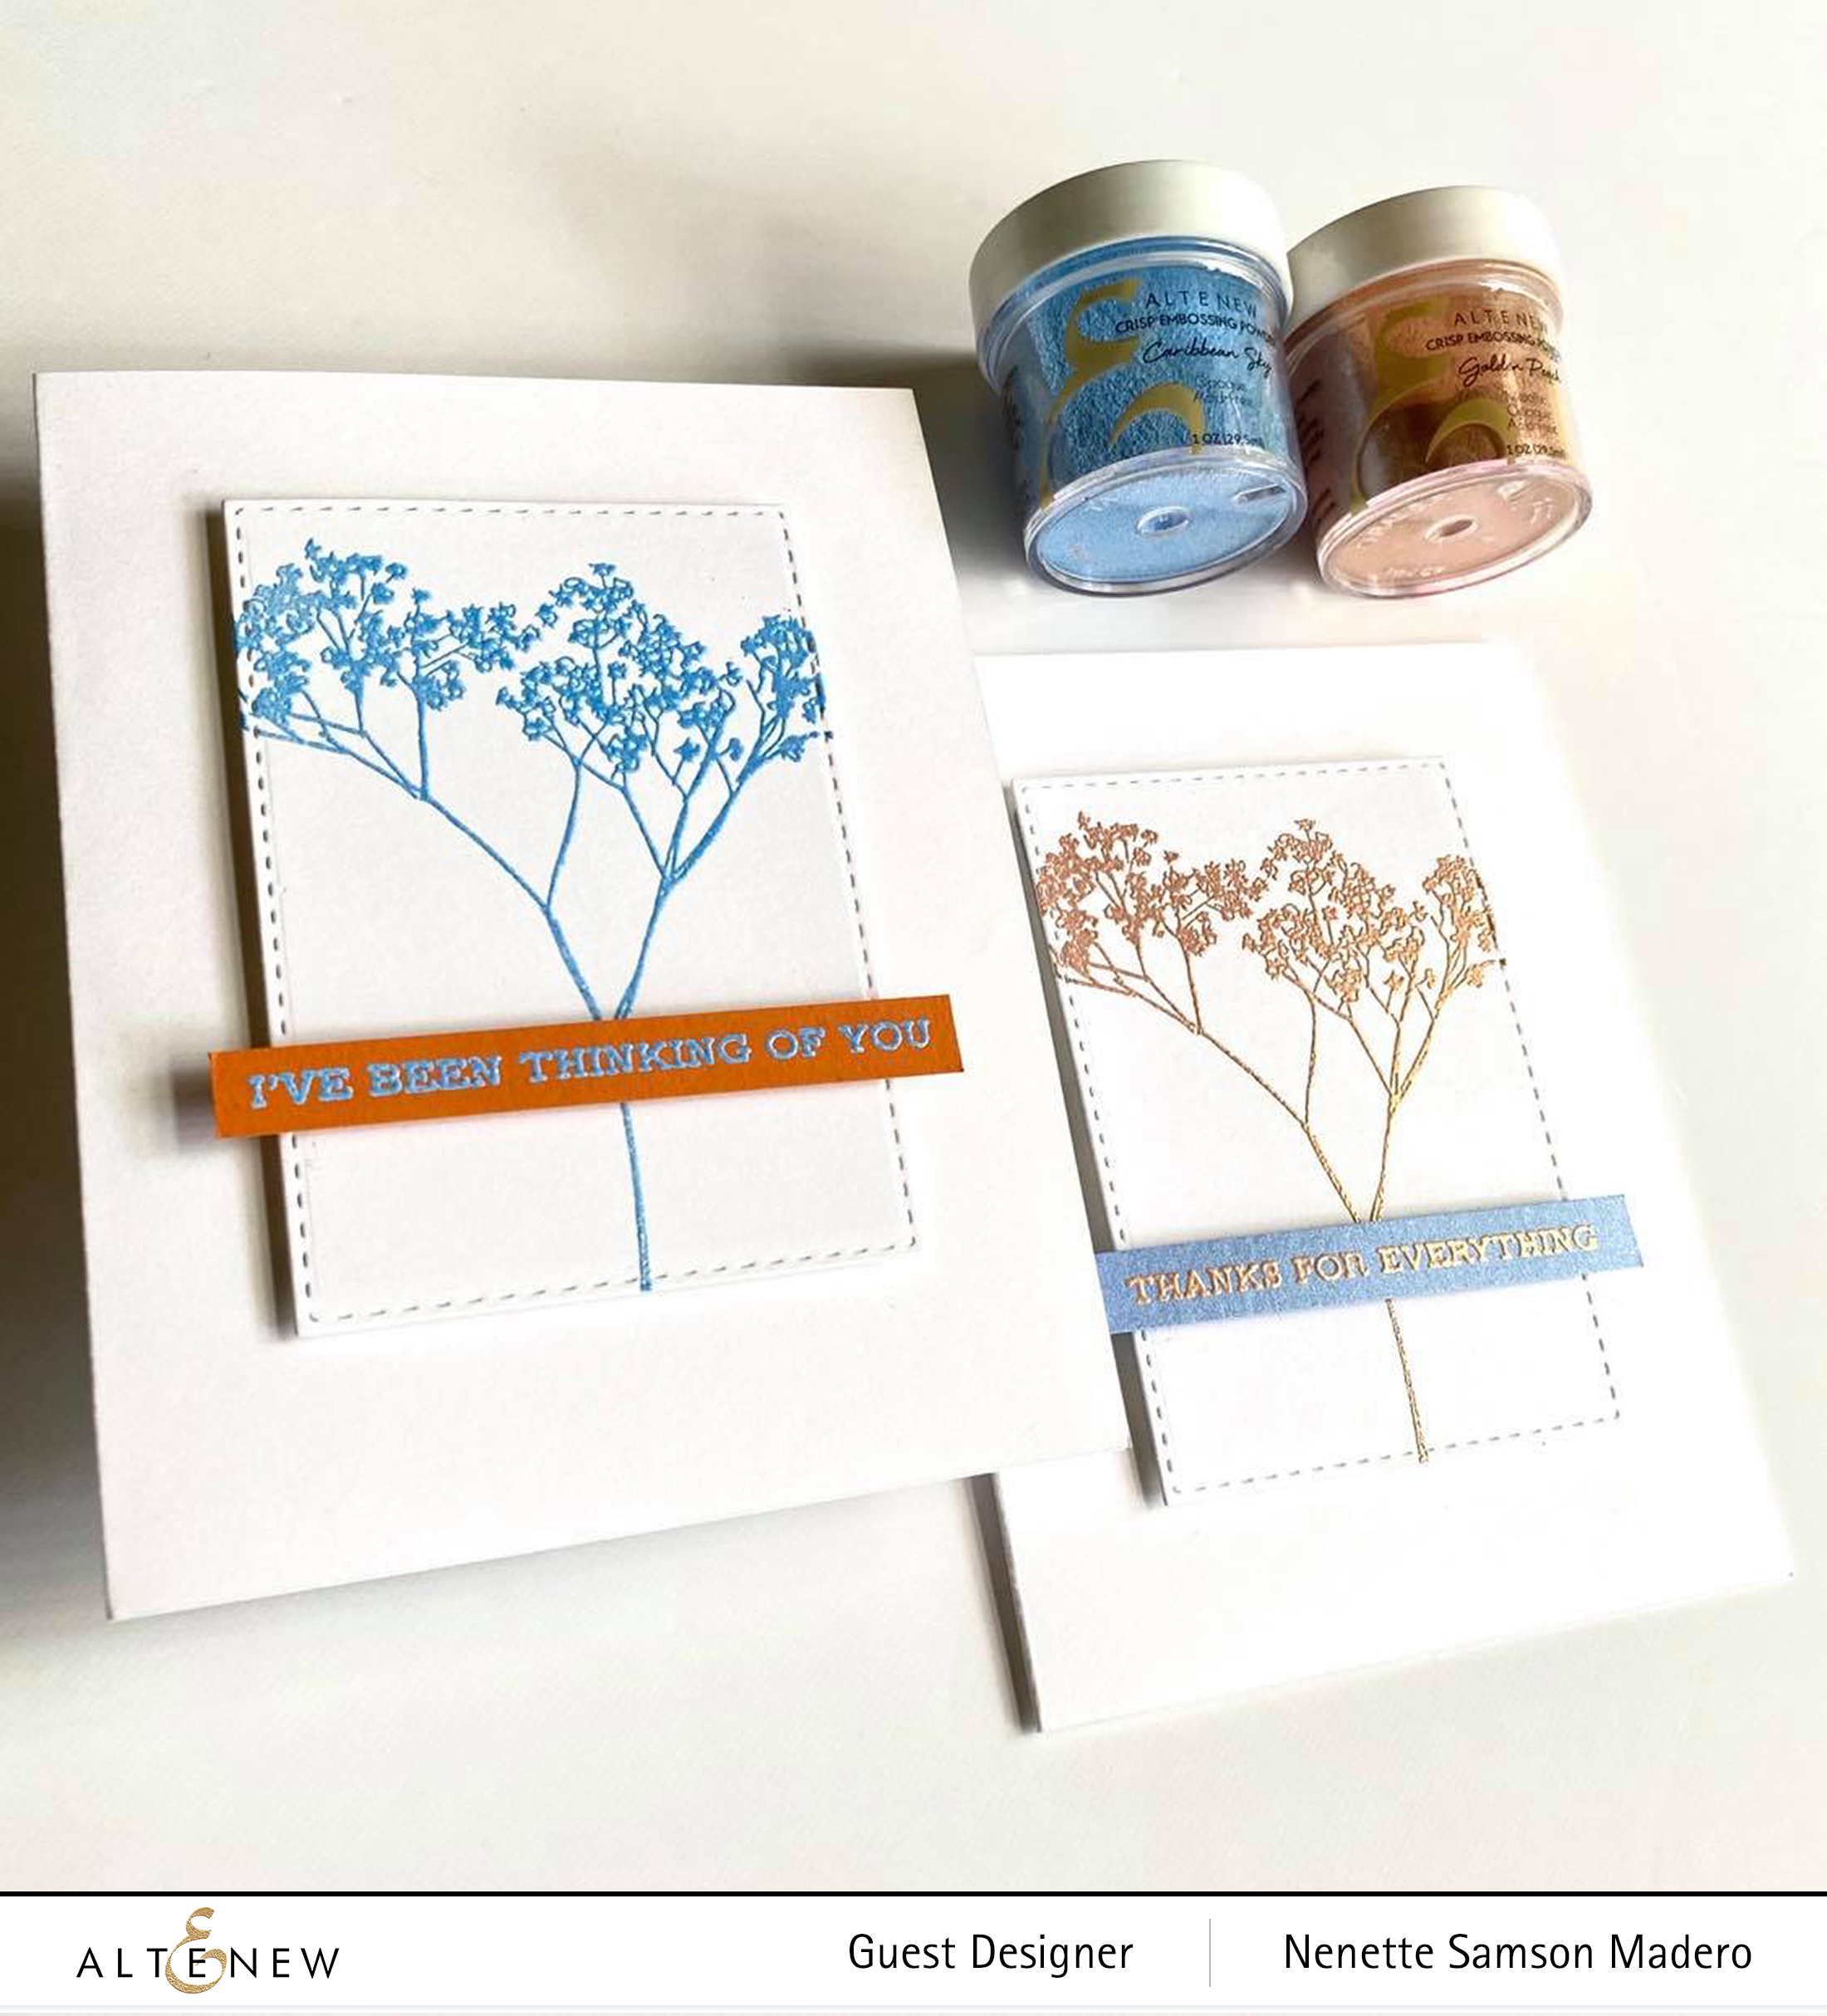
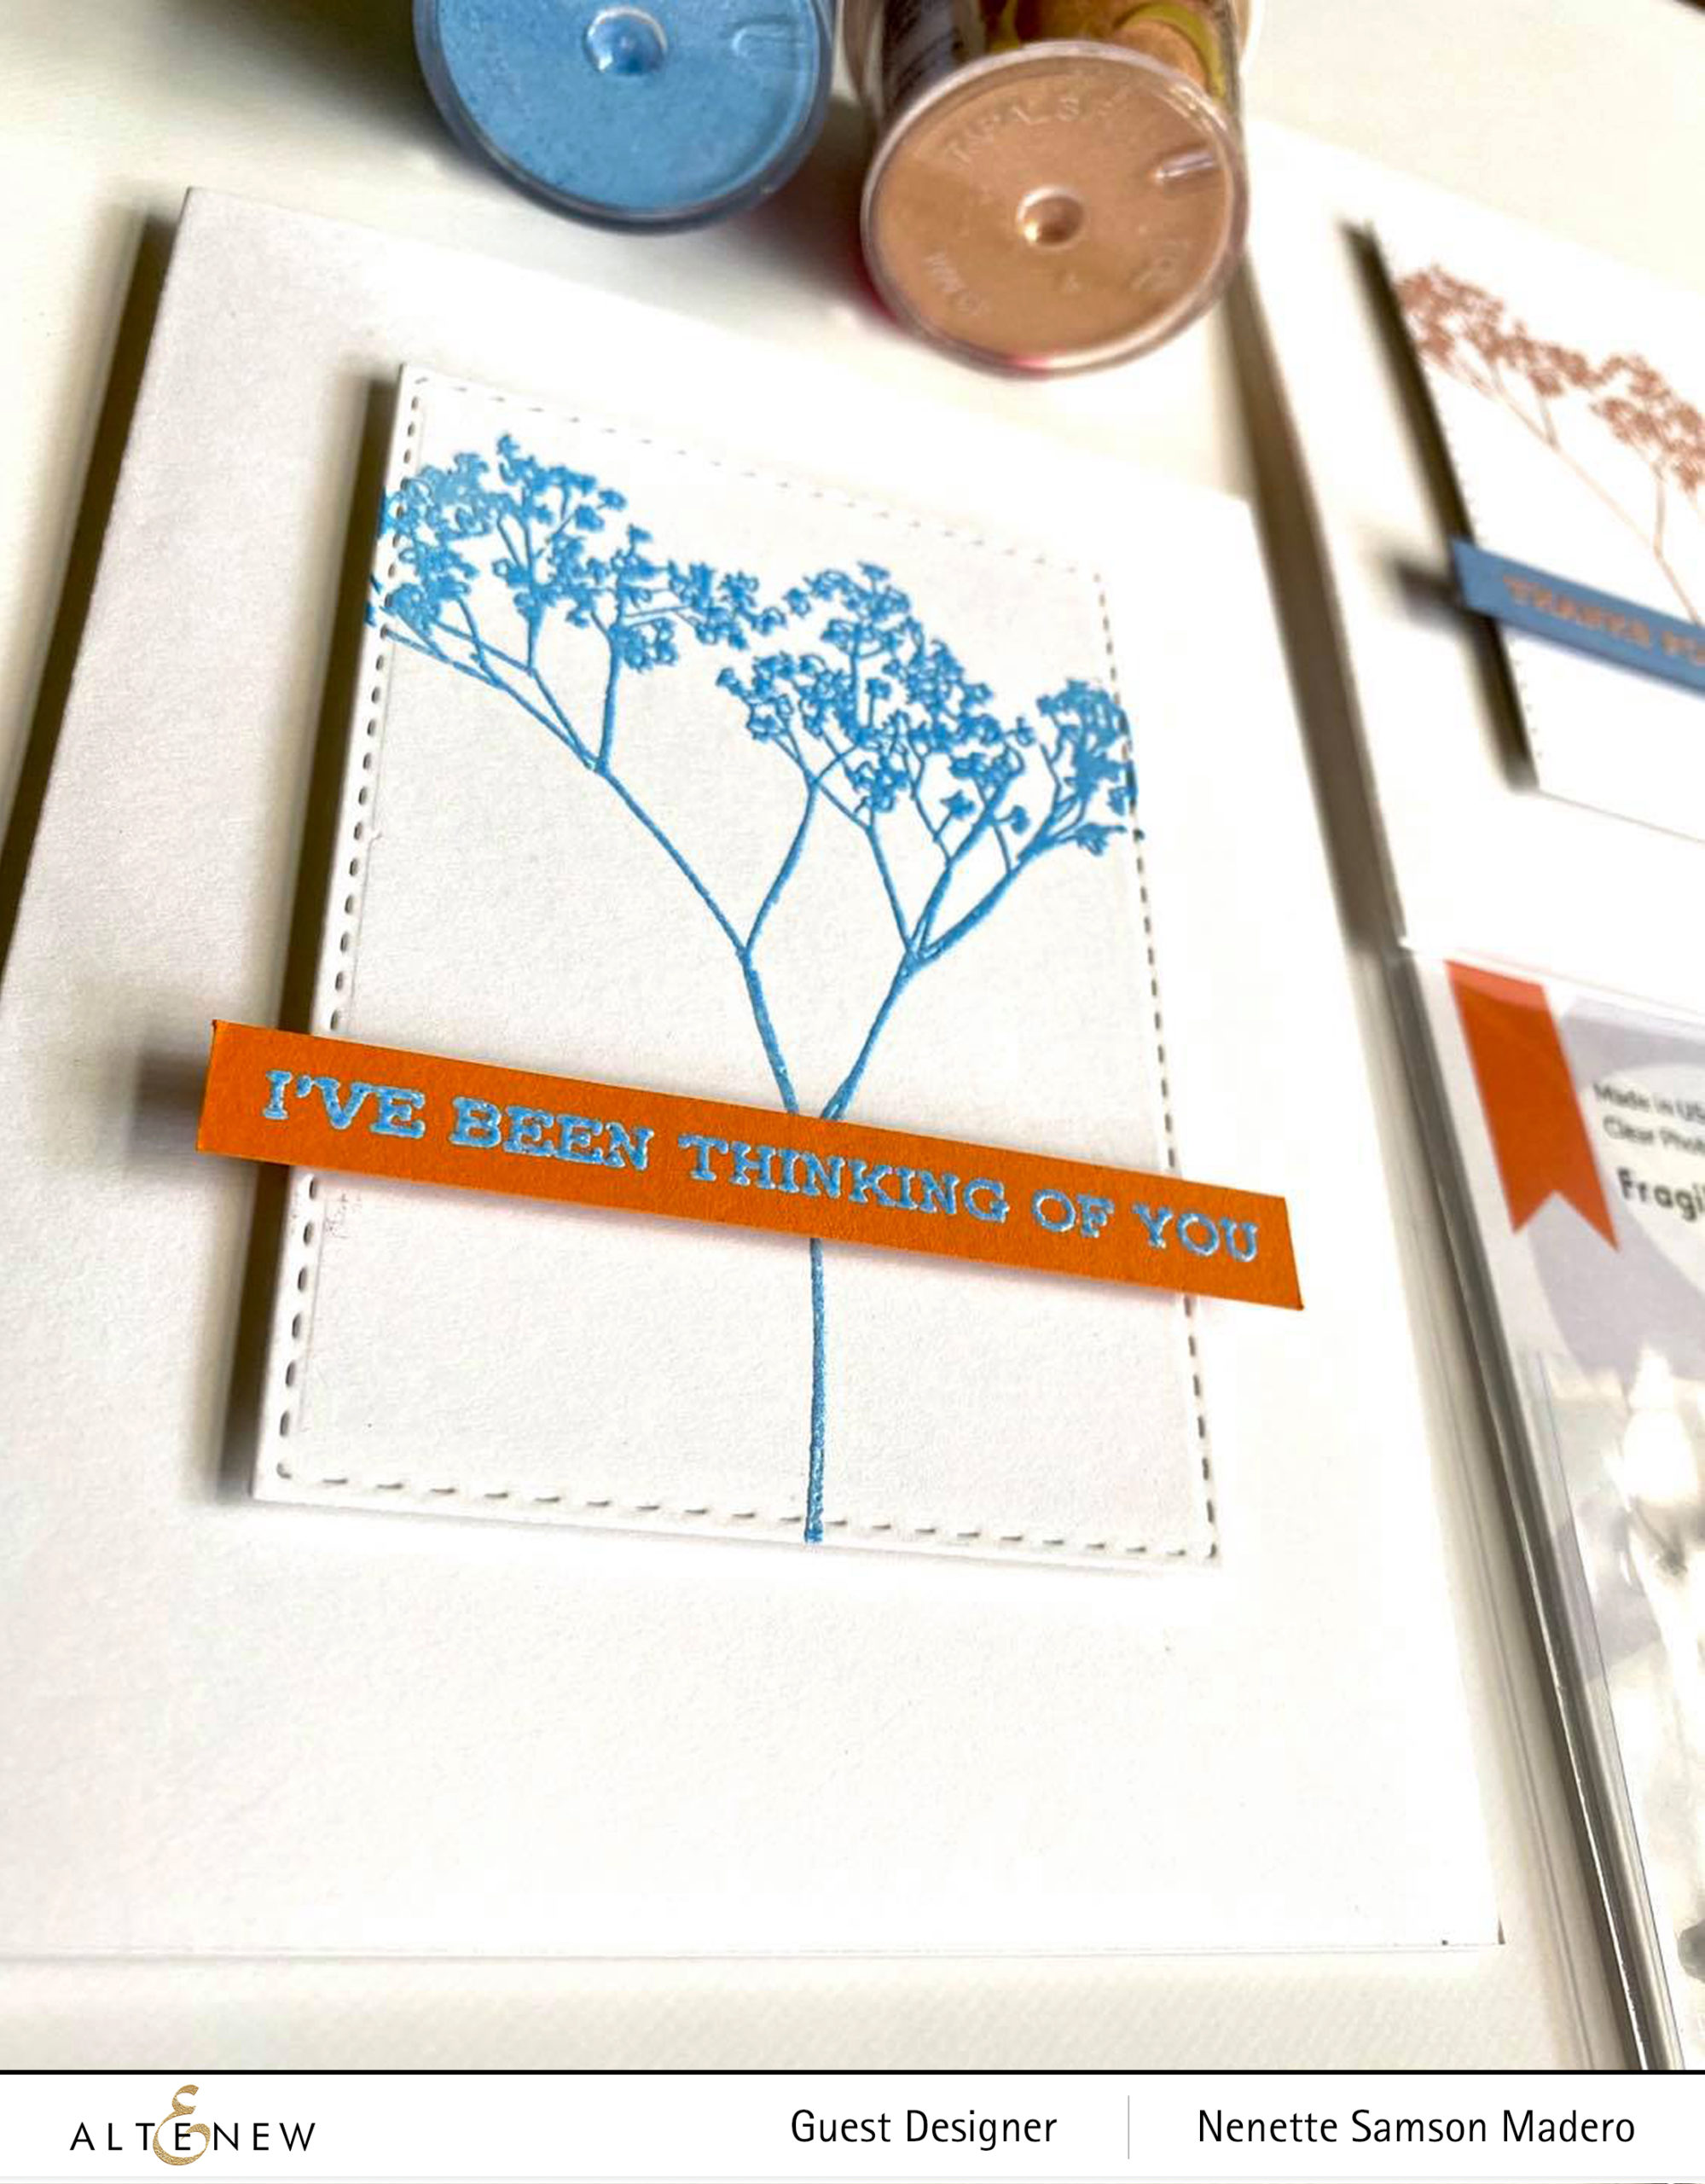
If you have been following my previous blog posts, you’ll notice that my style leans heavily towards layering and lots of embellishments. Restraining myself from adding more to a card is truly a struggle for me. I have a hard time creating clean and simple cards because I tend to cover up all of the white space. That being said, I’ve always been a huge fan of Cathy Zielske‘s CAS style ever since my scrapbooking days in the early 2000s. From her, I’ve learned the basics in design principles. She’s my rockstar when it comes to CAS layouts and cards. And just recently, she sent me a video message full of sound advice on how to deal with certain types of people. I am so humbled that she took time out of her busy schedule to personally send a message and make me feel better. So in honor of this amazing human being, this post showcases a number of CAS cards and from this post onwards, I will step out of my comfort zone and try to include a card that reflects her style. Thank you, Cathy! Truly appreciate what you did. ❤️ Below is a set of CAS cards inspired by her style using the Fragile Foliage stamp set.
I’VE BEEN THINKING OF YOU|THANKS FOR EVERYTHING
The image from the Fragile Foliage image was stamped on a rectangular die cut cardstock. This was adhered on the card front using a foam sheet. Golden peach and Caribbean sky embossing powders were used to emboss the sentiments from the Sentiment Strips stamp set.
Thank you so much for dropping by!!! As I’ve said earlier, I truly enjoy reading all your wonderful comments. Do say hi and let me know which card is your favorite! Would love to see you too in my other social media platforms. To see my latest projects, you can follow me on Instagramand Facebook . Thanks again for dropping by and keep on crafting!!!
Hi everyone! It has been a while since I’ve posted! The past month has been very busy preparing card kits for the participants. A total of 8 projects were prepared and we had to finish them within 4 hours. I think some of the participants were a little stressed out! 🙂 Below are the cards/tag that they made.
Wonderland Stamp Set and Winter Wonderland Watercolor Brush markers
For the first card, the participants got to try out their own Wonderland stamp set and did stamping, embossing and die cutting of the flowers on watercolor paper. After that, they colored the petals using wet on wet technique and added some salt for more texture. The background was colored using distress oxide inks and splattered with water droplets.
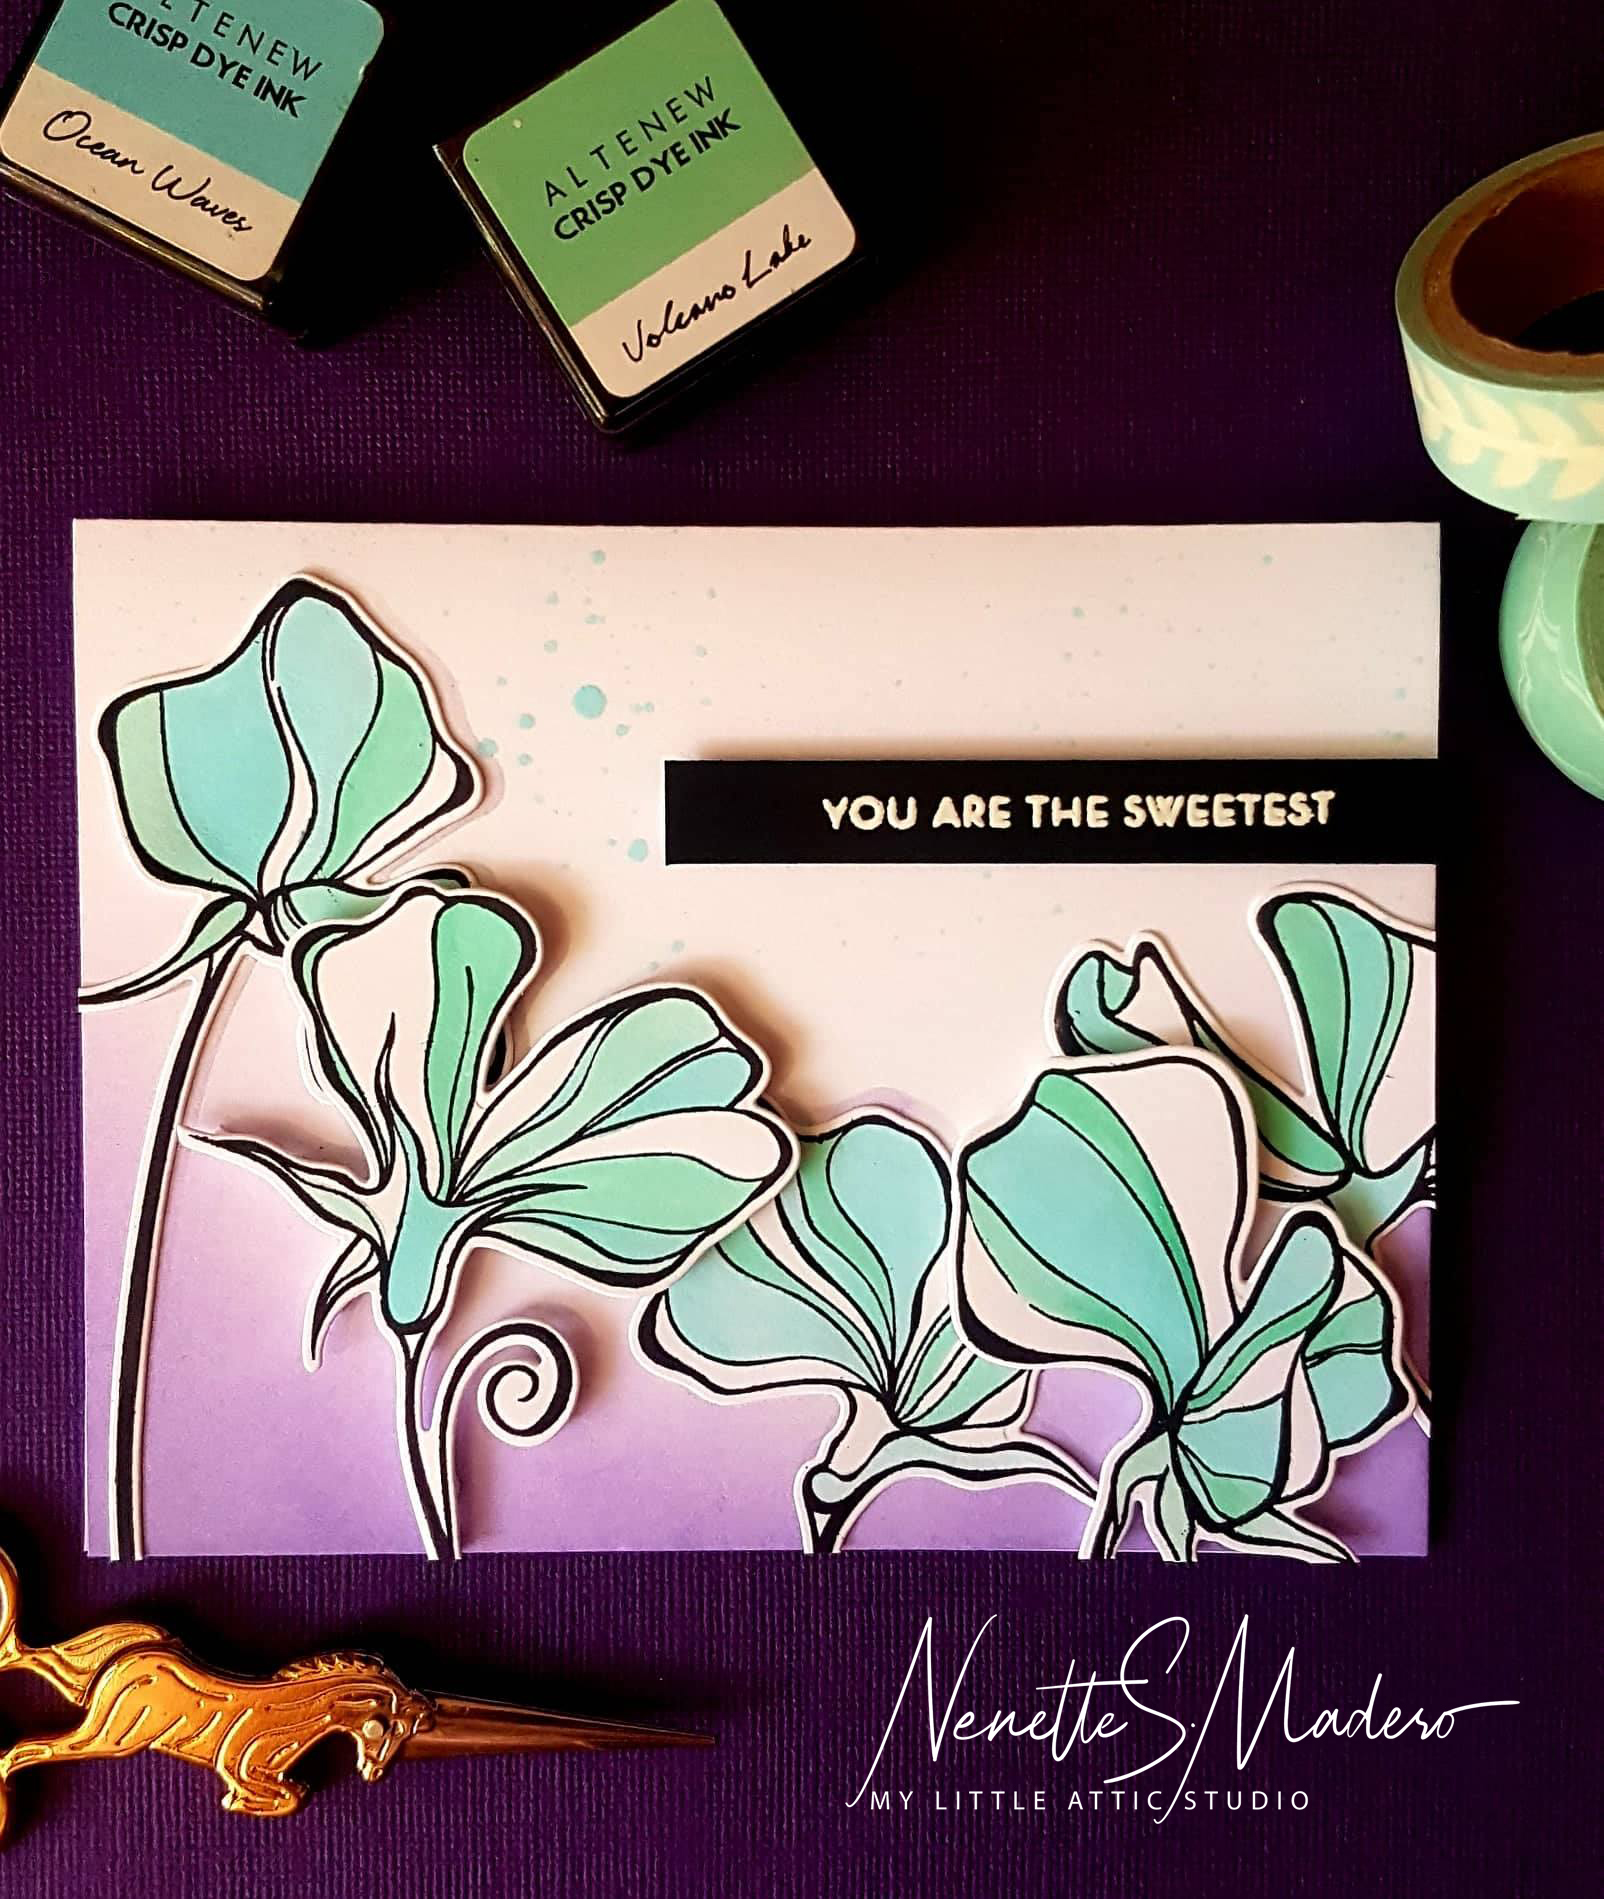
Sweet Peas Stamp set
The next card was made using the Sweet Peas stamp set. This time, the participants got to use their masks to create shadows of the flowers. They used Zig clear color real brush pens to color in the petals. For this card, I used Altenew dye inks and was careful not to add too much water.
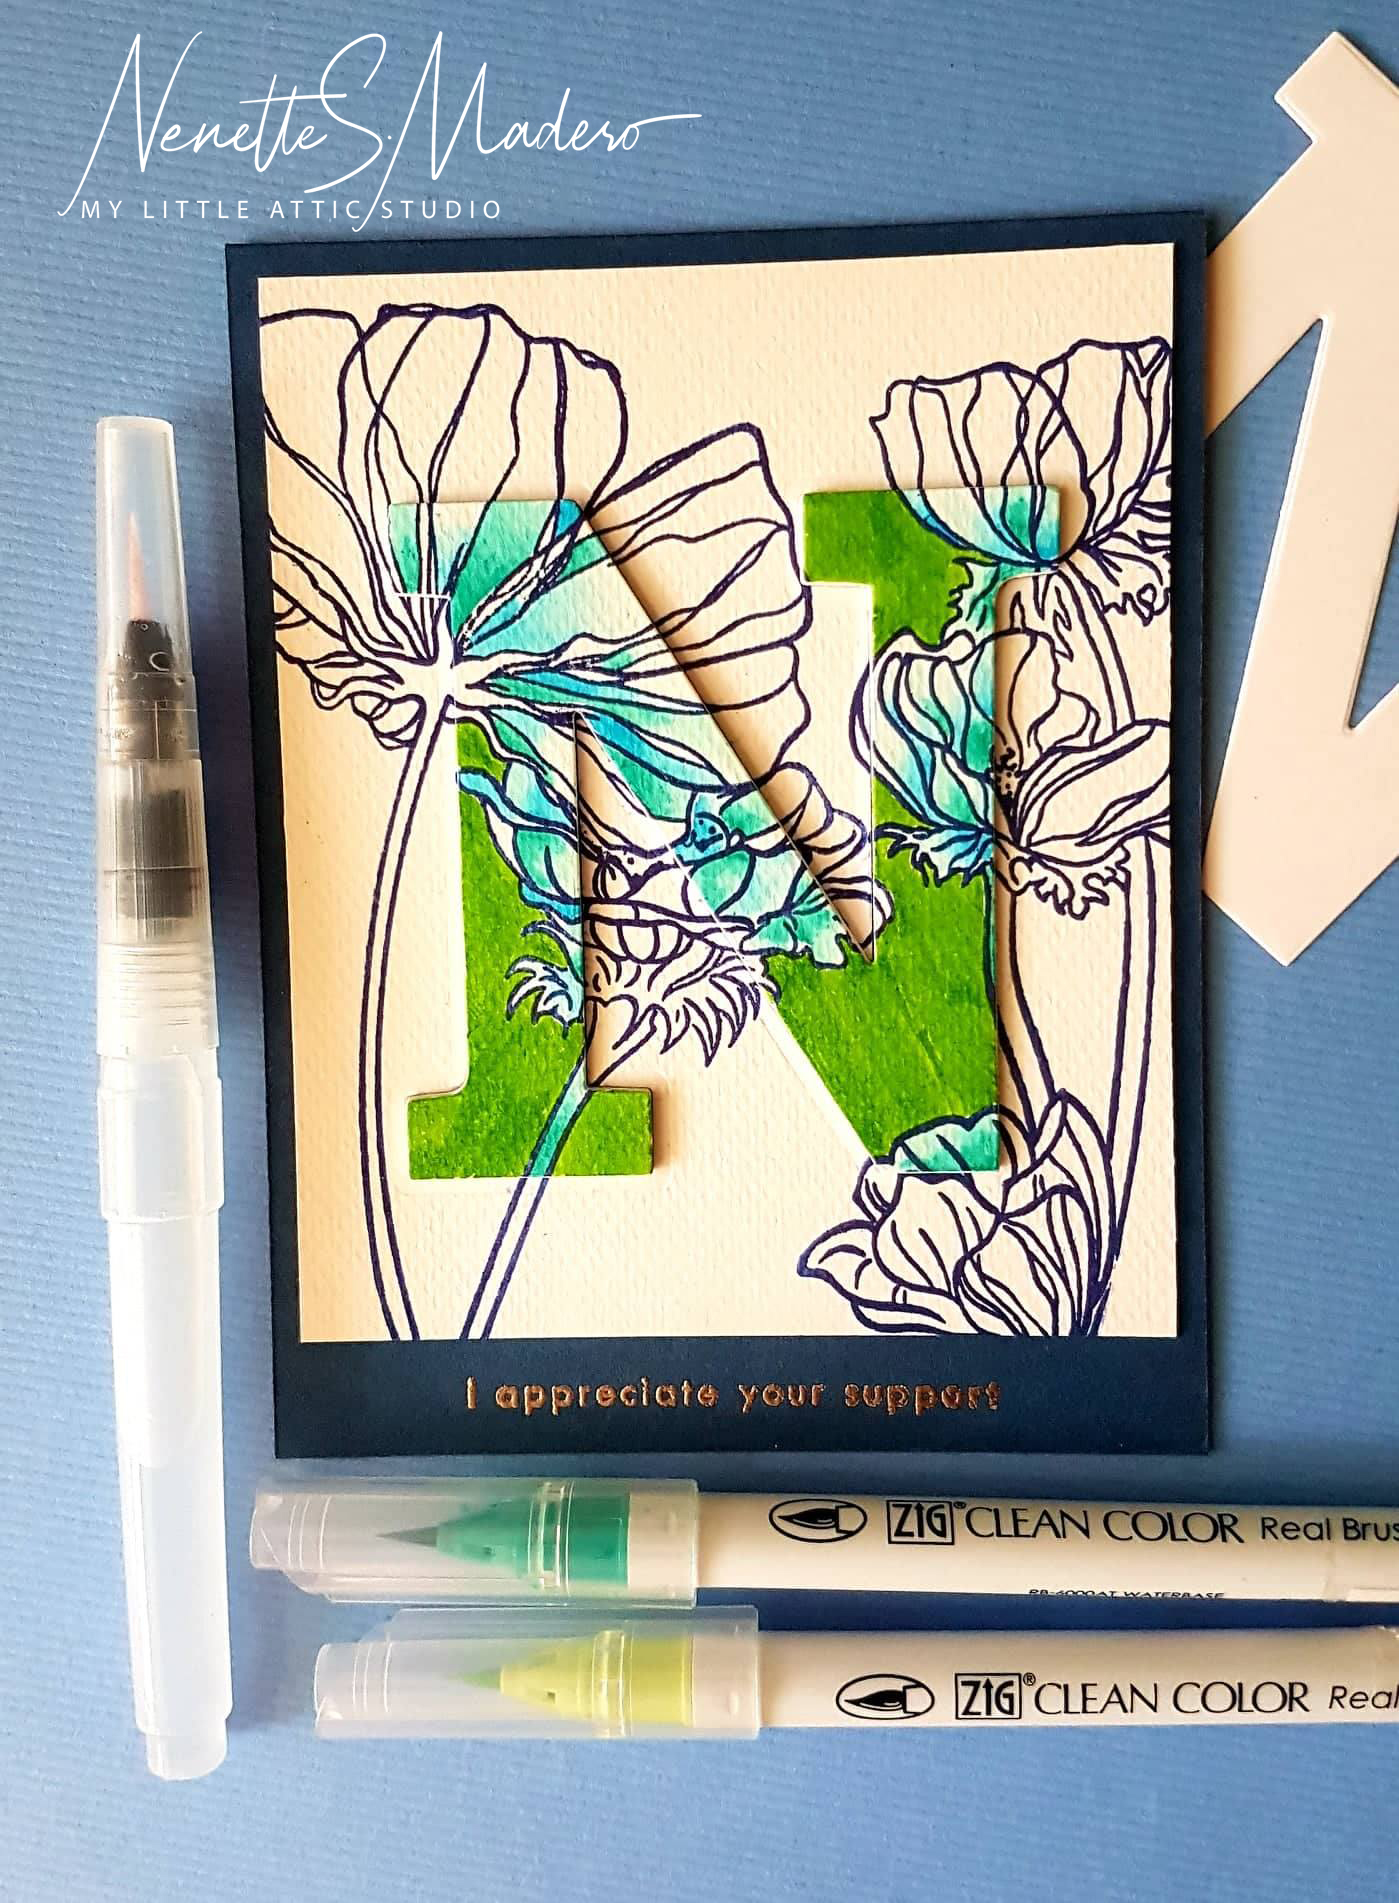
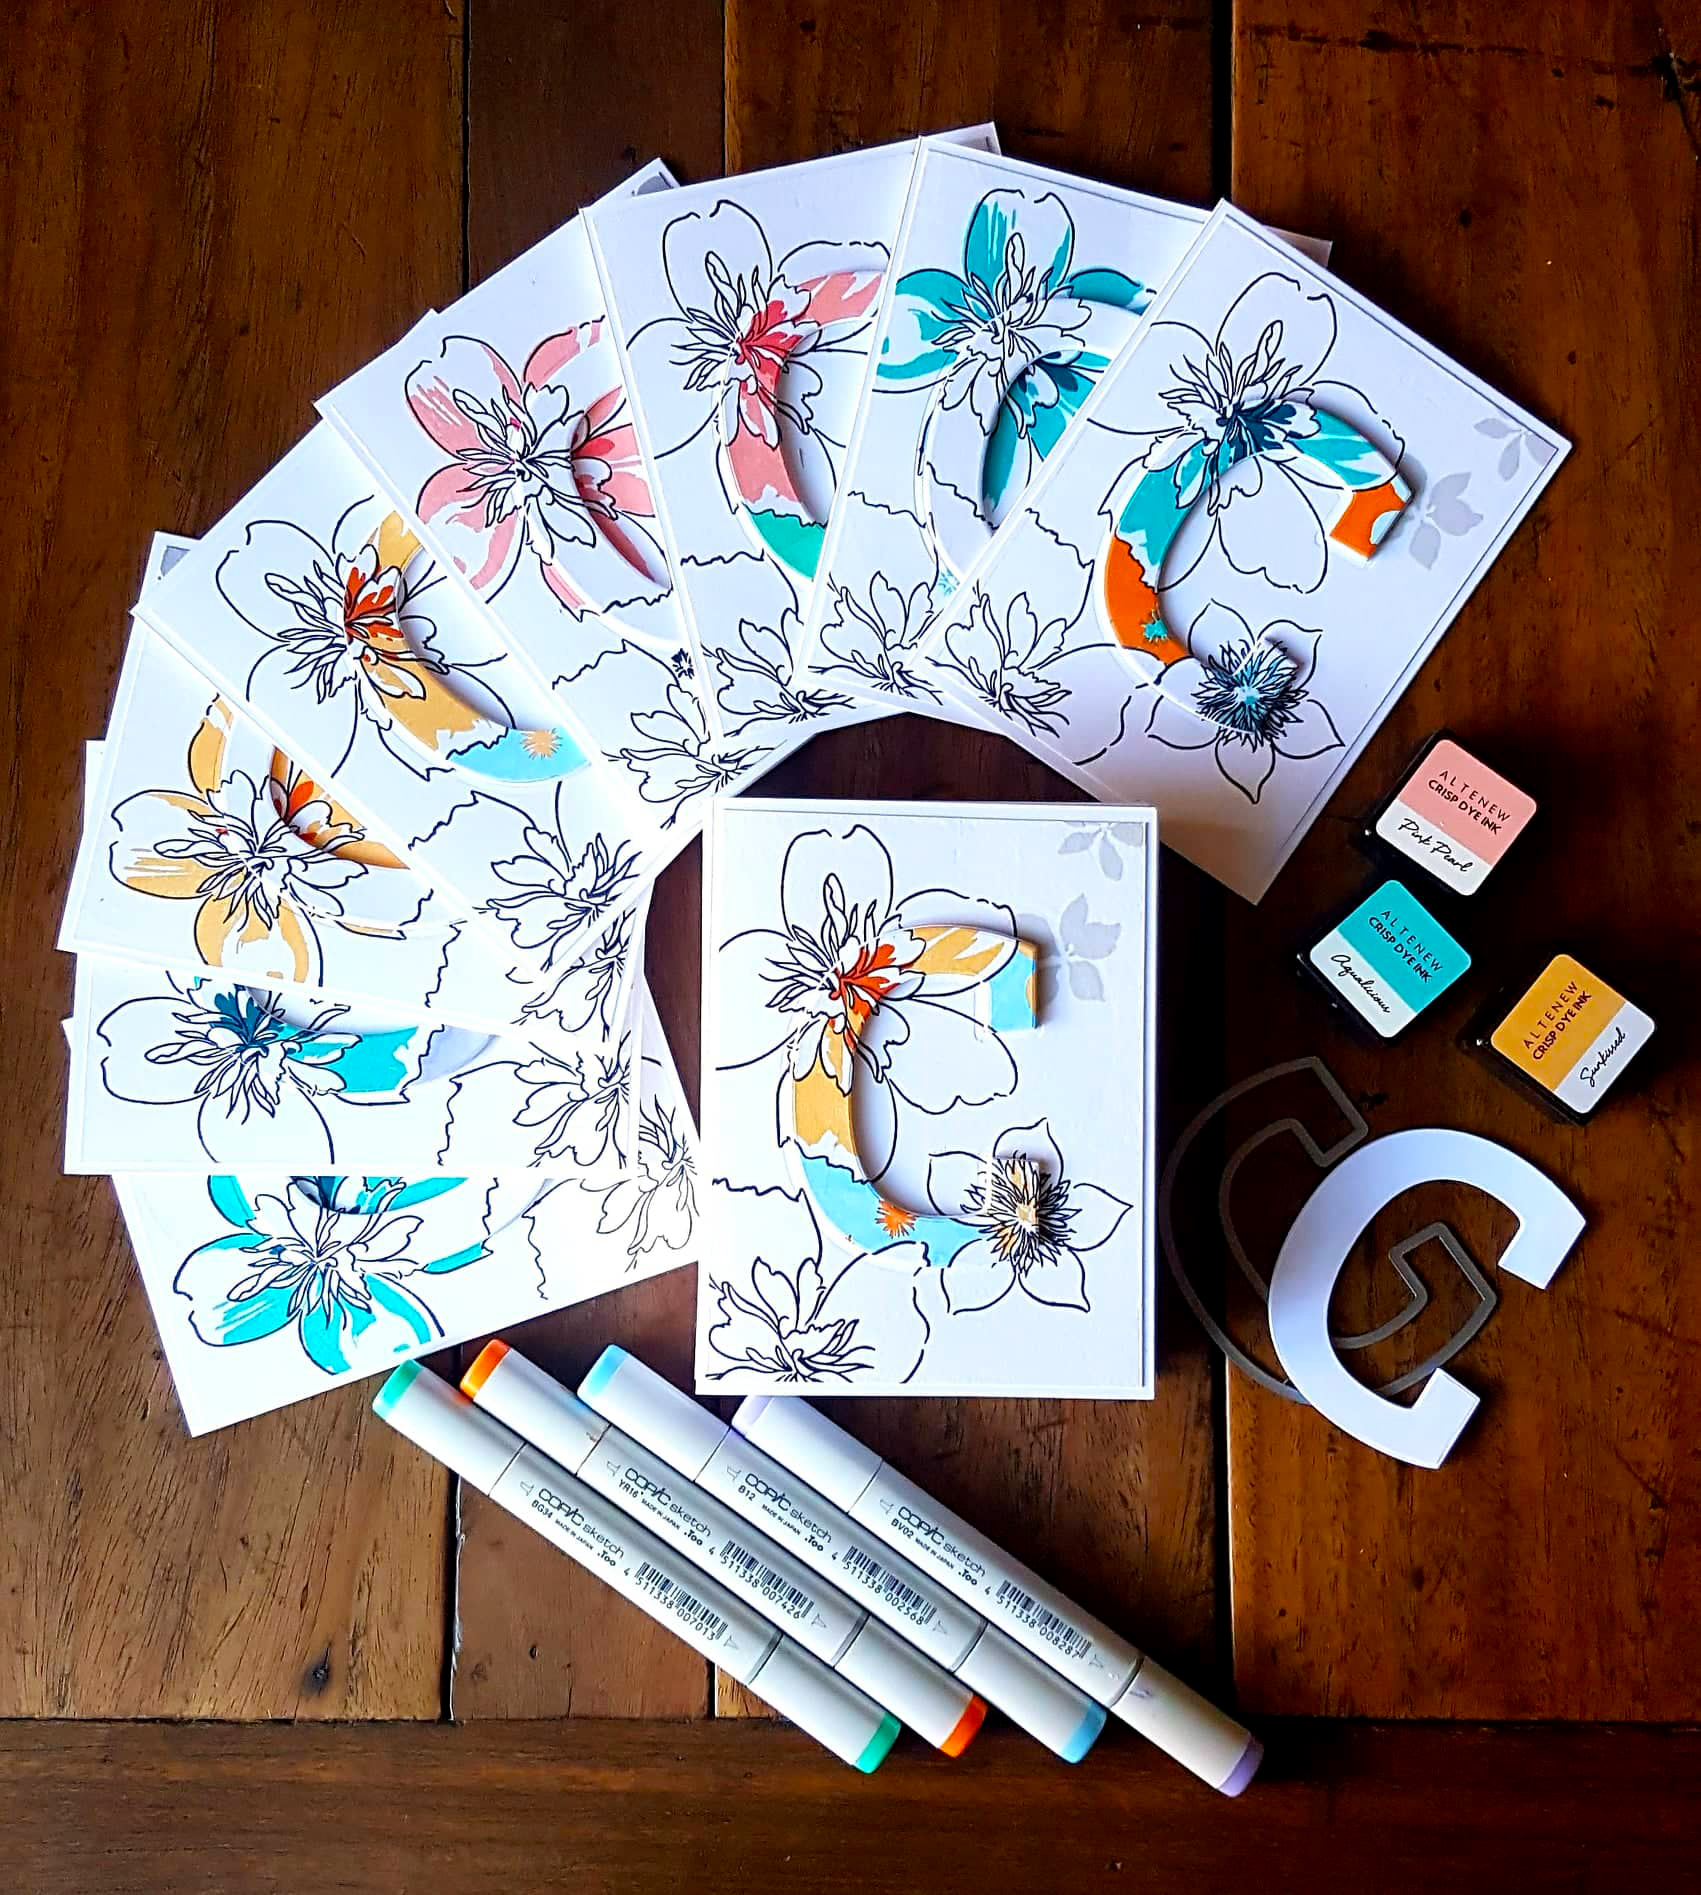
Altenew Woodland Stamp and Mega Alphabet die
This card was made using the Woodland stamp and the coordinating masks. I just love how thin the masks are and how easy it is to create layering. Only the die cut letter was colored to make it pop out.
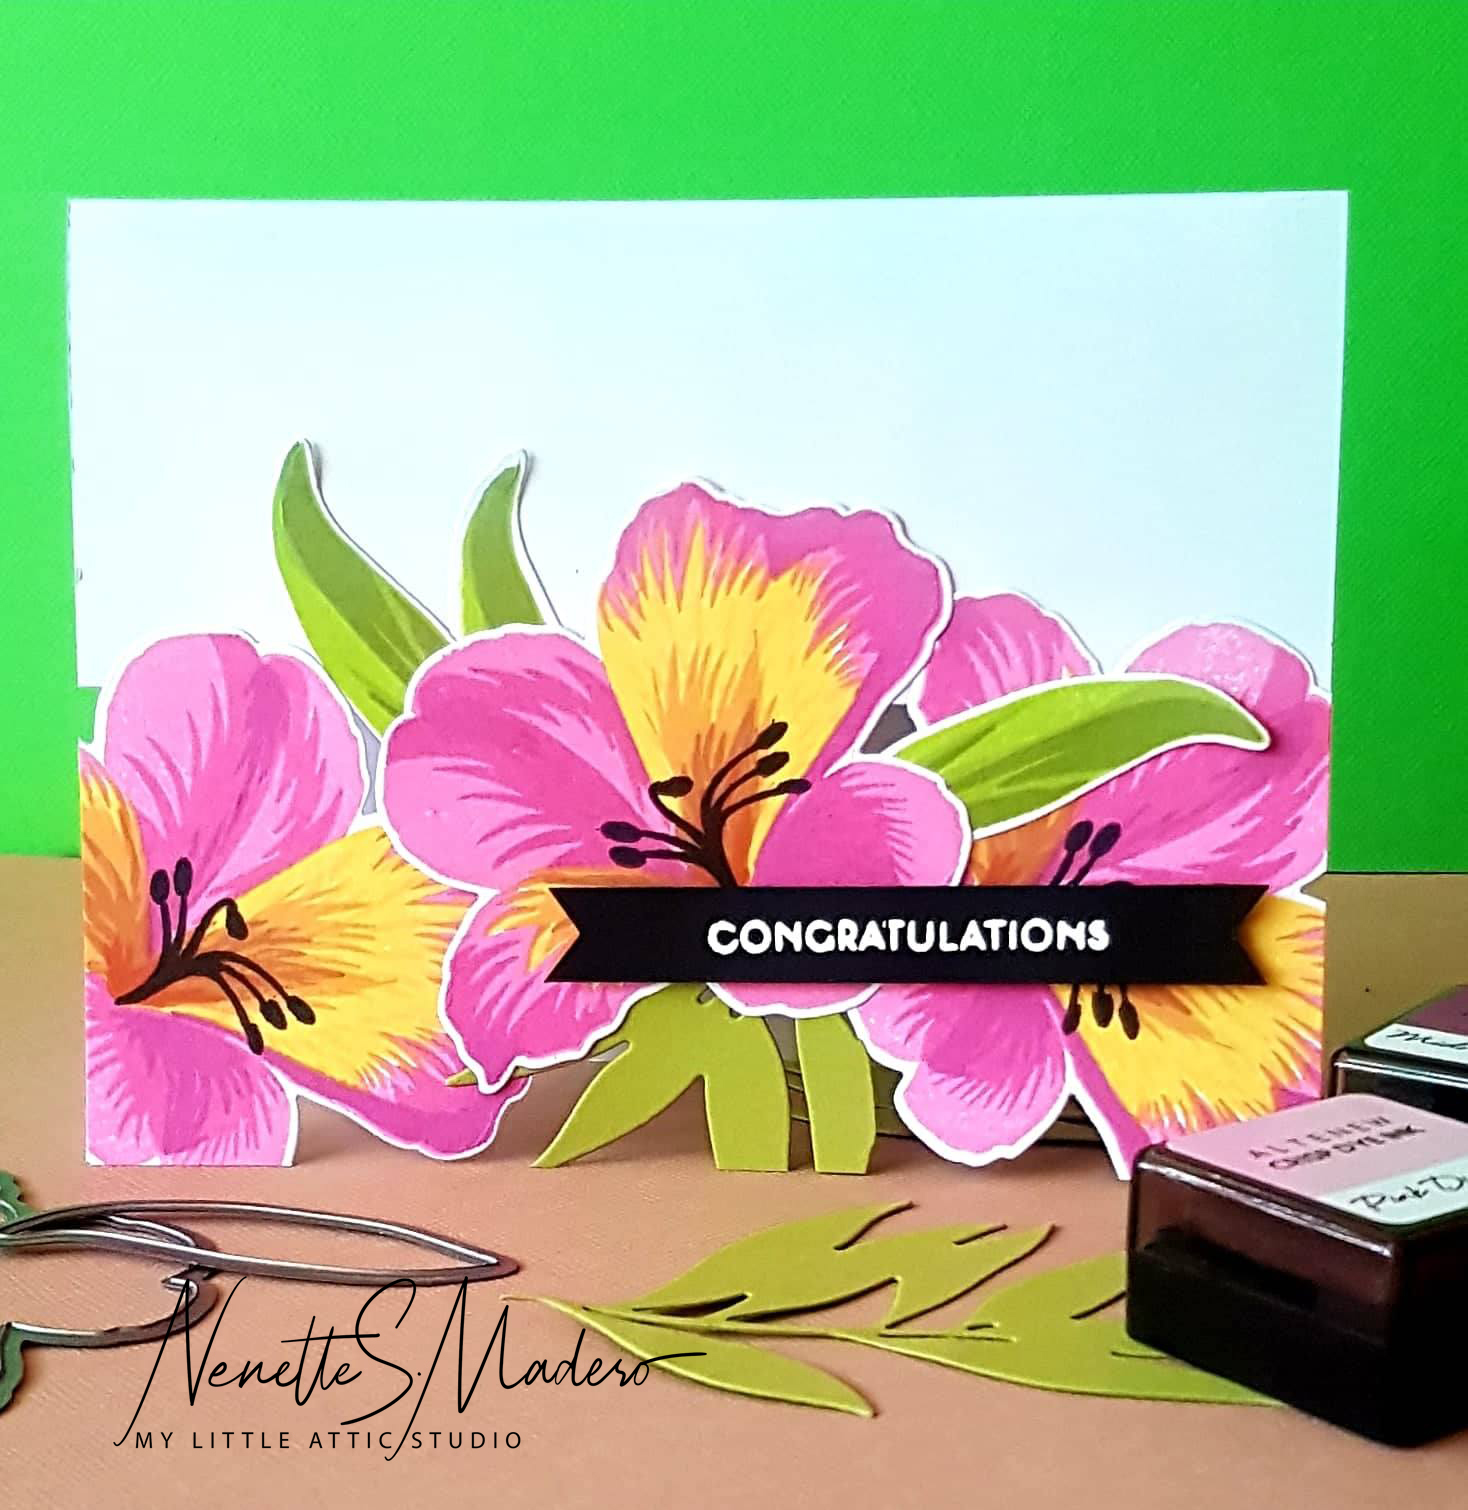
Altenew Build a flower: Peruvian Lily Stamp set and Hibiscus Garden 3D die for foliage
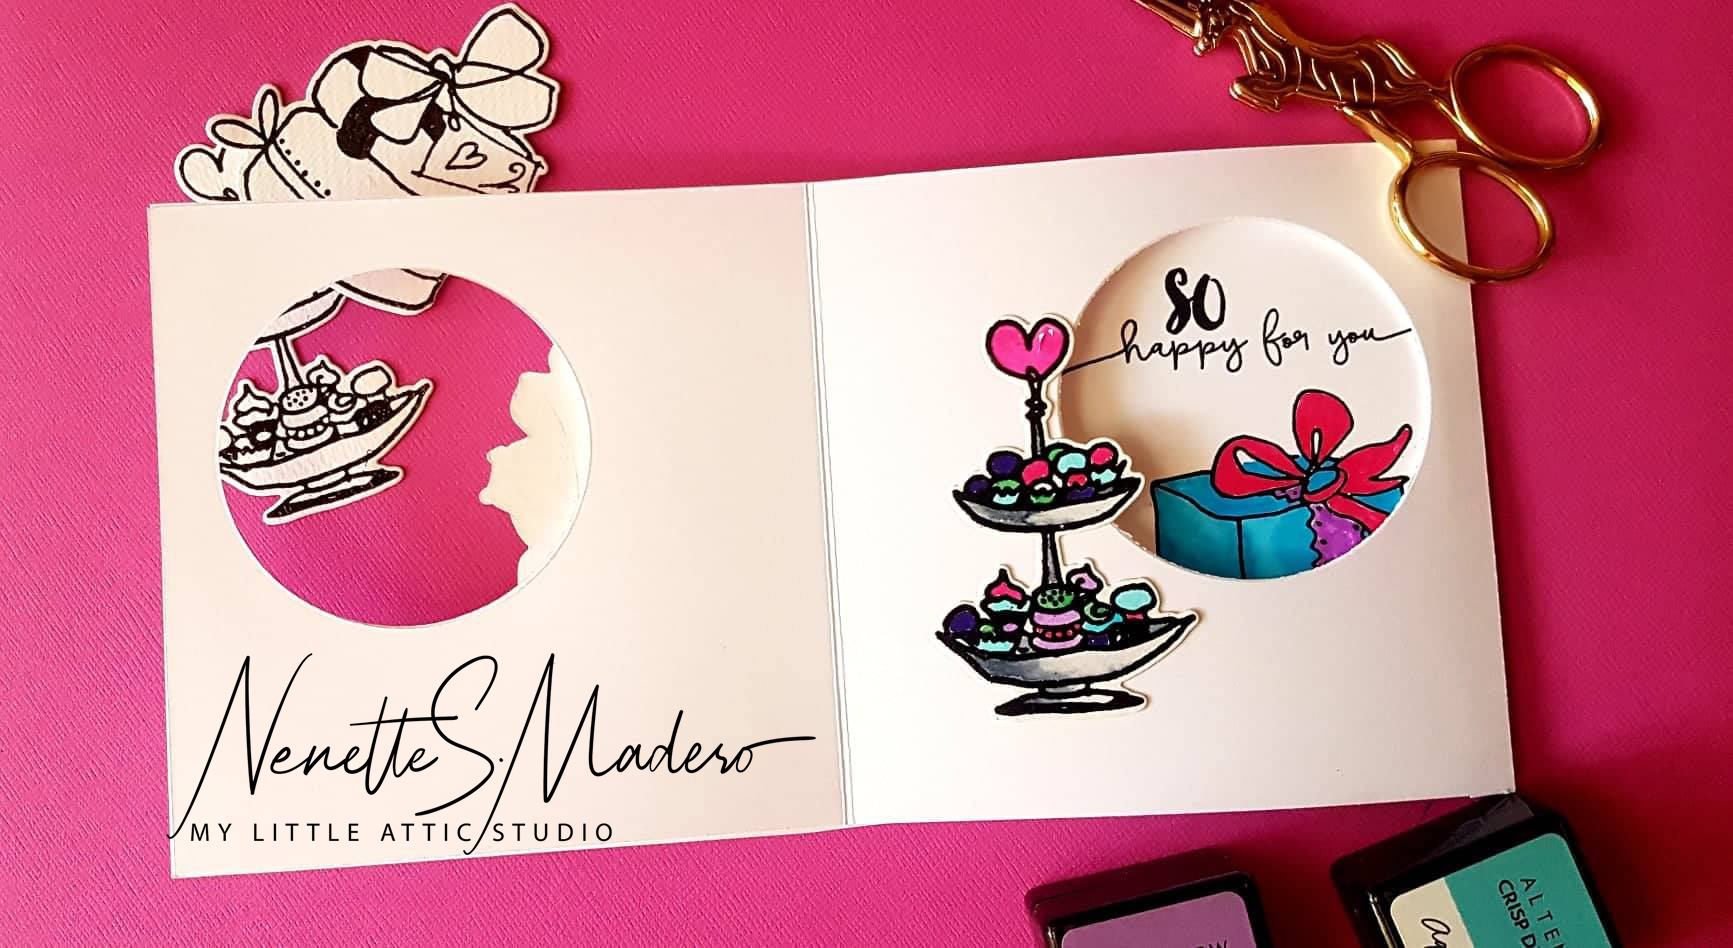
For the next card, I got inspiration from Jennifer Mcguire’s see through card but instead of doing the whole front, only half the card was see through 🙂 I love how these Peruvian Lily layers are so easy to line up. The students learned how to use the press and seal to pick up all the elements together while maintaining the positions. It’s a technique that will definitely be very useful in future cardmaking projects.
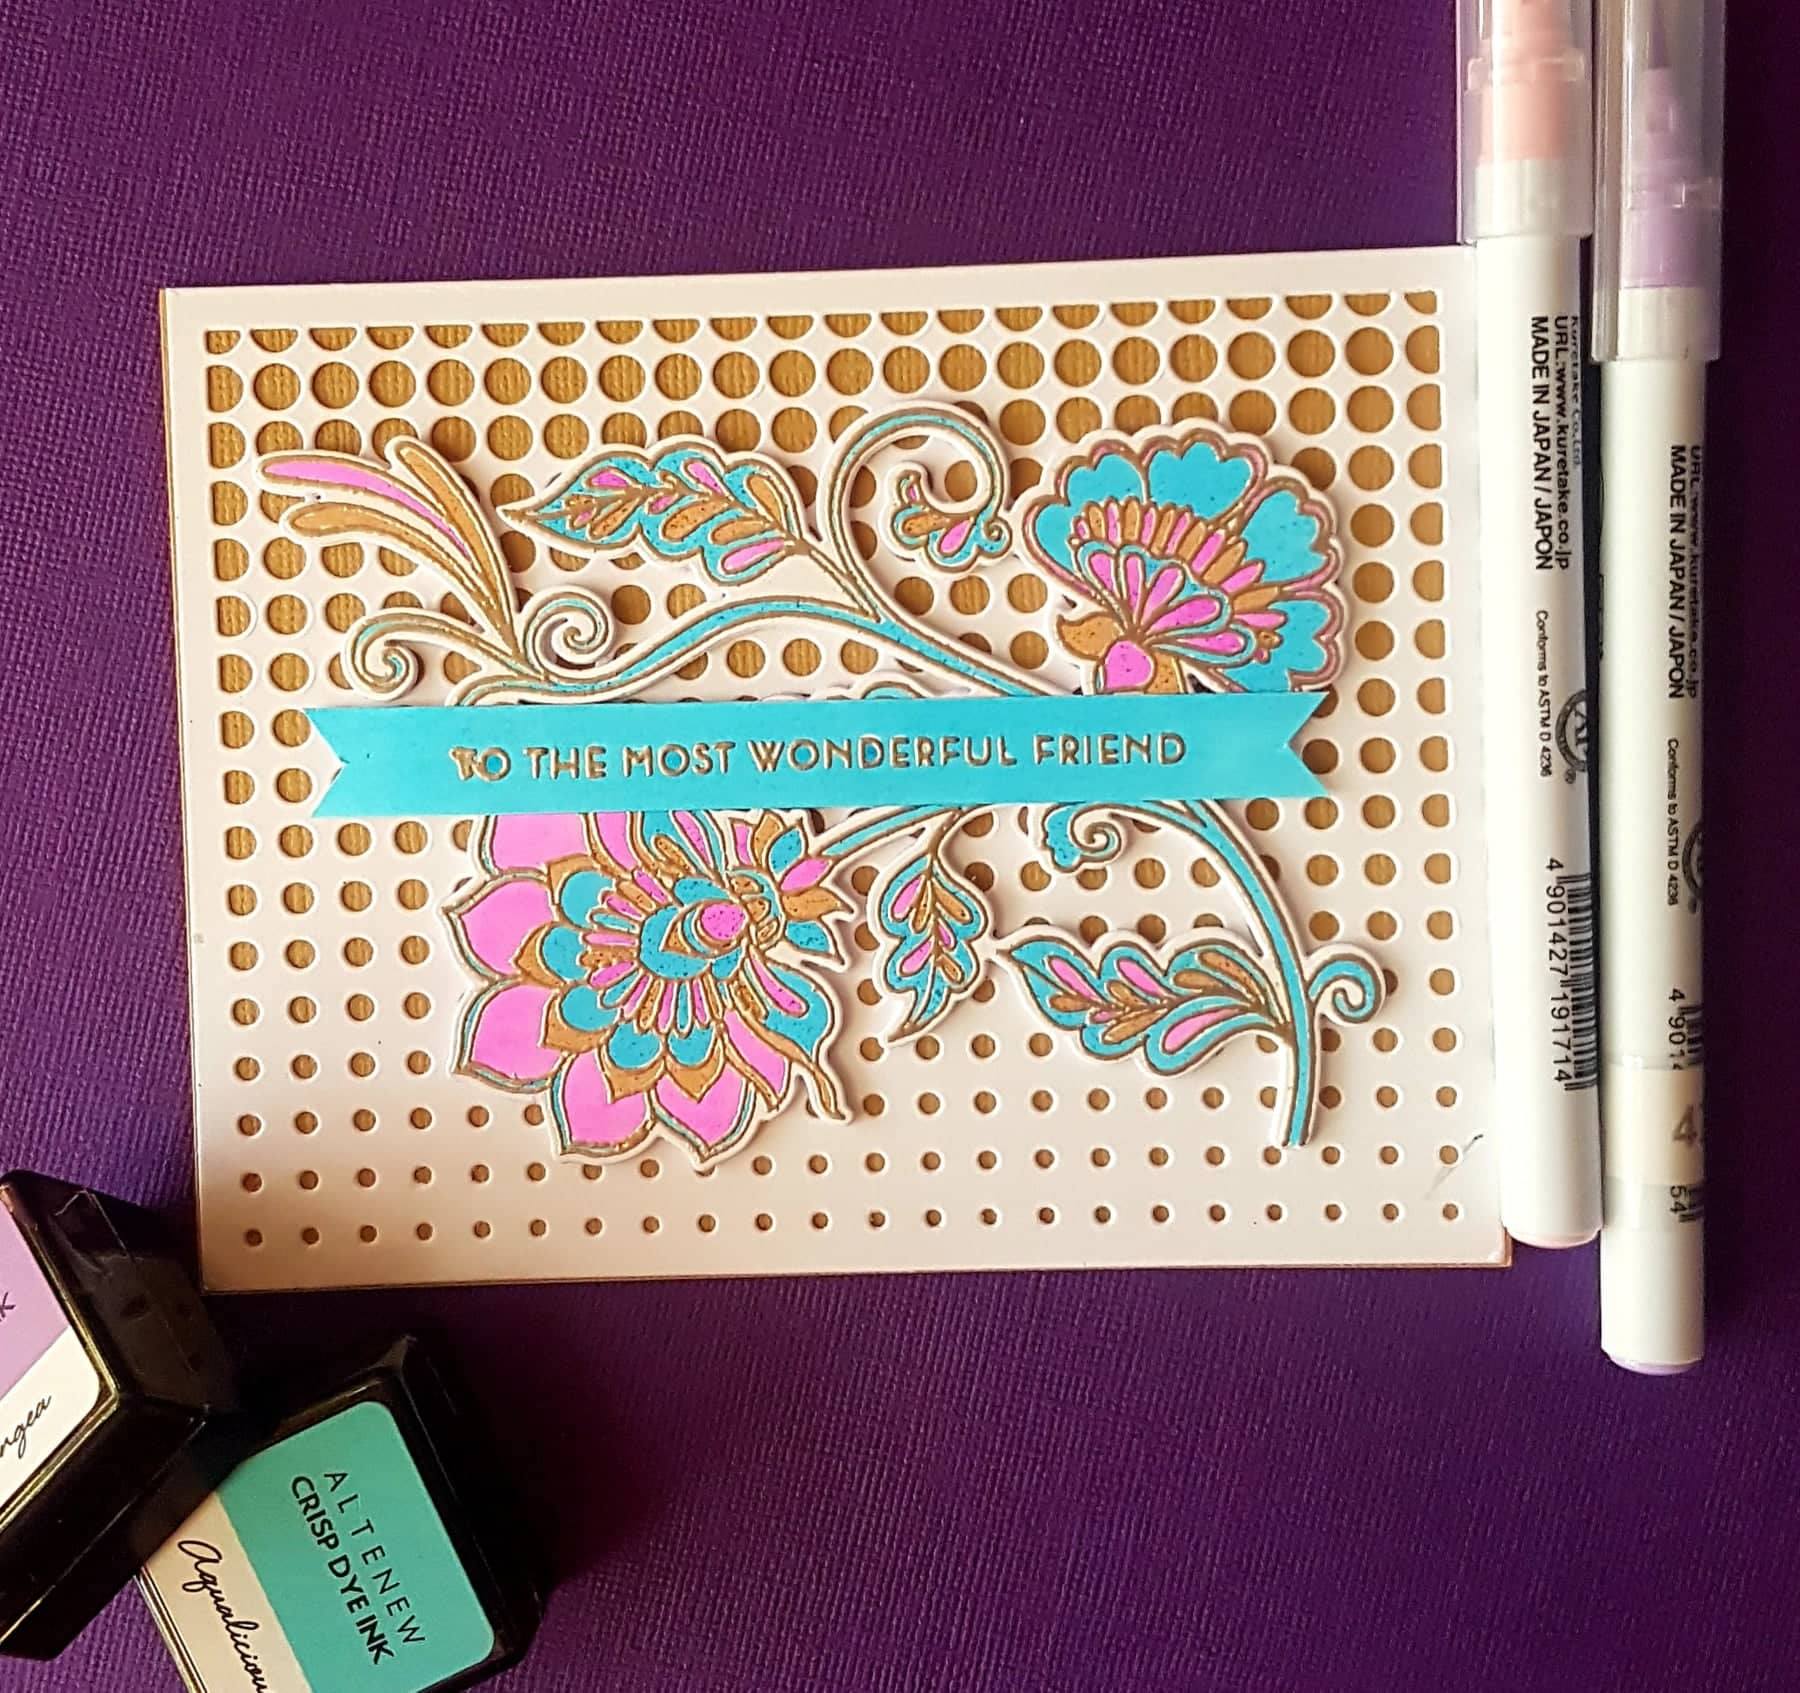
Altenew Needlework Motif Stamp and die set; Halftone die
This card was pretty straight forward. All they had to do was color in the images and sentiment strip, stick together the images to create a thicker chipboard-like image and assemble the card.
Altenew Celebrations Stamp and die set; Altenew stencils, Watercolor brush pens
Another card inspired by Jennifer 🙂 This is a peek-a-boo card wherein the image changes as you open the card. All images are from the Celebrations stamp set. It is a bit tricky to assemble the card but once you get the hang of it, it’s pretty easy. The important thing is to make sure the windows line up when you die cut the circles.
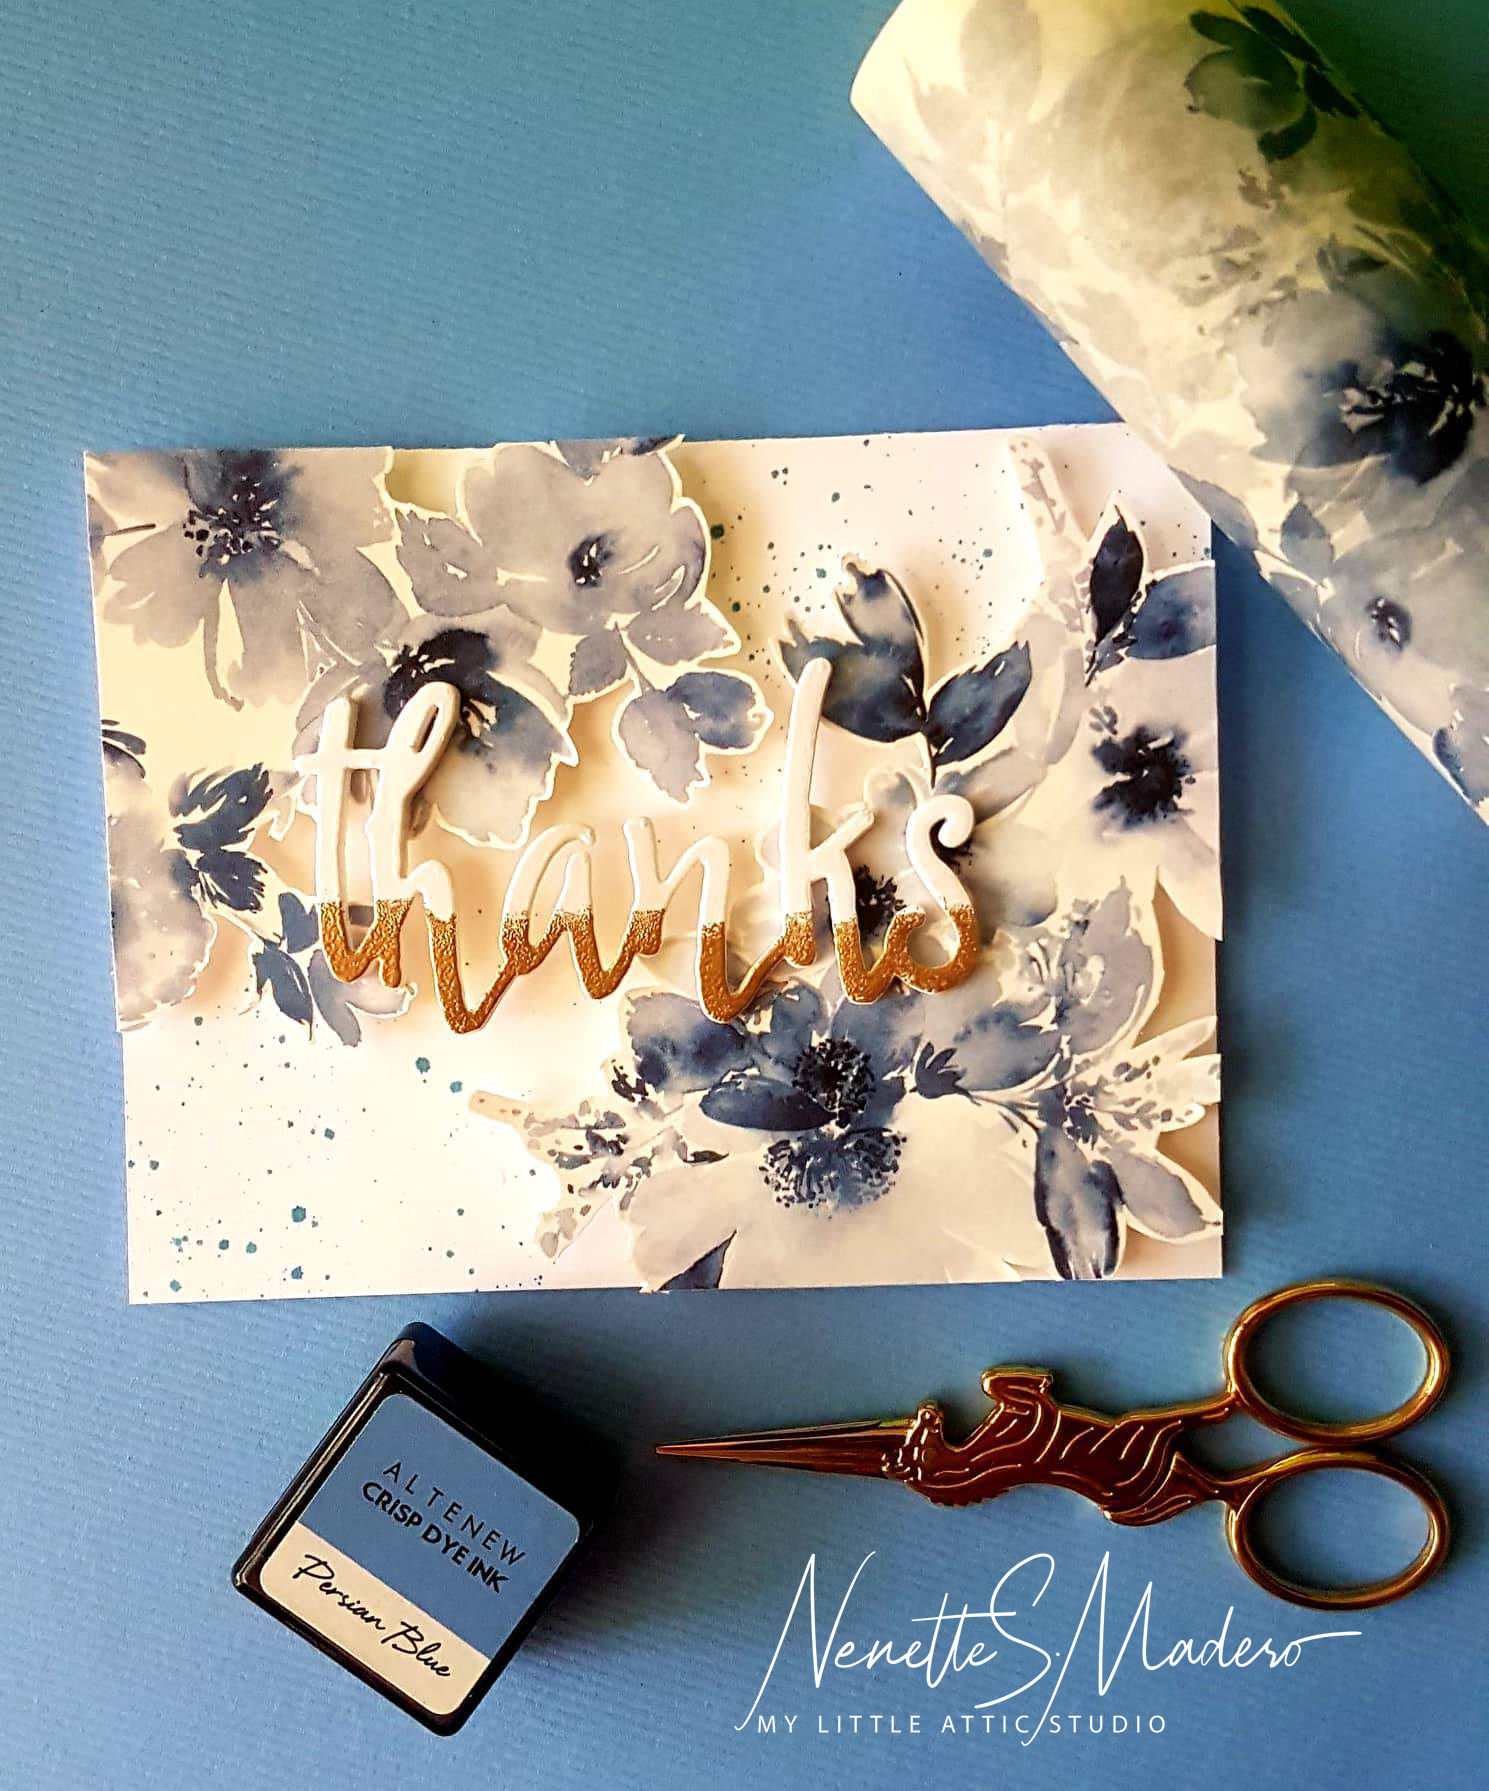
Altenew Monochrome washi tape; Rose gold embossing powder; Thanks die
This card was so simple to make but the outcome was elegant. Washi tape was stuck to Neenah Solar white cardstock and the flower and leaves images were fussy cut. They were then adhered using foam tape. The thanks die cut was again layered and the lower part was heat embossed using my all time favorite gold embossing powder from Altenew– rose gold.
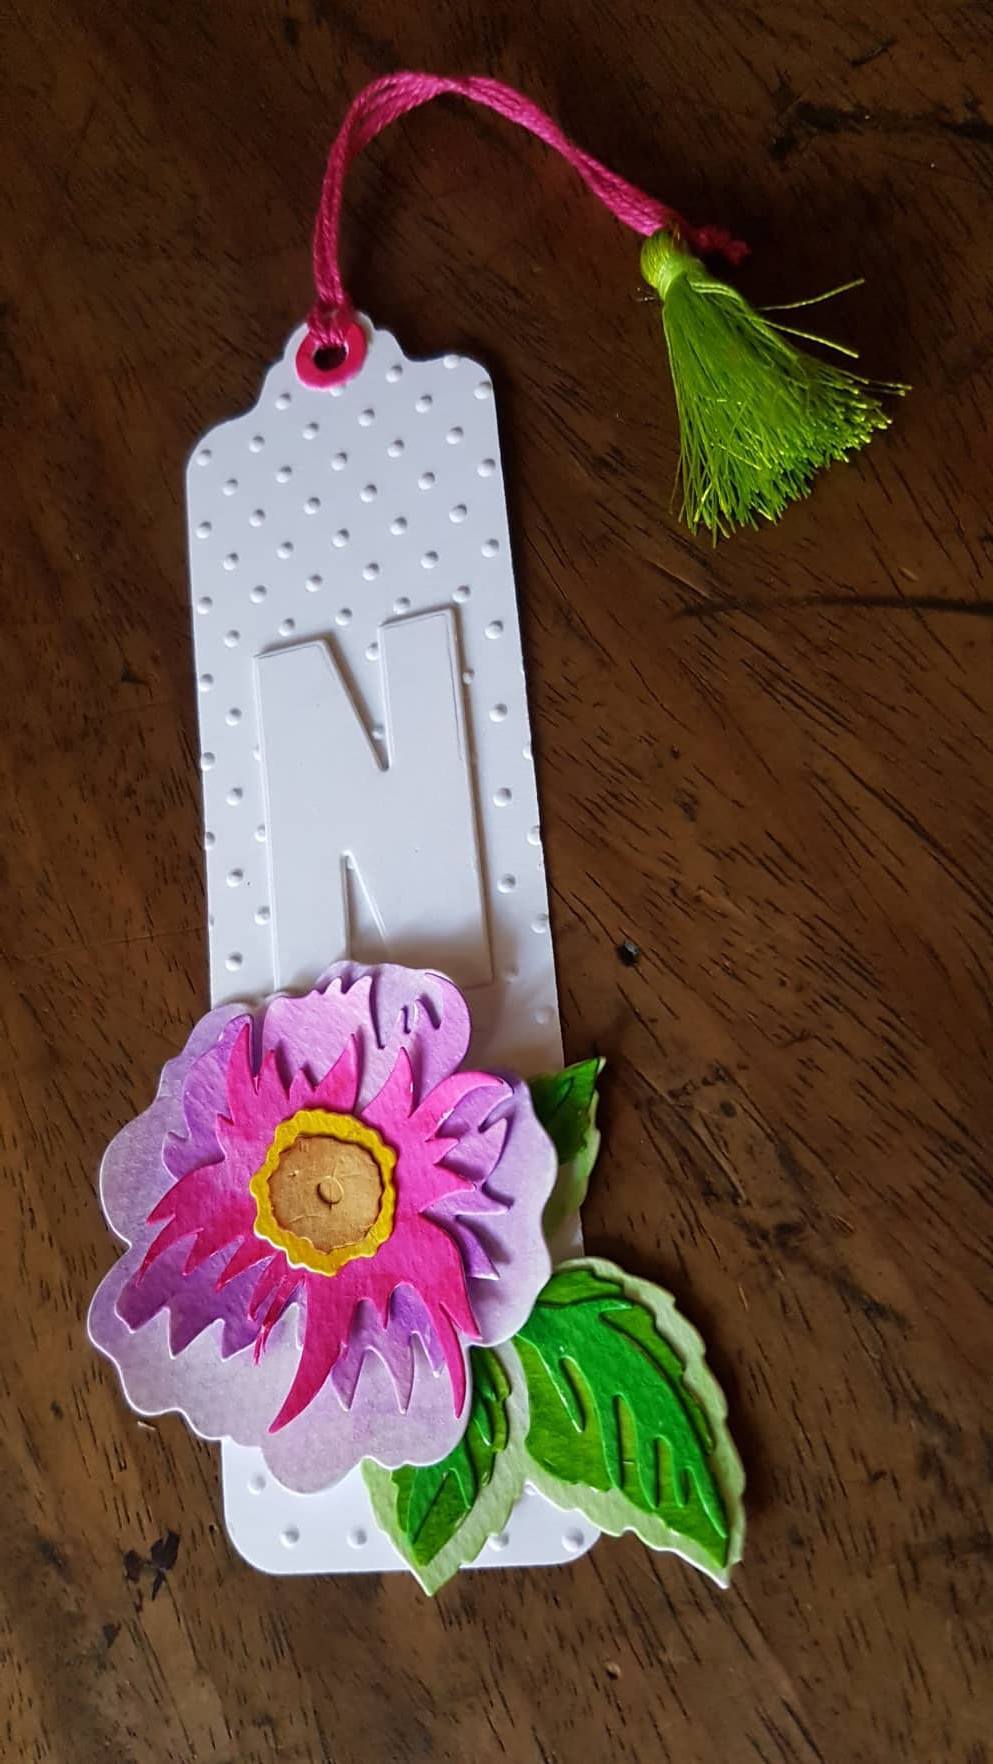
Altenew Wild Rose 3D die; Caps bold alpha die
The last project was a tag using the Wild Rose 3D die. The separate petals were colored using monochromatic colors of Zig markers while the 2 center pieces were colored in using contrasting colors.
The class ended with some shopping and merienda. It was so nice to see everyone having an enjoyable time learning, getting to know new crafty friends and having fun creating cards. I look forward to seeing you again for the next Altenew workshop. Stay tuned! <3
Hi everyone! I just love giving handmade gifts. It tells the recipient that the gift comes with so much heart because you spent time and effort creating them. It’s something very personal and no two items are the same. Each is unique since they’re individually handmade.
It also tells the receiver that you have thought about him/her– color preference, style, hobbies, etc. — something specifically created for the recipient.
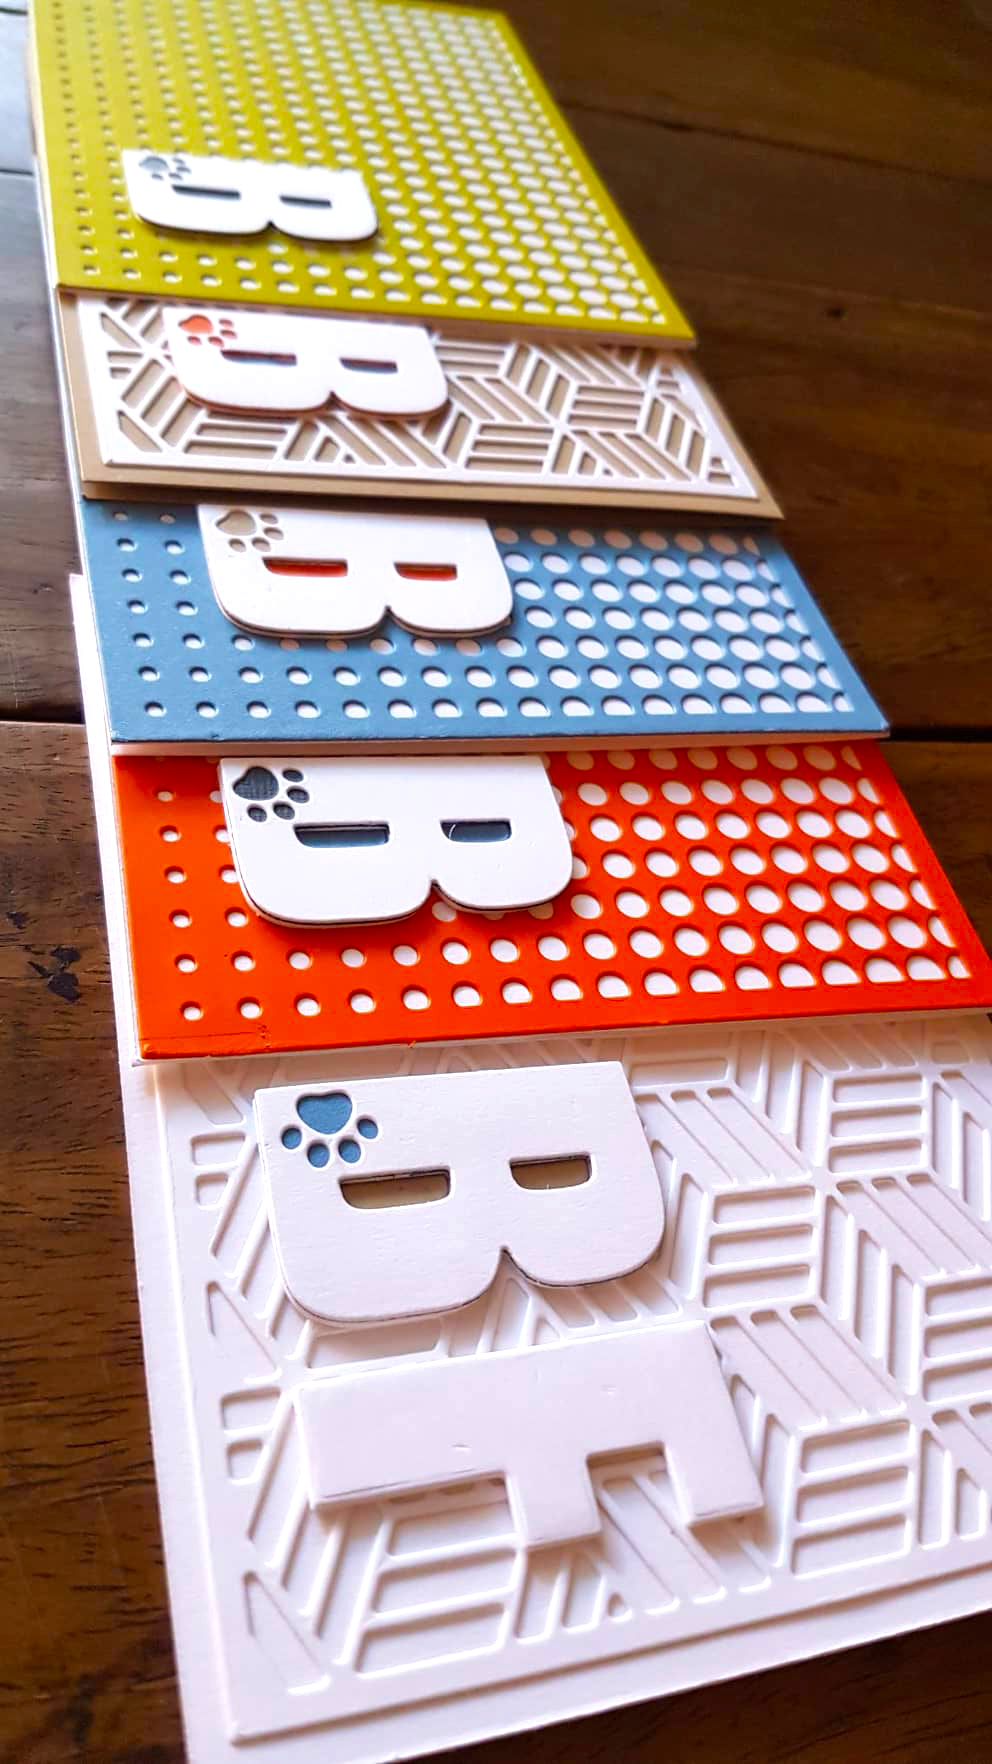
This was made for Brad, the trainer of our dog Monty using background and letter dies from Altenew.This is our baby, Monty!
It’s significant to know the age and style preference of the recipient as well. Is it whimsical? Is it clean and elegant? Is it fun and quirky?
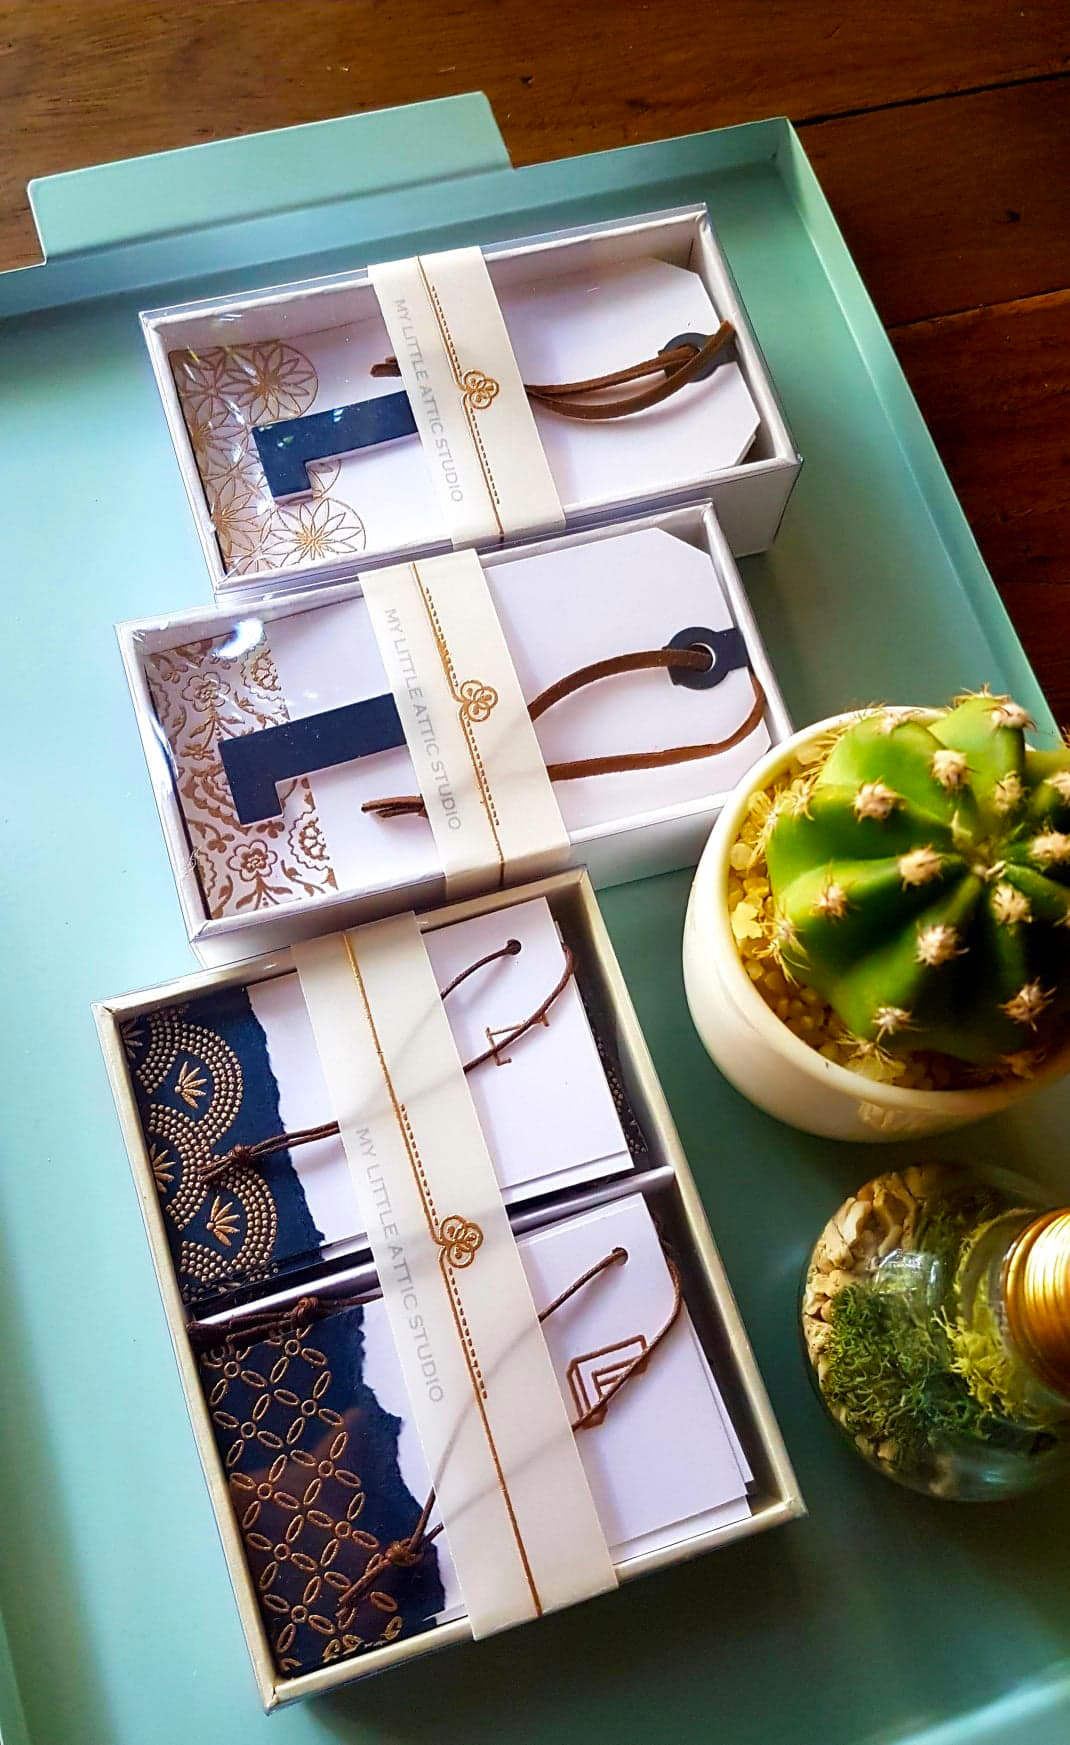
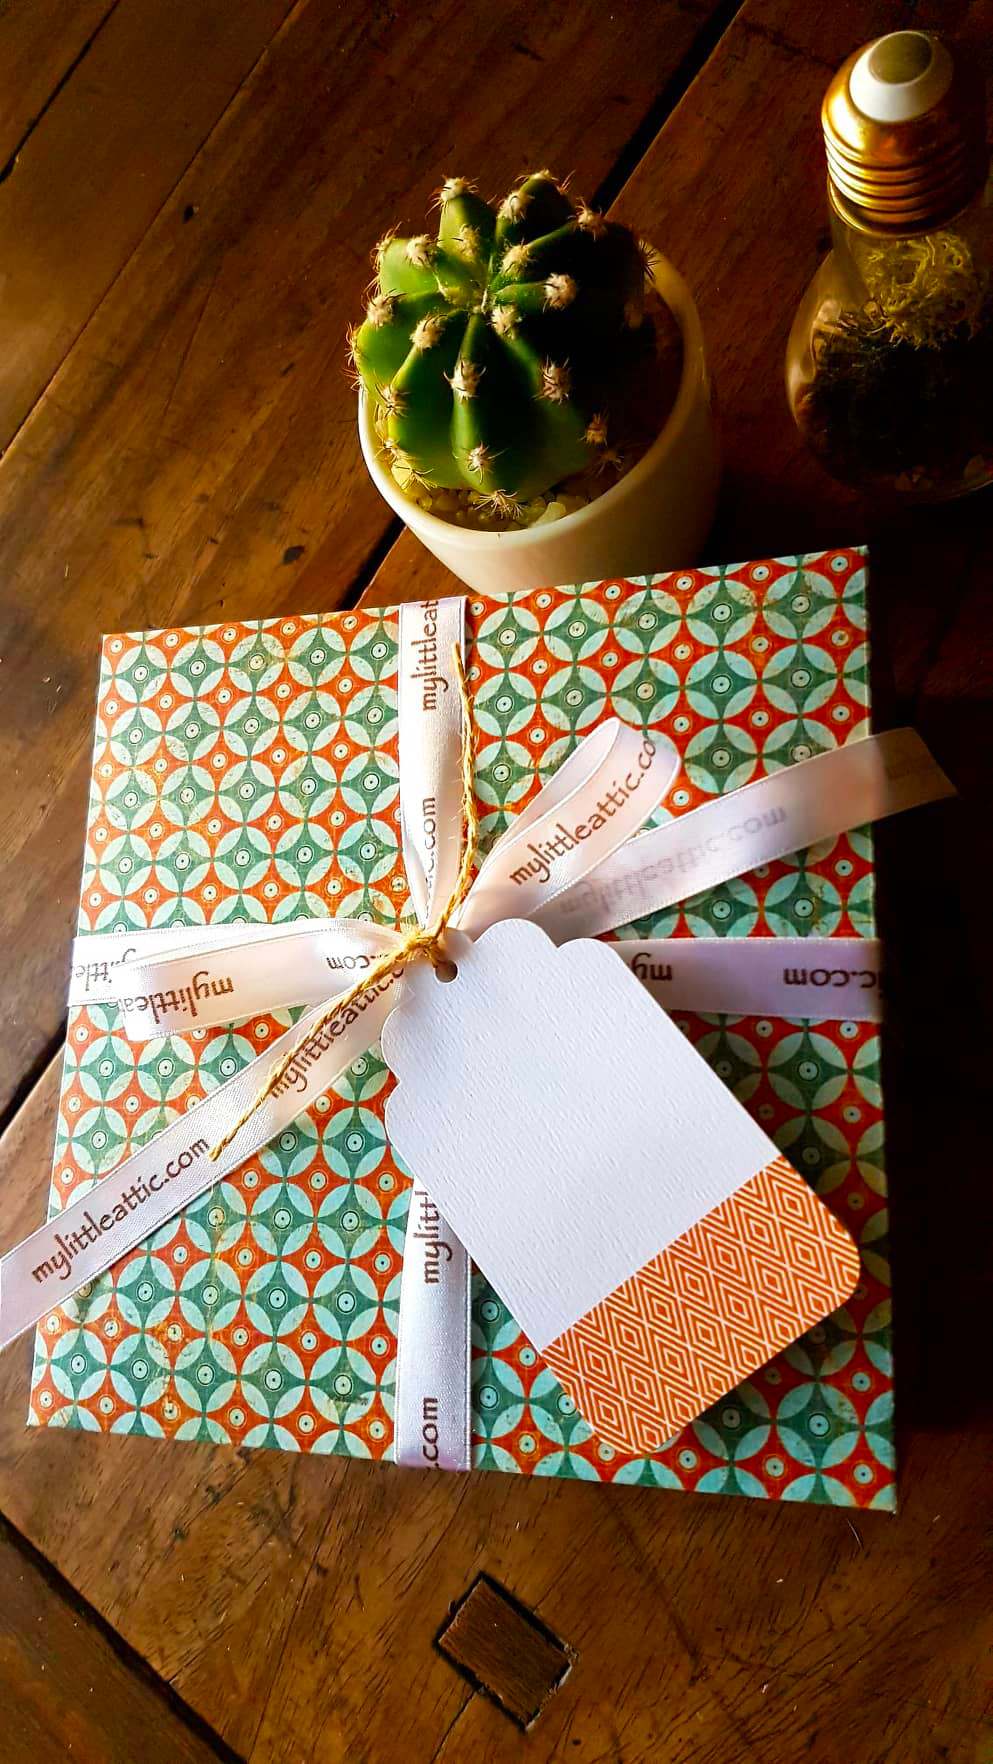
Packaging is also very important. It shows that you went a step further. It makes it more exciting for the recipient to discover what’s inside.
Some people wonder why handmade crafts are more expensive than mass produced products. It takes a lot of time to come up with a finished product– designing the layout, die cutting or hand cutting the paper, prepping the paper, inking, stamping, water-coloring, coloring, applying mixed media, redoing the item if the outcome is not right (thus wasting materials), pasting, embossing, packaging, adding little details to make it look more presentable etc. etc. etc. times the number of cards you make. It is really time consuming! So I truly appreciate the people who value handmade craft.
Some of you have requested for me to sell handmade cards for birthdays, anniversaries, etc. Will be posting some of them soon. Again, thanks for appreciating handmade goodness. Happy Friday everyone!