Altenew Educators “Giving Thanks” Blog Hop and Linky Party + Giveaway

Altenew Educators “Giving Thanks” Blog Hop and Linky Party + Giveaway

Welcome everyone to Altenew Educators Giving Thanks Blog hop and linky party + giveaway!!! I’m so excited to be a part of this blog hop with my co-educators!!! The hop starts at the Altenew Card Blog. The complete blog hop list is at the end of this post in case you get lost.

We are in this unprecedented crisis. Yet so many doctors, nurses, technicians, scientists, policemen, grocery storekeepers, pharmacists, food delivery crew, bank tellers, couriers, garbage collectors, hospital cleaning staff etc. work tirelessly to keep us all safe and so that we can continue to live our new normal lives. I truly appreciate that the theme for this blog hop is thankfulness. In our own little way, we can express our appreciation and gratitude to these everyday heroes for their dedication and selflessness through our cards.

I love the idea of coming up with 2 cards using the same stamped images. I sometimes call it my yin and yang cards. The following pairs were done using the same stamp sets. I just varied the looks by using the negative and positive die cuts, changing up the placement of the flowers, or by cutting the die cuts in half (the split card trick was inspired by Jennifer Mcguire). Here are my samples:


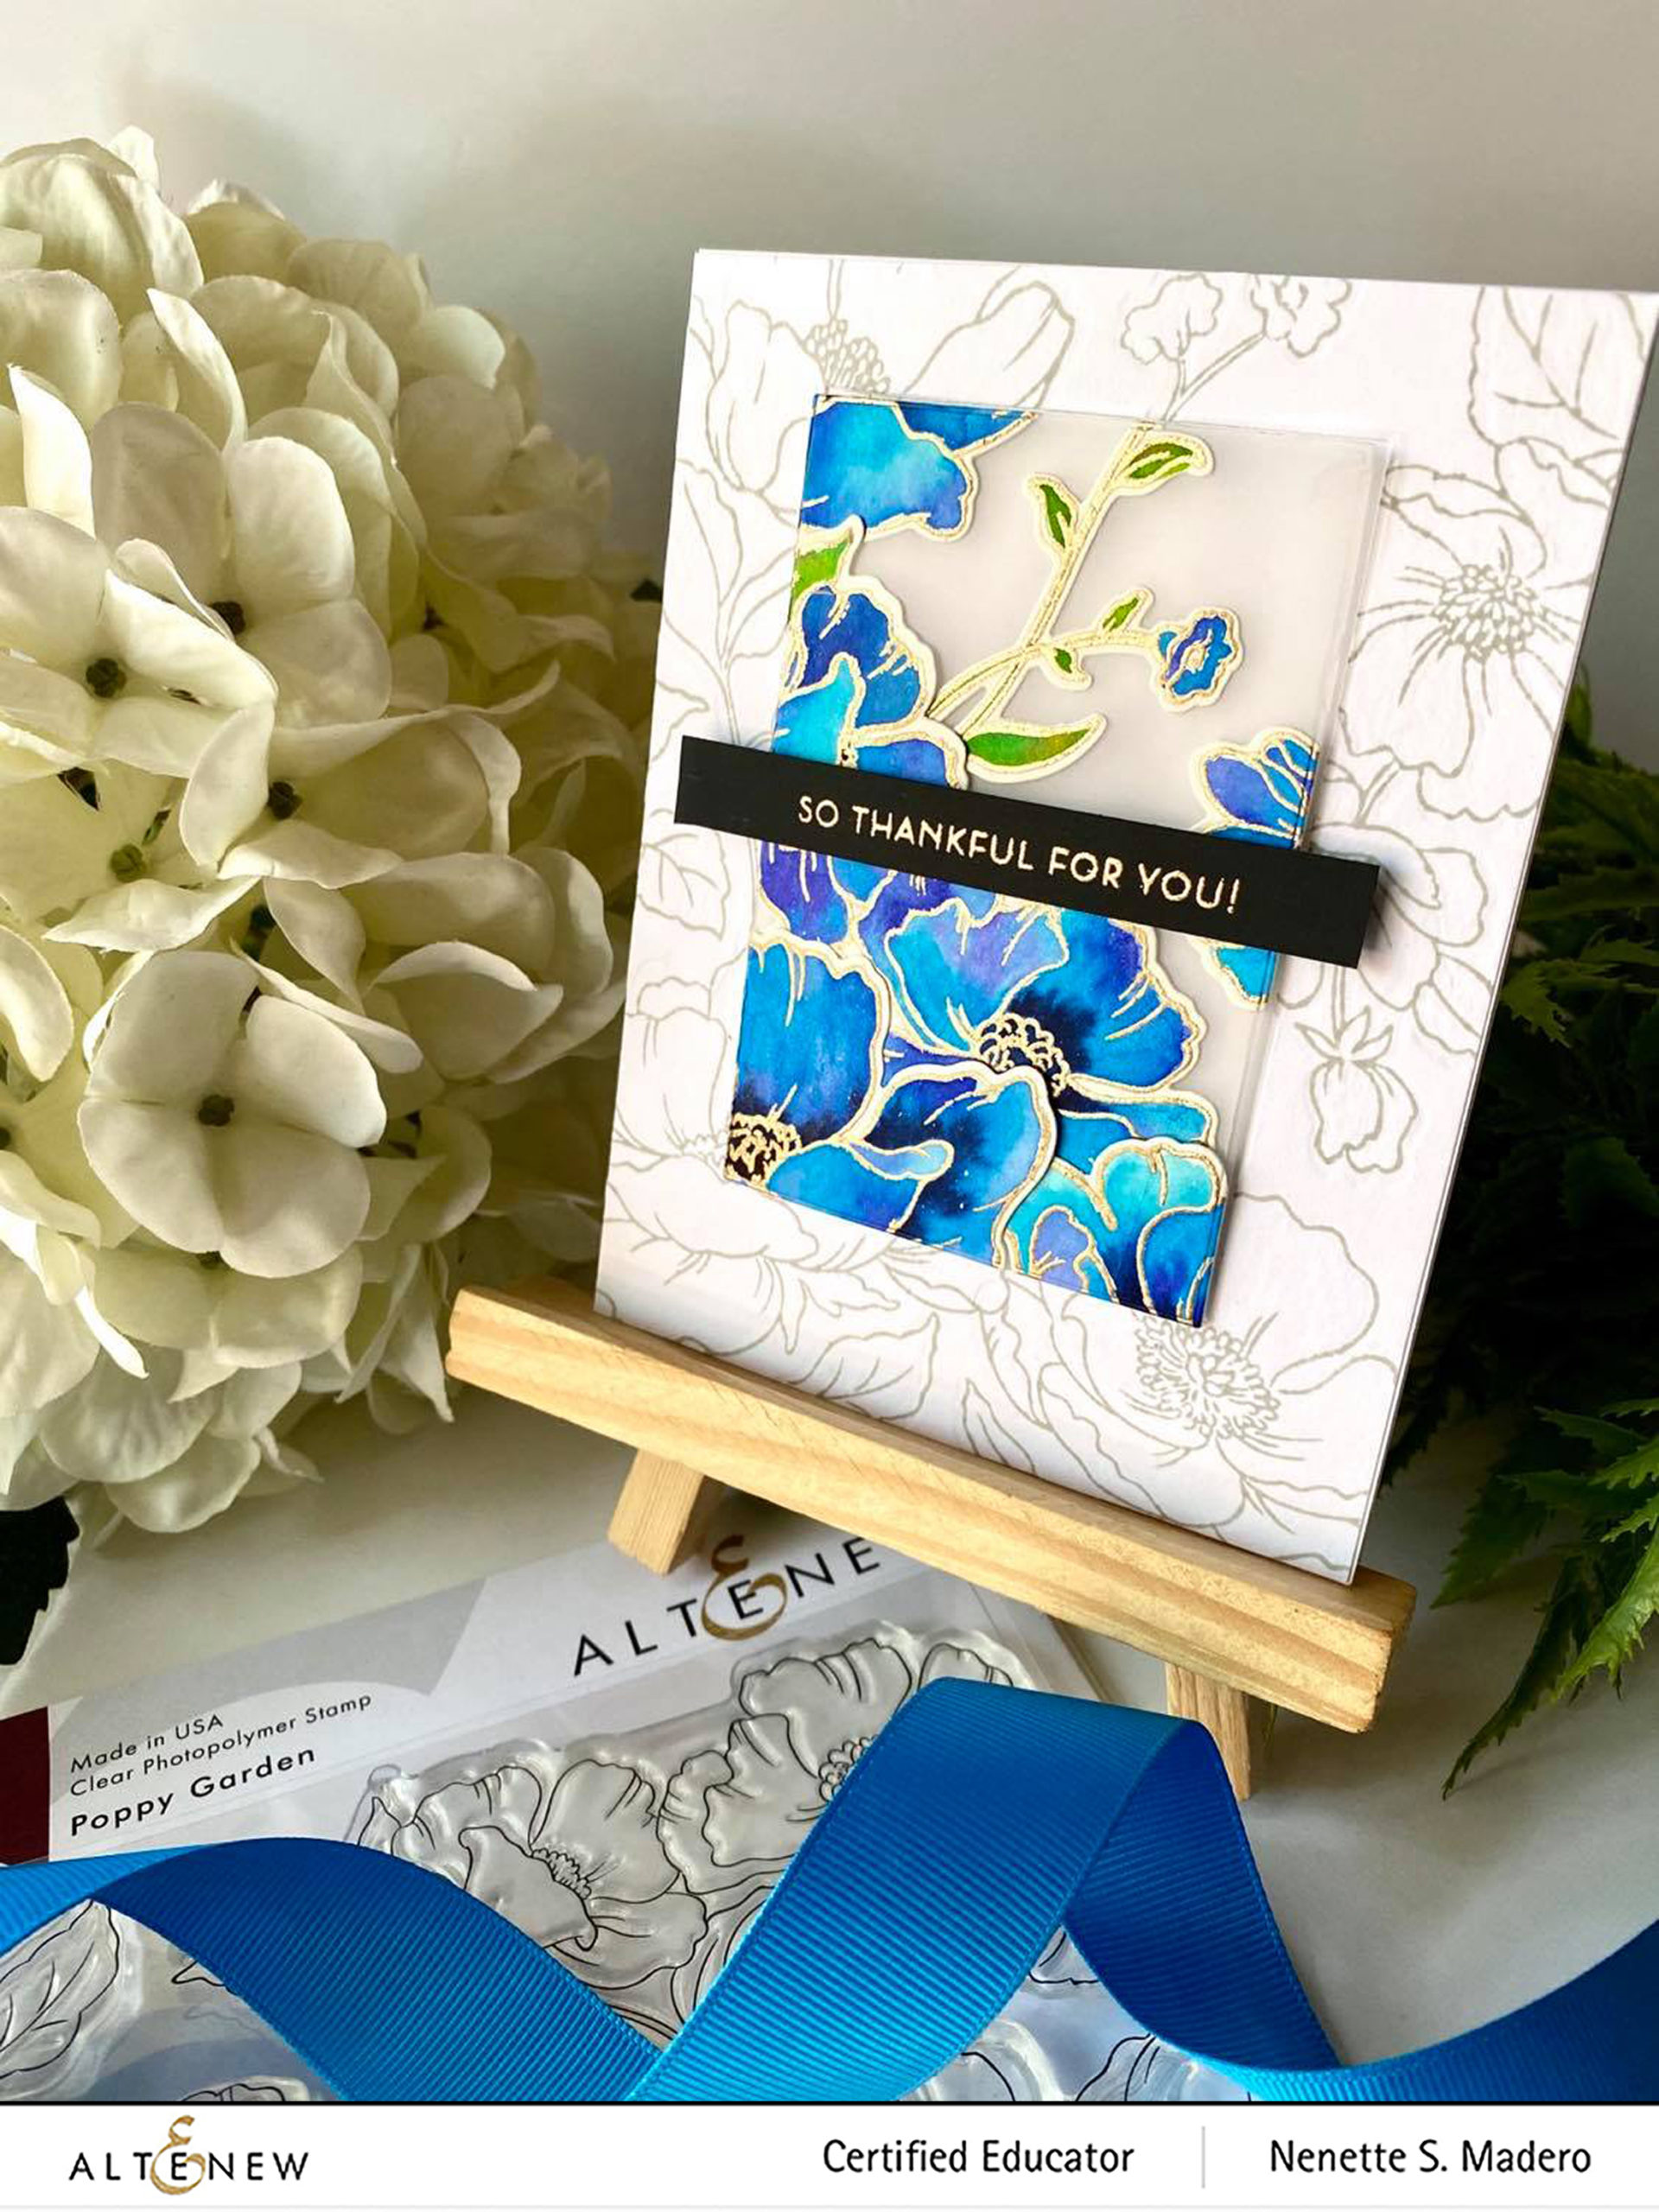
THANK YOU AND SO THANKFUL FOR YOU CARDS


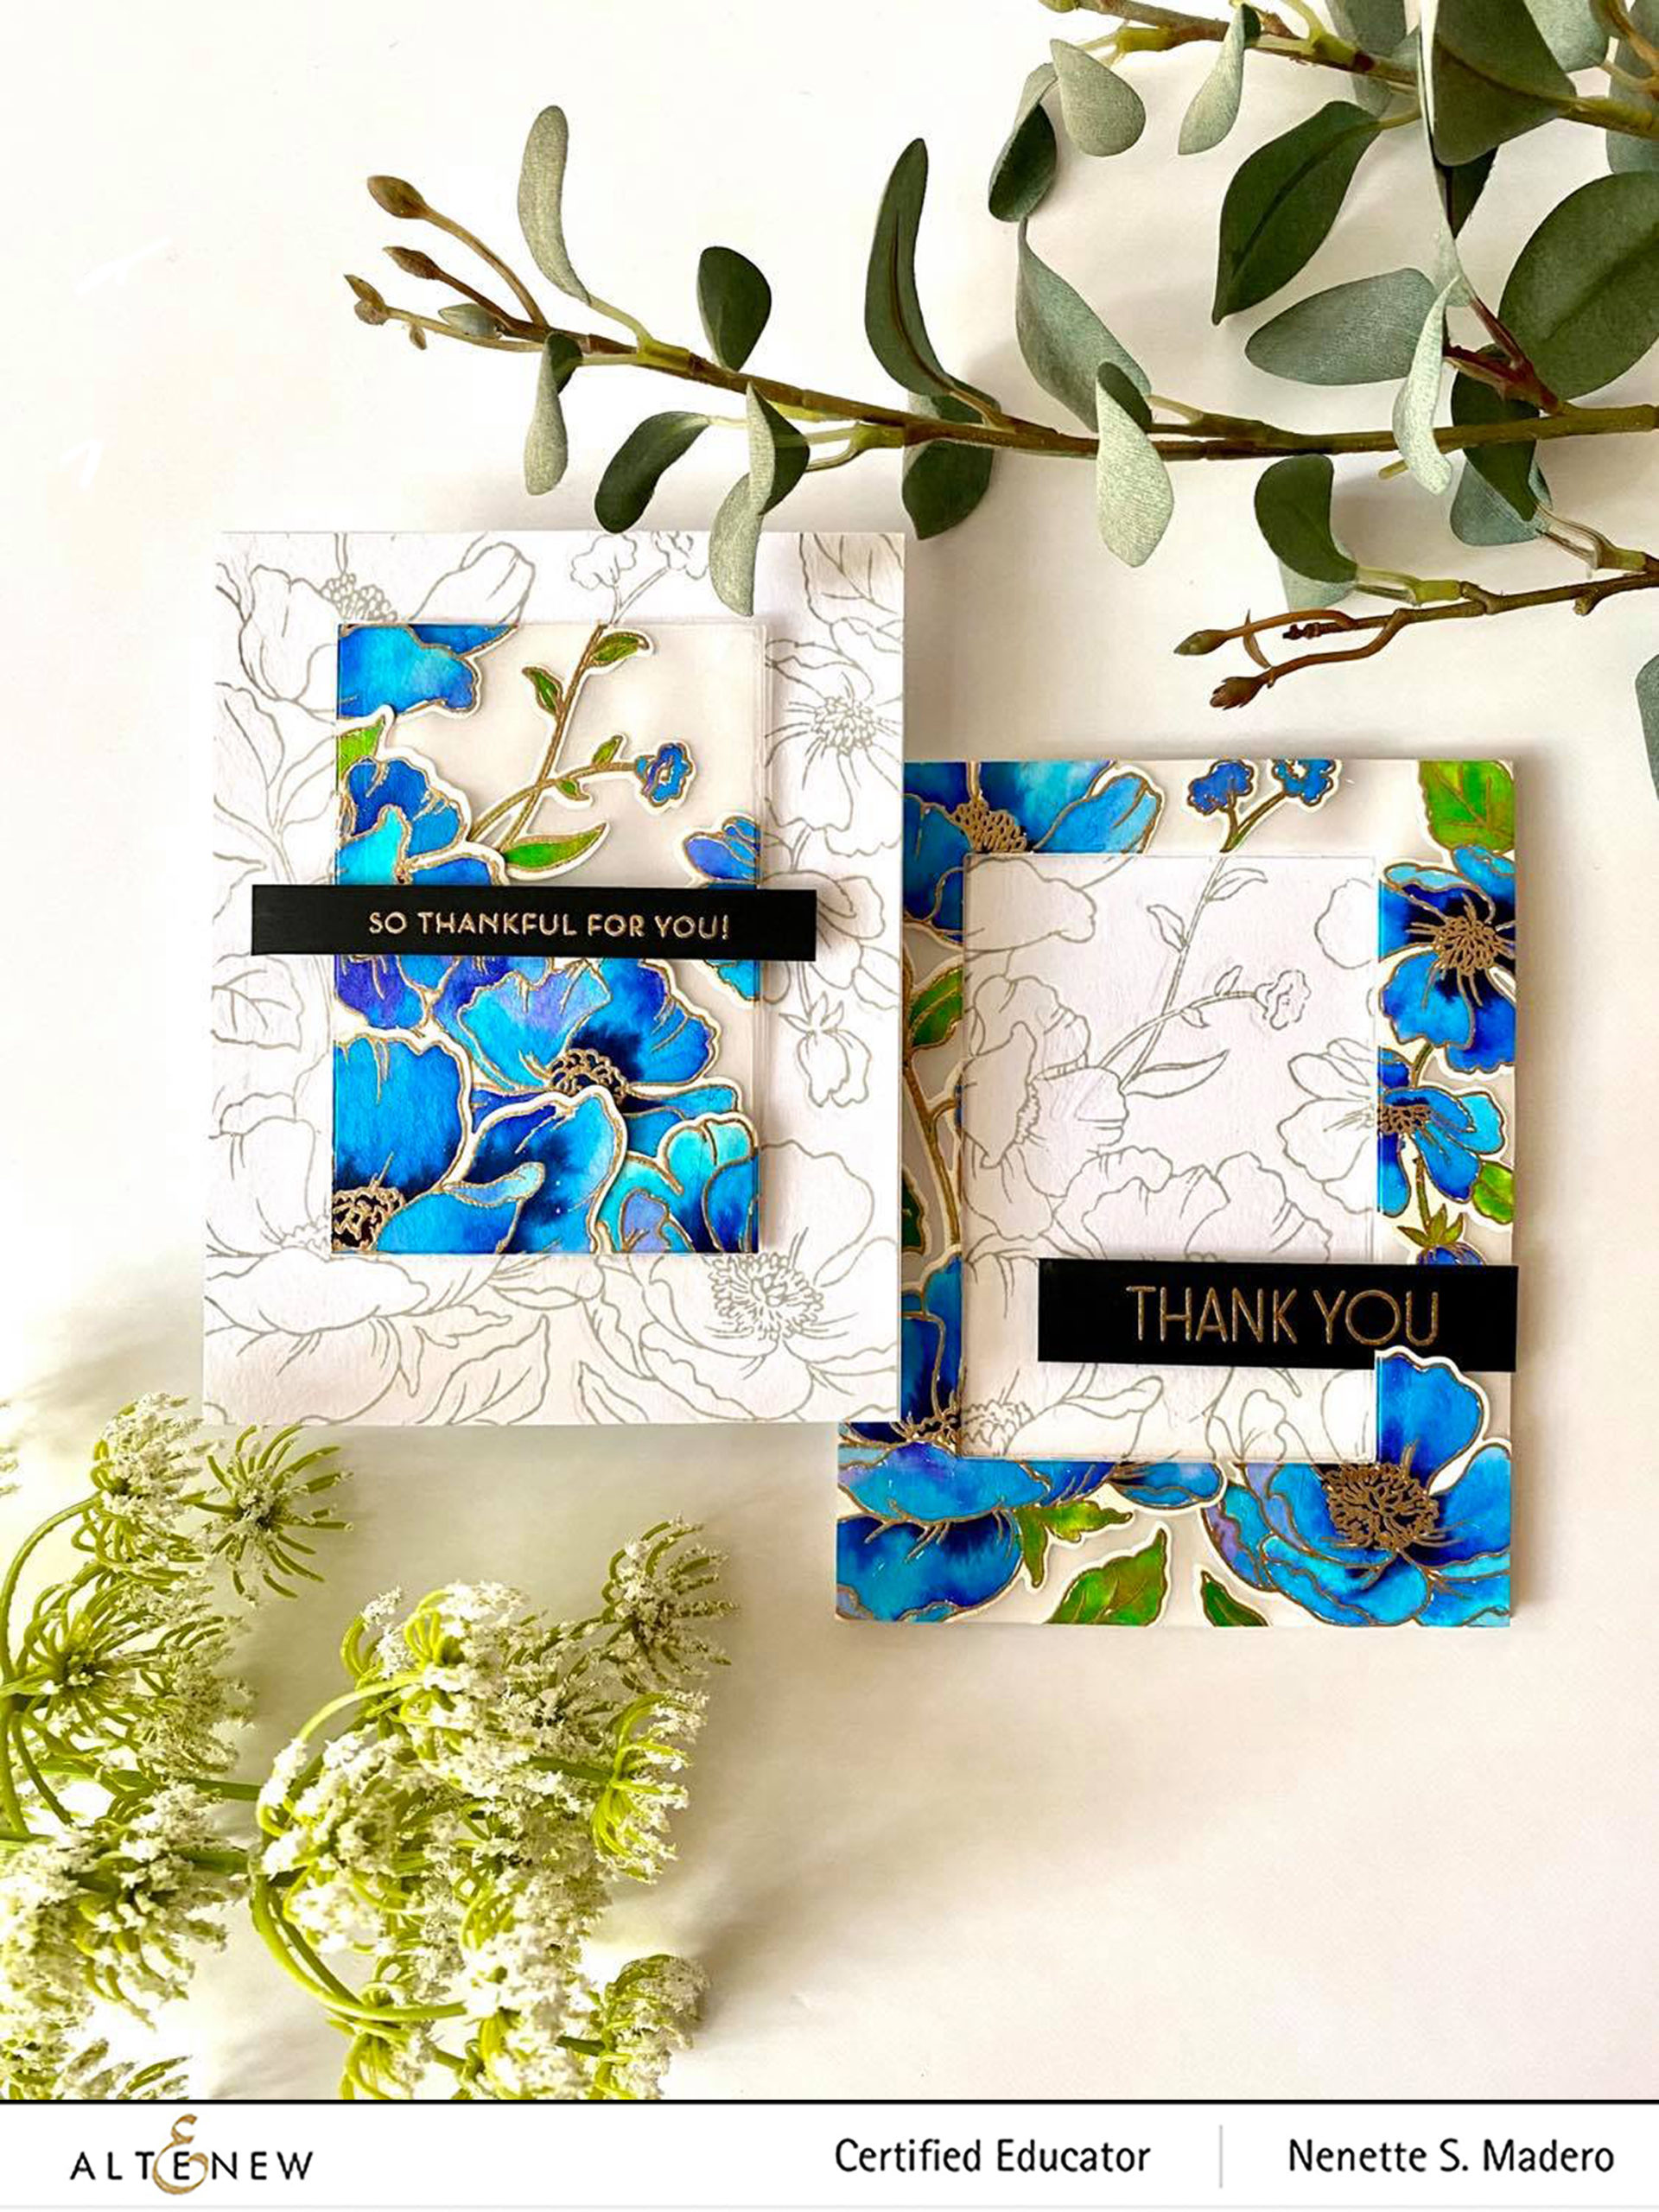
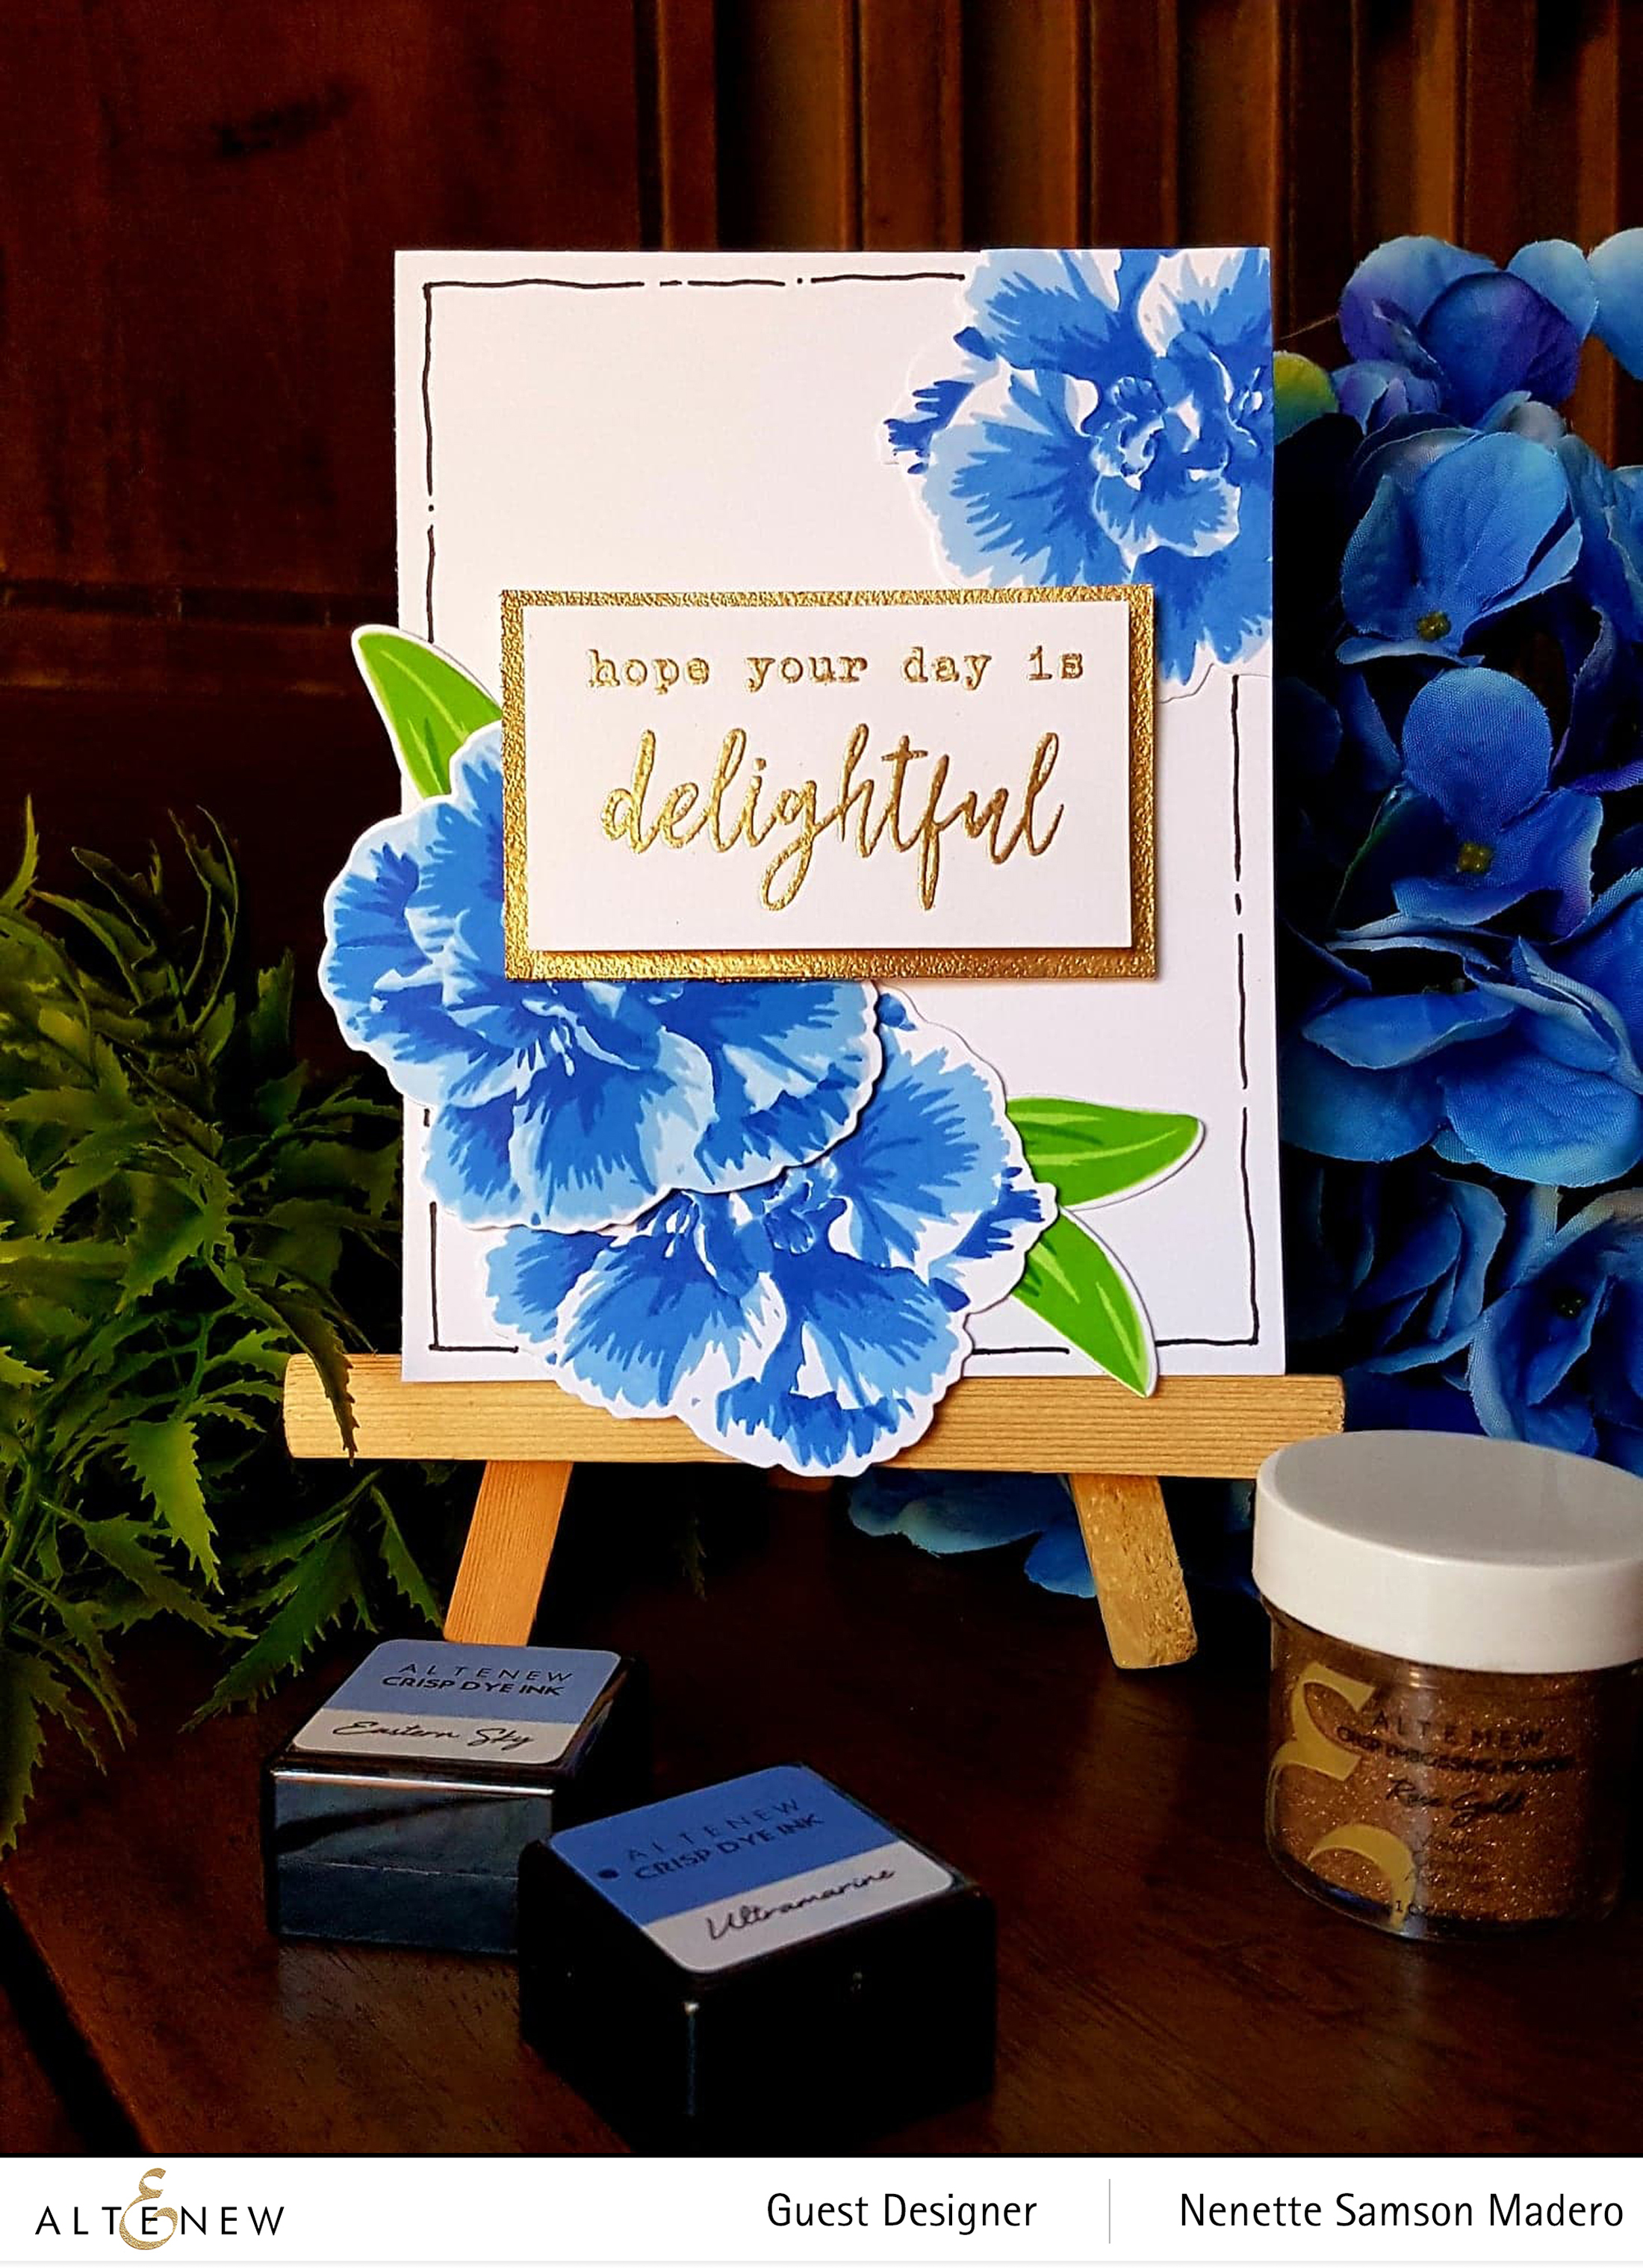
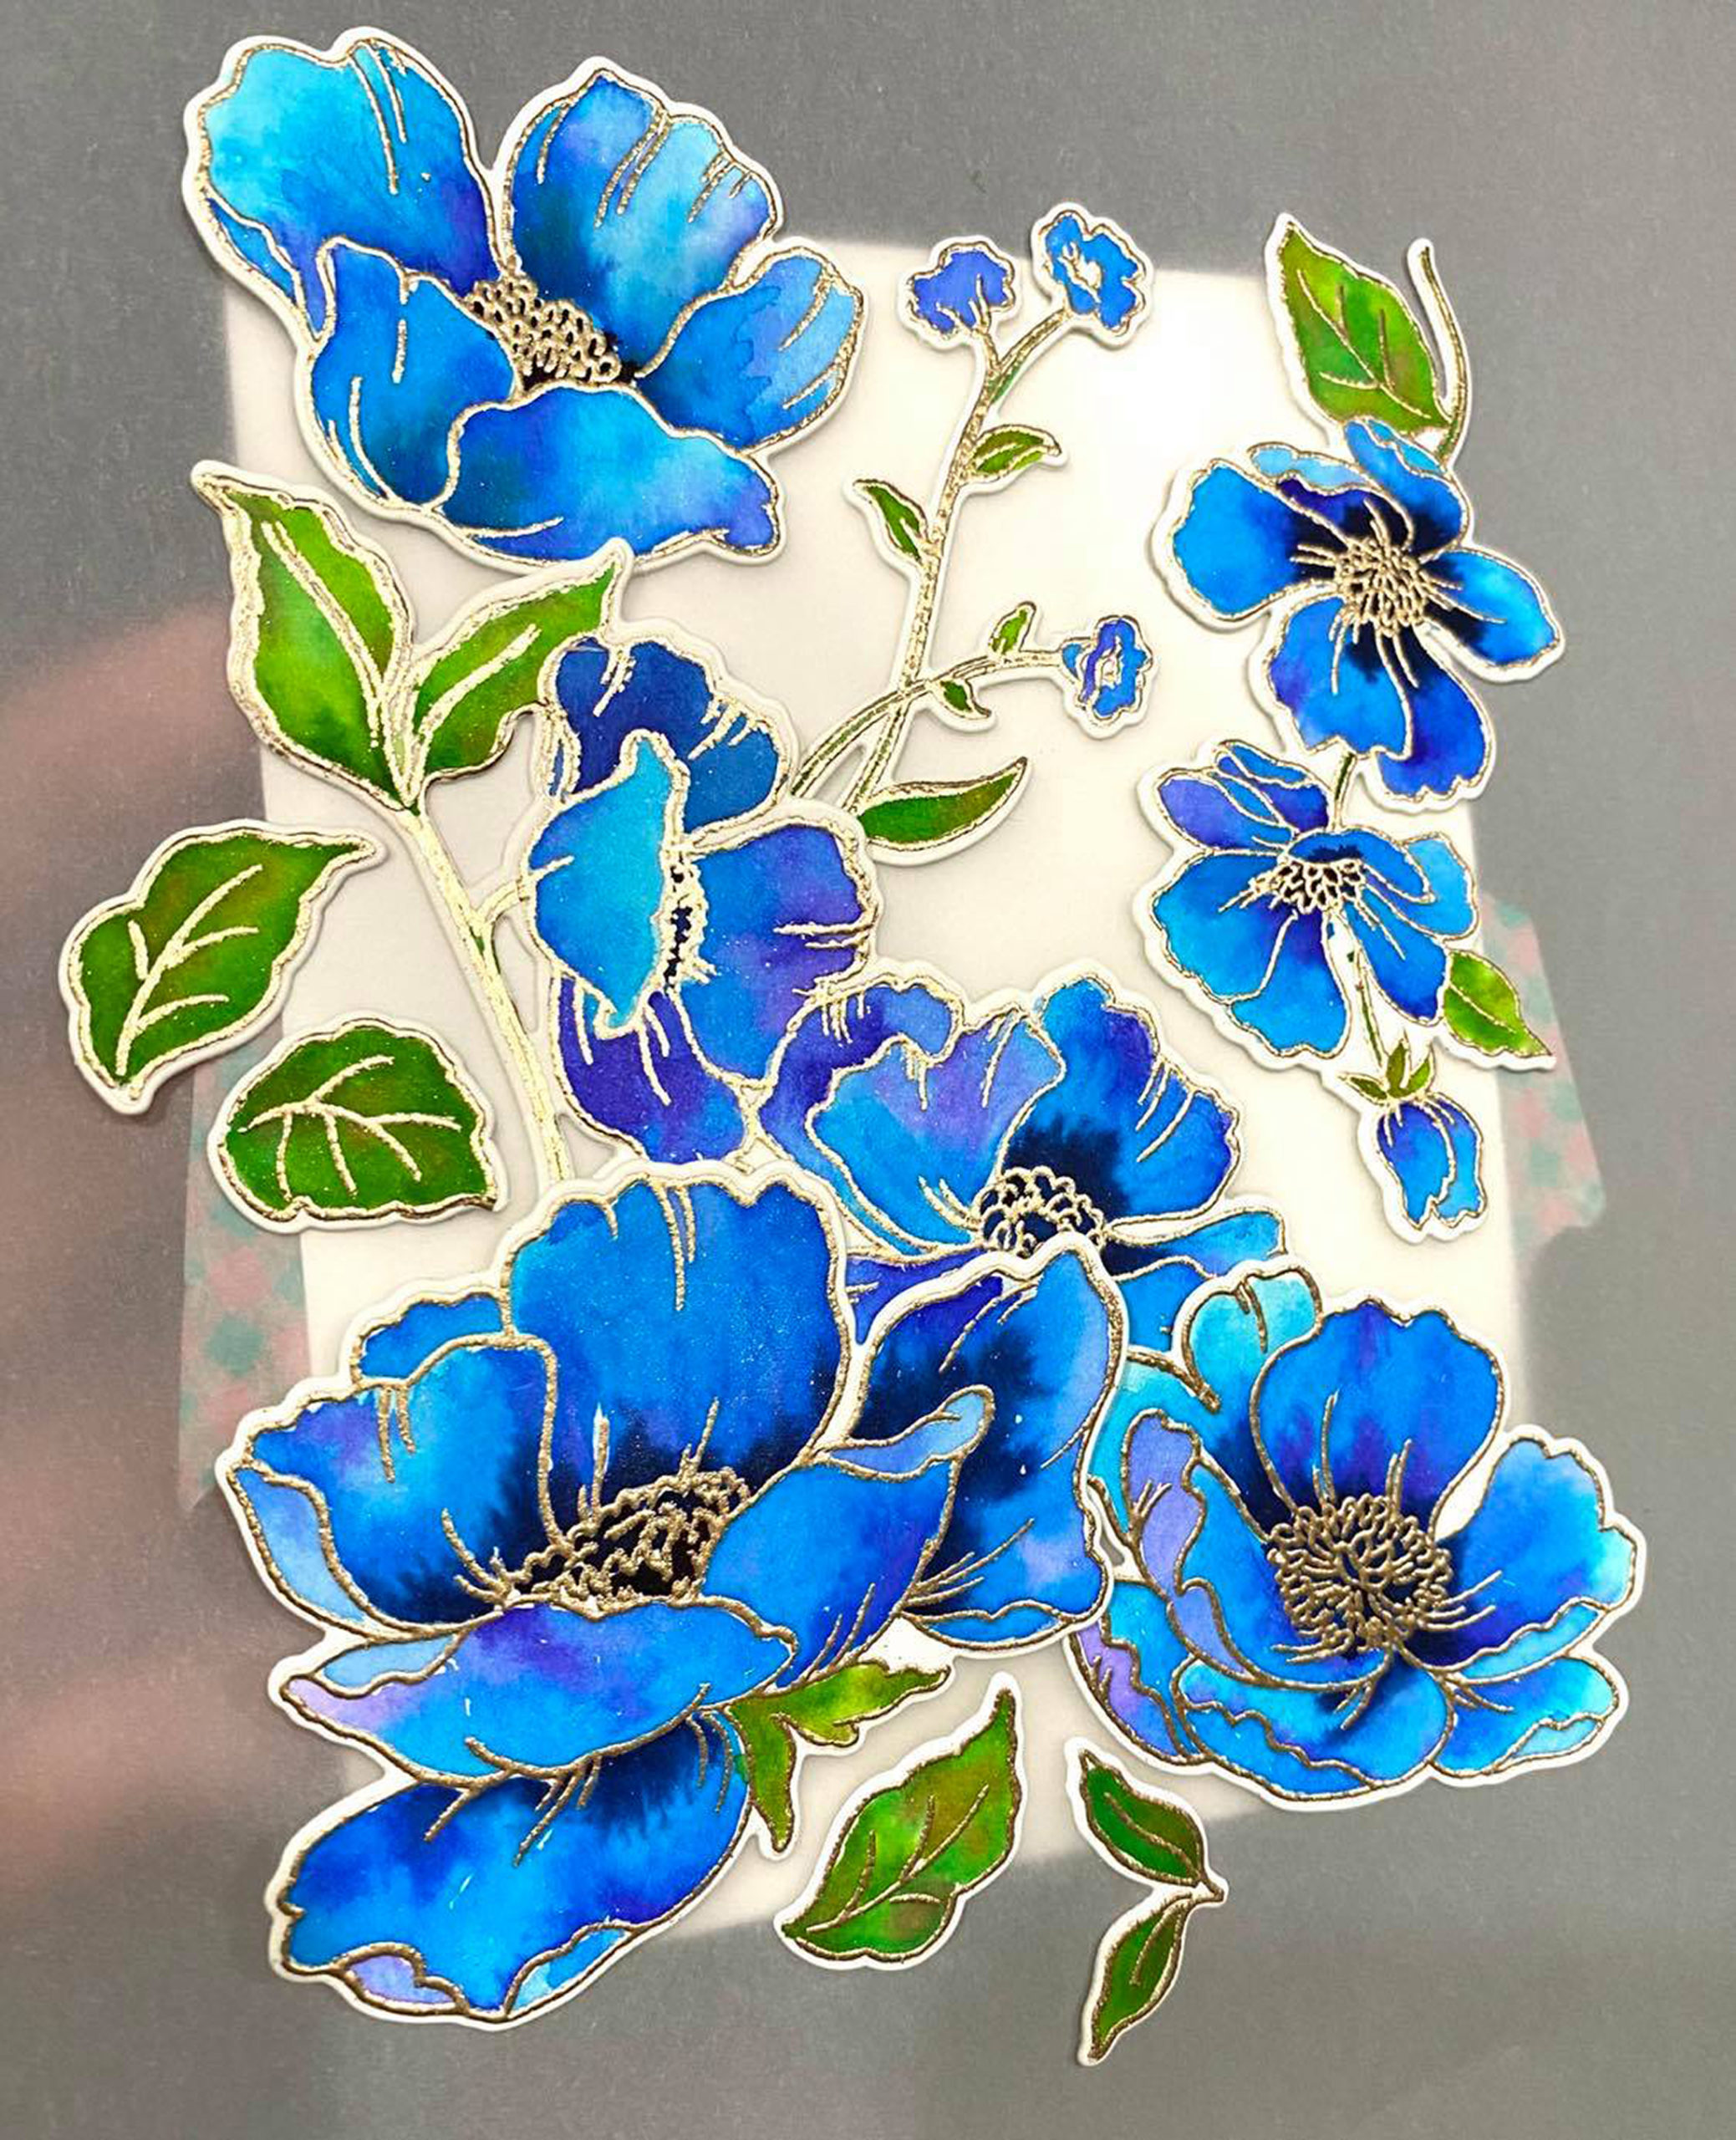
I loved coloring the Poppy Garden stamp images so I used it in 4 of my cards– warm colors for one set of die cuts and cool colors for the other set. I stamped all the images on watercolor paper with Versamark Ink then embossed with Rose gold embossing powder. The Tropical Fiesta and Winter Wonderland watecolor brush markers were used to color the stamped and embossed images. The images where then die cut using the coordinating dies.

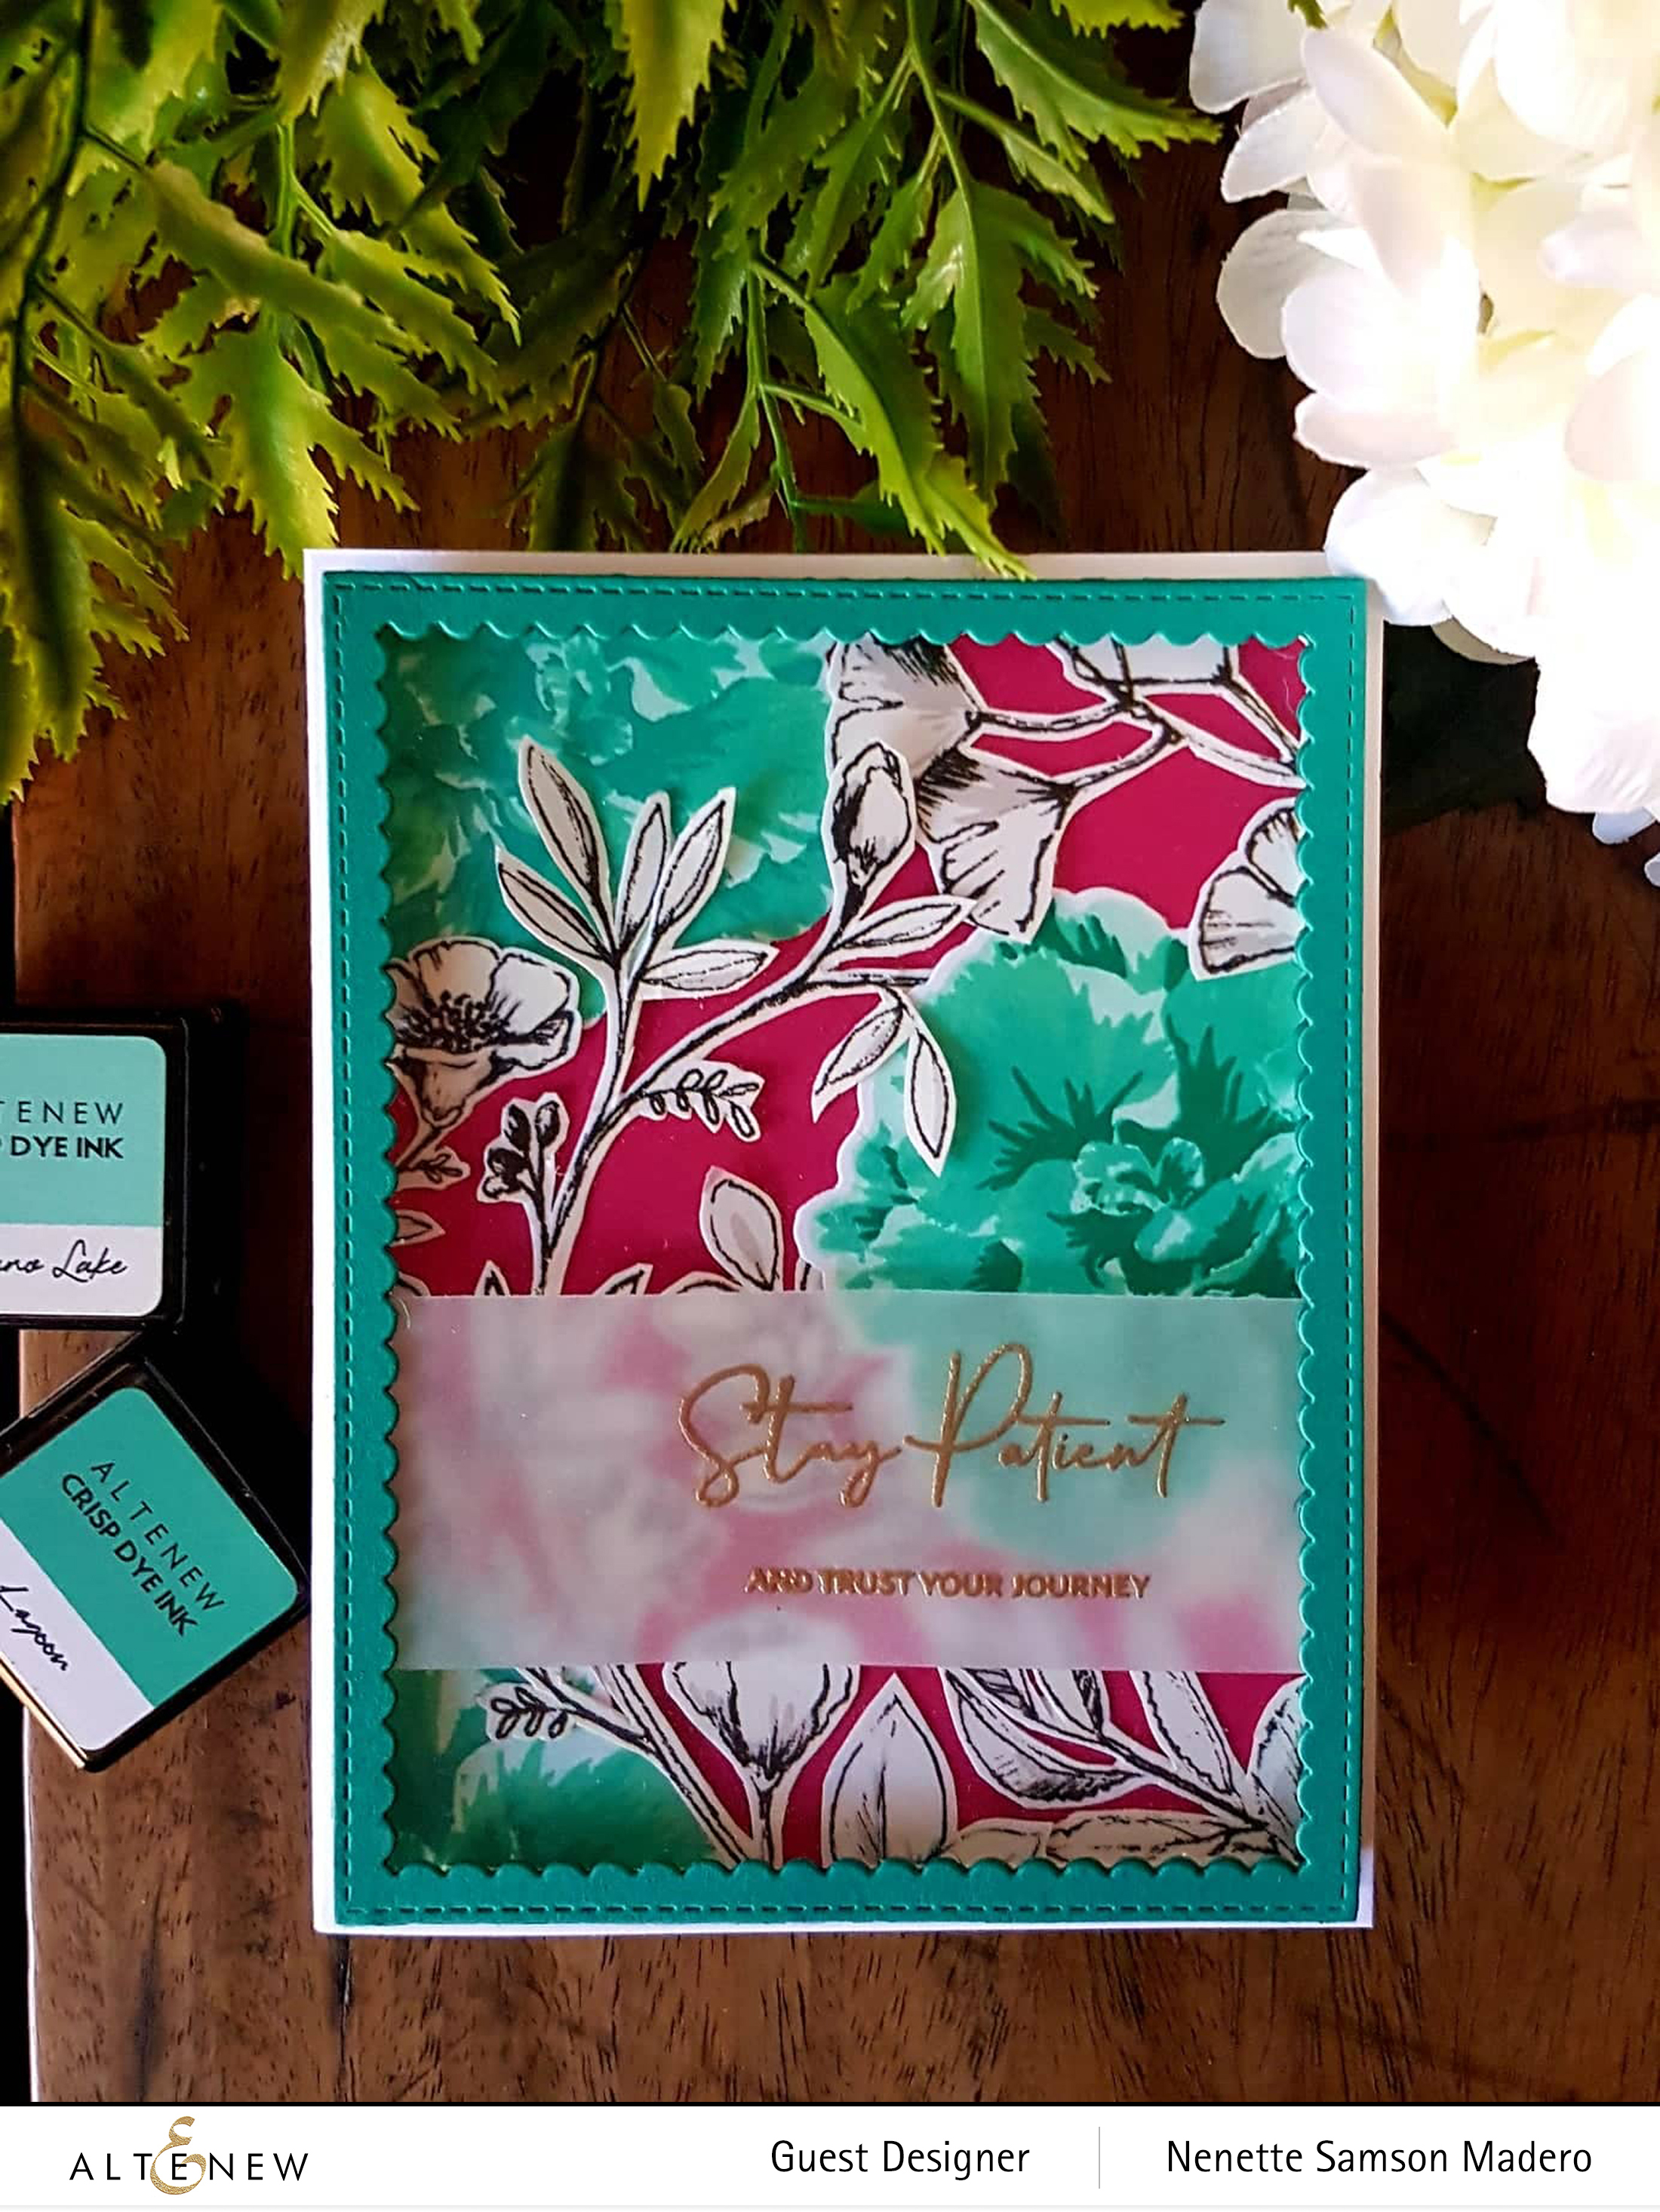
Next, I stamped the biggest image onto Neenah Solar White CS using the Silver lake dye ink. I chose a lighter color instead of black so that the watercolored images will stand out more. Then I used the coordinating stencil to mask the stamped image so that I can overlap and stamp the second image. Always remember that whatever you stamp first will be the image that will look closest to you. Everything else will be behind the masked image so plan your stamping accordingly. I continued until I covered the entire paper using all the different stamp images.

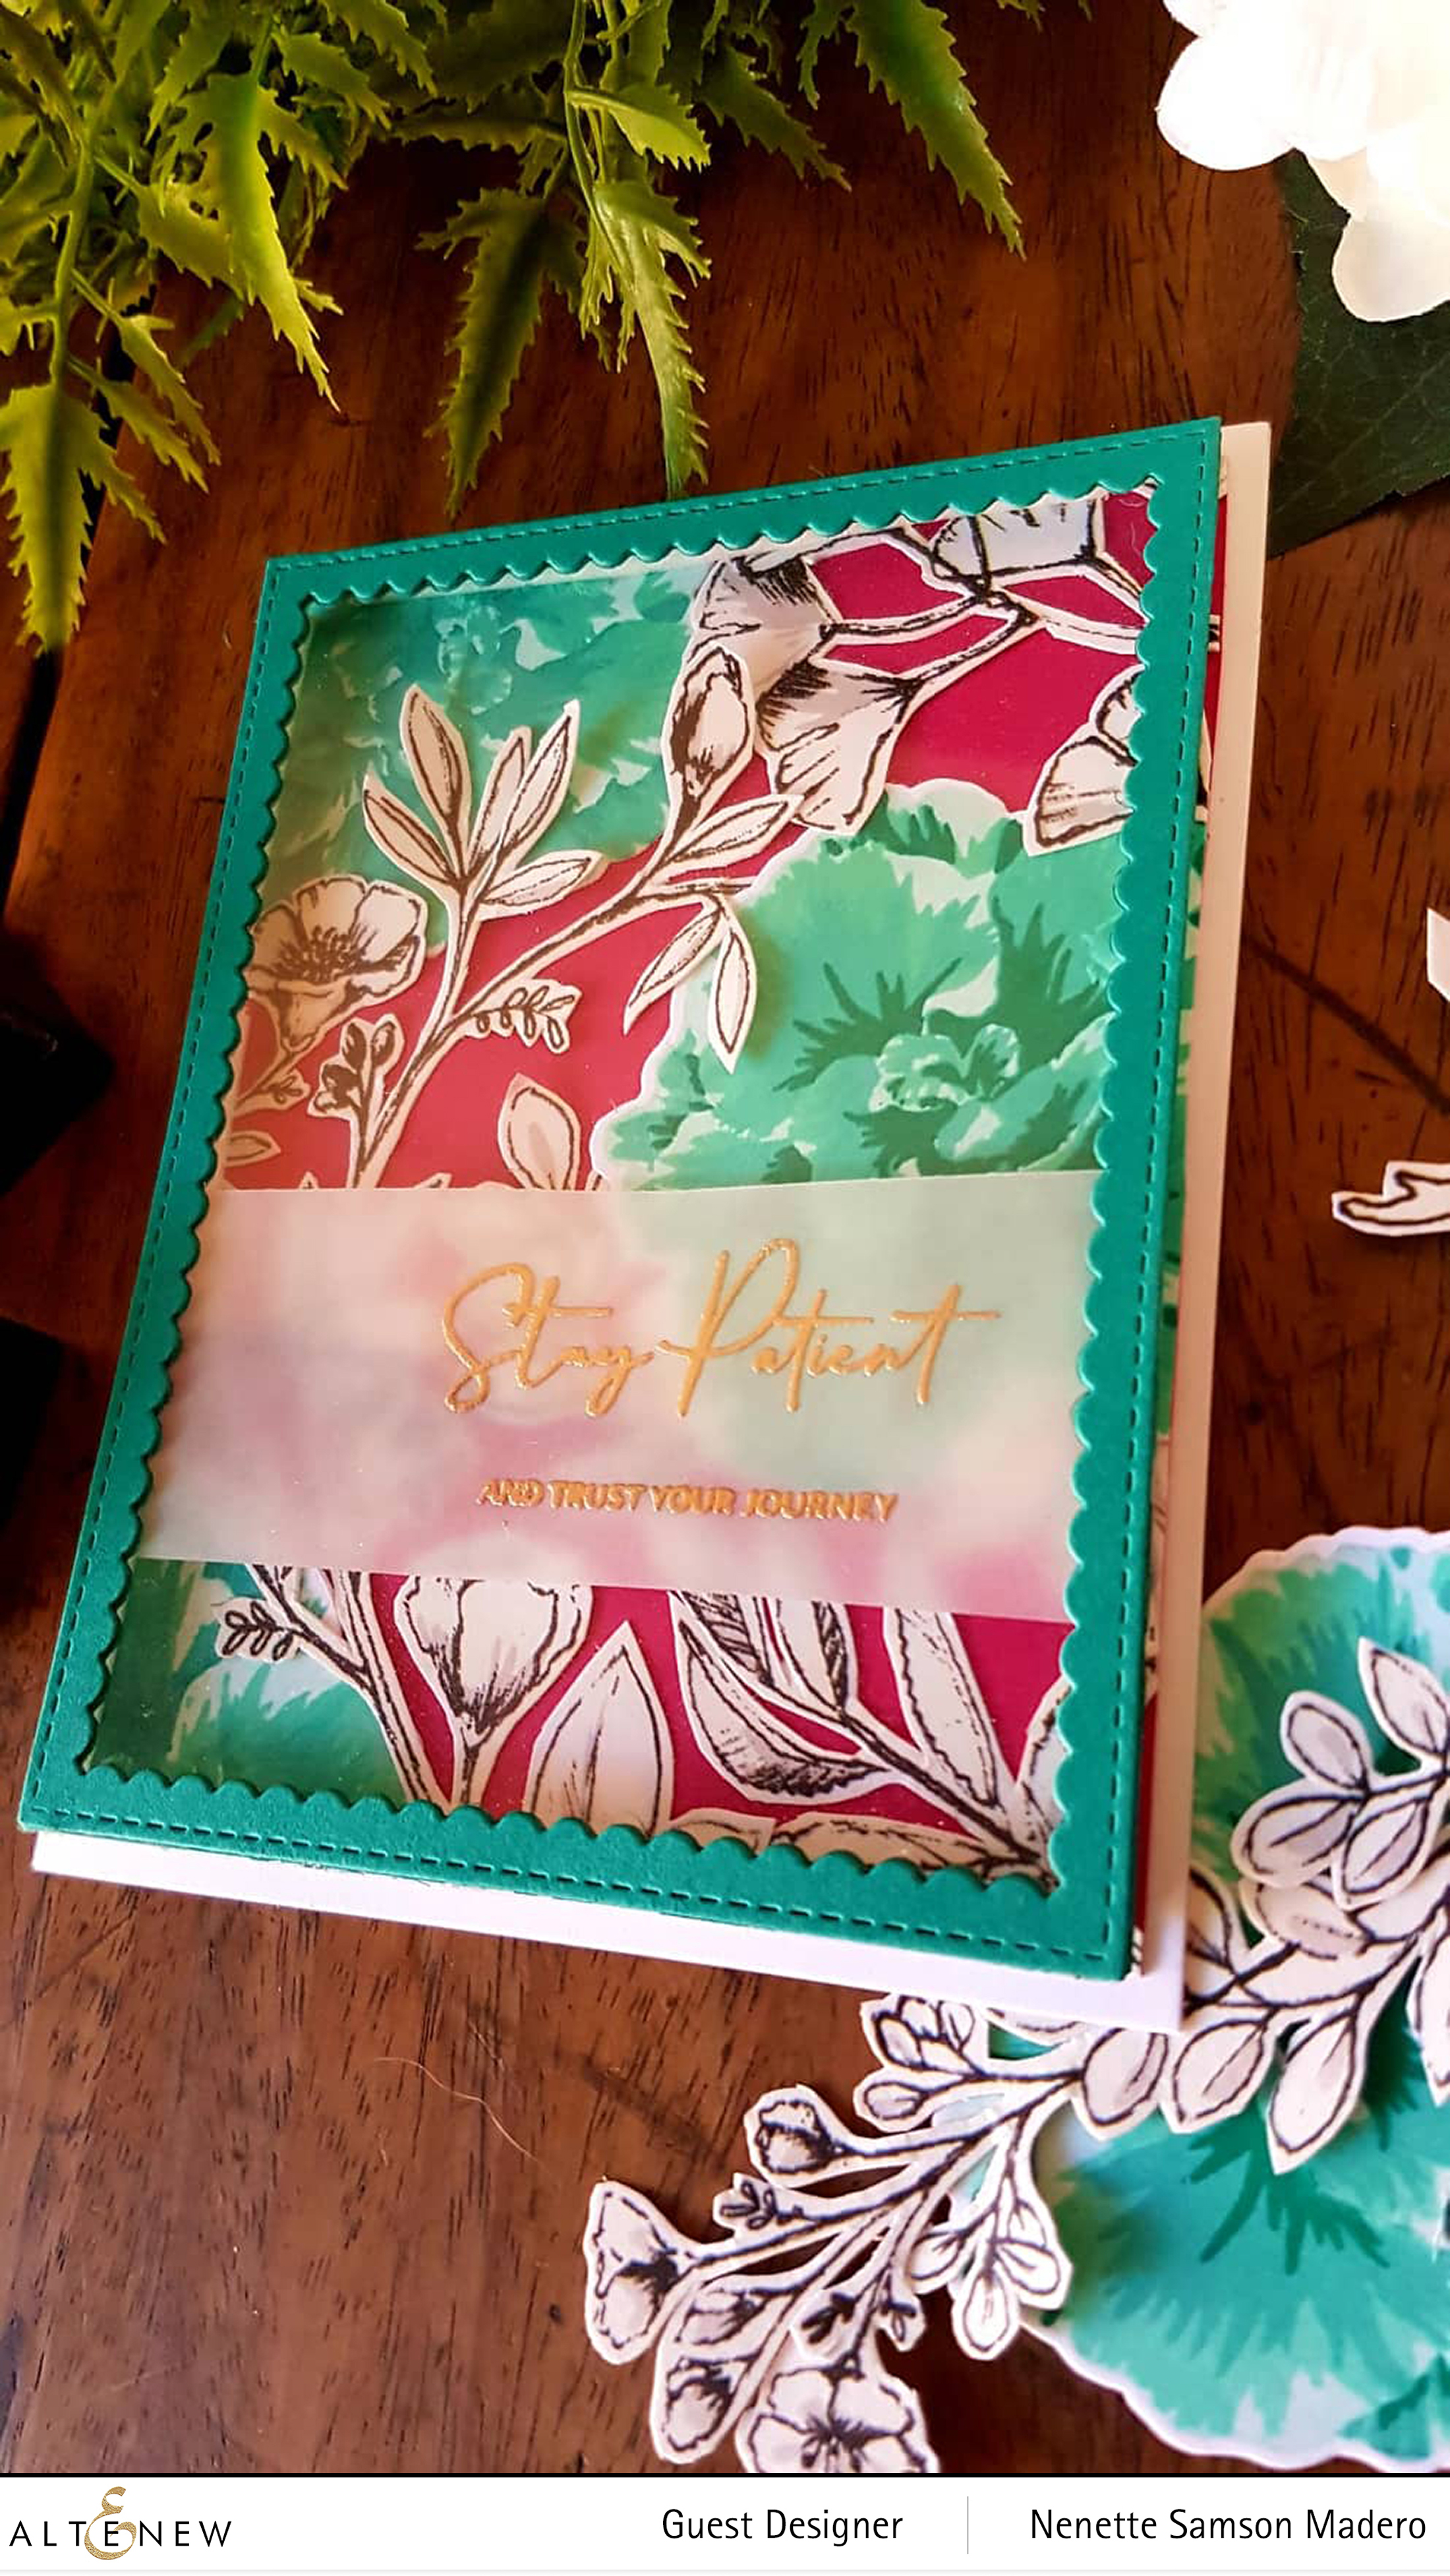
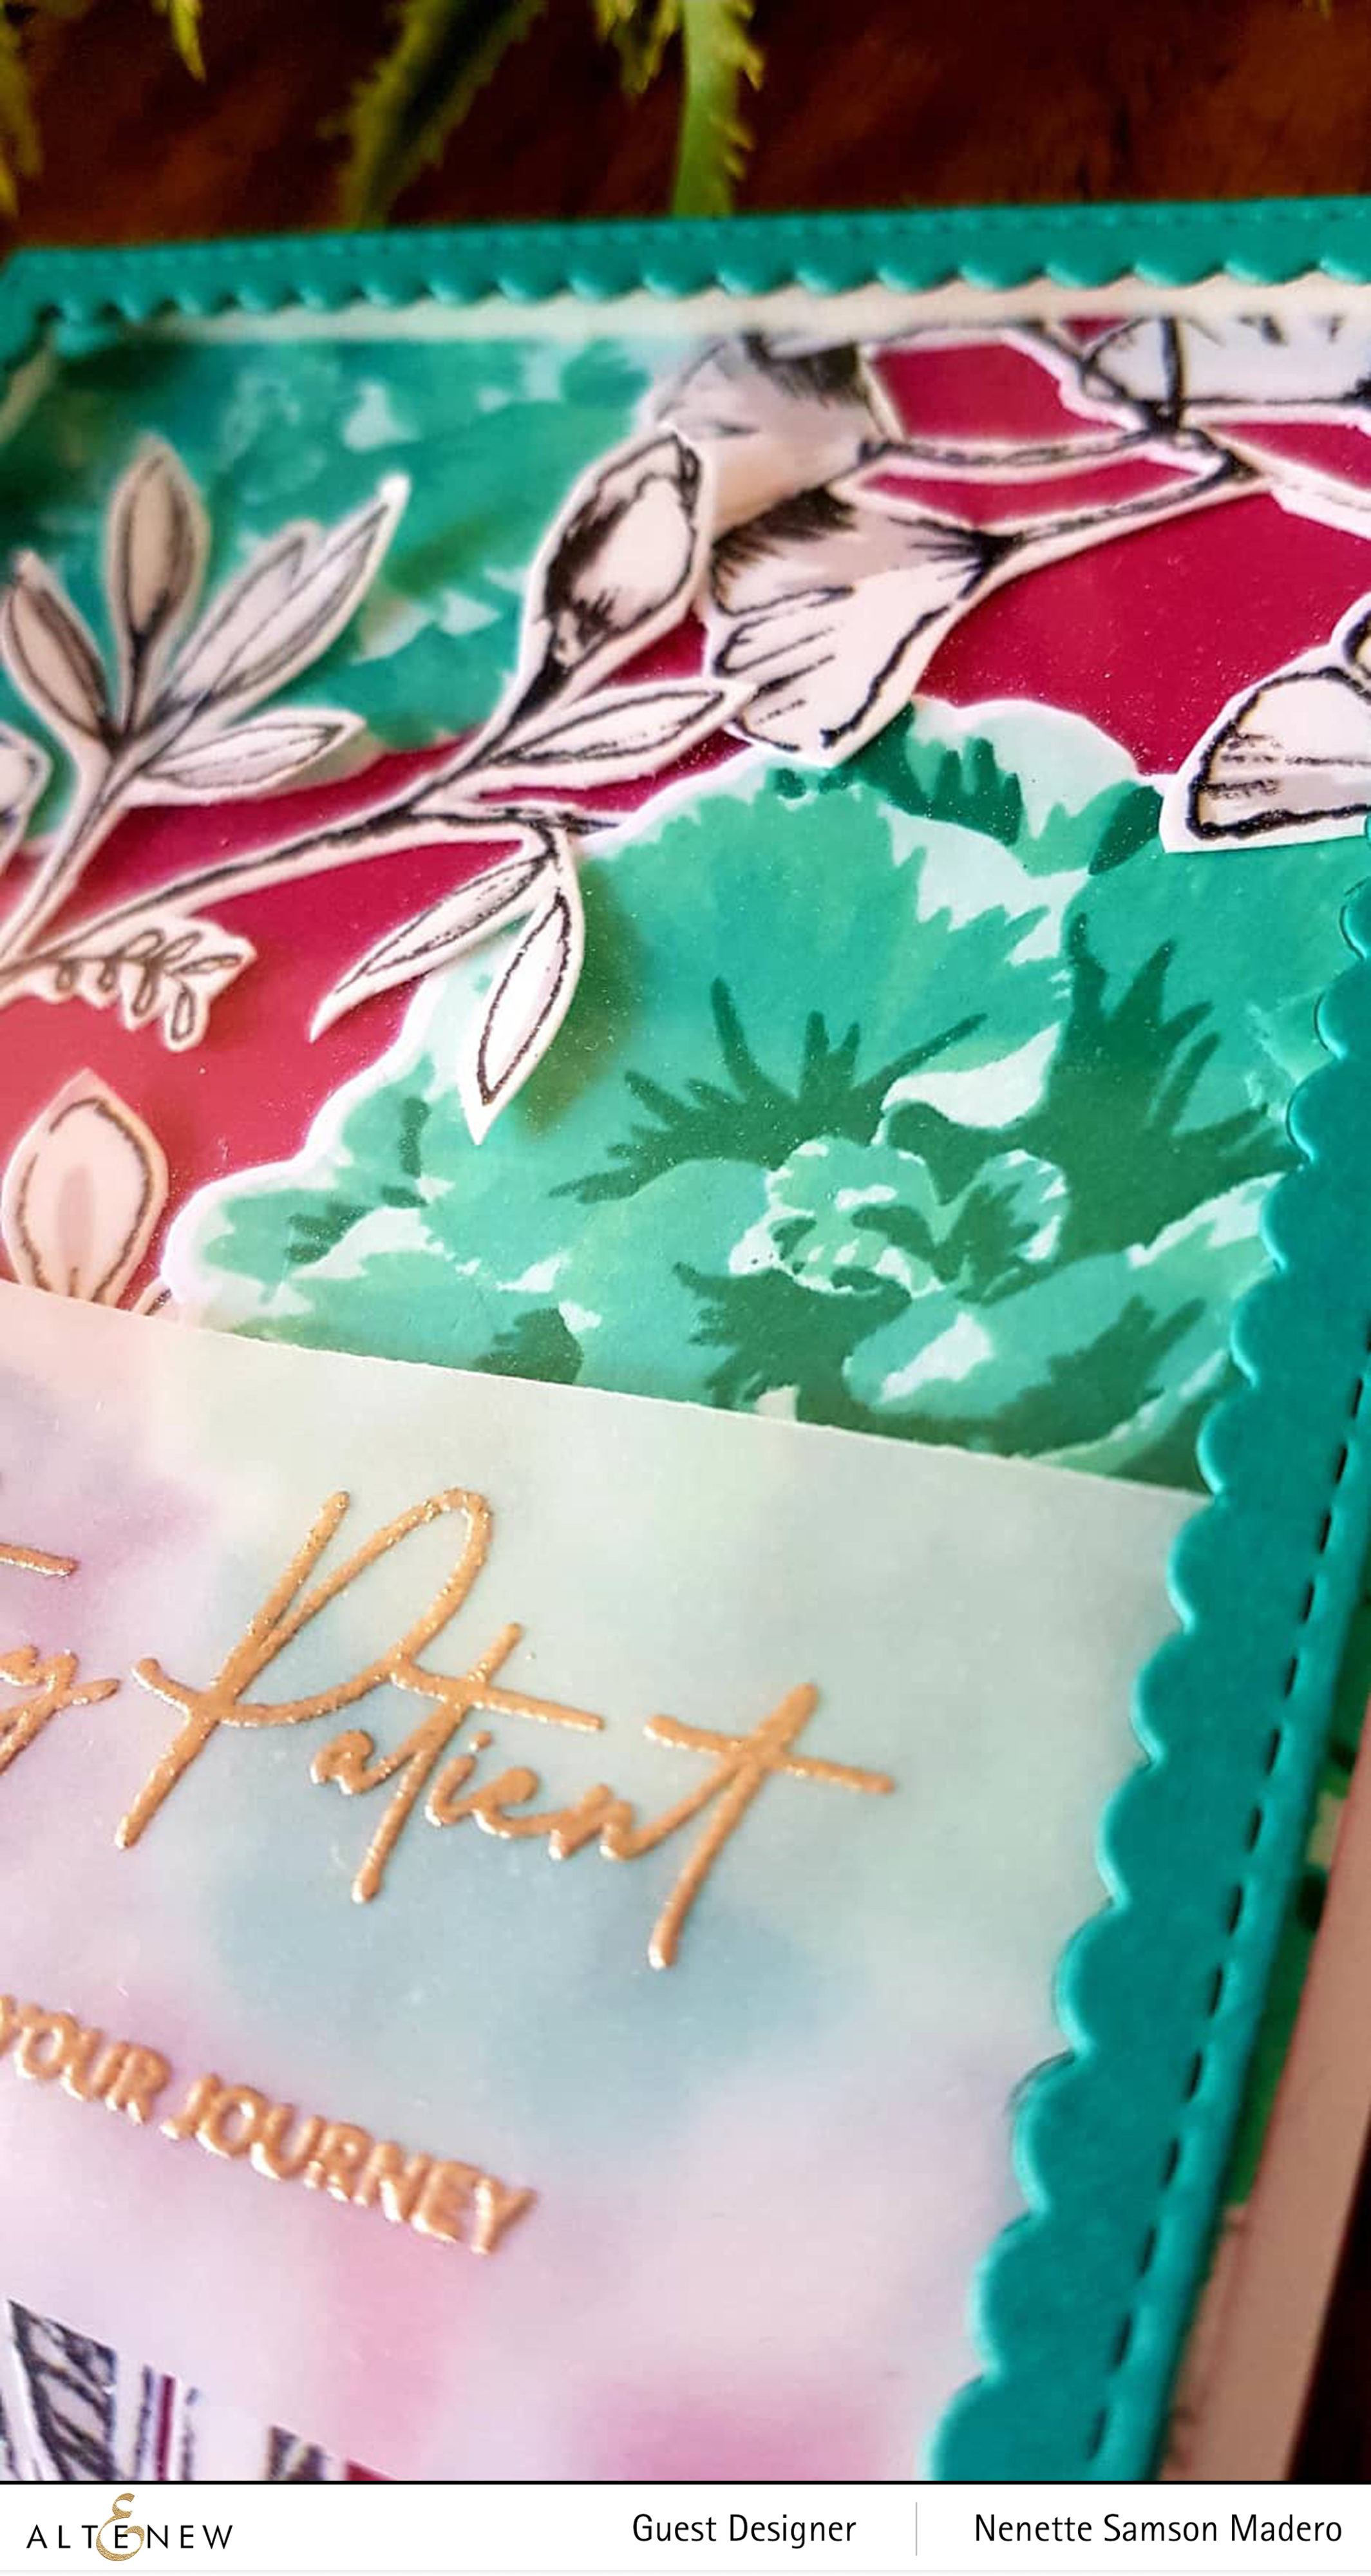
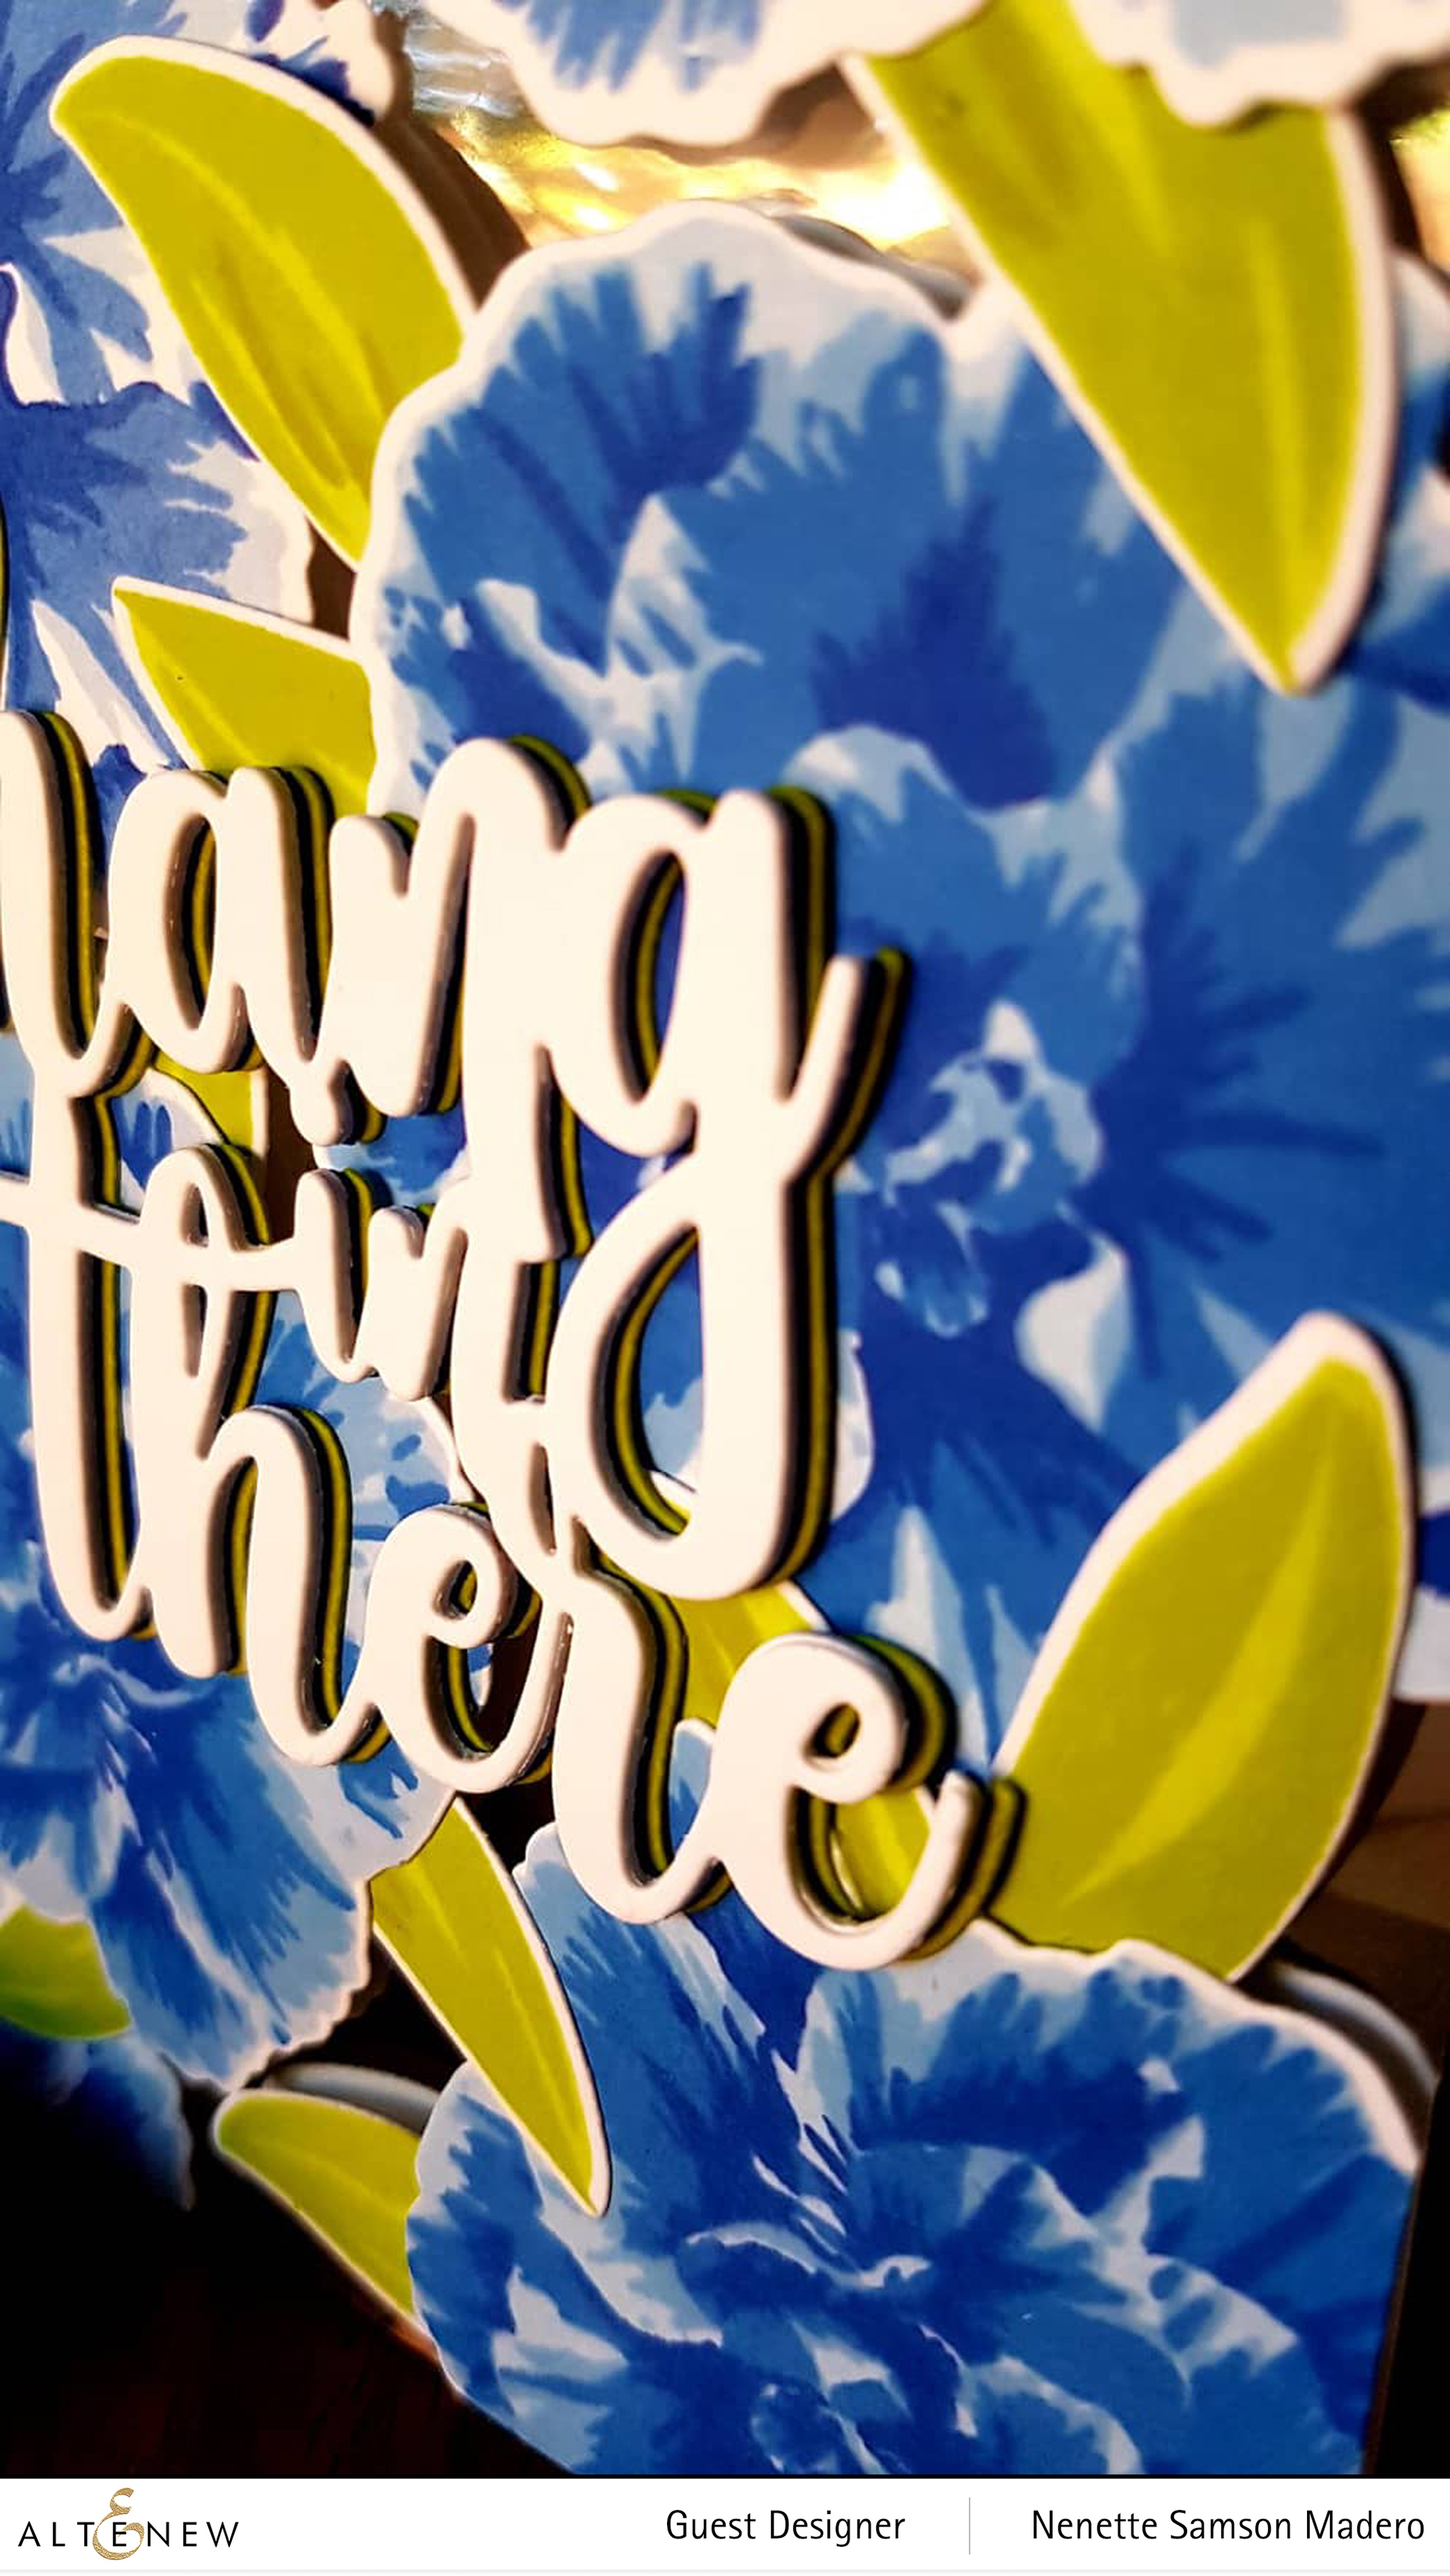
I then temporarily adhered vellum over the stamped panel using washi tape so that I can glue the die-cut flowers on top following the placement of the stamped images. You can also use transparency as an alternative. Make sure you secure the two together using washi tape so that the vellum with the die cuts and the stamped panel will not shift when it goes through the die-cutting machine. Both sheets were then die cut using a rectangular die to create a frame.

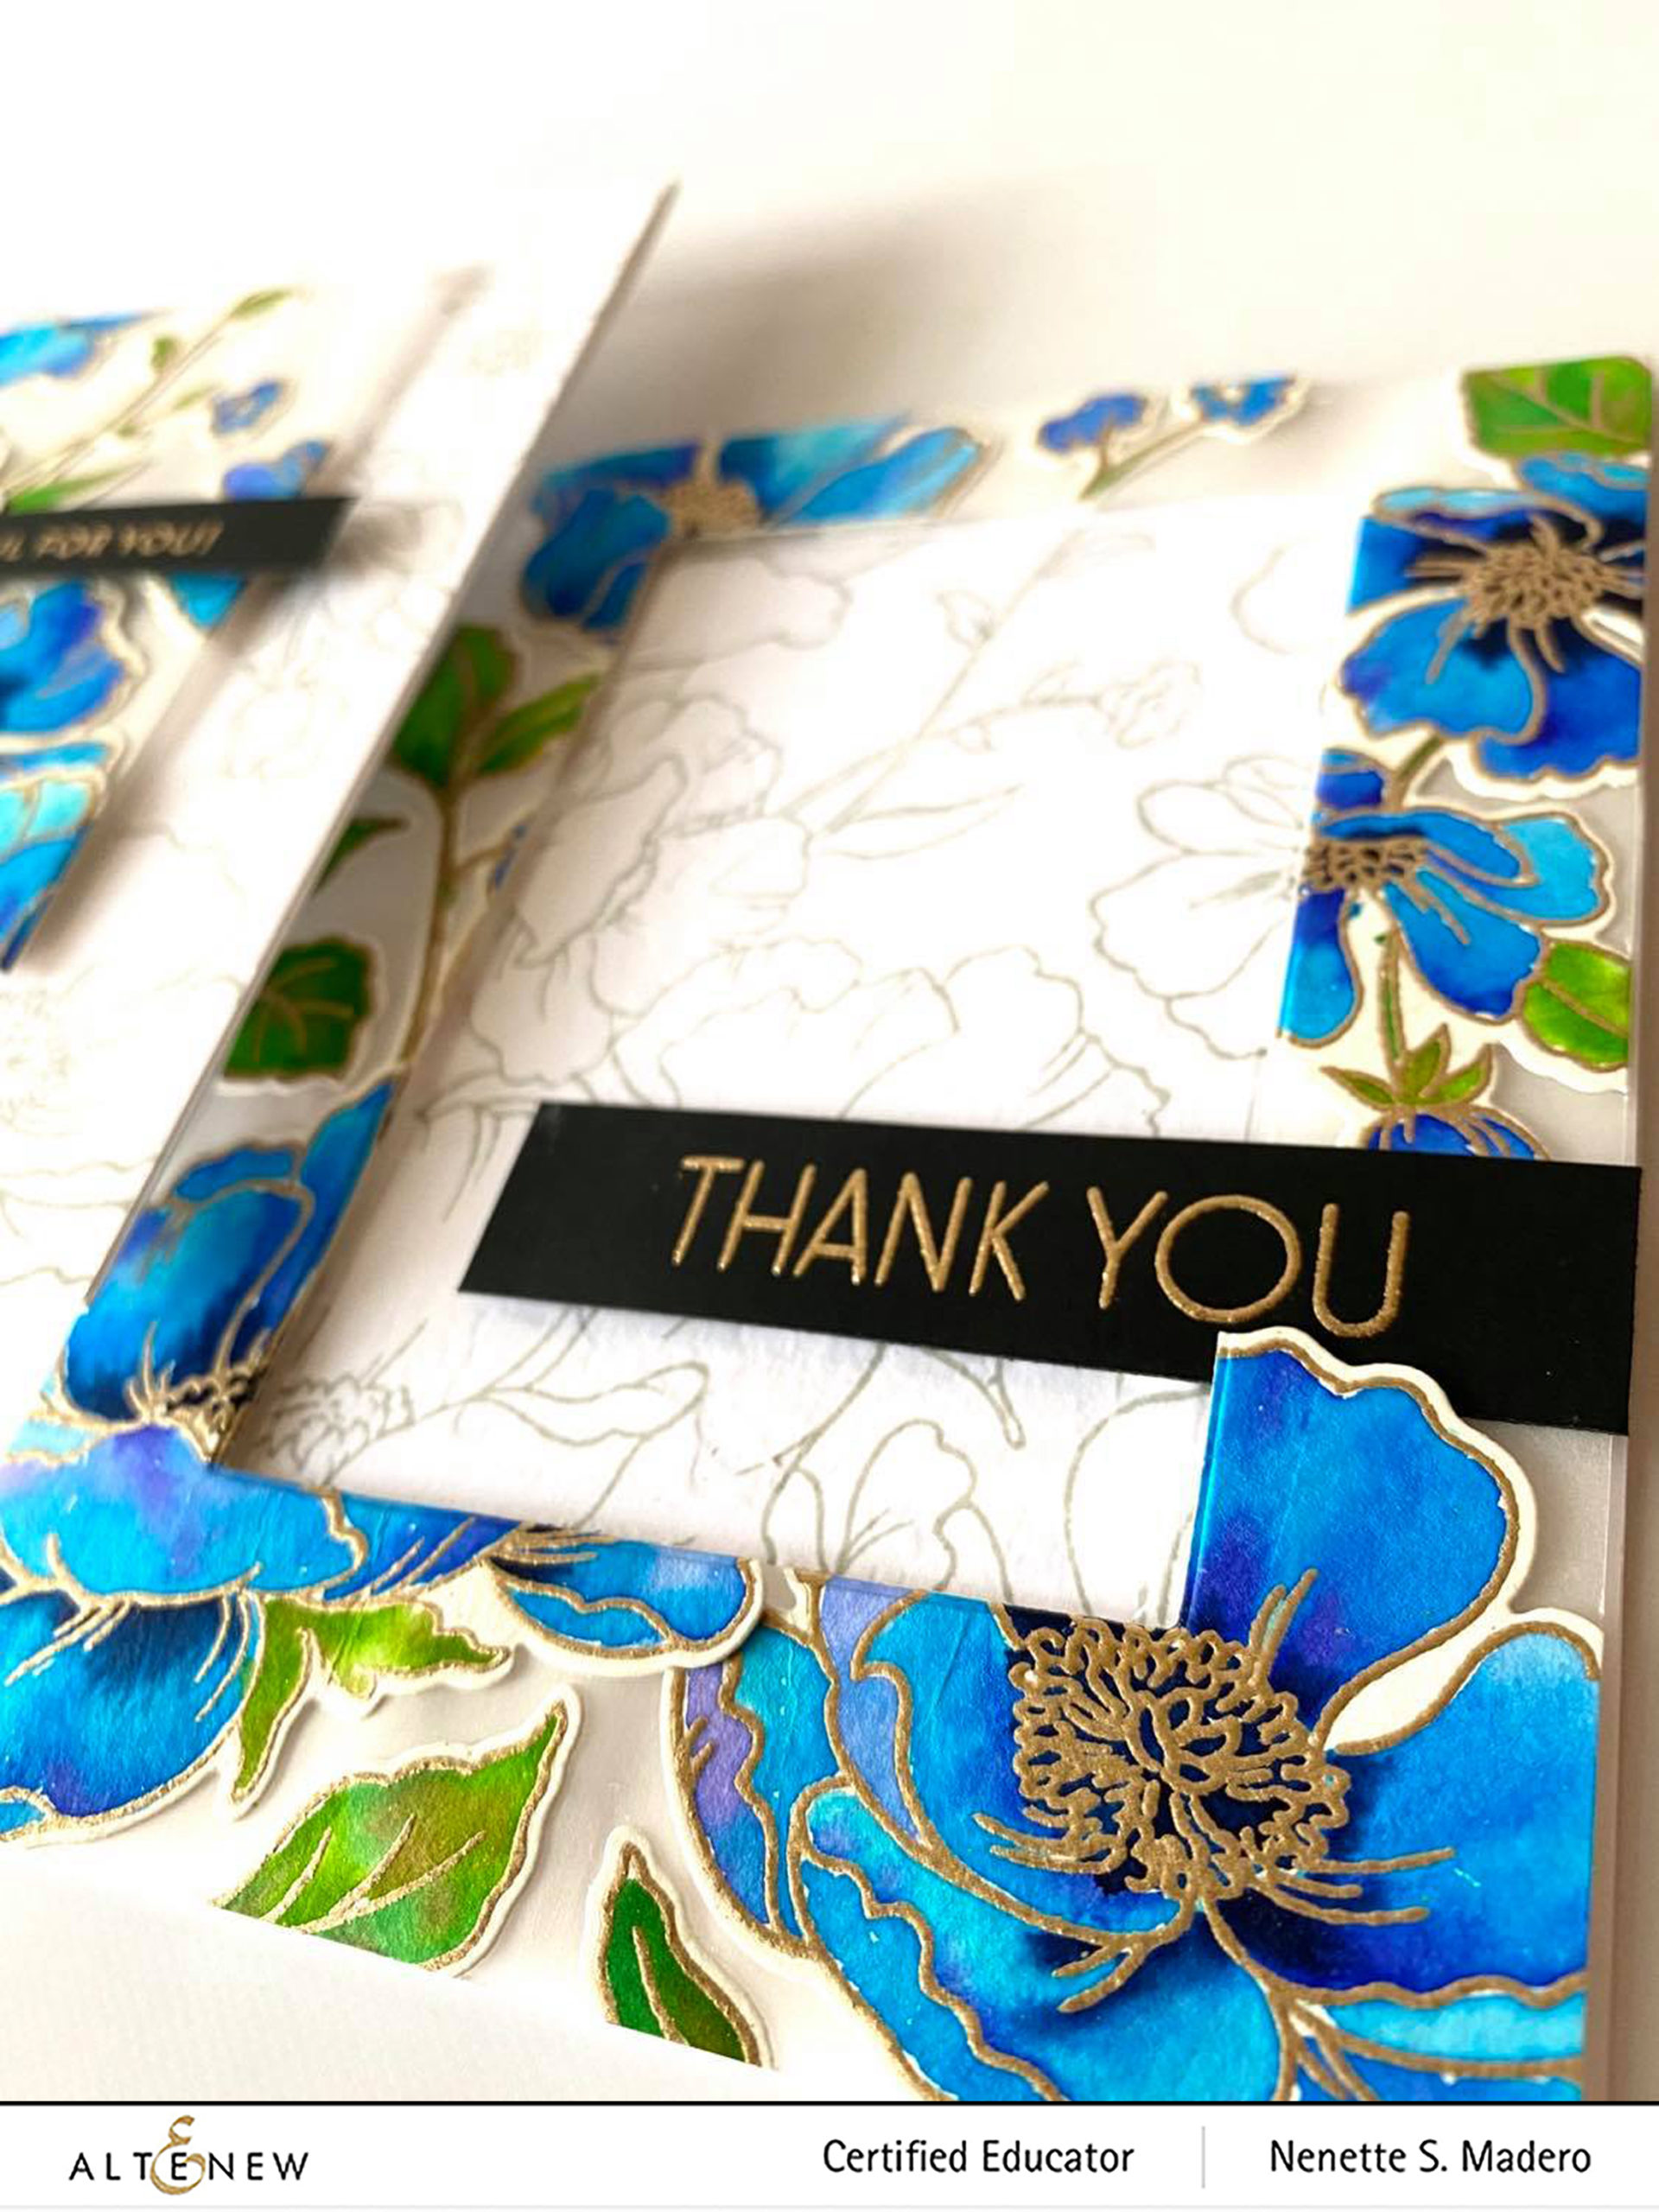
The negative die cut frame was adhered onto an A2 card front using foam squares. The middle portion of the stamped panel was glued to the center of the card then the sentiment from the Ornamental Bliss stamp set was stamped on black cardstock and embossed with Rose Gold embossing powder. This was mounted onto the card front using foam squares.

The same thing was done for the 2nd card. I just made sure that the flowers aligned when I adhered the middle panel using foam squares. Sentiment for this card was from the Needlework Motif stamp set.


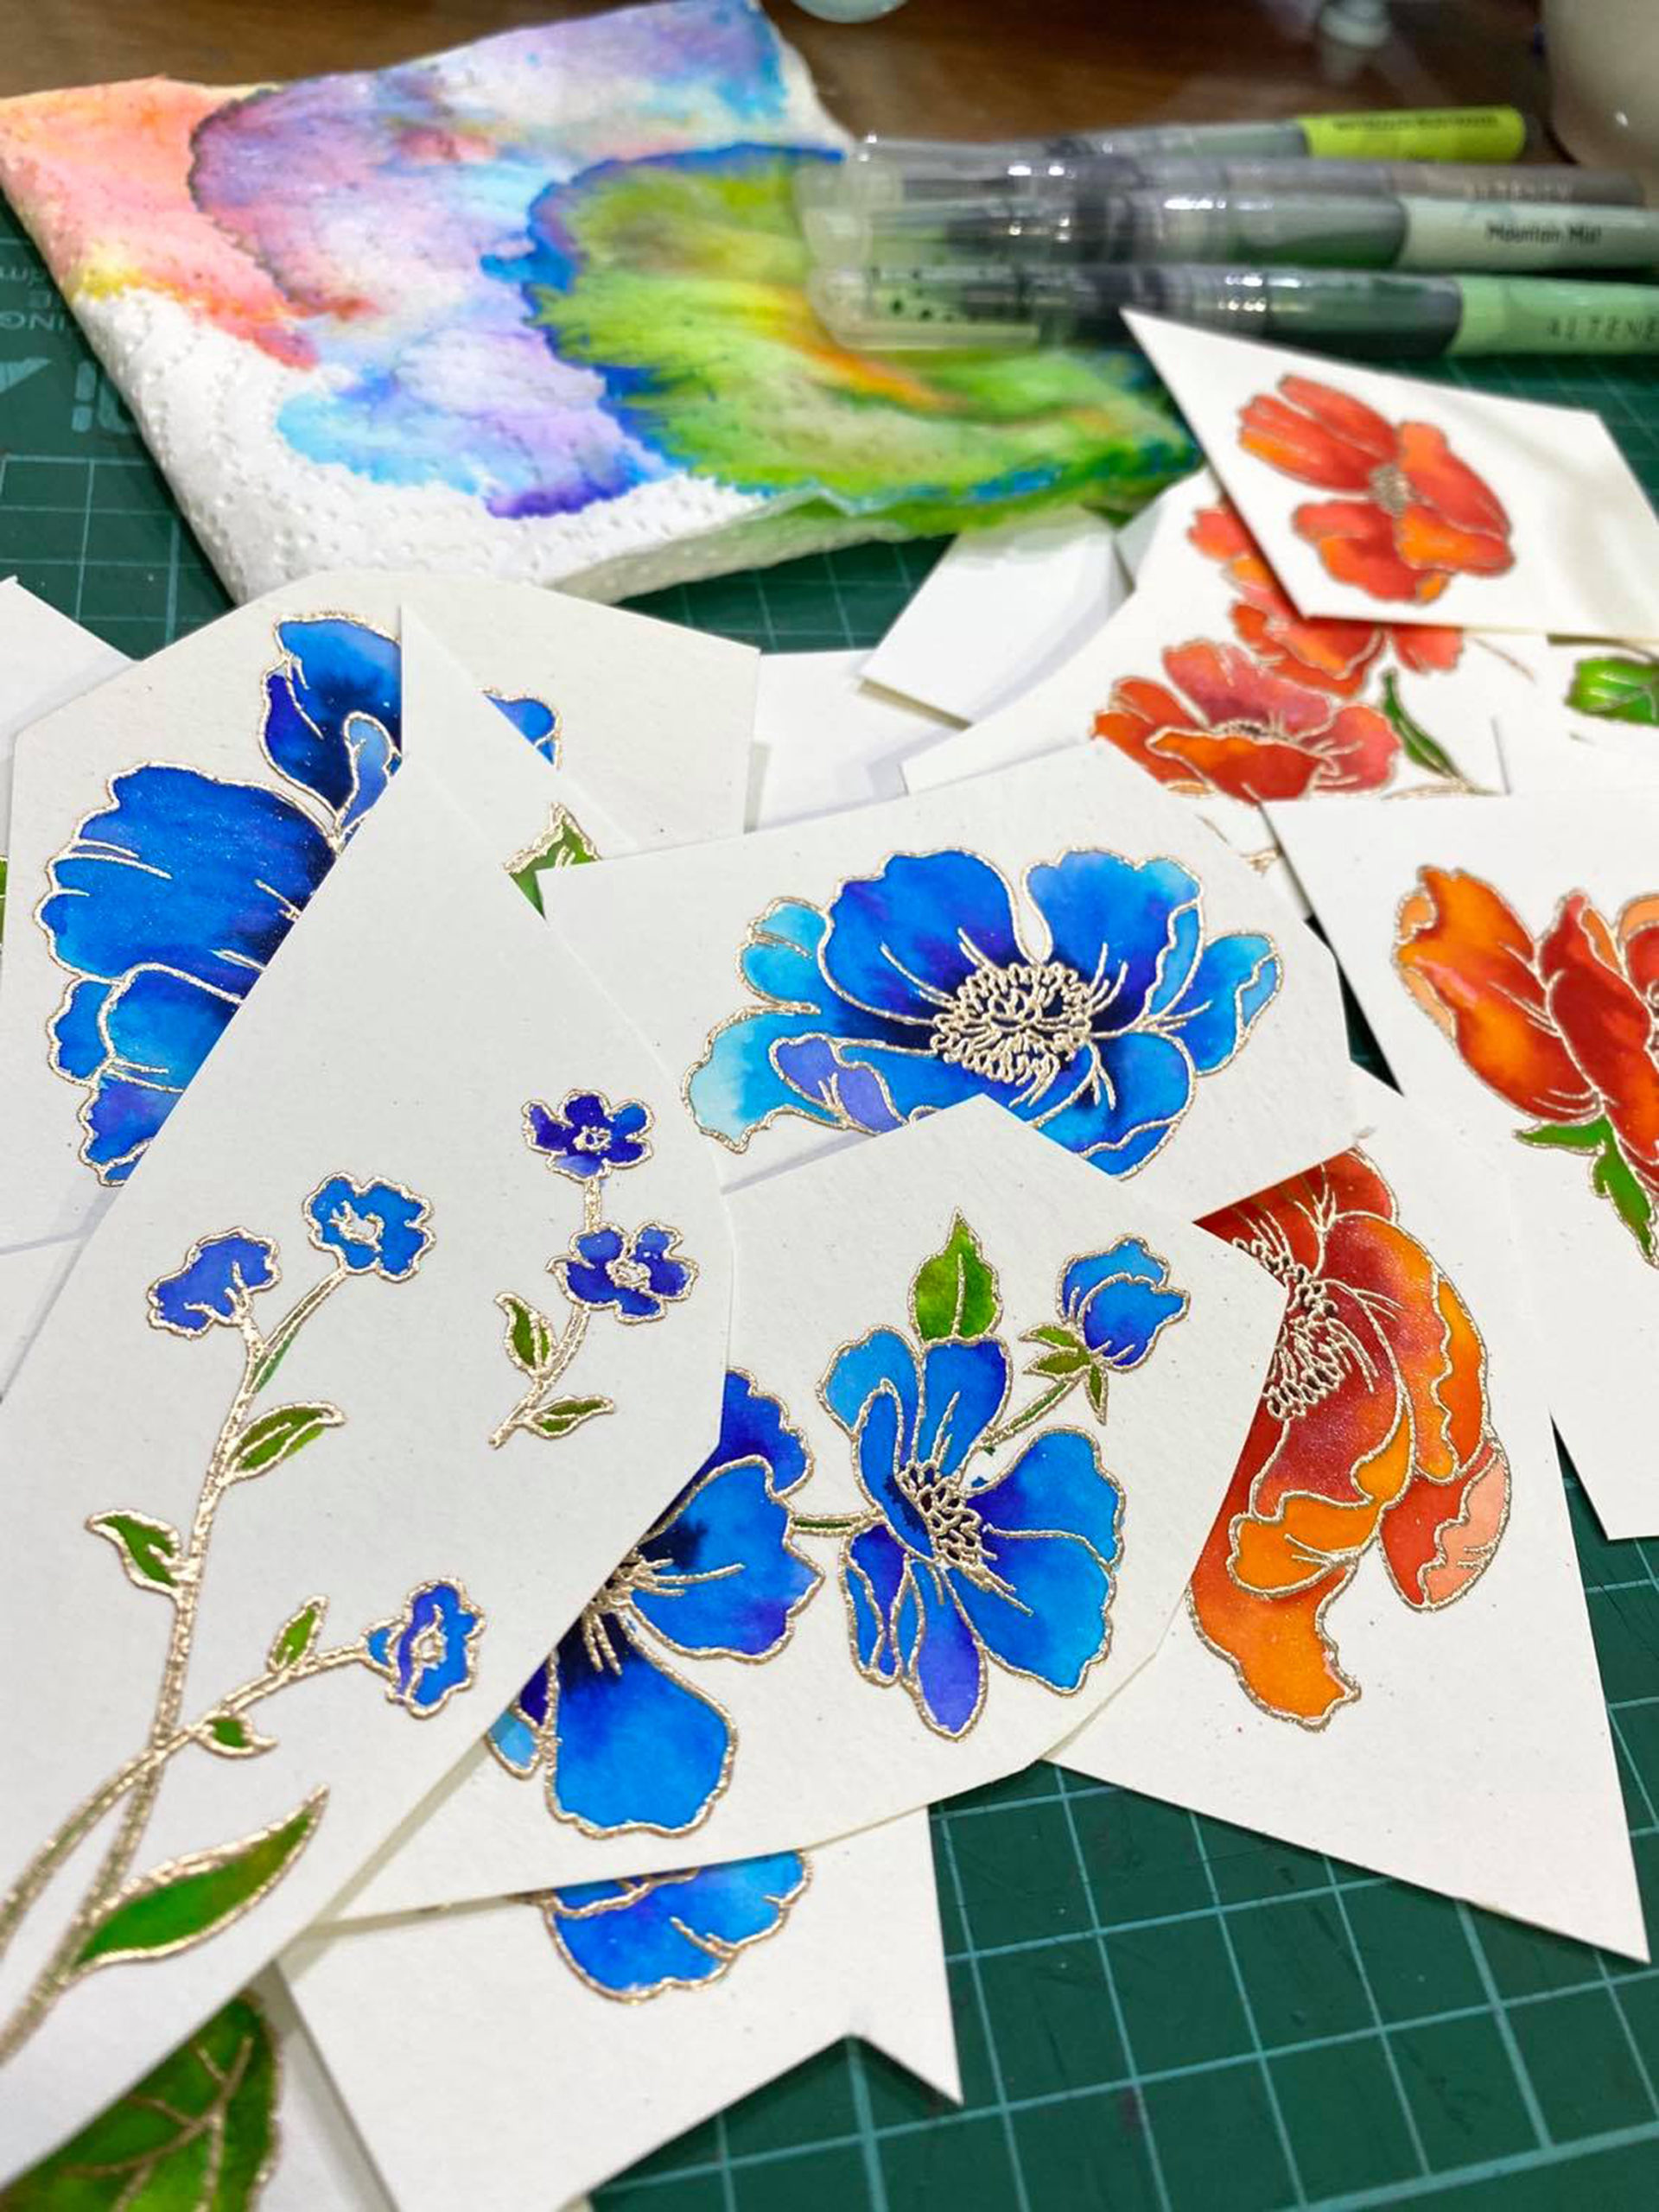
THANK YOU AND I APPRECIATE EVERYTHING YOU DO CARDS


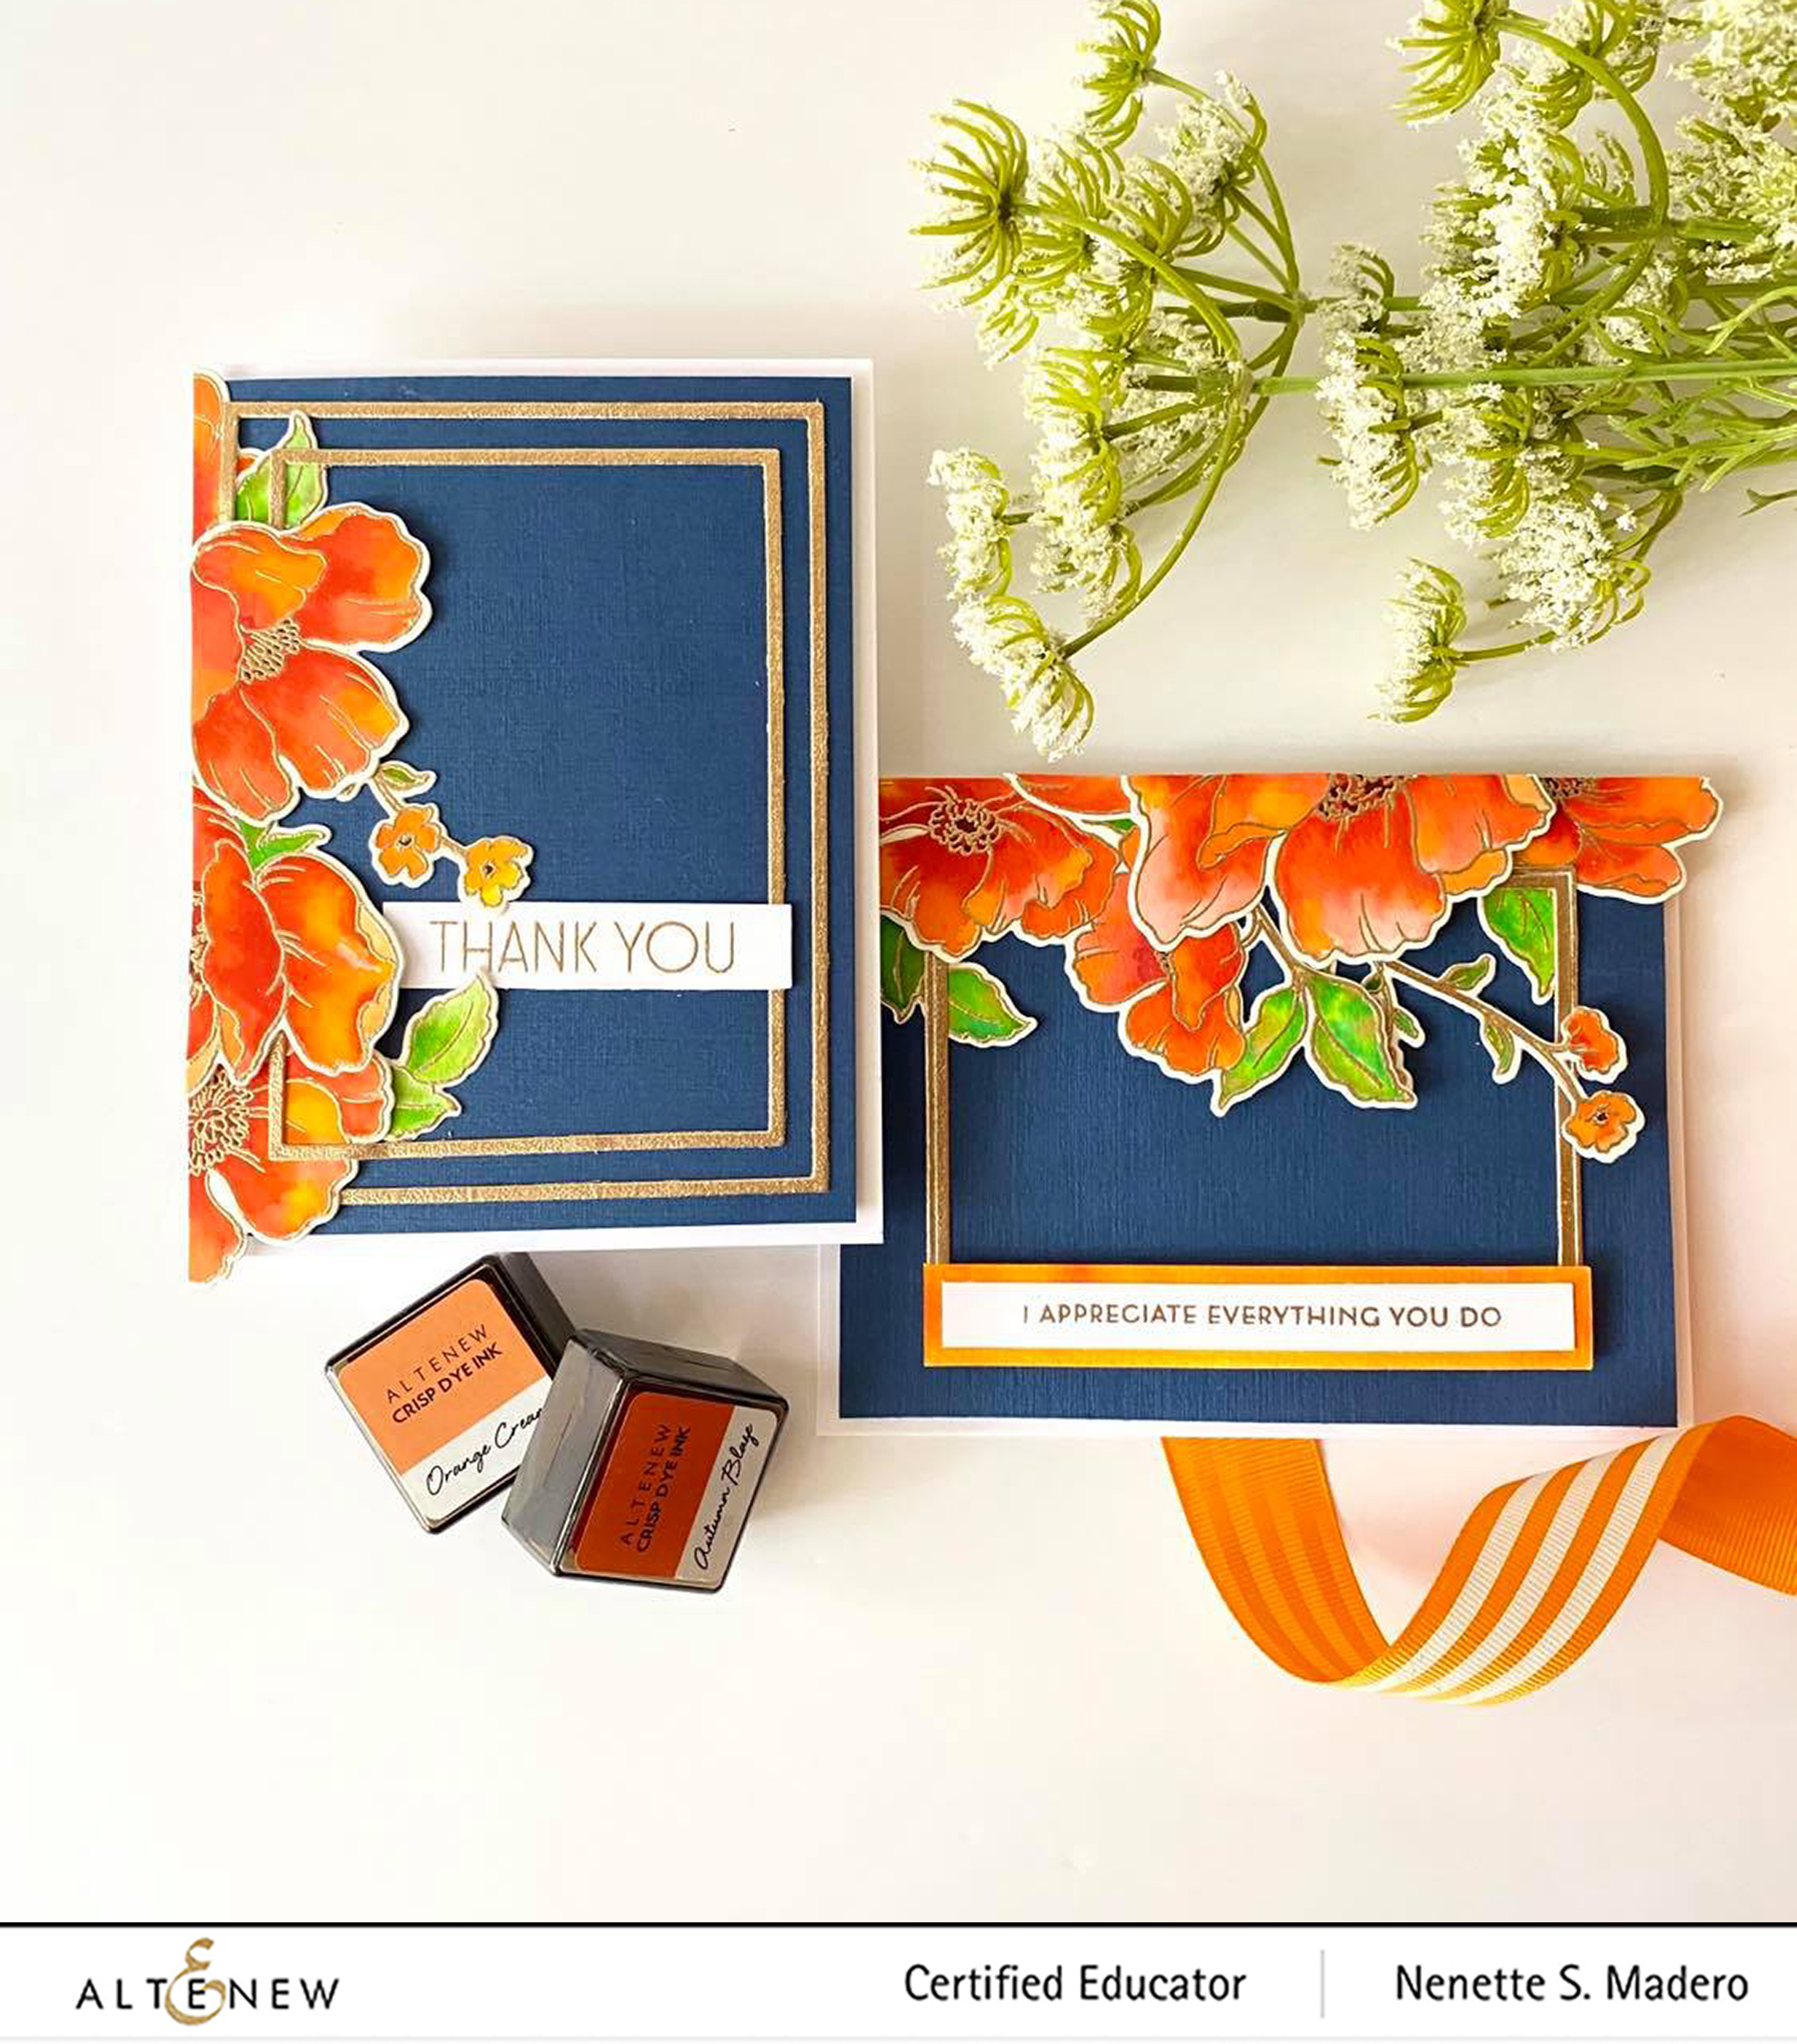
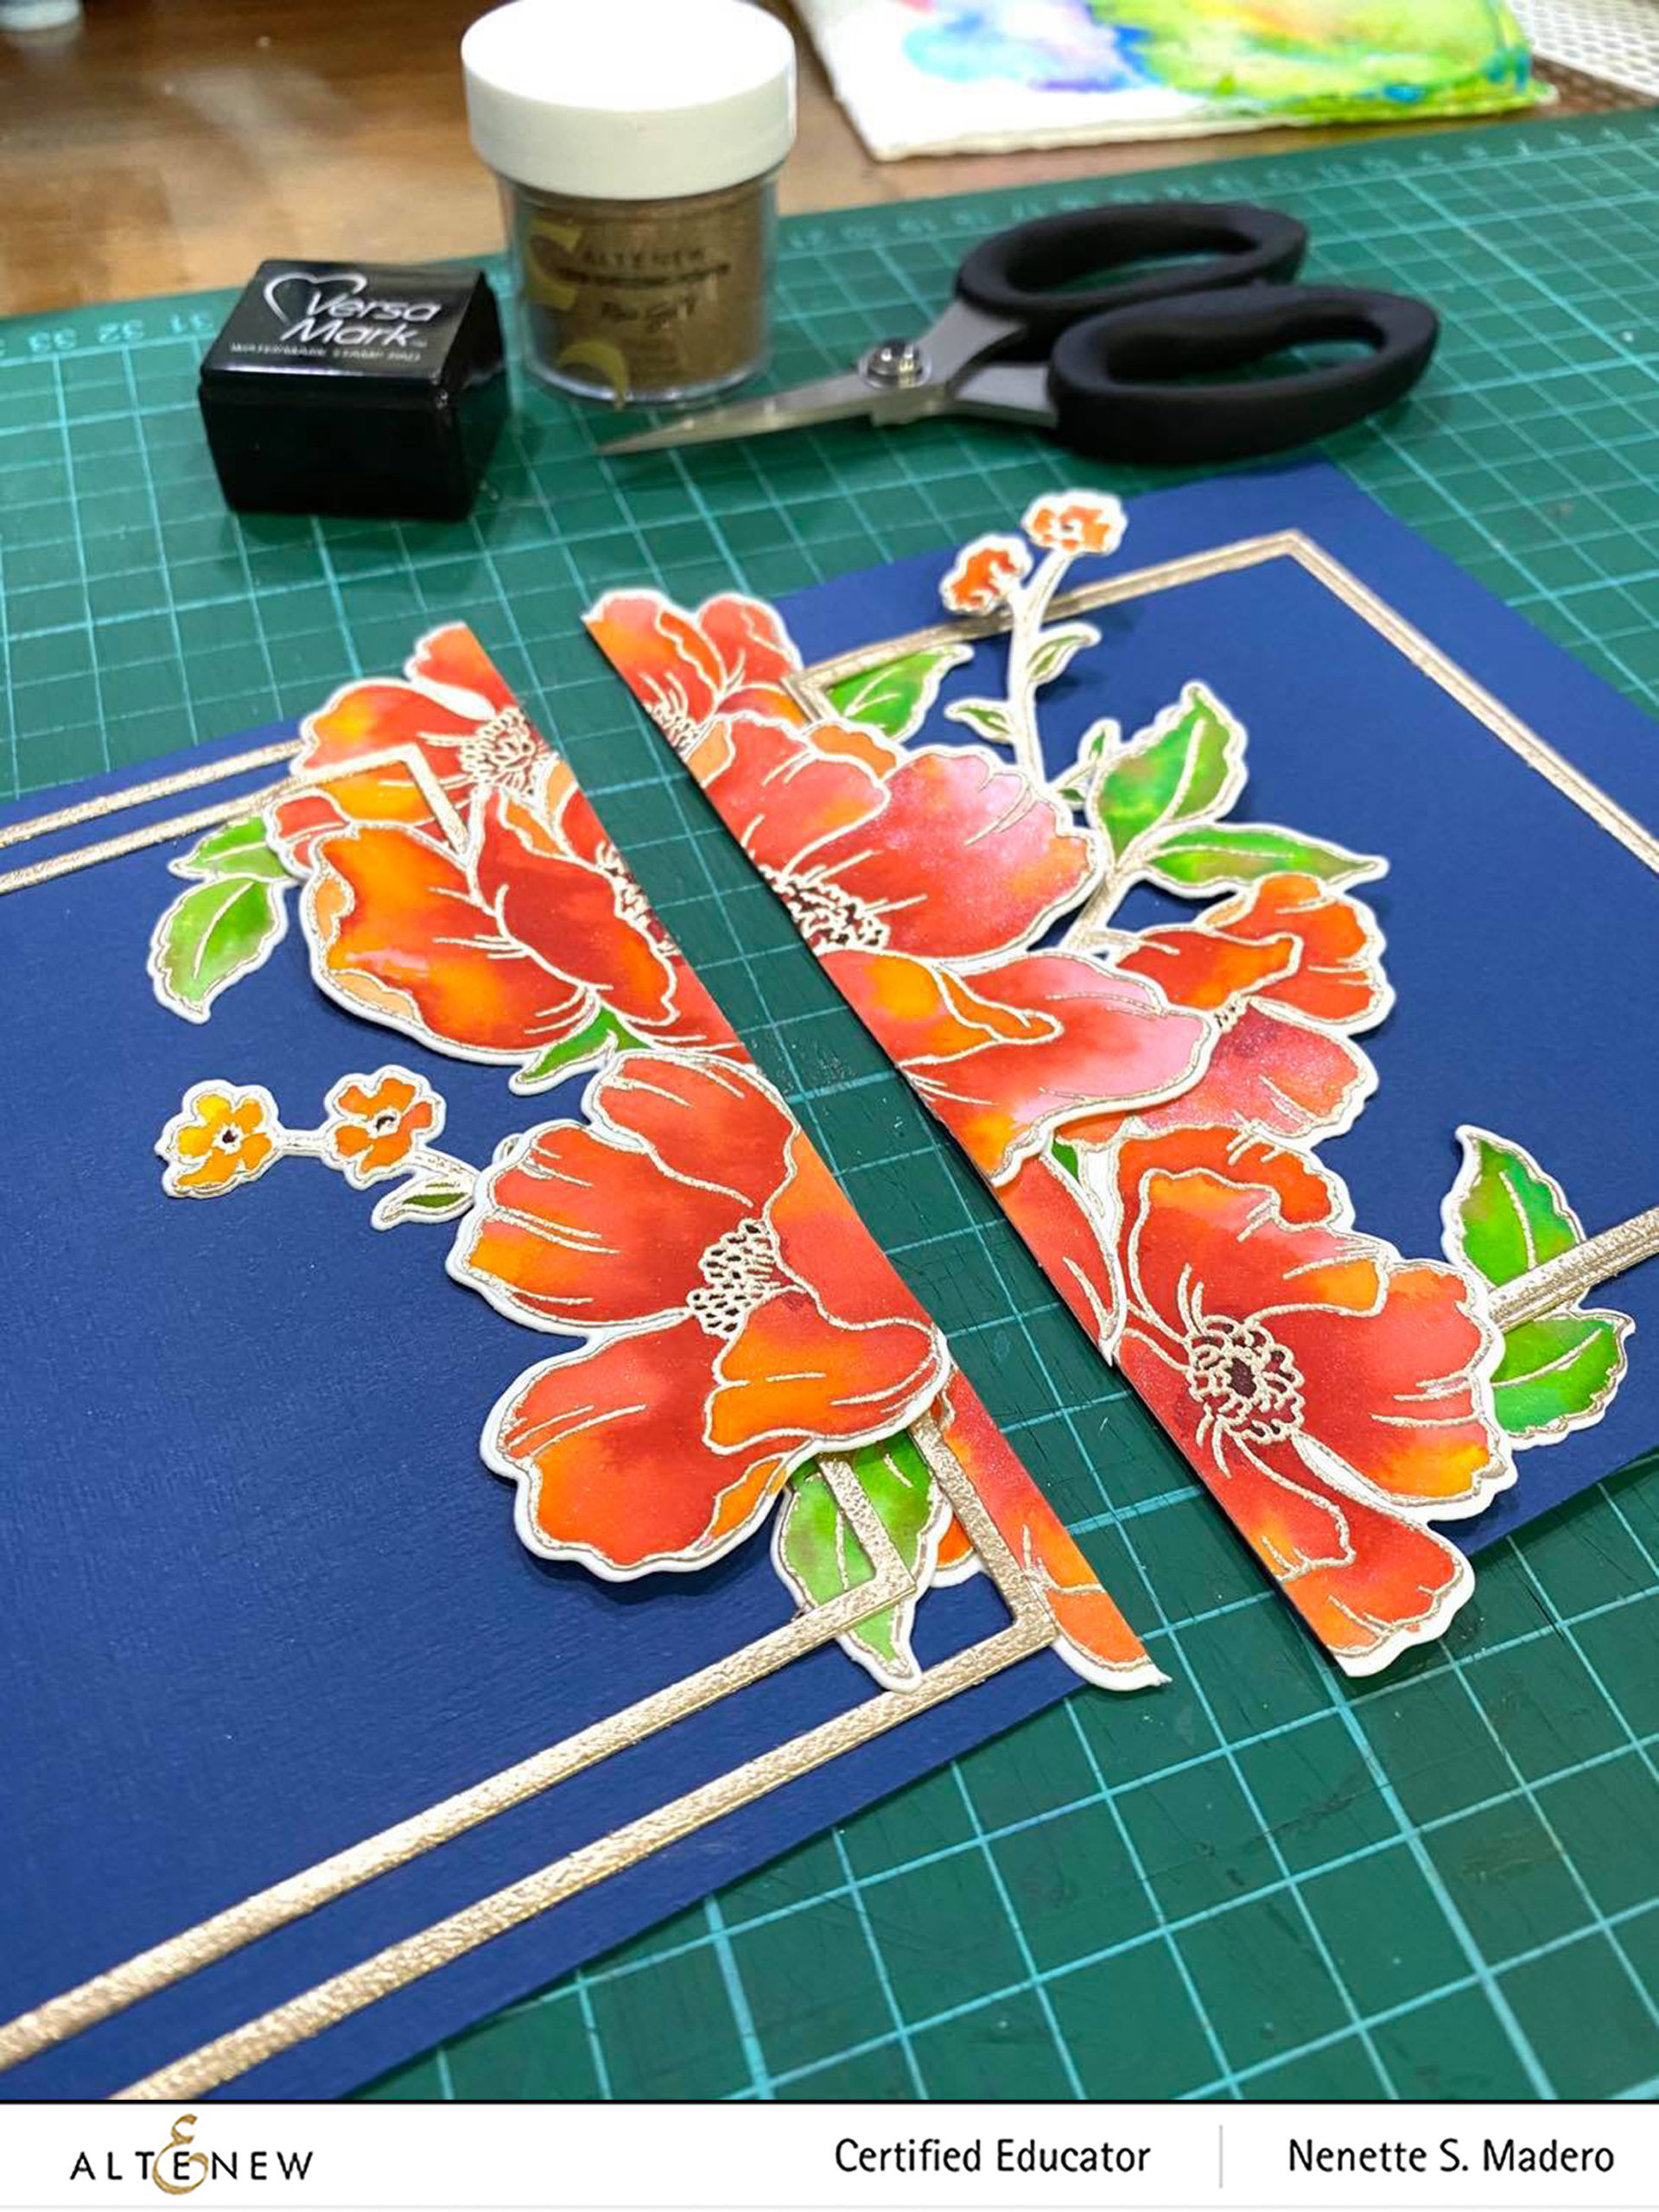
For these cards, I watercolored the flowers using the wet on wet technique using warm colors. I loved the split card idea of Jennifer Mcguire wherein she adhered the elements in the middle of an 81/2 x 5 1/2 cardstock just like the photo below.

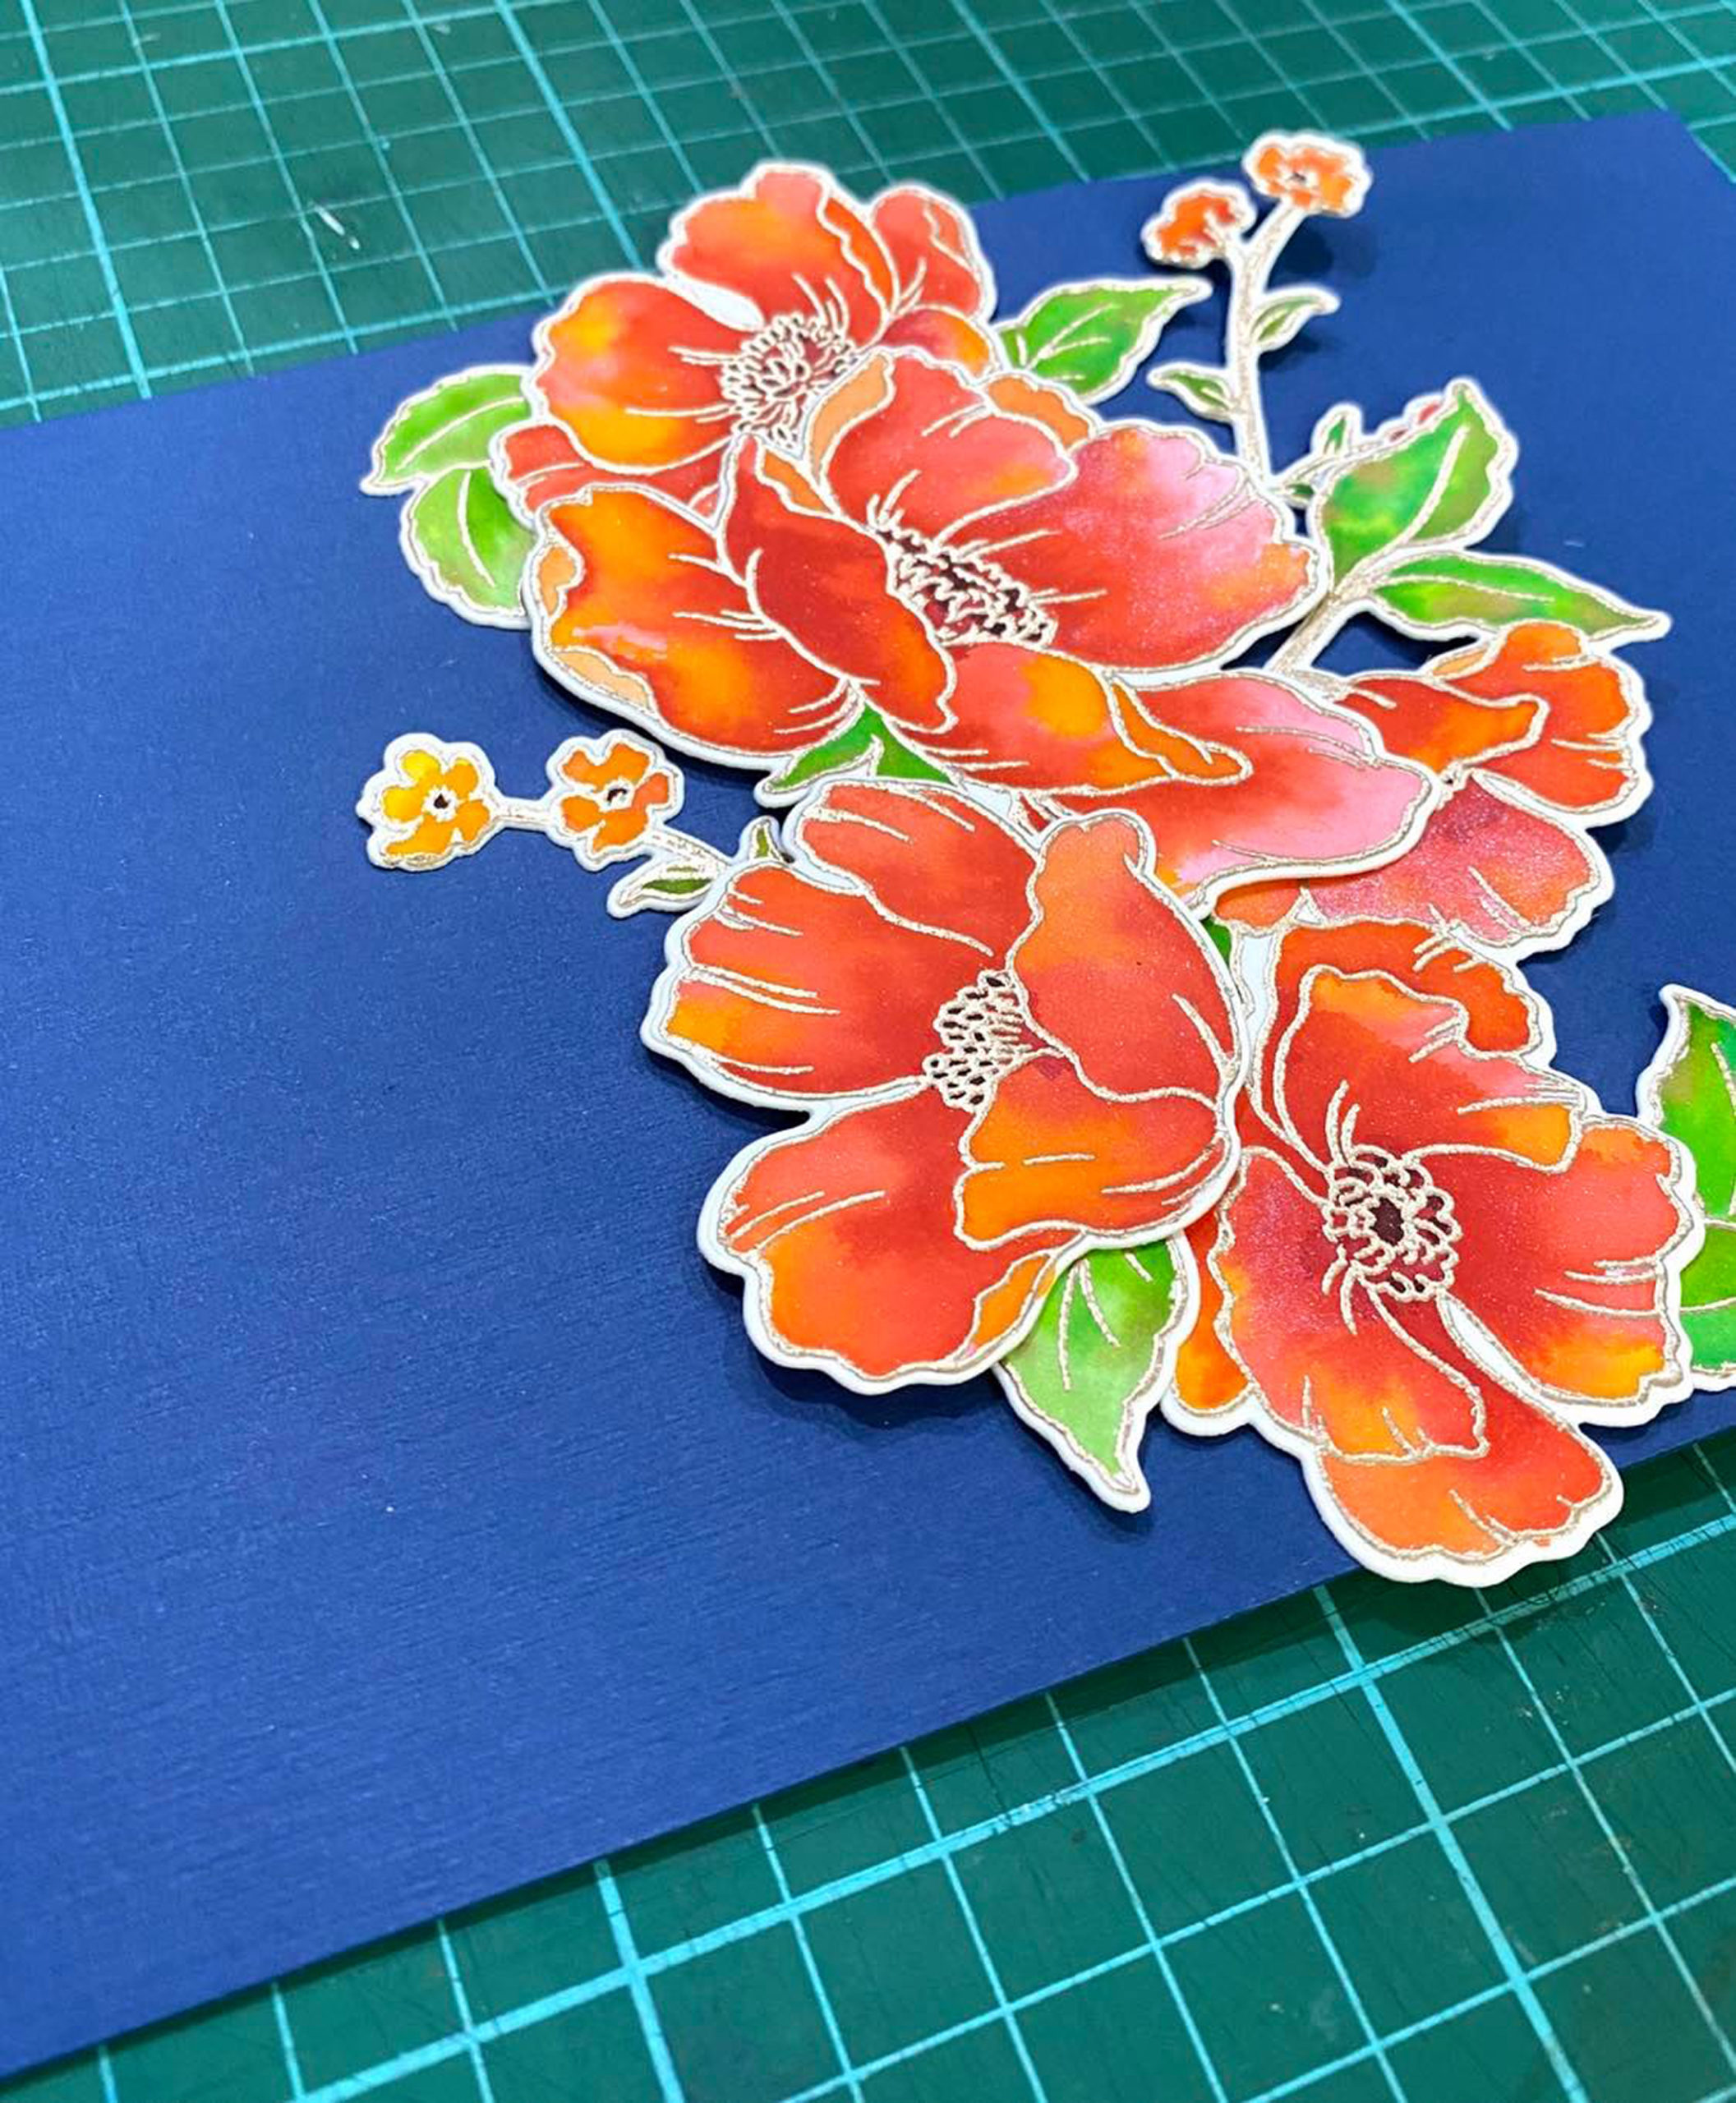
I then used a guillotine cutter to cut right at the center thus dividing it into two panels. I wanted a gold border for both panels to define the edges so I went ahead and embossed the fine frame die cuts with rose gold embossing powder.

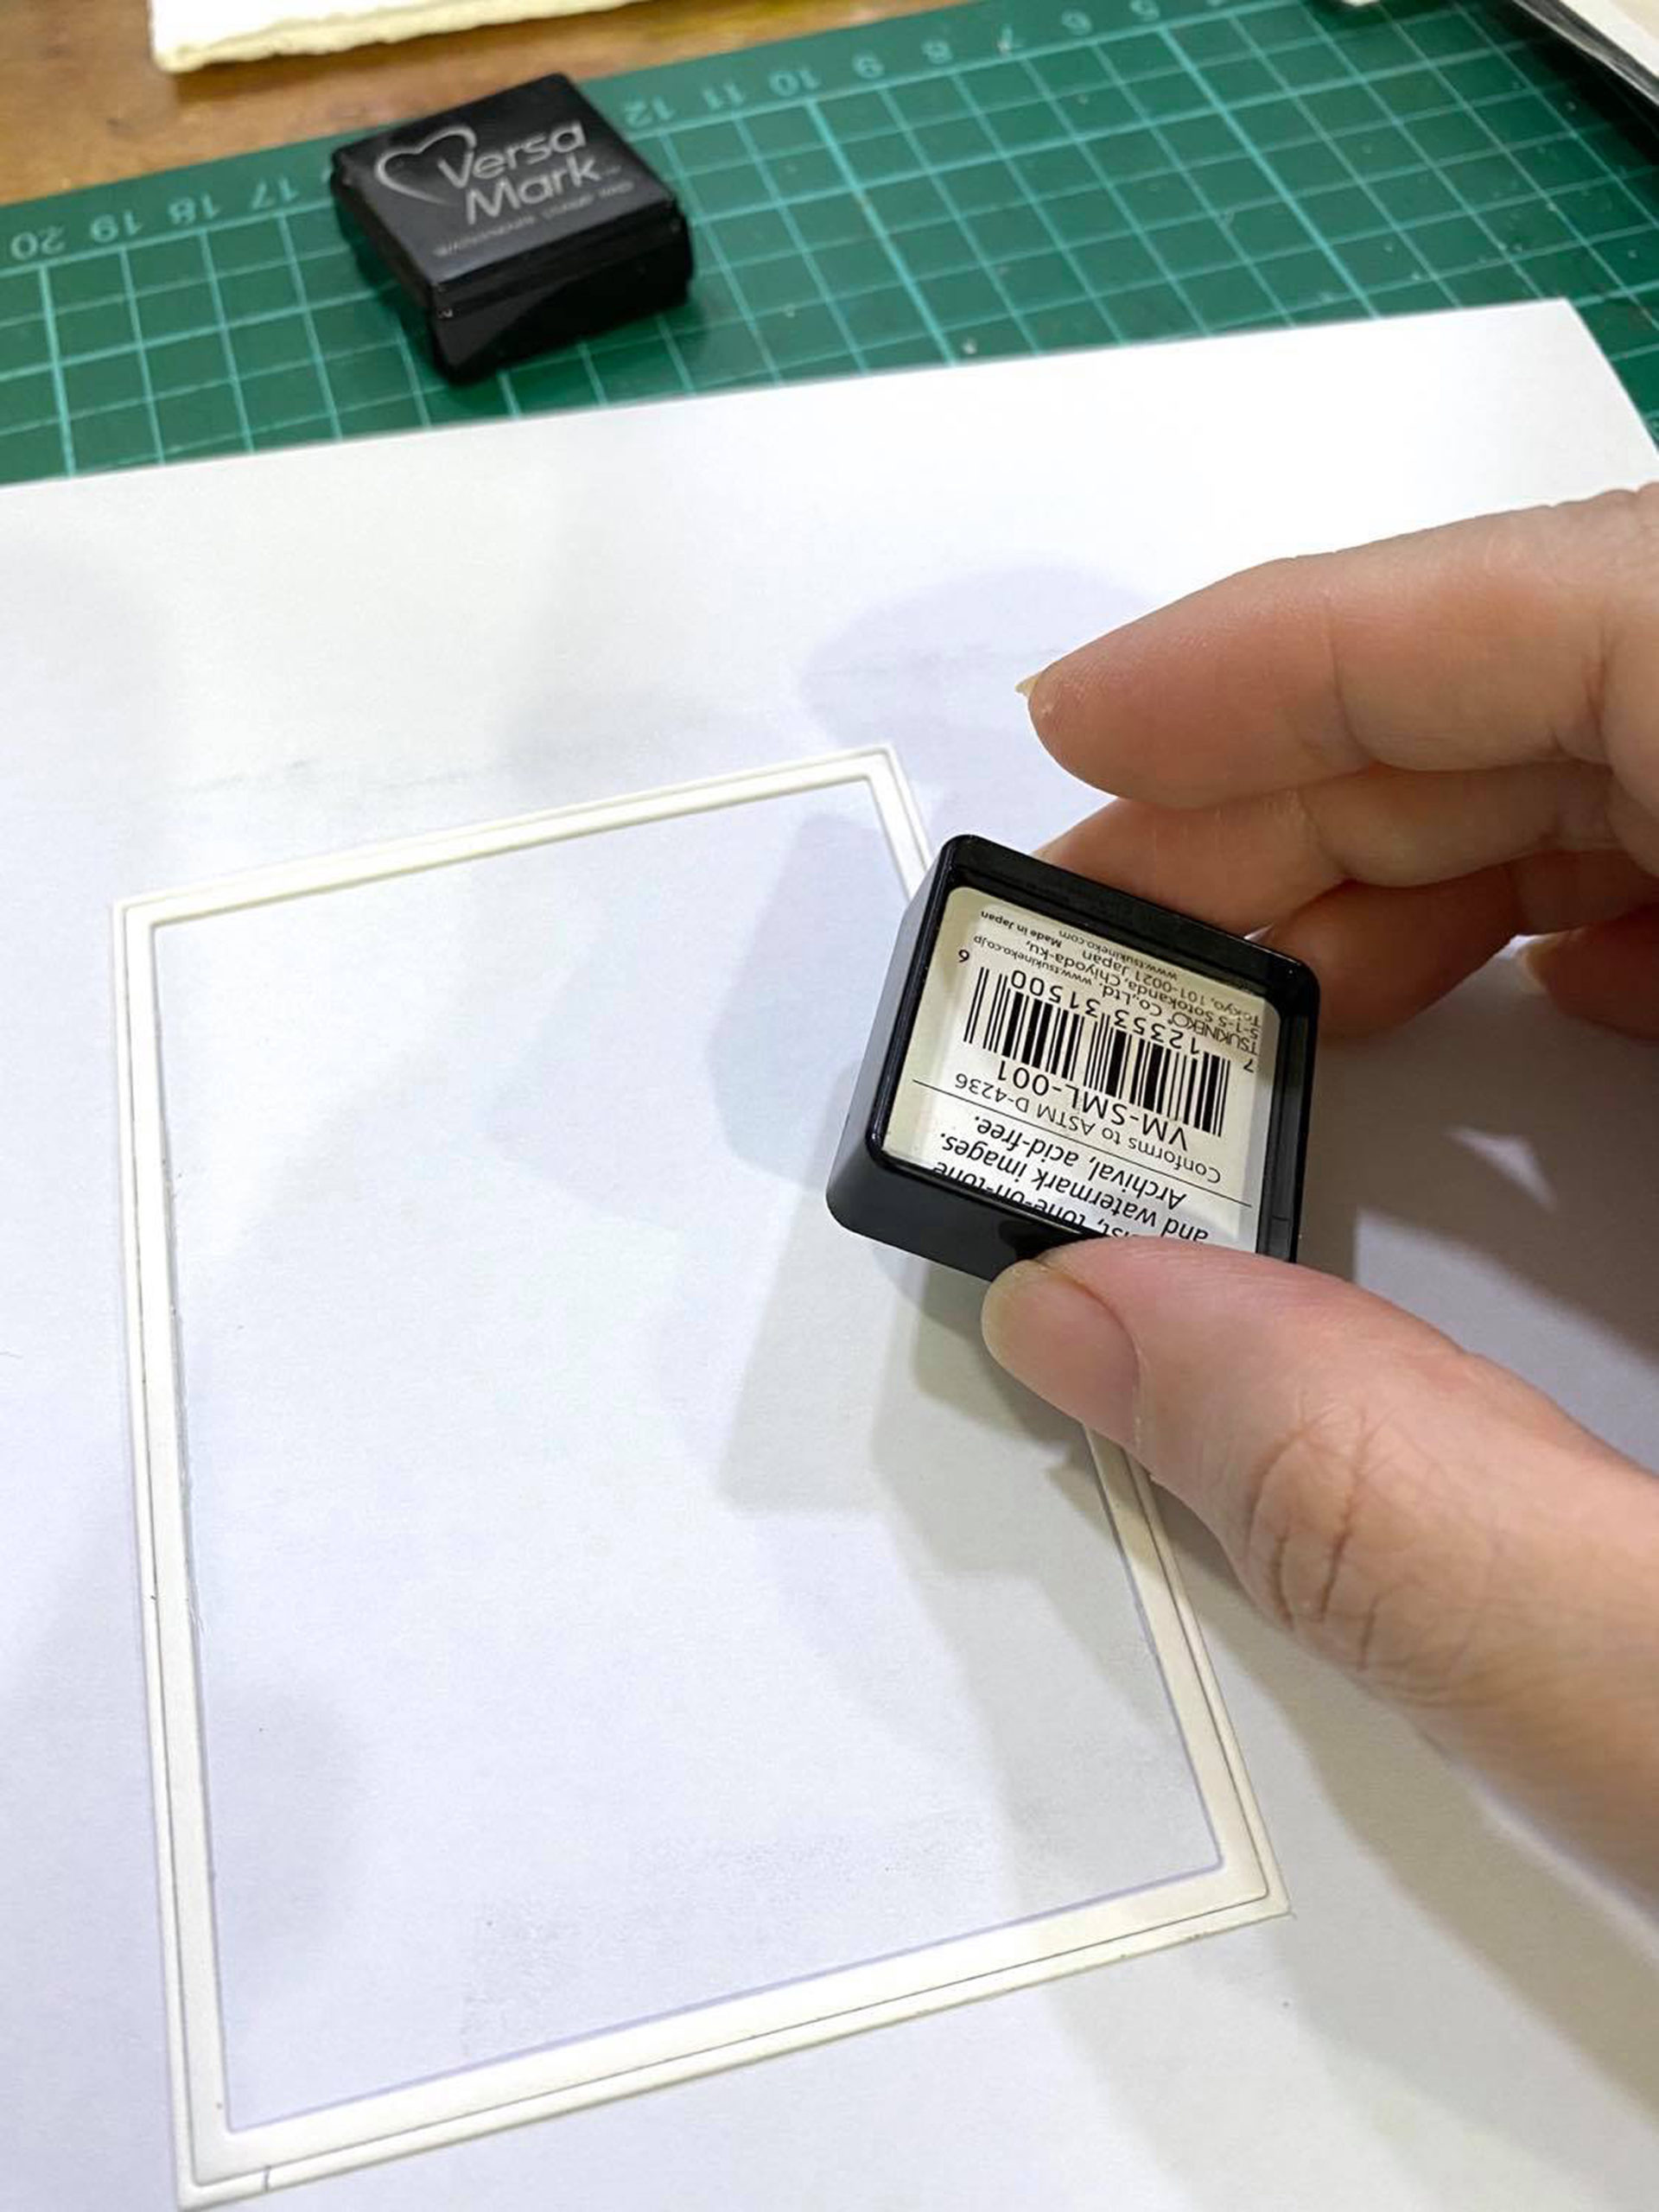
First, I inked up the frames with Versamark Ink then I poured the embossing powder and embossed it with a heat gun.

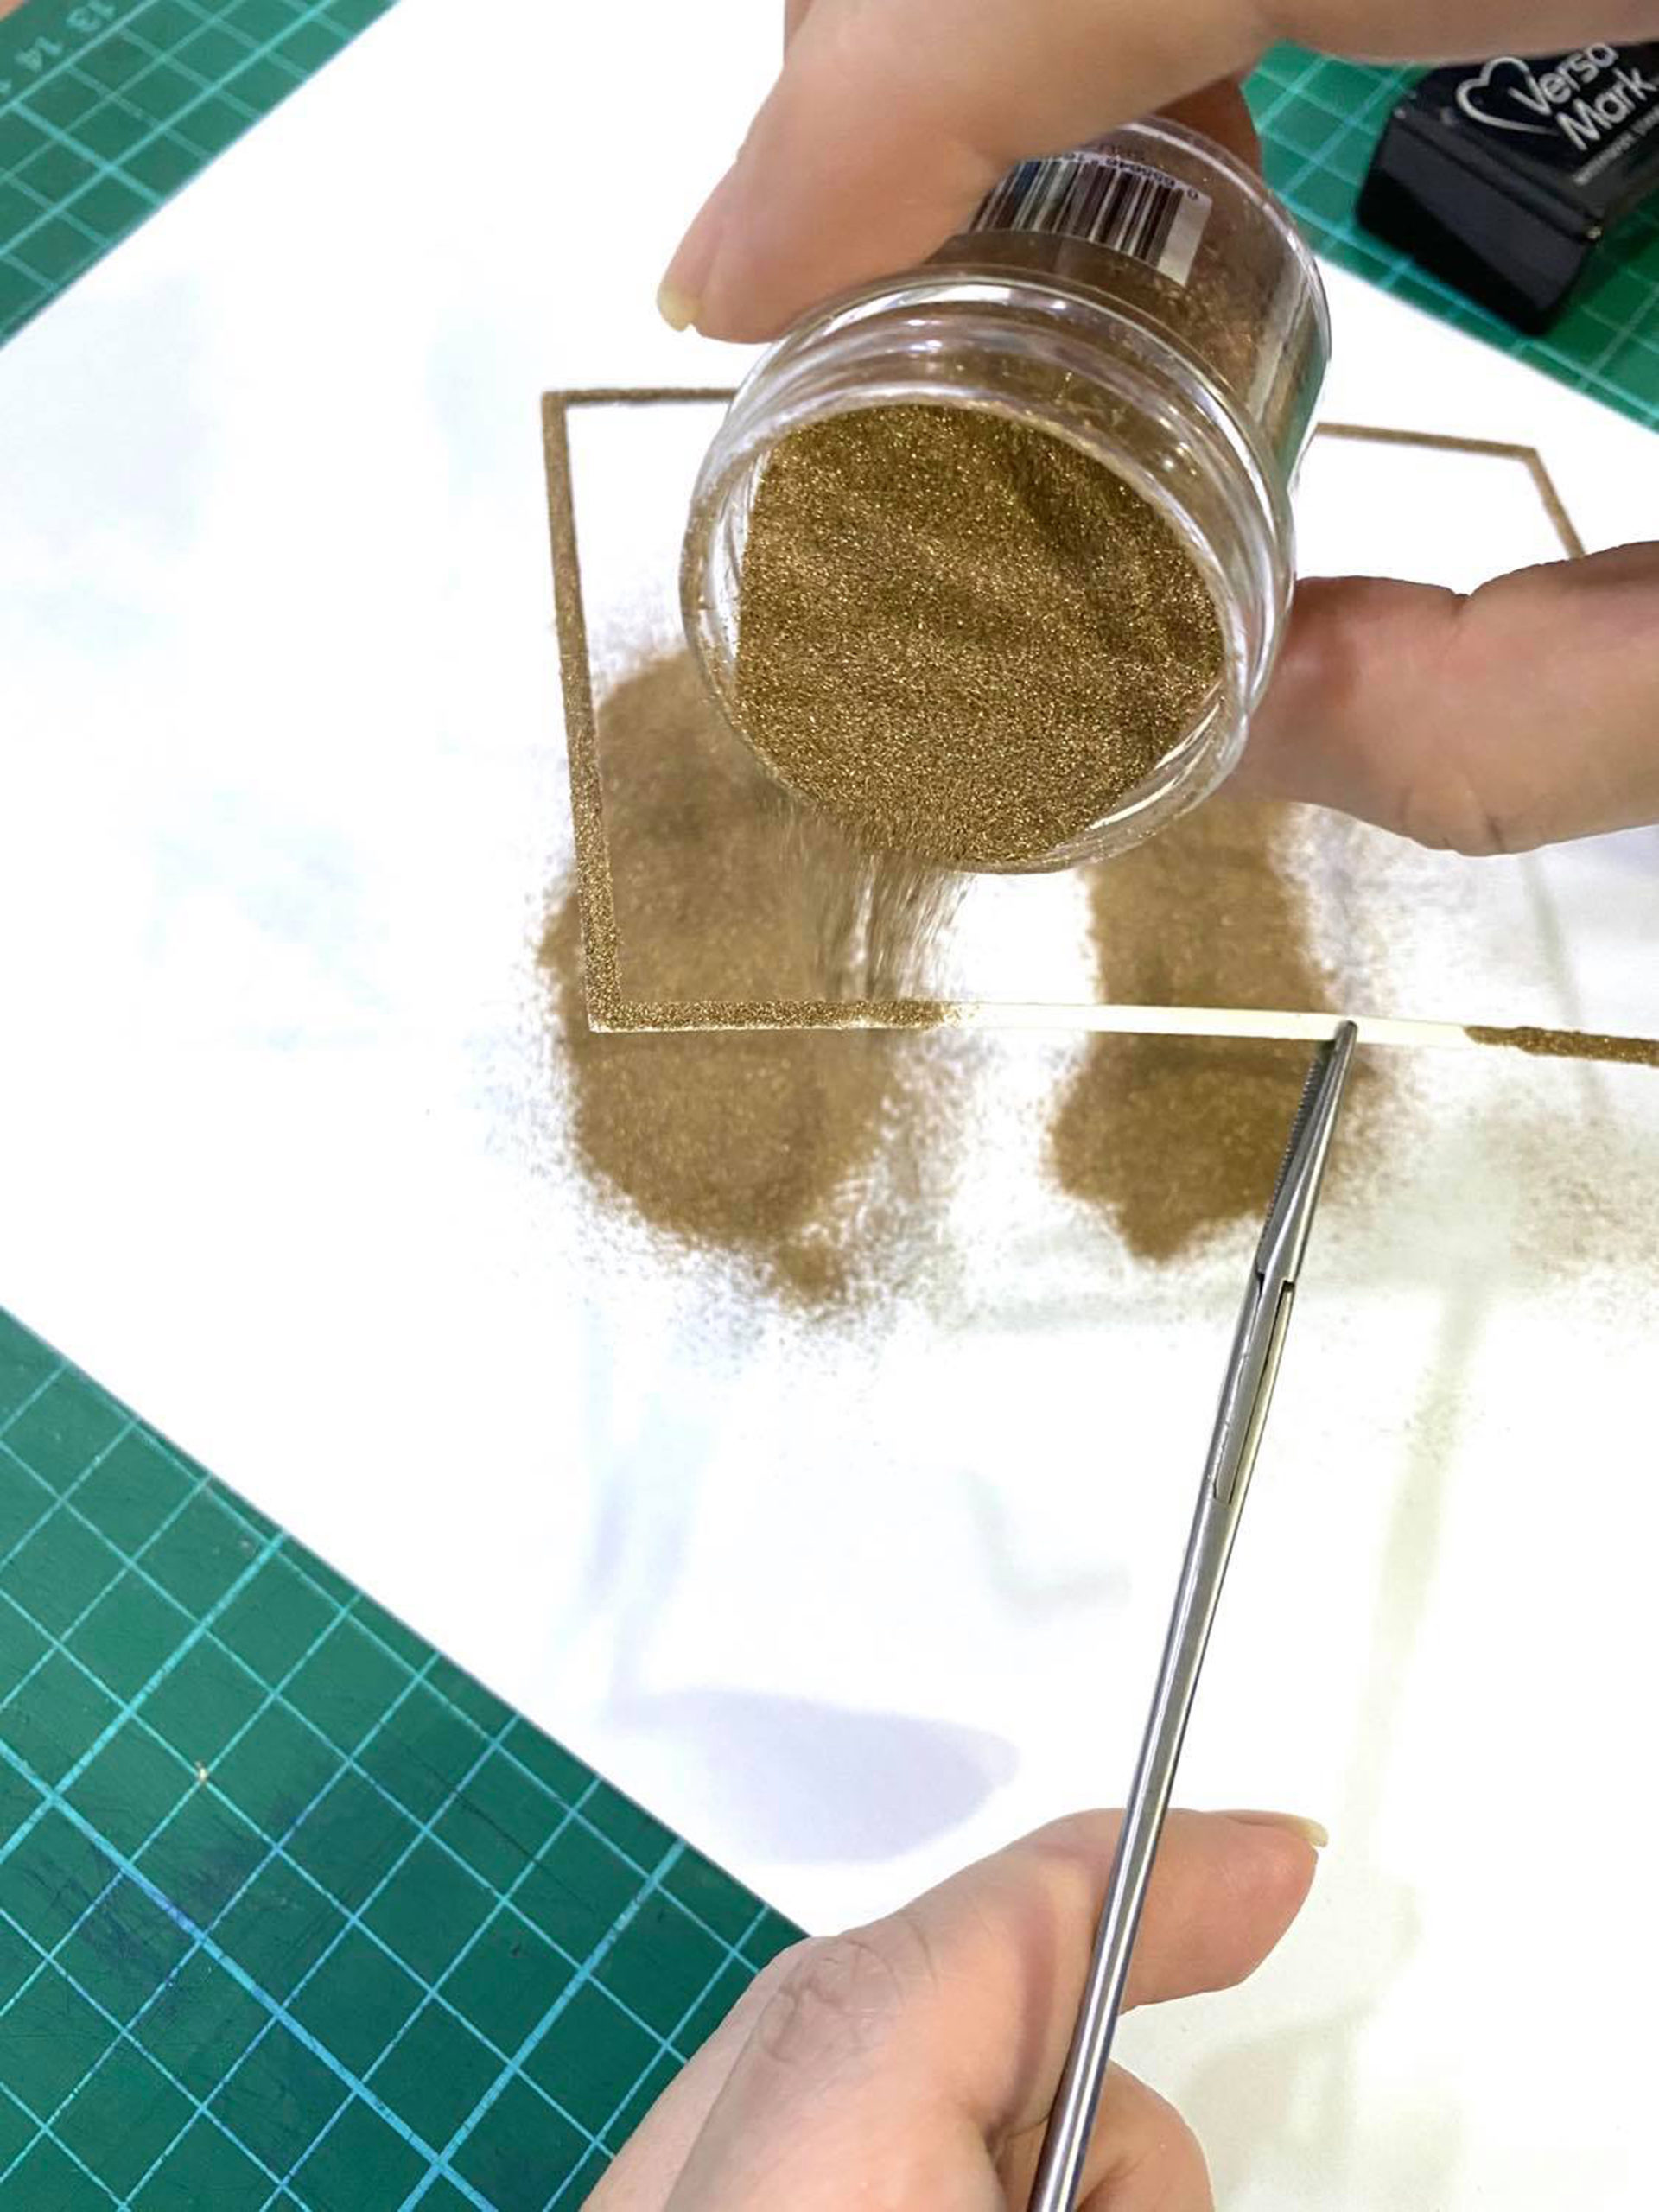
Now I have frames that match perfectly with the embossed flowers.

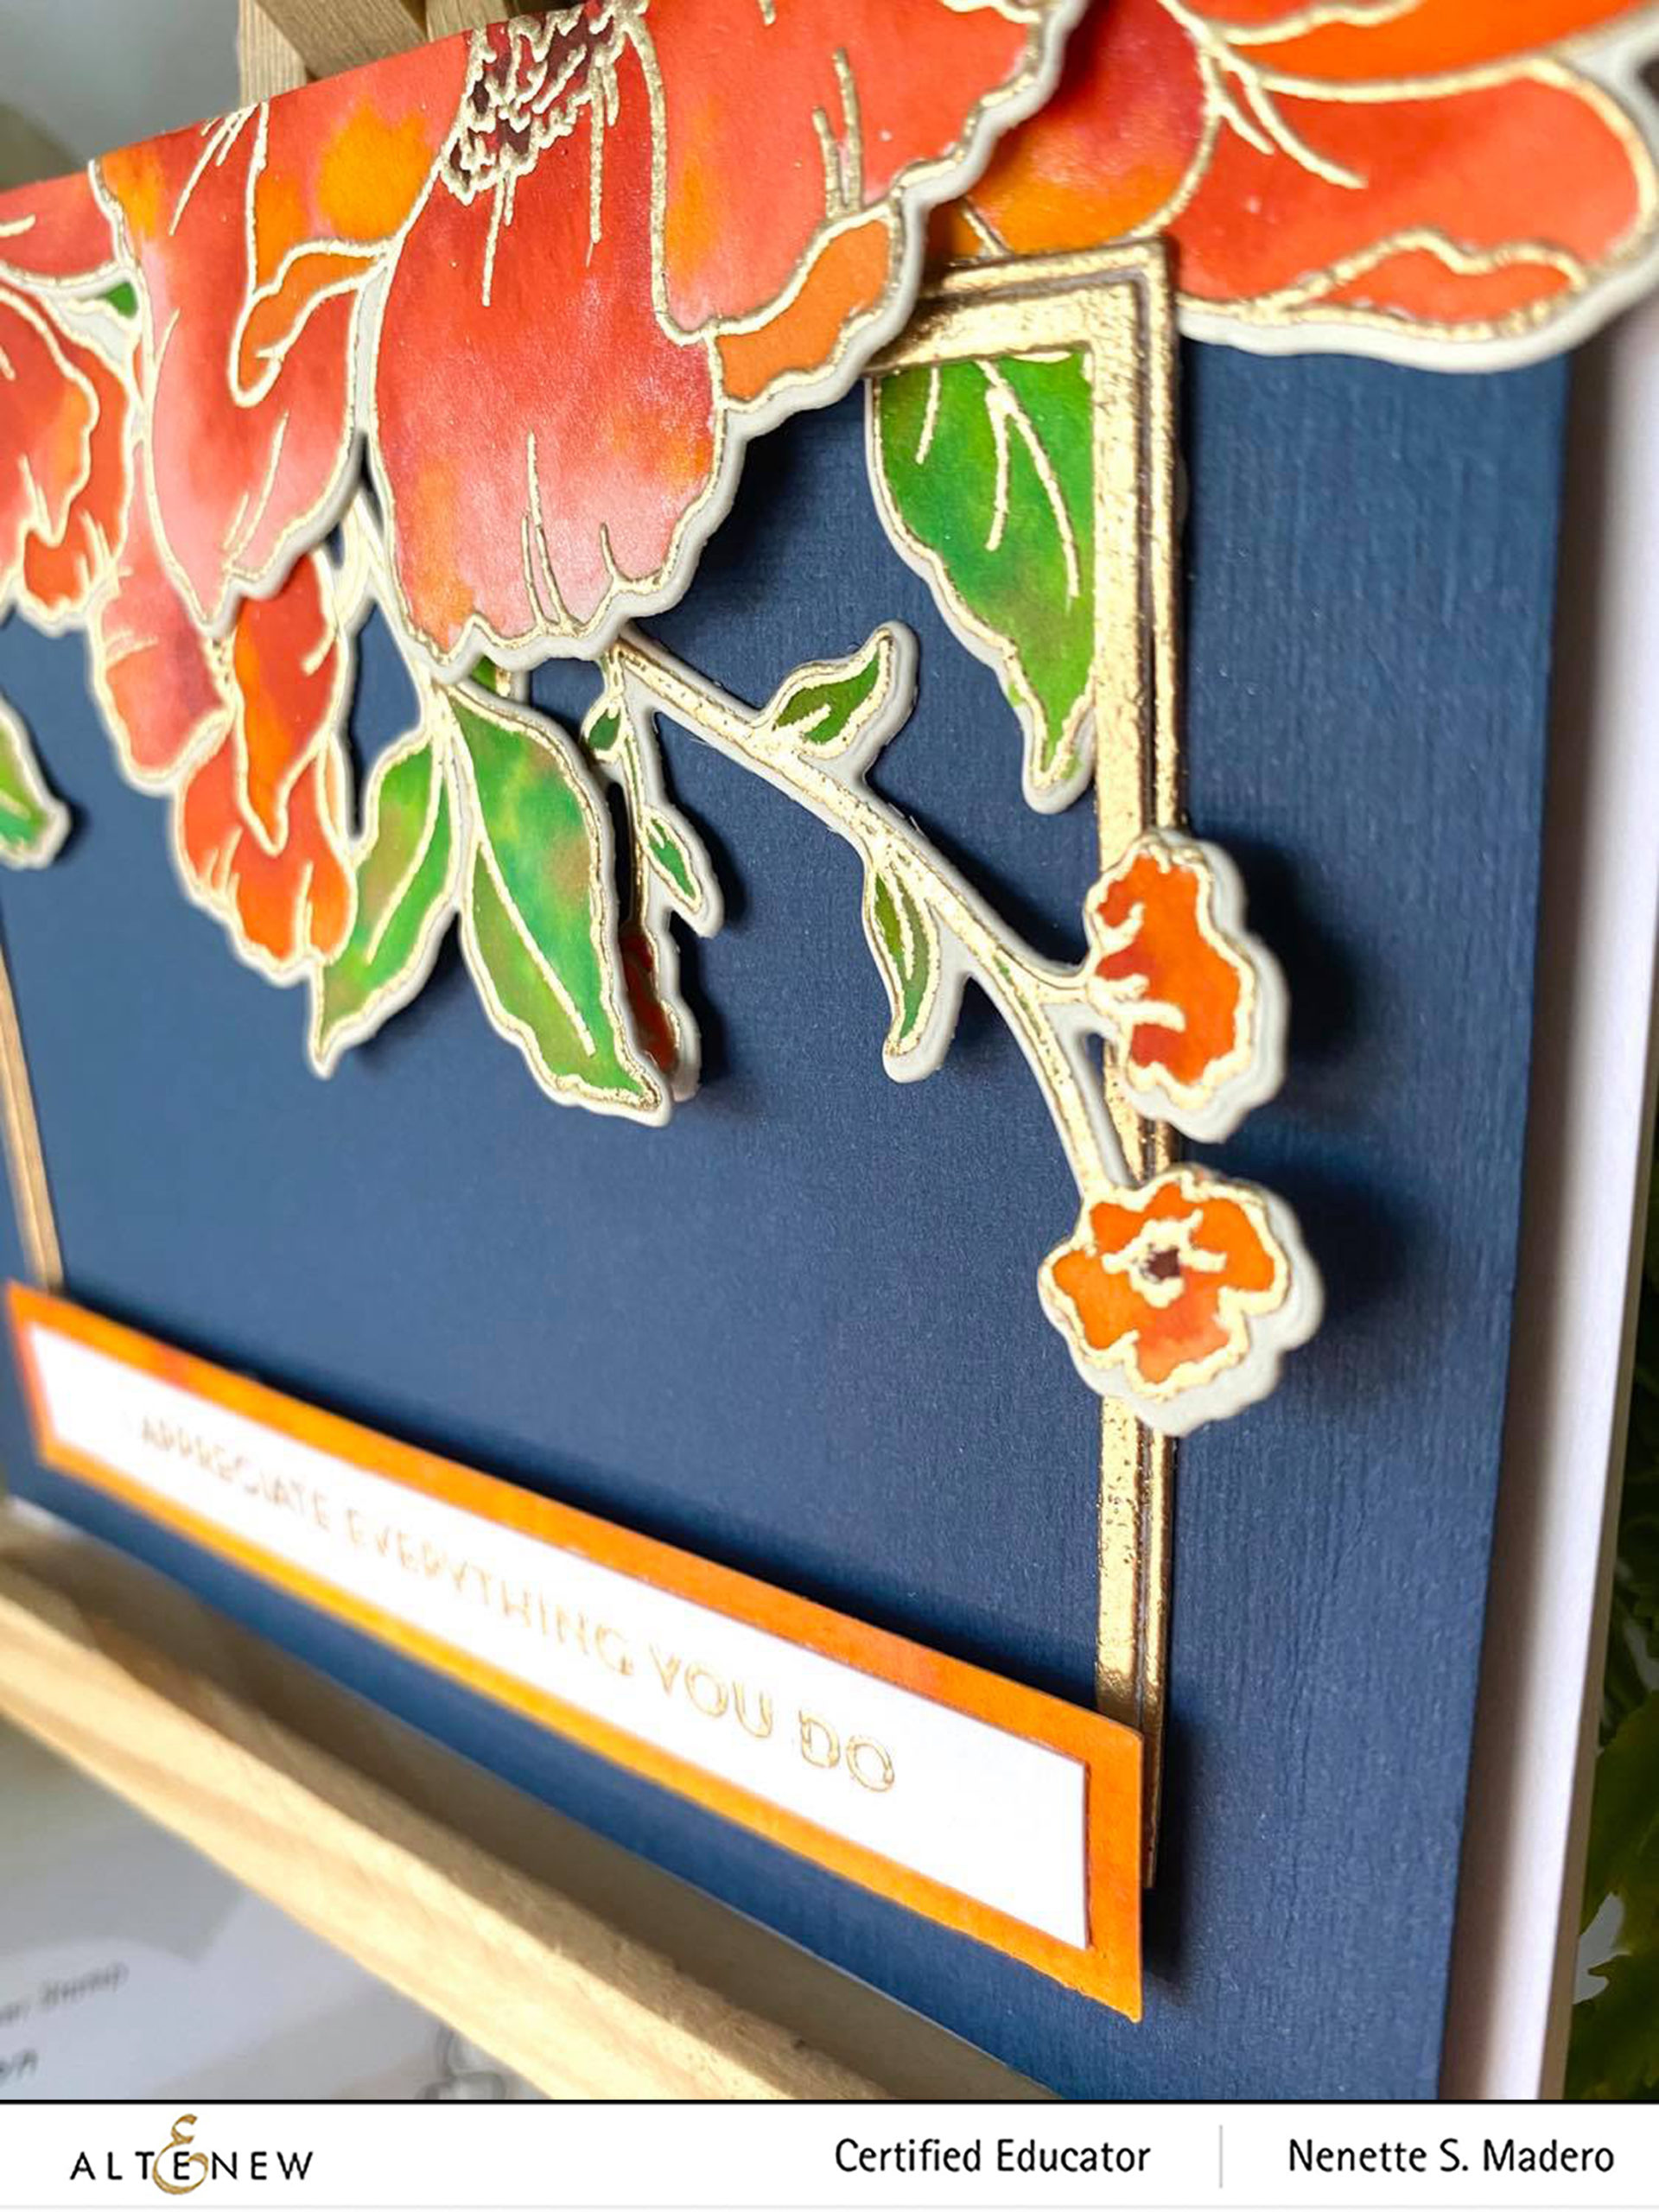
I made sure to use foam squares to adhere some of the flowers for added dimension. I also did not put glue at the tips of the leaves and small flowers for a more organic look. To finish it off, the card fronts were adhered to top folding and side folding A2 white cardstocks.


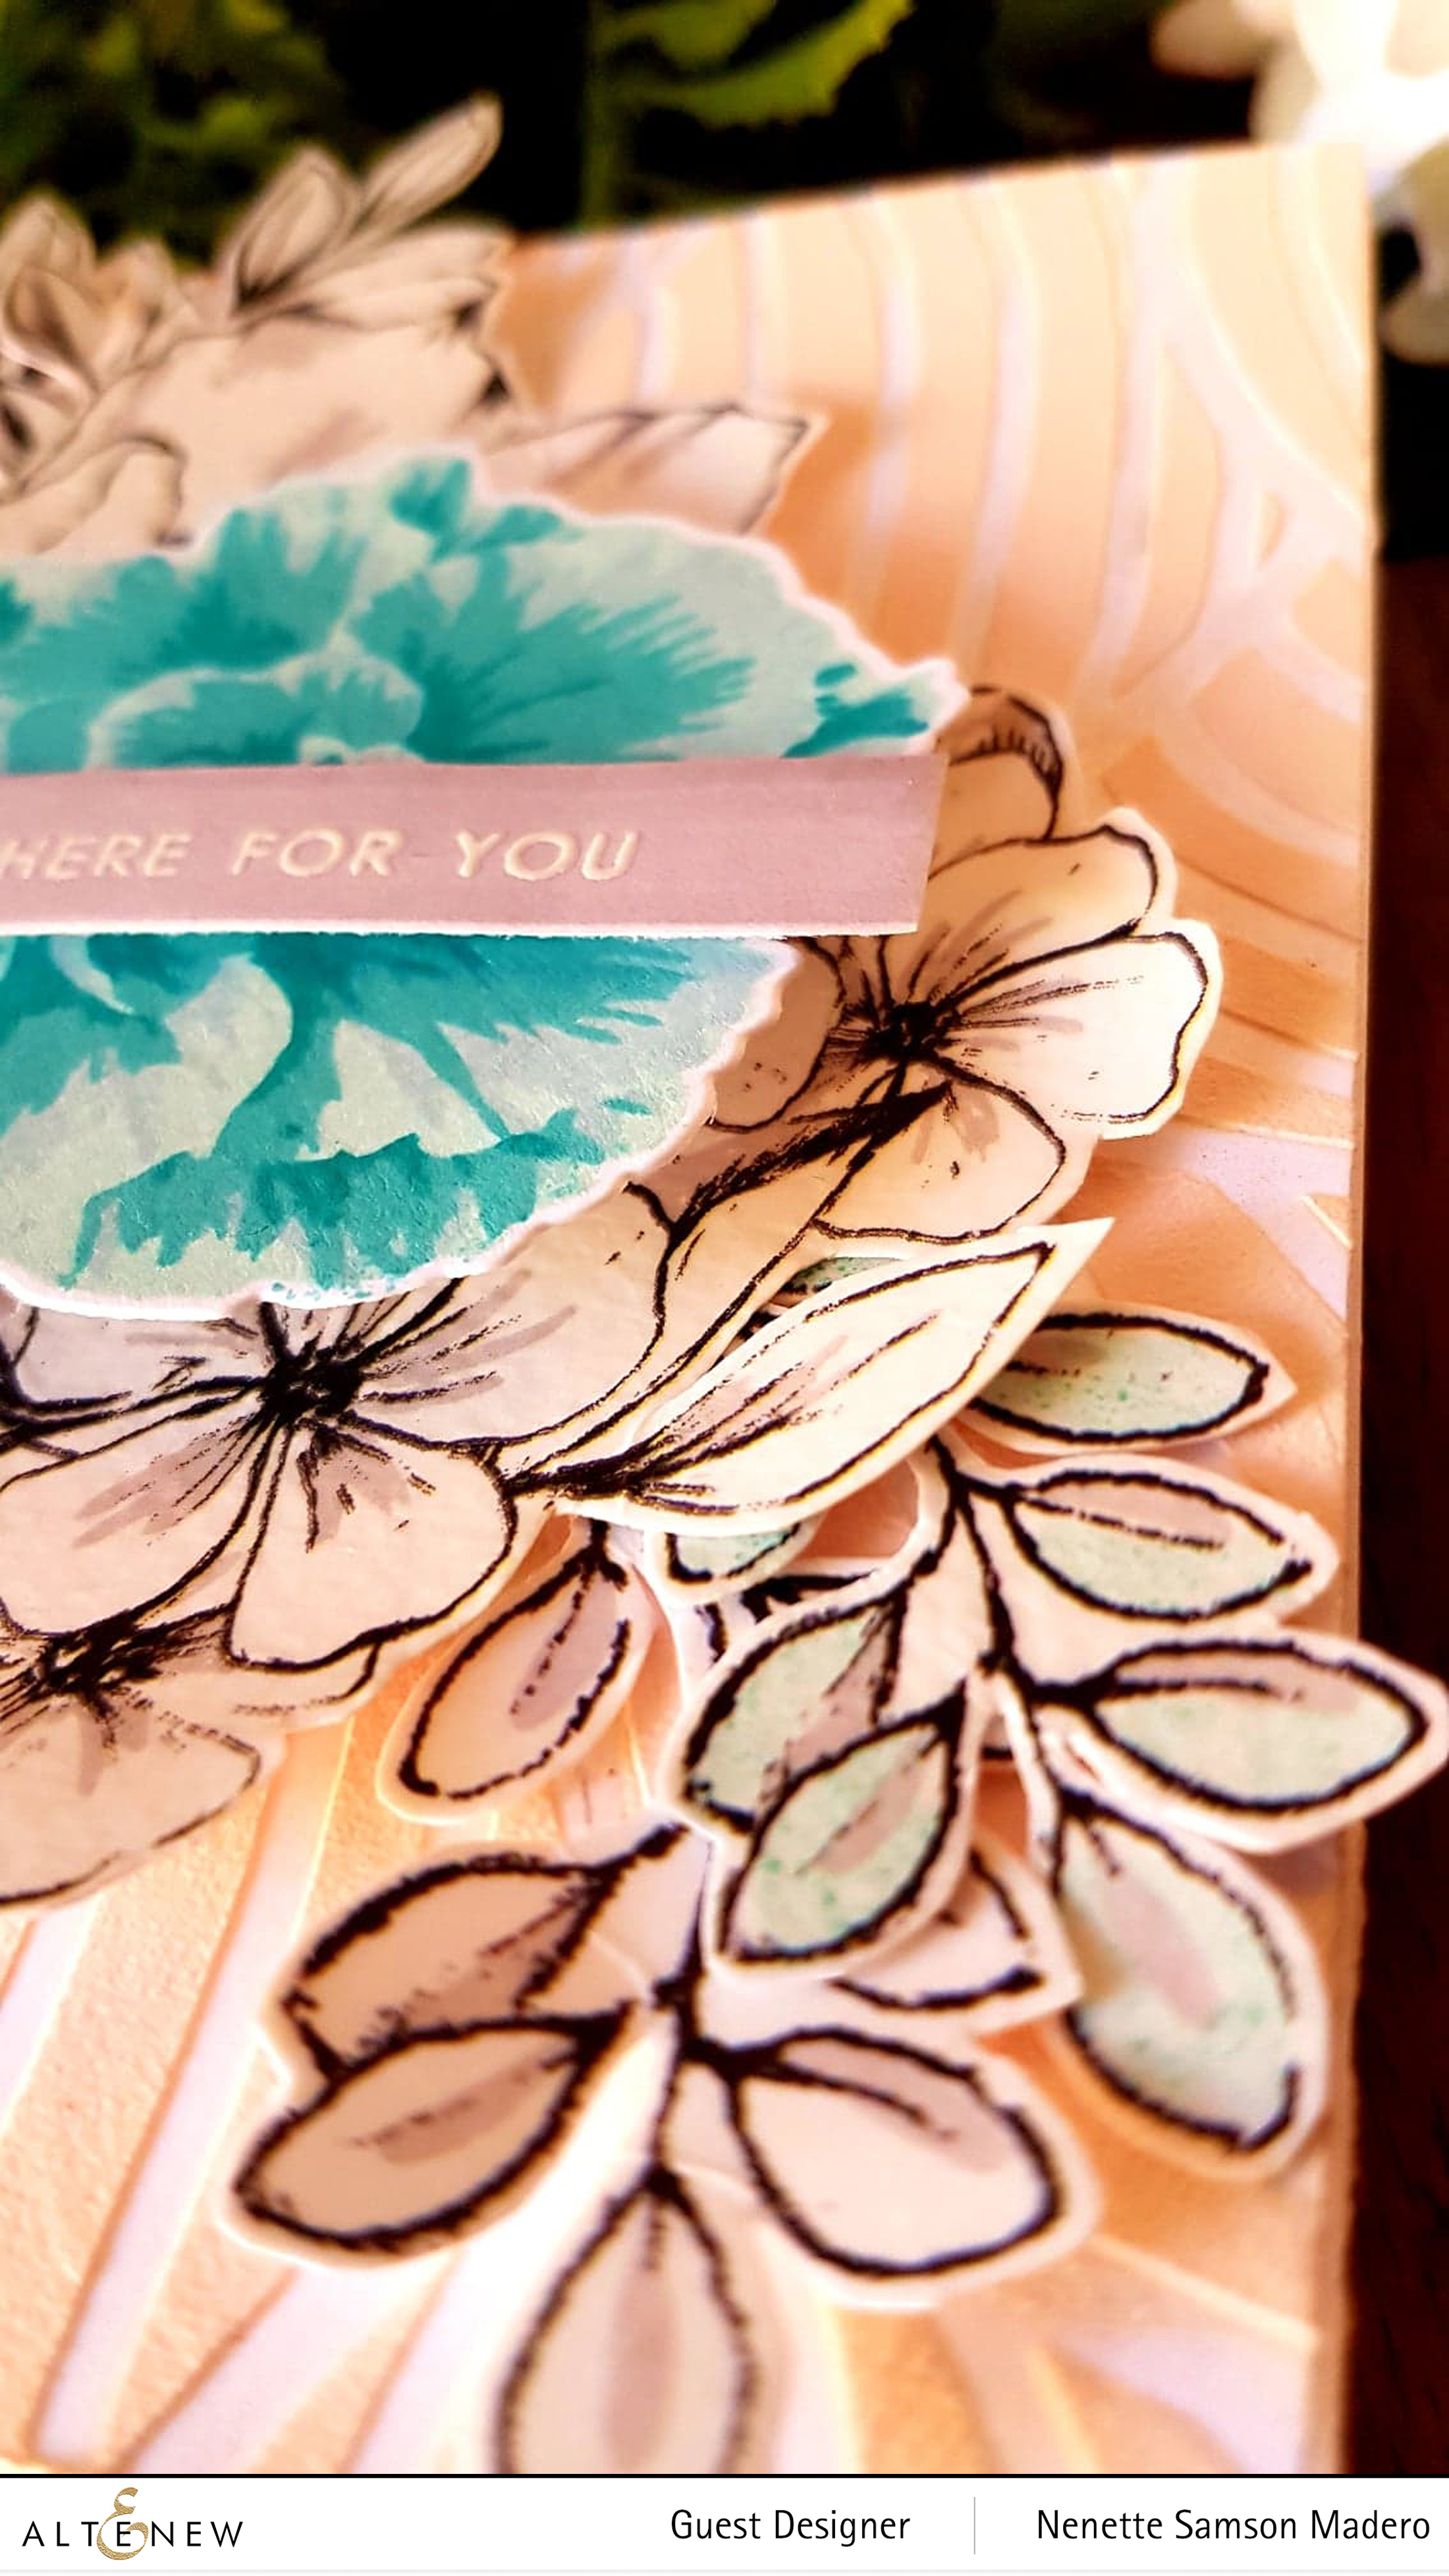
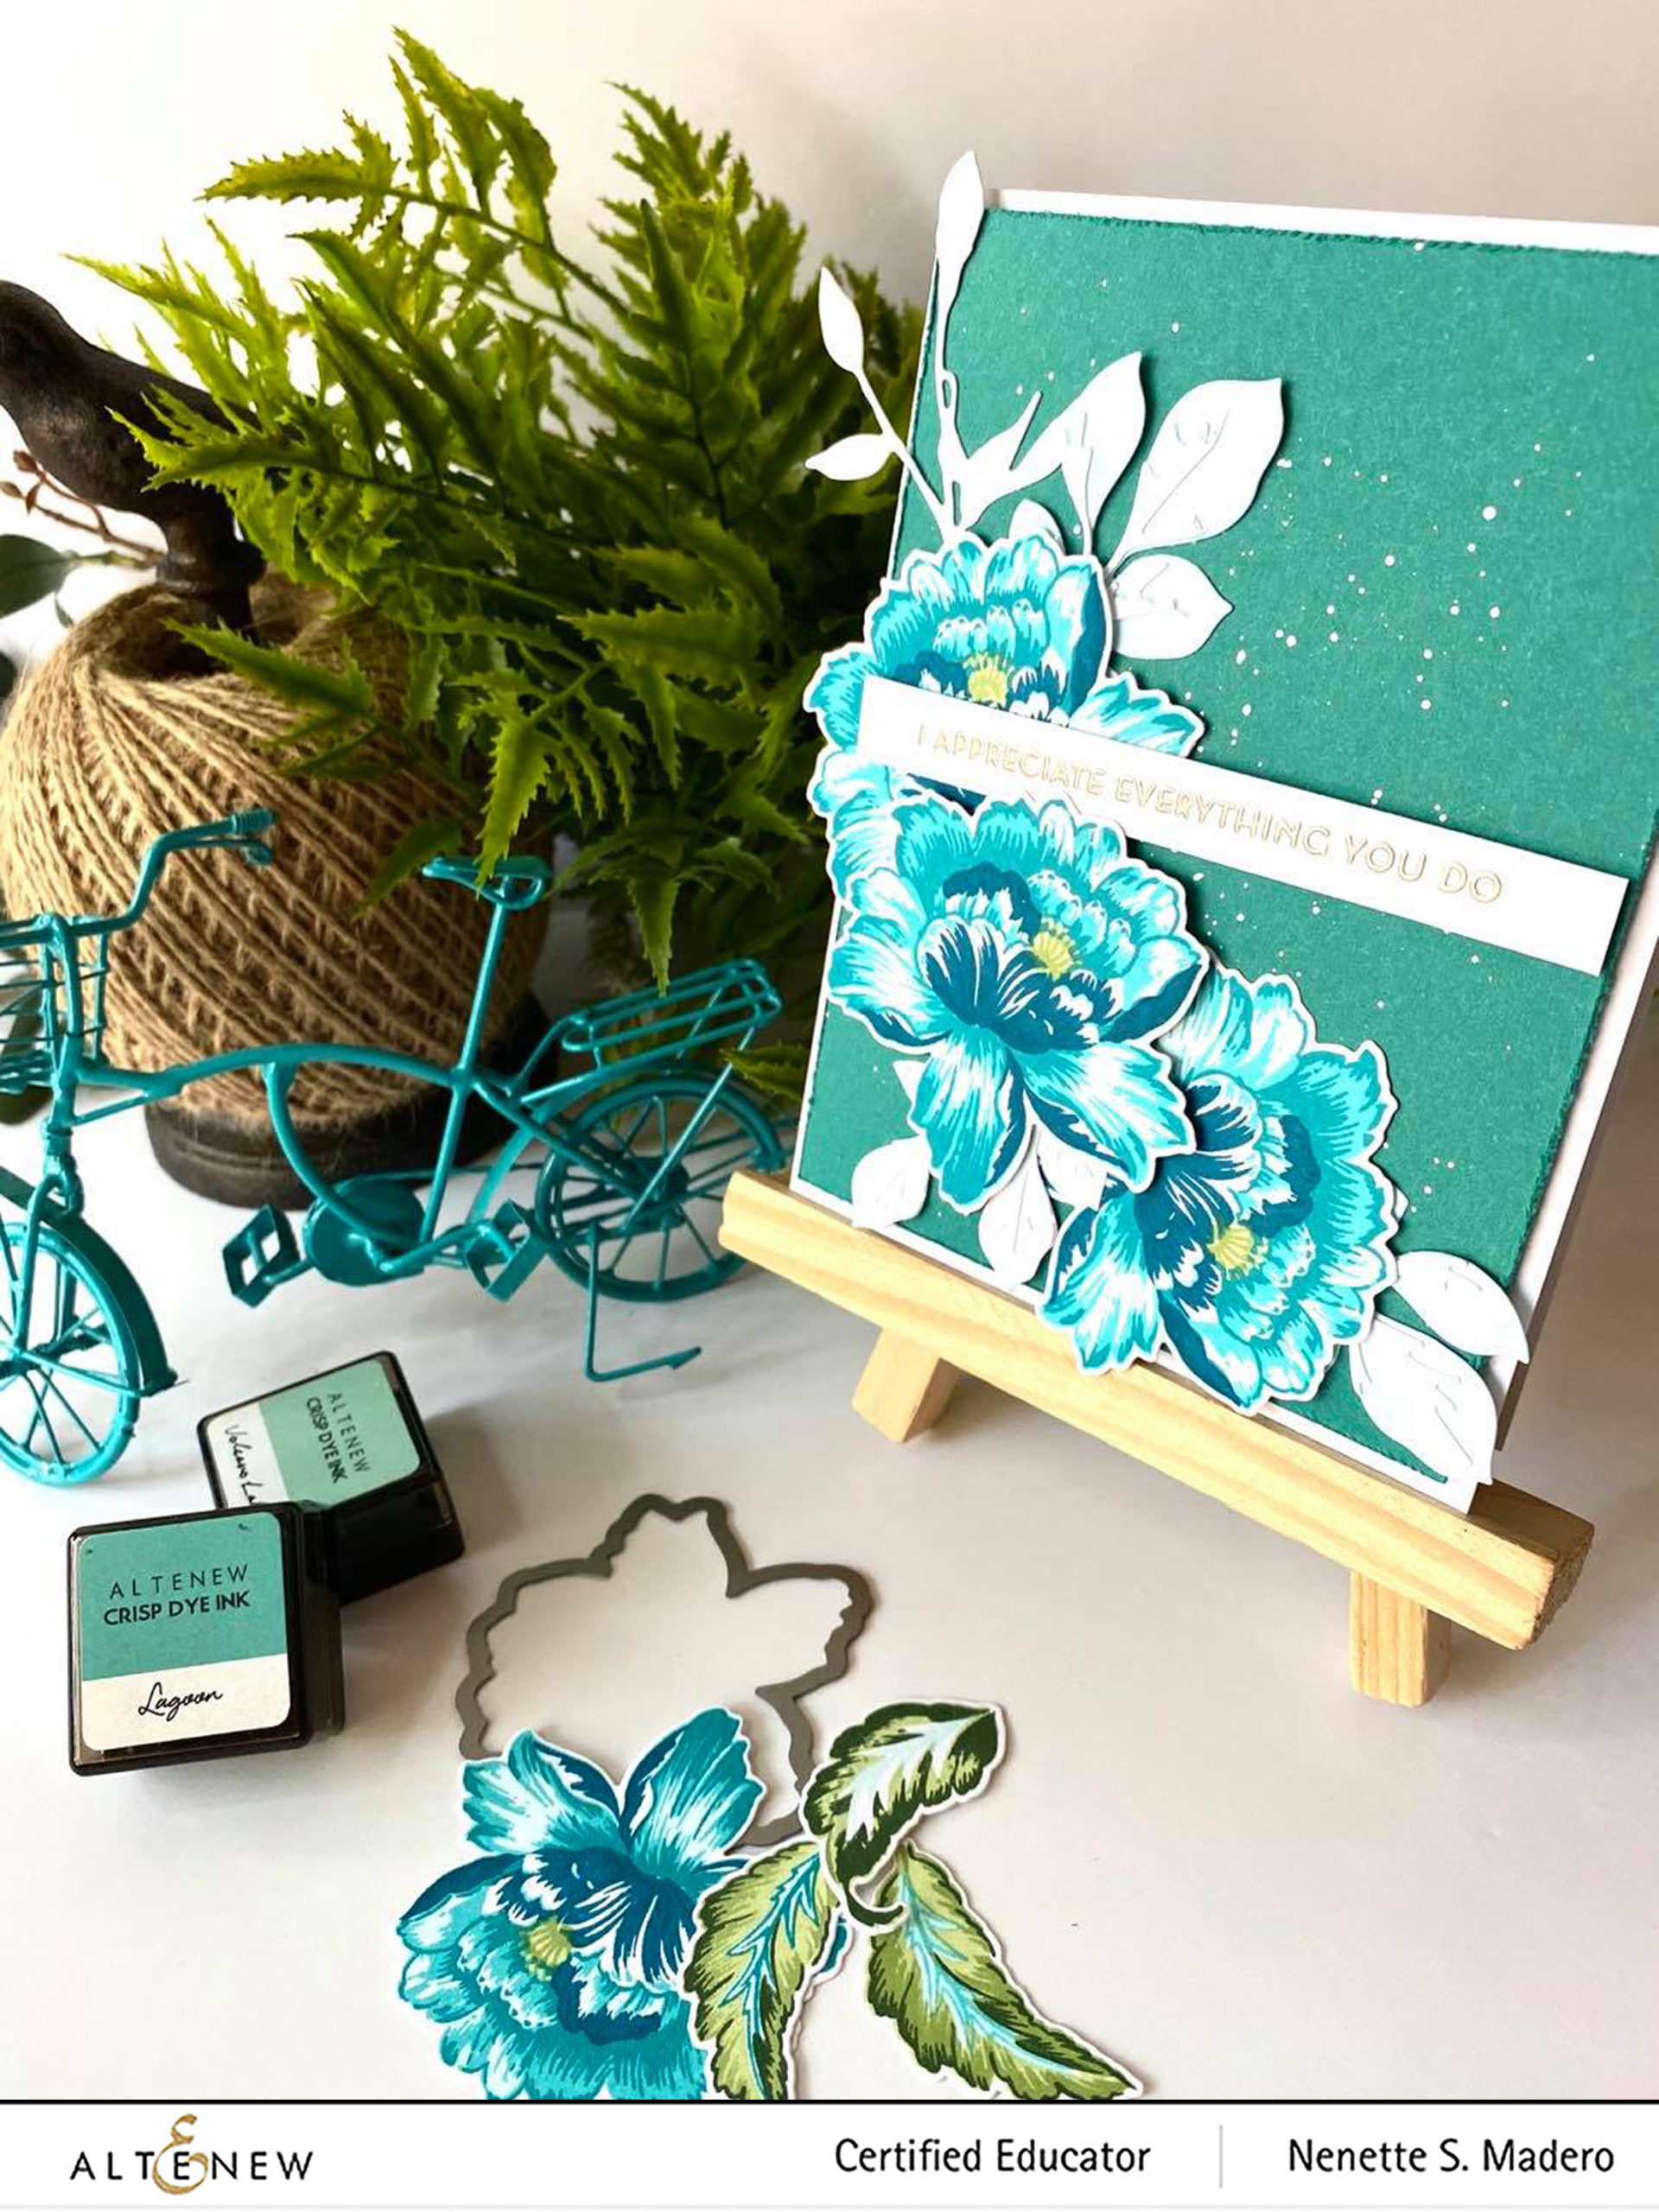
I APPRECIATE EVERYTHING YOU DO AND WHAT A BEAUTIFUL BLESSING YOU ARE TO ME CARDS


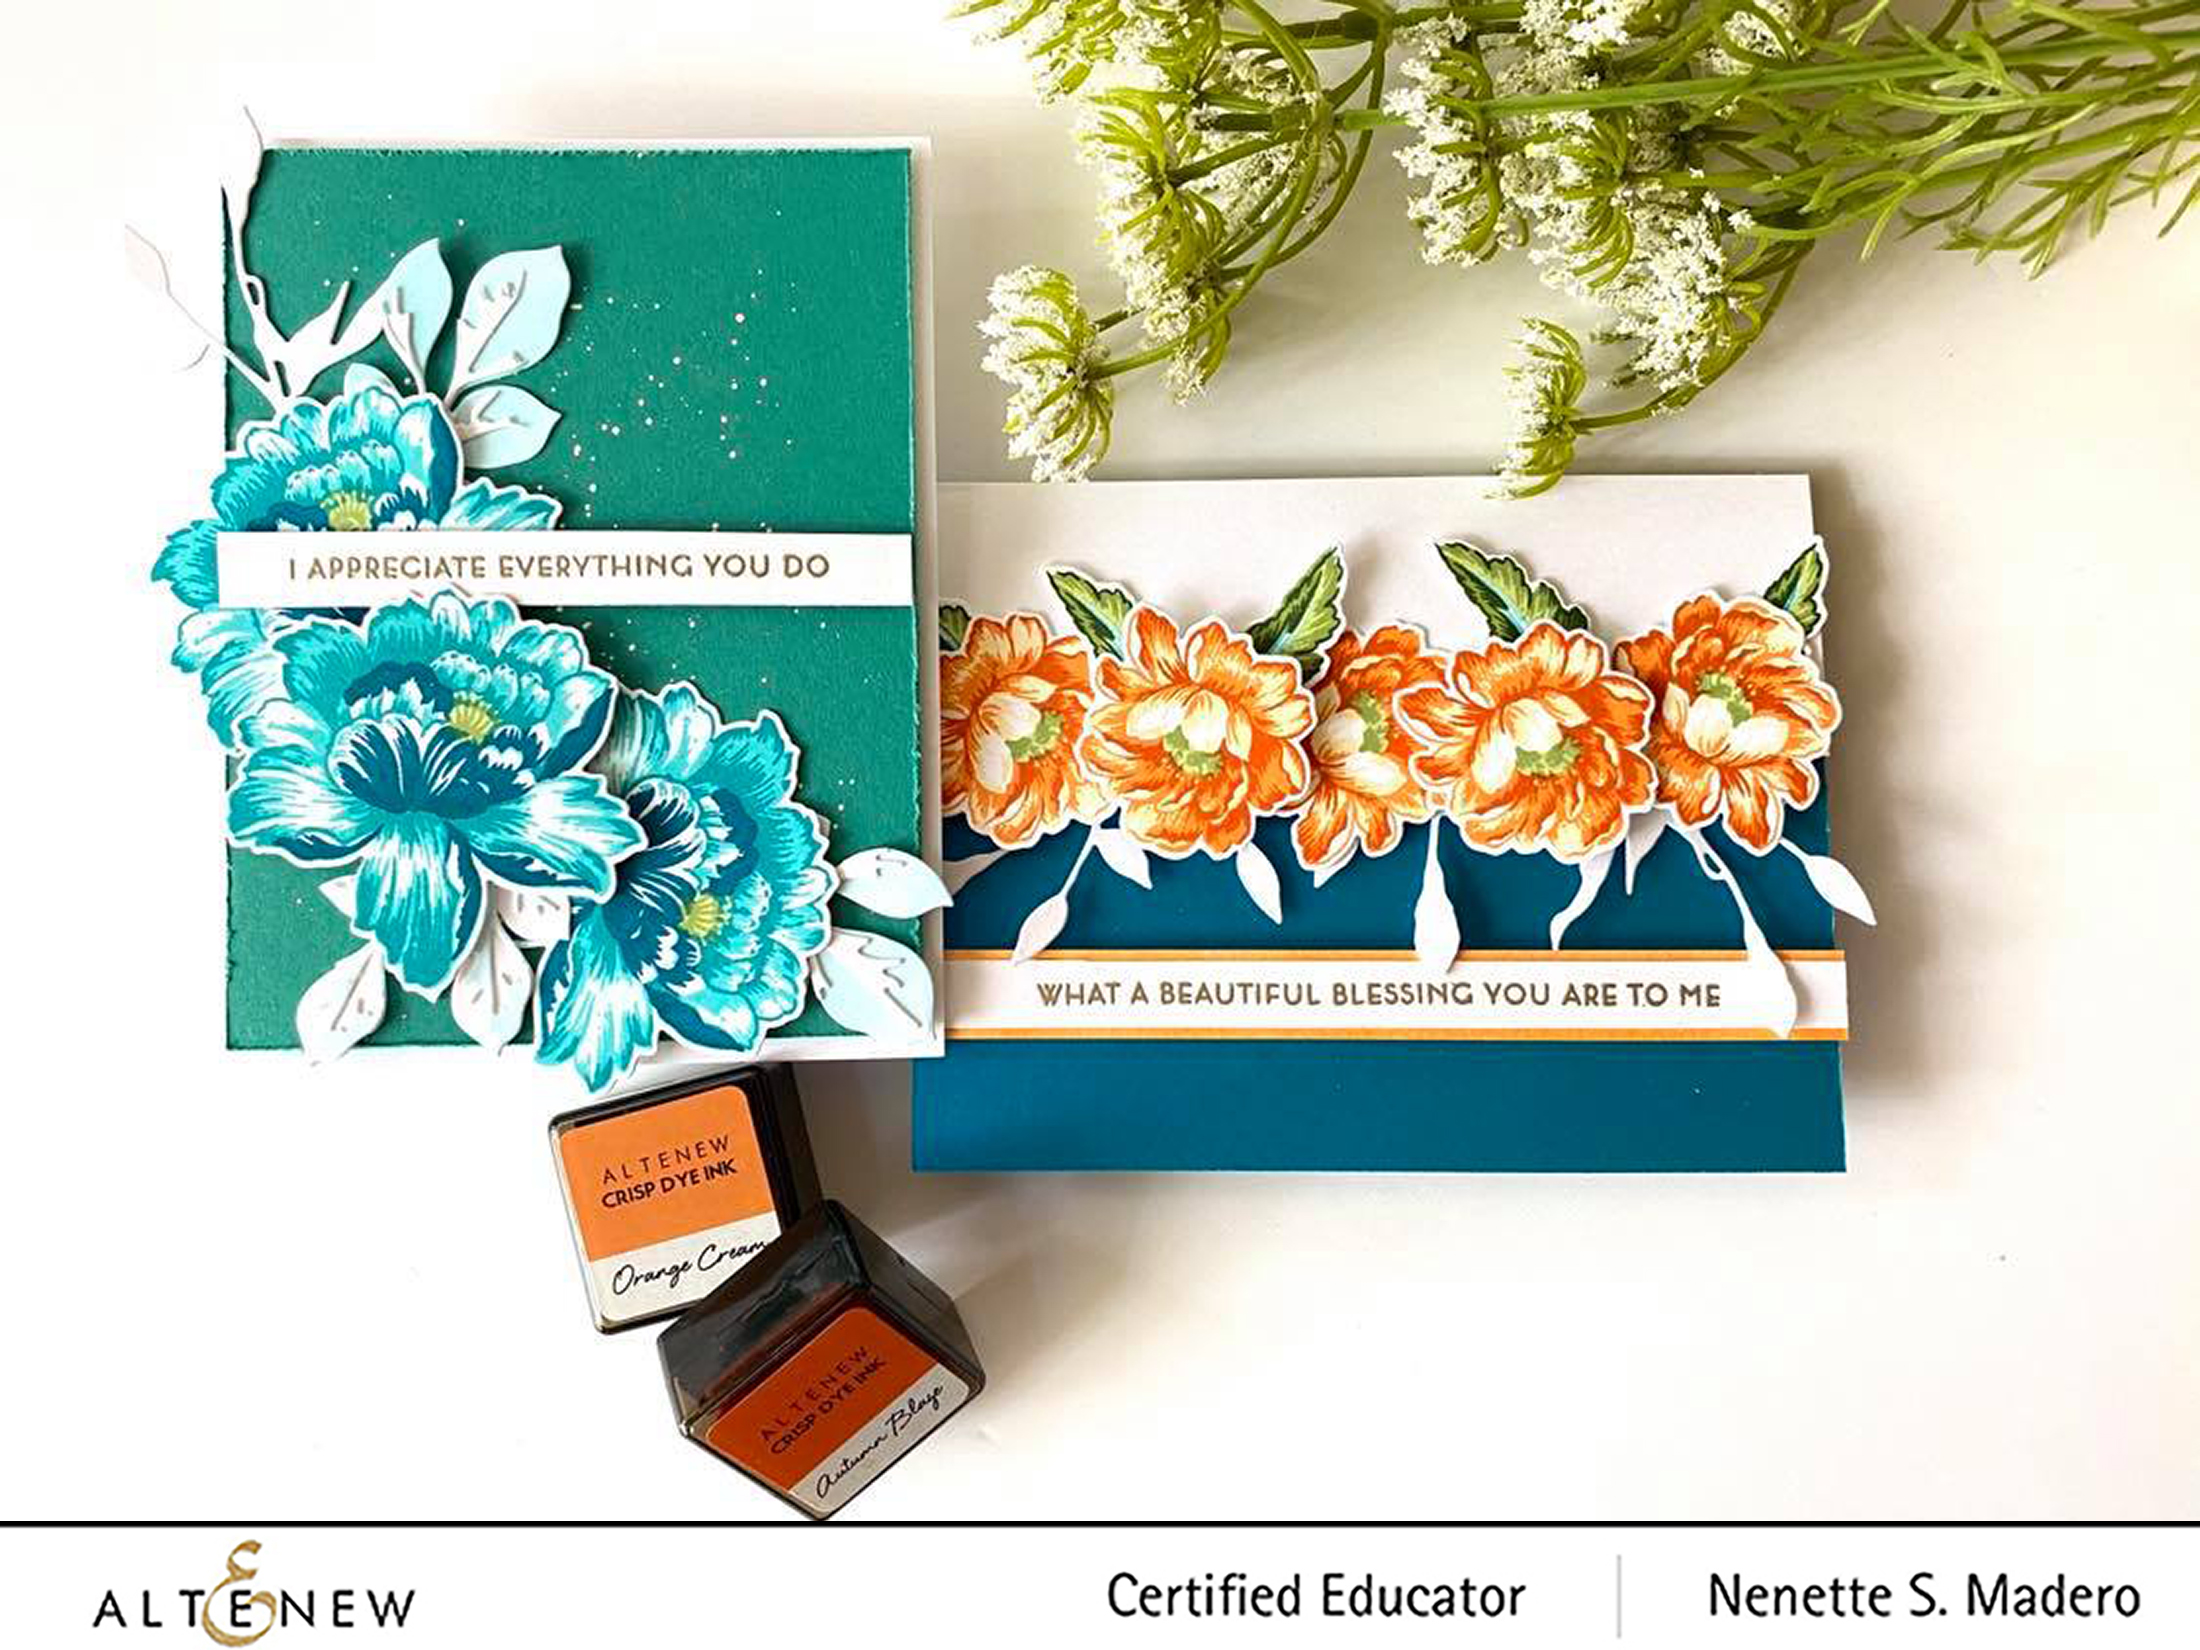
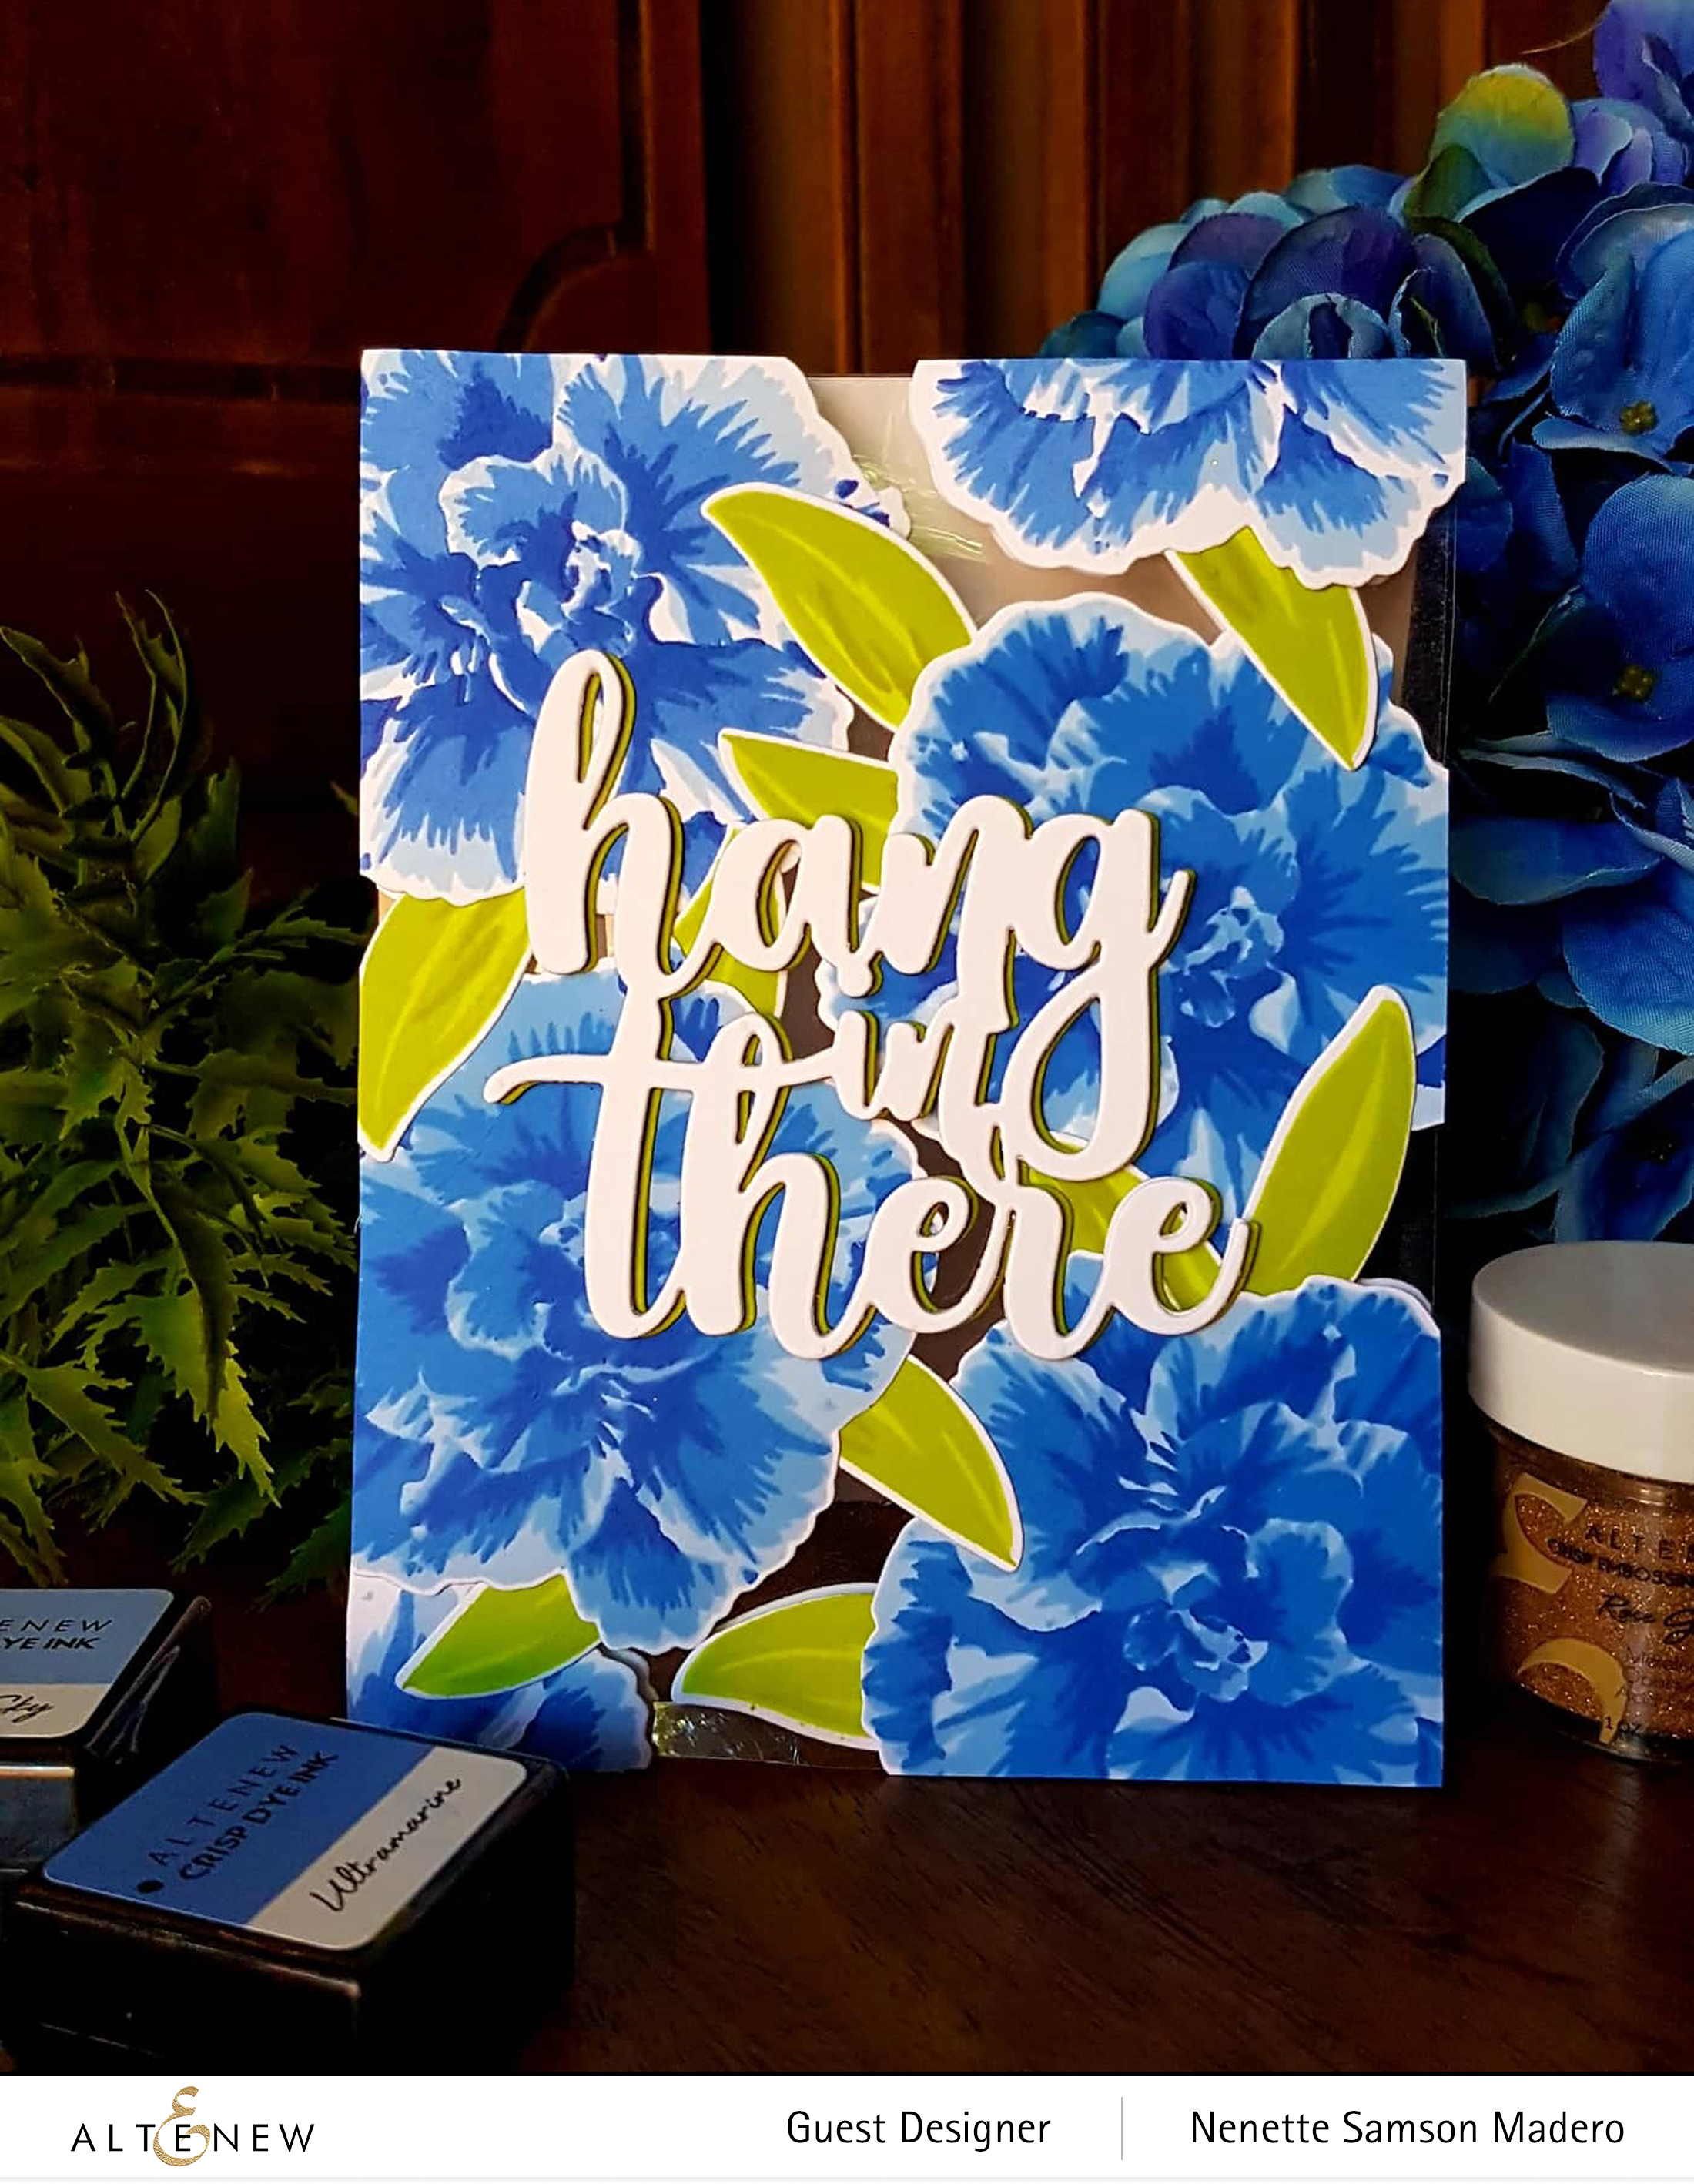
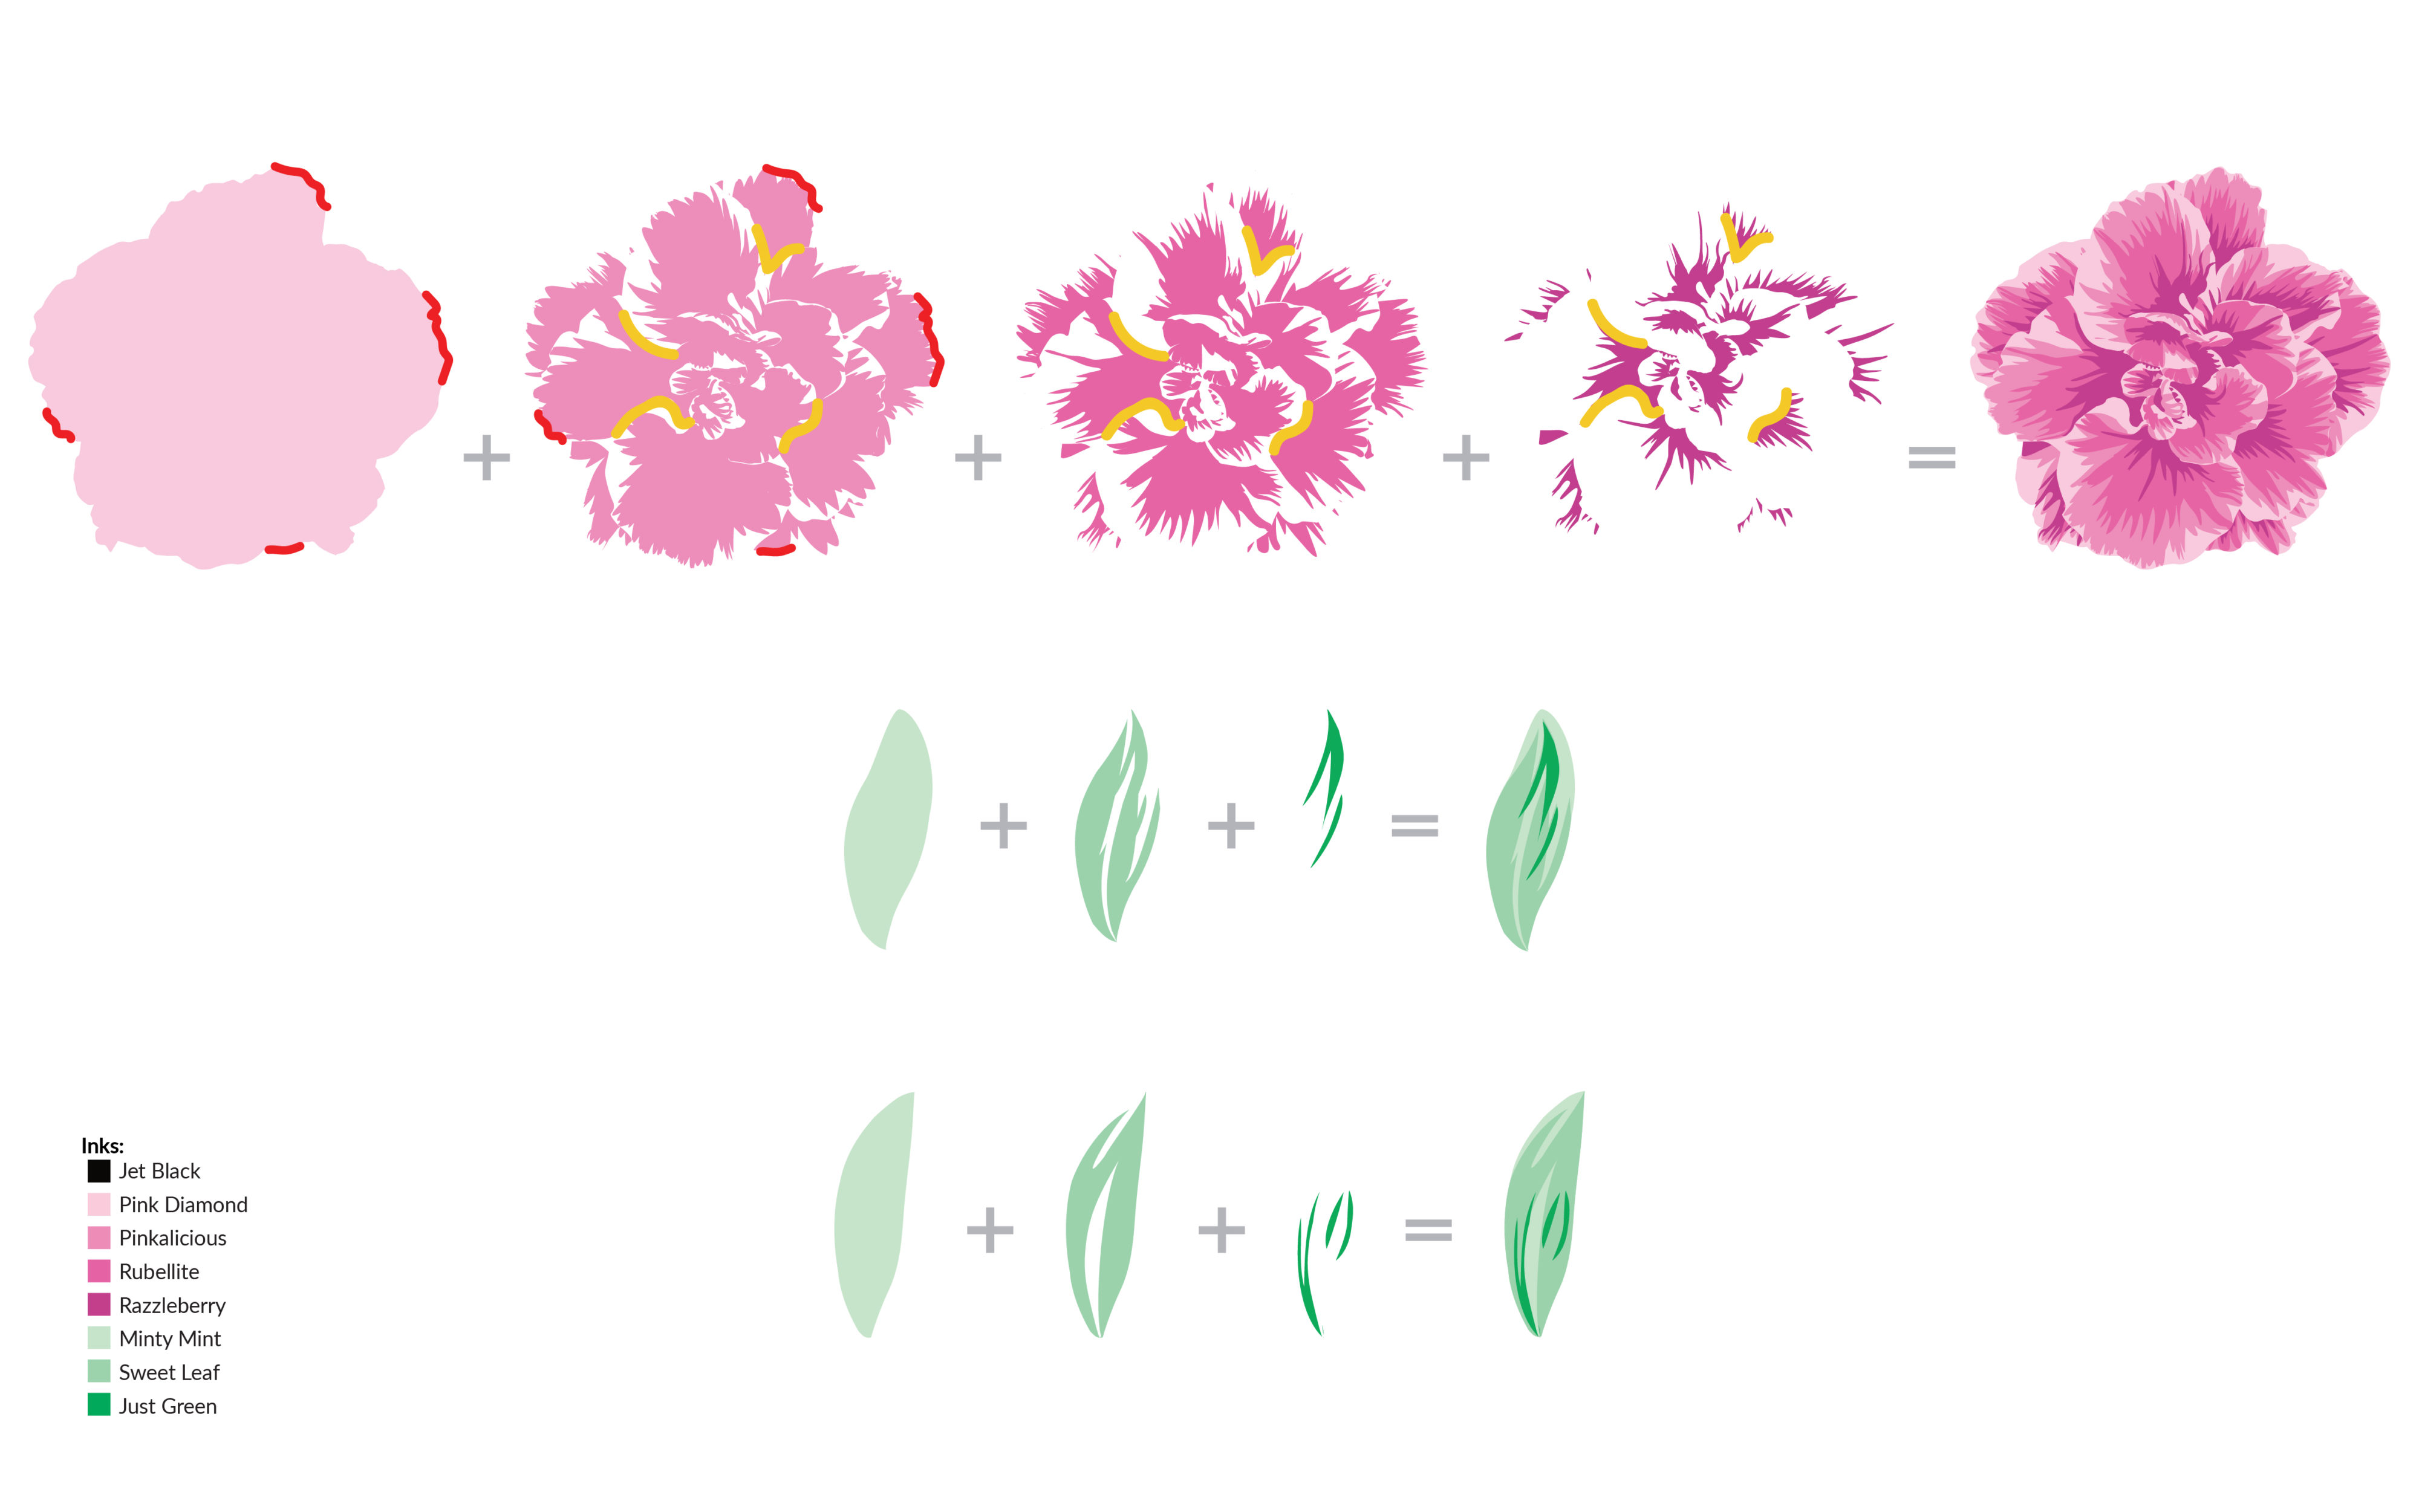
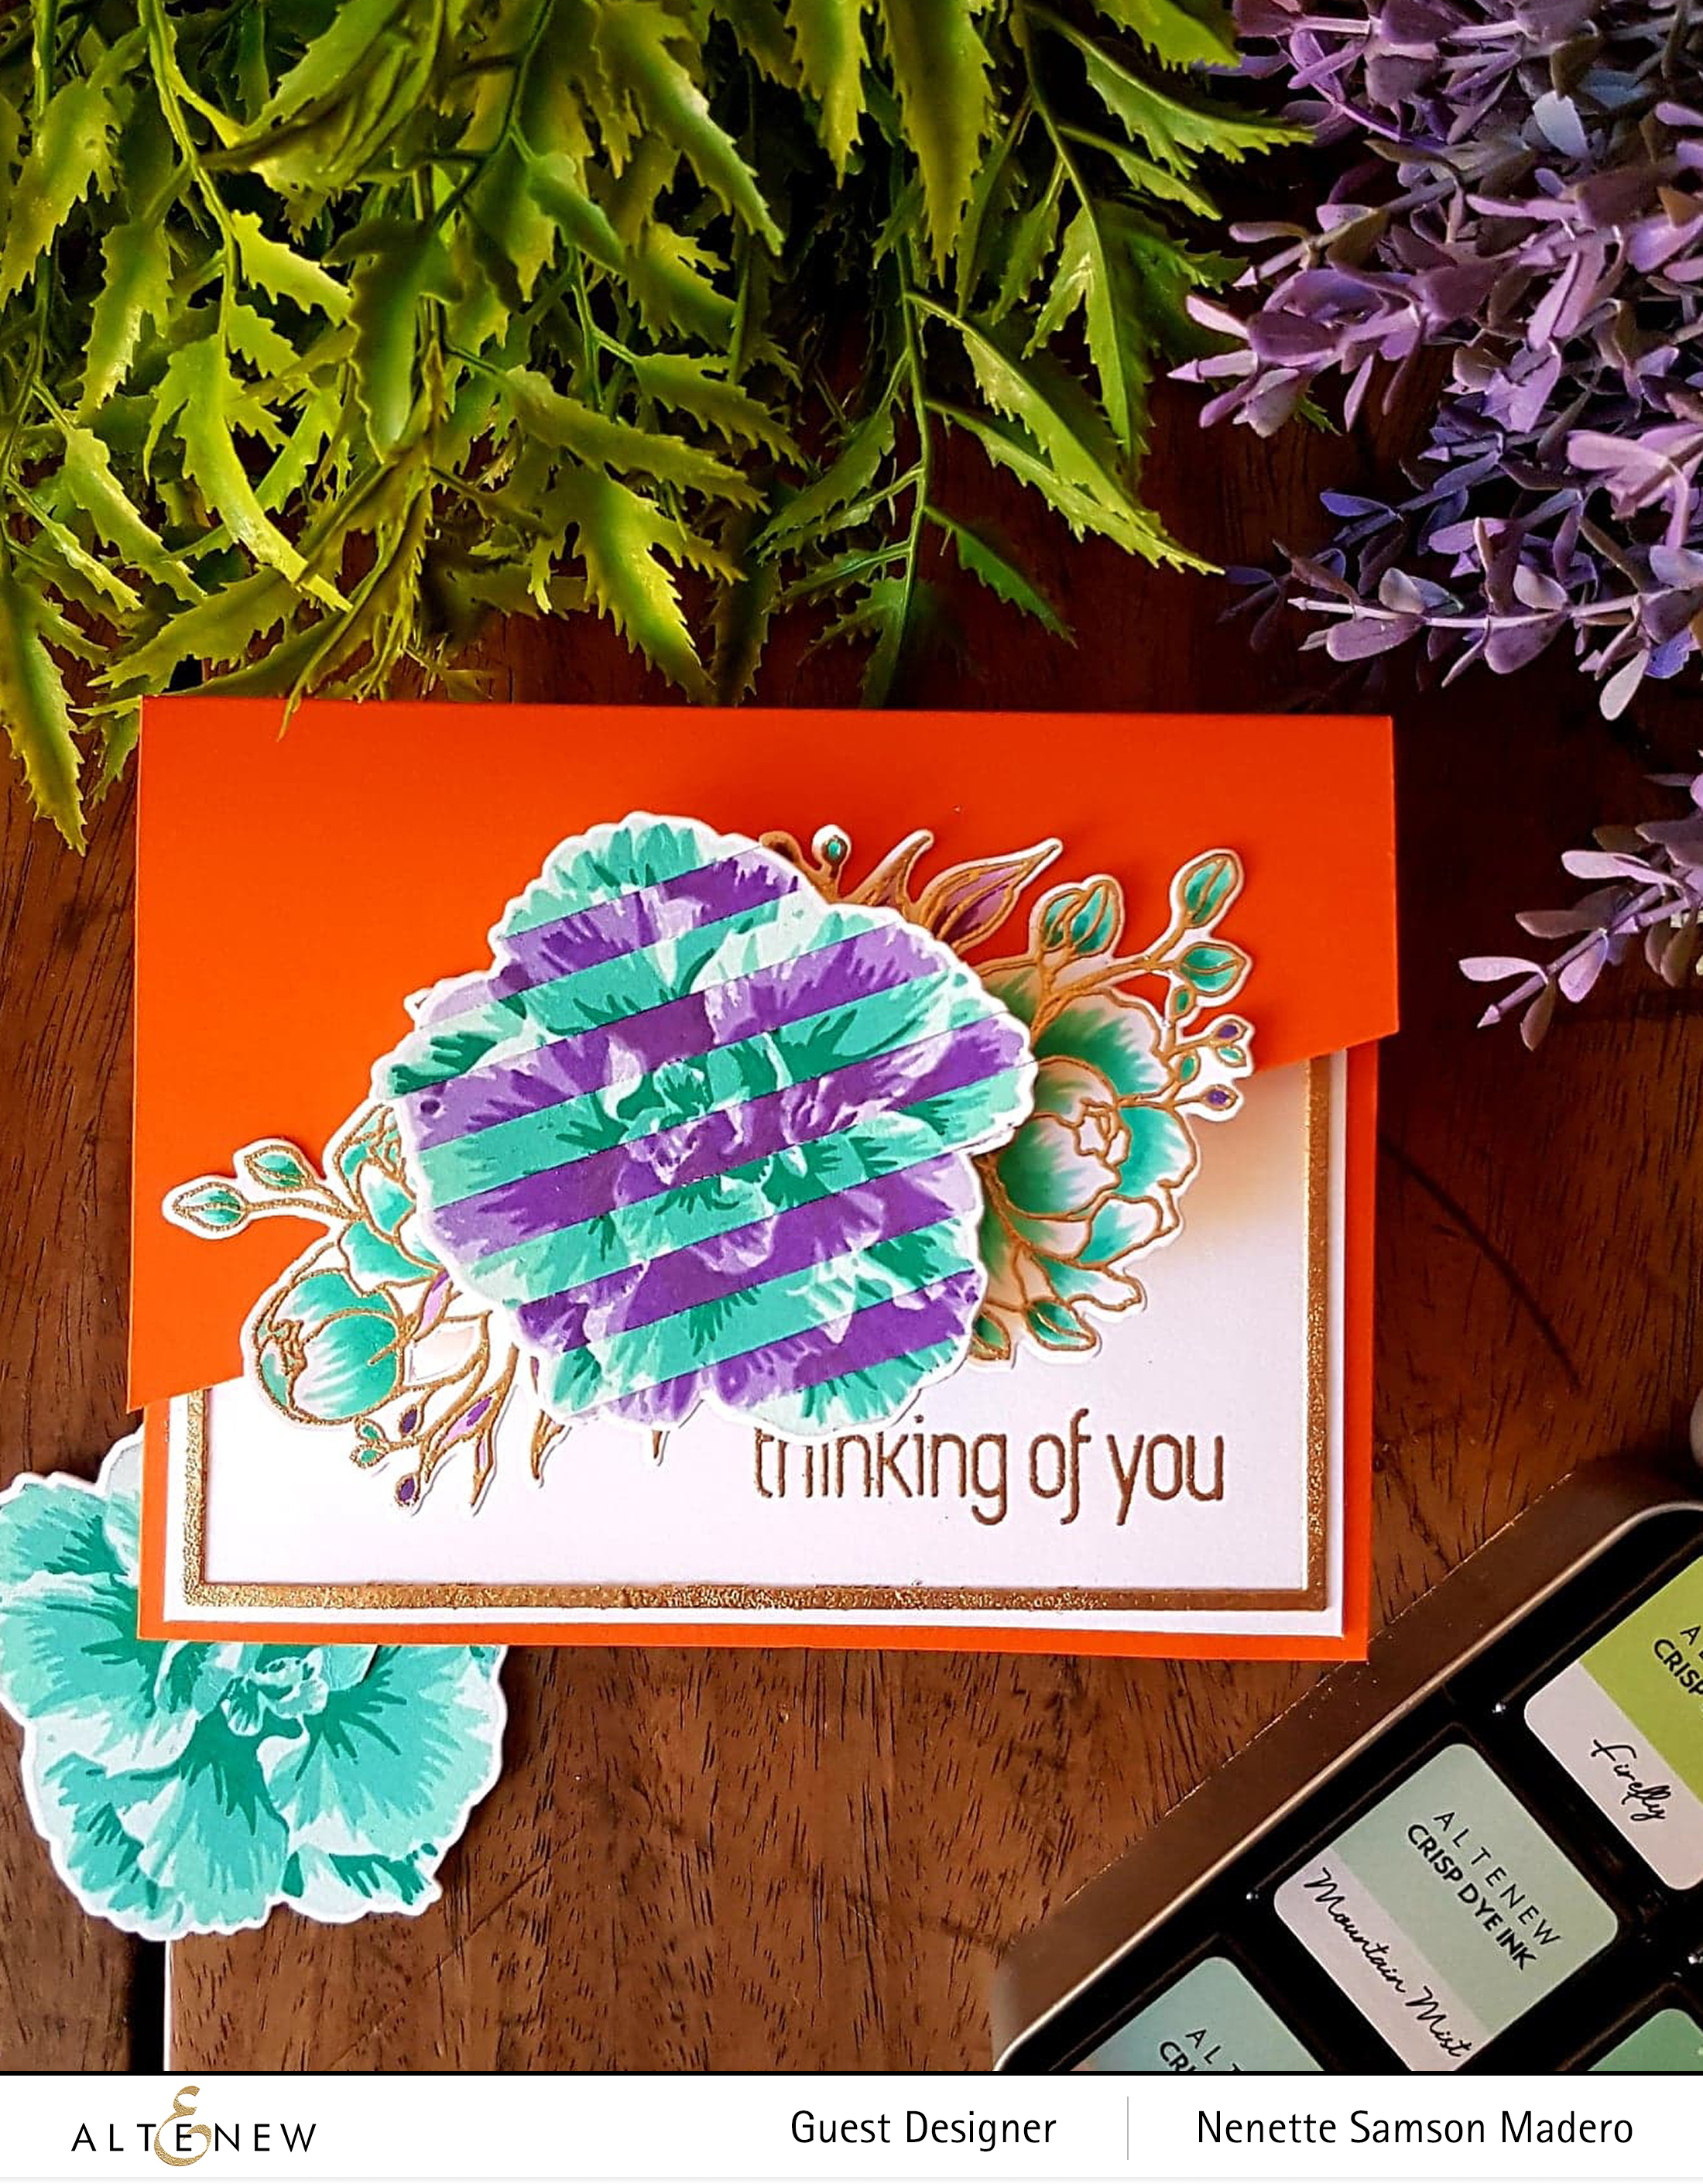
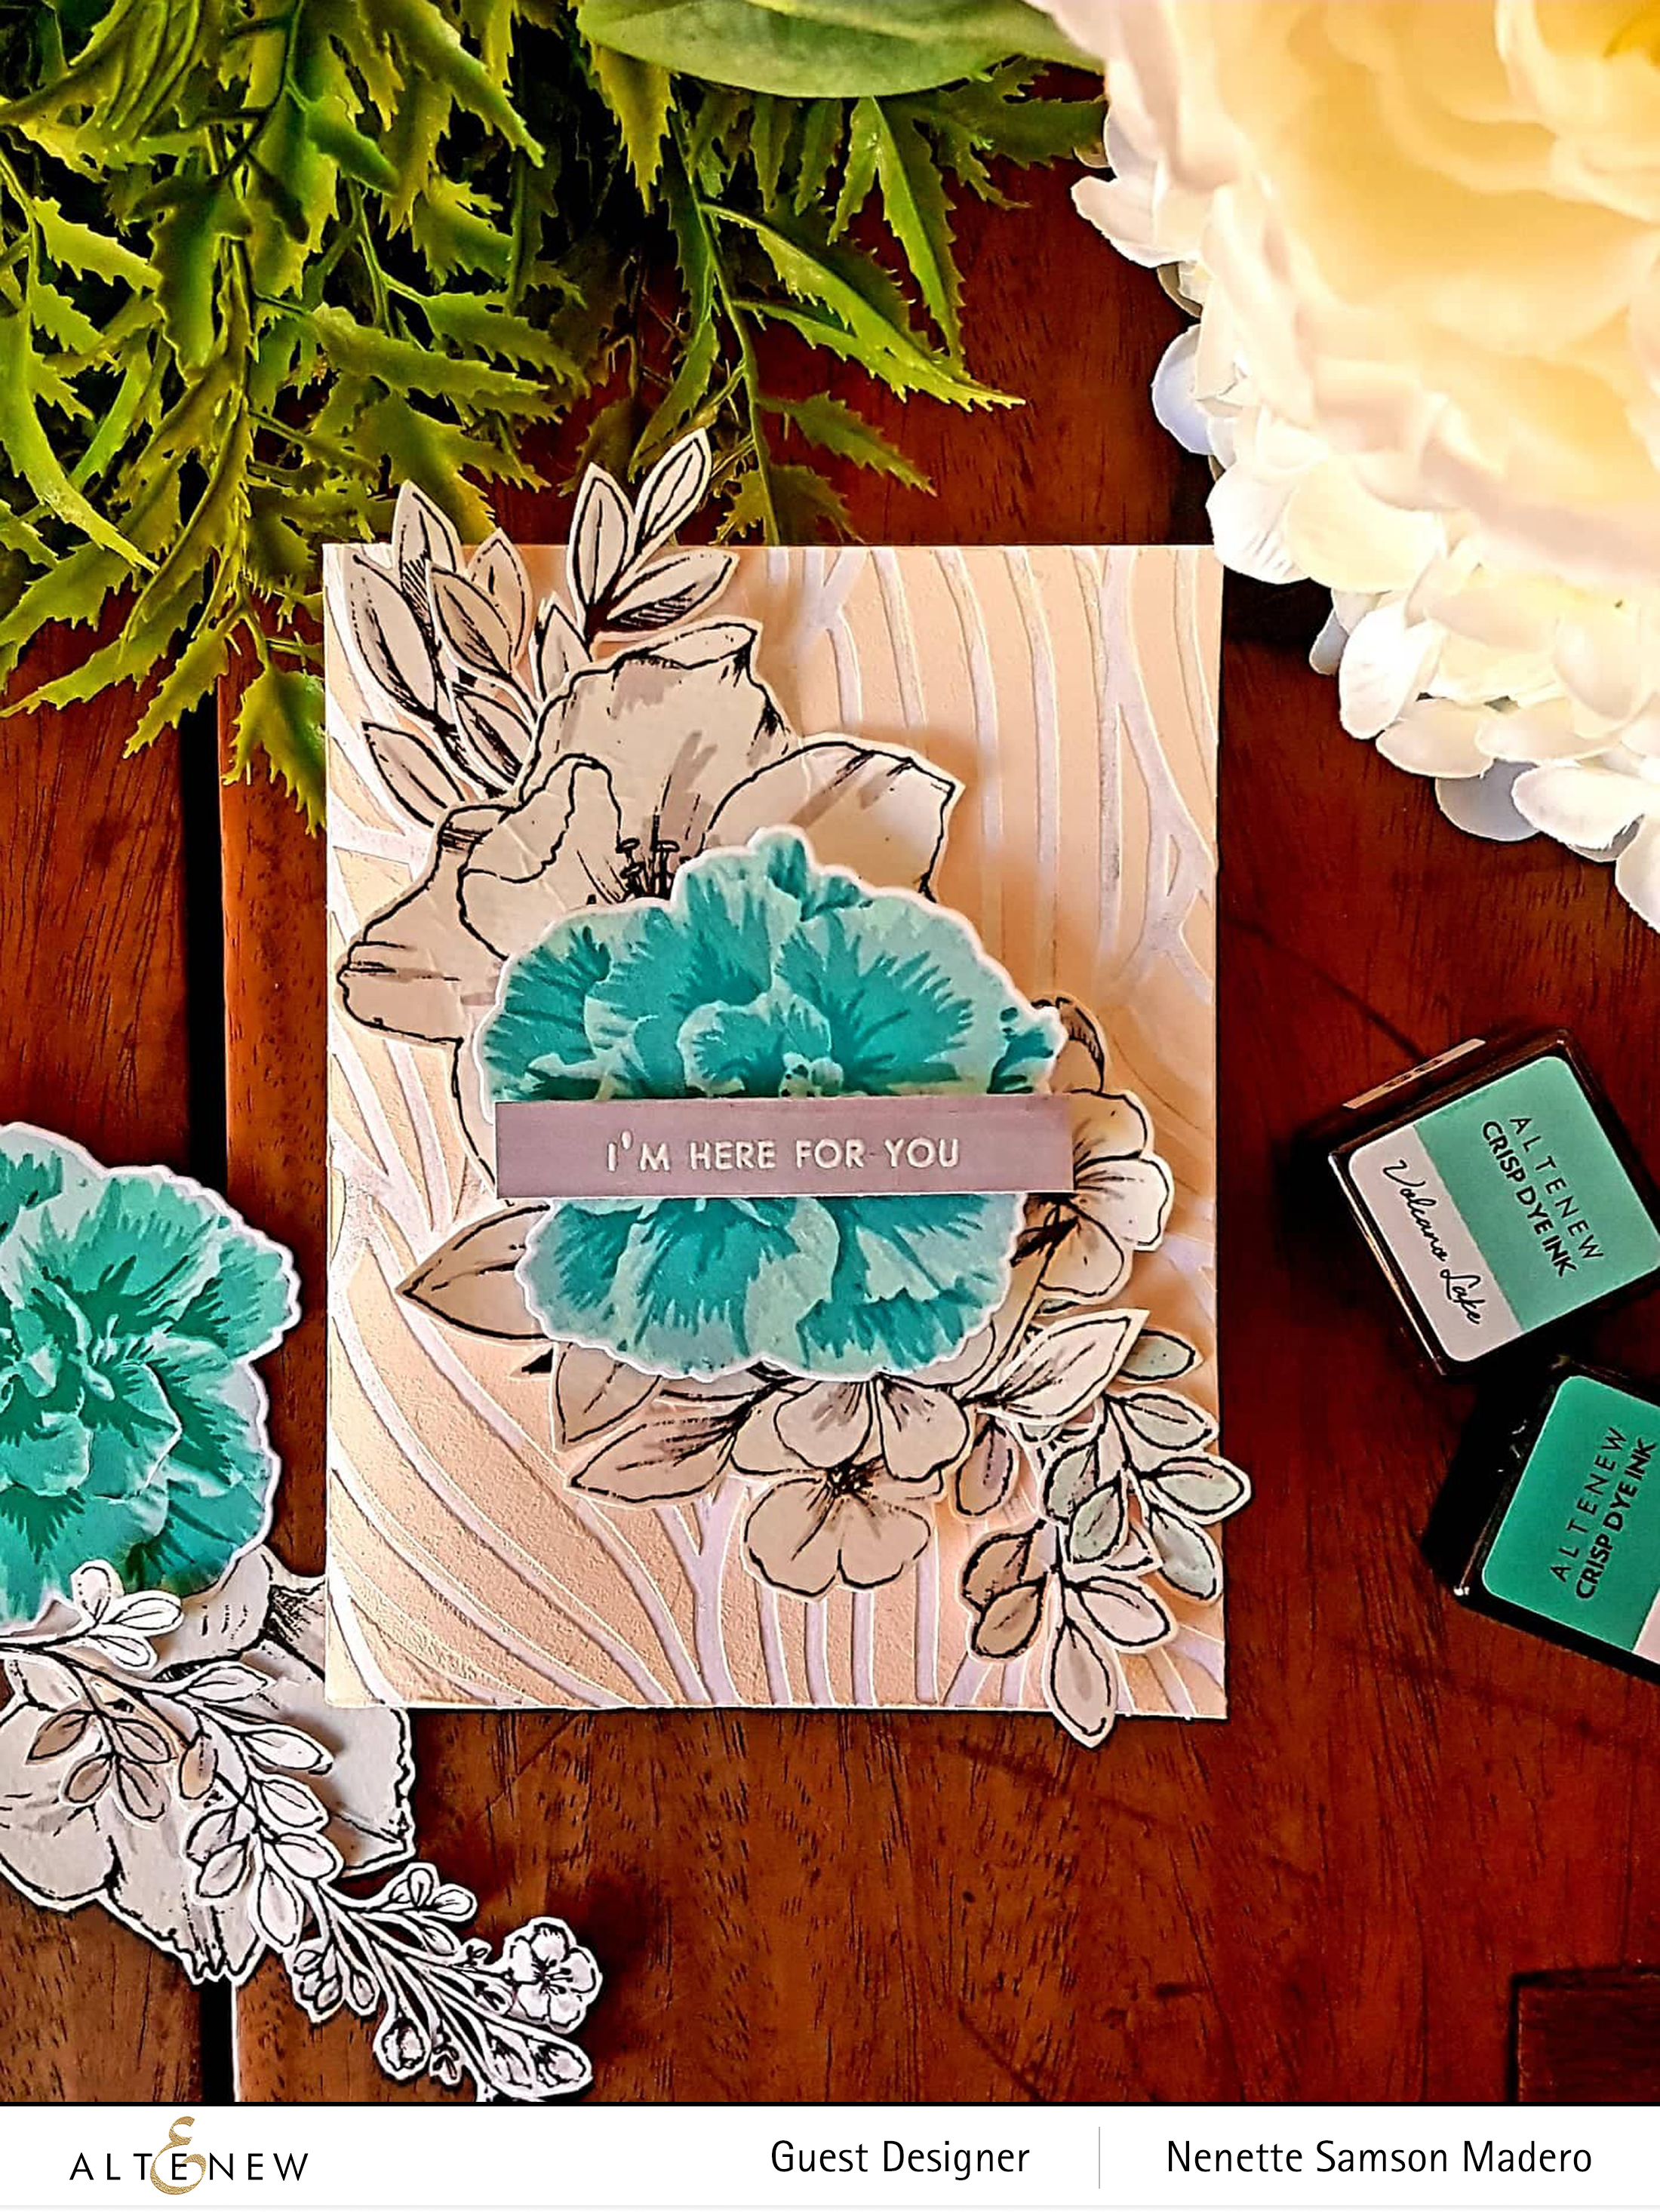
For these two cards, I used the Regal Beauty Stamp and die set, Rose Flurries 3D dies, and Garden Picks 3d dies. The layers of the flowers and leaves were stamped using Altenew dye inks then these were die cut using the coordinating dies.

Leaves from the Rose Flurries and the Garden Picks 3D die sets were used for these cards as well.

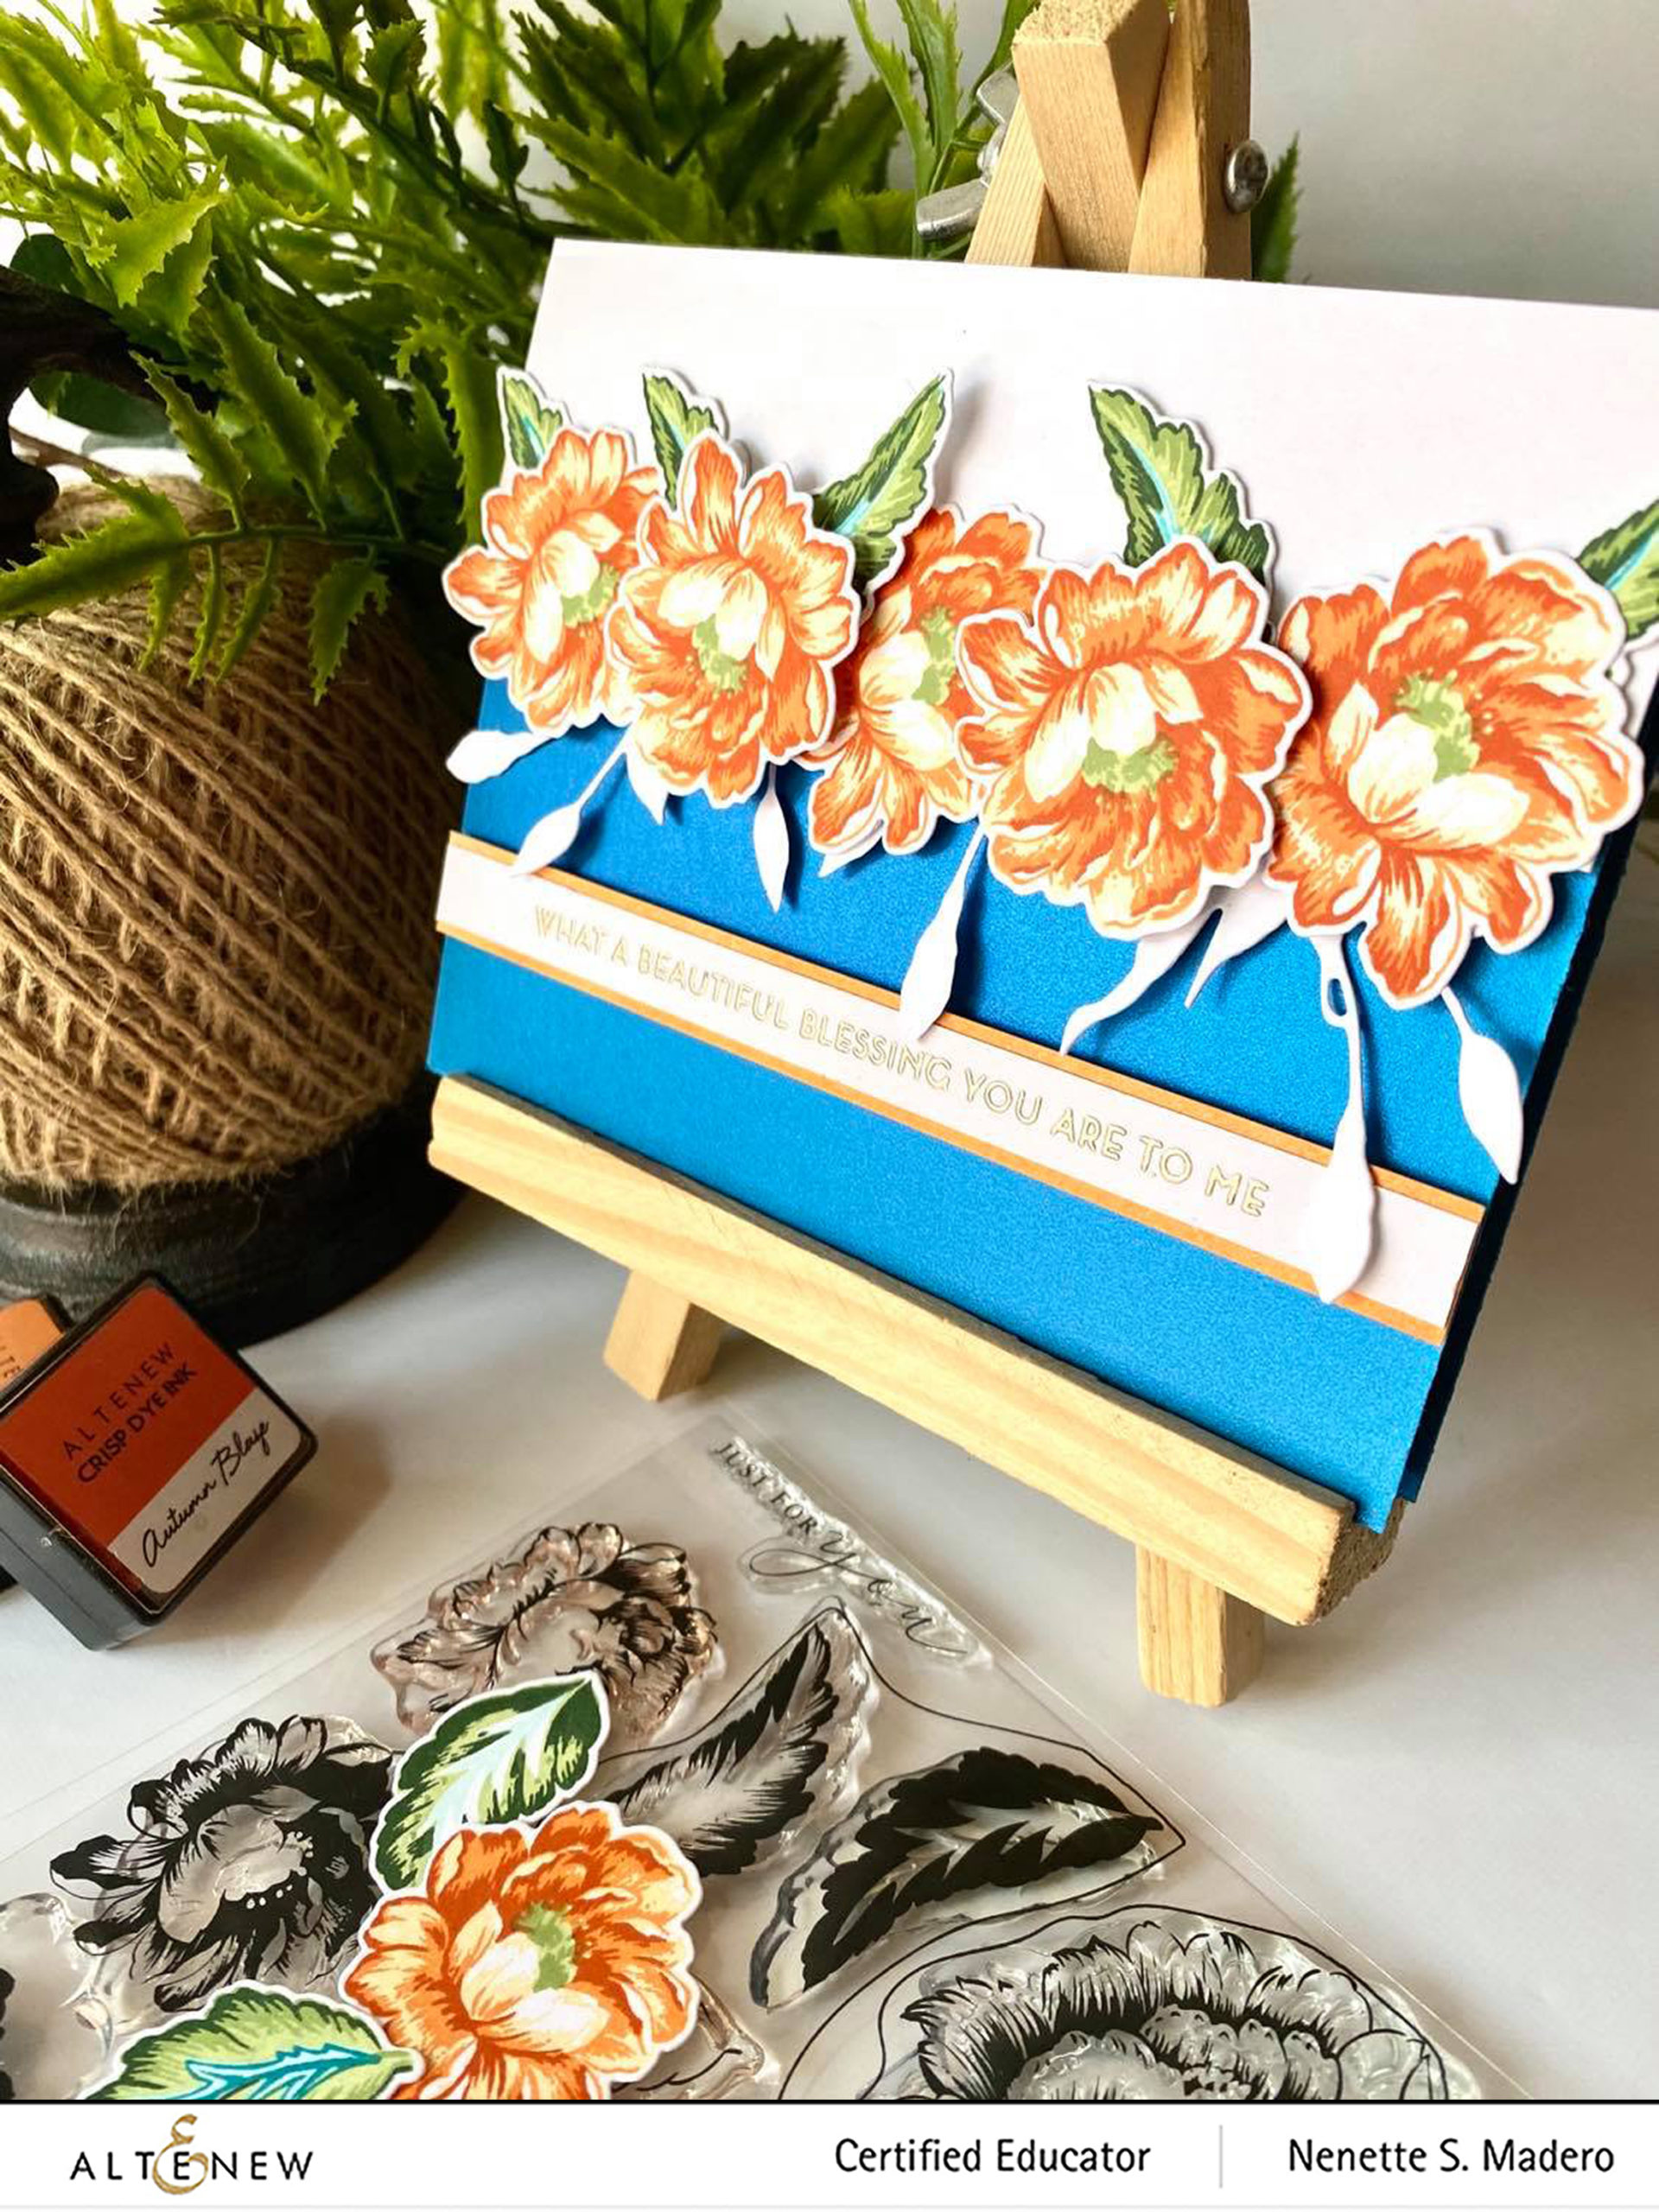
Sentiments from the Needlework Motif stamp set were stamped using the Platinum crisp embossing powder. I used similar ink colors from the brush markers to create a mat for the sentiment.


PRIZES


Altenew is giving away a $30 gift certificate to 3 lucky winners! Please leave a comment here on the Altenew Card Blog by 6/17/2020 for a chance to win.

Altenew will also draw a winner to receive a $15 Altenew gift certificate from the comments left on each designer’s blog on the blog hop list below. All winners will be announced on the Card Blog on 6/21/2020.

There’s MORE! We will pick 2 of our favorite handmade creations from those who joined the linky party and they will each receive a $15 Altenew gift certificate!

Special offer:
FREE U.S. shipping with code HAPPY6T or $5 OFF international shipping with code SHOPPING6T at checkout on orders over $29. Offer valid from 6/10/2020 at 12:01 am EDT through6/11/2020 at 11:59 pm EDT. Shop HERE! Not valid on prior purchases. Cannot be combined with other promo codes. Not valid on Altenew Academy Classes and Virtual Workshops.

This is no ordinary hop! Altenew wants you to join in on the fun as well. There is a Linky Party going on at the Altenew Card Blog. All you have to do is link up your creations based on the theme of the hop, which is, “Giving Thanks” and mention that you are taking part in the Altenew Educators Blog Hop and Linky Party. So what are you waiting for?! Link up!

There are many more card examples from the other amazing certified Altenew educators so please make sure to drop by their blogs, too! Next up is Christine Pennington. Thank you so much for dropping by and do leave a comment to get a chance to win! I always love hearing from my readers. Stay safe everyone! Until my next post. Happy crafting!!!

FB & IG: MY LITTLE ATTIC STUDIO | WWW.MYLITTLEATTIC.COM


BLOG HOP ORDER


Altenew Build-A-Flower: Camellia Japonica Release Blog Hop + Giveaway

Altenew Build-A-Flower: Camellia Japonica Release Blog Hop + Giveaway

Hello everyone!!! I am so excited to be a part of this Altenew blog hop featuring the beautiful Altenew Build-A-Flower: Camellia Japonica. Thank you so much to the uber-talented Jaycee Gaspar for leading all of you to my blog. If you somehow get lost, the entire blog hop list can be found at the end of this post.

Altenew has been in the forefront of designing layered floral stamps and dies and this particular stamp set does not disappoint. There are two options to obtain this stamp set– one is the Build-A-Flower: Camellia Japonica stamp and die bundle and the other is the Build-A-Flower: Camellia Japonica & Ink Bundle which comes with a 5% discount!

BUILD-A-FLOWER: CAMELLIA JAPONICA

BUILD-A-FLOWER: CAMELLIA JAPONICA & INK BUNDLE

The flower image is pretty huge… approximately 2.75″ x 2.5″ so it’s prefect as a focal point in any card design. Below you will find 5 ways on how to use this stamp set.

STAY PATIENT AND TRUST THE JOURNEY CARD

MATERIALS:

For this first card, I wanted to create a shadow box card. I fussy cut the flowers and leaves of the Botanical Rhapsody washi tape that was stuck to white CS for easy cutting. I stamped 3 Build a Flower Japonica images using Mountain Mist, Volcano Lake, Aqualicious and Lagoon crisp dye inks. I arranged the 3 flowers (always choose odd numbers when placing the focal images on a card—a design principle I learned during my scrapbooking days 🙂 ) then I covered up the space with the cut out washi images. I made sure not to adhere the tips of the leaves to give it a more natural feel.

I just love the sentiments from the One Day At A Time stamp set… such uplifting messages!!! The sentiment was stamped on vellum using Versamark Ink and Rose Gold Embossing powder. 2 stitched rectangle scallop frames were die cut from teal cardstock and the following were stuck to each other: frame, transparency, vellum, frame. These served as the cover of the shadow box. Foam tape was placed on the edges of the frame and adhered to the floral panel then was adhered to a side folding A2 card front.

HANG IN THERE CARD

MATERIALS:

This see-through card was inspired by the amazing Jennifer Mcguire. You can check out her tutorial for this type of card here. I went ahead and stamped several of the BAF Camelia Japonica flower image with the Lapis Lazuli crip dye ink set ( Iceberg, Eastern Sky, Ultramarine and Azurite) and the leaves using Bamboo, Parrot and Olive crisp dye inks from the Tropical Forest set. Use the coordinating die cuts for the images. Below you will find the layering guide for this stamp set.

BUILD-A-FLOWER: CAMELLIA JAPONICA LAYERING GUIDE

The images were arranged to cover a 5.5” x 4.25” cardstock. I made sure that the flowers and leaves were somehow connected to each other. When I was happy with the arrangement, I used Press’n Seal to pick up all the flowers and leaves together. I carefully glued to leaves to the flowers then added foam tape. Cut a transparency at 4.25” x 11” and score at 5.5”. Lay the floral card front on top of the transparency. In order to hide the foam tape, I die cut the leaves and flowers on white cardstock and glued them to the inside of the card. This way, all the foam tapes will be hidden. The excess leaves and flowers were then cut. I added a 4.25” x 5.5” cardstock on the transparency to create the inside of the card.  The hang in there die was used to cut 5 pieces of cardstock. One was colored with the Parrot crisp dye ink using a blender brush. All 4 pieces were adhered to each other using adhesive and the colored layer was slightly shifted to the right to create a shadow.

HOPE YOUR DAY IS DELIGHTFUL CARD

MATERIALS:

I wanted to make a card that was easy to assemble. Since I already had extra stamped flowers, this card was finished in 5 minutes. The 3 flowers were arranged on opposite corners of the A2 top folding card front. The sentiment from the same stamp set was embossed using Rose Gold embossing powder. A gold mat was created by inking the paper with Versamark Ink then embossing it with the same embossing powder. The sentiment and flowers were adhered to the card front using foam tape. A black border was hand-drawn to frame the card. Such a quick and easy card to create!

THINKING OF YOU CARD

MATERIALS:

For this card, I wanted to change up the flower a little bit.  I stamped the flower image twice using the Enchanted Garden and the  Sea Shore Crips Dye Ink sets following the layering guide. After this, I layered them on top of each other and secured both with a post-it tape so that the layers won’t move when I simultaneously trim them into strips. Once the strips were cut, I used the die cut of the flower as a base to assemble the alternate strips of the flower.  I don’t know why but it somehow makes the flower look 3D. 🙂

Next, the image from the Book Club stamp set was embossed using Versamark Ink and Rose Gold embossing powder.  The following artist makers from set D were used to color the flowers using the flicking technique: B802, B714 and B815. The leaves were colored with Artist markers set B:R702, R823. The card front of an orange A2 card base was cut diagonally. Both die cuts where attached diagonally as well. I framed the white cardstock with the Fine  Frames Die Set which was heat embossed with Rose Gold Embossing powder to match the other floral image.  Finally, the sentiment from the Swiss Dots was also stamped and embossed.

I’M HERE FOR YOU CARD

MATERIALS:

For this last card, I wanted the flower to be the star in this card so I left the Botanical Rhapsody washi tape uncolored and the background muted. The background was done by using the Feathered Leaves Stencil with some Altenew Embossing Paste mixed with some Orange Cream Crisp Dye Ink. The stencil was placed on the front cover of an A2 card and the tinted embossing paste was evenly spread using a spatula. The stencil was carefully removed and the card was allowed to dry.

The white areas were then colored using Wink of Stella clear just to add some shimmer.  To make it easier to cut, the Botanical Rhapsody Washi Tape was stuck to a white cardstock then fussy cut. I used the Artist Marker WG03 from Set B to color a piece of cardstock  to match the Botanical Rhapsody washi flowers/leaves then I heat embossed the sentiment from Forever and Always using Versamark Ink with Pure White Embossing Powder. Flowers and foliage were arranged and glued down using adhesive and foam squares.

I hope you liked the cards I created for this release. Make sure to drop by the Altenew Card Blog and check out the other creative ways this stamp set can be used. It may also be a good idea to sign up for the Build-A-Flower Monthly subscription plan. When you are signed up, you are guaranteed a spot in the monthly BAF releases and will receive a set each month – at a specially discounted price! ($35.00 →$29.99).

To celebrate this release, Altenew is giving away a $30 gift certificate to 6 lucky winners! Please leave a comment on the Altenew Card Blog and/or Altenew Scrapbook Blog for a chance to win.

Altenew will also draw a winner to receive a $15 gift certificate from the comments left on each designer’s blog on the blog hop list below. All winners will be announced on the Altenew blogs on 7/7/2019.

Next up is the talented Irna Fonina. In case you are lost, below you will find the entire blog hop order. Make sure to leave a comment below to get a chance to win, ok? I truly appreciate you stopping by. If you liked my projects, it would be wonderful if you can follow me on Instagram (@mylittleatticstudio) and Facebook at My Little Attic Studio<3 Thank you so much for dropping by! Till my next post <3

BLOG HOP ORDER