Hello everybody!!! It’s so nice to be with my co-educators again for another blog hop. 😊 If you just came from Maryam Sharara‘s blog, then you’re on the right track. Make sure you drop by the Altenew Blog for complete details of the hop.
This blog hop is all about stencils. Altenew has quite a number of beautiful stencils. Here are some creative ways on how you can make some backgrounds using stencils to create some CAS and dimensional cards. I also included some tips on how to fix mistakes, too.
BE OUR OWN KIND OF BEAUTIFUL
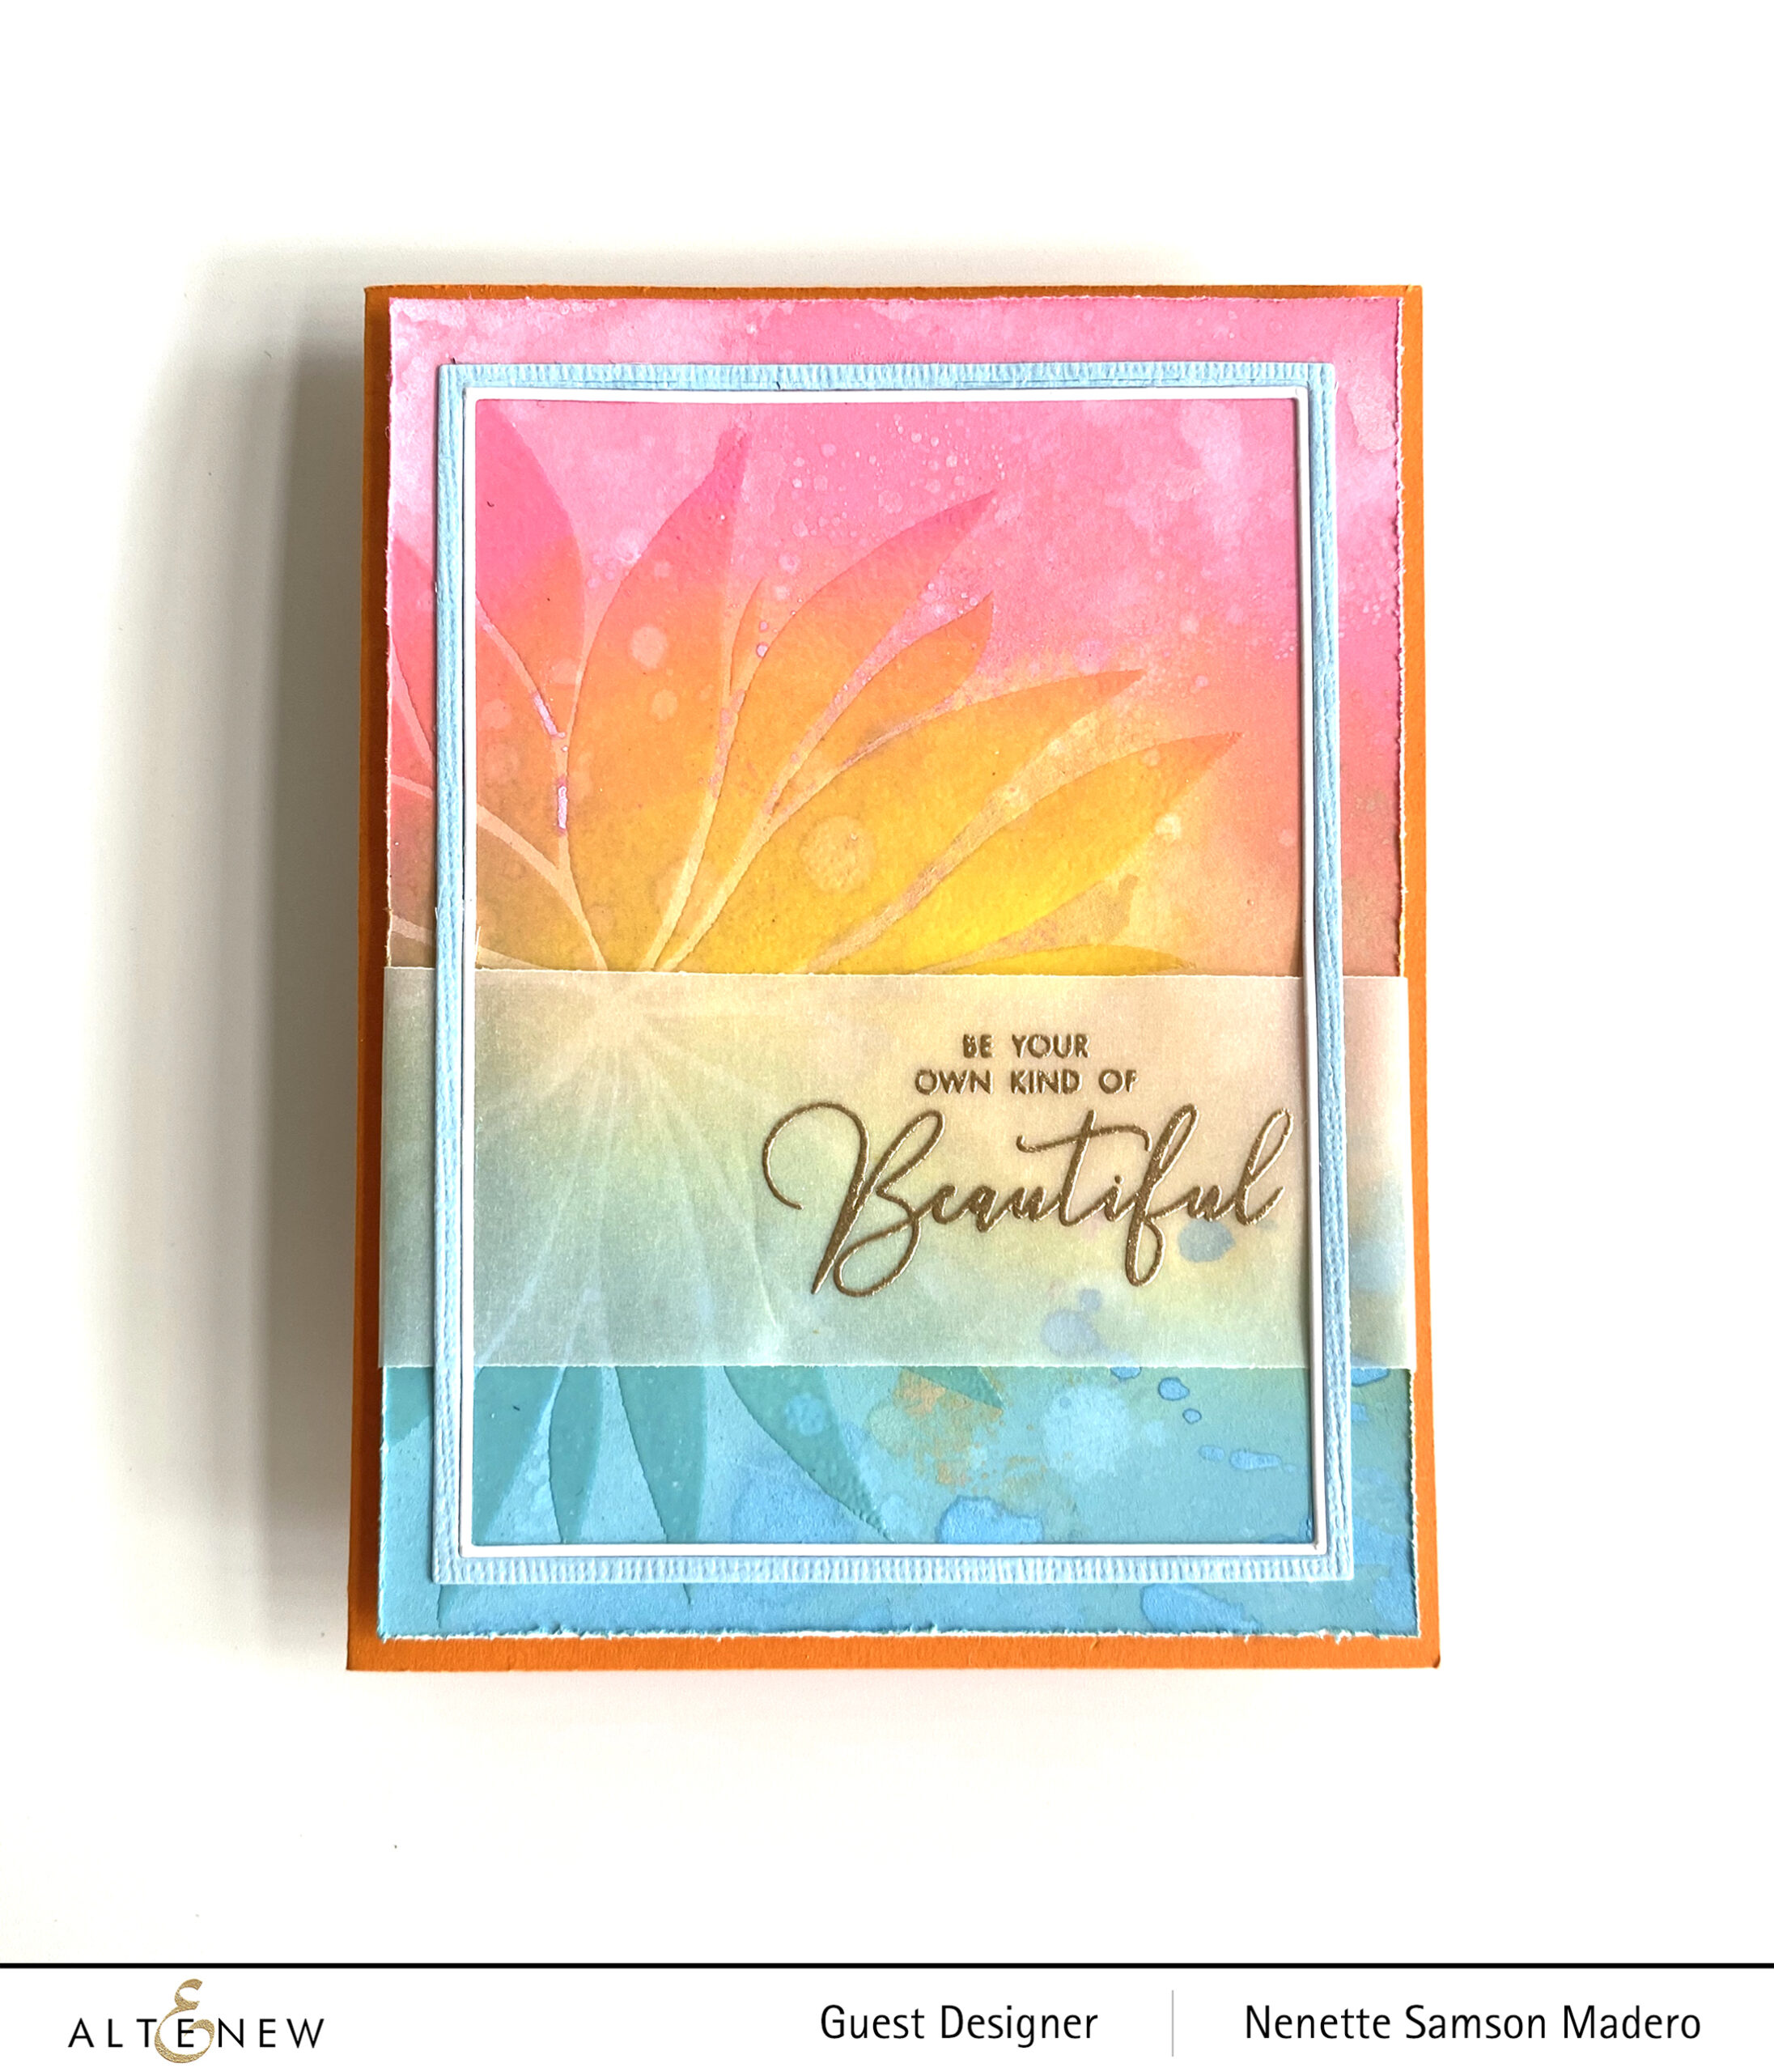
I made a lot of backgrounds for this blog hop. For this first card, watercolor paper was colored using distress inks. I love how oxide inks are easy to blend together. Water splatters were added to create some texture. When this was dry, the Bursting Dahlia stencil was placed on top then Versamark Ink was pressed through the openings of the petals.
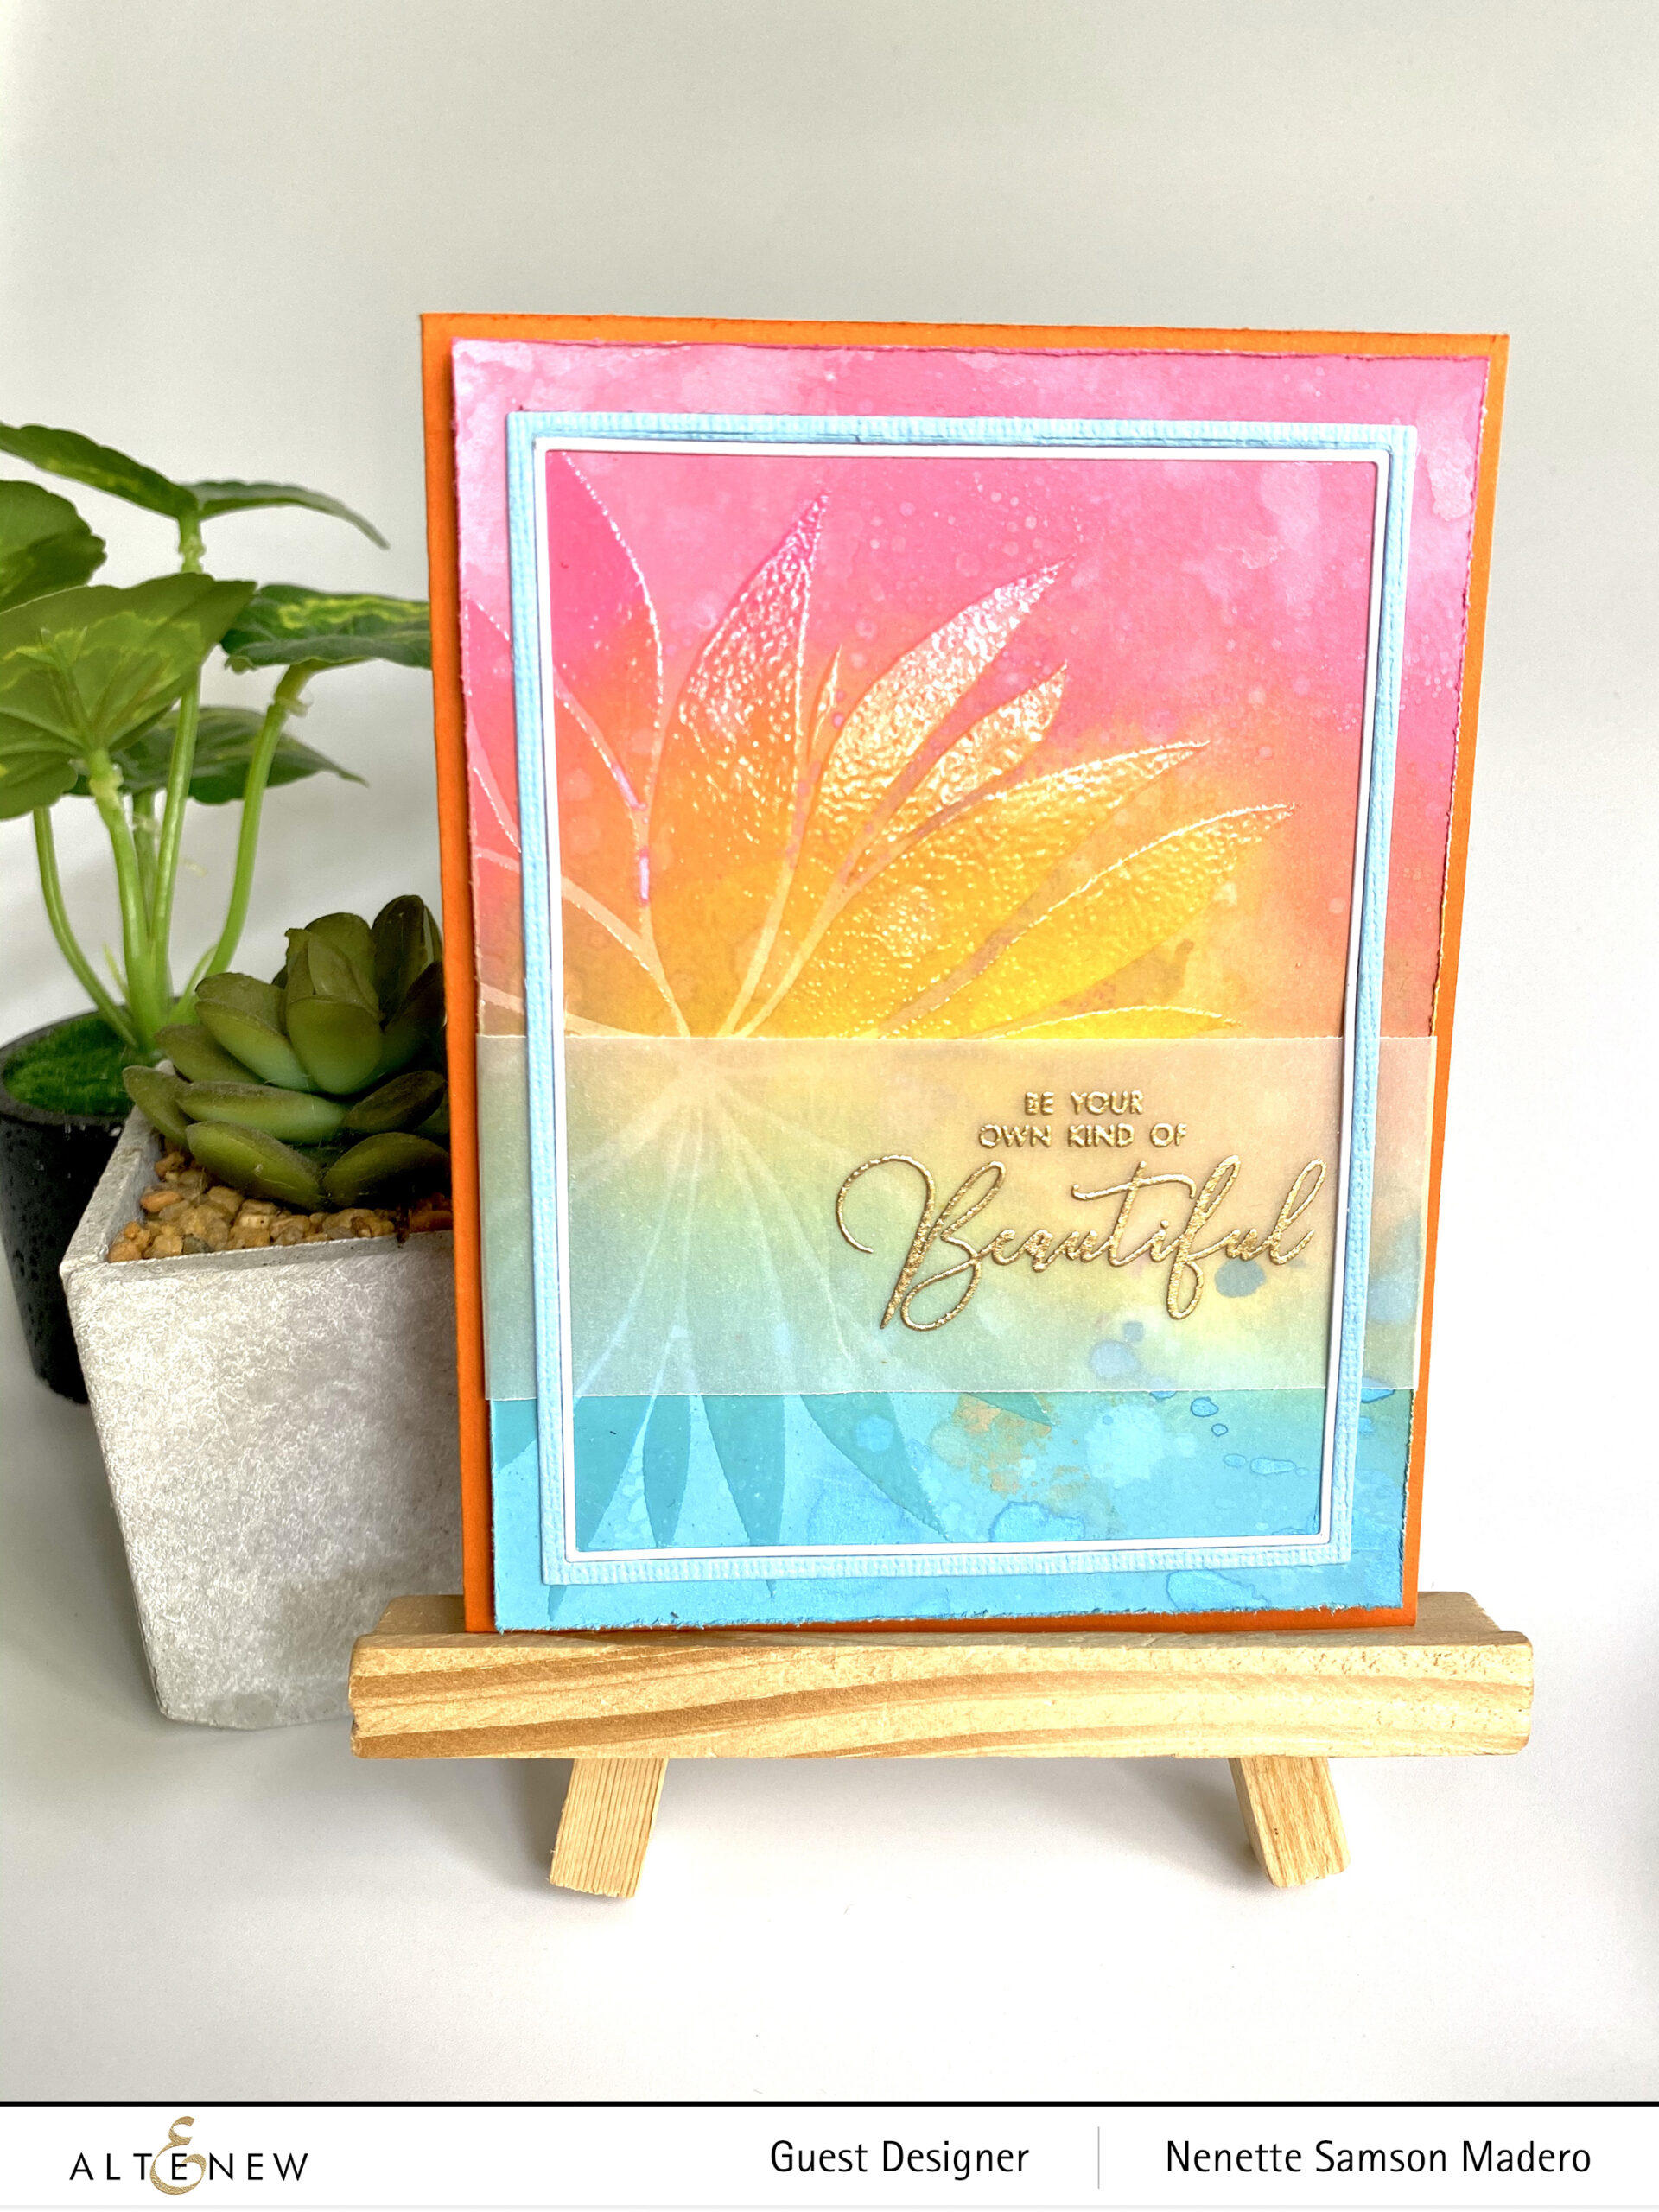
The image was embossed using Crystal Clear embossing powder and this automatically made the image darker than the background. The sentiment from the Paint-A-Flower: Paeonia Japonica was stamped on vellum and embossed using my all-time favorite gold embossing powder- the Rose Gold embossing powder. I added frames to finish the card. The edges of the panel were distressed using a paper distresser then this was mounted on a card front using foam squares.
I’M HERE FOR YOU
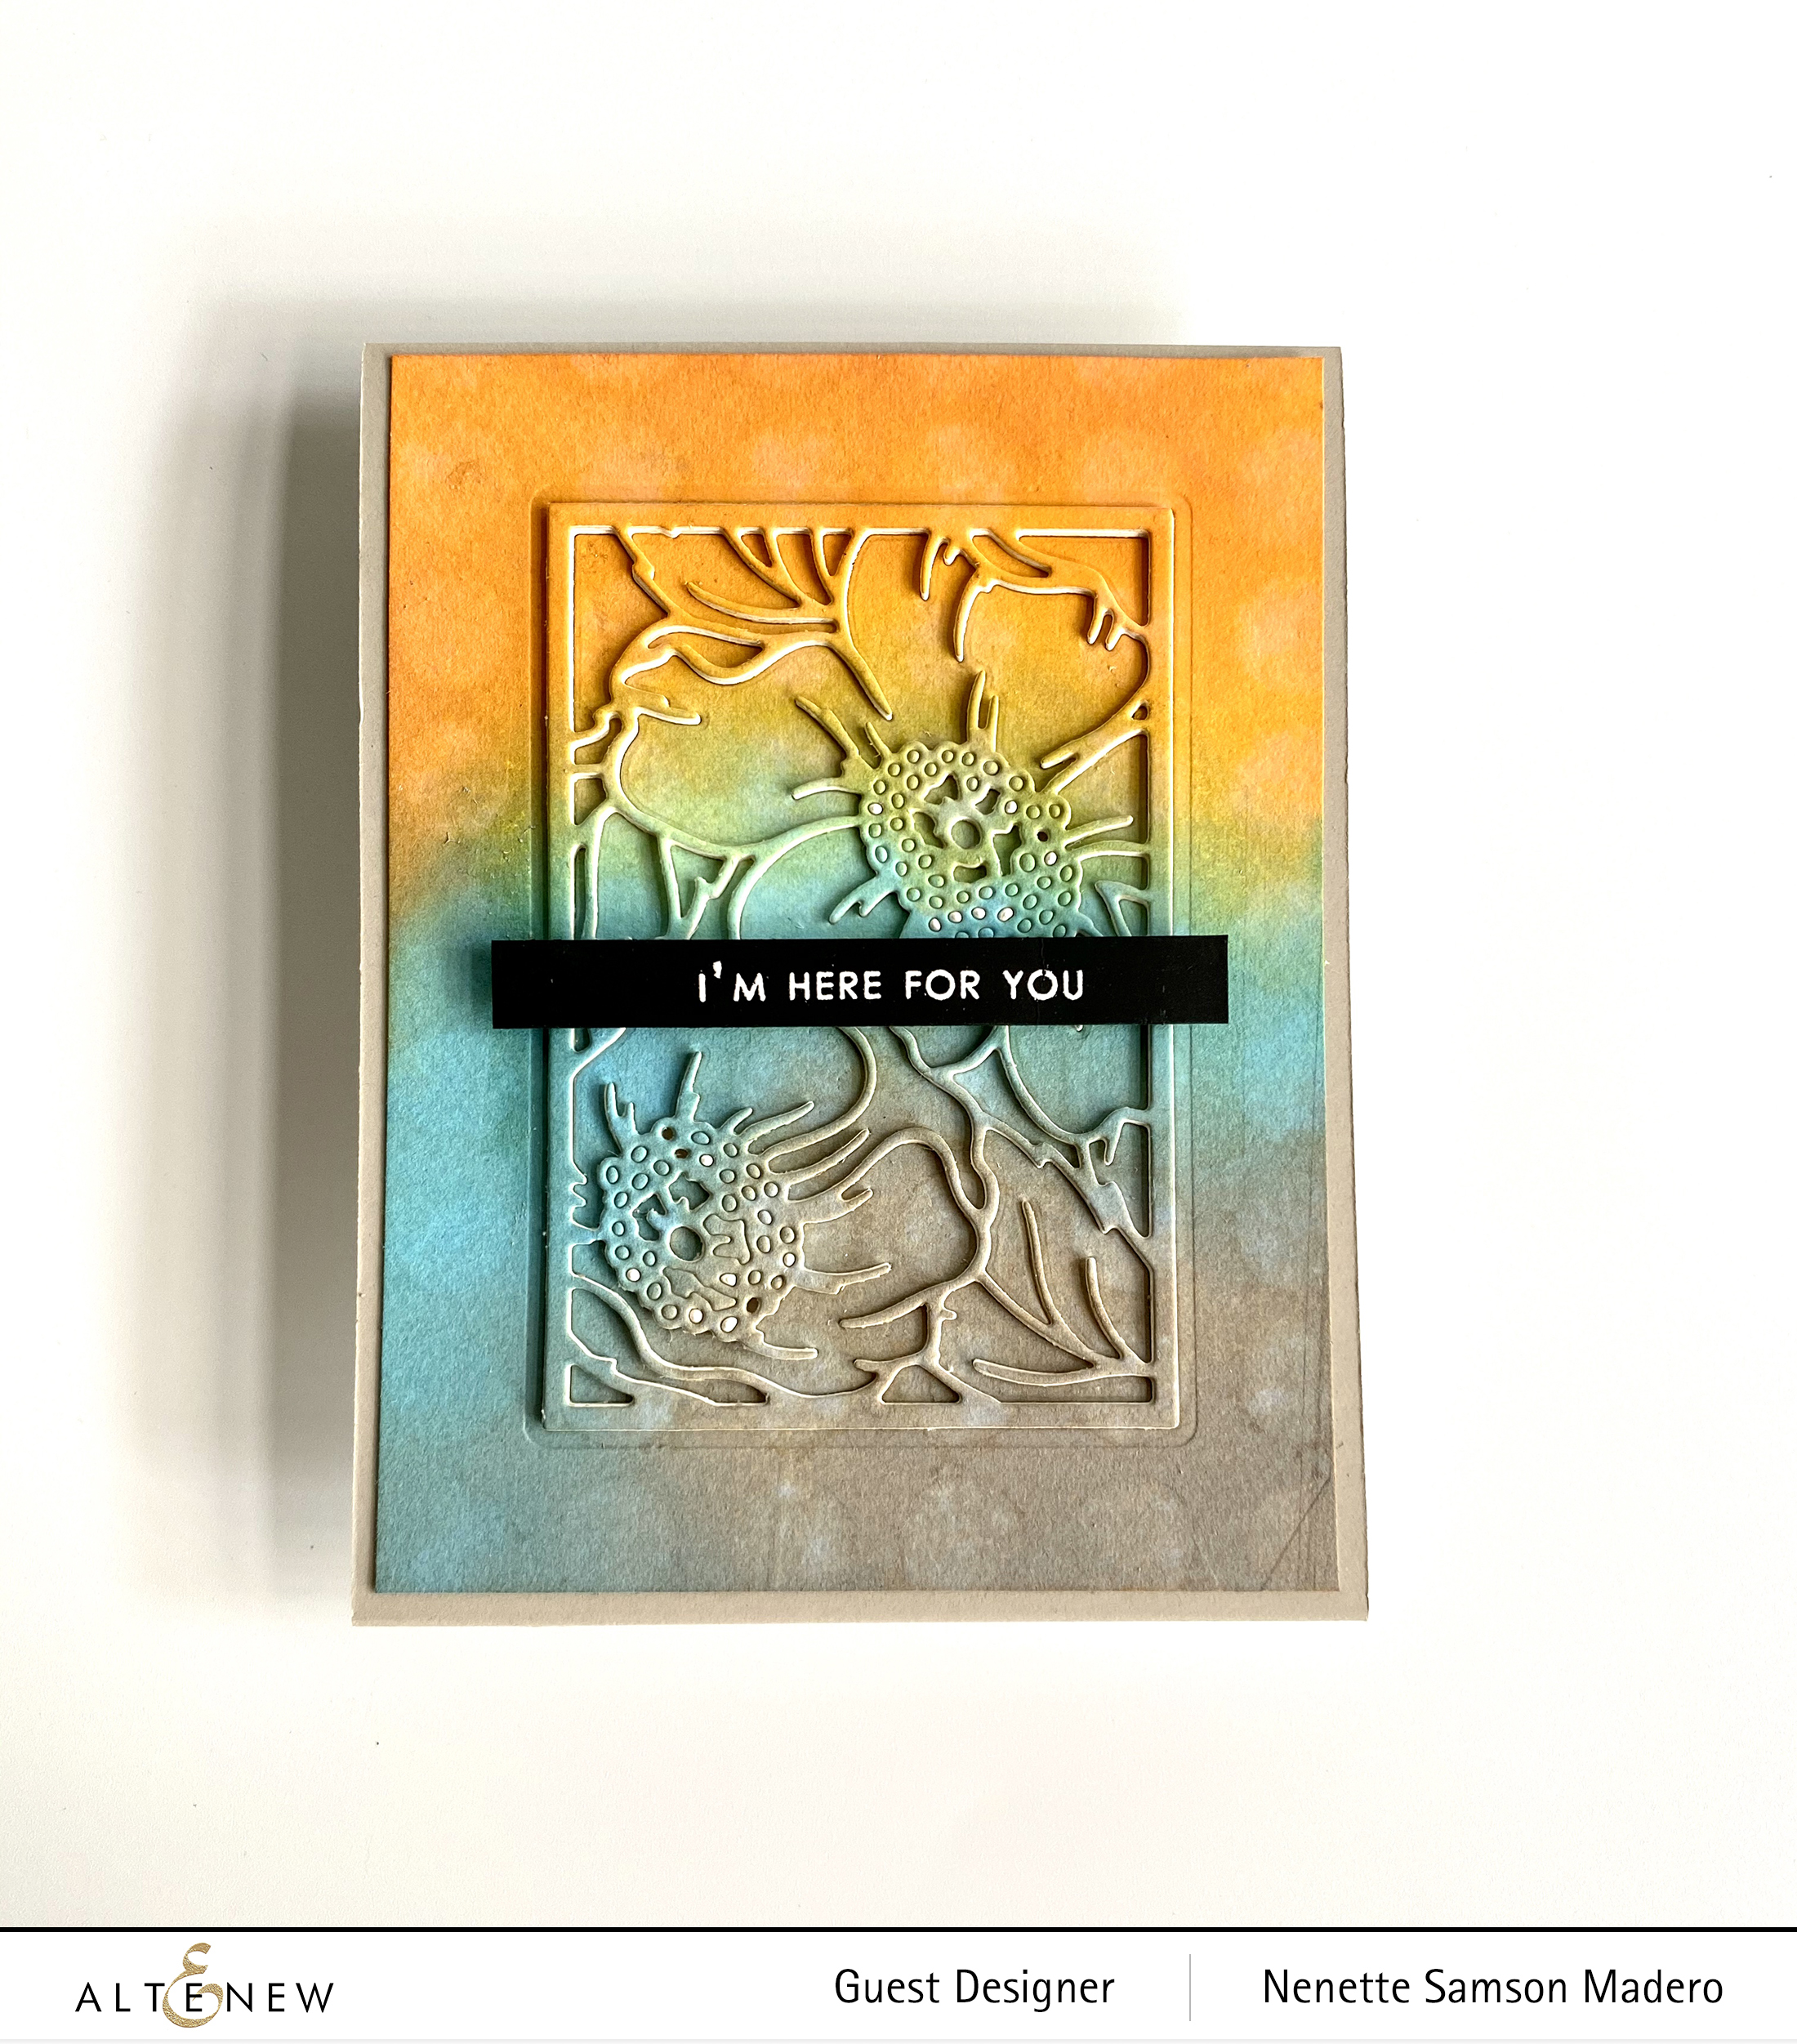
Here’s another background I made using distress inks. After applying the inks onto Neenah solar white cardstock, I placed the bubble wrap stencil on top and sprayed over with water using light mist only. Then I used a baby wipe to go over the stencil and remove some ink. This is called the ghosting technique and I love the subtle effect of the dots. I learned this technique from Dyan Reaveley.
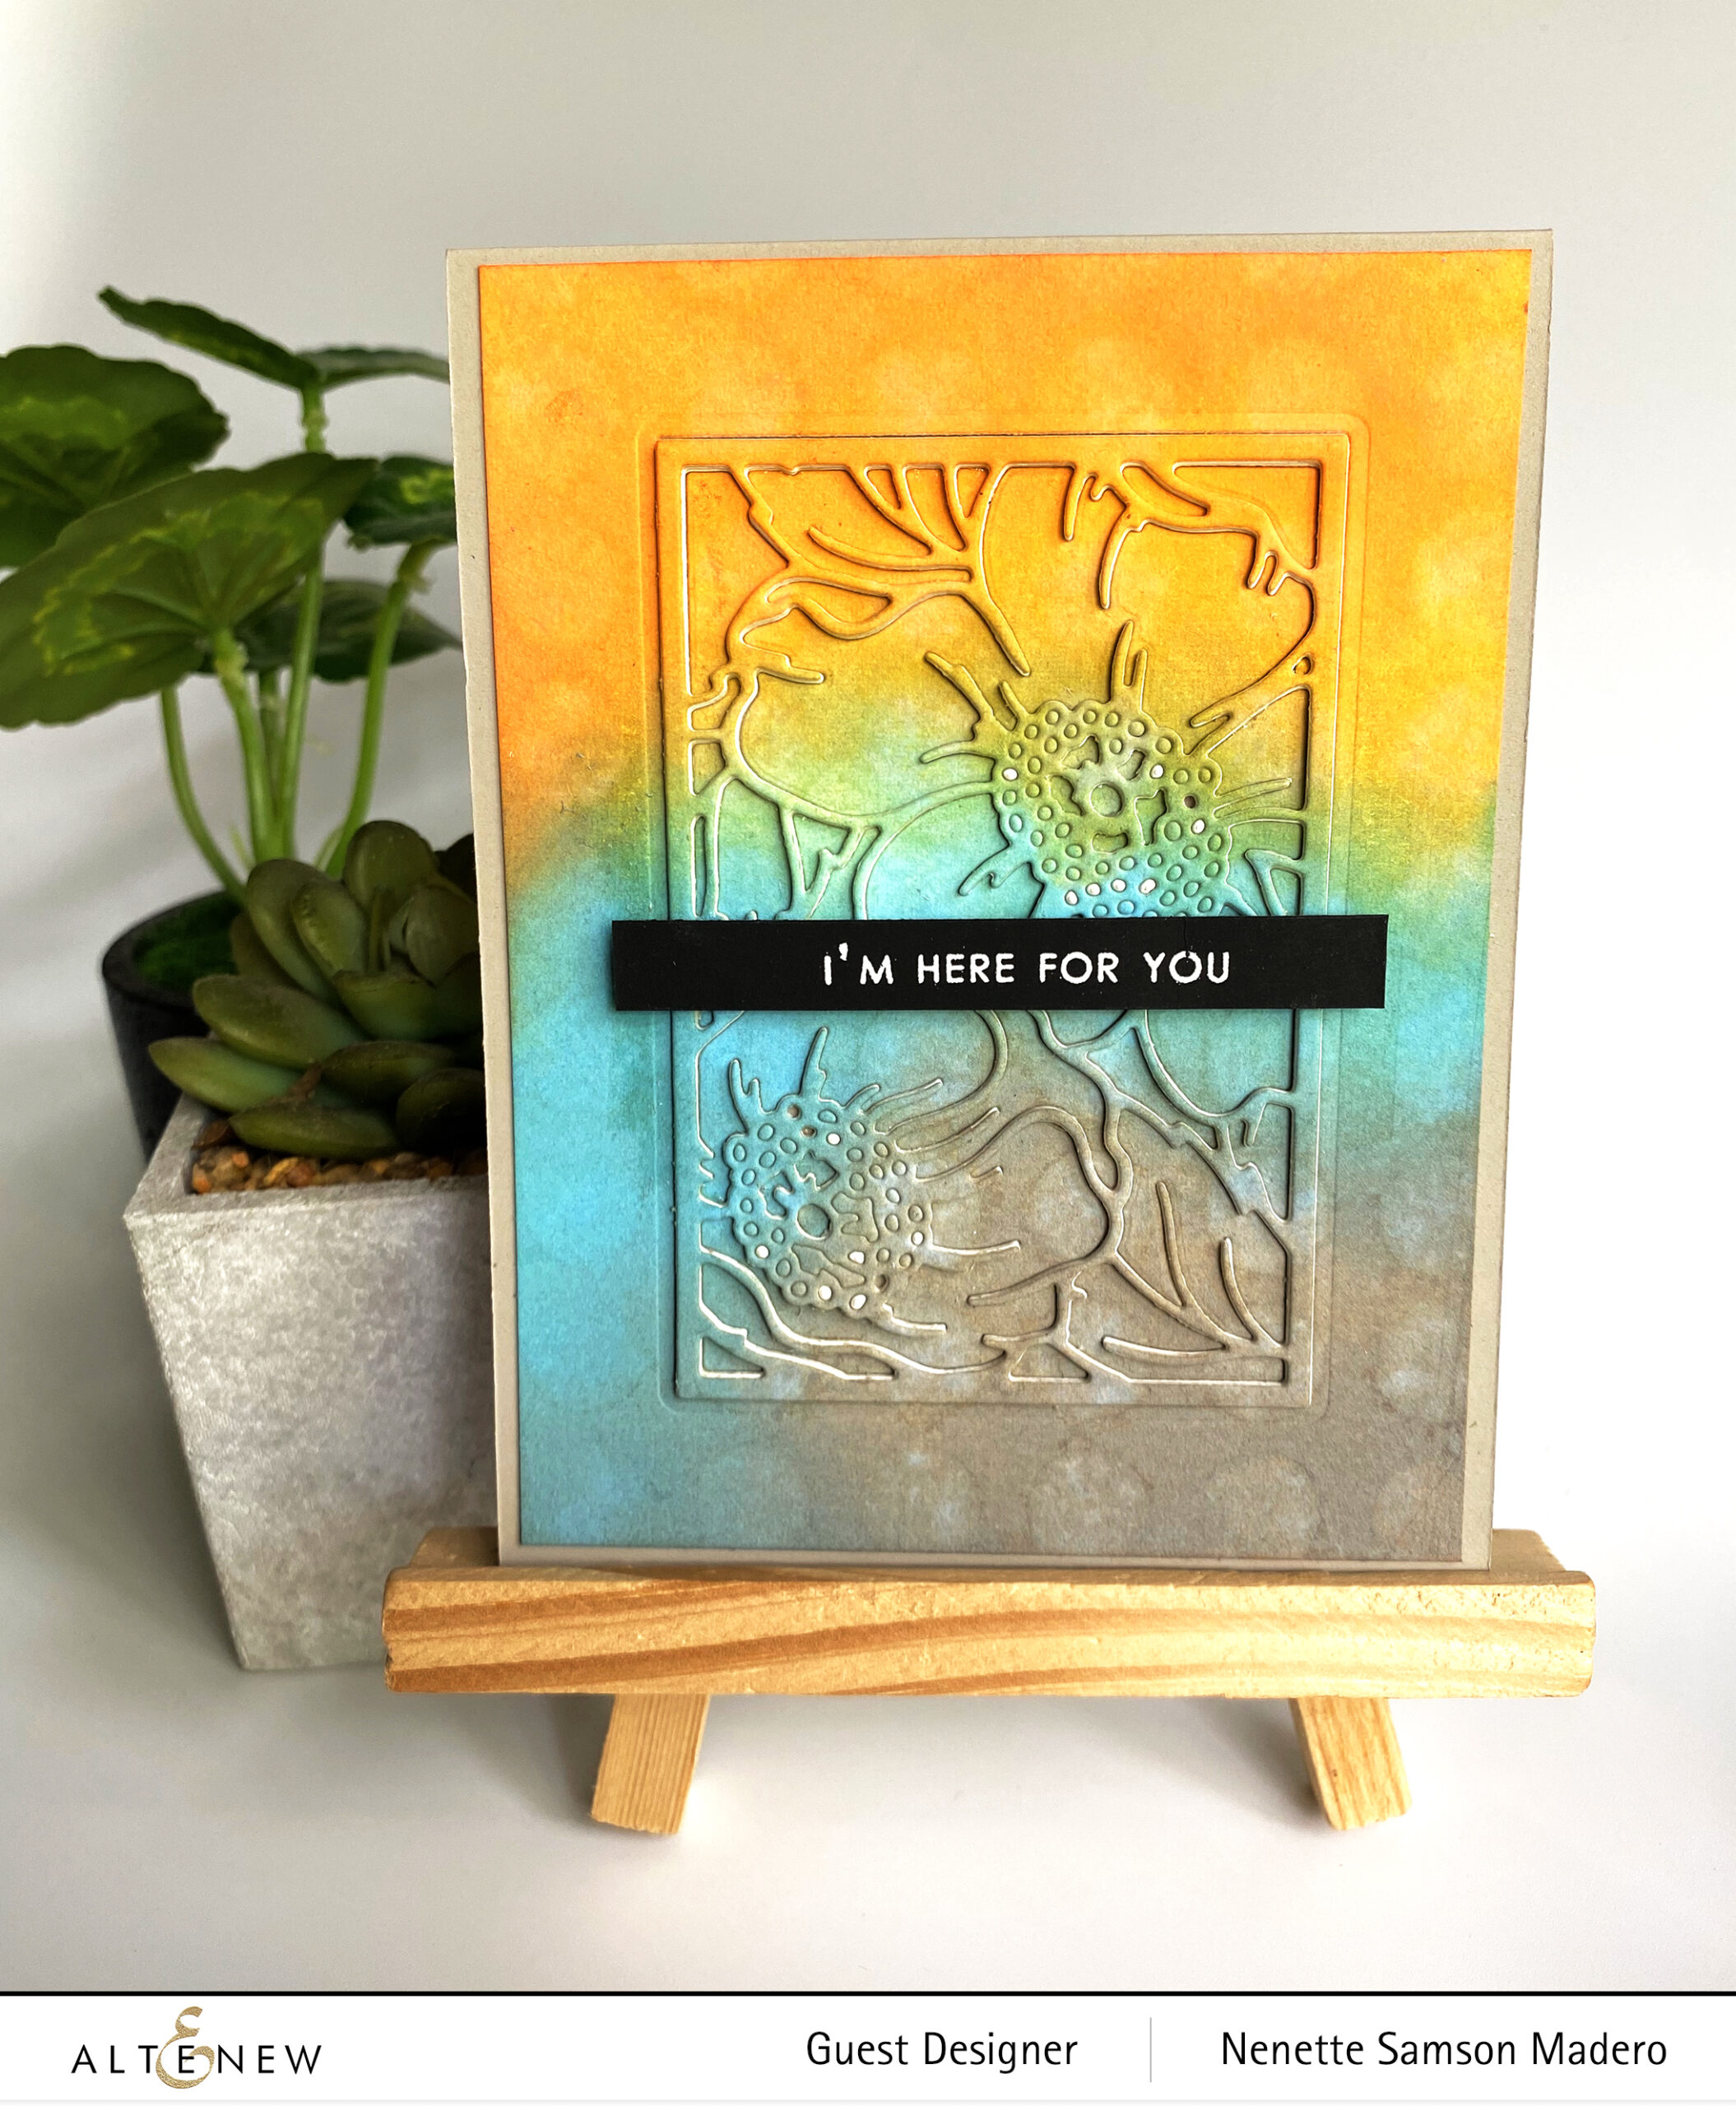
When the panel was dry, I used the Dog Rose Panel A to die cut the floral image. The sentiment was stamped on black cardstock using Versamark Ink and white embossing powder then mounted using foam tape.
THANK YOU
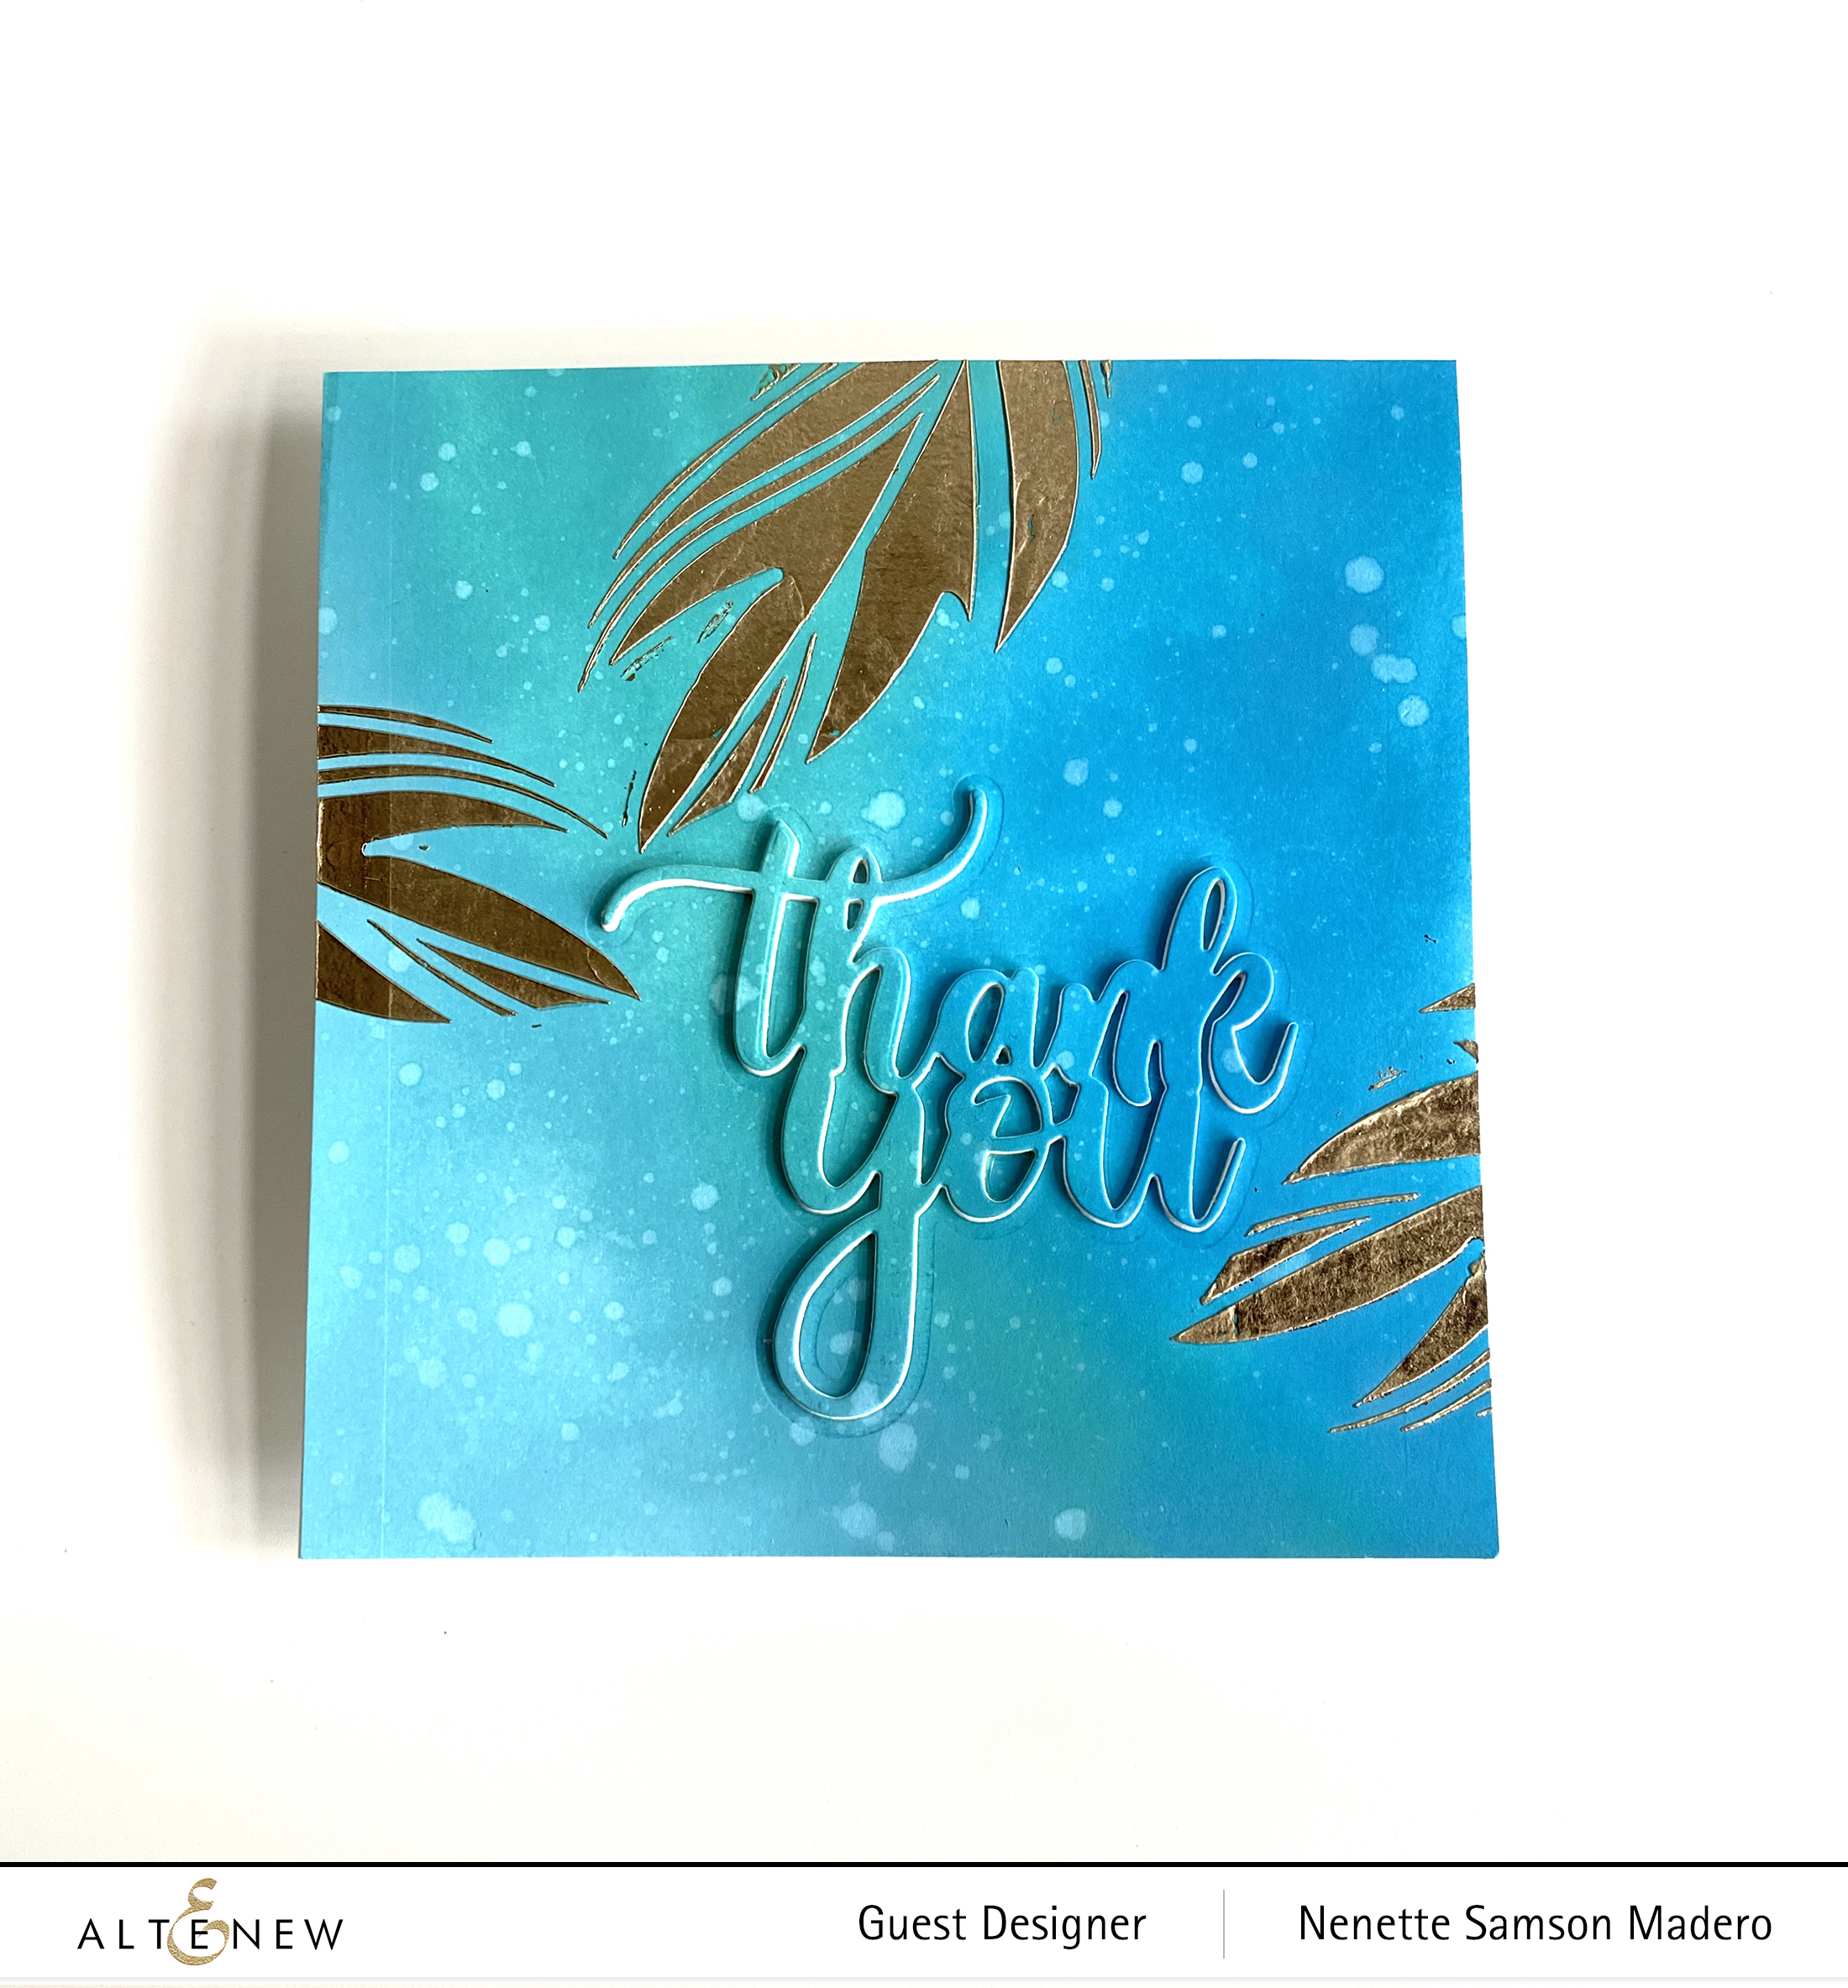
Here’s a simple card using foil. The background was colored using shades of blues then I selected only certain parts of the stencil to add the transfer gel. The rest of the stencil was covered with post-it notes to prevent the gel from going to the other areas of the stencil.

I should have die cut the thank you sentiment before applying the transfer gel cause when I ran it through the die cutting machine, the shininess of the foil became dull. 😥 So next time, I’ll make sure to do the foiling last.
TRUE FRIENDS ARE EVERYTHING
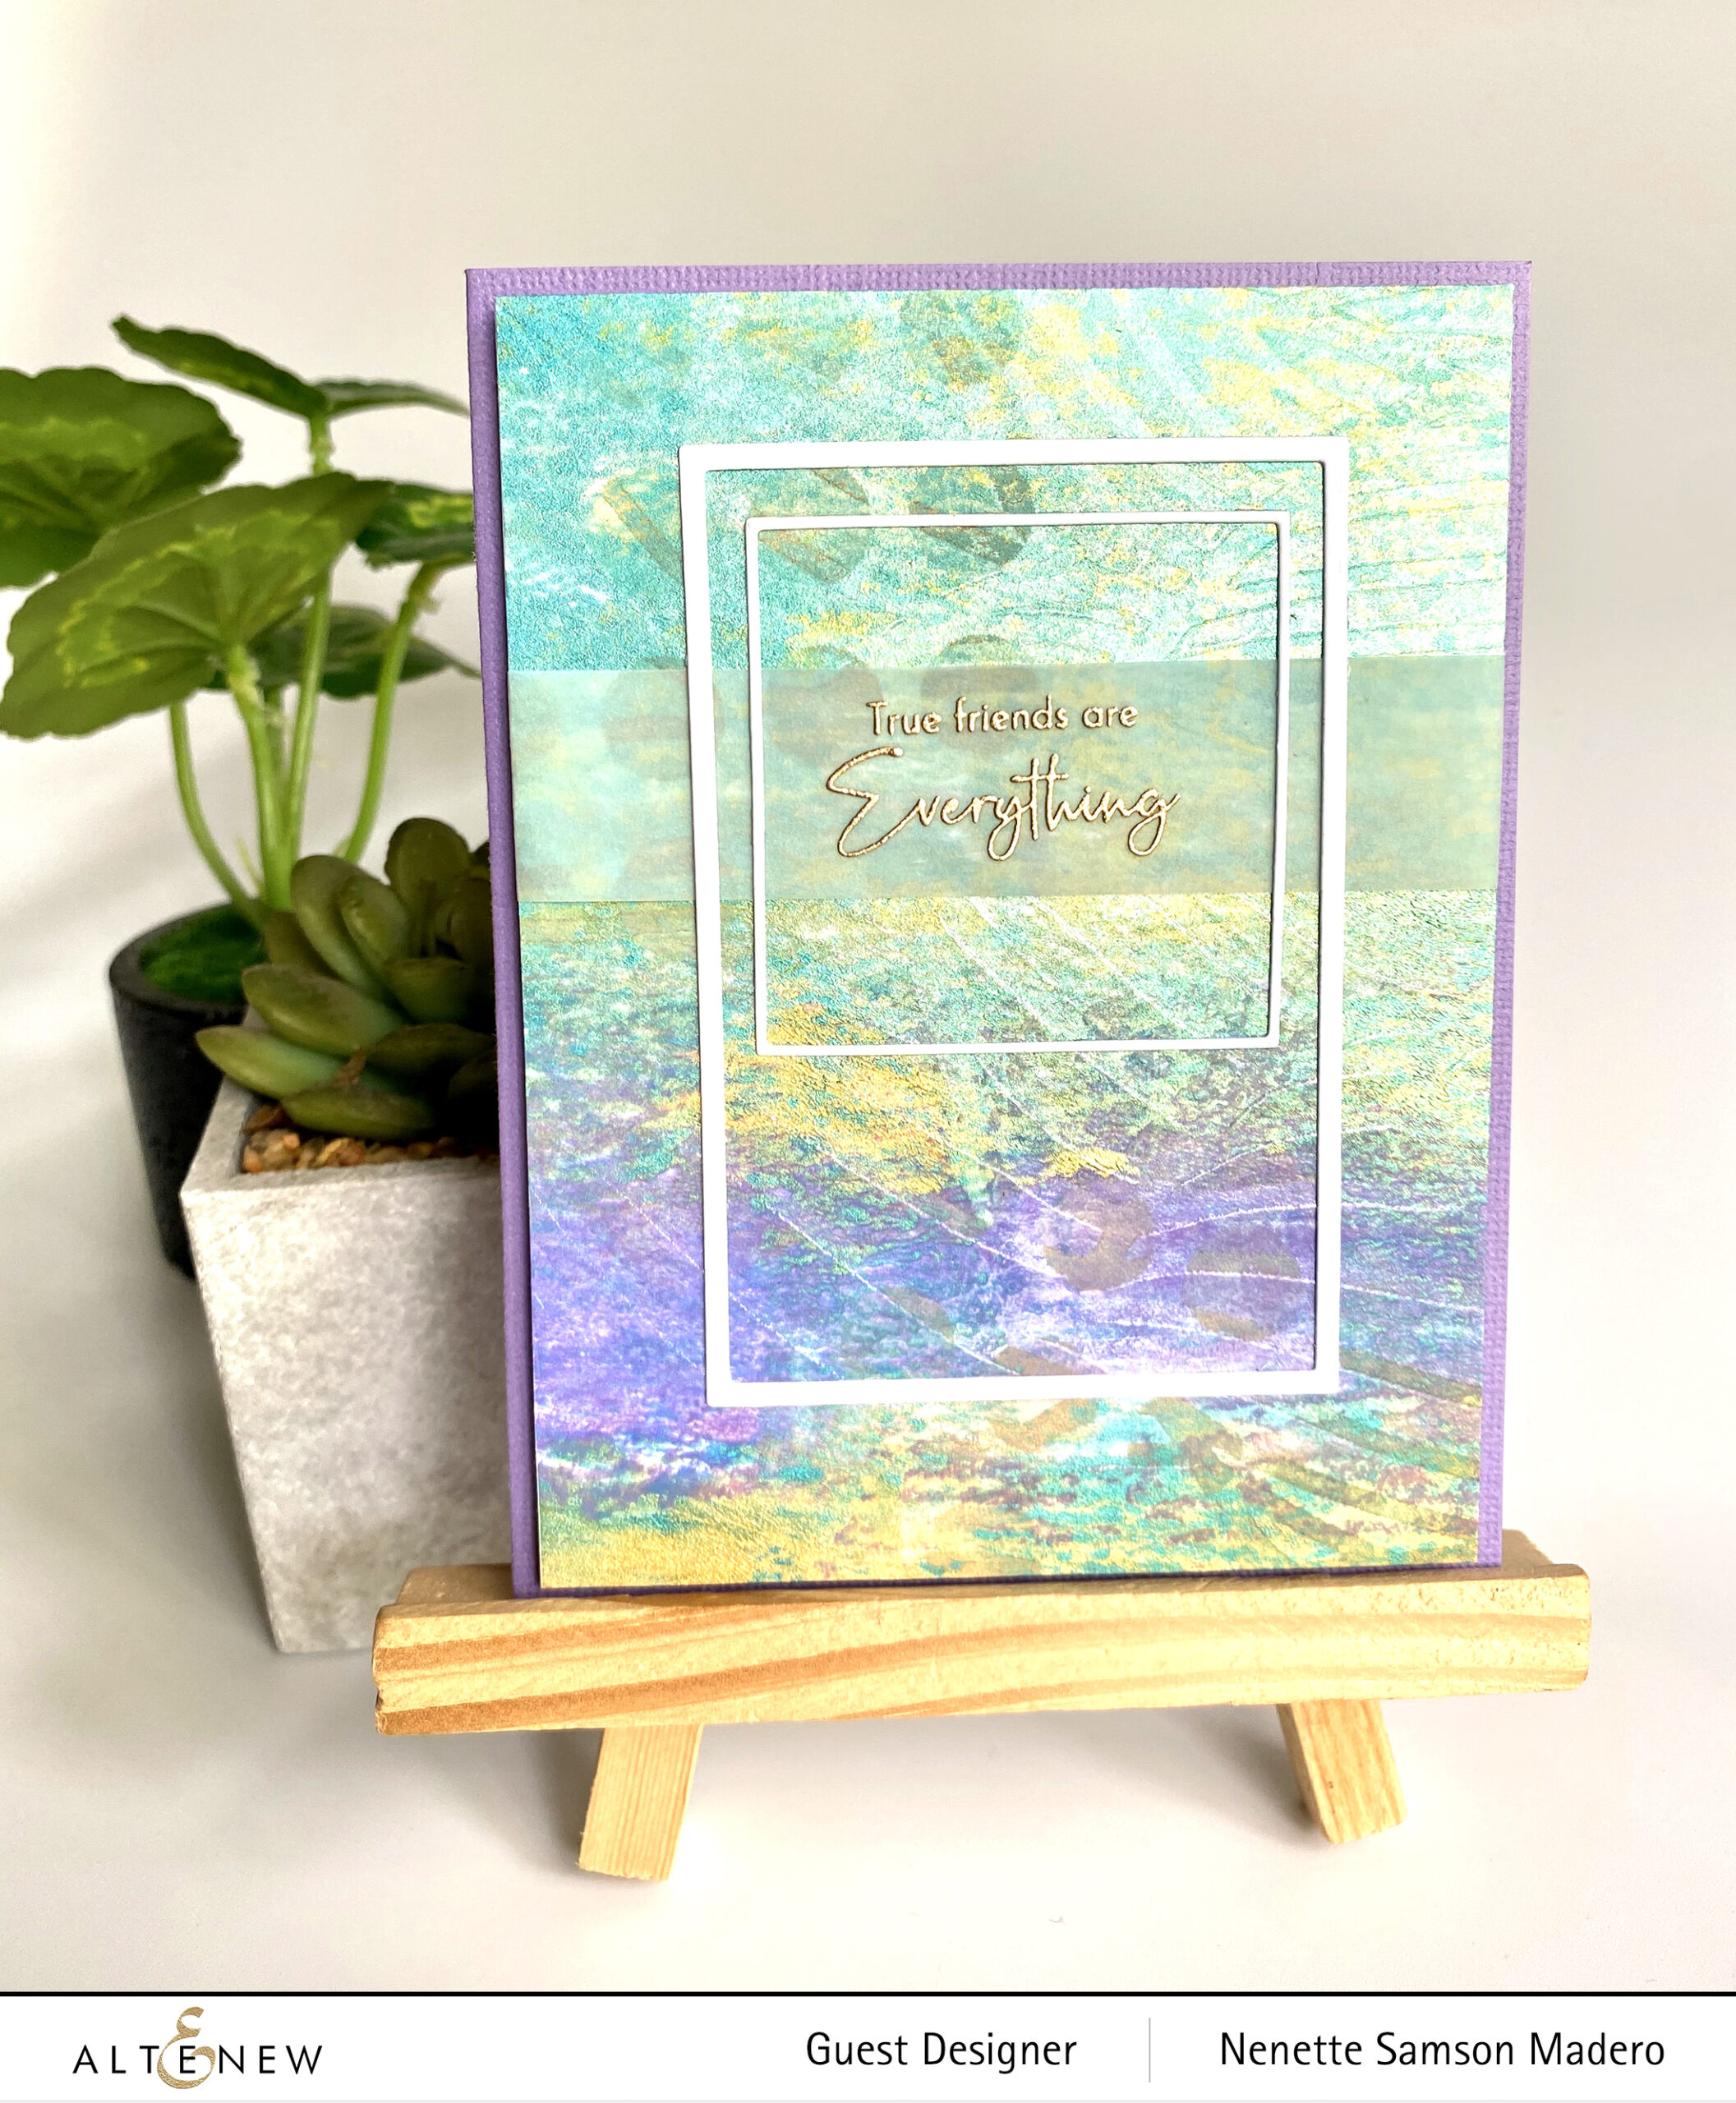
I had my Gelli plate out since I recently used it for my last blog hop so I thought of creating more monoprints using stencils. First, I added dots of assorted acrylic paints on the Gelli plate. I made sure to use colors that will go well together. A brayer was used to spread the paint on the plate. This was allowed to dry then a thin coat of white acrylic paint was added. Neenah solar white CS was used to pick up the monoprint.
When this was dry, I used the bubble wrap stencil to add some circles here and there using a distress ink tool and frayed burlap oxide ink. The Feathered leaves stencil was then put on top then Versamark ink and clear embossing powder was used to create another layer. I love the layers on this card and the subtle texture the stencil added.
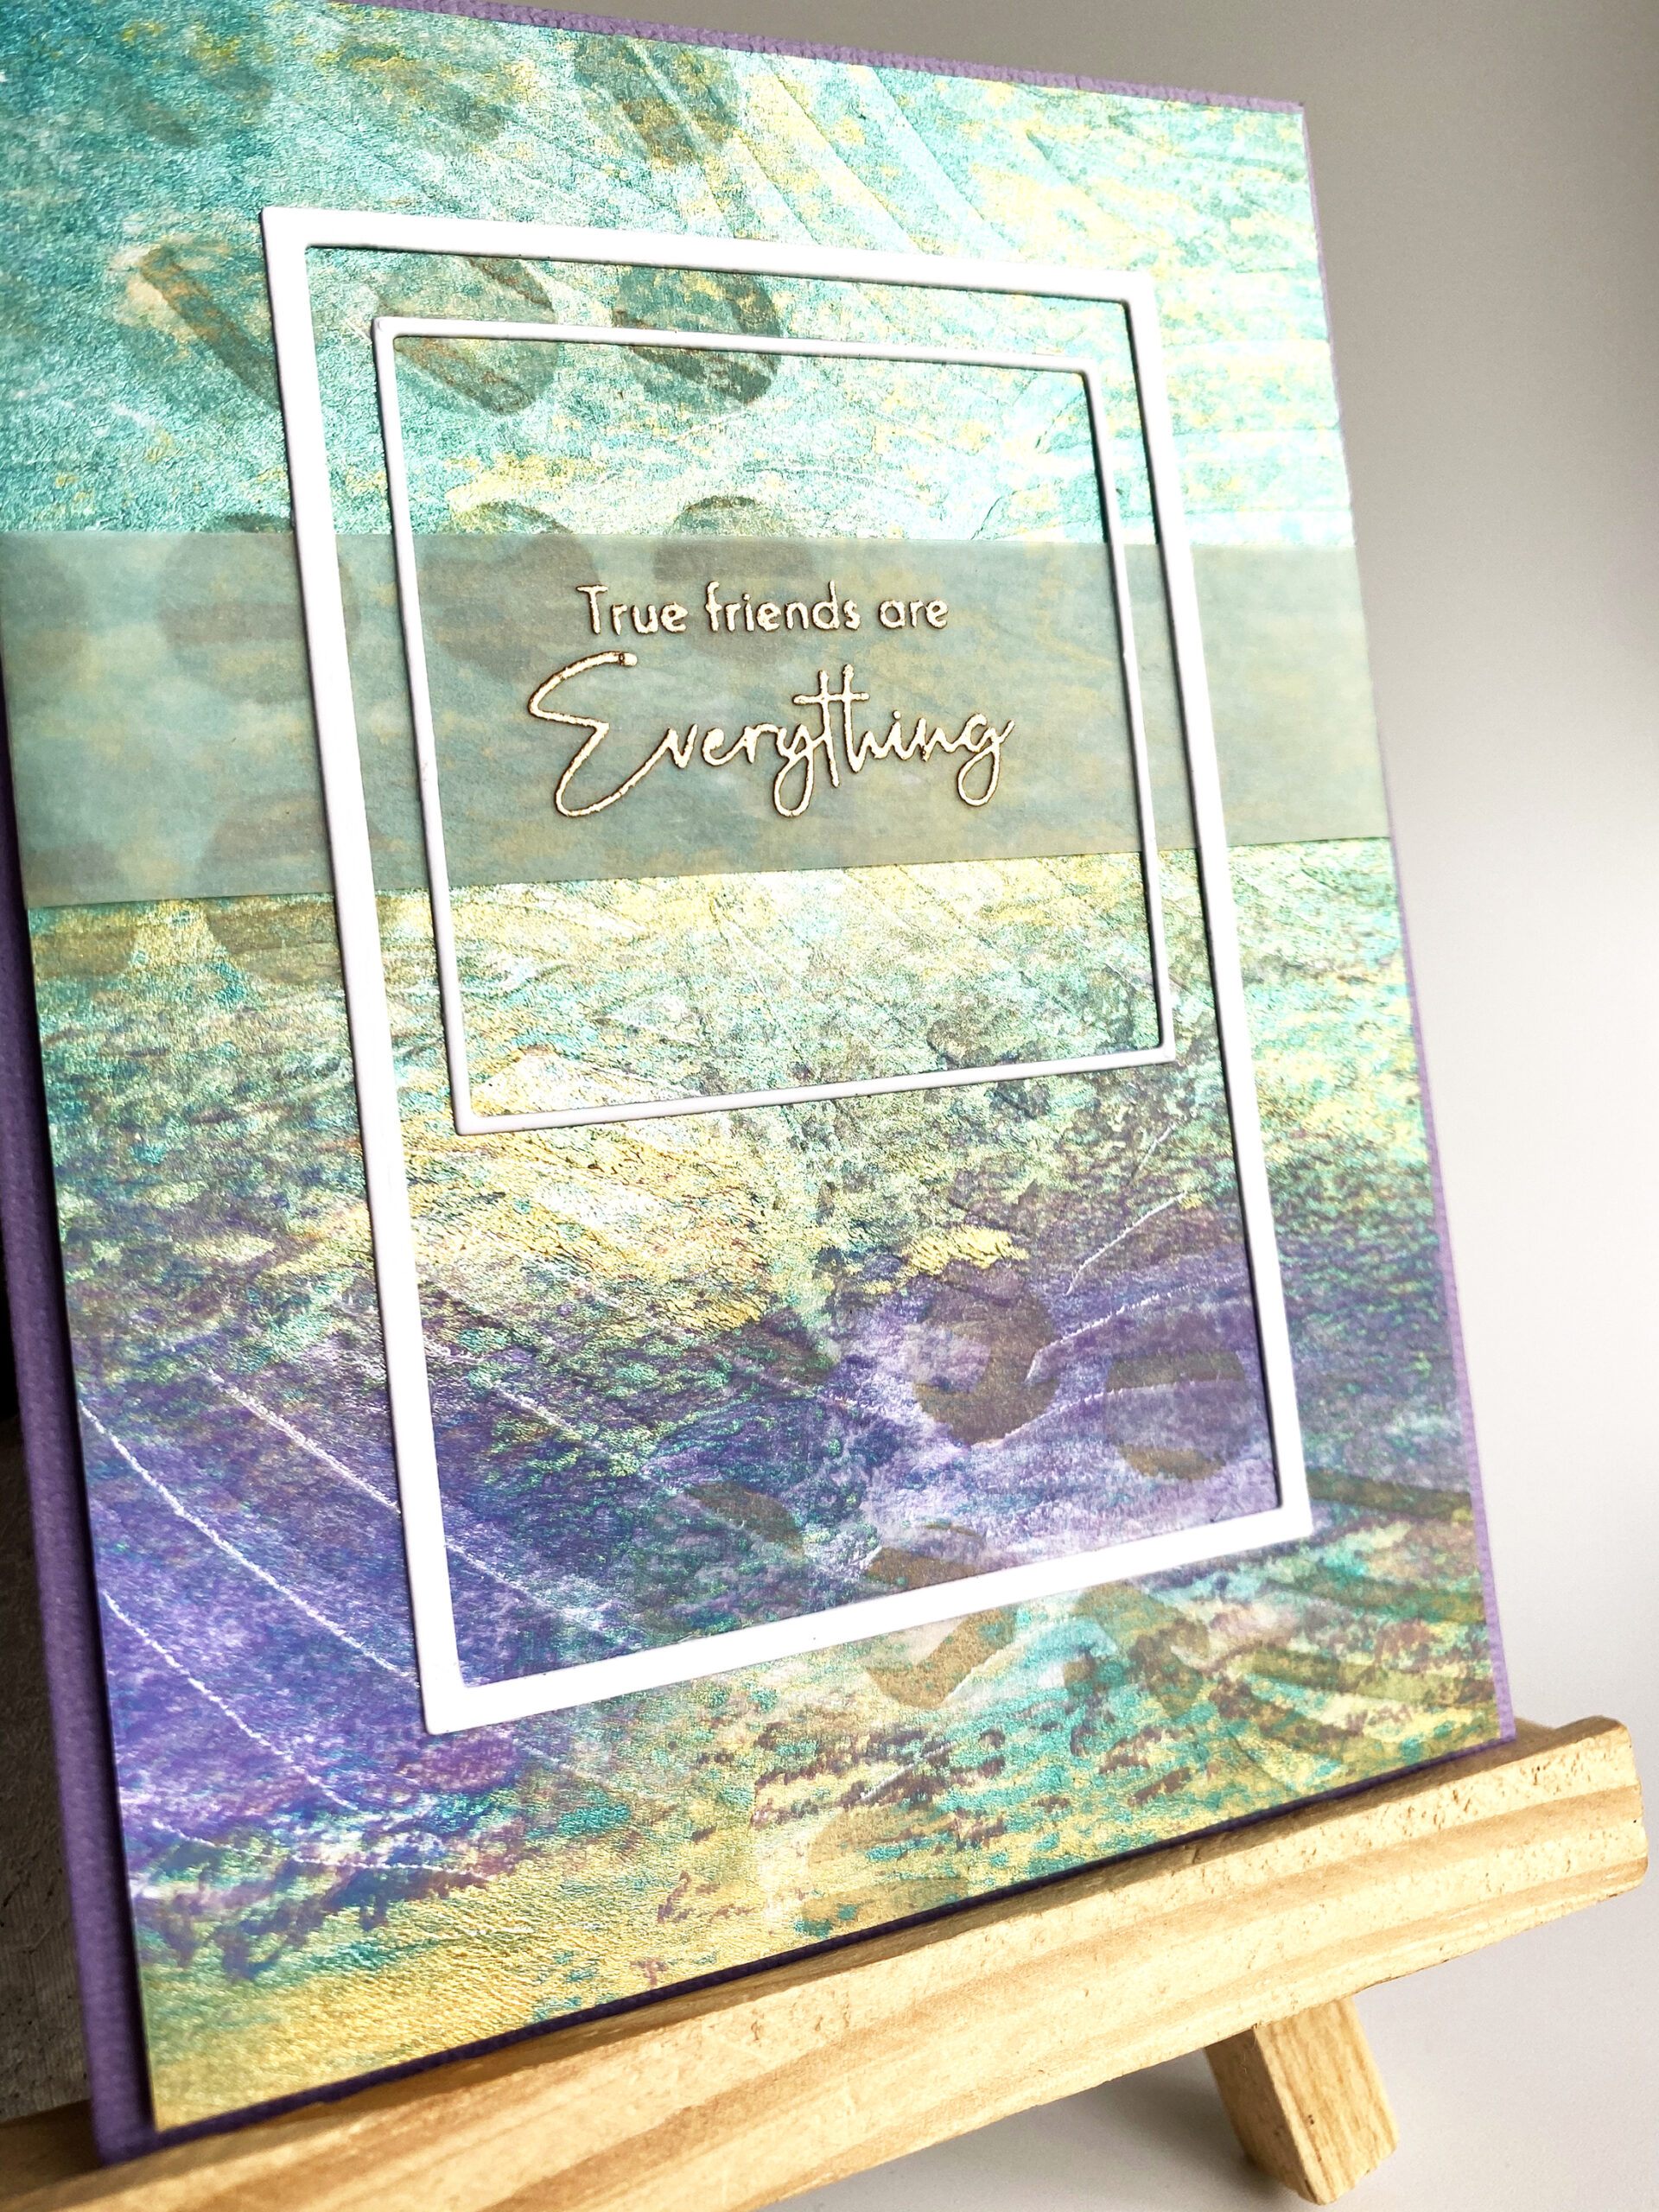
The sentiment was stamped on vellum then I used 2 different sets of frames to highlight the sentiment.
I HAVE BEEN THINKING OF YOU
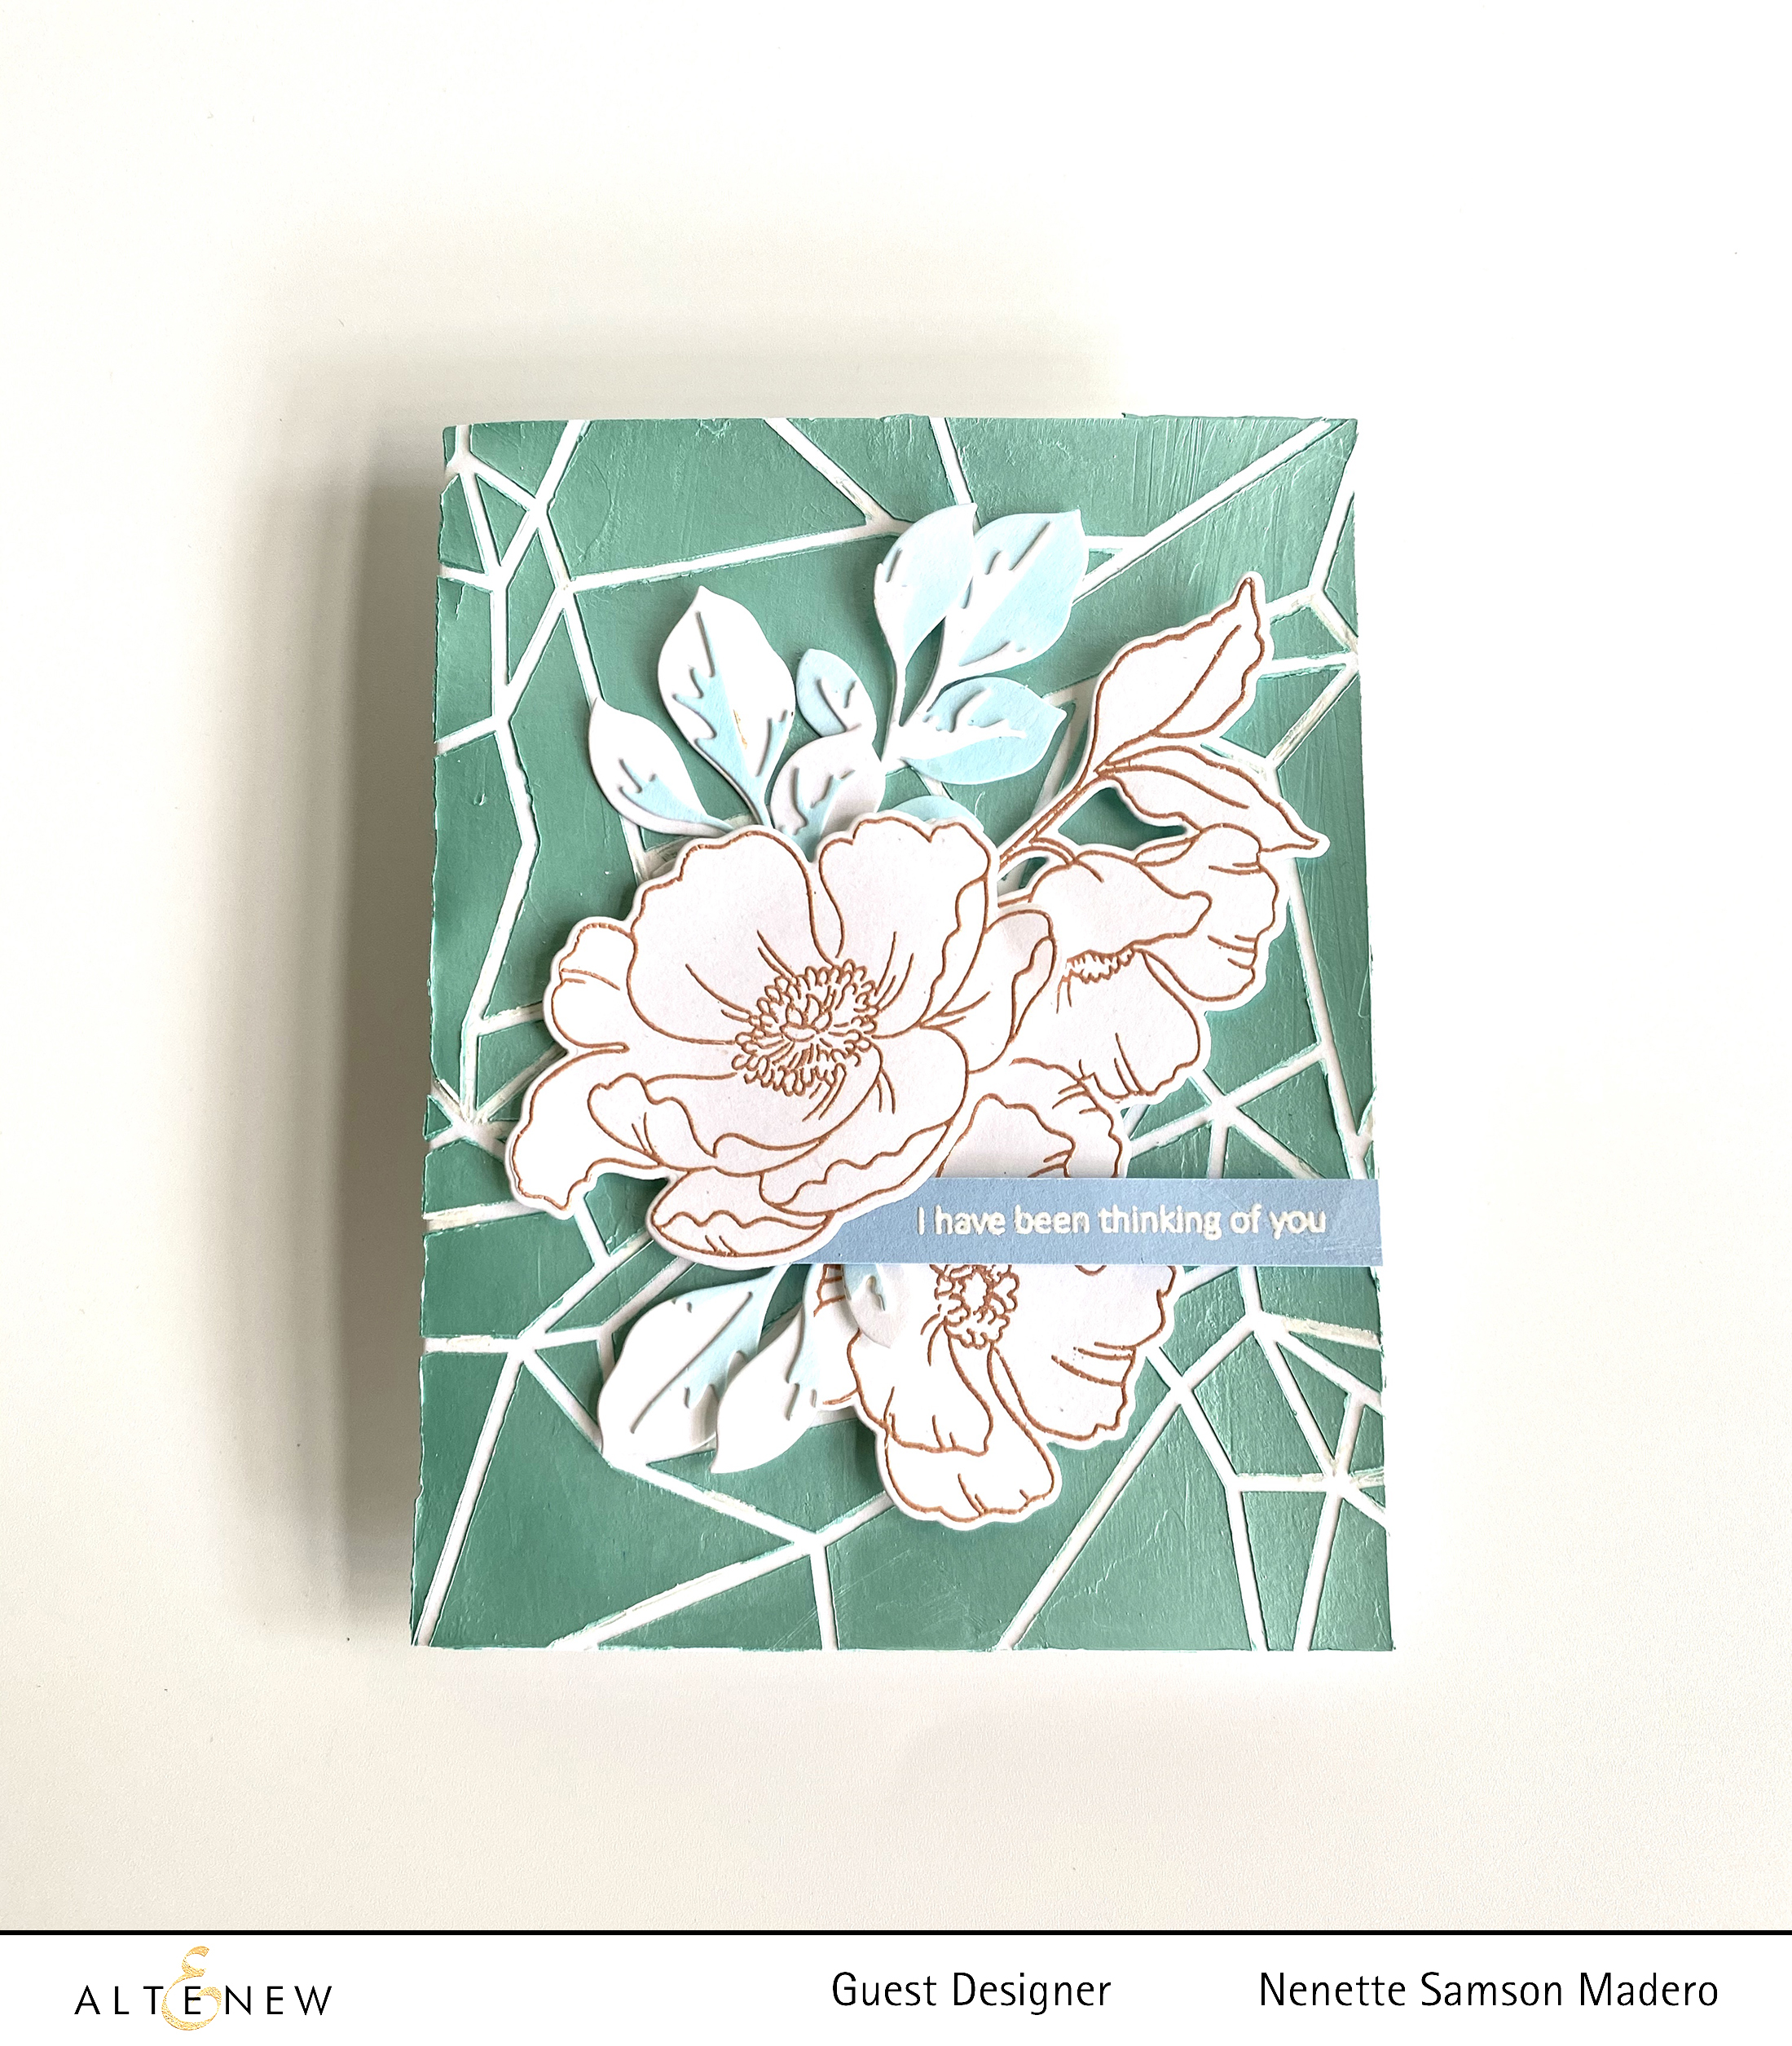
I made another background using the Geometric Landscape Stencil and the Nuvo mousse for added dimension. I allowed it to dry while stamping and embossing the flowers from the Poppy Garden stamp set. I also die cut the leaves from the Garden Picks 3d die. The sentiment from the Poppy Garden set was embossed using white embossing powder while the flowers were embossed using Golden Peach embossing powder.
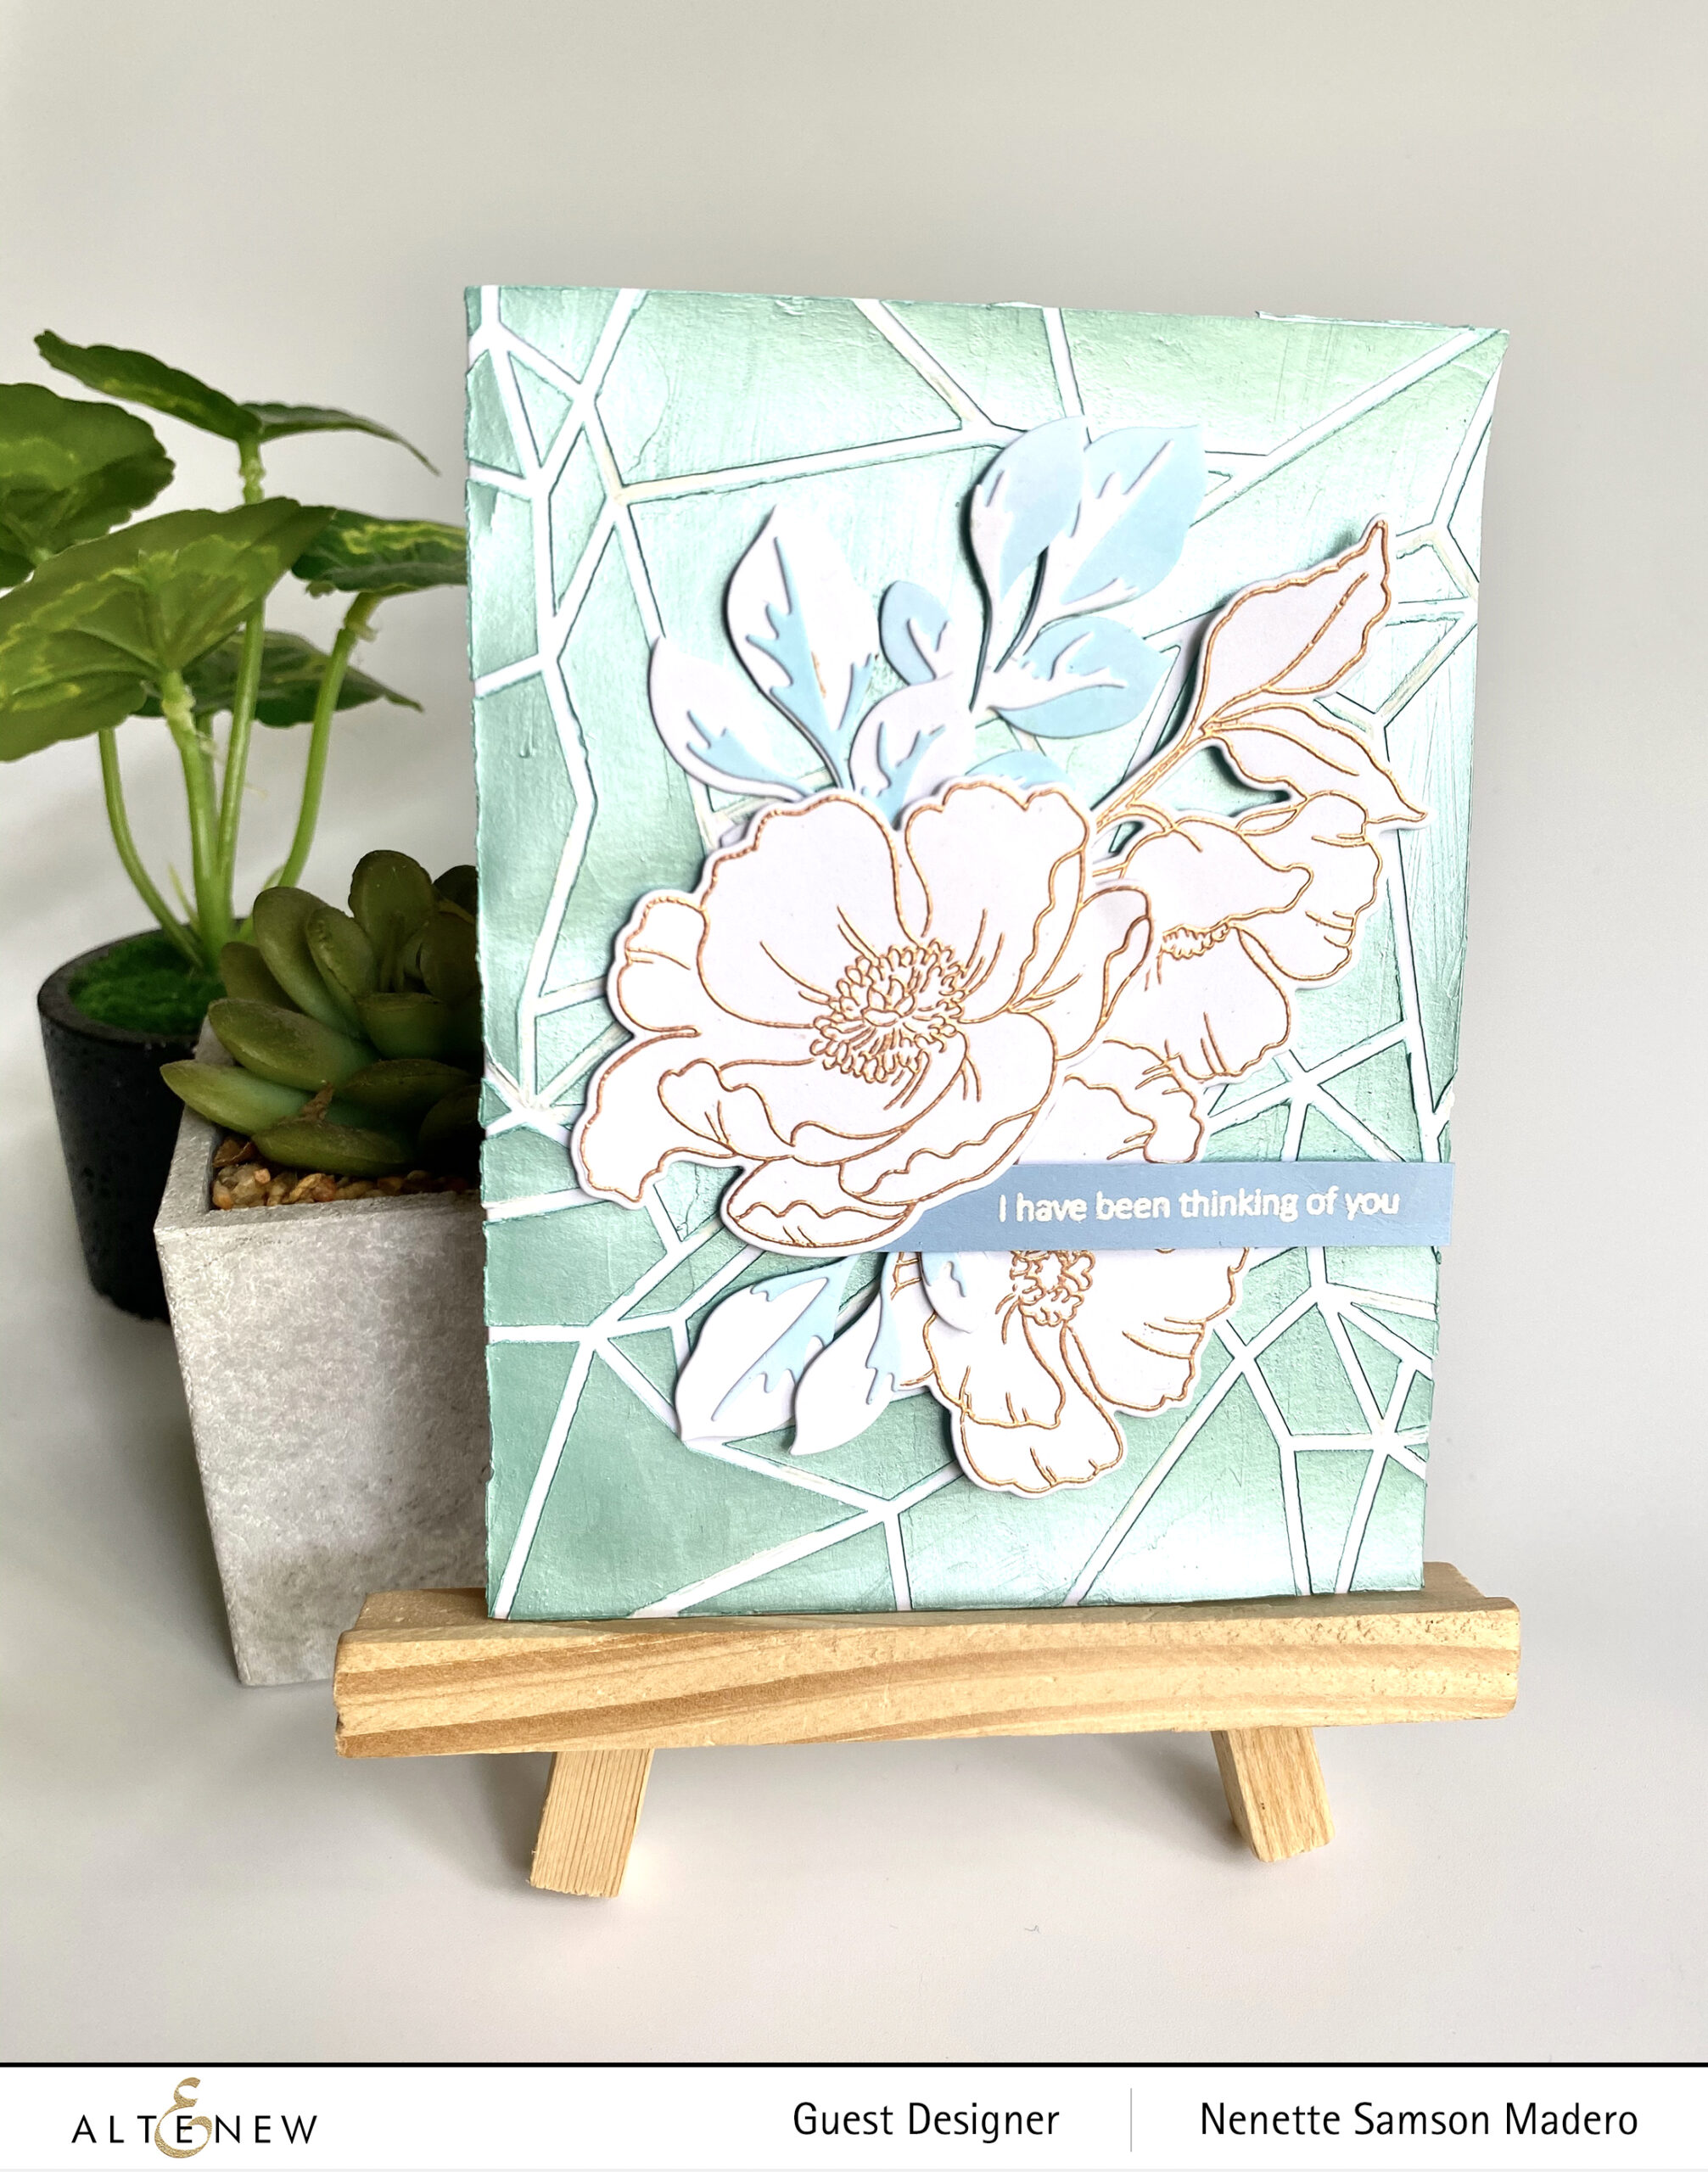
All of the embellishments were arranged using foam squares for added dimension. By the way, when I pulled up the stencil from the paper, I noticed some of the mousse went under the stencil. After it dried, I just used a Uniball Signo white gel pen to cover up the areas. That way, I didn’t have to repeat the whole process and waste material. 😊
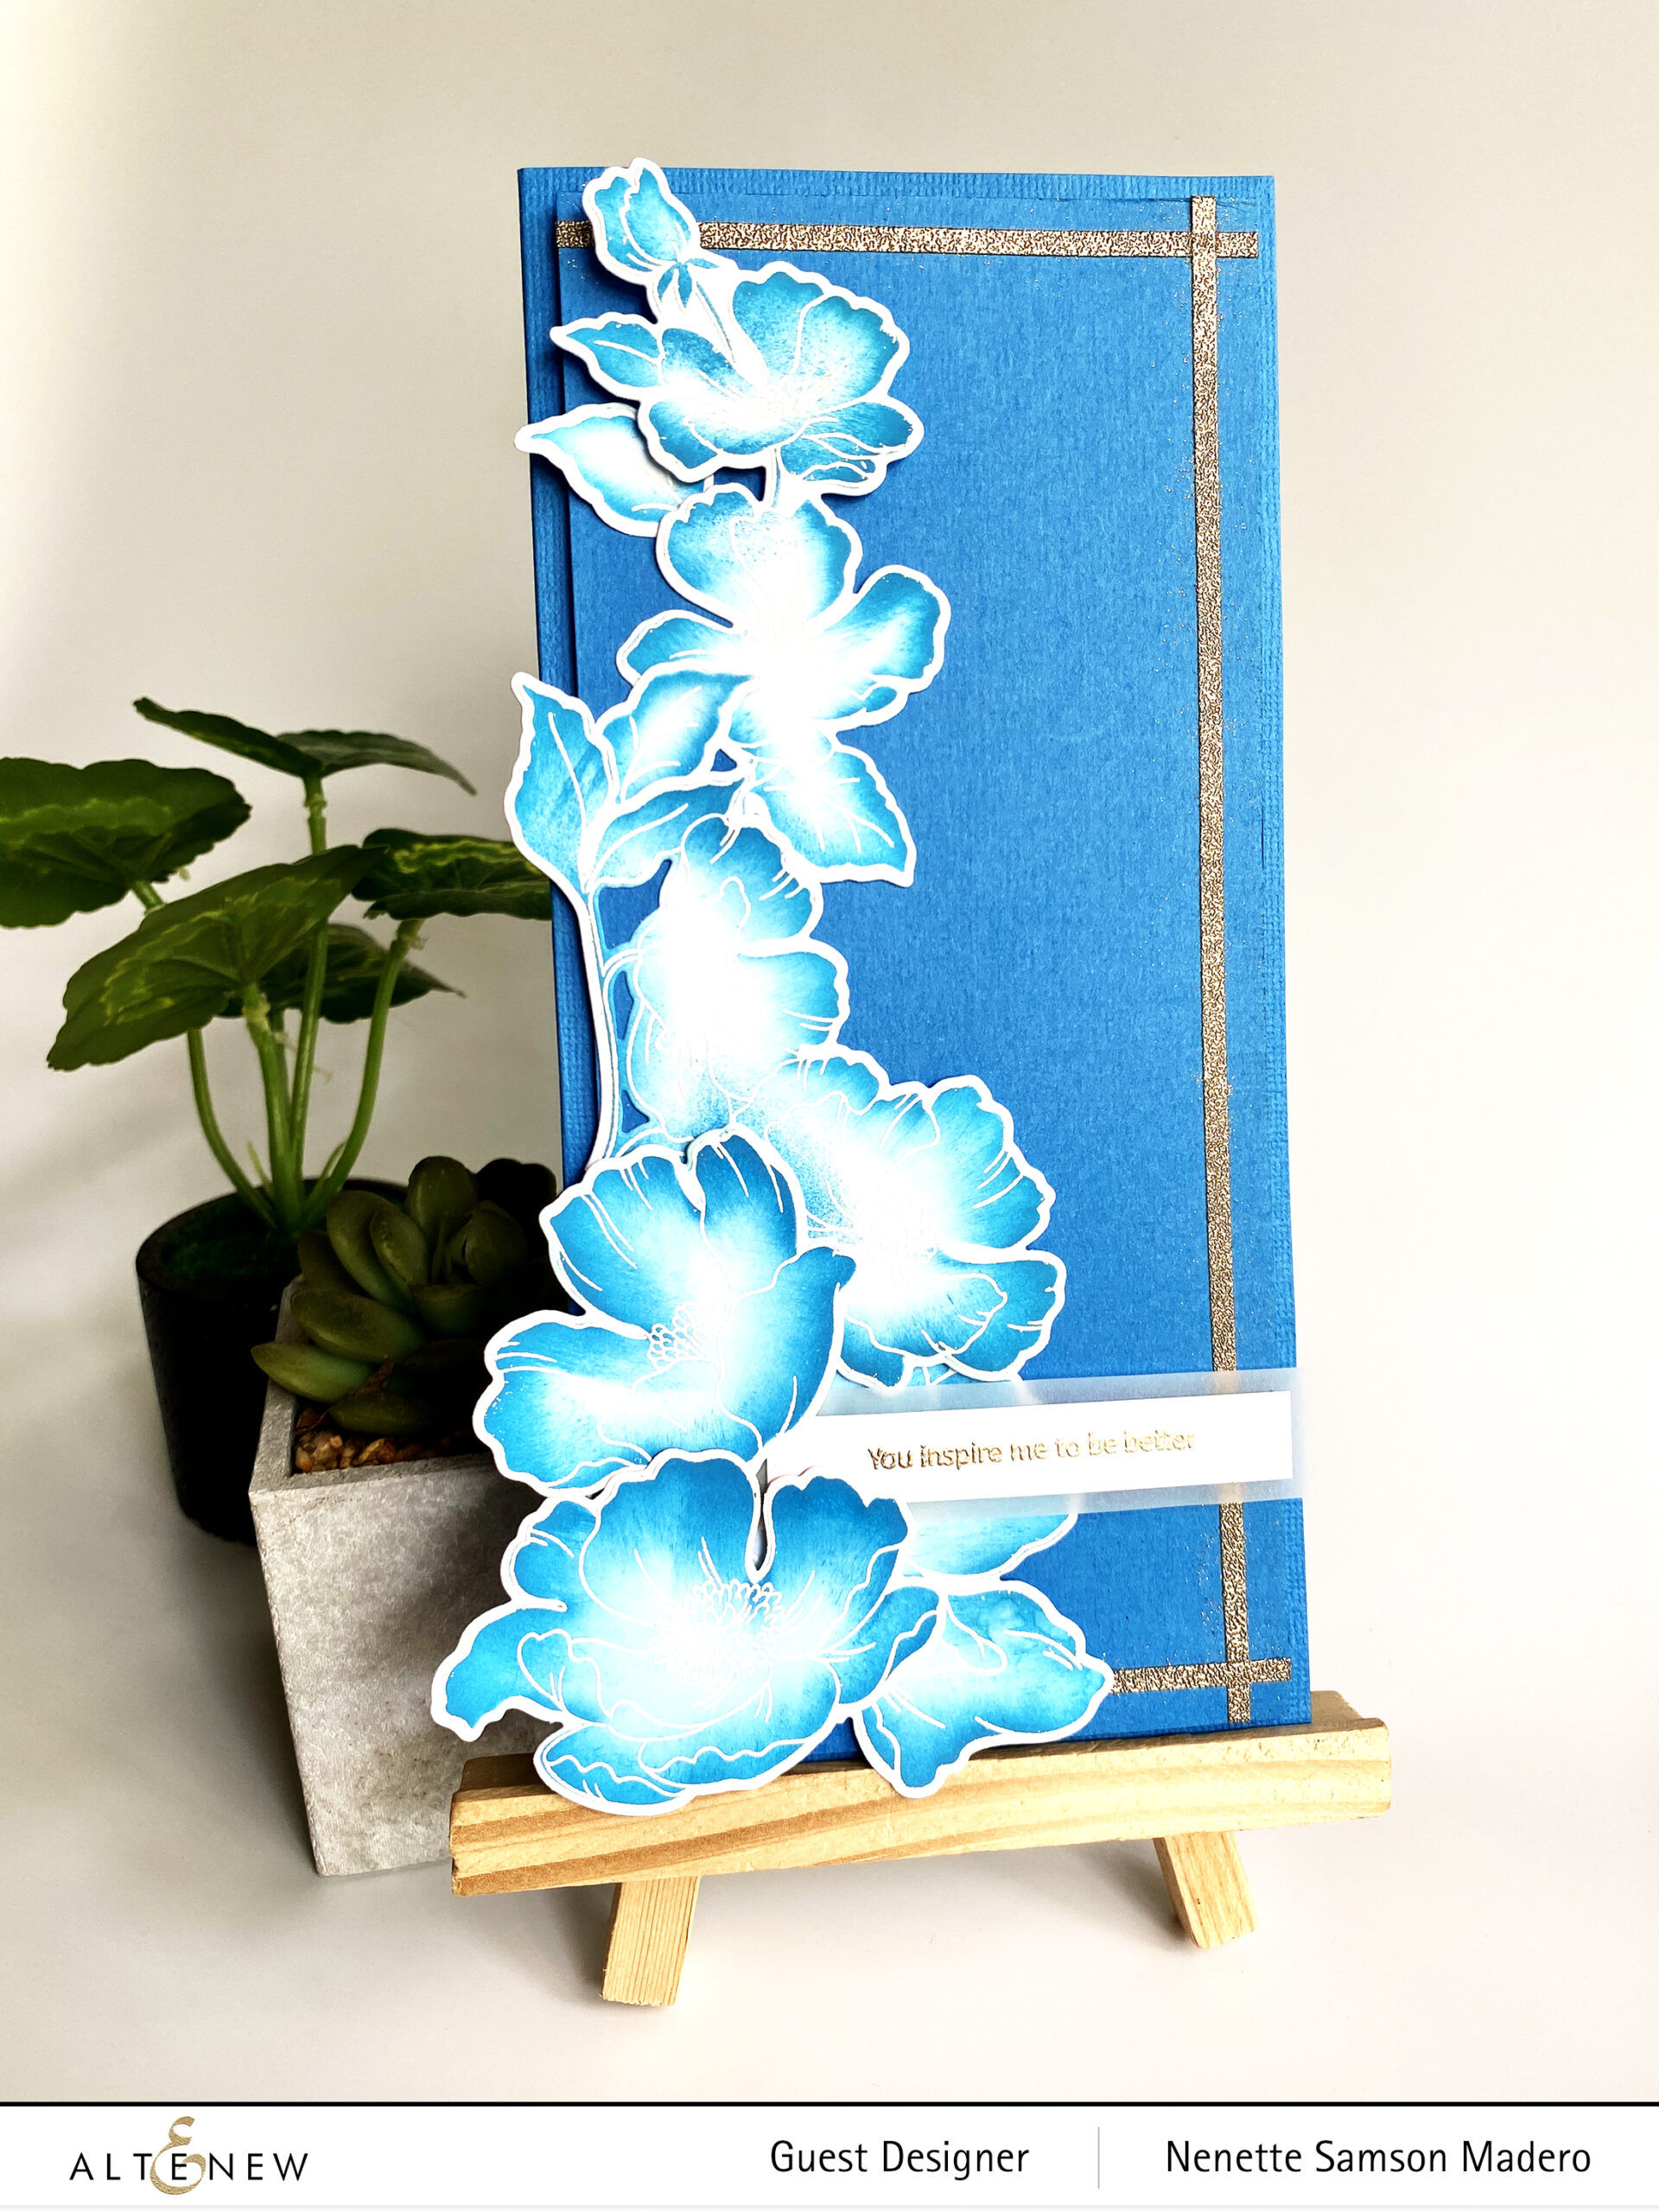
YOU INSPIRE ME TO BE BETTER
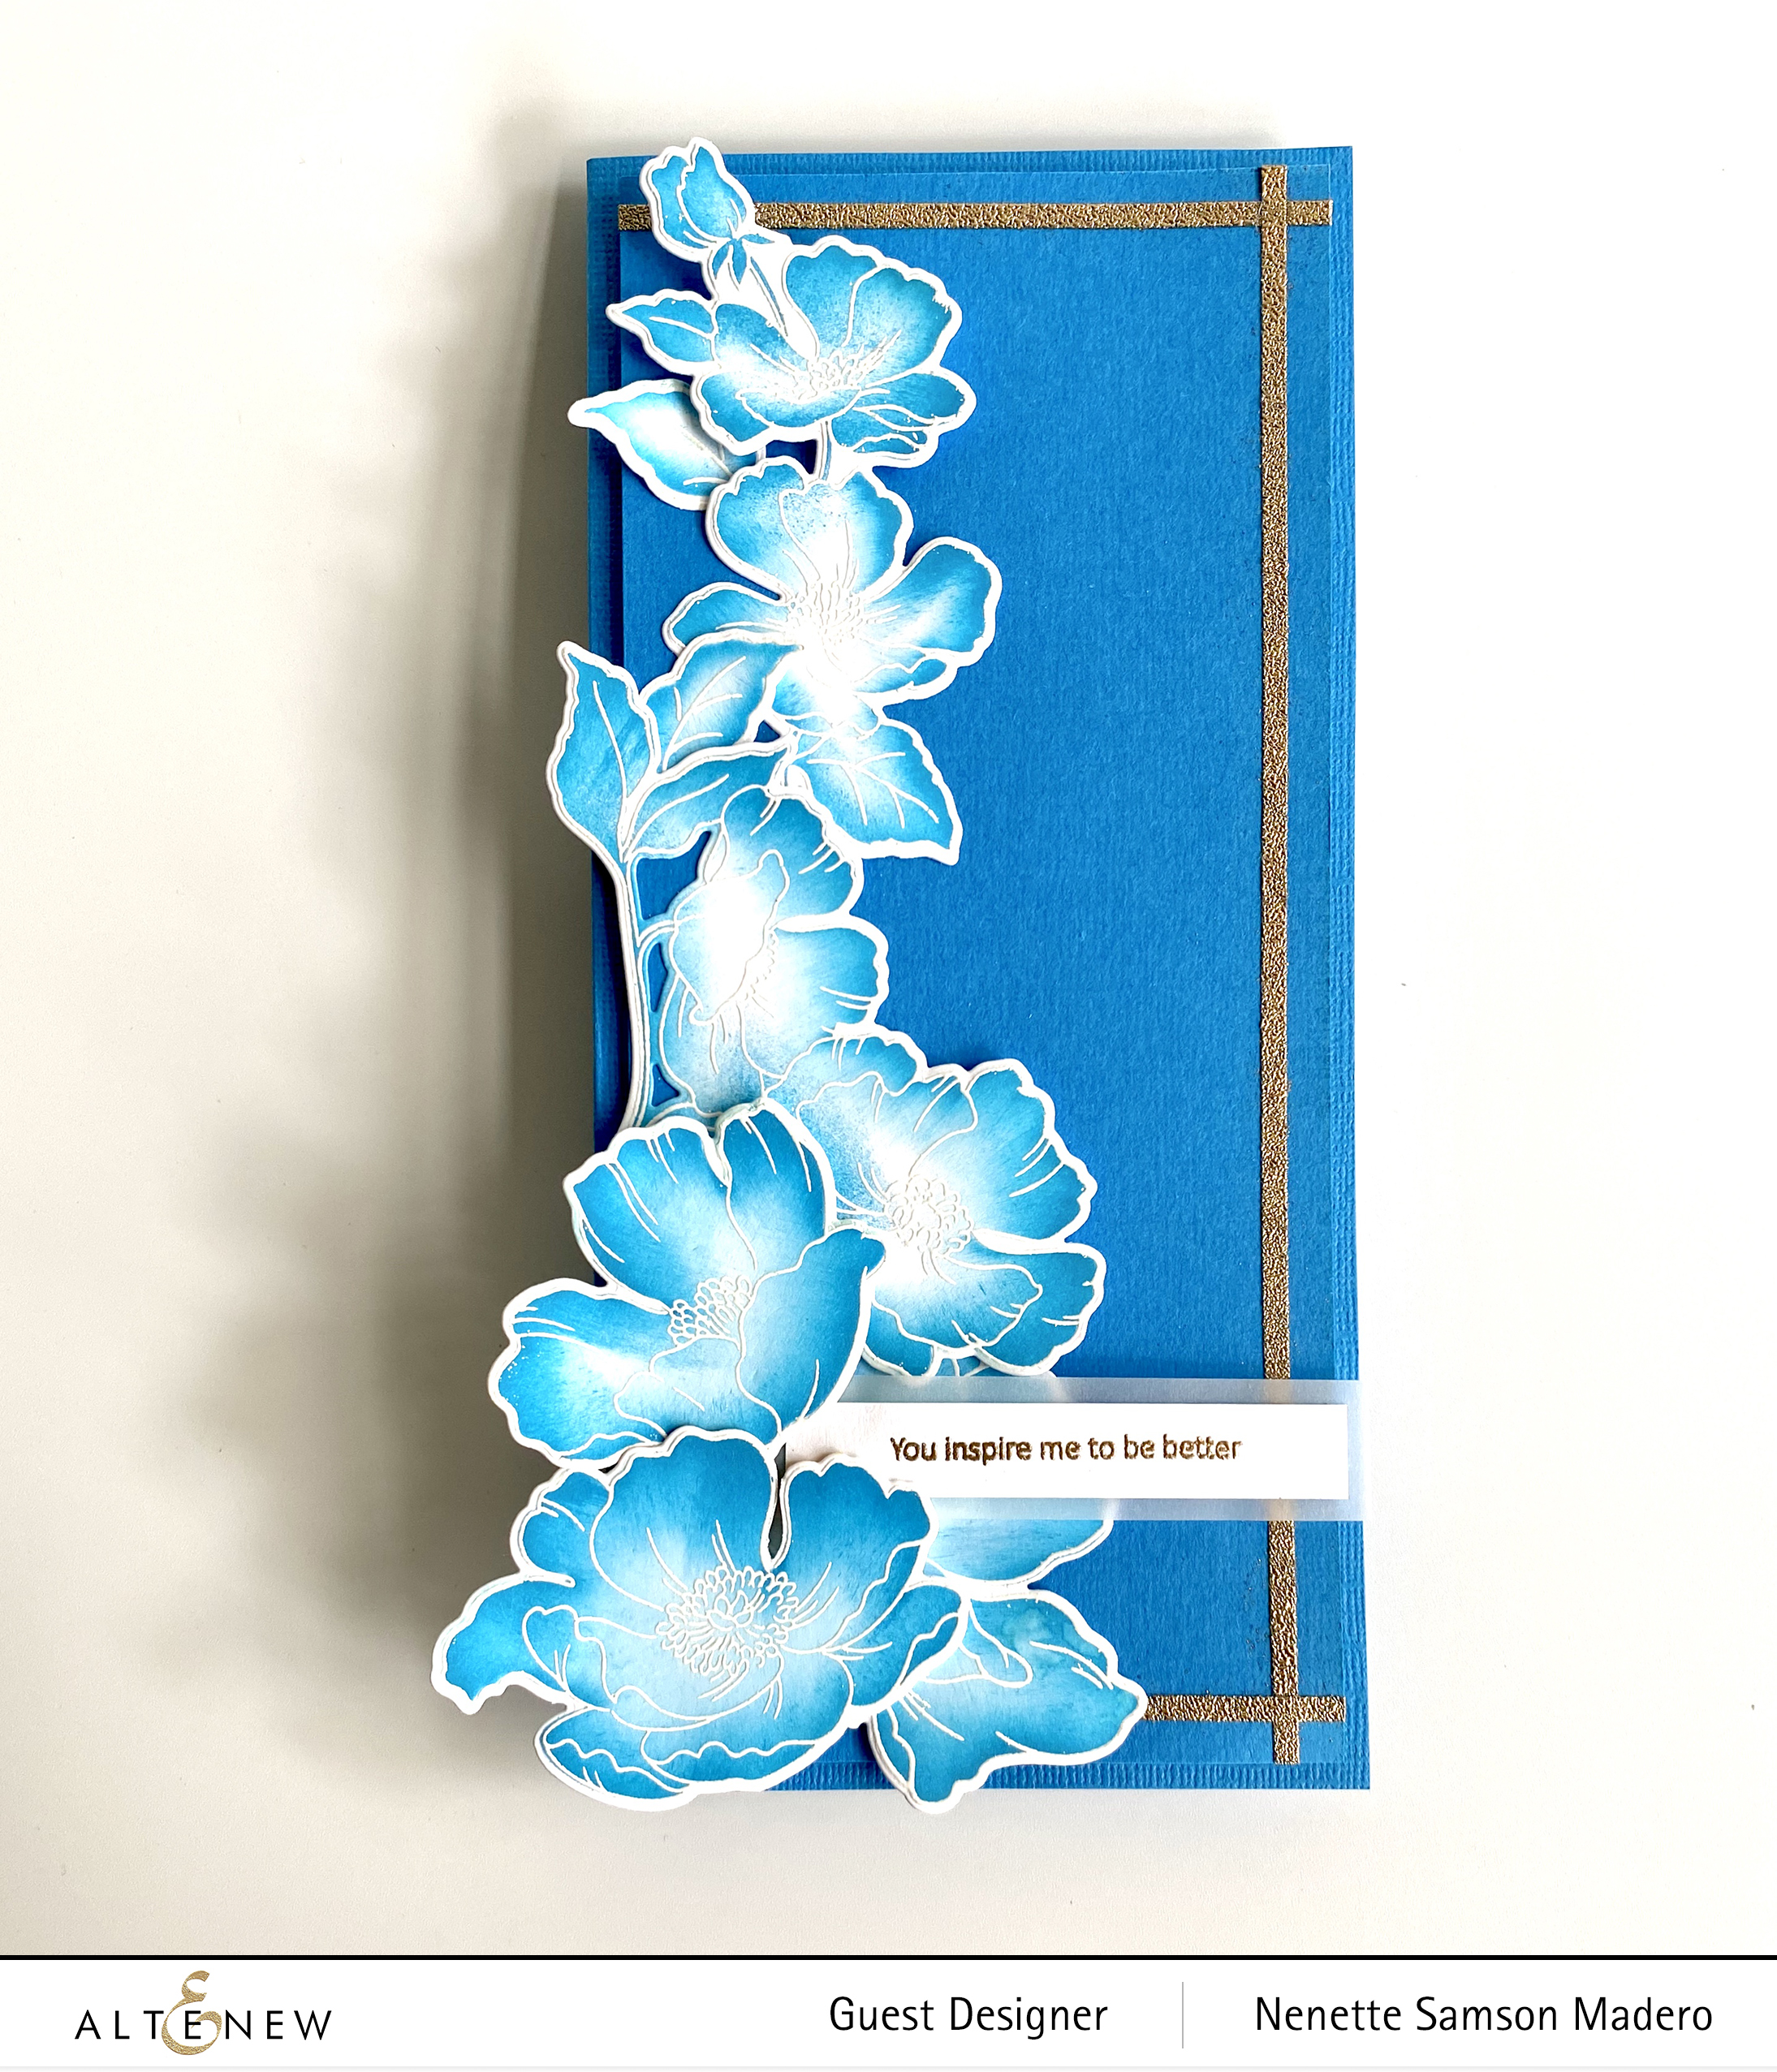
For my last card, I wanted to make use of the Poppy Garden Mask stencil. I laid the stencil on a Neenah Solar white cardstock then used a round distress tool to add Mermaid Lagoon distress oxide ink to the edges of the floral images using a swiping motion from outside going in. This way, the middle of the flower remained white while the edges were dark. This is a fun way of coloring images quickly. I like the steaks that the foam created. Just make sure to follow the direction of the petals when applying the ink. When all the mask images of the flowers were colored, I stamped the outline images using Versamark Ink and embossed them with Pure white embossing powder.
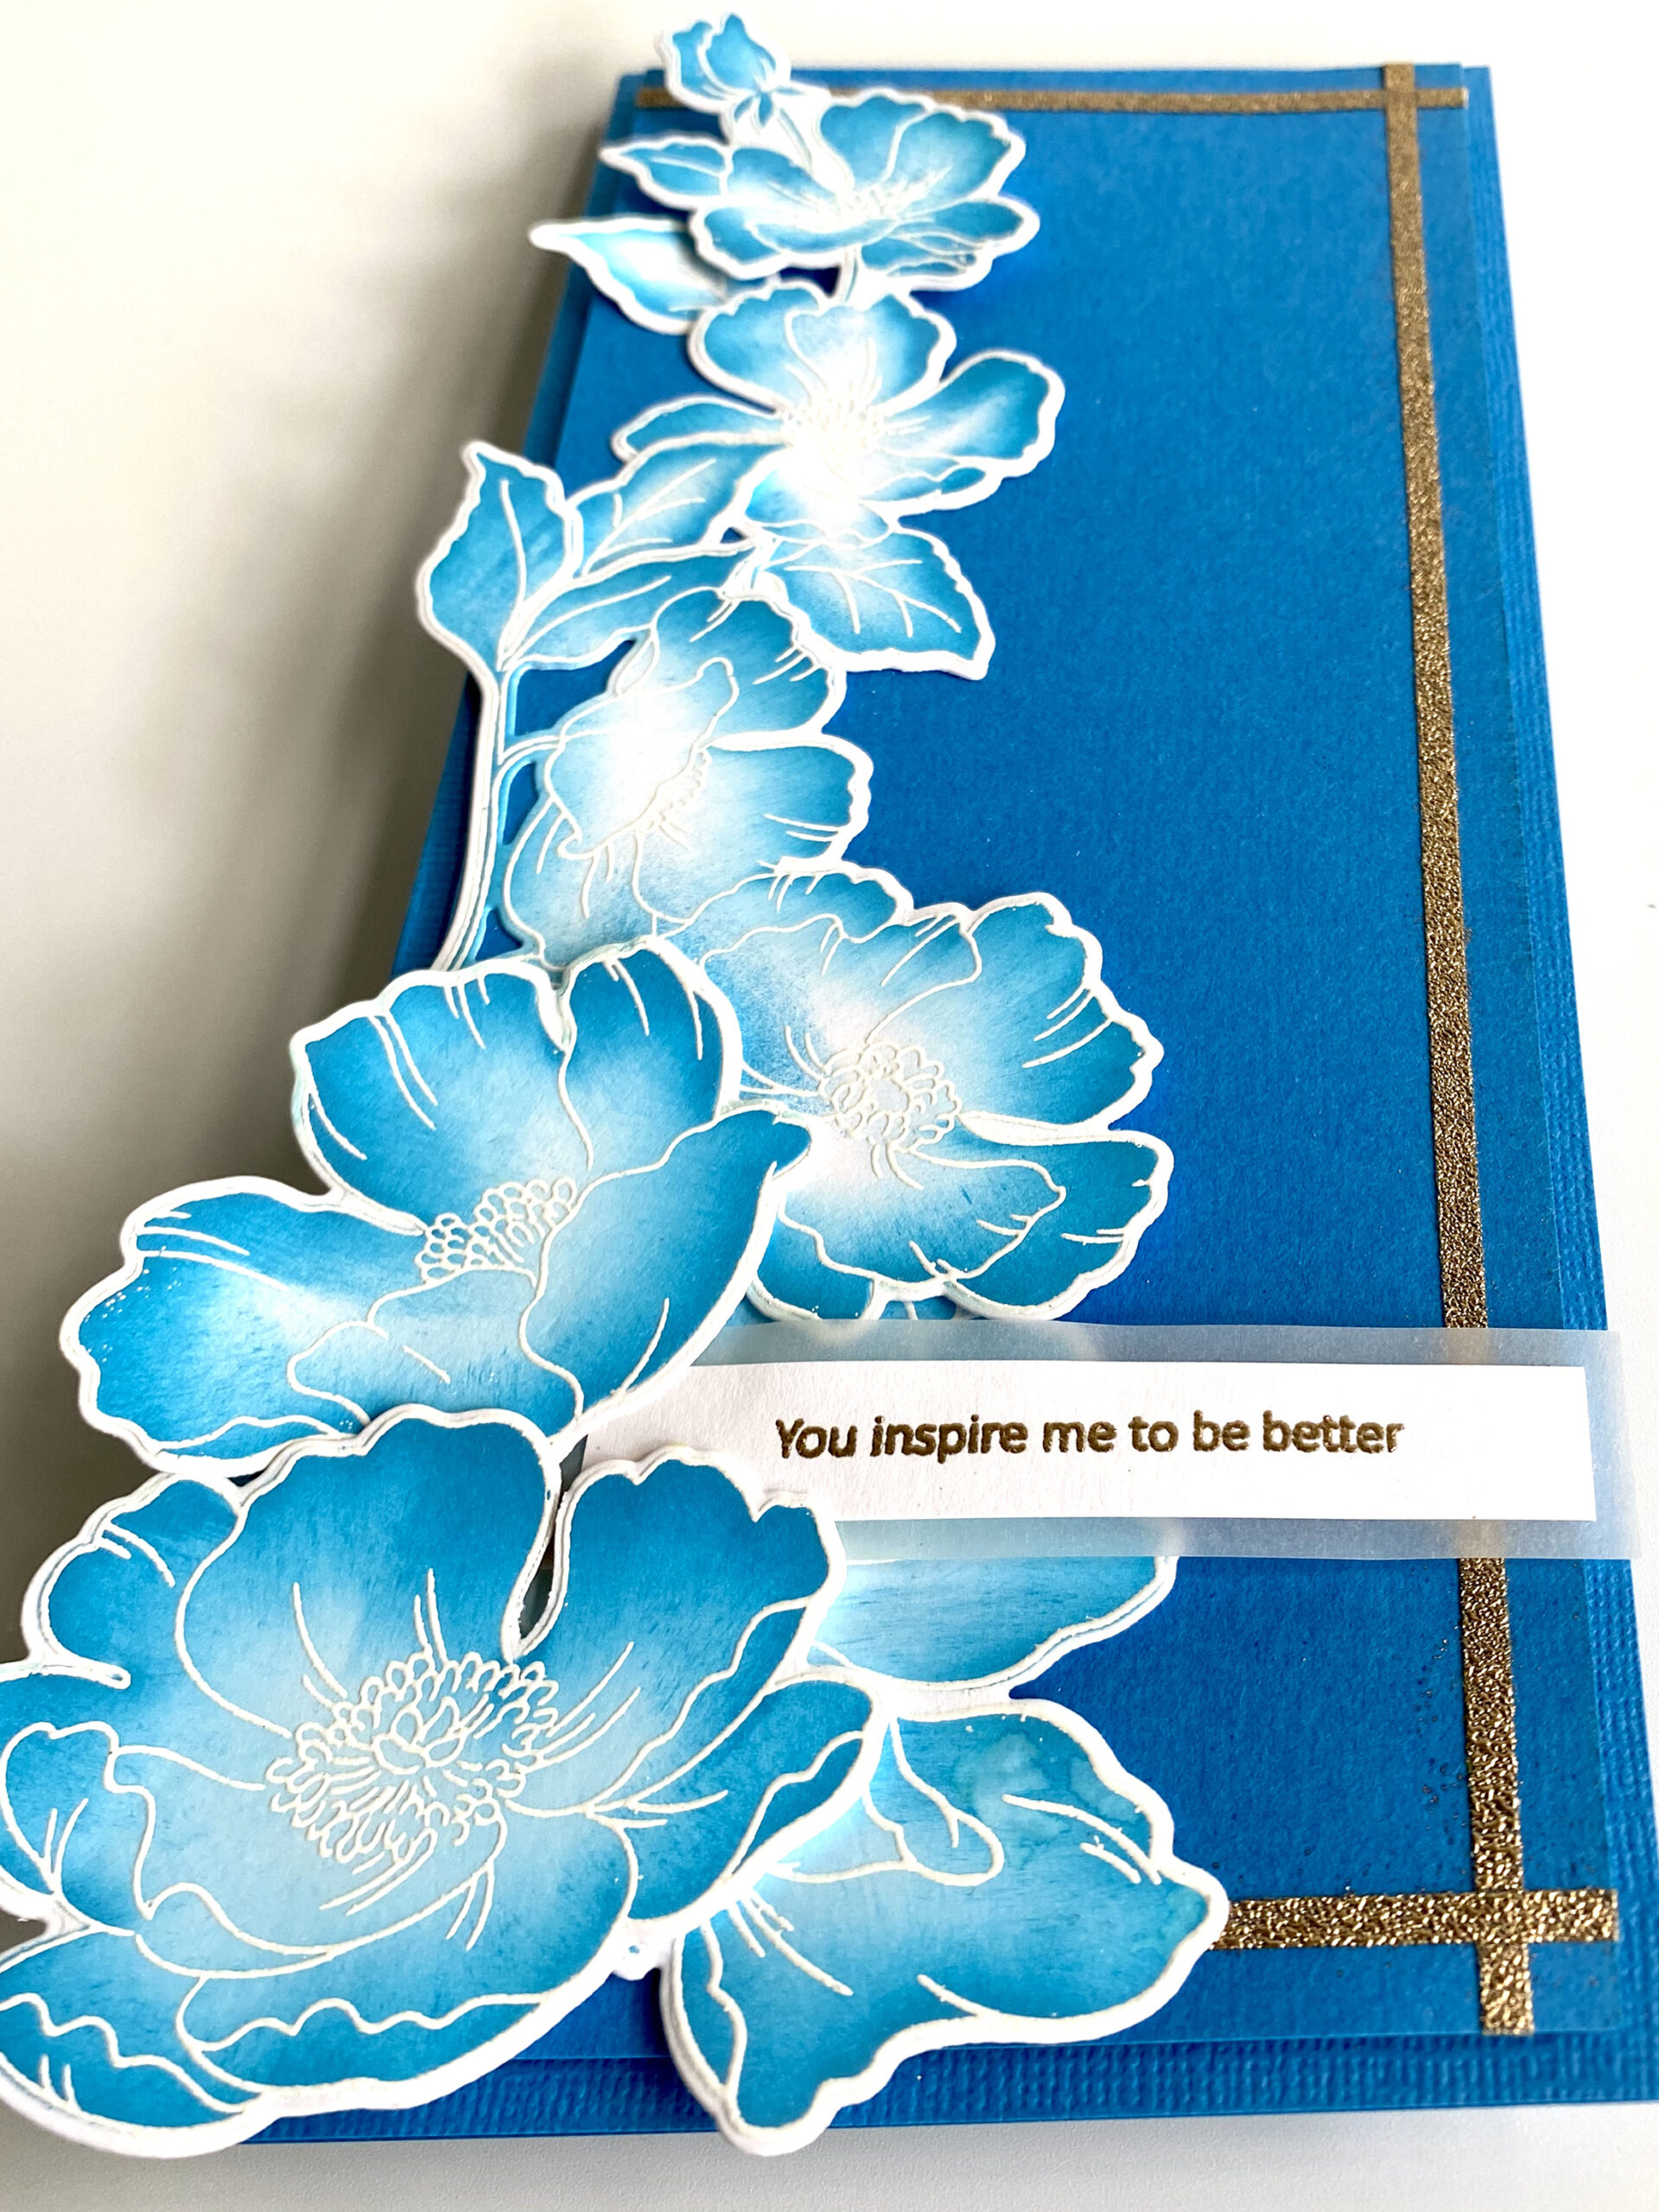
I needed a frame for this slim card so an easy way to do this is to use 1/8″ double-sided tape and heat emboss it using Rose Gold embossing powder. The flowers were arranged on one side and adhered to the card front using glue and foam squares. For a more organic look, just add foam squares to the edges of the petal then glue down the middle of the flower. You can also bend the edges of the flowers and leaves so that they won’t look so stiff.
You can watch a video on how to create these flowers by clicking this link: https://youtu.be/AORyc3Rr2hs . I’m very new at making videos so please bear with me. 😥 Do let me know if the video is helpful so that I can plan to include more videos in the future.
PRIZES
Altenew is giving away a $20 gift certificate to 5 lucky winners! Please leave a comment on the Altenew Card Blog by 9/19/2020 for a chance to win.
Altenew will also draw a winner to receive a $15 Altenew gift certificate from the comments left on each designer’s blog on the blog hop list below so don’t forget to leave a comment! I truly love hearing from all of you. All winners will be announced on the Altenew Winners Page on 9/22/2020.
There’s MORE! Altenew will pick 2 of their favorite handmade creations from those who joined the linky party and they will each receive a $15 Altenew gift certificate!
Next stop is Irina Fonina’s blog. For real-time updates, please follow me on IG: My Little Attic Studio. I also host some giveaways there once in a while so hope to see you there, too. 🙂 Thanks so much for dropping by and please stay safe and well. Take care, everyone! Until my next blog post!

BLOG HOP LIST: ALTENEW CARD BLOG | AMBER RAIN DAVIS | NEHA AGGARWAL | NICOLE WATT | ERIN THOMPSON | TERI WILSON | HELEN KALB | RACHAEL SHEDEED | TERRI MARIE KOSZLER | ROSIE NEUSTAEDTER | AMY HILL | NANDINI KARMARKAR | MARYAM SHARARA | NENETTE S. MADERO | IRINA FONINA | VICKI FINGER | VIRGINIA LU
IG: MY LITTLE ATTIC STUDIO | FB: MY LITTLE ATTIC STUDIO | WWW.MYLITTLEATTIC.COM

OMG these are all just AMAZING! Your color blending is GORGEOUS! Thanks for beautiful inspiration!
I just love how you use deep saturated color for your cards Nenette!
This is fabulous! Thank you for sharing! I absolutely love that you express what you’re learning from & even ask us to bear with you, you have done beautifully & you have inspired me so much! Thank you so much for sharing everything! 😊 I’m so glad I found you on this hop! I’m subscribed ❤
WOW! Amazing cards. So many great techniques. I particularly like the different ways you added texture with clear embossing powder and the subtleness of the ghosting technique. Thanks for all the wonderful inspiration. I’m really inspired to get my stencils out so I can start playing!
All your cards are amazing, Nenette. It is impossible to choose one favorite.
These are all amazing!! My favorite is the Bursting Dahlia card! I ordered that stencil when it came and haven’t used it yet. I am definitely going to case your technique with the stencil in all different colors! Thanks so much for the fabulous ideas!
WOW, Nenette, I’m always impressed by your spectacular color combinations and designs. Your photos are great too. You captured the shine so well!
Absolutely beautiful. Love them all. Thanks for sharing
LOVE, love, love your cards! The color choices and intensity are fantastic! The first card really caught my eye with the cardstock base, then the frame around the front piece. All that color, then intensified with the flower stencil being shiny! Fabulous!
There’s something extra special about each one of your cards! All are fabulous!
Your cards are incredible! I especially like the True Friends and the first cards! Very creative. Thank you.
BEAUTIFUL cards! I love them all. I especially like the ghosting technique & applying the embossing powder after you colored the paper. Thank you for such unique ideas!
Thanks for sharing.
I love your cards. The gradient coloring is just beautiful. TFS
WOW! Stunning! I LOVE the glistening and beautiful stencil choices!
Thanks so much, Meghan! <3
Wow, Nenette! Just gorgeous cards! Simply stunning! 💜💜💜
Hello my friend! Thanks for your kind words and for your continued support!
Your cards are just incredible works of art! They are all beautiful!!
Thank you so much, Peg!
Your cards are GORGEOUS! It’s hard to pick a fave, but I am loving the rainbow colours and blending on the first. The sentiment on vellum looks perfect
yay!!! Glad you liked them, Amber!
Gorgeous Stenciling technique cards with awesome ink blending and love those color combos! I love all the texture with the stencils using water, paste, foil etc, all so pretty.
Thanks for appreciating my cards, Melissa!!! <3
Your cards are stunning! Beautiful colors, wonderful layouts. I love them all.
THank you for your kind words, Cyndi!
Really nice cards and color blending on each are so pretty
Thanks so much!
Wow! Your cards are really lovely! I love how you created the blue flowers on your video! The subtle look of the Versamark ink on your first card is so pretty!
Thank you so much, Lauryne!
The clear embossed dahlia card is absolutely gorgeous!!! So simple, yet so fun!
Thank you, Elizabeth!
Gorgeous cards! Love your beautiful color combos and details!
Glad you liked them, Denise! Thanks for dropping by!
Absolutely stunning! So nice to meet and be inspired by you! Can’t wait to see what other things you’ve made!
Thank you so much, Dorothy!!! Welcome to my blog! <3
OMG OMG OMG!! All these cards look fantabulous!! I love them alllll!!!
Thank you for being part of this hop, Nenette and sharing your creativity with everyone!
Thanks you so much, Erum!!! You inspire me so much!!!
Gorgeous cards!
Thanks so much, Kelsey! <3
I so enjoy seeing your fabulous projects!!
Awww.. thanks so much, Cindy! <3
These are all so very lovely. I ilke the frames combinations with the vellum. Would like to try them all.
Thanks so much for your lovely comment!
What a great variety of colourful cards! You really showcased the versatility of working with stencils!
Thank you so much, Avonlea! <3
These are crazy gorgeous!!! I must try some of these with my nesting frame dies — never really thought to use them like so. Thank you for the great inspiration.
Thanks so much, Kimberly!
You have been so creative in your use of these stencils. Thank you for sharing.
You are most welcome, Penny! Thanks for dropping by!
So many beautiful cards and ideas! Thanks for sharing!
Thank you so much, Dawn!