")

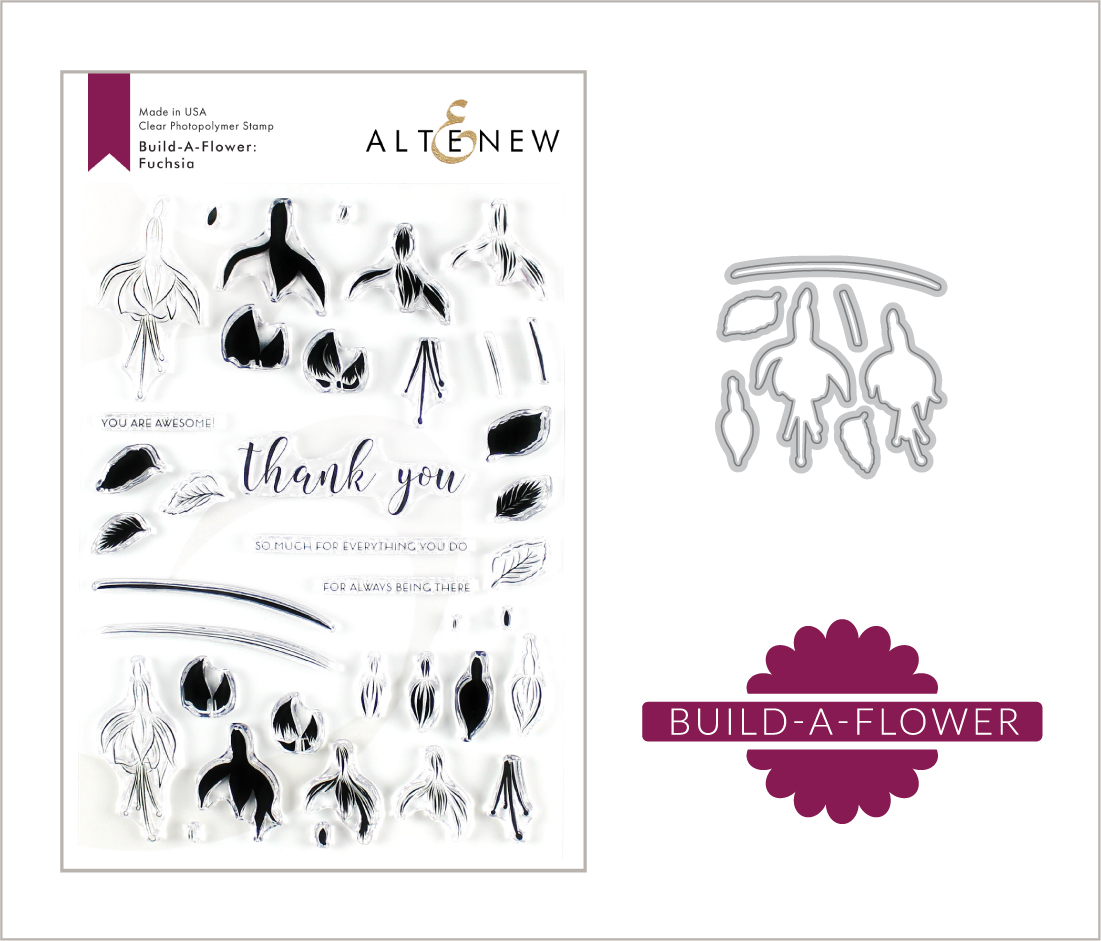
Hello, crafty friends! Thanks so much to Svitlana Shayevich for sending all of you over to my blog. For the complete details, please visit the Altenew Card Blog. You can view and purchase the complete release here. Below are some samples I made using some of the latest releases.
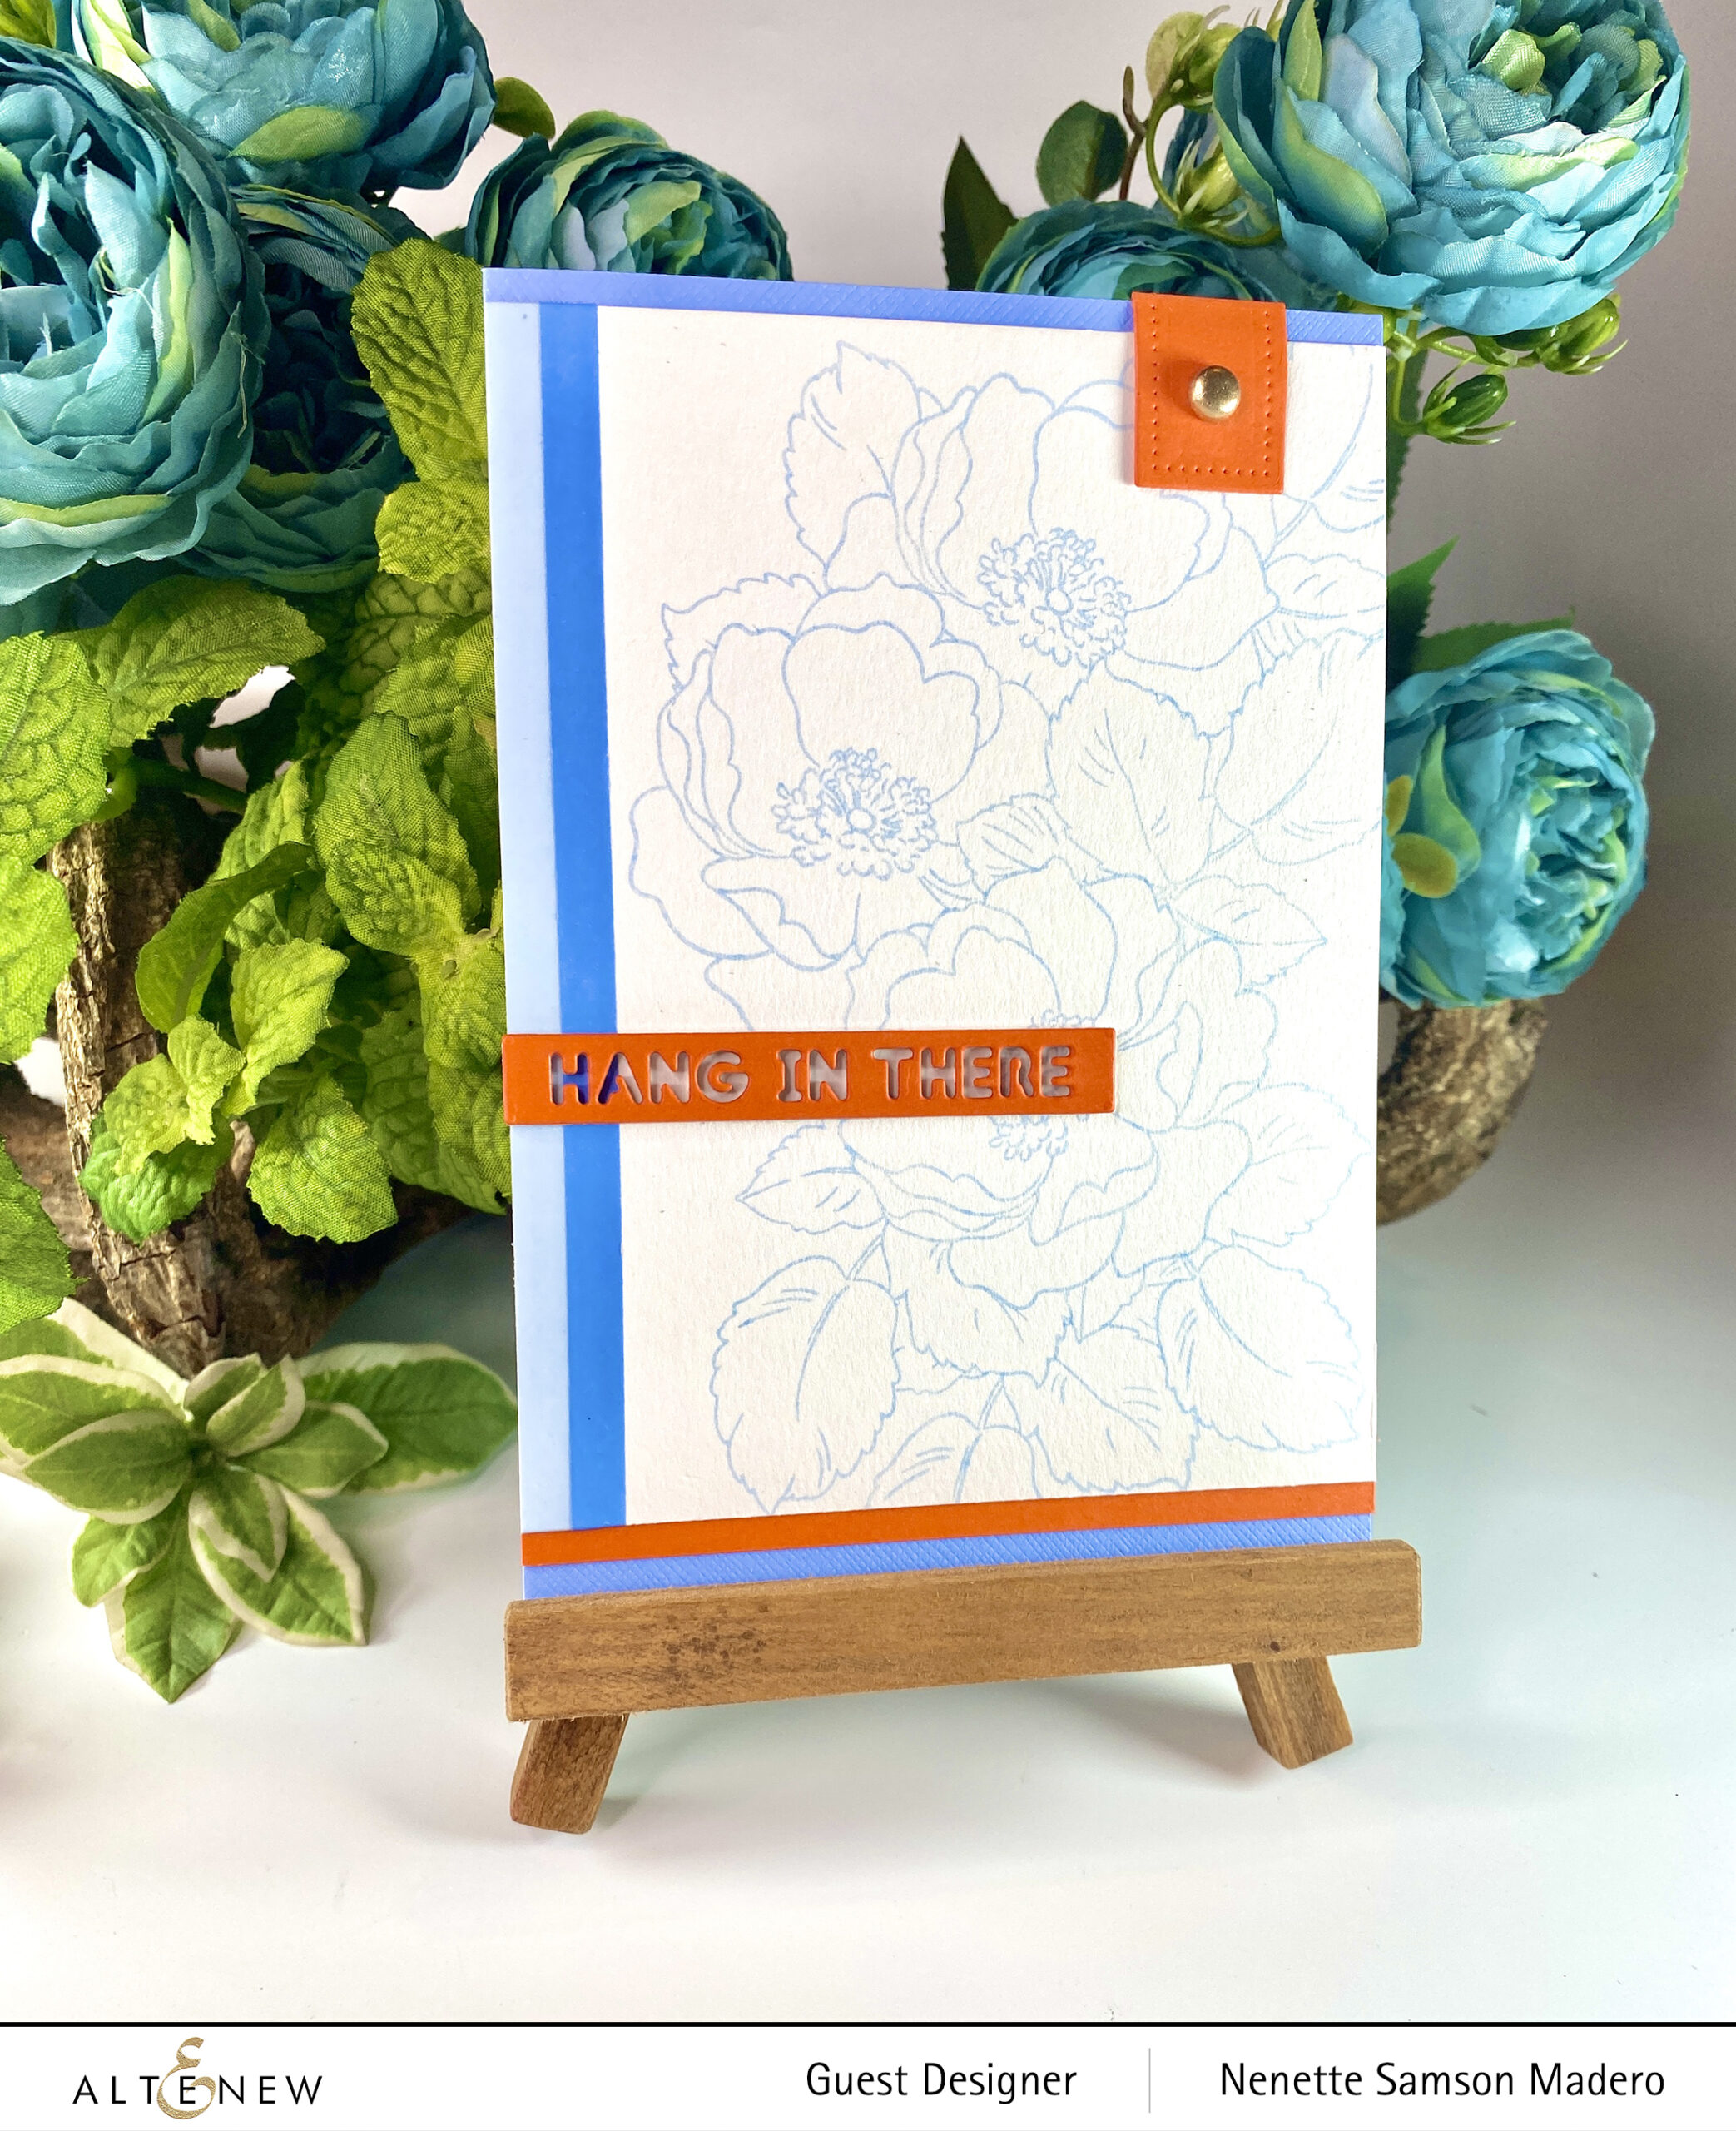
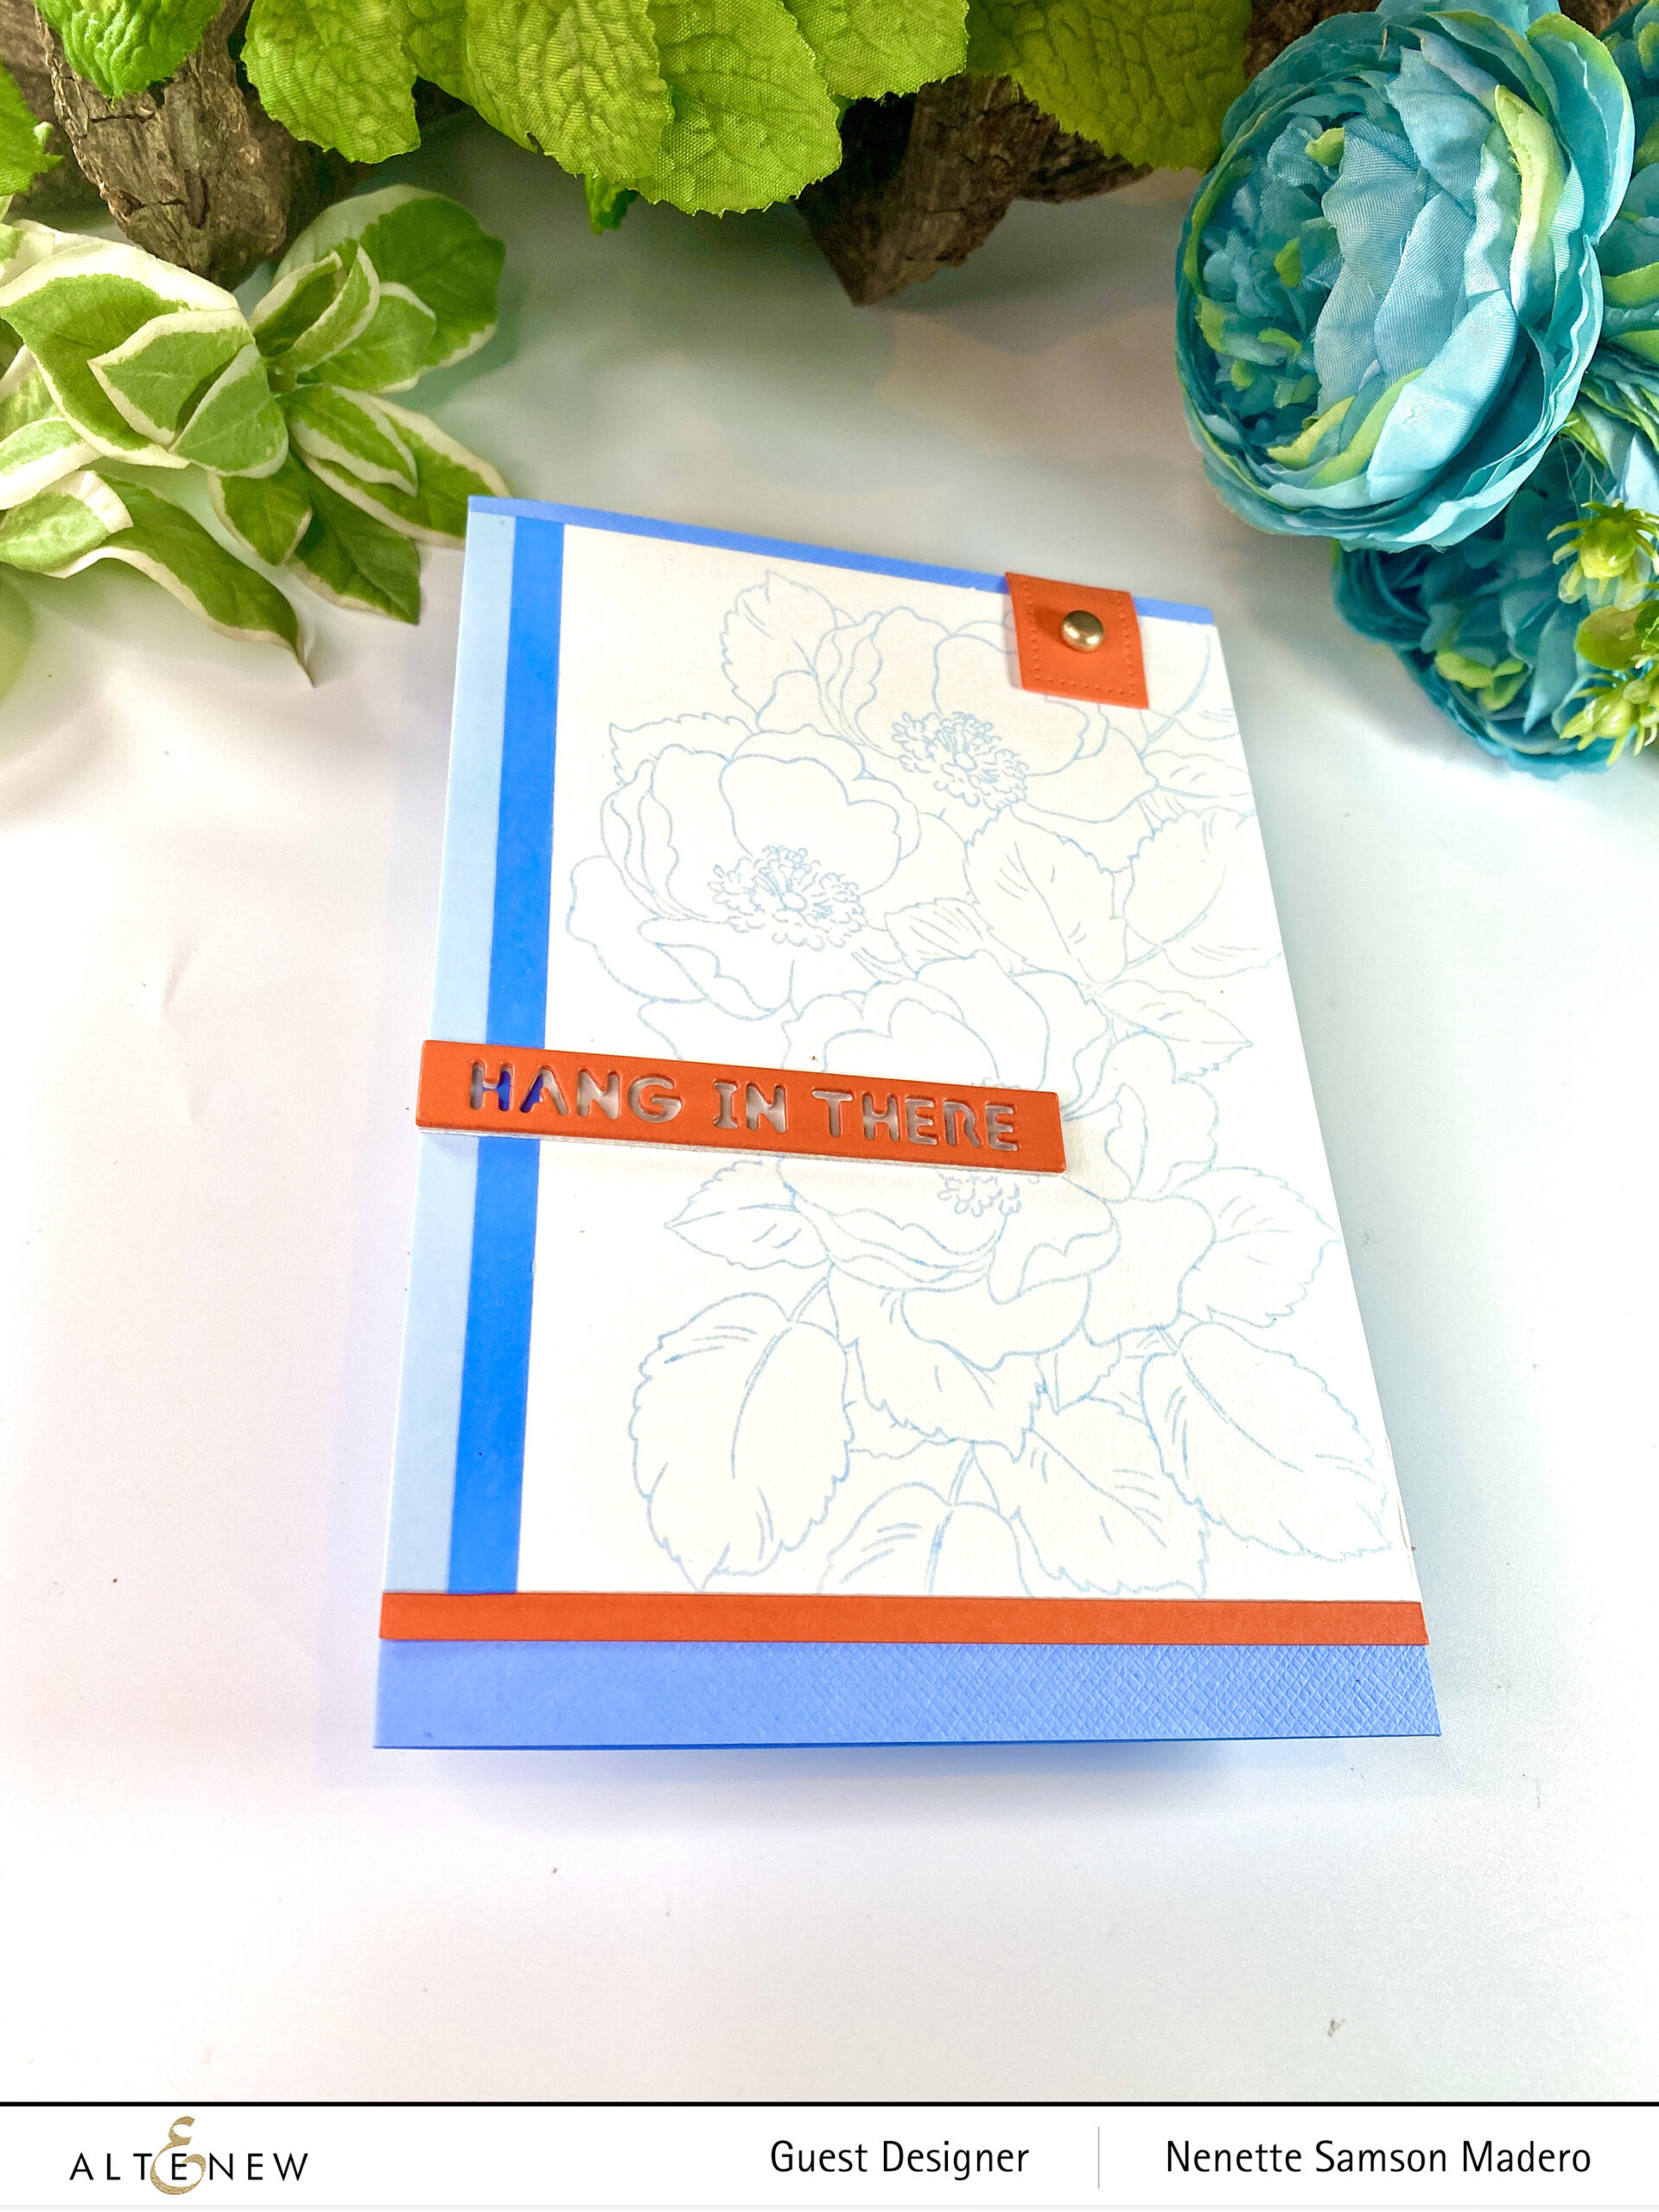
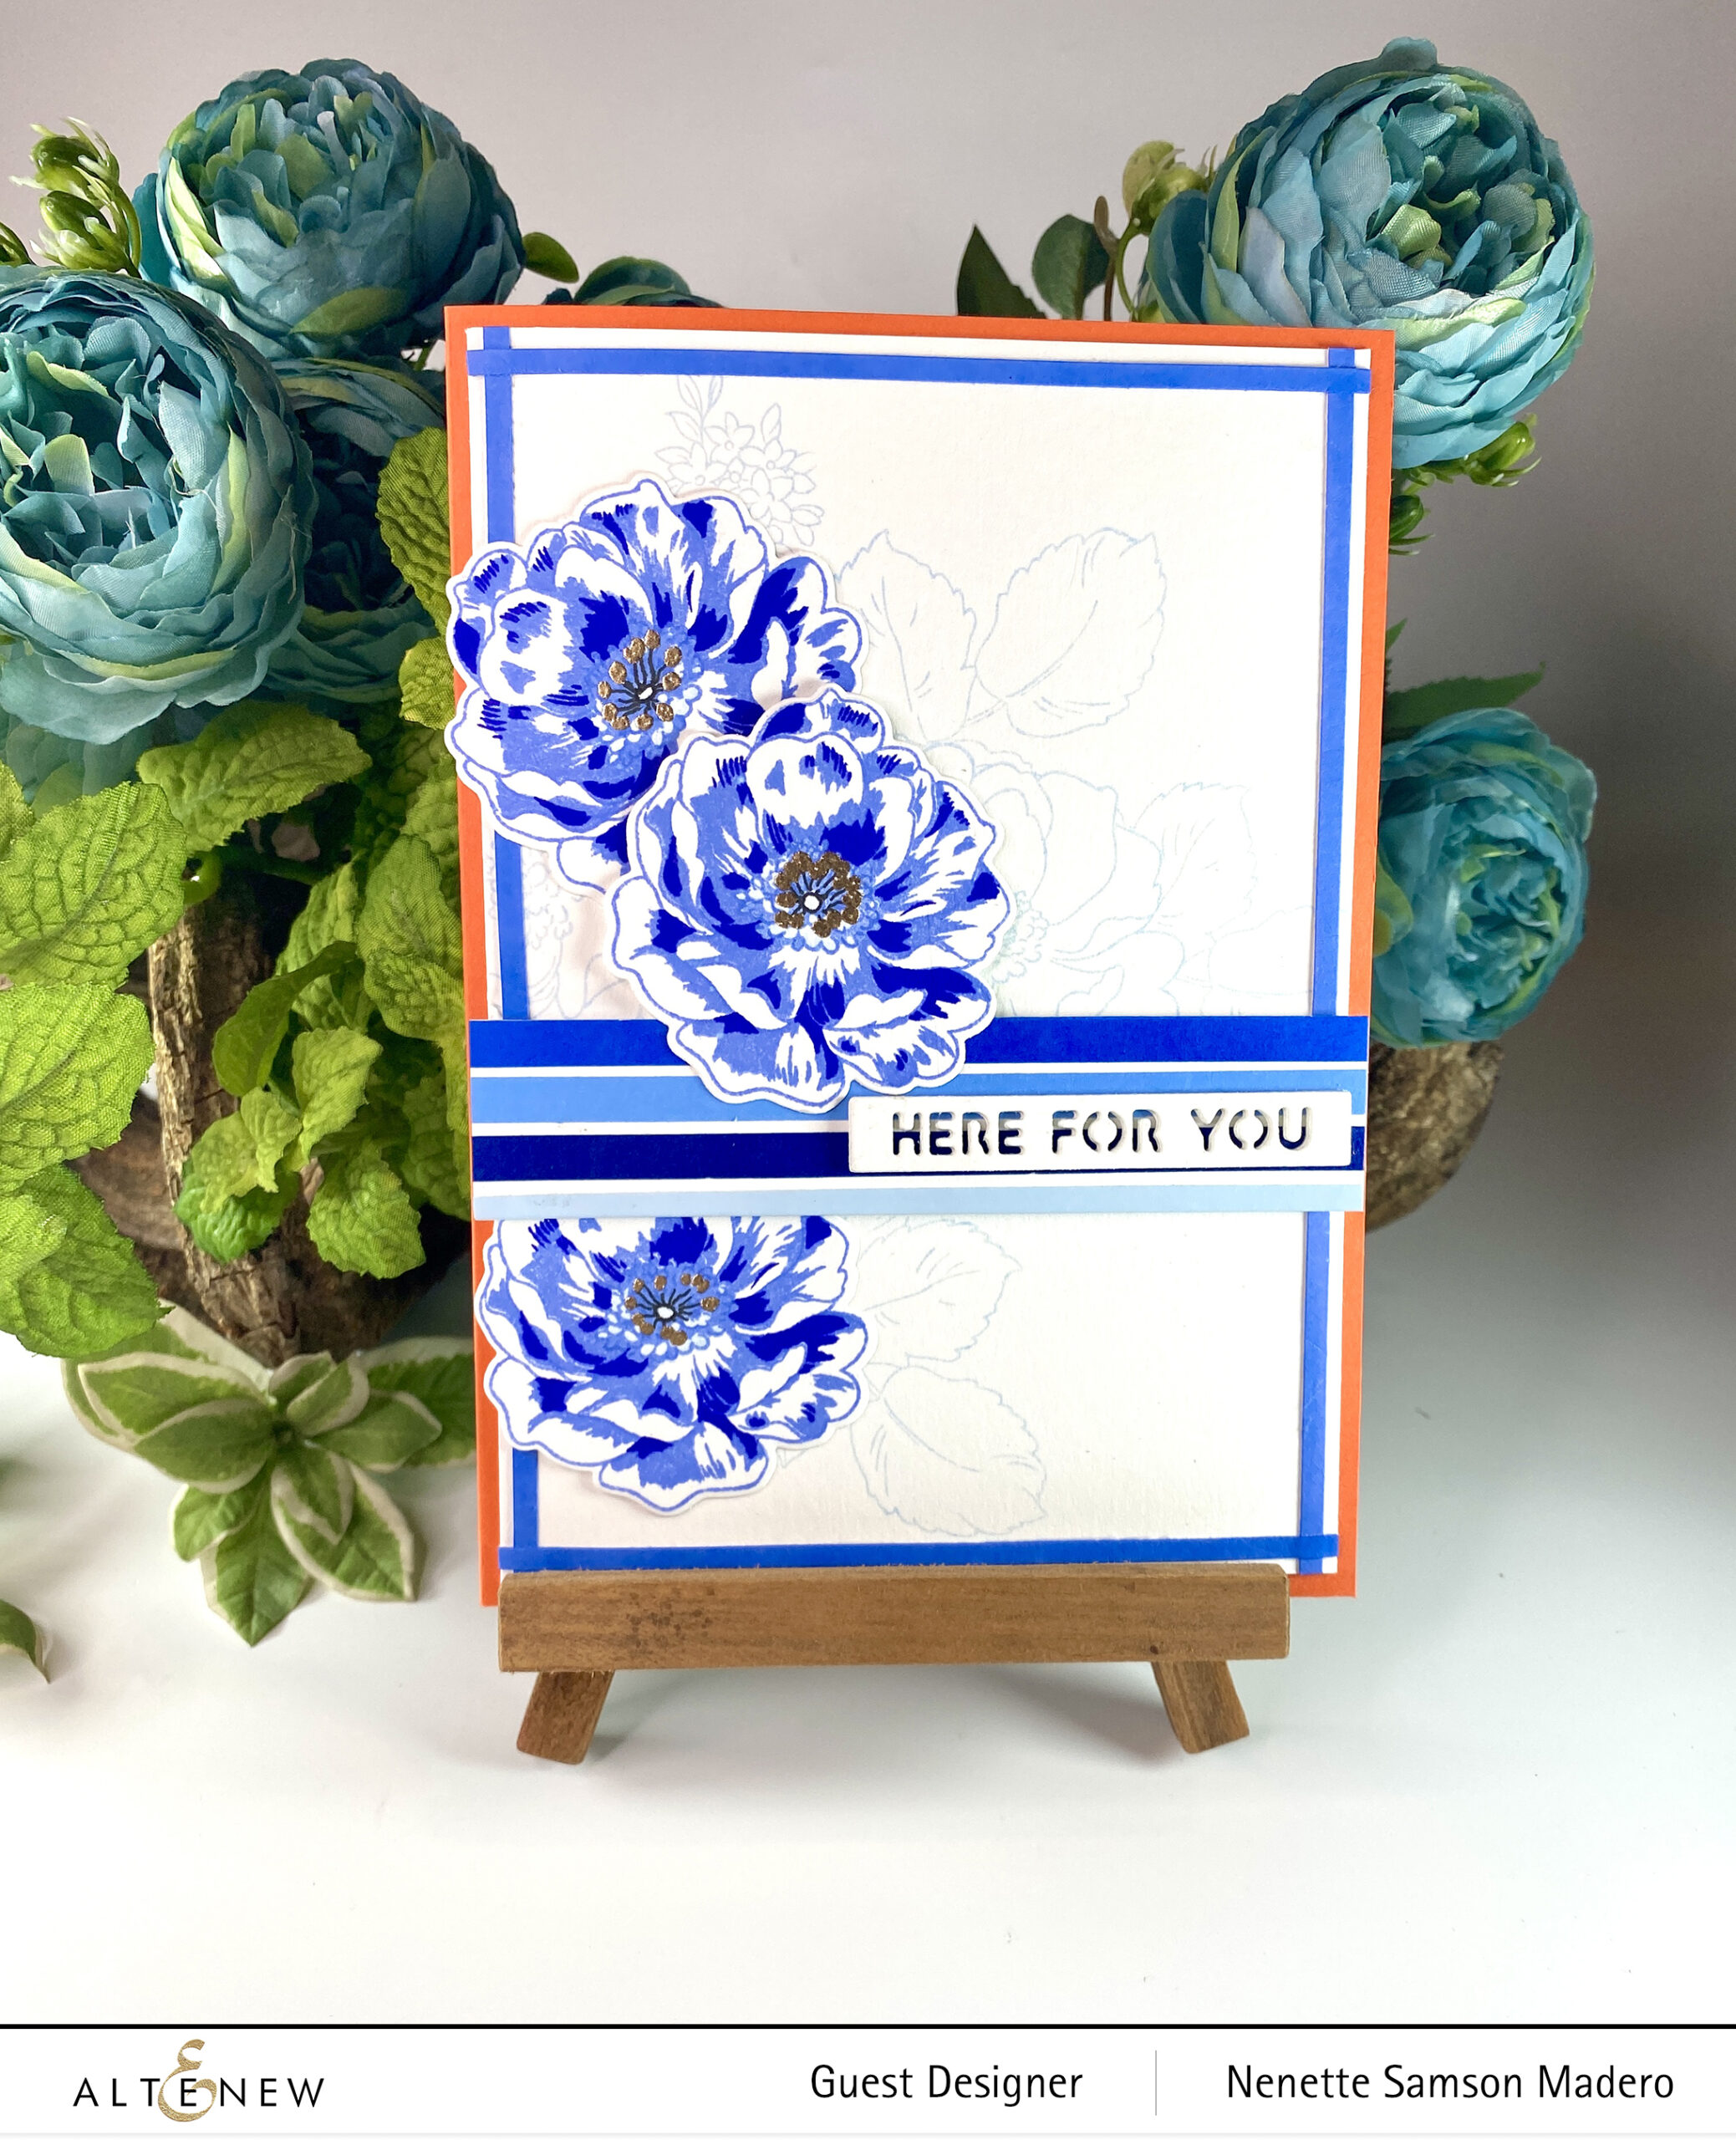
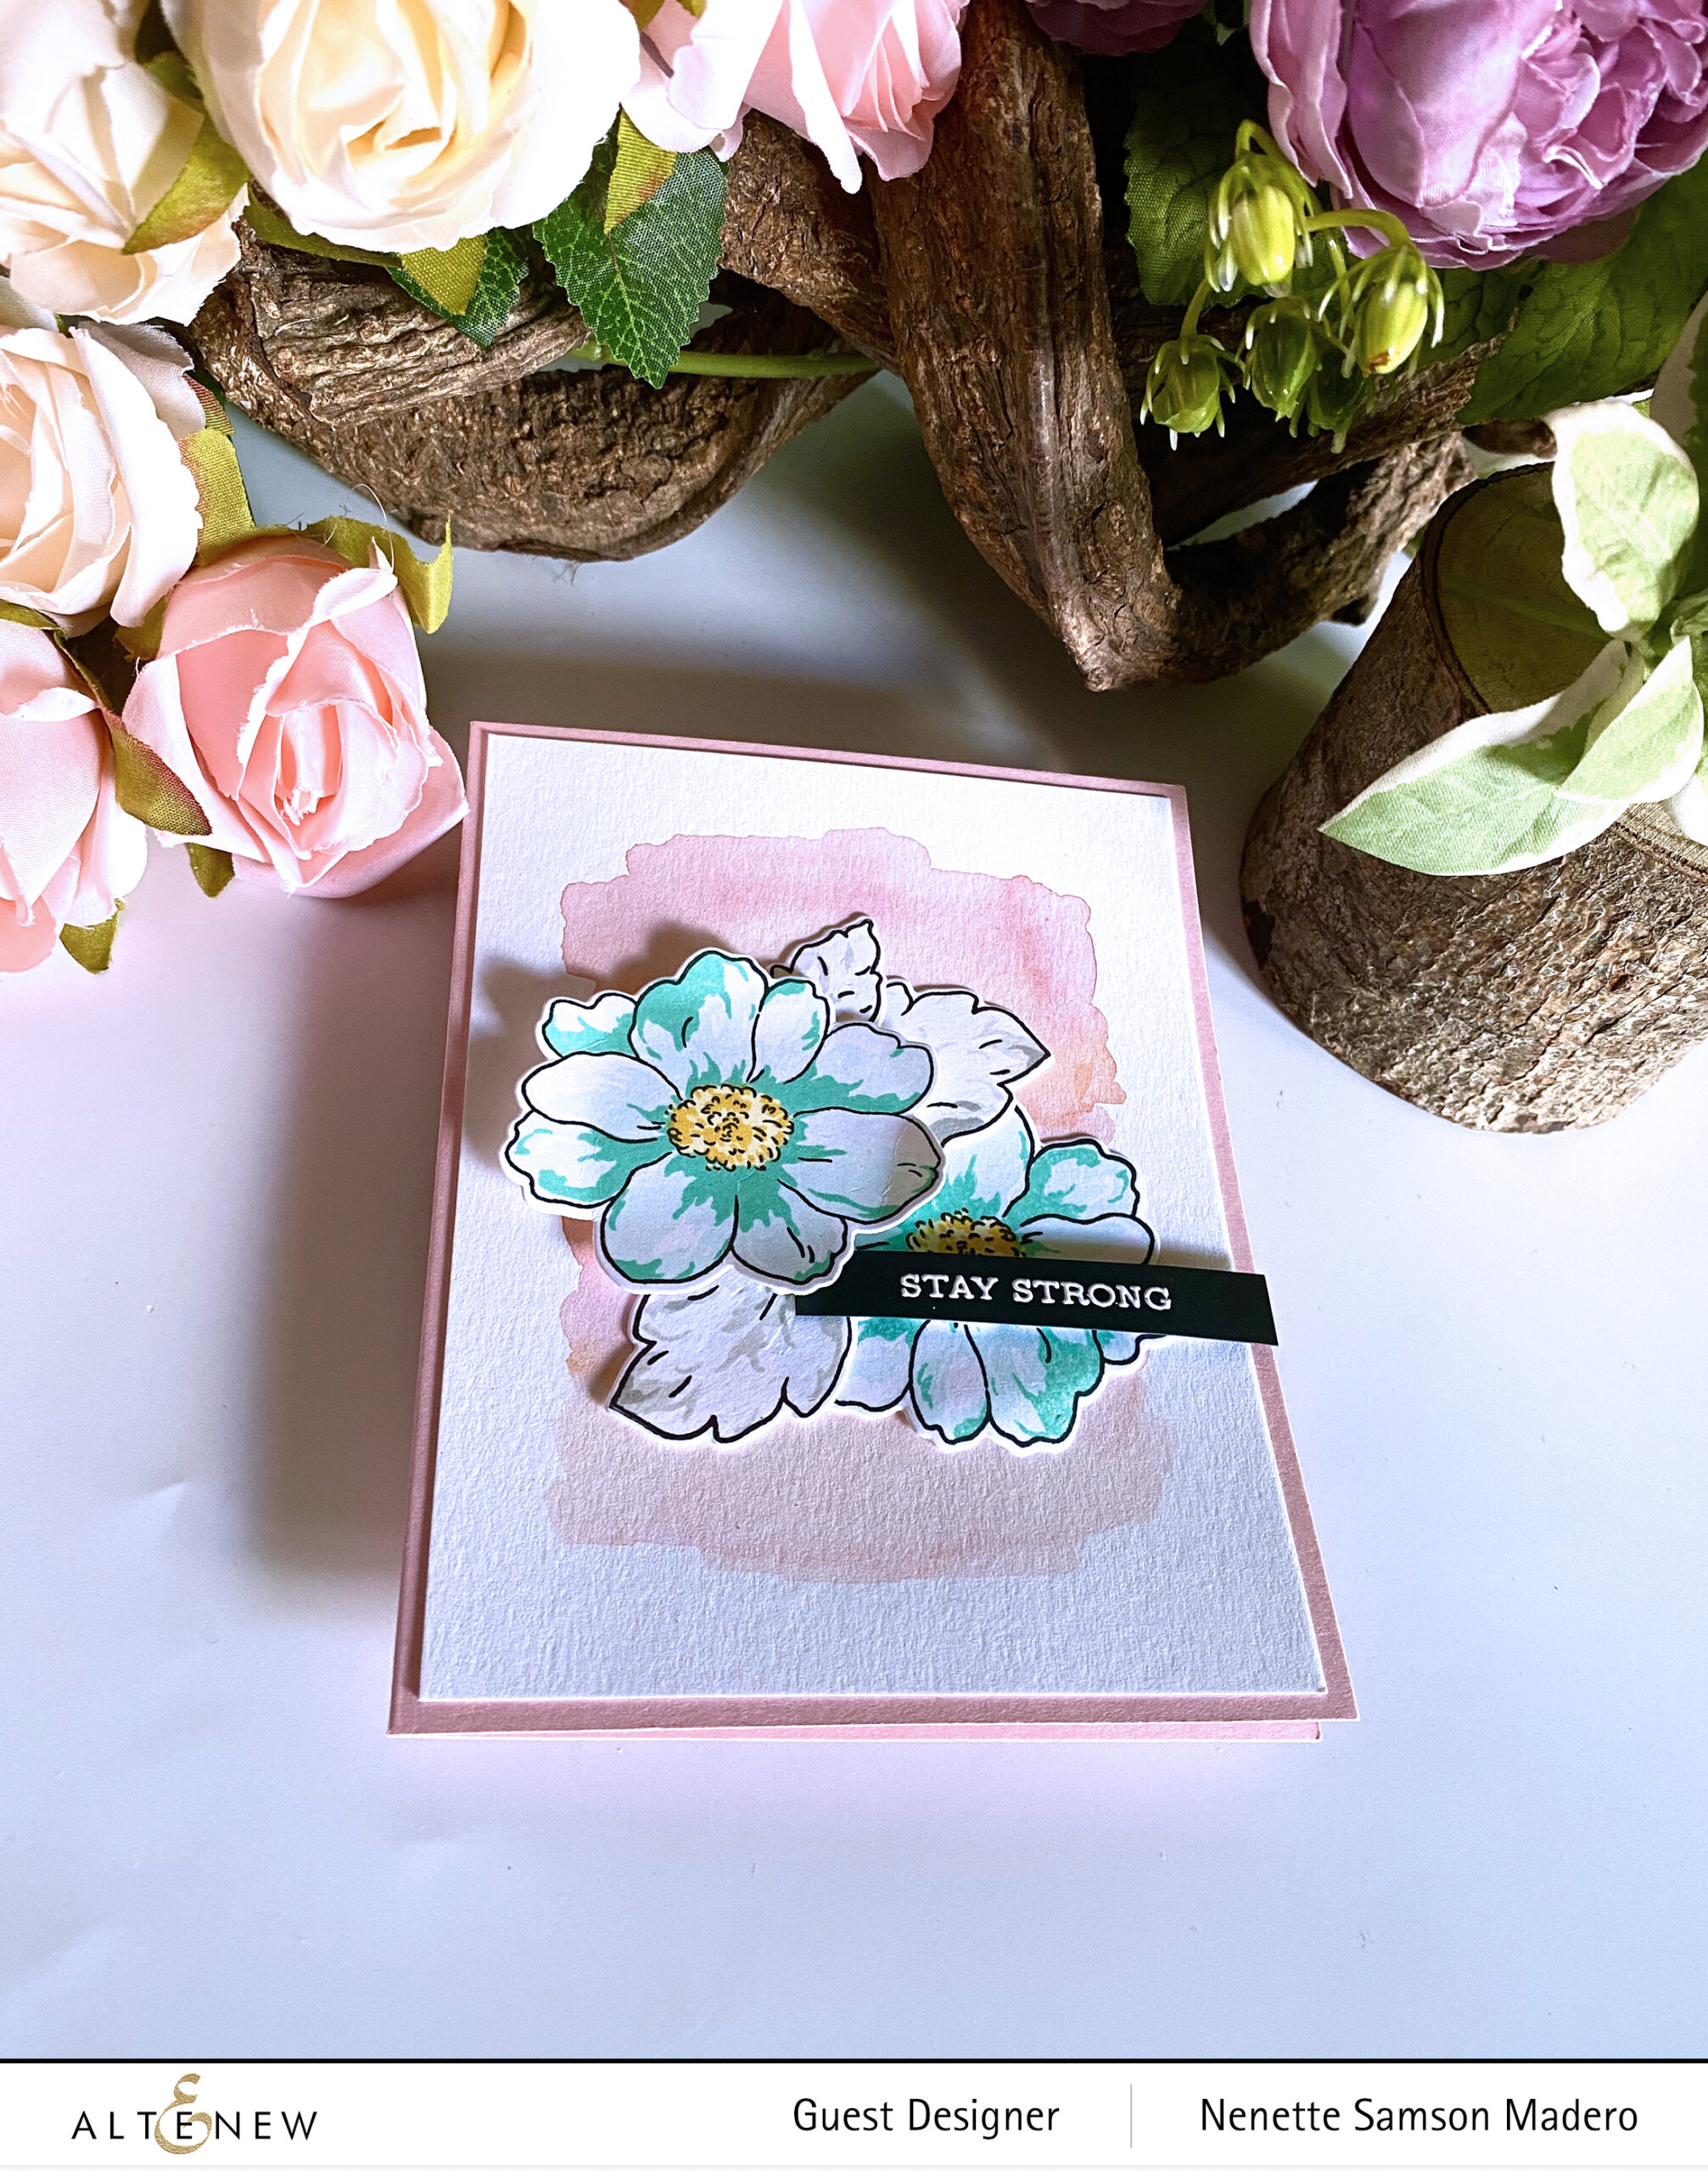
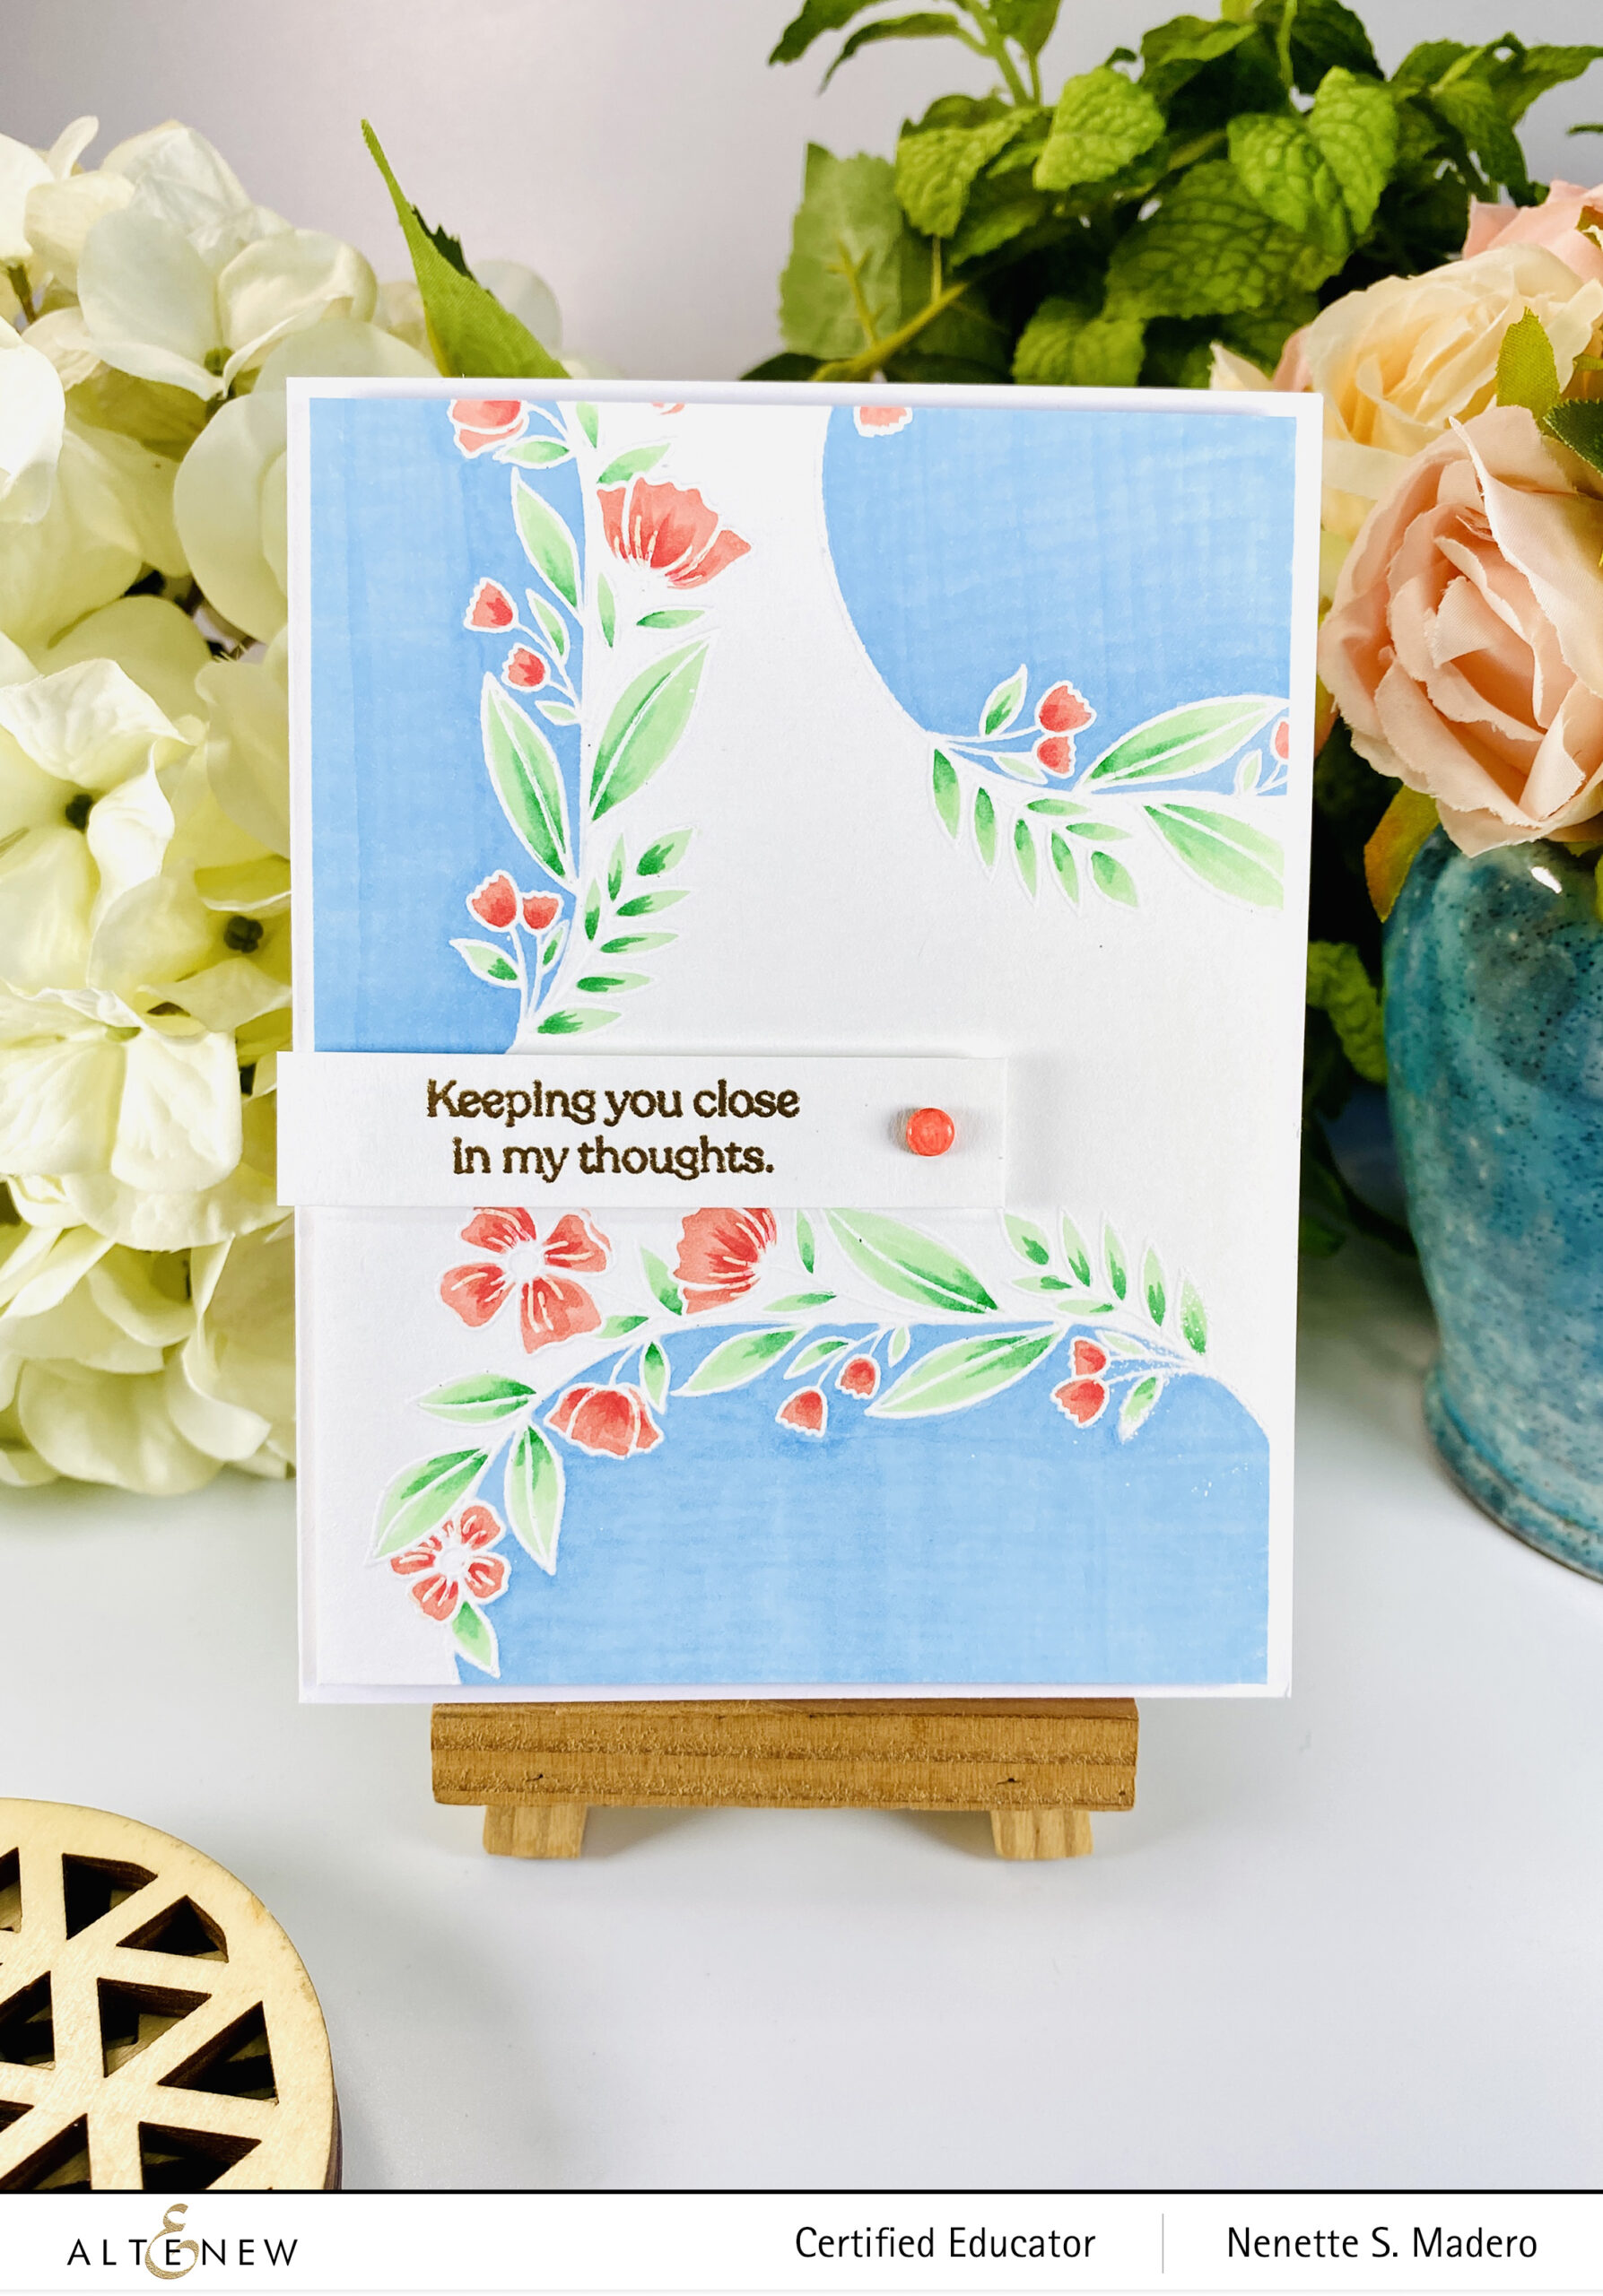
KEEPING YOU CLOSE IN MY THOUGHTS
STEPS:
- Stamp and emboss the image from the Sentimental Florals Stamp set using Pure White embossing powder.
- Color the floral images with Altenew Artist Markers.
- Stamp the sentiment and emboss using Rose Gold embossing powder.
- Color a brad using the matching artist marker. When dry, add Versamark ink and emboss with clear embossing powder.
- Color the inside of the wreath blue with markers.
- Assemble the card.
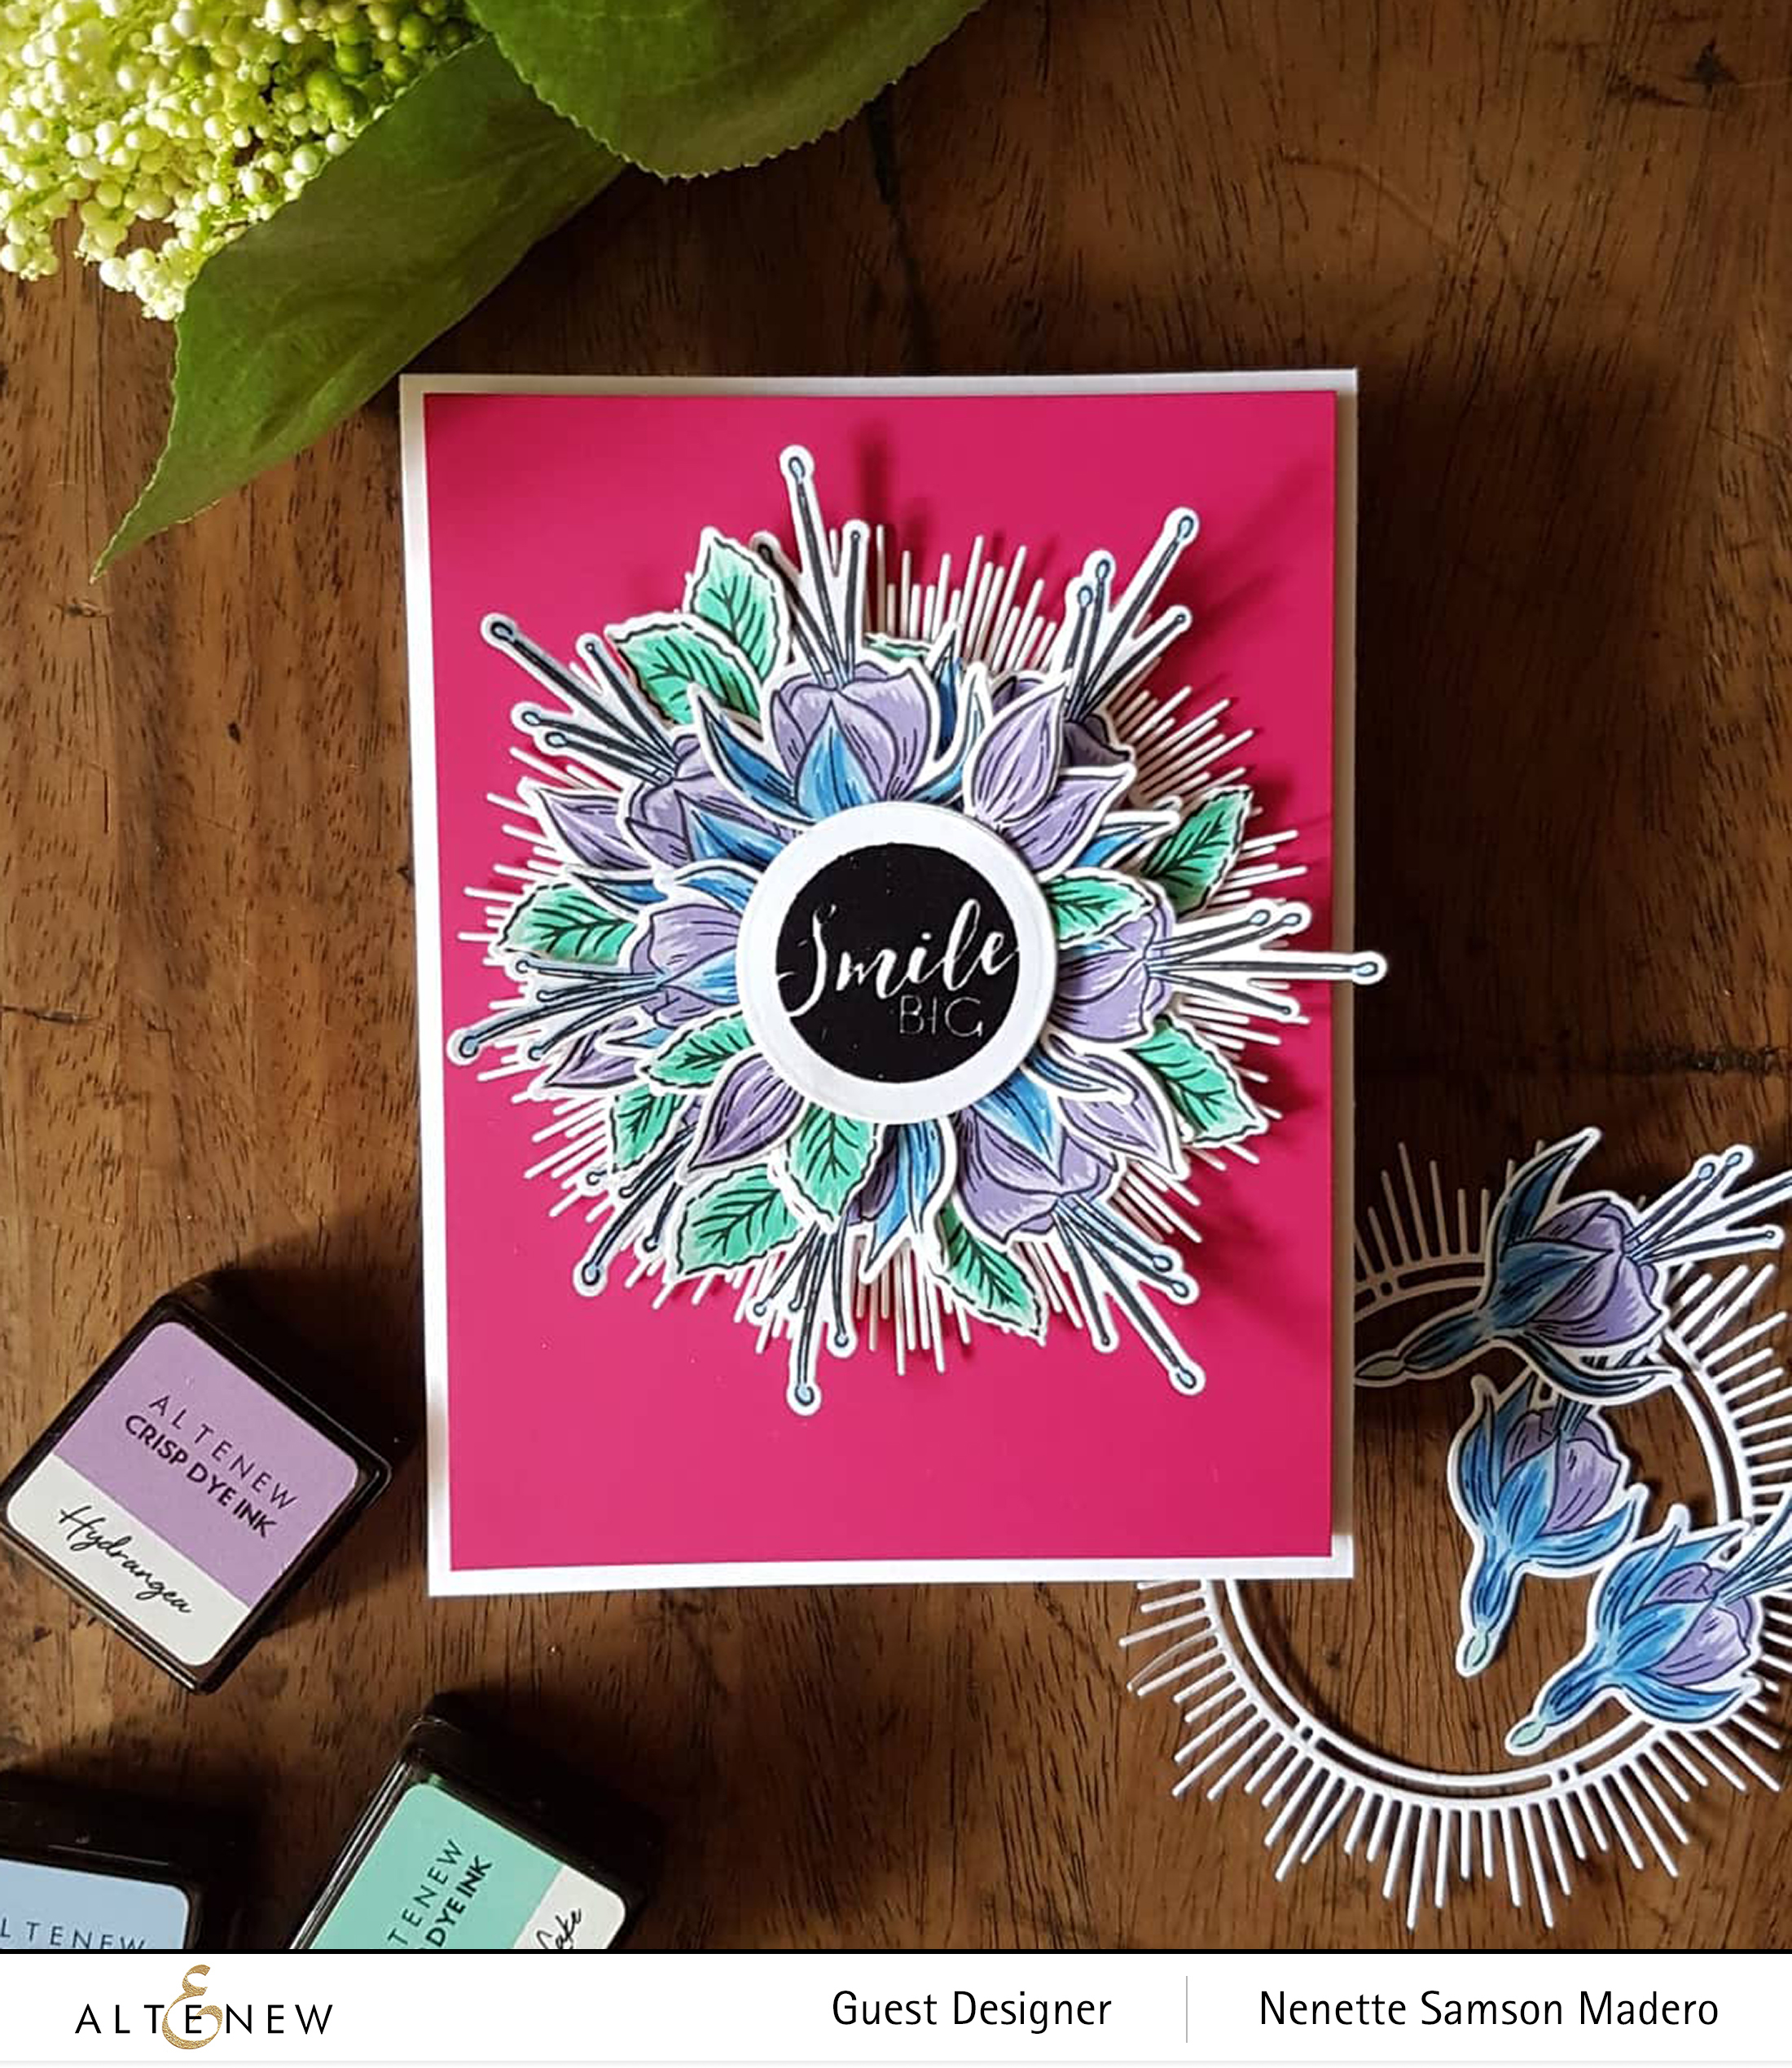
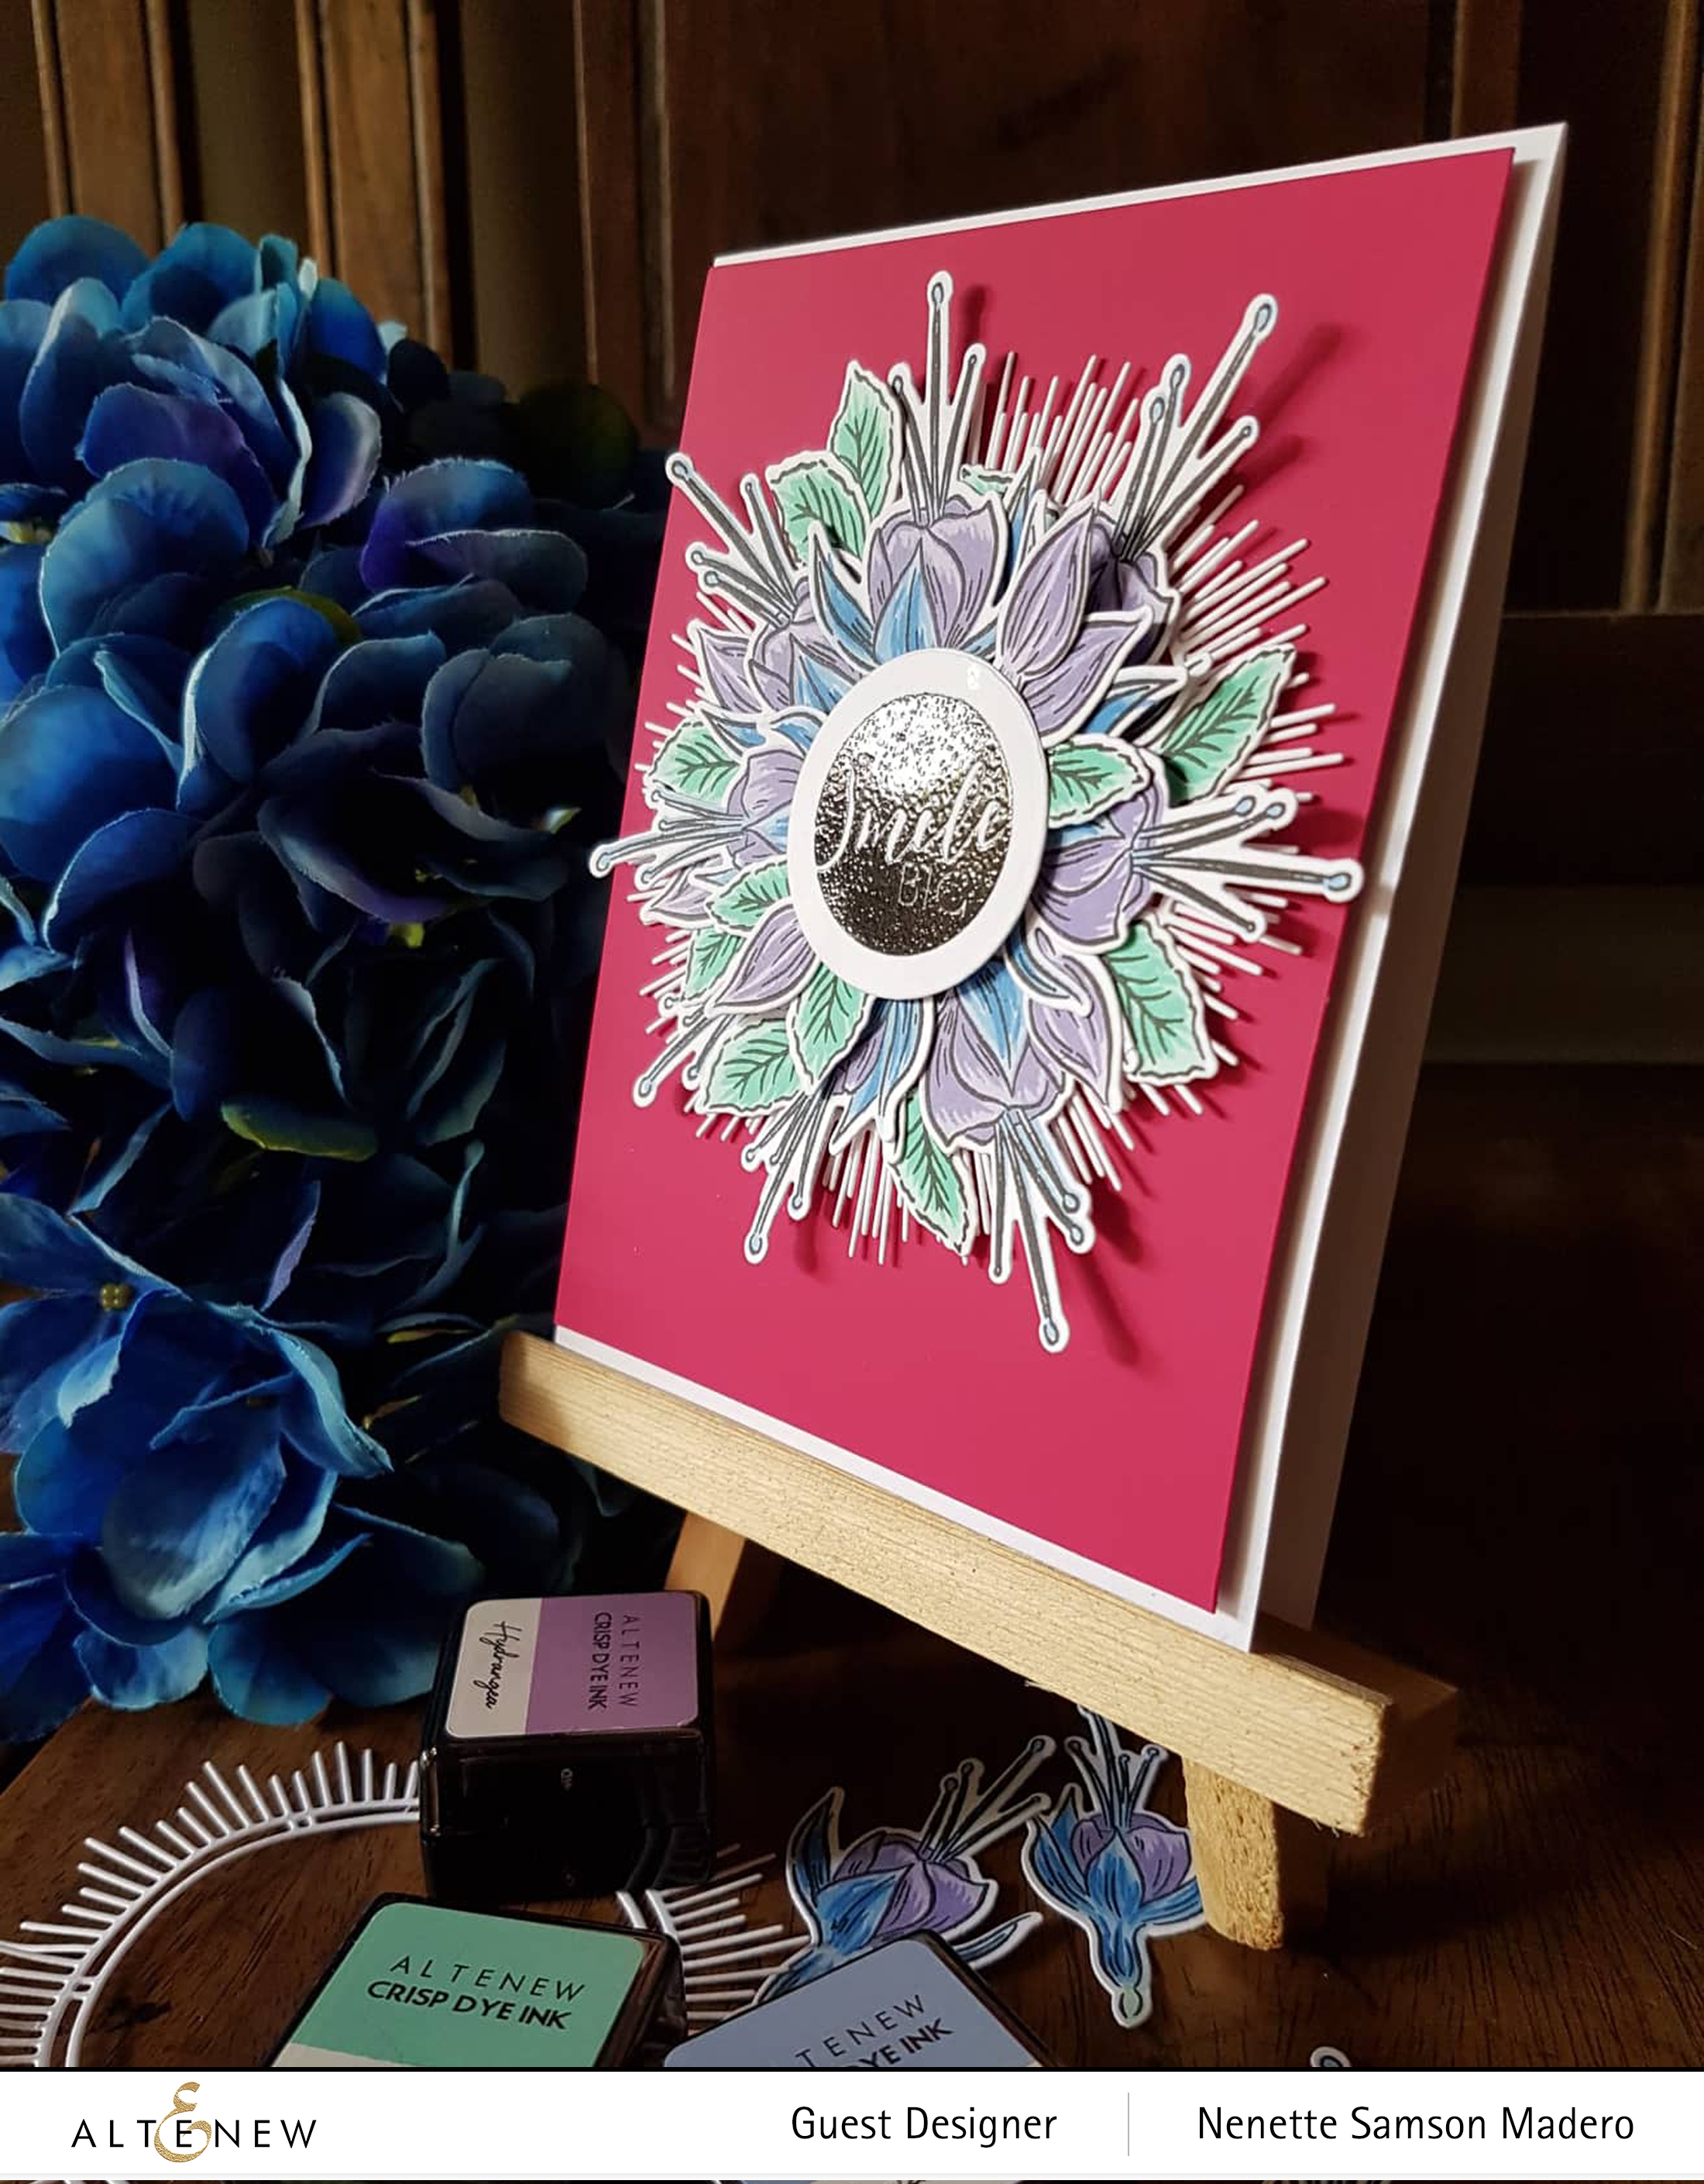
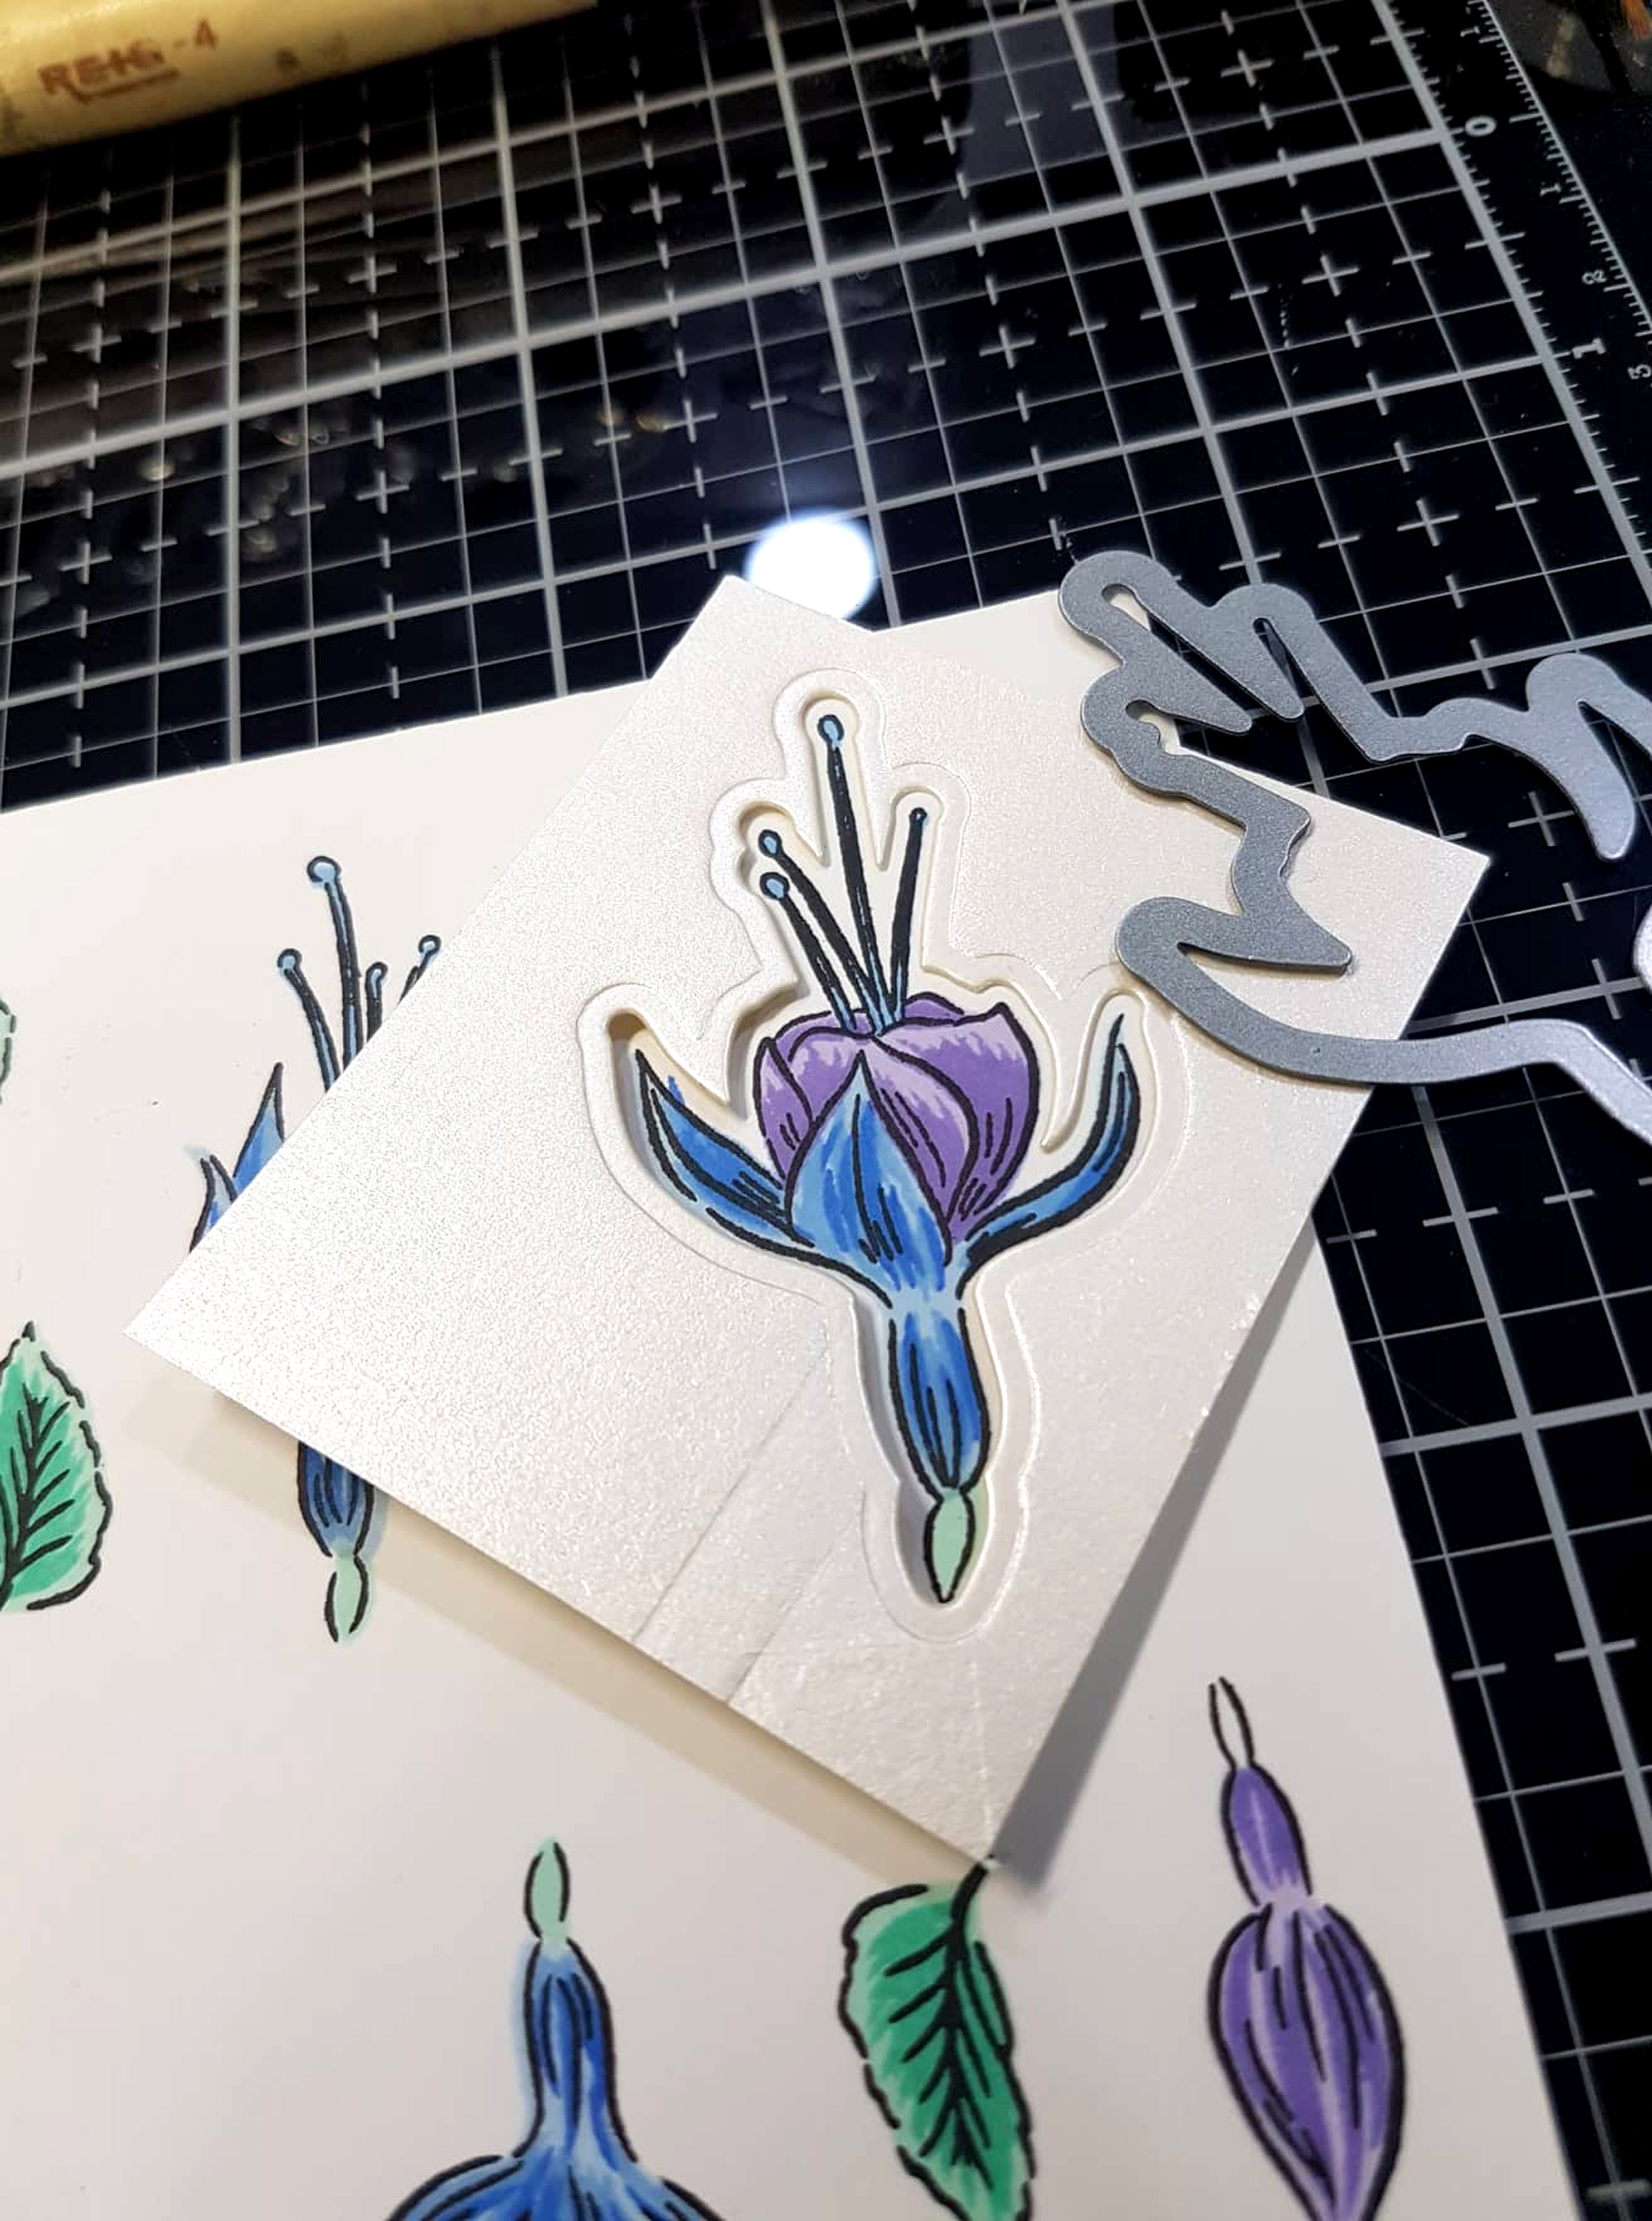
I thought of using the wreath differently by just stamping portions of it and coloring the inner parts.
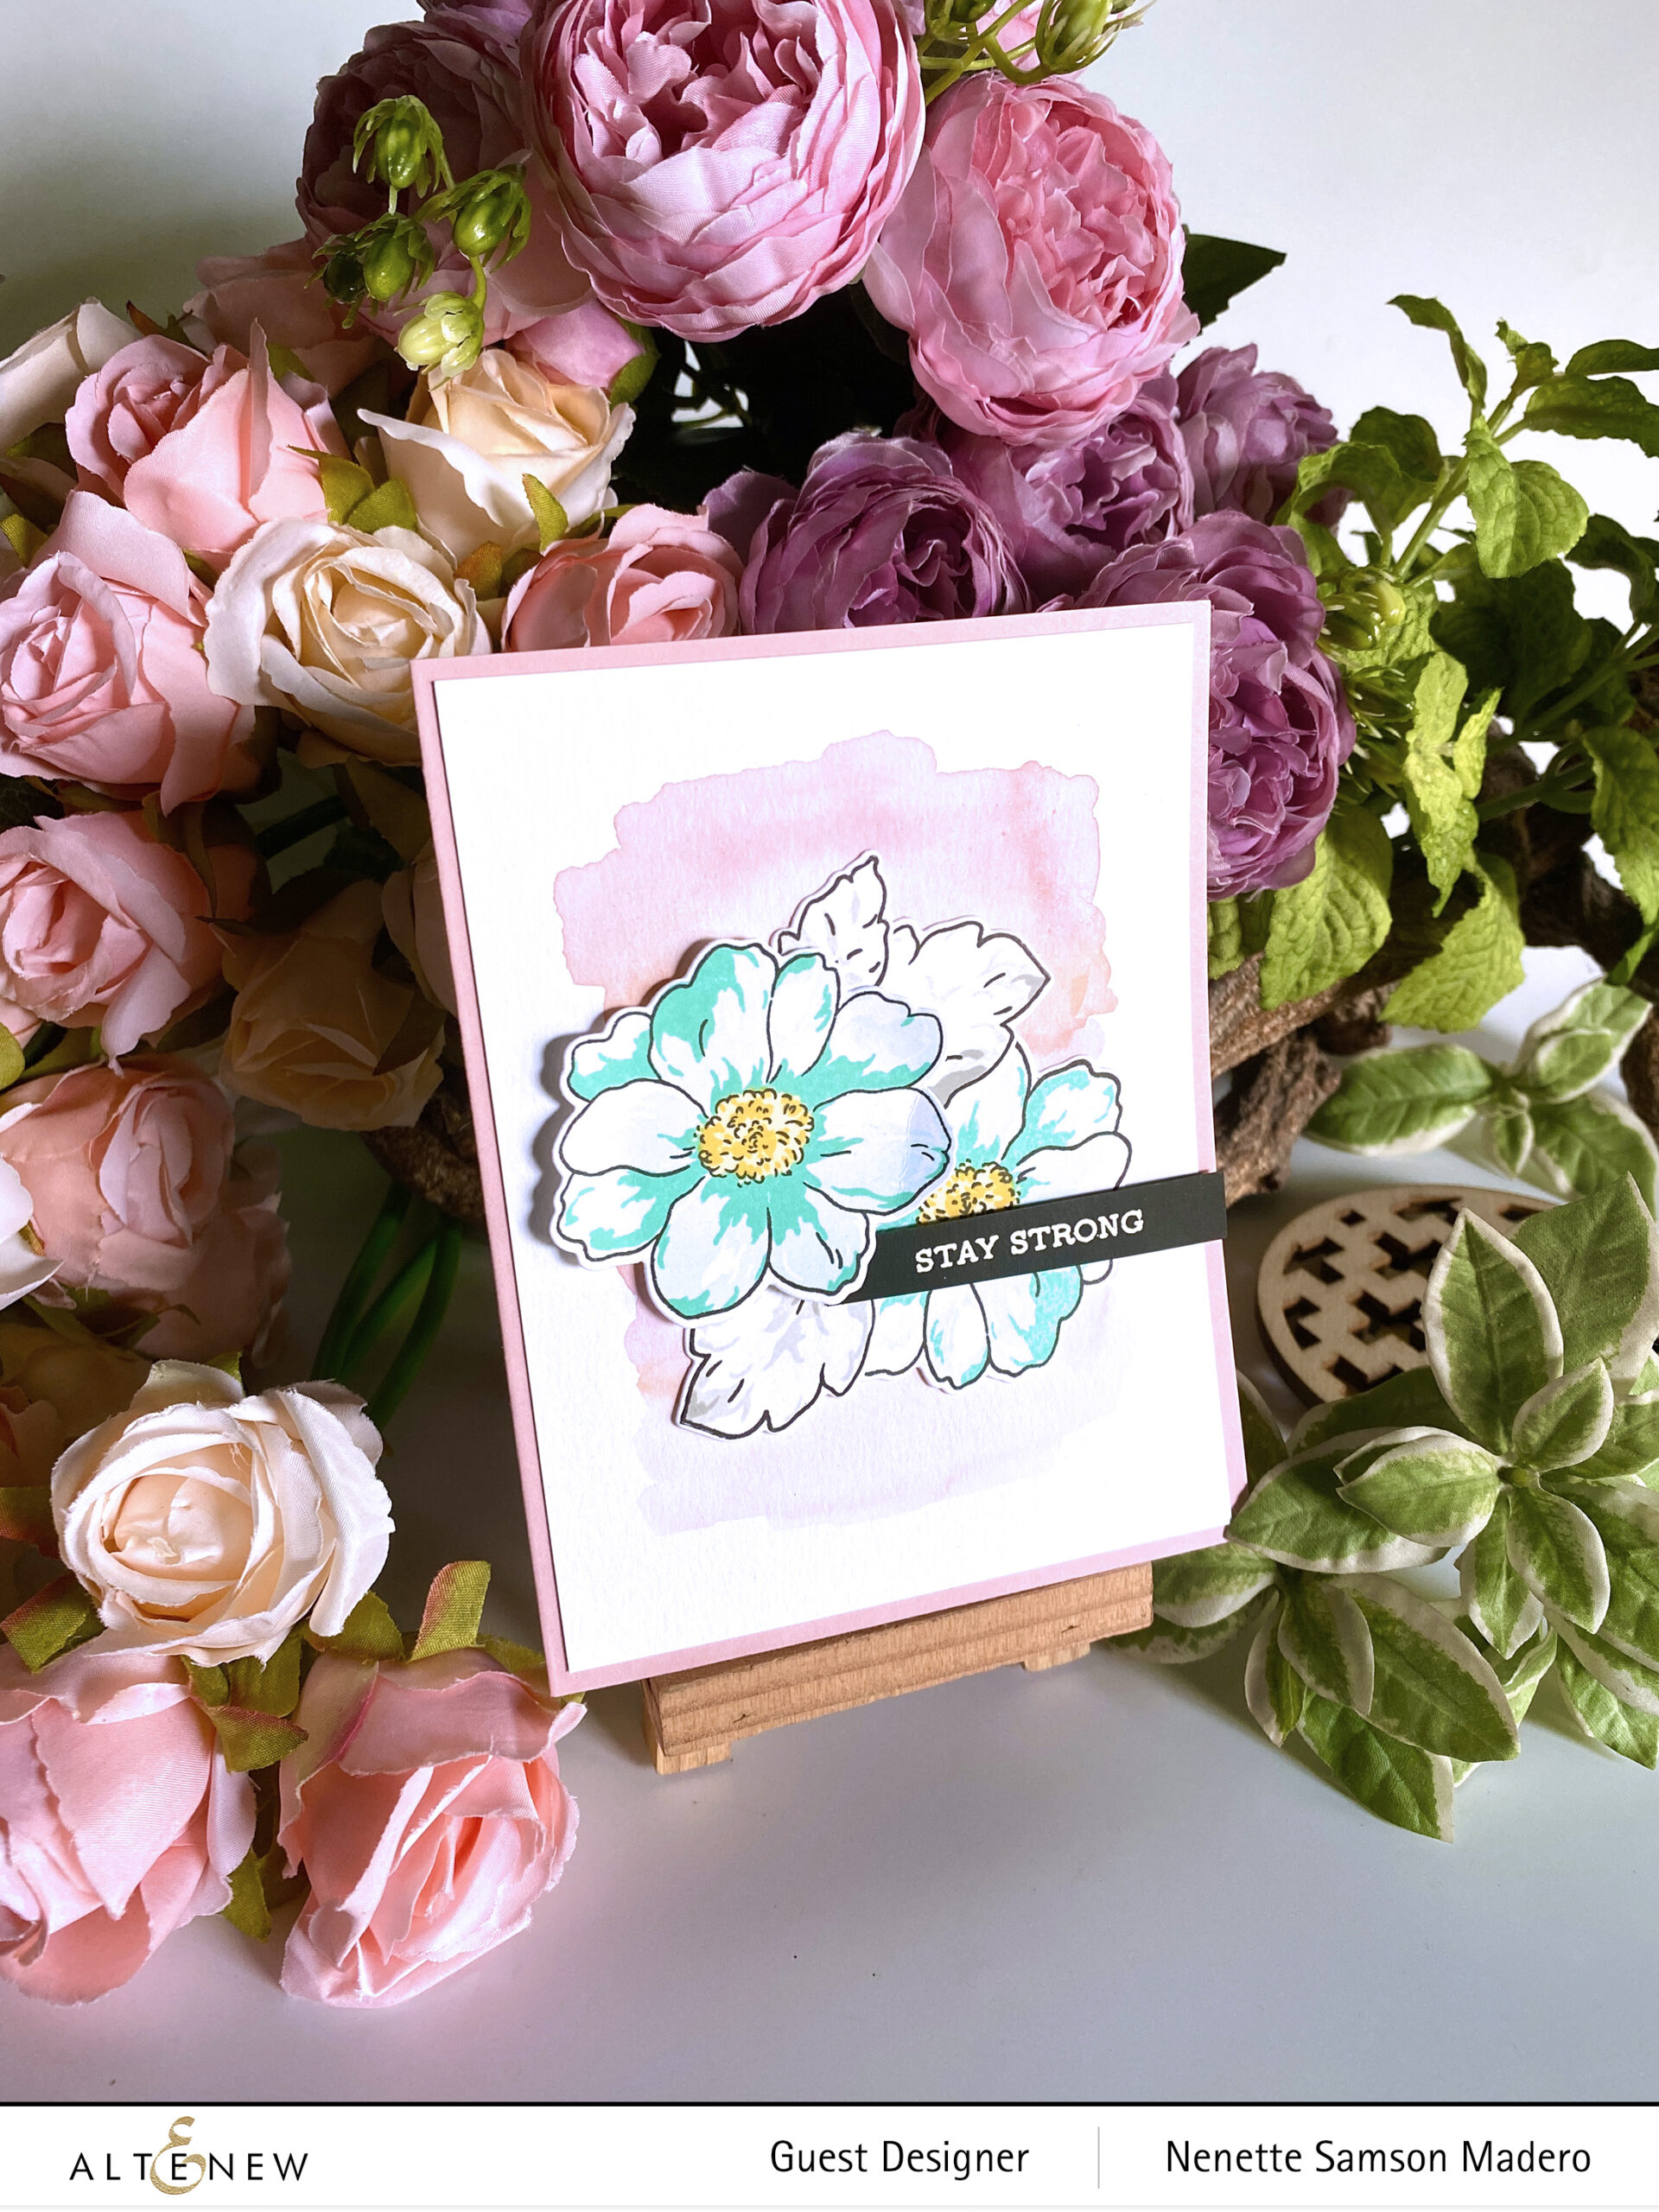
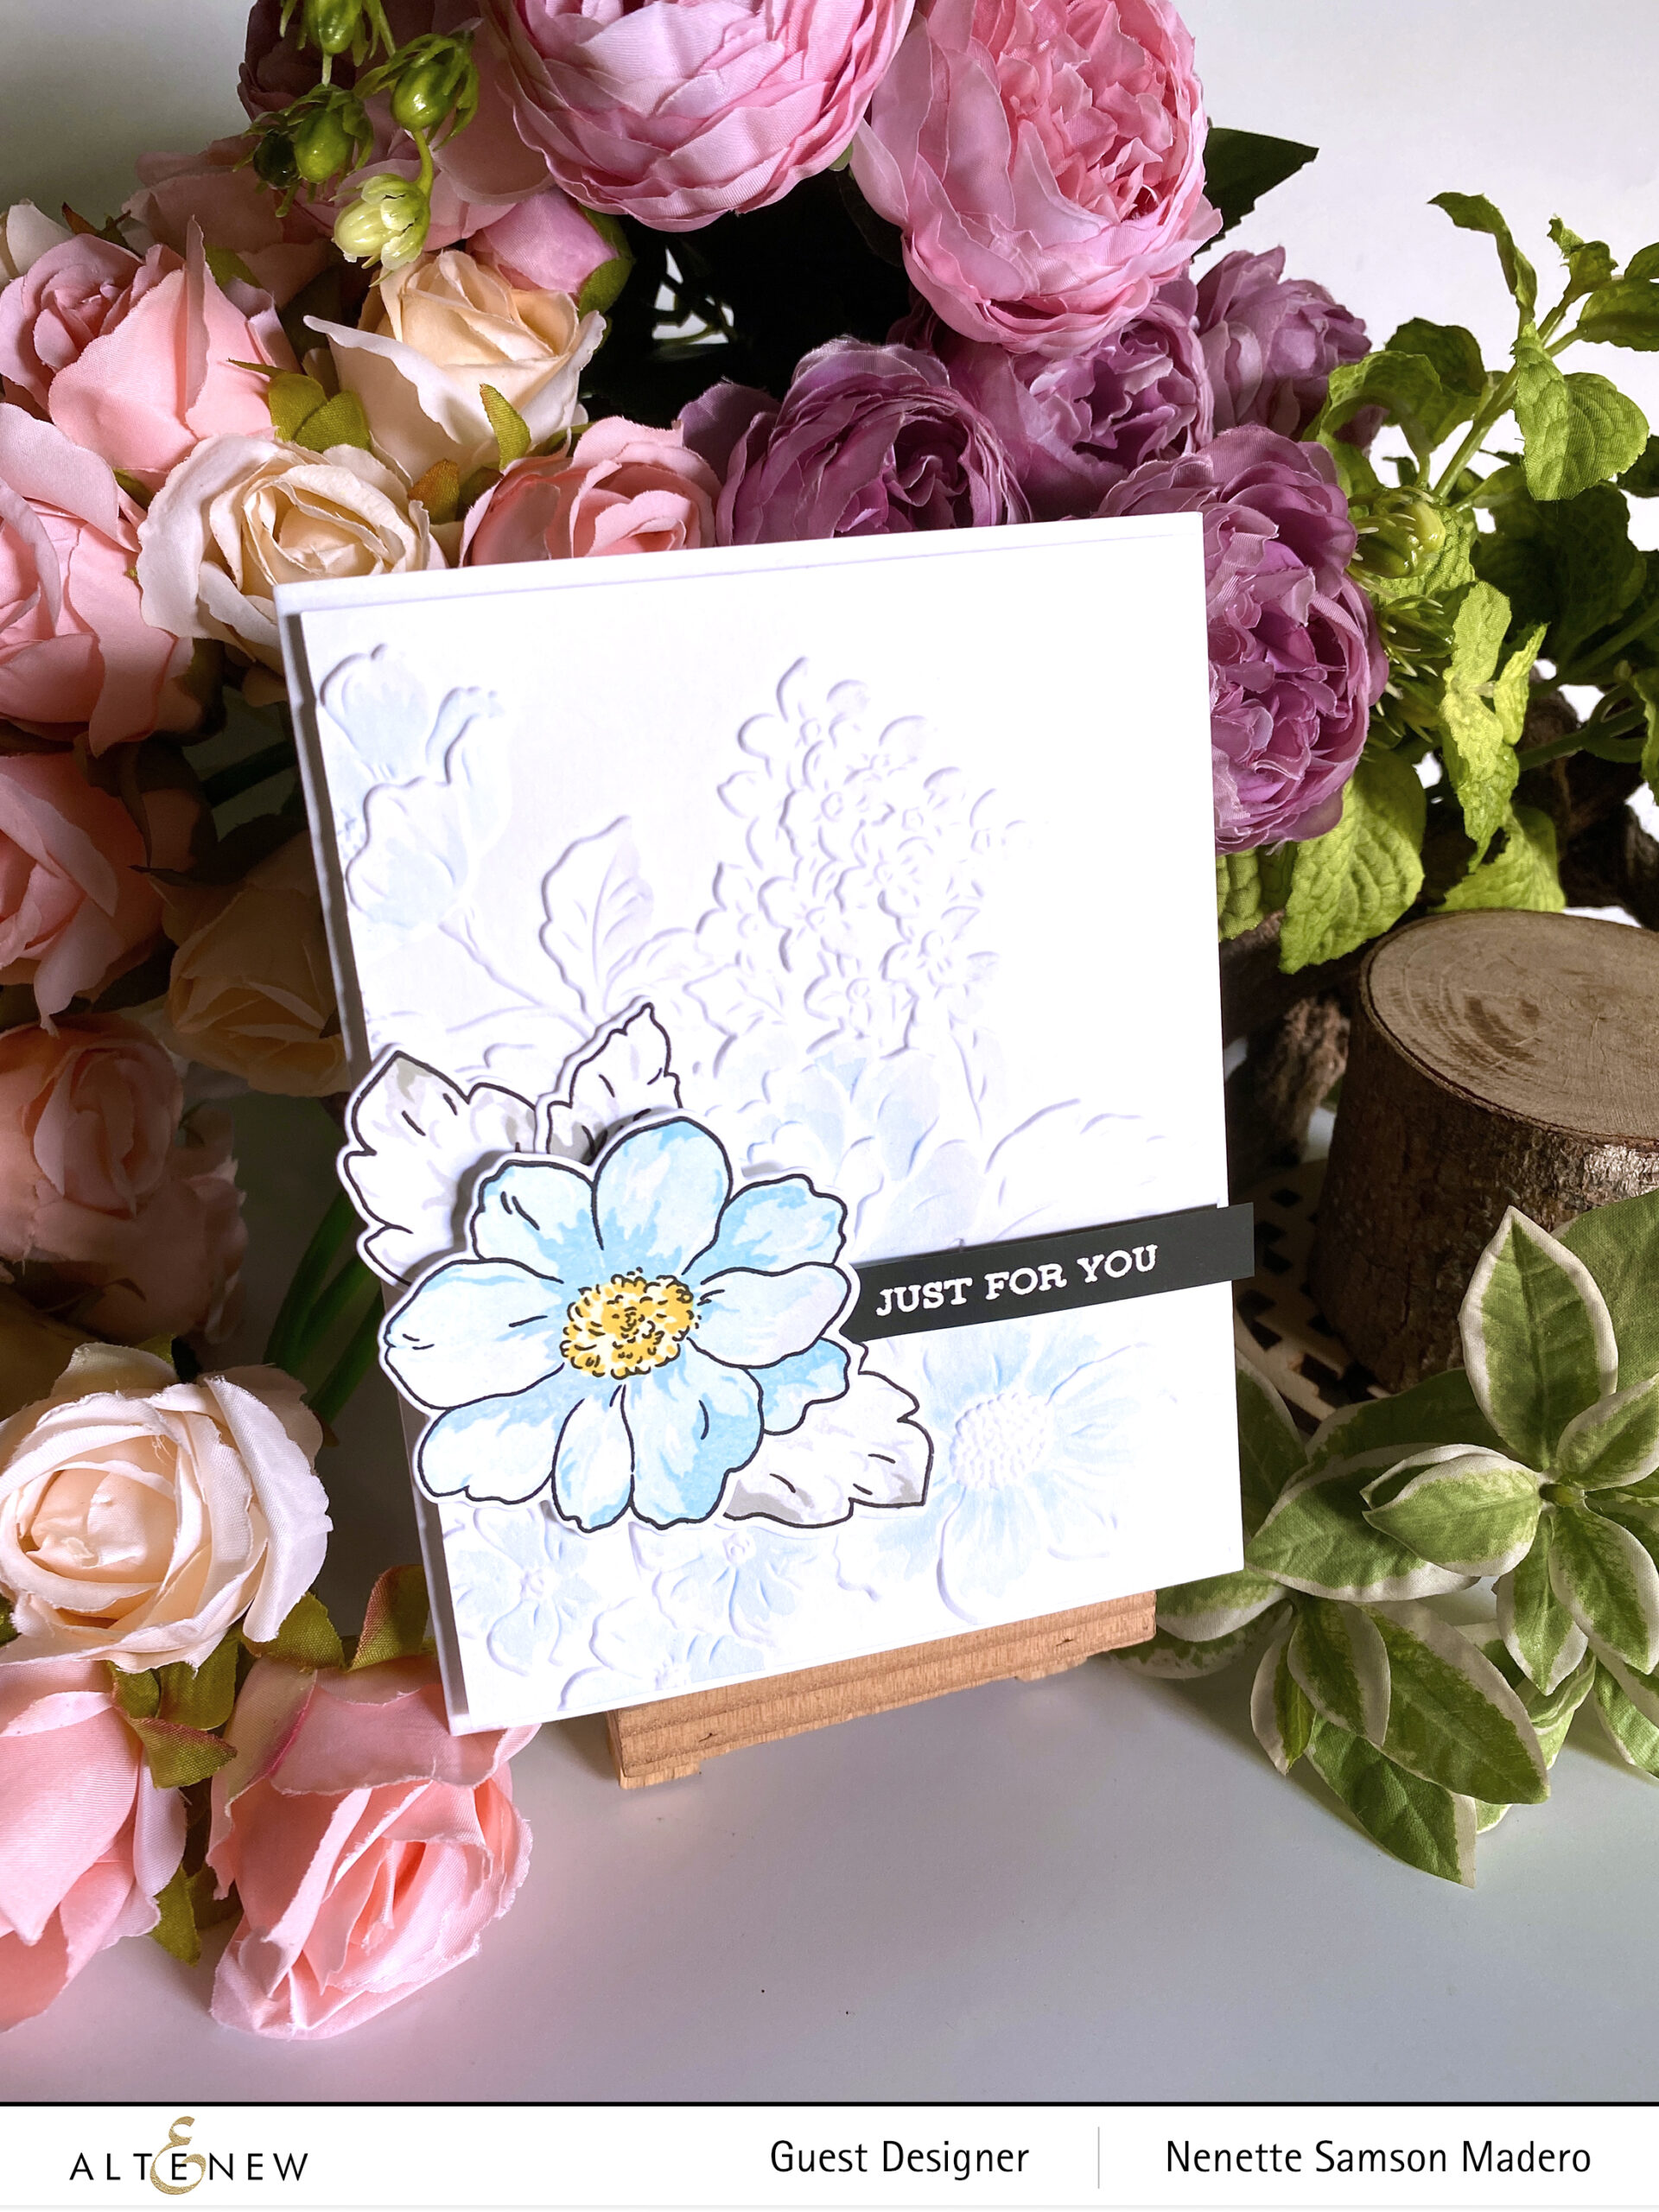
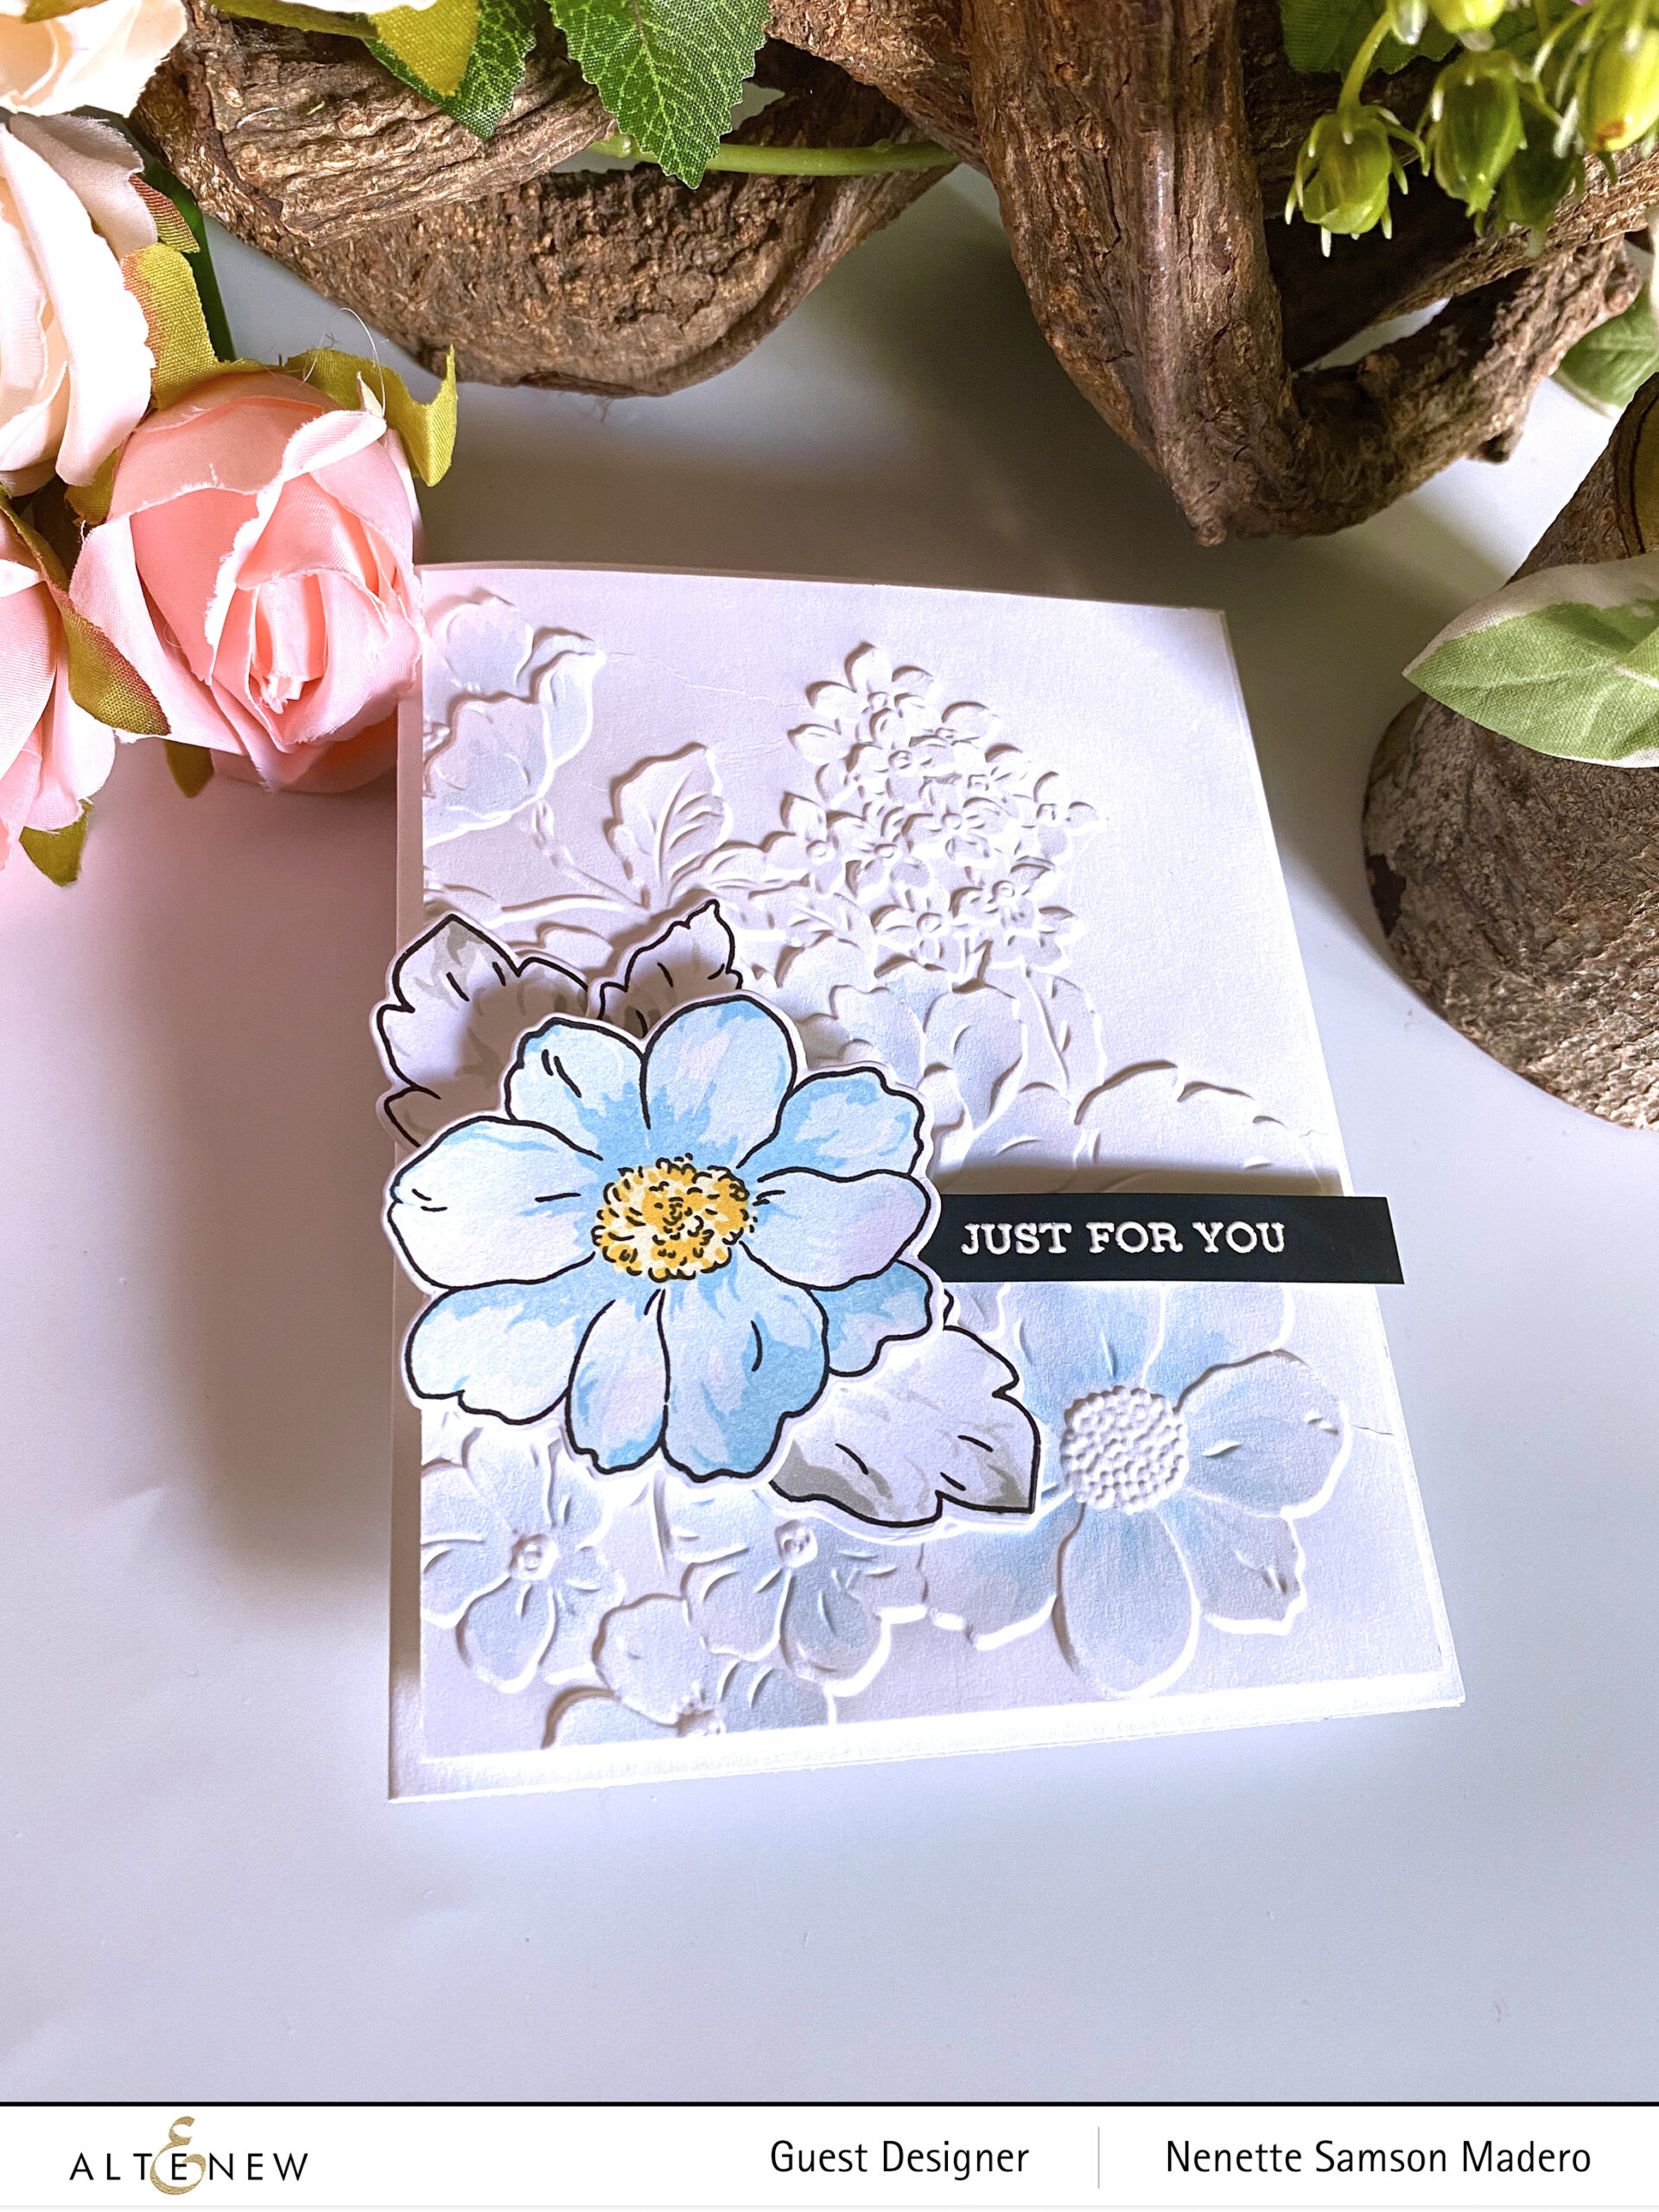
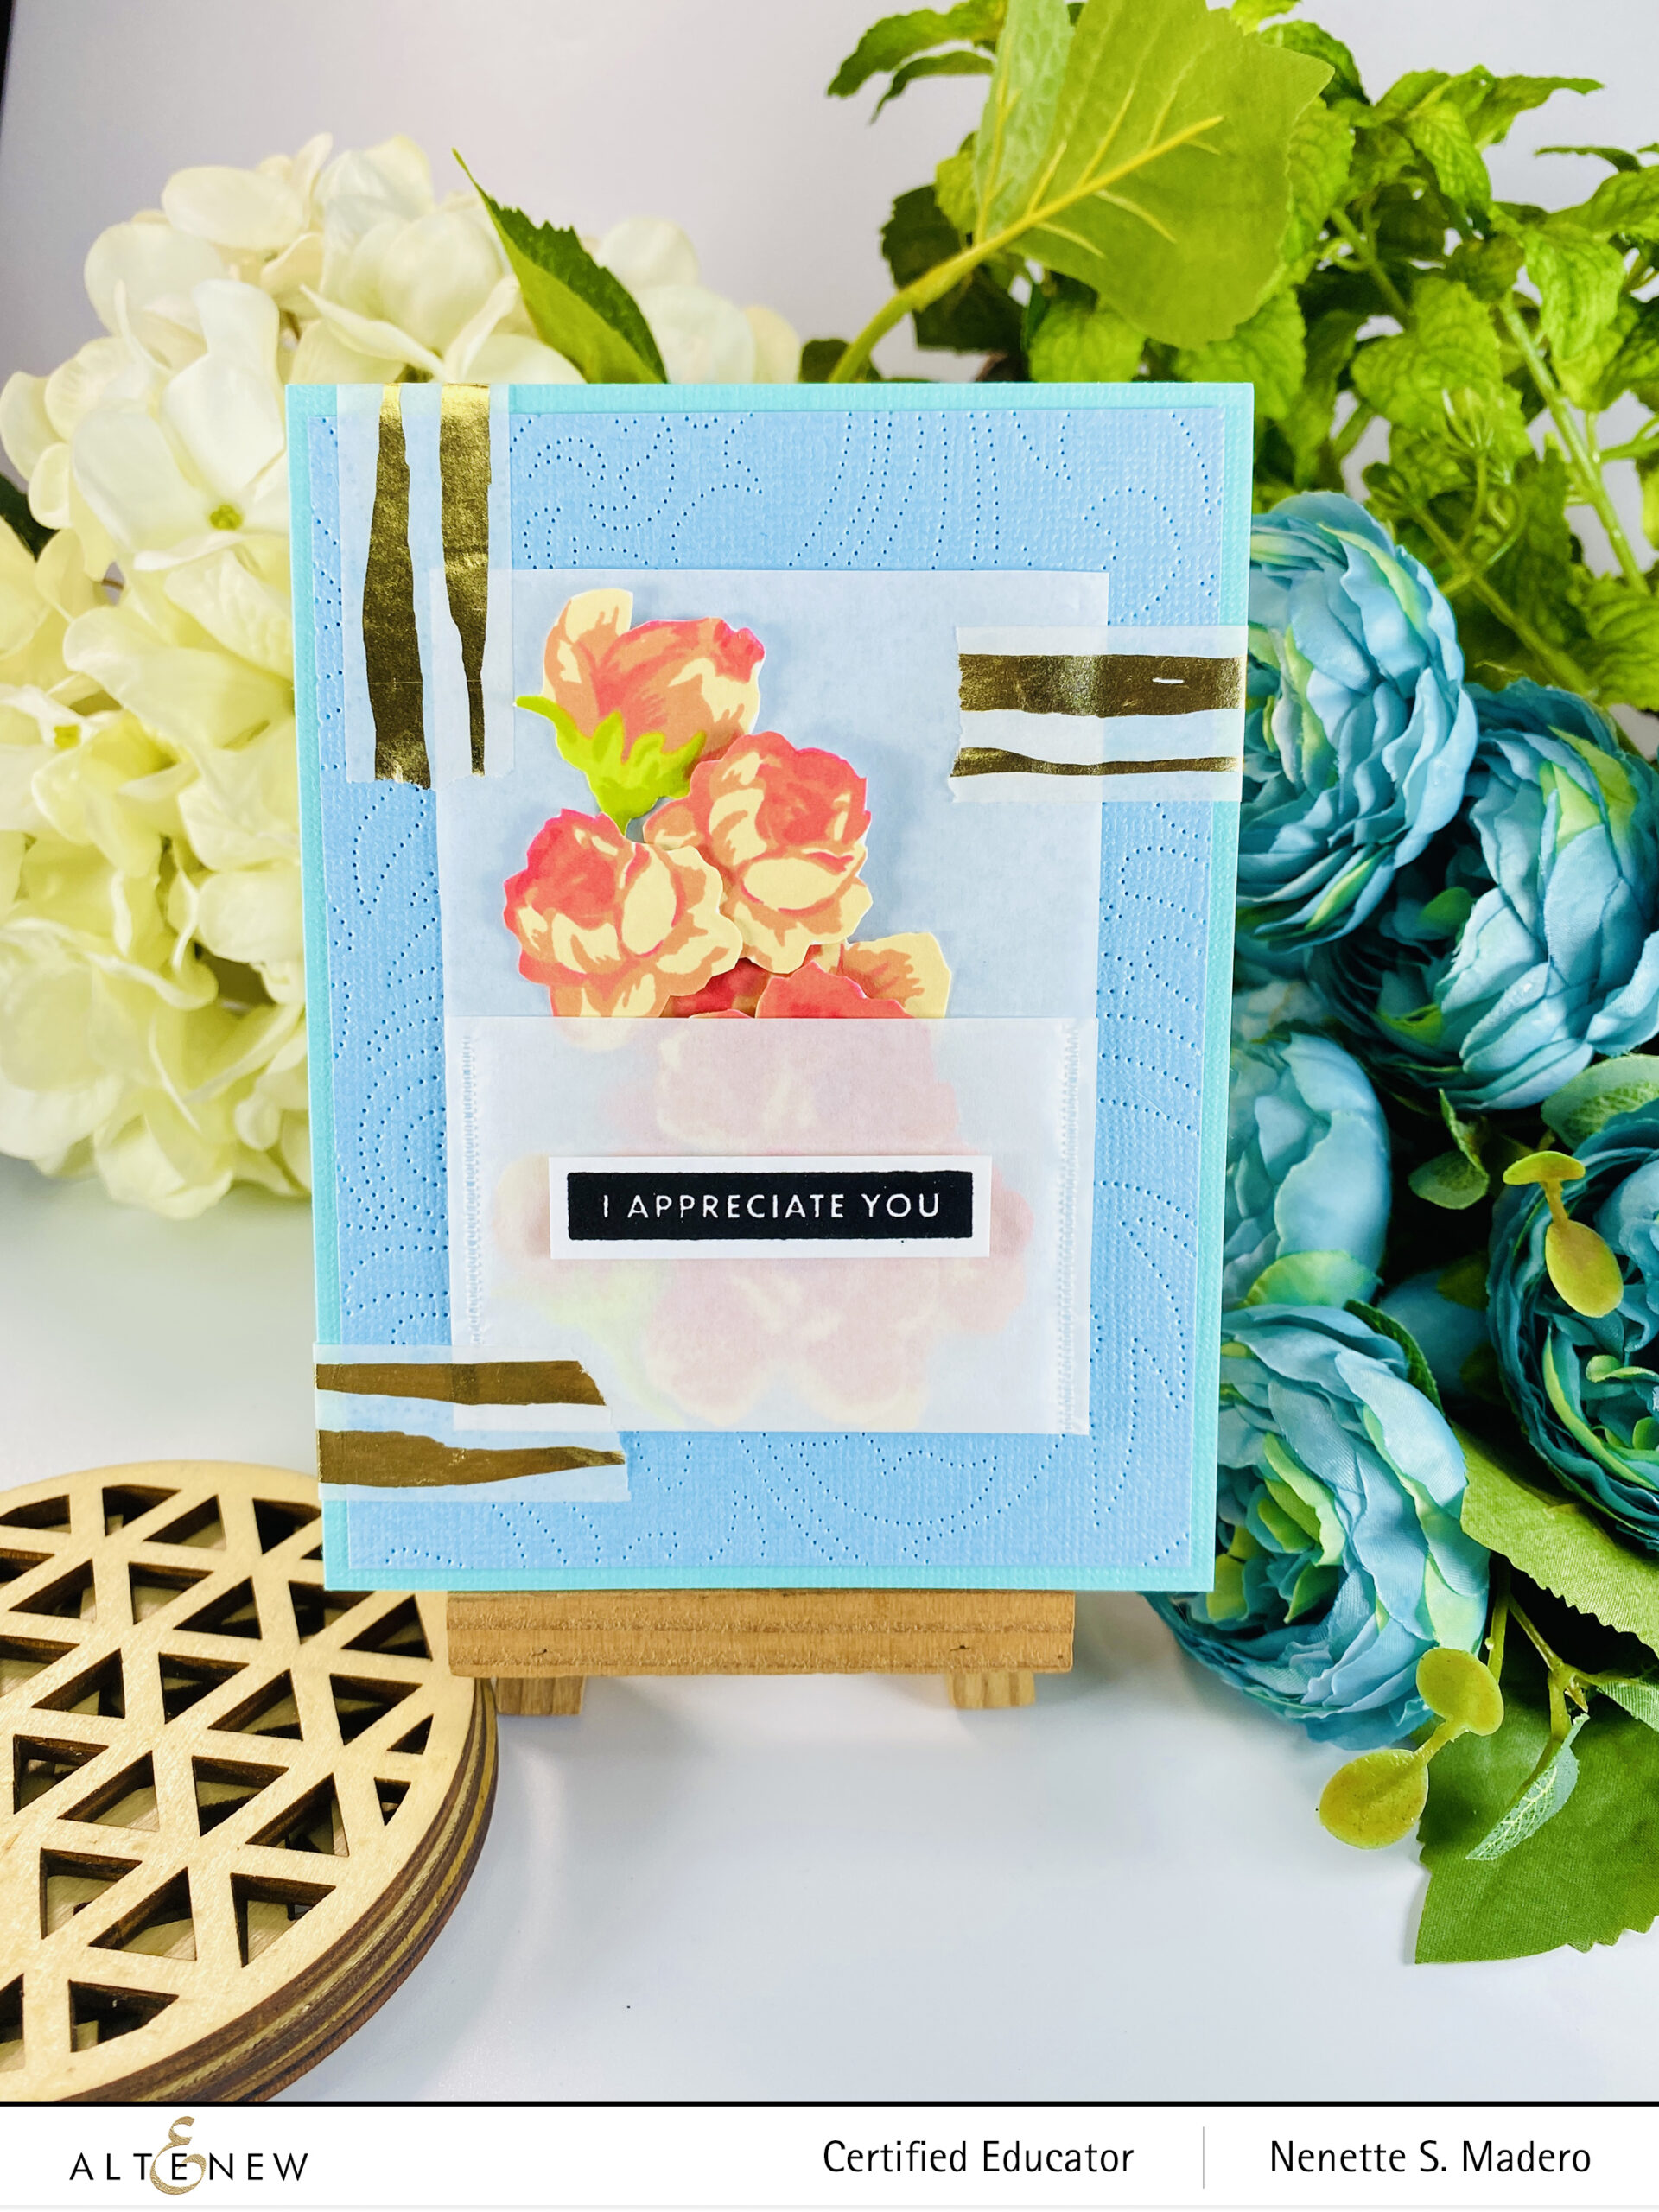
I APPRECIATE YOU
STEPS:
- Stamp the image from the Ethereal Roses Stamp set using dye inks.
- Fussy cut the flowers.
- Create a pouch using vellum and a stapleless stapler.
- Fill the pocket with flowers and adhere some with glue.
- Deboss a light blue panel using the Dotted Swirls Debossing Cover Die.
- Attach the pocket to the debossed panel using the Golden Stream Washi Tape and adhere to the card front with glue.
- Stamp and emboss the sentiment from the Bold Sentiments Stamp set and attach with foam squares.
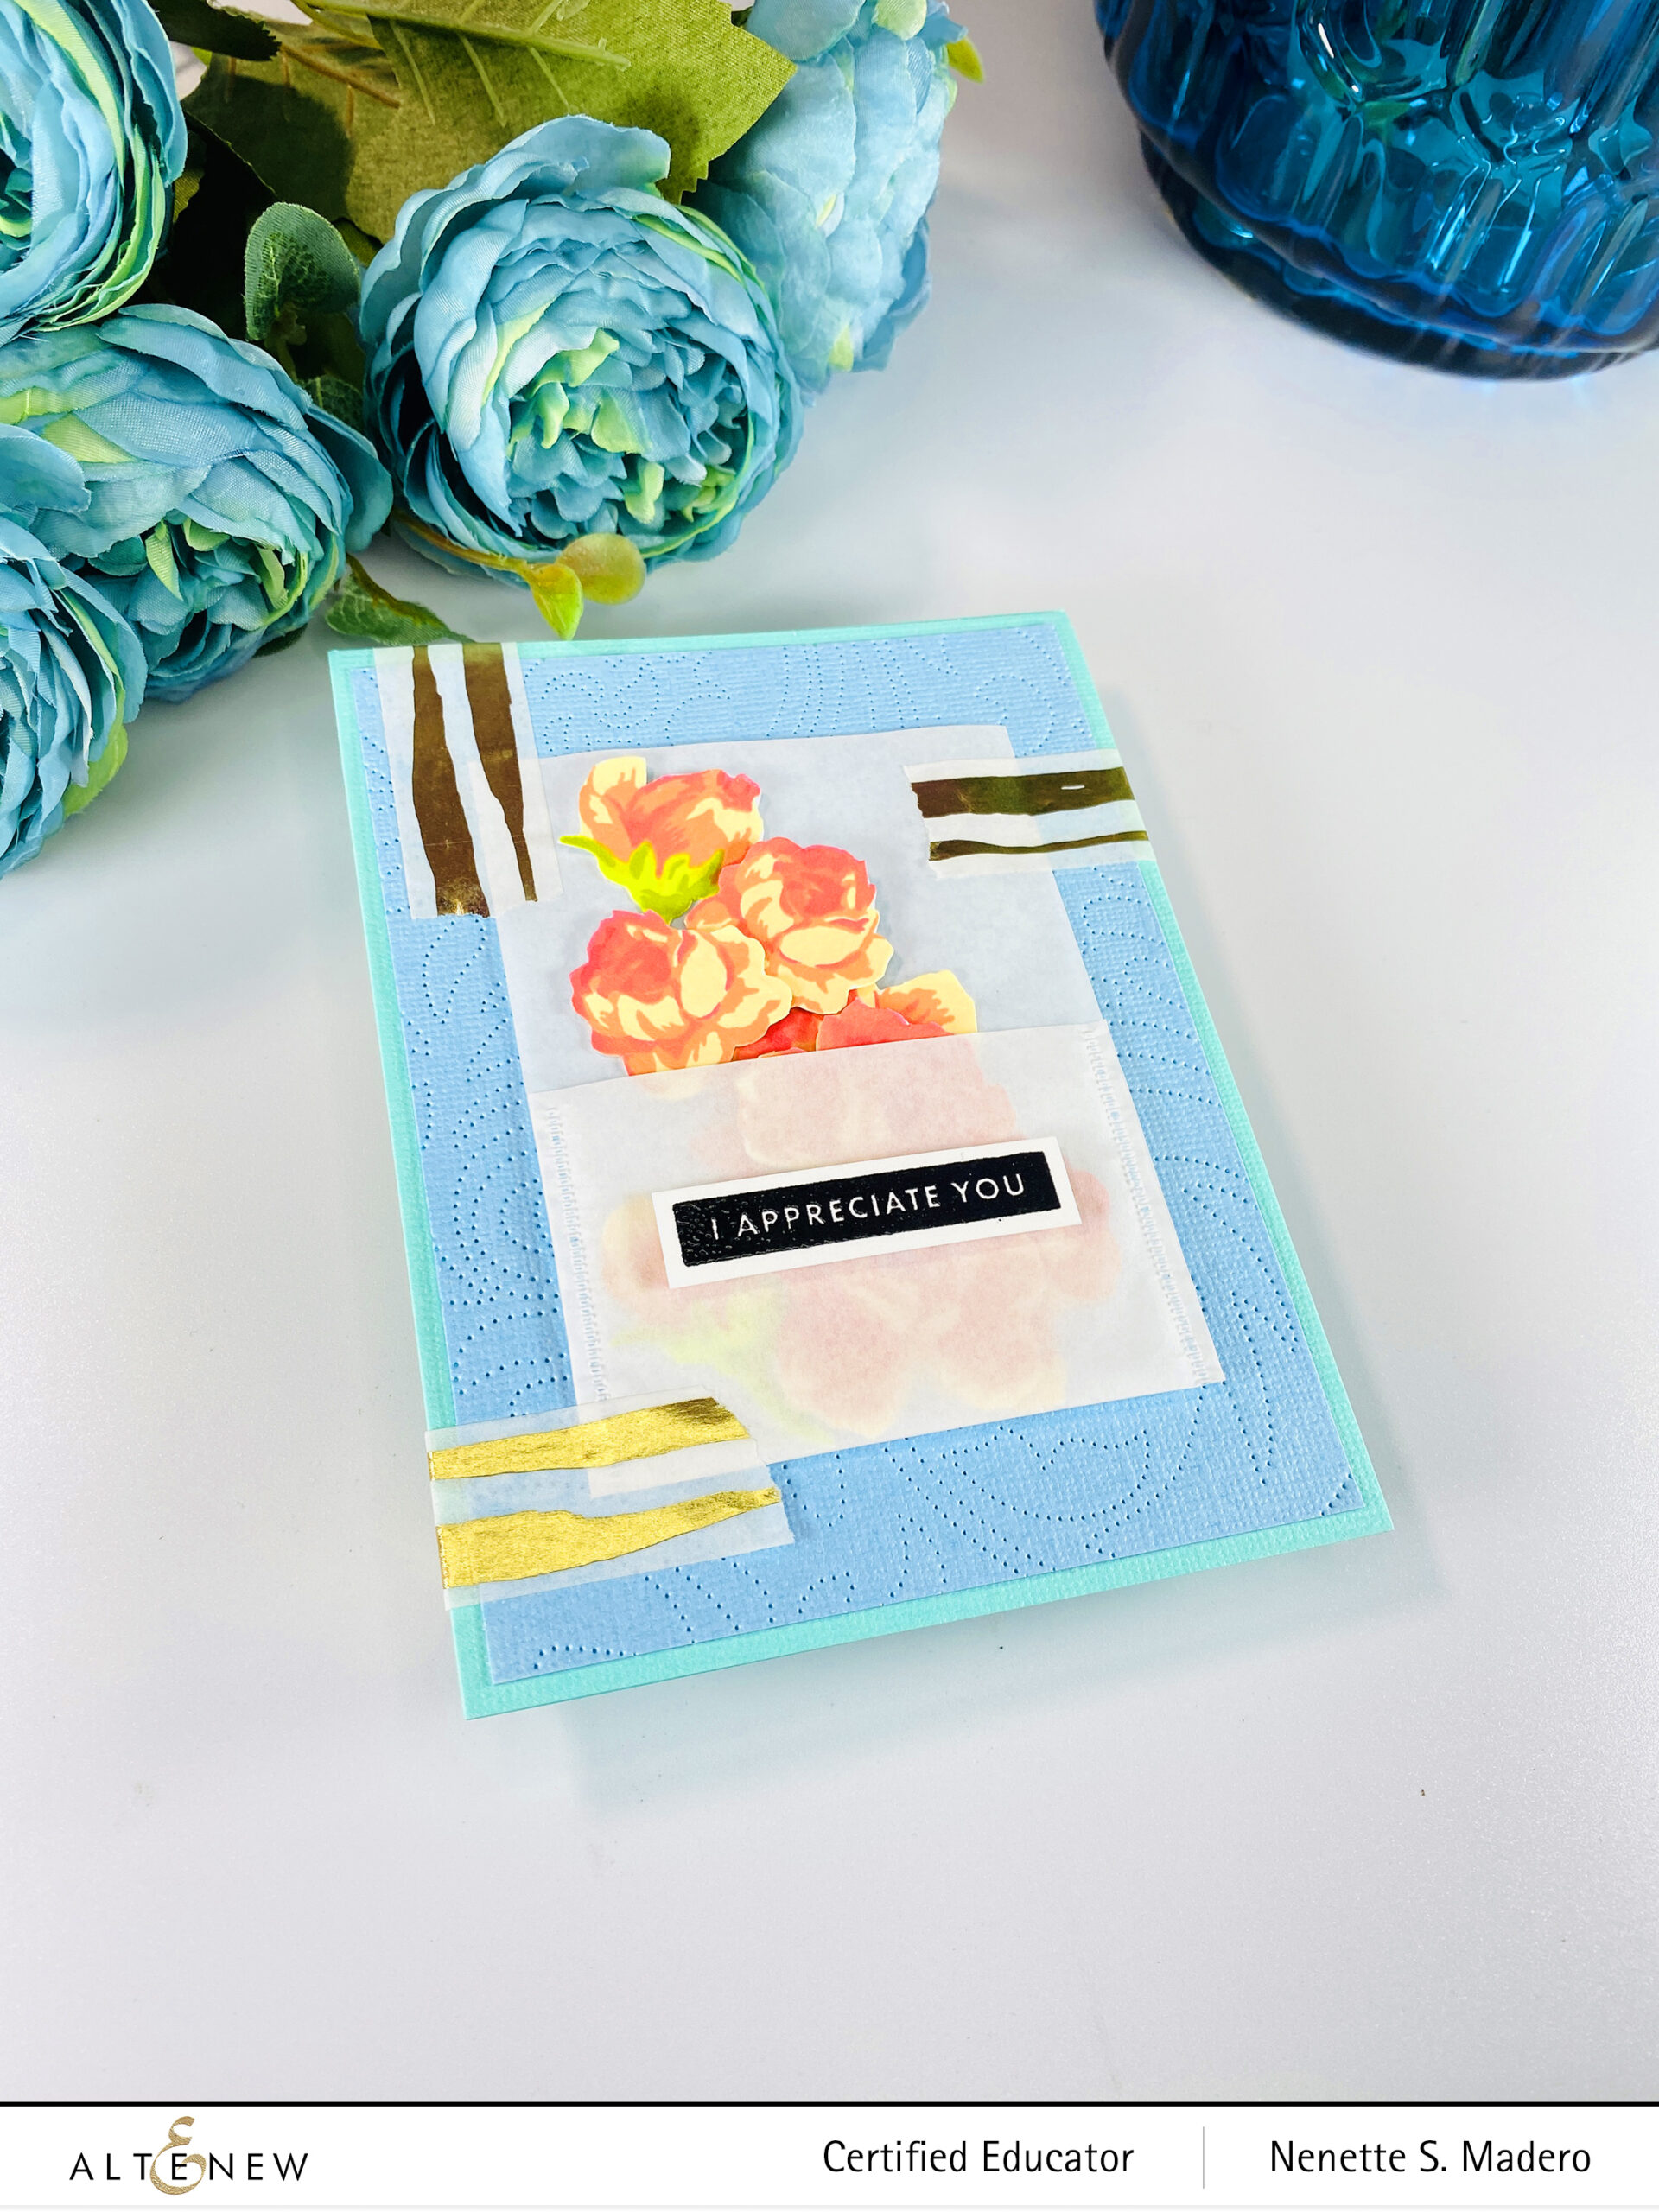
The recipient can use the loose flowers for her own cards or layouts.
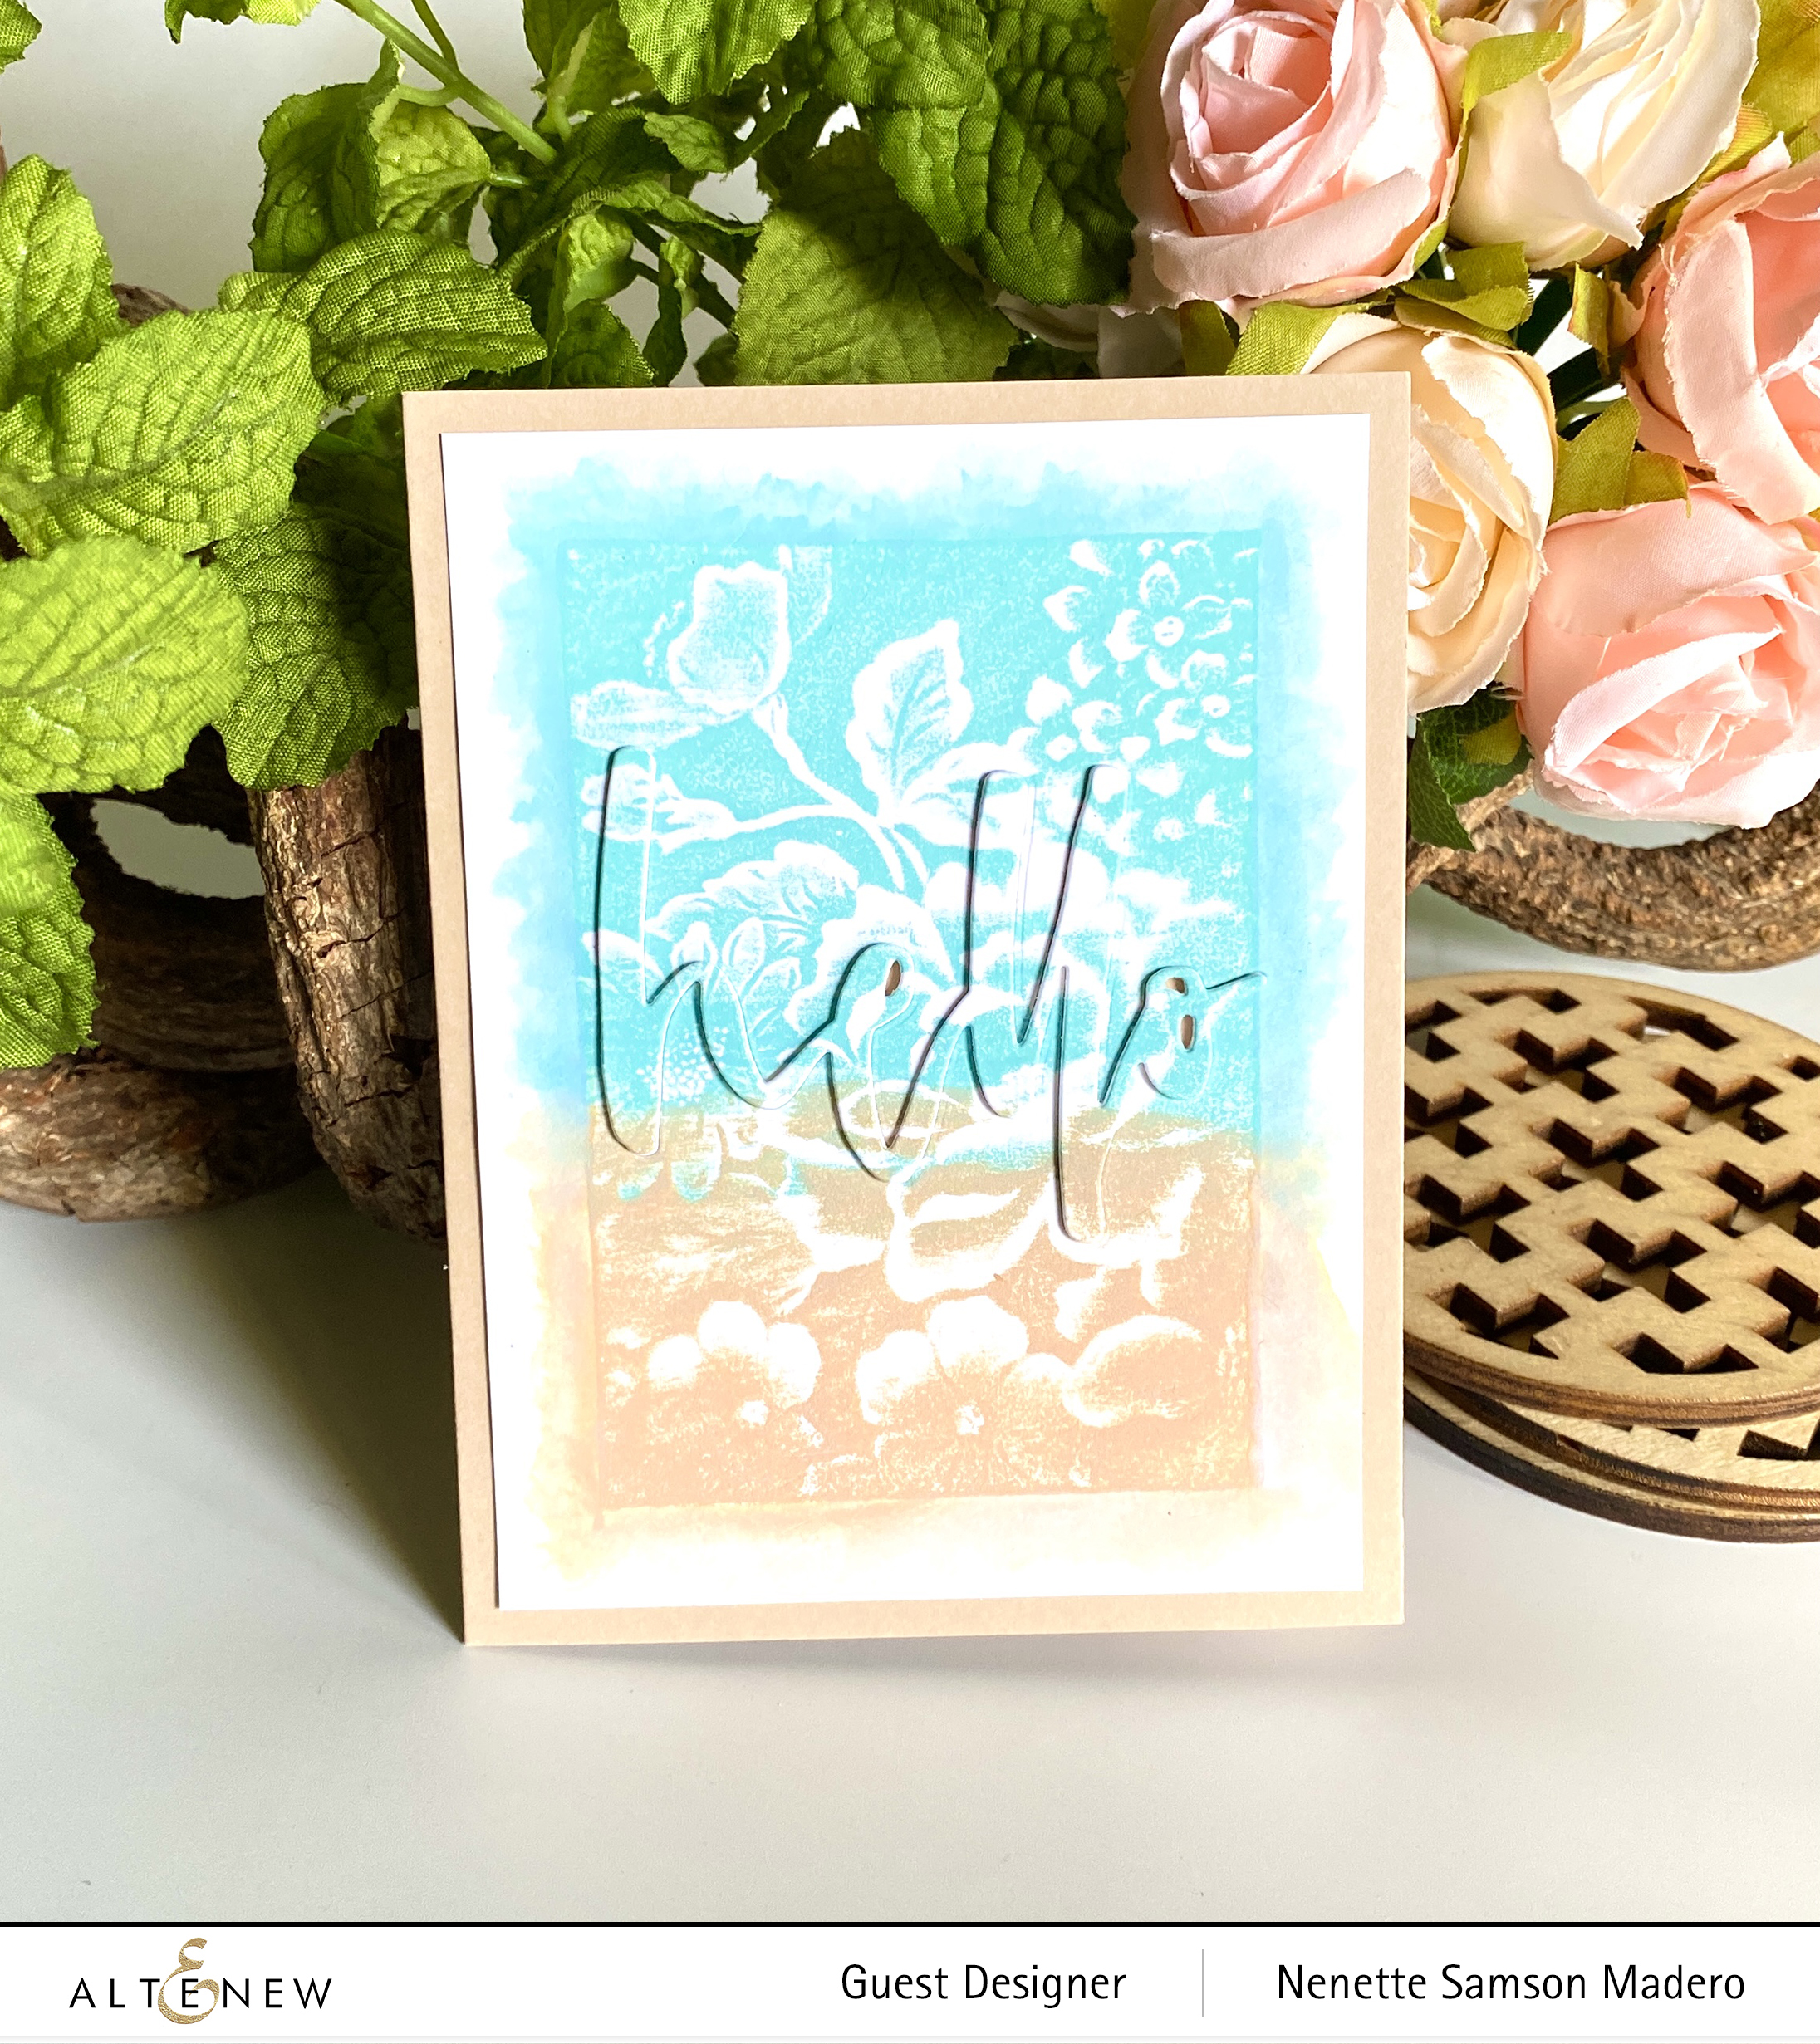
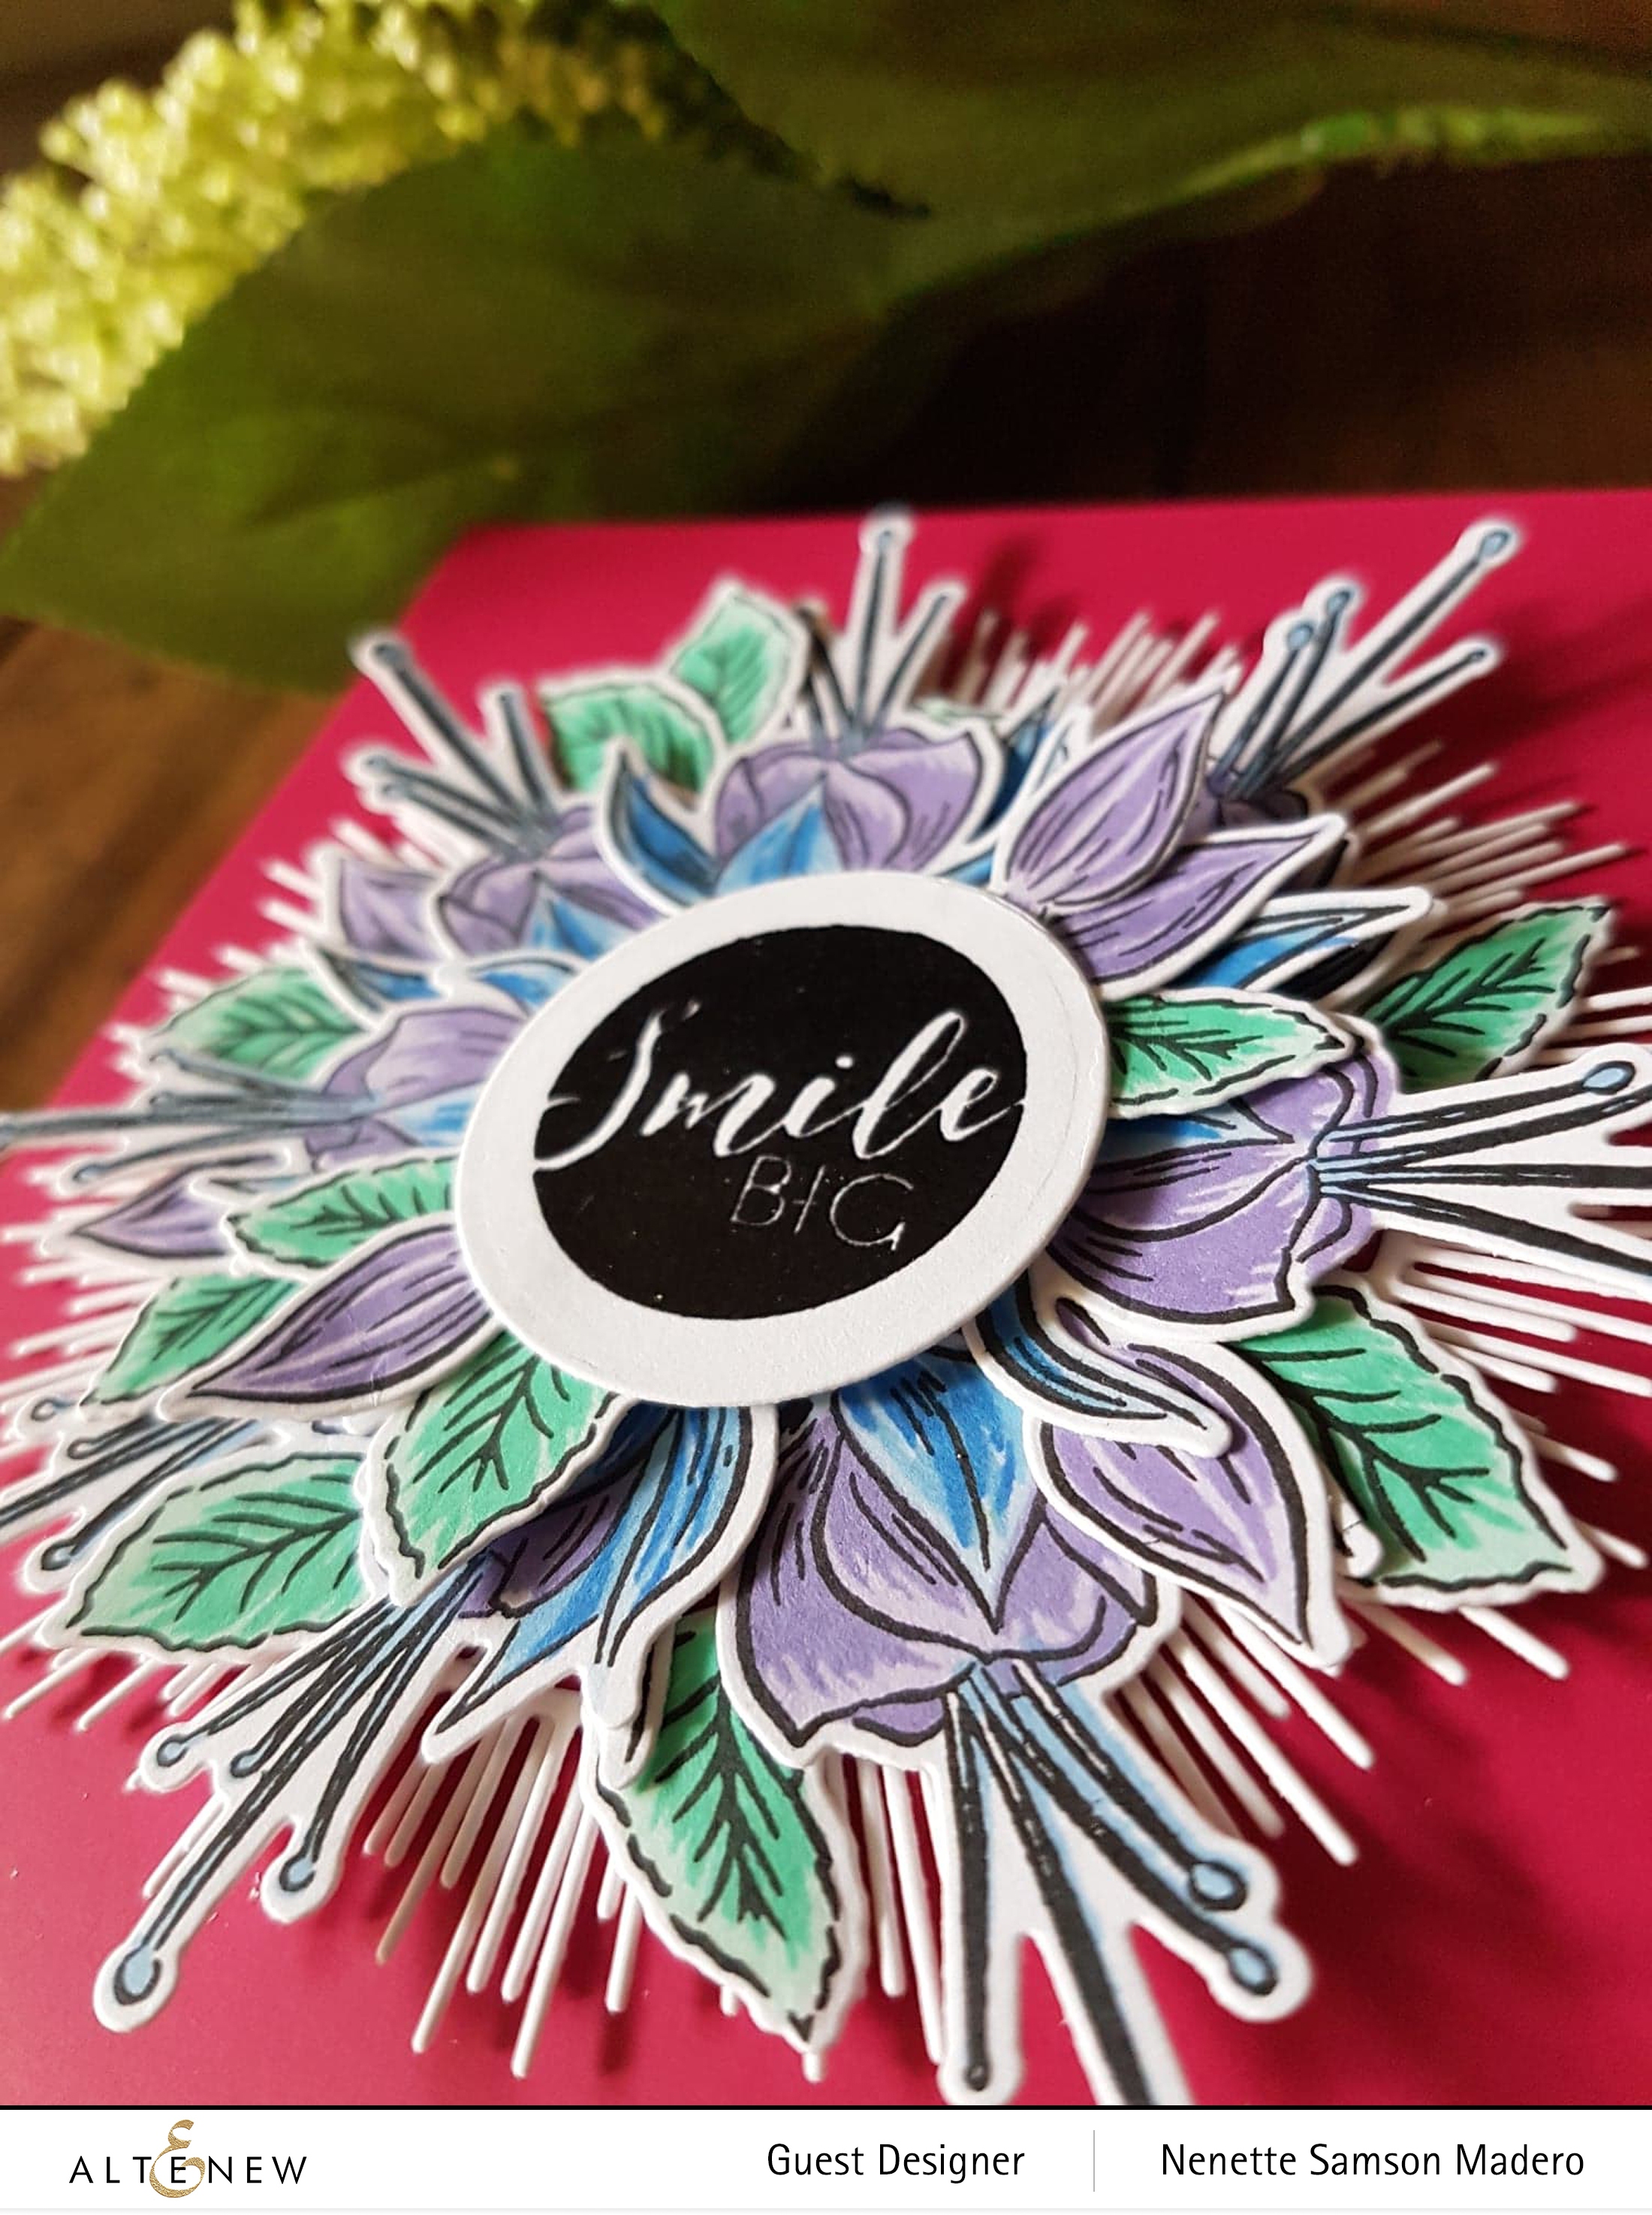
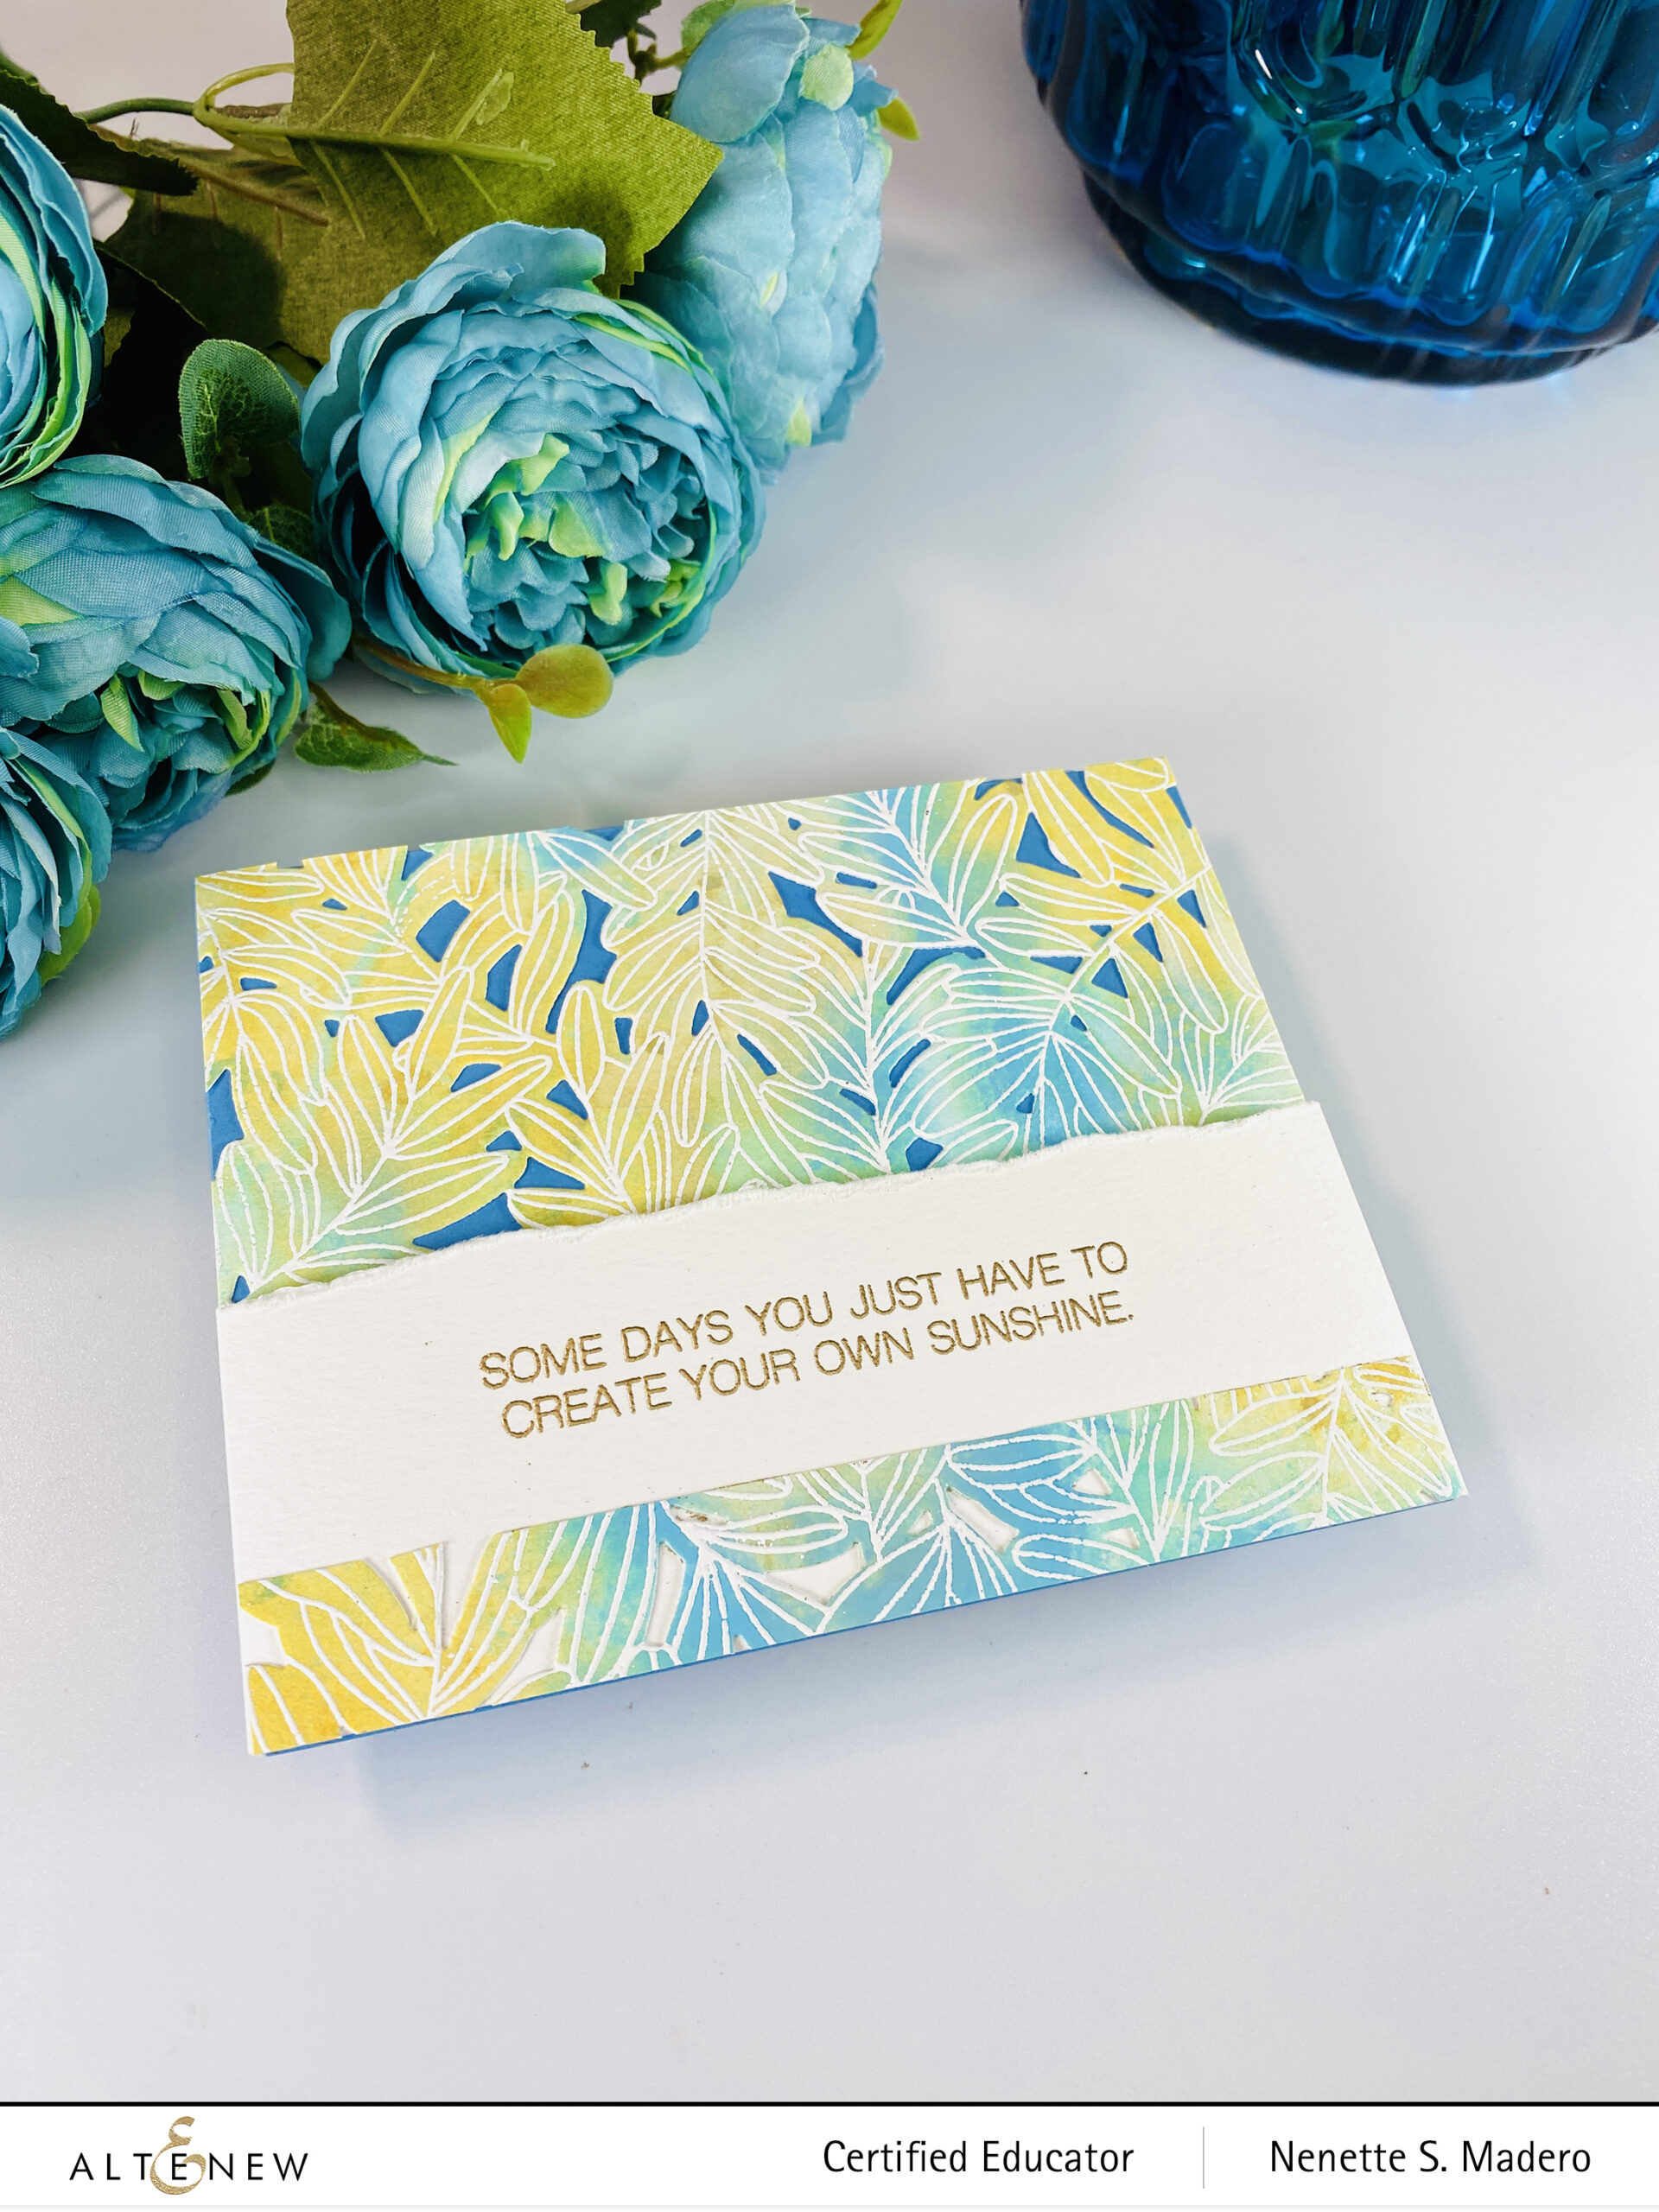
SOME DAYS YOU JUST HAVE TO CREATE YOUR OWN SUNSHINE
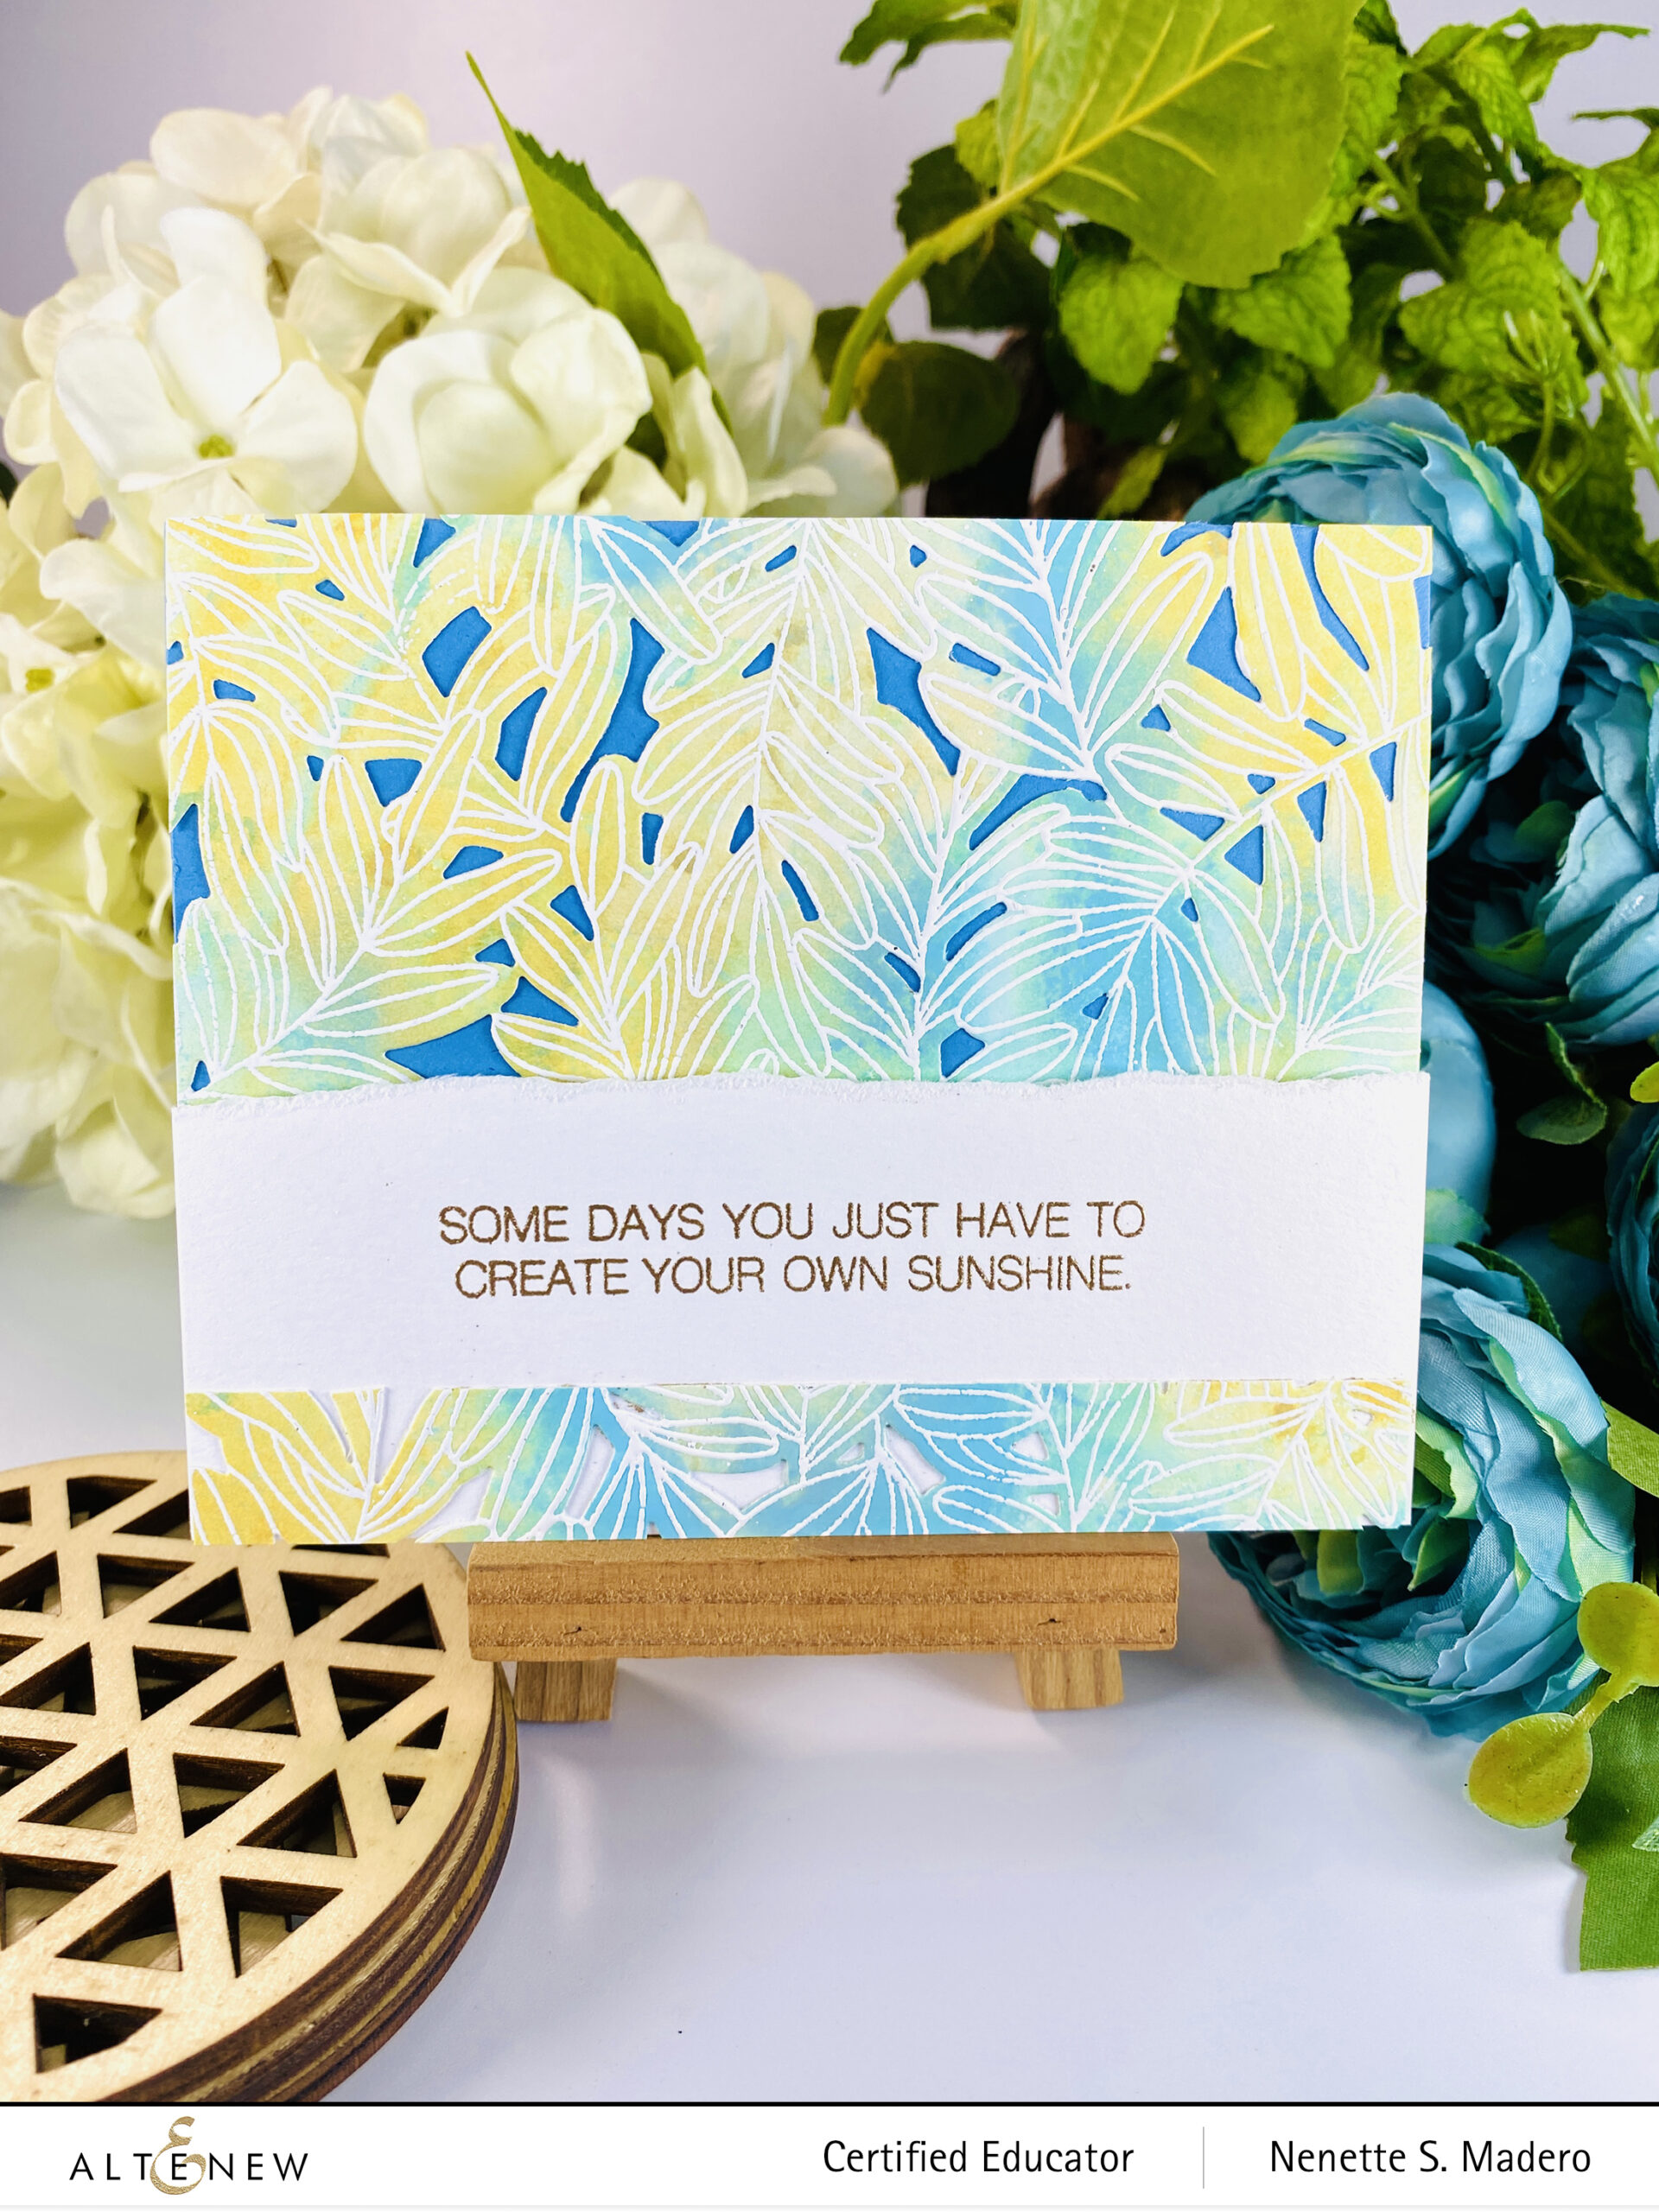
STEPS:
- Create a background using Distress sprays and allow it to dry.
- Stamp and emboss the image from the Climbing Leaves stamp set and Pure White embossing powder. Die-cut the image using the coordinating die set.
- Stamp and emboss the sentiment using Rose gold embossing powder.
- Attach the leftover background to the bottom of the sentiment and tear the top part.
- Assemble the card using foam sheets.
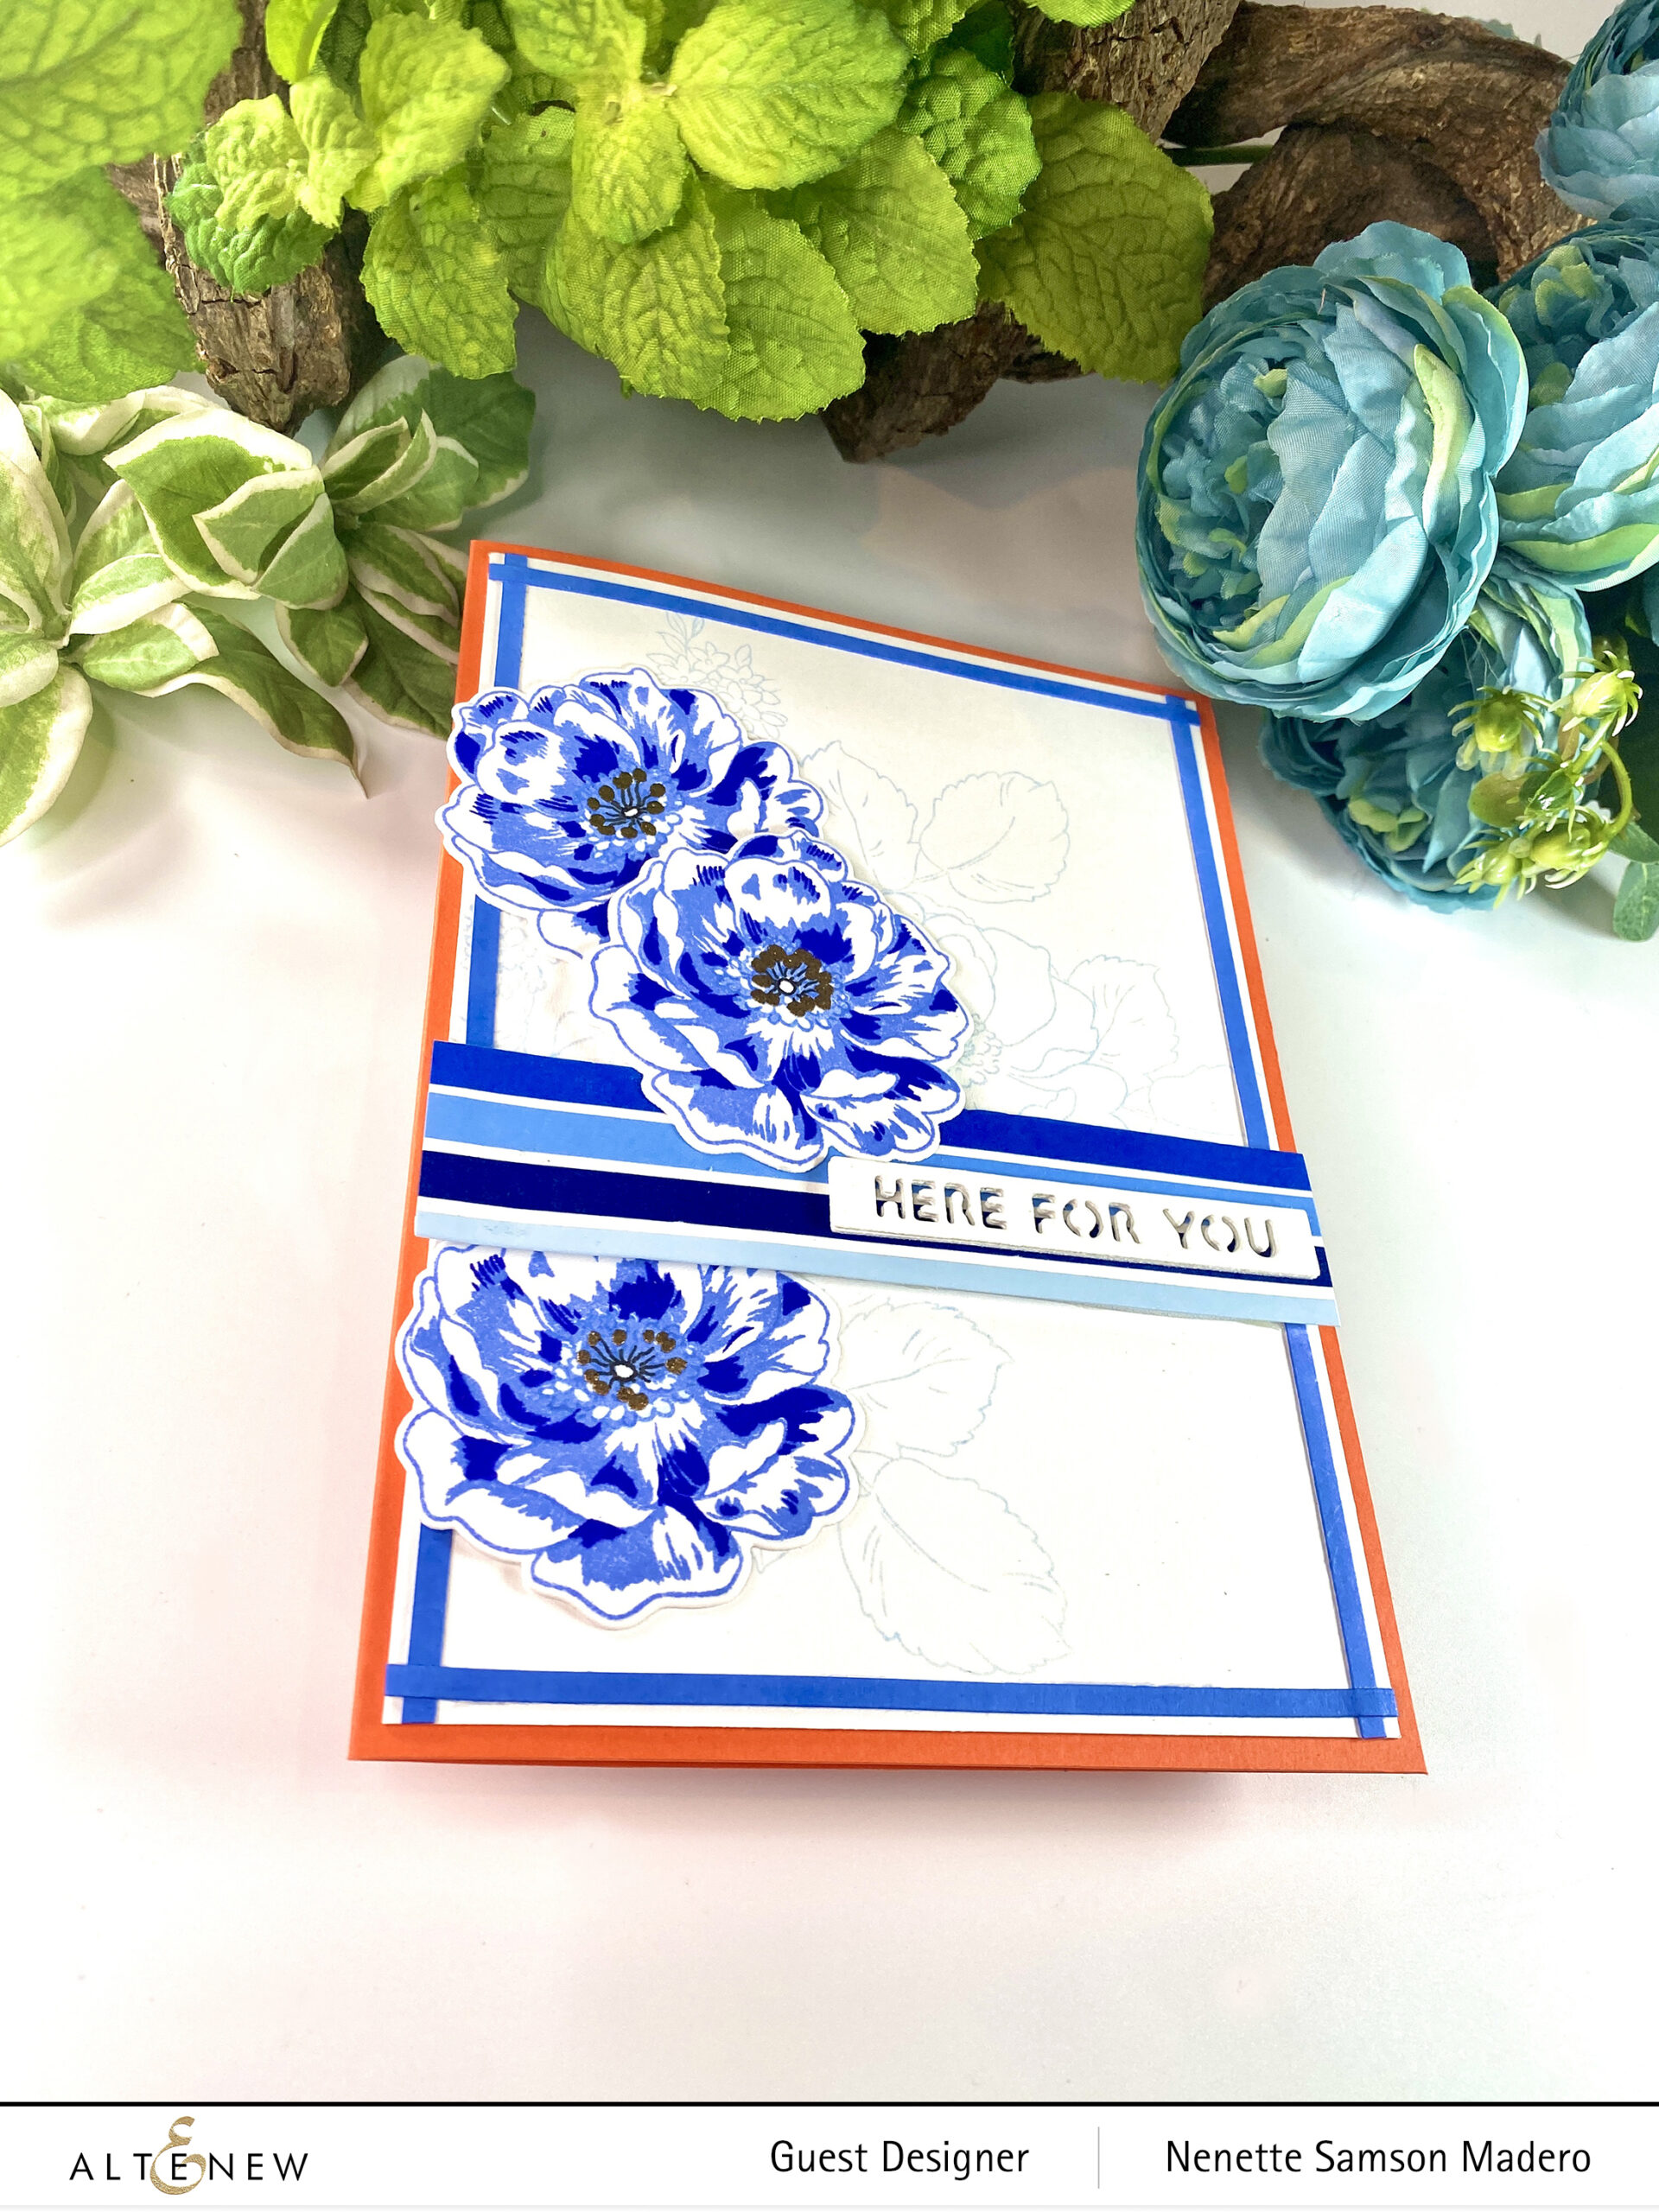
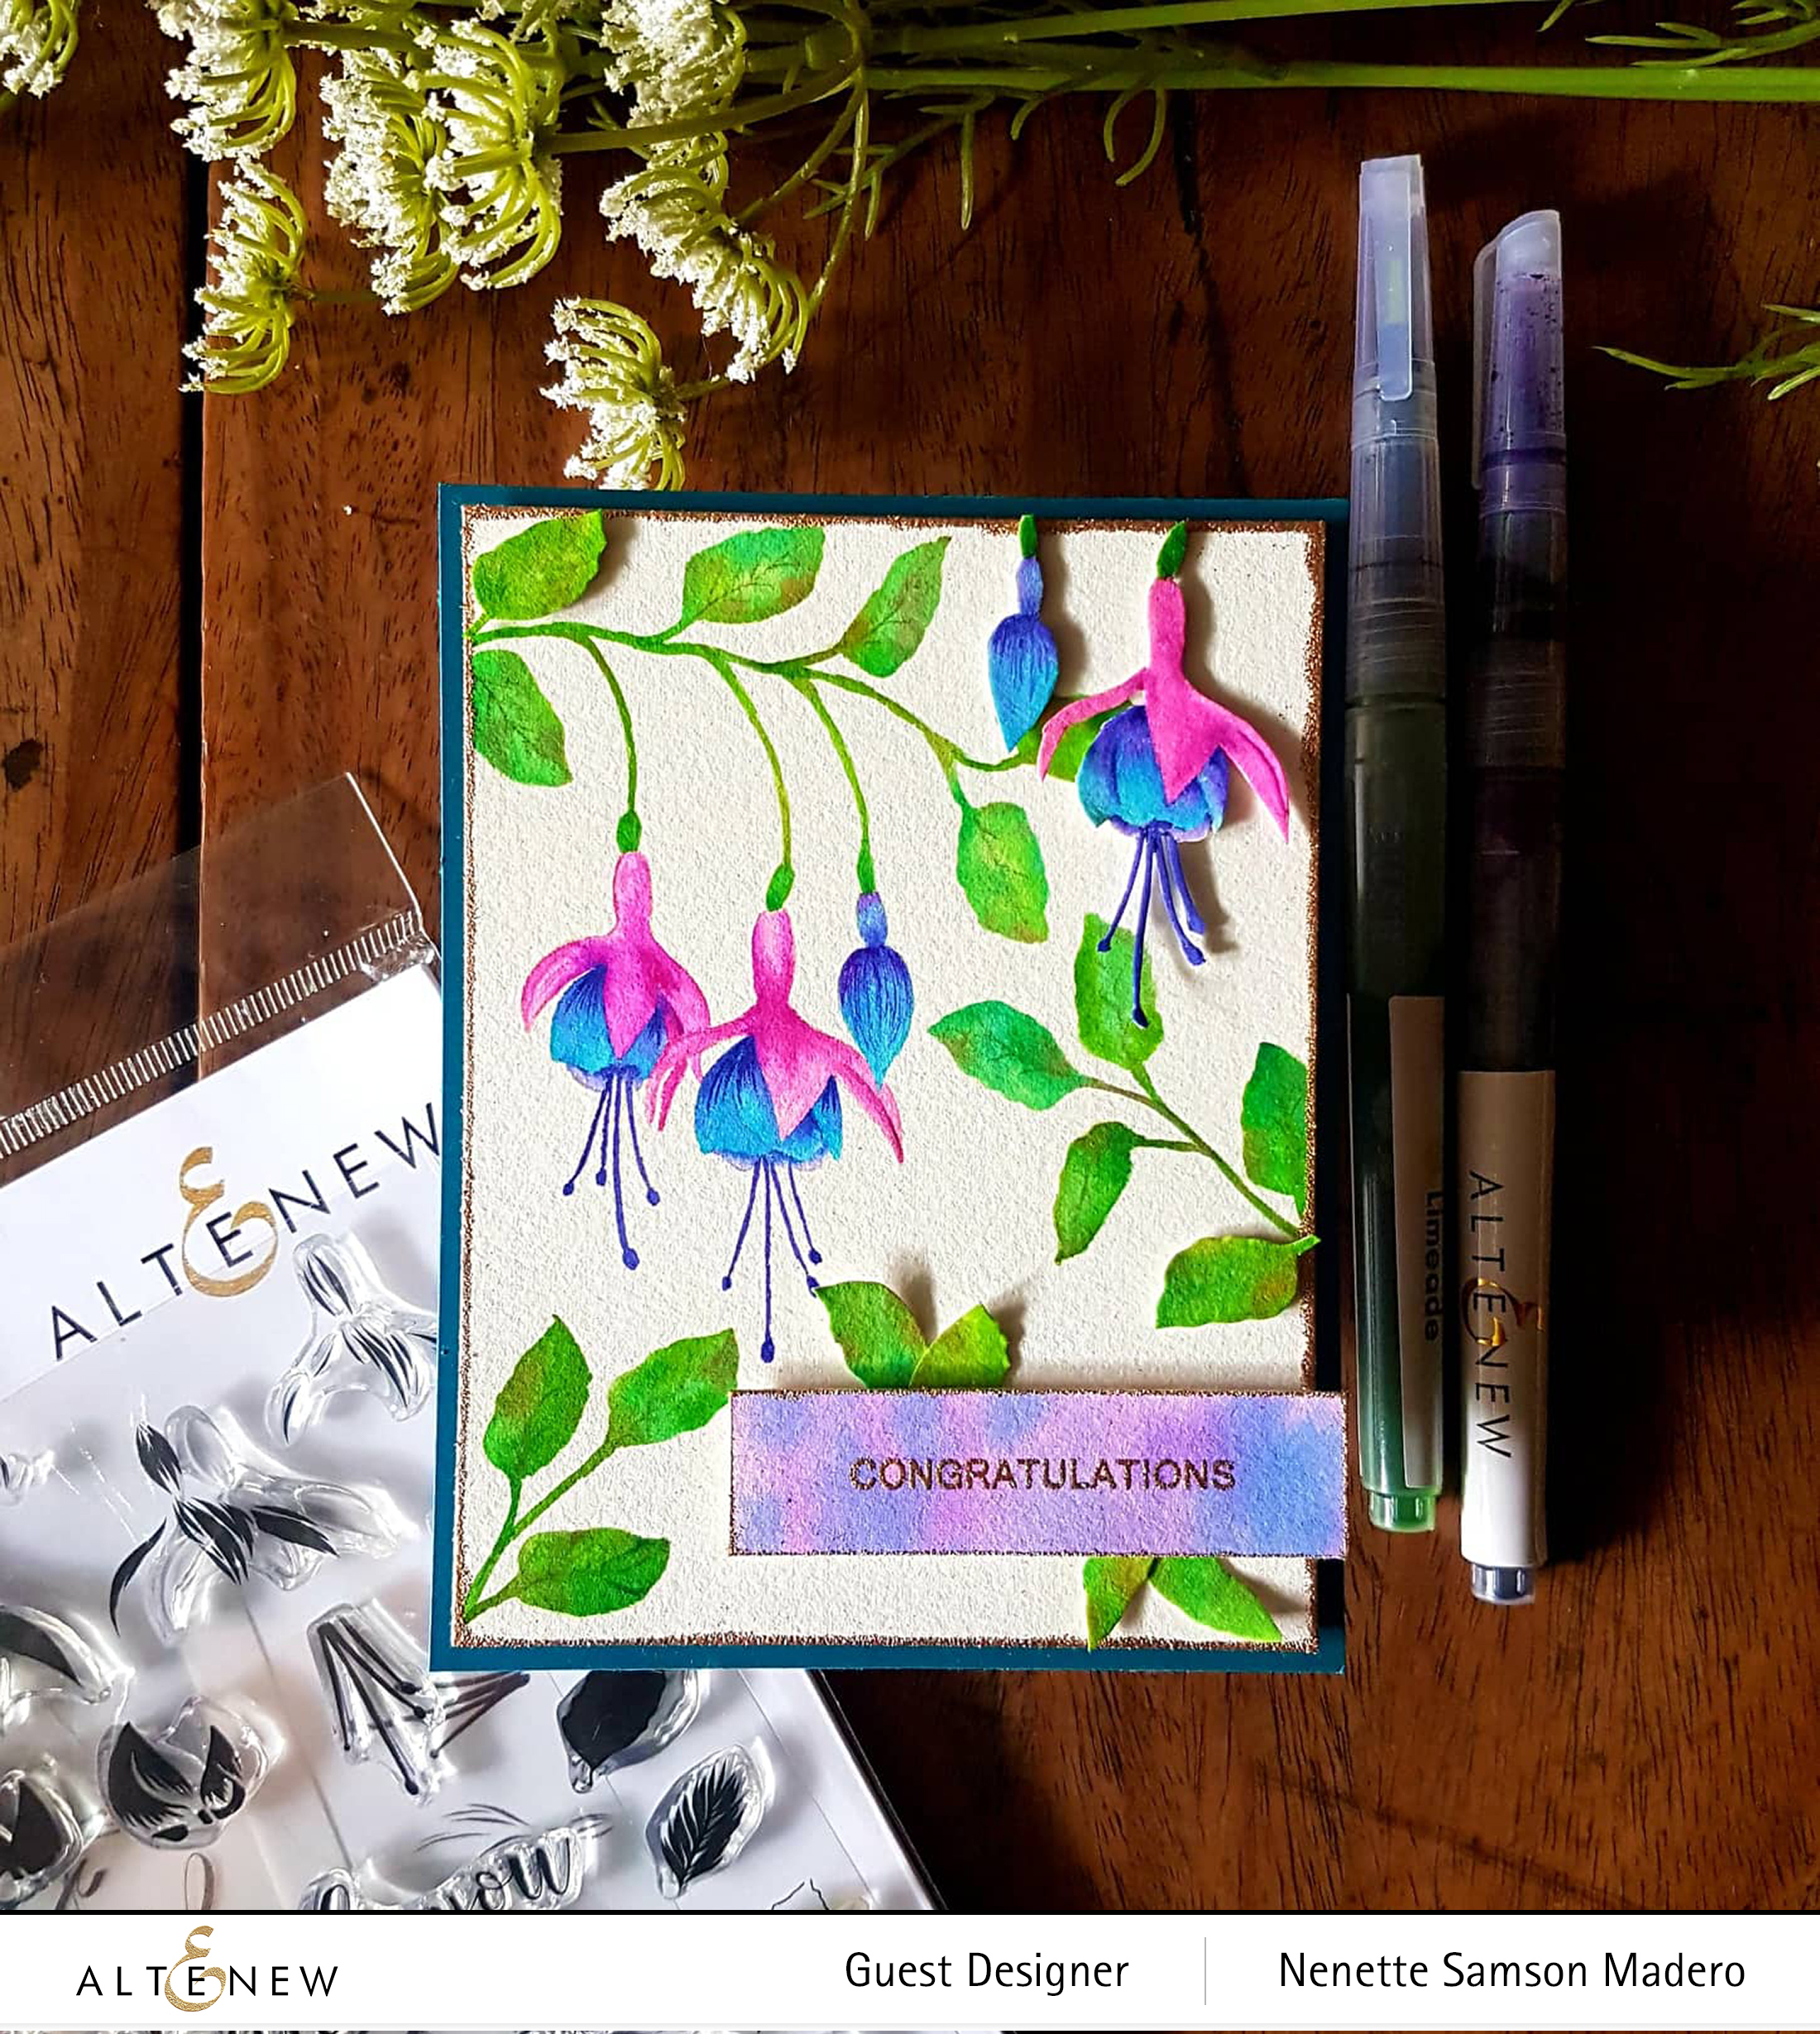
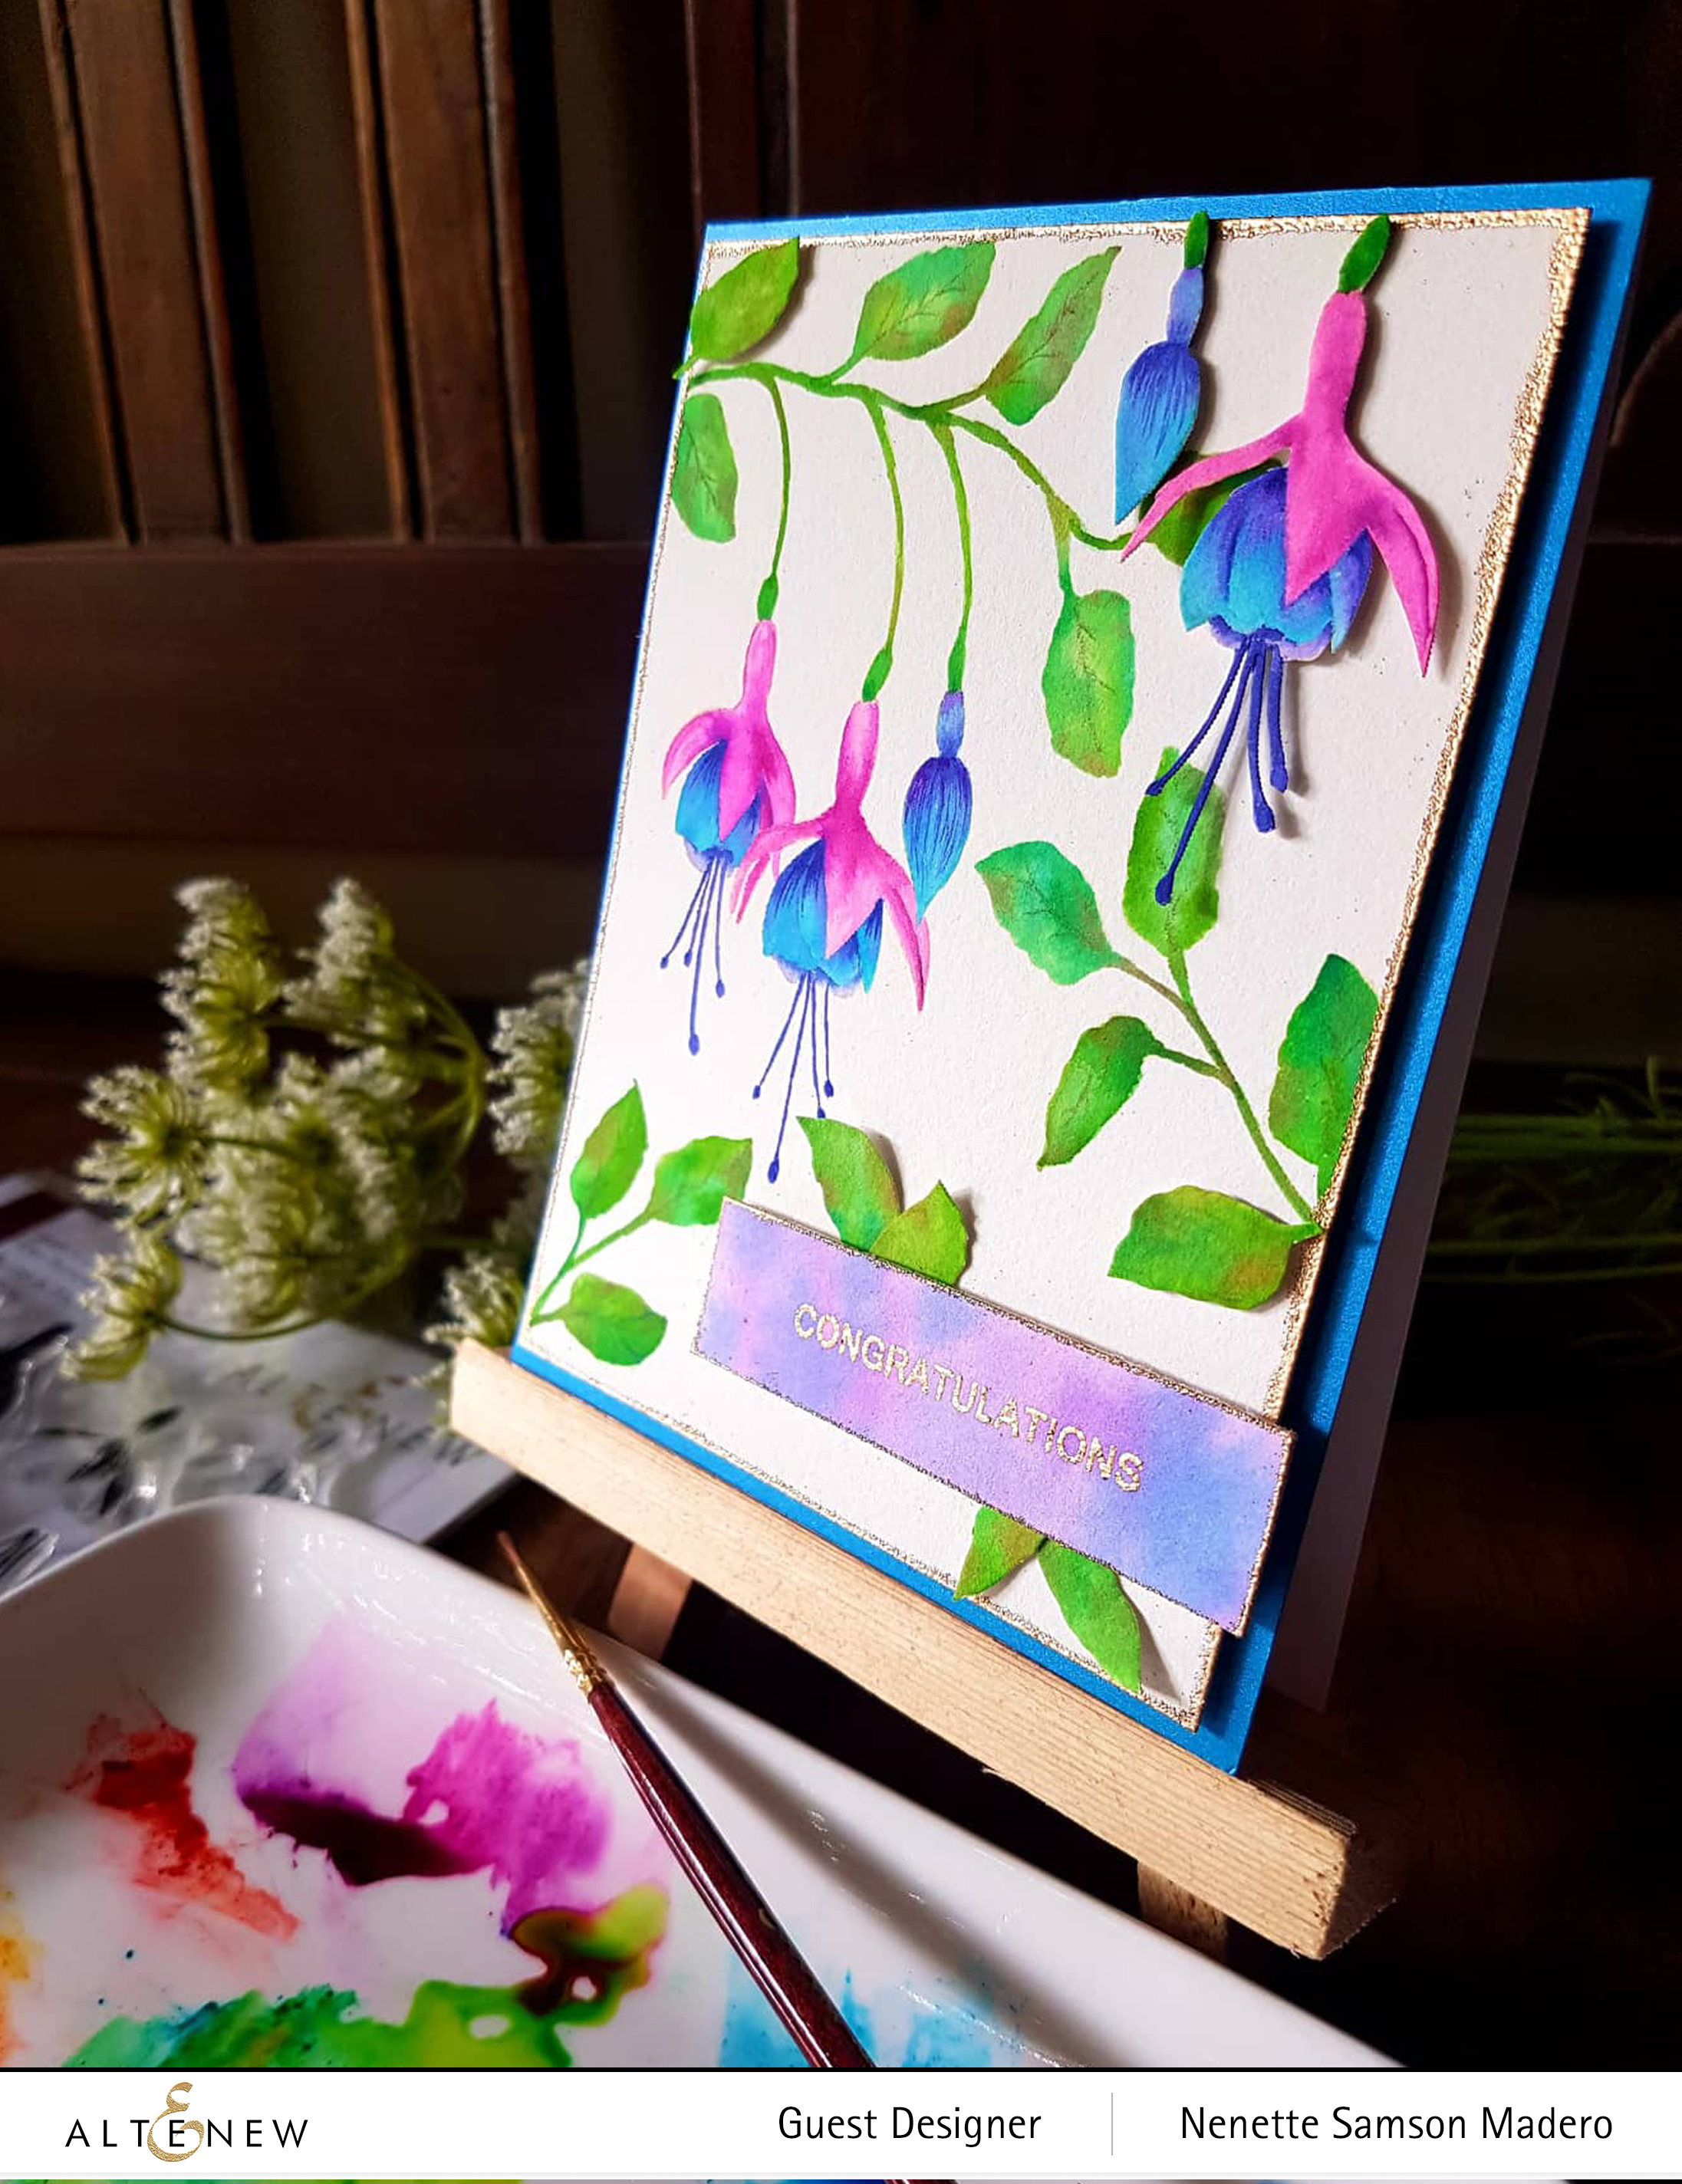
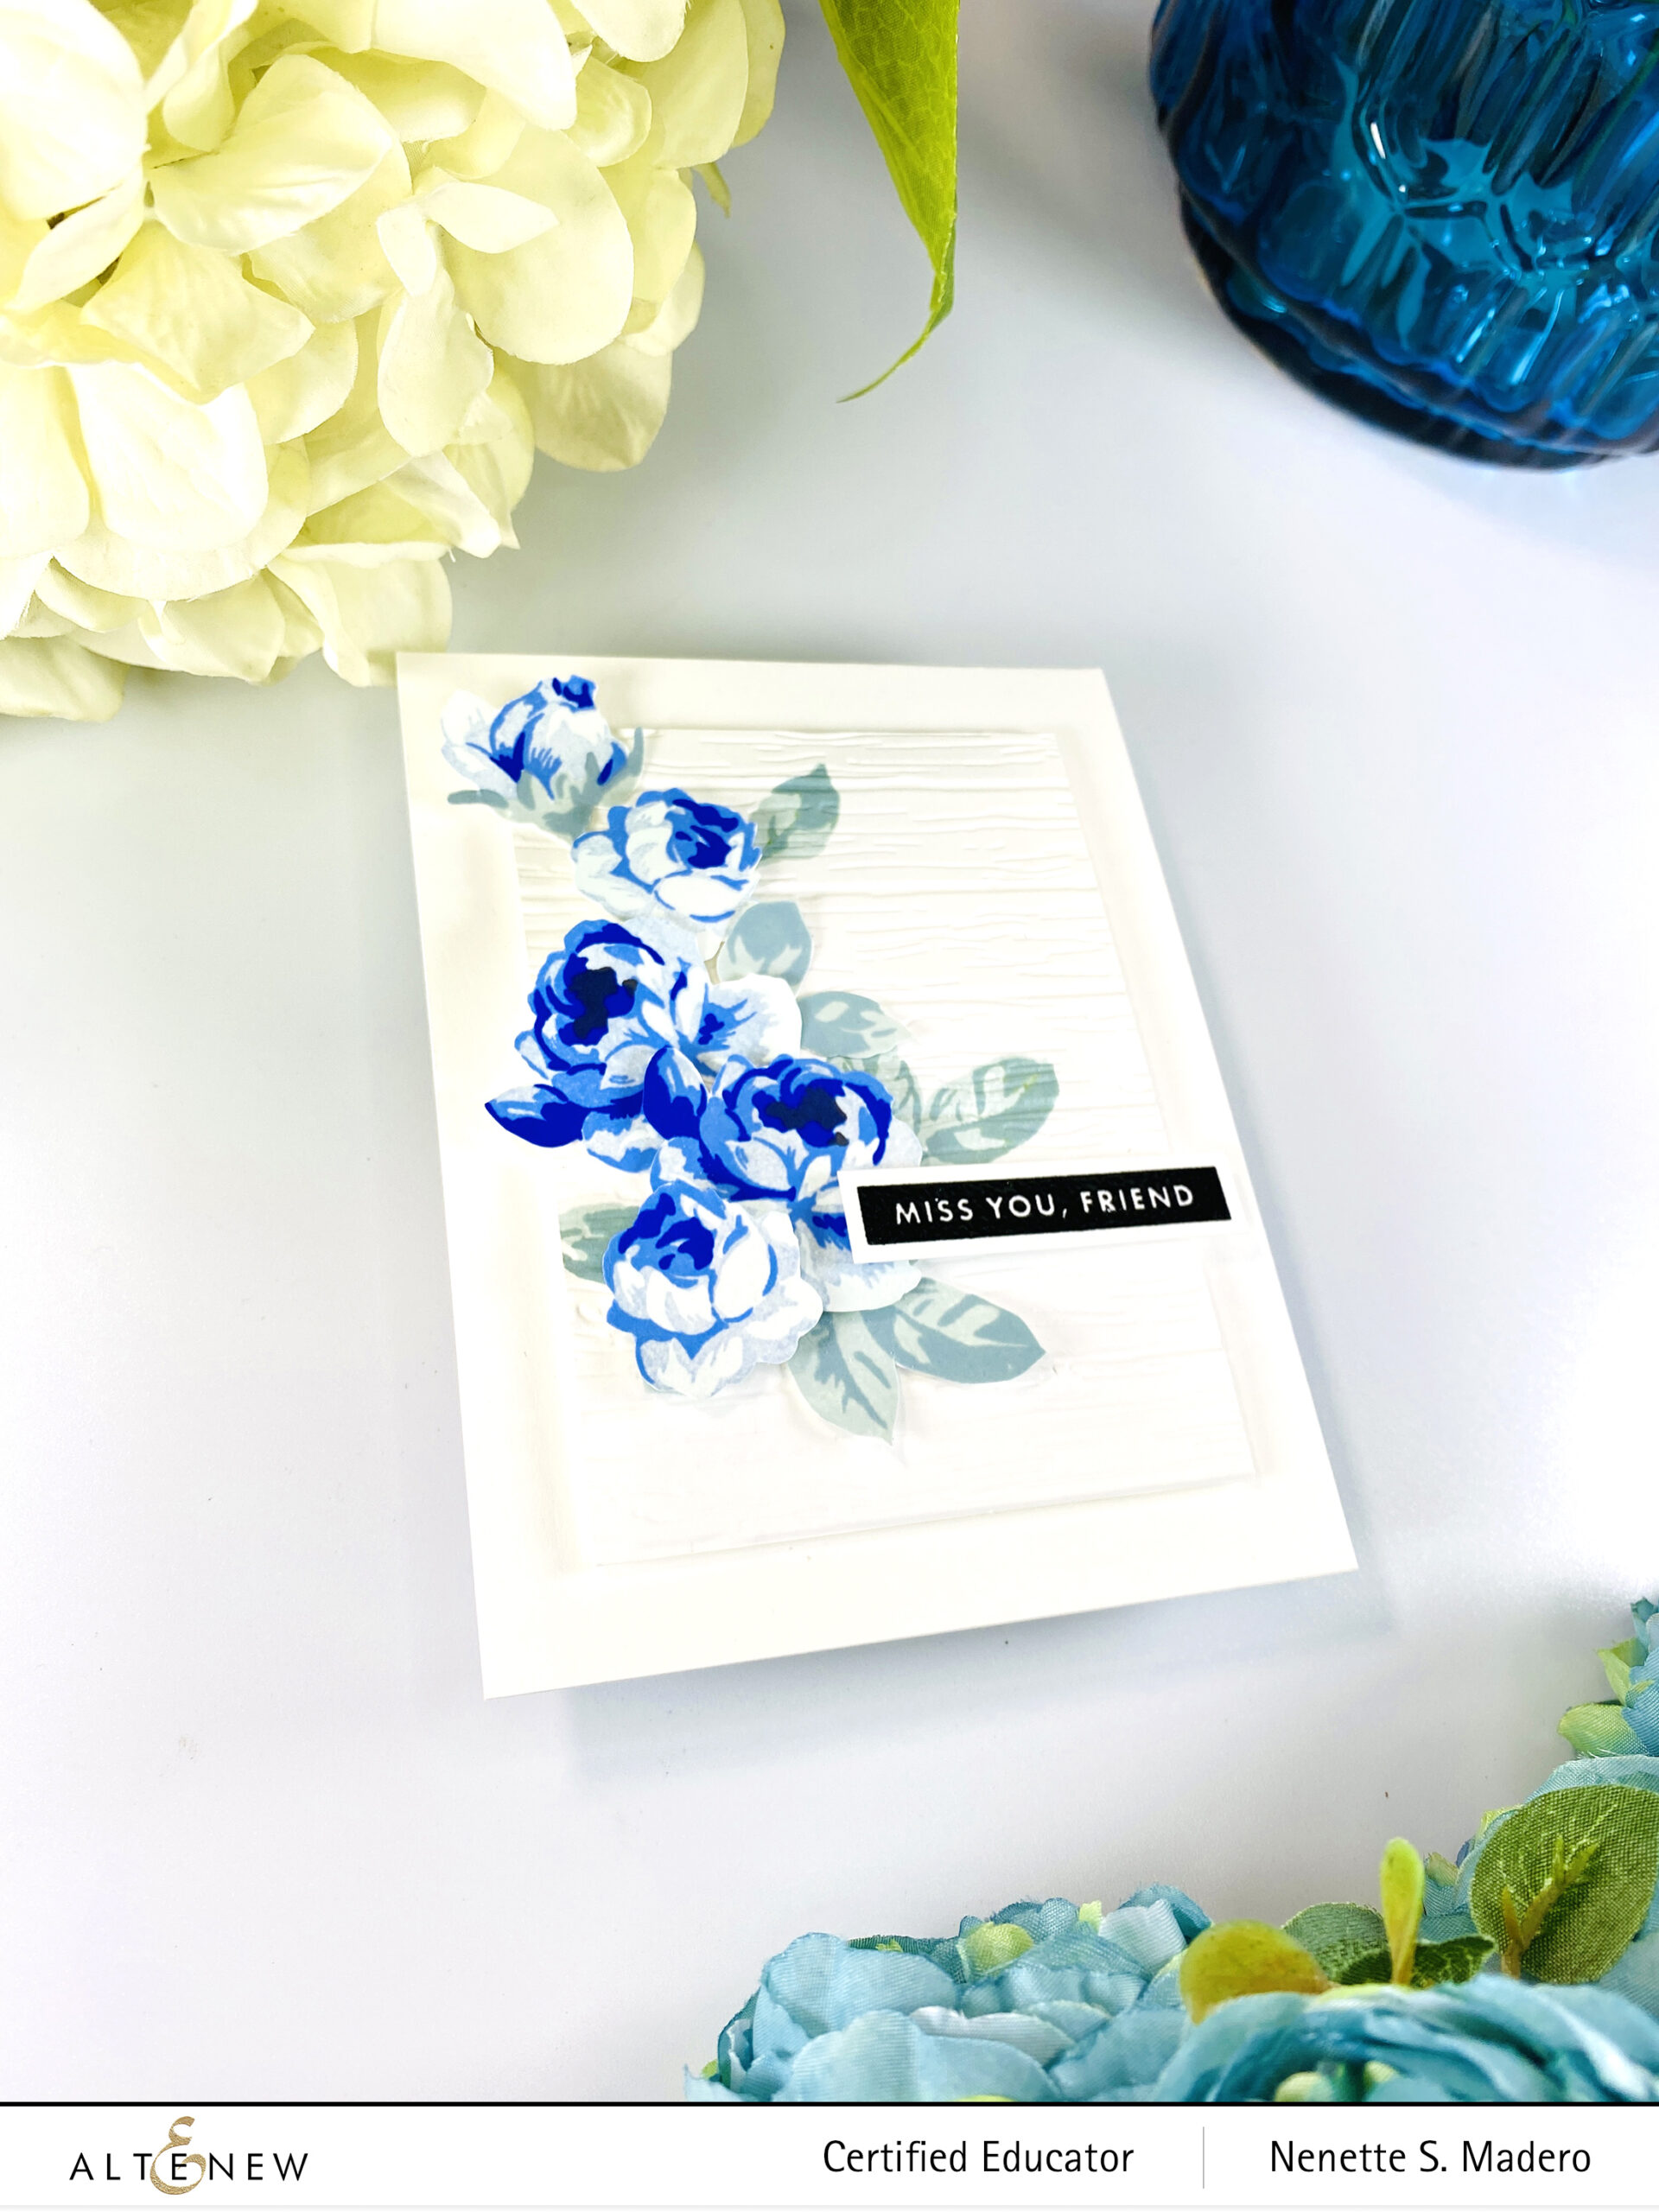
MISS YOU, FRIEND
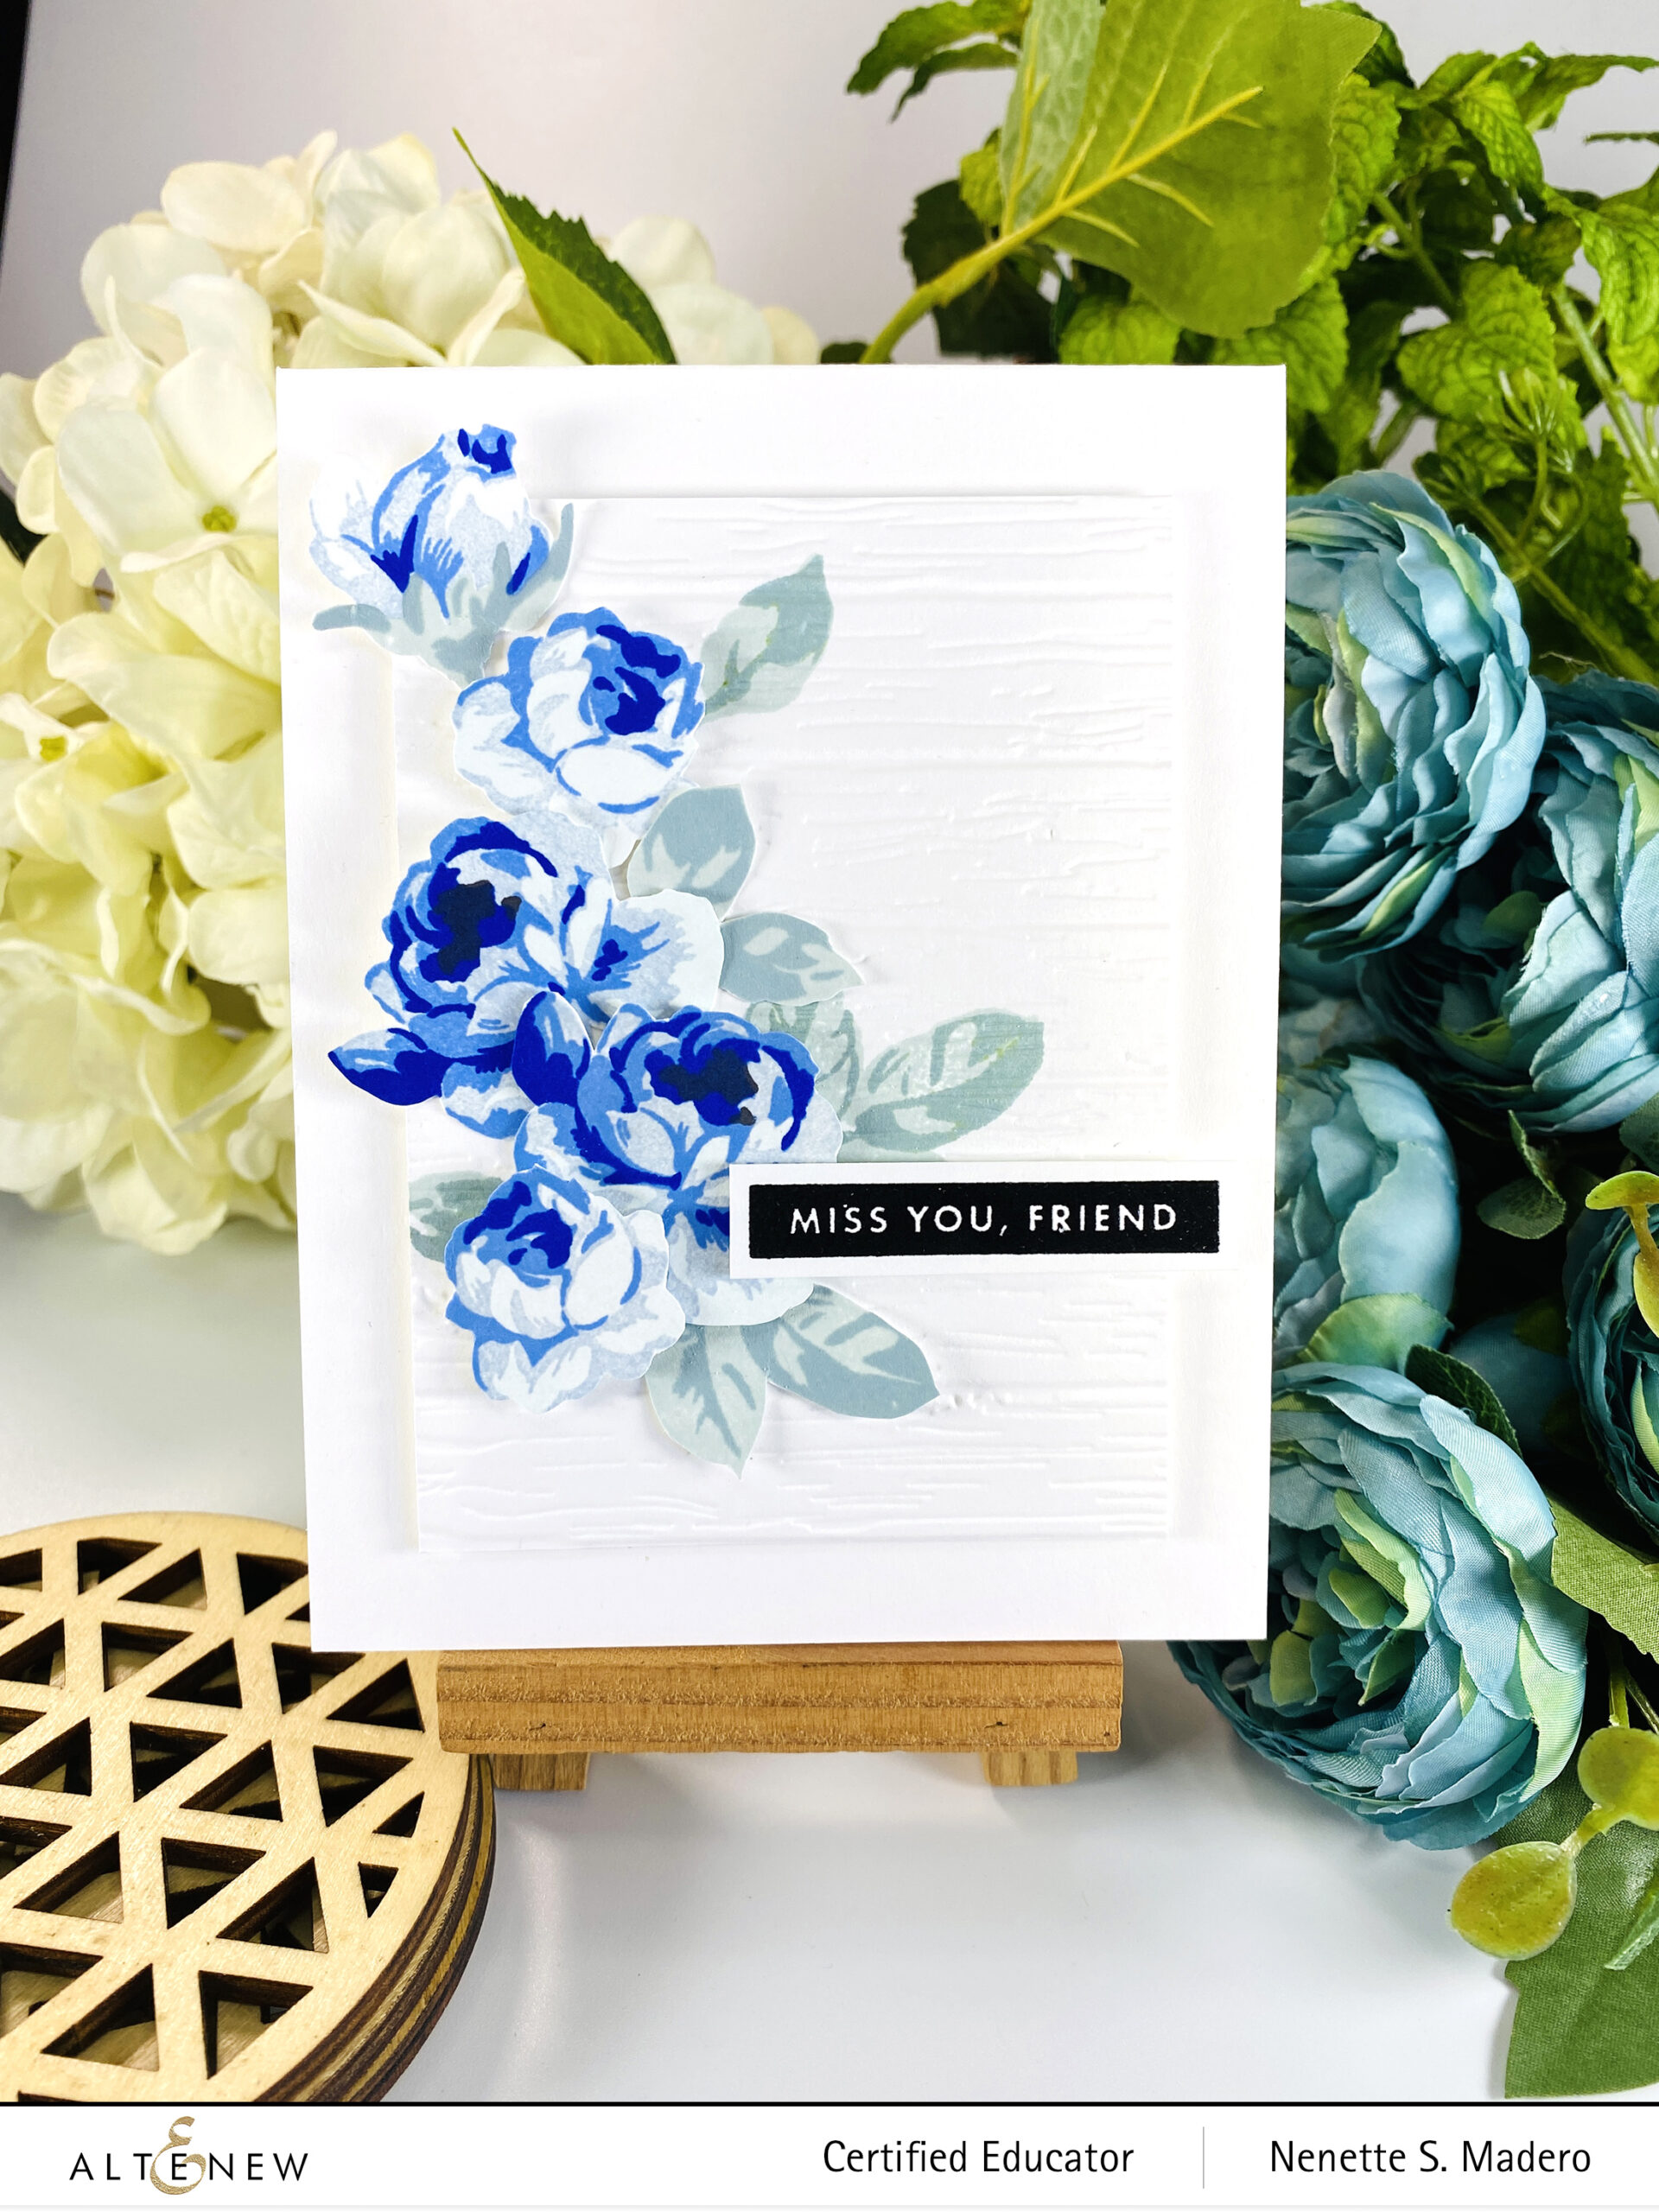
STEPS:
- Stamp the floral images using dye inks. Fussy cut the flowers and leaves.
- Position the floral images onto a panel and lightly mark the areas to know where to stamp the leaves.
- Stamp the leaves, then emboss using the Deck Planks 3D embossing folder.
- Stamp the sentiment from the Bold Sentiments Stamp using Obsidian Ink and emboss with Clear embossing powder.
FREE GIFTS

We are running a free gift promotion to celebrate the release. Feel free to share the promotion banner/info on your blog hop post or on your social media post using your affiliate links for a chance to make some extra money.
- Get a FREE brand new Today is the Day Mini Inspiration Guide with every order from 06/03/2022 through 06/05/2022. Shop HERE!
- Get a FREE brand new Today is the Day Stamp & Die Release Inspiration Guide Ebook (worth $5.99) with every order of high-value Sweet Moments Bundles. Shop HERE! *Exclusions apply.
- Get a FREE brand new Online Cardmaking Class with every order from the new Today is the Day Stamp & Die Release Collection from 06/03/2022 through 06/09/2022. Shop HERE!
GIVEAWAYS
$300 in total prizes! To celebrate this release, Altenew is giving away a $50 gift certificate to 2 lucky winners and a $25 gift certificate to 8 winners! Please leave a comment on the Altenew Card Blog and/or each designer’s blog post on the blog hop list below by 06/09/2022 for a chance to win.
Altenew will draw ten random winners from the comments left on each blog hop stop and announce the winners on the Altenew Winners Page on 06/11/2022.
Next up: Maryam Perez. If you liked my cards, I hope you can follow me on Instagram and YouTube to see my latest creations. Links are found below. Don’t forget to leave a comment to get a chance to win a prize from Altenew! Thank you so much for dropping by! Happy crafting!

")