

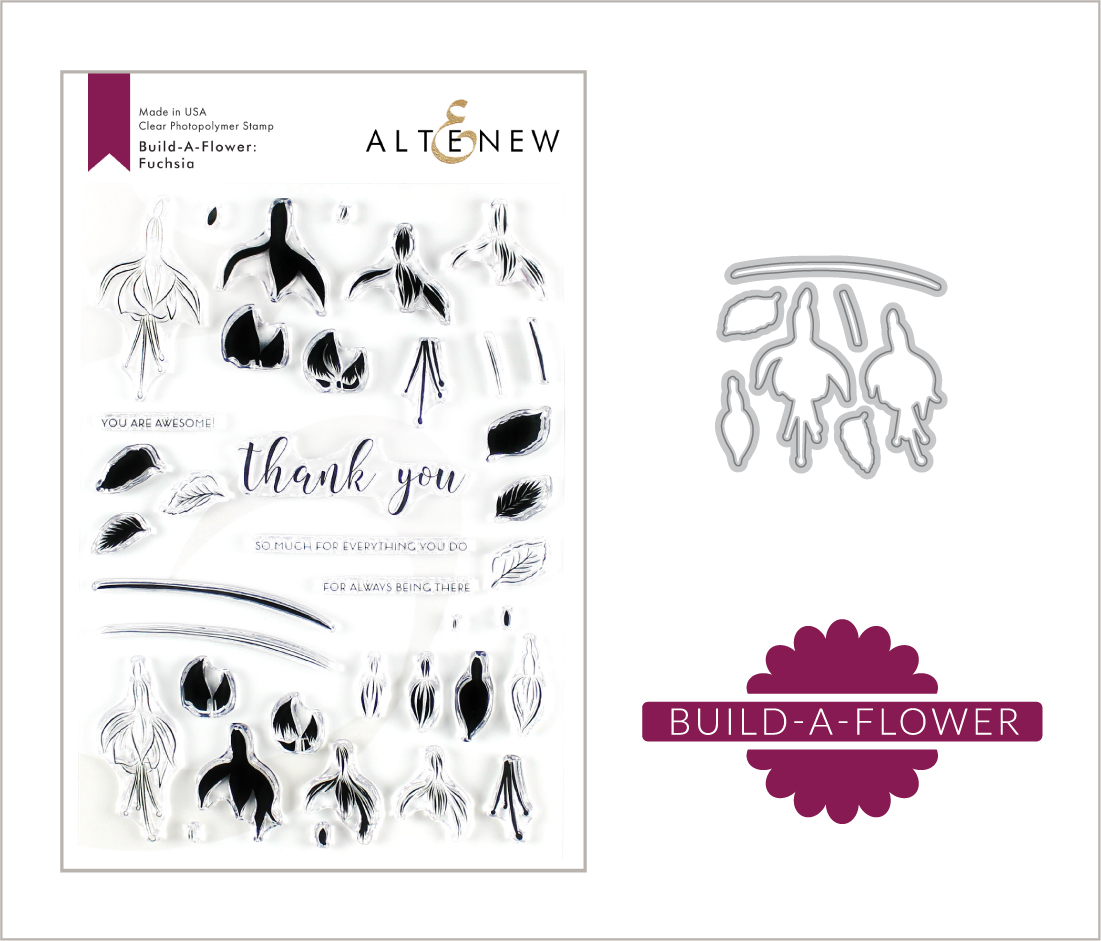
Hi everyone! Welcome to Altenew’s Build-a Flower: Fuschia release! You have arrived from the blog of the amazing EMILY MIDGETT. Just in case you are lost, the master list will be at the end of this blog post and at the Altenew Card Blog where this stamp set release is being hosted. Take a look at this beautiful stamp and die set!!!
Below are 2 samples of cards I made for this stamp set using the stamp layering technique and the
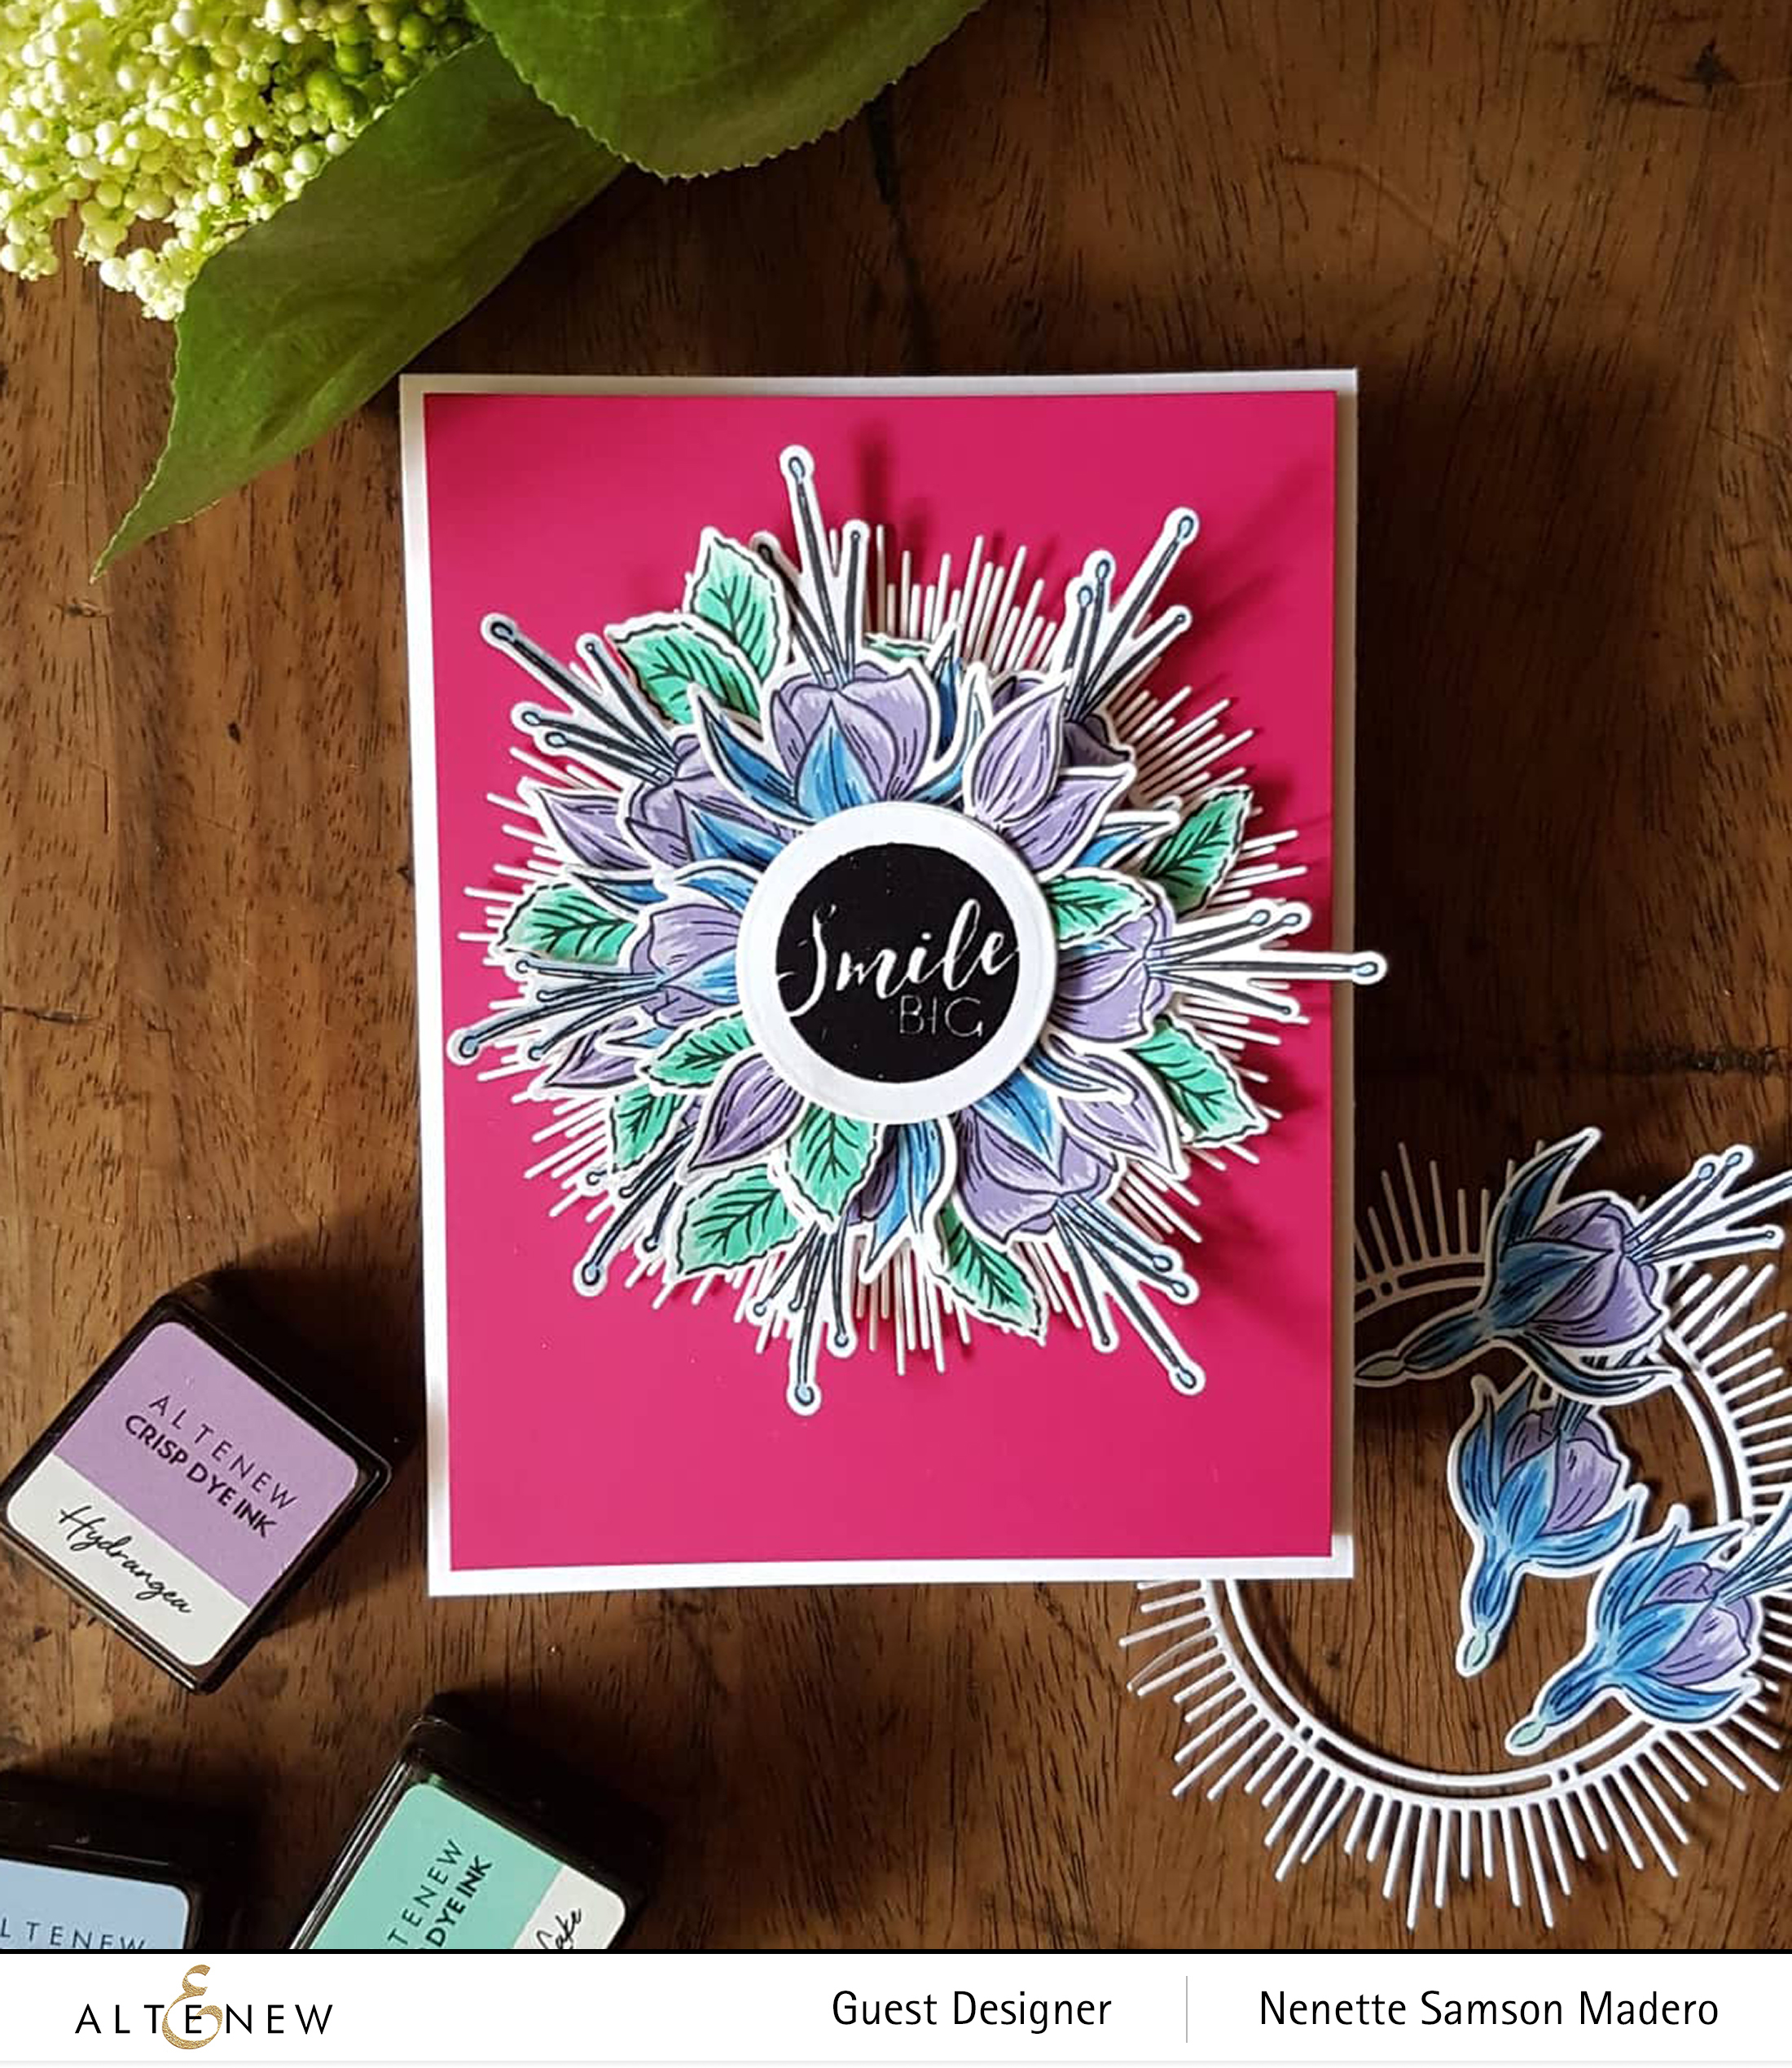
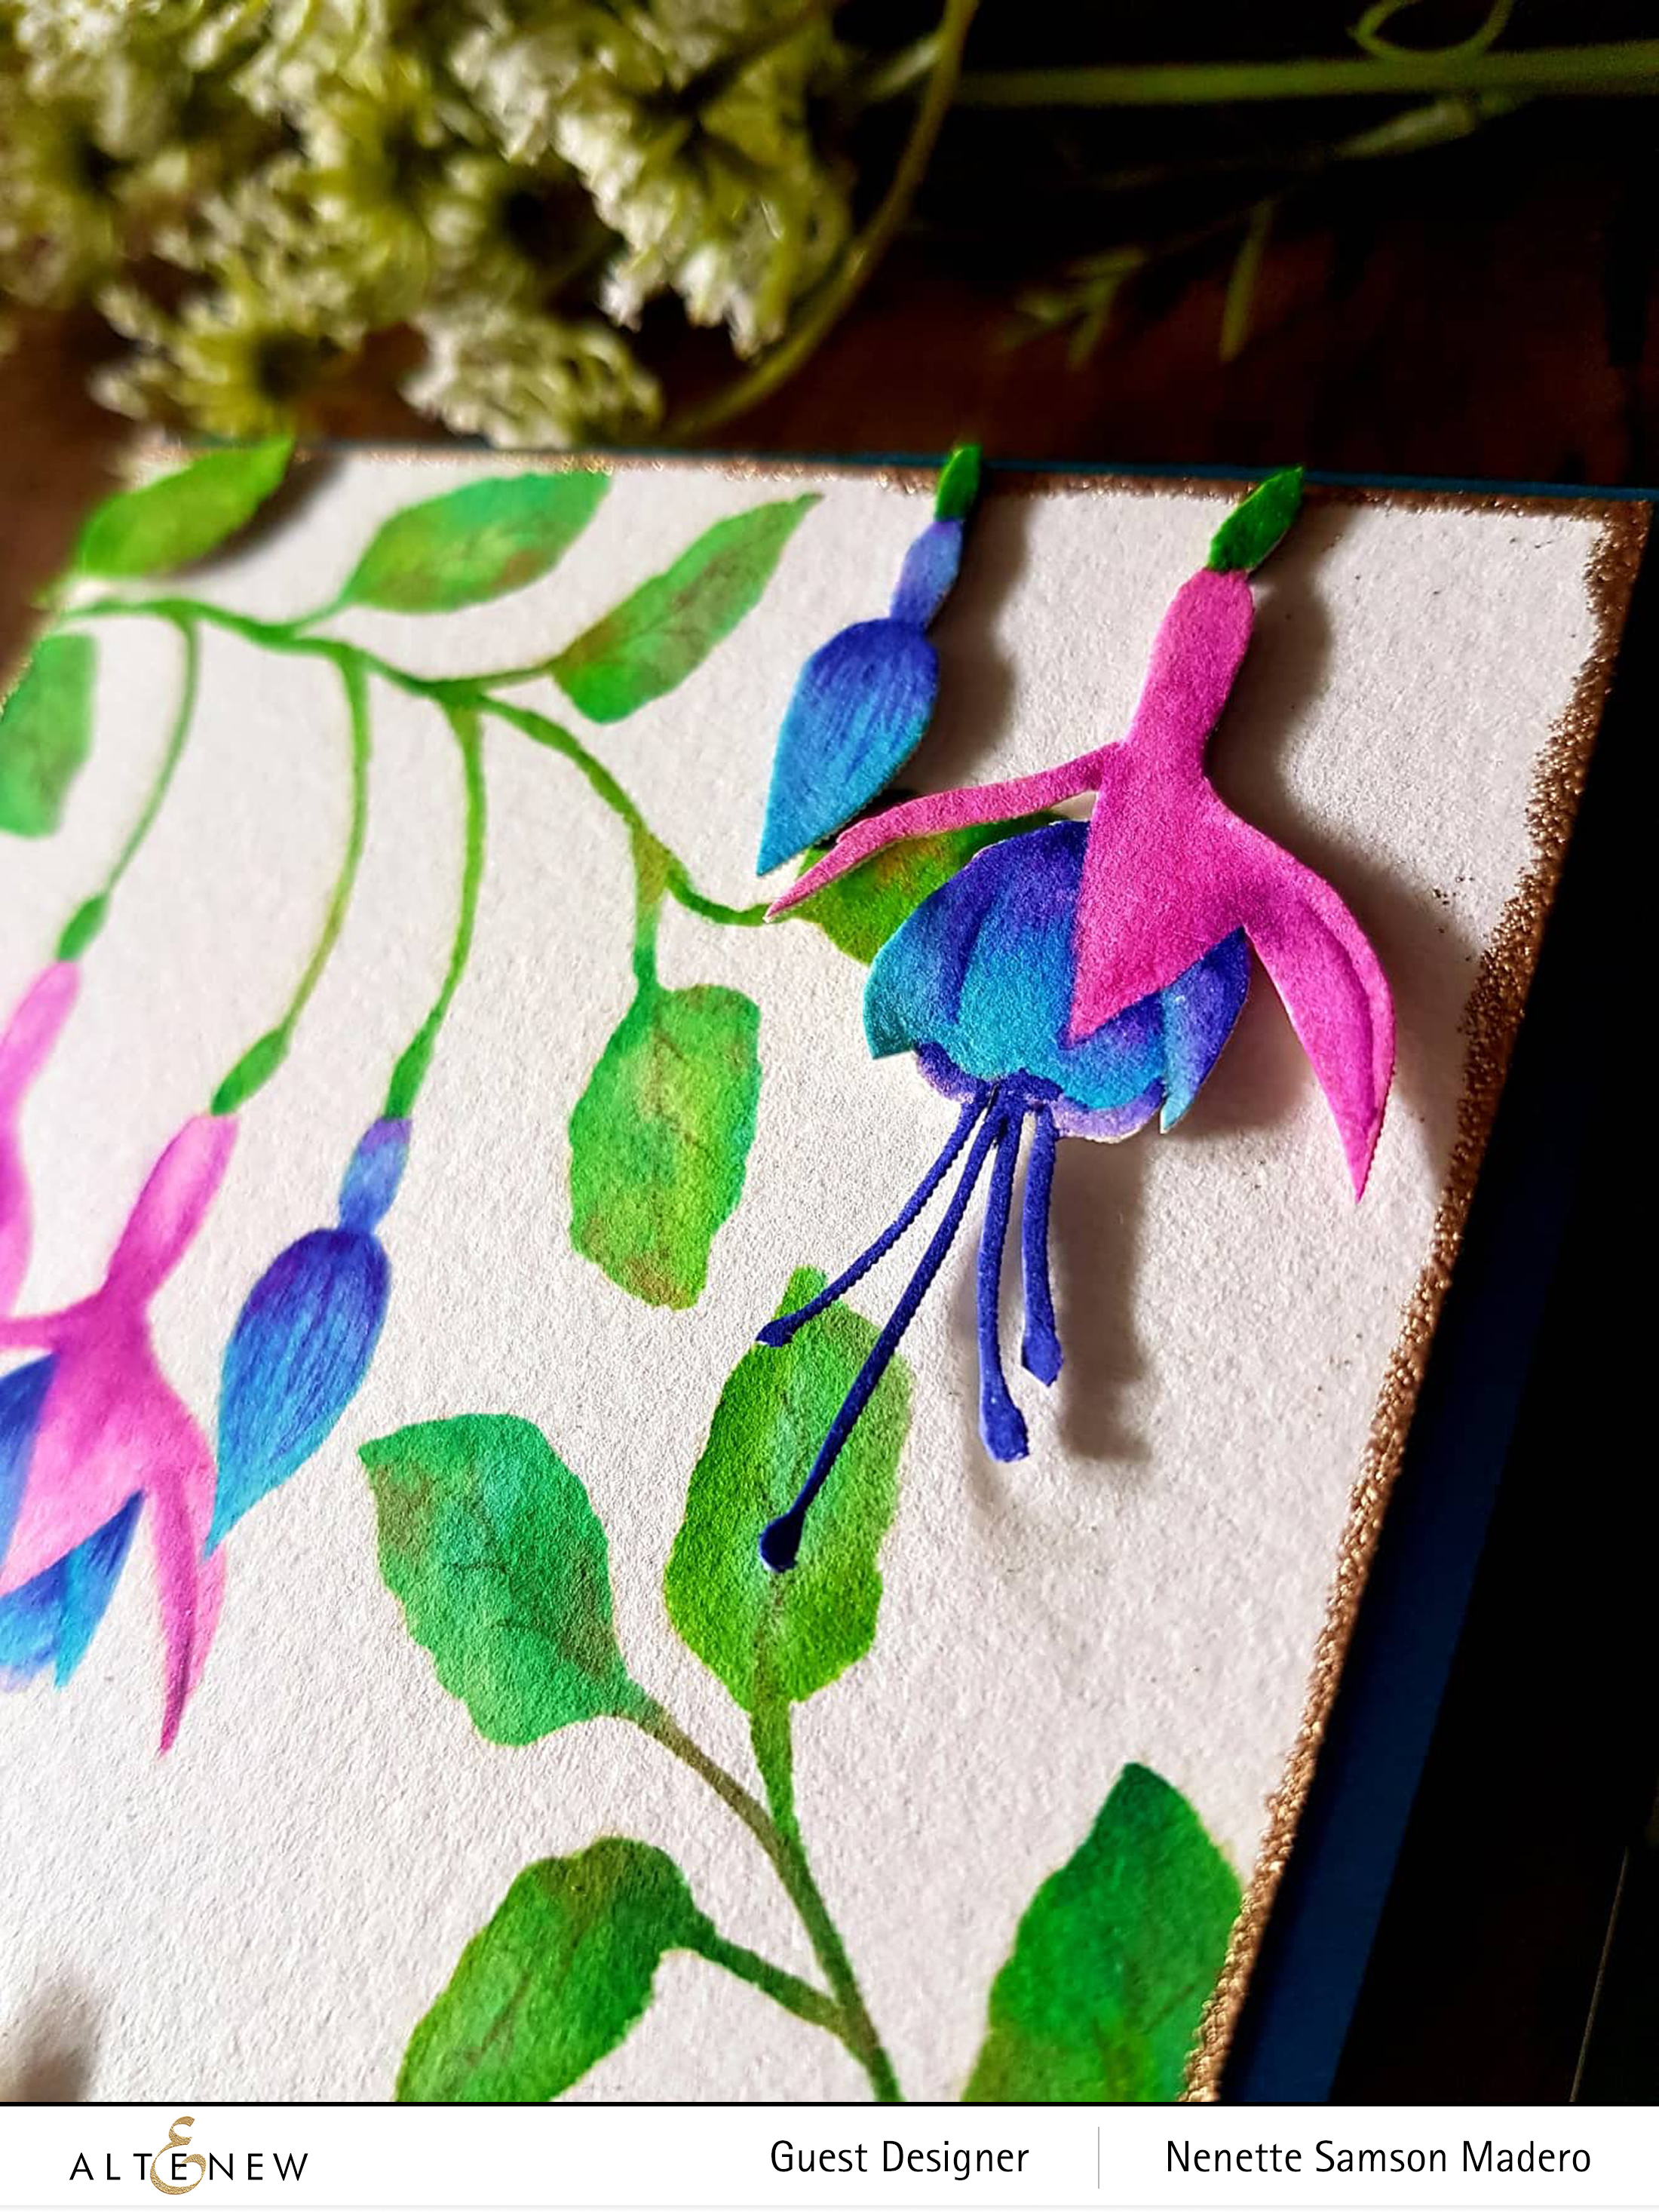
SMILE BIG CARD
MATERIALS:
- ALTENEW BUILD-A-FLOWER: FUCHSIA STAMP AND DIE BUNDLE
- ALTENEW MID-CENTURY FRAME DIE
- ALTENEW OBSIDIAN PIGMENT INK
- ALTENEW CRISP CLEAR EMBOSSING POWDER
- ALTENEW CIRCLED SENTIMENTS
- ALTENEW CRISP DYE INKS- MOUNTAIN MIST, VOLCANO LAKE, ICEBERG, EASTERN SKY, ULTRAMARINE, WISTERIA, HYDRANGEA, ULTRAVIOLET
- Neenah solar white Cardstock, hot pink cardstock
- Scrapbook Adhesives foam squares
- Tombo Mono Multi Liquid glue
- Misti
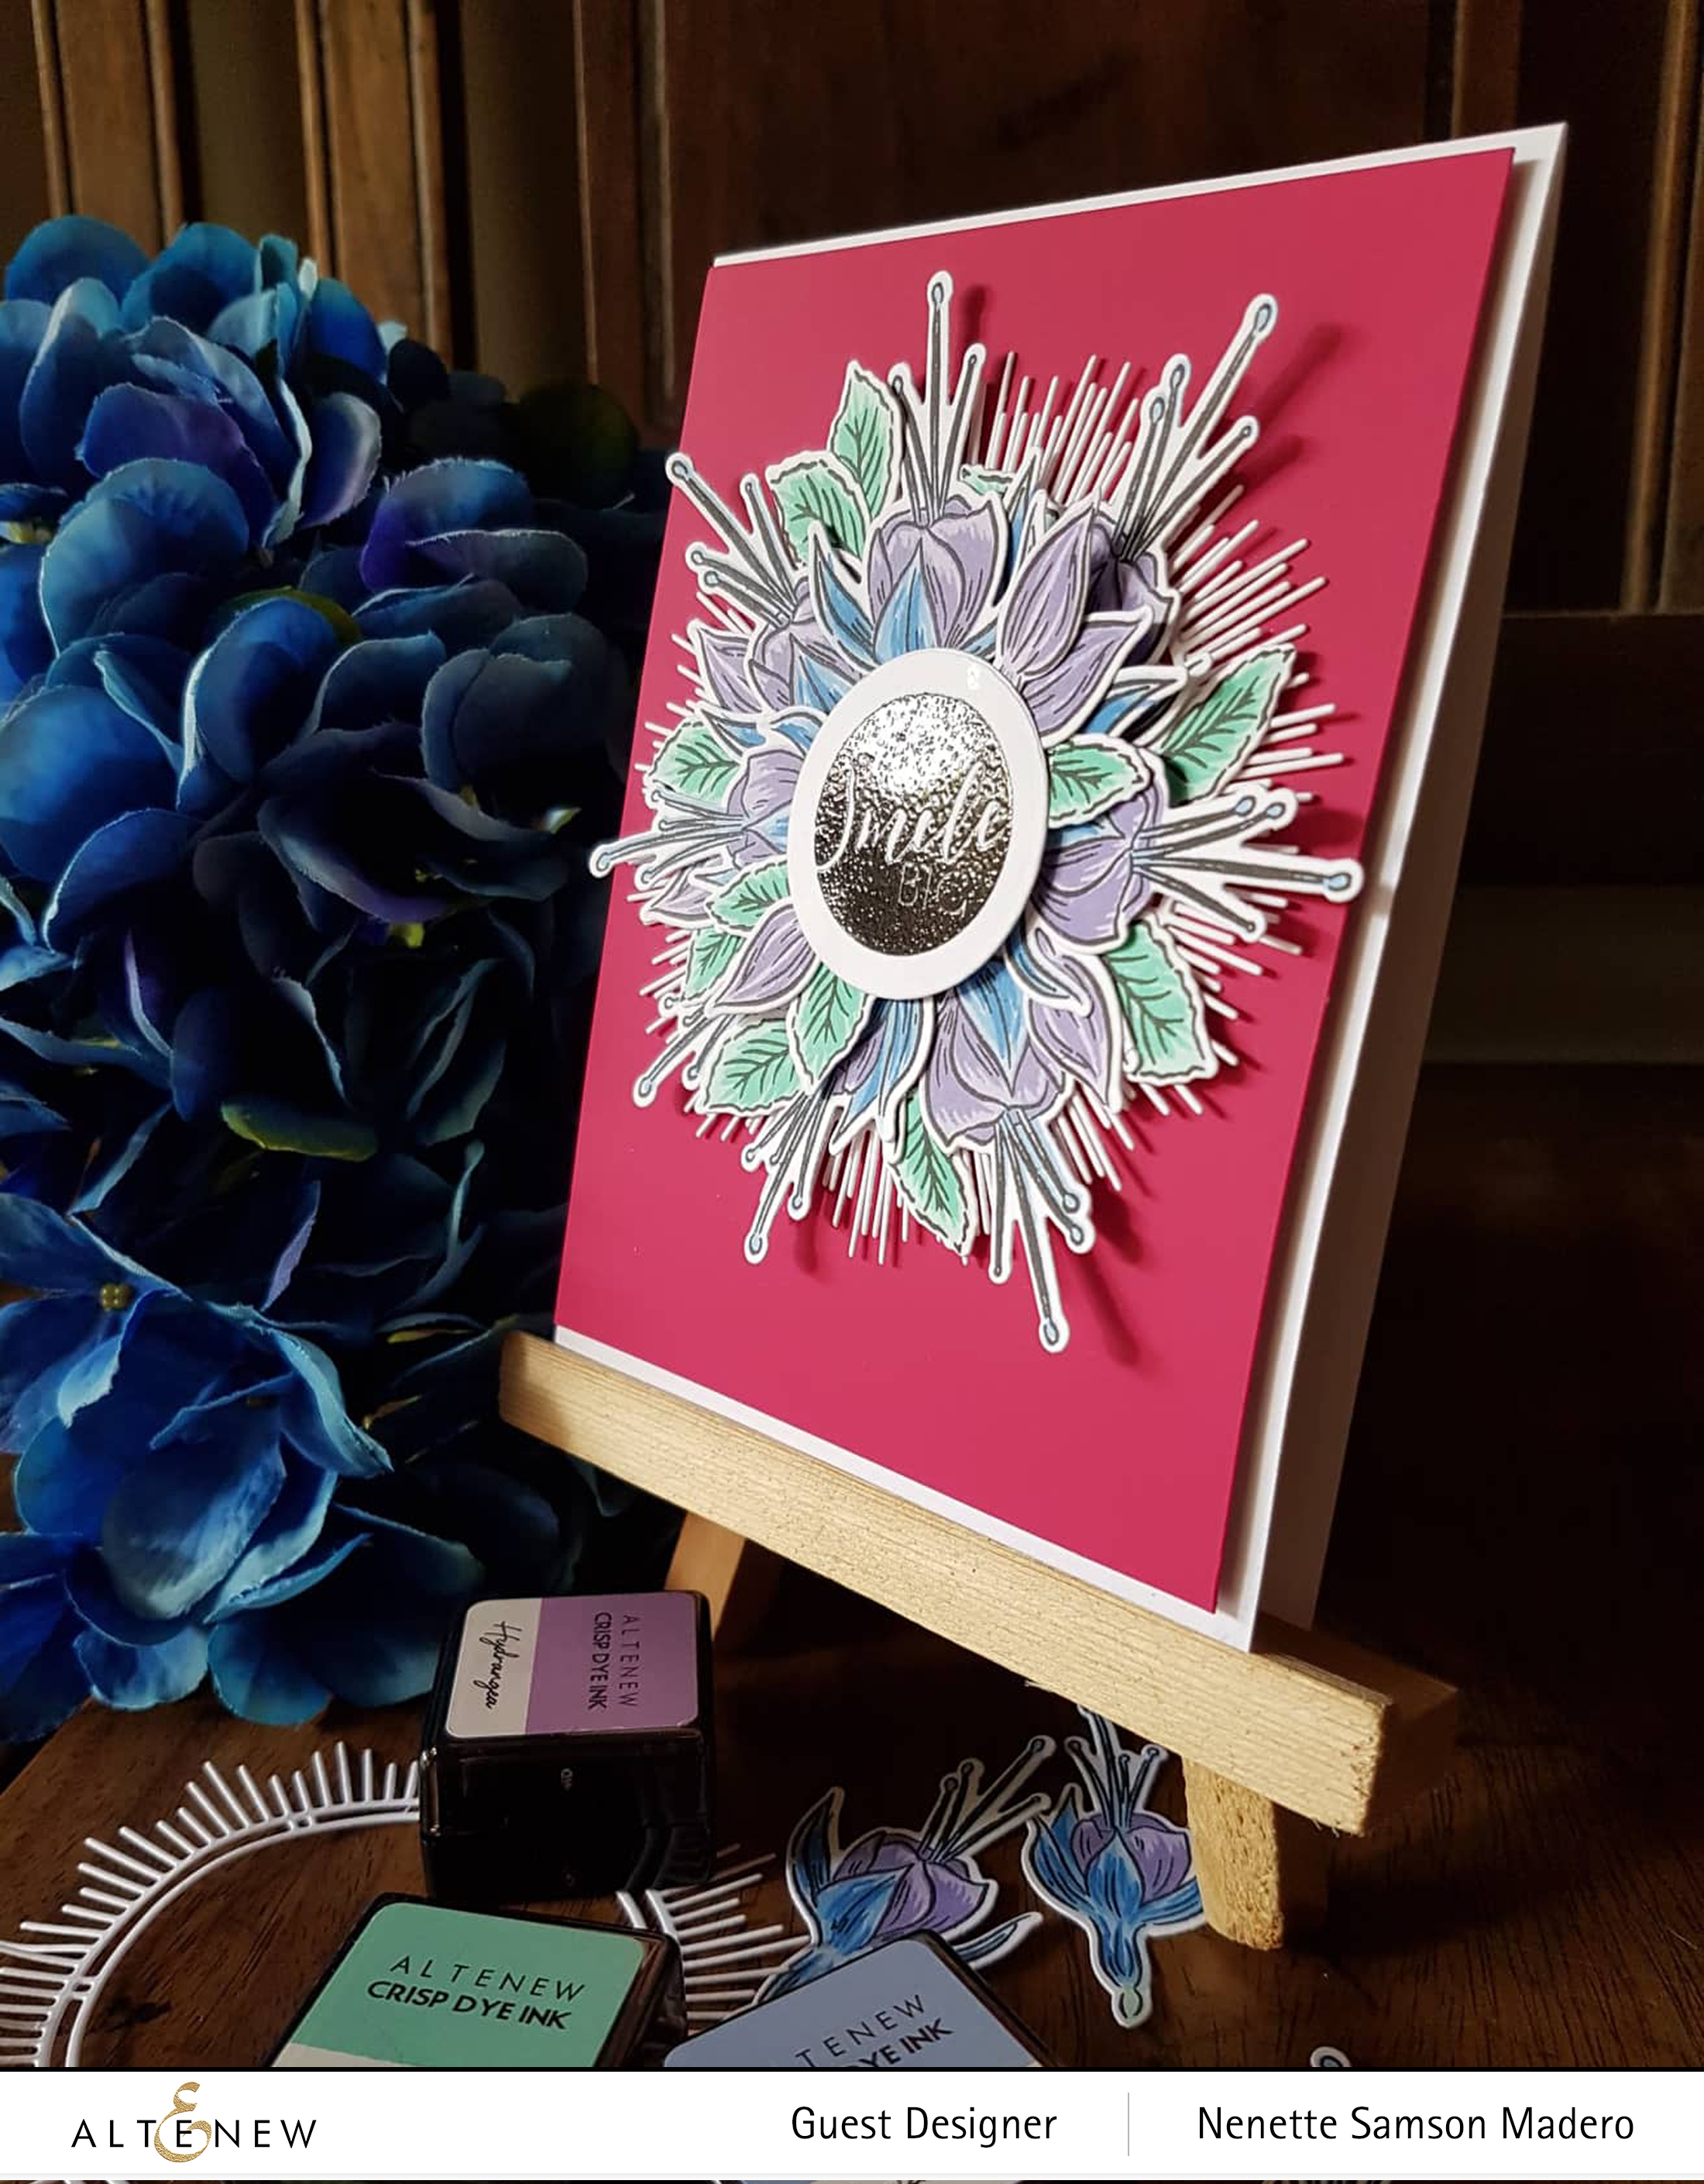
I decided not to use the stems for this flower and just use the flowers, buds and leaves to create a focal point. The mid-century frame die was used to create a frame using white cardstock. Two of them were layered to add more rays. The flowers were then stamped using the different layers then the flowers were arranged using adhesive and foam tape for dimension.
I always die cut scratch paper to act as a template when lining up the die with the stamped image to make sure the white outline around the image is uniform.
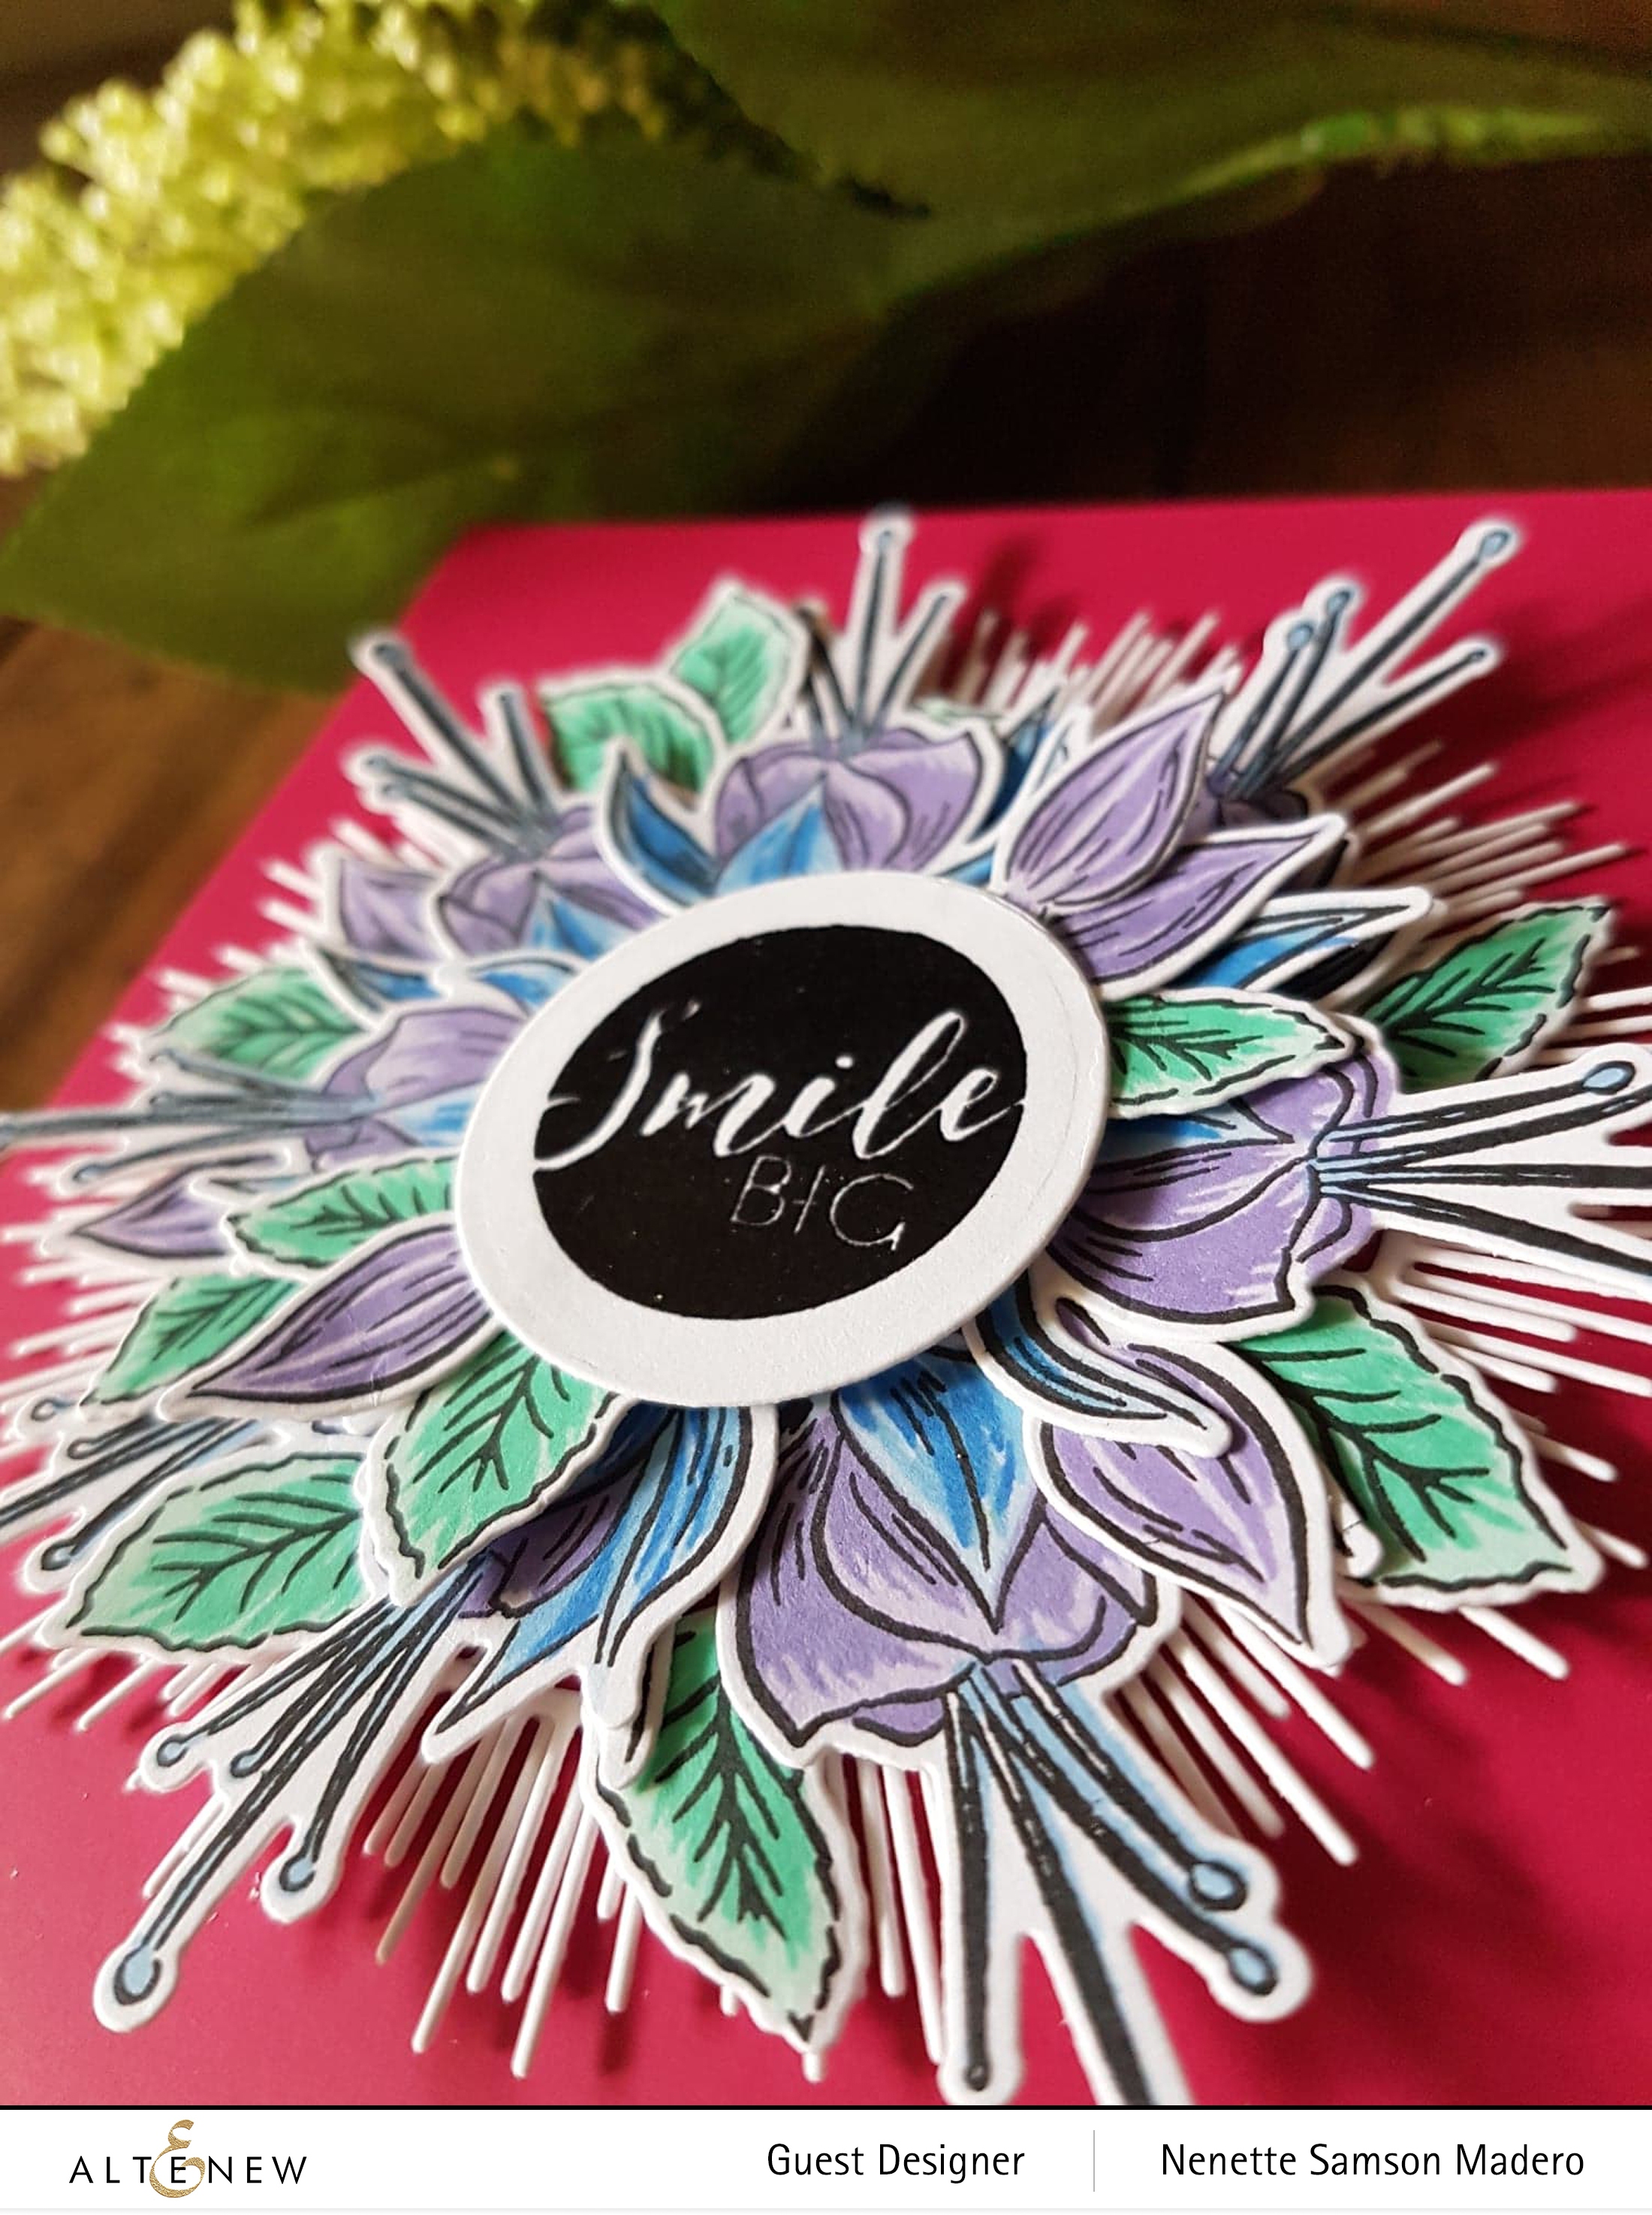
The sentiment from the Circled Sentiments was stamped using the Obsidian pigment ink then embossed with clear embossing powder.
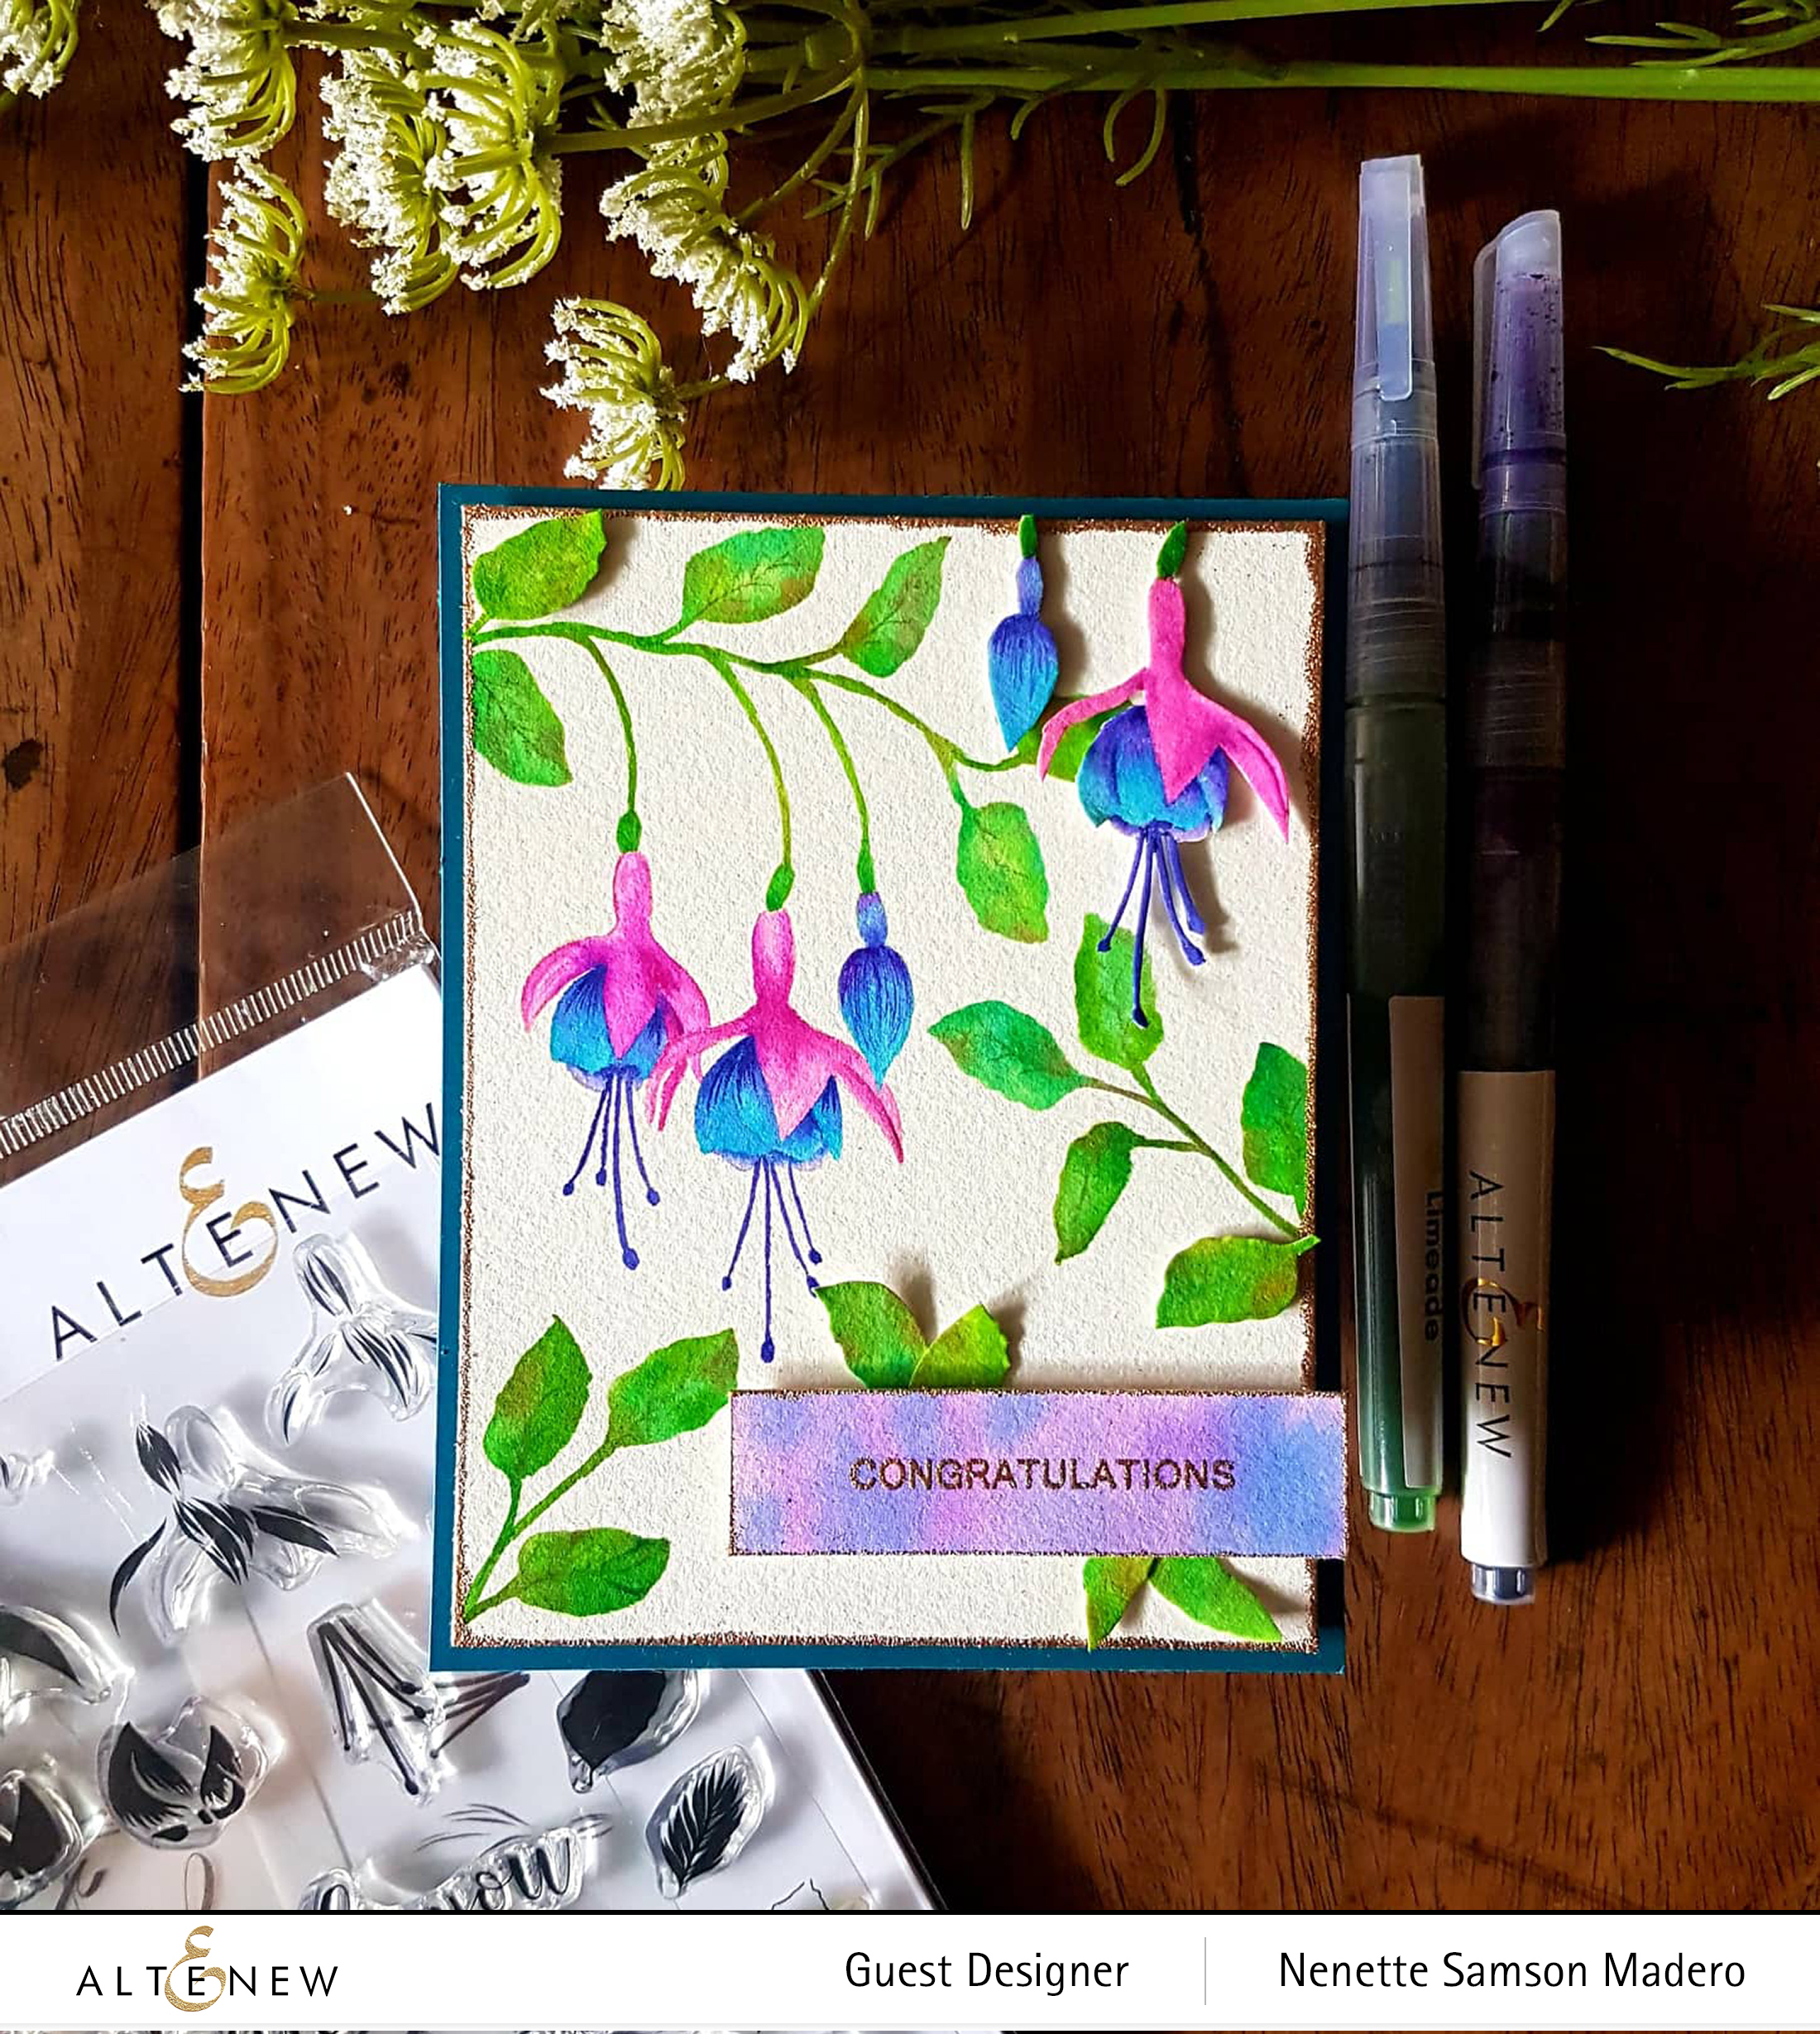
CONGRATULATIONS CARD
MATERIALS:
- ALTENEW BUILD A FLOWER: FUCHSIA STAMP SET
- ALTENEW DARE TO DREAM STAMP for the sentiment
- ALTENEW ROSE GOLD CRISP EMBOSSING POWDER
- ALTENEW WATERCOLOR BRUSH MARKERS
- Arches Watercolor Paper cold press 300gsm
- Versamark Ink
- Teal cardstock
- masking paper
- Distress Ink Antique Linen
- Scrapbook Adhesives foam squares
- Tombow Mono Multi Liquid glue
I had a booboo 🙁 After carefully stamping and masking my card front, I didn’t realize that the magnet of my Misti somehow had ink underneath it so when I lifted it from the card front, this was what I saw. 🙁
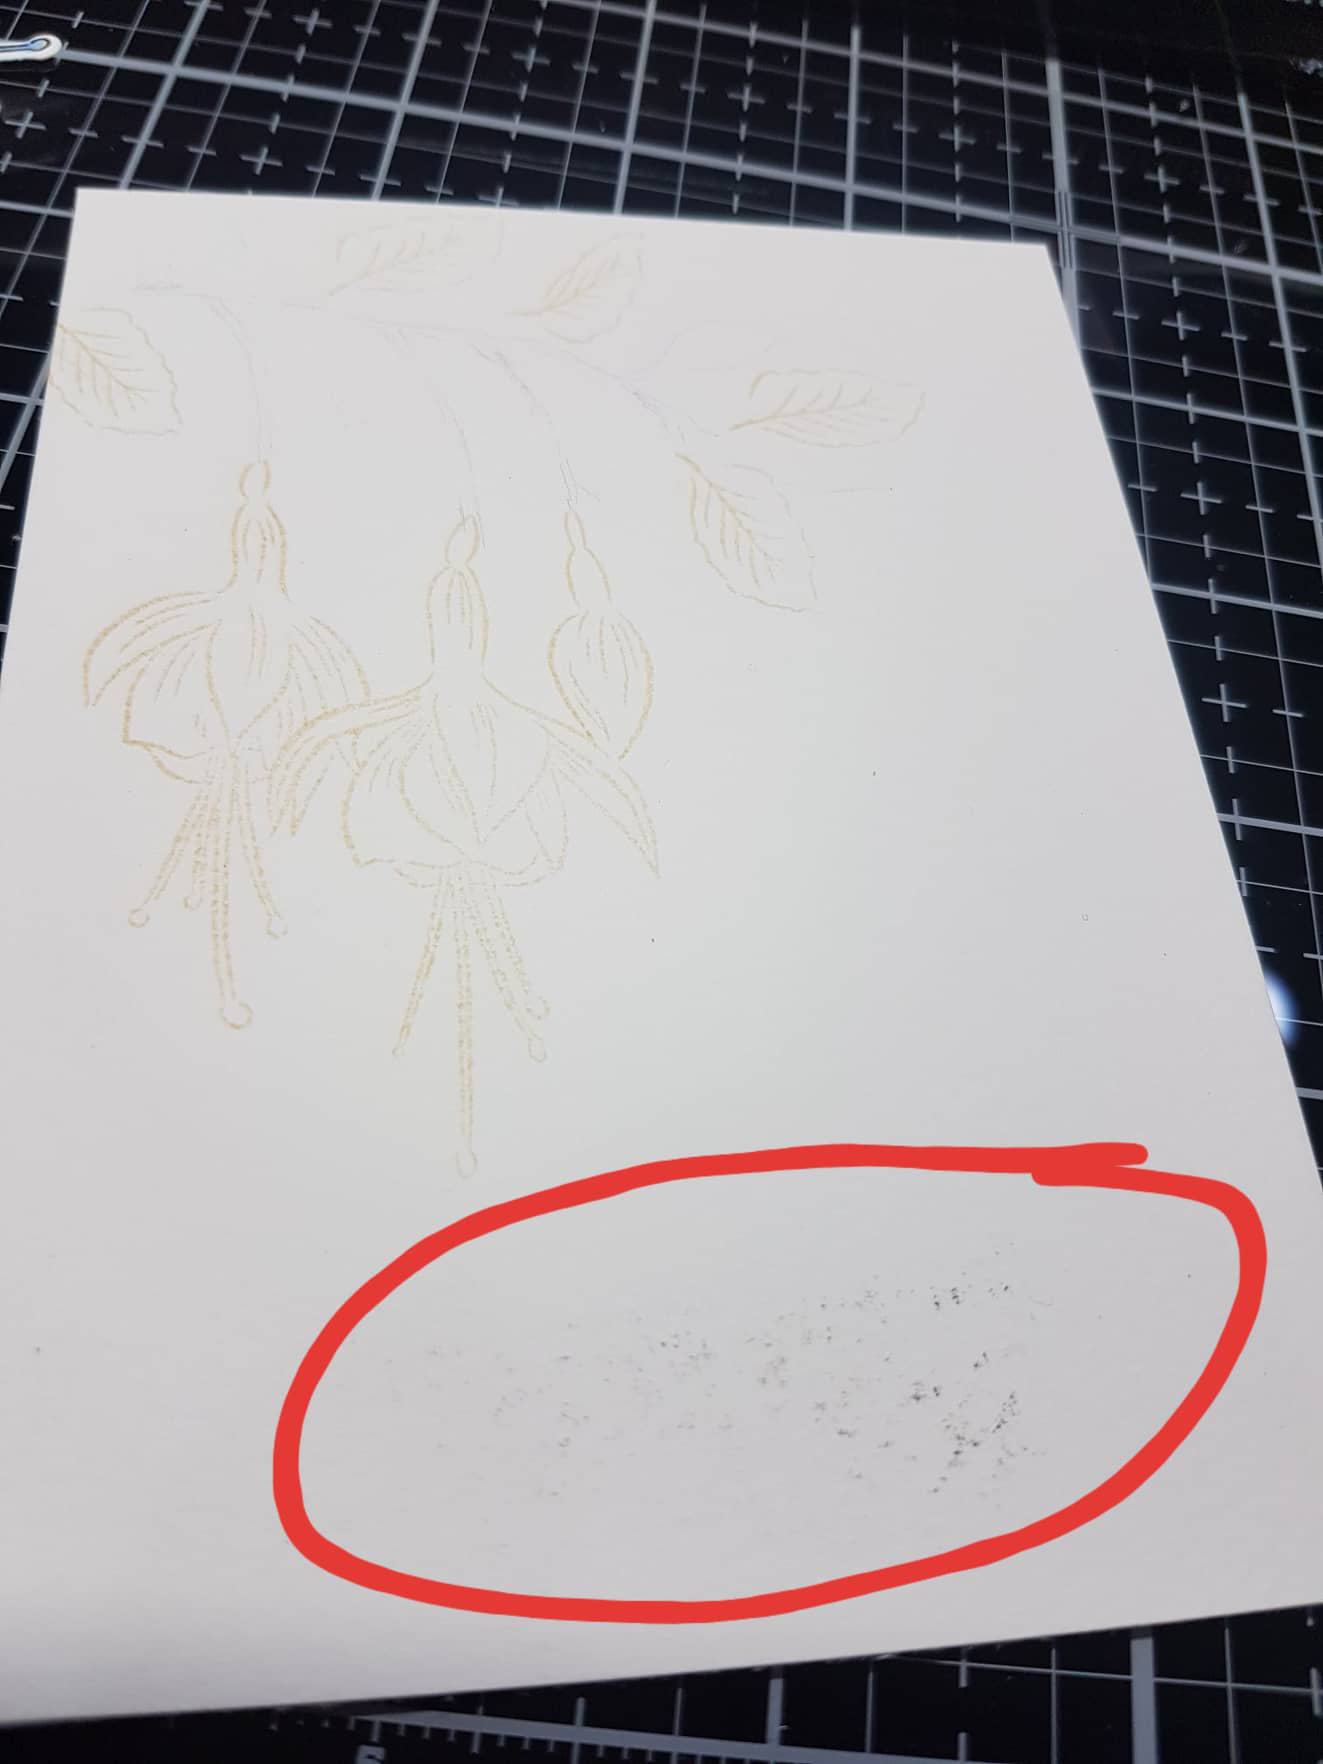
So instead of starting all over again with stamping and masking, I just decide to cover up the area with a

I chose to make a simple no-line
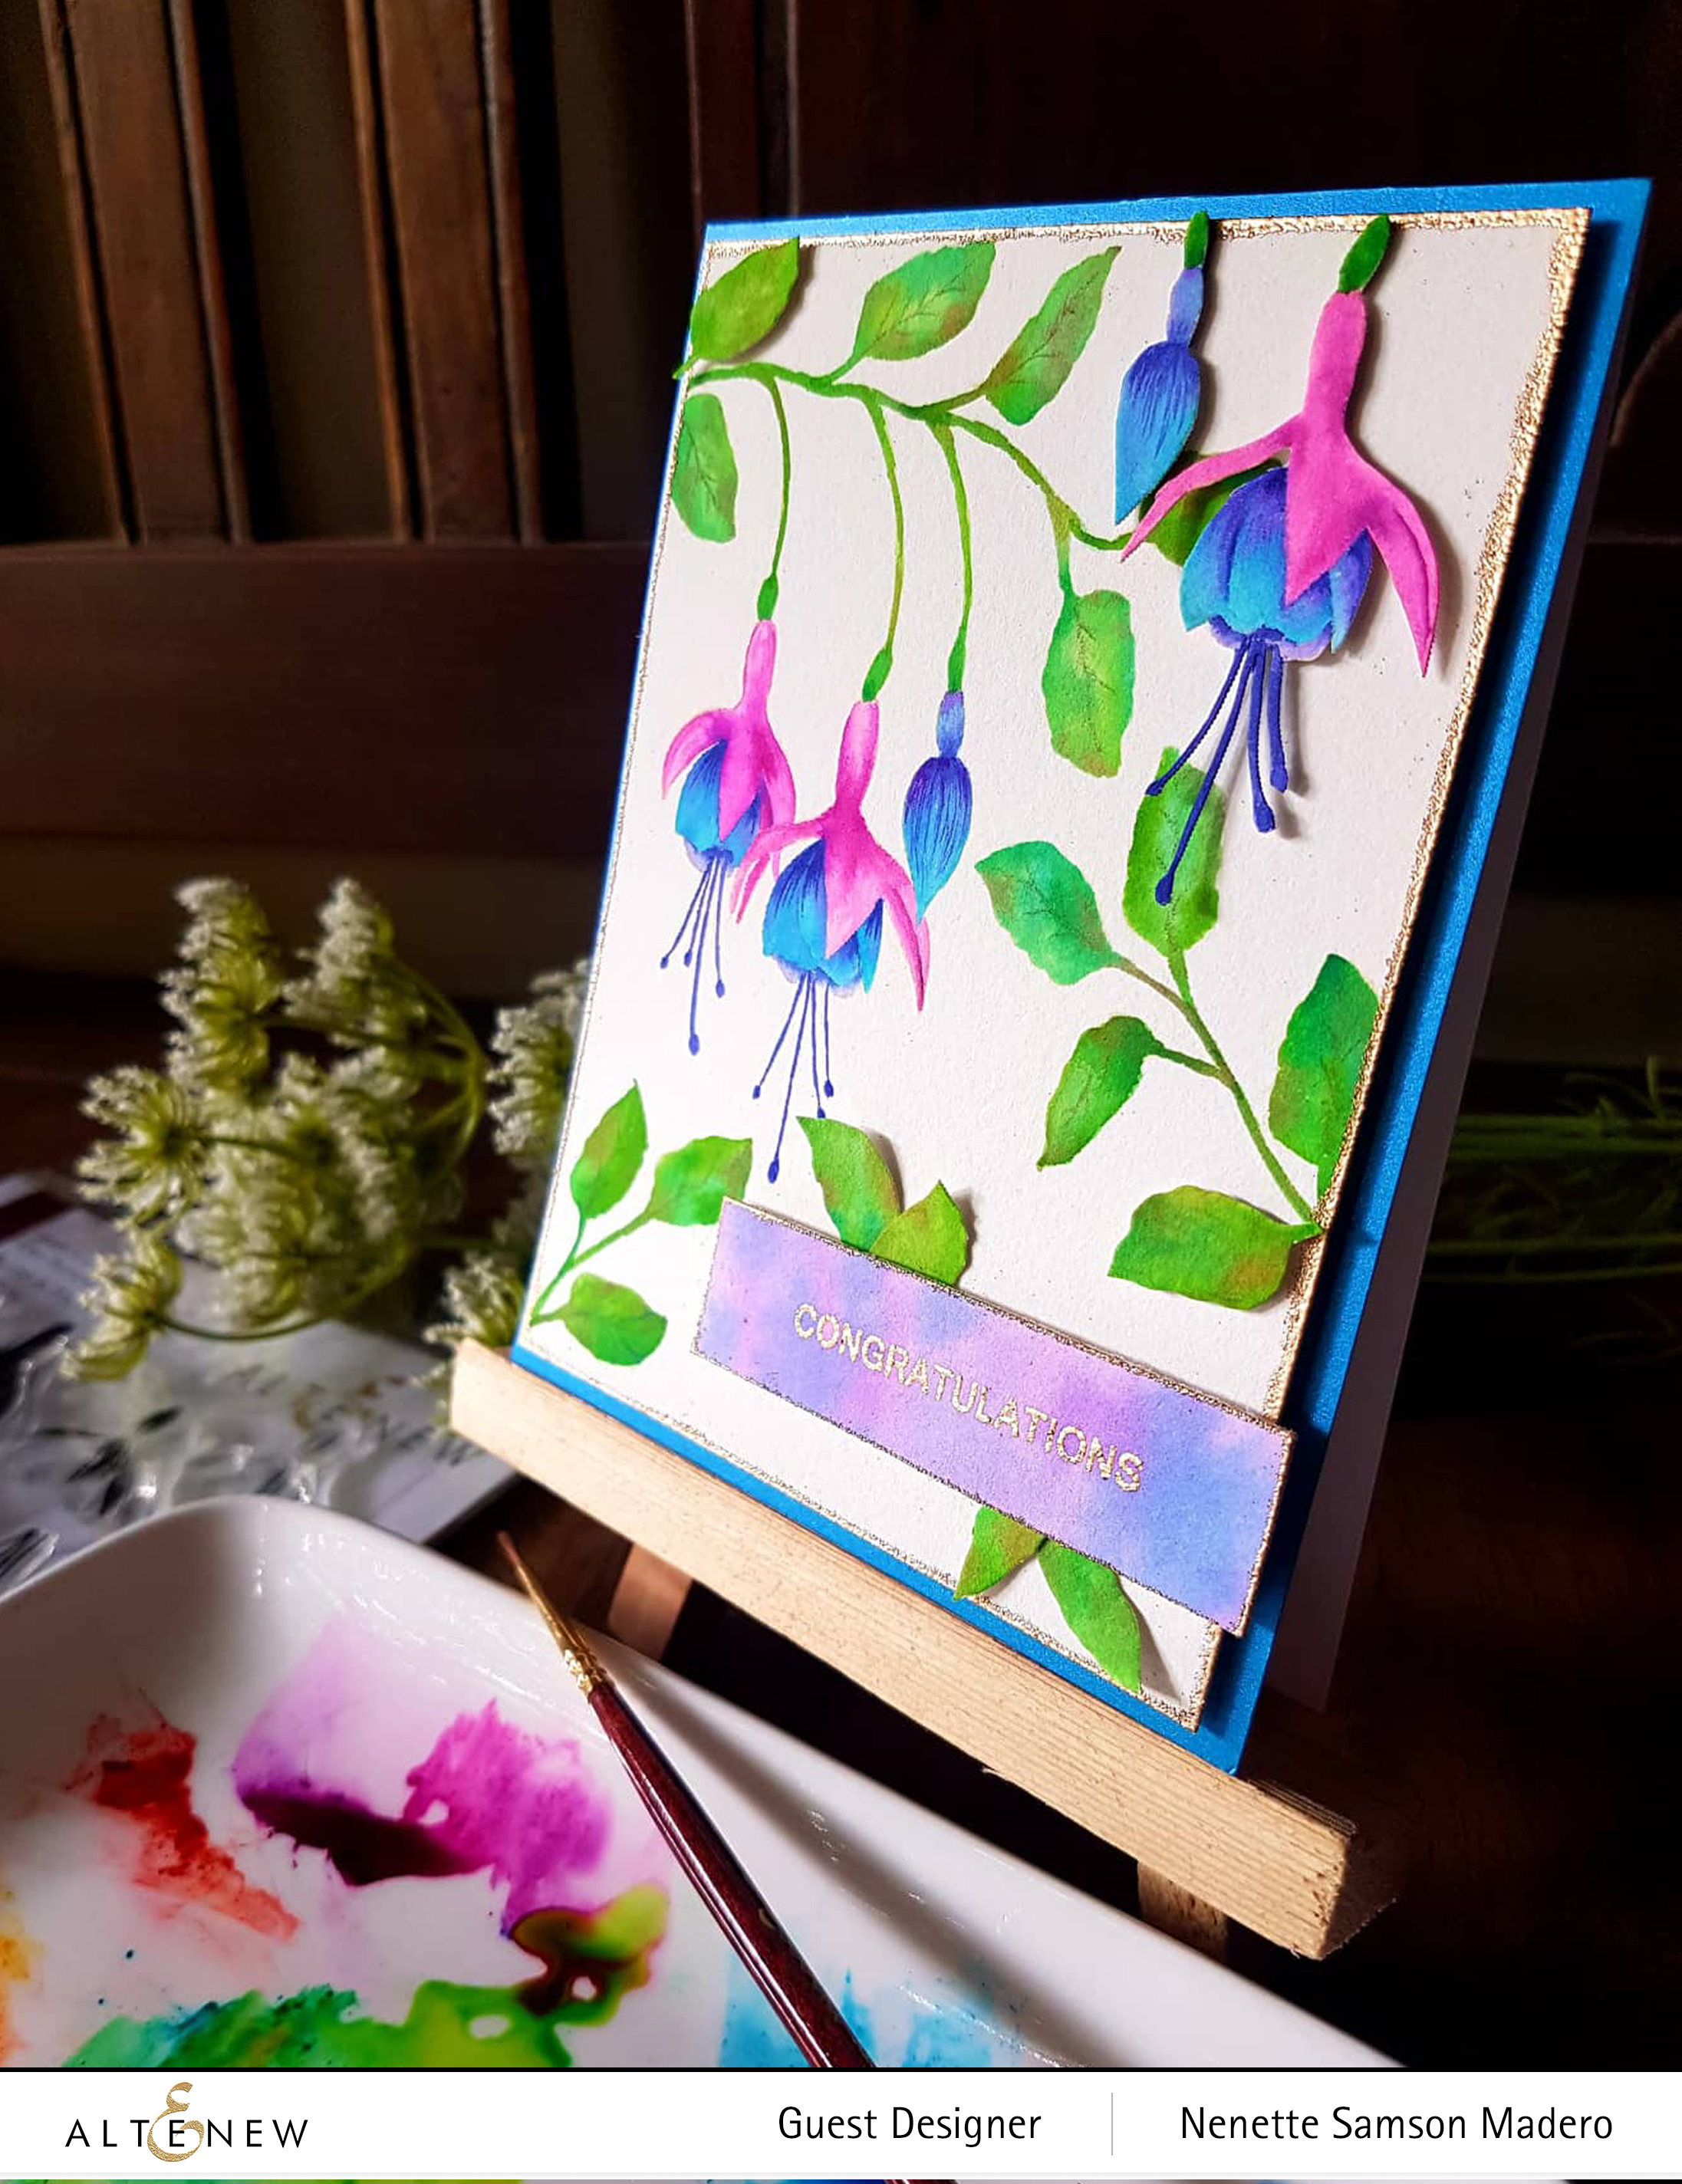
I also inked the edges of the card front and sentiment strip with Versmark Ink and then heat embossed with Rose Gold embossing powder to add a touch of shimmer at the edges of the card.
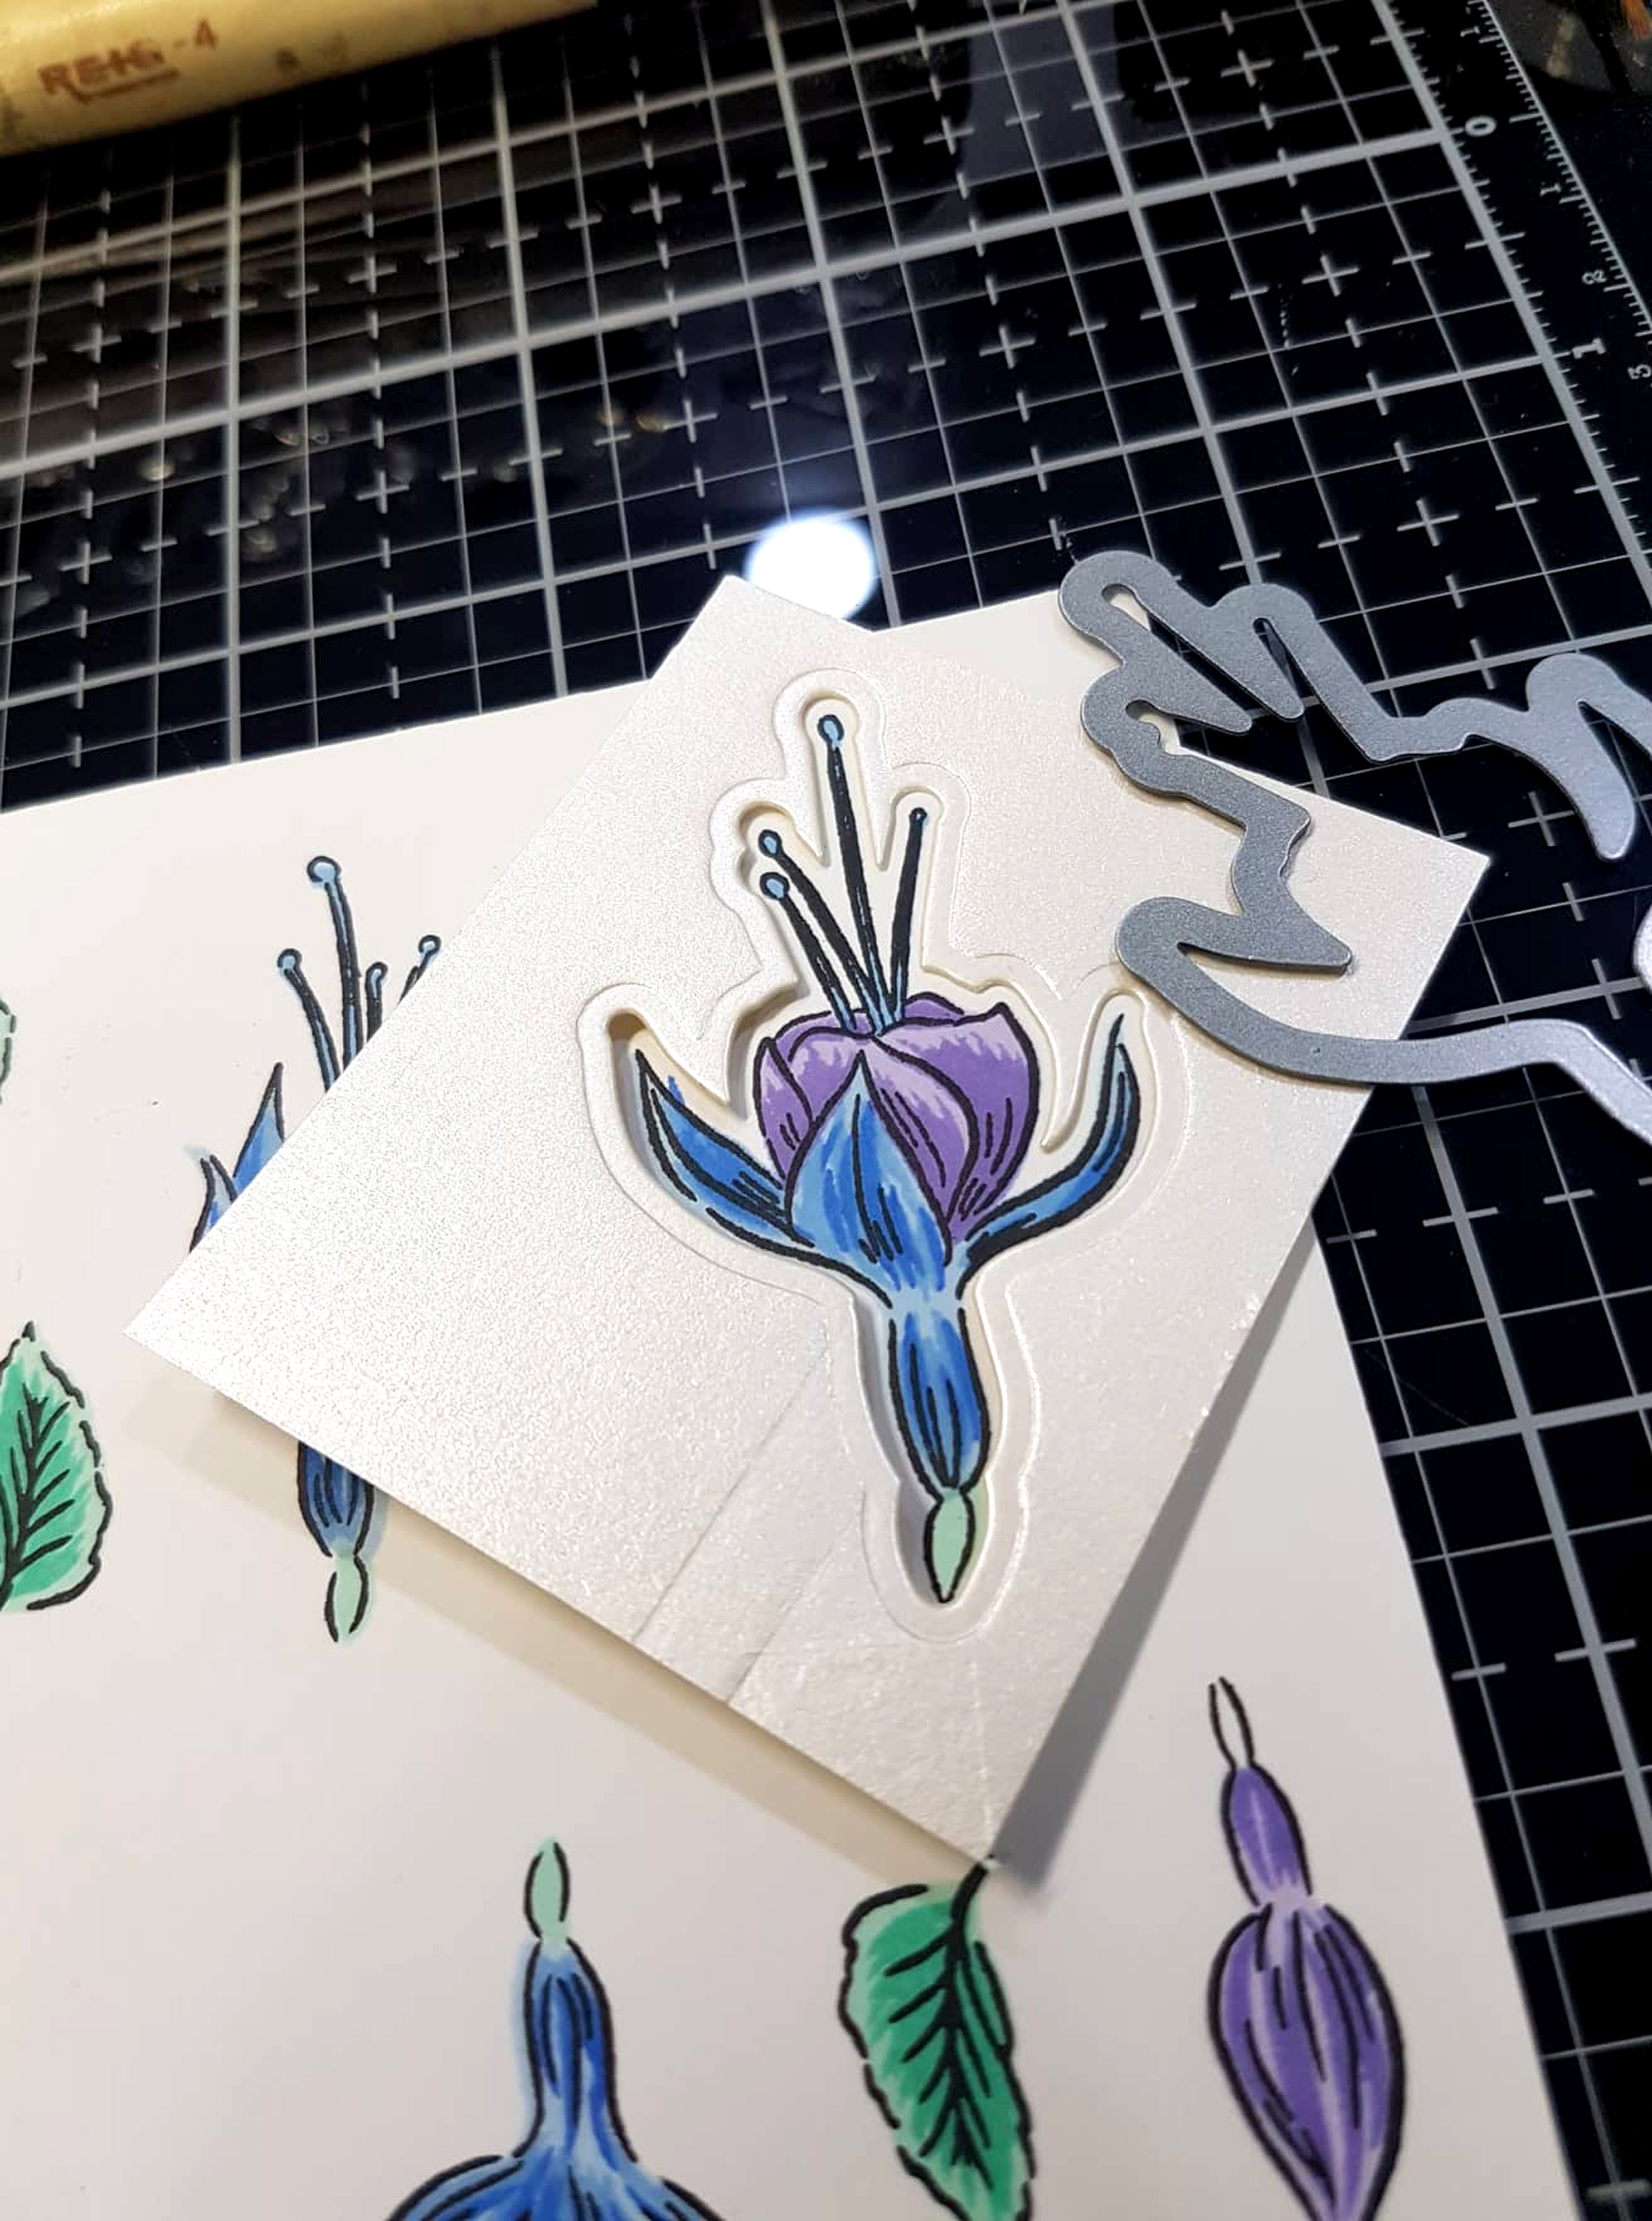
Since I had extra flowers and leaves, I decided to fussy cut
To celebrate this release, Altenew is giving away a $30 gift certificate to 6 lucky winners! Please leave a comment on the Altenew Card Blog and/or Altenew Scrapbook Blog for a chance to win.
We’ll also draw a winner to receive a $15 gift certificate from the comments left on each designer’s blog on the blog hop list below. All winners will be announced on the Altenew blogs on 10/7/2019.
Thank you so much for dropping by!!! I appreciate all your heartwarming comments here and on IG. Your kind words continue to inspire me to create more. ❤️ Next up is the amazing Caly Person. Hope you can follow my IG & FB accounts for future paper
FACEBOOK | INSTAGRAM | PINTEREST
BLOG HOP LIST
Hi, Nenette- Your cards are fabulous! I am following along on the Altenew blog hop!
Love what you did. We can always take a mistake and make something great out of it. 🙂 Great card!
Thanks so much, Mendy!
Good morning
I just want to say what a lovely webshop you have made! I am a customer of your website and really like your products. I had visited your webshop last week, and I saw a very nice product i wanna order. But I have a question! Today I wanted to order it, but can not find the item anymore in your store. Mail me if you are going to sell it again. I’ll wait.
Greetings
Hi Mia! Feel free to send me an e-mail as to what particular item you are looking for. I’d be glad to help!
Oh my! These are spectacular!! The bold beauties coming from the centerpiece first! And the “save” on your gorgeous watercolor card too!!
Thank you so much, Beverly! <3
Love the creativity and colors of the first card. Both cards are great!