Altenew Educators “Floral with Geometric Elements” Blog Hop and Linky Party + Giveaway

Altenew Educators “Floral with Geometric Elements” Blog Hop and Linky Party + Giveaway

Hello everyone!!! Welcome to the Altenew Educators’ Floral with Geometric Elements Blog Hop and giveaway! If you just came from the Altenew blog, I’d like to welcome all of you to mine!!! It is truly a thrill to be sharing this blog hop with my co-educators. We have all completed an amazing creative journey through the Altenew Educator Certification Program and each of us has definitely learned so many wonderful tips and techniques through all the amazing classes the program offers. During my time, it was Virginia Lu and Nicole Picadura who were heading the program and were so helpful and encouraging. Now, the talented Erum Tasneem has joined the group. Big, big thanks to these lovely ladies for everything that they do for the educators!!!

I have a number of cards to share so let’s get started! A few weeks back, I was in a creative rut… no inspiration at all. Some of my friends suggested to organize my craft room, learn a new technique, change my workspace etc. but what actually worked for me was making backgrounds using the Gelli plate! I love how unplanned the process is. All I had to do was make sure the colors complemented each other. And it worked! The idea to create backgrounds came from Bridgit Koopsen, an amazing mixed media artist. I had a number of backgrounds to play with and below are some of the cards that I made using the backgrounds I created using some Altenew stencils as my geometric element.


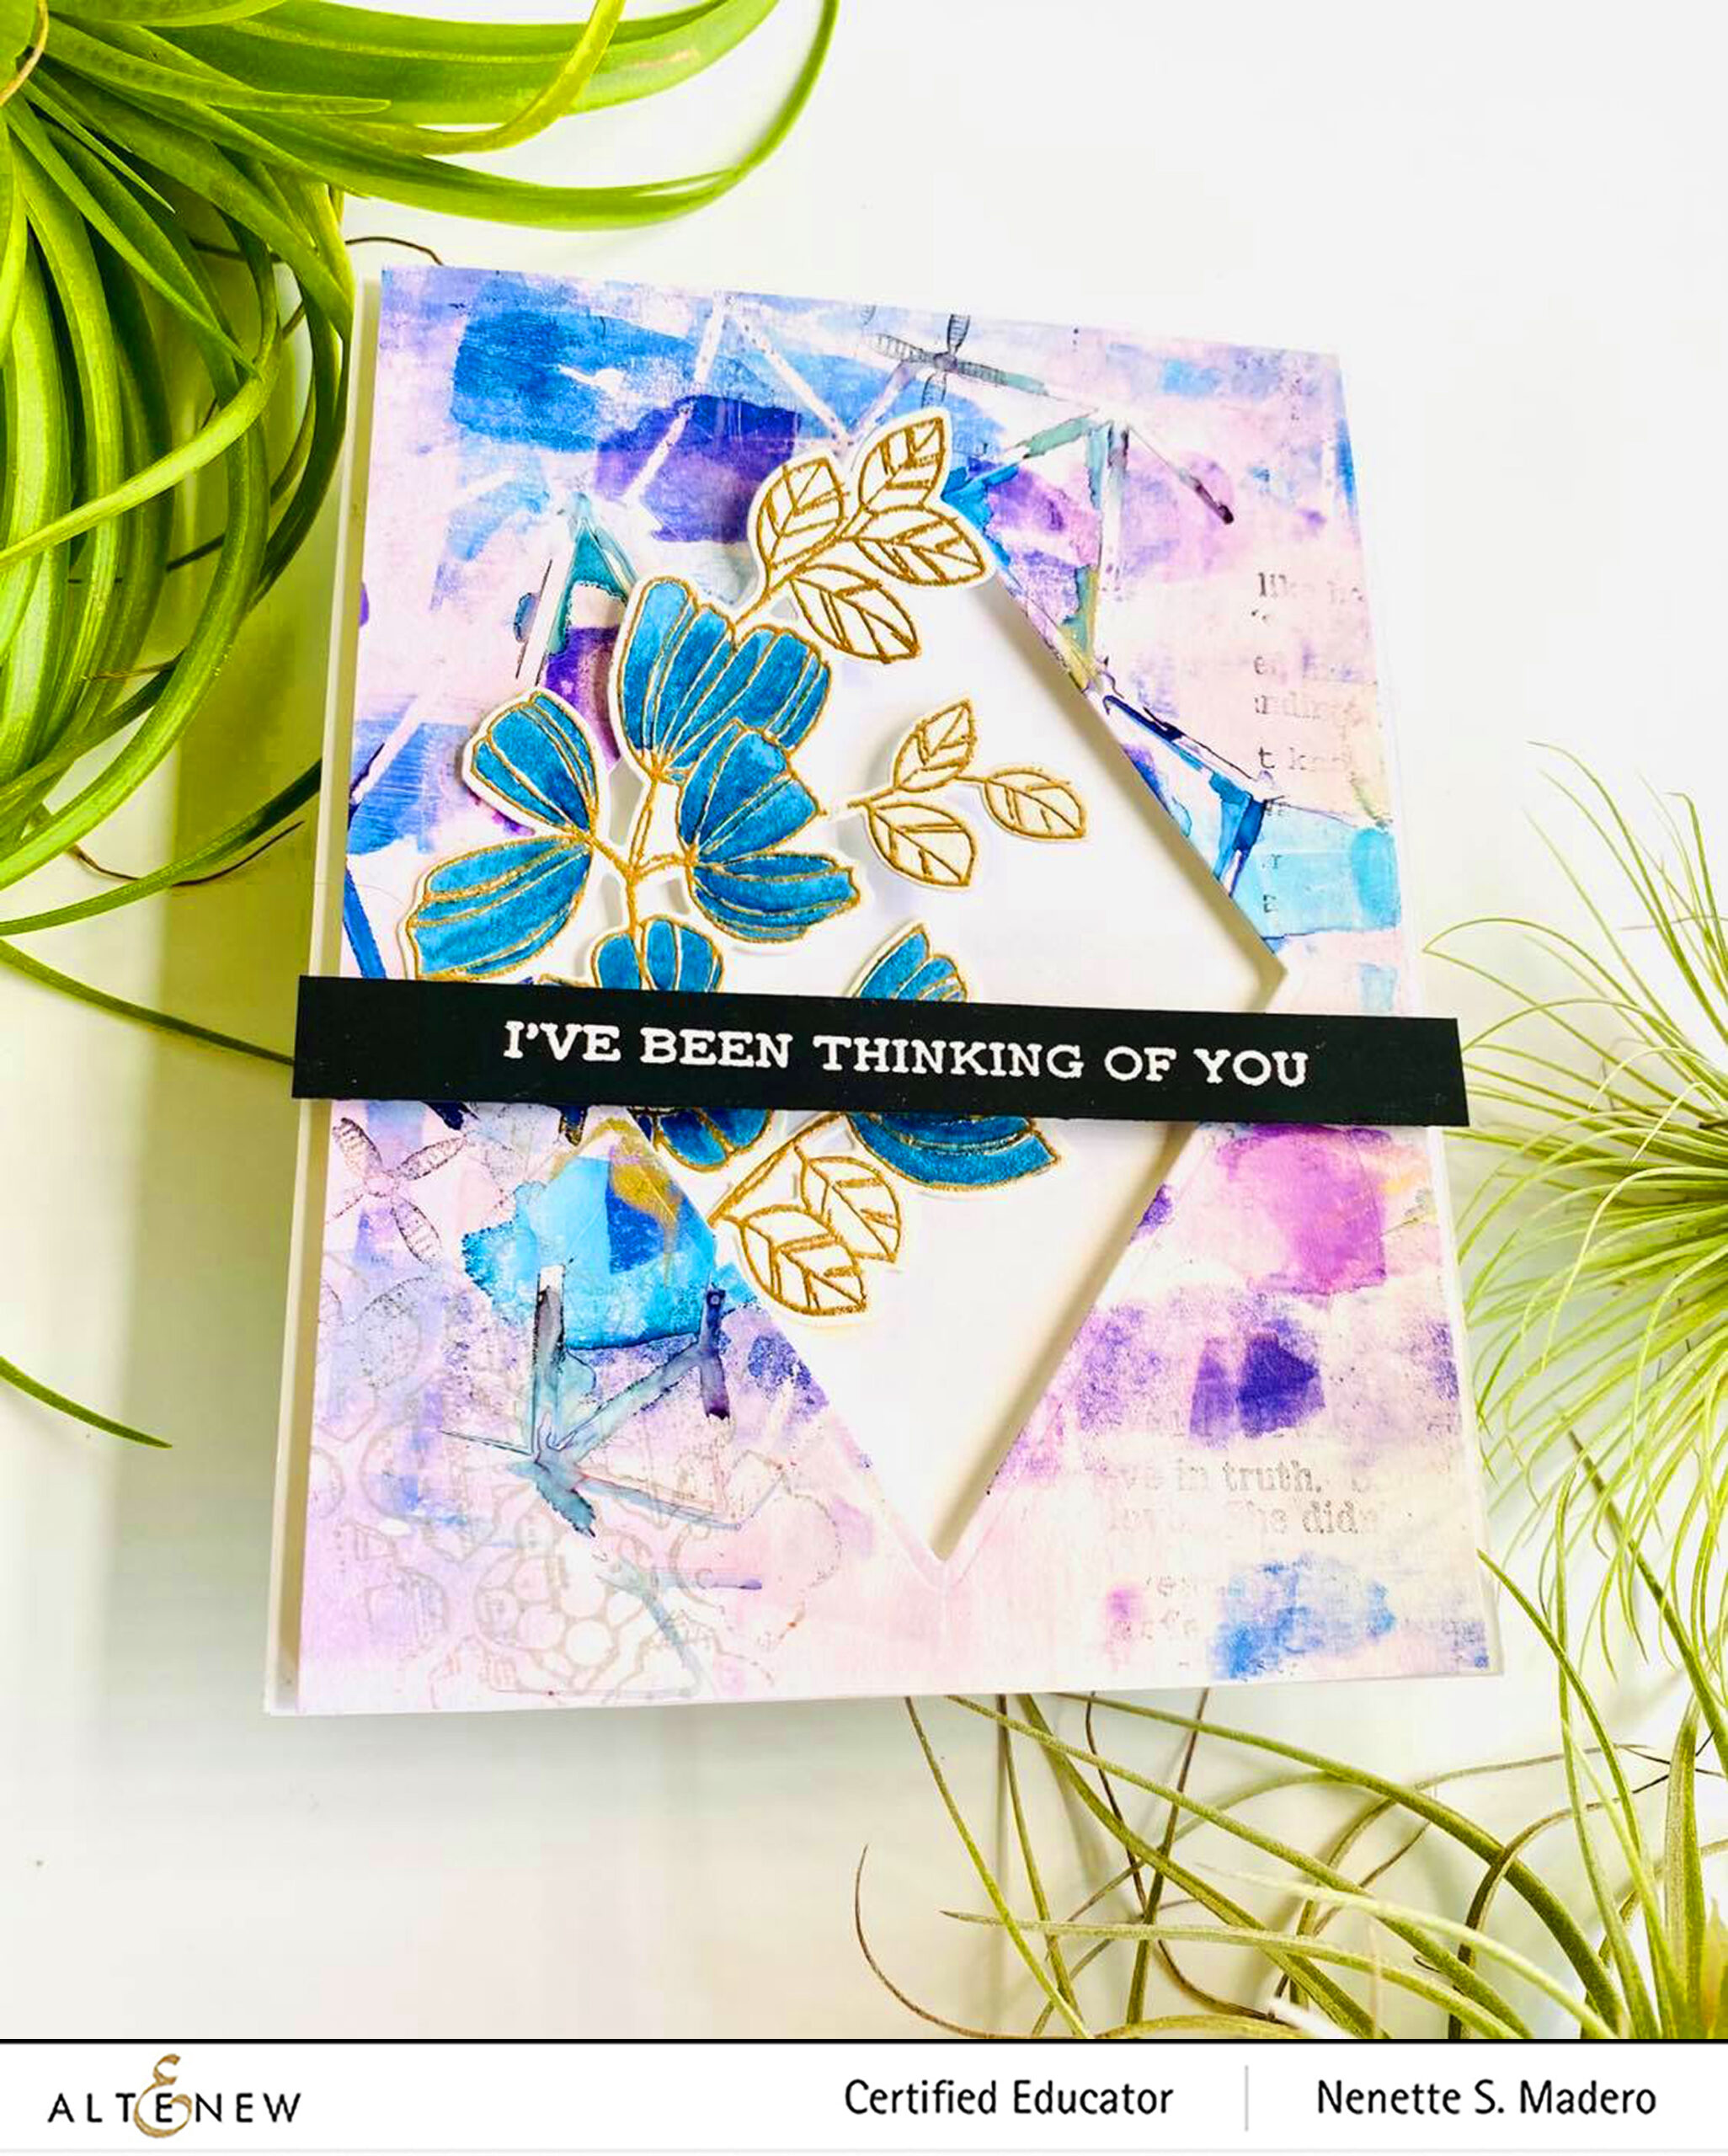
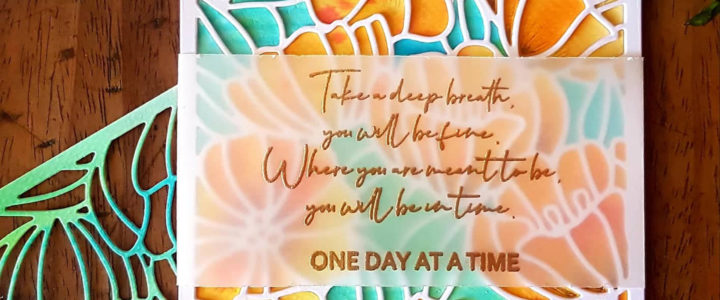
JUST BELIEVE IN YOURSELF/I’VE BEEN THINKING OF YOU


MATERIALS: WEEKEND DOODLES STAMP AND DIE, GEOMETRIC LANDSCAPE STENCIL, SENTIMENT STRIPS STAMP, VERSAMARK INK, VELLUM, NEENAH SOLAR WHITE CARDSTOCK, TOMBOW MONO MULTI LIQUID GLUE, FOAM SQUARES, ALCOHOL INKS-BOYSENBERRY, POOL, GLACIER, SAILBOAT BLUE, GOLD MIXATIVE, GELLI PLATE OTHER STAMP SETS

These are what I call my Yin and Yang cards wherein I switch the die cut parts to create two cards. For the background, I dropped alcohol inks on a Gelli plate and used a brayer to spread the inks. I let the first coat dry then placed the stencil on top and dropped a second layer of inks. When the inks were dry to touch, I removed the Geometric Landscape stencil then covered the entire surface with a thin coat of white acrylic paint. Neenah solar white cardstock was placed on top of the paint and I used a brayer to go through the entire surface. A print was then pulled from the gelli pate. It’s amazing how fun this technique was… I really couldn’t tell what the outcome would be. Random images were then stamped using black or grey for added texture.
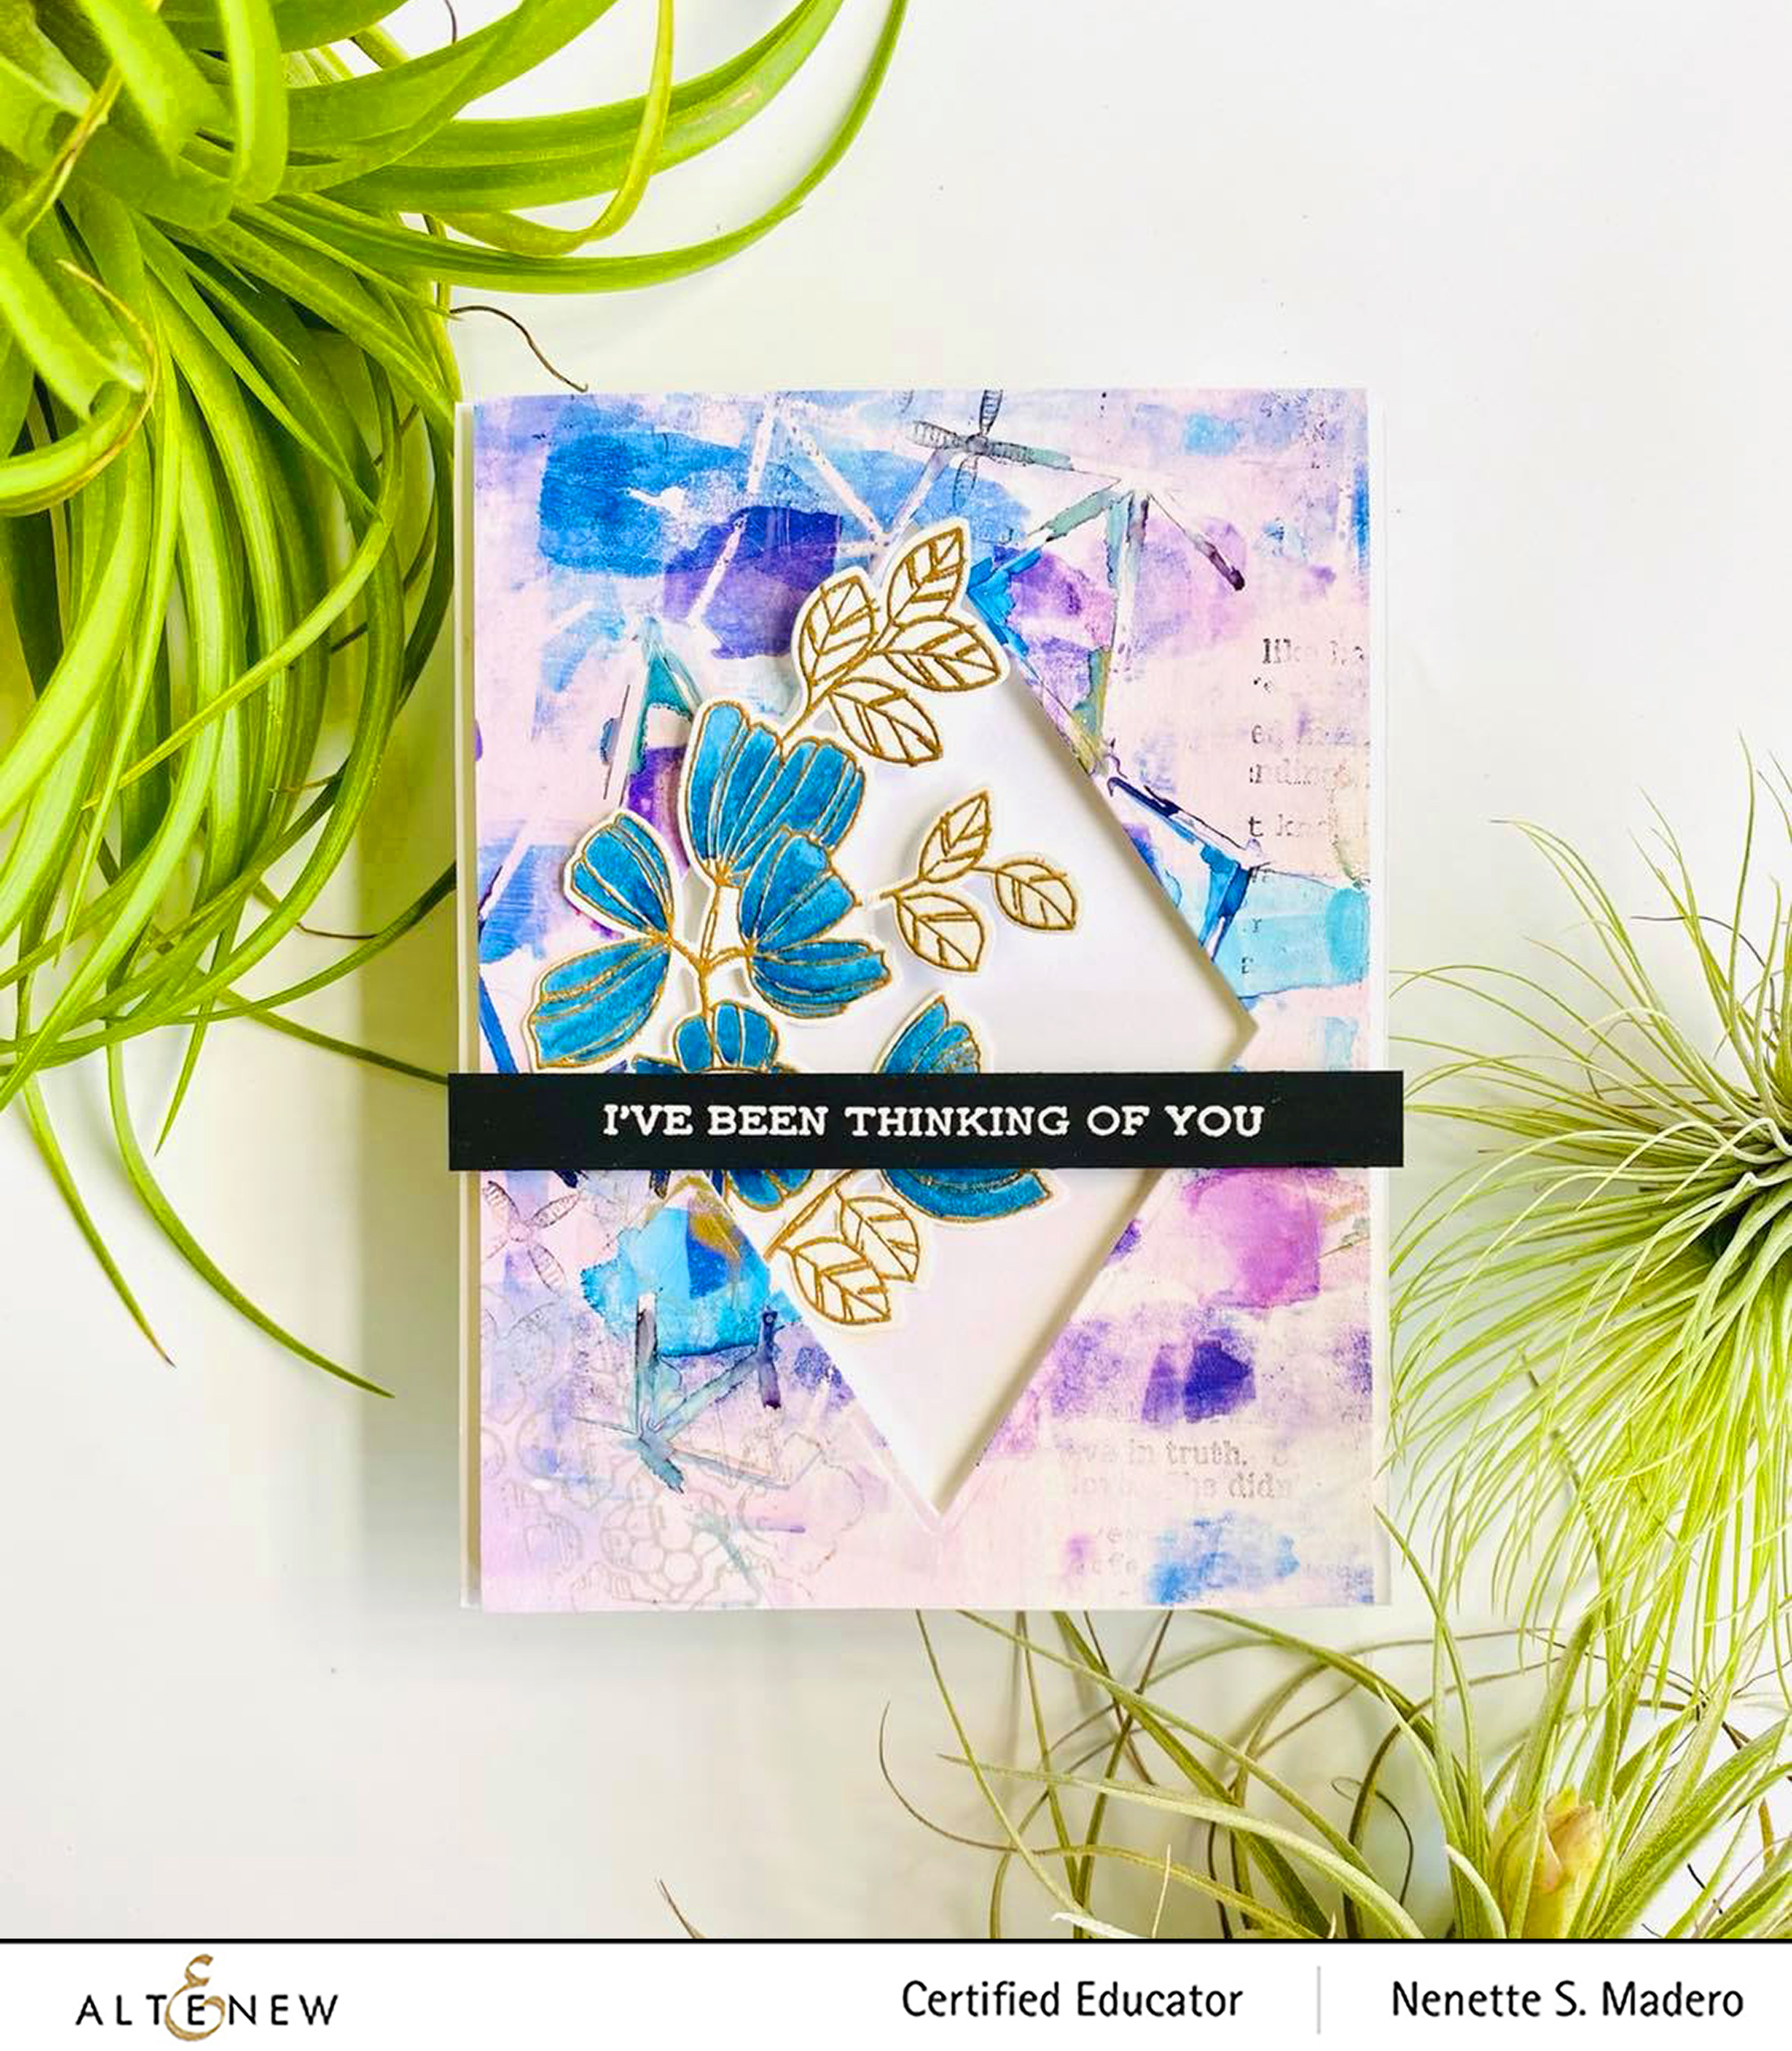
For the “I’ve been thinking of you card”, I die cut the diamond from the center of the printed image and saved the die cut part. Working with the negative part, I adhered it to a top folding A2 card using foam squares and inserted a die cut, embossed and watercolored floral image from the Weekend Doodles stamp set. The sentiment was stamped on black cardstock and embossed using white embossing powder.
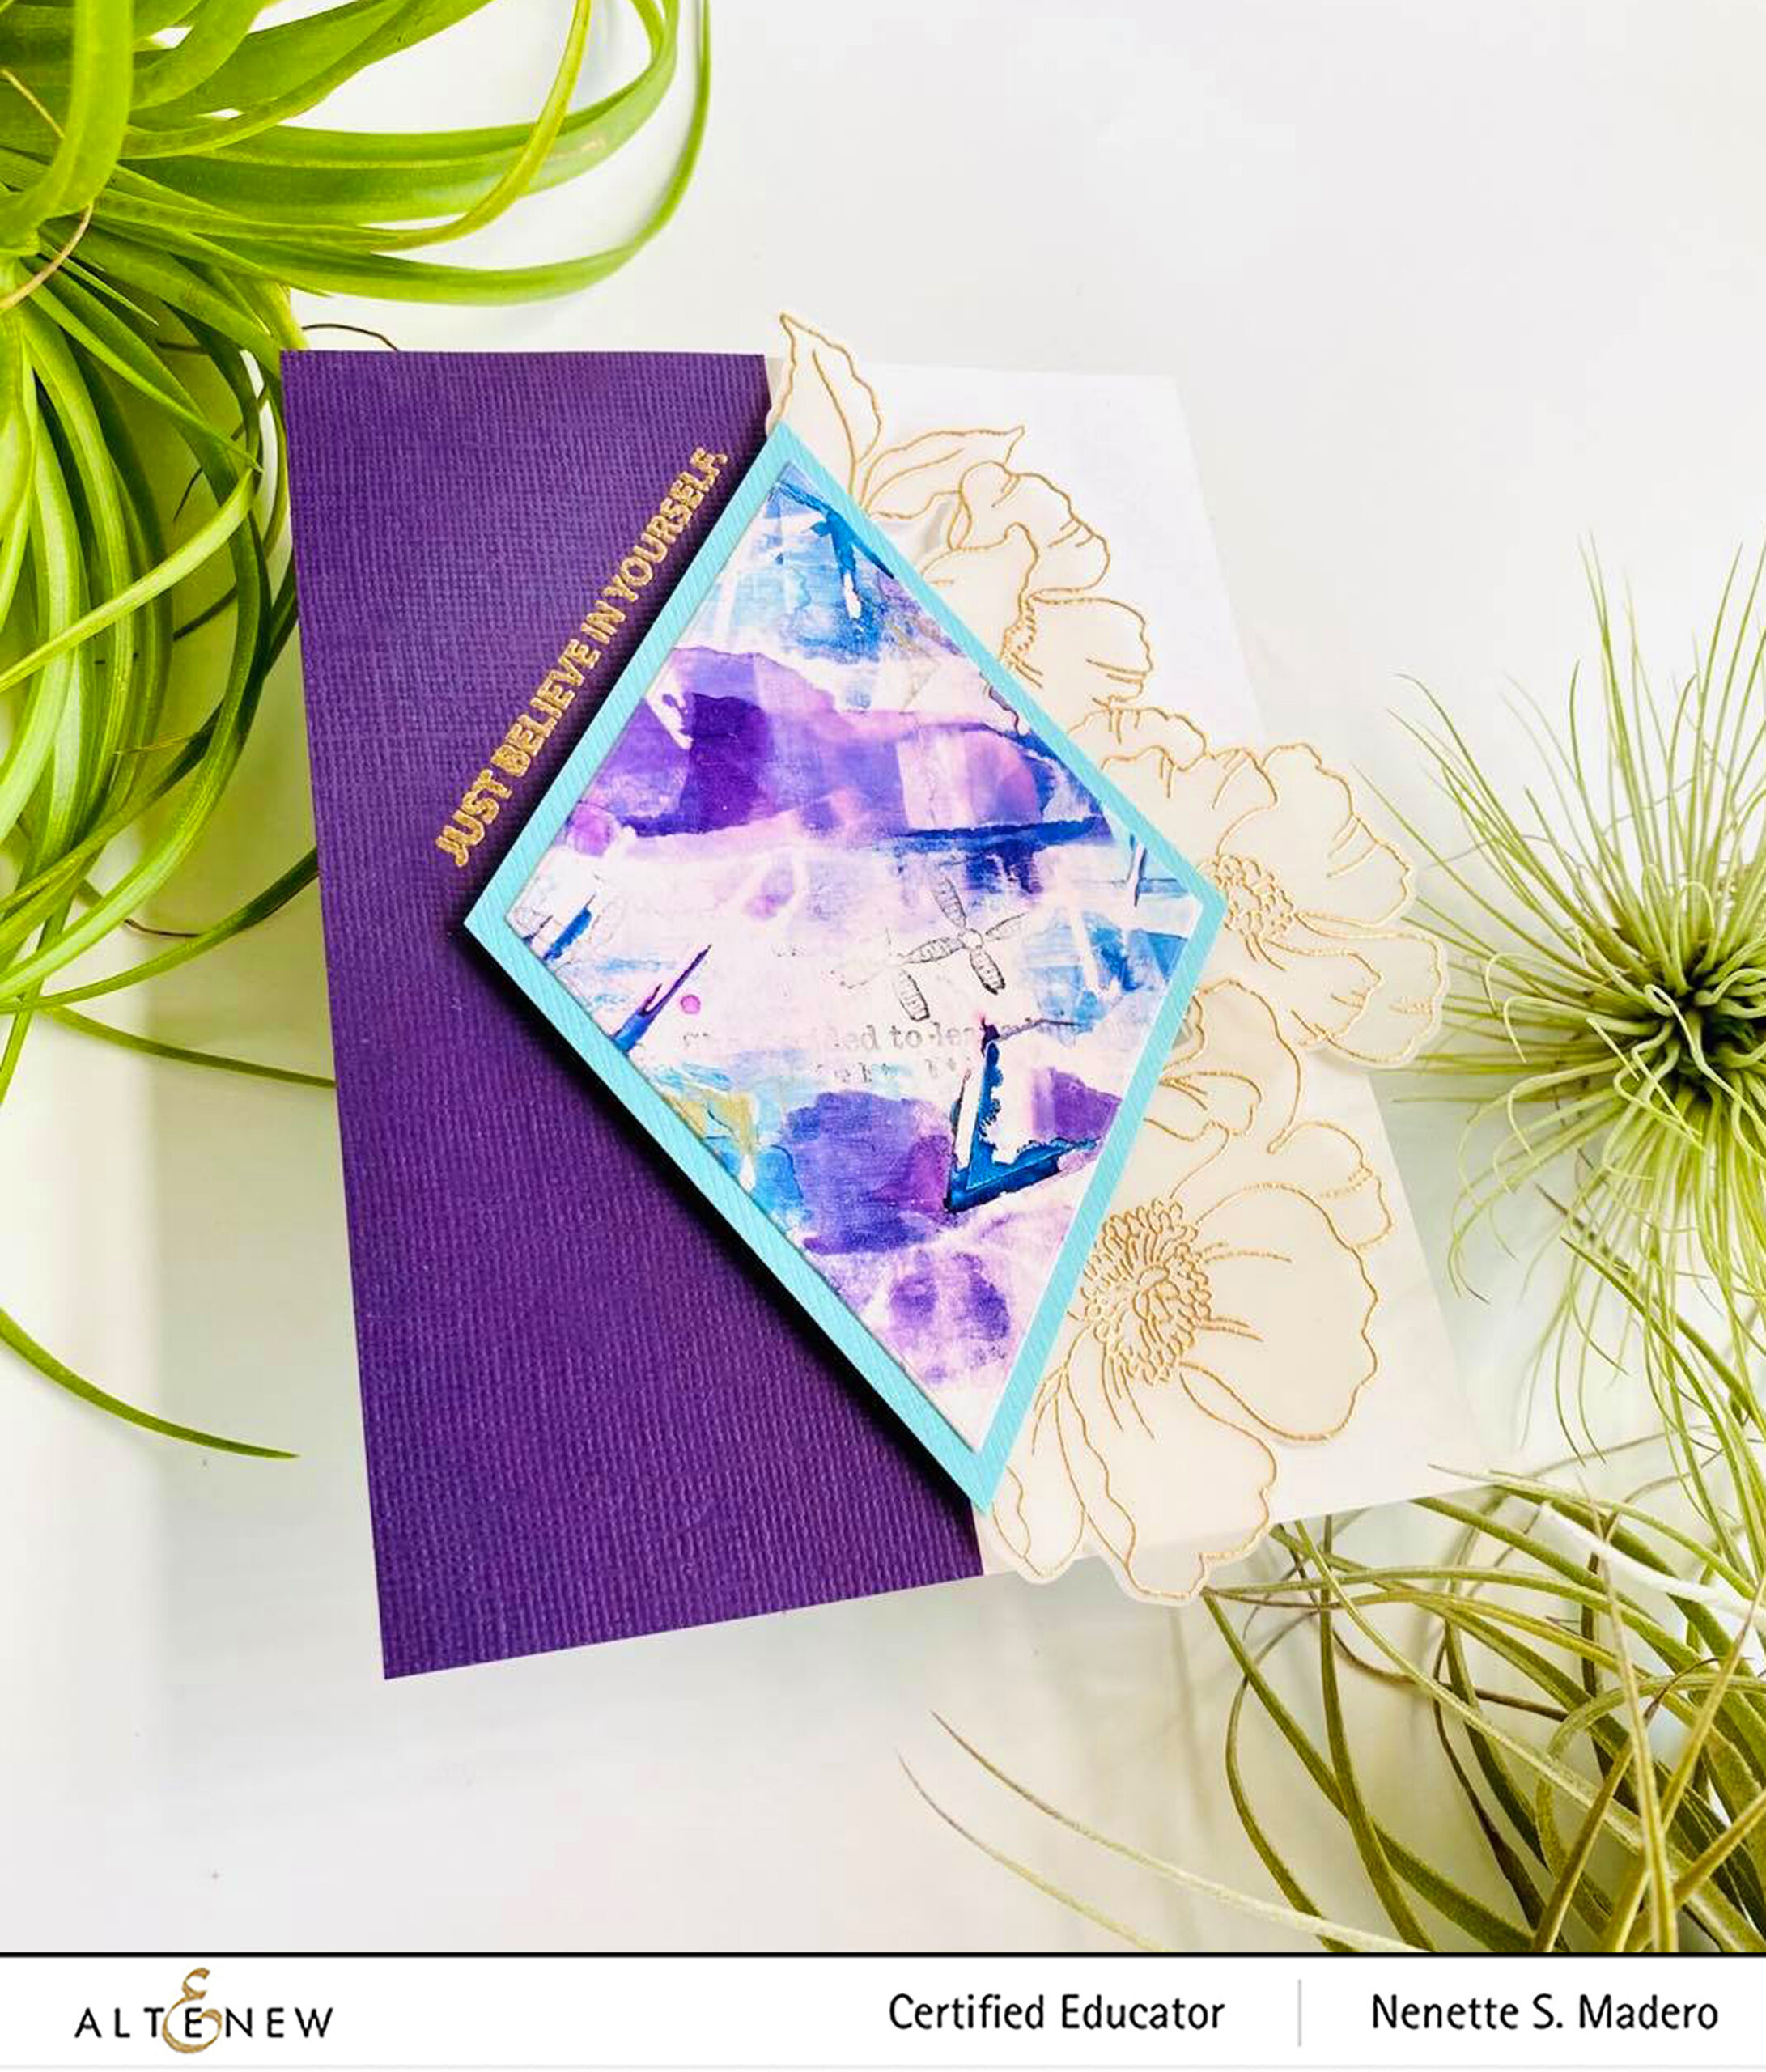
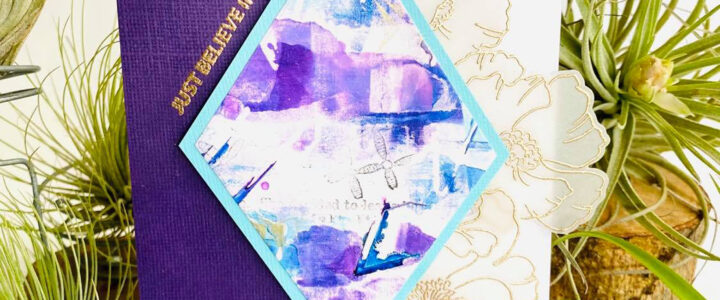
For the “Just Believe in Yourself” card, I adhered a purple cardstock on half of the card front. I added embossed floral images from the Poppy Garden Stamp set to the matted diamond die-cut and added this in the middle of the card with foam squares. I love how the weight of the flowers balanced the dark colored cardstock. The diamond at the center also serves as a geometric element.


PRAYING FOR YOU
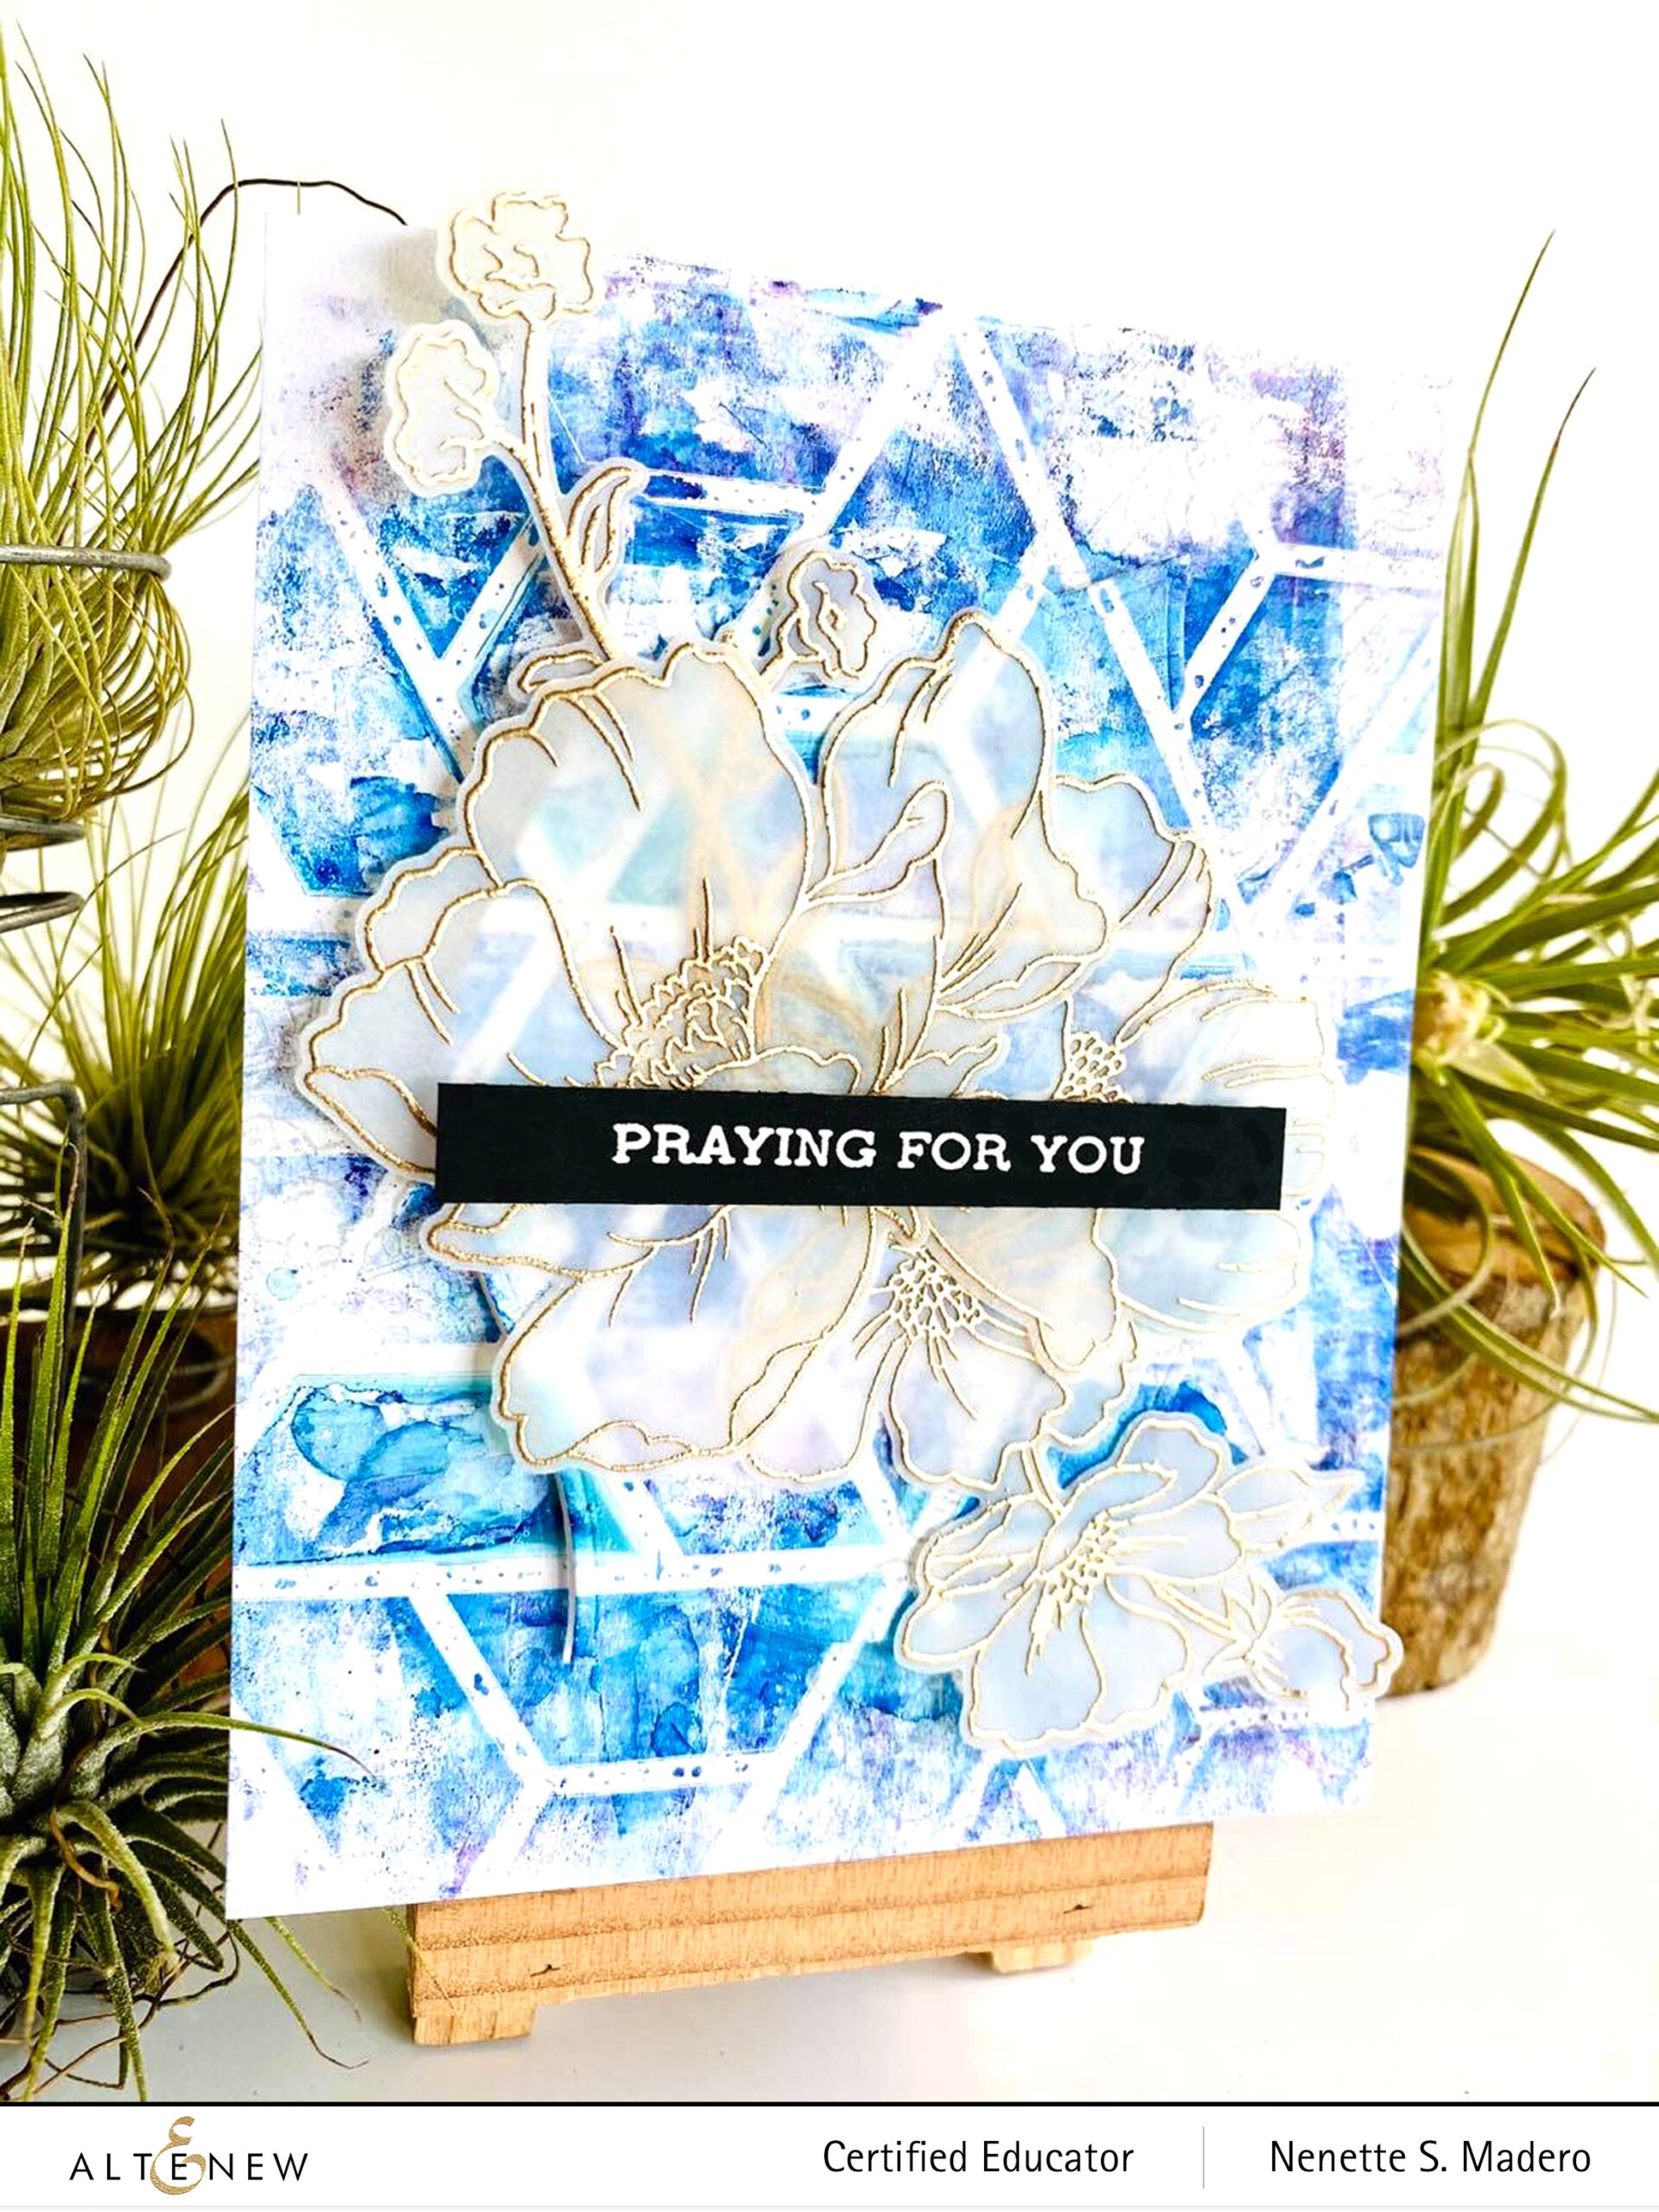

MATERIALS: POPPY GARDEN STAMP AND DIE, COLOR BLOCK TRIANGLE STENCIL, NESTING LABEL DIE, GELLI PLATE, ALCOHOL INKS-LAGUNA, SAILBOAT BLUE, PATINA, COBALT, GLACIER, TURQUOISE, ROSE GOLD EMBOSSING POWDER, NEENAH SOLAR WHITE CARDSTOCK, VELLUM, WHITE EMBOSSING POWDER, SENTIMENT STRIPS

Here’s another card using the background I made. Same procedure as the cards above but this time using the Color Block Triangle Stencil for the geometric element. I die cut the center using the Nesting label die and popped it up with foam sheets so that the images from the Poppy Garden stamped on vellum will stand out more. I love the elegant look of the embossed gold on vellum. Just make sure to heat up your heat tool and heat the image from the back of the vellum to prevent warping.


HAPPY BIRTHDAY
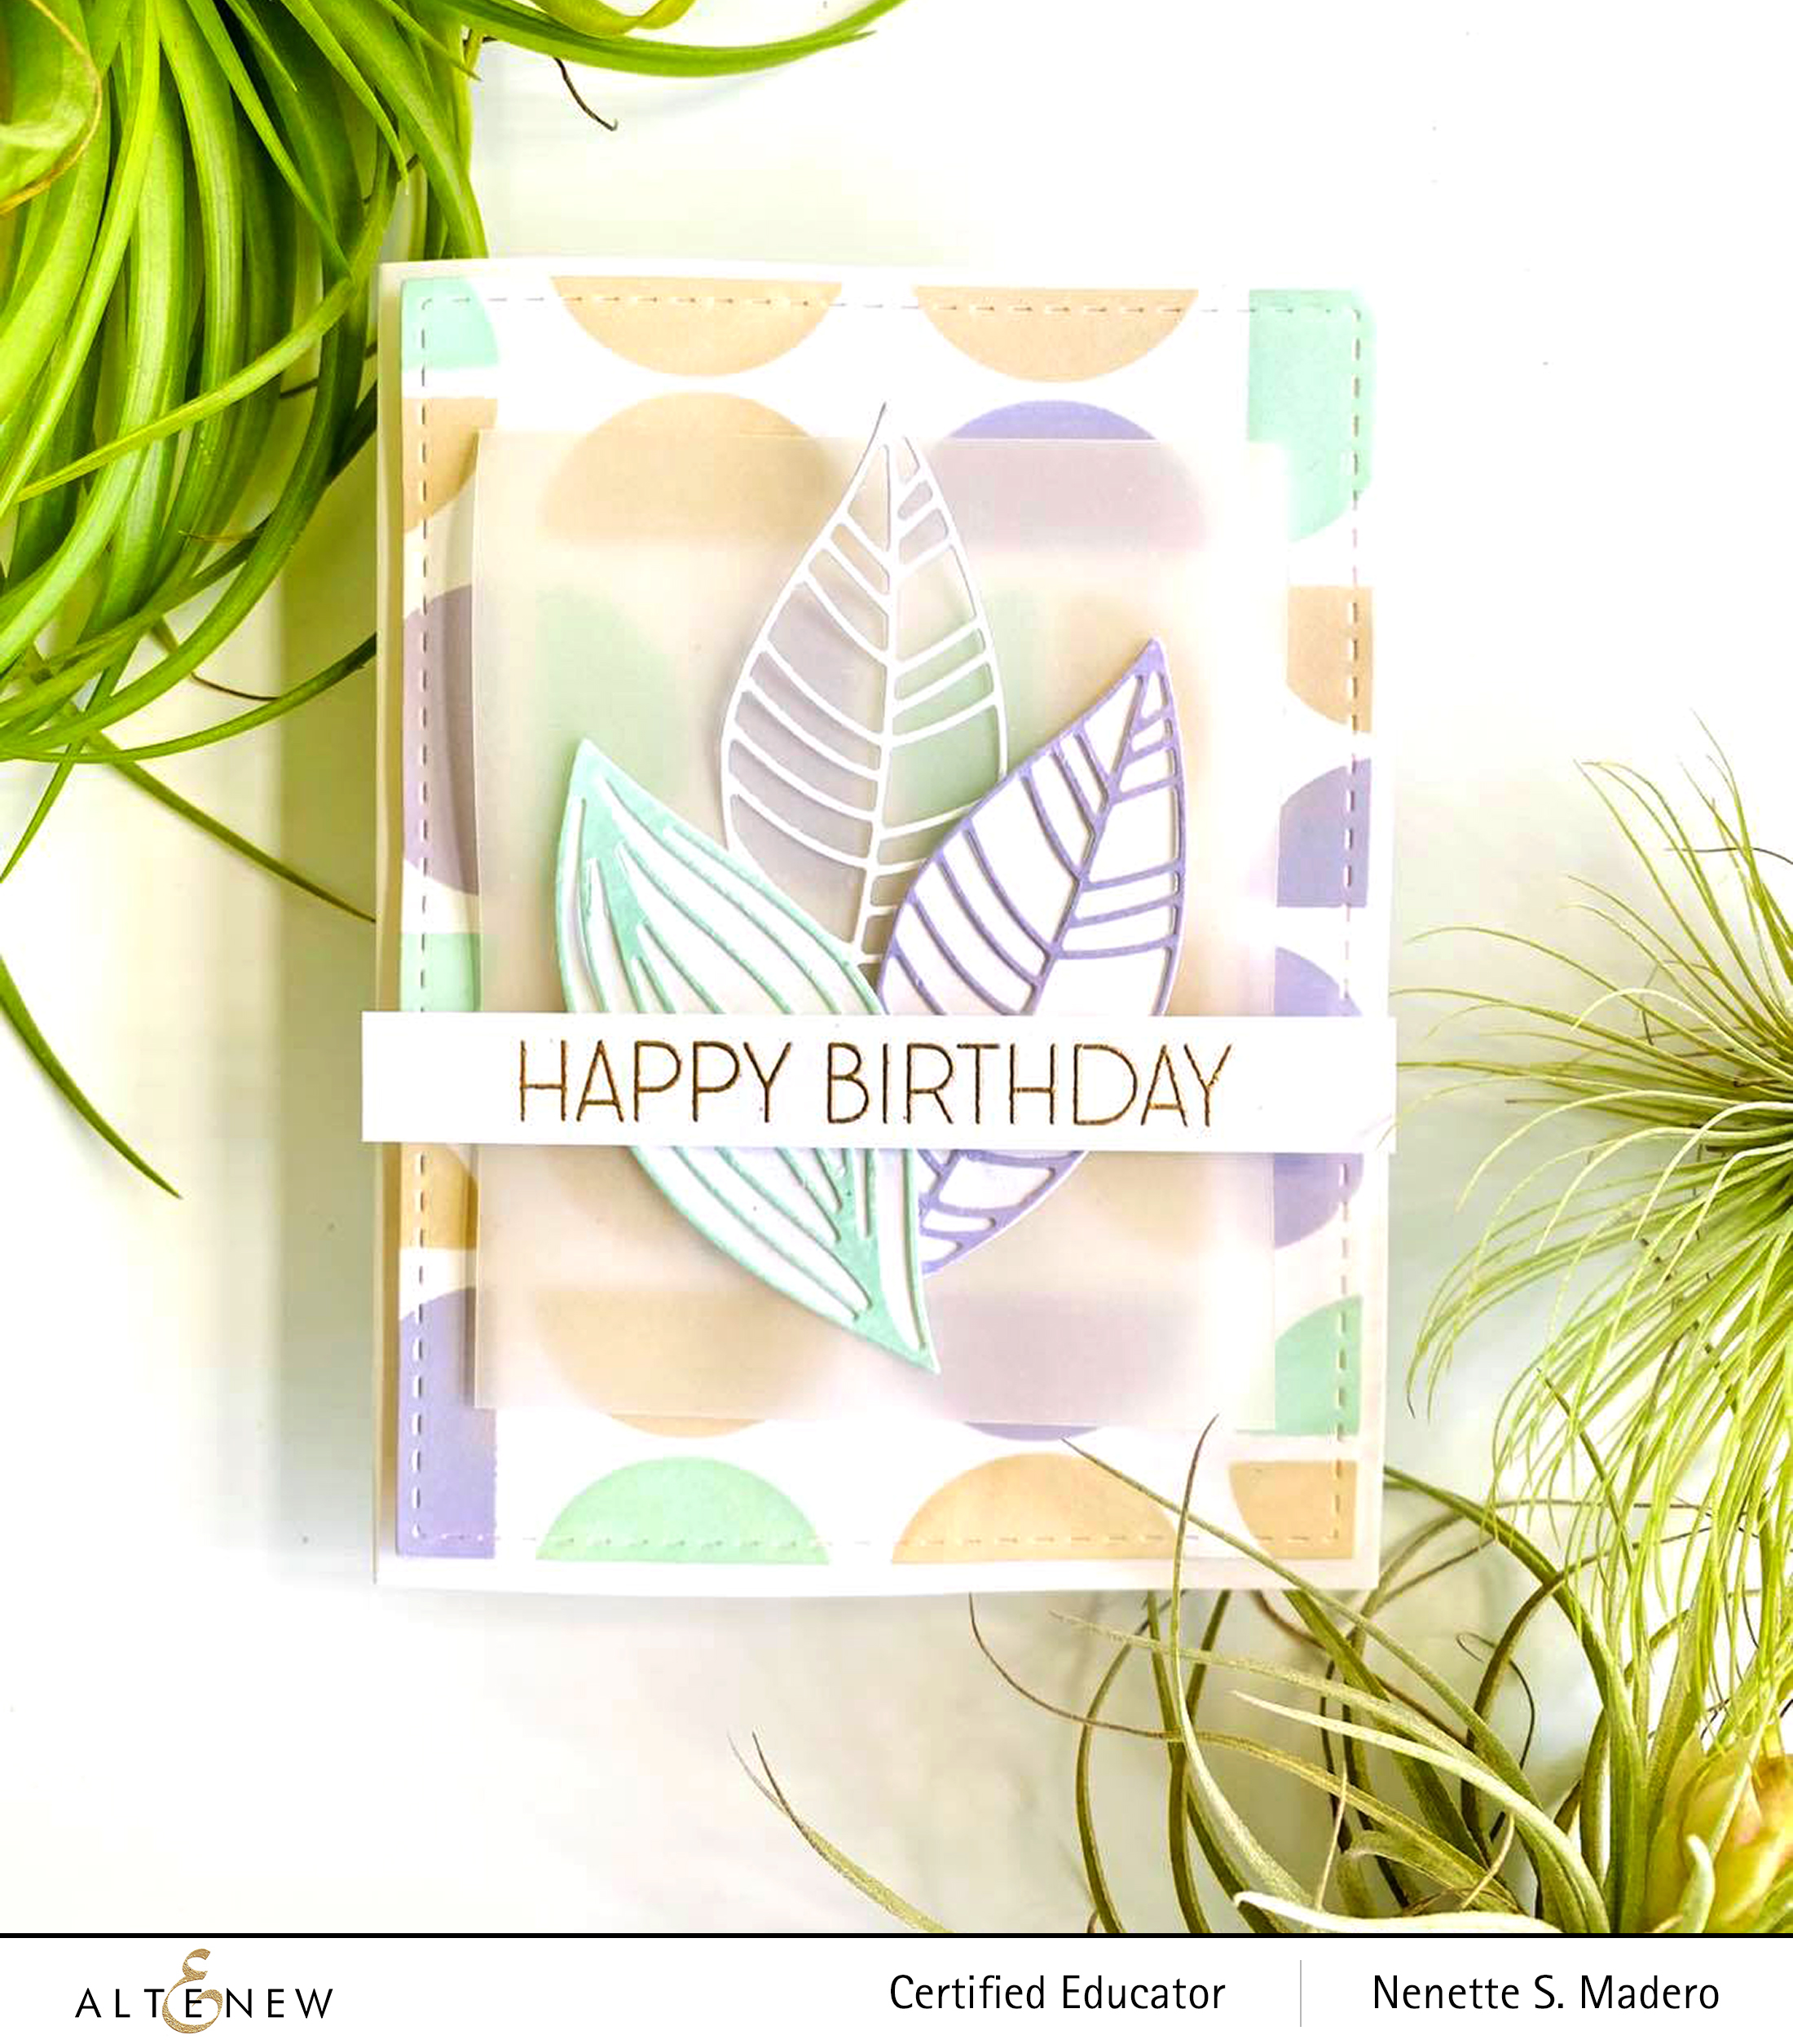

MATERIALS: LEAF MIX DIE SET, MODERN CIRCLES STENCIL, ORNAMENTAL BLISS STAMP, DYE INKS-WISTERIA, MOUNTAIN MIST, SAND DUNES, ROSE GOLD EMBOSSING POWDER, NEENAH SOLAR WHITE CARDSTOCK, VELLULM

For this card, I wanted to use the Modern Circles Stencil as the geometric element. I chose 3 colors and used a distress tool to add color to the card front. The stencil was rotated and more colors added to fill up the spaces. For the leaves, I just swiped the mini ink cubes directly on the white cardstock then die cut the leaves. These were then arranged on top of vellum and layered to the card front using foam squares.
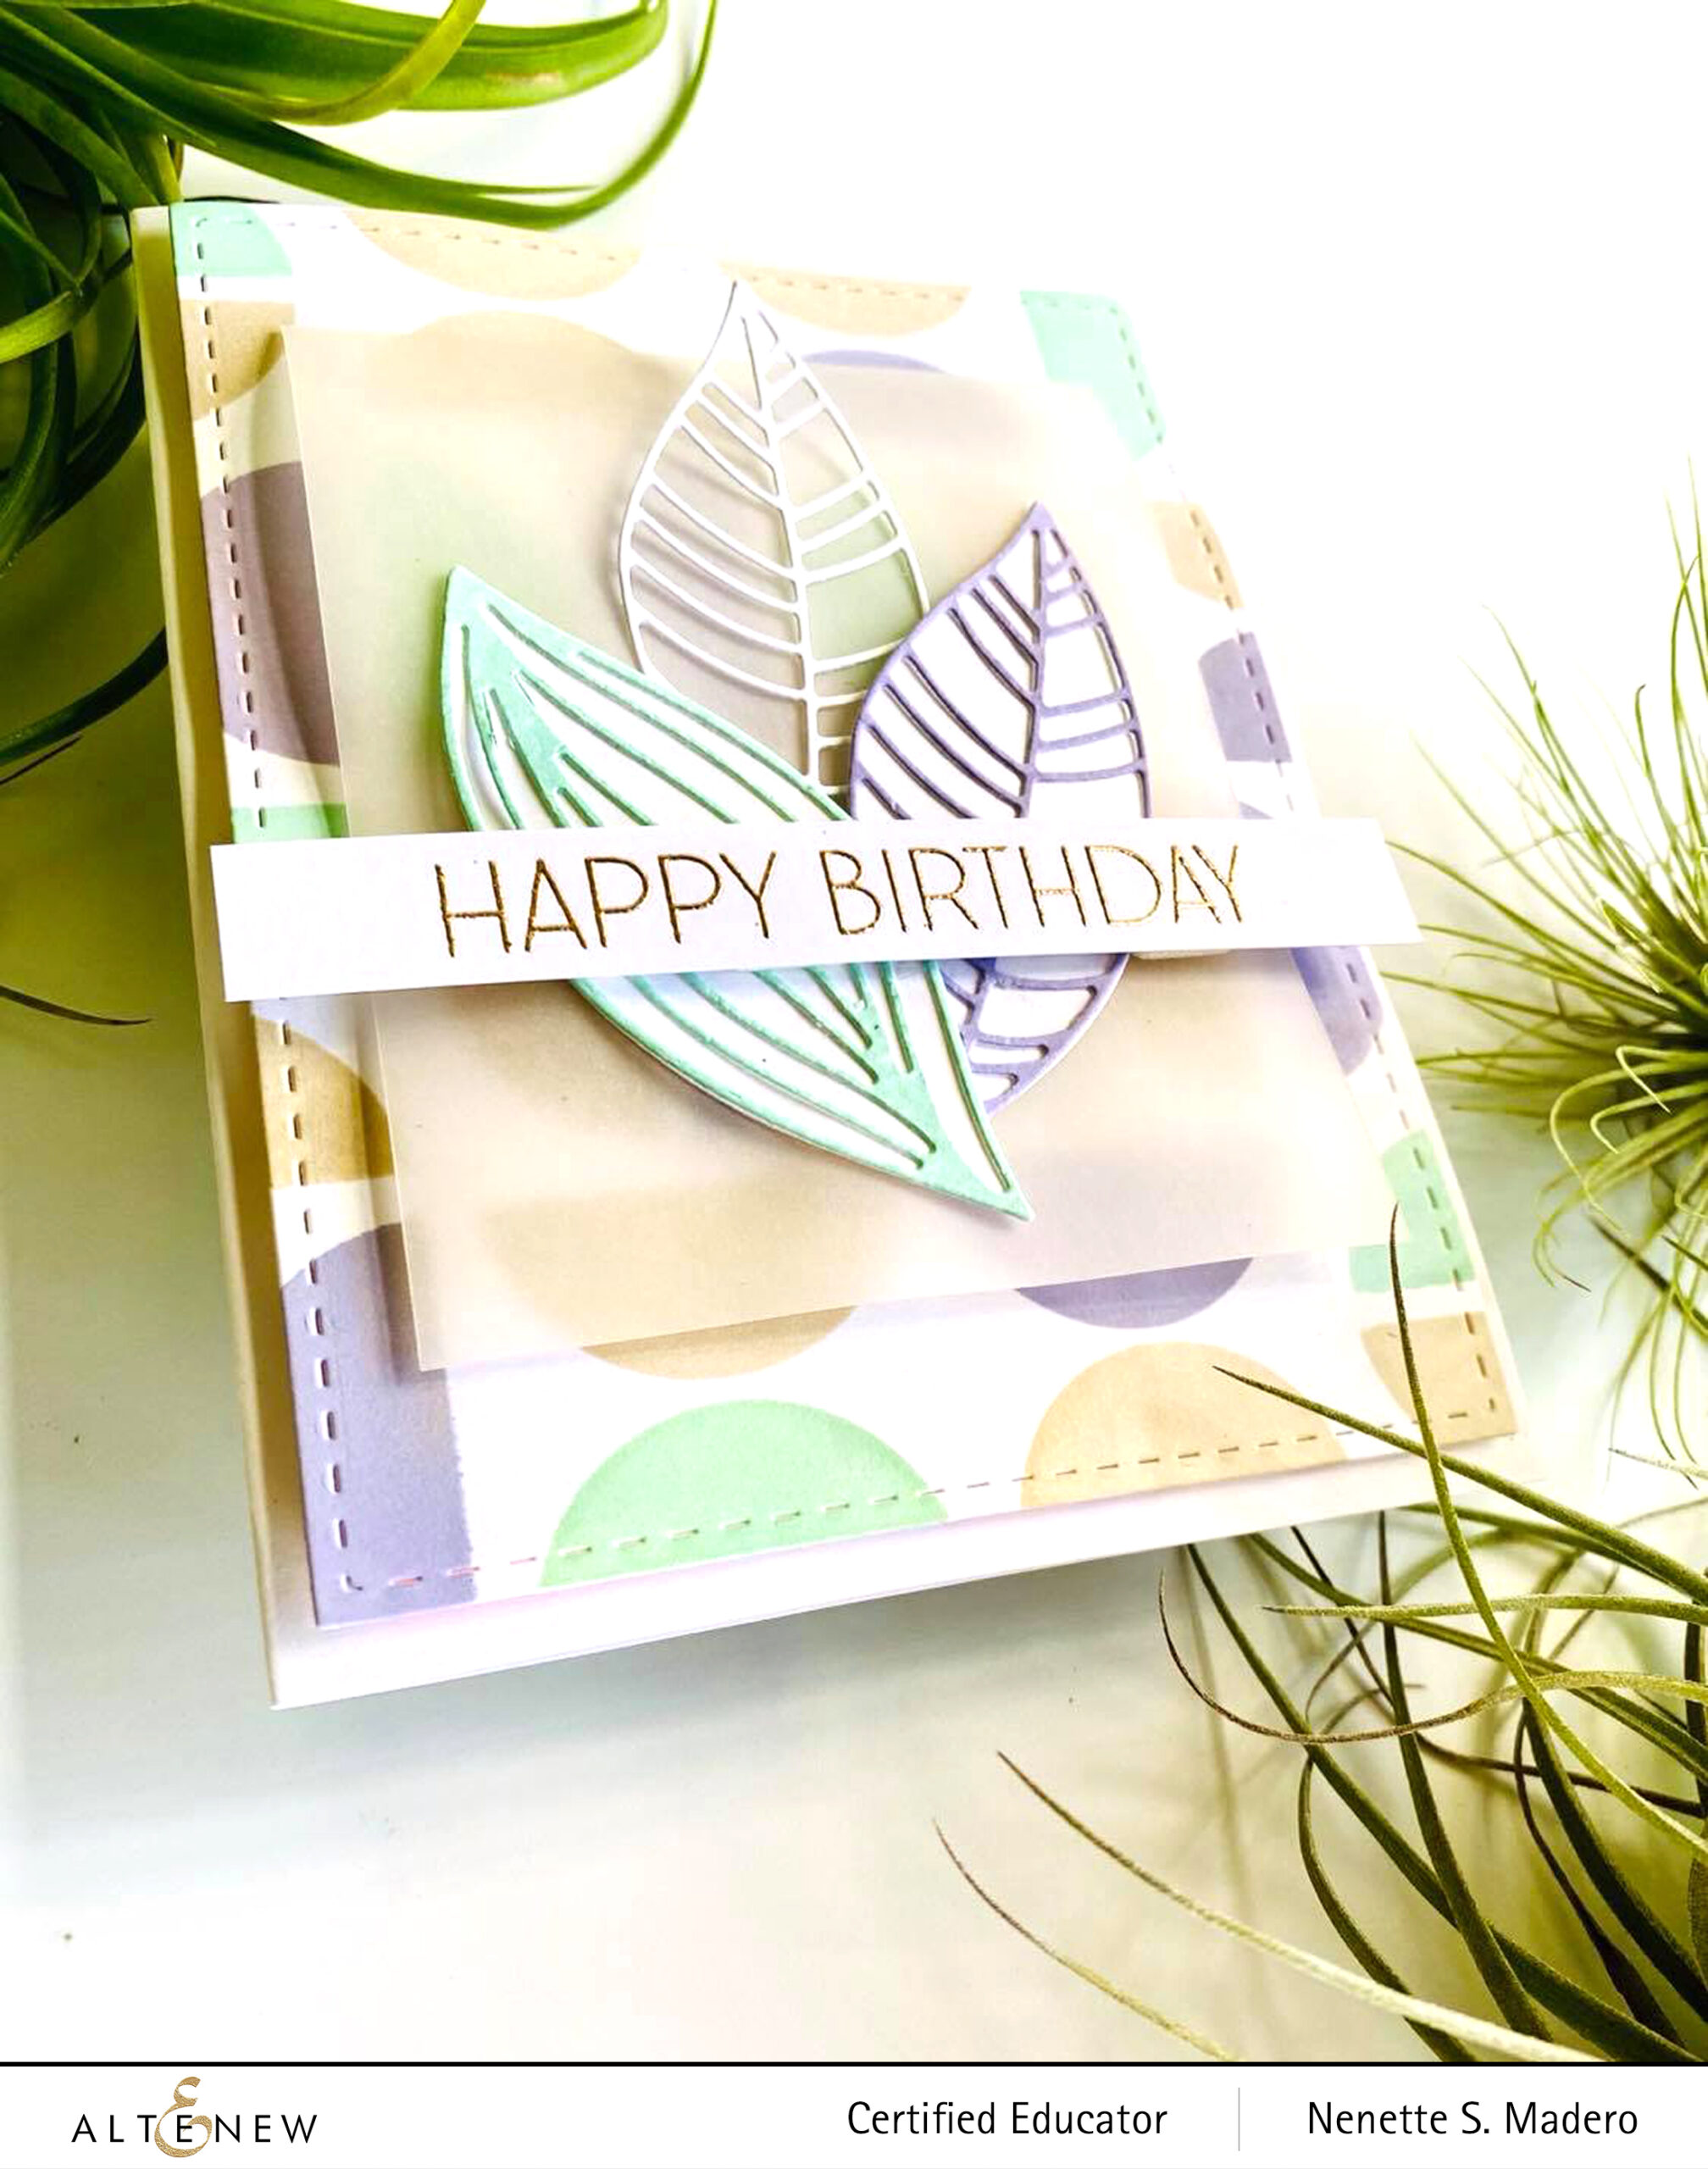
I made sure to use the same colors from the background to match the leaves. This is such a sweet birthday card and the vellum adds some softness to the card. The sentiment from the Ornamental Bliss stamp set was used for this card and embossed with Rose Gold embossing powder .


GRATEFUL FOR YOU EVERYDAY
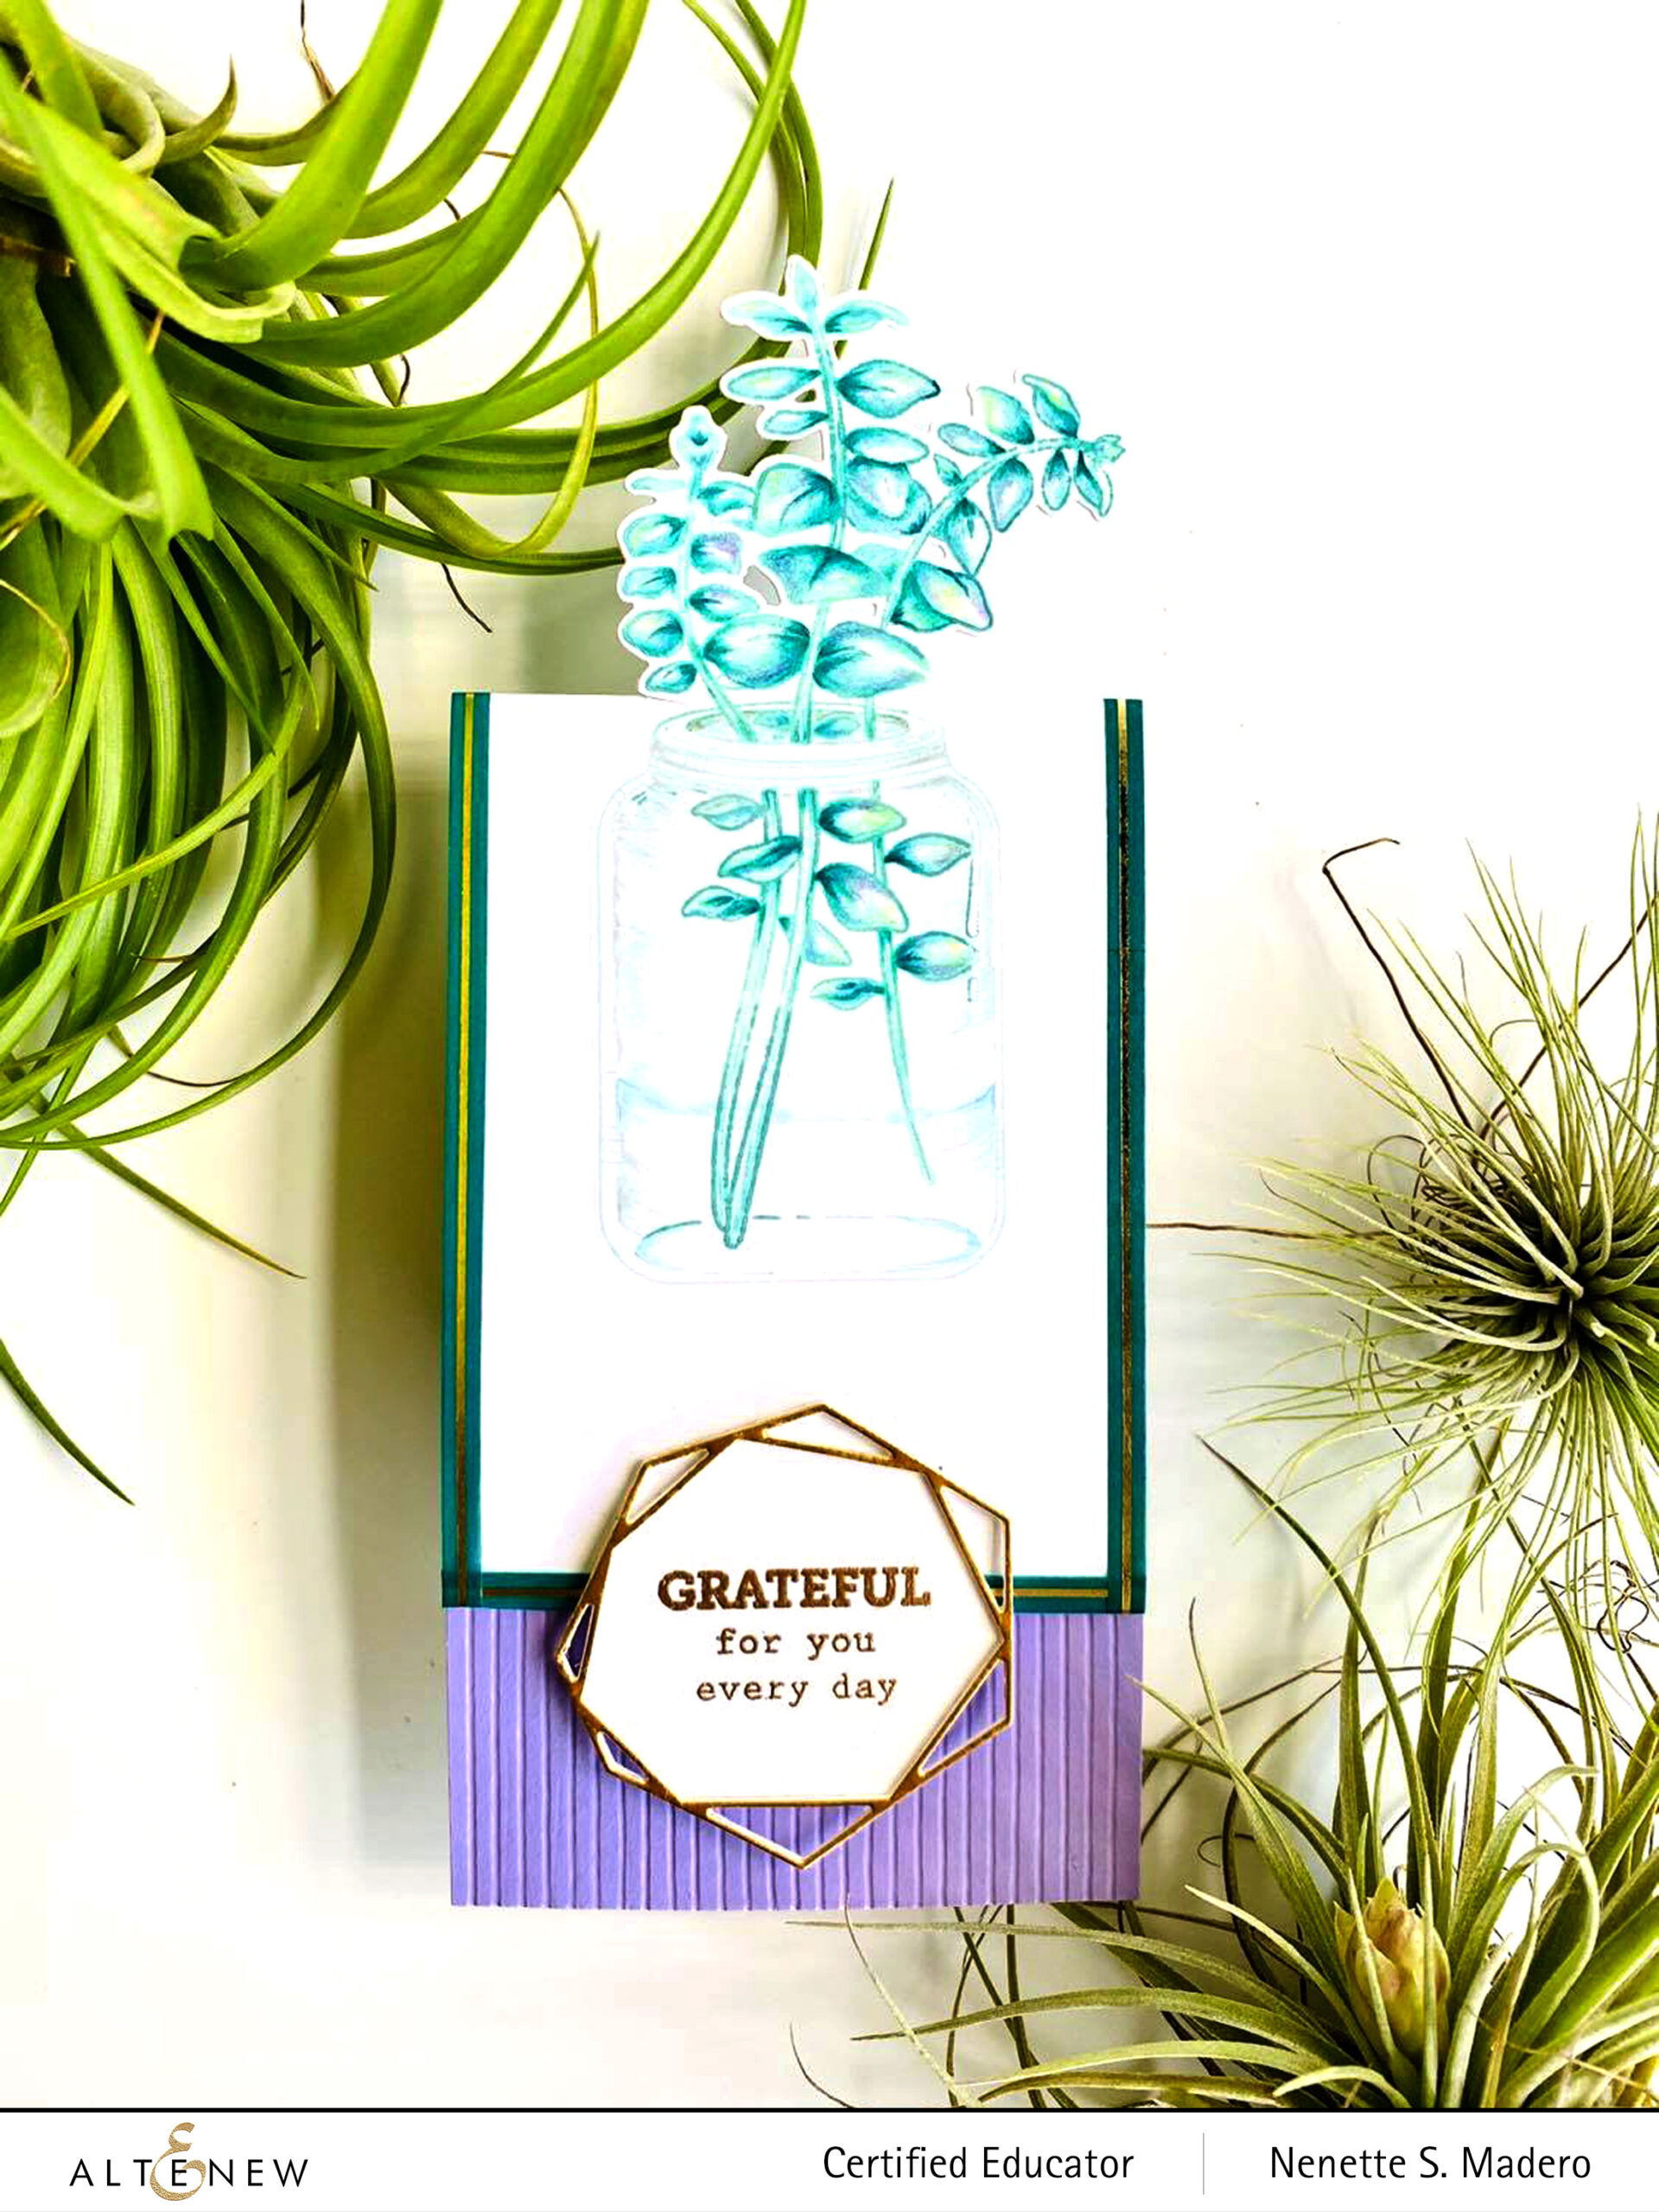

MATERIALS: EUCALYPTUS JAR STAMP AND DIE, CRYSTAL FRAMES DIE, EMERALD GOLD WASHI TAPE, DYE INKS-SEA GLASS, MOUNTAIN MIST, VOLCANO LAKE AND LAGOON, NEENAH SOLAR WHITE CARDSTOCK, TEFLON BONE FOLDER, SCOR-PAL, FABER CASTELL POLYCHROMOS COLORED PENCILS-COBLT GREEN, LIGHT PHTHALO GREEN, VIOLET, DEEP COBALT GREEN, MAY GREEN, SCOR BOARD

I love the Eucalyptus Jar Stamp set and wanted to use it differently so I created a slim card by doing partial die cutting. First, the image was stamped on Neenah solar white cardstock using the different shades of dye inks (blue greens for the eucalyptus and Sea Glass for the jar). Colored pencils were used to add color. There are many ways to use colored pencils. I prefer to use the medium color first, the lightest next, then lastly the darkest. Just make sure to use a light hand when coloring so that you do not burnish the paper. Once the paper is burnished, you won’t be able to add colors anymore.
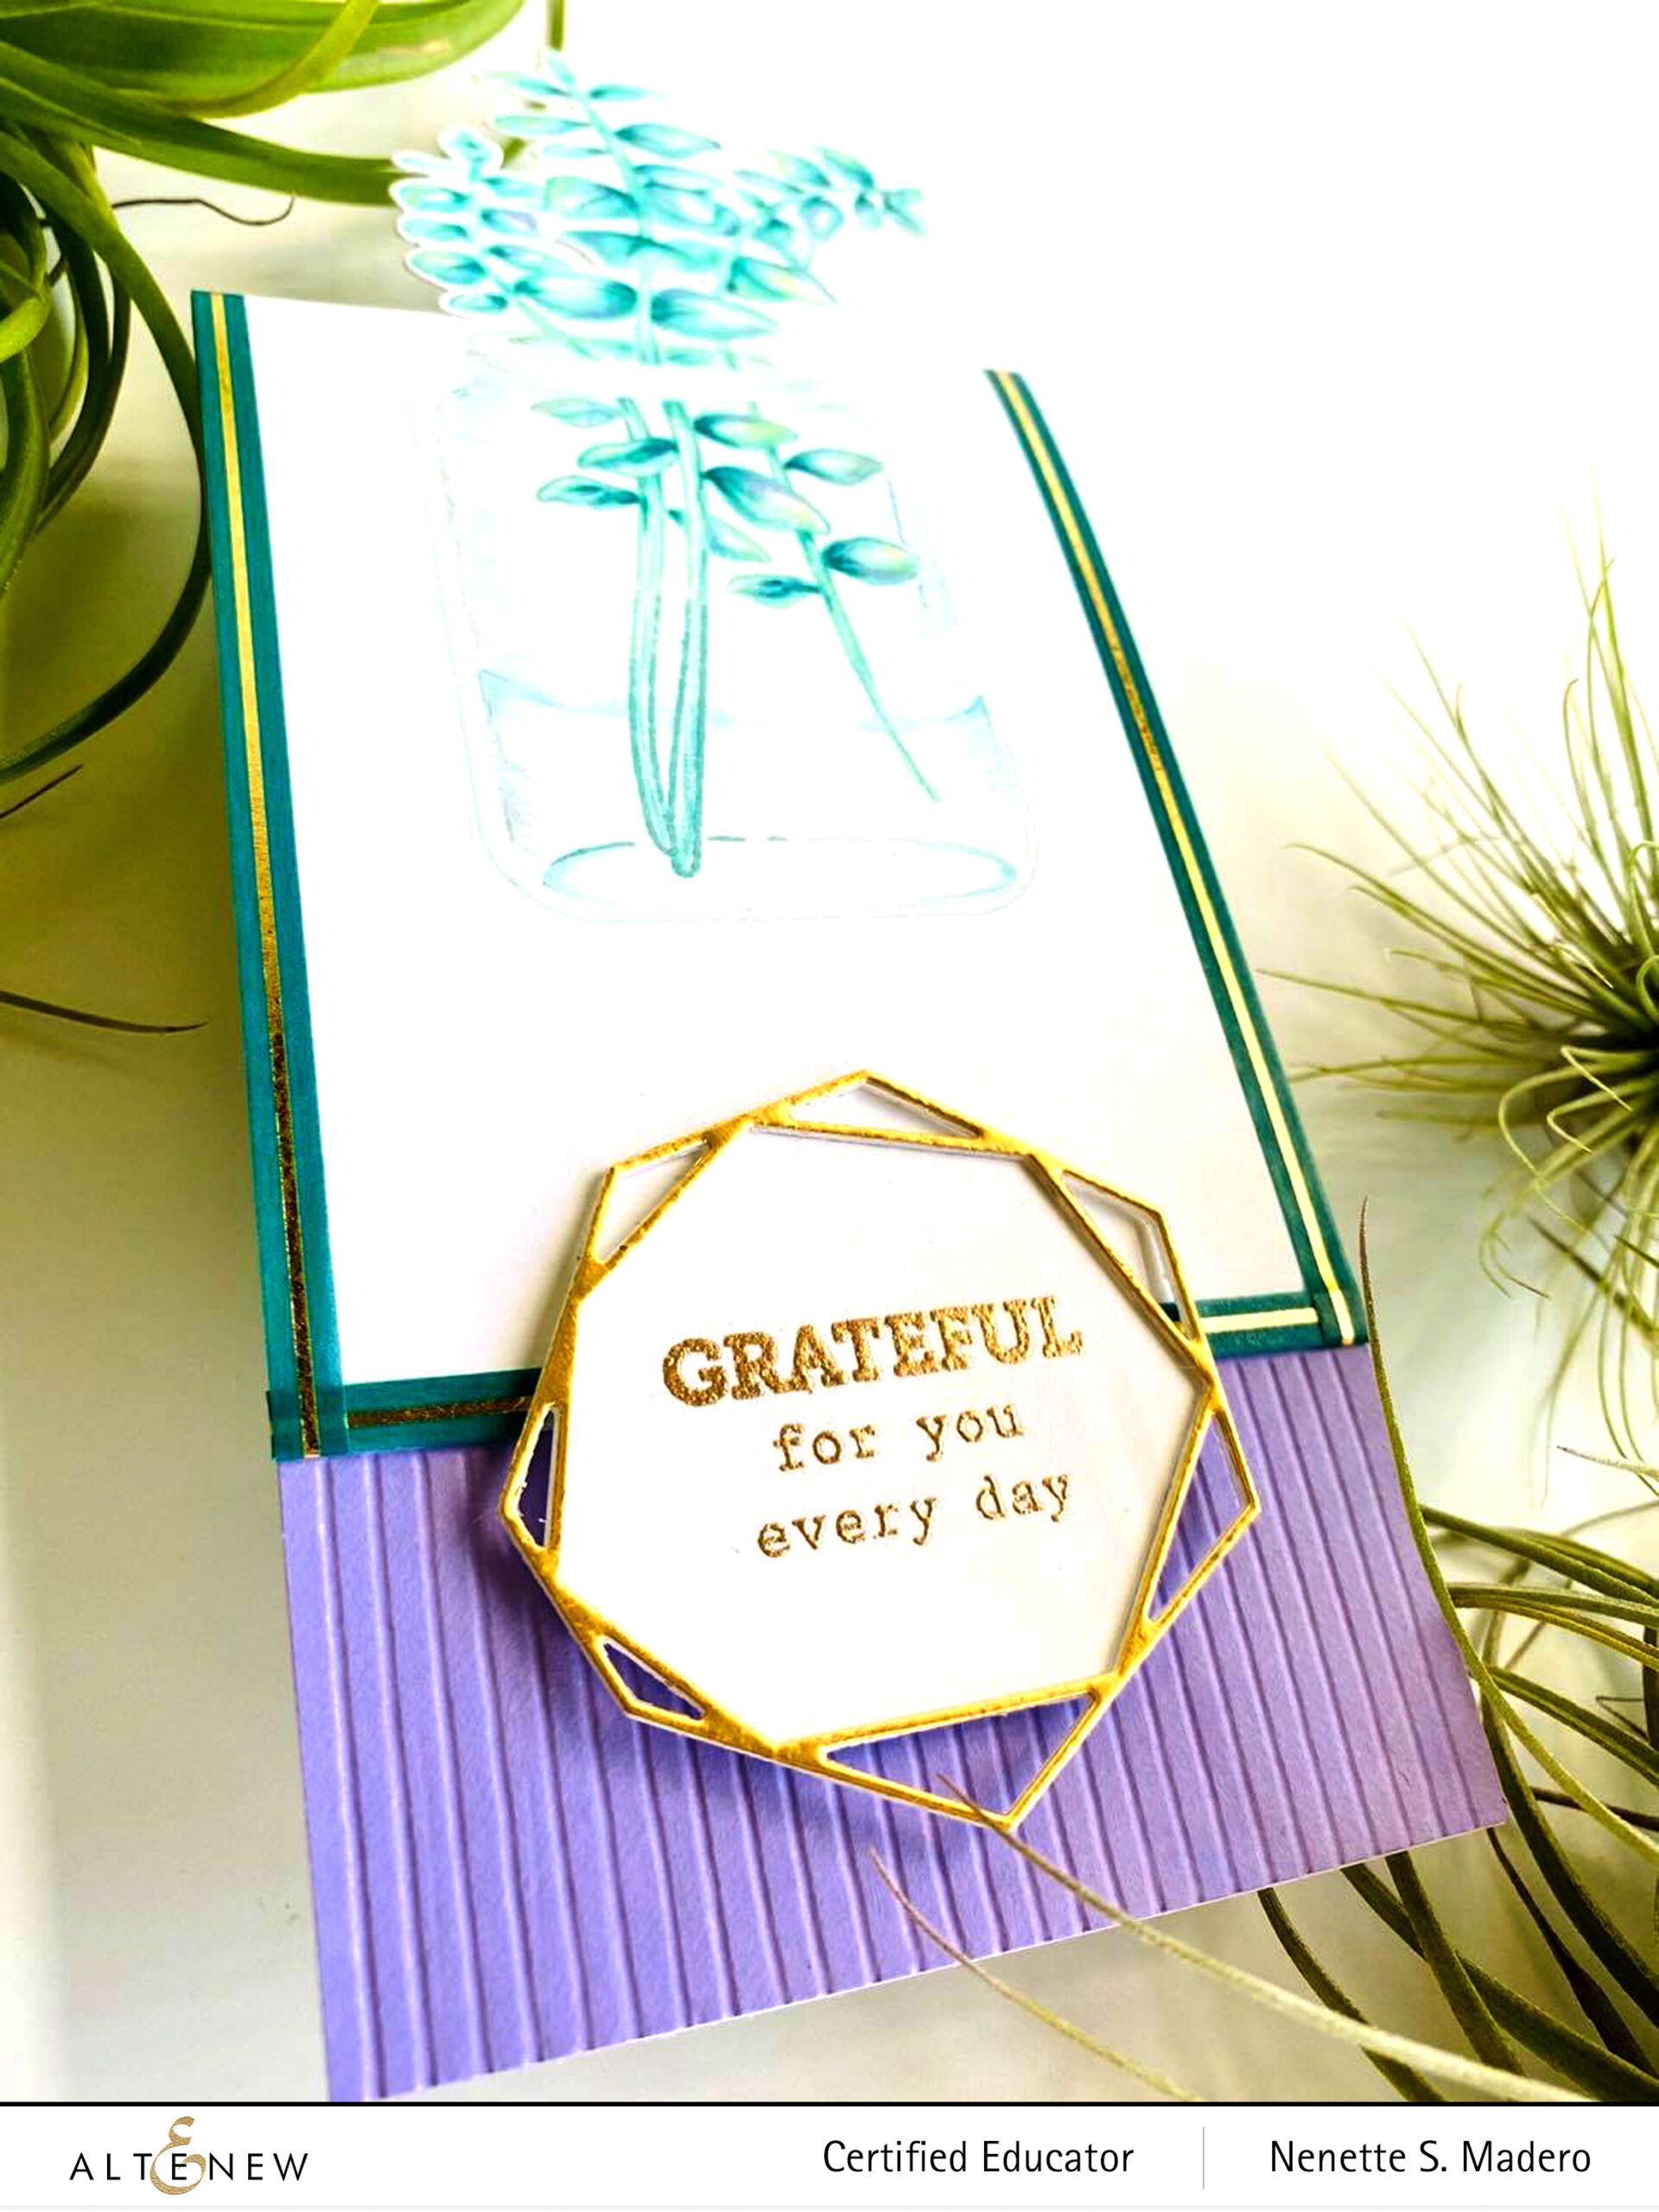
I then used the coordinating die to partially die cut the top part of the image. The cardstock was scored and folded. I added purple cardstock to the inside of the card to hide the back. Debossed stripes were added to the bottom of the card for texture using a bone folder and a scor board. I was happy with the outcome then I remembered that it needed a geometric element for the theme!!! 😱 Good thing I had the Crystal Frames die so I die cut one of the frames using matt gold cardstock and then embossed the sentiment with Rose gold embossing powder. I added the teal/gold washi tape on the edges to frame the image. Such a fun card to make!


THINKING OF YOU
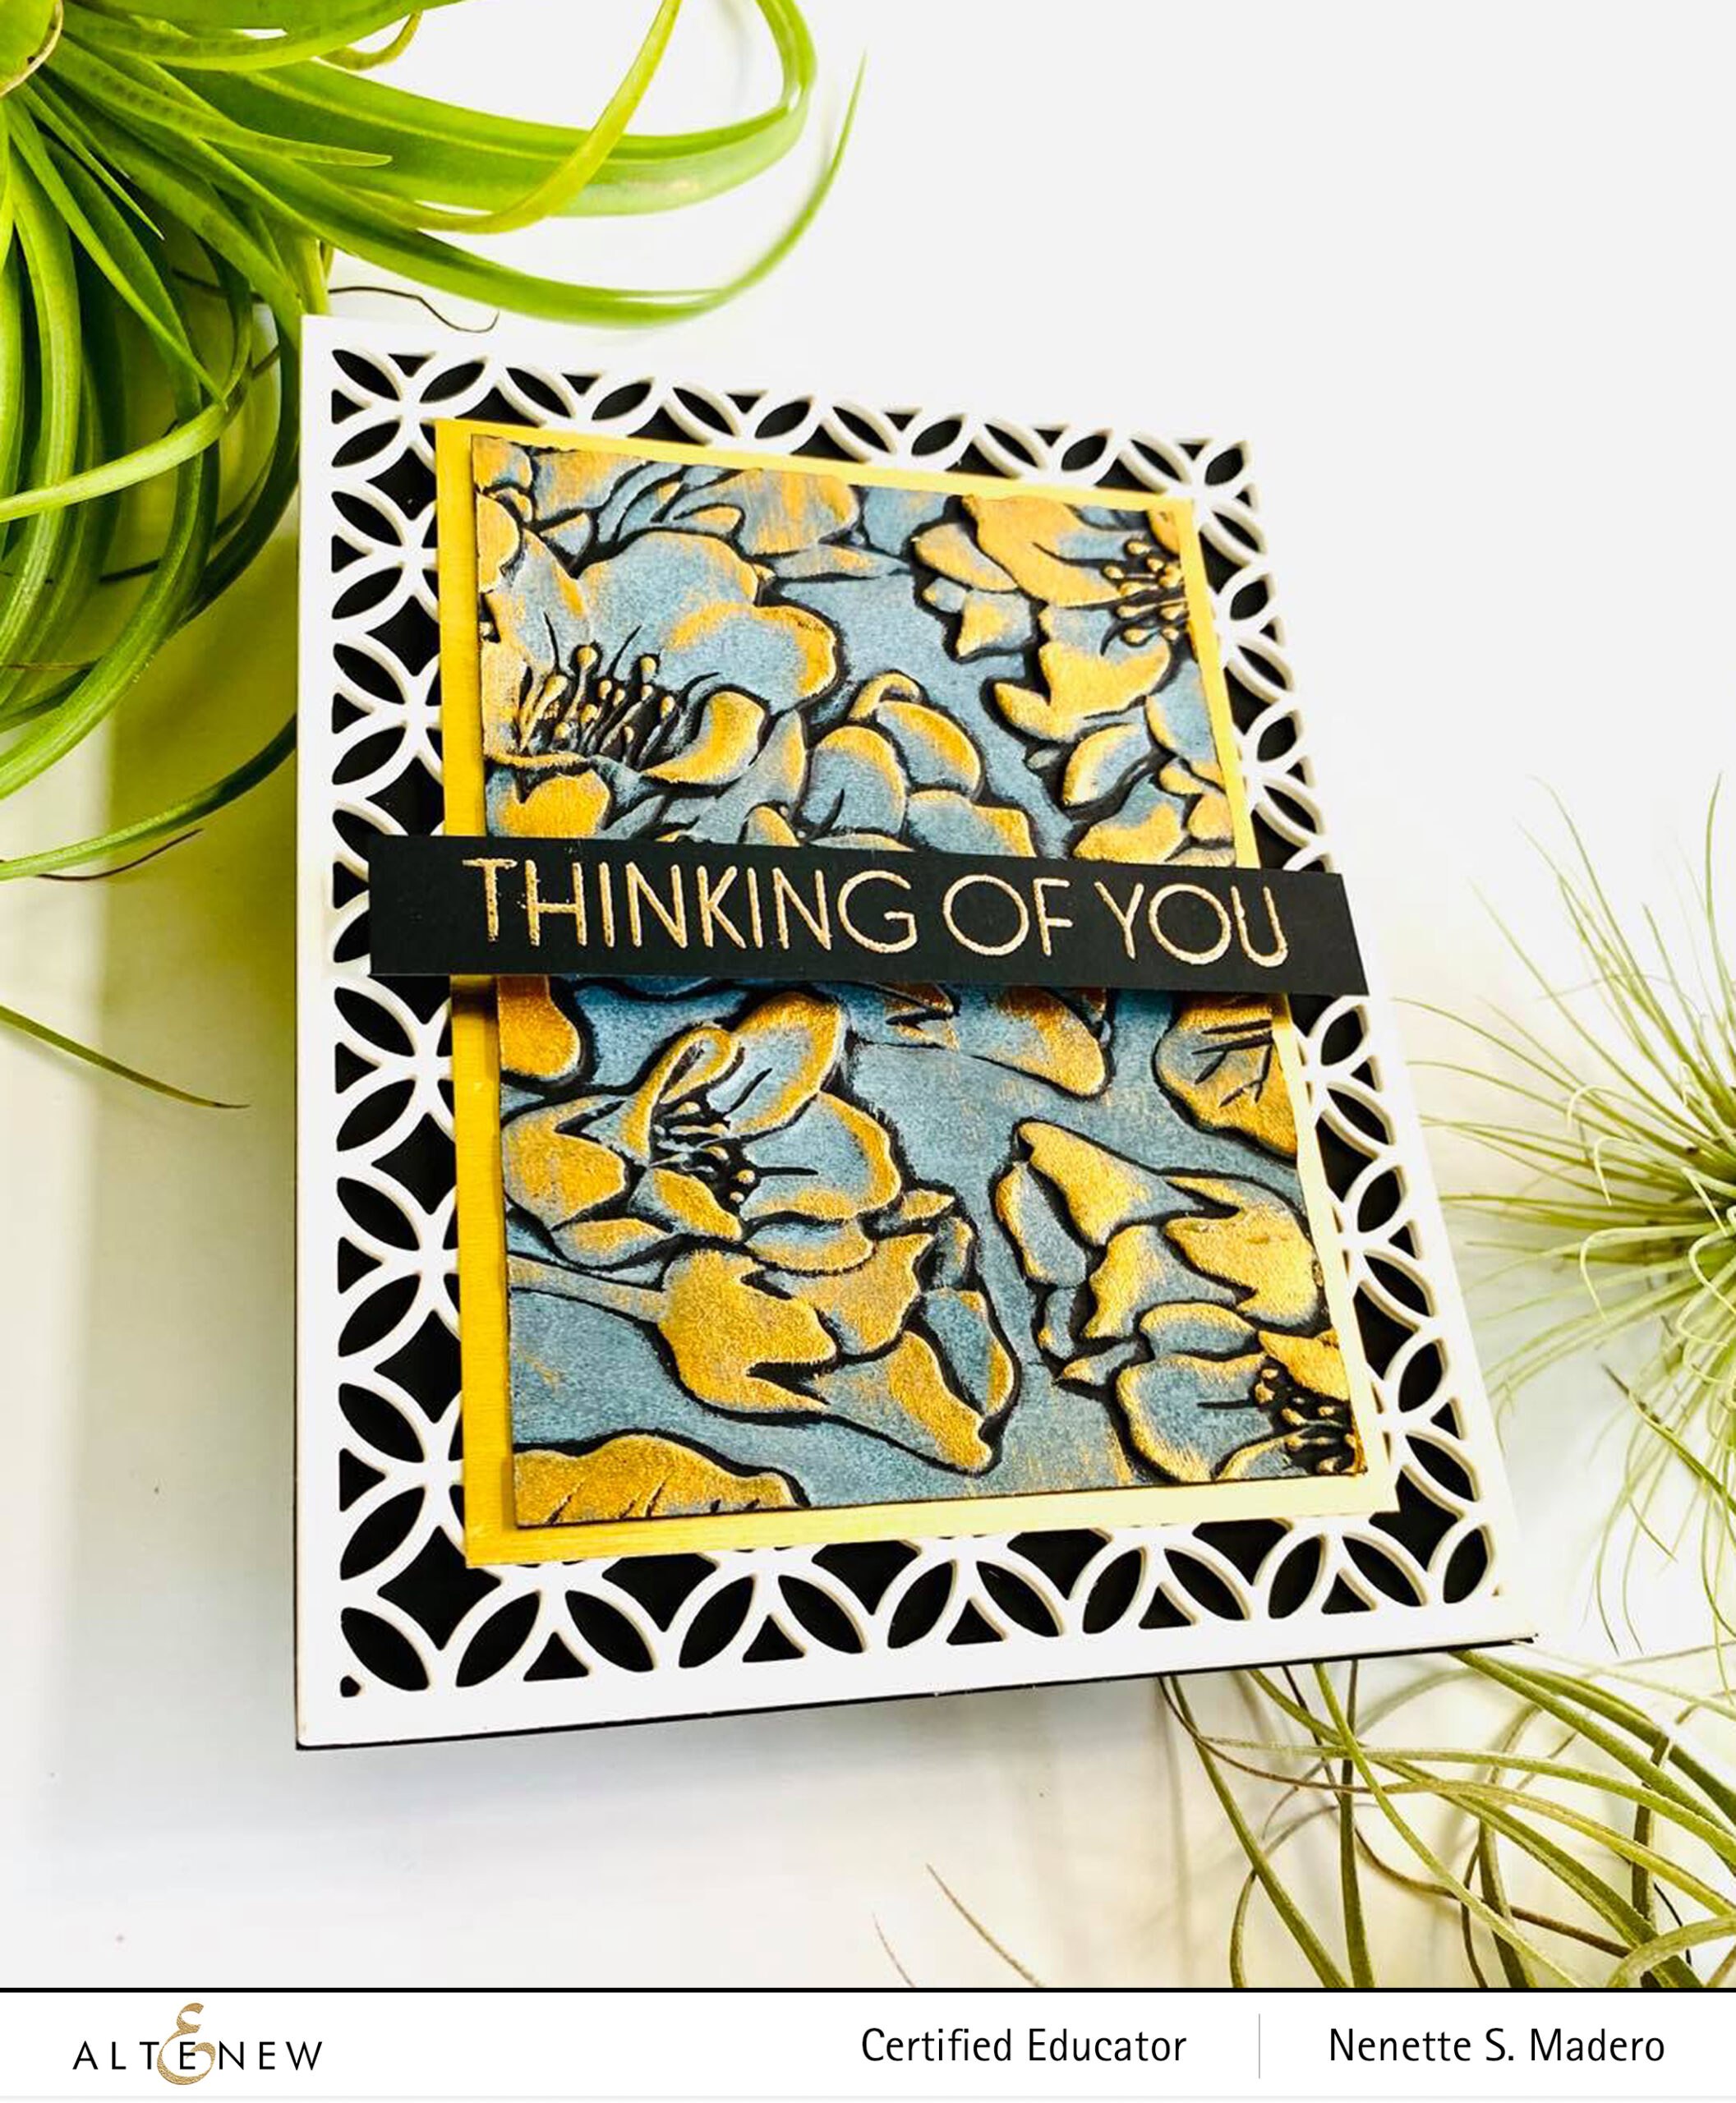


MATERIALS: BEAUTIFUL BERGENIA 3D EMBOSSING FOLDER, CIRCLE QUILT COVER DIE, ORNAMENTAL BLISS STAMP, ROSE GOLD EMBOSSING POWDER, DISTRESS OXIDE INKS-BUNDLED SAGE AND MERMAID LAGOON, GOLD TREASURE GLIDING POLISH, NEENAH SOLAR WHITE CARDSTOCK, BLACK CARDSTOCK

I seldom use black when I make cards but I’m loving the effect that the black cardstock gives when matched with an embossing folder and some inks. I was inspired by Bubblescrap and wanted to try her technique. First, I cut a piece of black cardstock then embossed it with the Beautiful Bergenia 3D embossing folder. I added color to the entire surface of the paper using a distress tool and my inky finger AFTER embossing. The creaminess of the oxide inks makes it easy to apply. When this was dry, I added some gold touches on the embossed parts of the flowers and leaves with a gold gliding polish. Gold cardstock was added to mat the embossed piece.

For my geometric element, the Circle Quilt cover die was used that added a nice contrast to the black cardstock. I stacked 4 pieces on top of each other for more dimension. The sentiment was stamped on black using Versamark ink then embossed with Rose gold embossing powder.


MAKE A WISH/YOU ARE LOVED
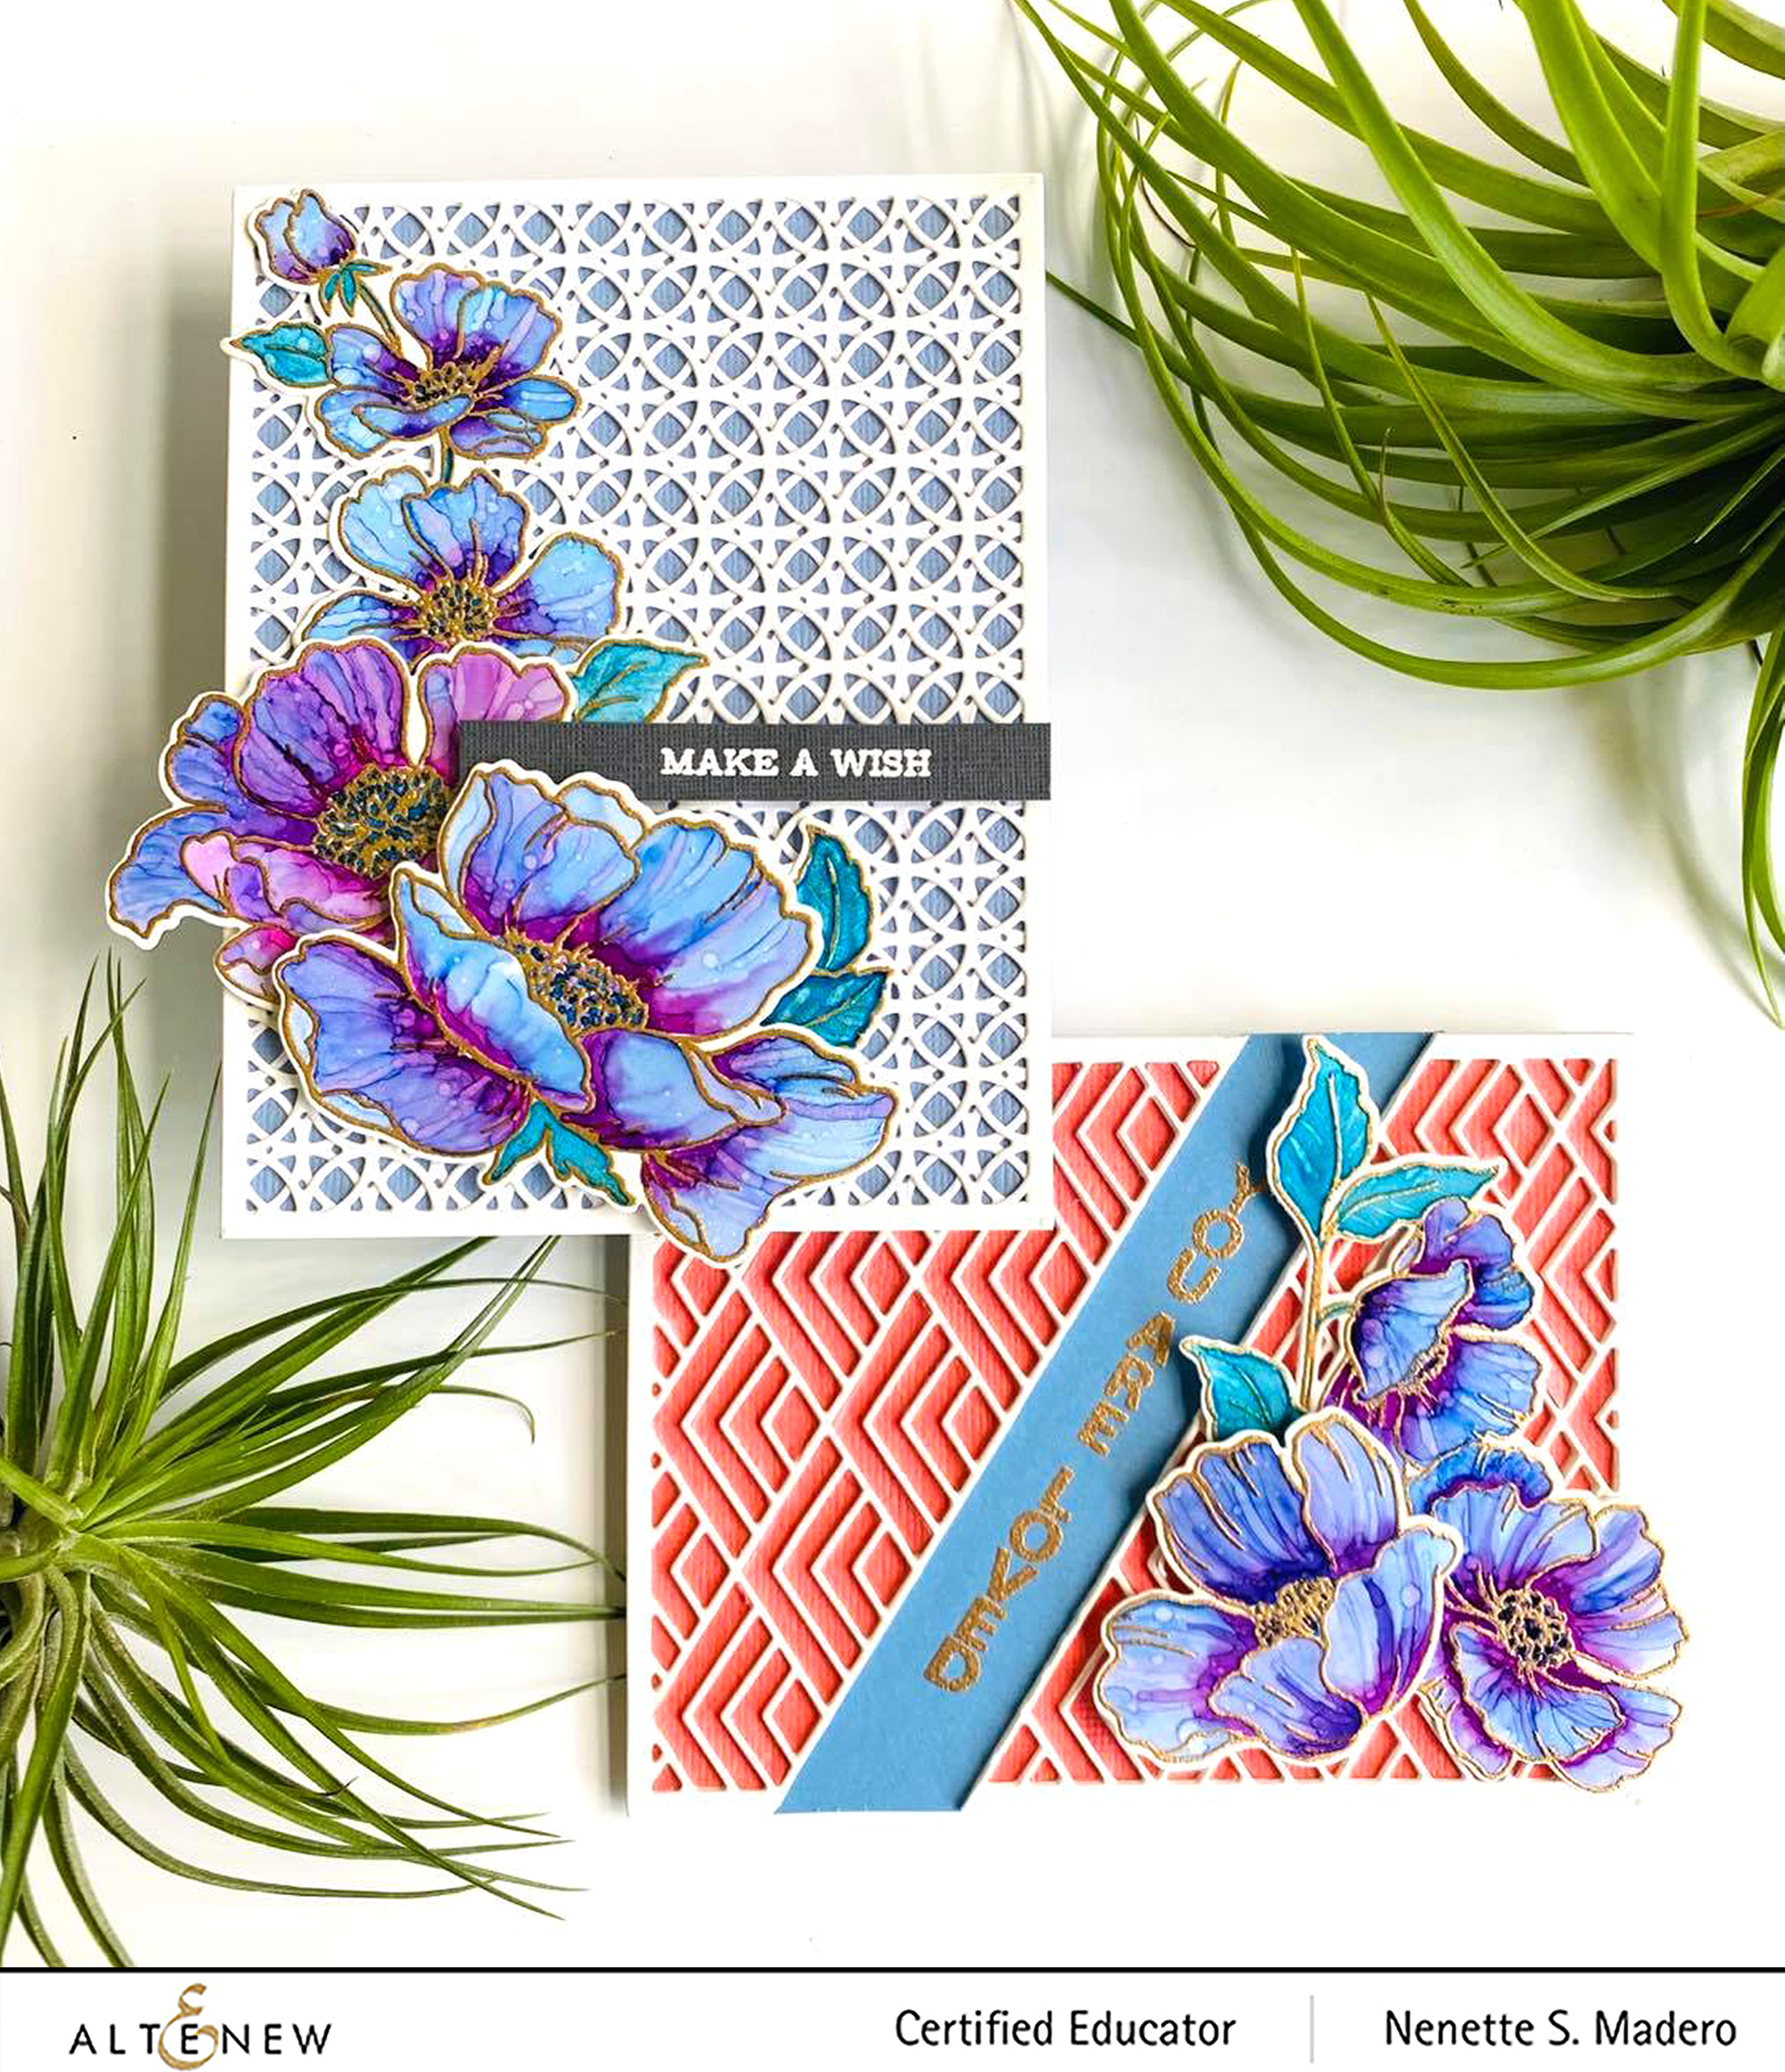

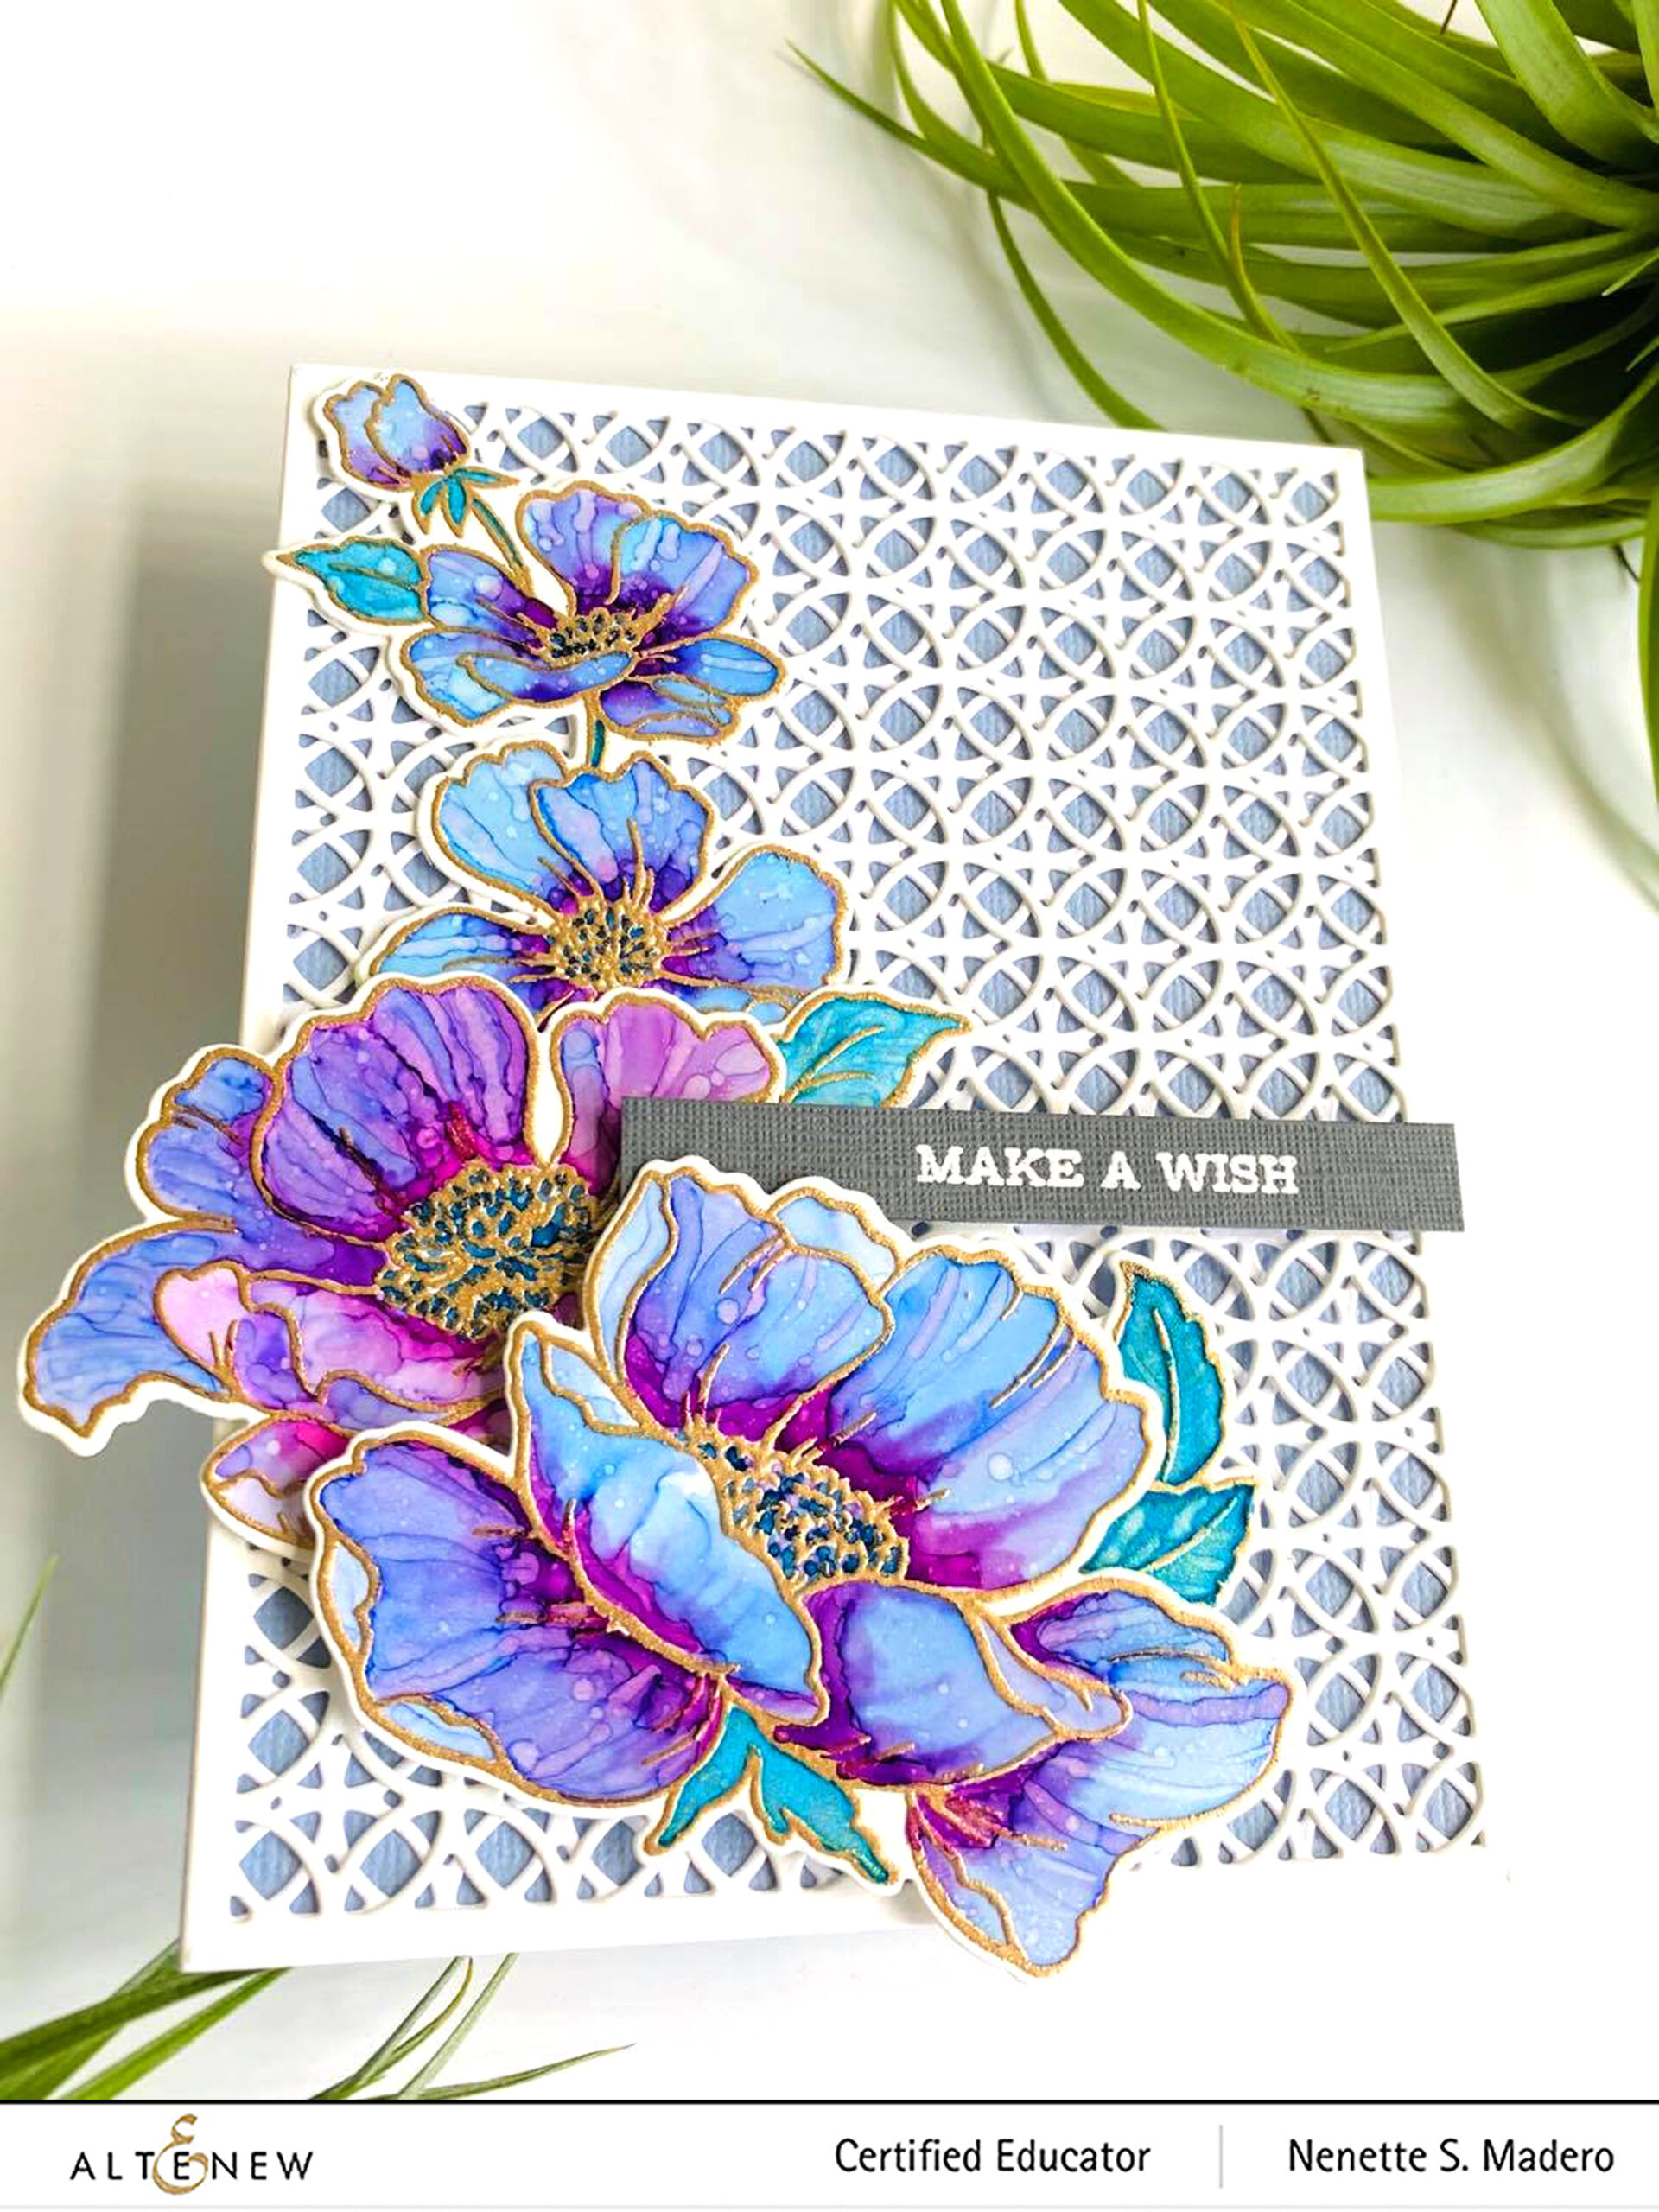
MATERIALS: POPPY GARDEN STAMP AND DIE SET, CIRCLE QUIT COVER DIE, STACKED DIAMONDS COVER DIE, HELLO HYDRANGEA STAMP, ROSE GOLD EMBOSSING POWDER, ALCOHOL INKS: BOYSENBERRY, GLACIER, PURPLE TWILIGHT, WILD PLUM, MERMAID, PIÑATA GOLD, NEENAH SOLAR WHITE CS, YUPO PAPER, VERSMARK INK, 99% ISOPROPYL ALCOHOL

“DON’T BE AFRAID TO FAIL. BE AFRAID NOT TO TRY.”

MICHAEL JORDAN

Lately, I have been trying out alcohol inks. I had them for many years but never really used them for fear of the unknown. 🙂 Their reaction to alcohol or blending solution is so unpredictable but I thought they’d look pretty on Altenew florals. I took some classes with @anujaaggarwal— a talented alcohol ink artist because I wanted to learn how these inks behave using different techniques. There’s still so much to learn but you’ll never know if you don’t try. Here are some of the cards I made using alcohol inks.
If you do plan to try this out, here are some tips you should follow:

  • work in a room that is well ventilated. If you have a respirator mask, the better so that it will prevent you from inhaling the fumes.
  • wear gloves to protect your hands from the inks and alcohol
  • alcohol and the inks are highly flammable so do not work near an open flame especially if you will be spraying alcohol
  • cover your work area with an absorbent mat ( I got a pack of disposable training pads for this purpose)
  • wipe your canvas/substrate/paper clean with alcohol before starting to remove dust/dirt/ink
  • seal your artwork with Kryon Kamar varnish then UV (make sure your painting is thoroughly dry before applying the varnish) 2-3 coats but dry between coats. Nozzle should be around 12-14 inches away from the substrate. Allow it to dry. This will prevent the painted flowers from scratches.

For this technique to work, you will need a floral image that does not have too many details. The POPPY GARDEN STAMP AND DIE SET was perfect for this technique. First, I heat embossed the images on Yupo paper. Do take note that since Yupo paper is made of polypropylene, a thermoplastic resin, it will warp if it is heated for too long. I made sure to keep my heat tool moving to minimize the warpage. The darkest color was added to the centers of the flowers. This was allowed to dry. Then with a brush loaded with alcohol mixed with blue/purple alcohol inks, I colored the rest of the petals slightly touching the dark ink to achieve some blending. Take note that the alcohol ink behaves differently from watercolor cause alcohol will tend to push the pigments away. The alcohol ink/alcohol ratio is also very important. The great thing about this is if you are not happy with the outcome, you can “erase” the area with alcohol. Just note that Yupo paper tends to stain, unlike Nara paper. Patience is needed when working with alcohol inks. I love the texture it gives and how unpredictable the outcome is.
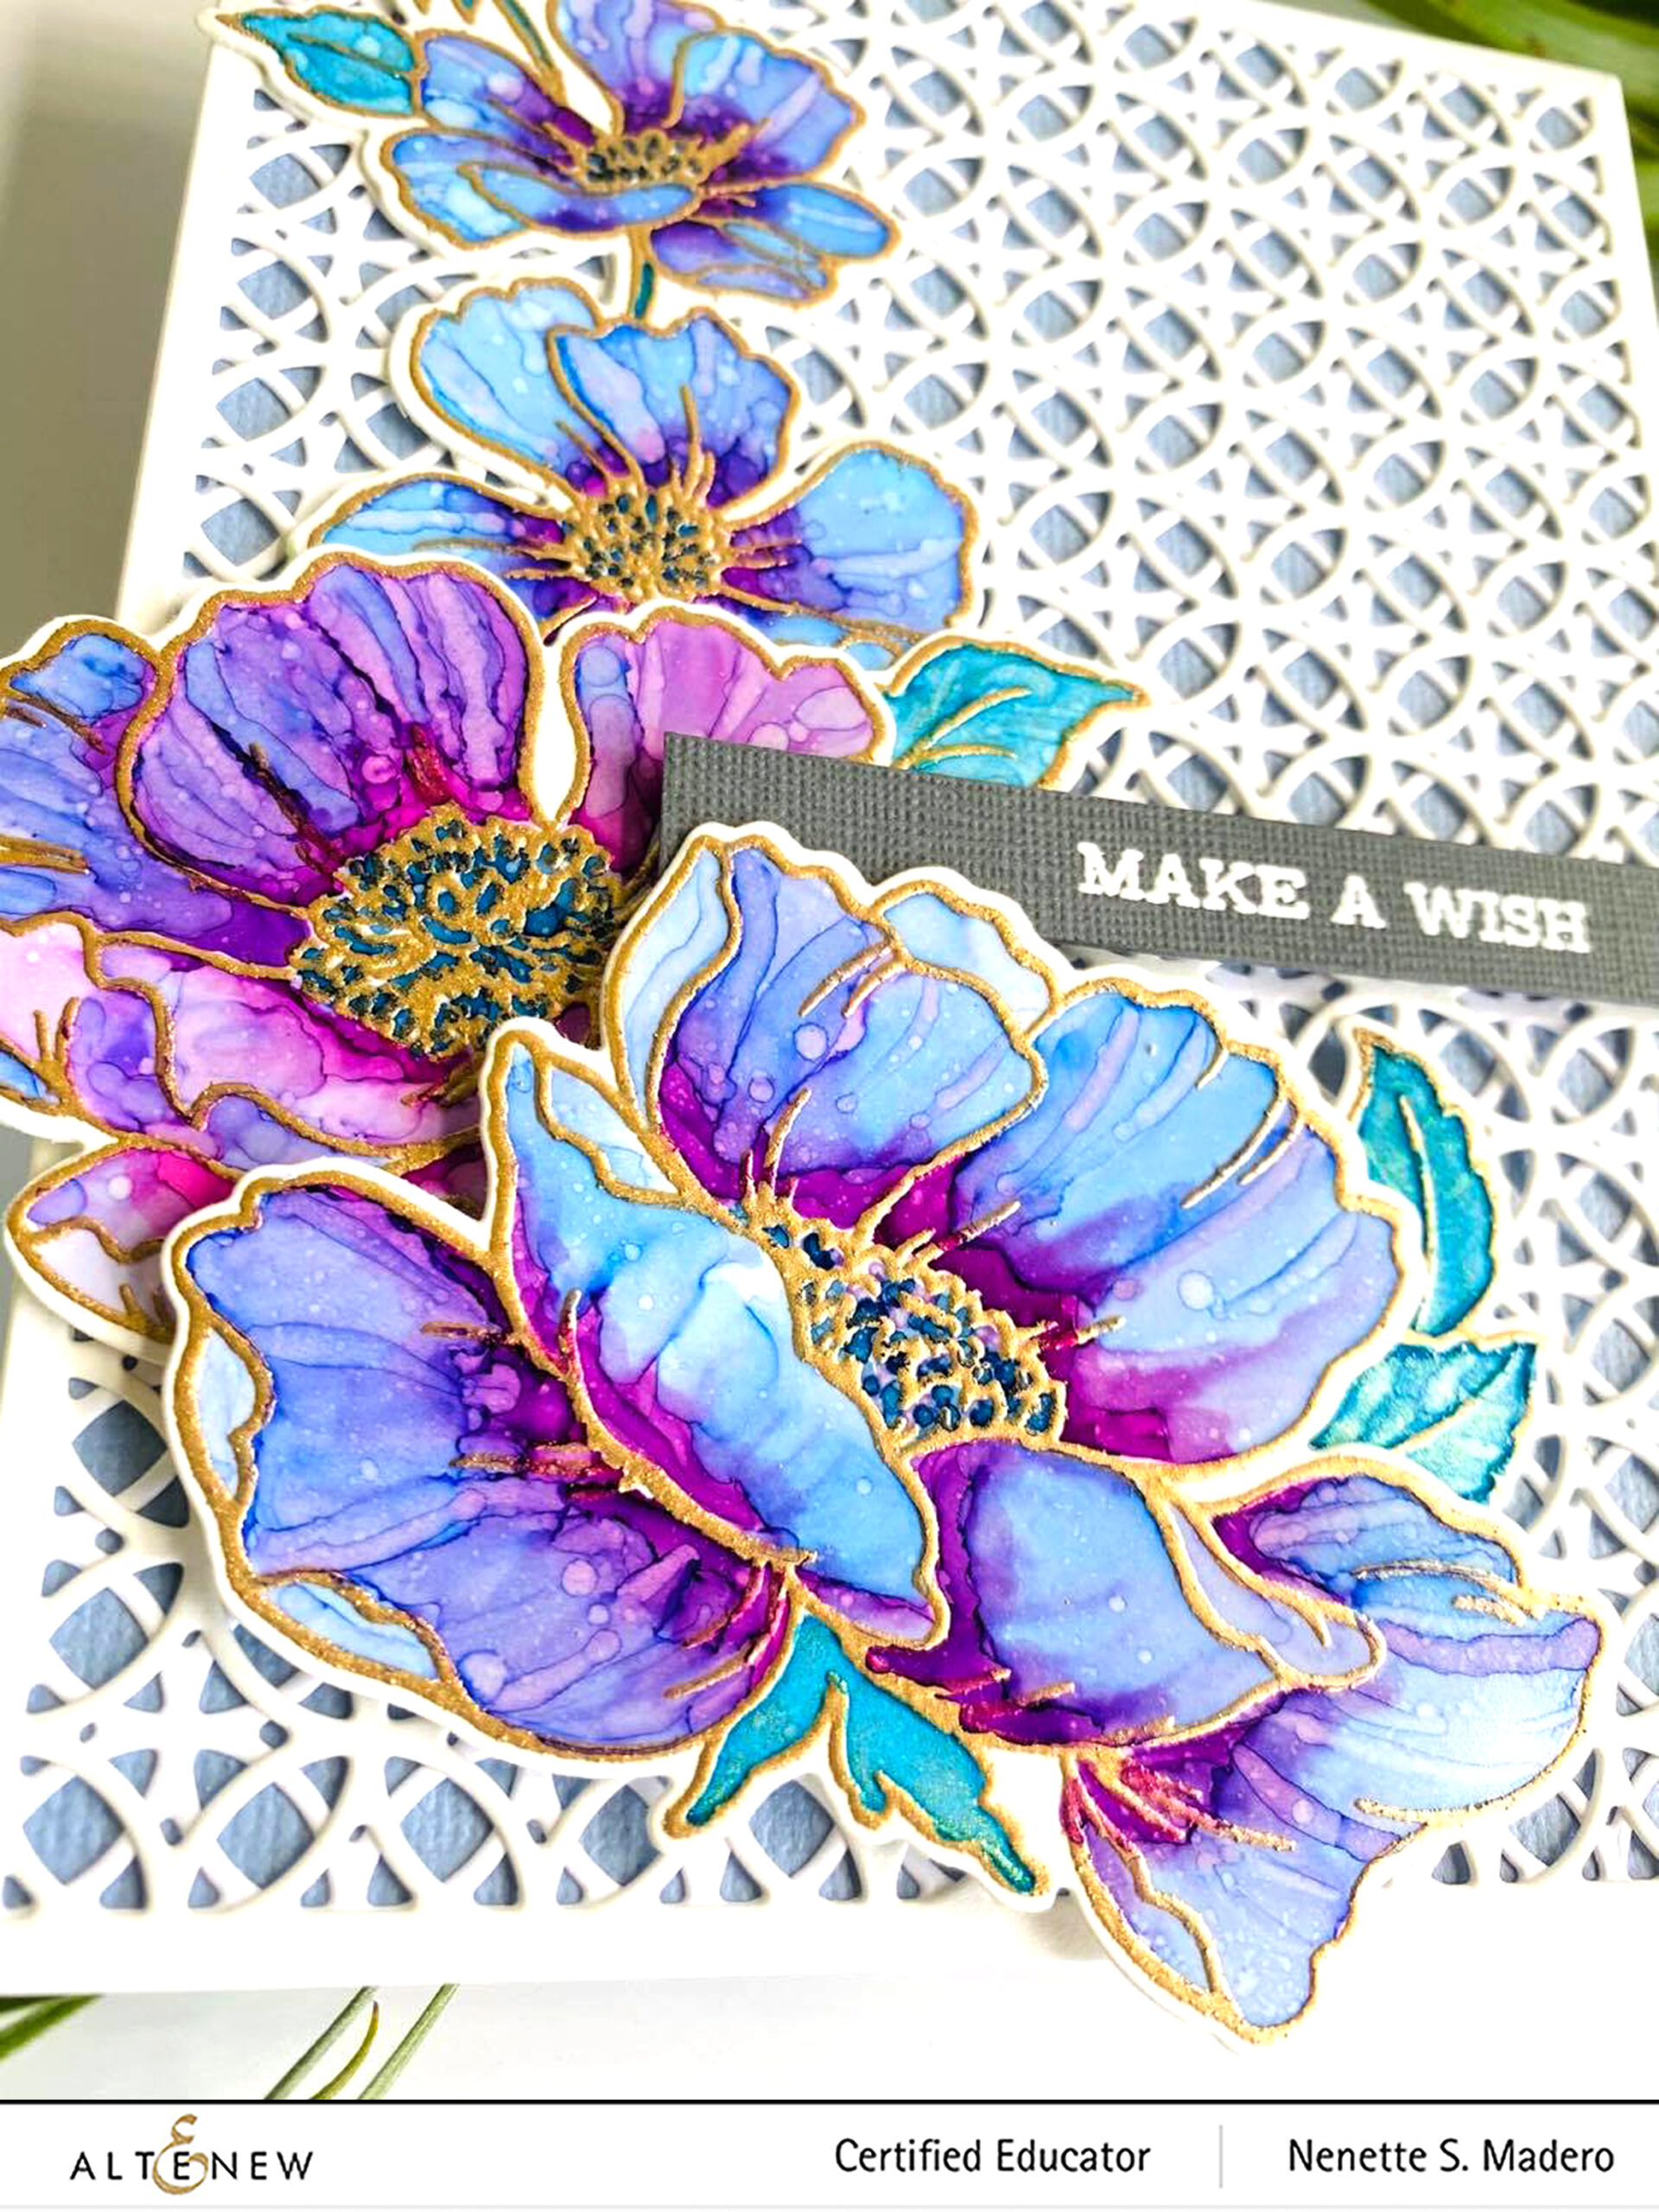
I then used a thin brush to add just plain alcohol for added texture. A fine spray bottle filled with alcohol was used to add tiny specks of alcohol on the entire surface. Make sure it’s far enough from the painted flowers otherwise you will have big blobs of white all over your project. The Circle Quilt die was used to cut 2 sheets of paper and the second was turned upside down before adhering to the 1st die-cut to create a unique geometric pattern for the background. The floral images were die cut using the coordinating dies and adhered to the card front with foam squares for dimension.
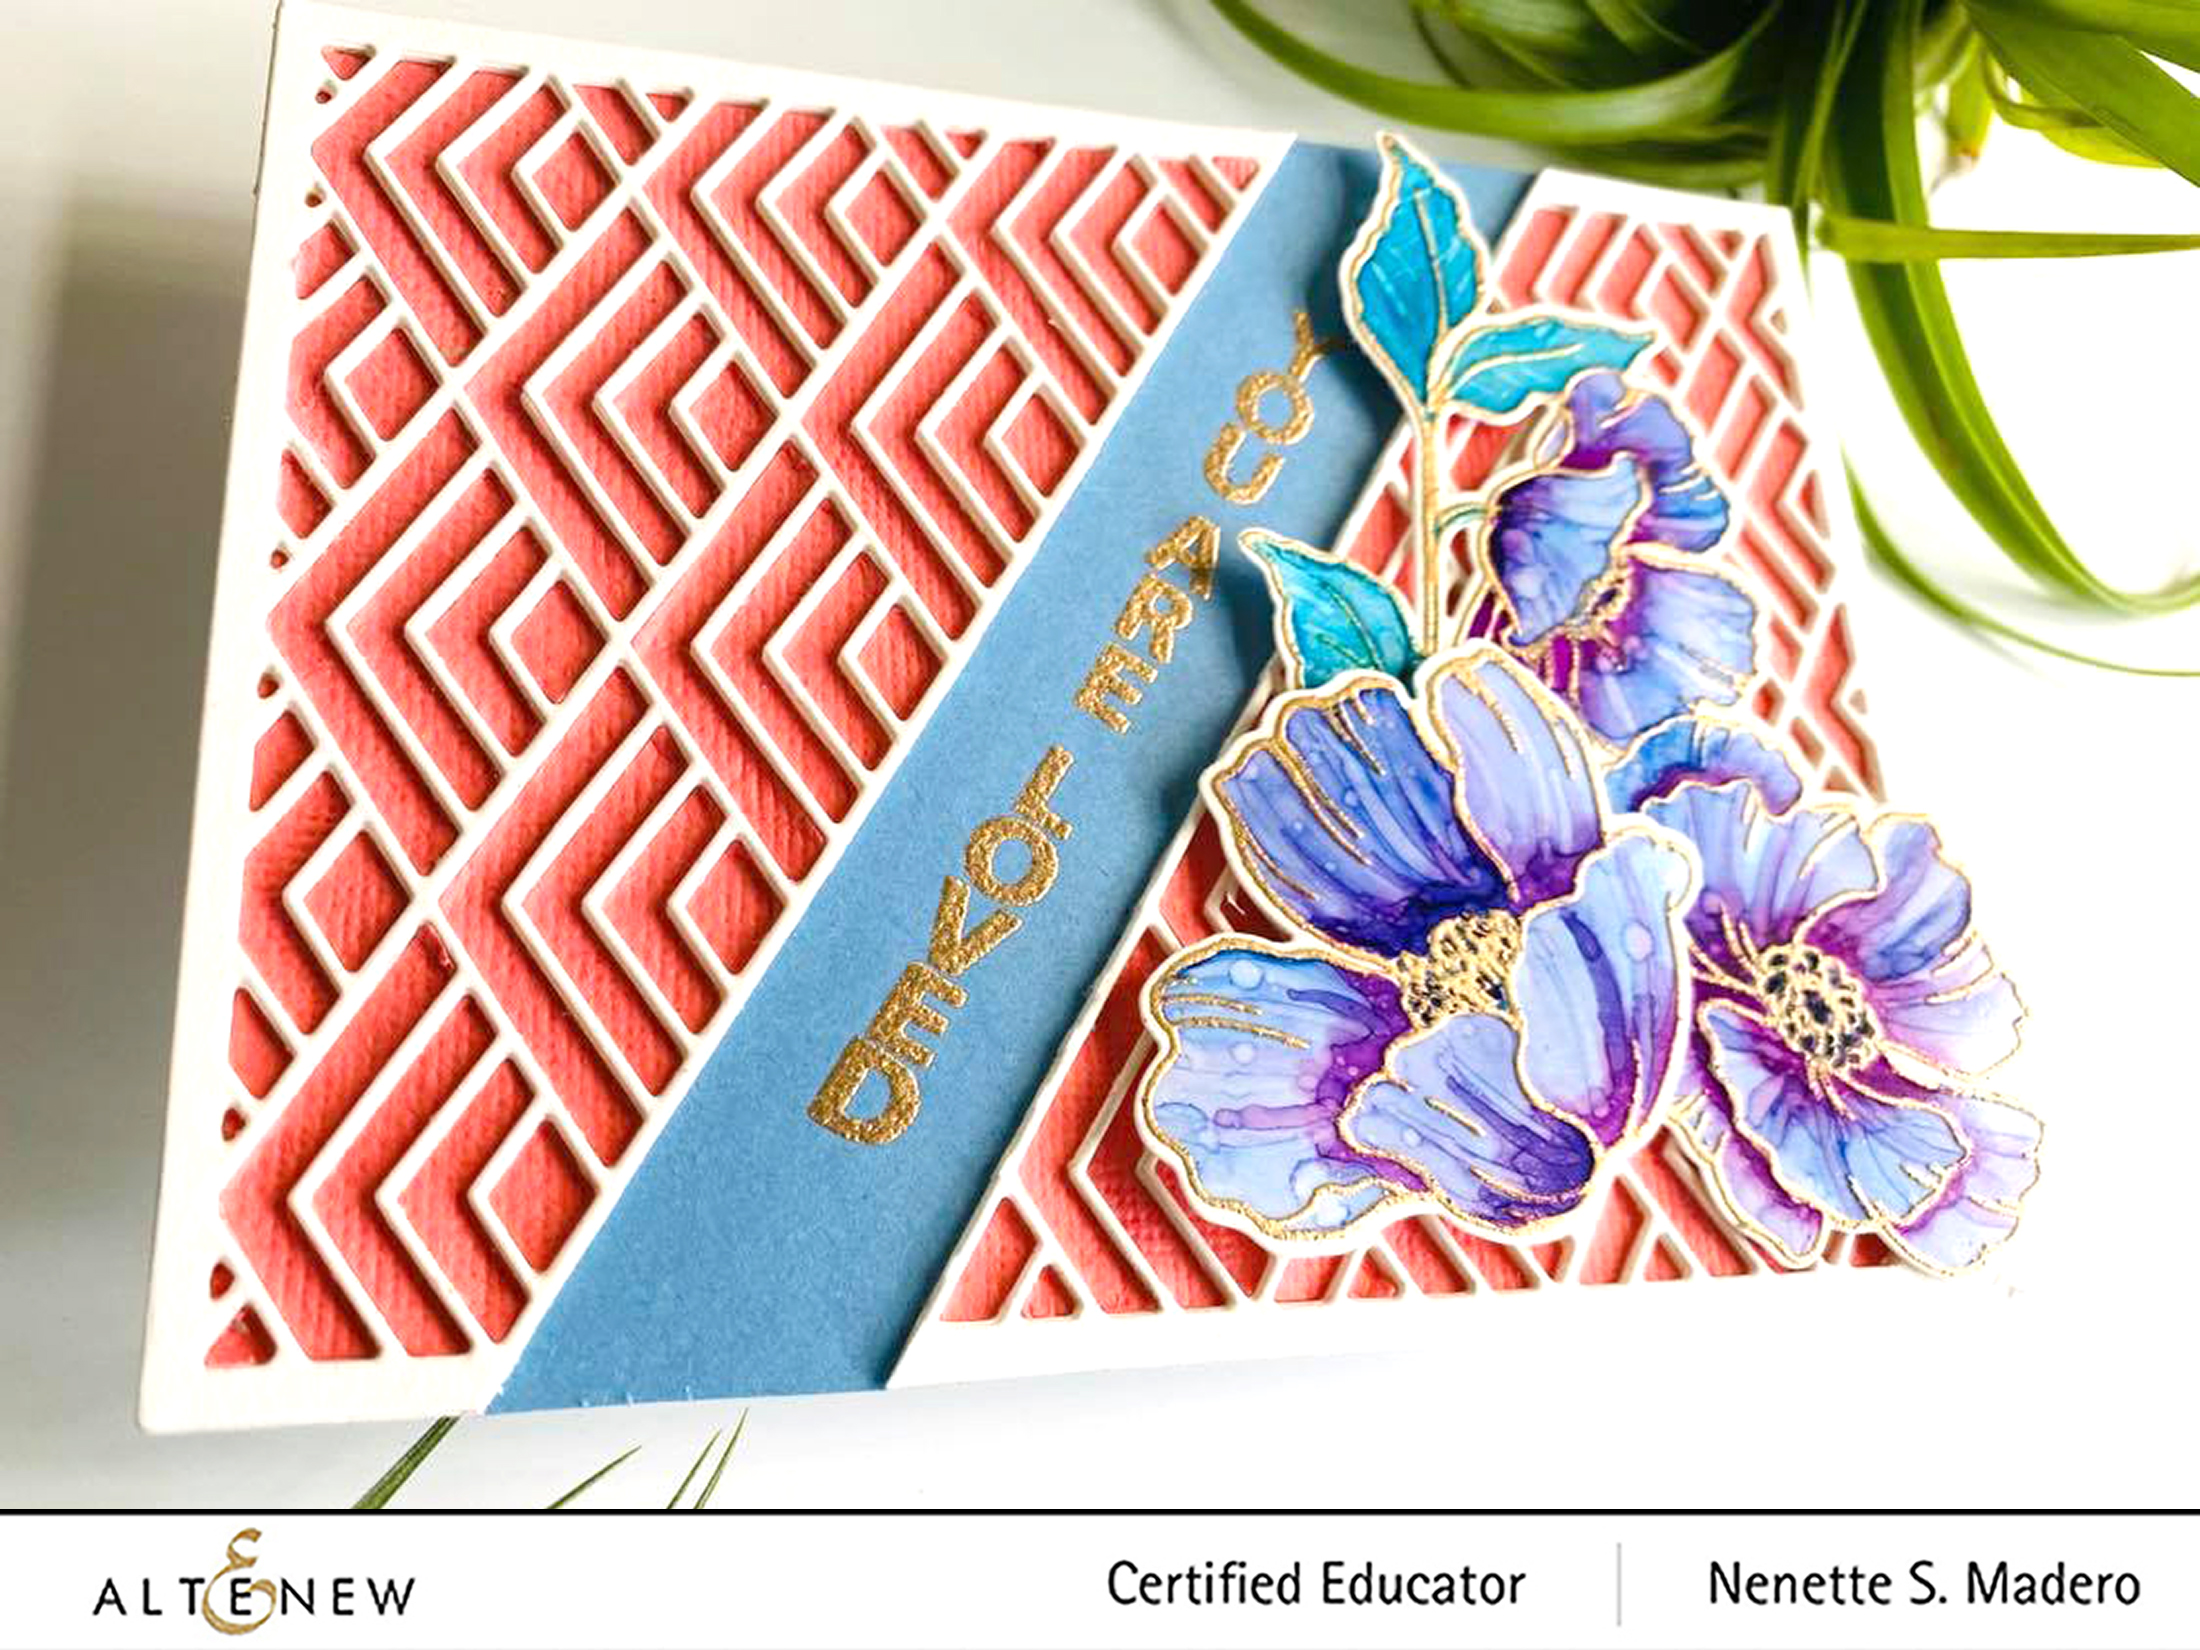
MATERIALS: POPPY GARDEN STAMP AND DIE SET, HELLO HYDRANGEA STAMP, STACKED DIAMONDS COVER DIE, ALCOHOL INKS, 99% ISOPROPYL ALCOHOL, ROSE GOLD EMBOSSING POWDER, FOAM SQUARES

For the second card using the same colored Poppy images, I wanted to create a different kind of background using the Stacked Diamonds cover die. I die cut 5 sheets of Neenah solar white CS and stacked them on top of each other. The middle portion of the die cut was cut off leaving a space for the sentiment.
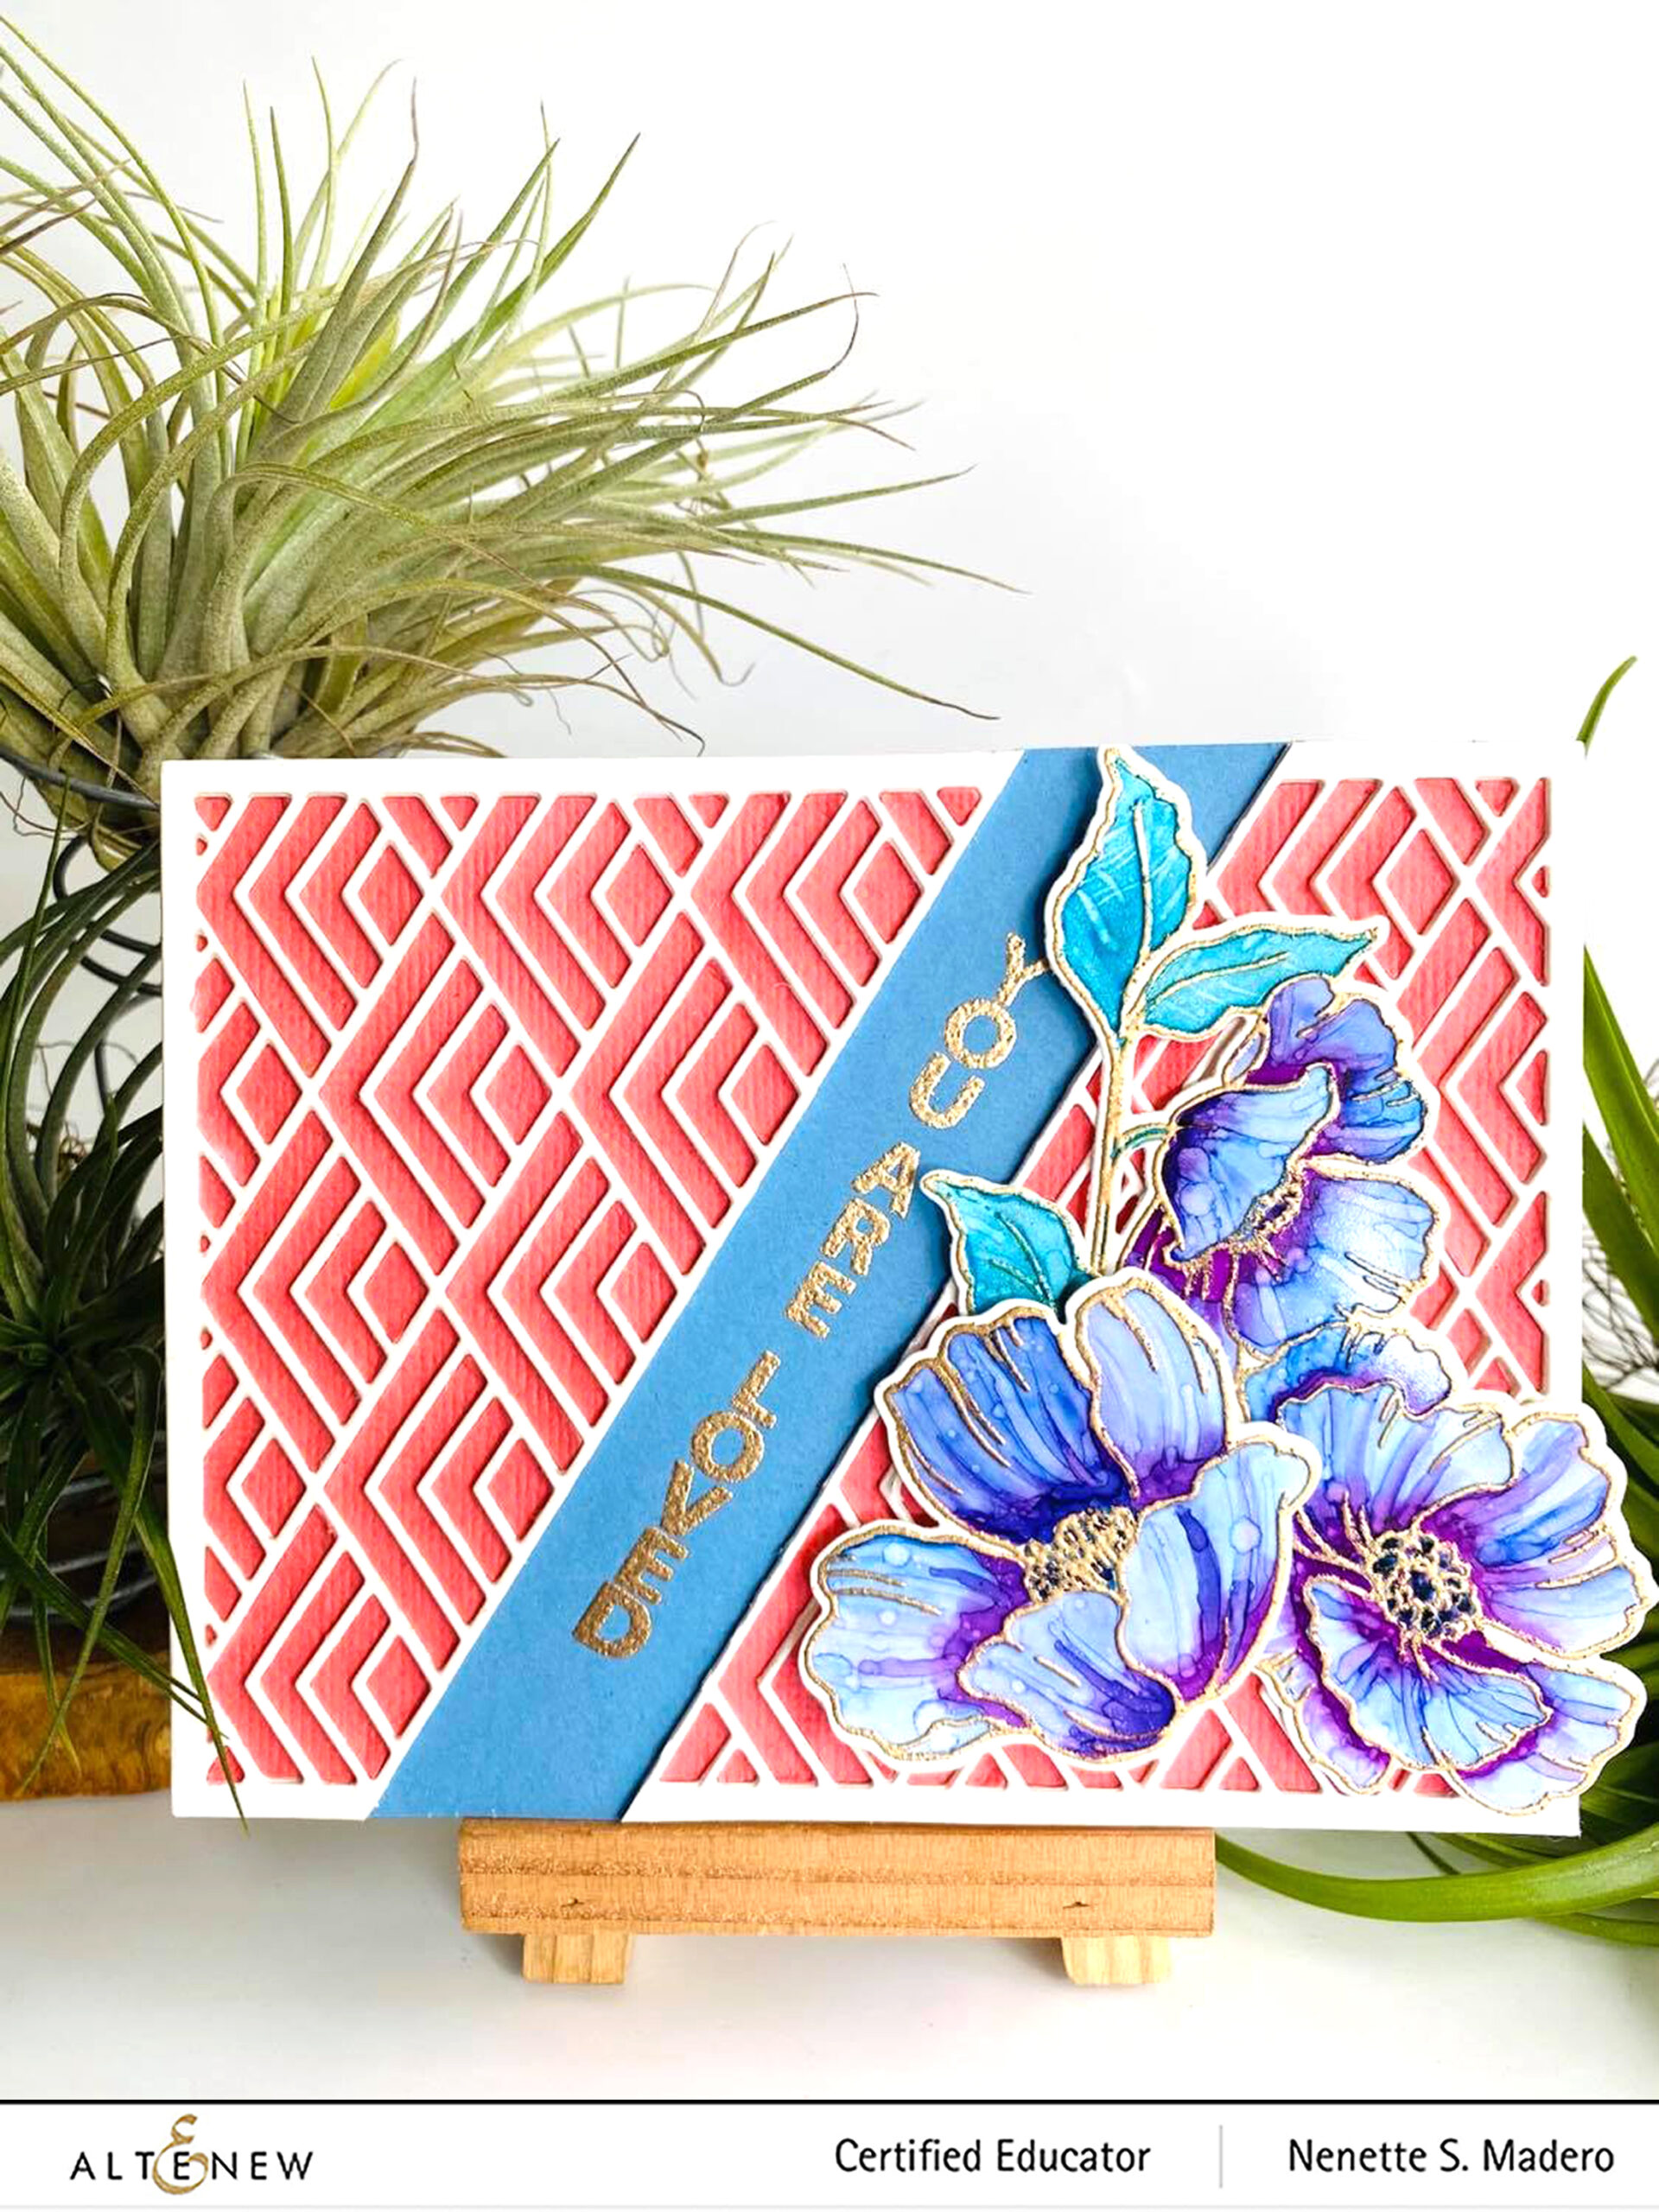
At first, I adhered the sentiment stamped onto blue CS to a card front then glued the Stacked diamonds die-cuts beside it. I wasn’t too happy with the outcome so I decided to die cut a peach-colored cardstock then did the inlay technique and added the positive pieces one by one. This made the Stacked diamonds die cut stand out more. The flowers were arranged in one corner and foam squares were used to add dimension.

I’ve attached a video tutorial below. You can also watch it on Youtube through this link.


PRIZES


Altenew is giving away a $30 gift certificate to 1 lucky winner! Please leave a comment here on the Altenew Card Blog by 12/21/2020 for a chance to win. Altenew will also draw a winner to receive a $15 Altenew gift certificate from the comments left on each designer’s blog on the blog hop list below. All winners will be announced on the Altenew Winners Page on 12/23/2020.

There’s MORE! What’s a hop without YOU?! We have included an Inlinkz on the Altenew blog for you to enter your gorgeous Altenew “Floral with Geometric Elements” creations. We will pick 2 of our favorite handmade creations from those who joined the linky party and they will each receive a $15 Altenew gift certificate!

Hope you liked the cards I made for this hop. Don’t forget to leave a comment here and in all the following blogs to get a chance to win some fabulous prizes from Altenew. I always look forward to reading your heartwarming comments. If you like my cards, I hope you’ll subscribe to my blog so that you’ll get notified once a new post is up. I would love to interact and get to know you more through Instagram as well so please follow me on IG @mylittleatticstudio and say hello. Next up is the talented Kari VanNoy. Thank you so much for dropping by! Wishing everyone a blessed Christmas and a New Year filled with renewed hope, good health and happiness. Stay safe everyone and happy crafting! 😊


BLOG HOP LIST


Altenew Card Blog
Nenette S. Madero<– YOU ARE HERE
Kari VanNoy
Helen Kalb
Teresa Litchfield
Colleen Balija
Rachael Shedeed
Pam Boedeker
Nandini Karmarkar
Amber Rain Davis
Neha Aggarwal
Amy Hill
Teri Wilson
Terri Marie Koszler
Eva Bussom
Sandra Woodson
Irina Fonina
Jaycee Gaspar
Roteja Galvan
Teri Stokes
Michelle Ochoa Murray
Rosie Neustaedter
Patty Mello
Virginia Lu

SUPPLY LIST


Affiliate links are used
ALTENEW ROSE GOLD CRISP EMBOSSING POWDER
Shop at:
ALT | MLA
ALTENEW HELLO HYDRANGEA STAMP AND DIE
Shop at:
ALT
ALTENEW WEEKEND DOODLES STAMP AND DIE BUNDLE
Shop at:
ALT
ALTENEW CIRCLE QUILT DIE
Shop at:
ALT
ALTENEW CRYSTAL FAMES DIE
Shop at:
ALT
ALTENEW SENTIMENT STRIPS STAMP
Shop at:
ALT
ALTENEW BEAUTIFUL BERGENIA 3D EMBOSSING FOLDER
Shop at:
ALT
ALTENEW WOODLESS WATERCOLOR PENCILS
Shop at:
ALT
YUPO PAPER
YUPO PAPER
Shop at:
AMZ
ALTENEW LEAF MIX DIE SET
Shop at:
ALT
ALTENEW MODERN CIRCLES STENCIL
Shop at:
ALT
ALTENEW EMERALD GOLD WASHI TAPE
Shop at:
ALT
ALTENEW NESTING  LABELS DIE SET
ALTENEW NESTING LABELS DIE SET
Shop at:
ALT
ALTENEW COLOR BLOCK TRIANGLE STENCIL
Shop at:
ALT
ALTENEW POPPY GARDEN STAMP AND DIE
Shop at:
ALT
ALTENEW GEOMETRIC LANDSCAPE STENCIL
Shop at:
ALT
ALTENEW GEO FRAMES DIE
Shop at:
ALT
ALTENEW MOUNTAIN MIST DYE INK
Shop at:
ALT
ALTENEW SAN DUNES DYE INK
Shop at:
ALT
Gelli Plate 8x10
Gelli Plate 8×10
Shop at:
AMZ
BRAYER
BRAYER
Shop at:
AMZ
LIQUITEX BASICS TITANIUM WHITE ACRYLIC PAINT
Shop at:
AMZ
TEFLON BONE FOLDER
TEFLON BONE FOLDER
Shop at:
AMZ
SCOR PAL SCOR BOARD
SCOR PAL SCOR BOARD
Shop at:
AMZ
ALTENEW STACKED DIAMONDS COVER DIE
Shop at:
ALT

ALTENEW’S 6TH ANNIVERSARY BLOG HOP DAY 3 + GIVEAWAY

ALTENEW’S 6TH ANNIVERSARY BLOG HOP DAY 3 + GIVEAWAY

Welcome to Altenew’s blog hop Day 3!!! Right now, my country is under enhanced community quarantine that has displaced over 100k people. My heart goes out to all the front liners– doctors, nurses, residents, health care workers, police and law enforcement people, pharmacists, grocery employees, delivery guys etc– just to make sure that we survive. Aside from helping out in donations for hospital equipment and protective gear or other necessities desperately needed now, our crafting community can help in giving inspiration to all those who have to be quarantined at home. Maybe a little inspiration can keep them calm and provide some distraction and help relieve stress.

I’m thrilled and humbled to be a part of this big big giveaway to celebrate Altenew’s 6th anniversary!!! I can’t believe it has been 6 years already!!! Congratulations to the Altenew team for continuously giving us beautiful stamp designs and materials to work with. Don’t forget to drop by the Altenew Card Blog for the complete list of giveaways. Here are some of the cards I made for this hop.


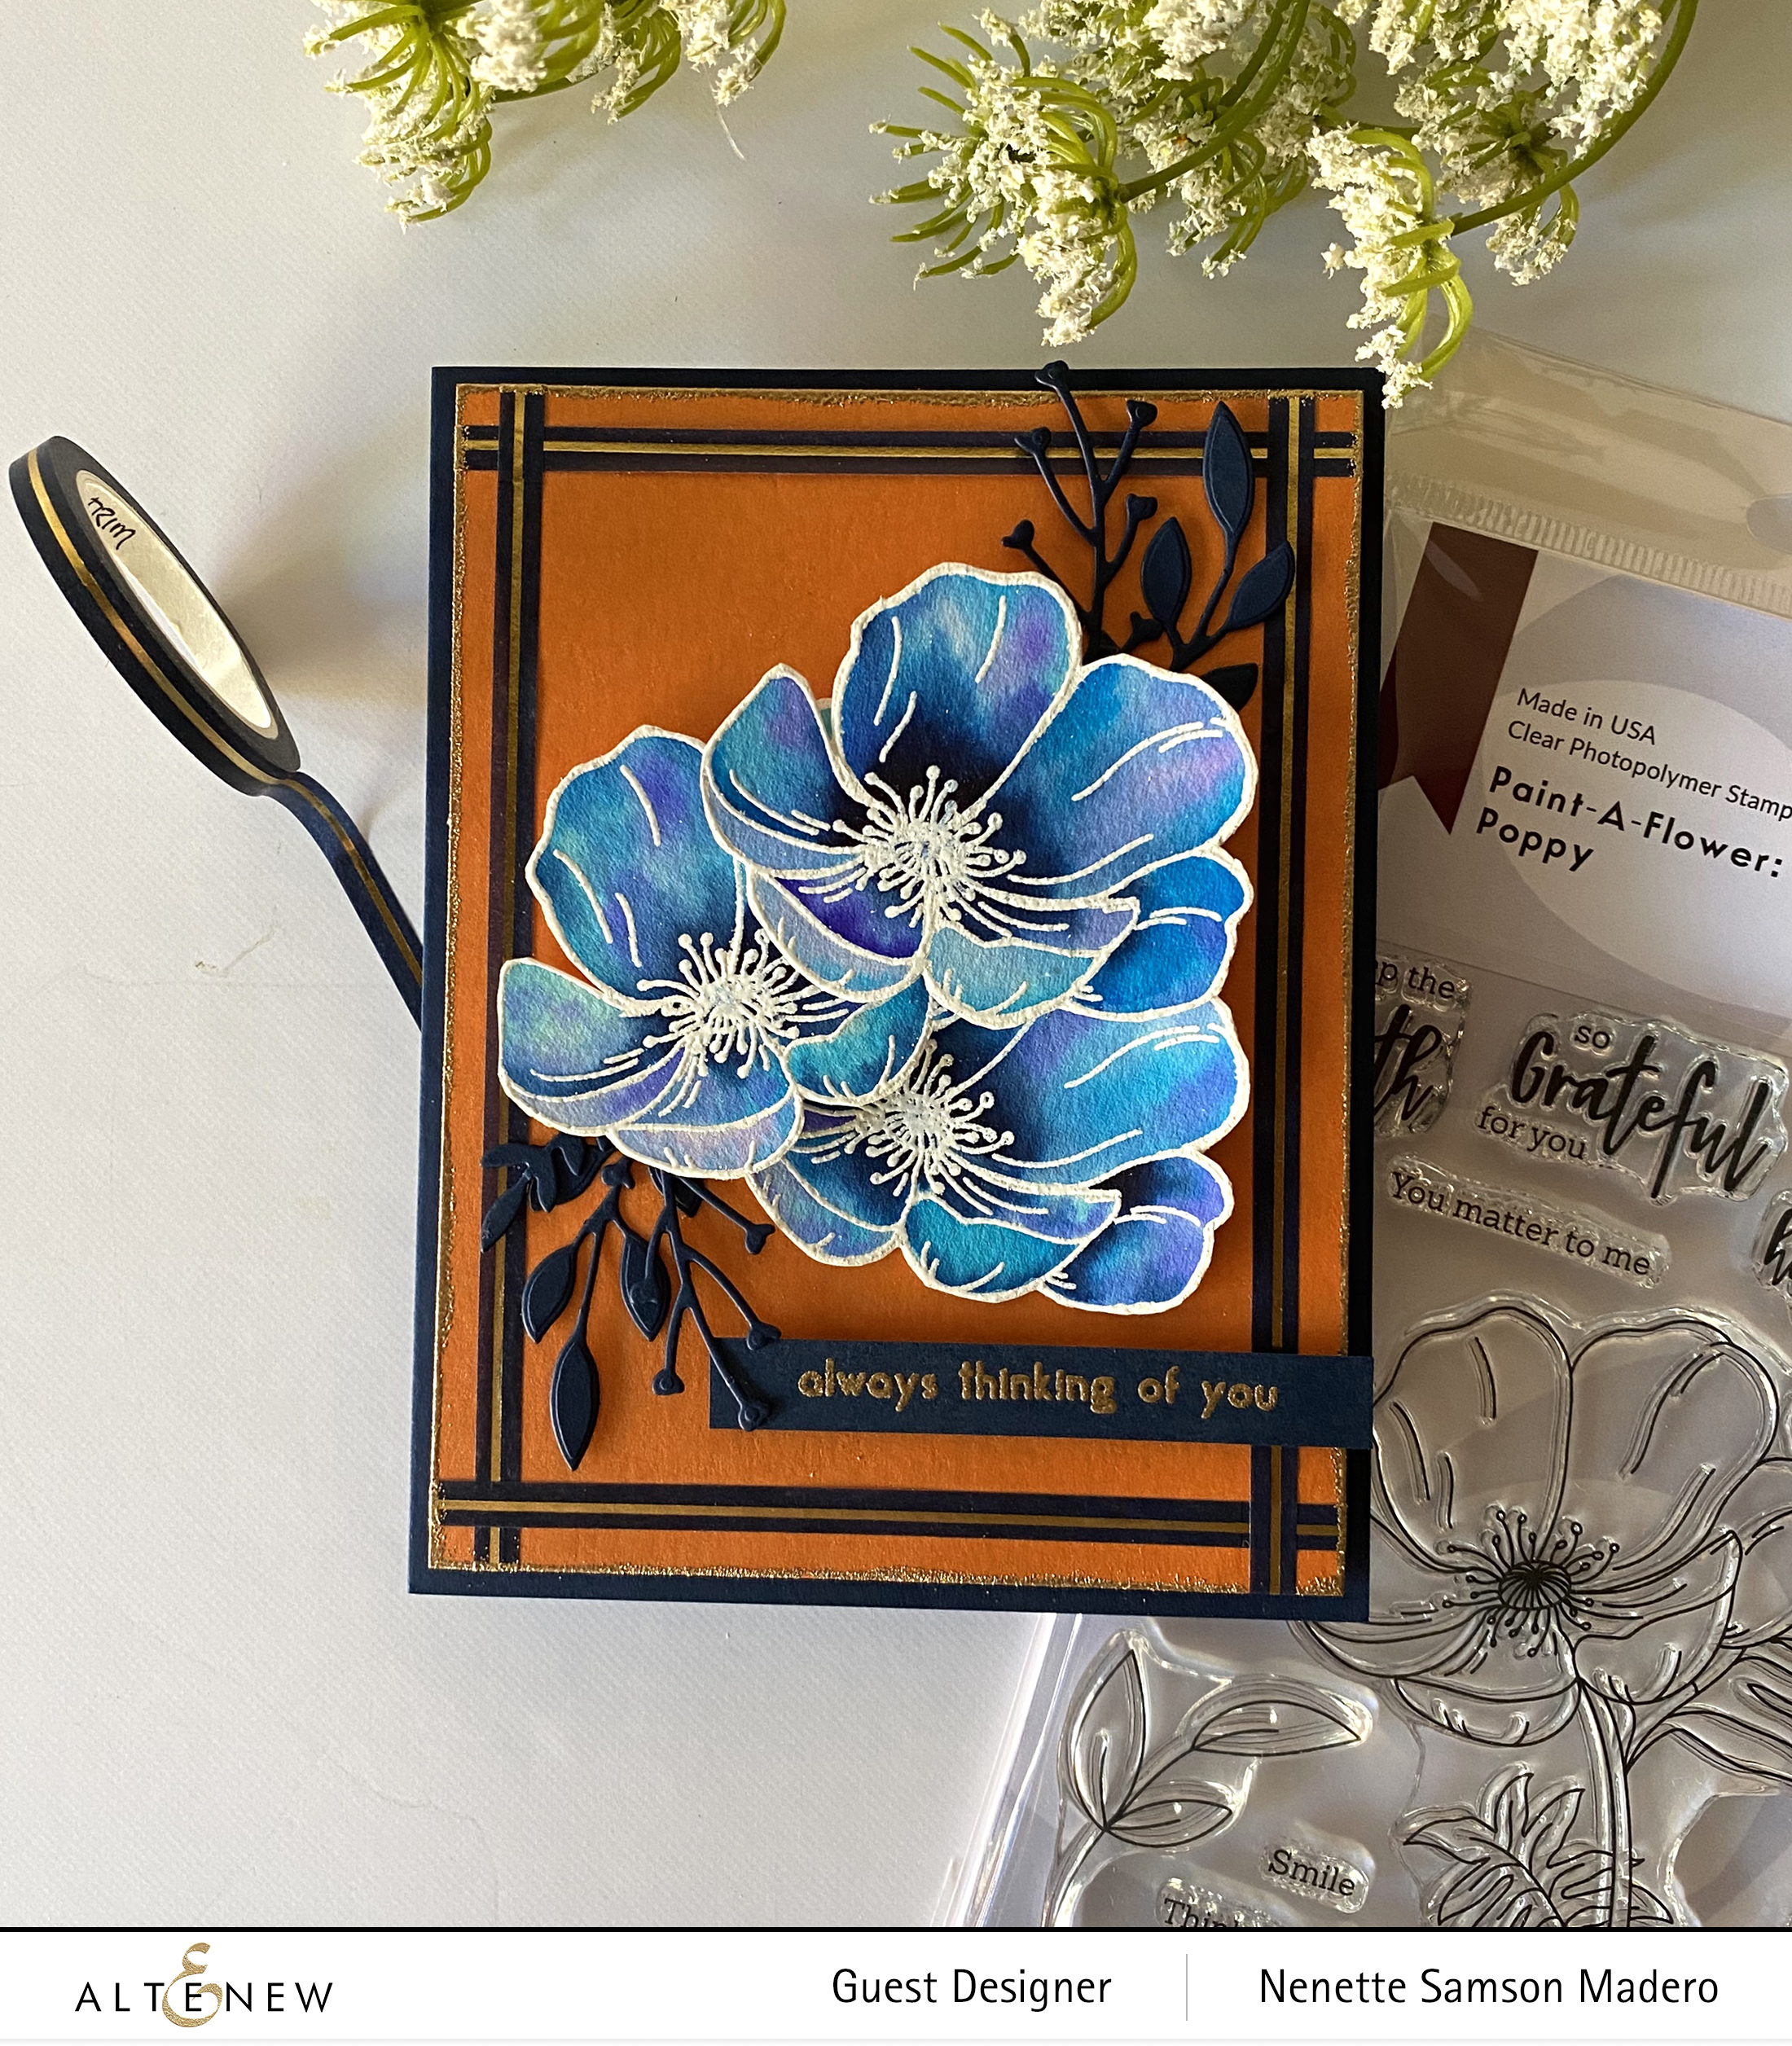
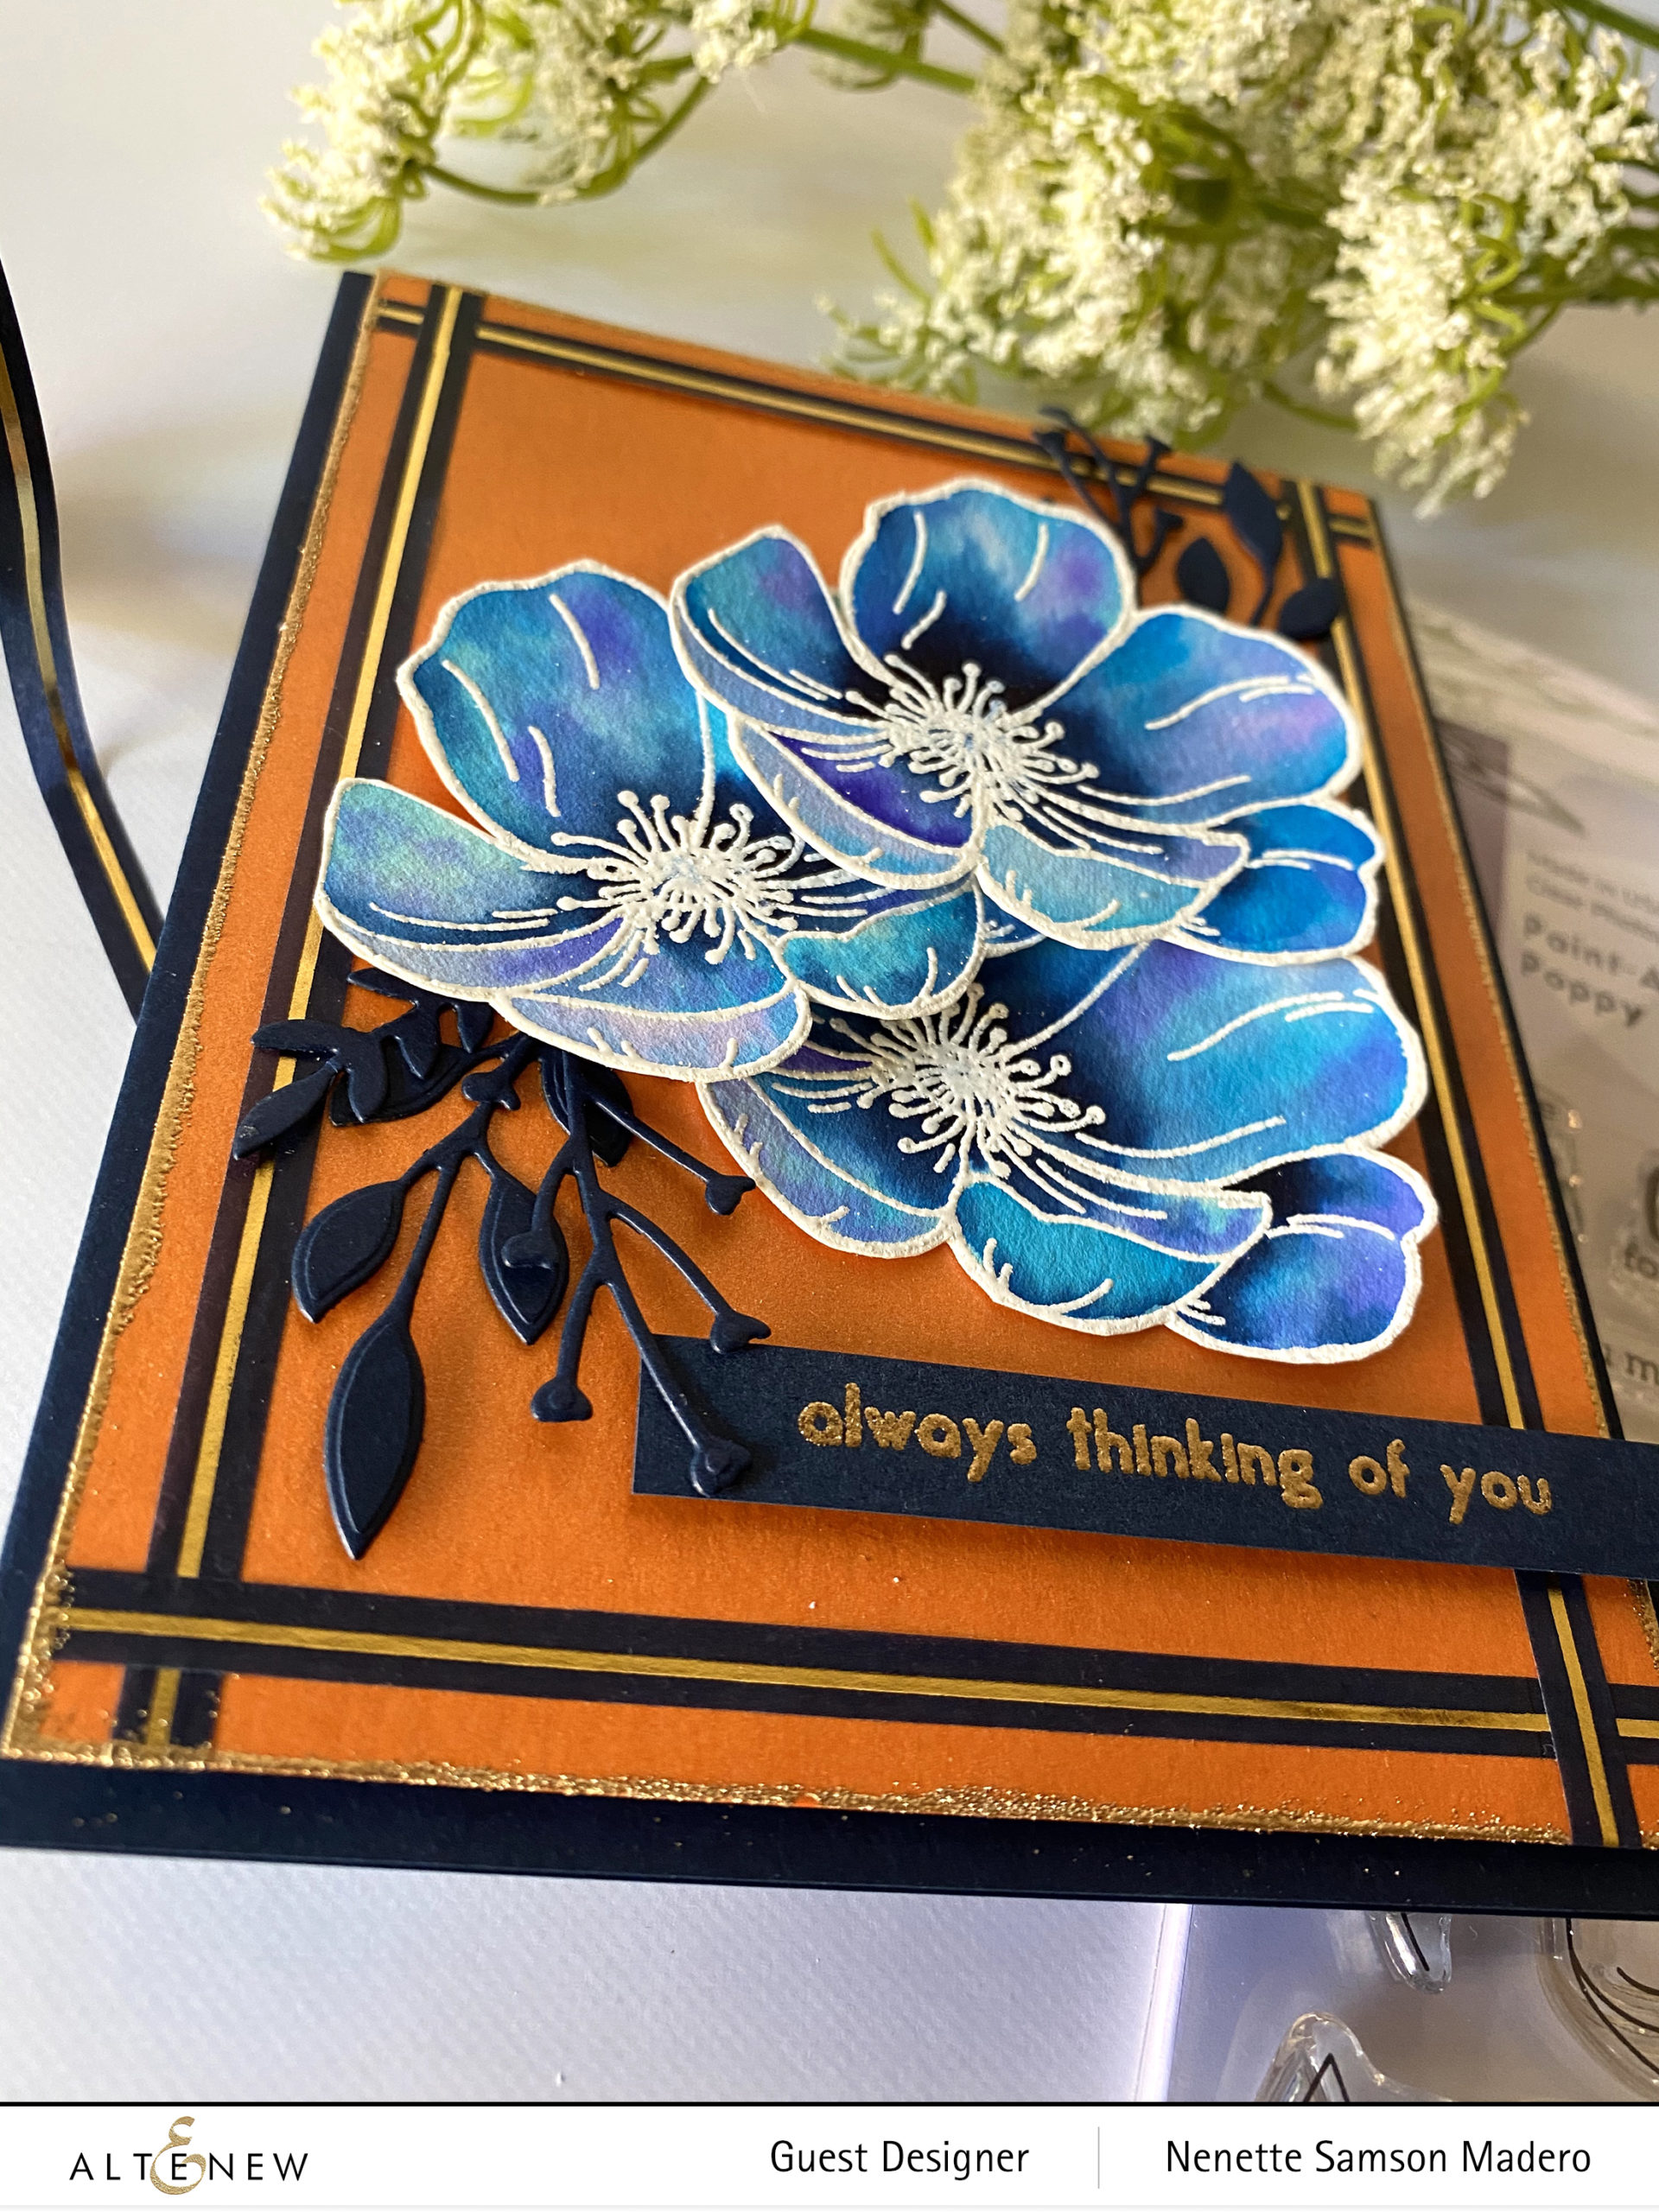
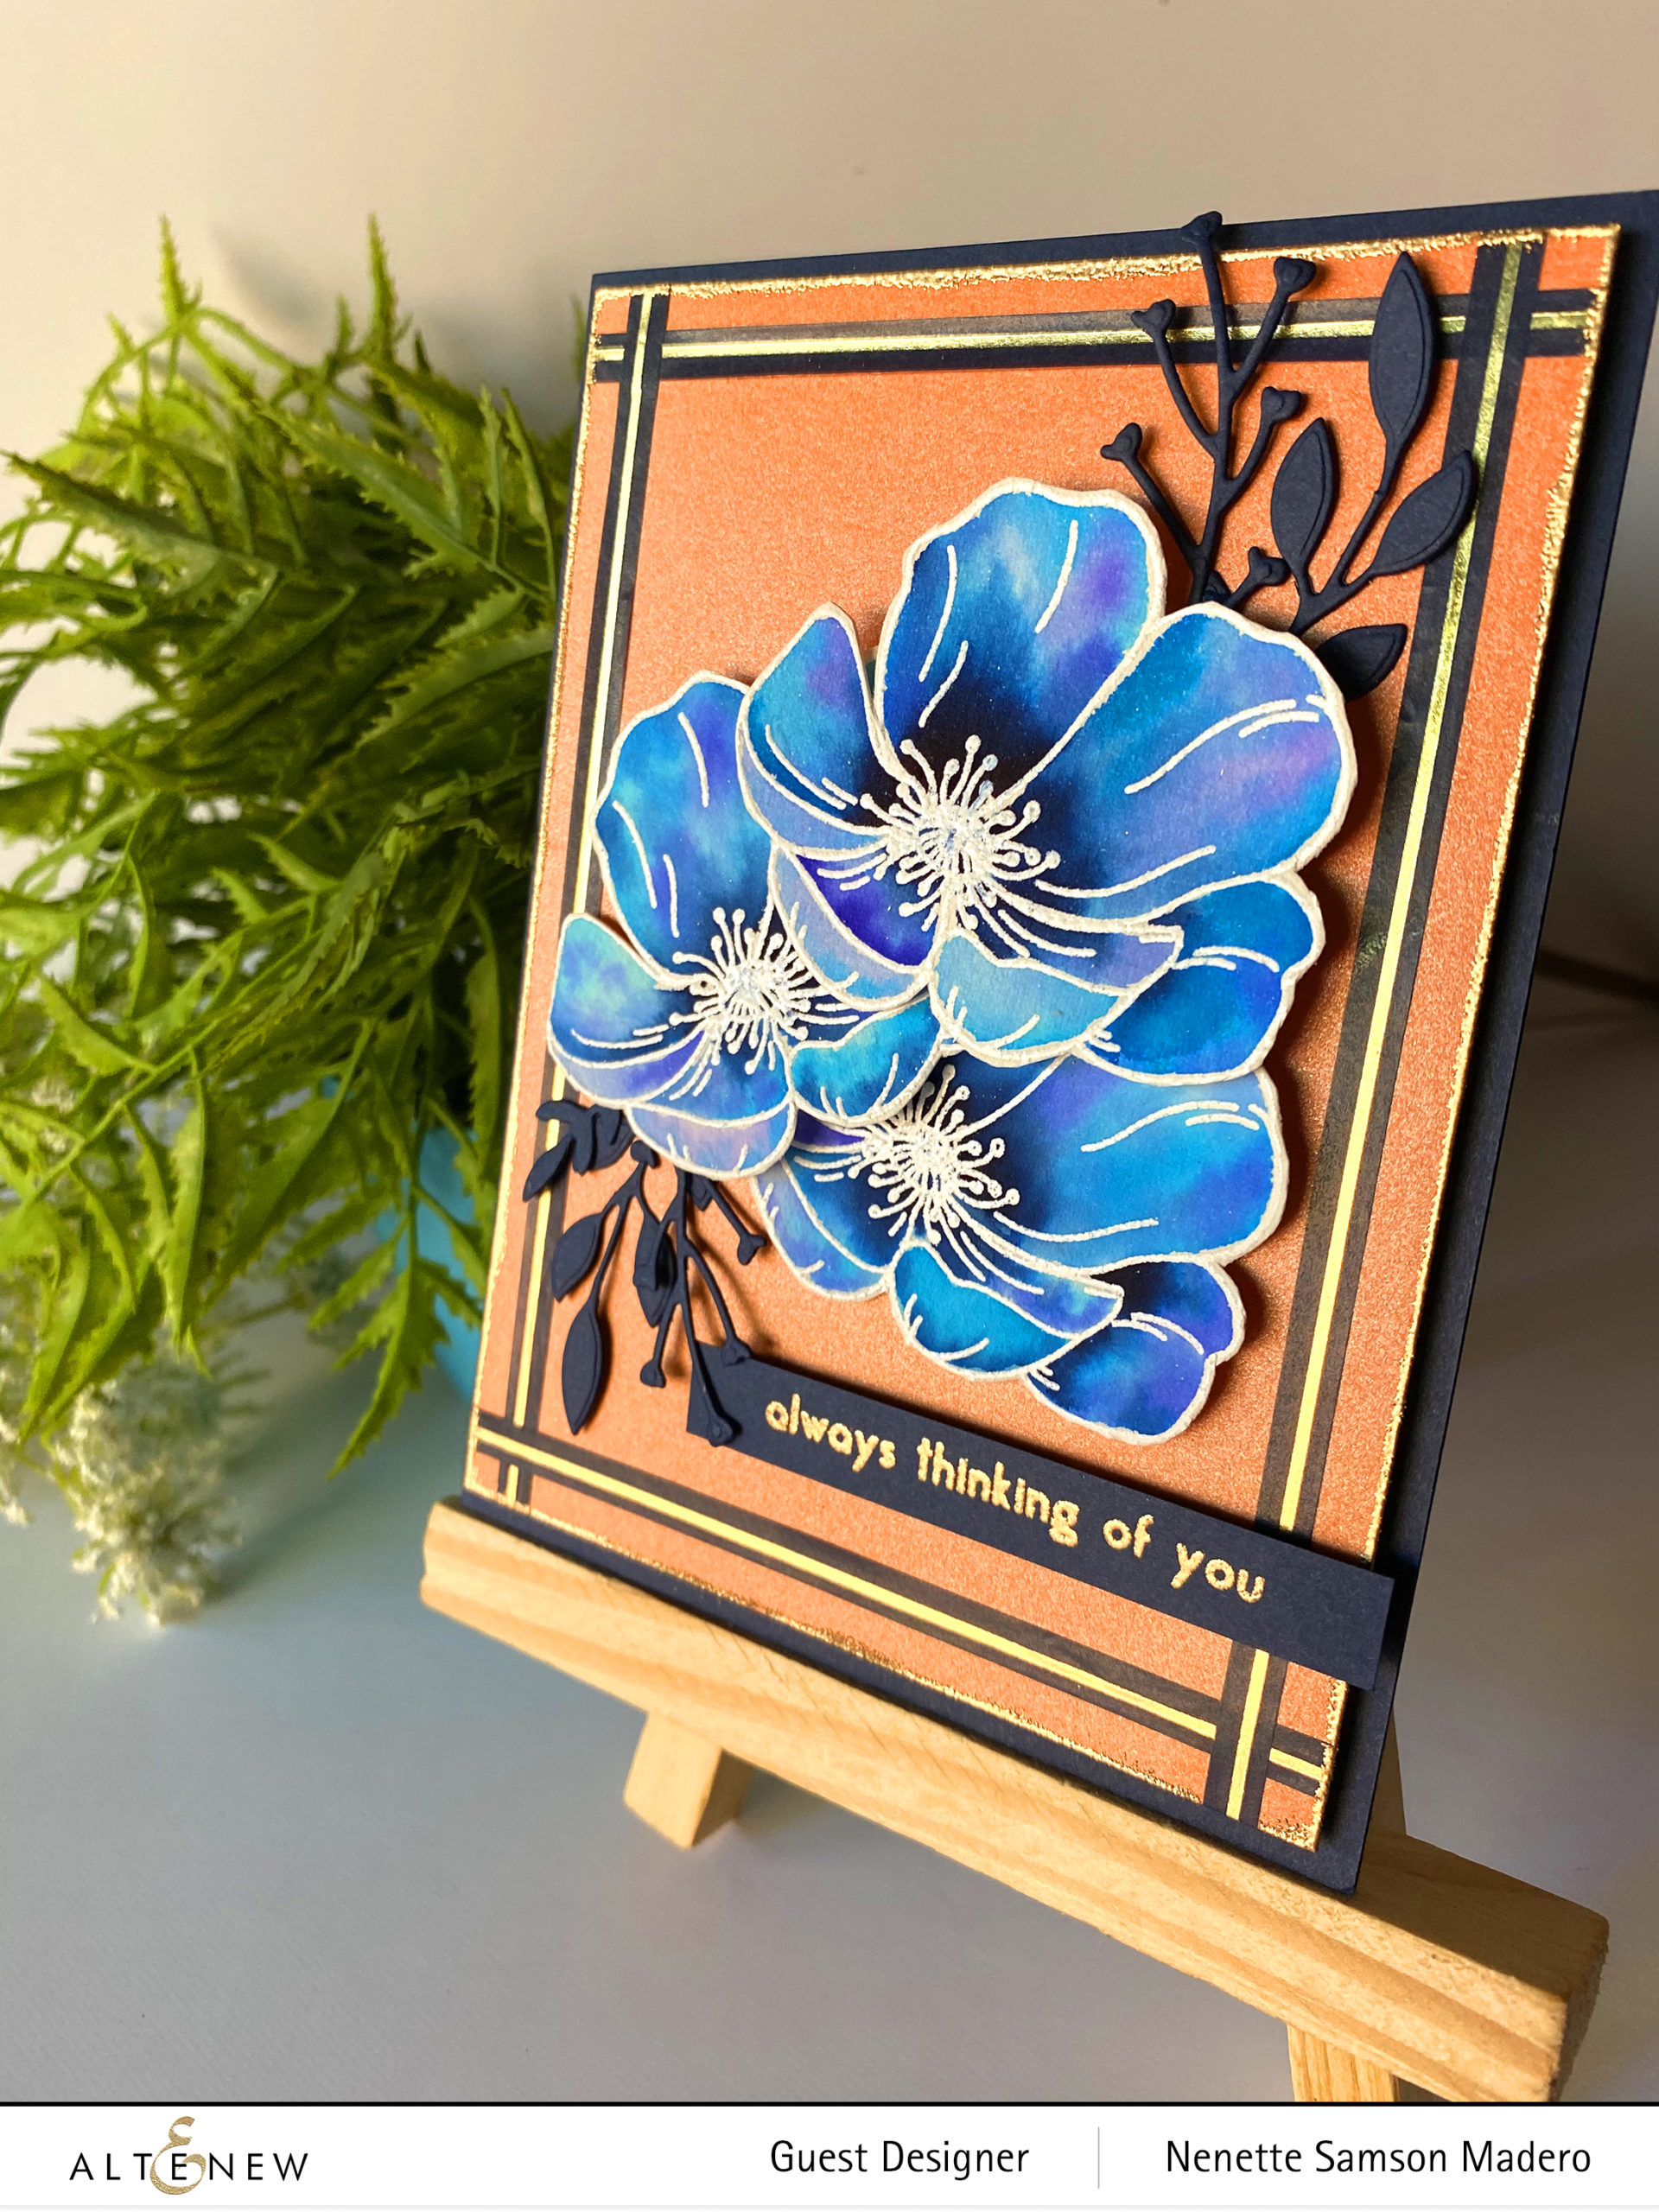
ALWAYS THINKING OF YOU


I used the beautiful Paint a Flower Poppy stamp for this card. These flowers were stamped on watercolor paper using Versa Mark Embossing ink then embossed with Altenew pure white crisp embossing powder. The petals were then watercolored using the watercolor brush markers.

Some of the foliage from the Layered Floral Elements die were used to cut navy blue cardstock. The sentiment was stamped on the blue cardstock as well and embossed with the Rose Gold Embossing powder. I added Versamark Ink to the edges and embossed with gold embossing powder for contrast. The flowers were adhered using foam tape to create some dimension. These flowers were framed using the Navy Gold trim washi tape.


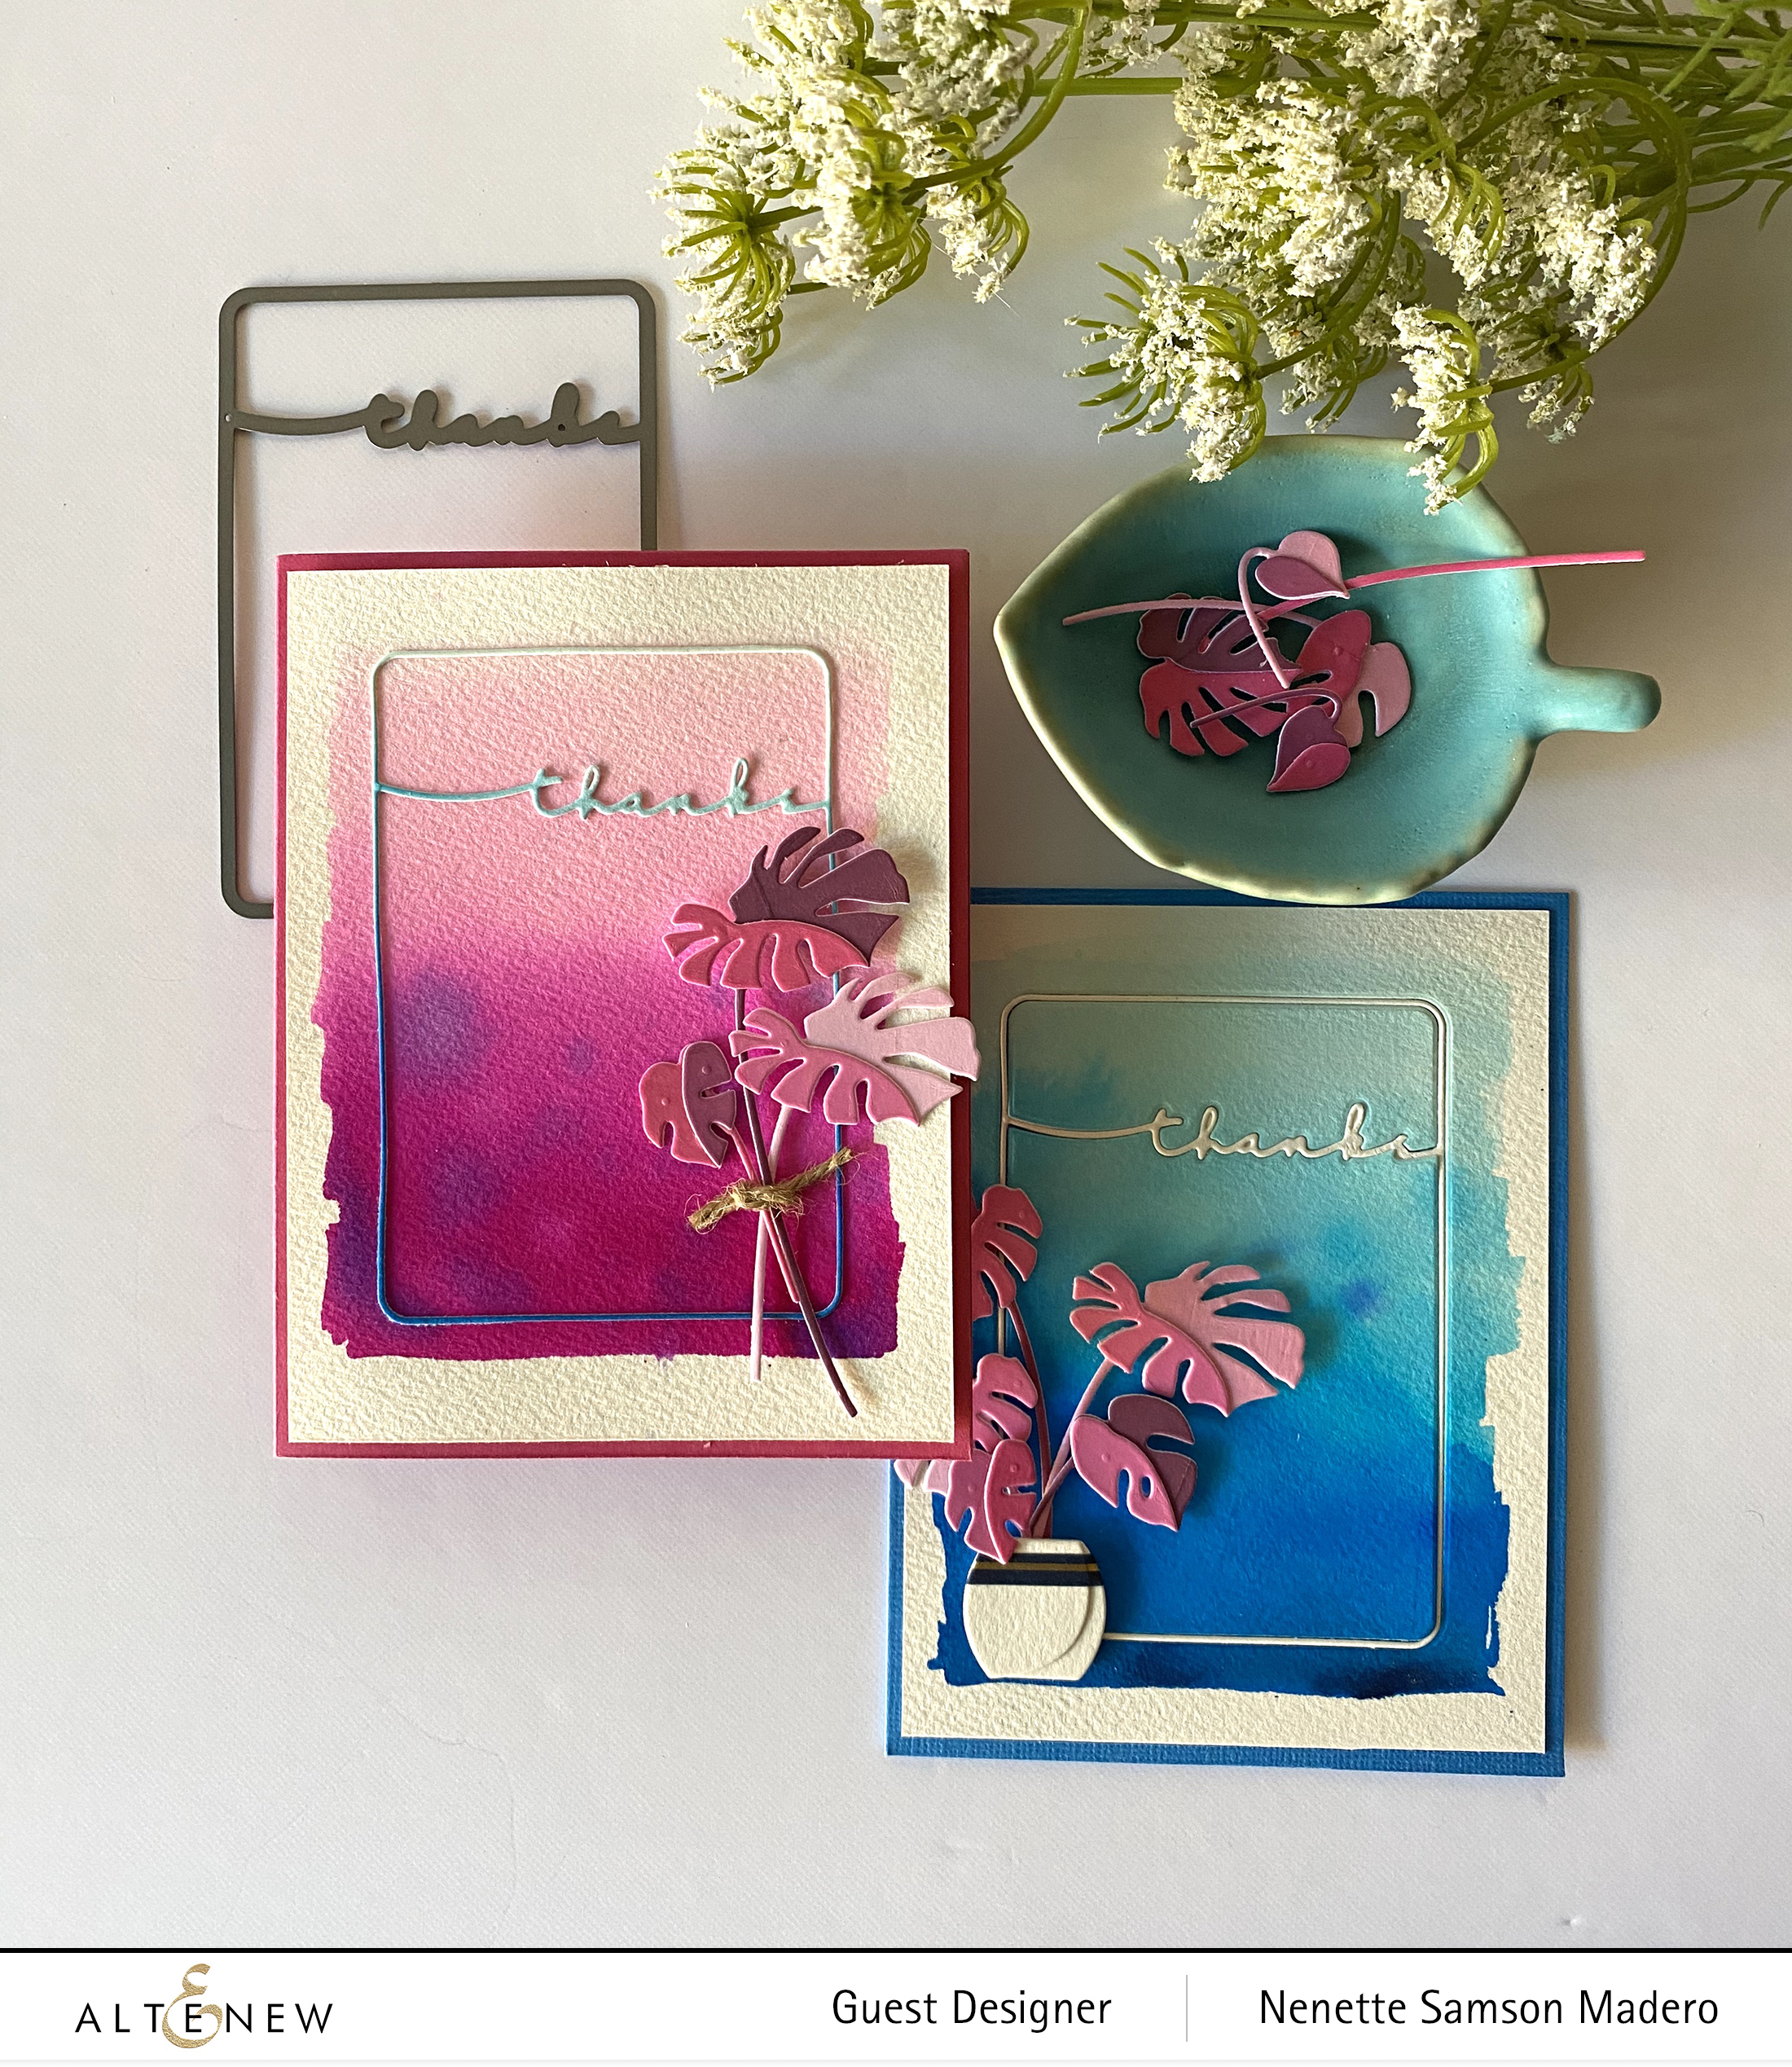
THANKS


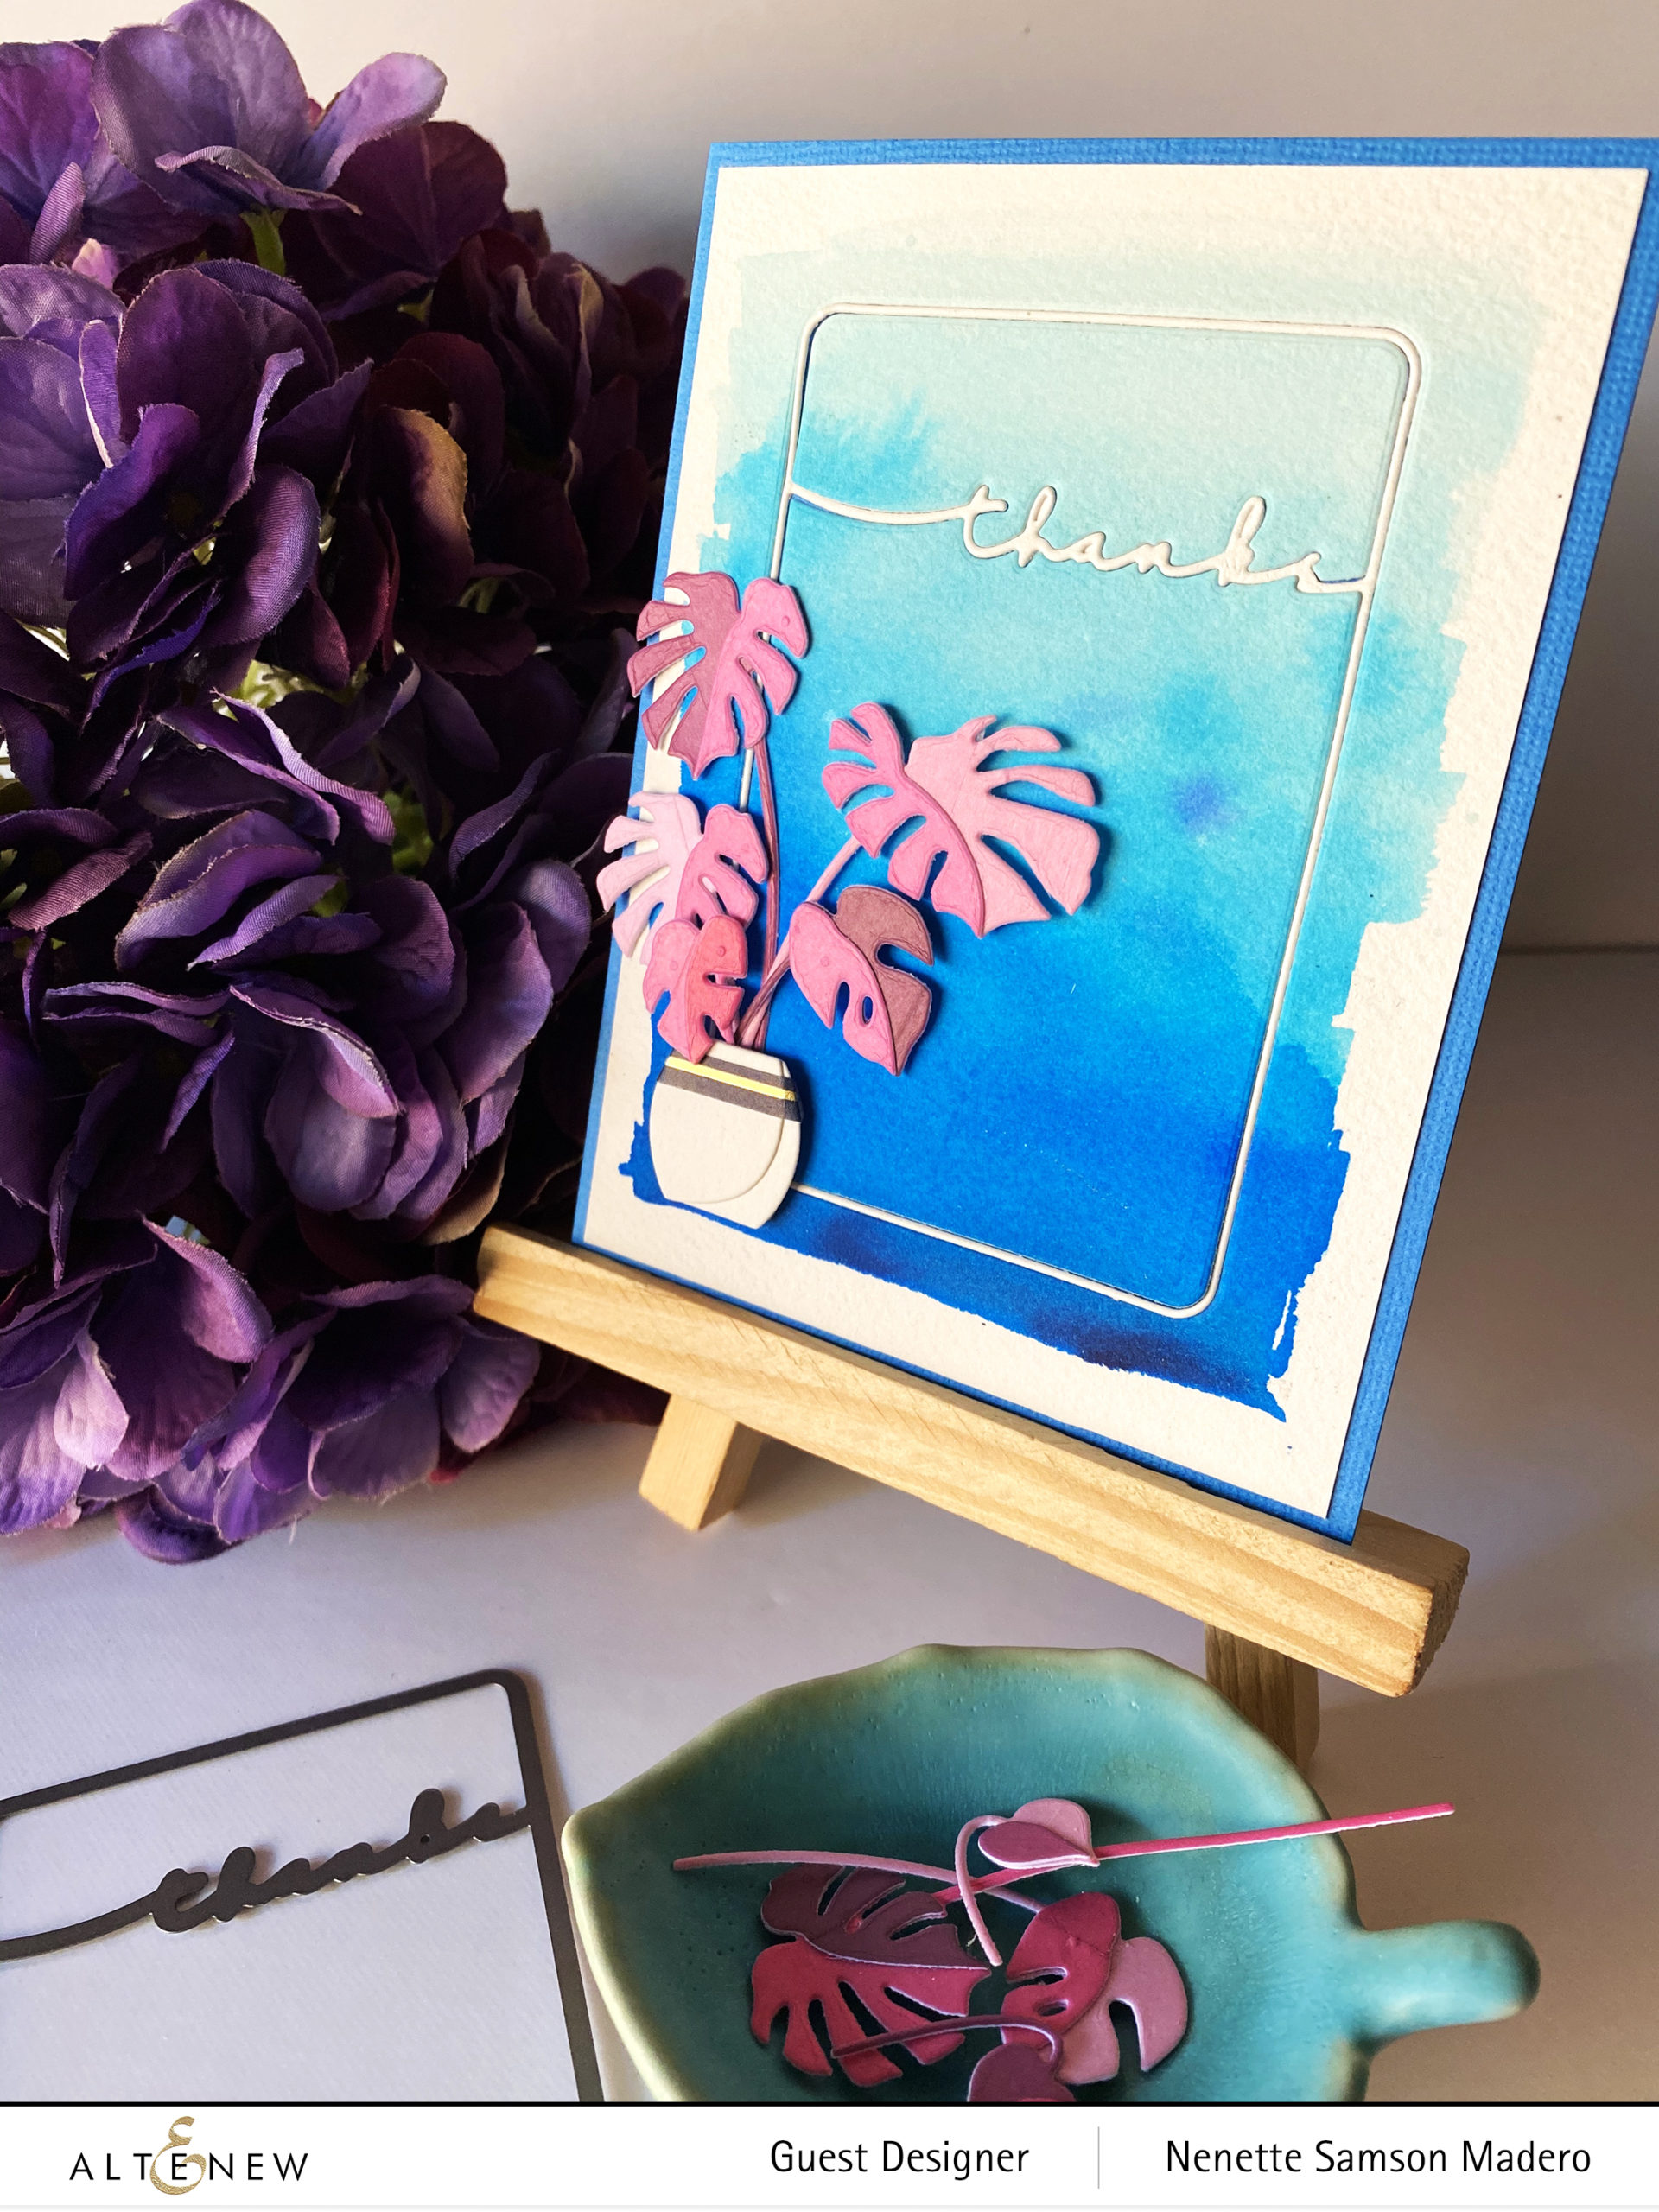
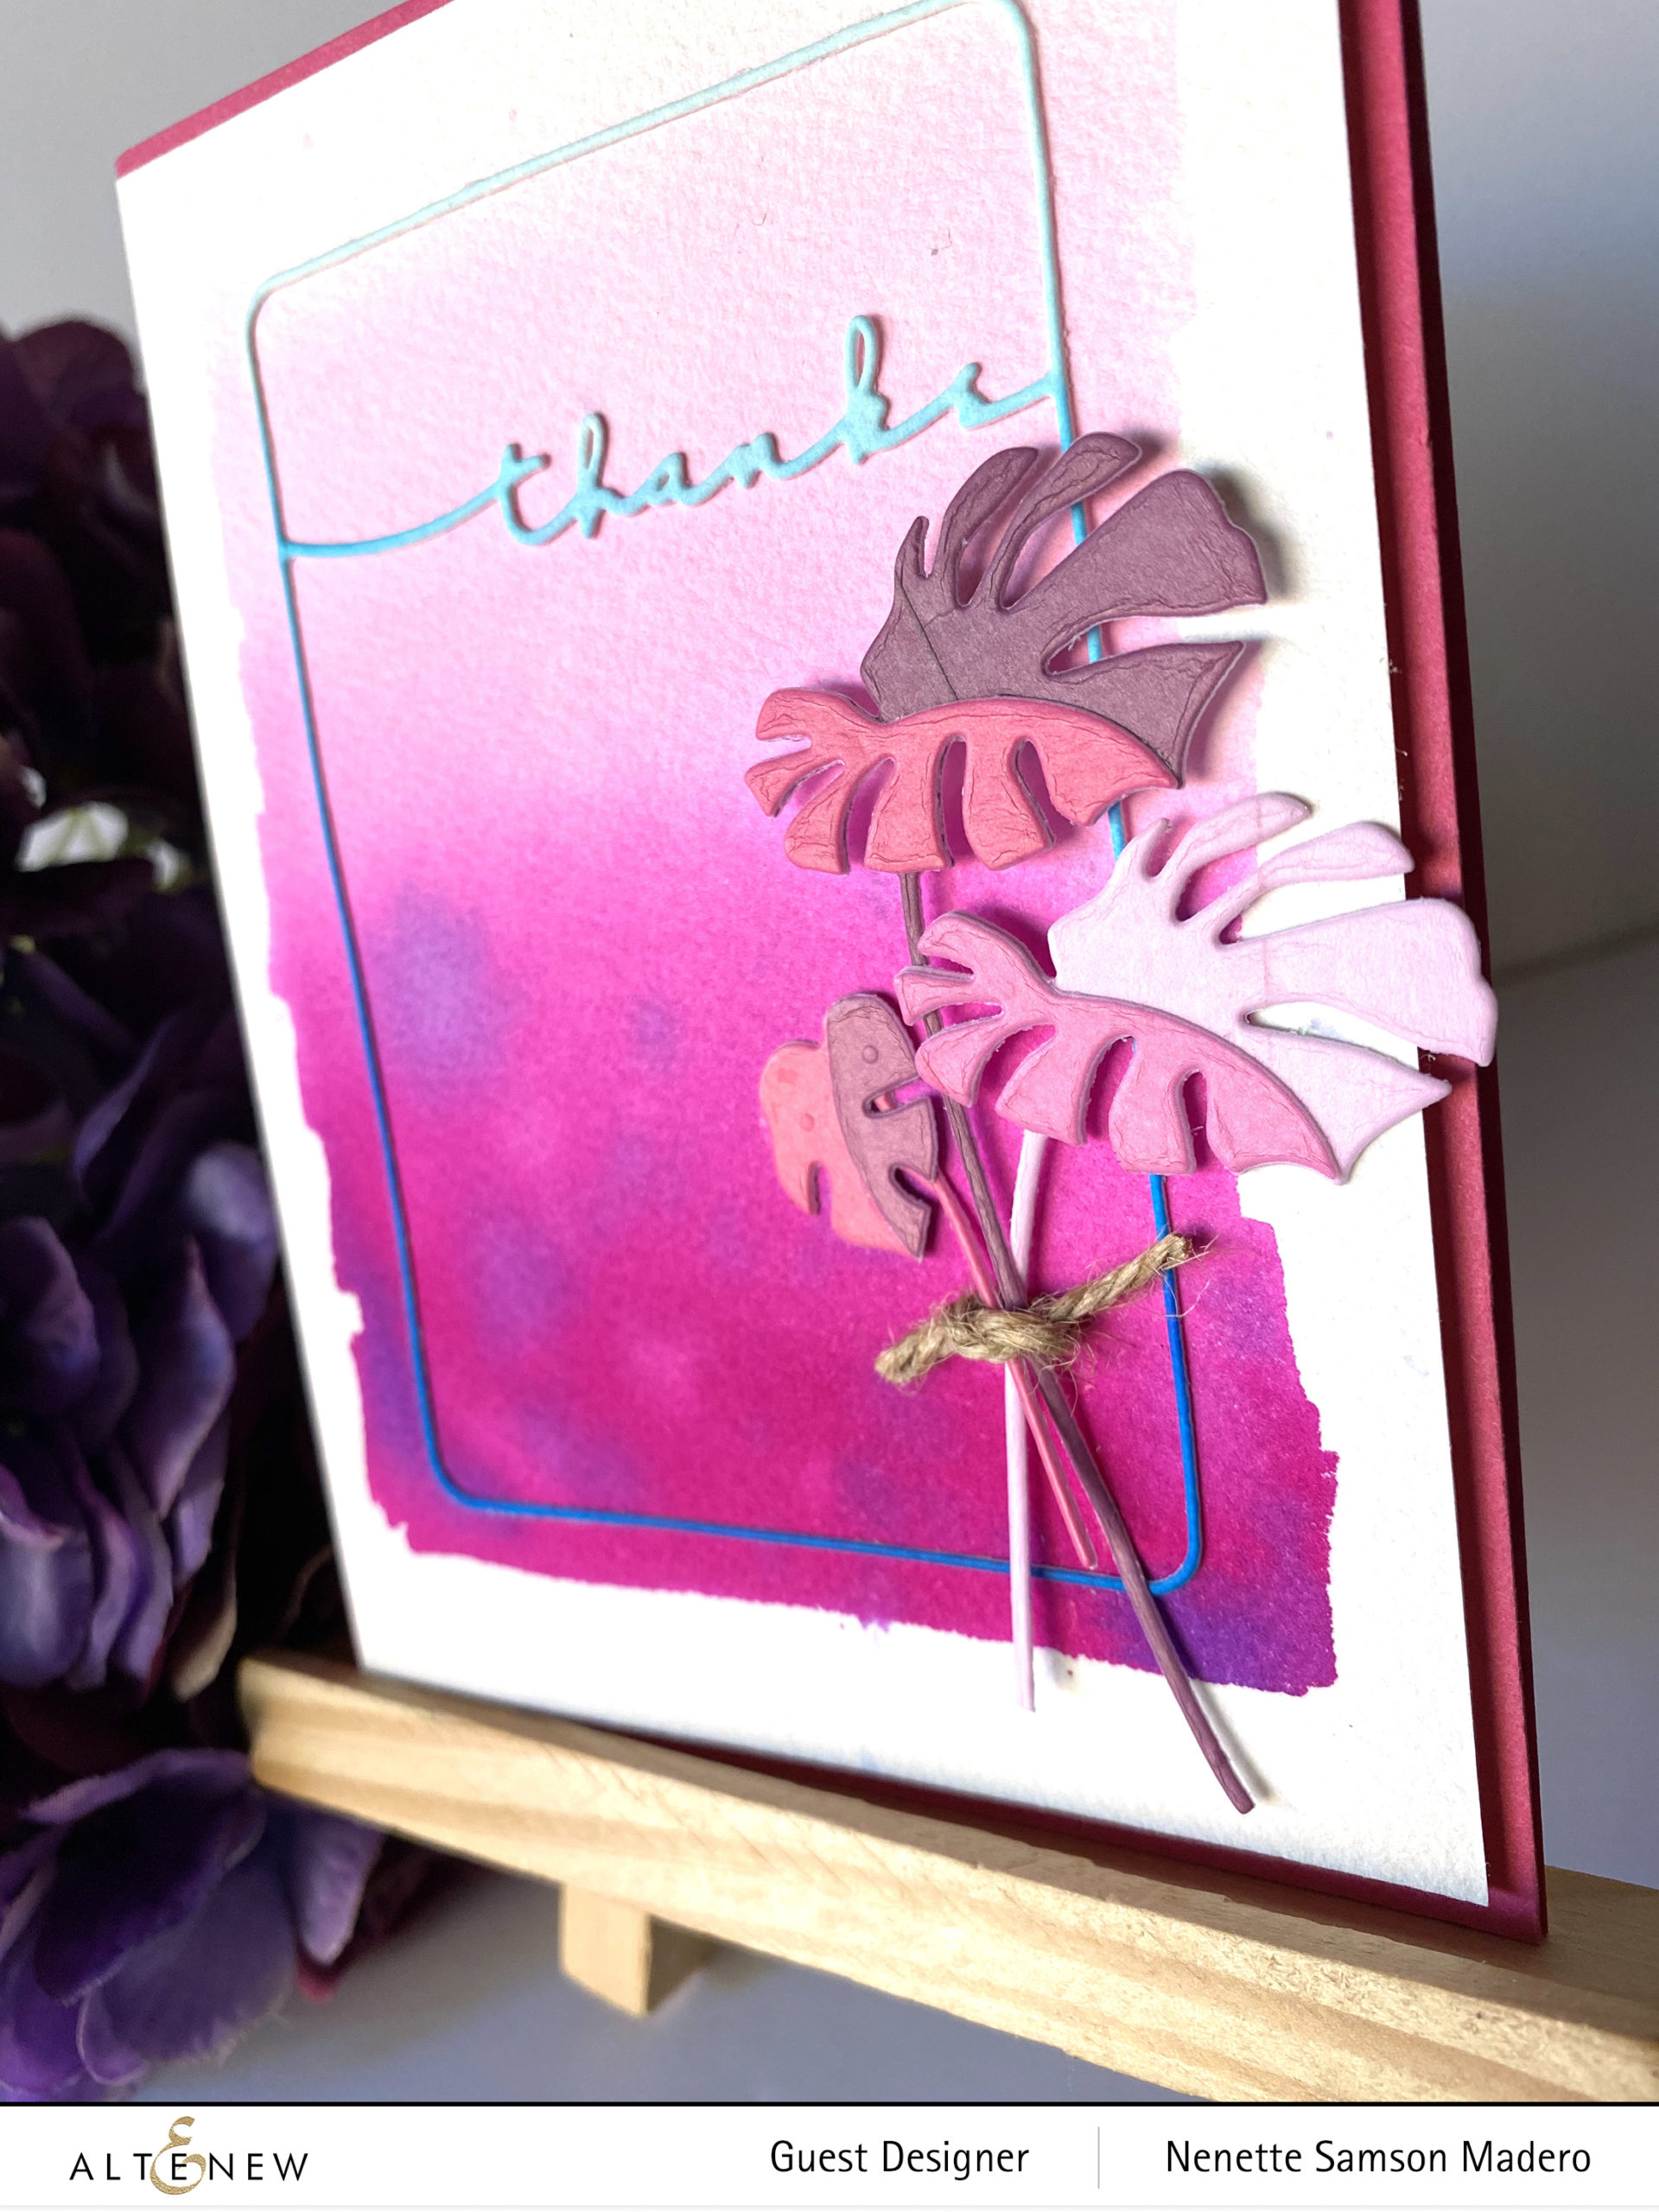
I love when you can make two different cards by switching some elements. These were very easy to make using the Monstera 3d die set. (I’m obsessed with them!!!) These cards were inspired by Norine Borys’ card using the same die. The different directions of the leaves make them fun to arrange in a vase or pot.

I adhered the different shades from the Rose Petal washi tapes onto Neenah Solar White cardstocks then I die cut the leaves. Two watercolor papers were painted–one using pinks and violets starting at the bottom with the most concentrated watercolor and slowly fading towards the top to create an ombre effect. The other was painted with blues and a touch of purple. The Framed Thanks die was used to cut out the image from the blue watercolored paper and adhered to the pink cardfront.

I cut another thanks die on plain white cardstock for the blue card and pieced in the negative parts of the die. The leaves where then arranged using jute string and the other with a pot. The Navy Gold trim washi tape was used to add accent to the pot.


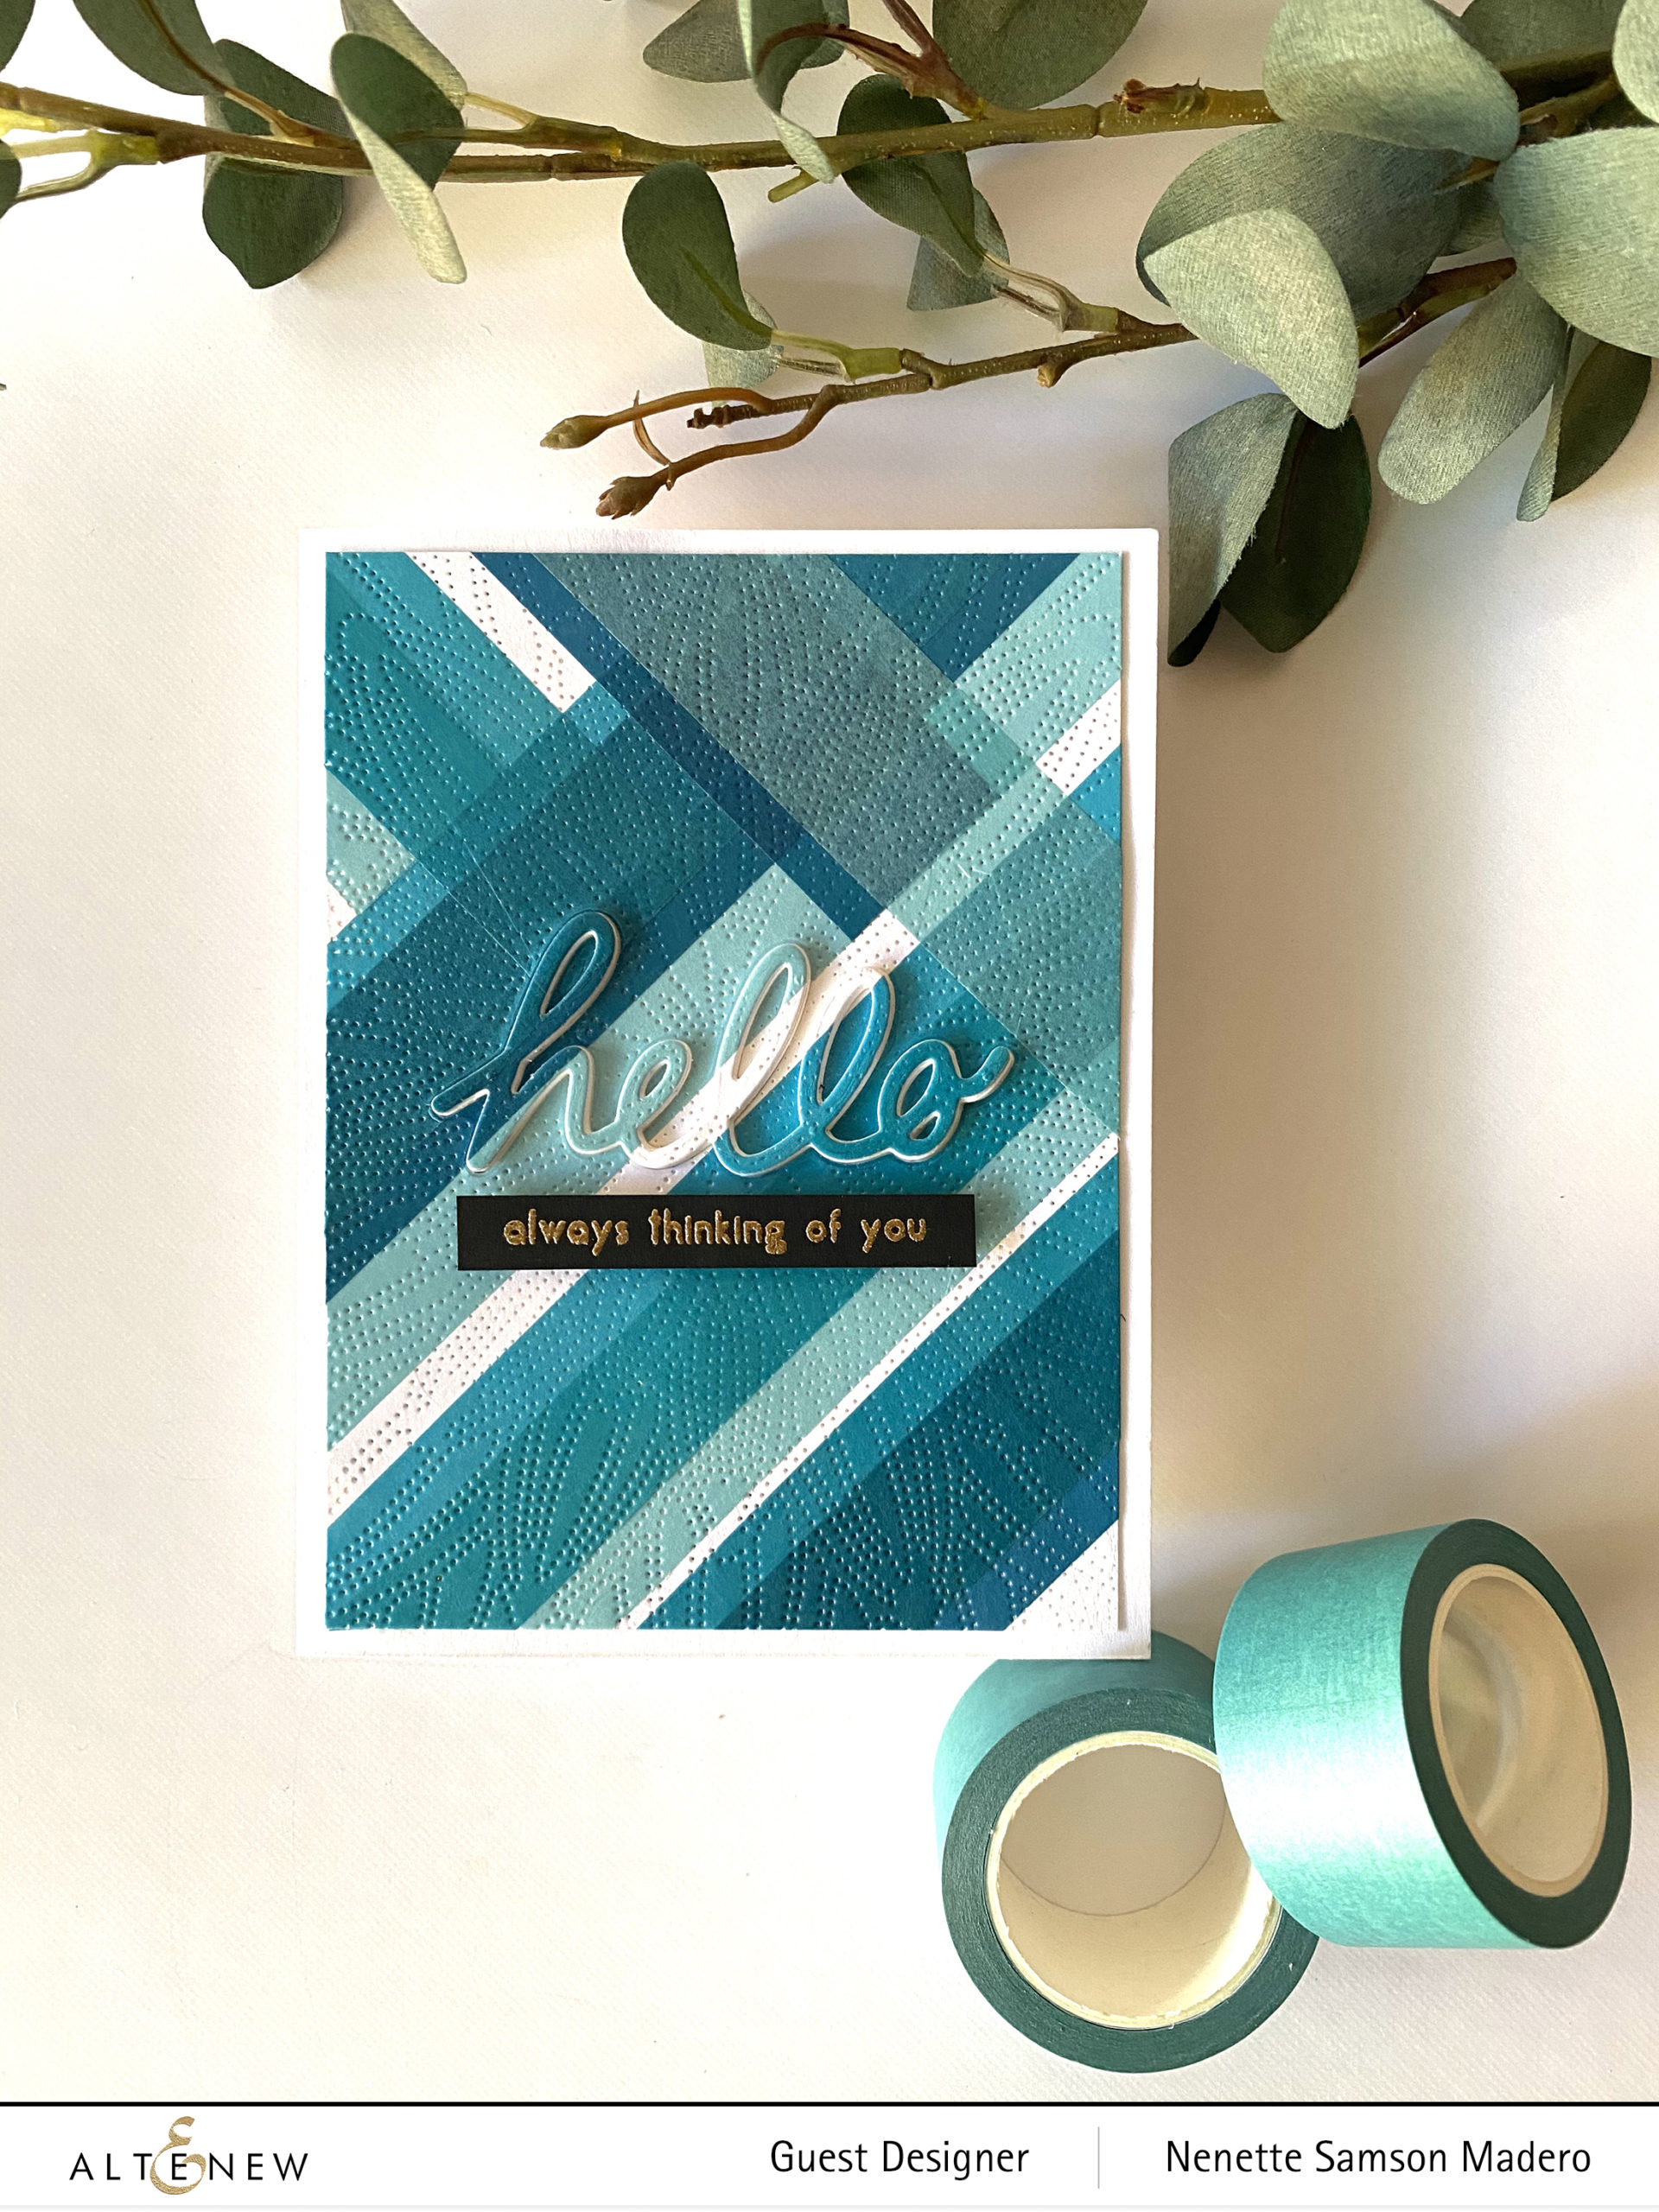
HELLO ALWAYS THINKING OF YOU


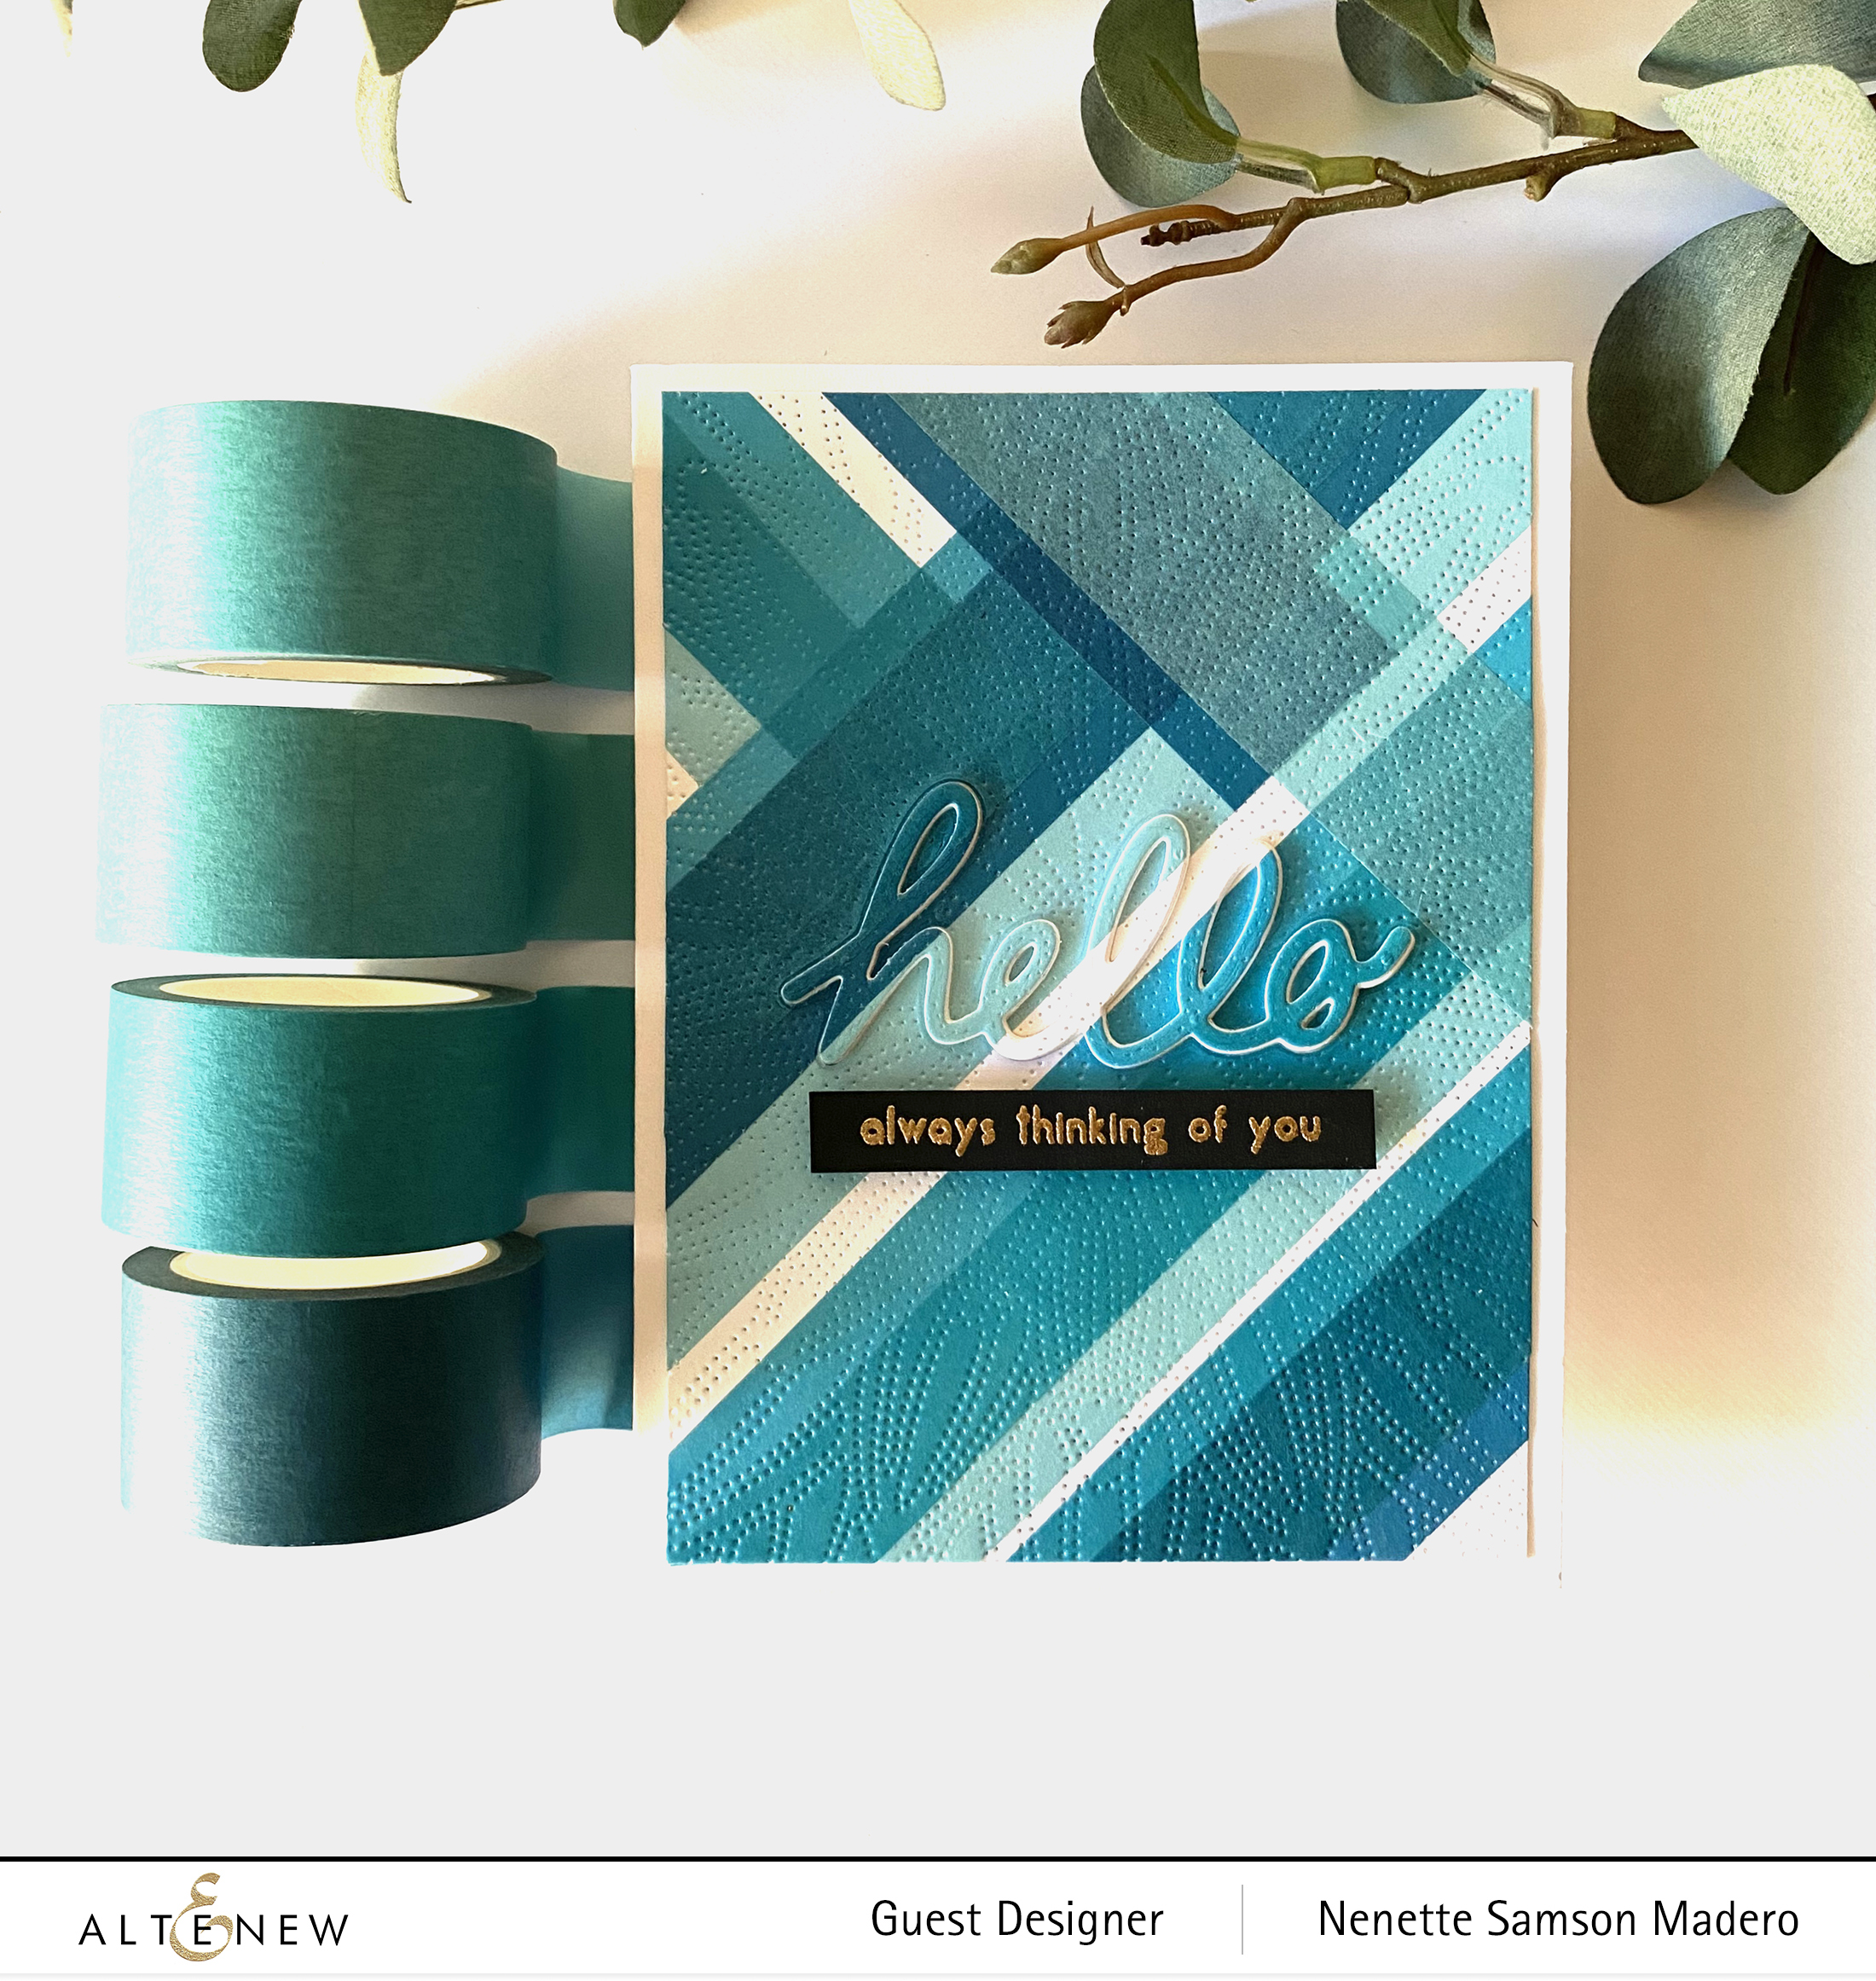
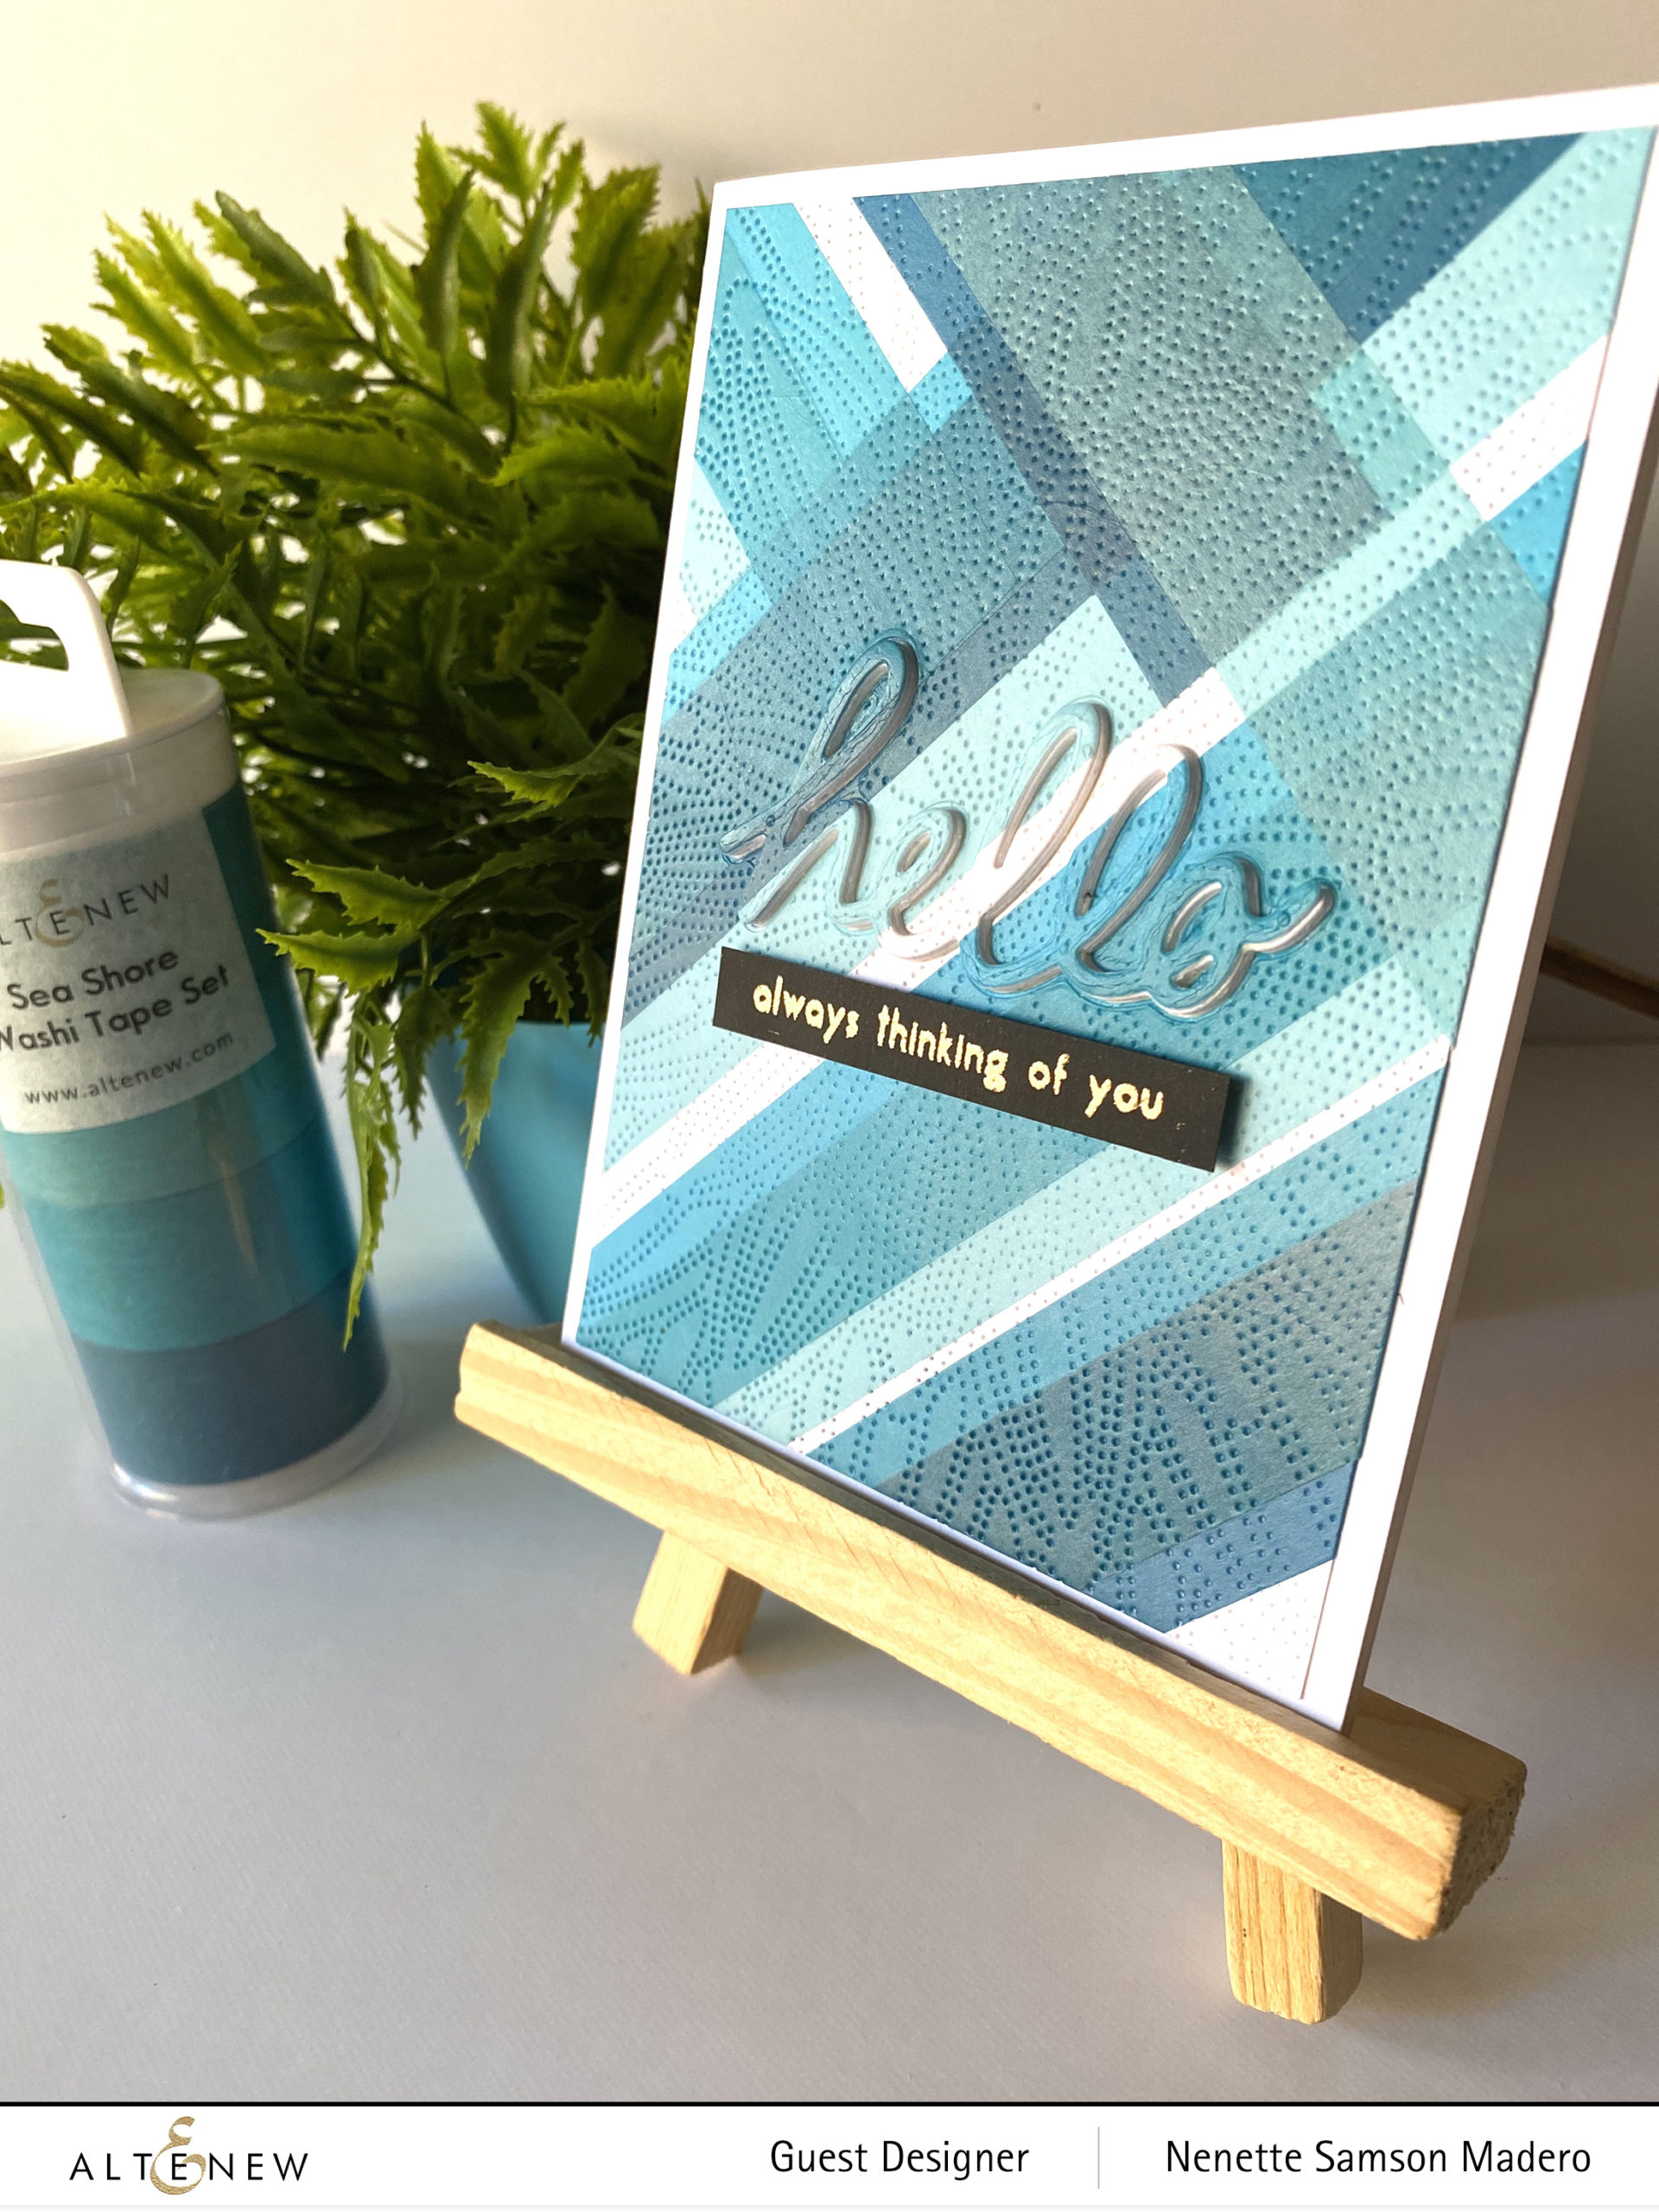
Here’s a simple card to make by using washi tapes and dies. I created a geometric background using the different shades of the Sea Shore Washi Tape. I made sure to leave some white paper showing through. I then used the Dotted Starburst debossing cover die and debossed the whole panel.

I love the subtle texture it gives on card fronts. ❤️ Notice that when you layer the washi tapes since they are translucent, you get more shades of blue when they’re taped on top of each other. The Handwritten Hello die was used to cut the word right at the center of the front panel. An additional 4 layers were cut and adhered together to add dimension. The sentiment was stamped using Rose Gold Embossing Powder on black cardstock.


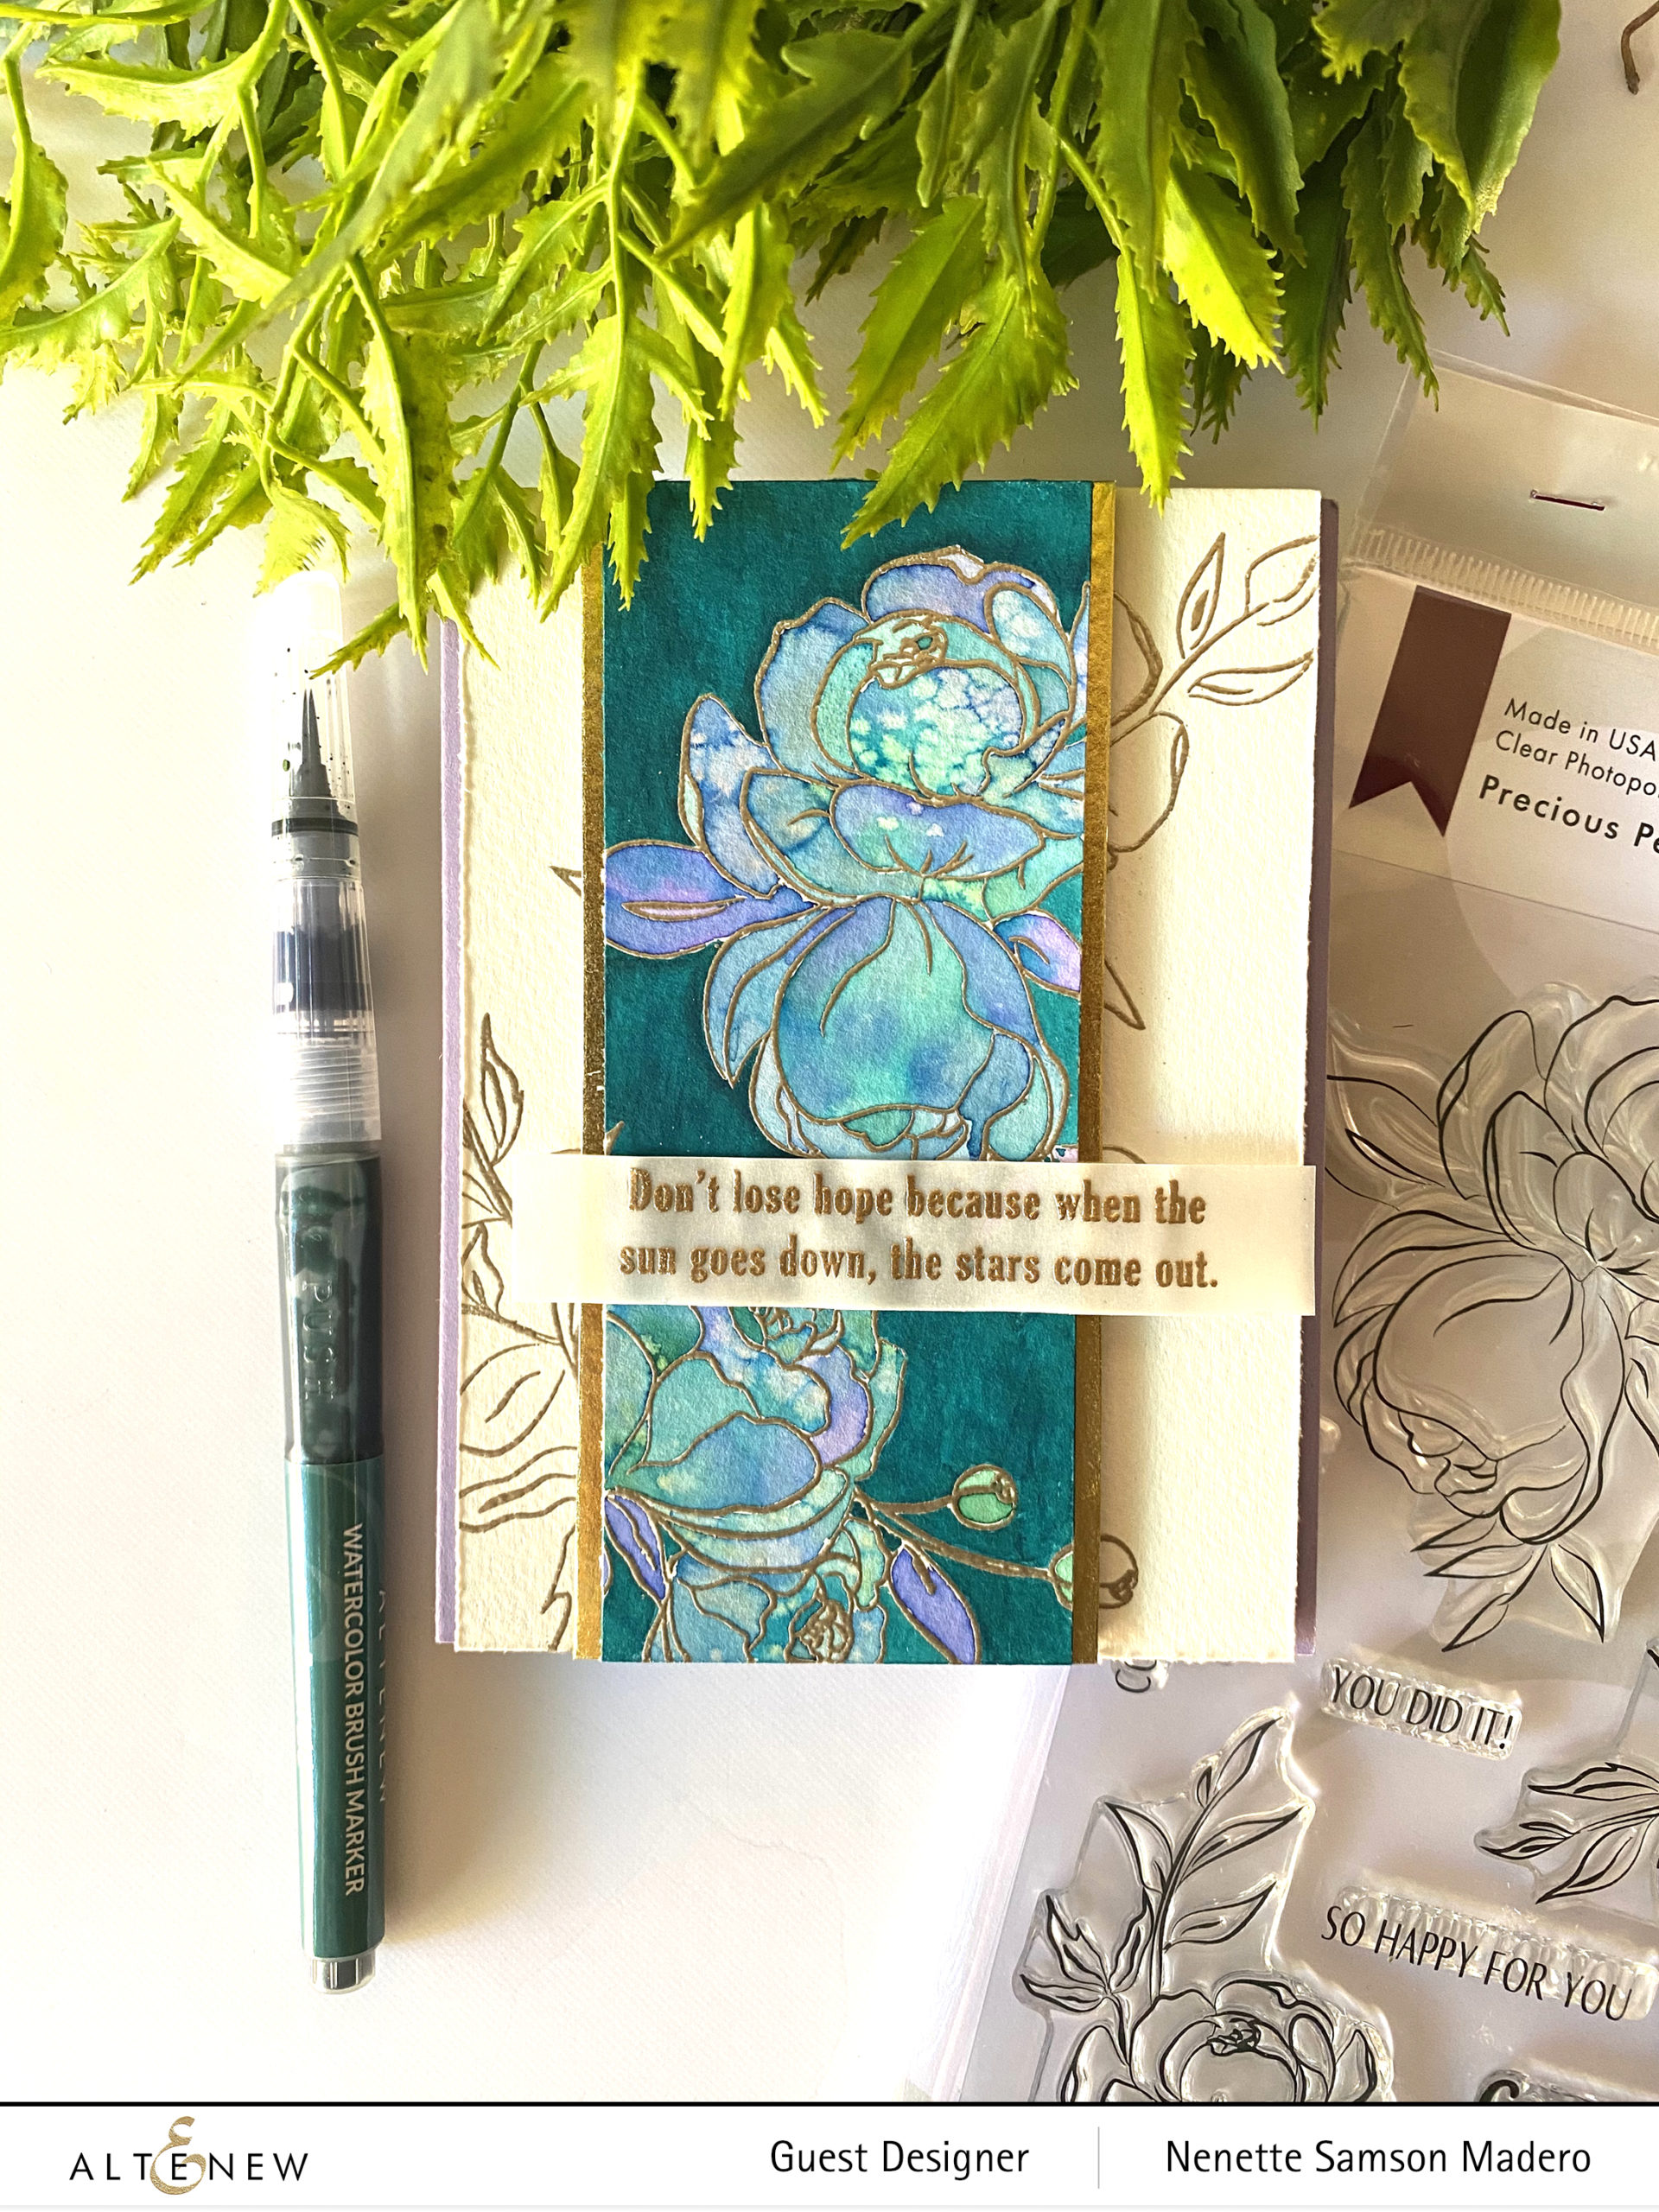
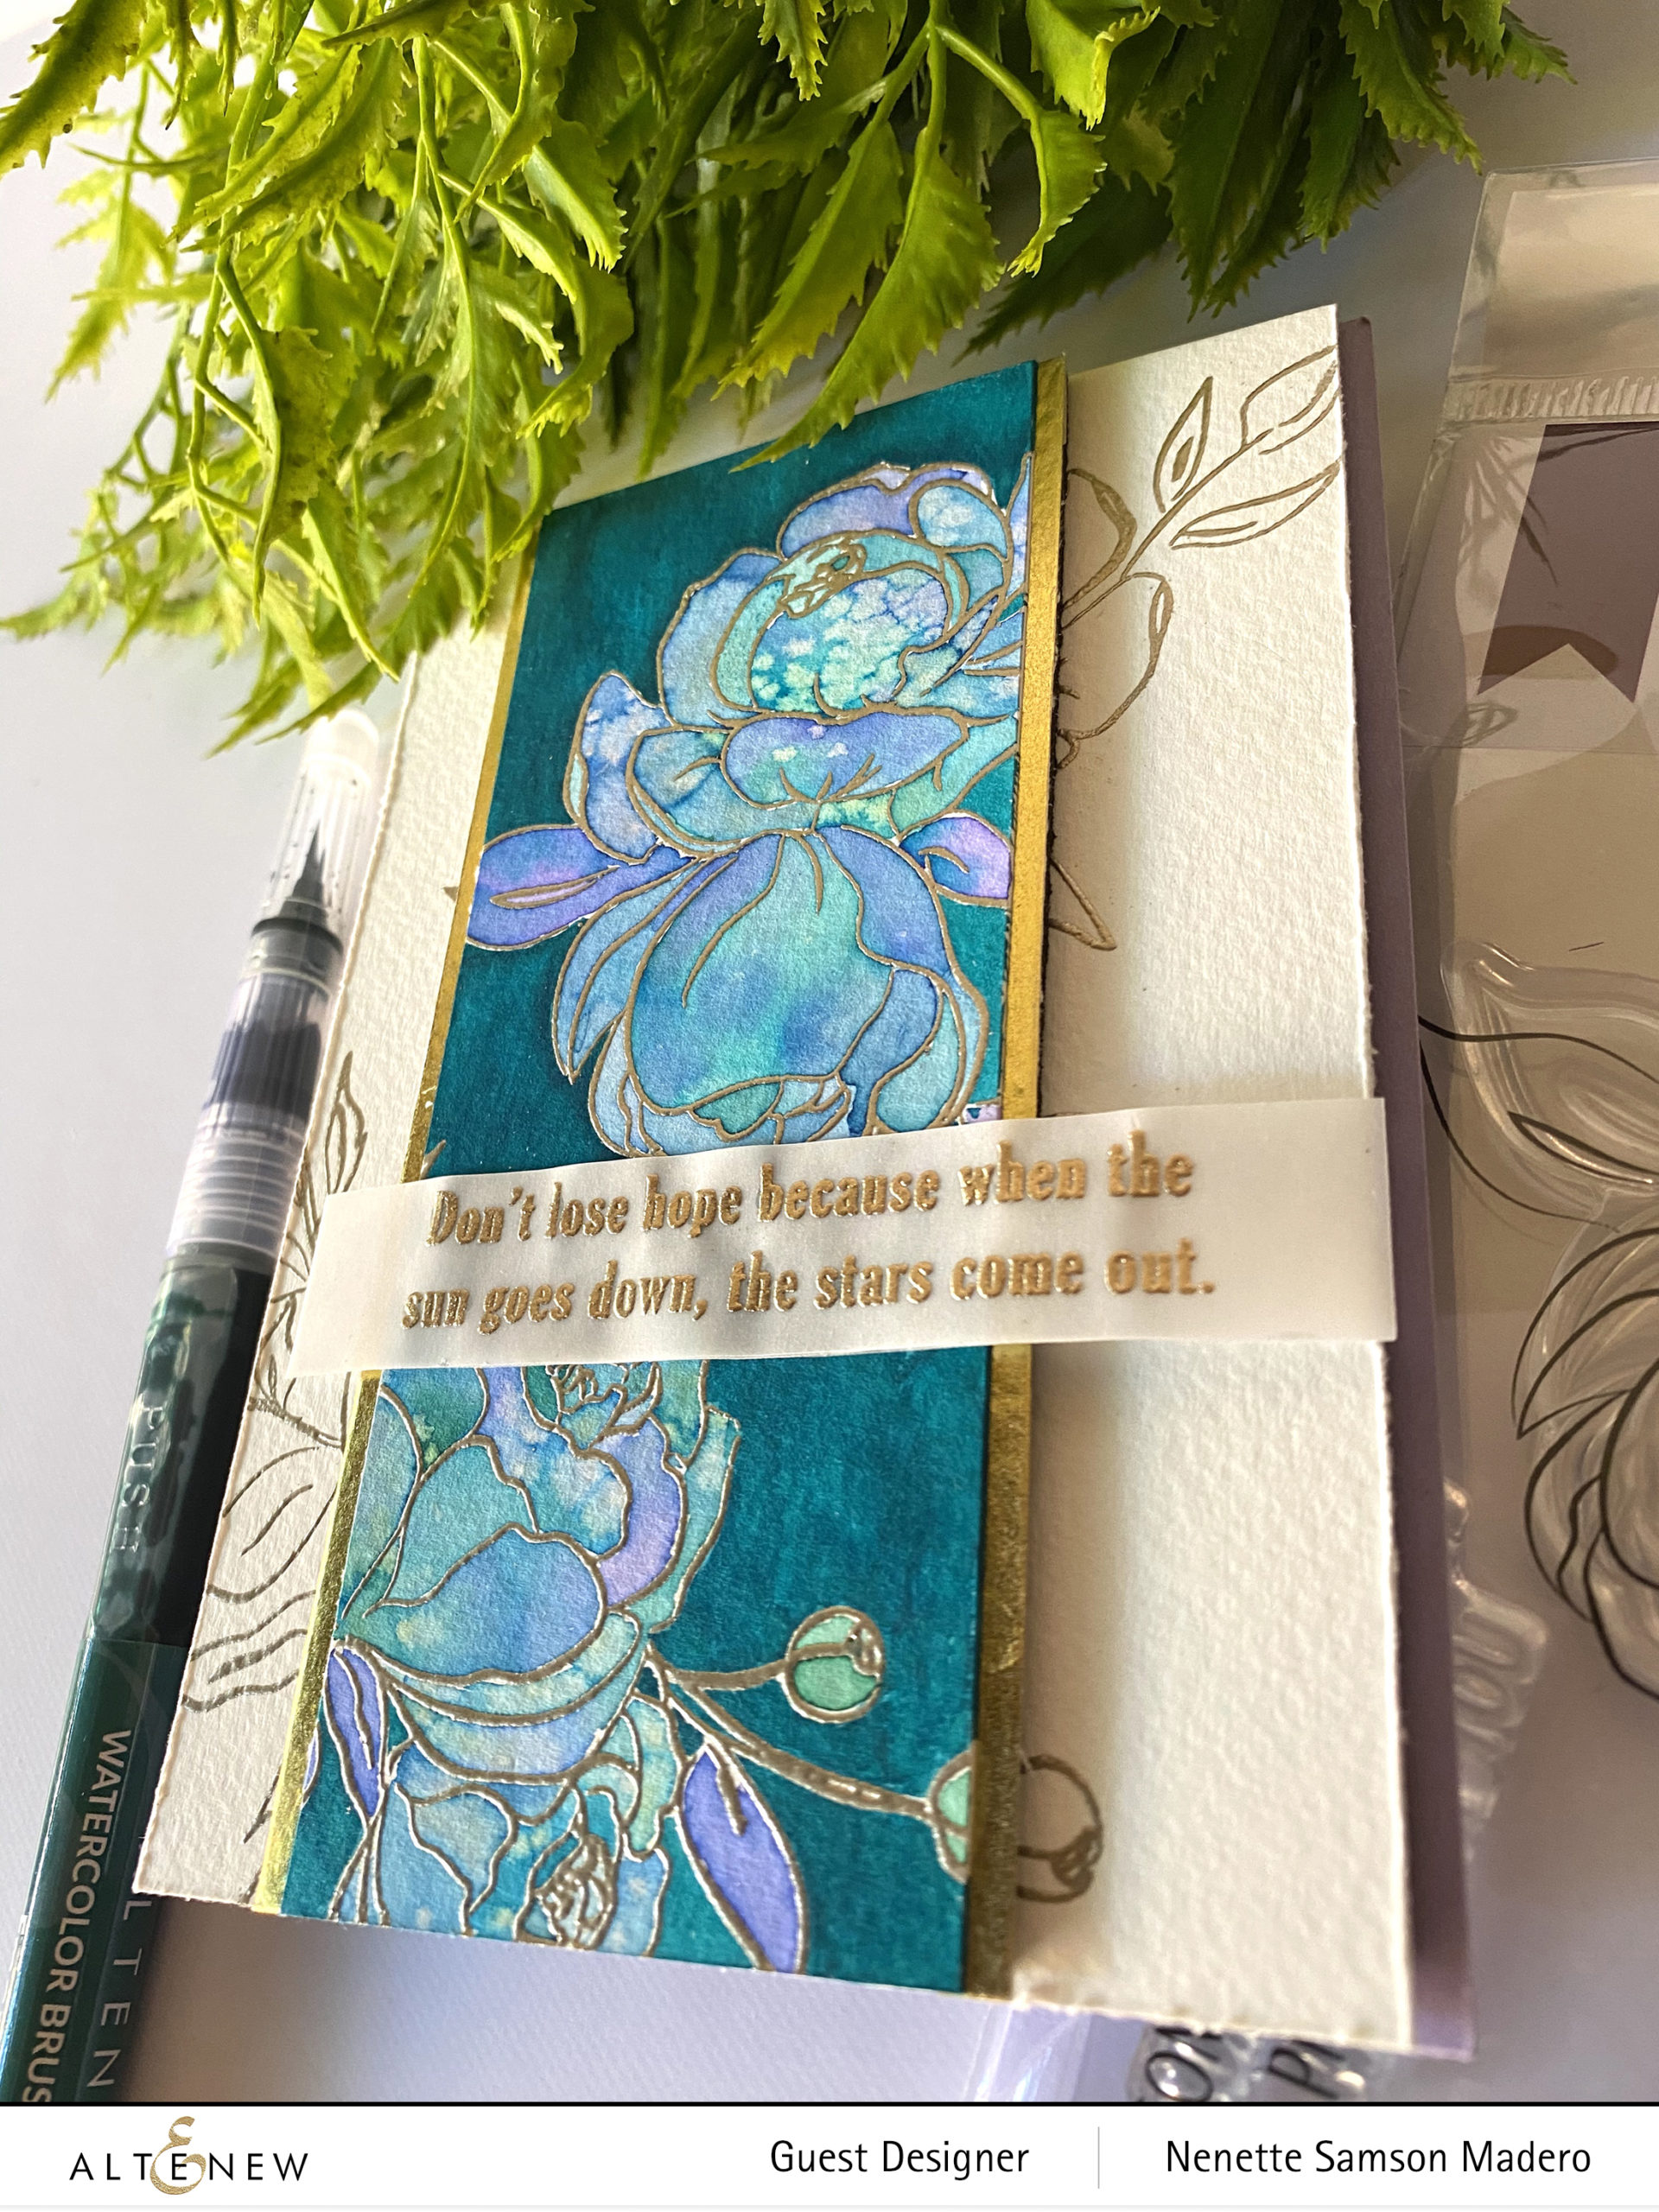
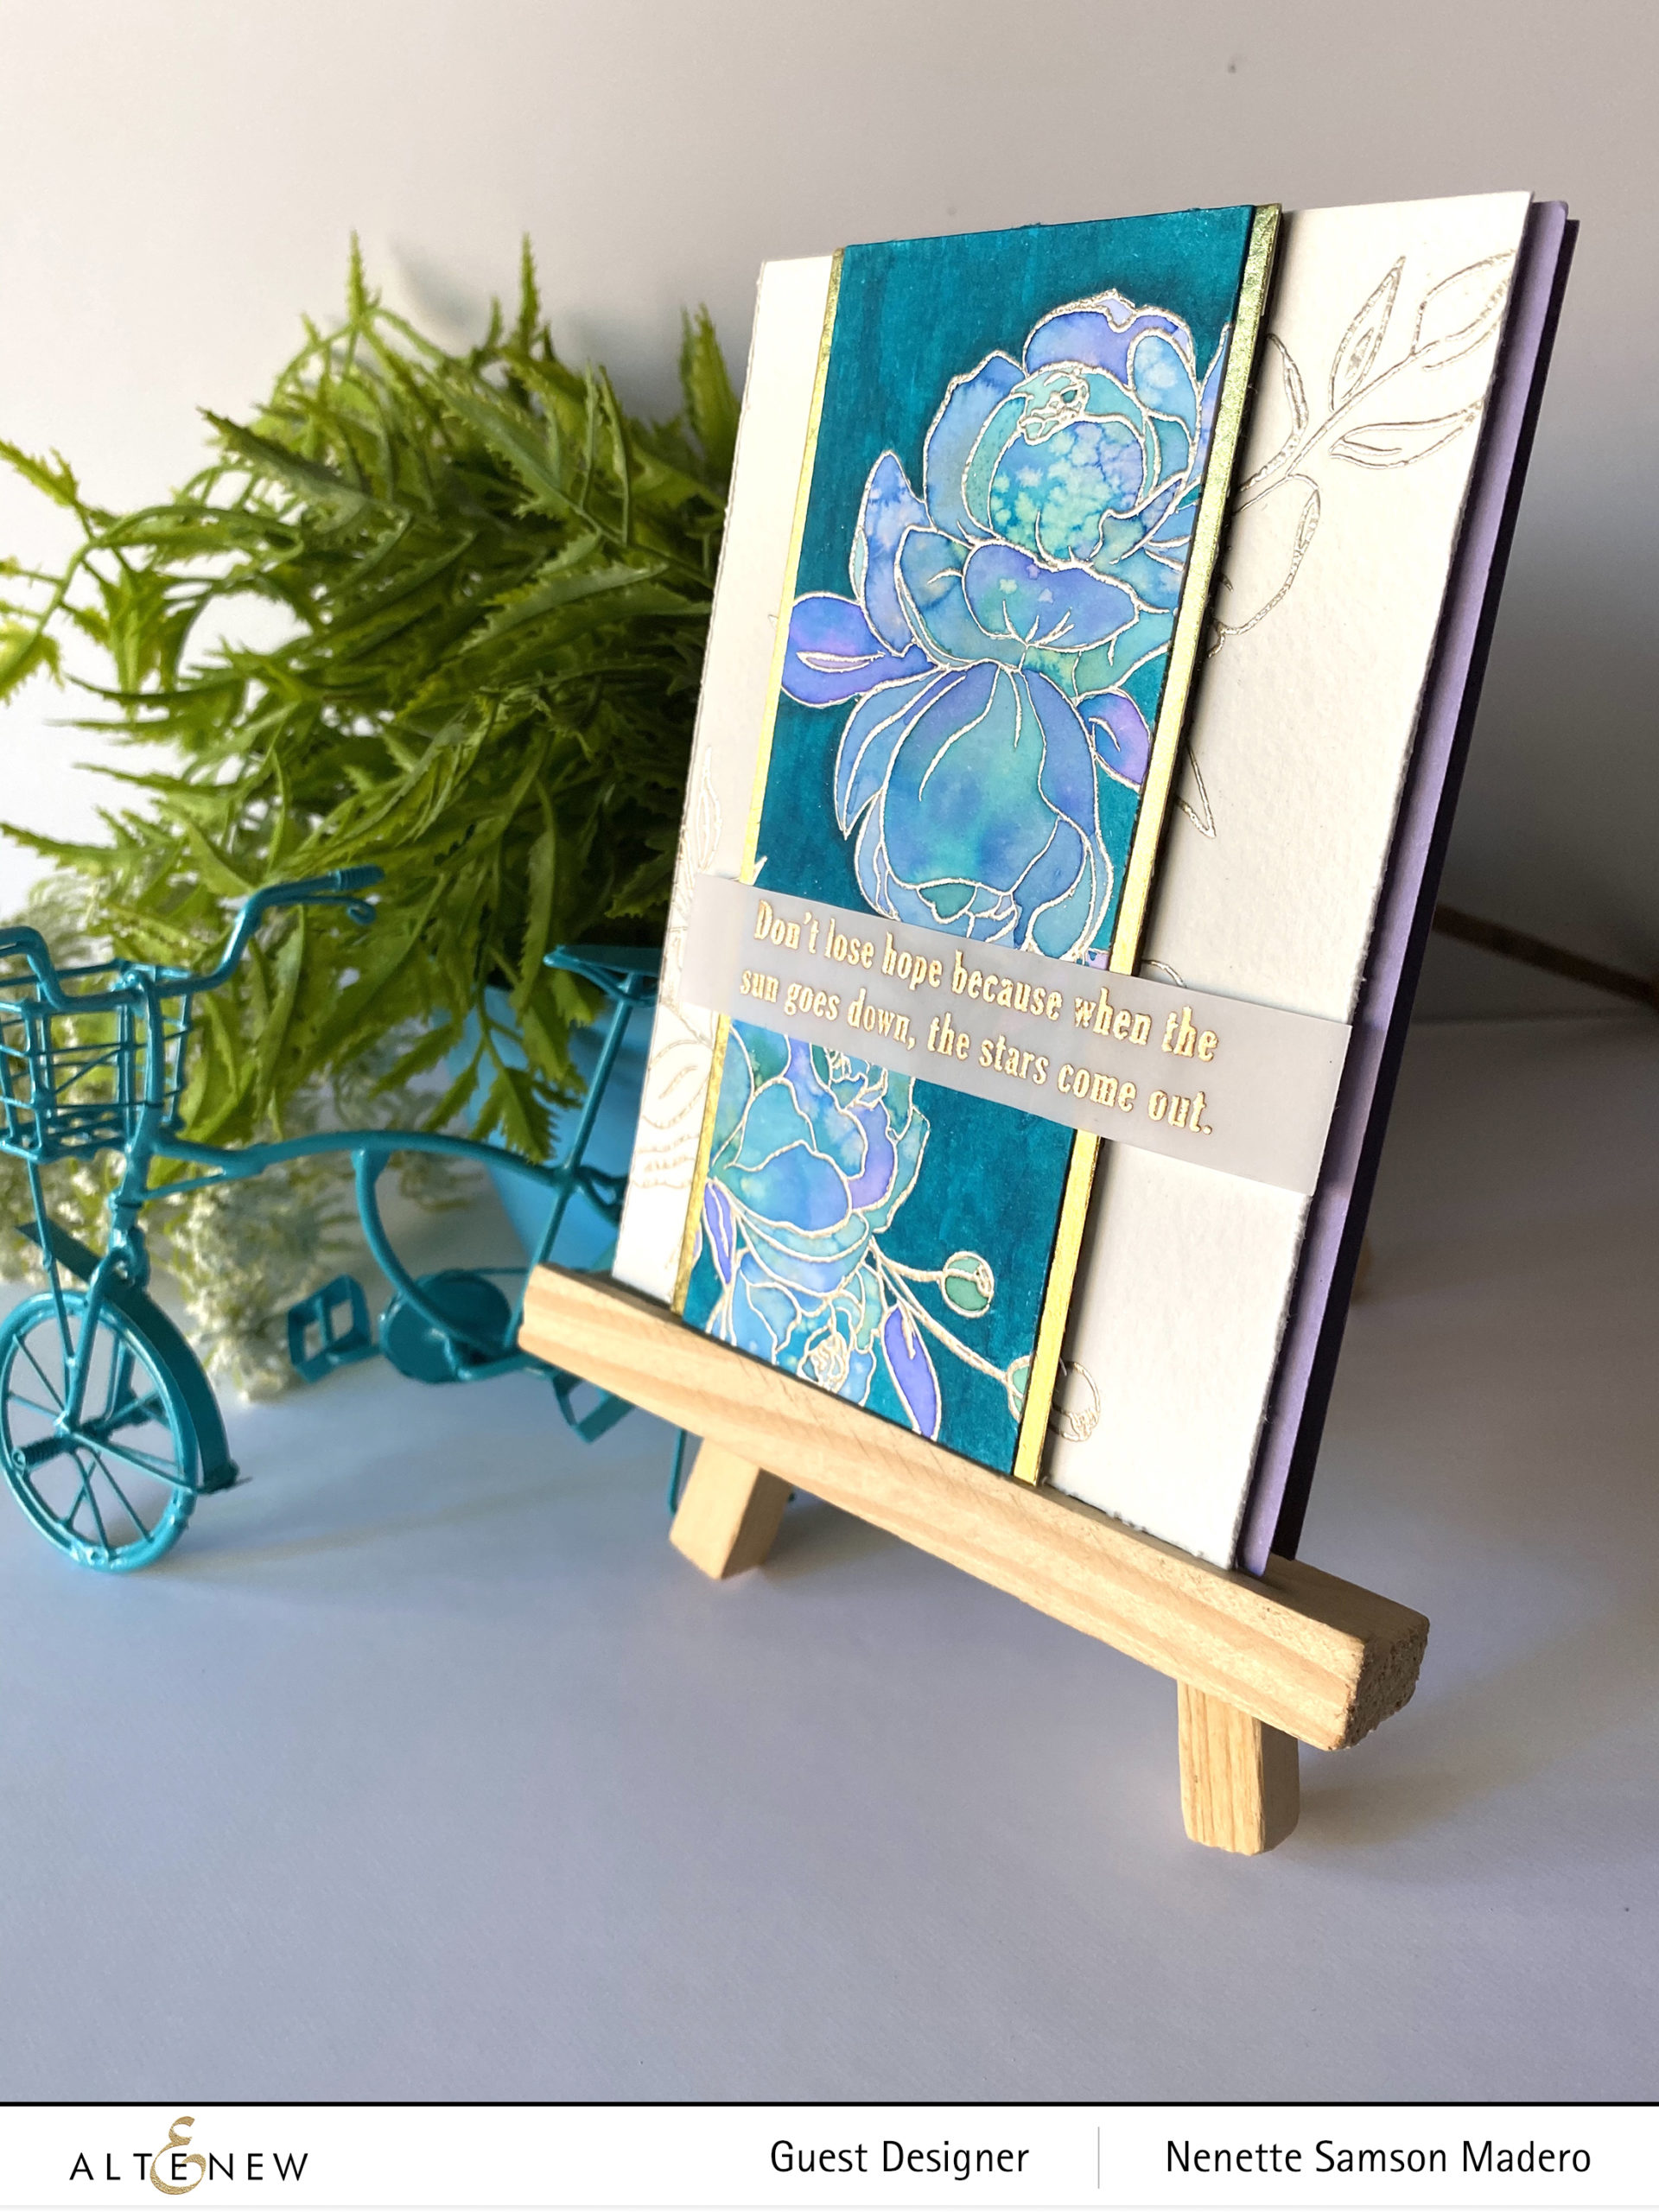
DON’T LOSE HOPE BECAUSE WHEN THE SUN GOES DOWN, THE STARS COME OUT

This card is so timely. The message gives us hope that things will get better. For this card, I stamped the floral images from the Precious Peony stamp set on watercolor cardstock and again on Neenah solar white cardstock without moving the stamp images. Both images were embossed using the Platinum Crisp Embossing Powder . Next, 1 inch was trimmed off on each side of the watercolored paper. The central part was then colored using the Altenew brush watercolor markers. While the flowers were still wet, I sprinkled some salt to create some pattern on the flowers. The background was colored using the Lagoon watercolor brush marker. I just love this color!

This panel was layered on top of a cardstock lined with the Gold foil .2 inch washi tape for contrast. Foam tape was mounted behind this painted panel then adhered on top of the embossed image making sure to line up the petals and leaves. This was then attached to a purple side folding card. The sentiment from the Kind Words stamp was stamped on vellum using Versa Mark embossing ink then embossed with Rose Gold embossing powder. I added 2 more layers of vellum to make the sentiment a little sturdy.


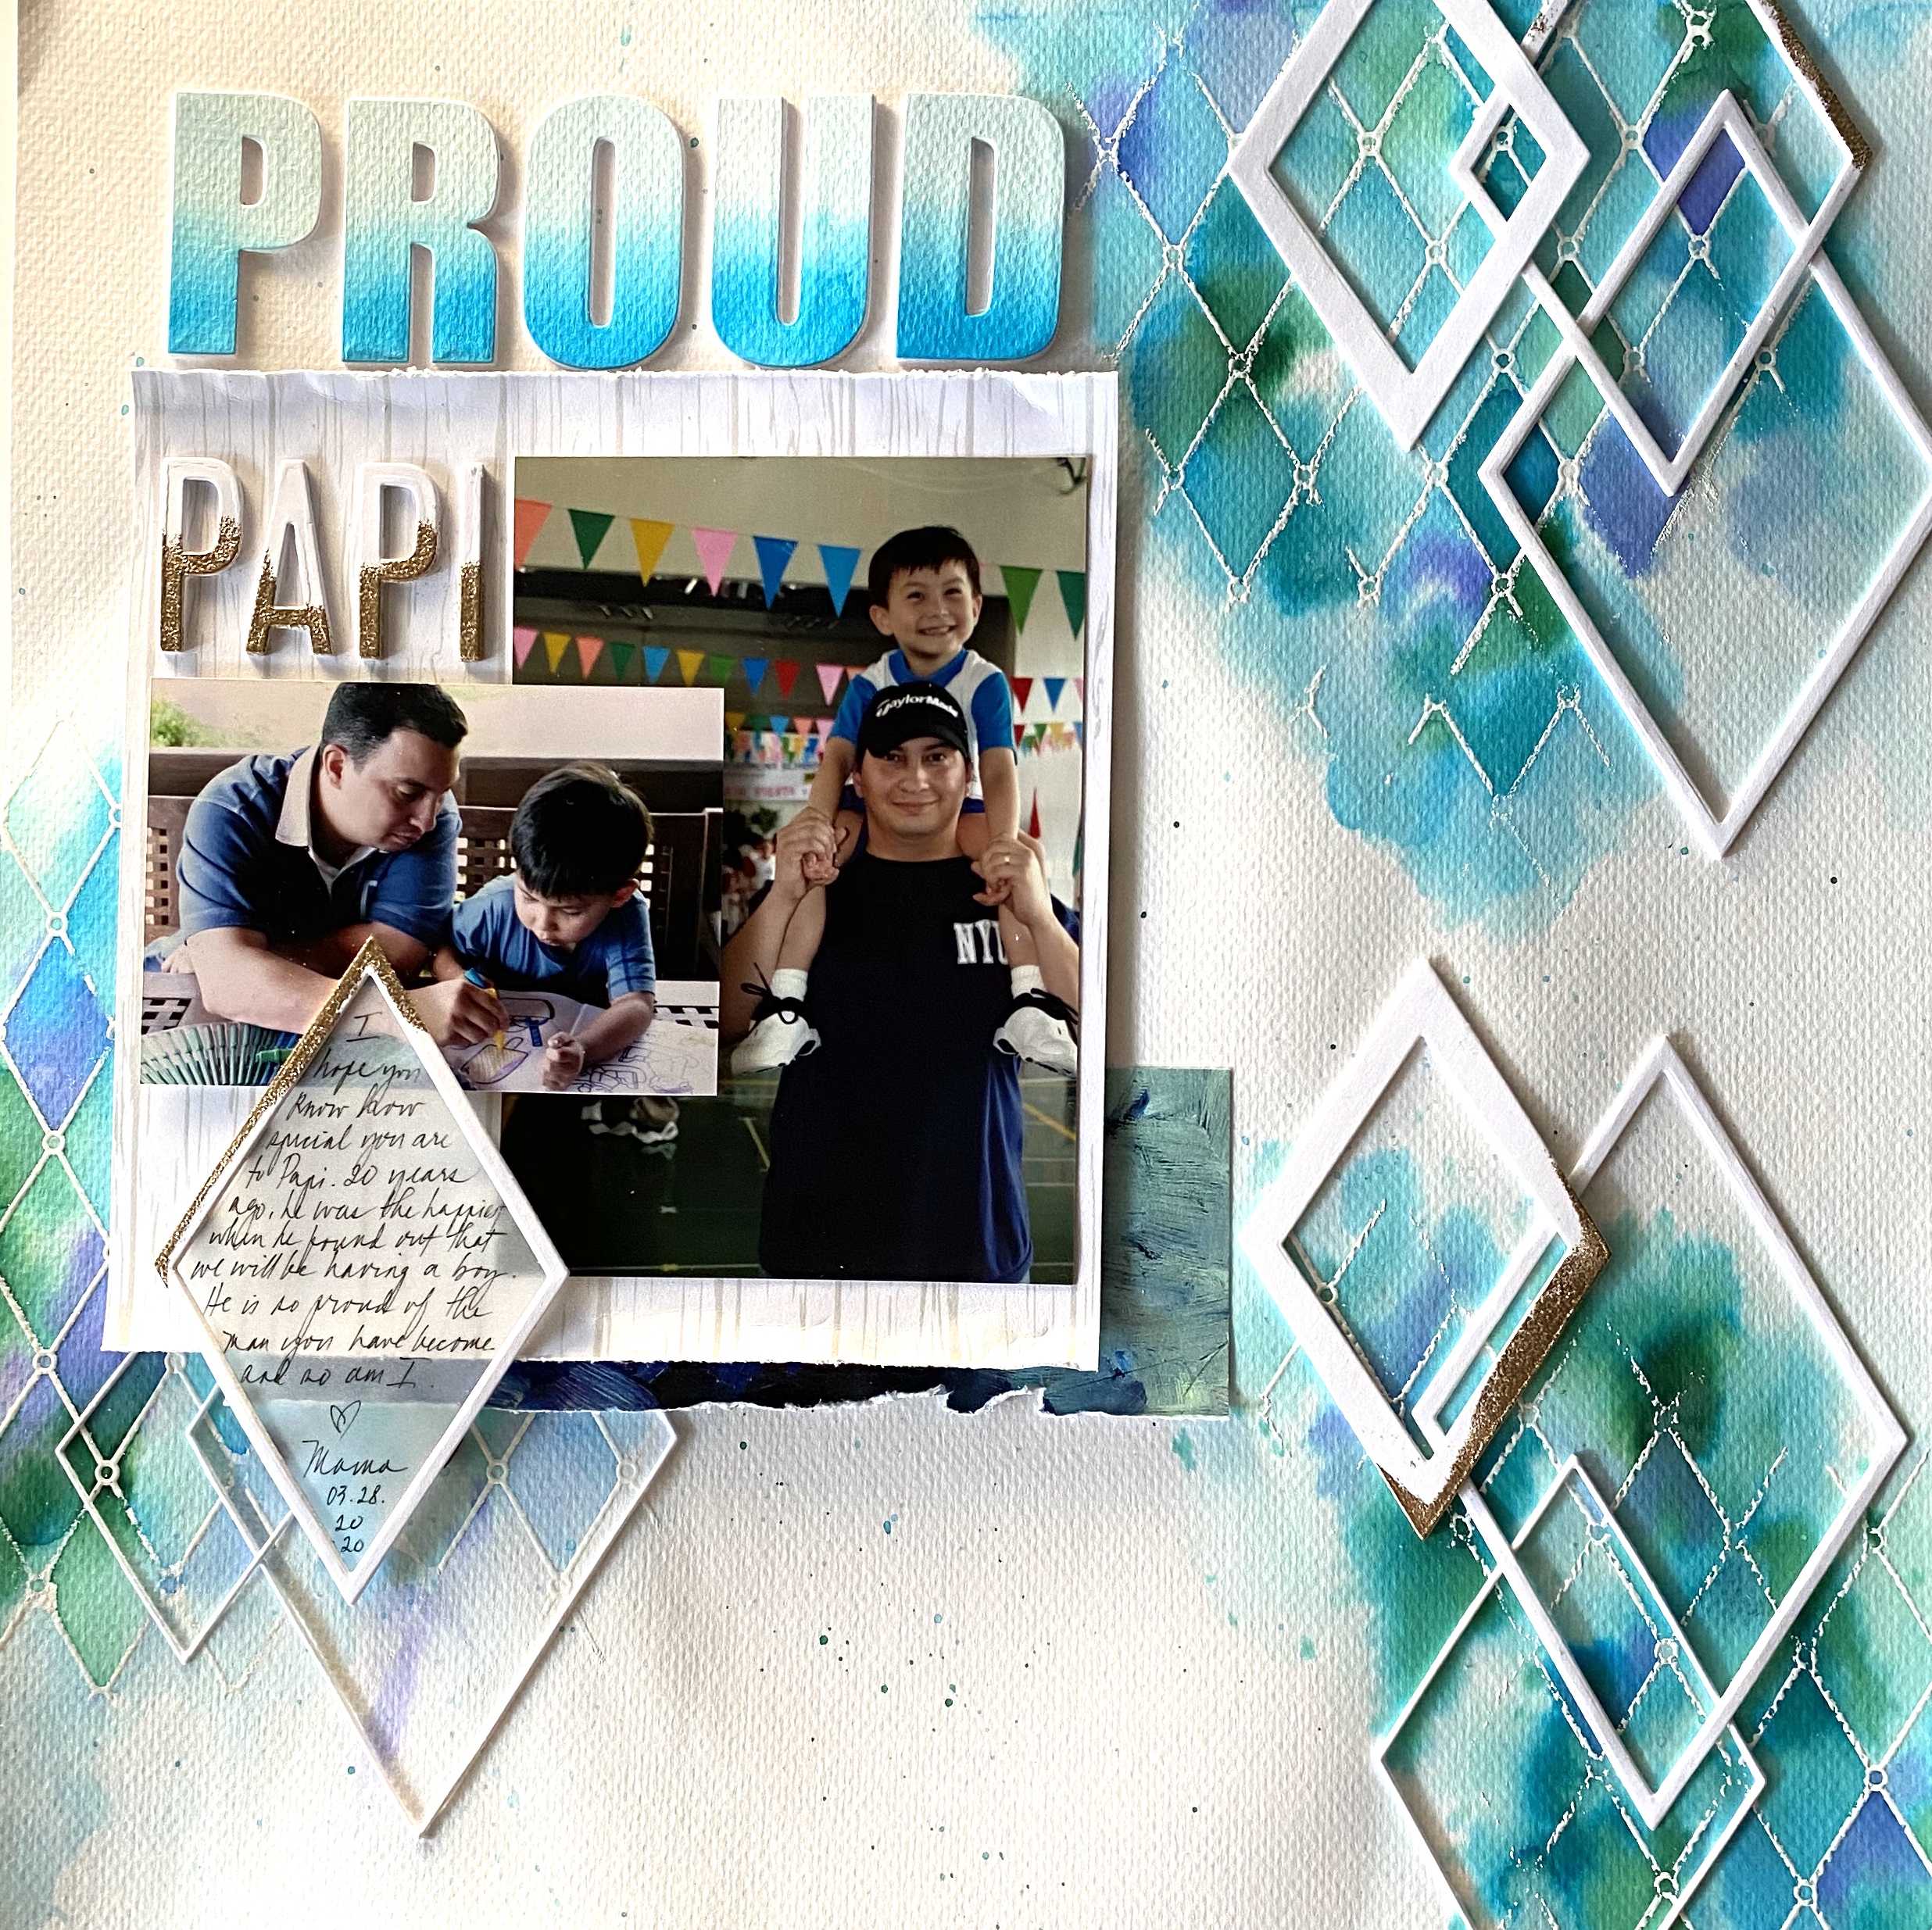
PROUD PAPI


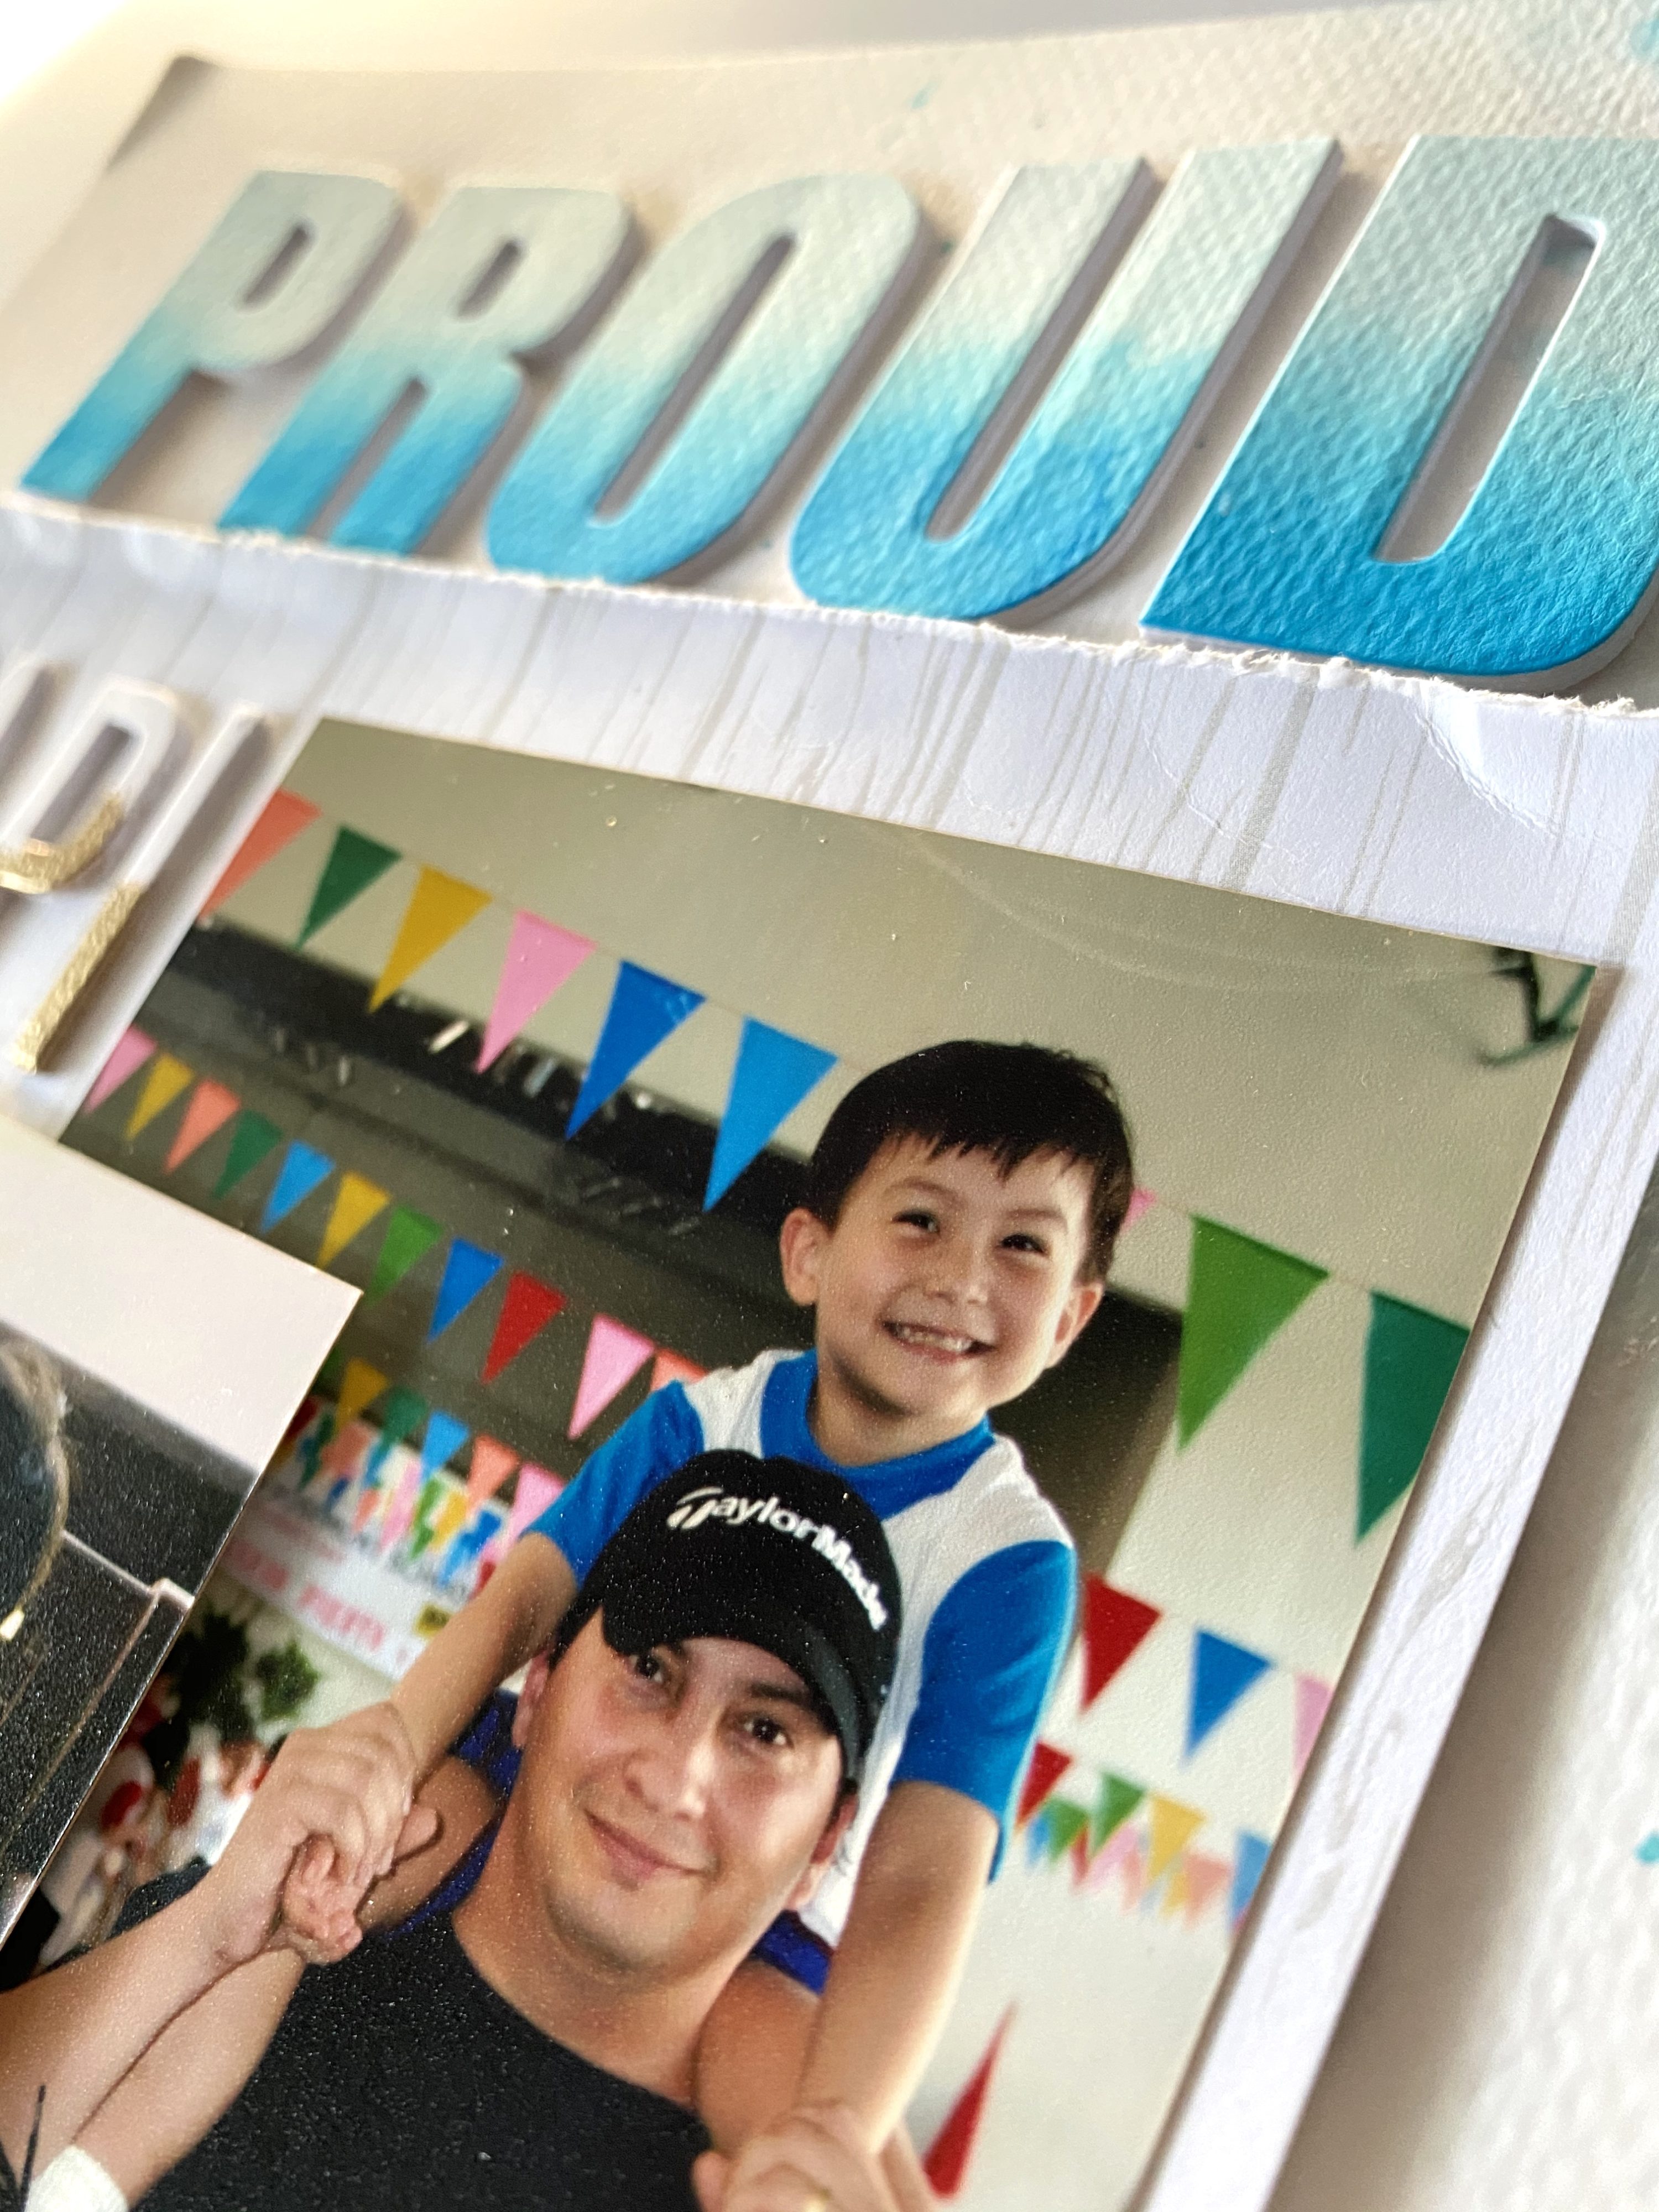
I don’t think I’ve ever created a layout WITHOUT flowers until today. I found these photos of my husband and son tucked away in a drawer and wanted to create a simple masculine layout. Before I did anything, I visualized the layout to have 3 areas of stamped images, color and embellishments.

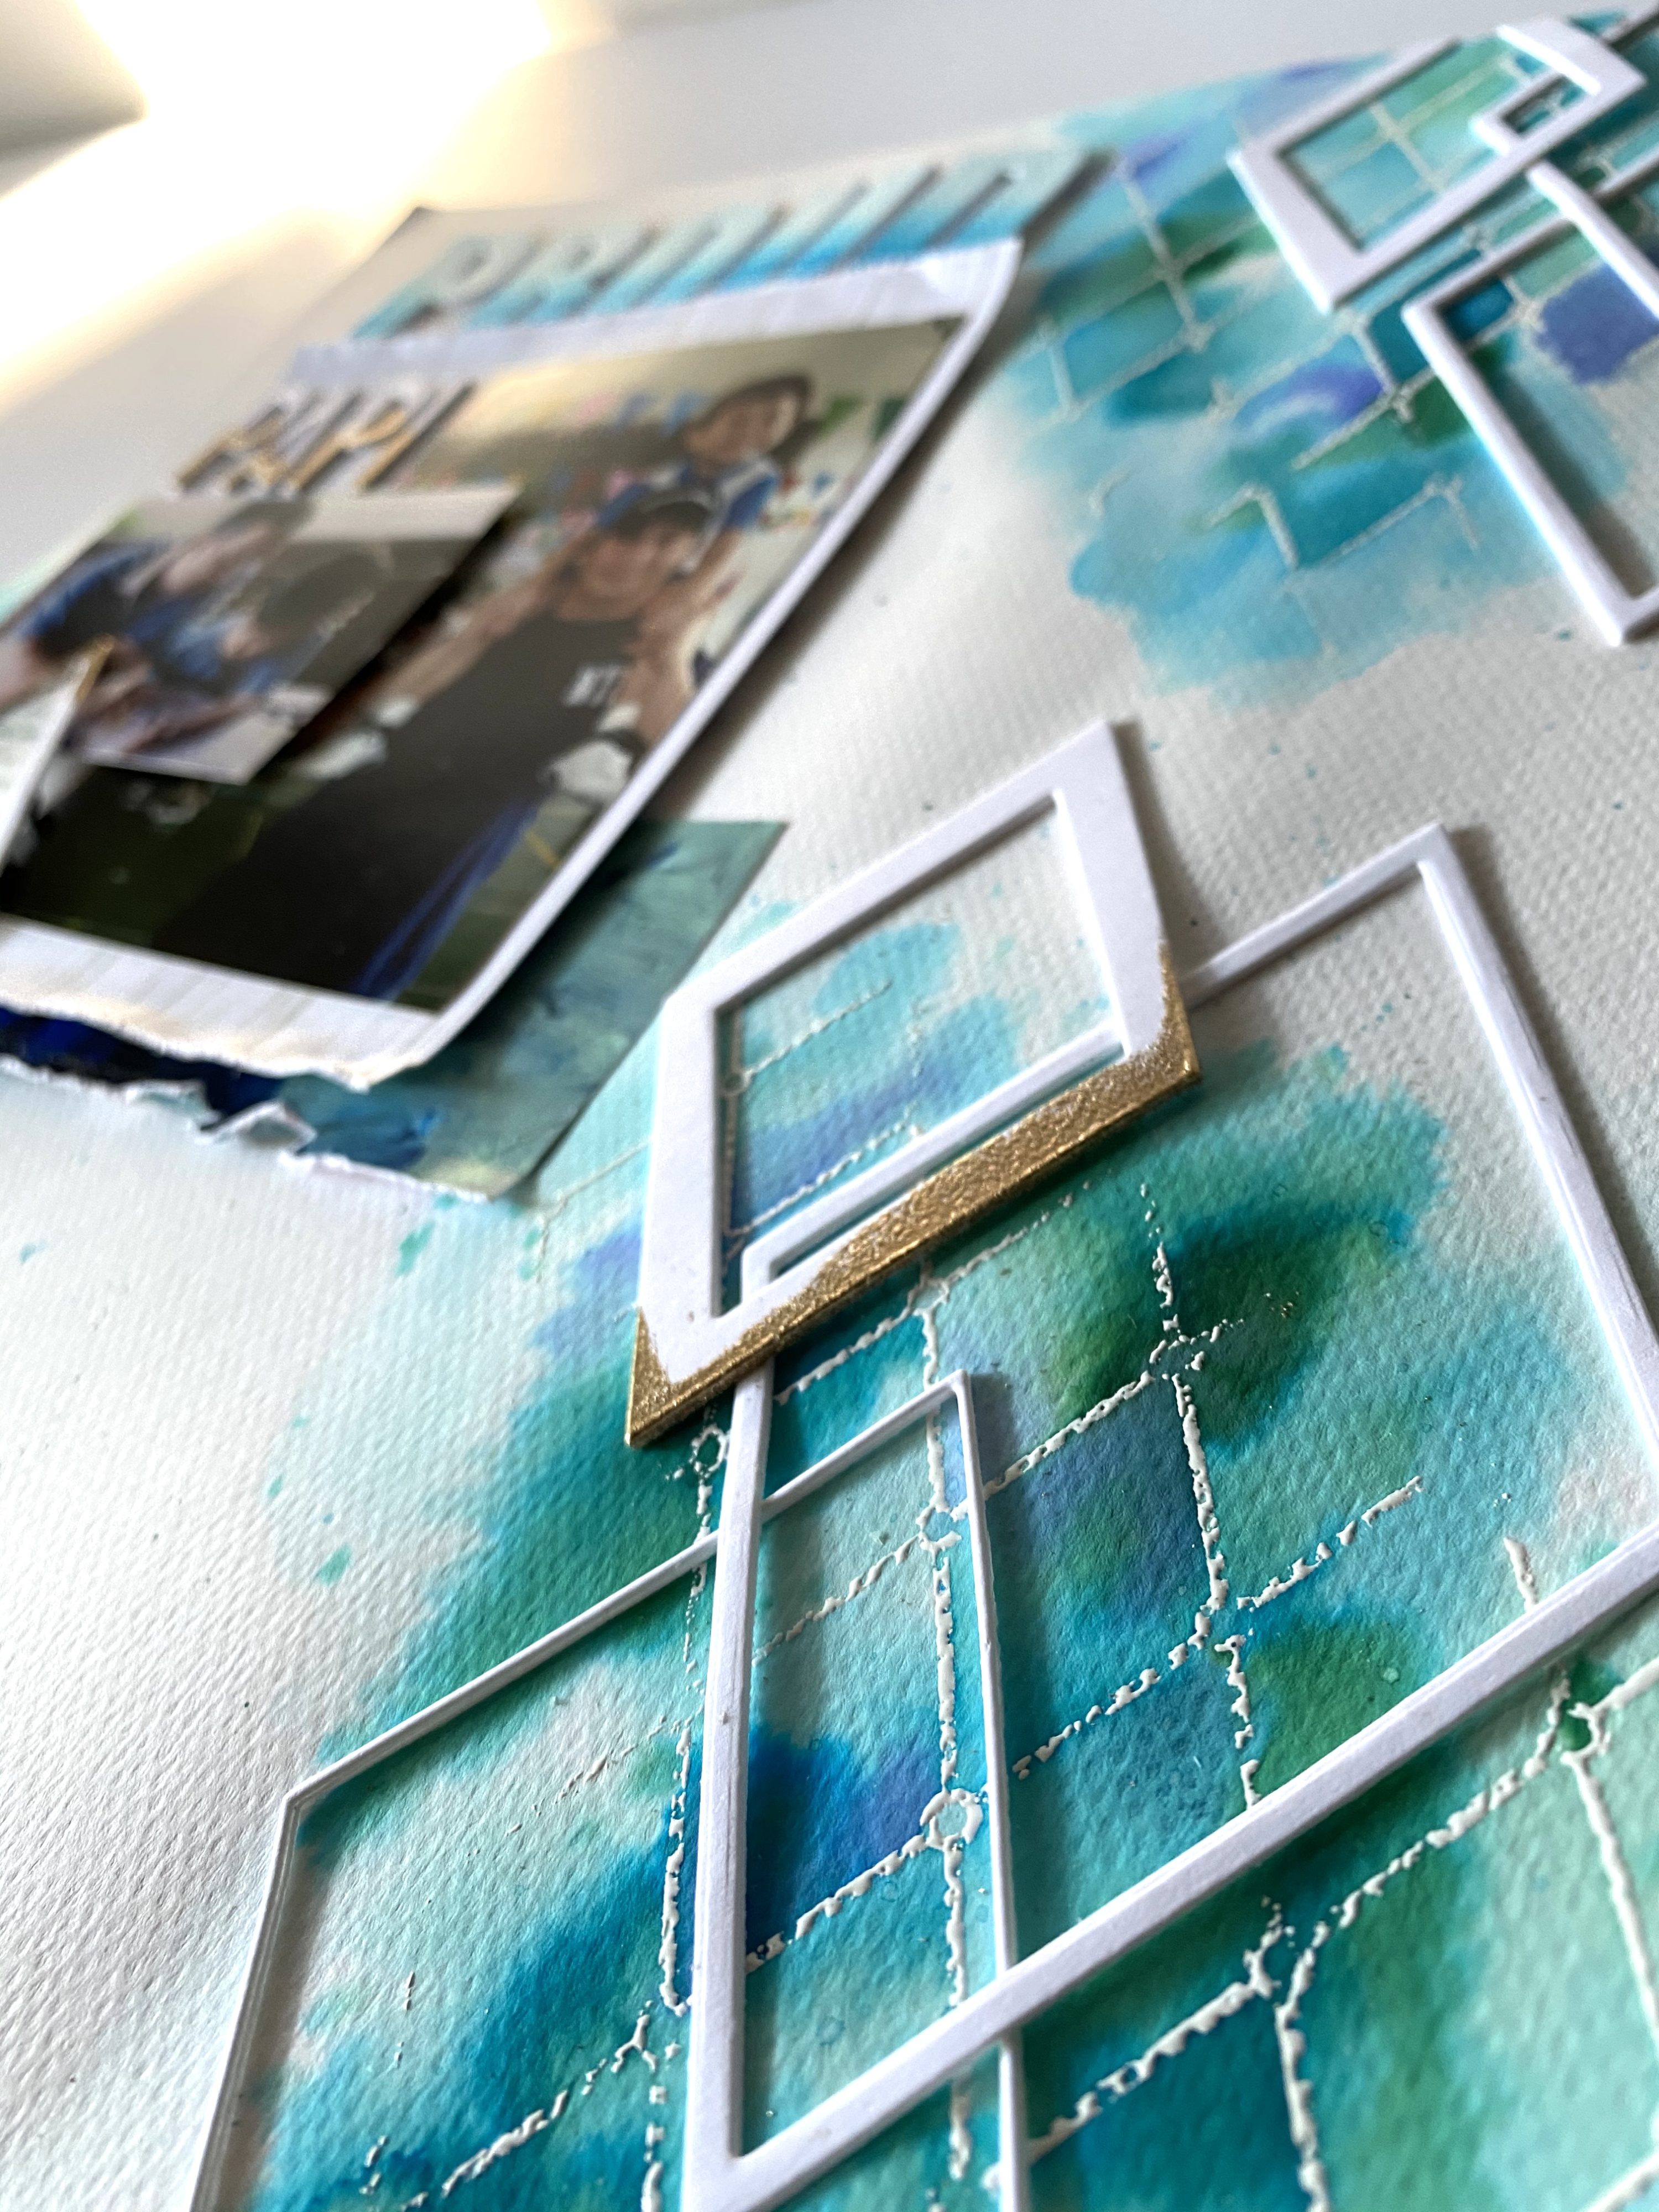
I used the Pattern Play -Diamond stamp set for the background embossed with white embossing powder. Watercolor brush markers were used to add colors to the background. The Fina Frames Diamonds Set was used to cut out the diamonds and these were stacked on top of each other to create dimension. The papers from Alluring Blooms and the Blushing Blooms created a base for the photos. The Fine alphabet die and the Caps bold alphabet were used for the title. The letters were either watercolored or embossed with gold embossing powder.

For the journaling, I traced the outline of the diamond onto vellum so that I could write within the lines.


SPECIAL OFFER


Enjoy FREE U.S. shipping with code HAPPY6TH or $5 OFF international shipping with code ANNIV20 at checkout. Offer valid from 4/2/2020 at 12:01 am EDT through 4/5/2020 at 11:59 pm EDT. Not valid on prior purchases. Cannot be combined with other promo codes. Shop here: https://altenew.com/


PRIZES


Altenew is giving away a $50 gift certificate to 6 lucky winners and one Altenew Academy class to 10 lucky winners. There are also 14 awesome companies/crafty friends who are celebrating with us, and they are offering the following prizes:

Altenew: 6 $50 Altenew gift certificates
Altenew Academy: 10 class spots
Jennifer McGuire Ink: 1 $100 Altenew gift certificate & 5 Share Handmade Kindness goodie bags($20 each)
My Sweet Petunia: 1 prize bundle(Original MISTI, a set of Creative Corners, a Cut-Align and a bar magnet)
CiLi in Papers: $100 gift certificate
Craft Stash: £75 gift certificate
Amy Tangerine: Your Brightest Year Yet online workshop(valued at $89)
Online Card Classes: 3 class spots
Simon Says Stamp: $50 gift certificate
Scrapbook.com: $50 gift certificate
Michelle’s Cards & Stamp: $50 gift certificate
Ellen Hutson LLC: $30 gift certificate
Butterfly Reflections Ink: $25 gift certificate
Scrapbook & Cards Today: 1 copy of Scrapbook & Cards Today Spring 2020 issue
Bumbleberry Papercrafts: £25 gift certificate
Seven Hills Crafts: £25 gift certificate

Be sure to leave comments by 4/12/2020 for a chance to win one of 37 prizes! To make the hop more exciting, start your comment with “Hi from (city or country where you’re from)!”. 37 winners will be chosen at random from the comments left on any of the blogs listed below and will be announced on the Altenew Card Blog on 4/18/2020.

Thank you so much for finding time to drop by! Your comments mean so much to me. I’ll be having my own little giveaway too and will pick a winner from the comments on my blog. The winner will be getting a card set from me <3 (will ship it out as soon as the situation gets better 🙏) Next stop: Scrapbook & Cards Today.

May this season of uncertainty give us more reasons to be kind to one another. My prayers go out to all the heroes risking their lives for a brighter future for all of us. Stay safe everyone and happy crafting! ❤️


BLOG HOP ORDER


Day 3: April 4th
Altenew Blog
Laura Bassen
Therese Calvird
LauraJane
Ellen Hutson LLC
Nathalie DeSousa
Seeka
Nenette S. Madero <<– YOU ARE HERE
Scrapbook & Cards Today
Sveta Fotinia
Ilda Dias
Craft Stash
Laurie Willison
Laura Volpes
Bumbleberry Papercrafts
Arjita Sepaha Singh
The Hedgehog Hollow
Jenny Colacicco

Altenew: A Year In Review Blog Hop + Giveaway

Altenew: A Year In Review Blog Hop + Giveaway

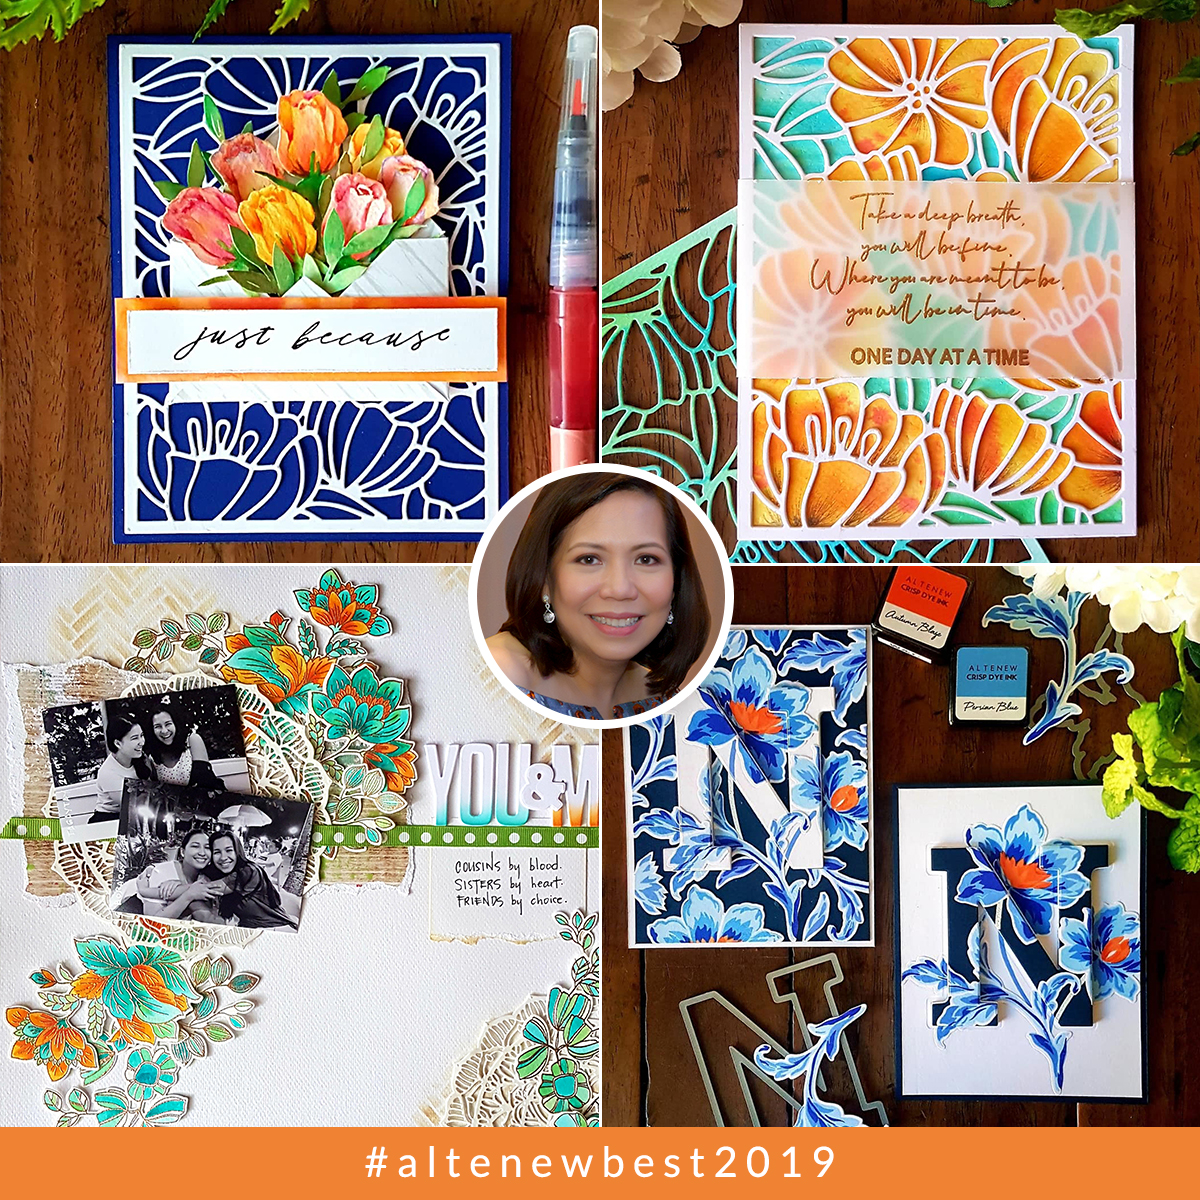
Hi everyone!!! I’m so thrilled to be a part of this Altenew year-end blog hop. Thank you so much, Ashlea Cornell, for sending them over here. 💜 We were asked to choose our top 4 favorite projects from 2019 and honestly, it was quite difficult to narrow it down to 4! I’m so grateful to be one of Altenew’s guest designers this year and because of this, I was able to create a lot of cards and a couple of layouts <3 Here are my top 4 projects:

It was an amazingly creative year filled with so much inspiration from all the talented designers and guest designers. If you start with a product that’s already so beautiful, you get so motivated to create and play with it.

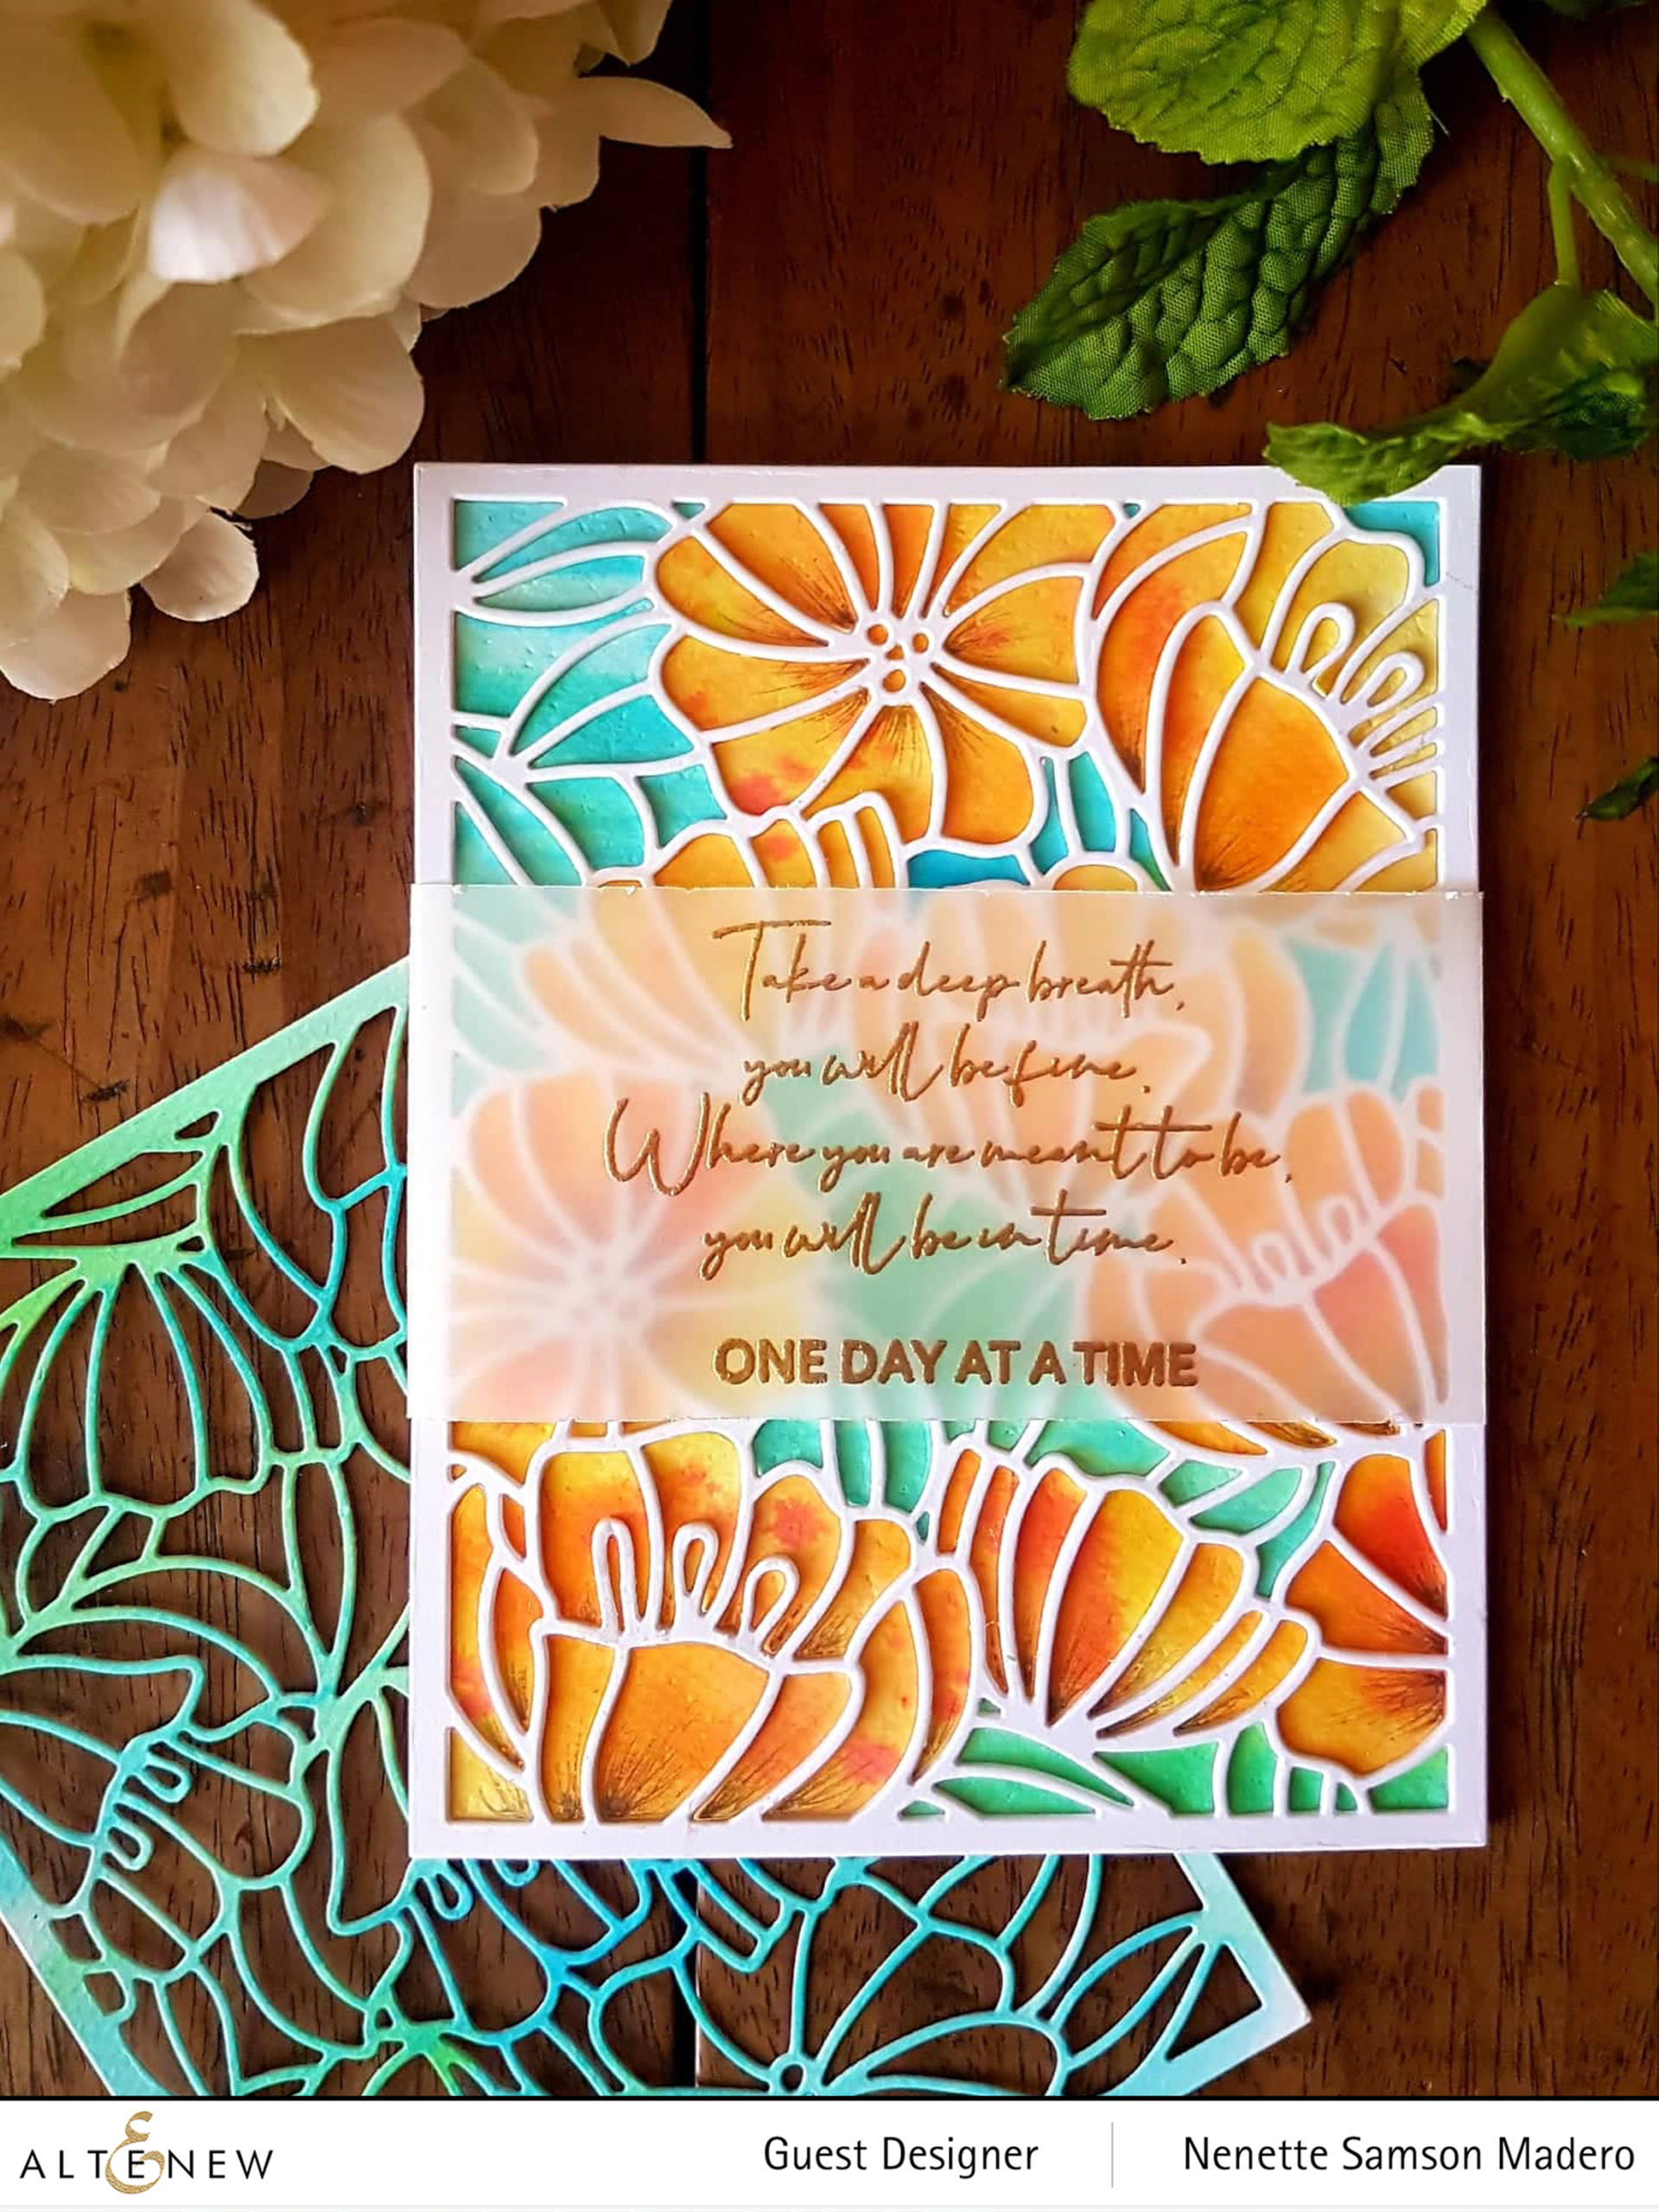
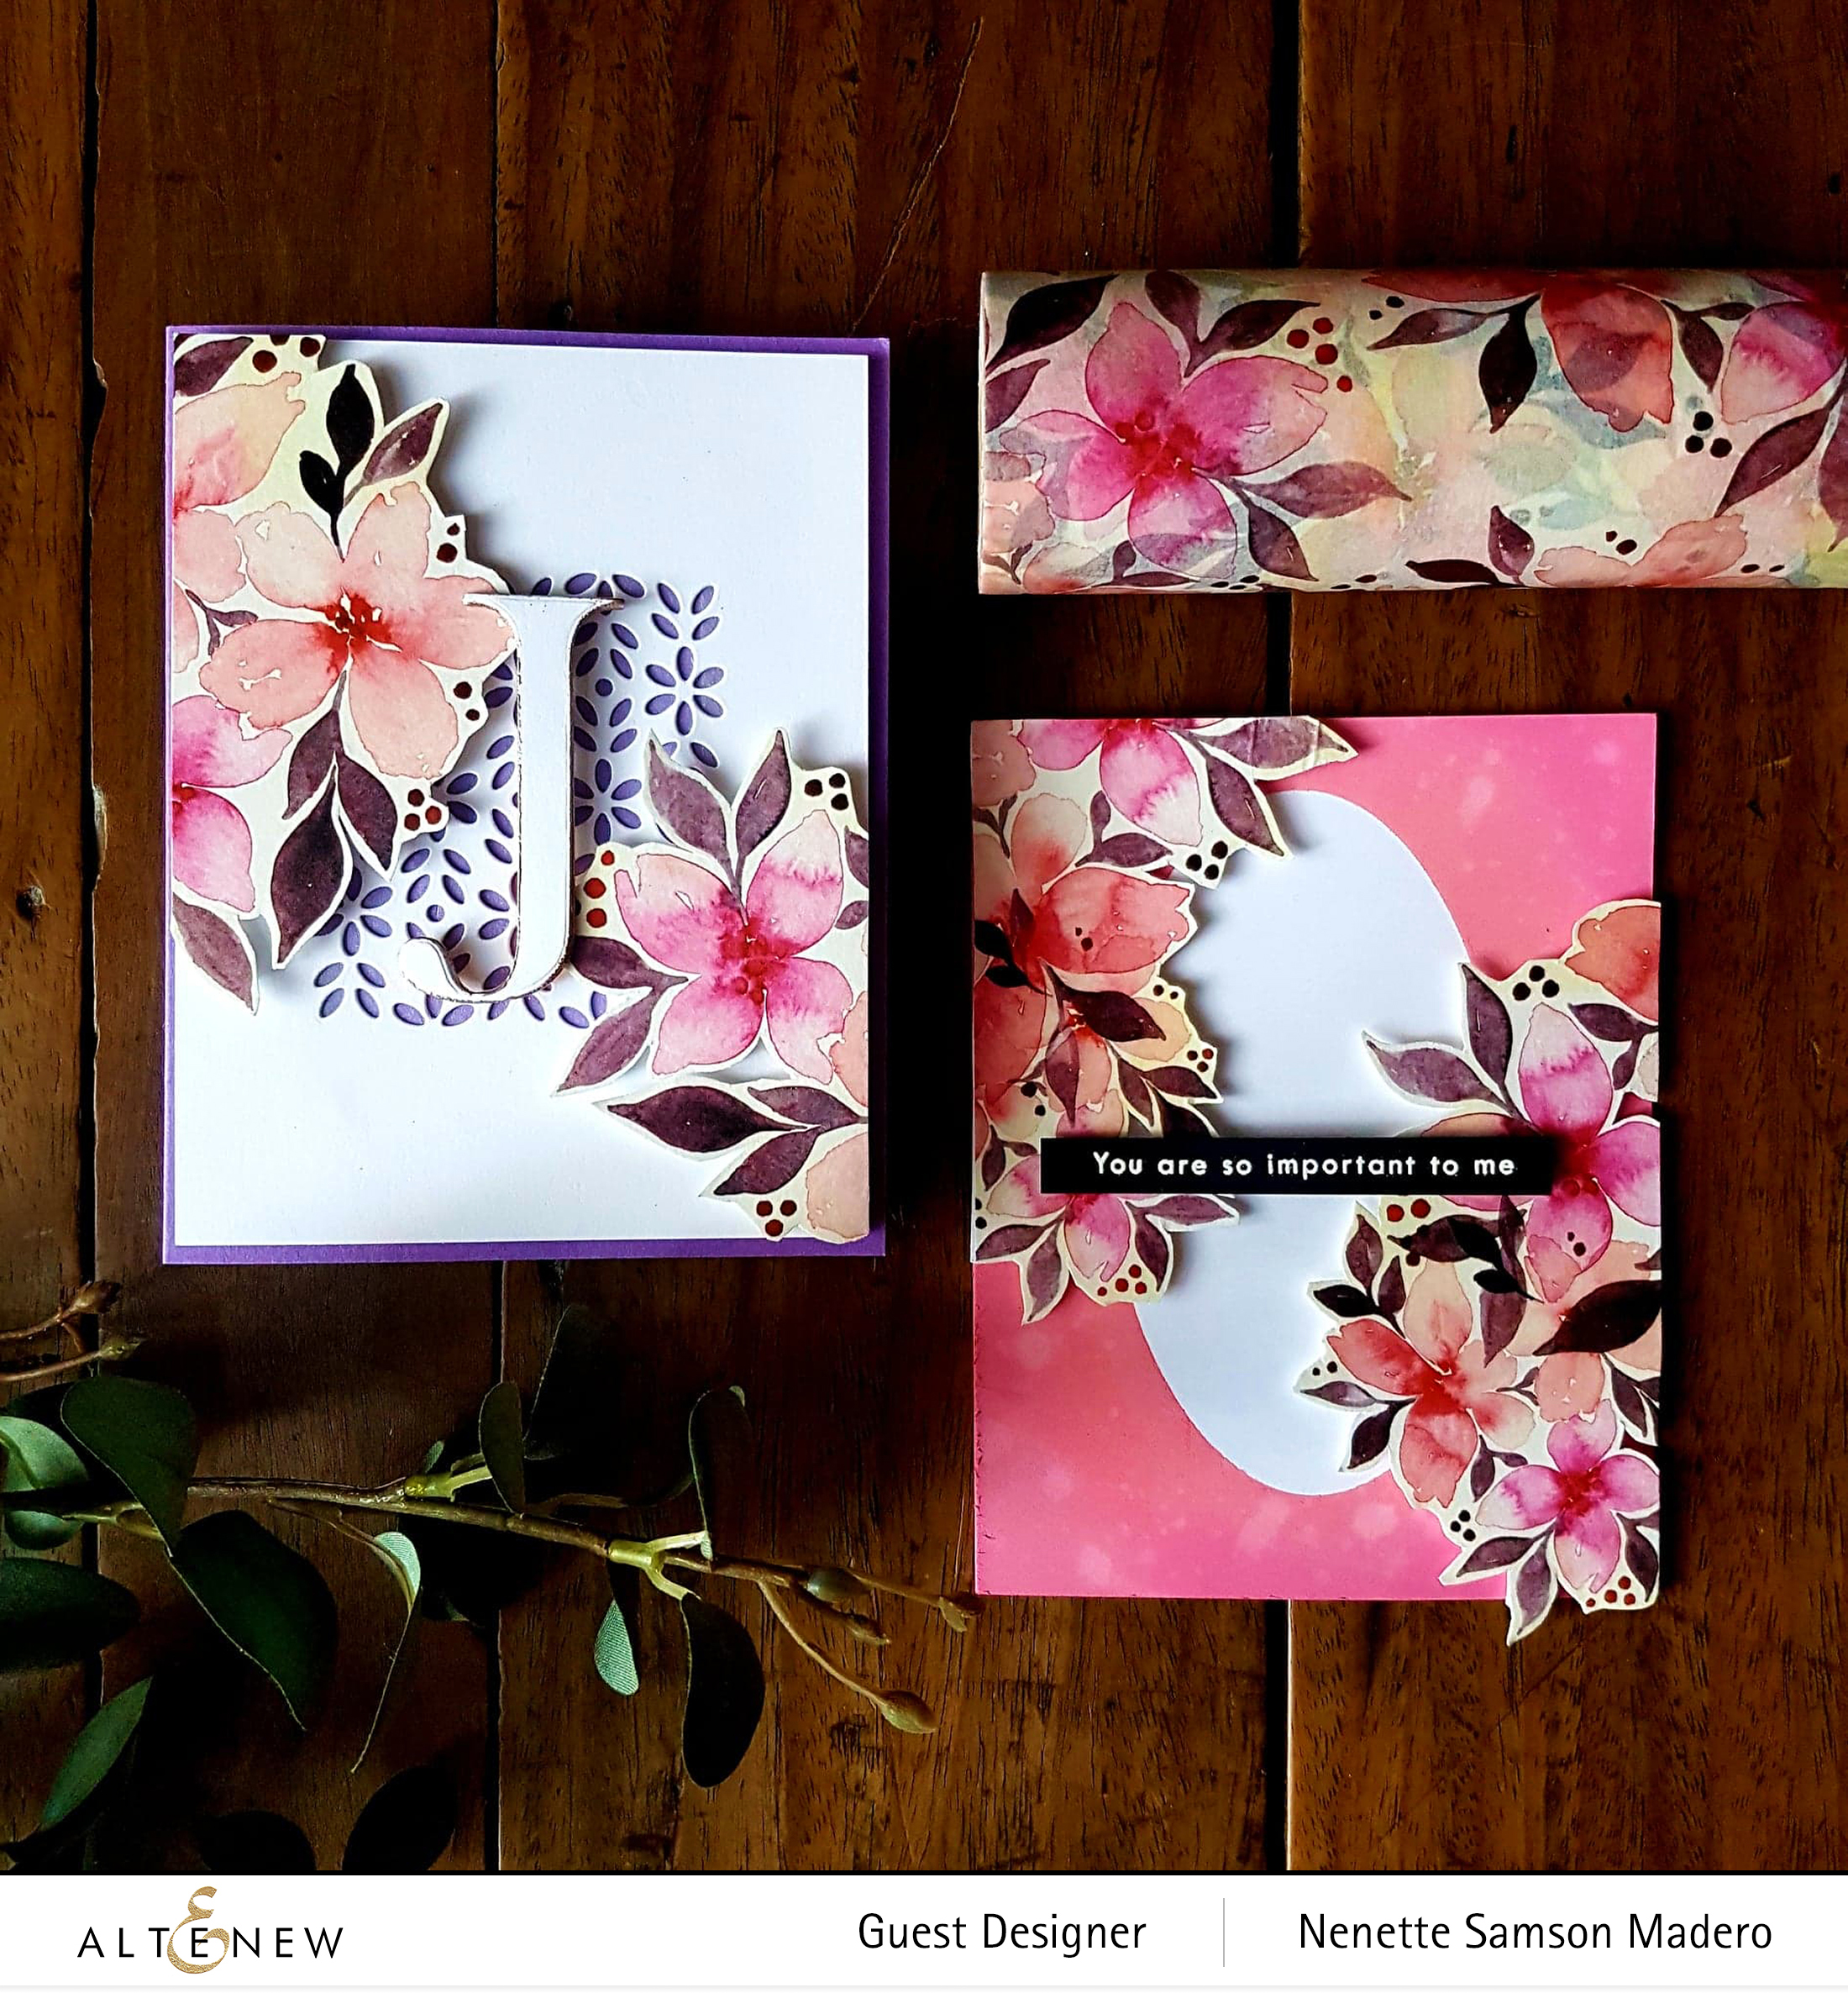
I love this card because of this gorgeous Dainty Blooms cover die. You can also make two cards with one die cut by using both the positive and the negative pieces.

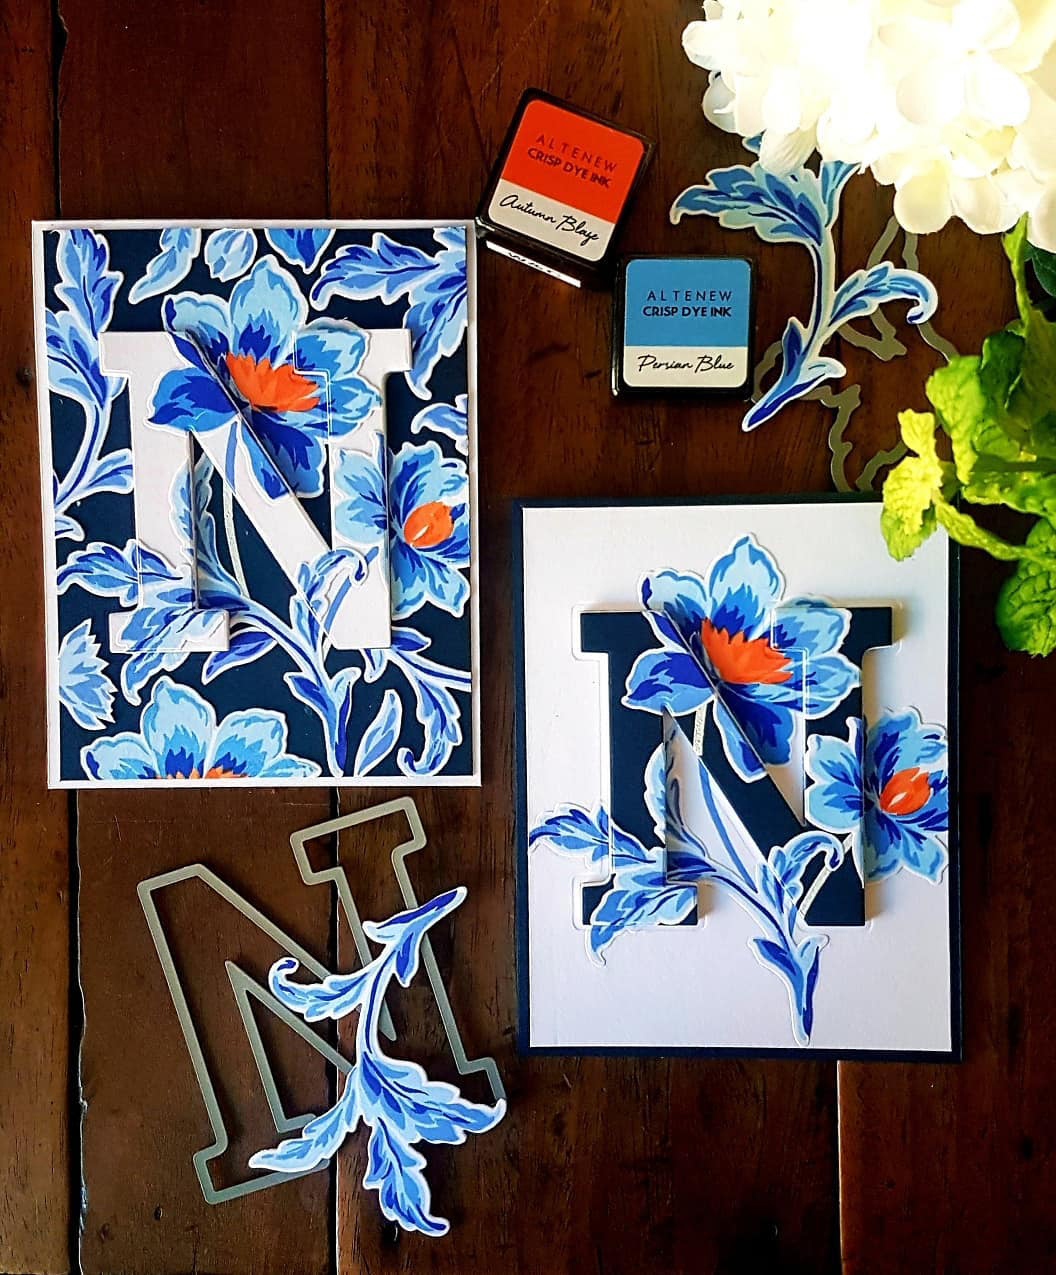
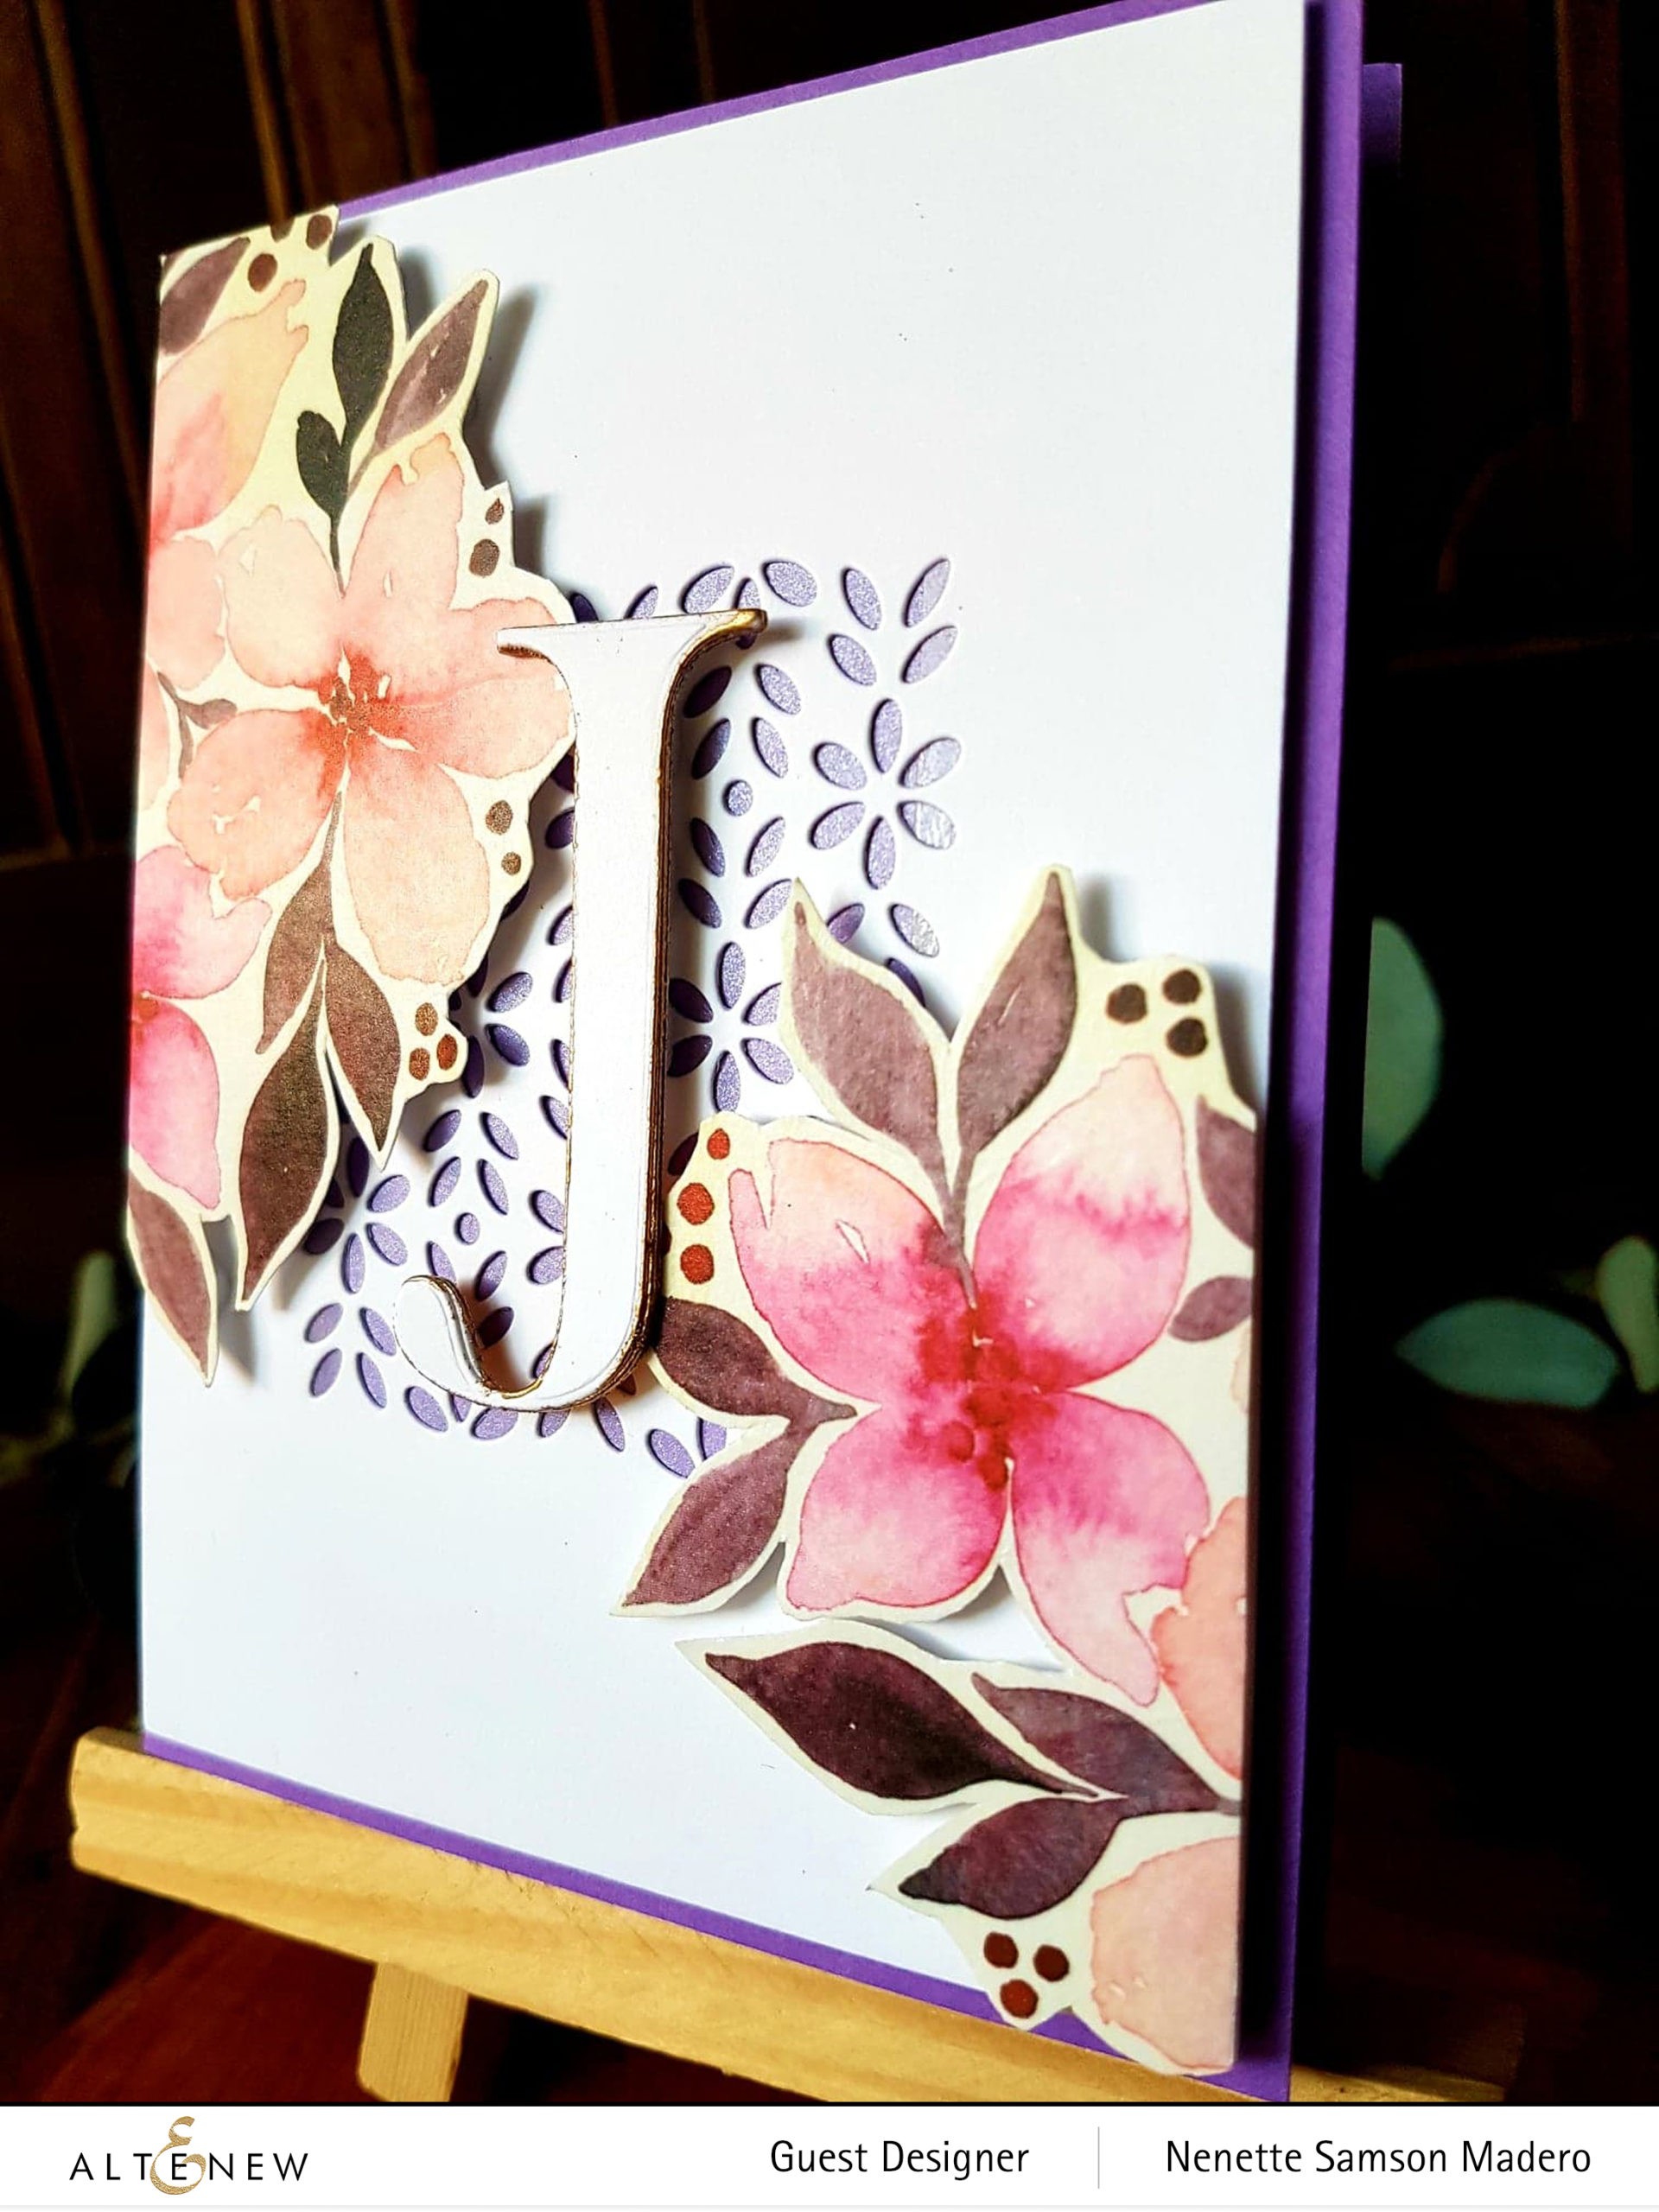
This is what I call my yin and yang cards– one card is elaborate while the other card is clean and simple. ❤️ Here I used the Angelique Motifs stamp and die sets and the Mega Alphabet die to create this monogram card.

This is on my top 4 list because I truly enjoyed painting the Inked rosebud for this card. It was small enough not to get overwhelmed in painting it and somehow, I managed to make it look 3D. 😊 I already had this bouquet design in my mind the minute I saw the stamp set. 🙂

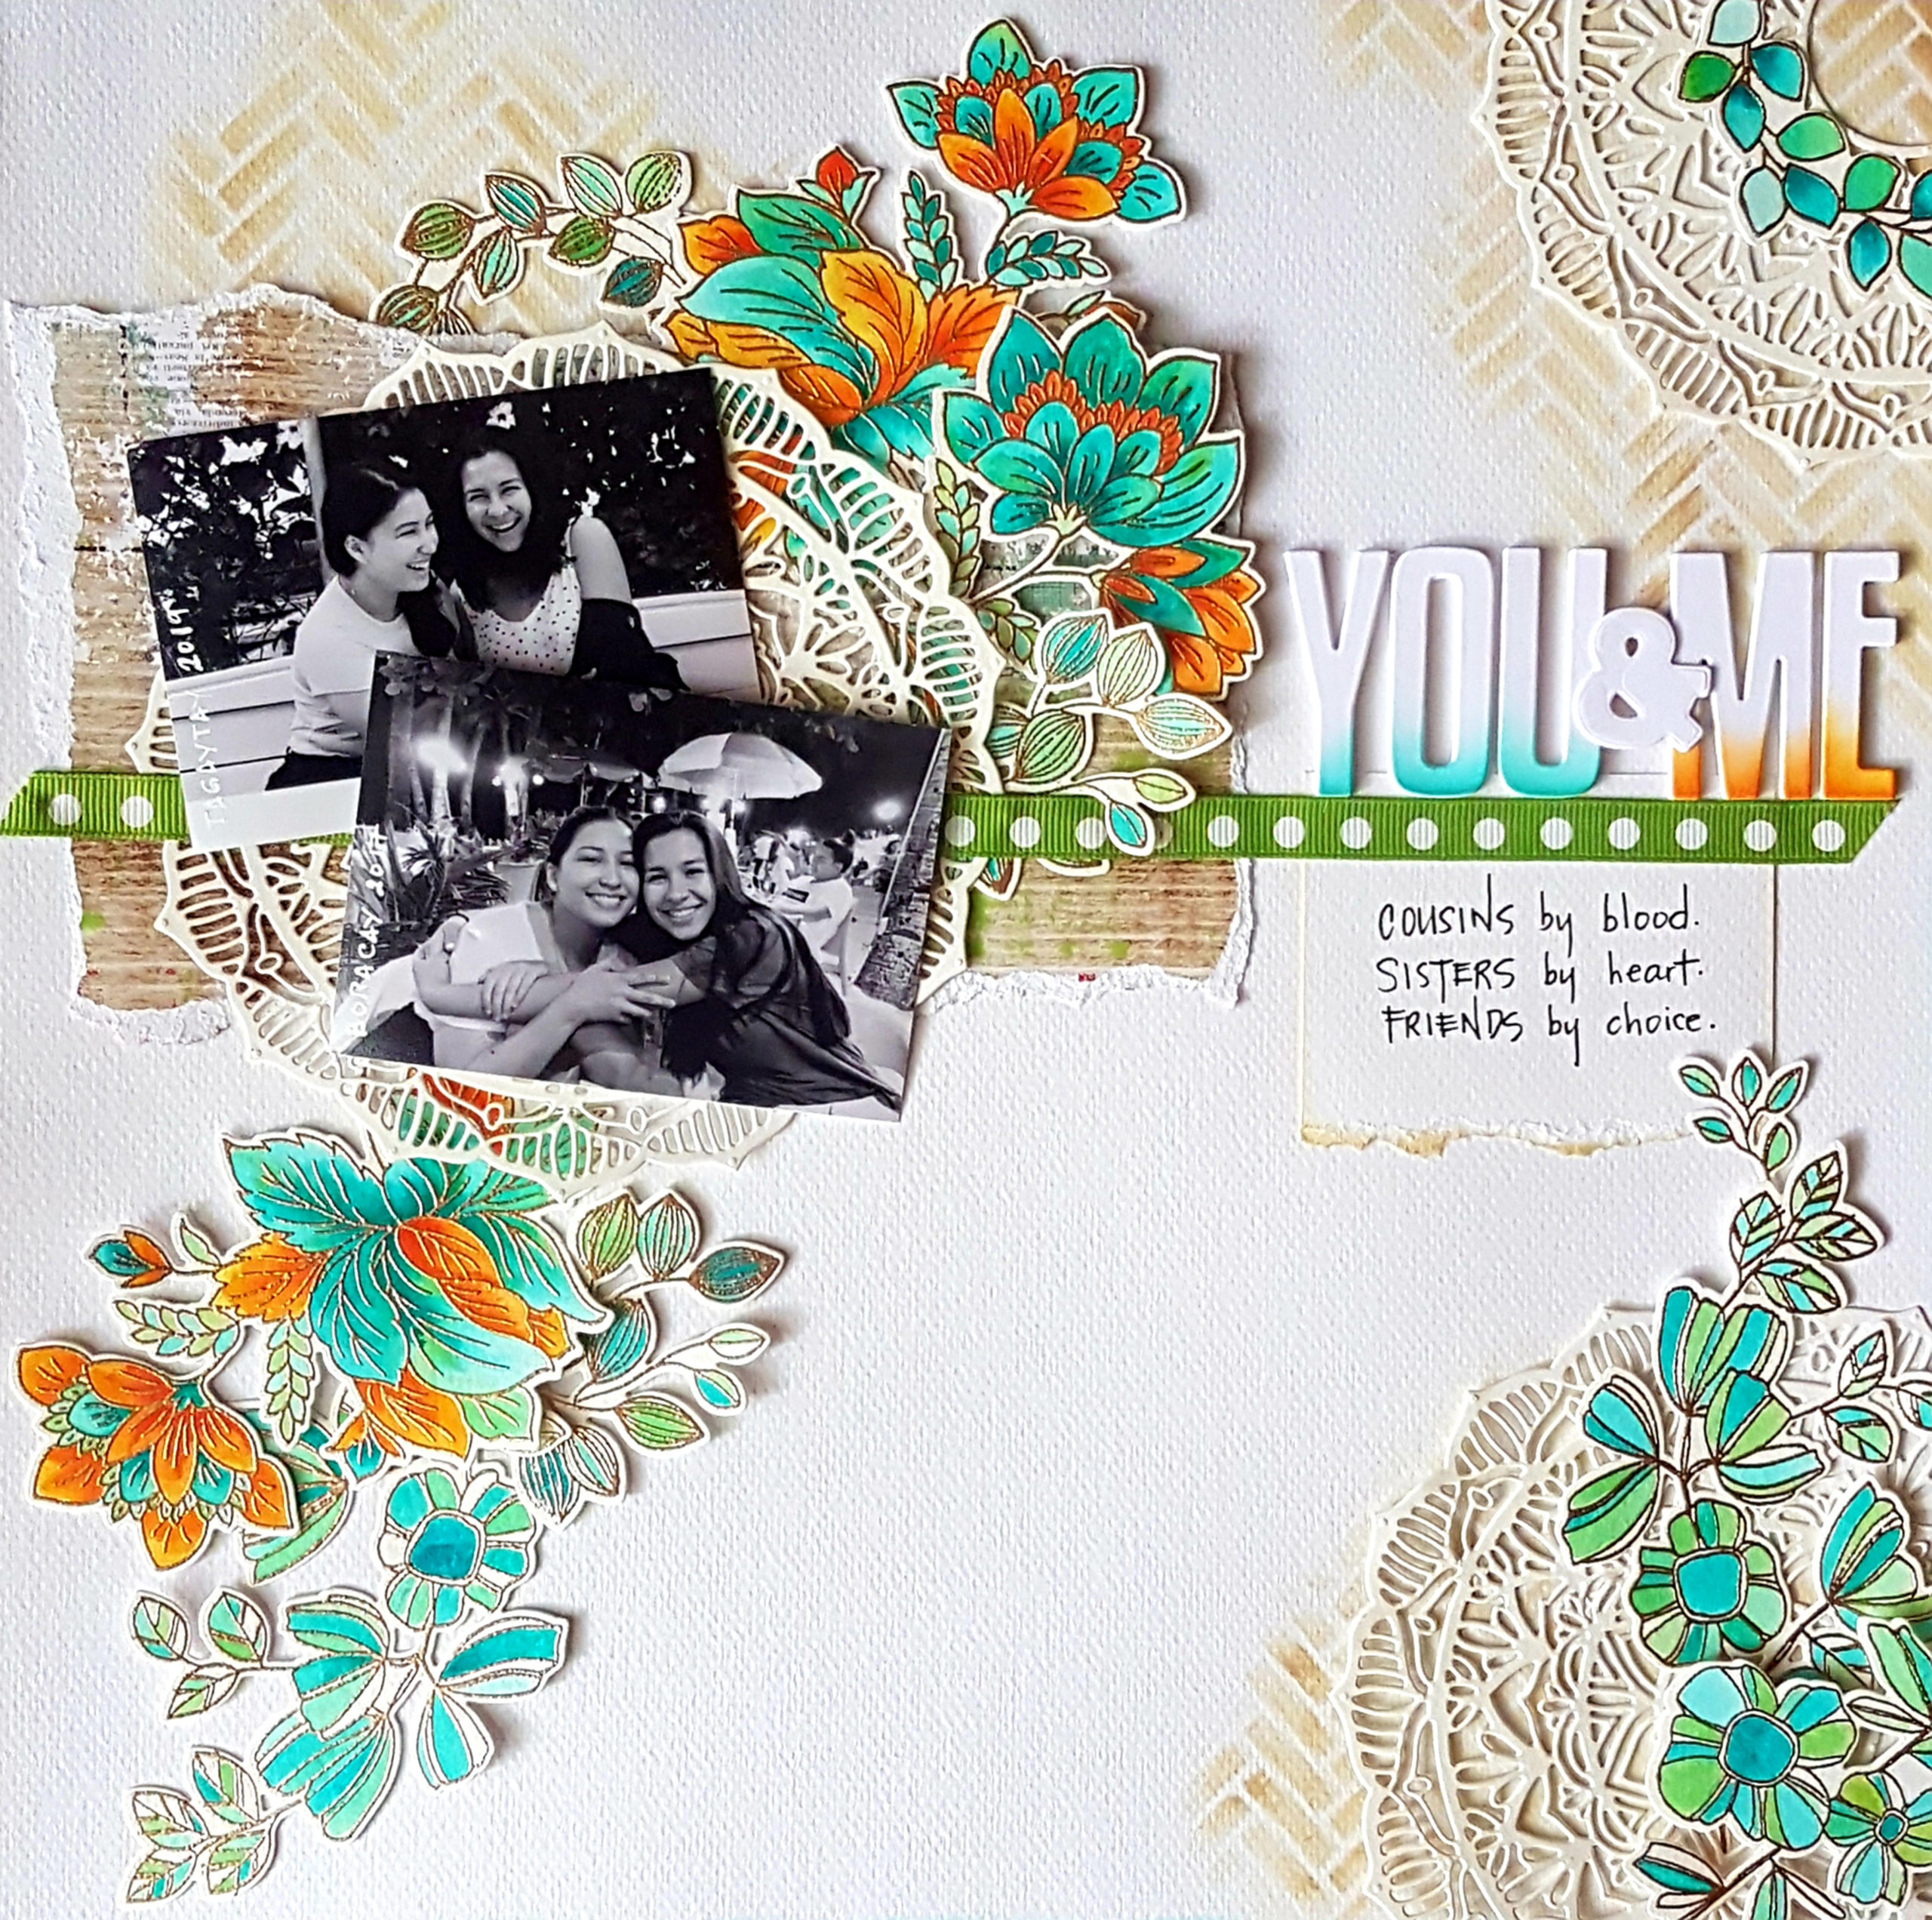
I haven’t done a scrapbook page in ages!!! These are my love letters to my children. Special photos inspire me to document a moment and when I saw these photos of my daughter and her cousin, I knew I had to create a layout using Altenew stamps, dies and stencils as embellishments. The layout was inspired by a PageMaps sketch. I used the Weekend Doodles and Ornate Foliage stamp and die sets, Mandala die and the Broken Chevron Stencil.

This will be my last post for 2019 and I’d like to share with you some cards I recently created for a Christmas card swap of My Little Attic Studio. Here are the cards that I made for my swap mate, Jen.

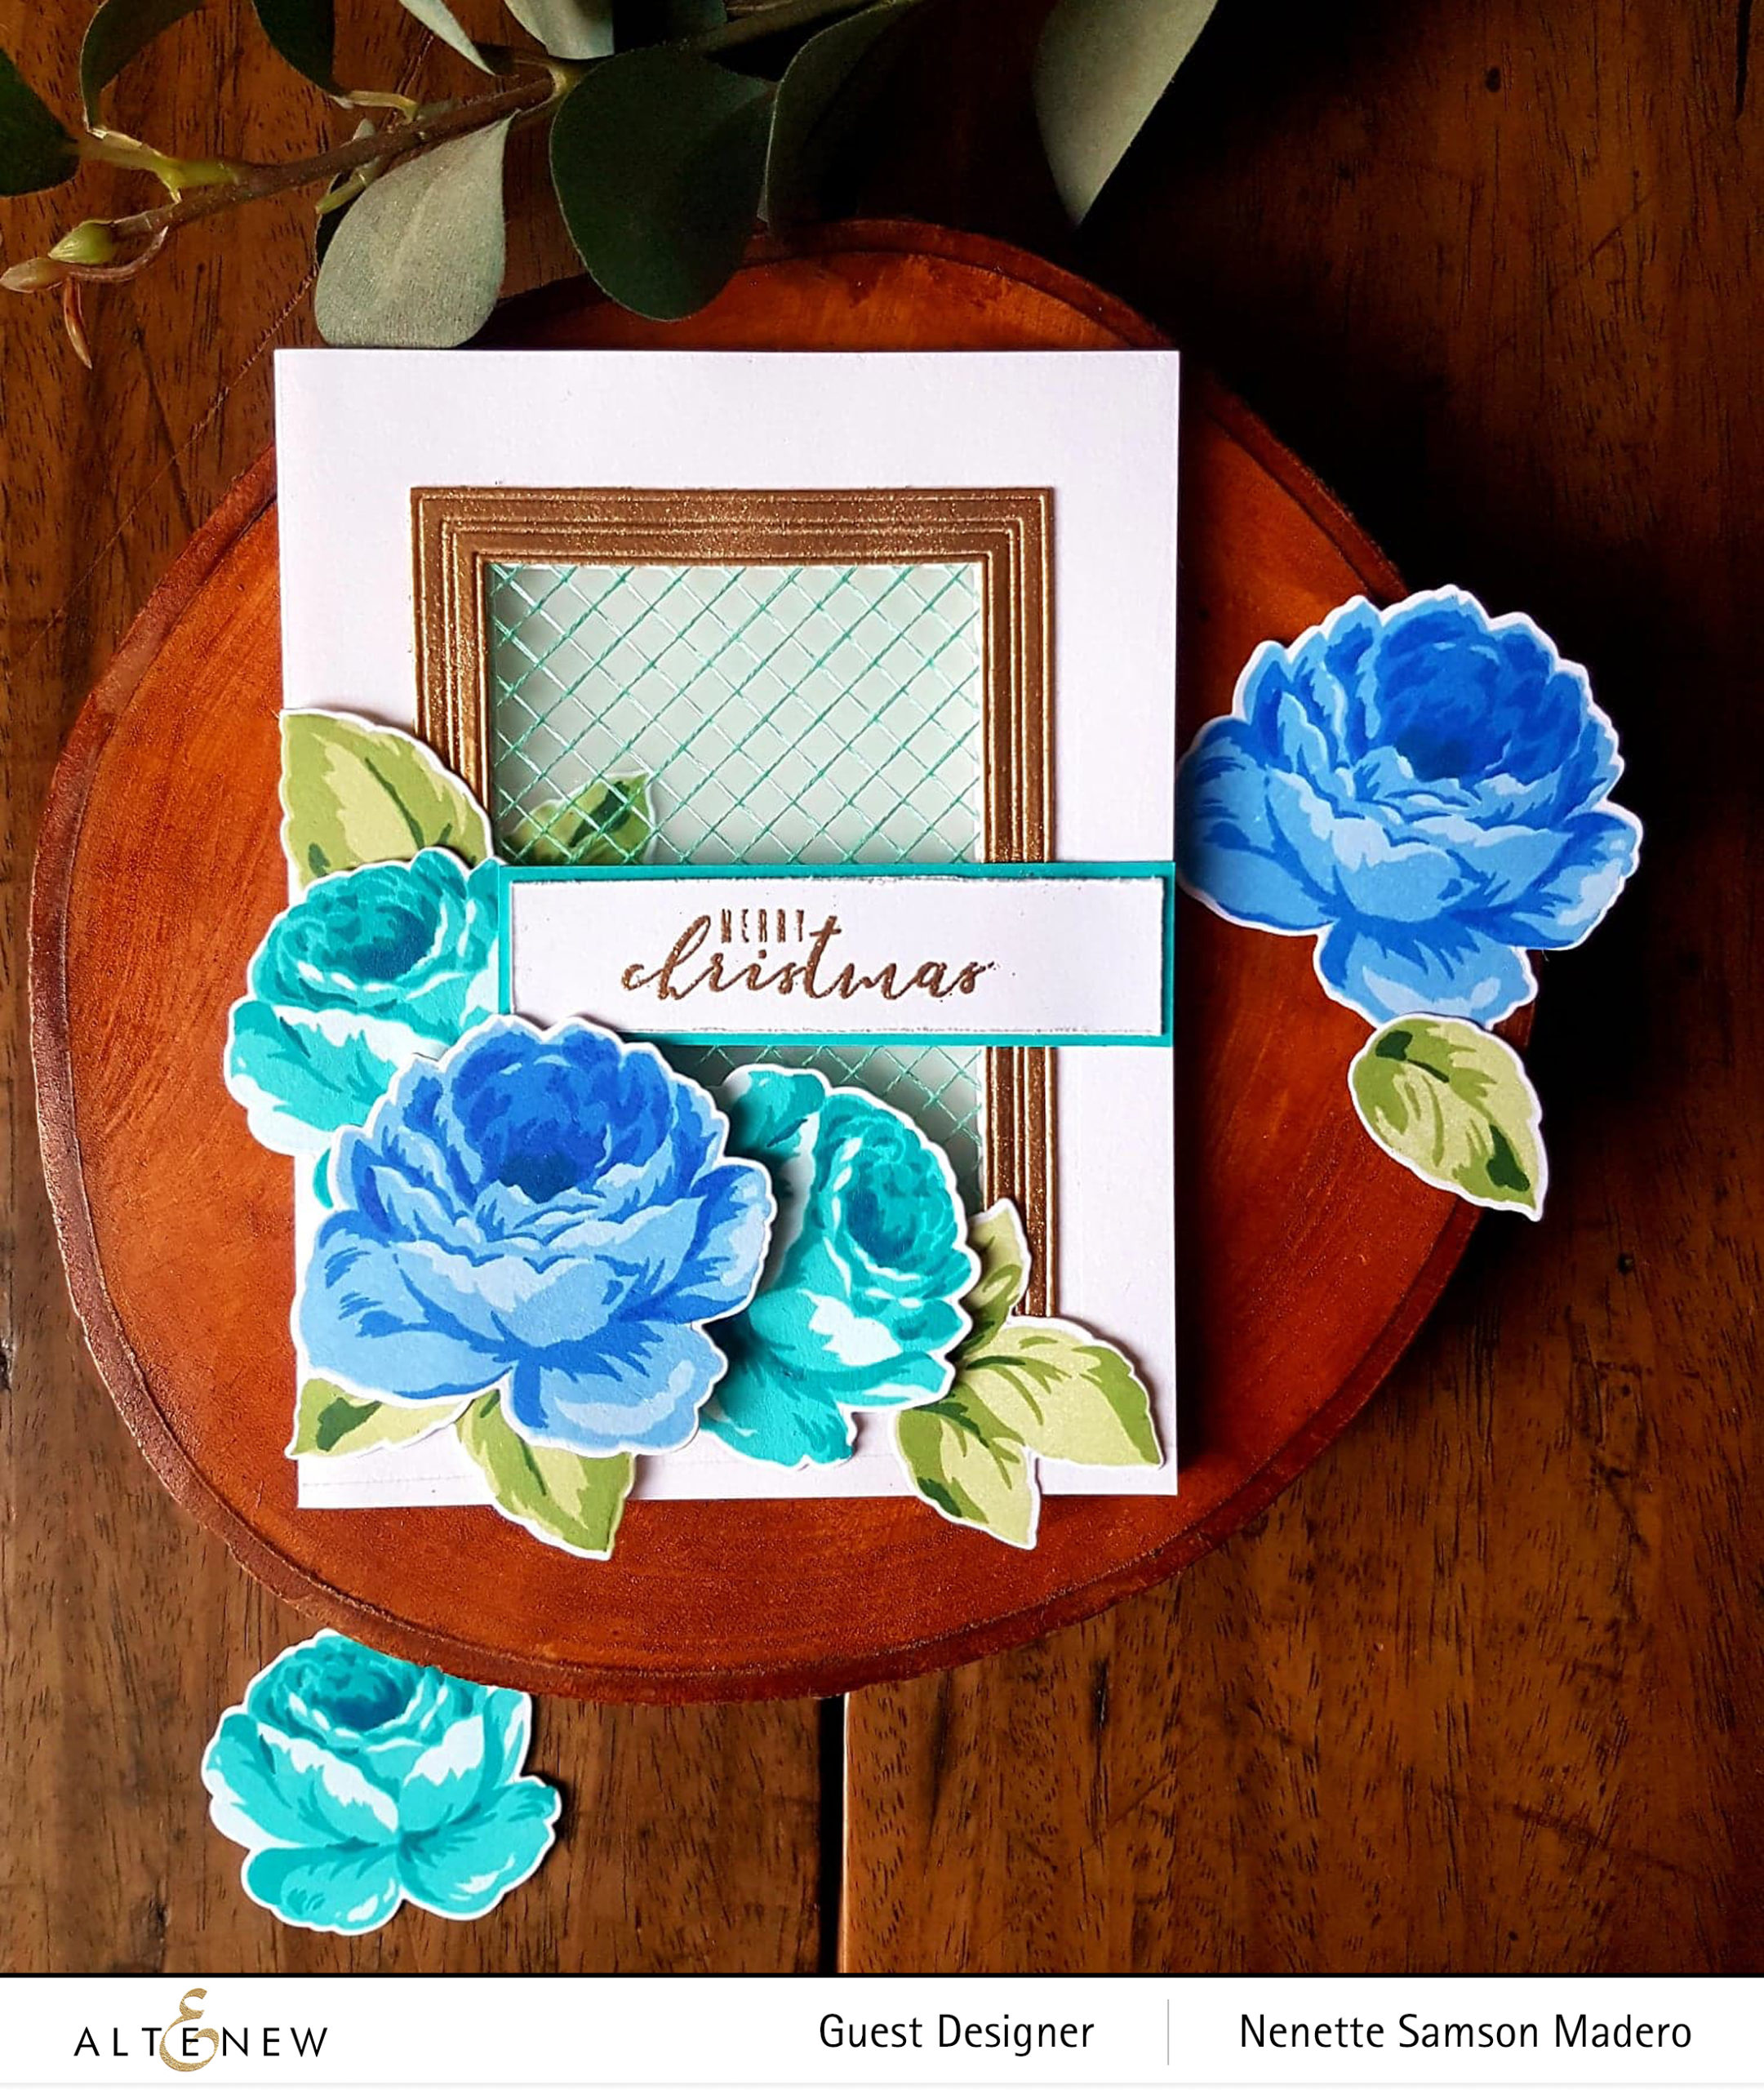
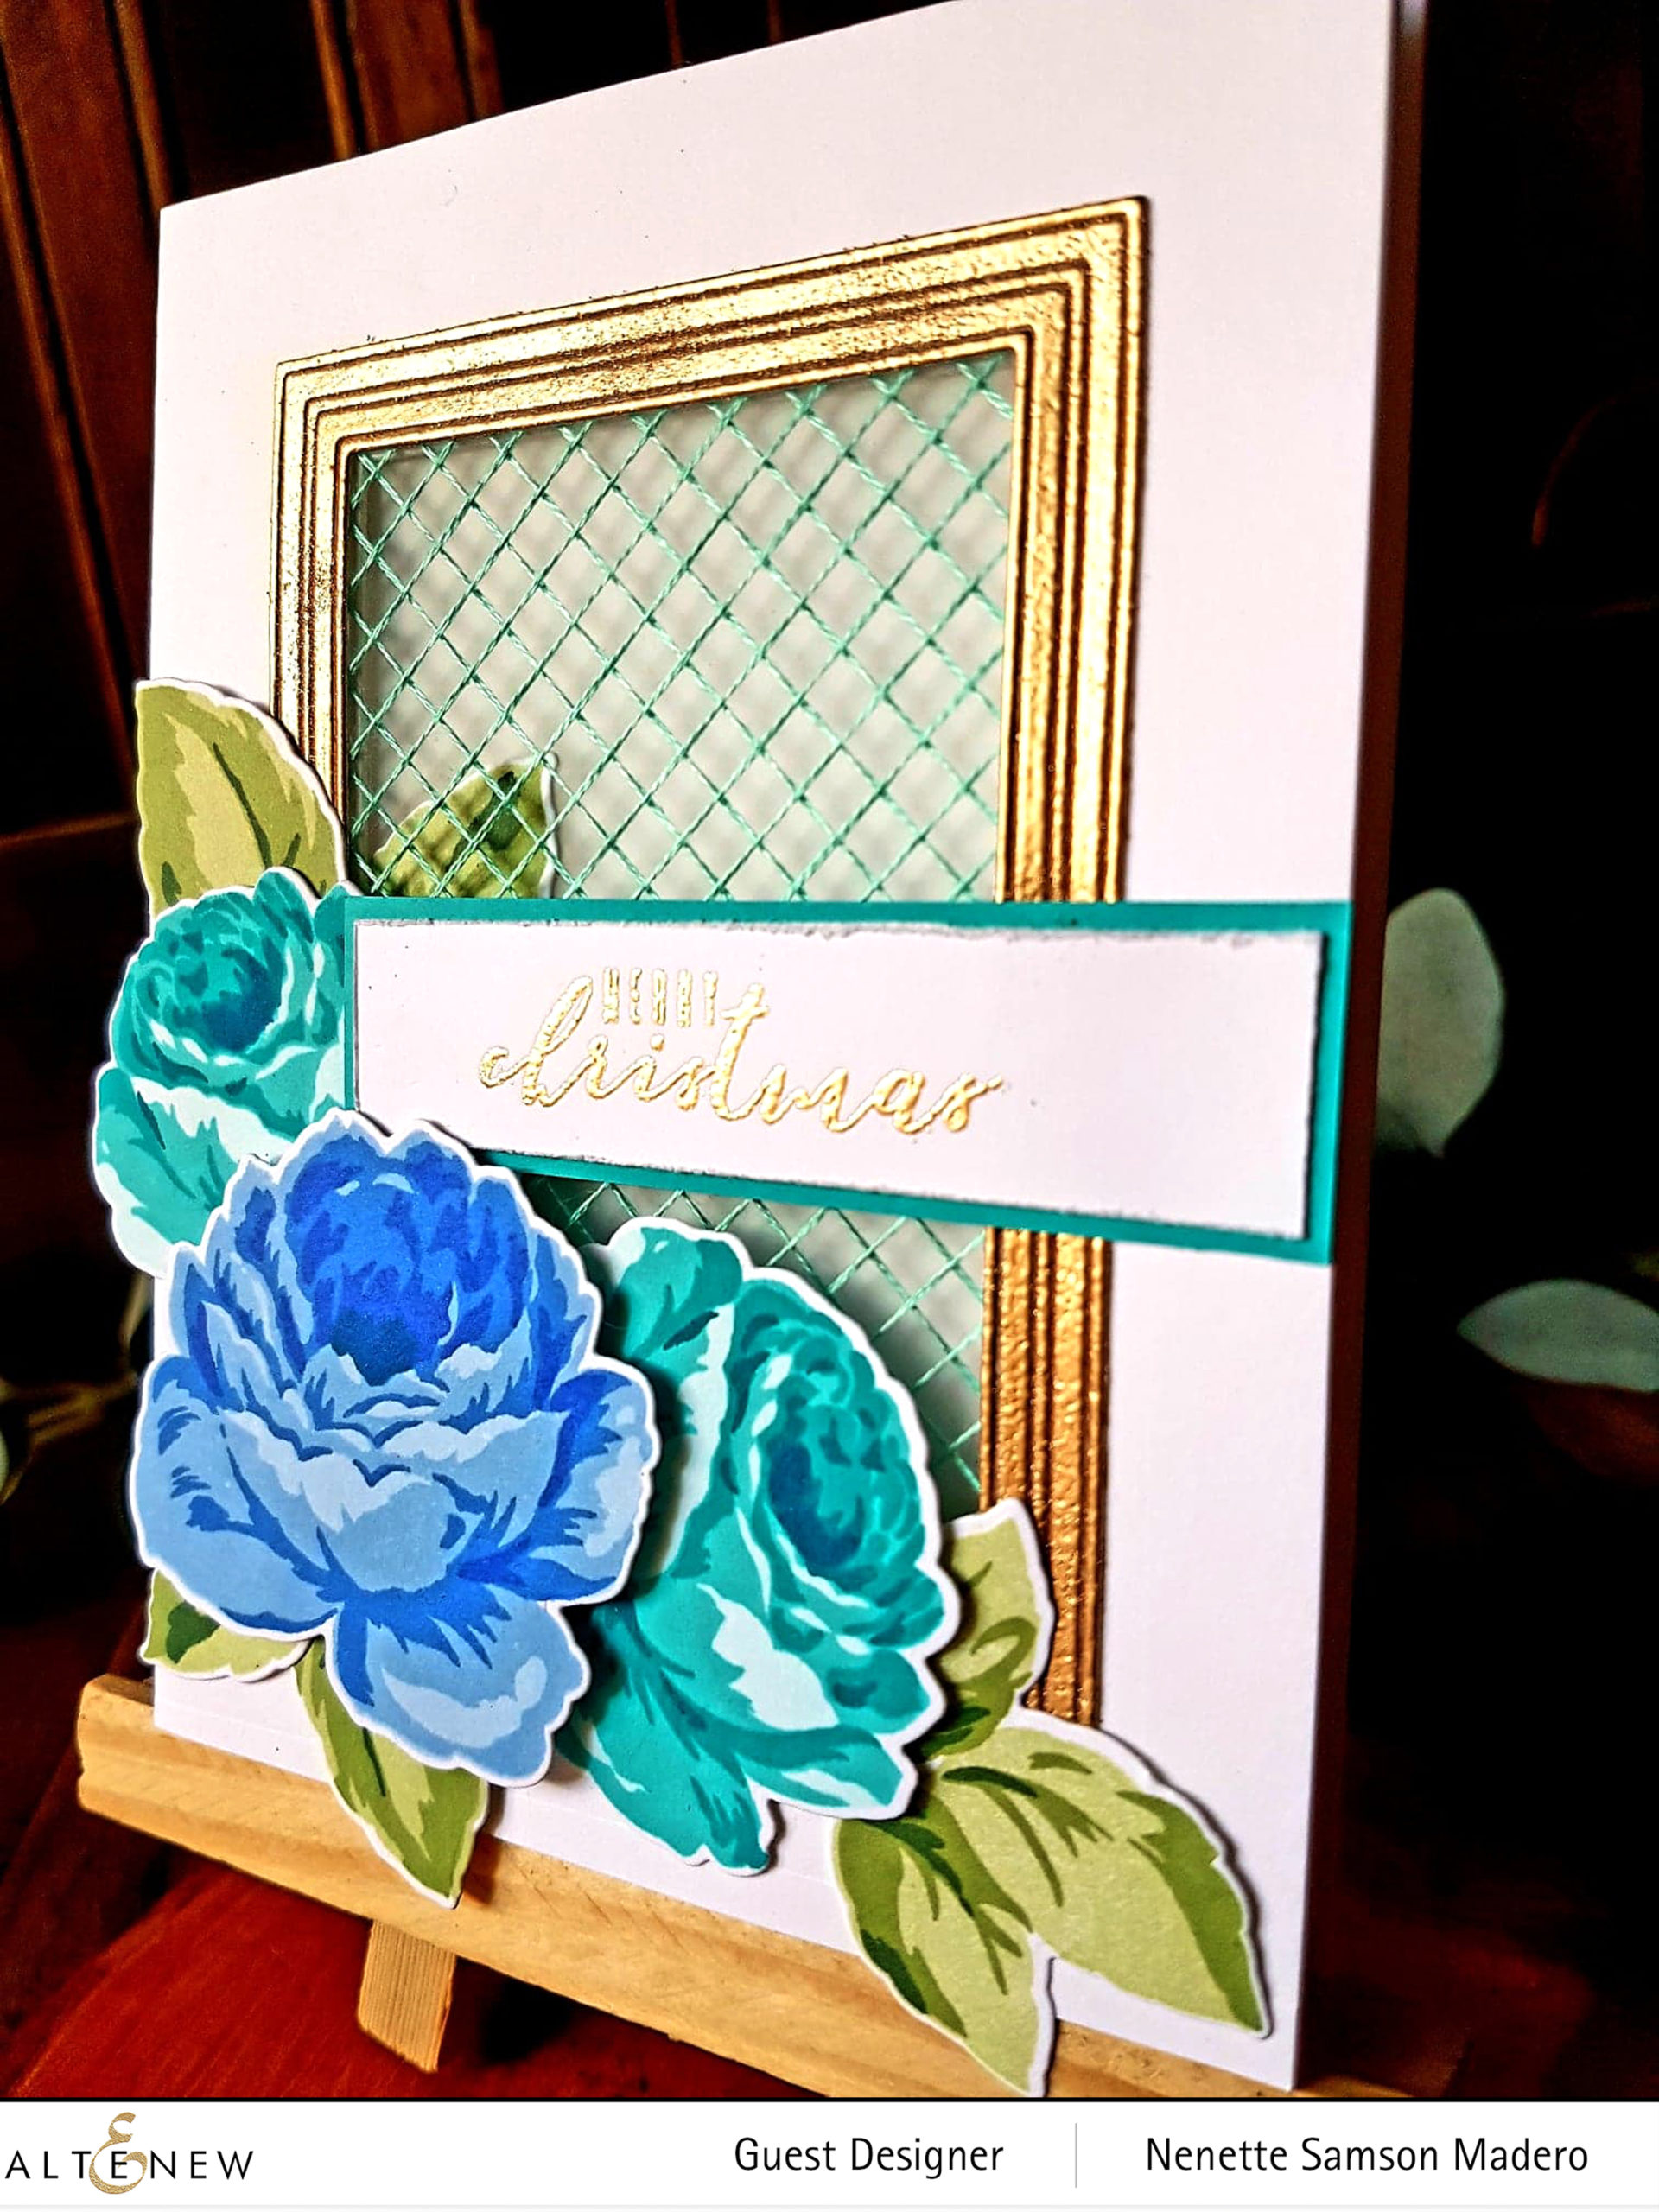
I used non-traditional colors for this Christmas card. This was the first time I played with the Antique Roses Stamp set and I immediately fell in love with it! The Sting Art Rectangle Die was used to create a window for this card.

5 layers of the Fine Frames Cover Die were used to cover the holes of the string art die and embossed with rose gold embossing powder. The flowers and leaves were stamped using Altenew dye inks.

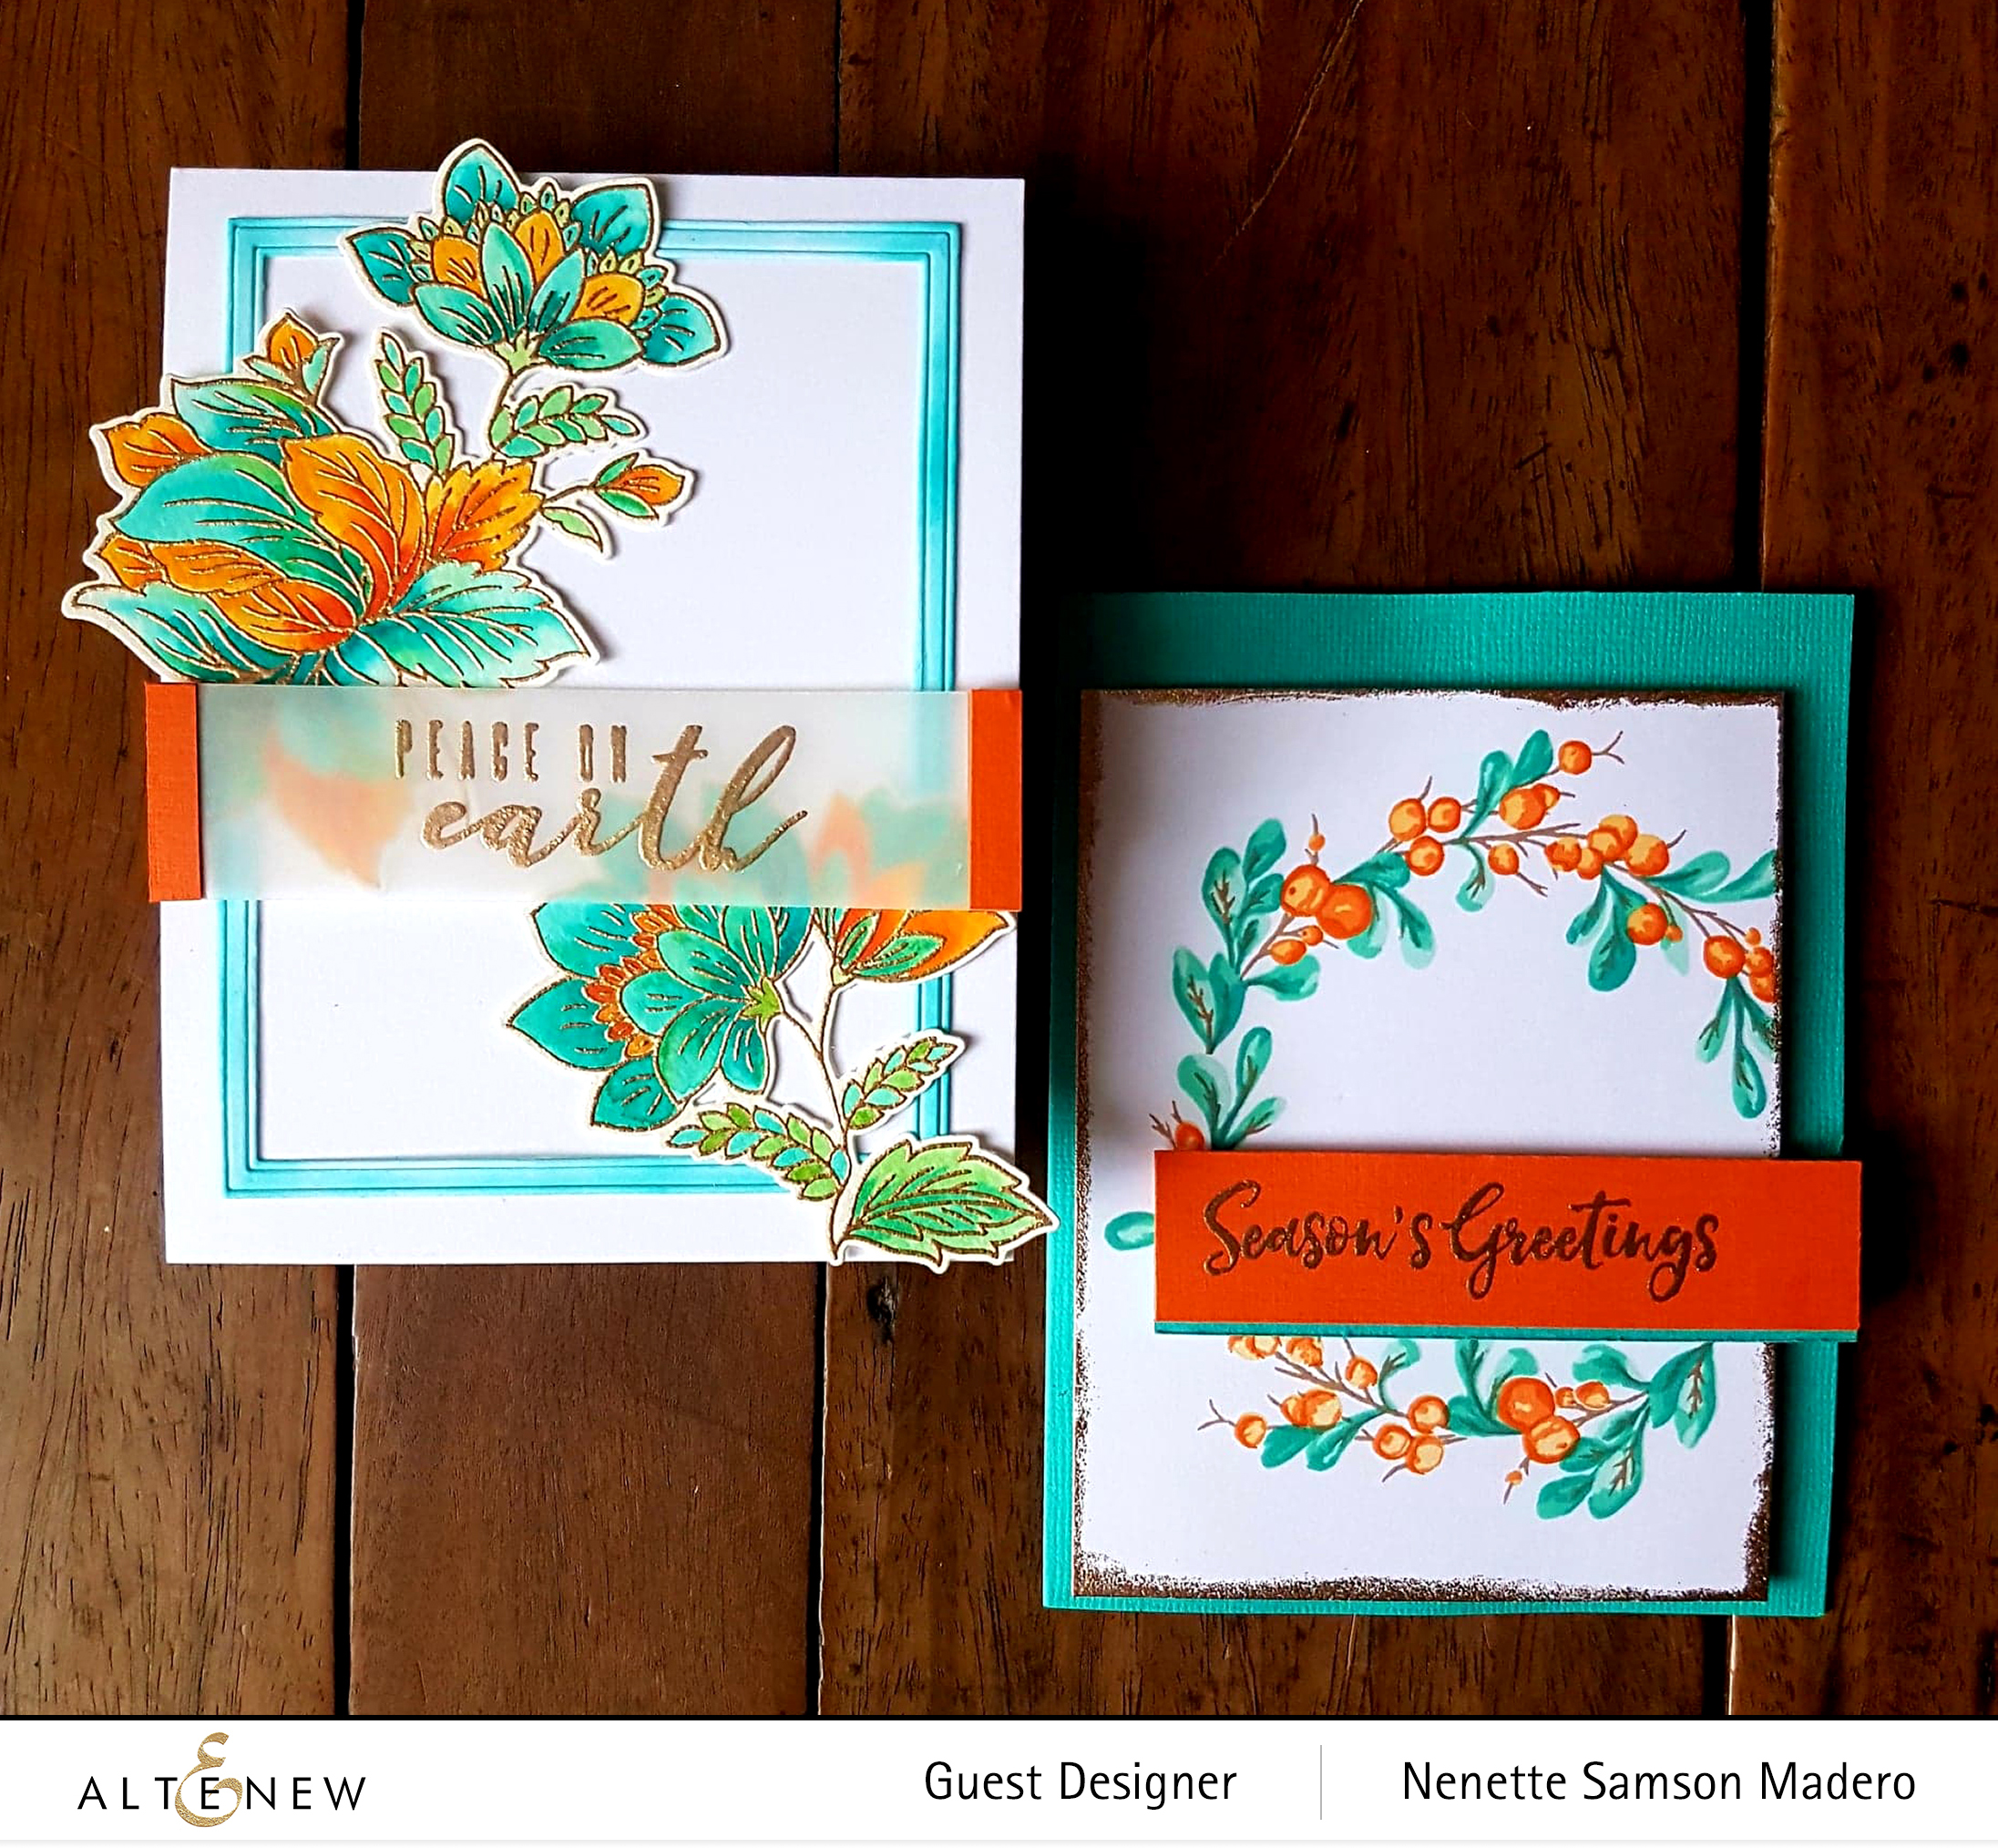
Here are some CAS cards using the Ornate Foliage stamp set and the Bountiful Branch stamp set. A lot of white space was left for these clean and simple cards and I used a combination of oranges and teal green for this set.

I thought of including some non-Christmas themed cards for the recipient using the Calming Bouquet washi tape. I just love how easy it is to embellish a card or scrapbook page using this washi tape.

Rose gold embossing powder was added to the edge of the monogram letter for some subtle shine. The washi cut-outs were popped up using foam squares to add dimension to the cards.

PRIZES

Altenew is giving away a $30 gift certificate to 6 lucky winners! Please leave a comment on the Altenew Card Blog and/or Altenew Scrapbook Blog by 01/03/2020 for a chance to win. Random winners will also be chosen to win a $15 gift certificate from the comments left on each stop on the hop. All winners will be announced on the Altenew blogs on 01/06/2020.

I’ve gotten to know quite a number of people through this blog, IG and FB and I just want you to know how grateful I am for all the positive and inspiring comments you leave behind. It warms my heart knowing that others appreciate my art. Thank you so much for continuing to inspire me to create! My profound gratitude to May Sukyong Park for inviting me to be a guest designer for Altenew. What an honor. ❤️

Wishing all of you a blessed Christmas season and may your New Year bring you peace, happiness and tons of crafty inspiration!!! Looking forward to a creative year ahead. Wishing you wonderful blessings always! ❤️

FACEBOOK | INSTAGRAM | WEBSITE | PINTEREST

BLOG HOP ORDER

Altenew Card Blog
Keeway Tsao
Laurie Willison
Michelle Murray
Kristina Pokazanieva
Norine Borys
Gayatri Murali
Jen Schow
Mindy Eggen
Vicky Papaioannou
Ashlea Cornell
Nenette S. Madero <– YOU ARE HERE
Janette Kausen
Altenew Scrapbook Blog
Nathalie DeSousa
Terri Koszler
Seeka
Jaycee Gaspar
Teri Wilson
Amber Rain Davis
Therese Calvird
Isha Gupta
Anna Komenda
Erum Tasneem
TaeEun Yoo

Lilith Eeckels
Alex Syberia
Caly Person
Virginia Lu
Amanda Baldwin
Maryám Pérez
LauraJane
Kathleen Graumüller
Zinia Redo
Nancy McClelland Kymona Tracey

Altenew Build-A-Flower: Bellflower Release Blog Hop + Giveaway

Altenew Build-A-Flower: Bellflower Release Blog Hop + Giveaway

Hello everyone! Welcome to Altenew’s Build-a-flower: Bellflower release blog hop! I’d like to thank the amazing Mindy Eggen for sending you over here. In case you are lost, the complete list will be added at the end of the post. The Altenew Card Blog is hosting this blog hop so do drop by and check out all the wonderful cards created using this stamp set.

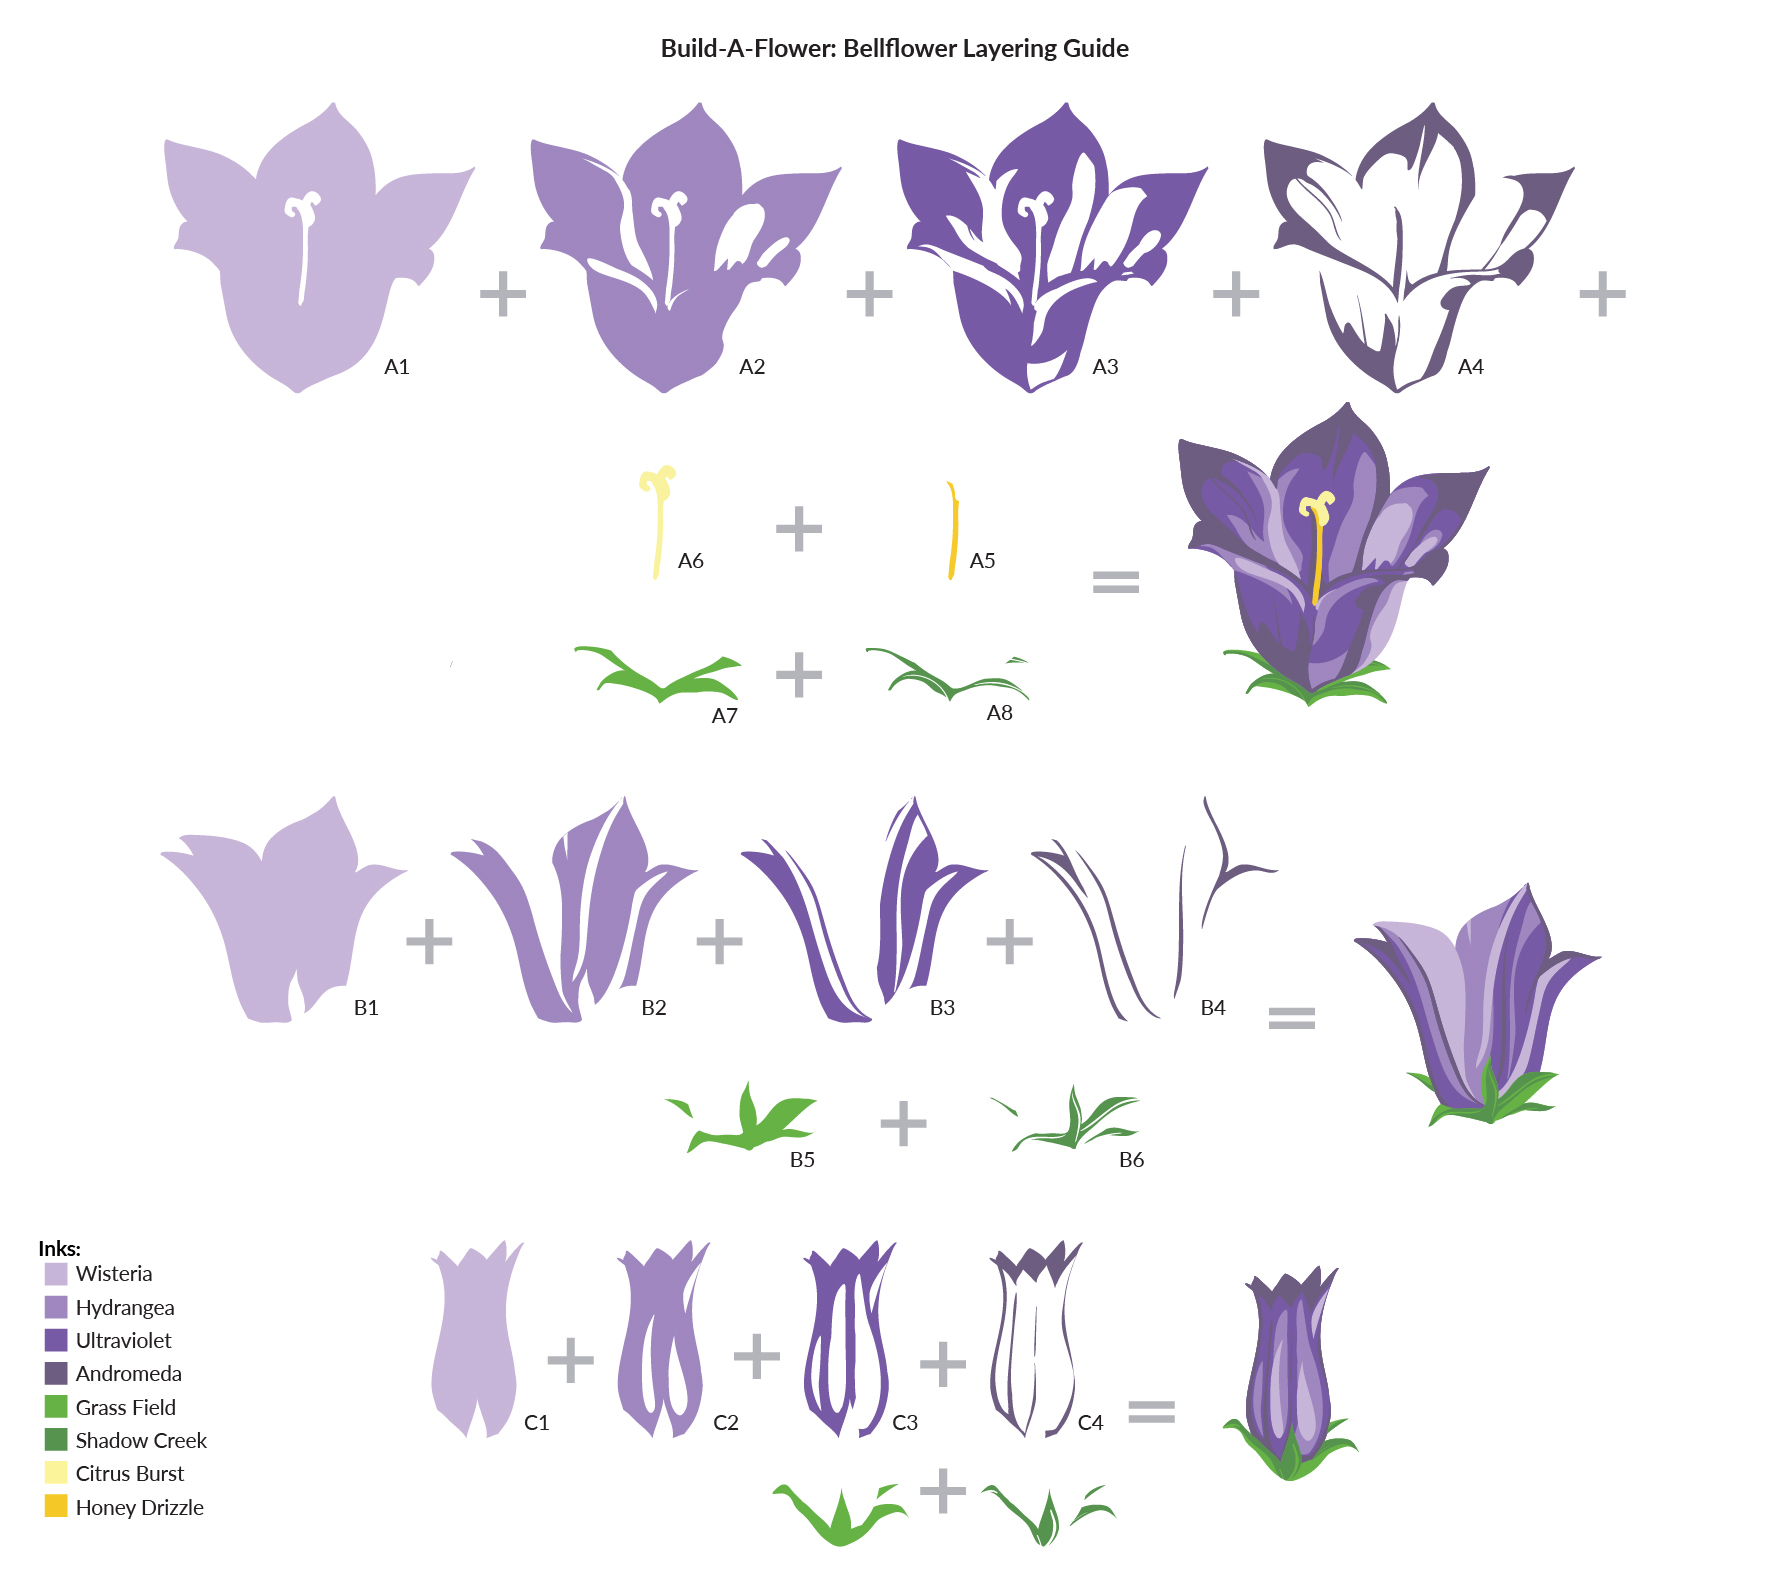
I’m a big fan of layered stamp sets. But I’d like to be honest… there are some sets that are more challenging for me to align than others. Fortunately, Altenew’s BAF Bellflower falls under the easy-to-align stamp sets! You can create a lot of flowers, stems, and sepals by systematic stamping. I learned this way of stamping from Jennifer Mcguire and it definitely saves so much time when making multiple images. Having a Misti stamping tool will be greatly helpful for this system of stamping.

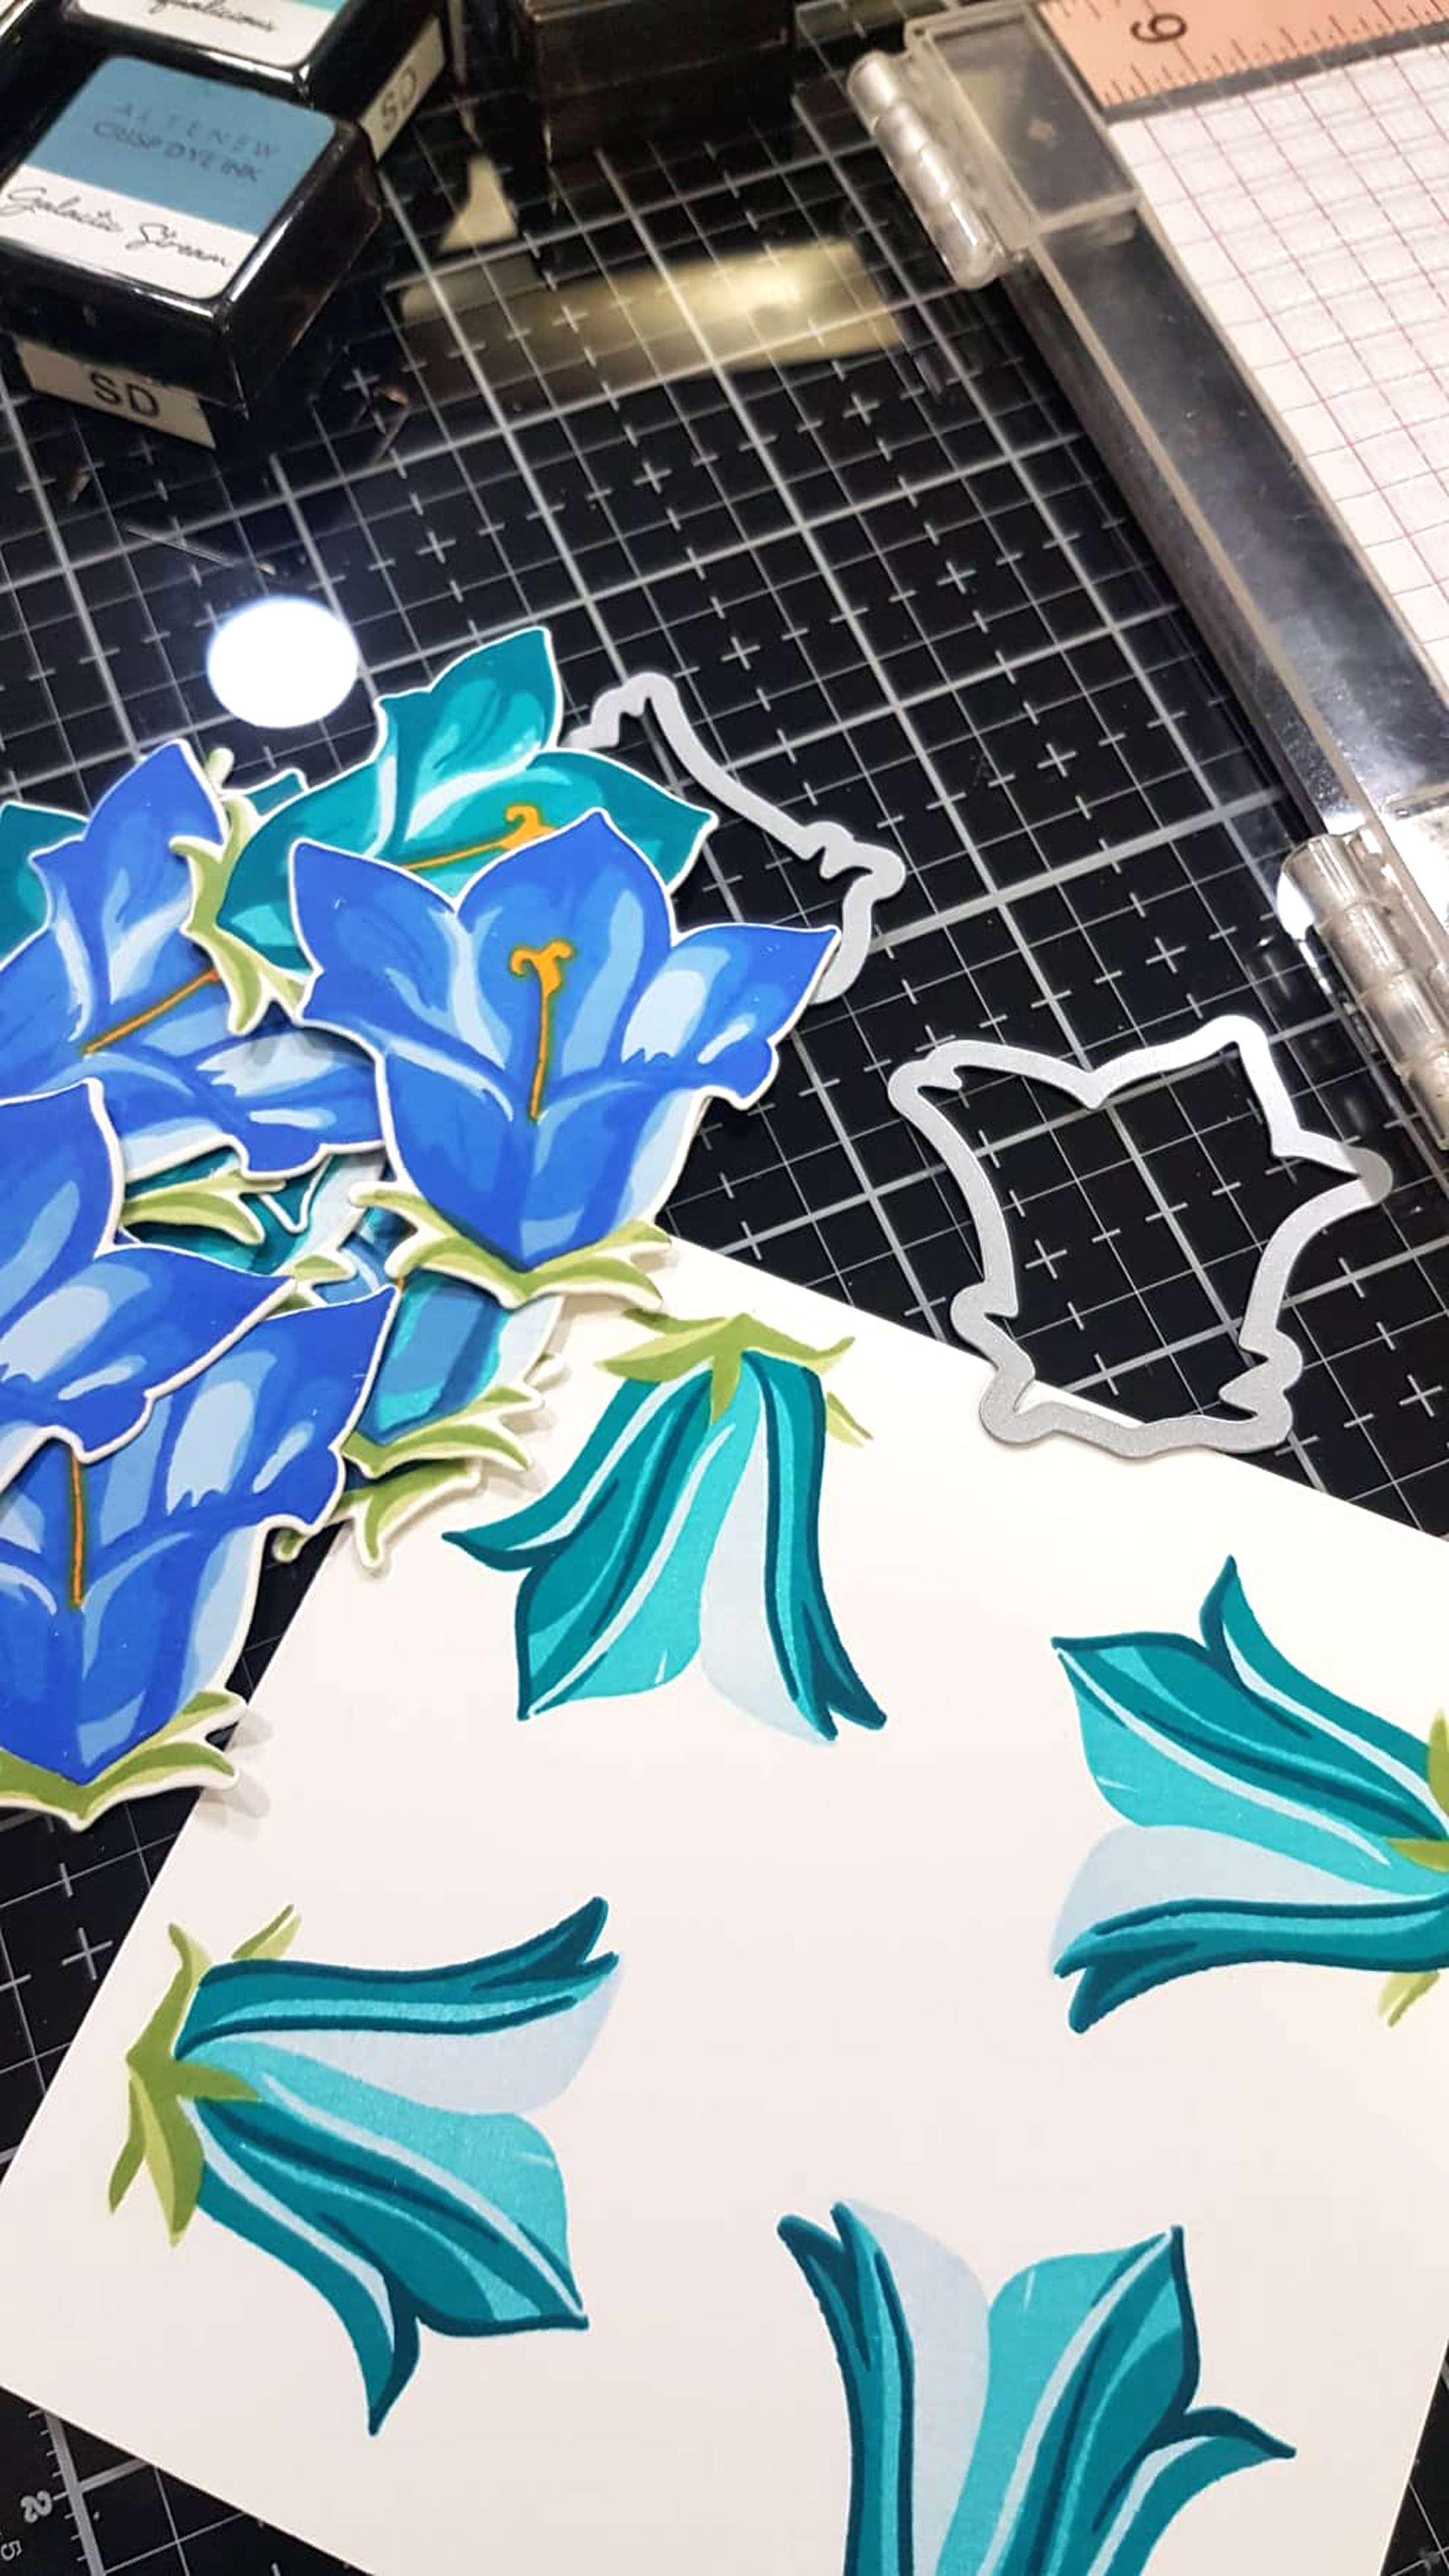
First, cut out a square piece of paper big enough to stamp your 4 images in each corner. Stamp the first layer, rotate the paper 90 degrees making sure the corner and sides are flush to the edges of the Misti then stamp. Repeat until you stamp all 4 corners. Then get the second layer, position the stamp on top of the image and pick up the stamp with the Misti. Get your darker ink then stamp and just rotate the paper to stamp all of the 2nd layers. Continue in this manner until your image is complete. I stamped a lot of flowers so that I always have extras to create cards. Below is the layering guide.

BUILD A FLOWER: BELLFLOWER GUIDE

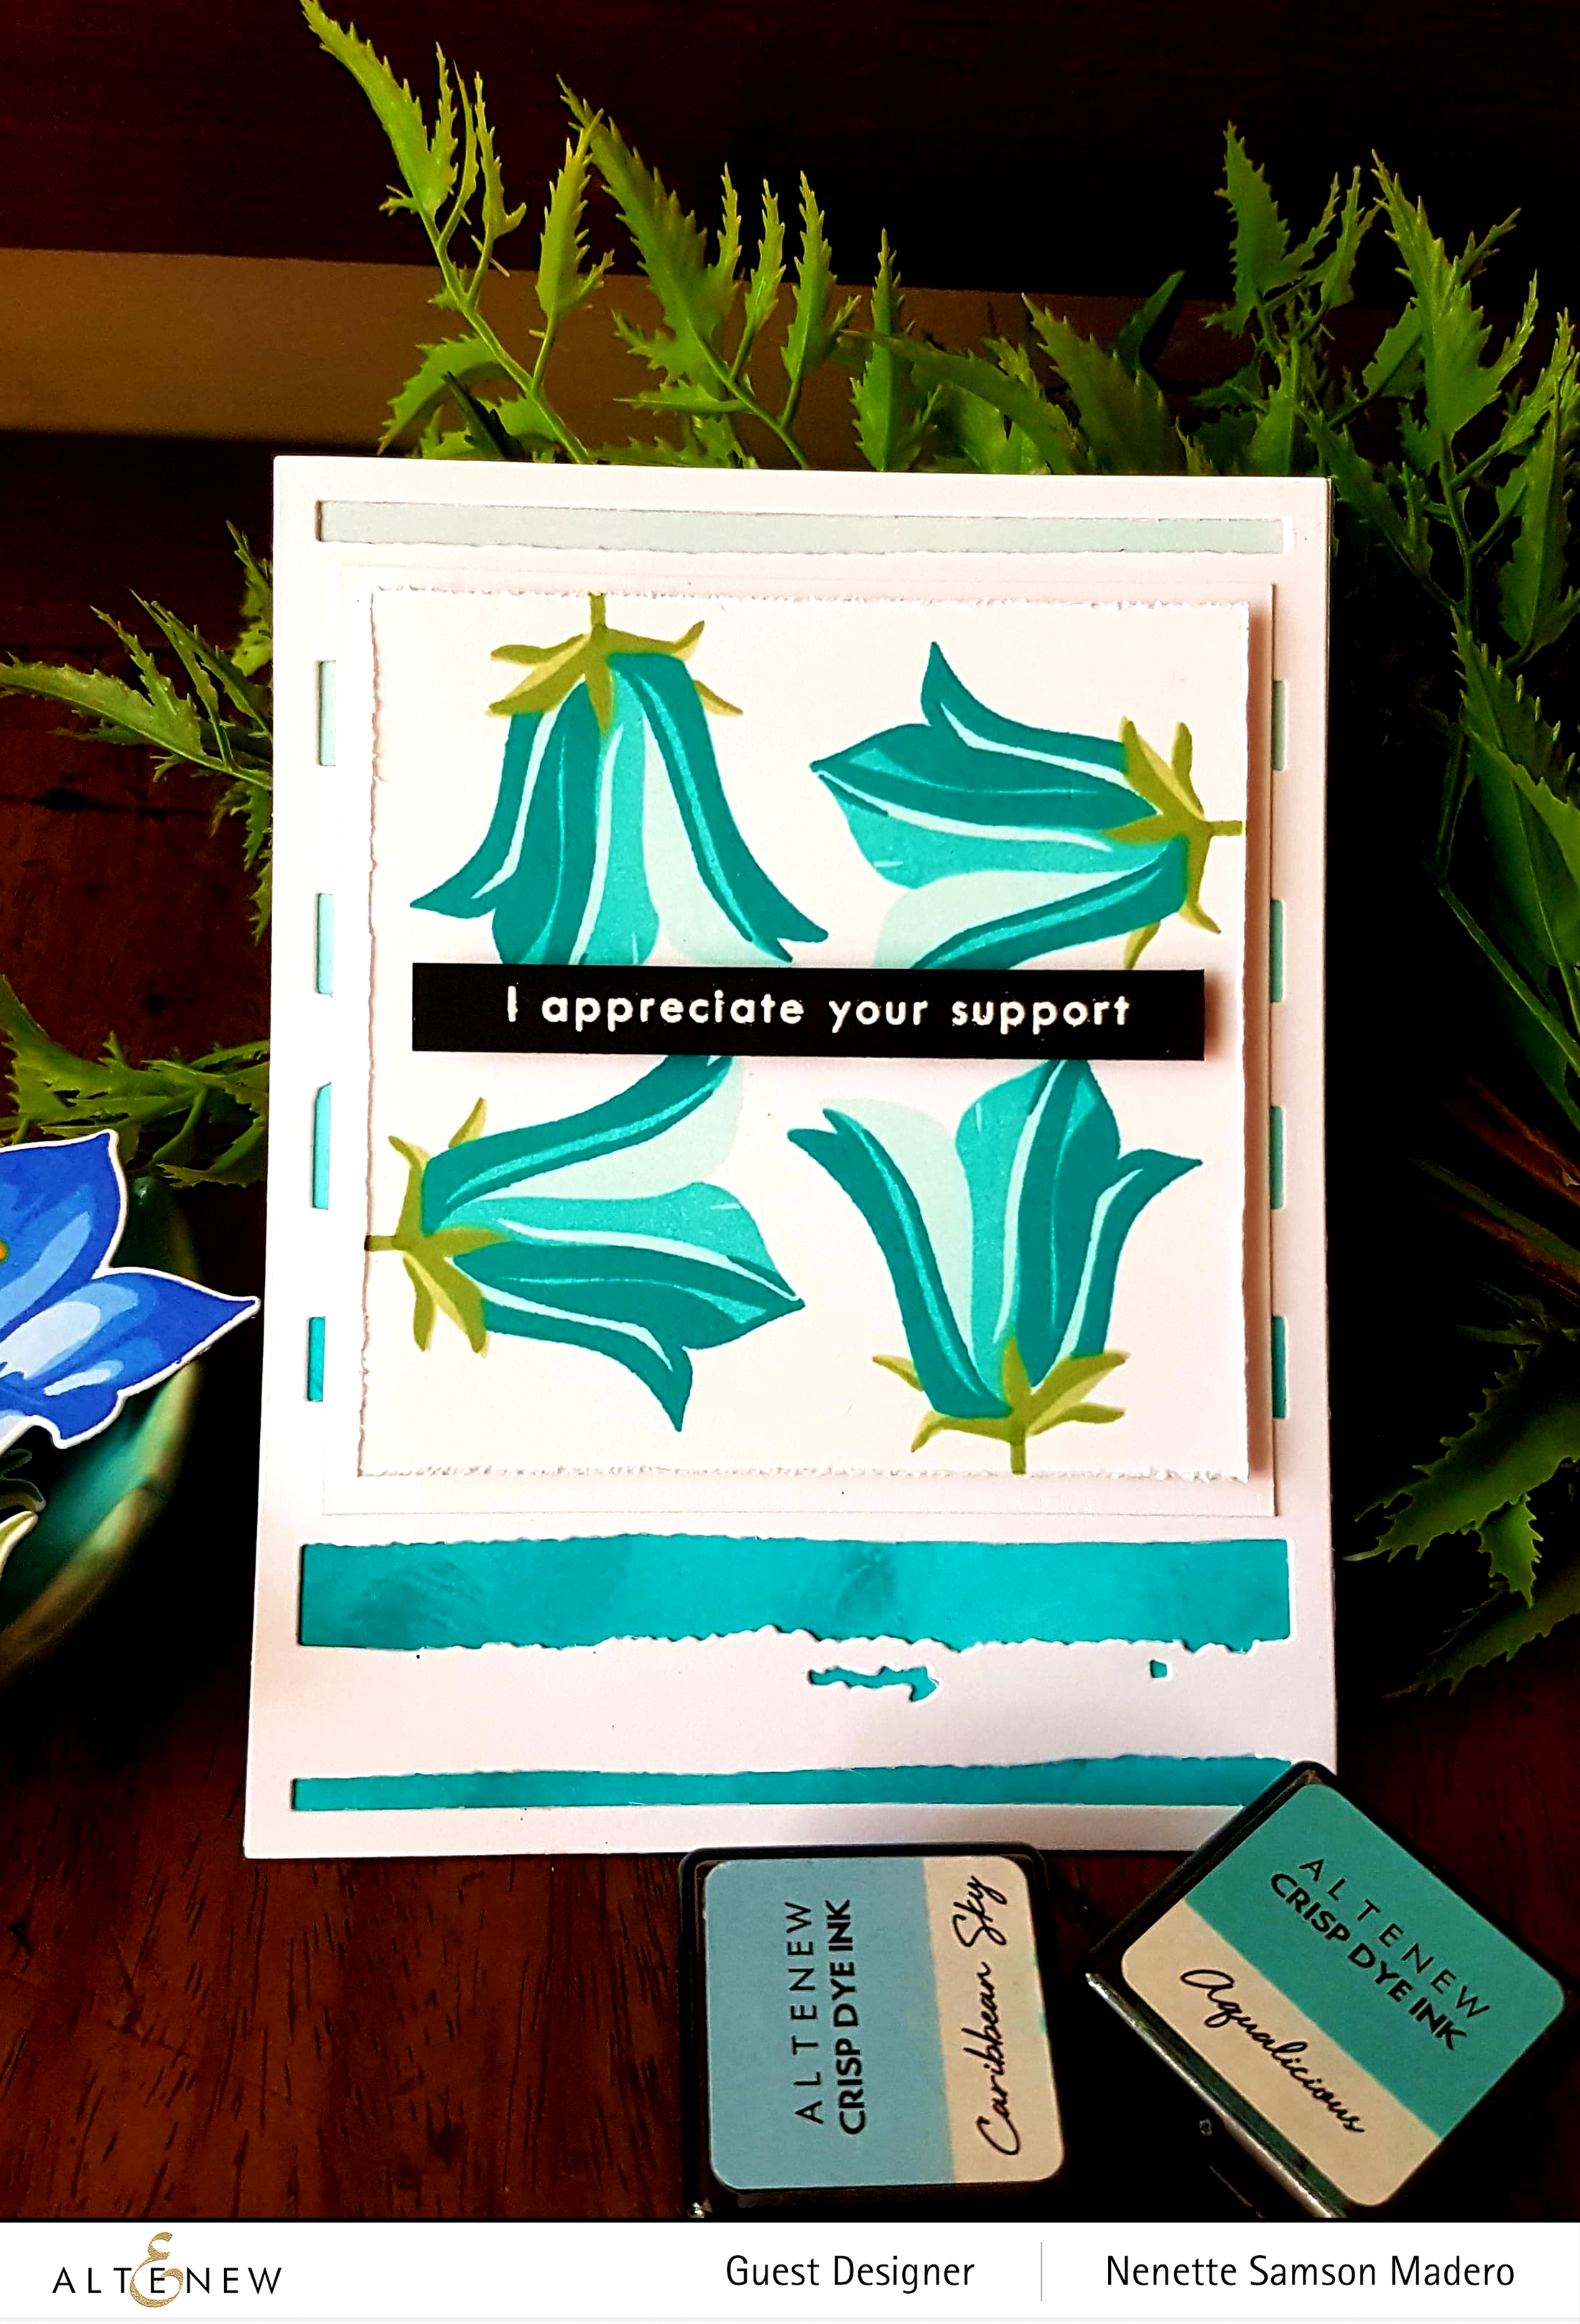
I APPRECIATE YOUR SUPPORT CARD

I loved how the images looked so I decided to use some of these stamped panels on cards instead of die-cutting them.

MATERIALS:

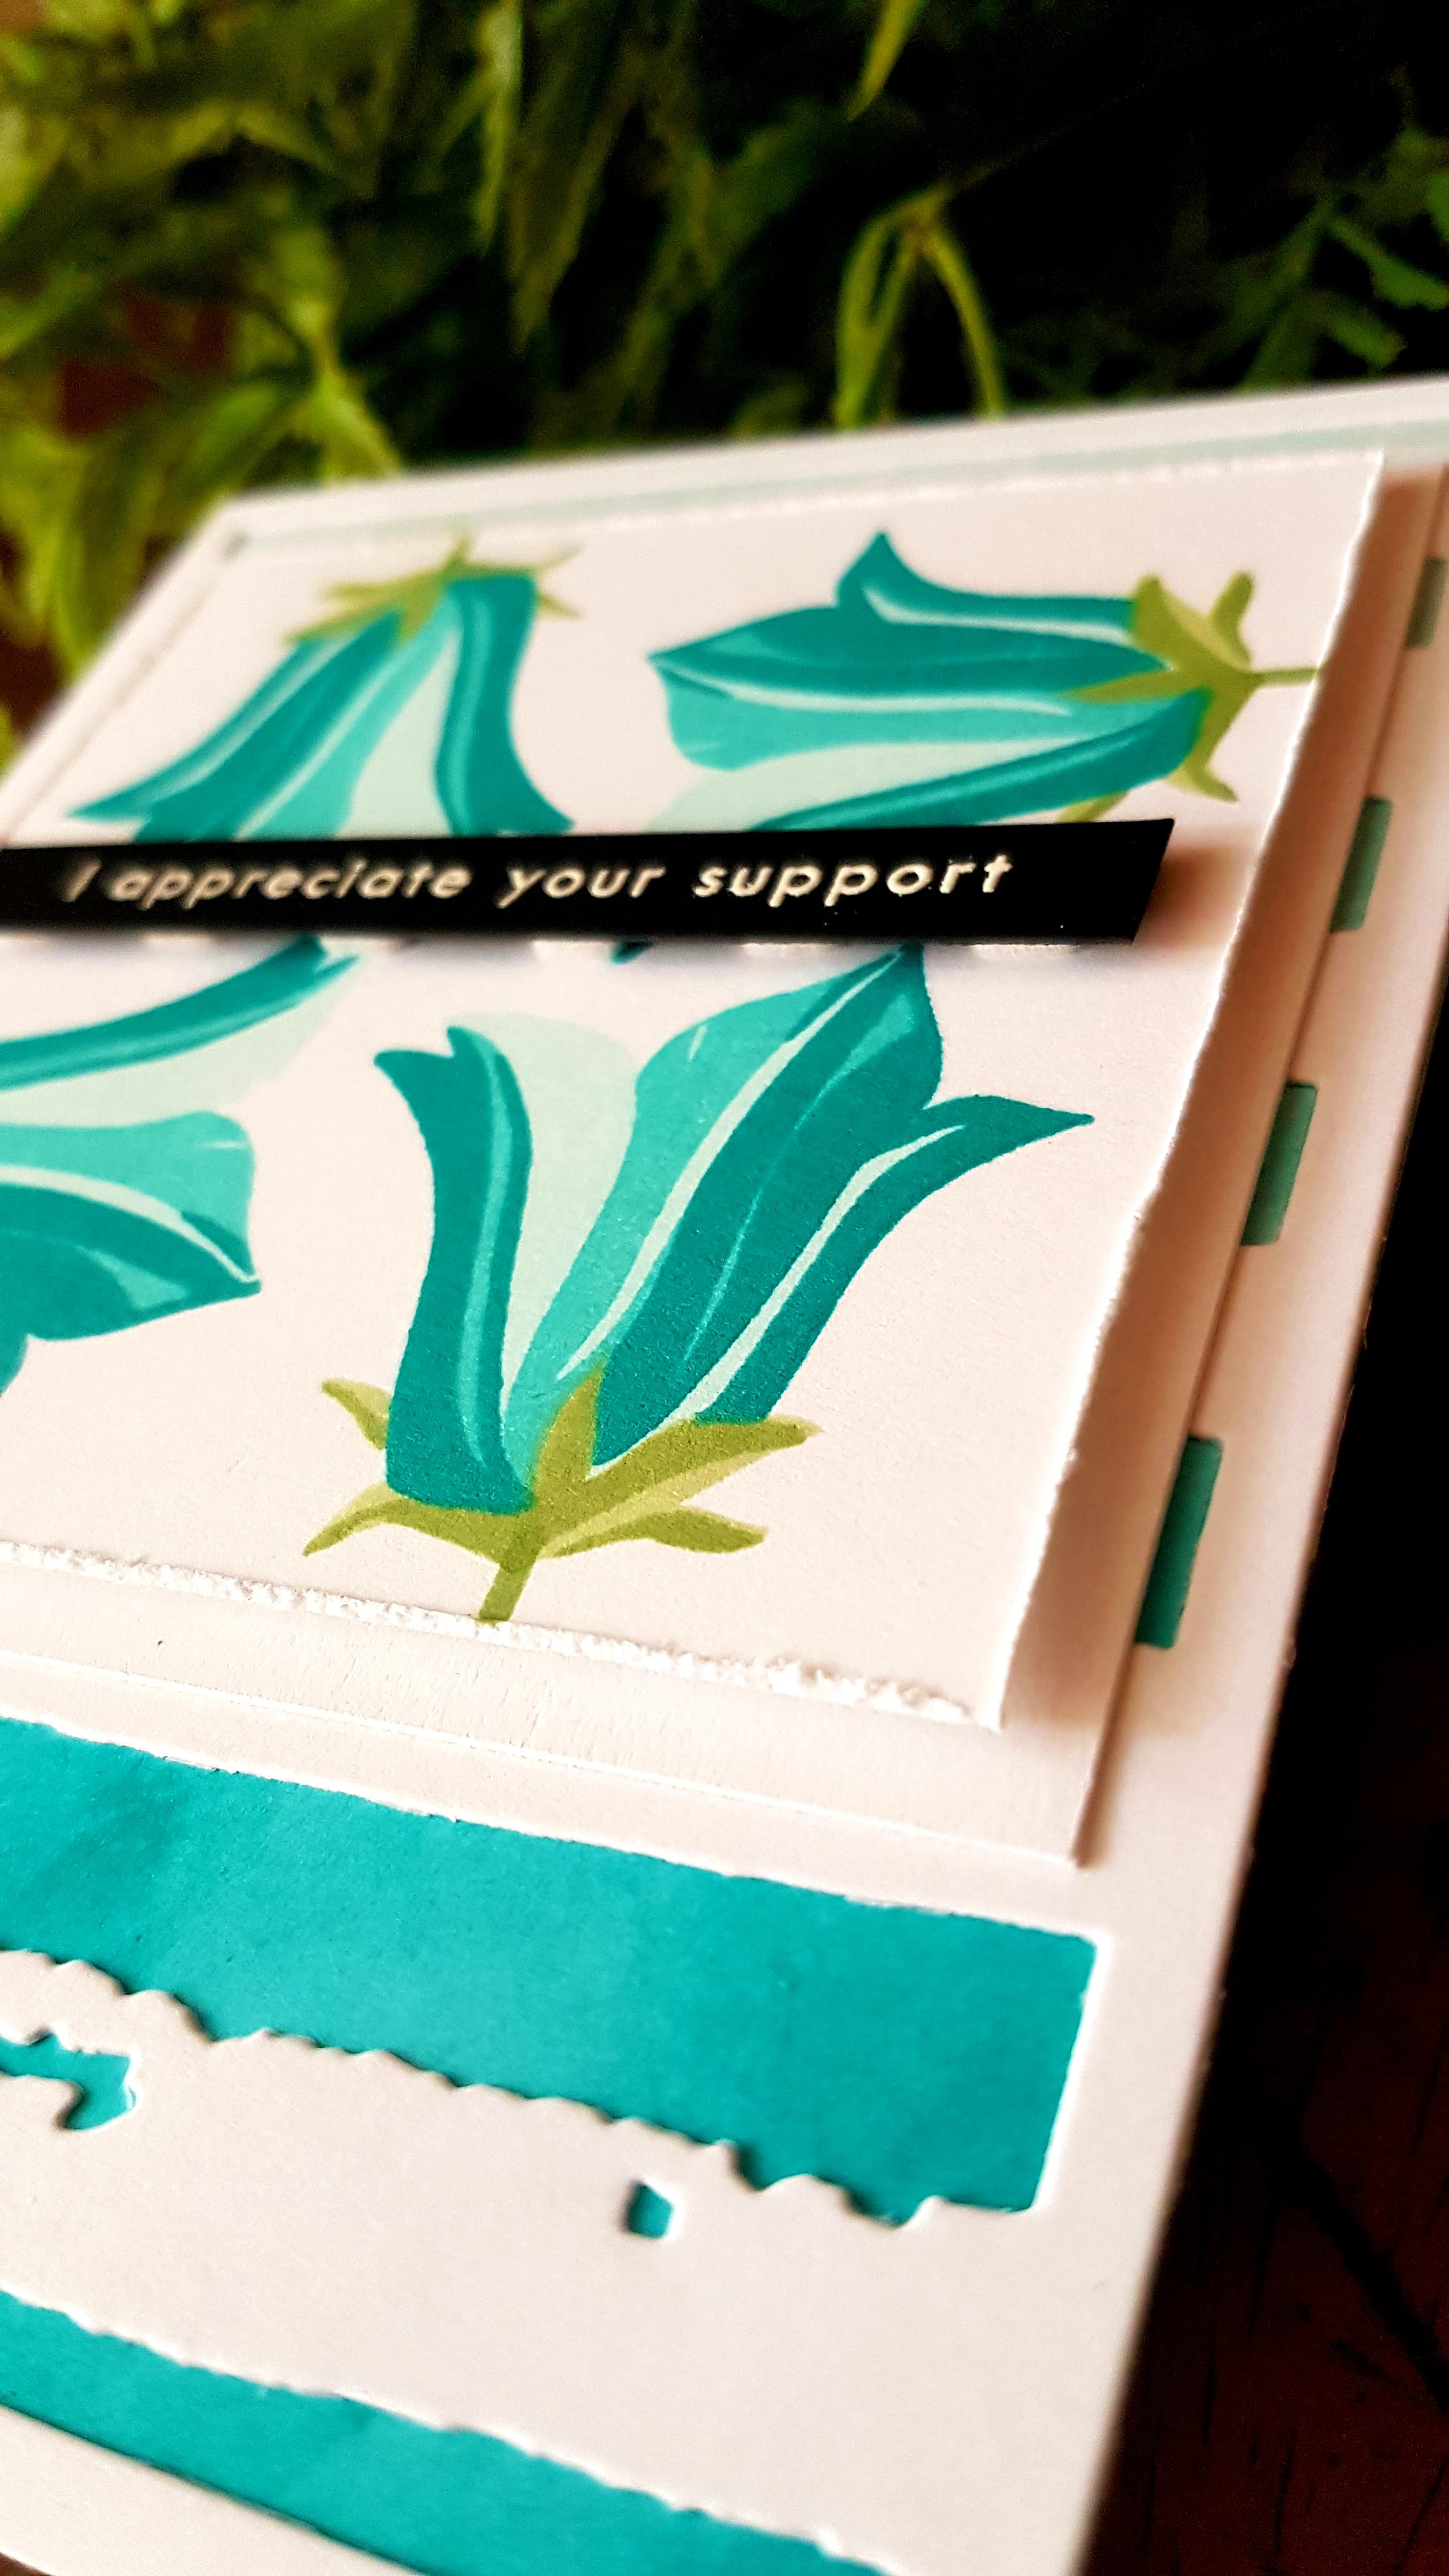
The front panel of an A2 card was colored using Altenew dye inks in shades of blue to create an ombre effect. The Watercolor stripes cover die cut was glued onto the card front. The stamped panel’s edges were distressed using the paper distresser tool then adhered onto a white mat then glued to the card front using foam squares. The sentiment was stamped on black cardstock using Versamark ink then embossed using white embossing powder.

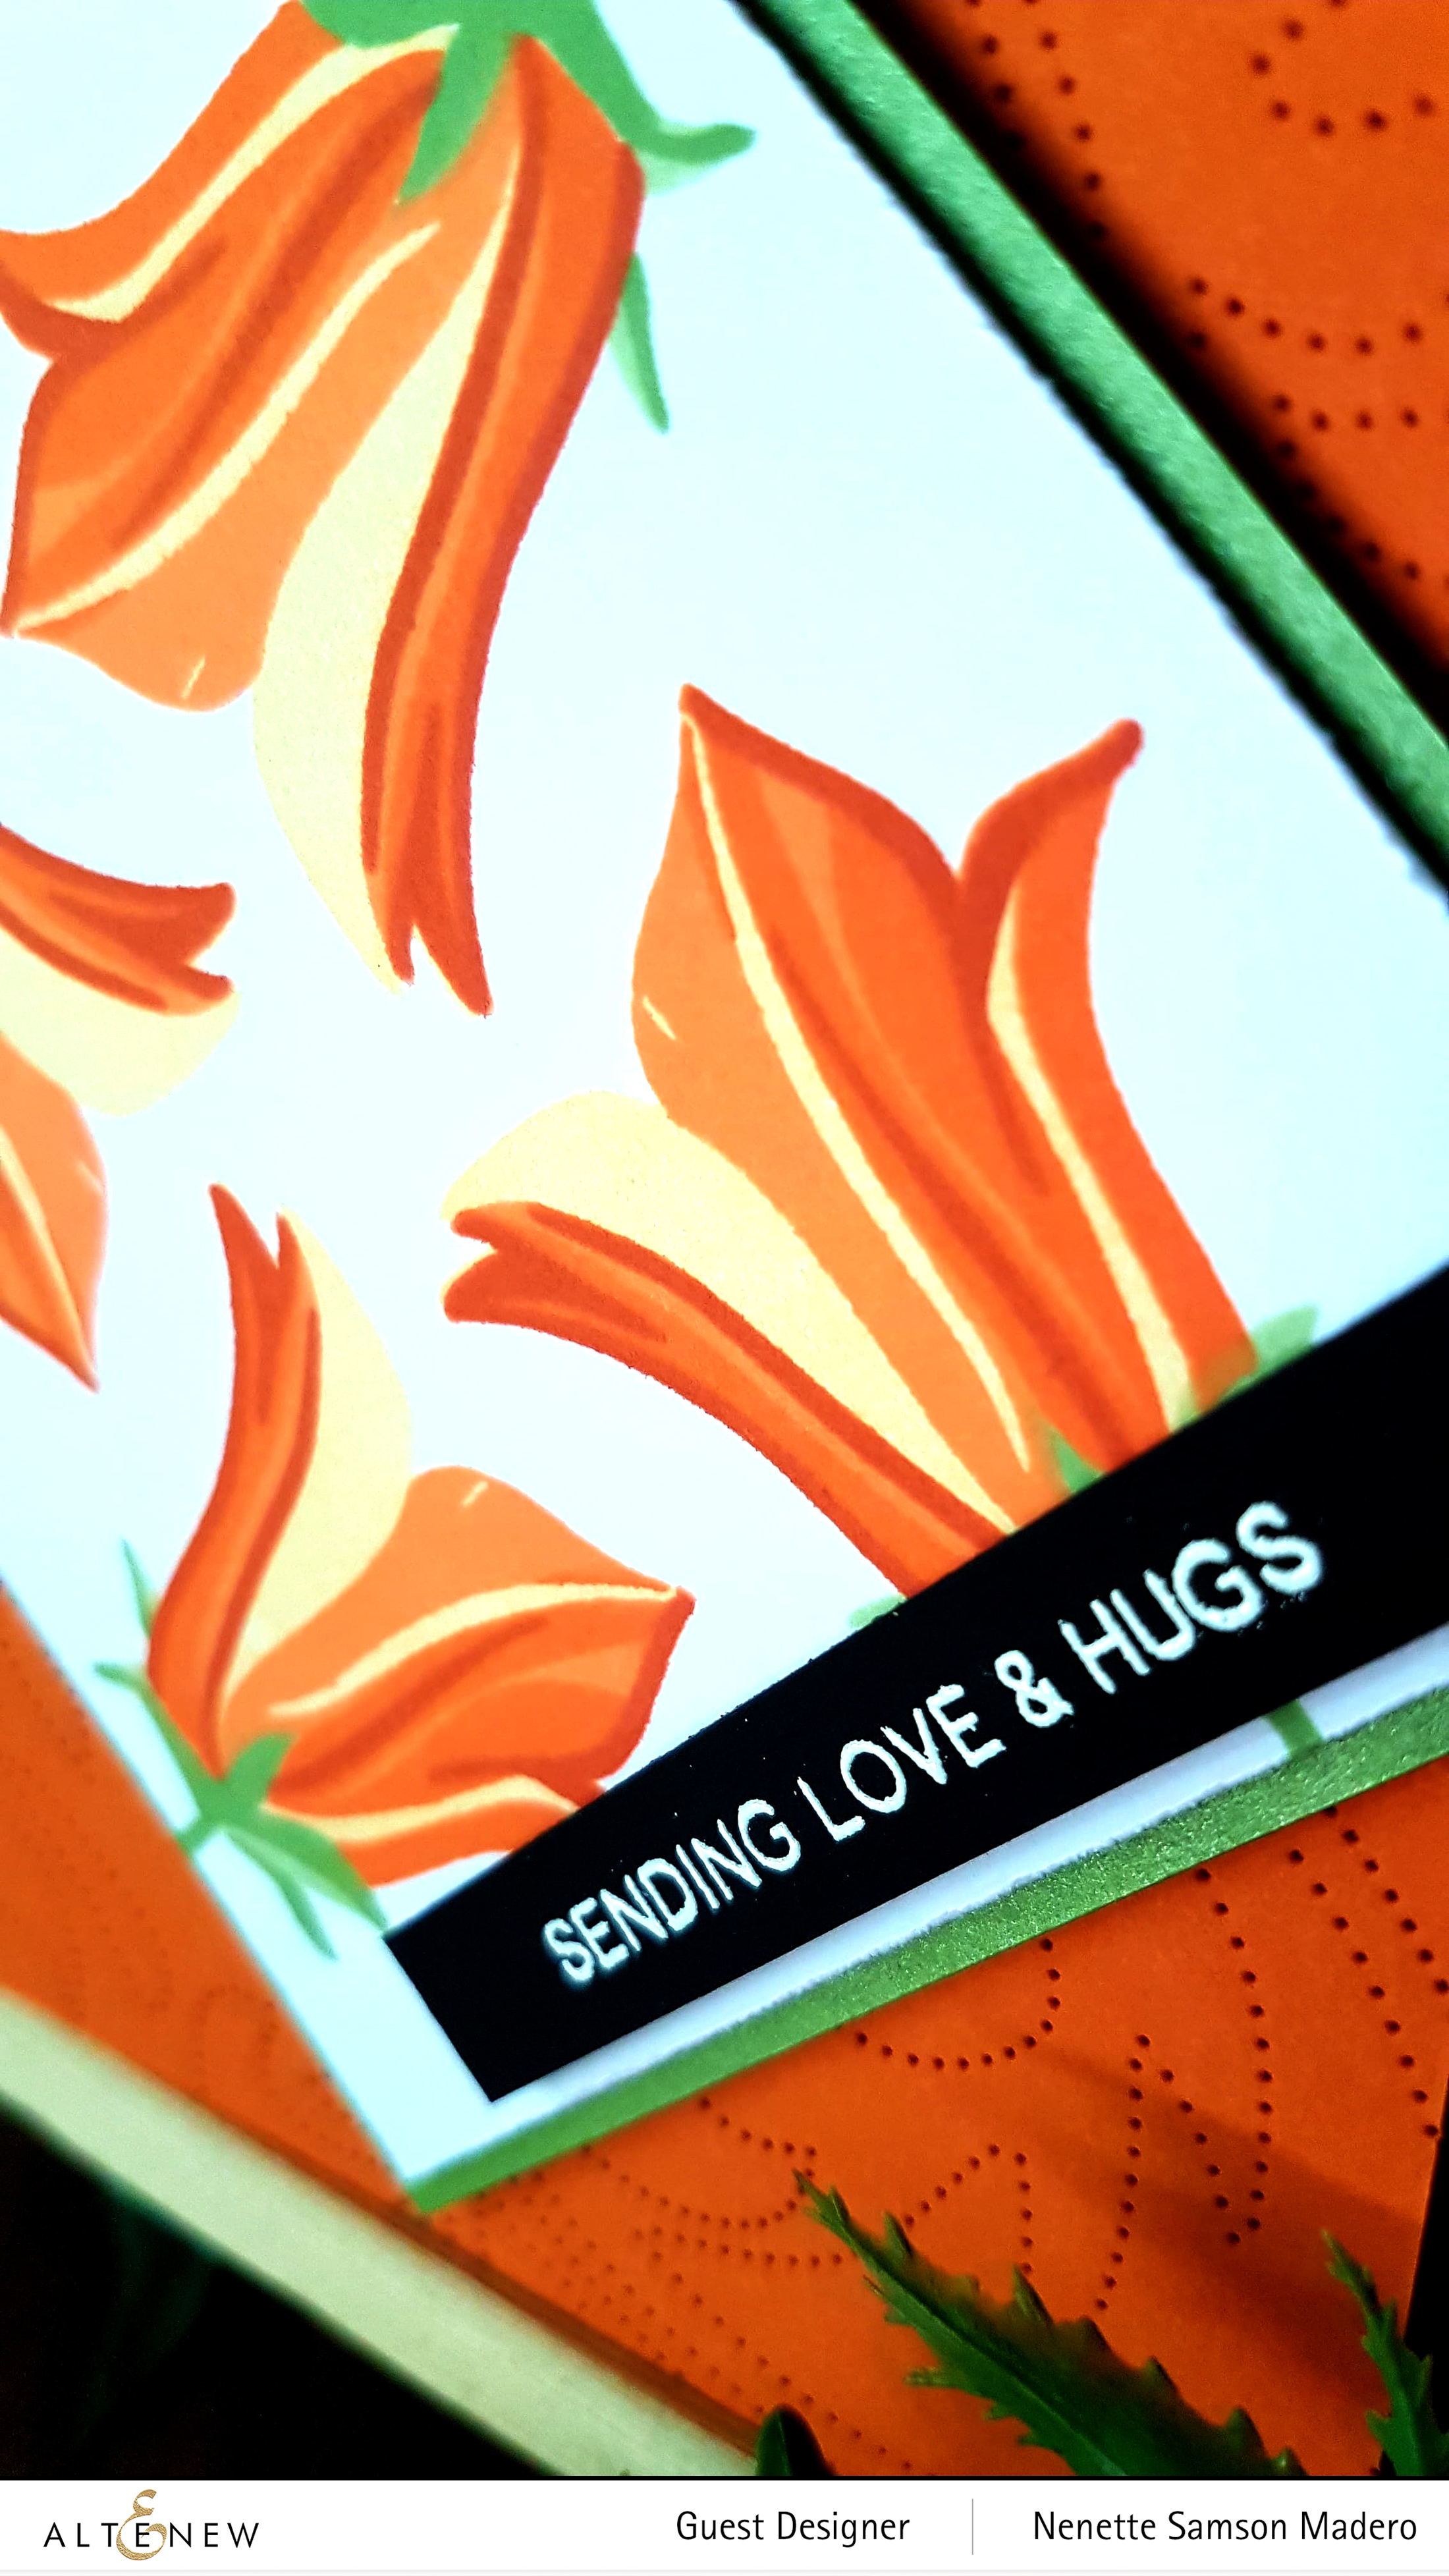
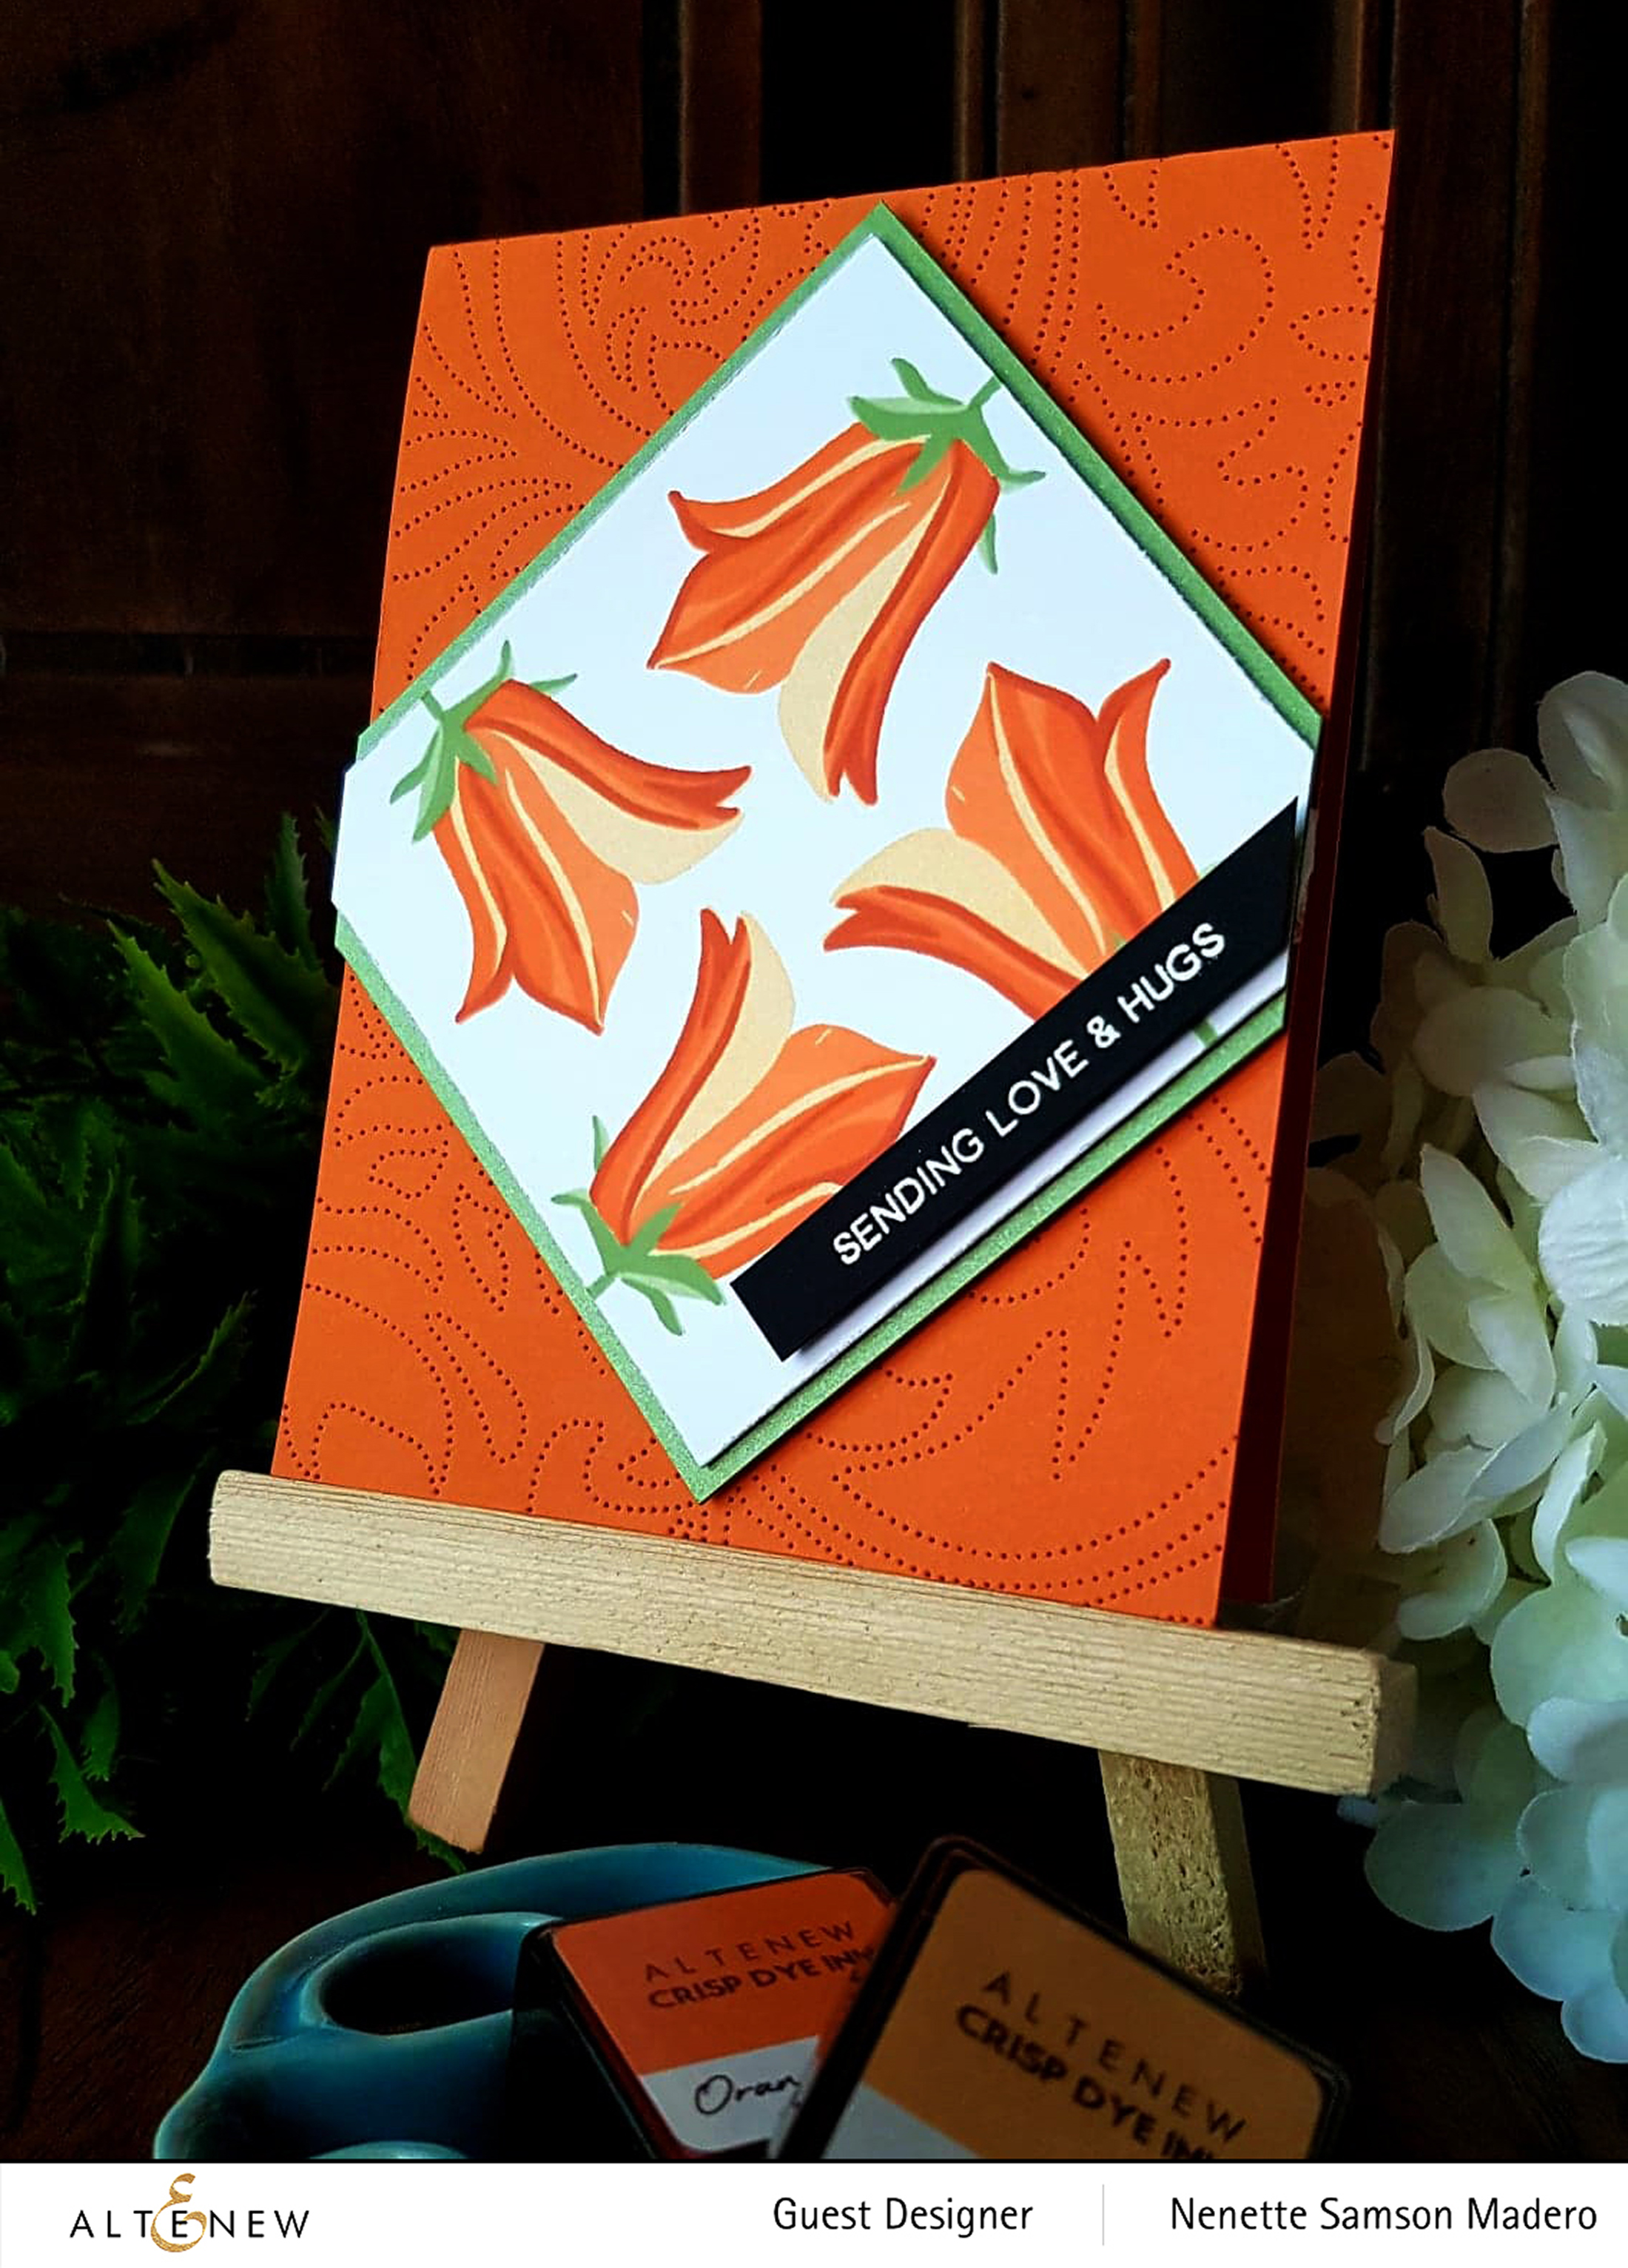
SENDING LOVE AND HUGS CARD

Another card was created using a different set of colors. By rotating the square panel, it somehow gives the card a more modern feel.

MATERIALS:

Orange cardstock was cut to 8.5″ x 4.25″ creating a top folding A2 card. The front panel was debossed using the beautiful Dotted Swirls Debossing cover die. I just love how it creates this subtle design on the paper! I will definitely be using this again soon. The flowers, sepals, and stems were stamped on a 3.5″ x 3.5″ Neenah Solar White Cardstock using the same procedure as previously discussed.

The stamped panel was mounted on a 3.75″ x 3.75″ green cardstock with some foam tape then mounted diagonally on the card front. The sentiment was stamped on back cardstock using Versamark Ink then embossed with Altenew Pure white crisp embossing powder. This was then adhered to the front panel using foam tape.

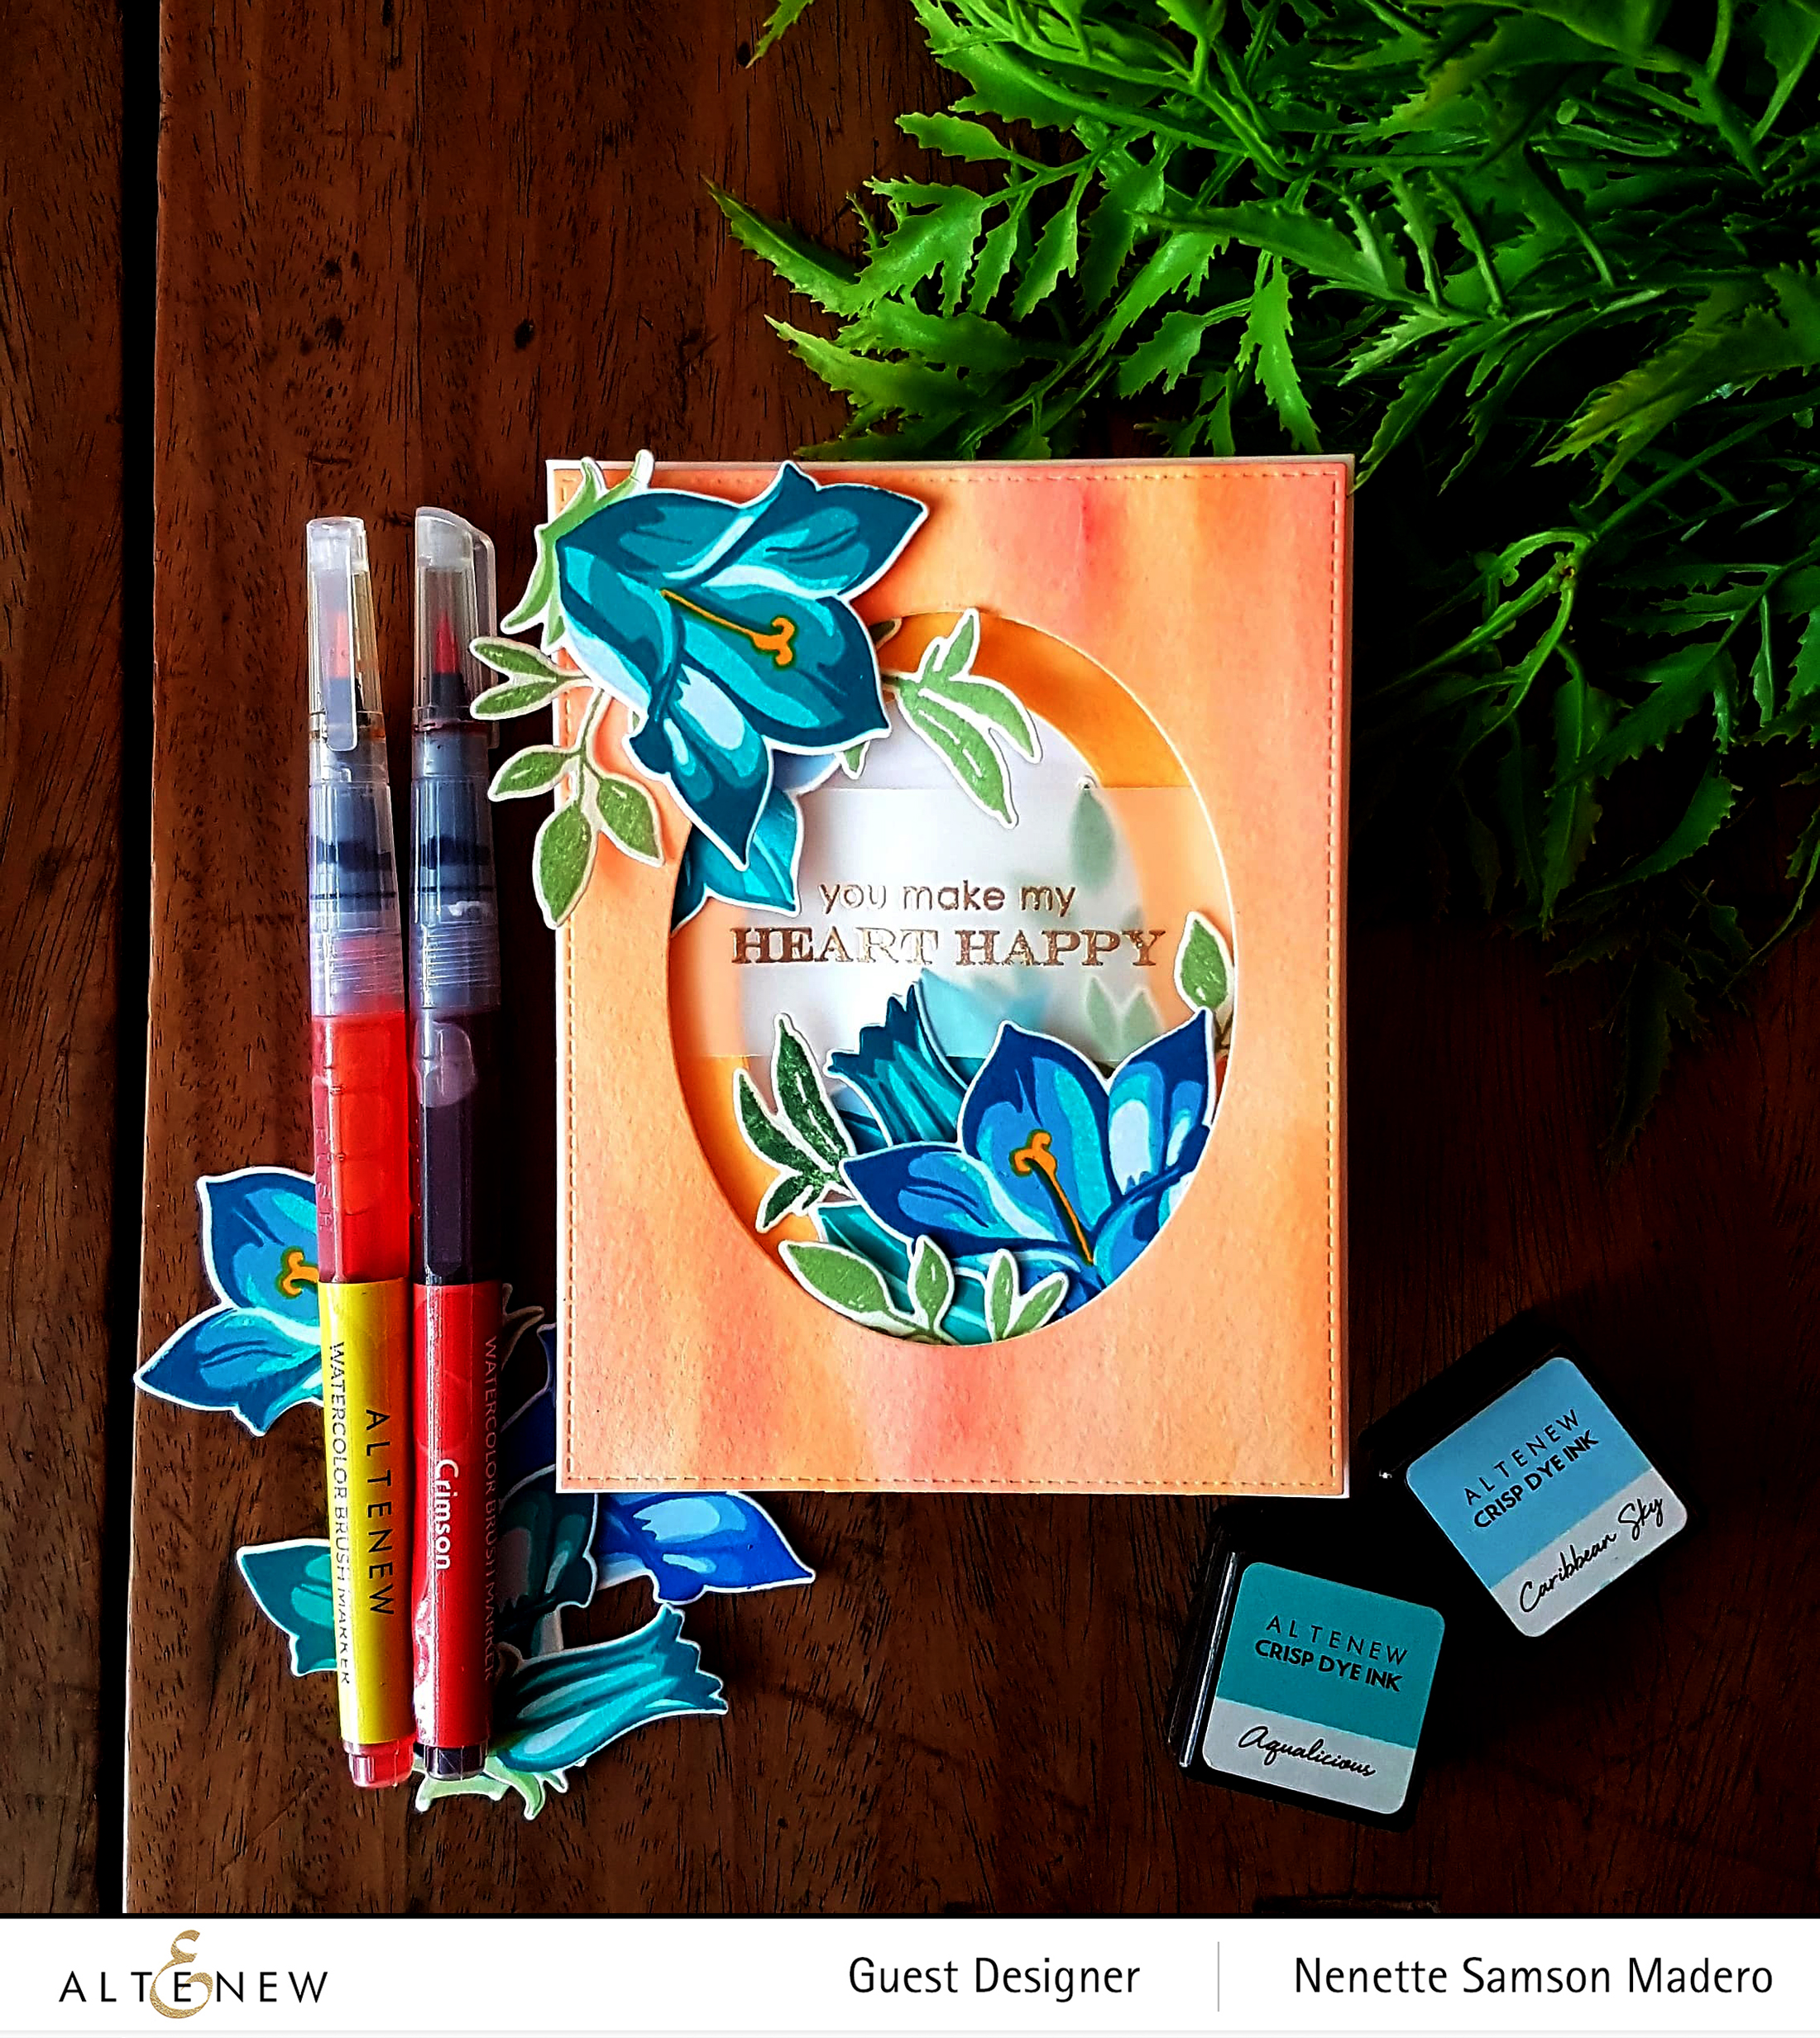
YOU MAKE MY HEART HAPPY CARD

MATERIALS:

I wanted to create layers for this card so I watercolored 2 sheets of 5.5″ x 4.25″ watercolor paper using Altenew’s watercolor brush markers. When the papers were dry, I used the Feeling Dotty Stencil with Versamark Ink to create some dot patterns on the watercolored paper then poured clear embossing powder and heat set it. This added some subtle texture. I used 2 different sizes of oval dies to cut windows. The smaller oval widow was stuck to the card front of an A2 side folding card using foam squares. The stamped flowers and leaves were arranged at the back of this panel. Next, I used foam squares again to adhere the 2nd bigger oval window to the first window. Flowers and leaves were arranged on the upper left and lower right side of the oval. The sentiment was stamped on vellum using Versamark ink and was embossed using Rose Gold Embossing powder This was then adhered to the 1st oval window. Lastly, the biggest flower image and some die cut leaves were glued to the front of the card.

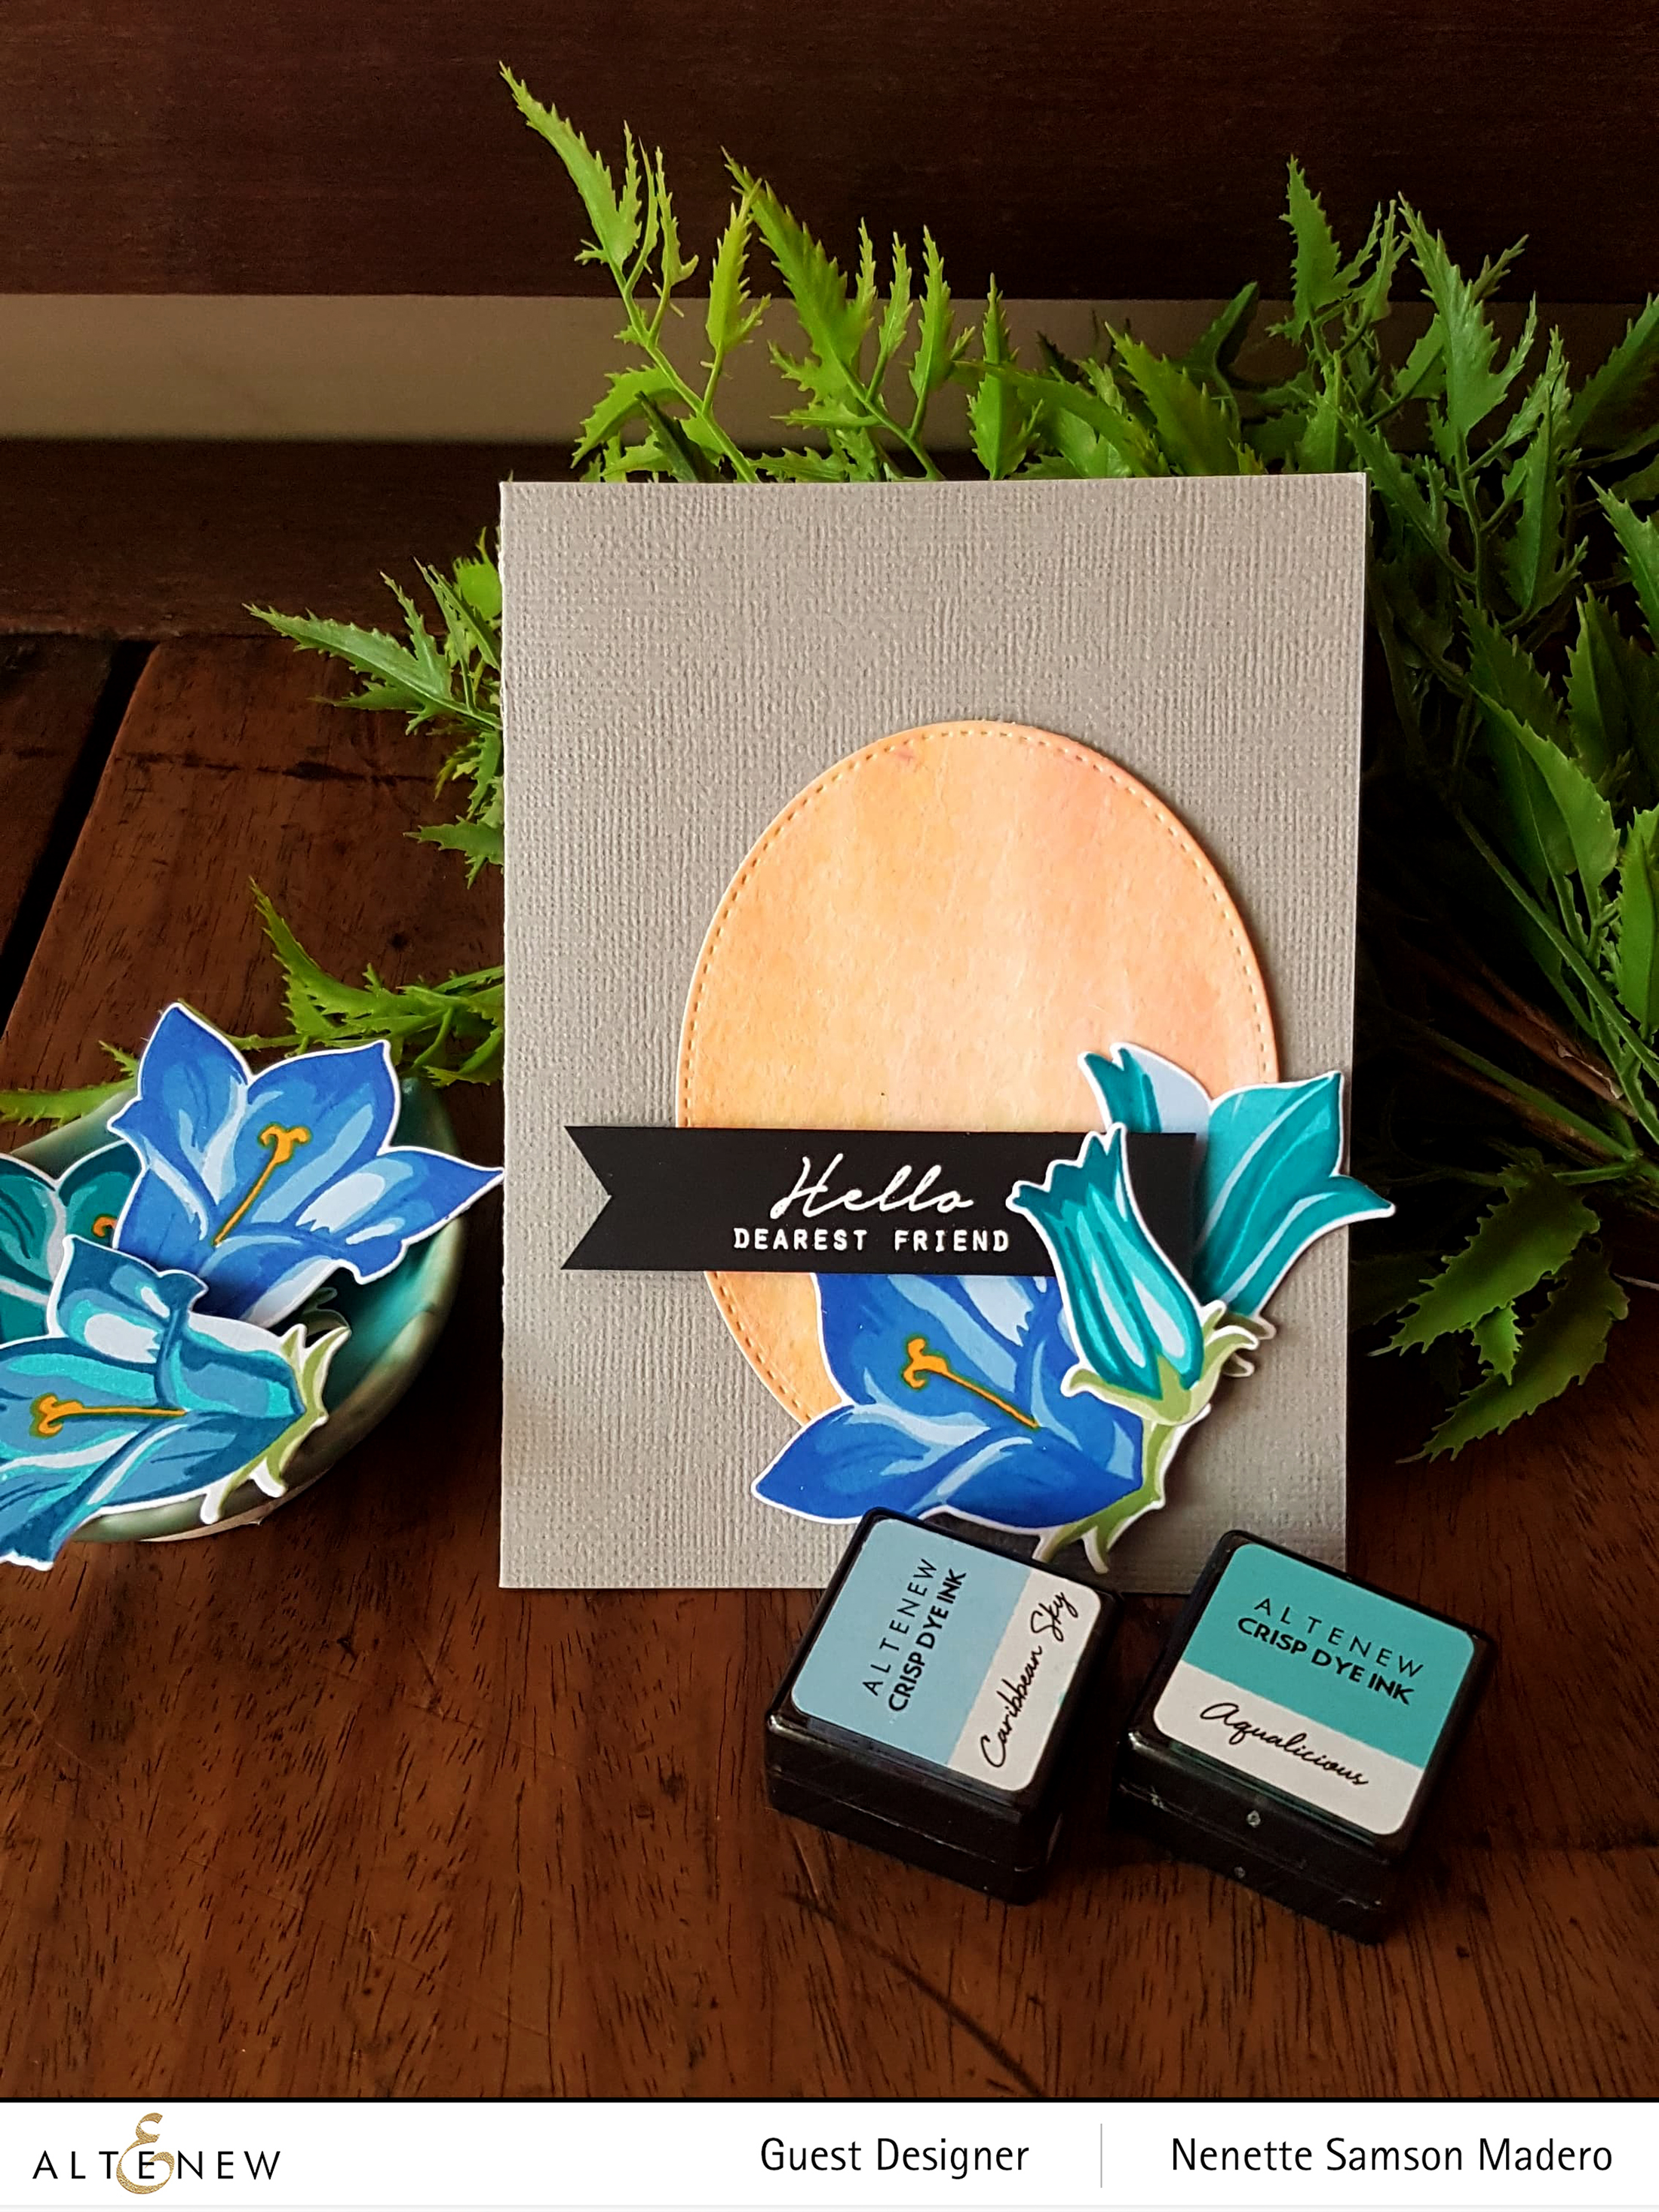
HELLO DEAREST FRIEND CARD

MATERIALS:

I always try to find use for the leftovers of my cards. I wanted to create a quick and simple card using the oval die cut that came from the previous card.

The oval piece was adhered using adhesive and 3 flowers and the sentiment were layered using foam tape to create dimension. This CAS card only took a minute to create using leftover die cut pieces. 🙂

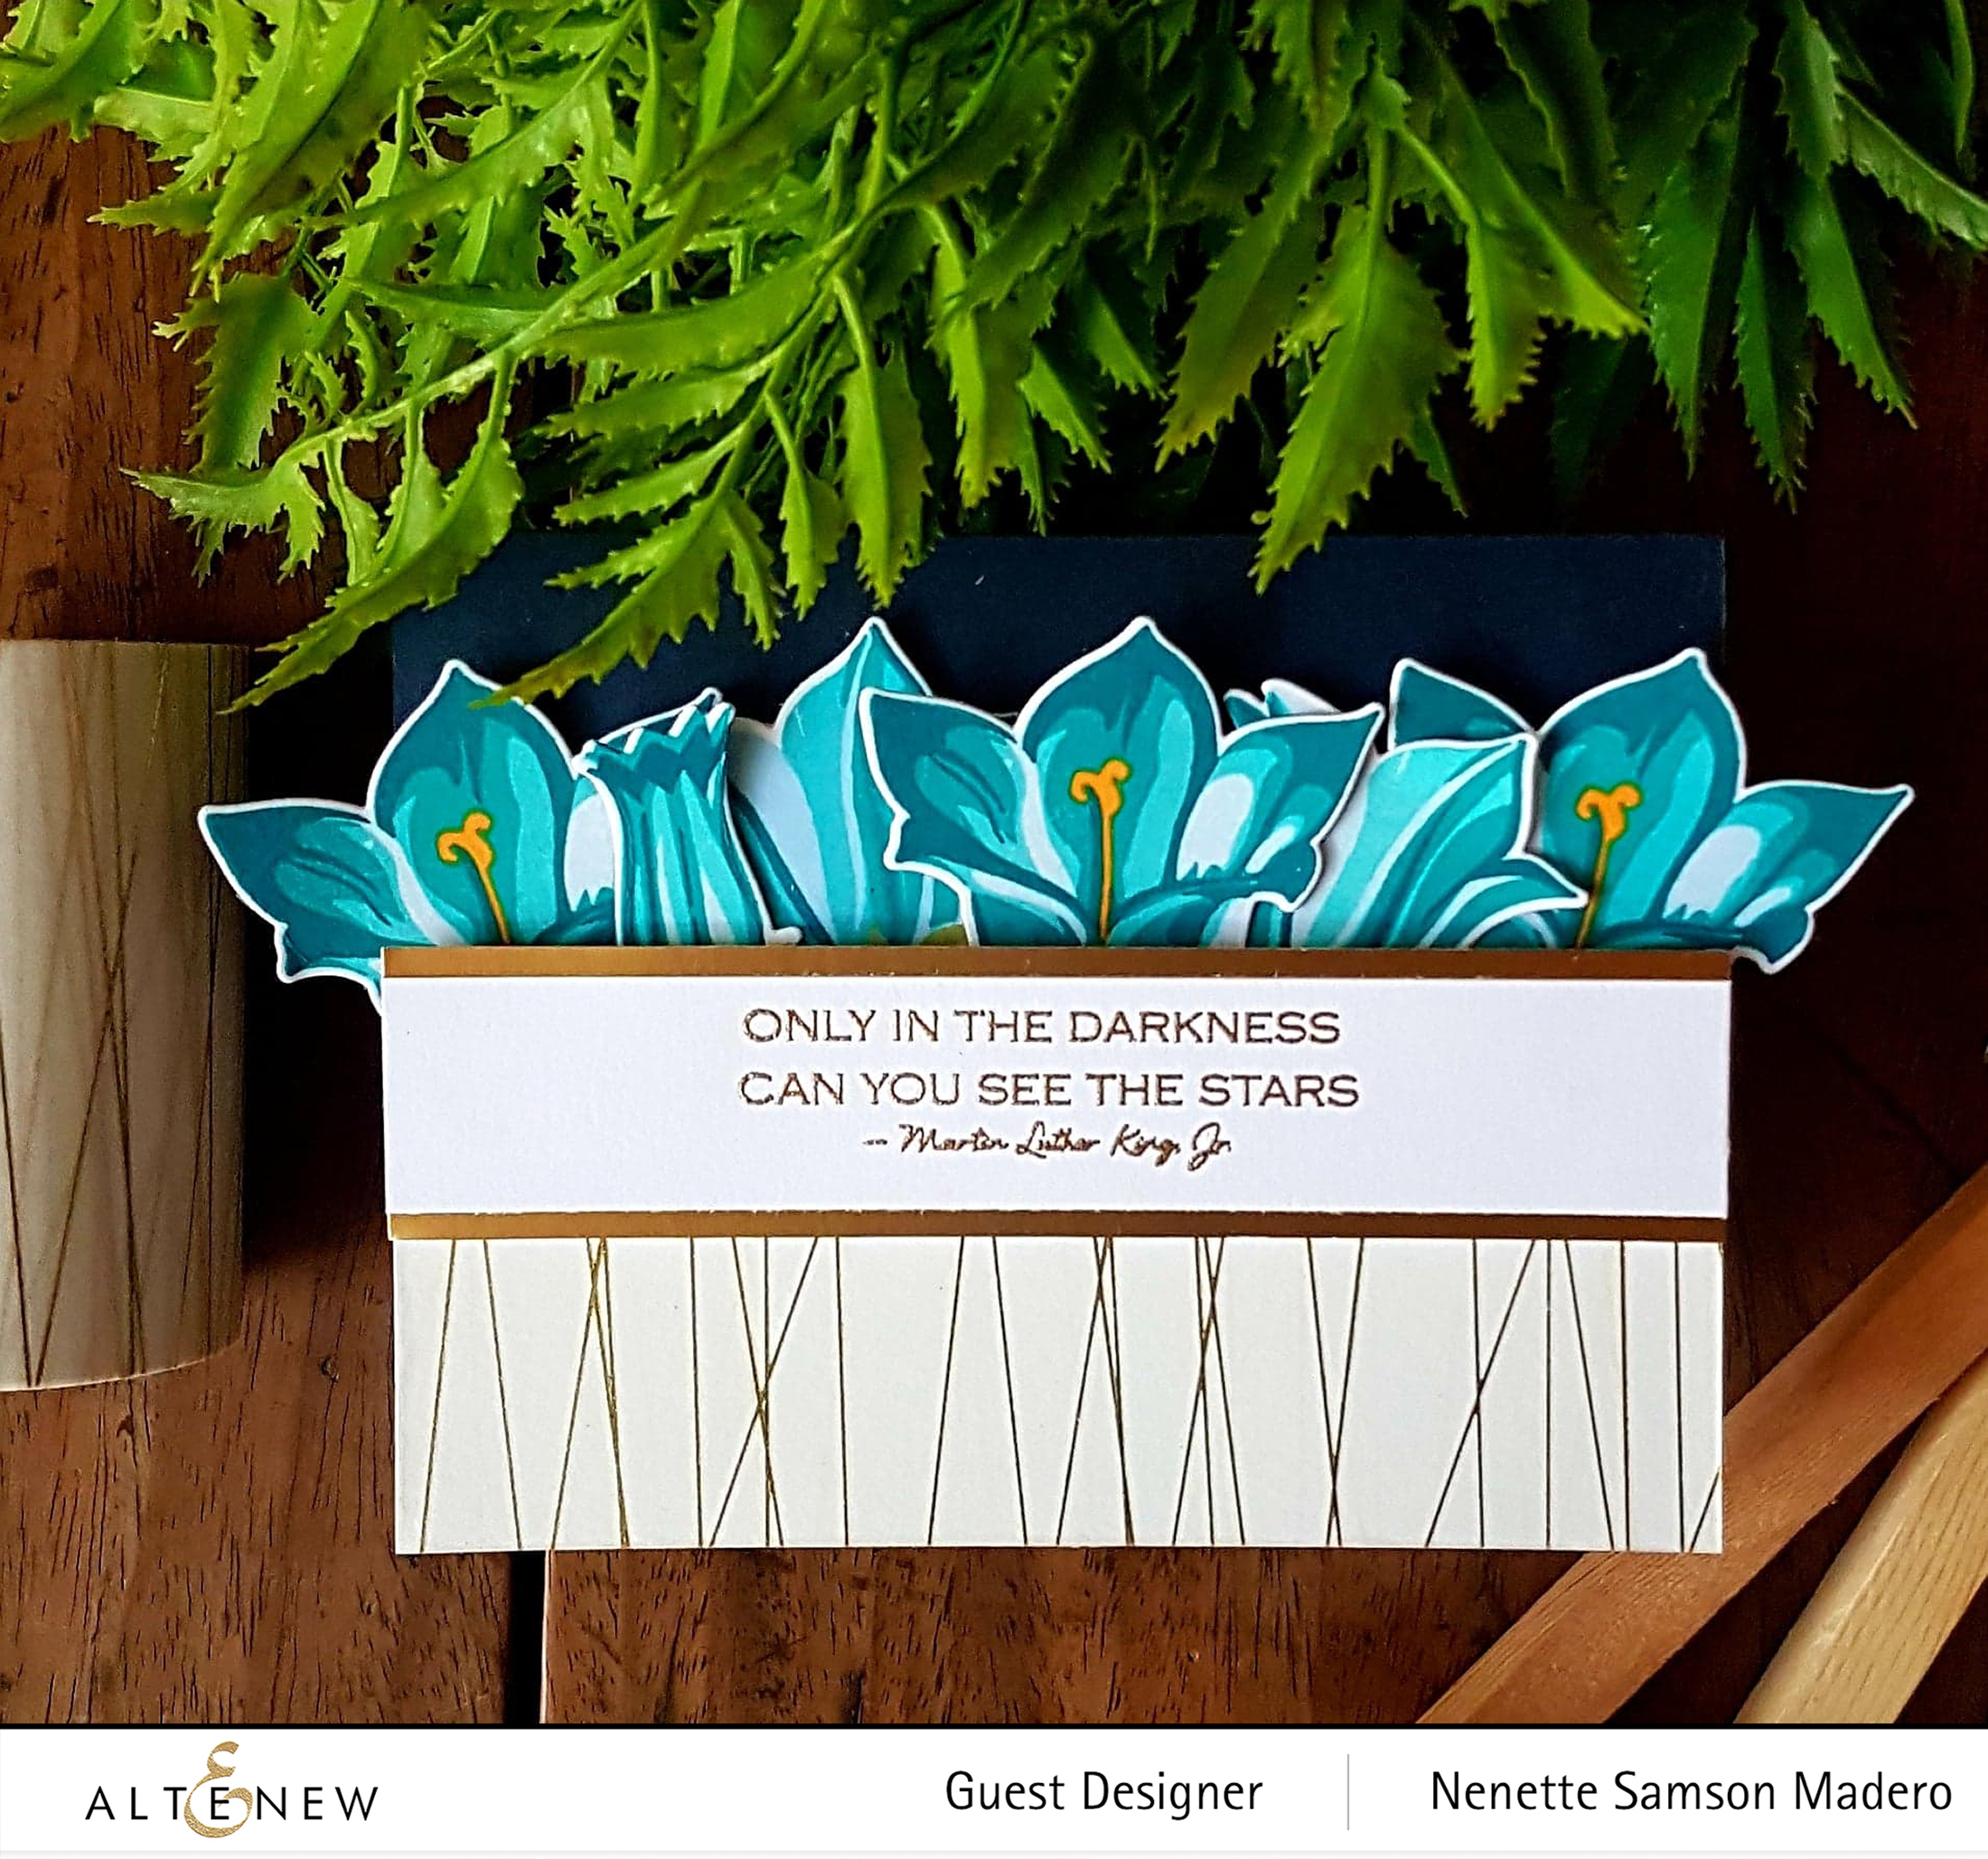
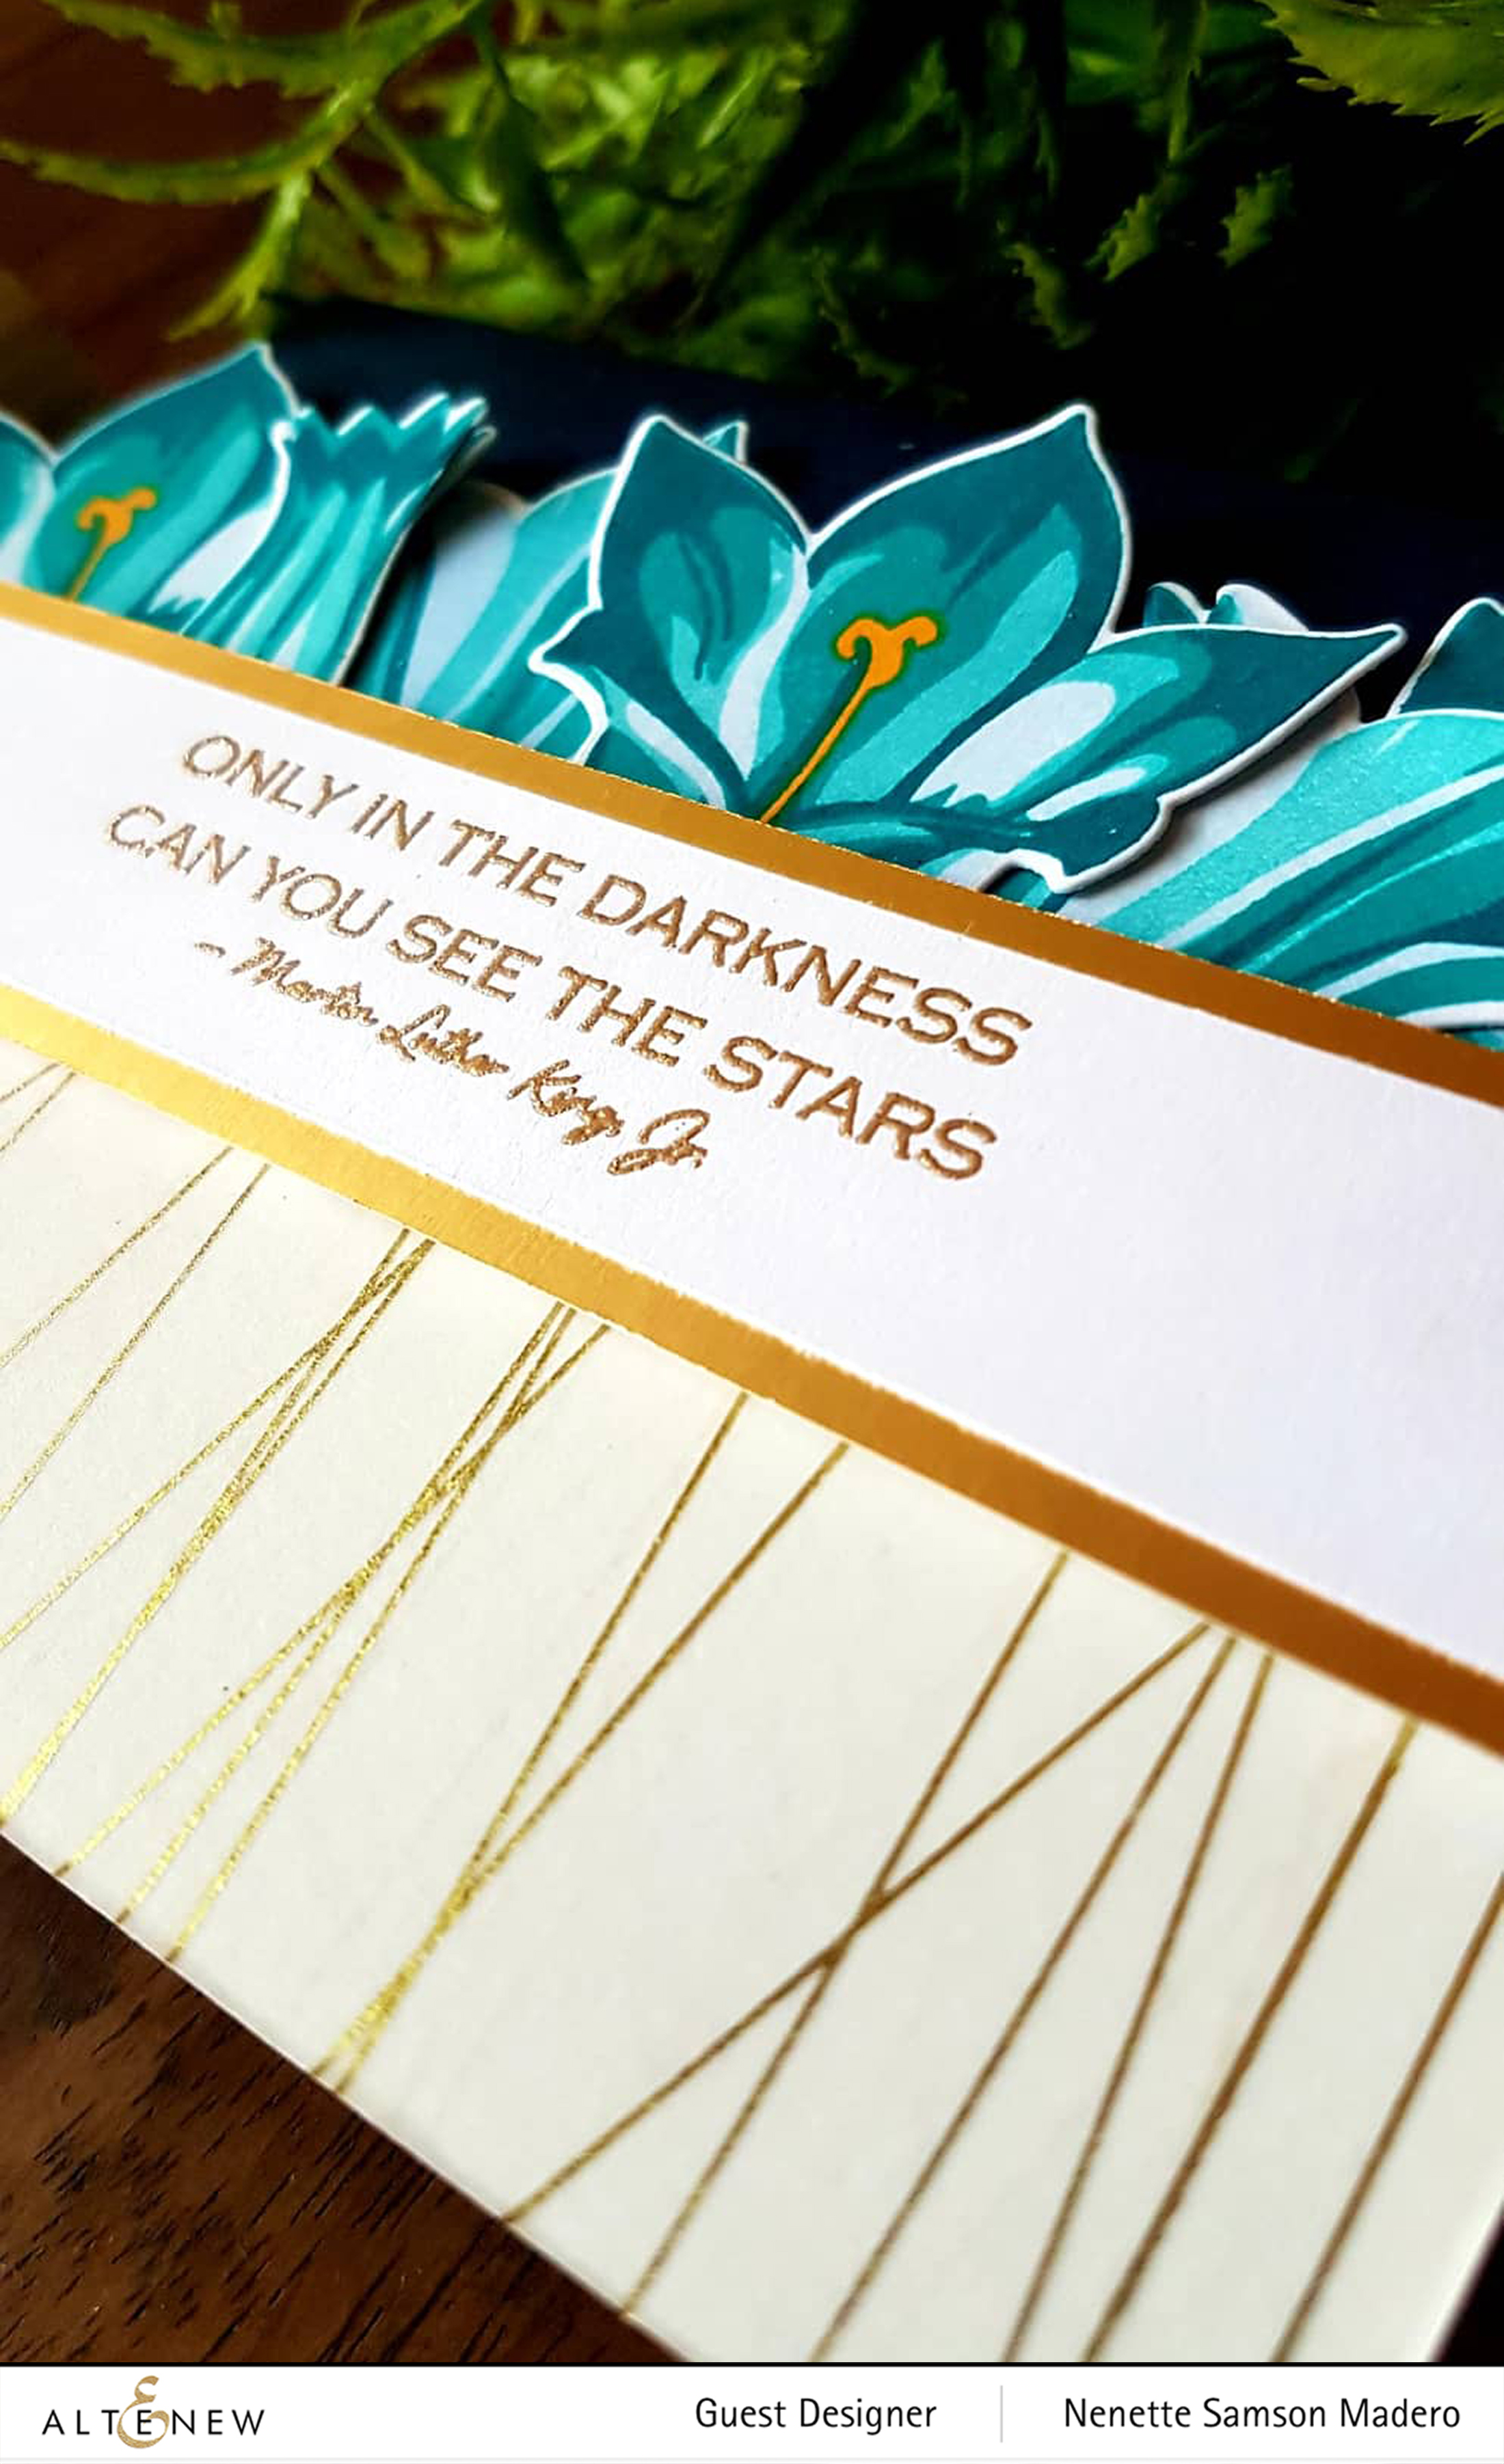
ONLY IN THE DARKNESS CAN YOU SEE THE STARS CARD

MATERIALS:

I wanted this card to have high contrast so I matched the navy blue with white and gold. The stamped flowers were arranged in a row overlapping each other. The sentiment from Kind Words was stamped on white CS using Versamark Ink and embossed with Rose Gold embossing powder. Gold matting was added to give emphasis to the sentiment. White cardstock was covered with the gold string washi tape and this was then adhered to the lower portion the card front. The sentiment was added using foam squares to add dimension.

PRIZES

To celebrate this release, Altenew is giving away a $30 gift certificate to 6 lucky winners! Please leave a comment on the Altenew Card Blog and/or Altenew Scrapbook Blog for a chance to win. Altenew will also draw a winner to receive a $15 gift certificate from the comments left on each designer’s blog on the blog hop list below so make sure to leave a comment below! All winners will be announced on the Altenew blogs on 8/10/2019.

Thank you so much for dropping by! Your wonderful comments truly warm my heart. If you like what you see, I’d appreciate if you can follow me on IG @mylittleatticstudio. Next stop is the uber-talented Jaycee Gaspar. His creations are just stunningly beautiful so make sure to hop over to his blog. Below is the complete list of amazing card designers. Until my next post! ❤️

FACEBOOK | INSTAGRAM | PINTEREST