

Welcome to Altenew’s August Release!! I’m so thrilled to be a part of this blog hop consisting of 34 blogs with all the wonderful card designers I admire! If you have been following along, you have just arrived from the super talented Alex Syberia. Thanks for sending them over, Alex! 🙂 If you find a broken link, you’ll find a master list at the end of this post and at the Altenew Card Blog.
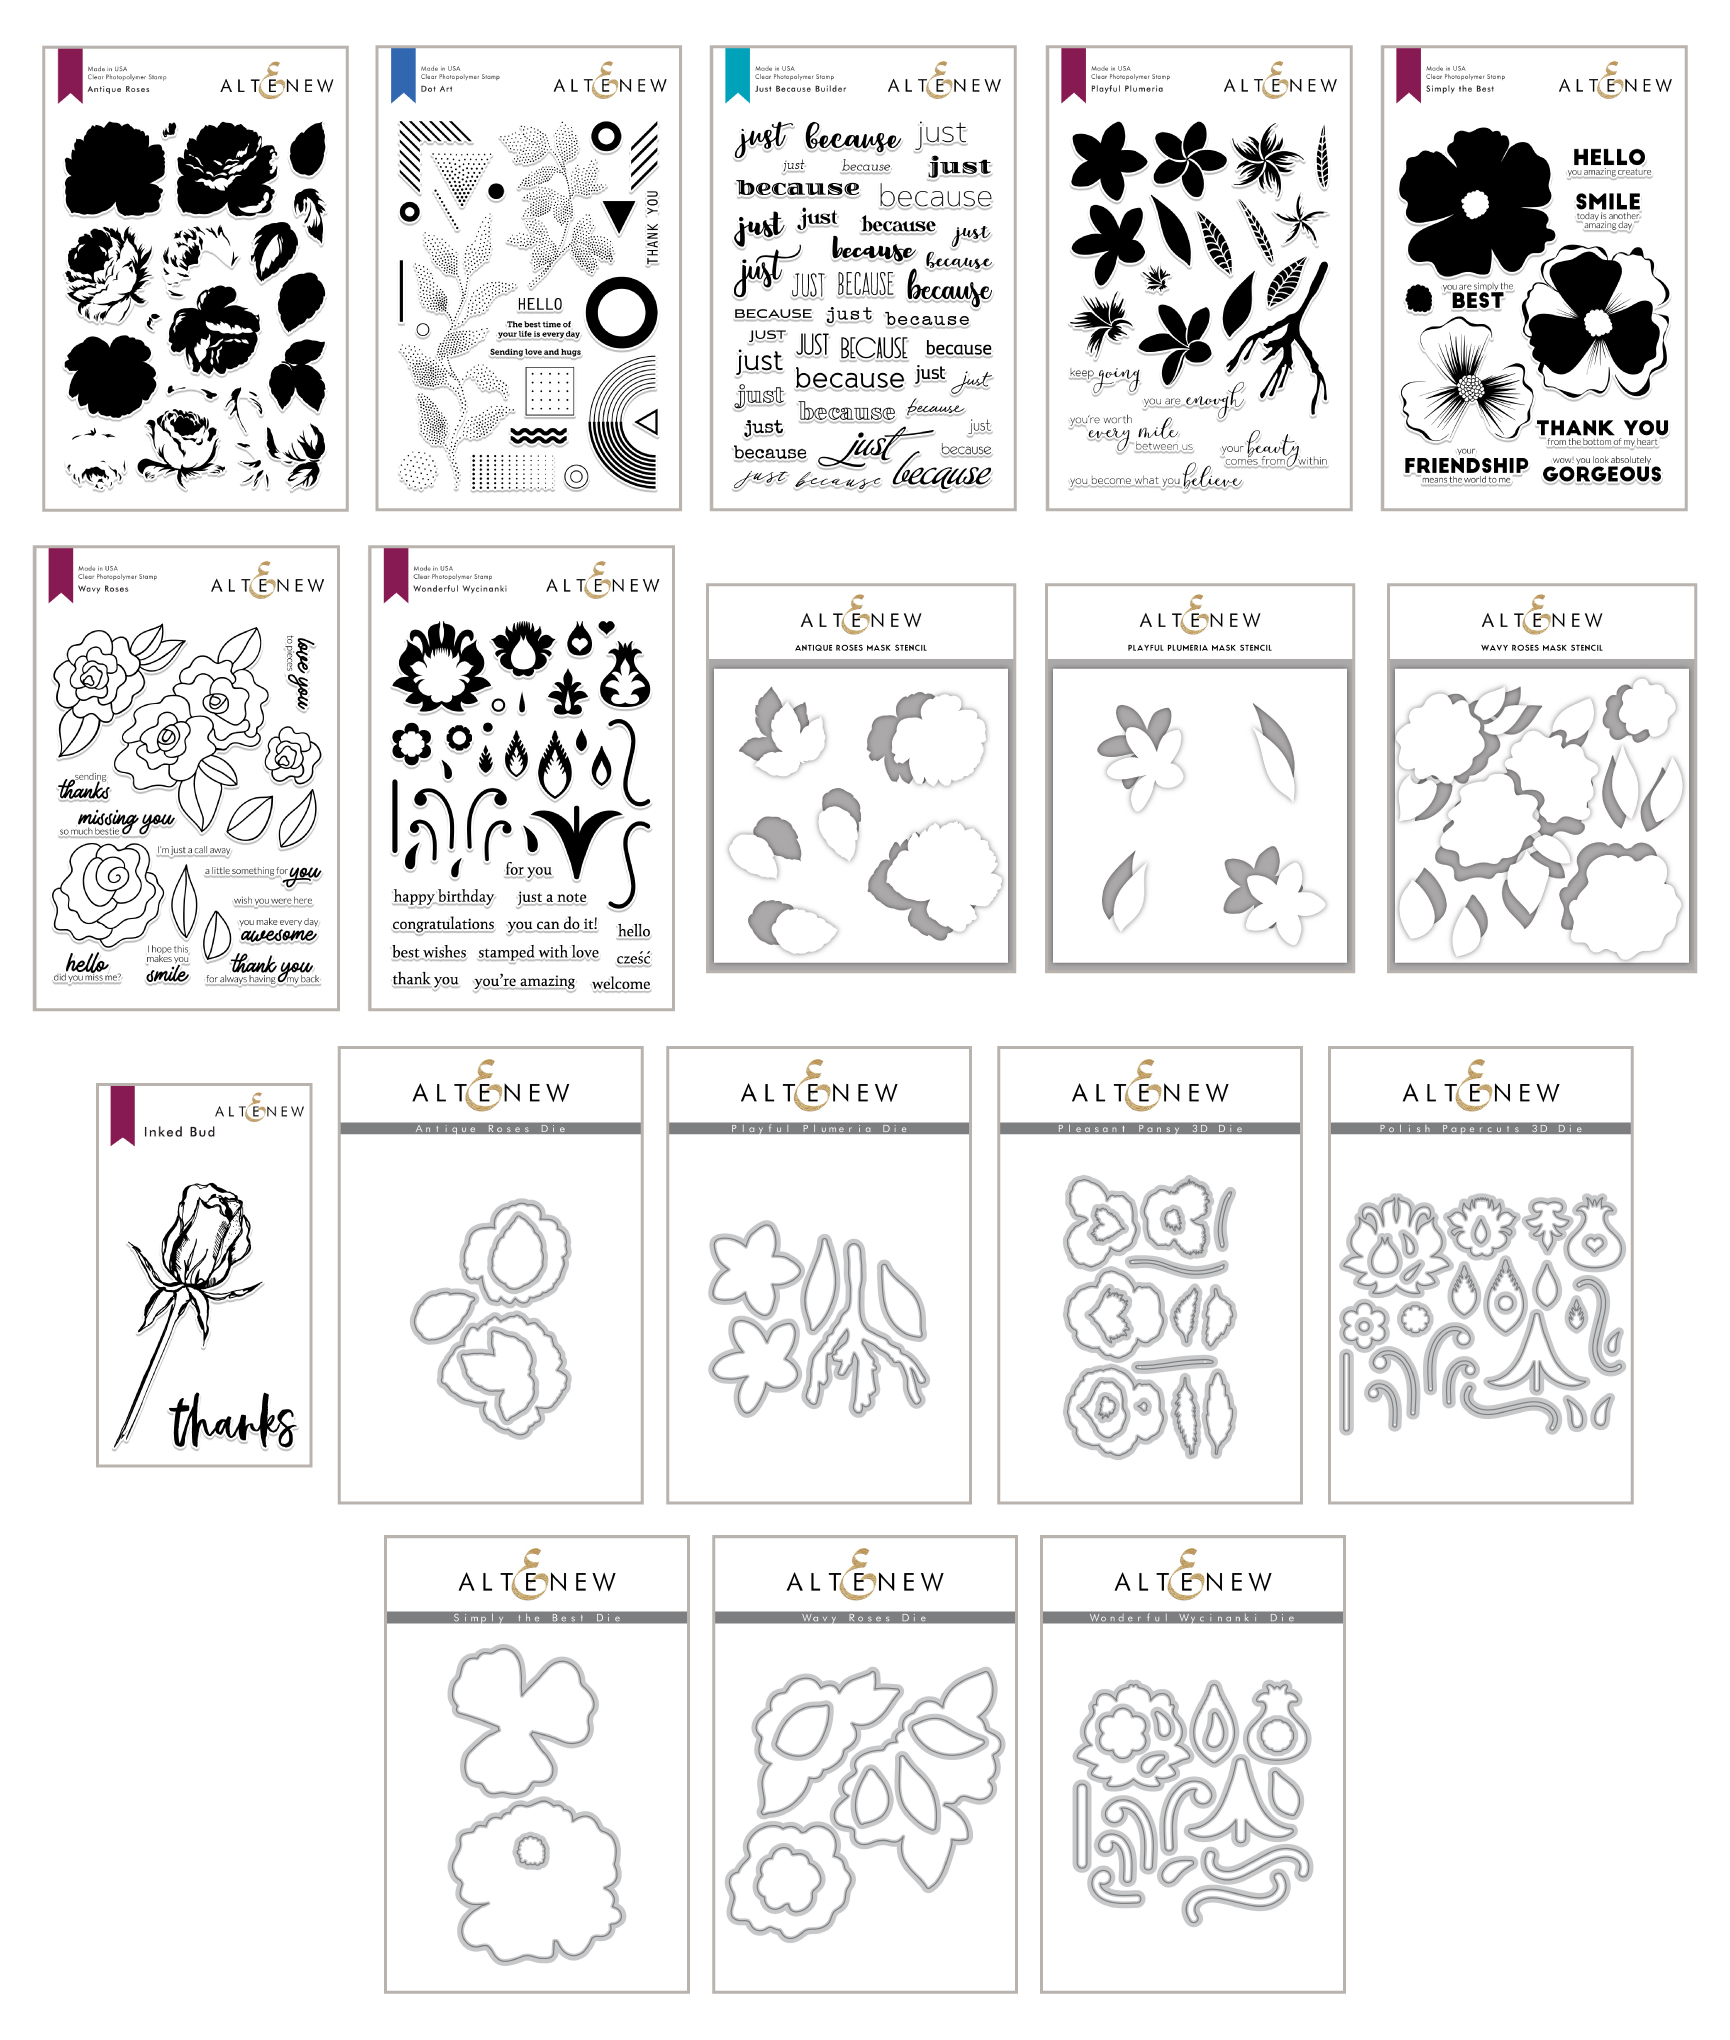
Take a look at the August 2019 Release! There are so many beautiful stamps, stencils, and dies that I found it difficult to choose which ones to use for my card samples! 🙂
HAPPY BIRTHDAY CARD
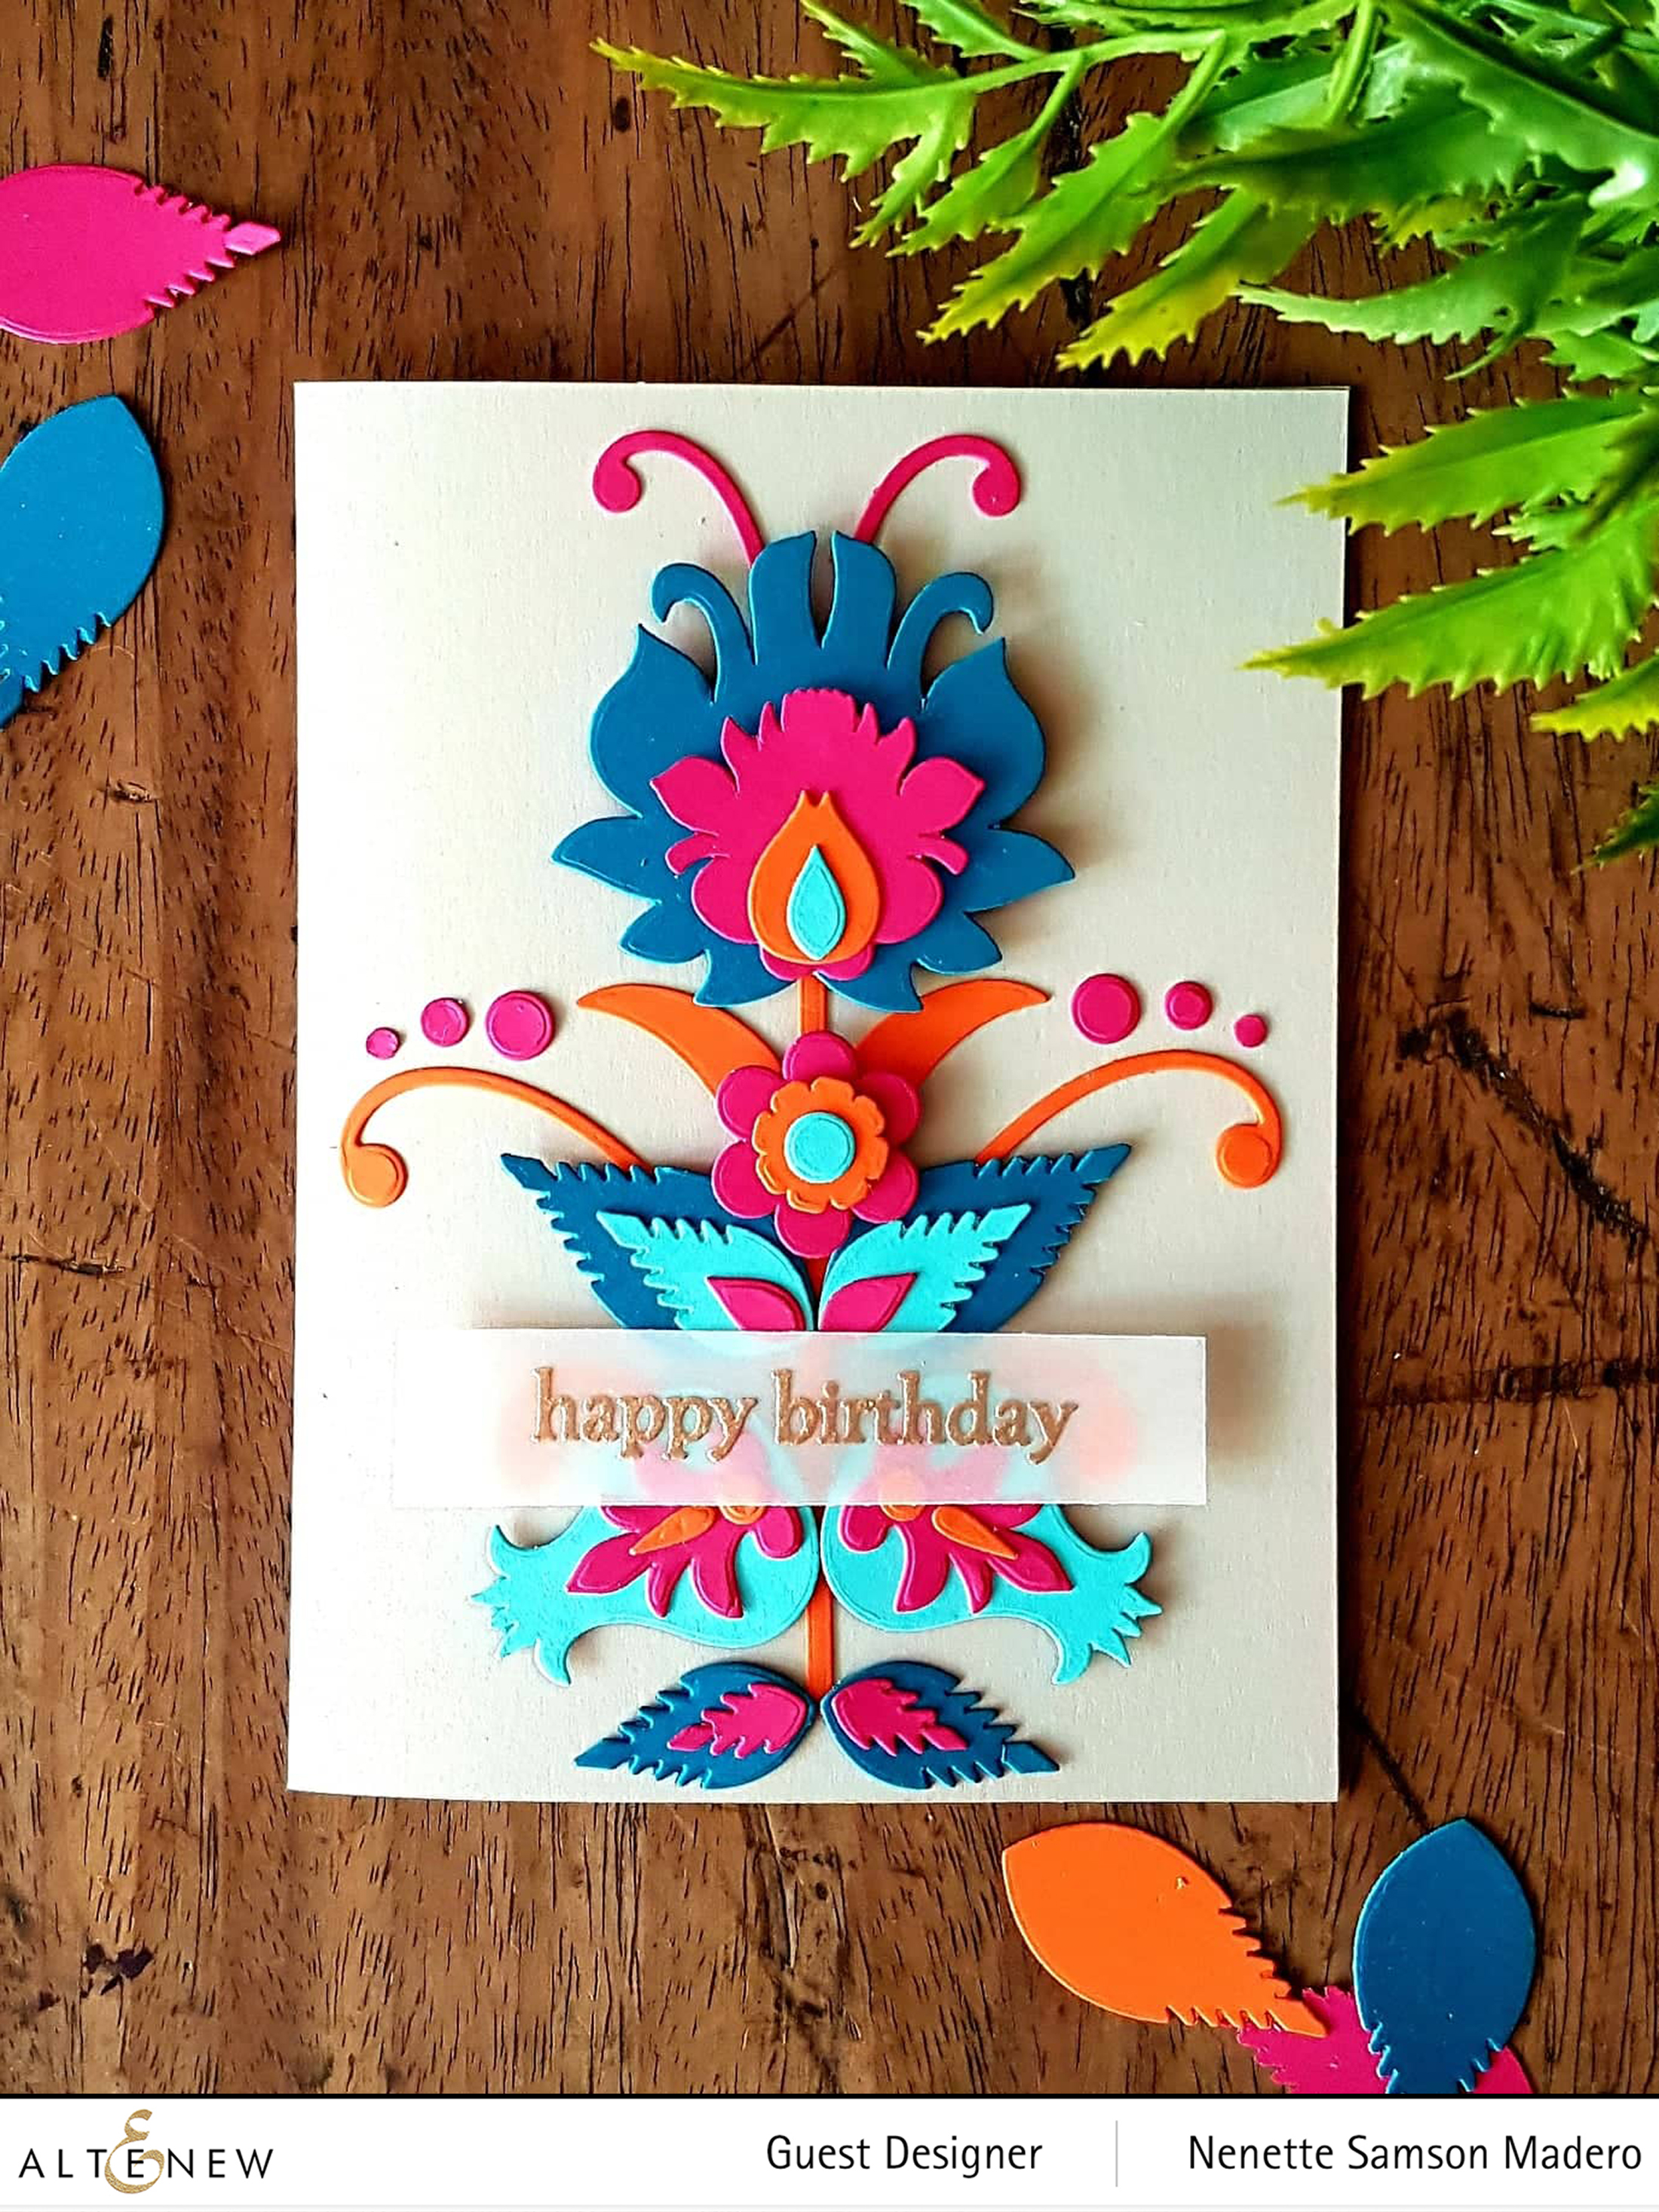
MATERIALS:
- ALTENEW Polish Papercuts 3D Die
- Altenew Wonderful Wycinanki Stamp for the sentiment
- Altenew Rose Gold embossing powder
- Vellum
- Versamark Ink
- Ifex Cordenons So Silk Glamour green, Curious Andina grey, Plike orange and So Silk Beauty Pink cardstocks
- Scrapbook Adhesives foam squares
- Tombow Mono Multi Liquid Glue
- Scor Tape 1/4 “
- Misti Stamping Tool
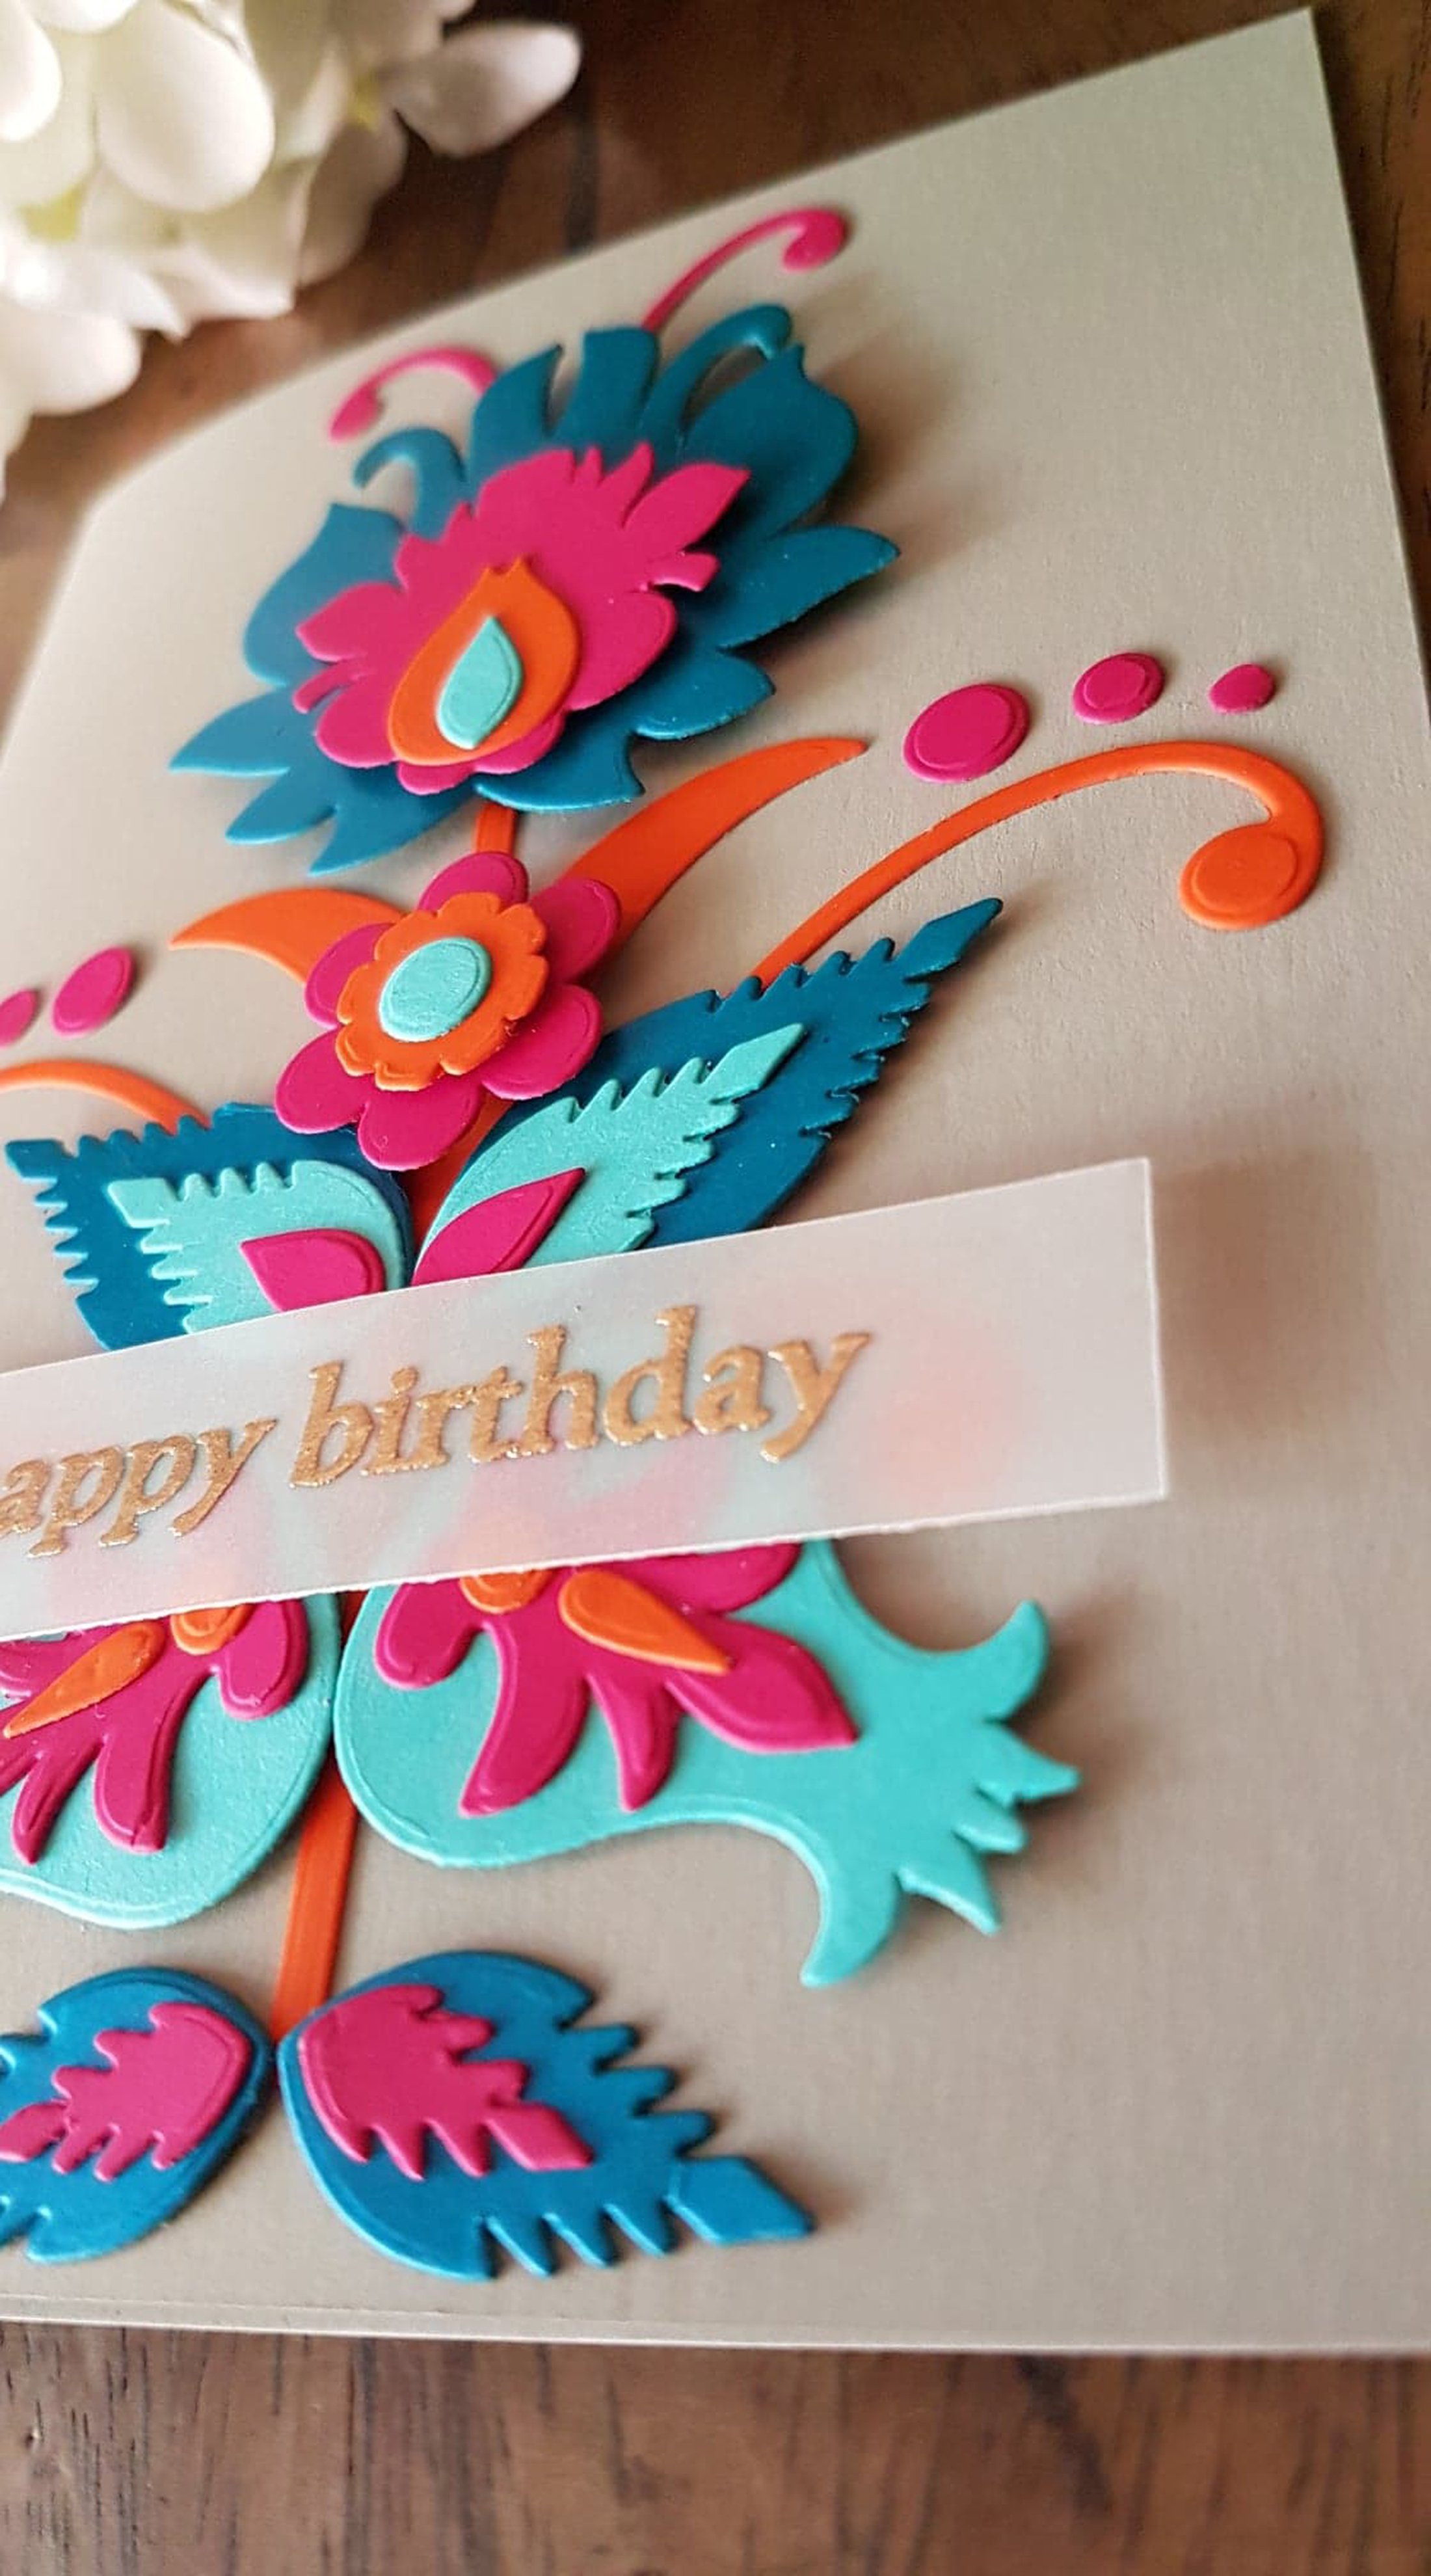
The first thing you have to do to create a card like this is to figure out the

SENDING LOVE AND HUGS CARD
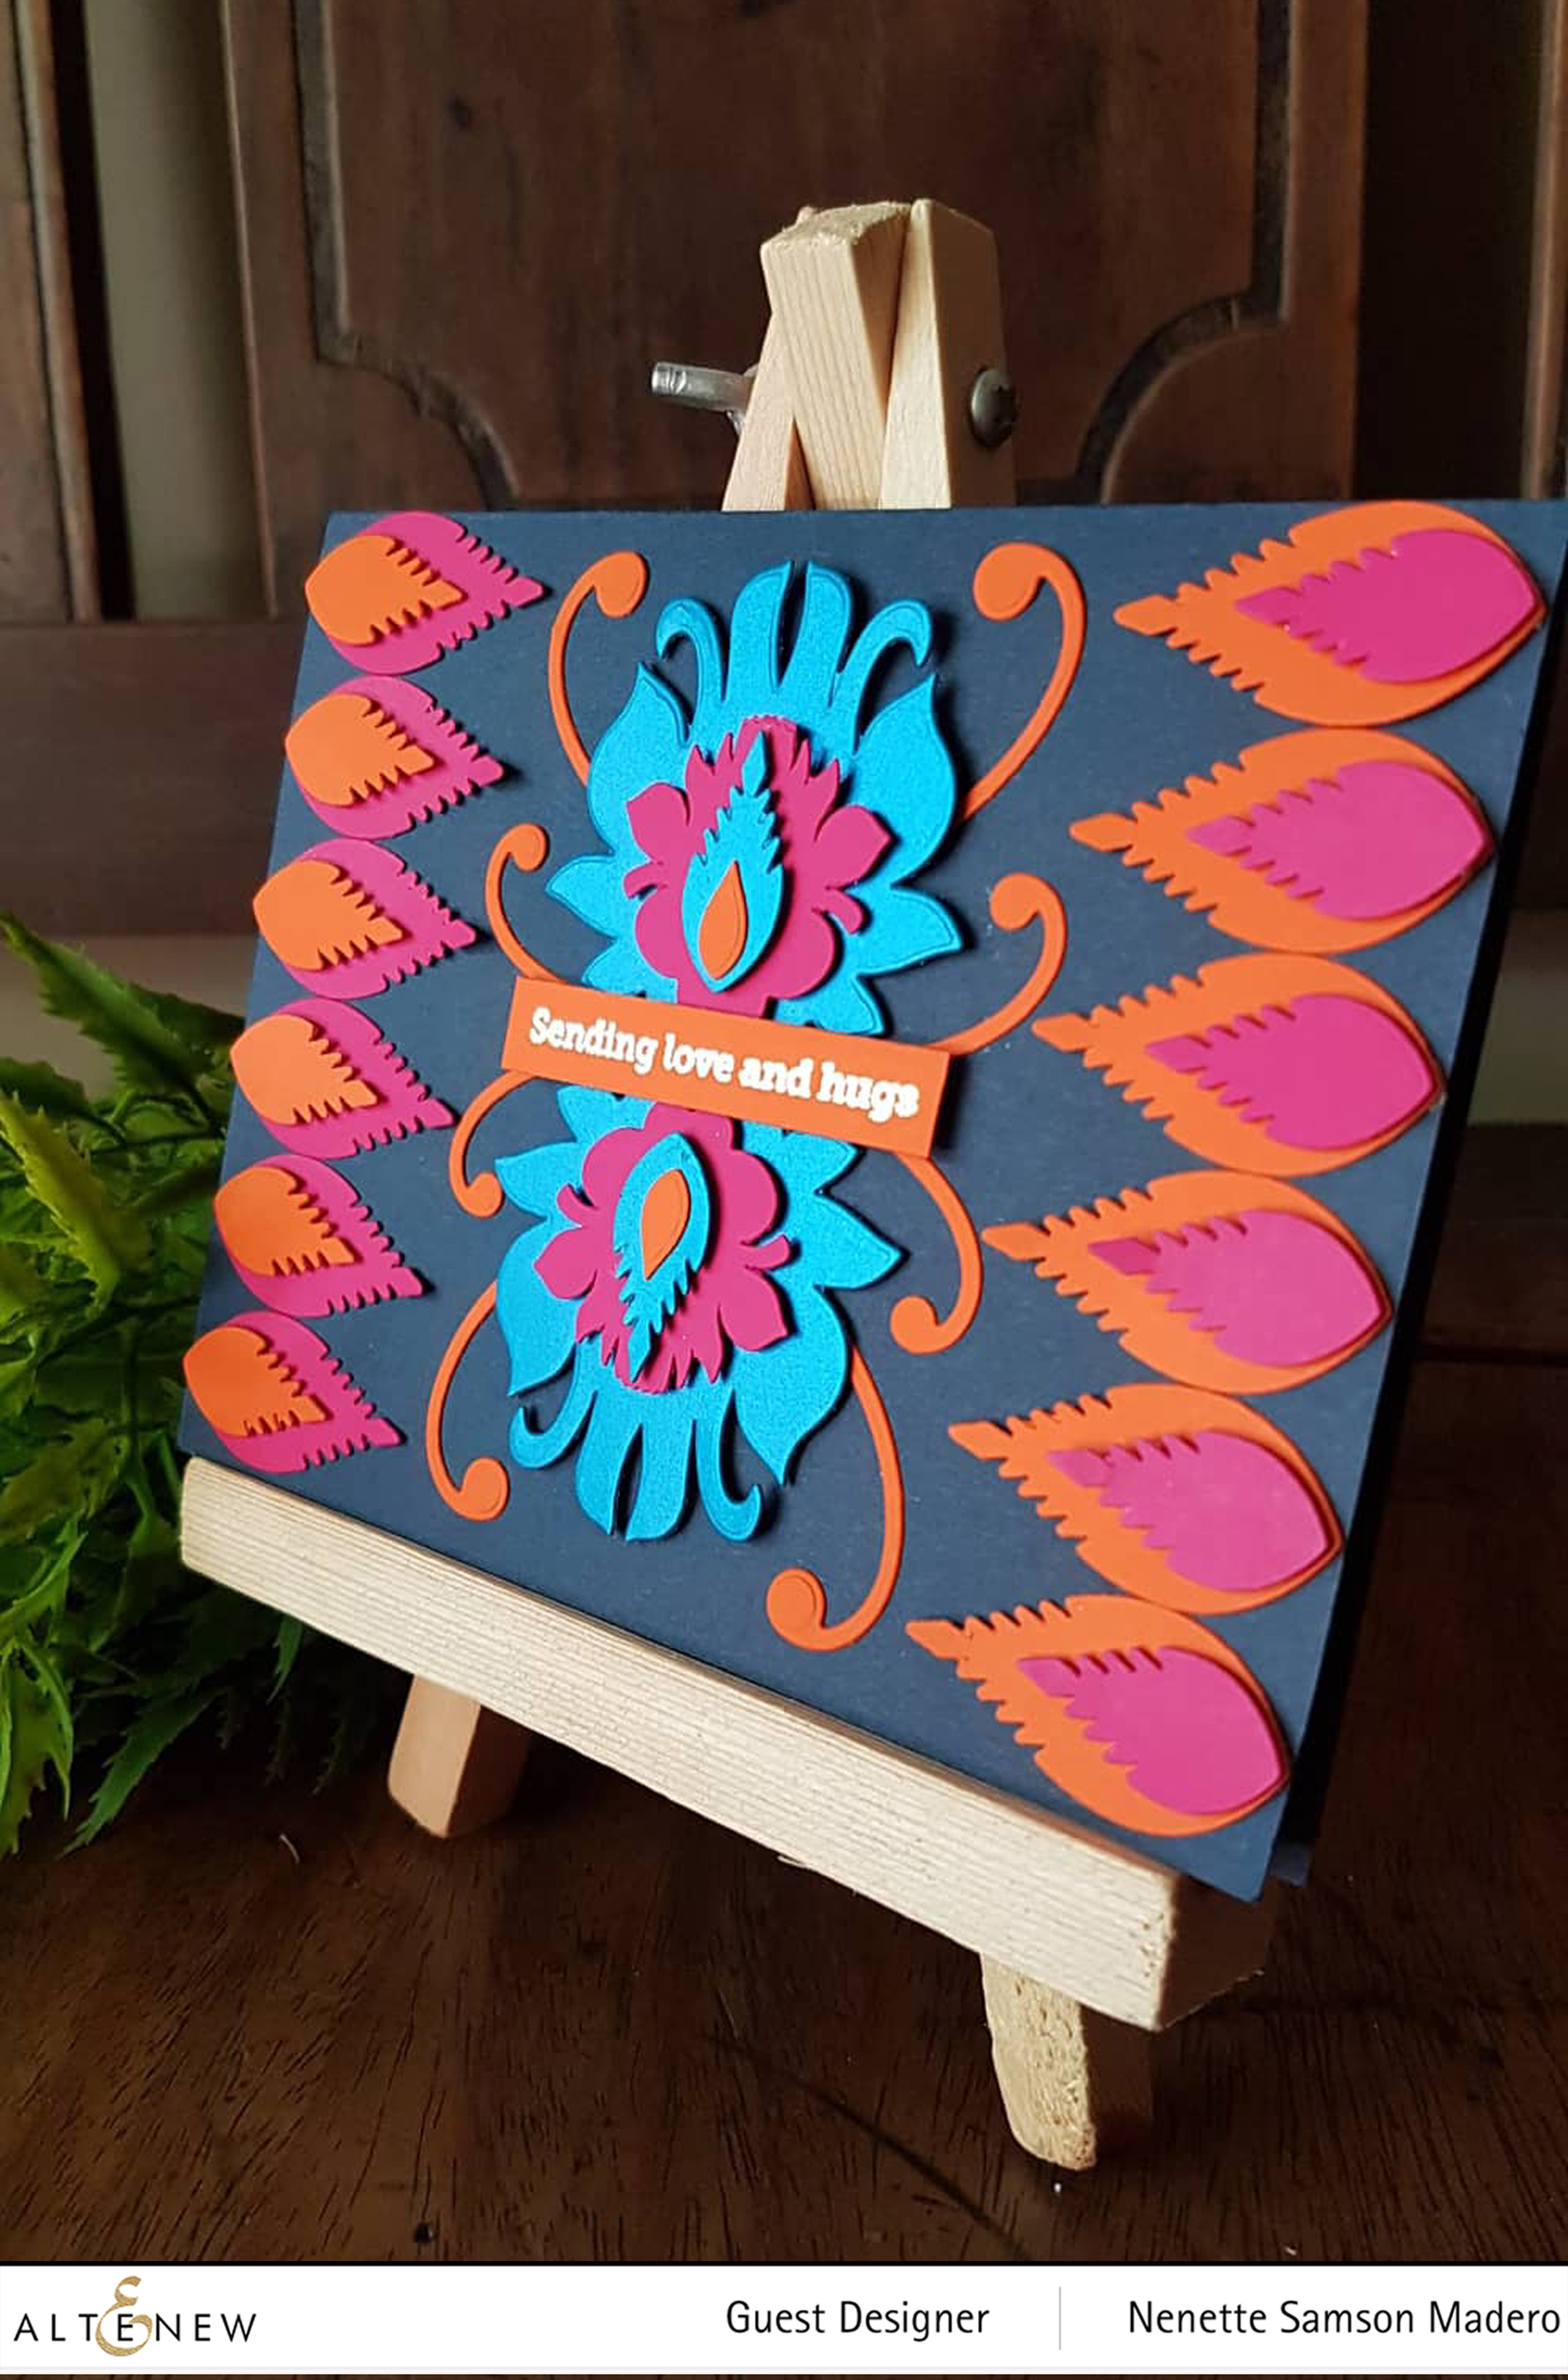
MATERIALS:
- Altenew Polish Papercuts 3D die
- Altenew Dot Art Stamp for the sentiment
- Altenew Rose Gold Embossing Powder
- Ifex Cordenons So Silk Glamour green, Curious Andina grey, Plike orange and So Silk Beauty Pink cardstocks
- Versamark Ink
- Scrapbook Adhesives foam tape
- Tombow Mono Multi Liquid Glue
- Scor Tape 1/4″
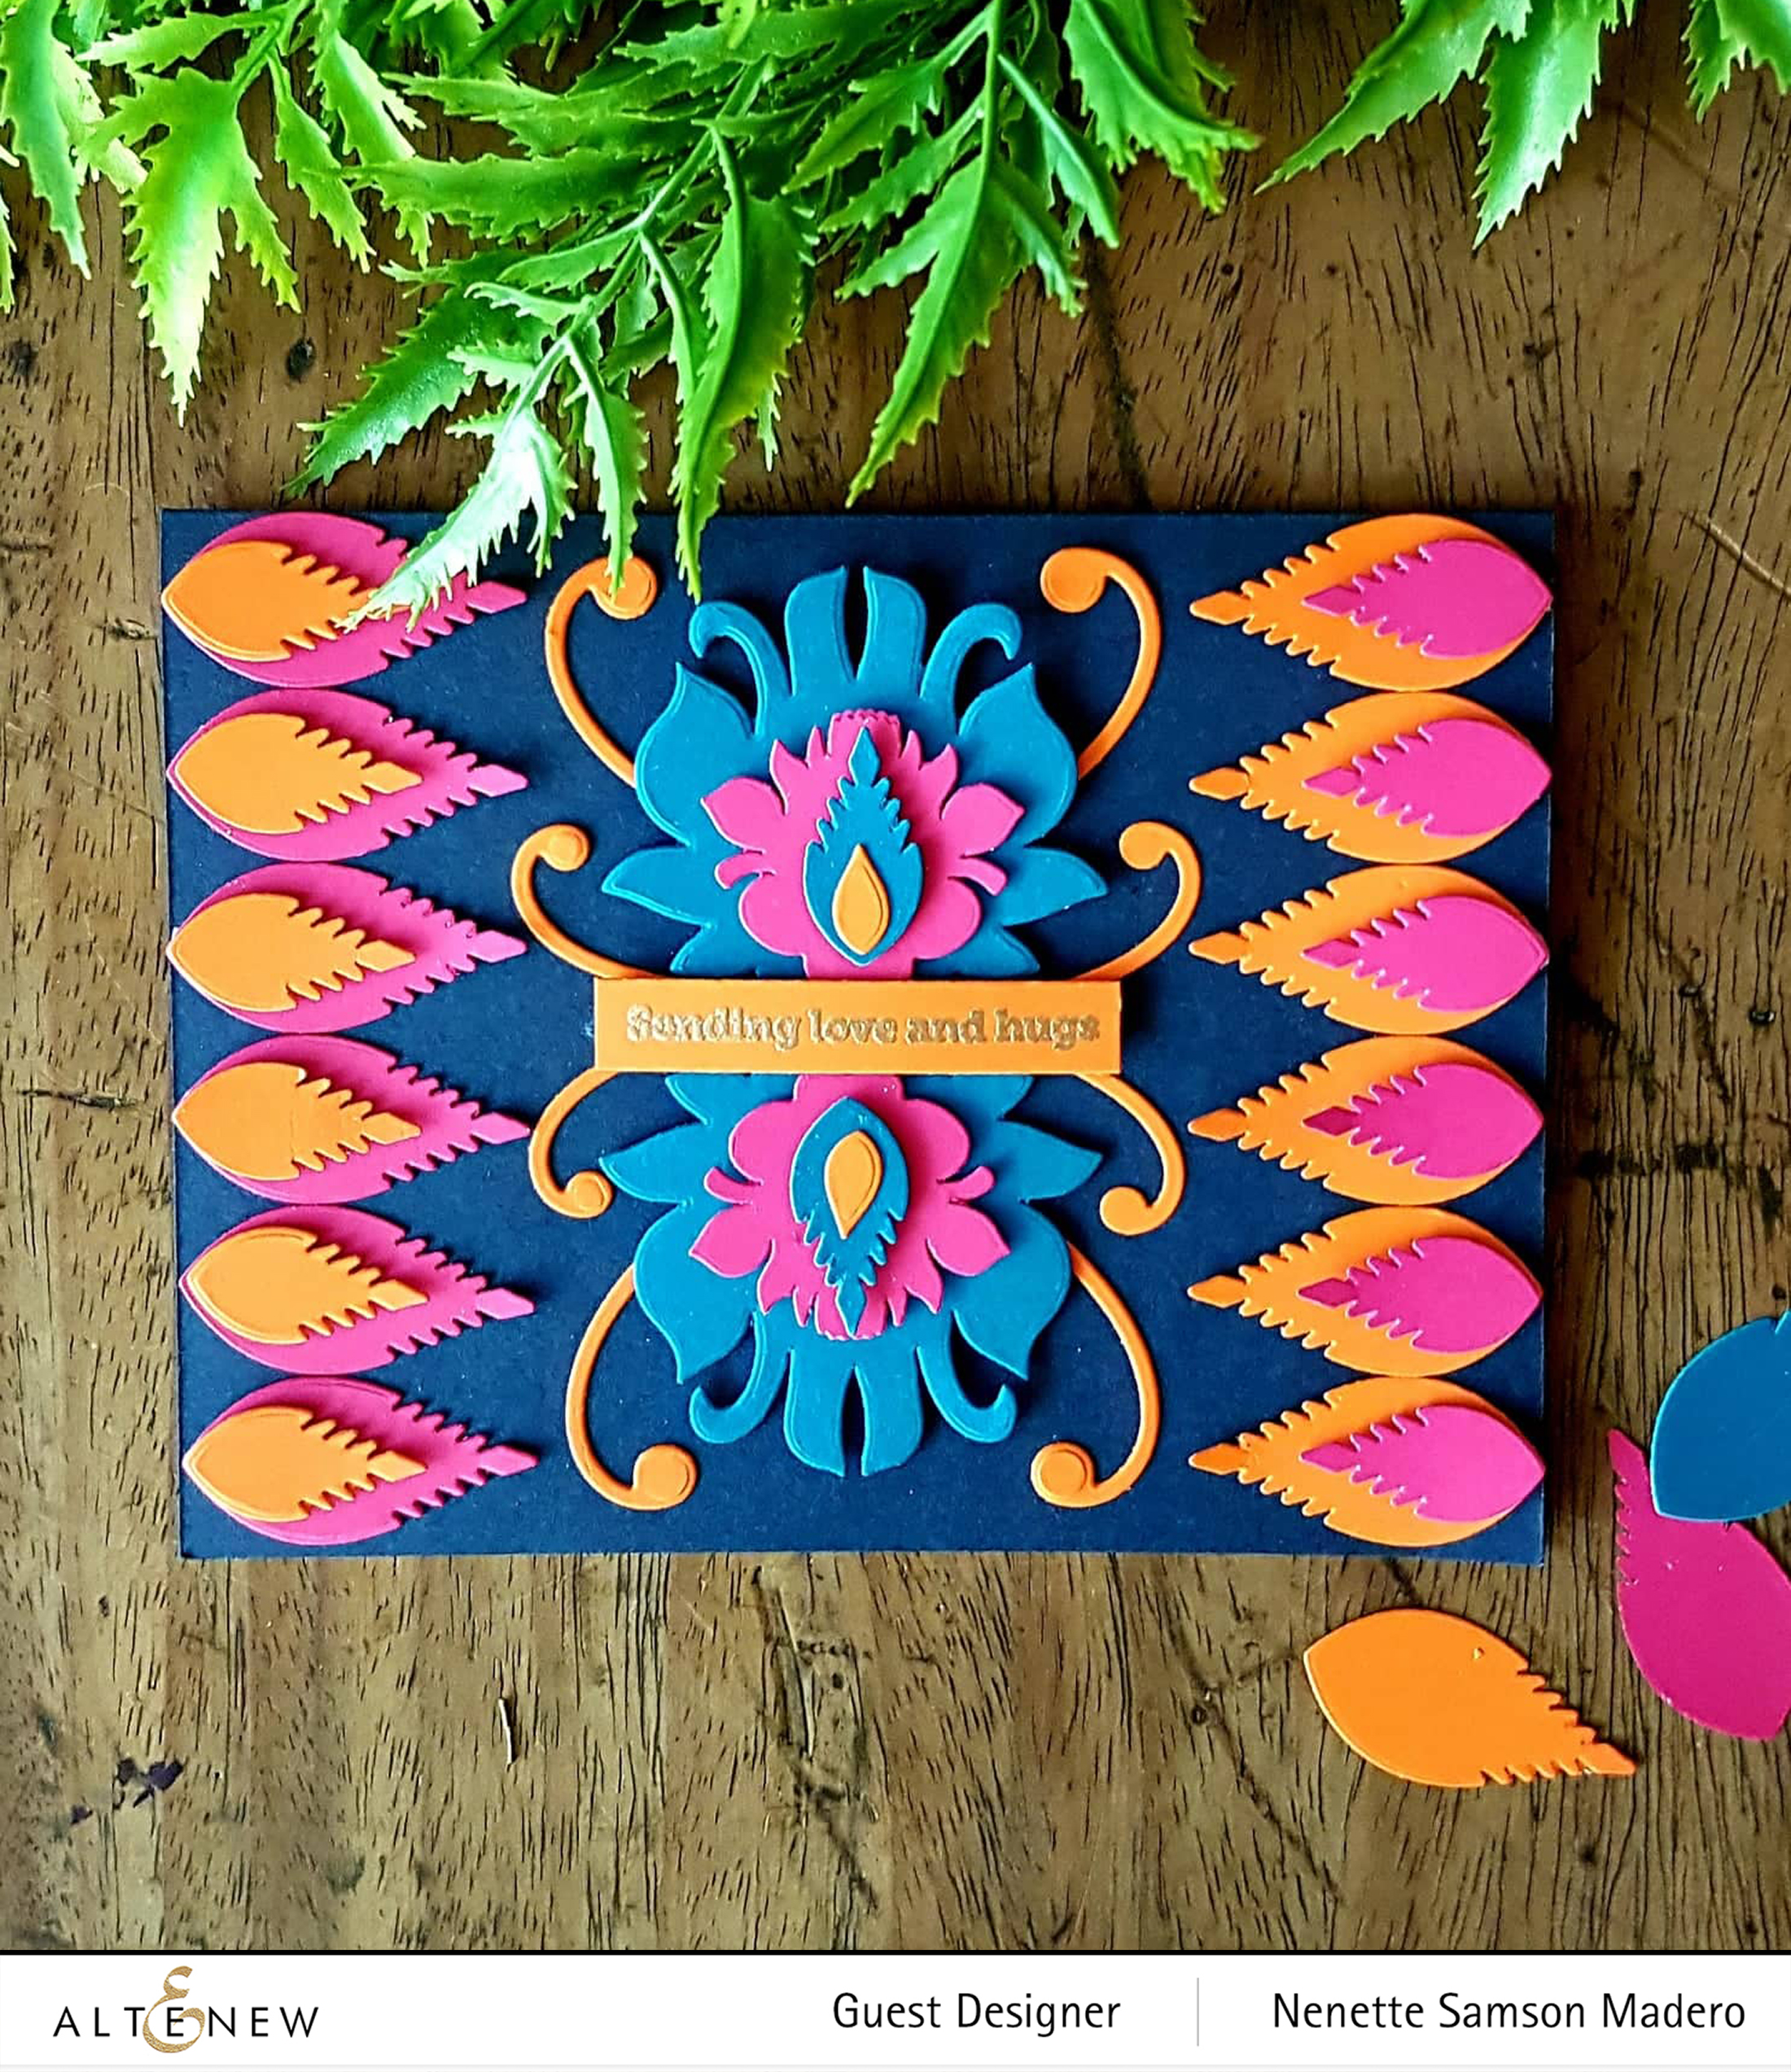
Here’s a second card using the Polish Paper Cuts 3D die once again but this time I used them on dark cardstock. The leaves created side borders. This is why it’s important to do all the die-cutting at once. It will make
A LITTLE SOMETHING FOR YOU CARD
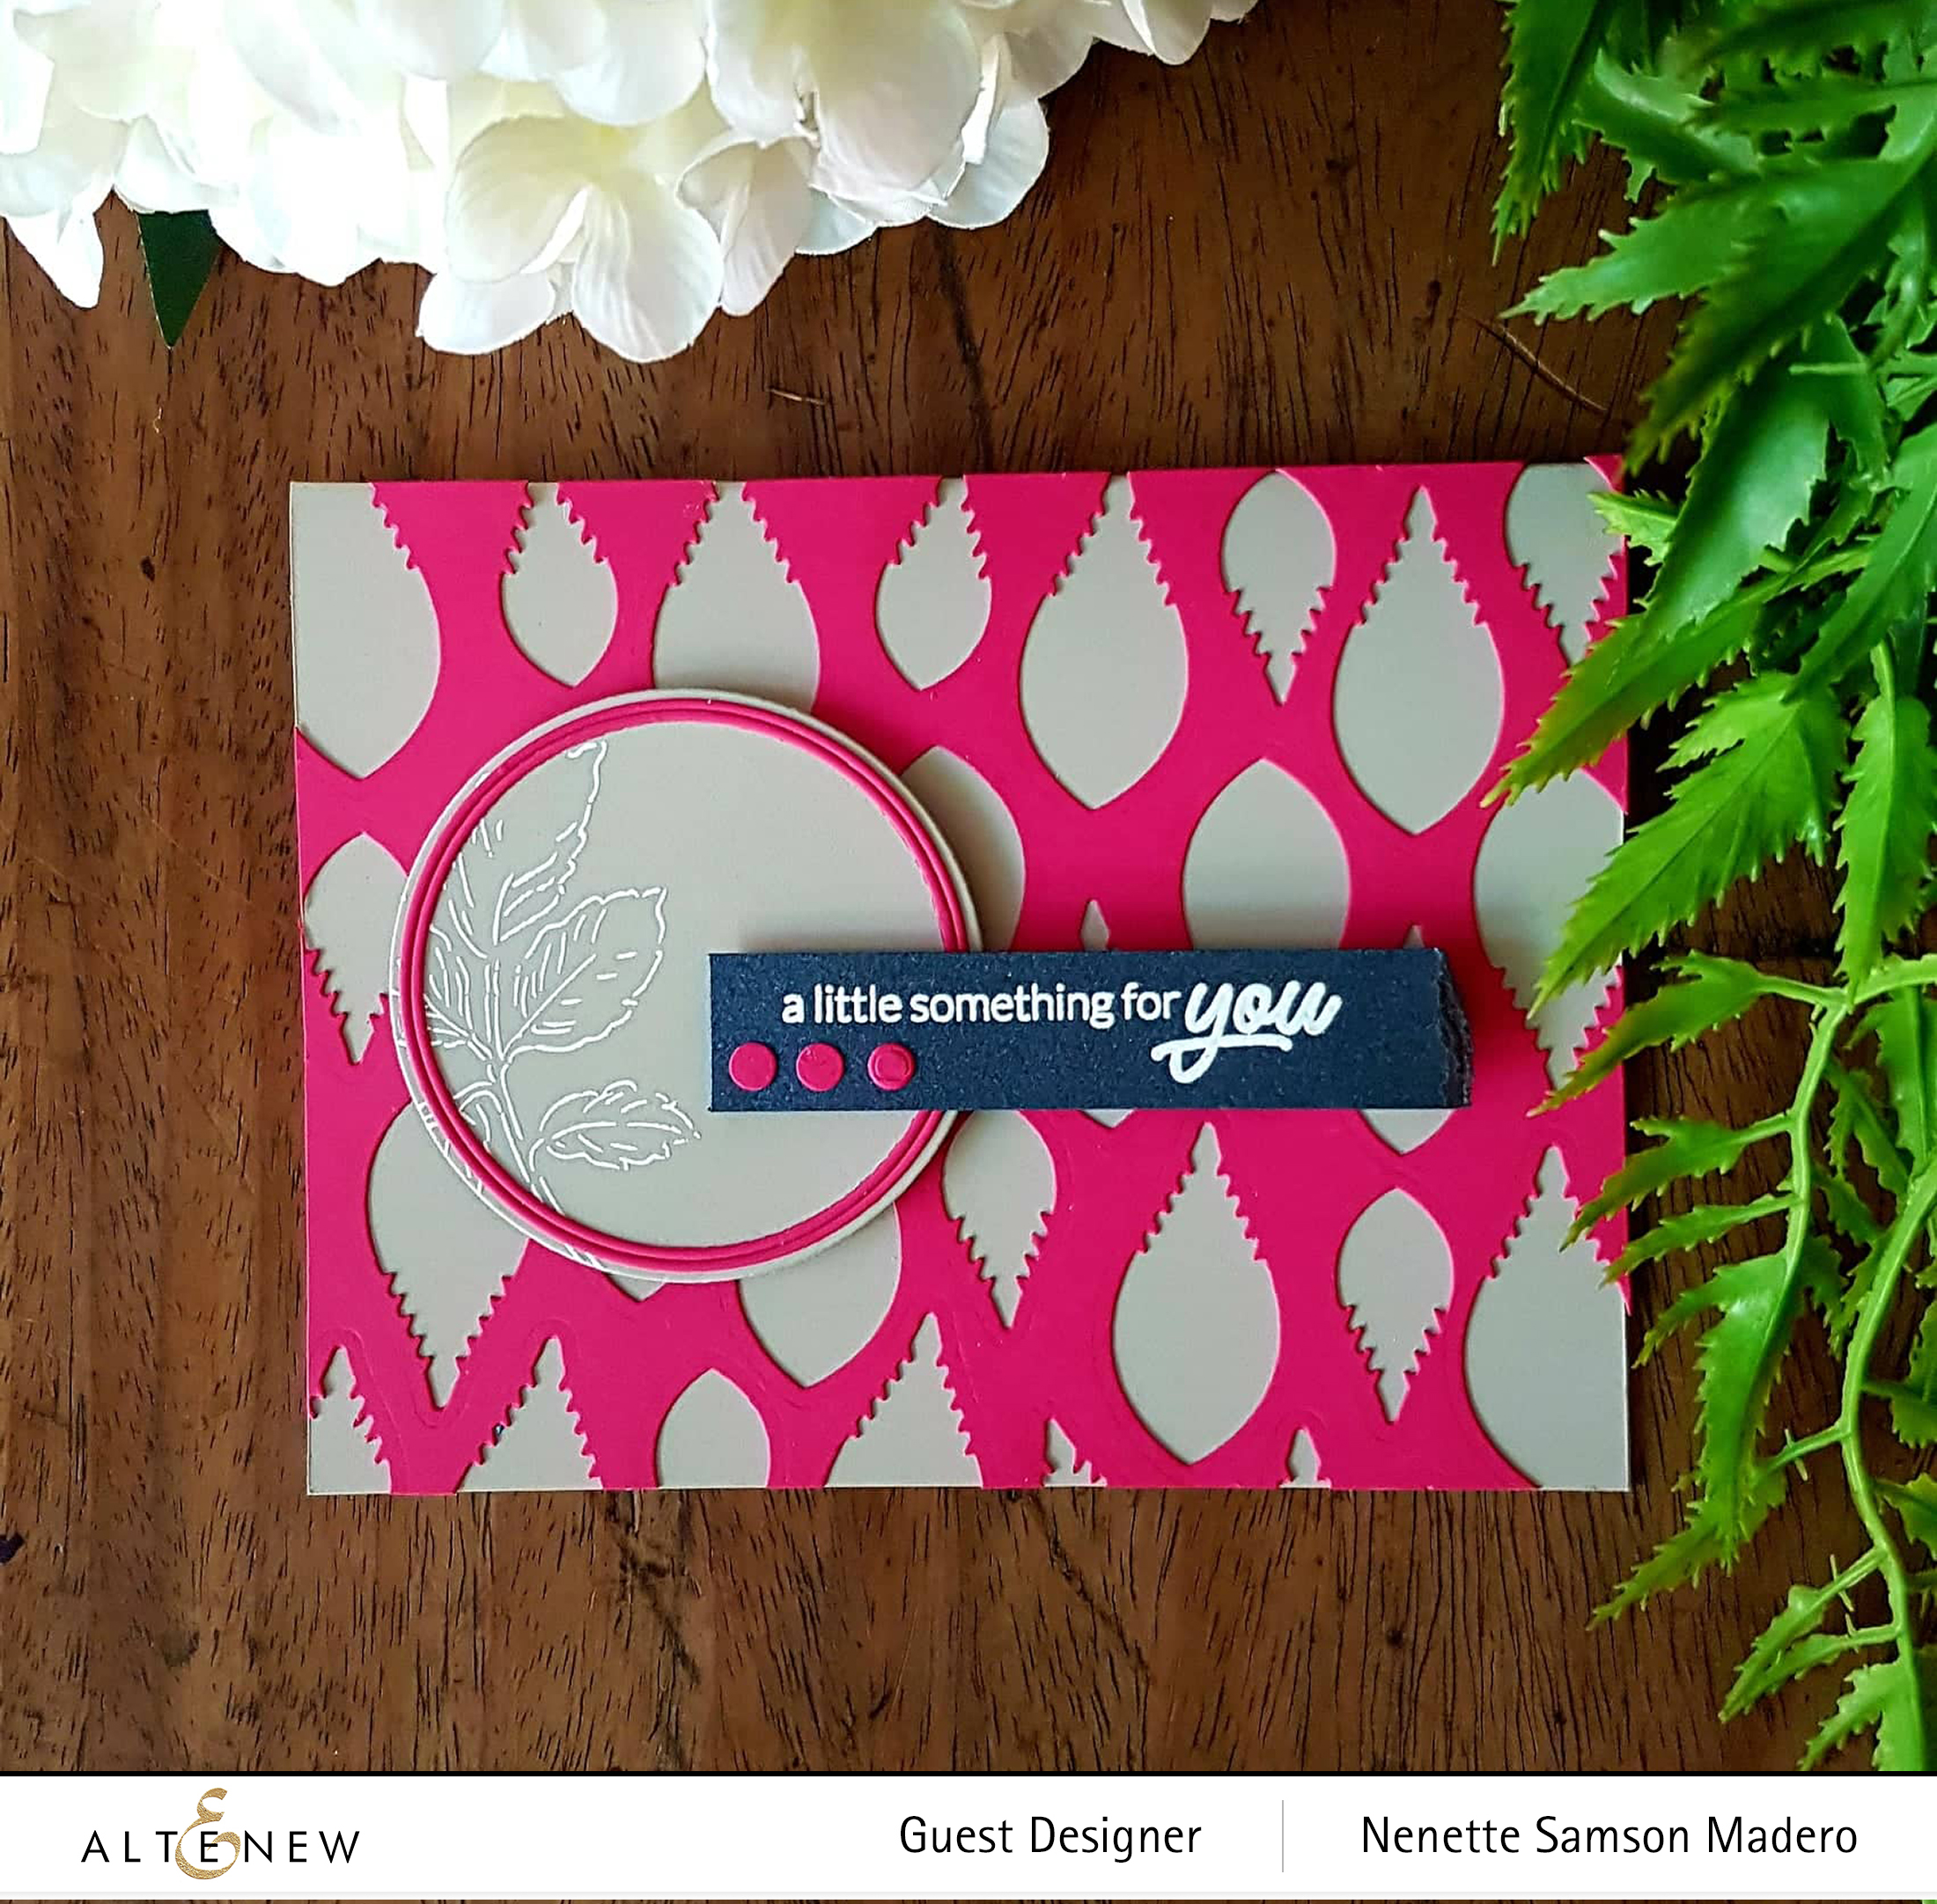
MATERIALS:
- Altenew Polish Papercuts 3D die
- Altenew Wavy Roses Stamp for the sentiment
- Altenew Beautiful Day Stamp for the leaves
- Altenew Fine Lines Circle Die
- Altenew Halftone Circles Nesting Die
- Altenew Crisp Pure White Embossing Powder
- Versamark Ink
Ifex Curious Andina grey, So Silk Beauty Pink and Stardream Lapiz Lazuli cardstocks- Scrapbook Adhesives foam squares
- Tombow Mono Multi Liquid glue
- Misti Stamping Tool
After 2 detail-intensive cards, I wanted to relax a bit and create some CAS cards. Almost always, I try to find use from the leftovers. I loved the negative pattern that the leaf dies created so I adhered it on top of the grey cardstock. A circle die cut was made using the Halftone Circles Nesting die then fine circle frames were created out of the pink cardstock using the Fine Lines Circle die.
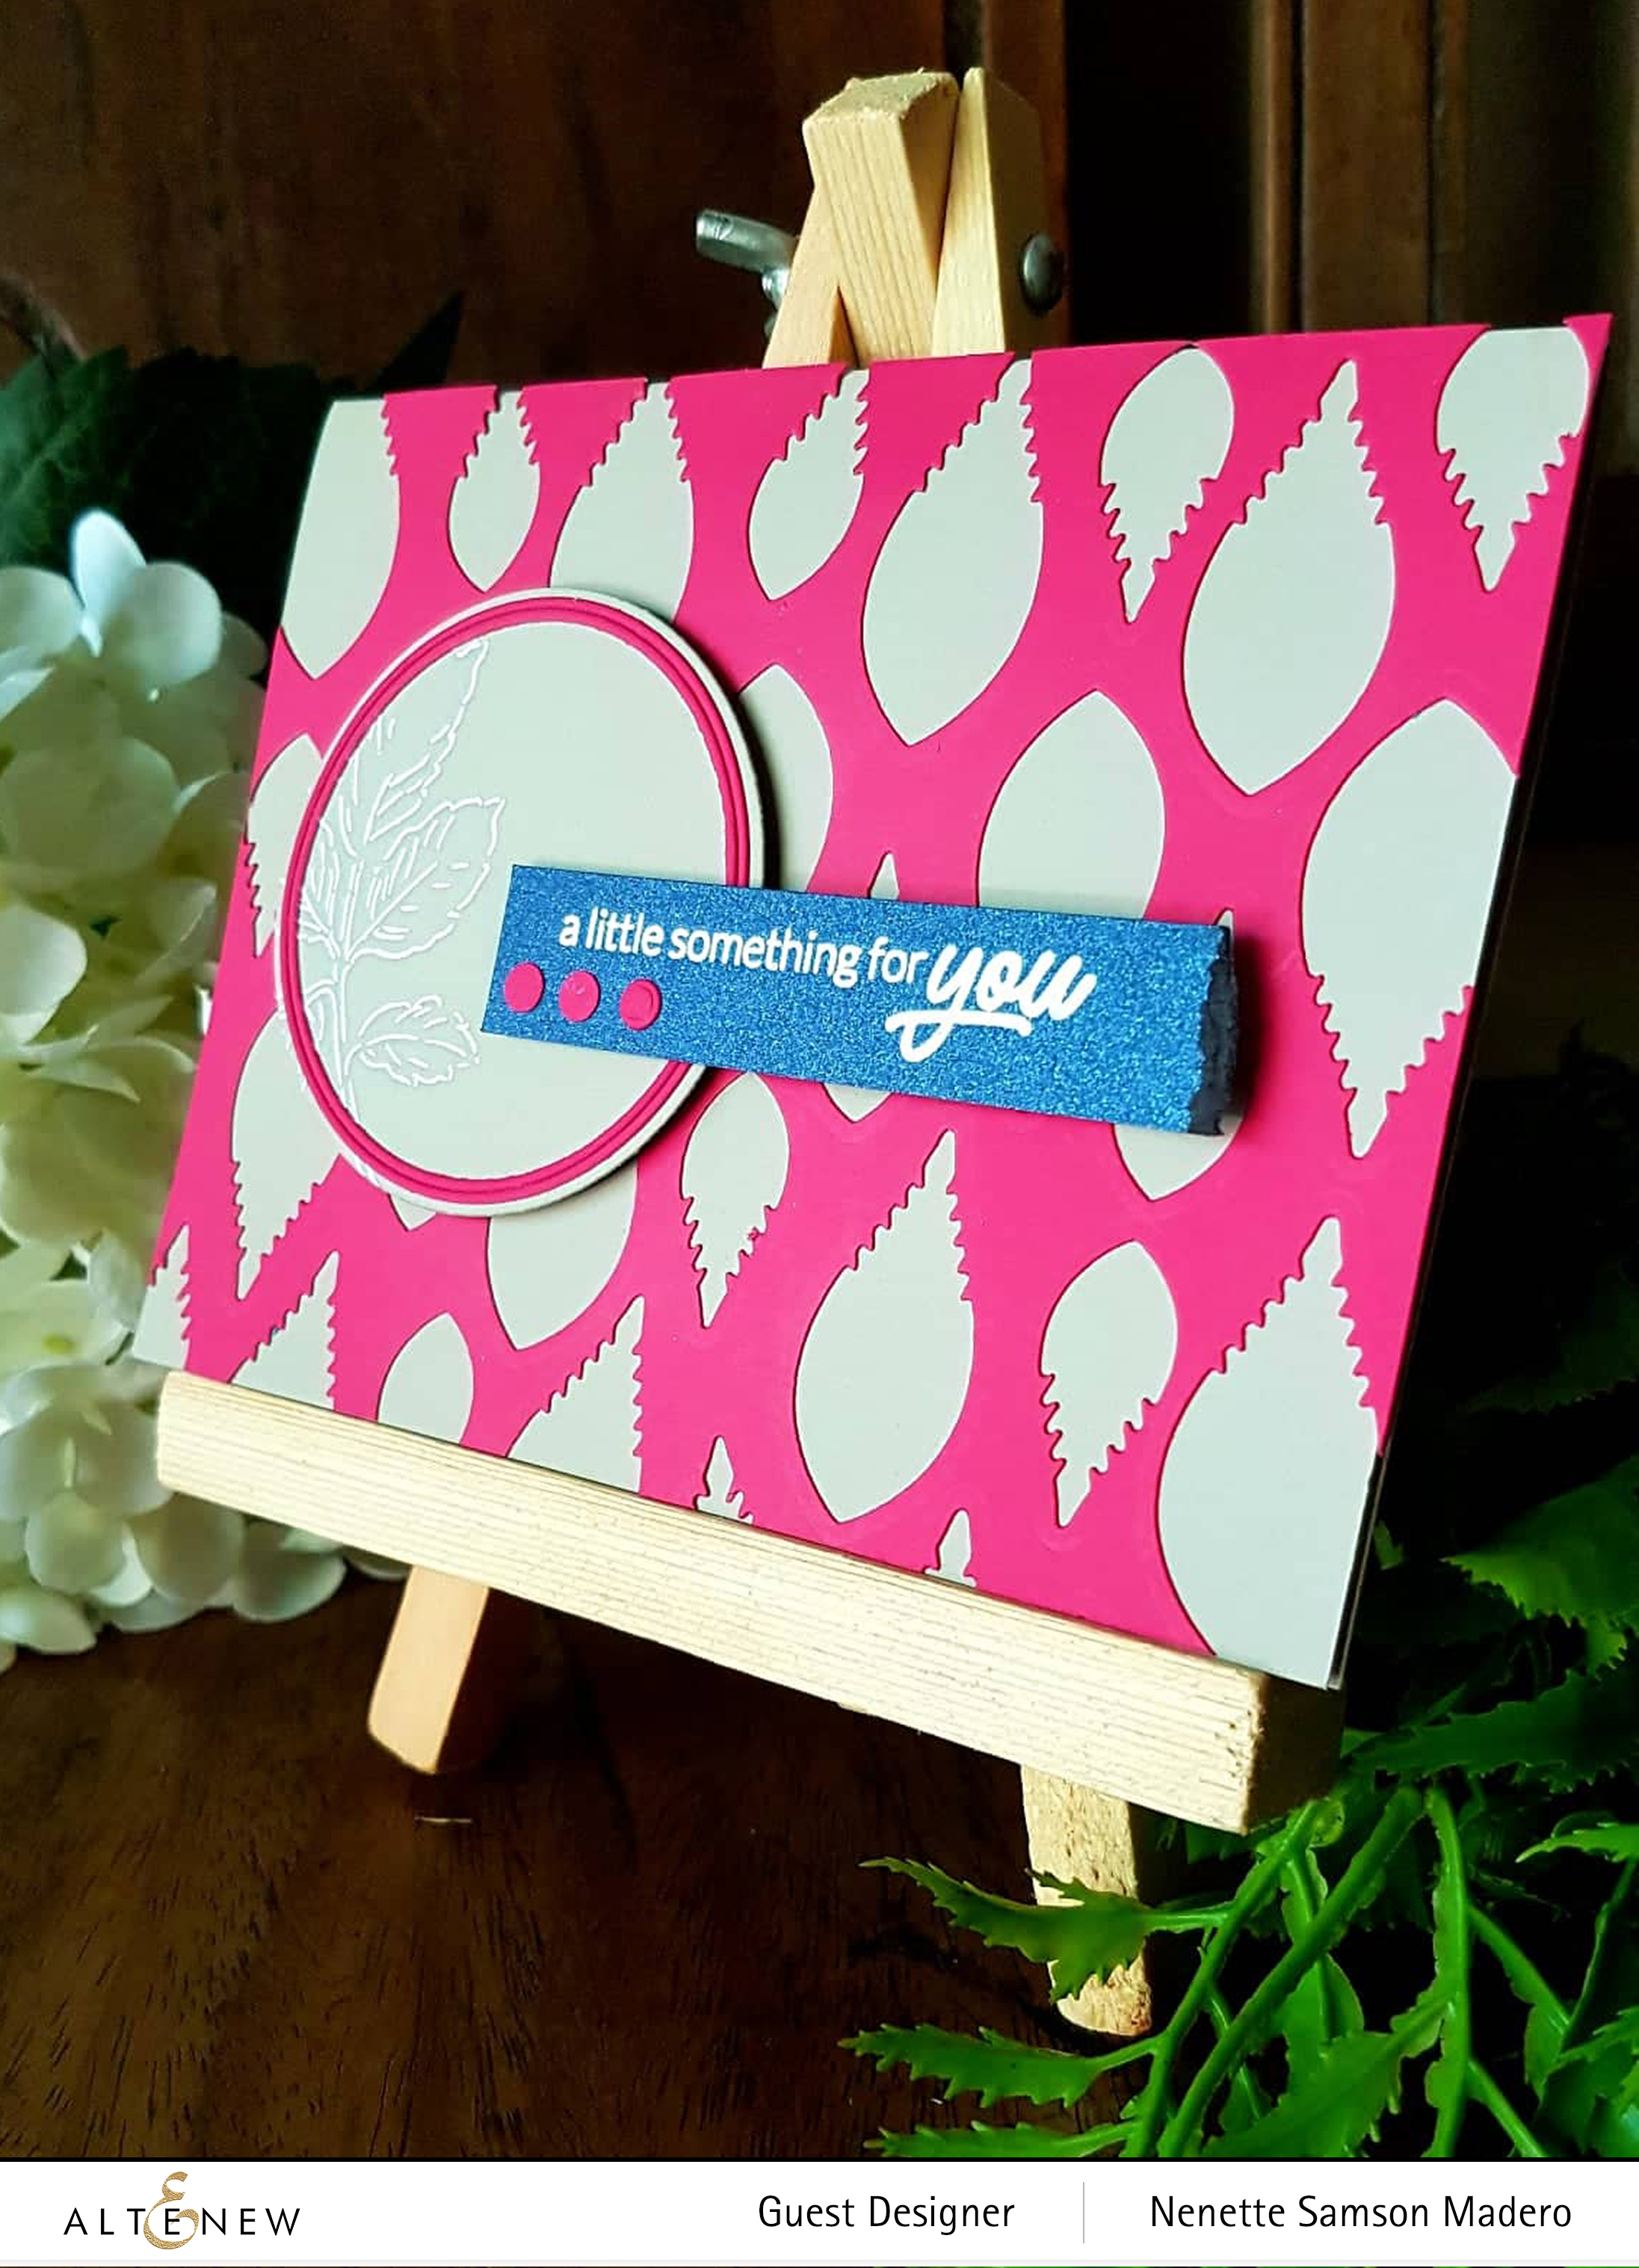
The detailed leaf from the Beautiful Day stamp set was stamped using Versamark Ink and embossed with pure white embossing ink. I love that the sentiment from the Wavy Rose Stamp set combines cursive and block writing. This was stamped on navy blue cardstock using Versamark ink and embossed again with the white embossing powder. The edge of the sentiment strip was torn to give some texture. 3 pink dots were placed on the lower left side of the sentiment strip to counterbalance the bold and heavy YOU.
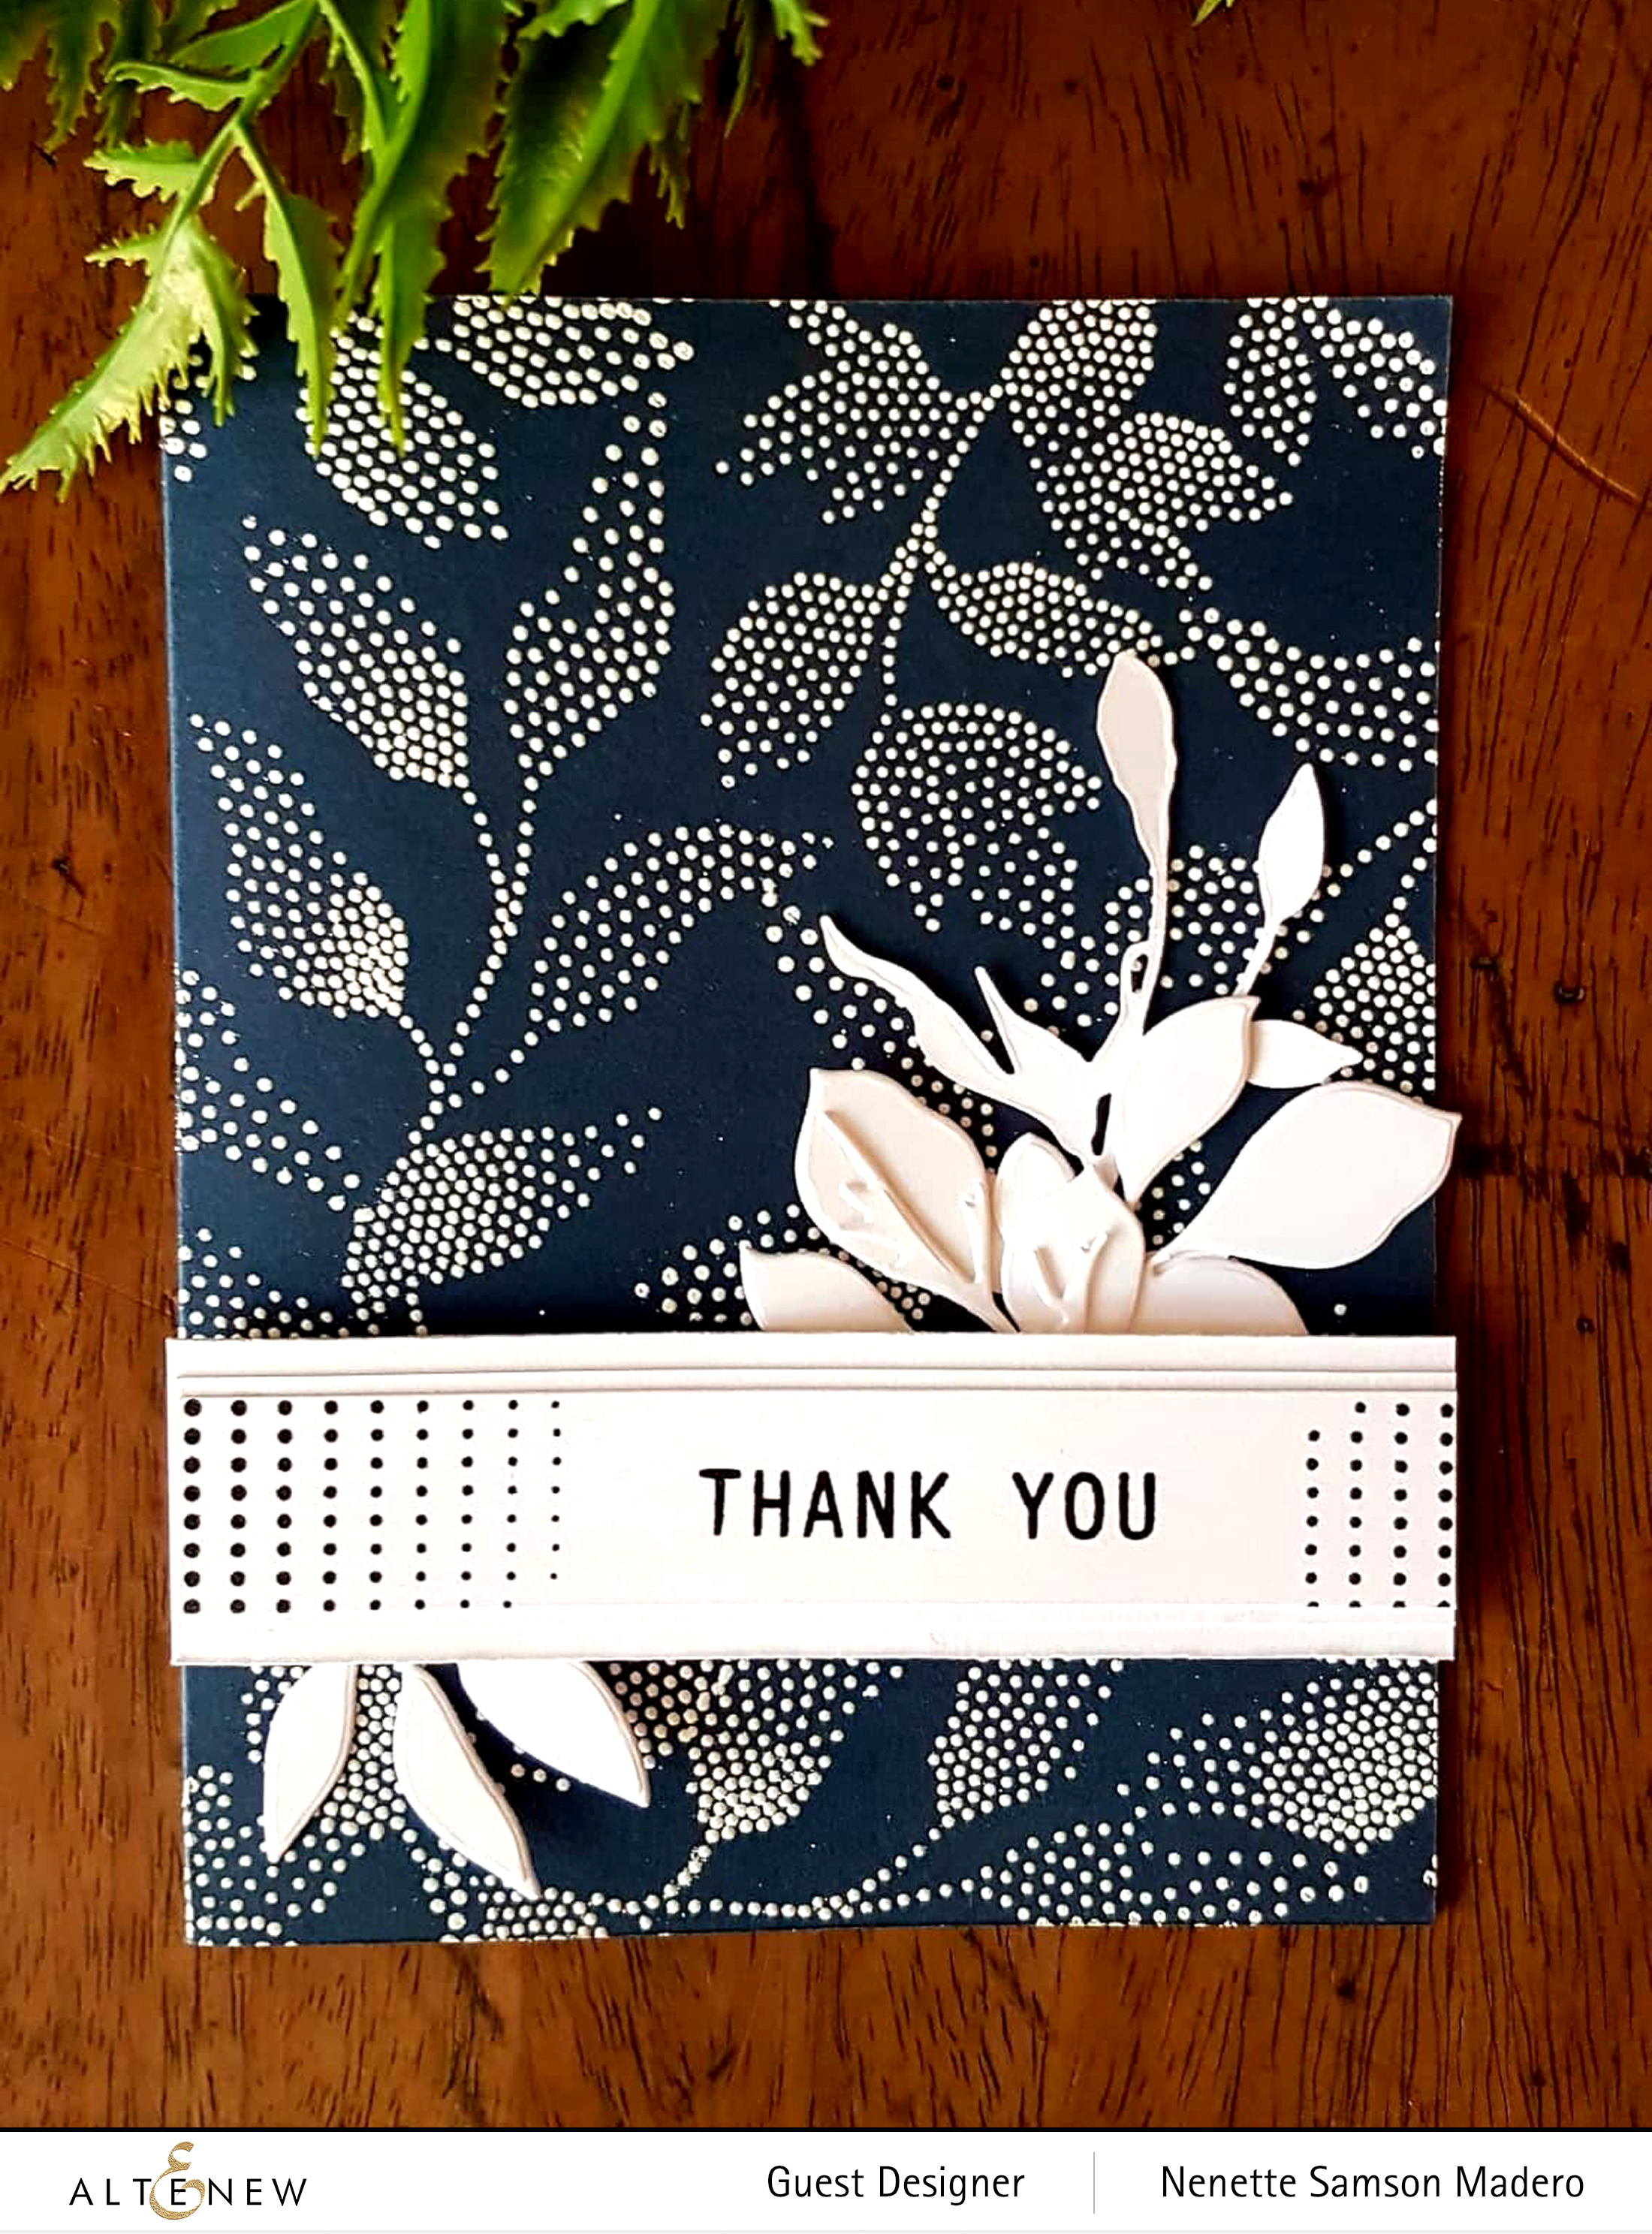
THANK YOU CARD
MATERIALS:
- Altenew Dot Art Stamp set
- Altenew Pure White Embossing Powder
- Altenew Obsidian Pigment Ink
- Altenew Rose Flurries 3D die
- Versamark Ink
- Neenah Solar White and Navy Blue Cardstocks
- Scrapbook Adhesives Foam Squares
- Paper Distresser
- Mono Sand Eraser
- Misti Stamping Tool
Here’s another CAS card. The leaf images from the Dot Art stamp set were stamped onto a navy blue cardstock to cover the entire card front using Versamark ink then embossed with white embossing powder. This was the first time for me to try out the Obsidian pigment ink and I’m in love with it!!! You only need some light tapping on the stamp set and the ink covers the entire surface! This will be my go-to black ink from now on. The sentiment and dots were stamped on white cardstock then 2 more layers of the same white cardstock were used to mat the sentiment strip. The edges of the strip were distressed using a paper distresser. The leaf die-cuts from the Rose Flurries 3D die set were added to the back of the sentiment strip to give some added interest.
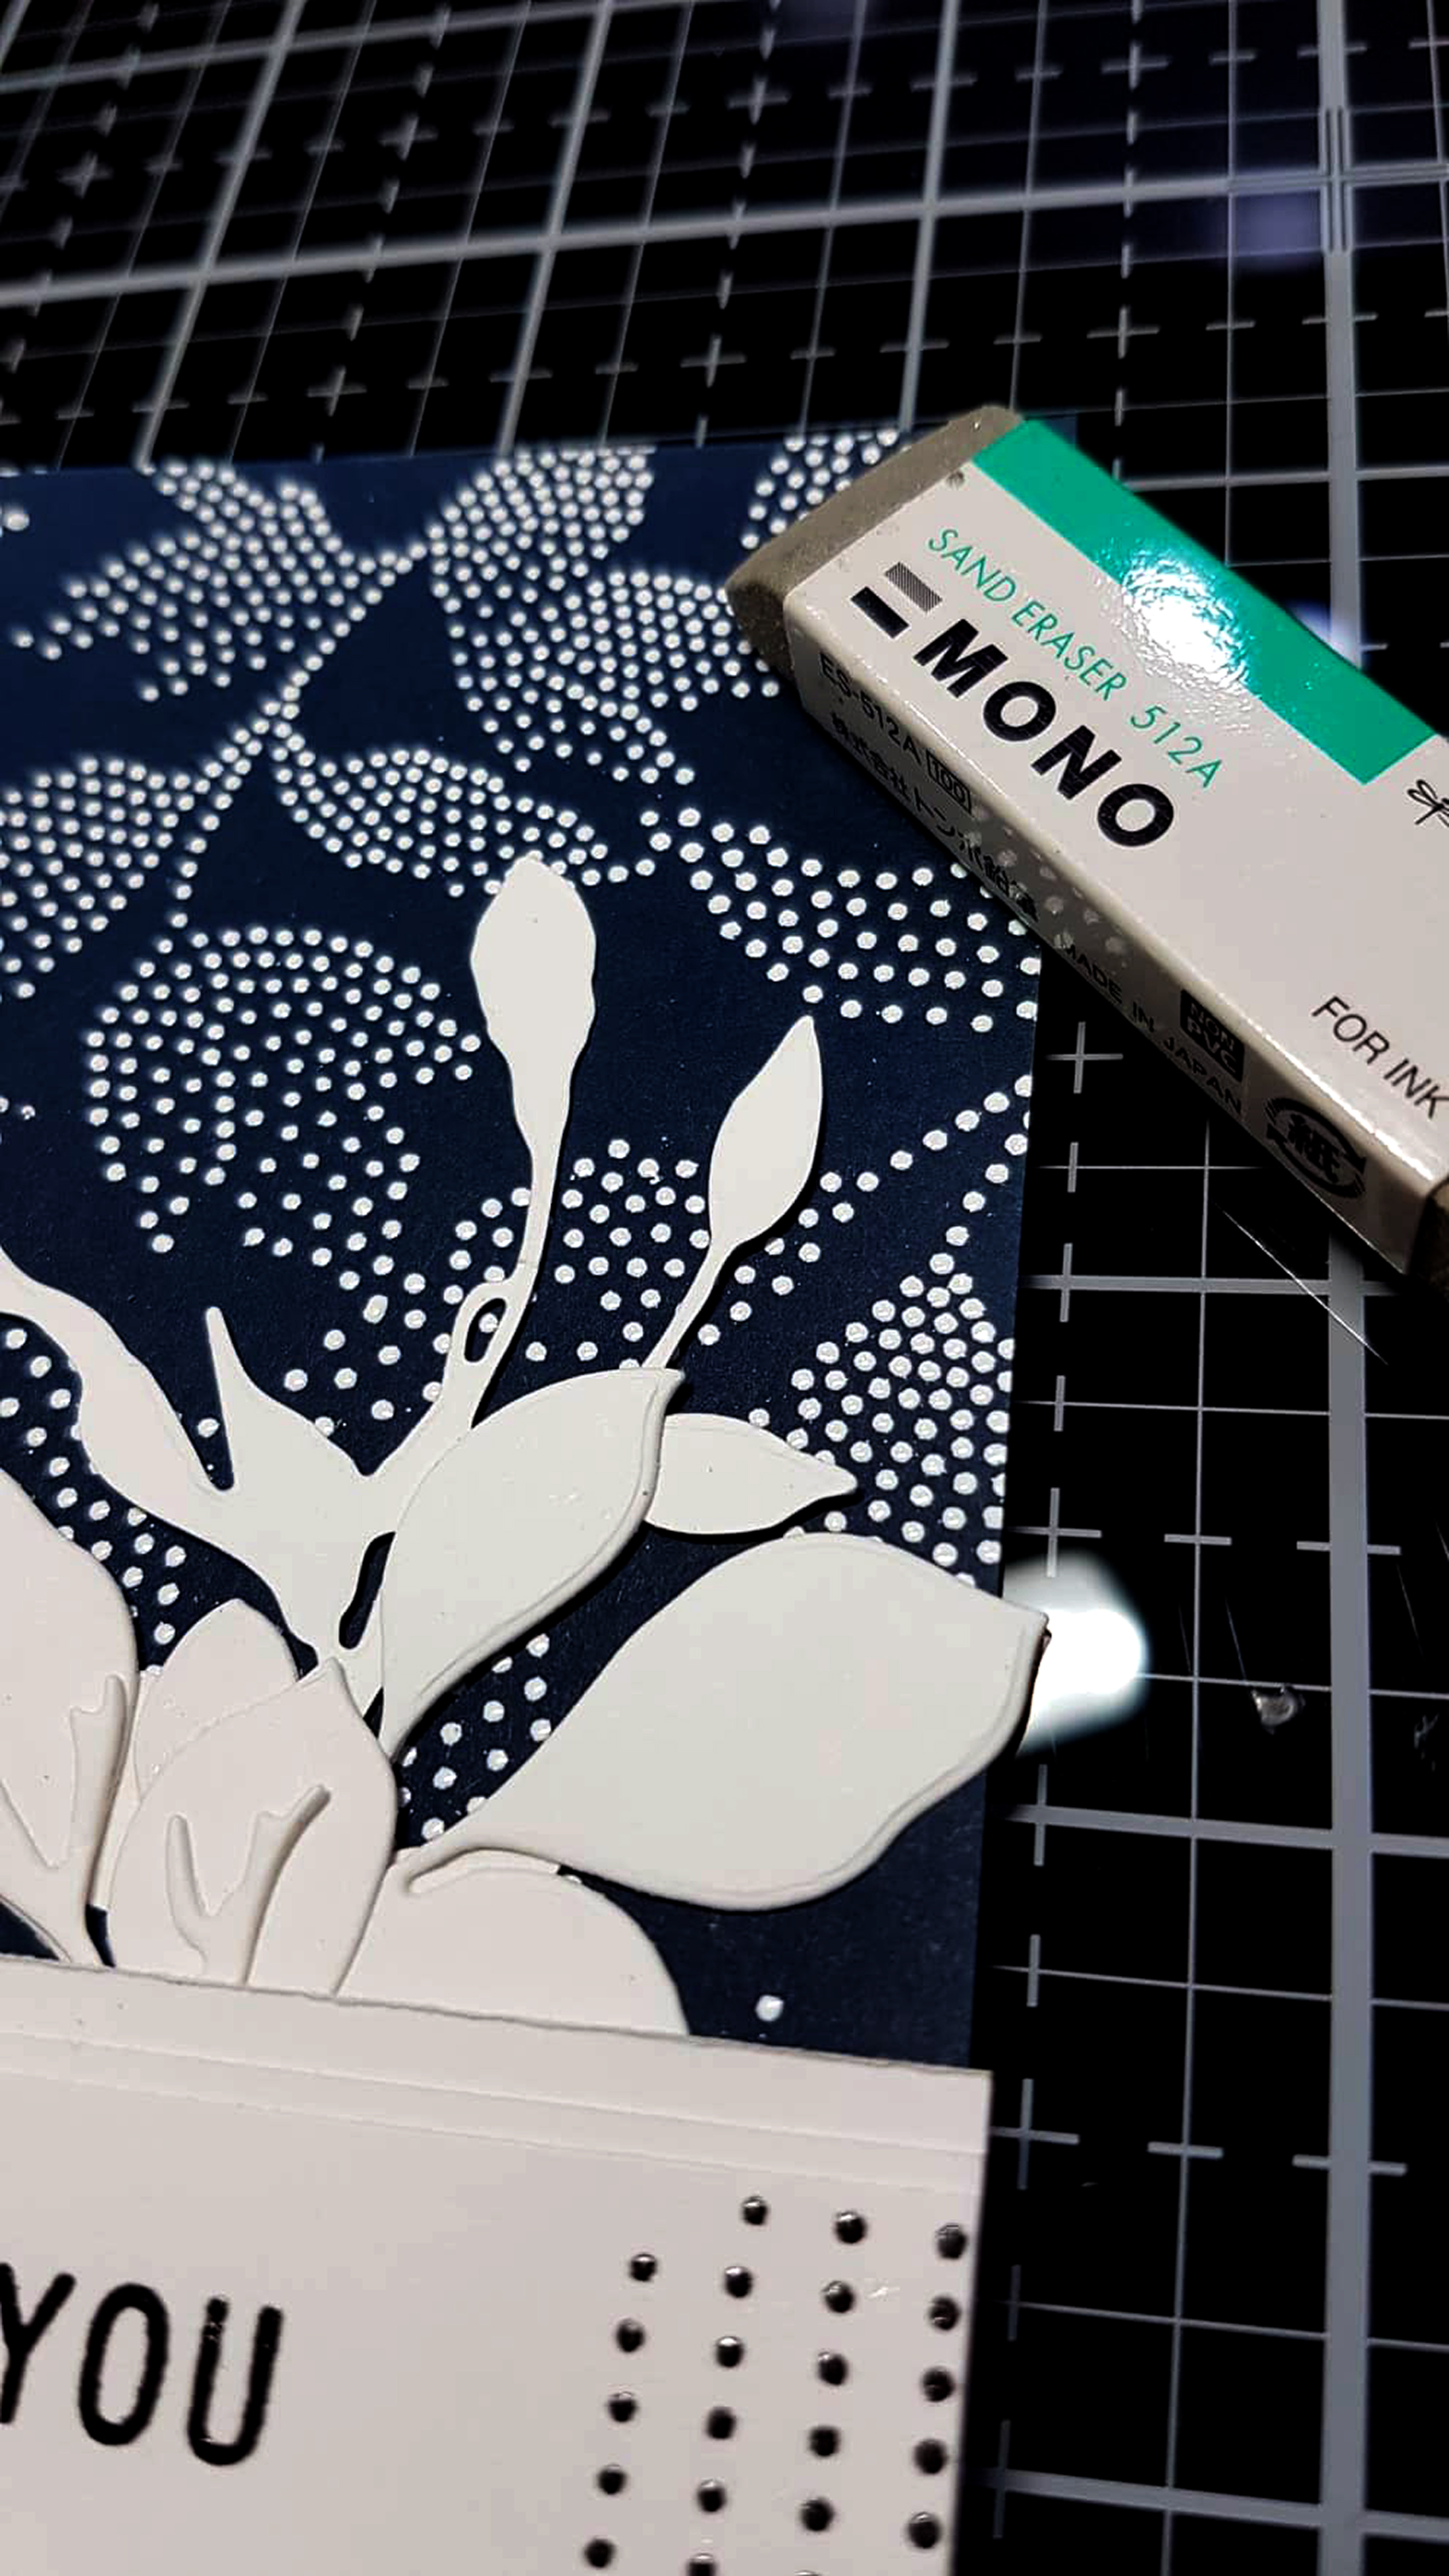
I usually struggle with keeping the background clean especially on dark-coloured cardstocks. Even if I use the antistatic tool before stamping and embossing and then using a fine tip paintbrush to remove the excess powder, most often than not, there will still be excess white specks of embossing powder after you heat emboss. A sand eraser can be used to remove the specks of excess white embossing powders on the background for a cleaner, more finished look.
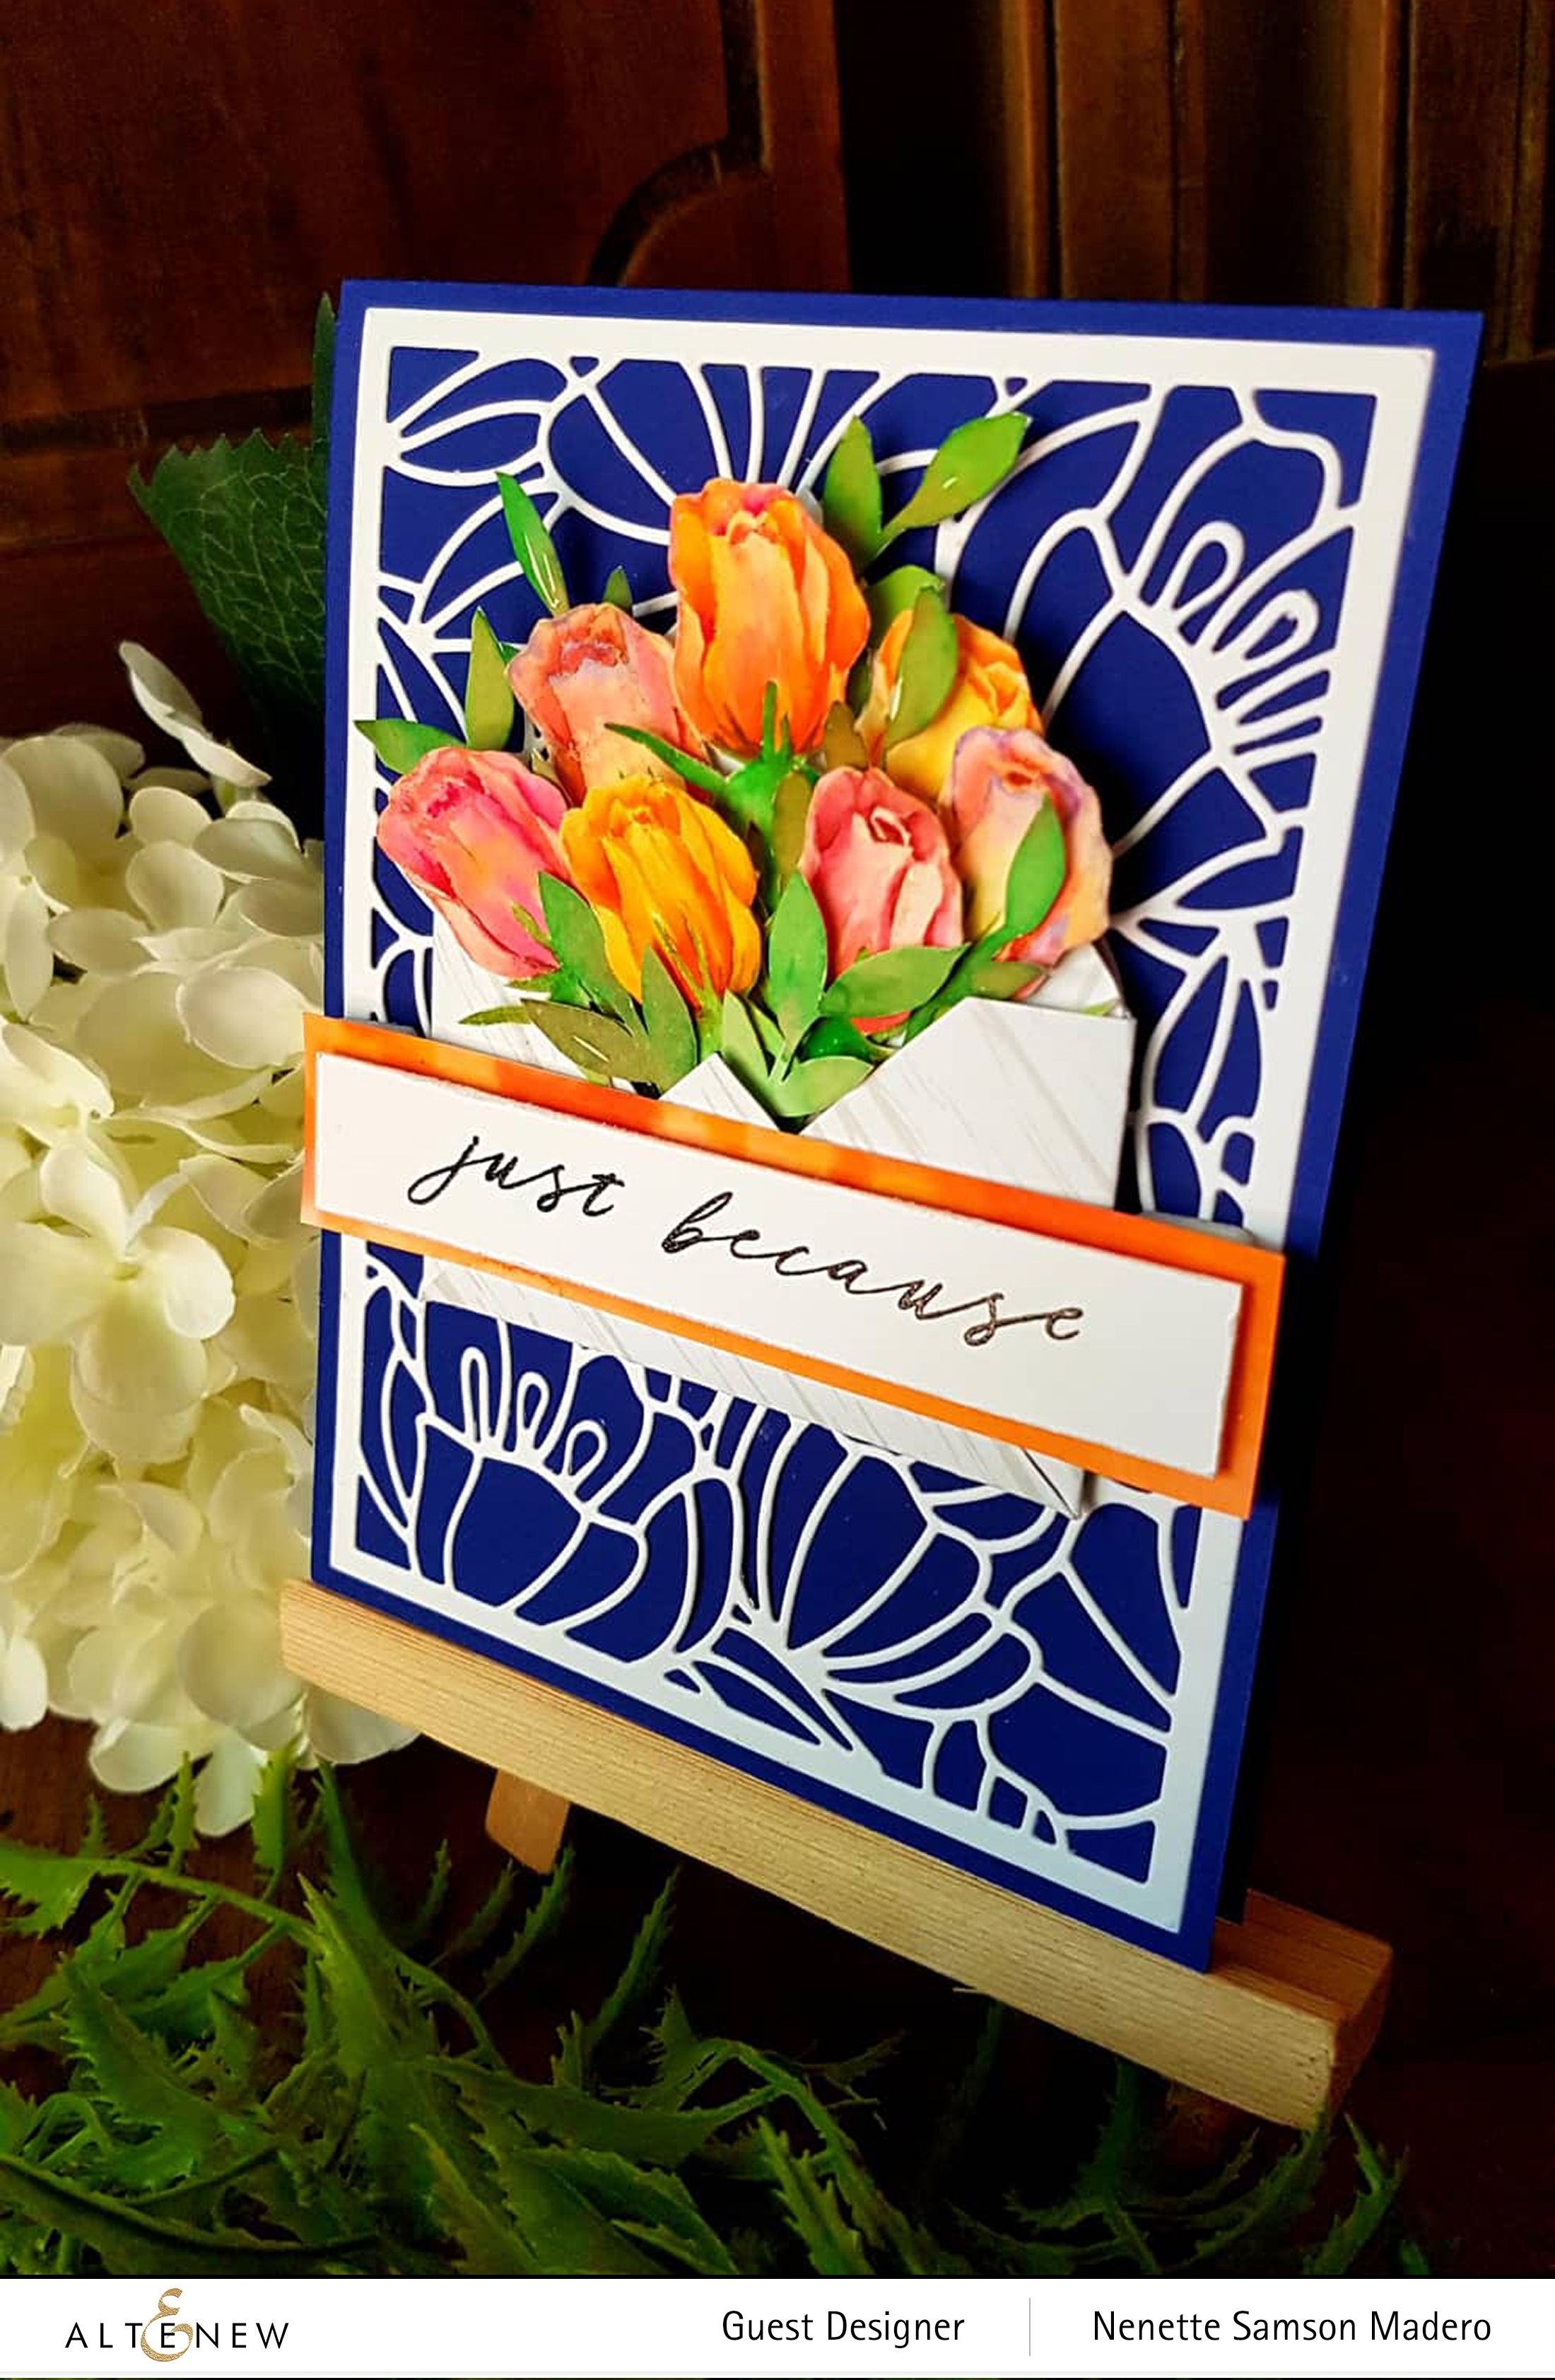
JUST BECAUSE CARD
MATERIALS:
- Altenew Inked Bud Stamp
- Altenew Dainty Blooms Cover Die
- Altenew Watercolor brush markers–Citrus Burst, Fresh Lemon, Rouge, Crimson, Persian Blue, Mountain Mist and Sweet Leaf
- Altenew Just
Because Builder - Neenah Solar White heavy CS
- Ifex Plike Blue cardstock
- Distress Ink Antique Linen
- Faber Castell Poly Chromos
colored pencils - Arches cold press
watercolor paper 300gsm - Altenew Essential Rock Collection Paper Pack
- Tombow Mono Multi Liquid Glue
- Ranger Glossy Accents dimensional medium
- Altenew Obsidian Pigment Ink
- Altenew Crystal Clear Embossing Powder
- Scrapbook Adhesives Foam Squares
- Misti Stamping Tool
- We Are Memory Keepers Envelope Scoreboard
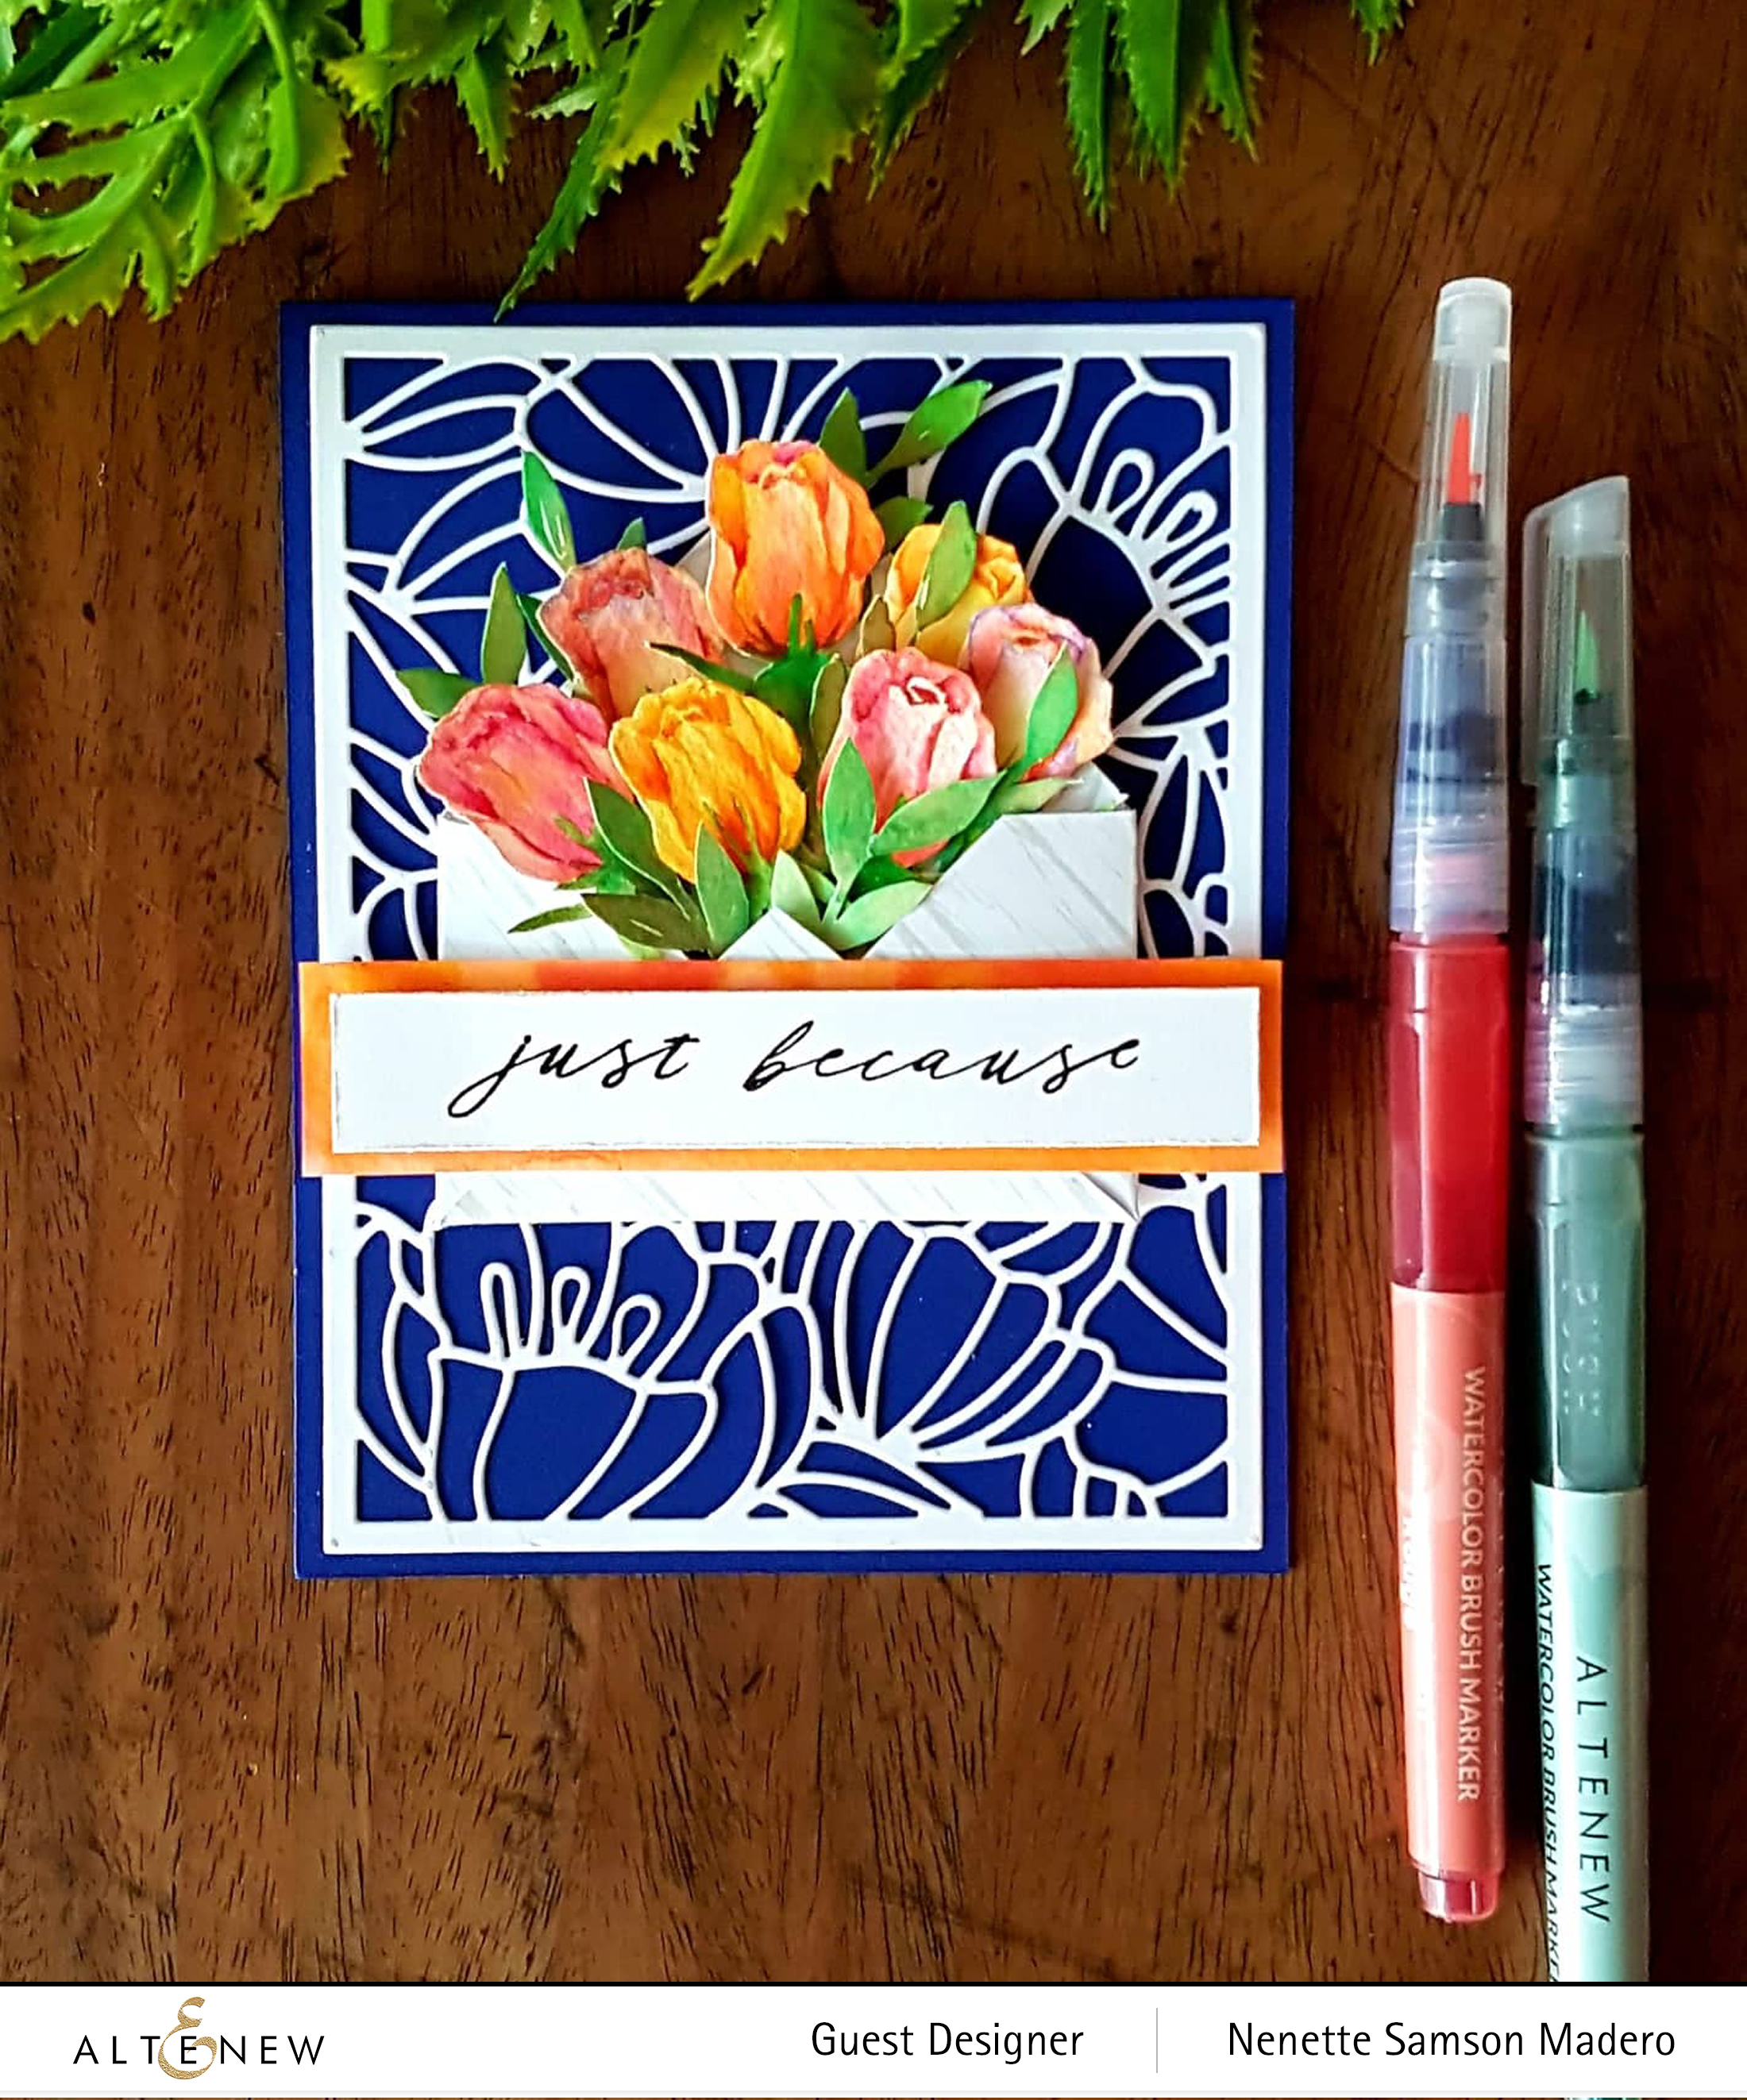
I love roses especially the buds and when I saw this stamp set, I immediately knew what I wanted to create. First, I stamped several images using Antique Linen distress ink on watercolor paper a few times to get a good impression of the image. After, I used the wet on wet technique to color the petals and sepals. Since this stamp set did not come with leaves, I just watercolored my own and fussy cut them. Instead of a vase, I thought of making a small envelope using one of the Essential Rock Collection papers to hold the flowers together. I only put glue on the stems to adhere it inside the envelope so that the flowers will have more dimension. The Altenew Dainty Blooms cover die was used to cut out the image on Neenah Solar white CS and this was then glued on a top folding A2 card. The envelope was then glued onto the card front using a strong adhesive.
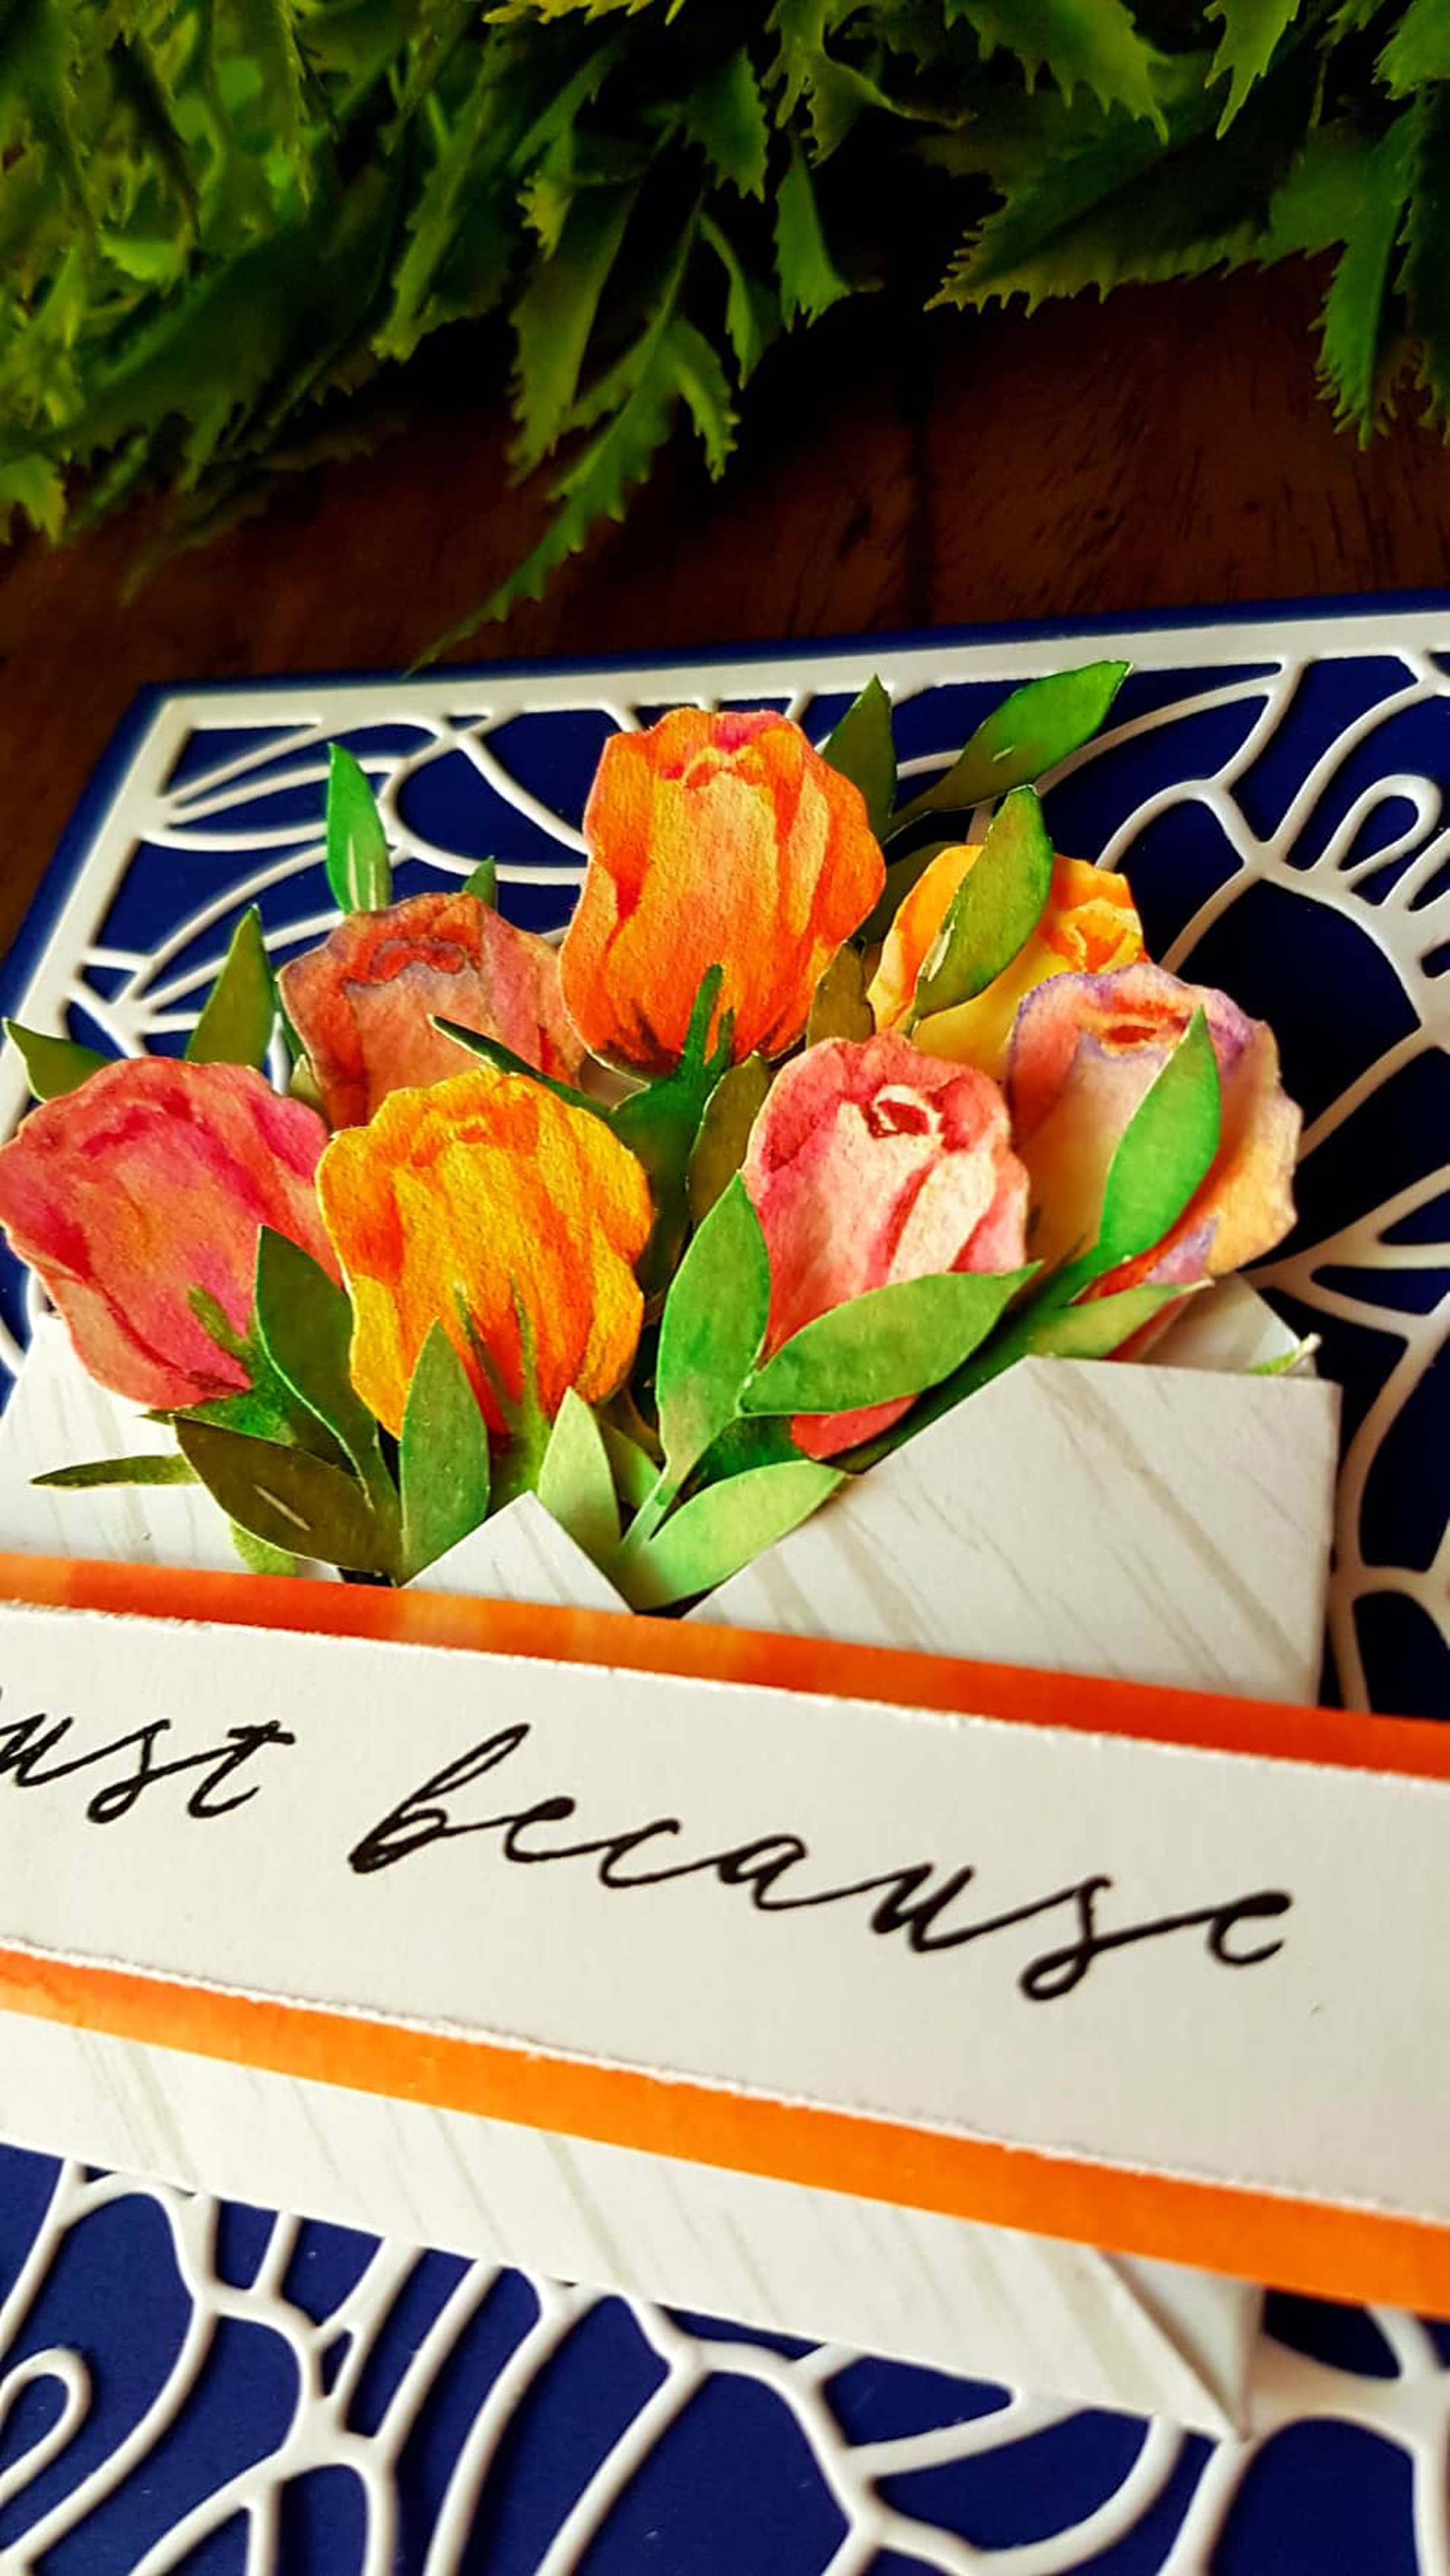
I chose the cursive writing of “JUST BECAUSE” to add to the feminine feel of the card and this was stamped with my new
YOU ARE ENOUGH CARD
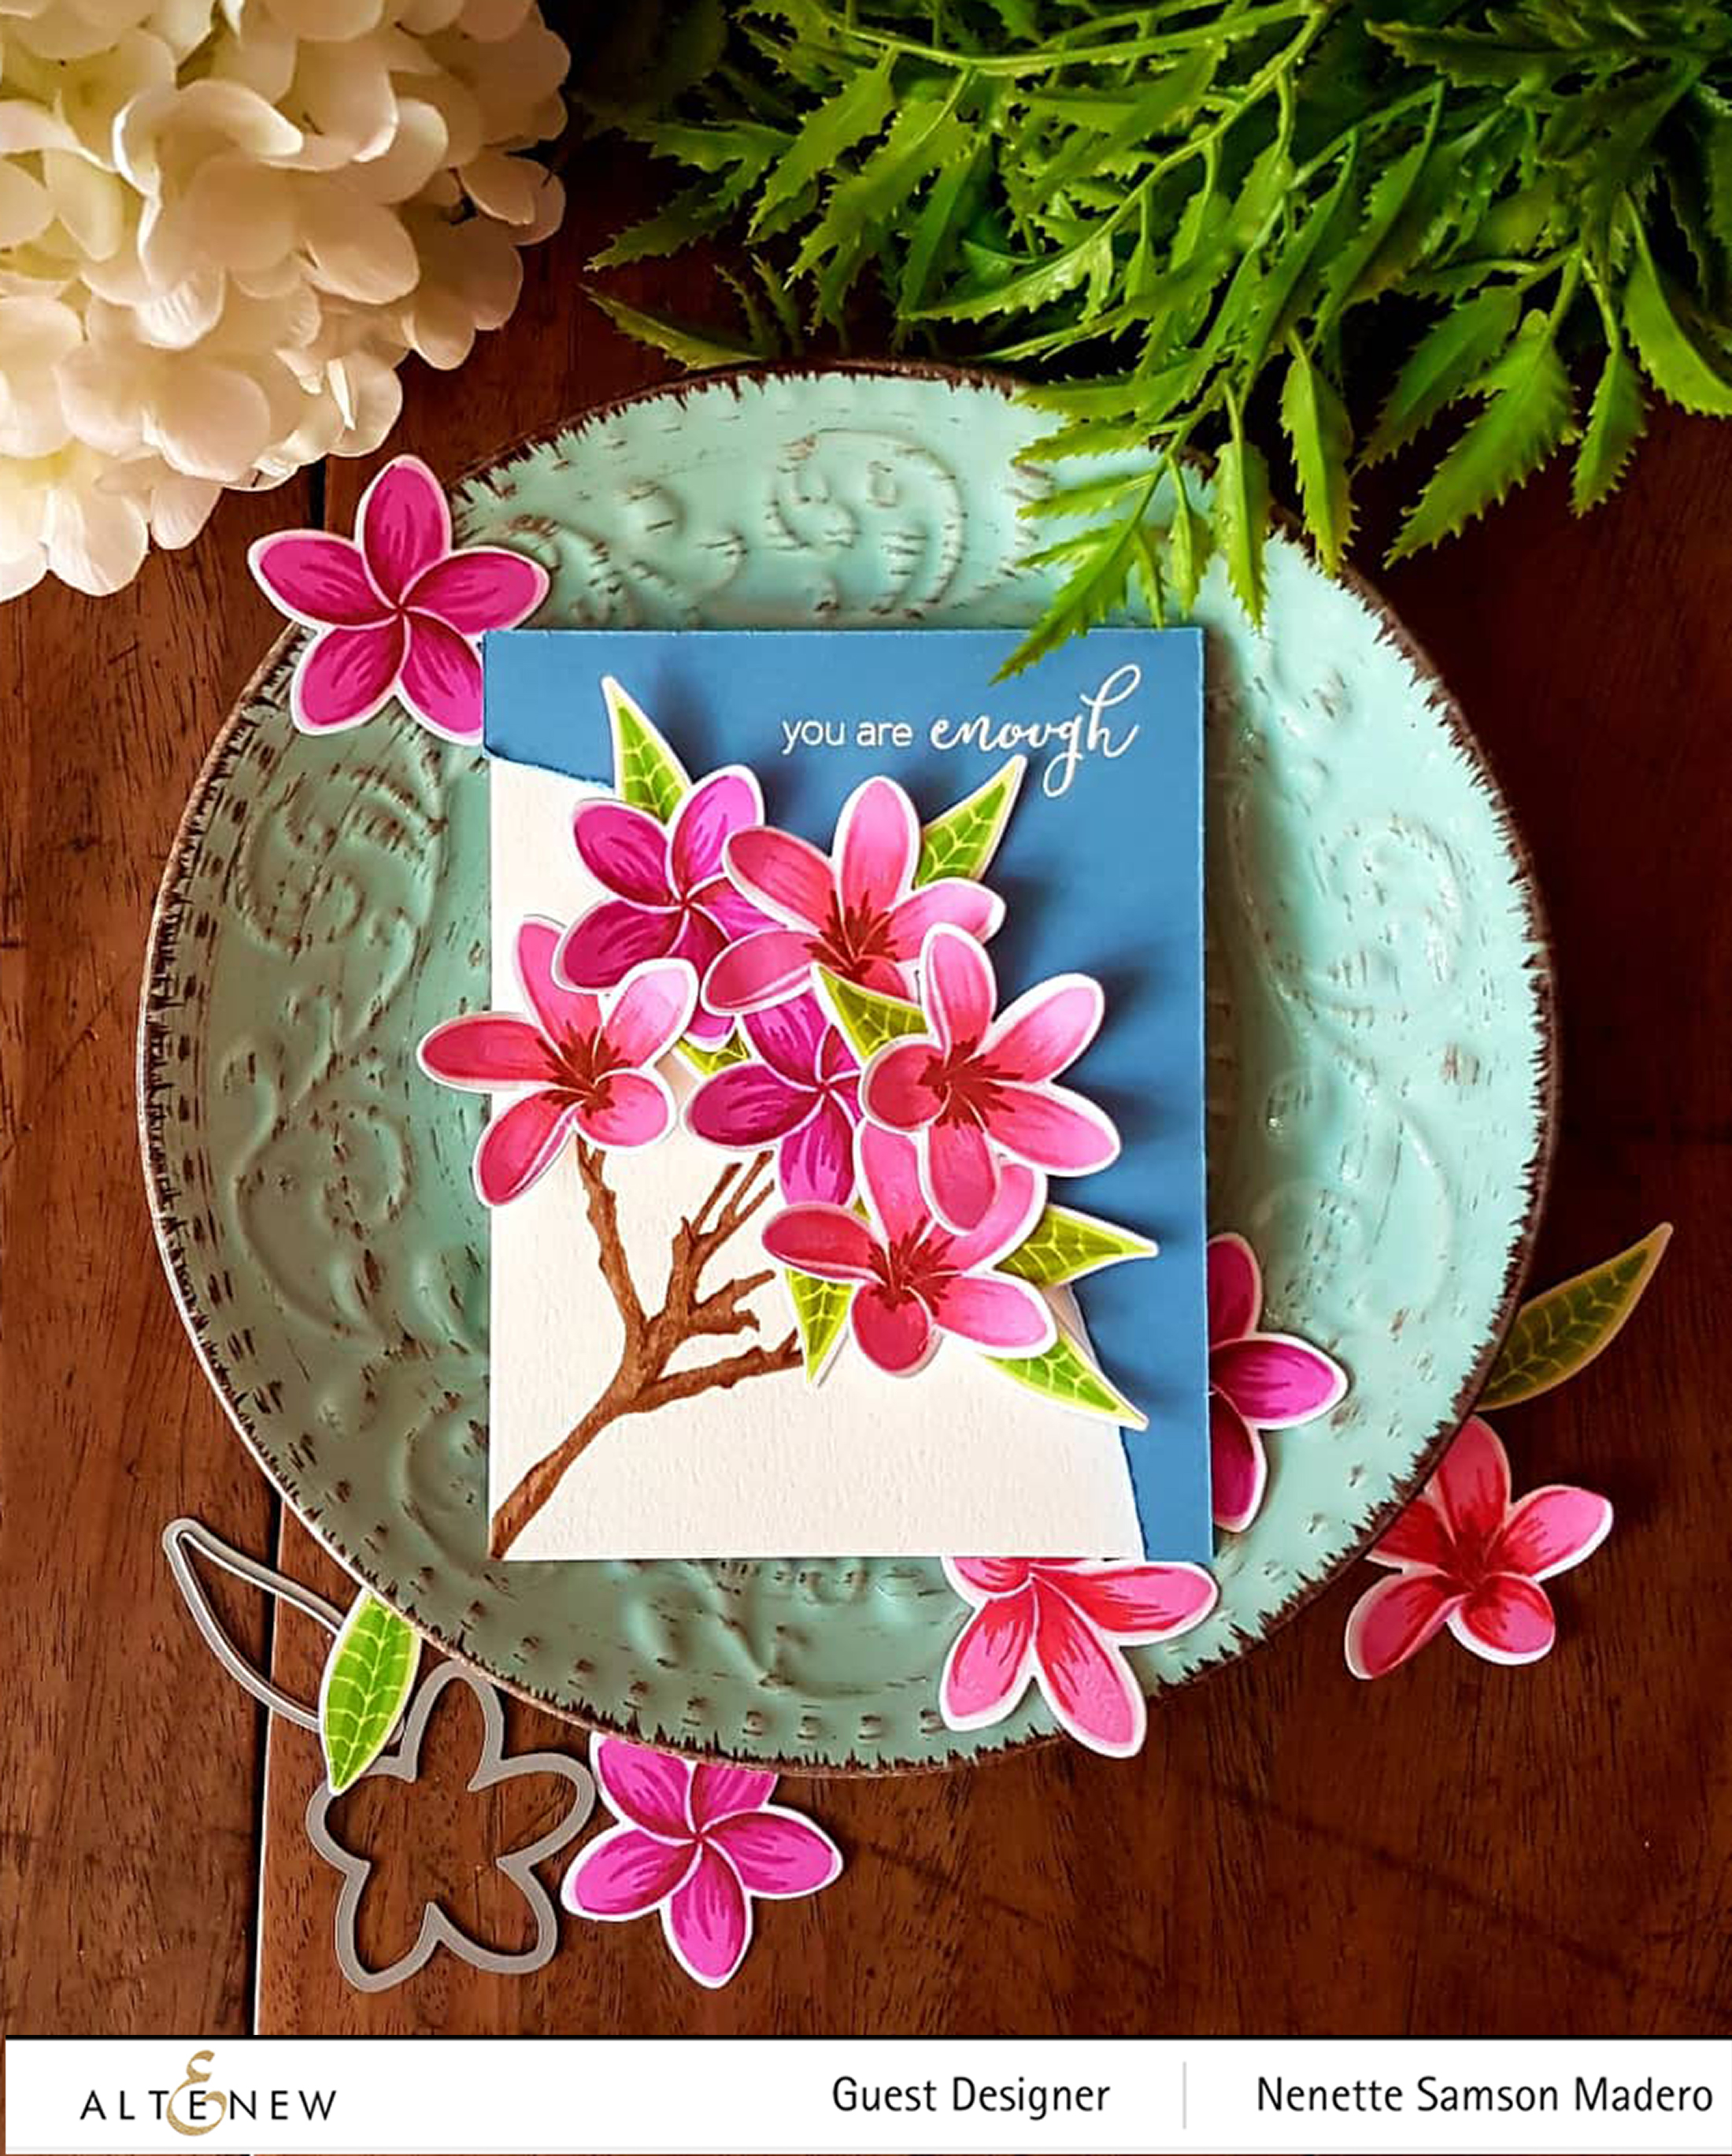
MATERIALS:
- Altenew Playful Plumeria Stamp and Die Bundle
- Altenew Crisp Dye inks- Baby Pink, Fuchsia, Rubellite, Magenta, Limeade, Bamboo, Lime, Fresh Leaf, Olive and Moss
- Altenew Artist Markers Set C R 403
- Neenah Solar White Cardstock and Blue Cardstock
- Tombow Mono Multi liquid glue
- Scrapbook Adhesives foam squares
- Faber-Castell Polychromos colored pencils
- Kuretake Wink of Stella brush clear
- Burnishing tool
- Misti Stamping Tool
First thing I do when I get a layered stamp set is to scan the black images onto
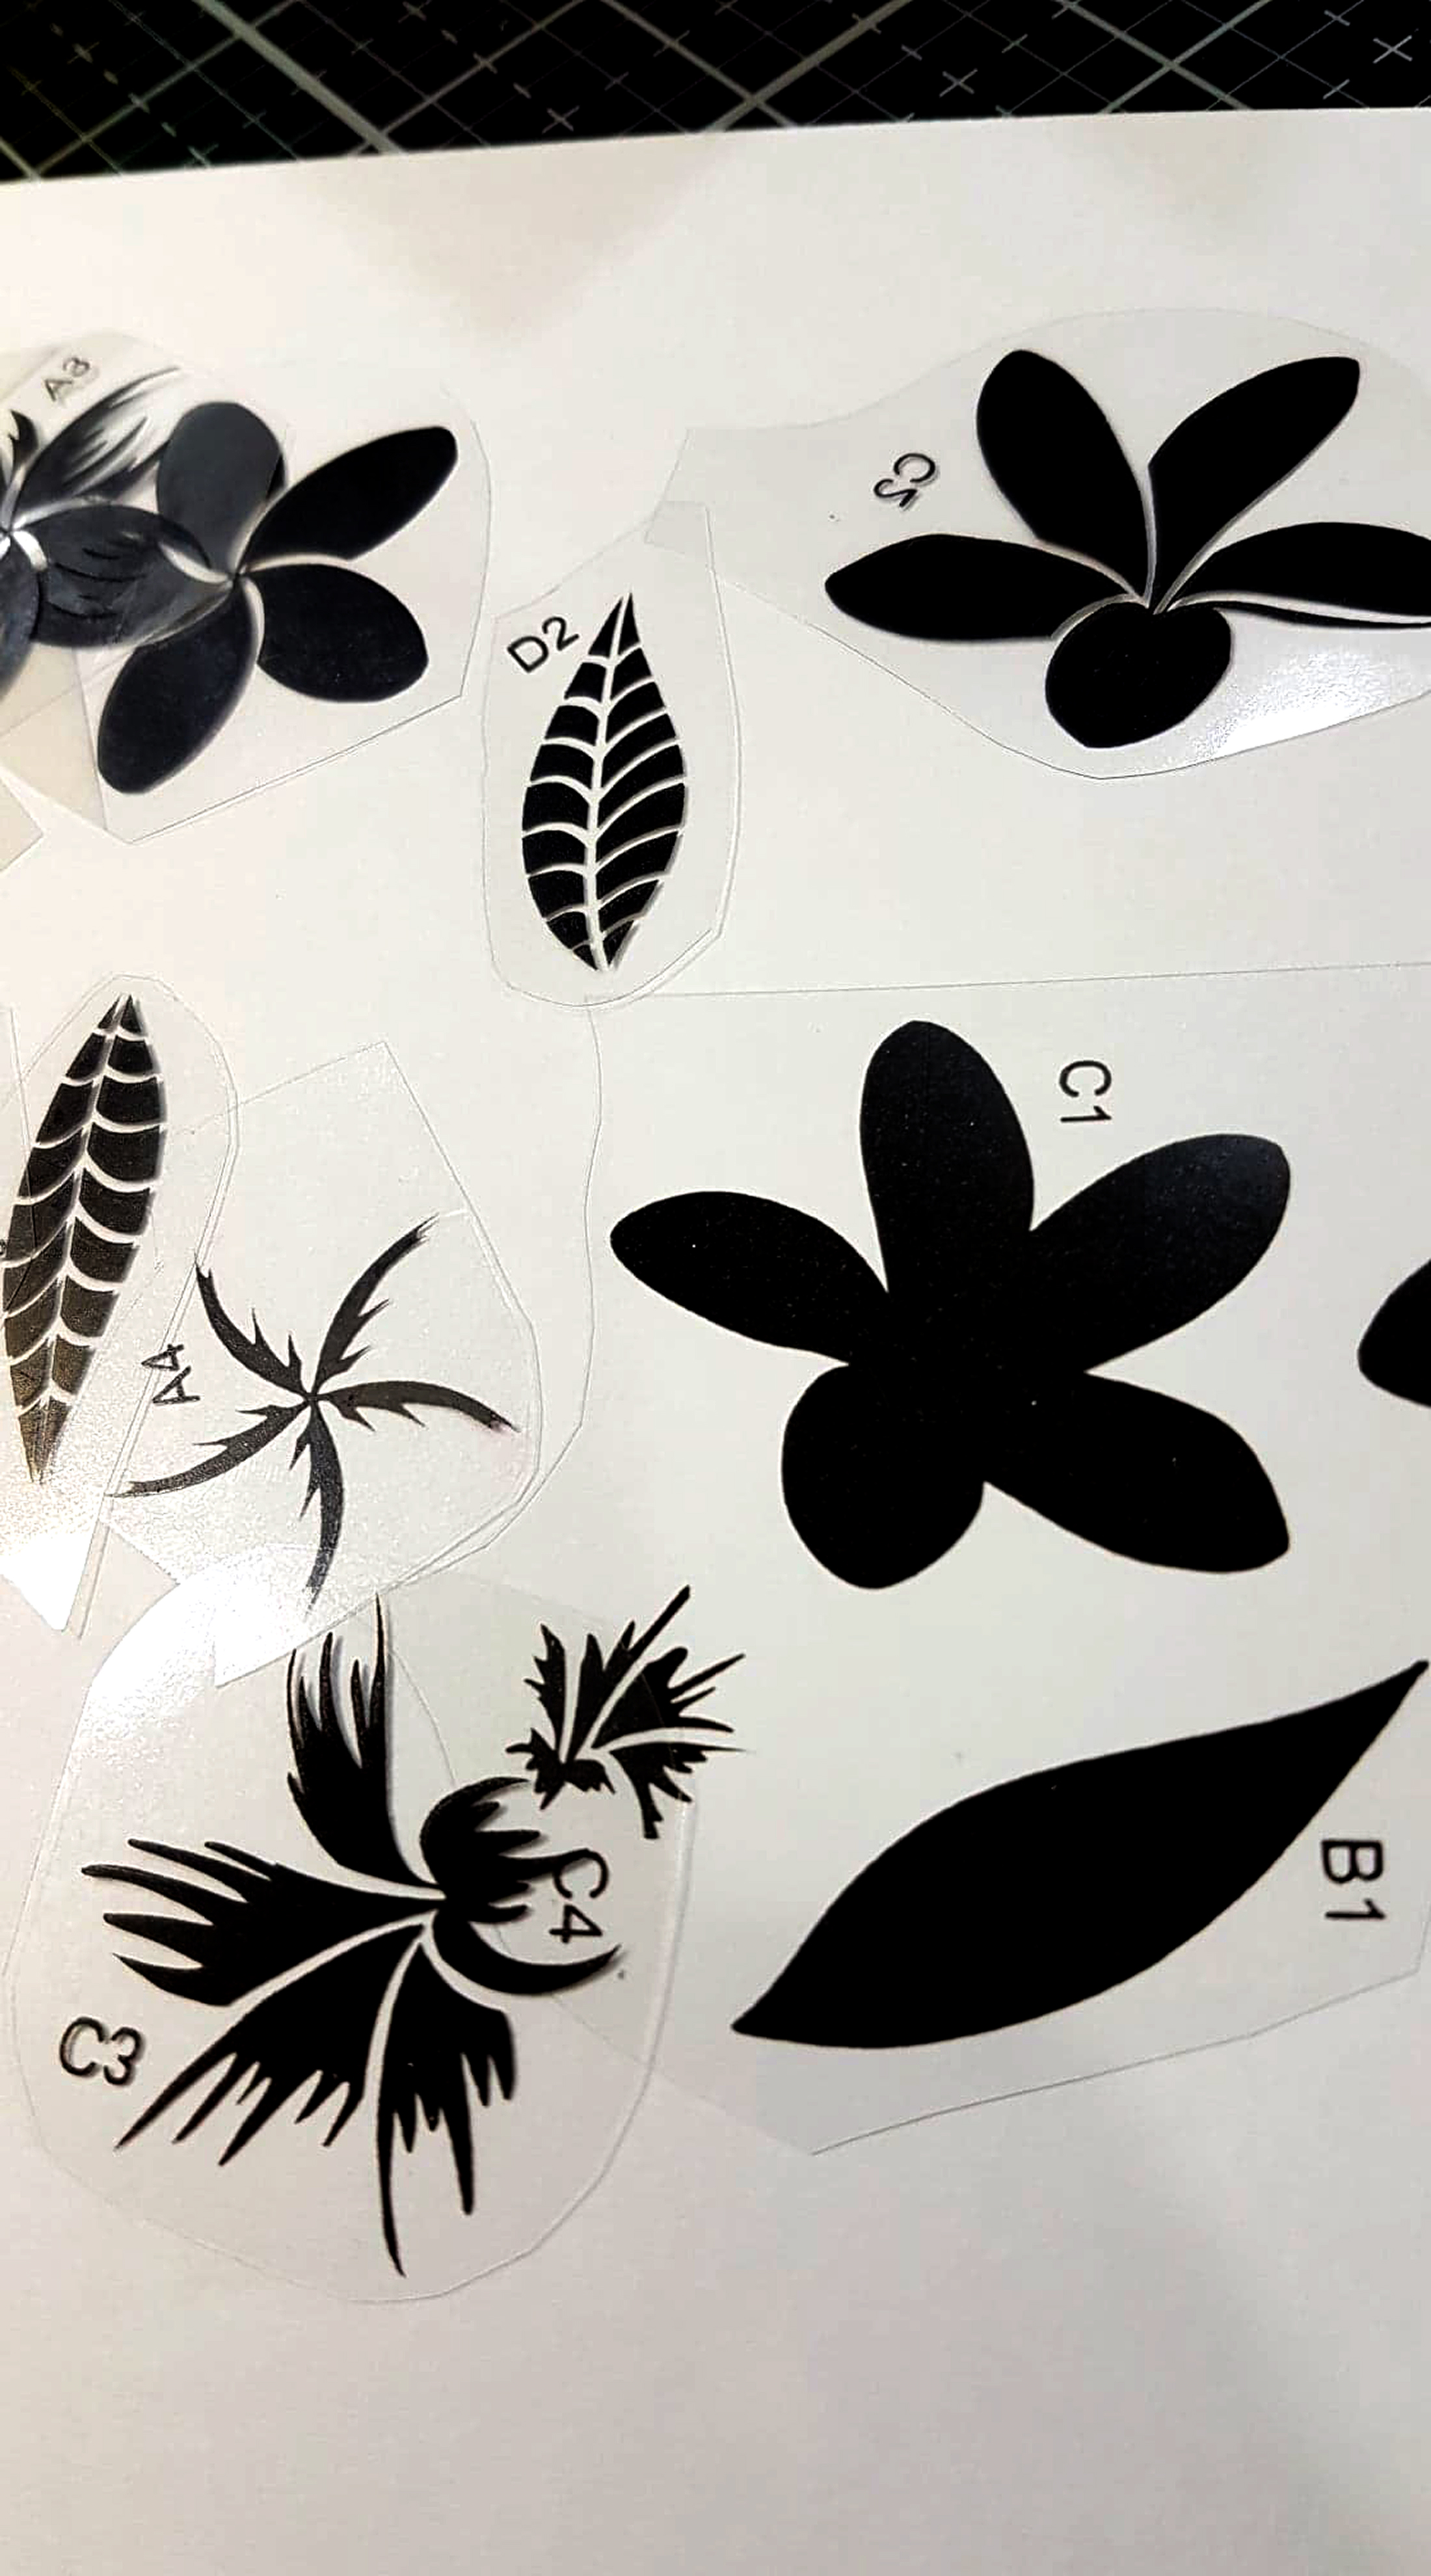
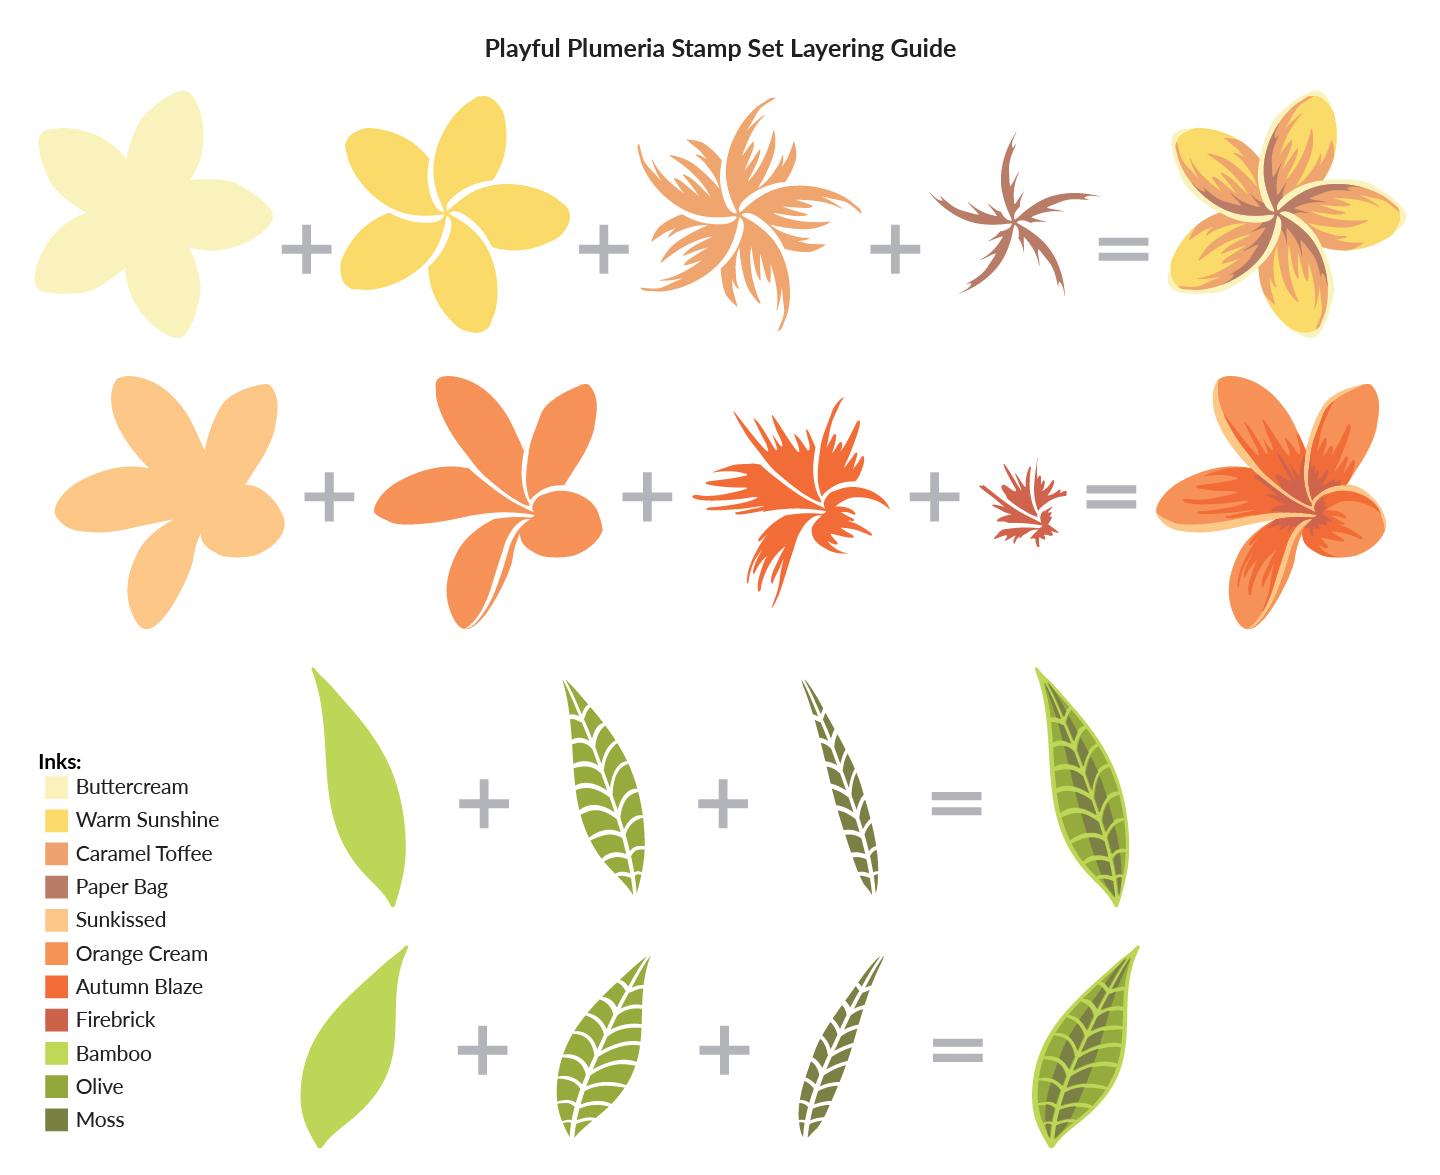
I then stamped the first layer with the lightest
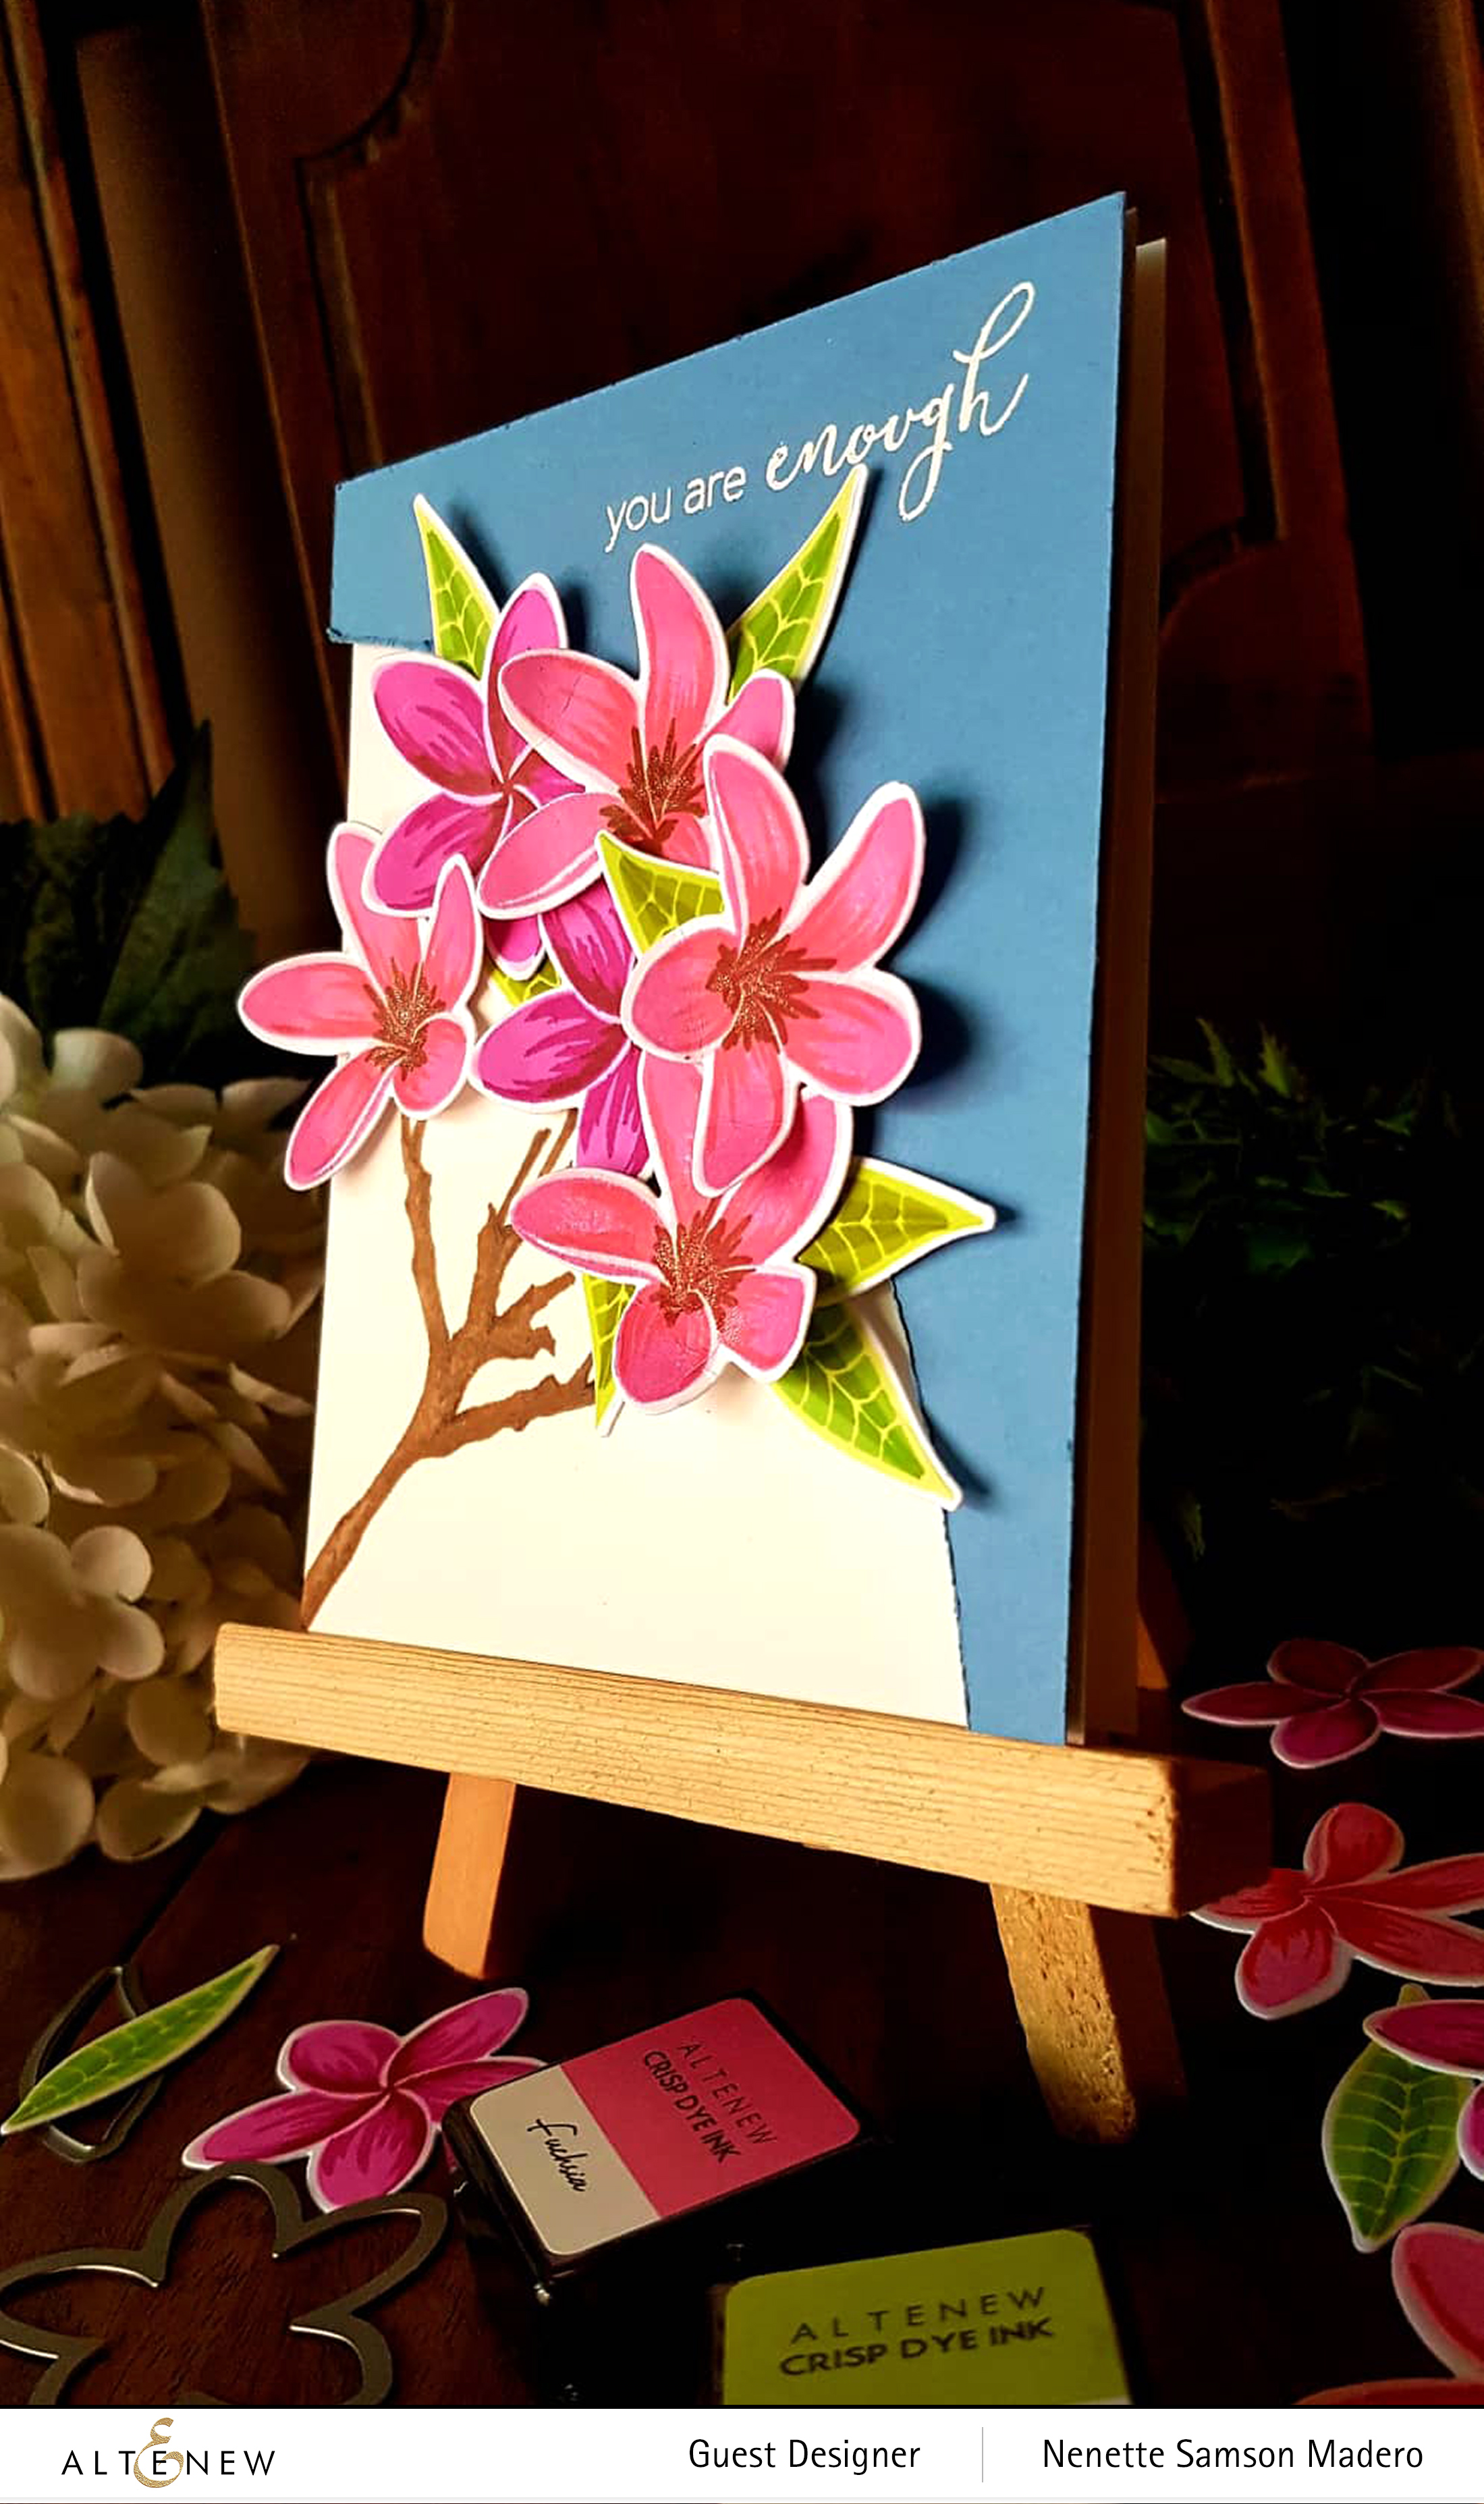
I almost did not finish this card. I stamped another branch from the top right corner towards the center but was not happy with the outcome. Then I encountered some problems stamping the flower itself and was ready to give up! 🙂 But instead of throwing it away, I thought of covering up the upper right side with blue cardstock and I used the Artist Marker to create my own 2nd layer design.
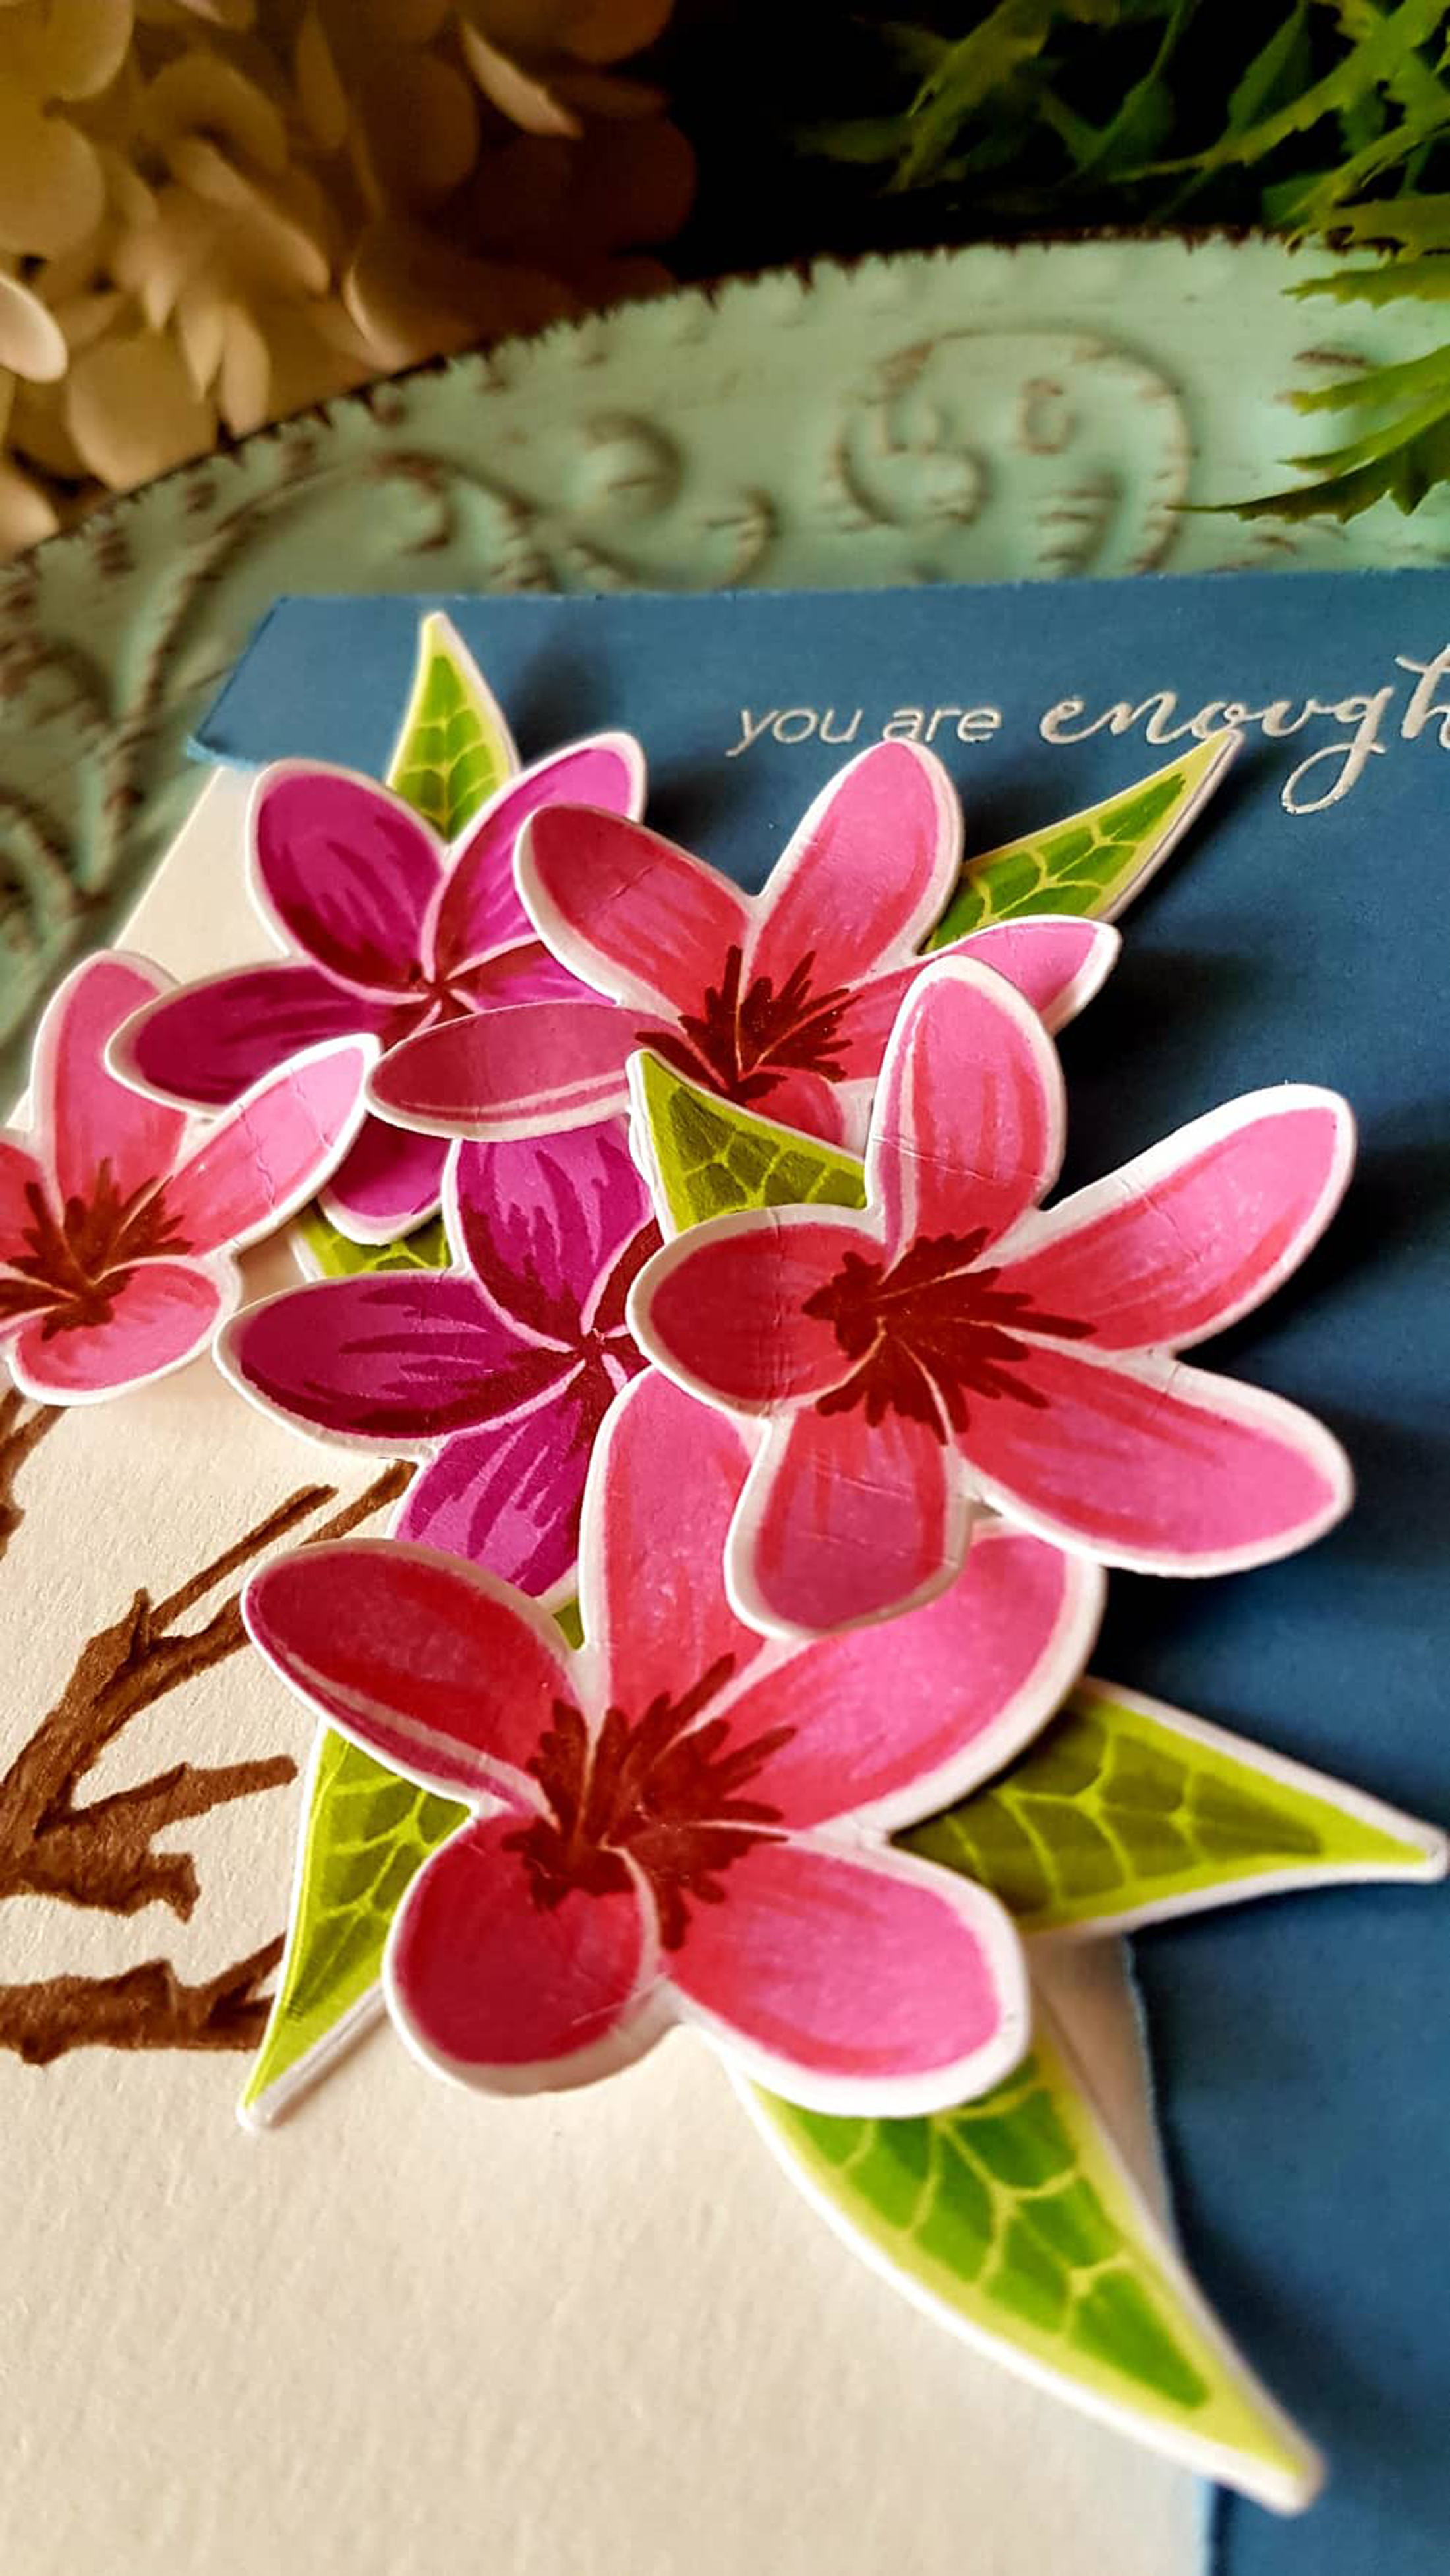
The flowers were burnished to curl up the petals then adhered with foam tape for dimension. I used some Wink of Stella to add some sparkle at the center of the flowers. Dark brown colored pencil was used to add more detailed shadows to the branch of the tree.
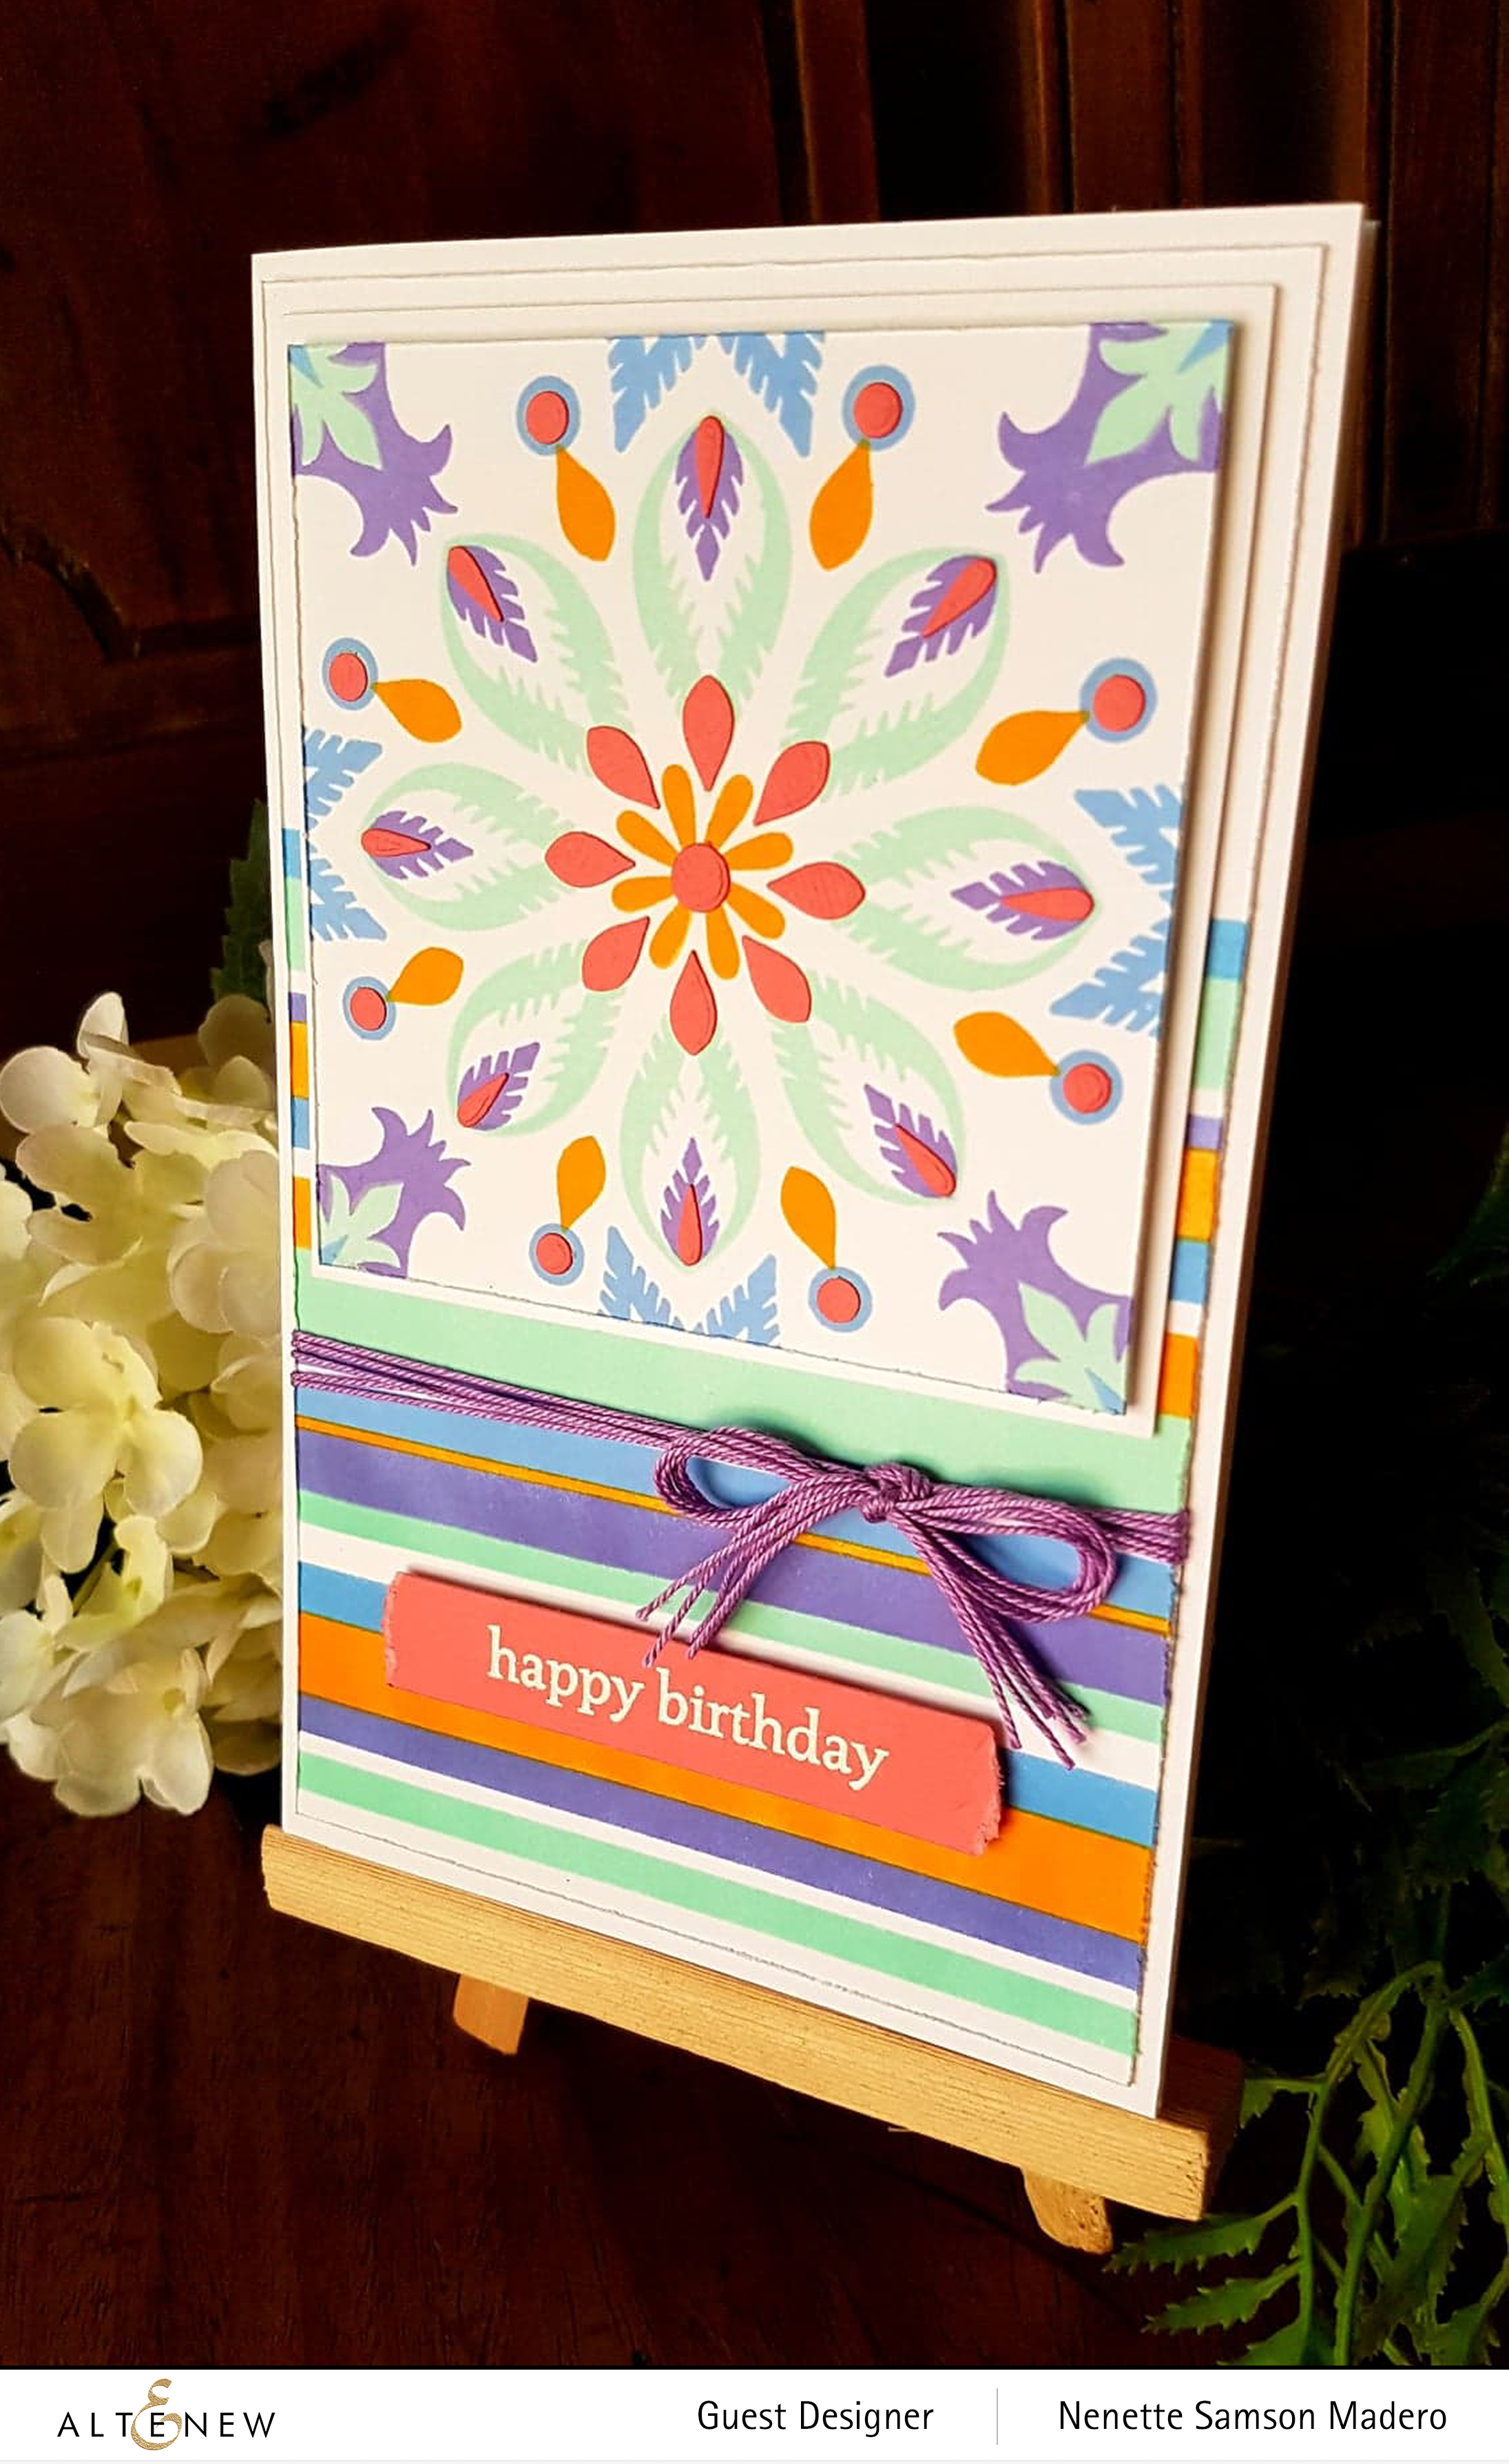
HAPPY BIRTHDAY CARD
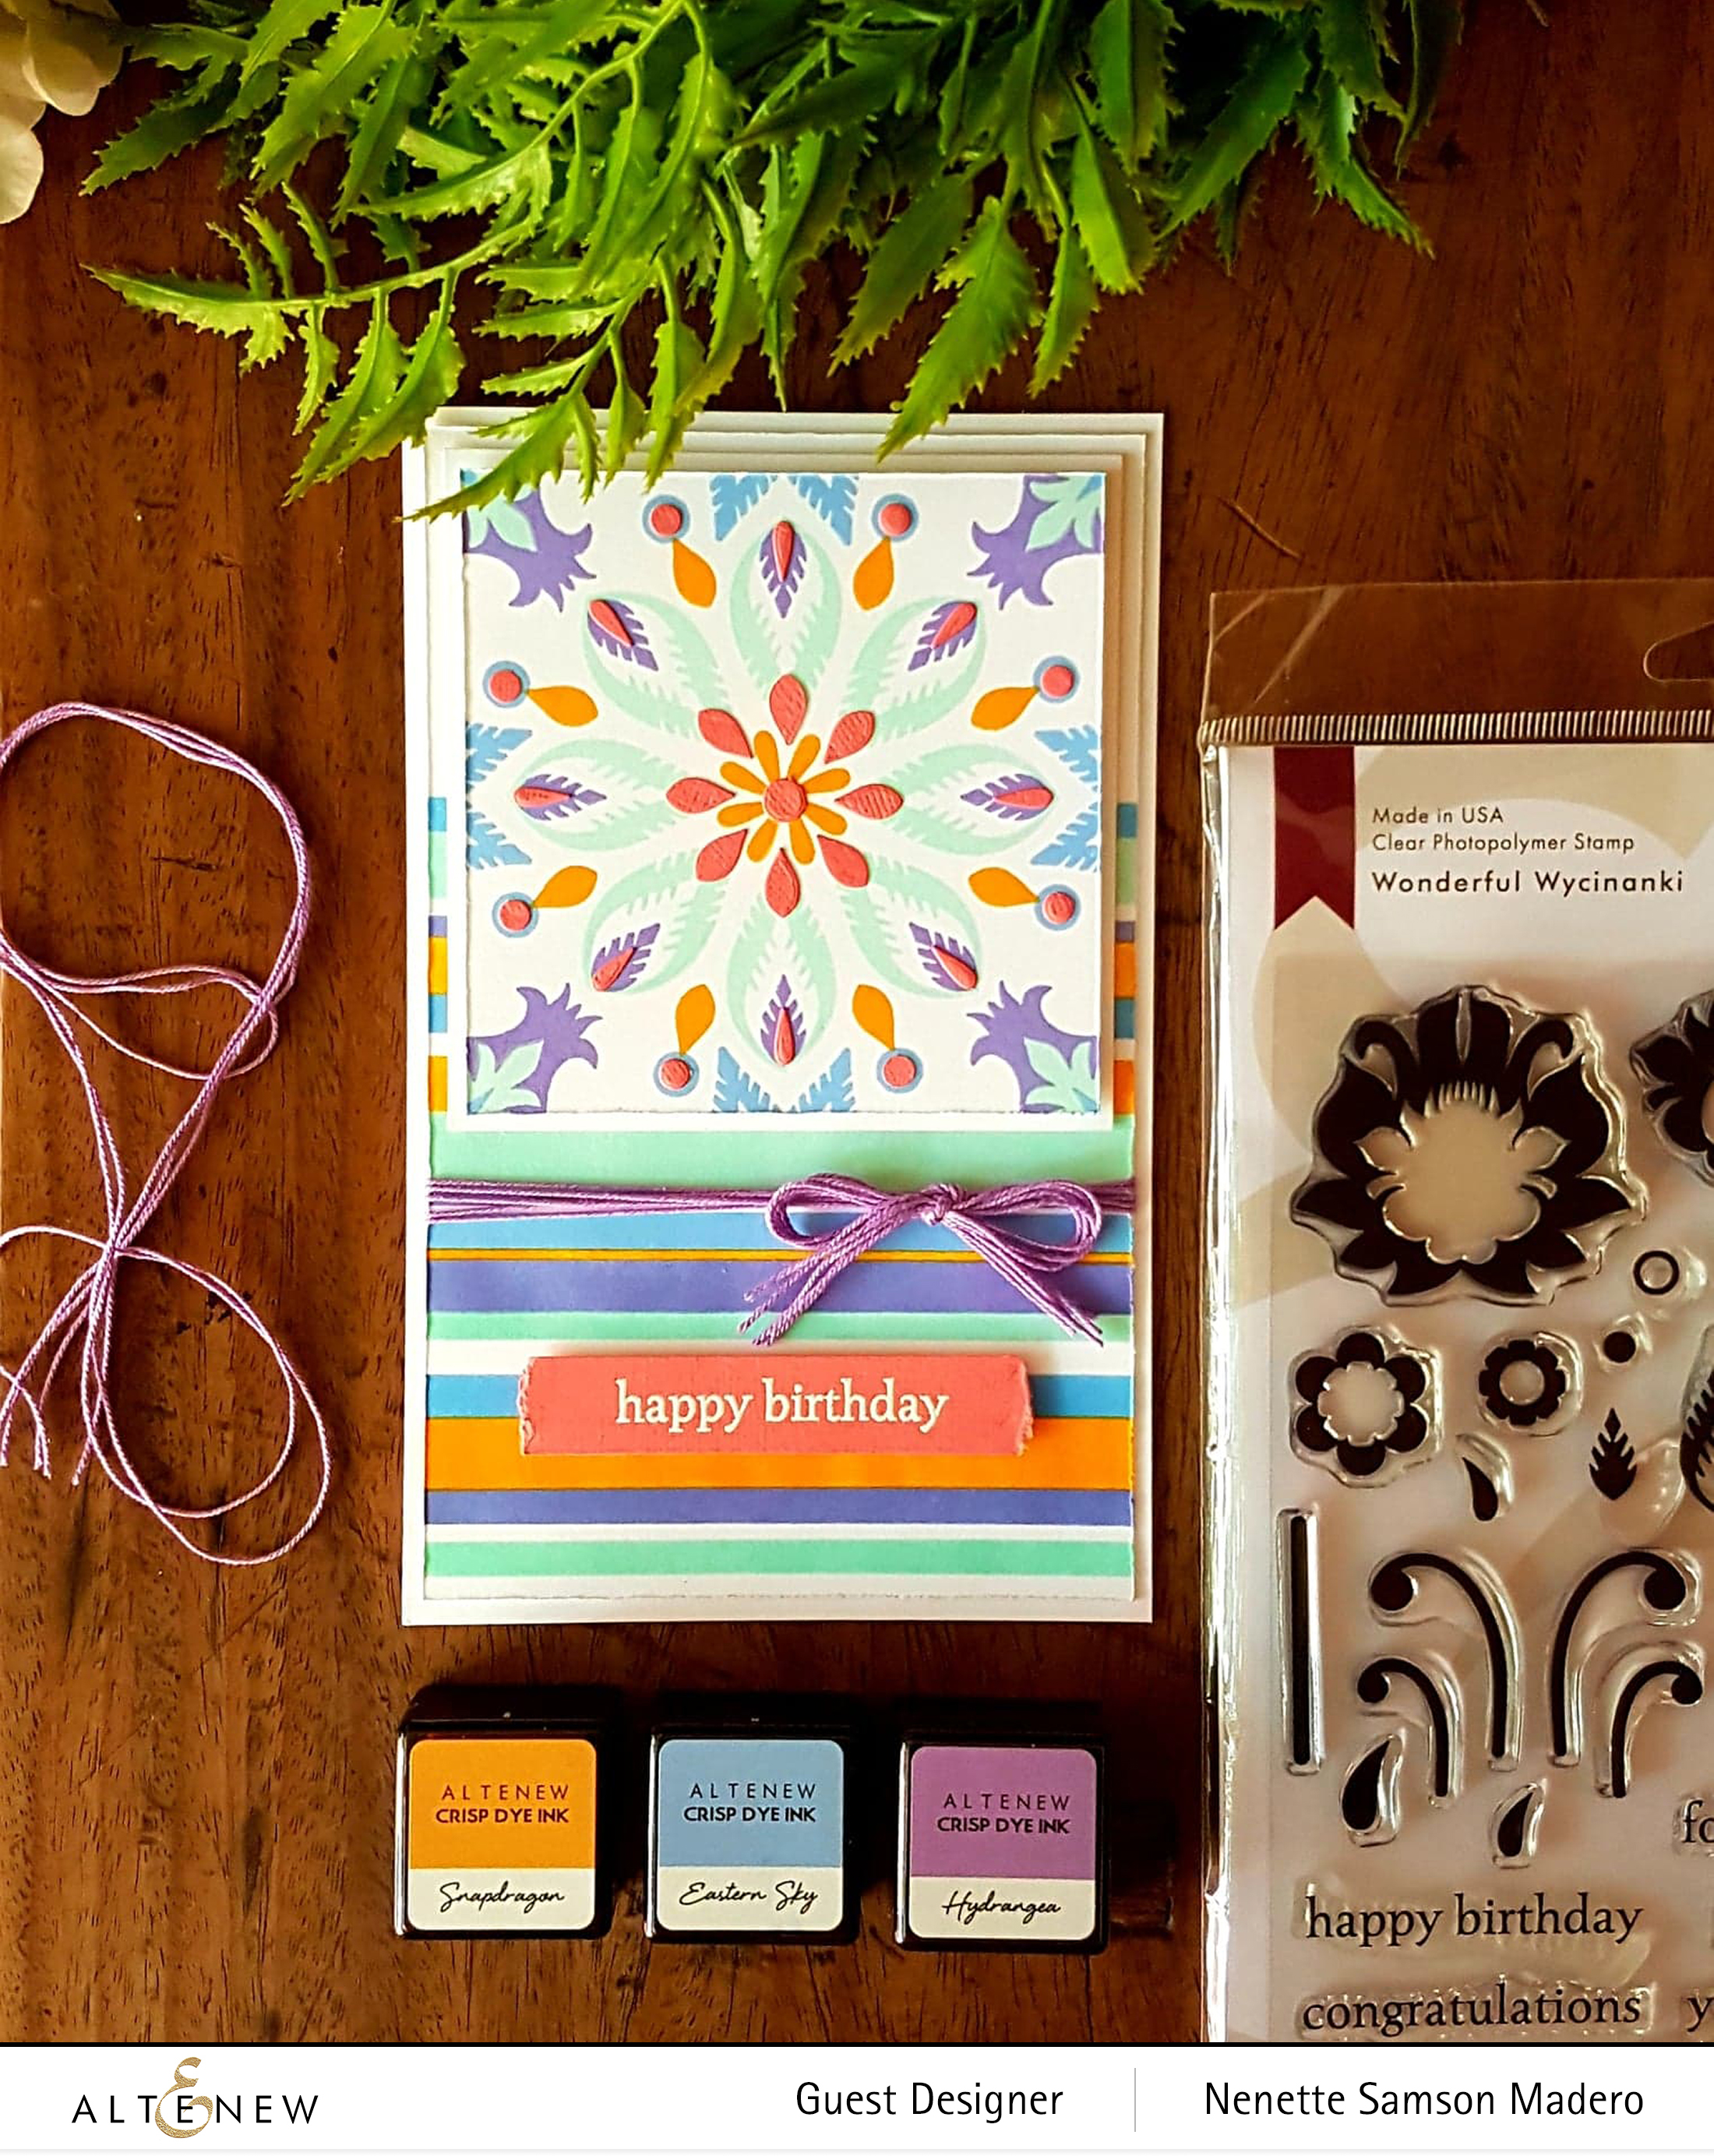
MATERIALS:
- Altenew Wonderful Wycinanki Stamp and Die Bundle
- Altenew Crisp Dye Inks Mountain Mist, Eastern Sky, Hydrangea and Snapdragon
- Altenew Crisp Pure White Embossing Powder
- Neenah Solar White Cardstock, salmon cardstock
- Tombow Mono Multi Liquid Glue
- Scrapbook Adhesives foam squares
- Gina K Wreath Builder Template
- paper distresser
- Misti Stamping Tool
- crochet thread
- Distress blending tool
- Post-It tape
I wanted to create my own simple mandala design using the Wonderful Wycinanki stamp set so I used the Misti with the Gina K wreath builder template. I marked the
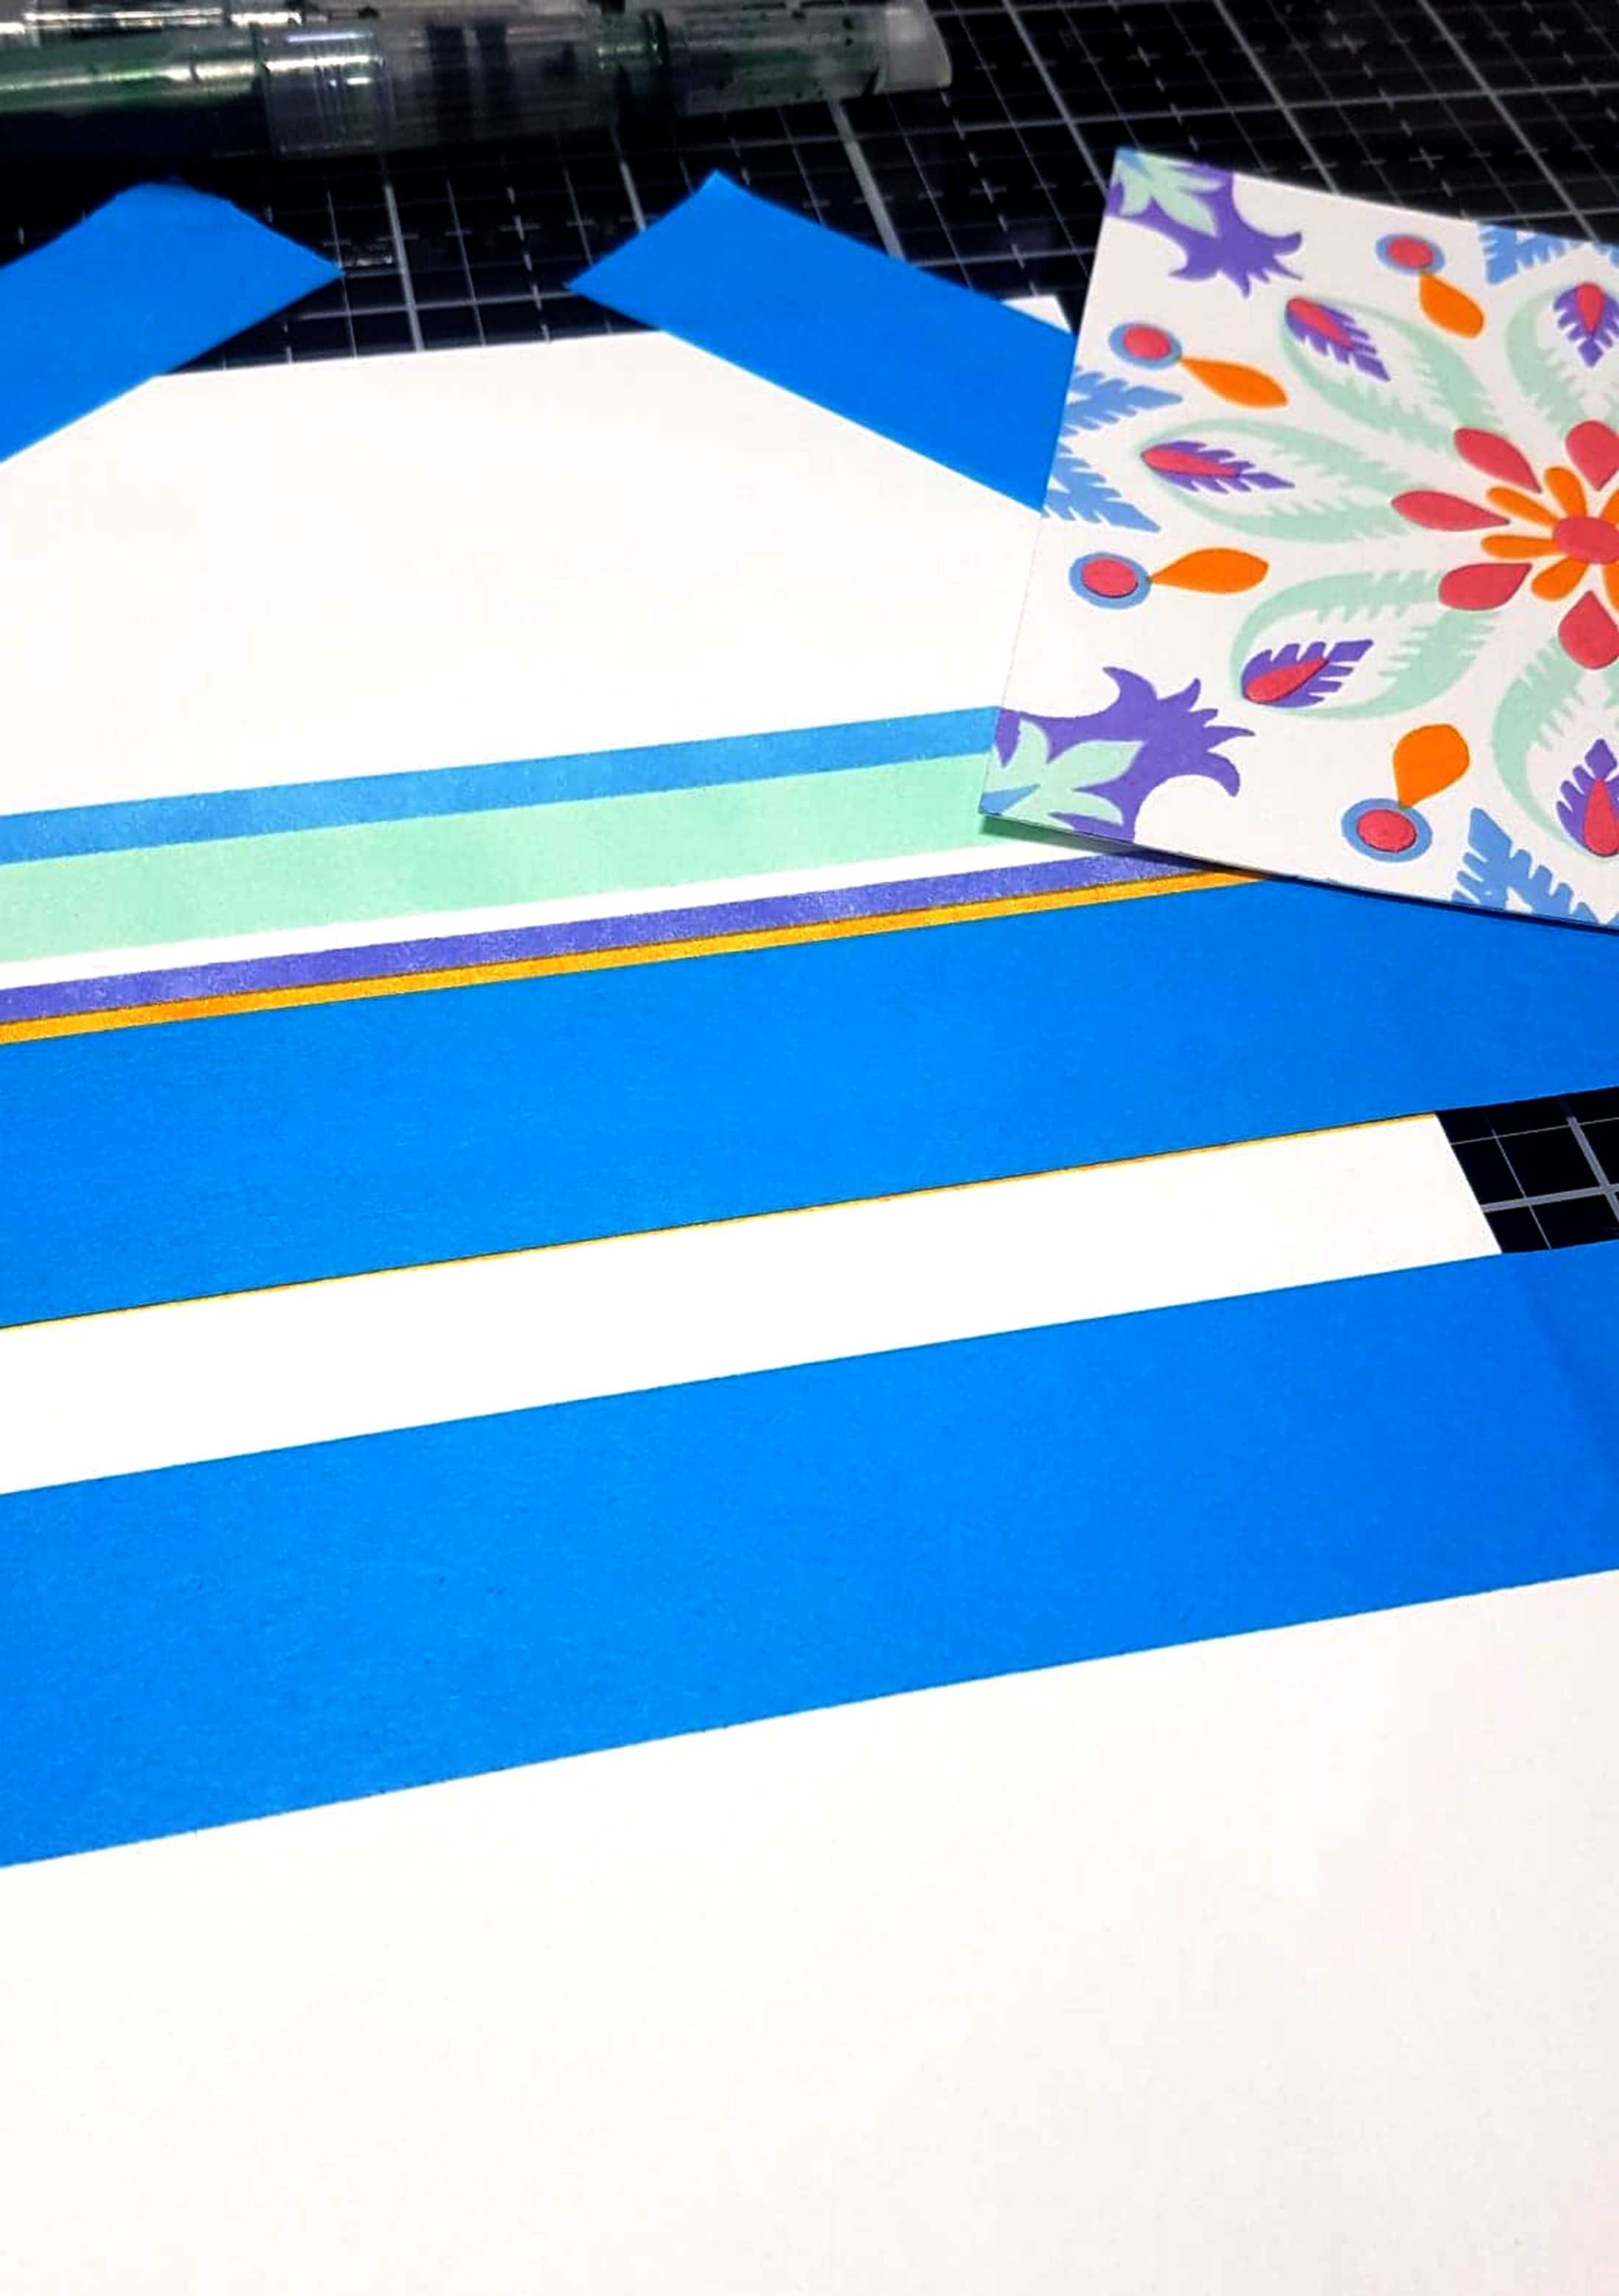
I created some striped patterns with varying widths using post-it strips, coordinating dye inks and a distress blending tool. Crochet thread was tied around the striped panel to make a bow for added accent. The edges of the panel were distressed using the paper distresser and adhered to a side folding card with foam squares. Some of the elements were die cut using the coordinating dies and glued on top of the image to create some dimension.
PRIZES
To celebrate this release, Altenew is giving away a $50 gift certificate to 6 lucky winners! Please leave a comment on the Altenew Card Blog and/or Altenew Scrapbook Blog by 8/14/2019 for a chance to win. Altenew will also draw a winner to receive a $20 gift certificate from the comments left on each designer’s blog on the blog hop list below. All winners will be announced on the Altenew blogs on 8/17/2019.
Next up is the lovely Laura
FACEBOOK | INSTAGRAM | PINTEREST | WWW.MYLITTLEATTIC.COM
- Altenew Card Blog
- Laura Bassen
- Norine Borys
- Jaycee Gaspar
- Therese Calvird
- Nathalie DeSousa
- Nicole Picadura
- Janette Kausen
- Sveta Fotinia
- Kelly Griglione
- Enza
Gudor - Sandra Dietrich
- Laurie Willison
- Virginia Lu
- Reiko Tsuchida
- Jennifer McGuire
- Altenew Scrapbook Blog
- Emily Midgett
- Lydia Fiedler
- Jen Schow
- Svitlana Shayevich
- Amber Rain Davis
- Maryam Perez
- Agnieszka Malyszek
- Zinia Redo
- Caly Person
- Kymona Tracey
- Alex Syberia
- Nenette S. Madero <<–YOU ARE HERE
- Laura Volpes
- Lilith Eeckels
- Terri Marie Koszler