
Hello, everyone! Welcome to my blog! If you just came from Reiko Tsuchida, you’re on the right track. For complete information about this hop, visit the Altenew Card Blog. Take a look at this gorgeous kit!

I created a few simple and quick cards to make and one that takes a little more time to color. Here are some examples I made using this kit.
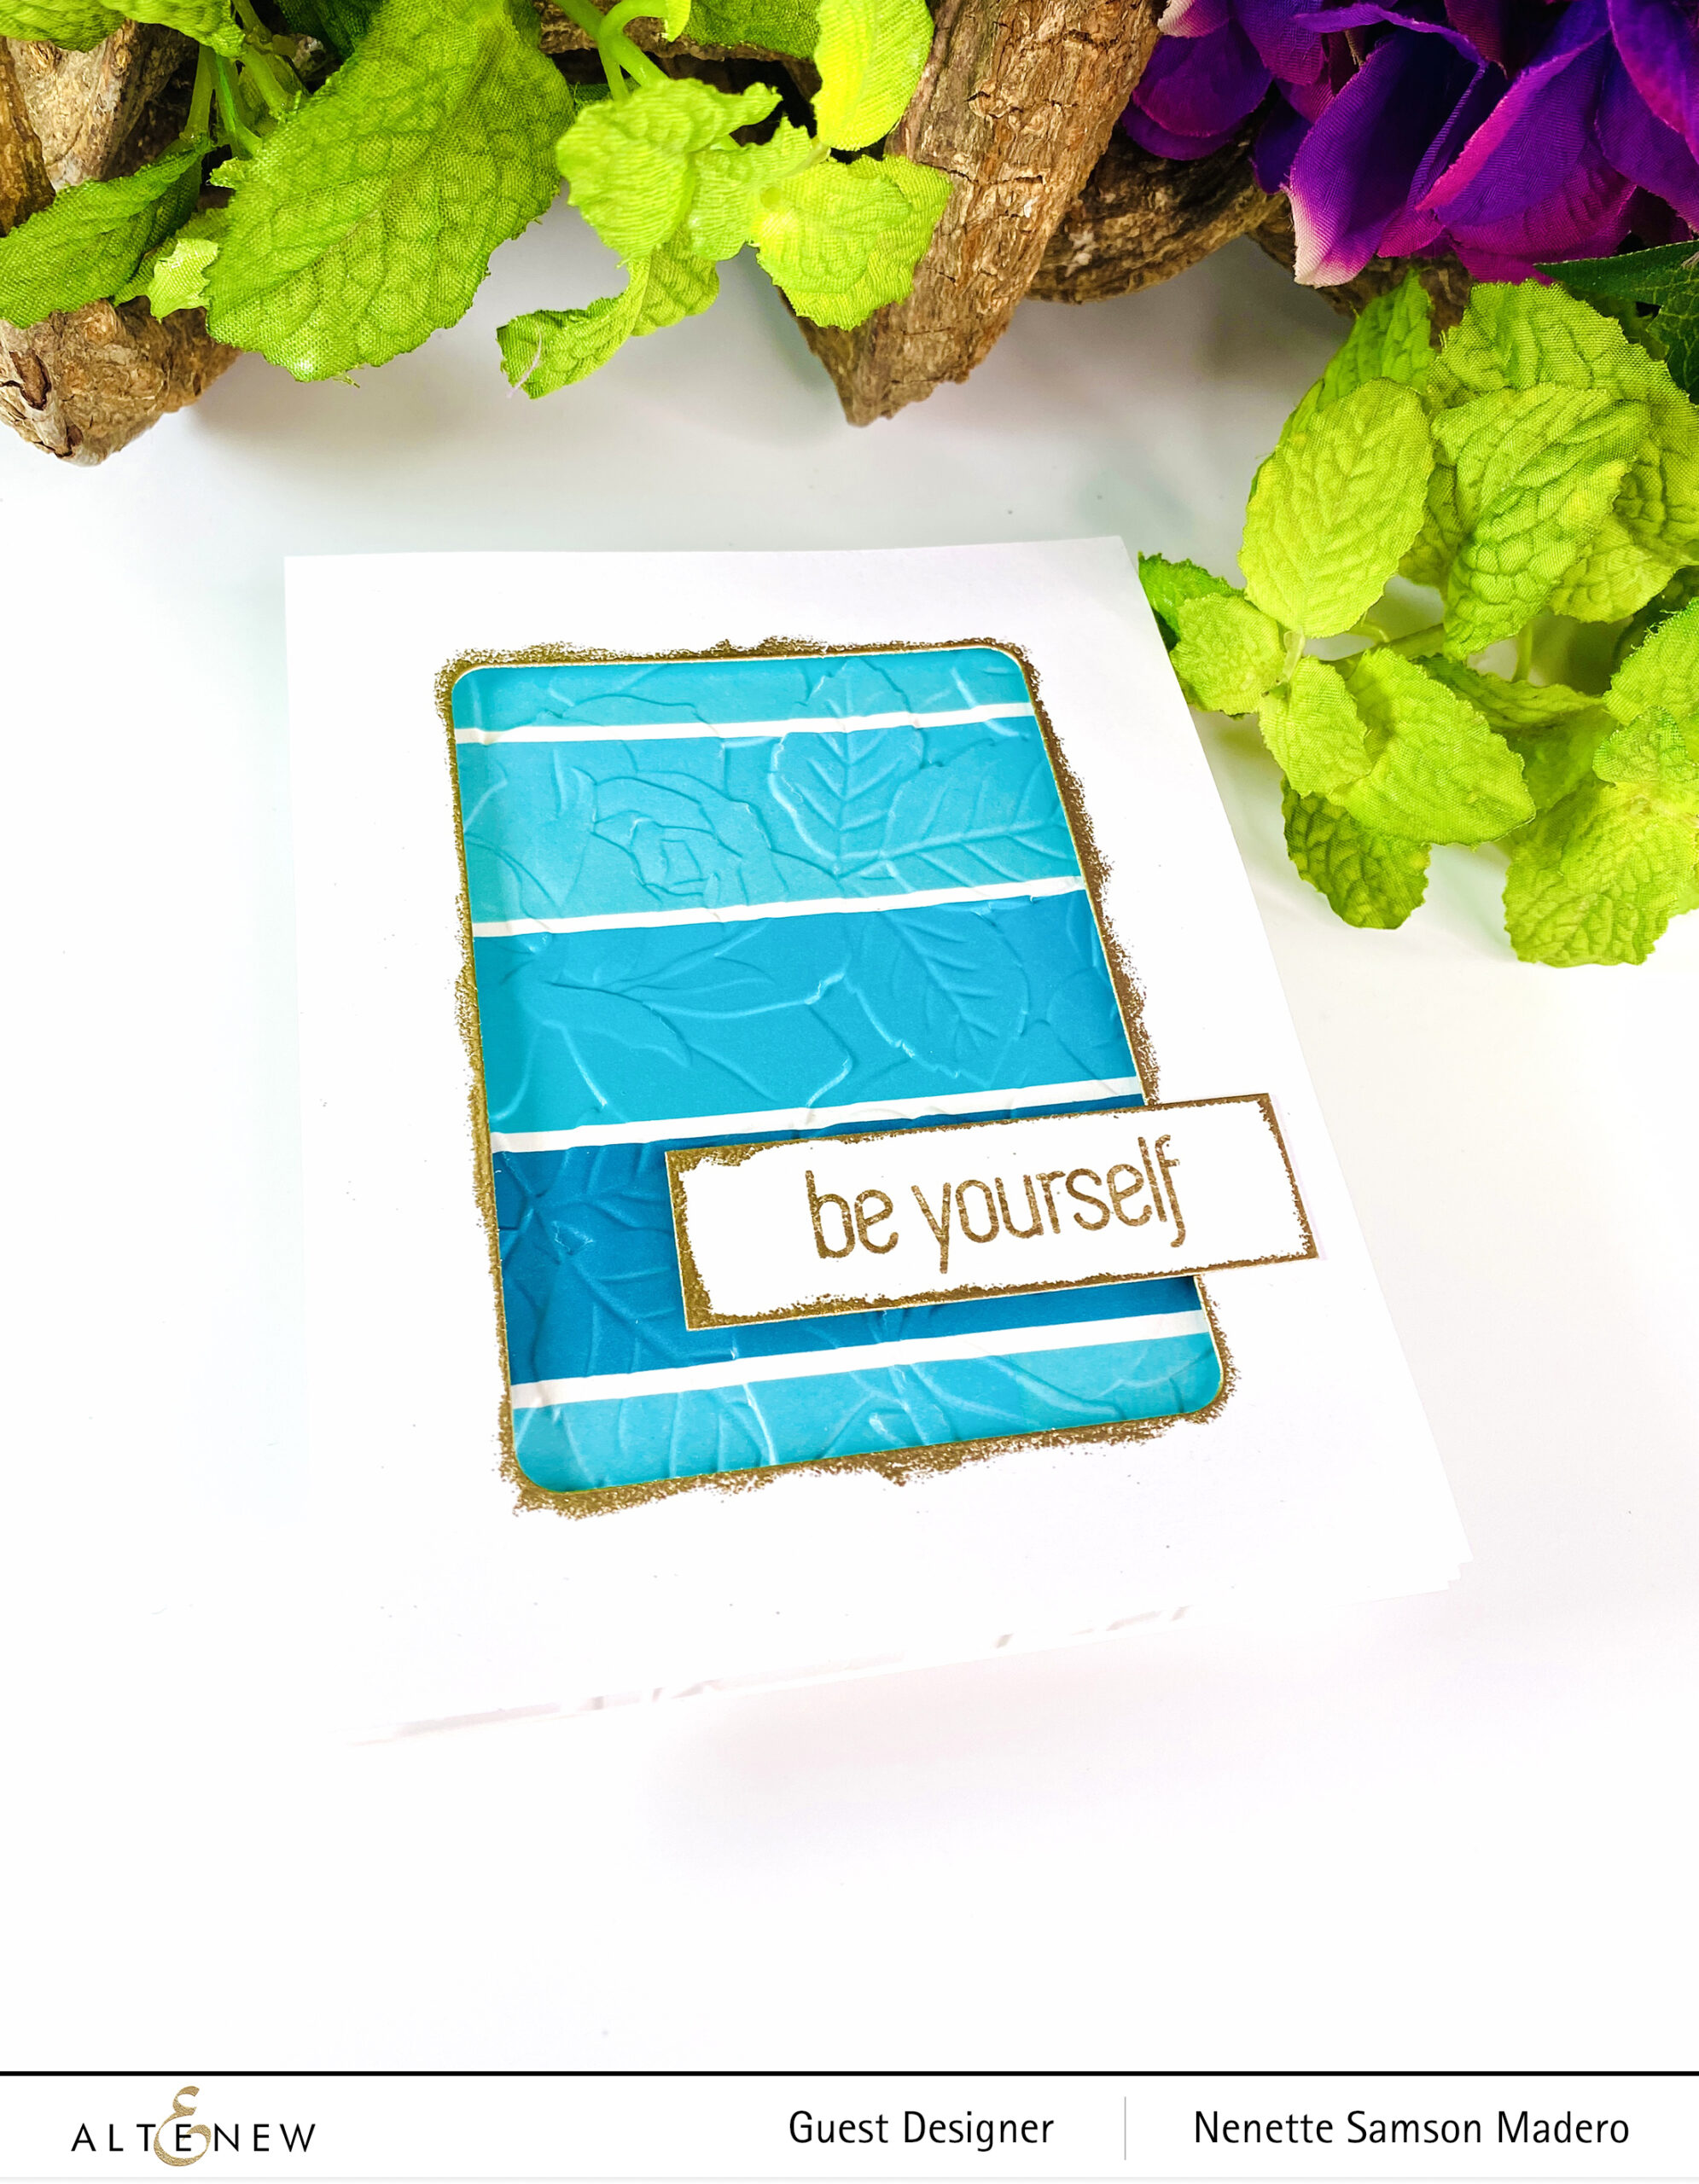
BE YOURSELF
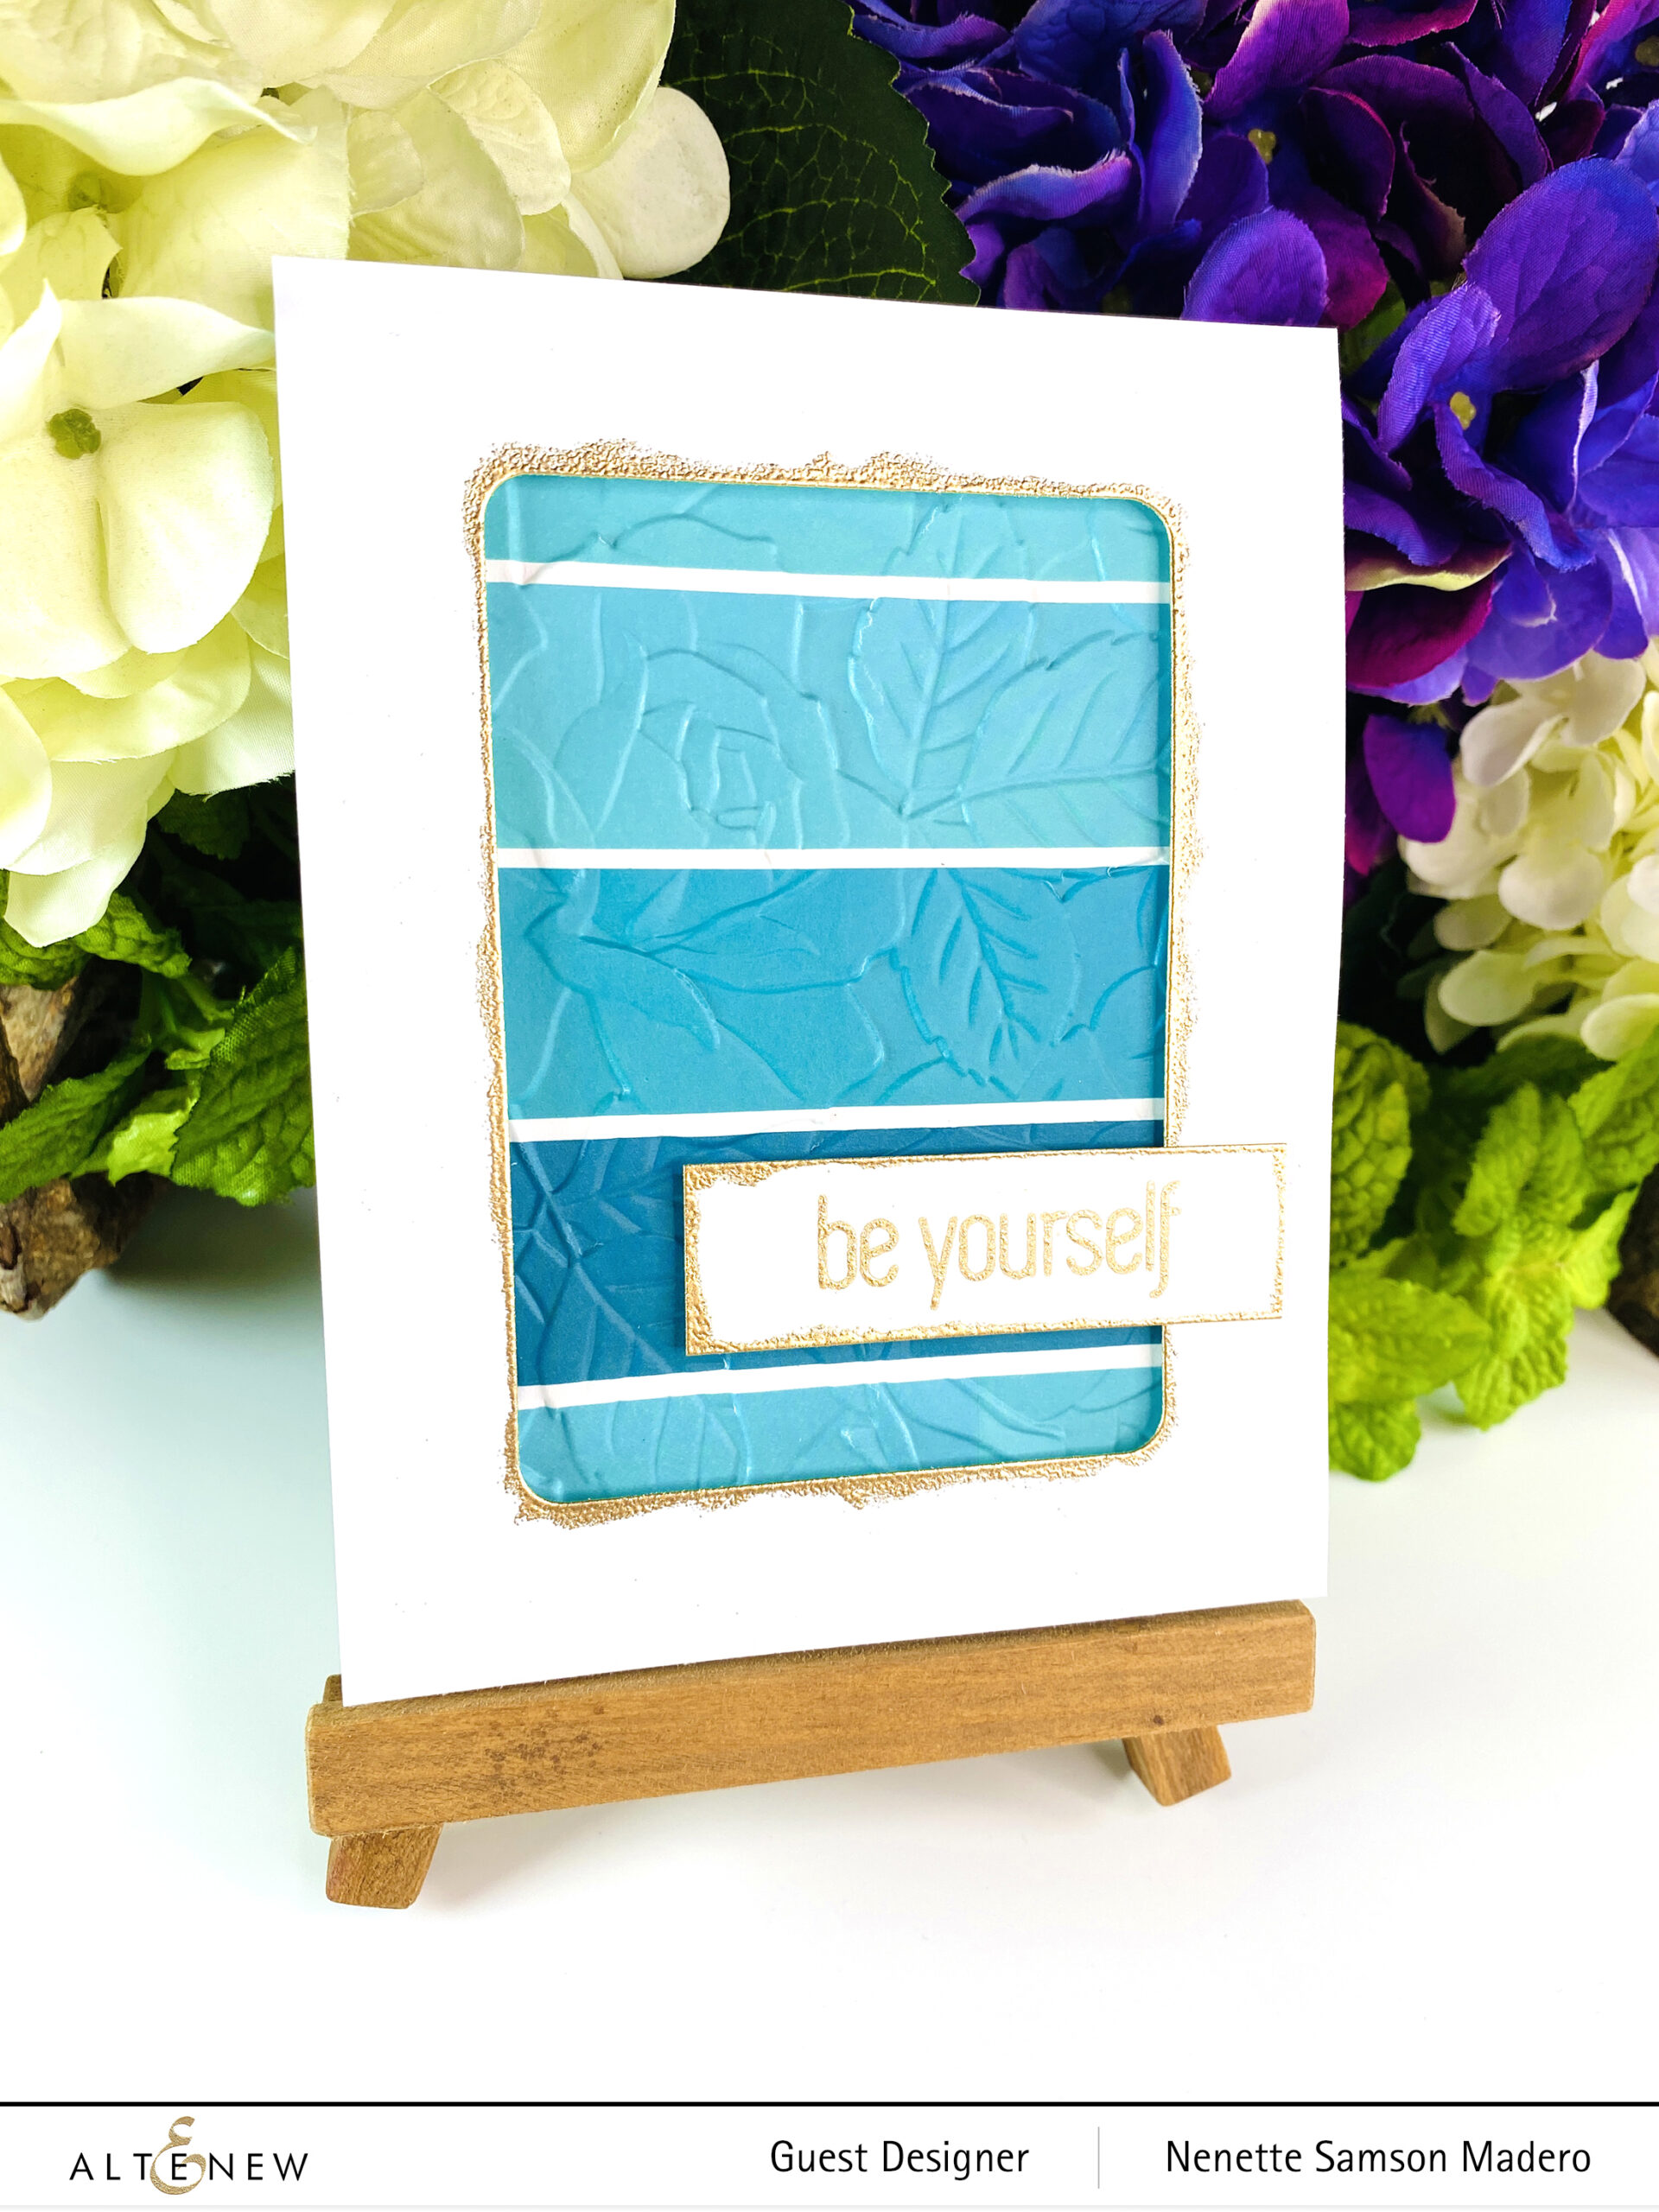
STEPS:
- Cover Neenah Solar White Cardstock using Sea Shore Washi tapes leaving a thin space for the paper to show.
- Emboss with Garden Rose 3D embossing folder.
- Die cut white cardstock using Rounded Rectangle Die. Add Versamark Ink to the edges and emboss with Rose Gold embossing powder.
- Stamp and emboss the sentiment from the Dainty Swiss Dots Stamp set.
- Assemble card using foam squares.
Here’s a CAS card with lots of texture. I love the effect of the 3D embossing folder on washi tape. Sometimes, there will be some tear here and there but that just adds more interest to the card.
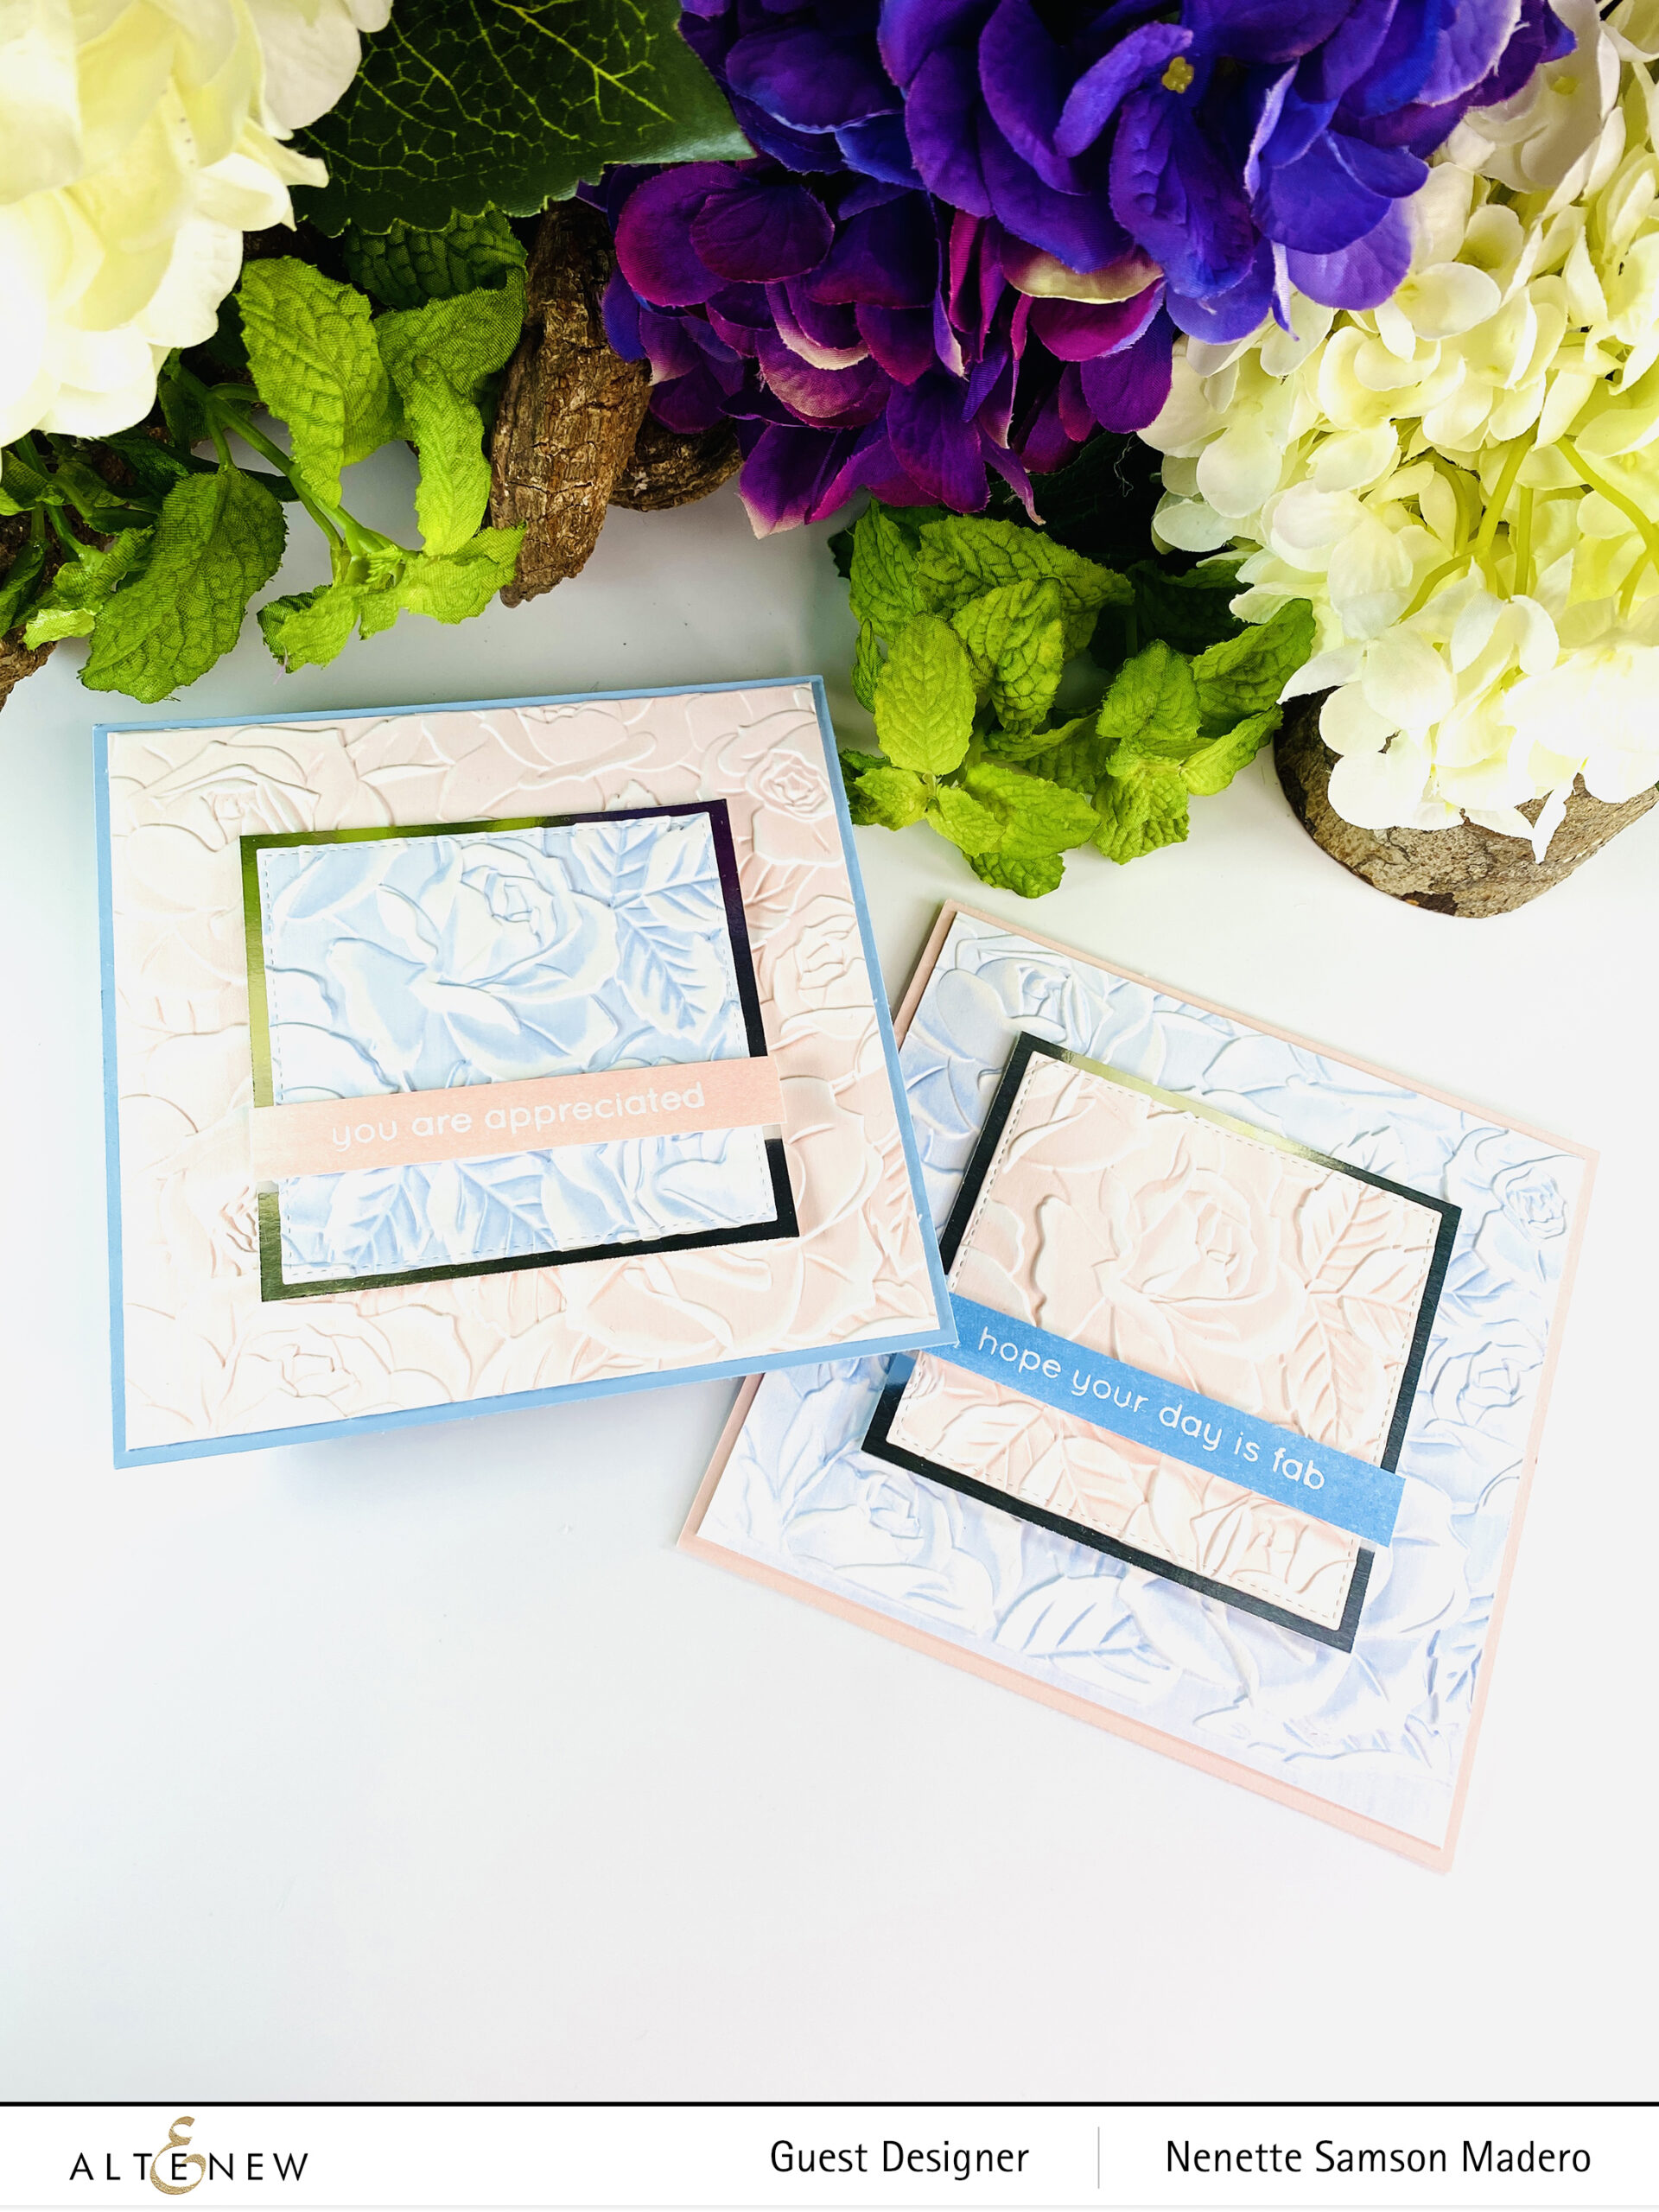
HOPE YOUR DAY IS FAB & YOU ARE APPRECIATED
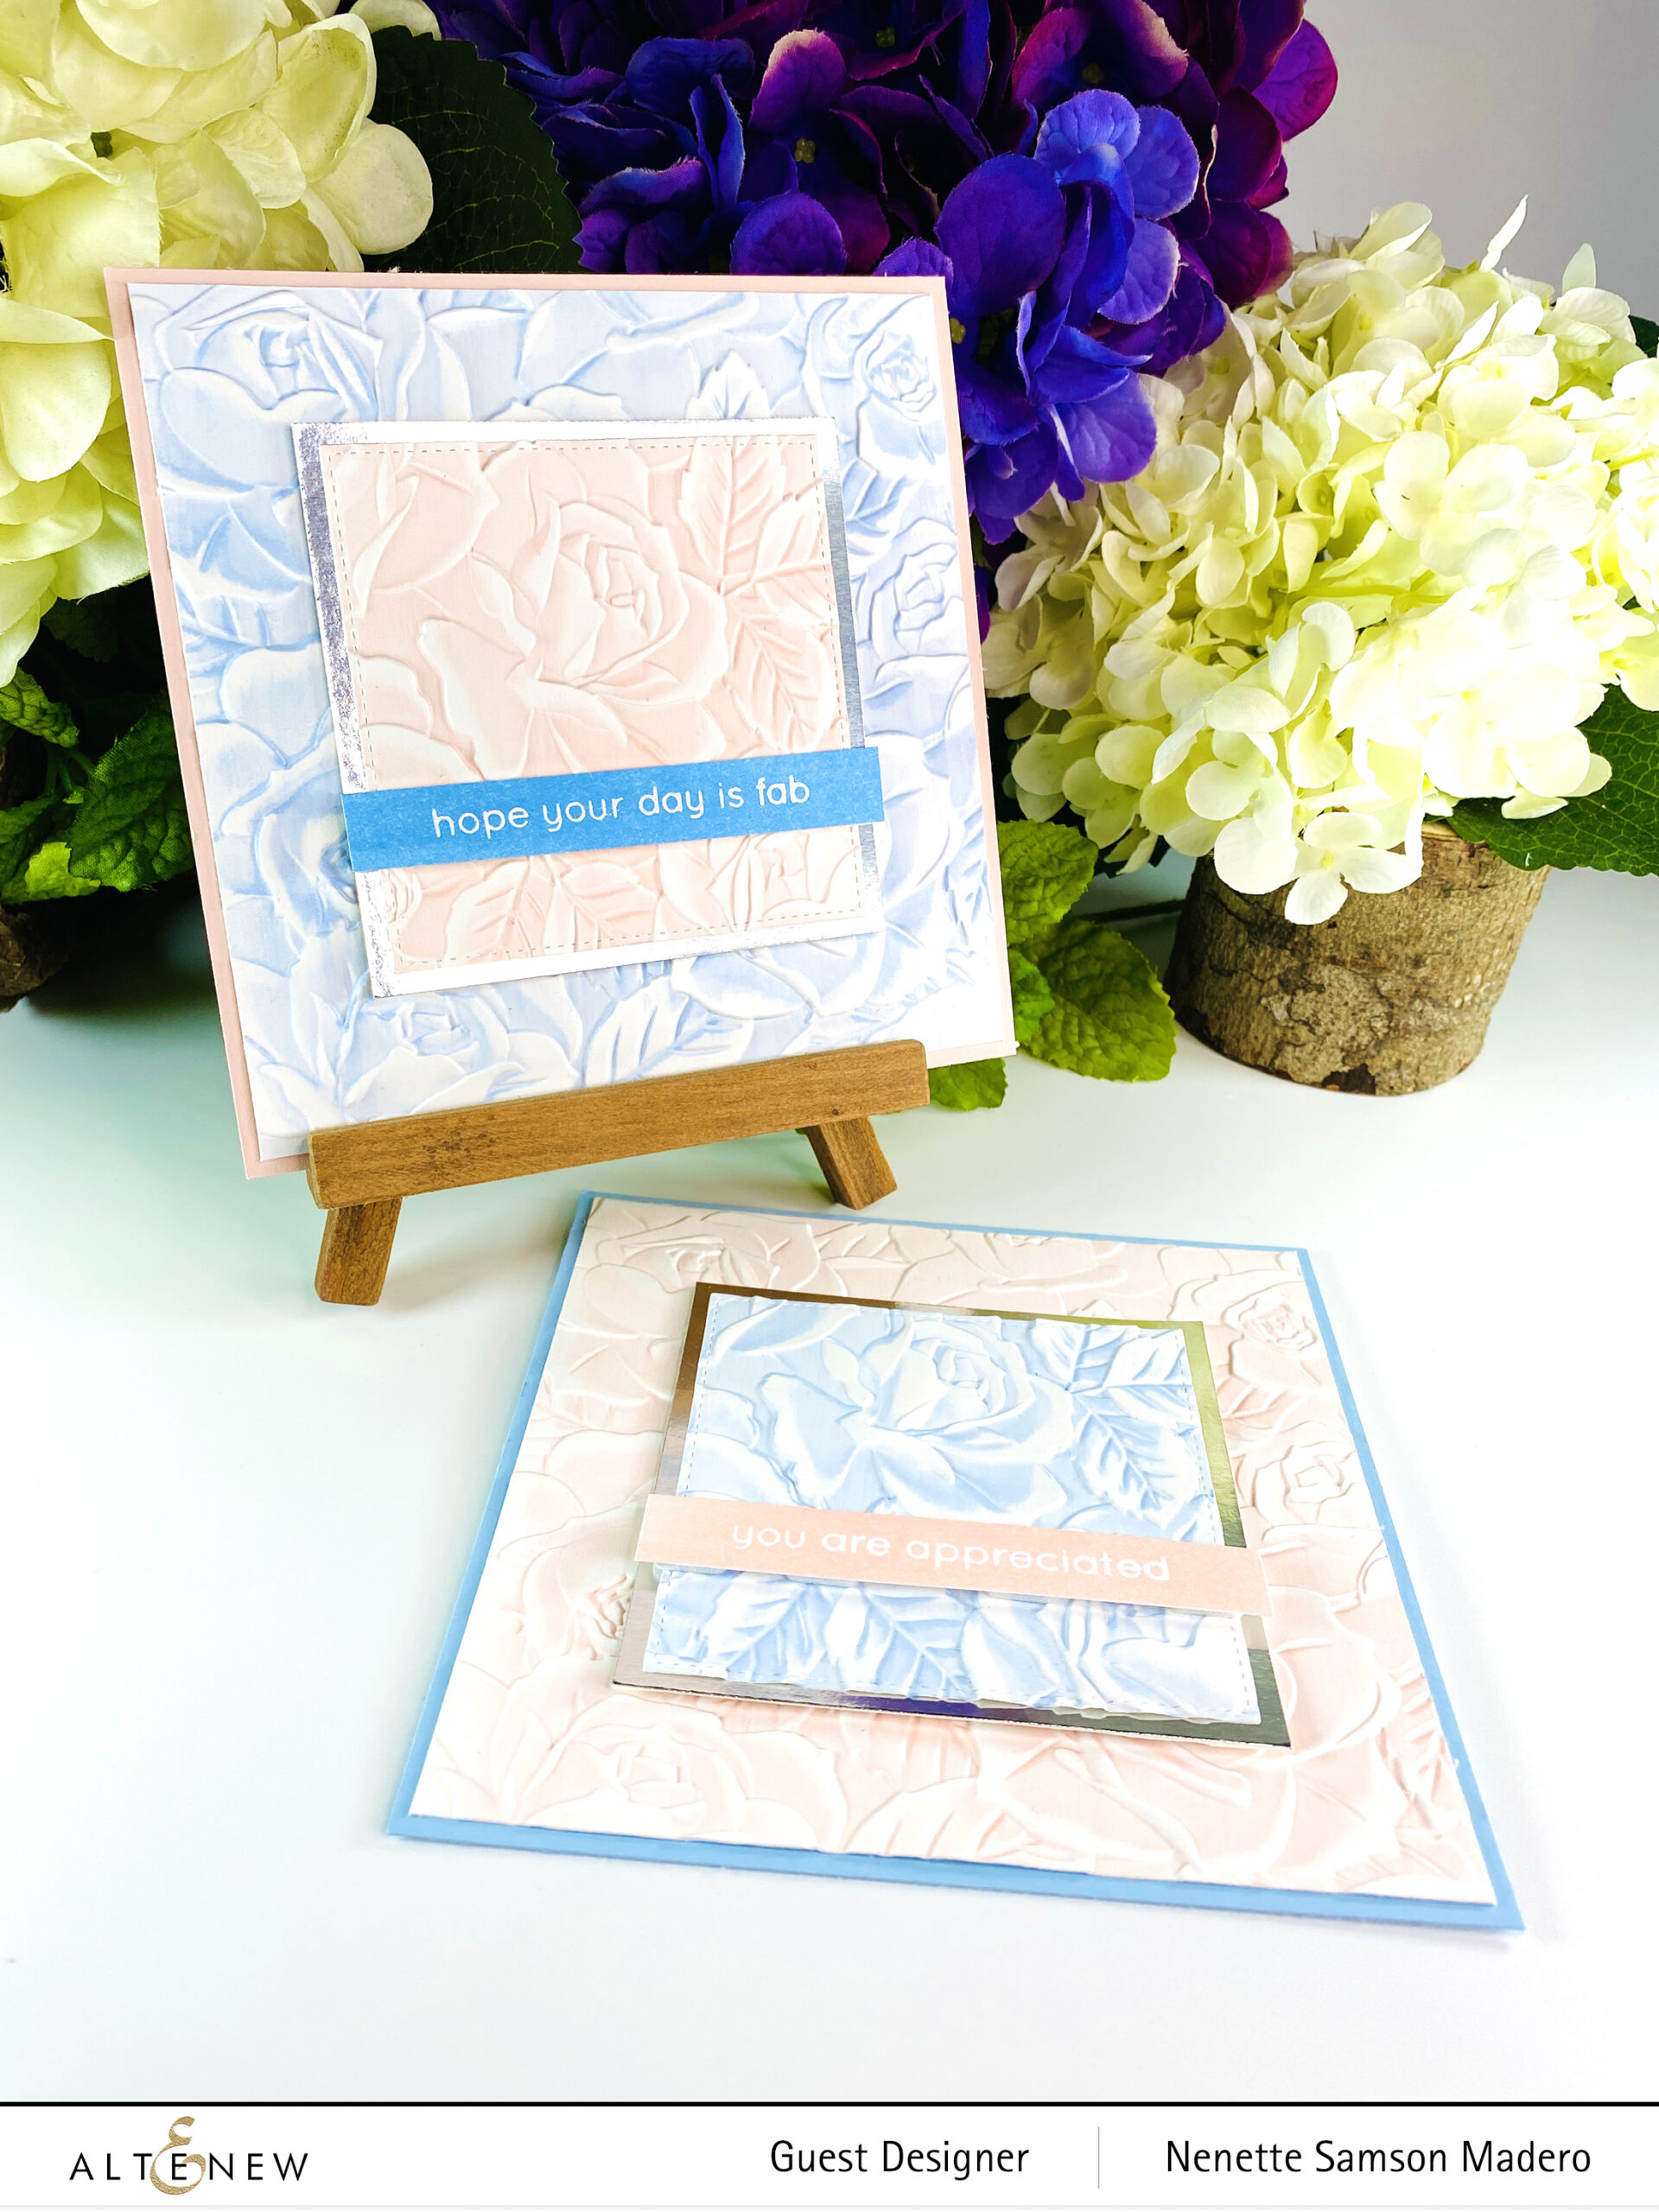
STEPS:
- Ink up the top cover of the 3D embossing folder with Caribbean Sky Mixed Media Ink and emboss white cardstock. Do the same using Frosty Pink Mixed Media Ink.
- Die cut the center using Halftone Squares Die set. Switch the enters and mat using silver cardstock.
- Add a card base. If you do not have colored cardstock, use the Mixed Media inks to color the paper to match your embossed layer.
- Assemble the card using foam squares.
This is another quick card to make. I love how intricate the roses are and the white highlights just make it look more 3D.
YOU ARE SO LOVED
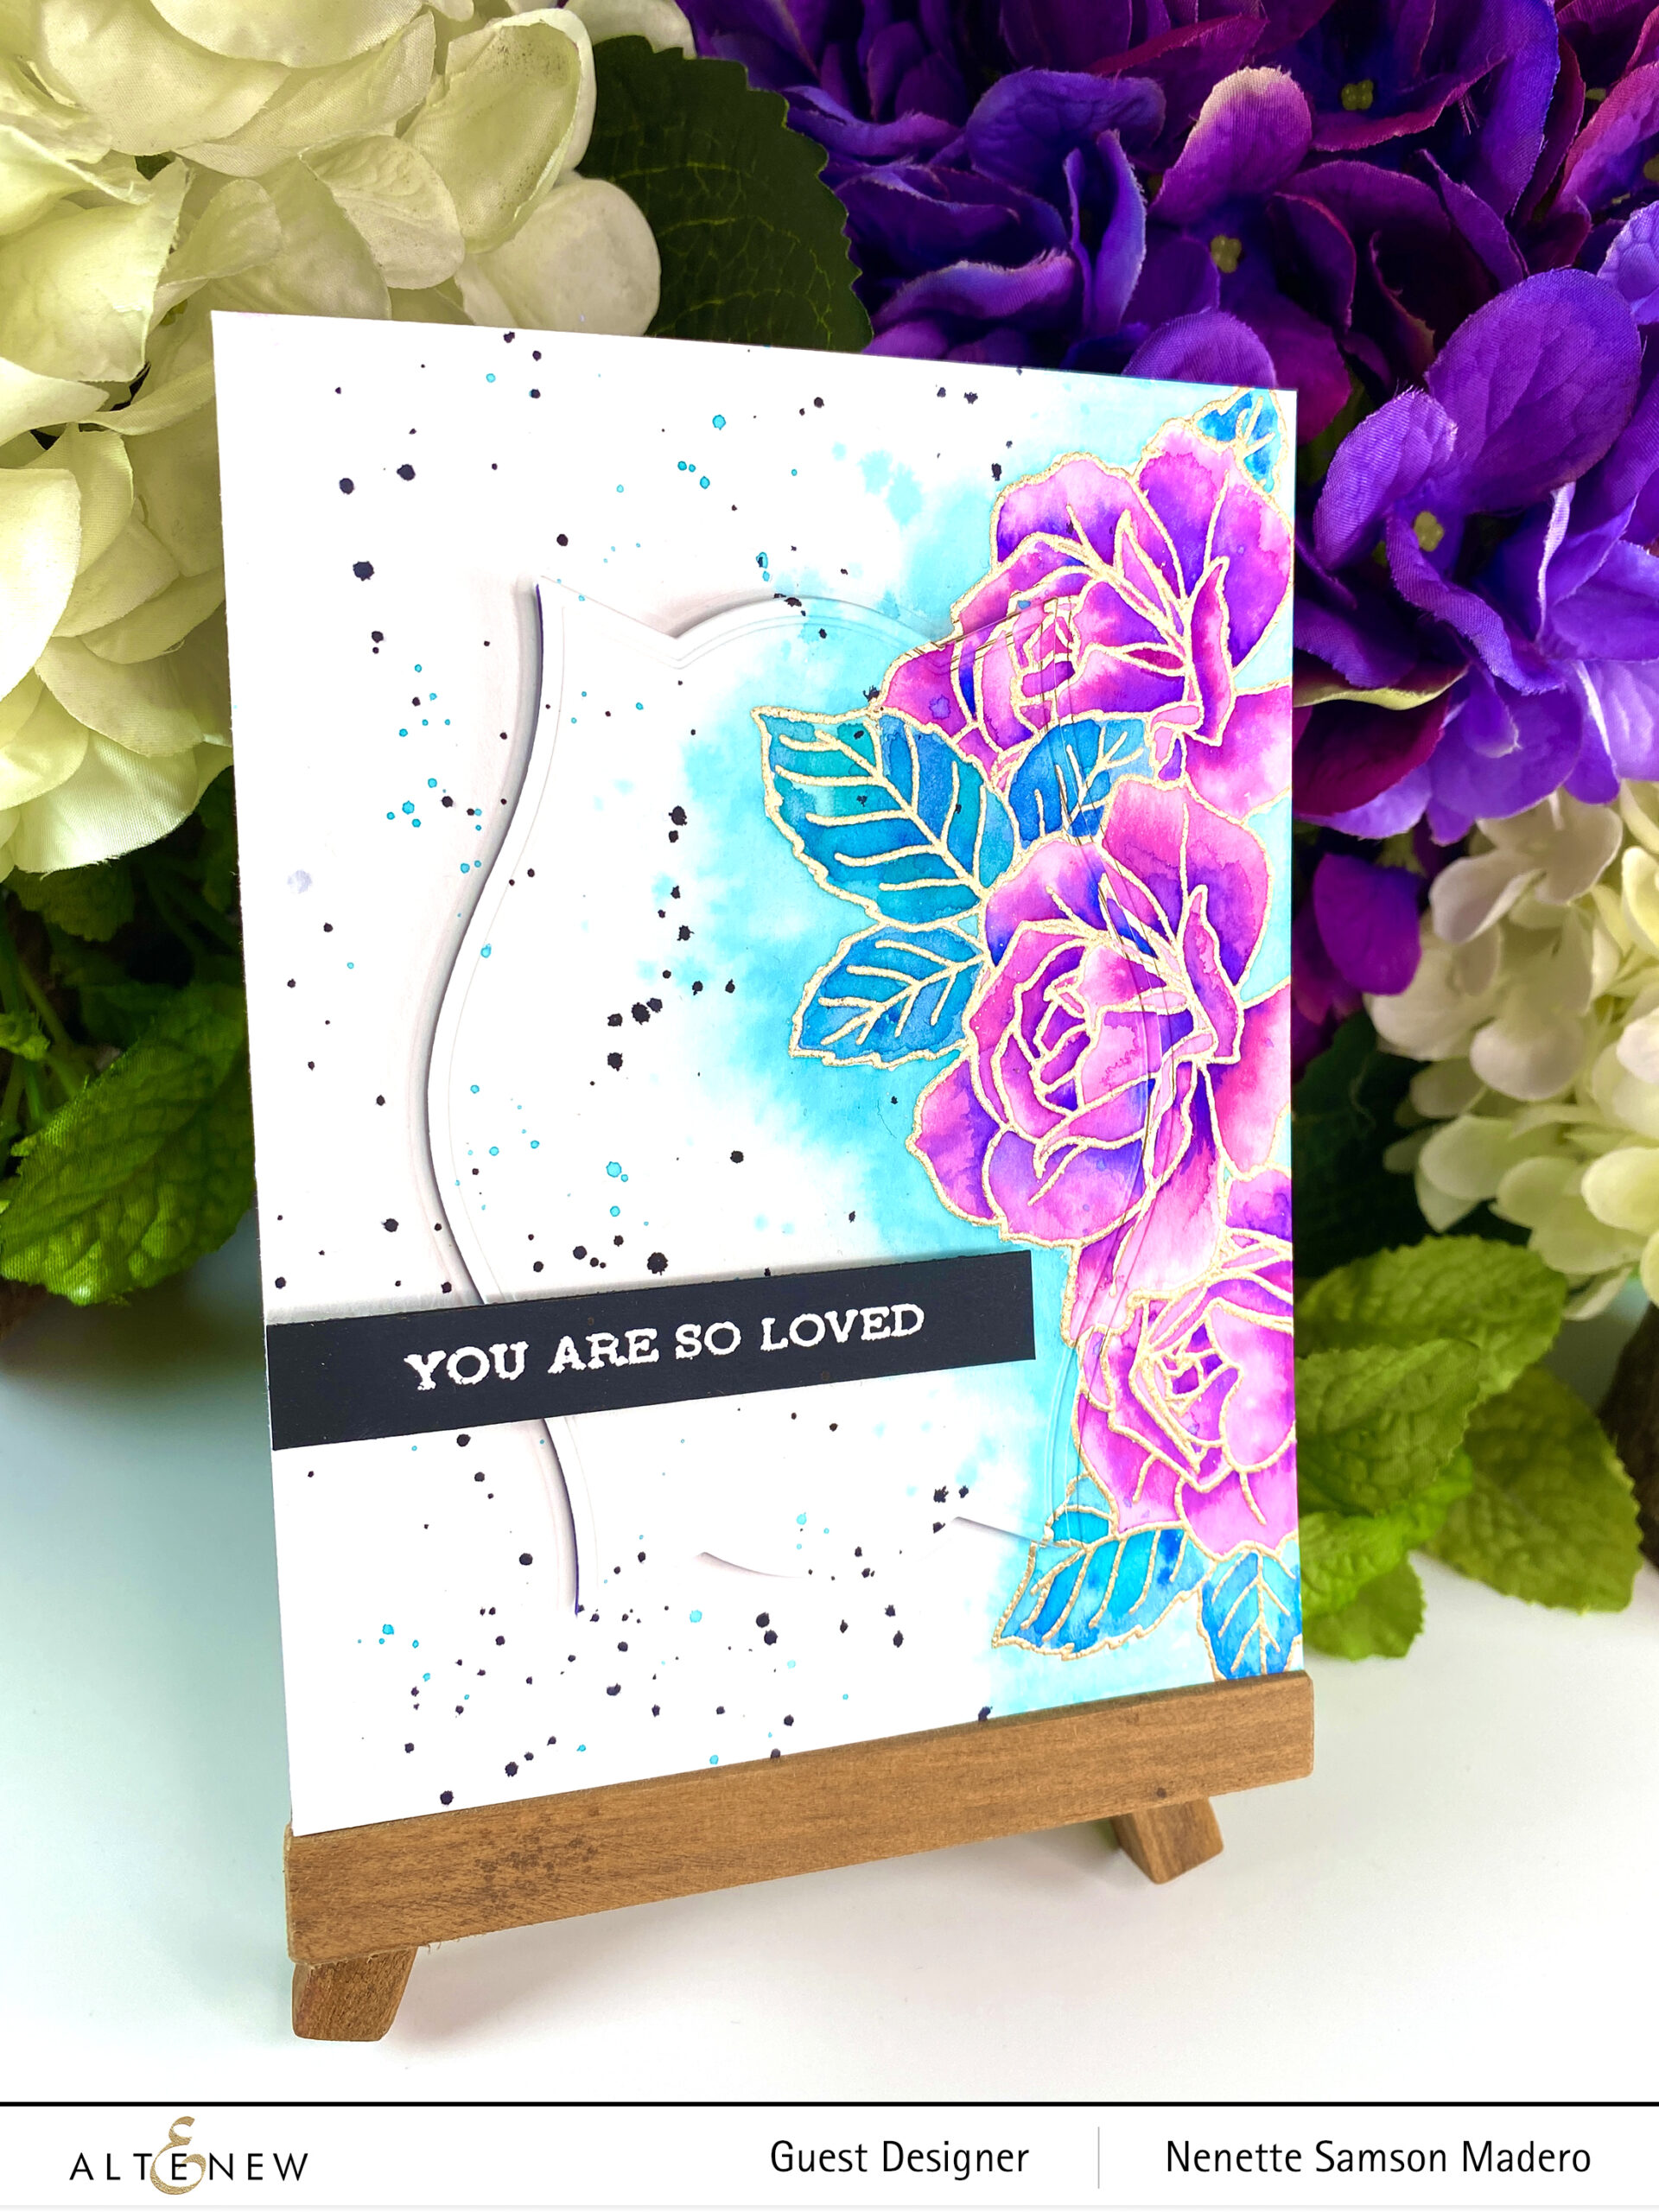
STEPS:
- Stamp on watercolor paper with Versamark and emboss with Rose Gold Embossing Powder the rose image from the kit . Stamp on masking paper and cut out the image. Mask the stamped image on the paper and stamp the leaves. Create a mask for the leaves then stamp and emboss another rose. Continue to stamp-emboss-mask to create the layered images.
- Watercolor the petals and leaves using the following Watercolor brush markers: Purple Wine, Persian Blue, Lagoon and Turquoise. Use the wet on wet technique.
- Add a light wash on the outer surface of the flowers and leaves.
- Add spatters including black ink.
- Die cut the center using Nesting Labels die.
- Emboss the sentiment with Pure White embossing powder on black cardstock.
- Assemble card.

The stamp masking took a while to do but I love the outcome with all the layering! I also do not normally put the stamped images on the right side of the card… I tend to arrange them on the lower-left corner or the left side of the card. This time, I wanted to try something different. I placed the sentiment on the opposite side of the stamped image for more balance. Let me know if you like this layout. 🙂
PRIZES AND GIVEAWAYS
$300 in total prizes! To celebrate this release, Altenew is giving away a $50 gift certificate to 2 lucky winners and a $ 25 gift certificate to 8 winners! Please leave a comment on the Altenew Card Blog and/or each designer’s blog post on the blog hop list below by 10/18/2021 for a chance to win. Altenew will draw 10 random winners from the comments left on each stop of this blog hop and announce the winners on the Altenew Winners Page on 10/20/2021.
Next up is the amazing Maryam Perez. Thank you so much for dropping by! I would love to hear from you so please leave a comment below and let me know which one is your favorite. For more of my creations, I hope to see you on my IG feed @mylittleatticstudio. Stay safe everyone and happy crafting!

I love the embossing both dry and wet! Gorgeous!
So beautiful!
Awesome colors, my friend.
Your card designs are always so unique and gorgeous! I love the gold embossed edges on the first card!
Beautiful cards. Thanks for the inspiration.
Gorgeous cards. Really love the last one.
Your cards are stunning, absolutely gorgeous!
Love your cards!
These are prettily colored roses with fabulous backgrounds.
Wonderful, unique cards. Thanks for sharing.
Lovely inspiration pieces. This is a wonderful kit and you’ve highlighted it beautifully.
Unique cards! Thanks for sharing.
Totally in love with this 🥰
Love the two for one set!
Love the texture on your CAS card, gorgeous.
Thanks so much, Maggie! <3
Great project shares. I like the ideas for framing.
Thank you so much!!! <3
Wow! Such gorgeous and unique cards.
Thank you so much, Sabine!
Beautiful cards. I especially love the first two using that stunning embossing folder — absolutely gorgeous.
Thanks a lot, Cyndi!
Holy moly…love that watercolored version. Nicely done!
Thanks a lot, Cheryl! <3
I love all the cats, but i feel the Happy Birthday is my favorite.
Thank you so much, Sara!
Beautiful cards Nenette. Thank you for posting the step-by-step directions.
You are most welcome, Li! <3
Colors, colors, colors. Wonderful!