Altenew Educators “Style it with Stencils” Blog Hop and Linky Party + Giveaway

Altenew Educators “Style it with Stencils” Blog Hop and Linky Party + Giveaway

Hello everybody!!! It’s so nice to be with my co-educators again for another blog hop. 😊 If you just came from Maryam Sharara‘s blog, then you’re on the right track. Make sure you drop by the Altenew Blog for complete details of the hop.

This blog hop is all about stencils. Altenew has quite a number of beautiful stencils. Here are some creative ways on how you can make some backgrounds using stencils to create some CAS and dimensional cards. I also included some tips on how to fix mistakes, too.


BE OUR OWN KIND OF BEAUTIFUL
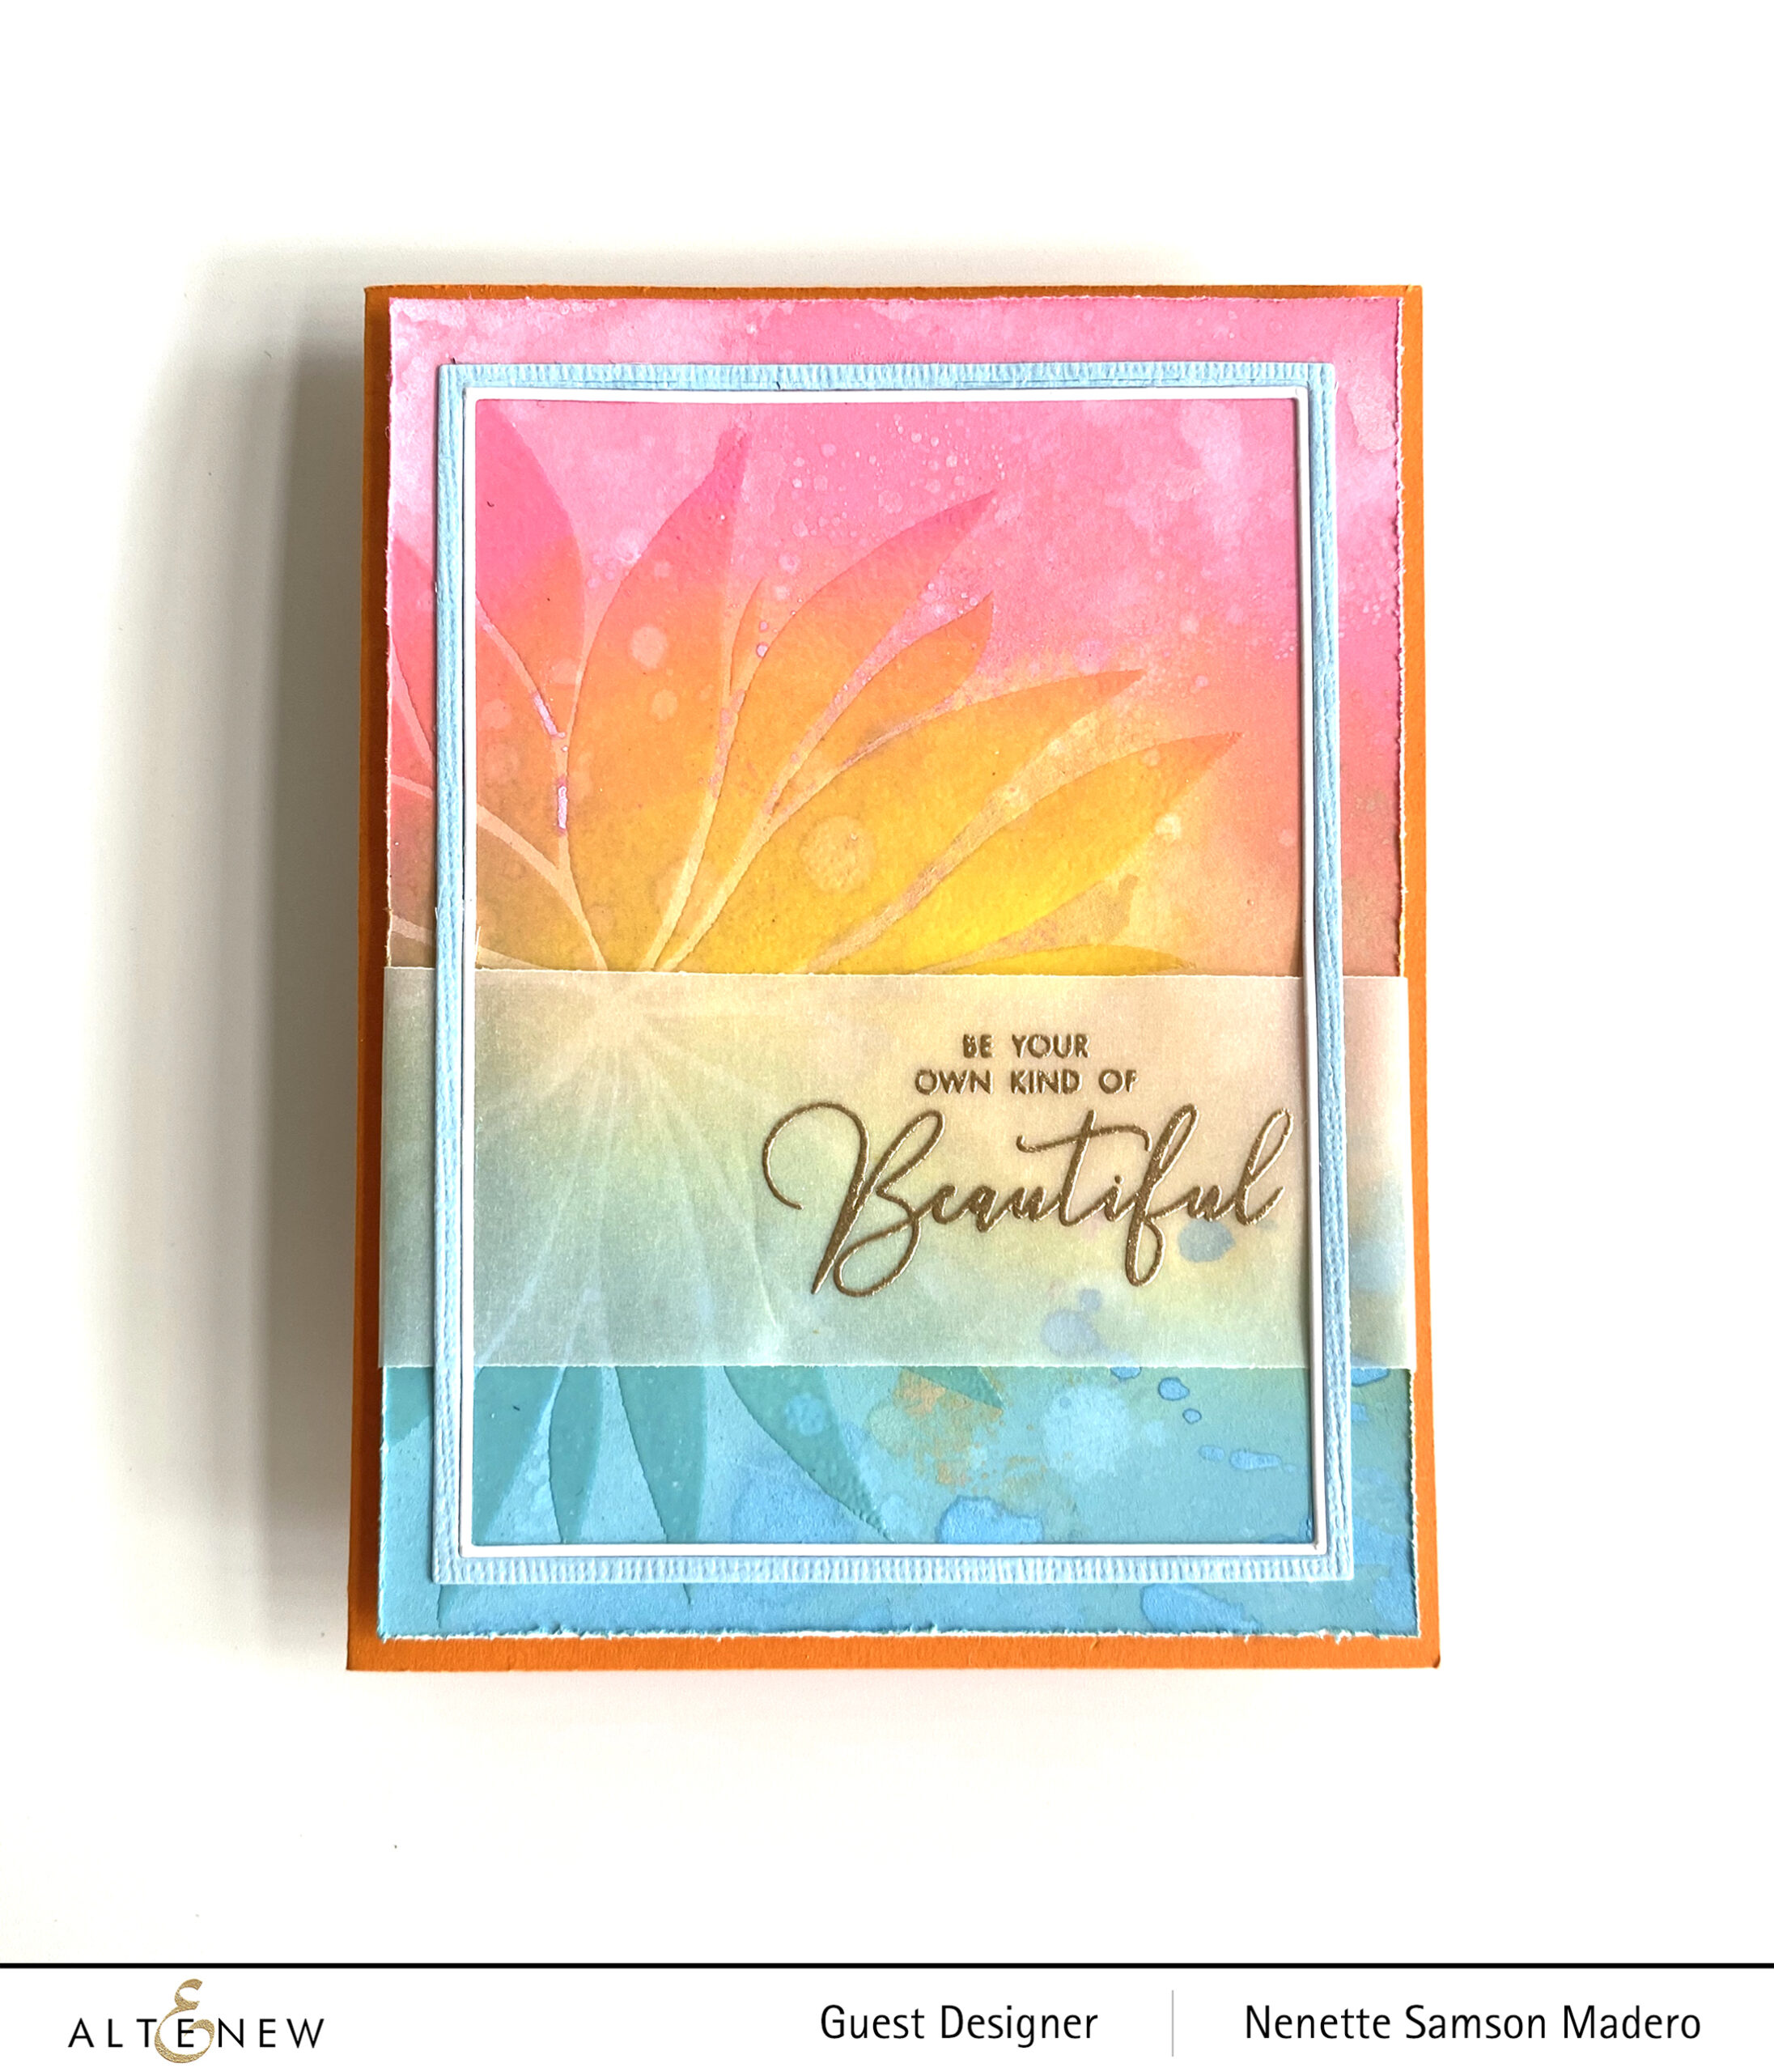

MATERIALS: Bursting Dahlia Stencil, Fine Frames Cover Die, Paint-a-Flower:Paeonia Japonica, Distress Oxide Inks- Broken China, Picked Raspberry, Fossilized Amber, Foam Squares

I made a lot of backgrounds for this blog hop. For this first card, watercolor paper was colored using distress inks. I love how oxide inks are easy to blend together. Water splatters were added to create some texture. When this was dry, the Bursting Dahlia stencil was placed on top then Versamark Ink was pressed through the openings of the petals.
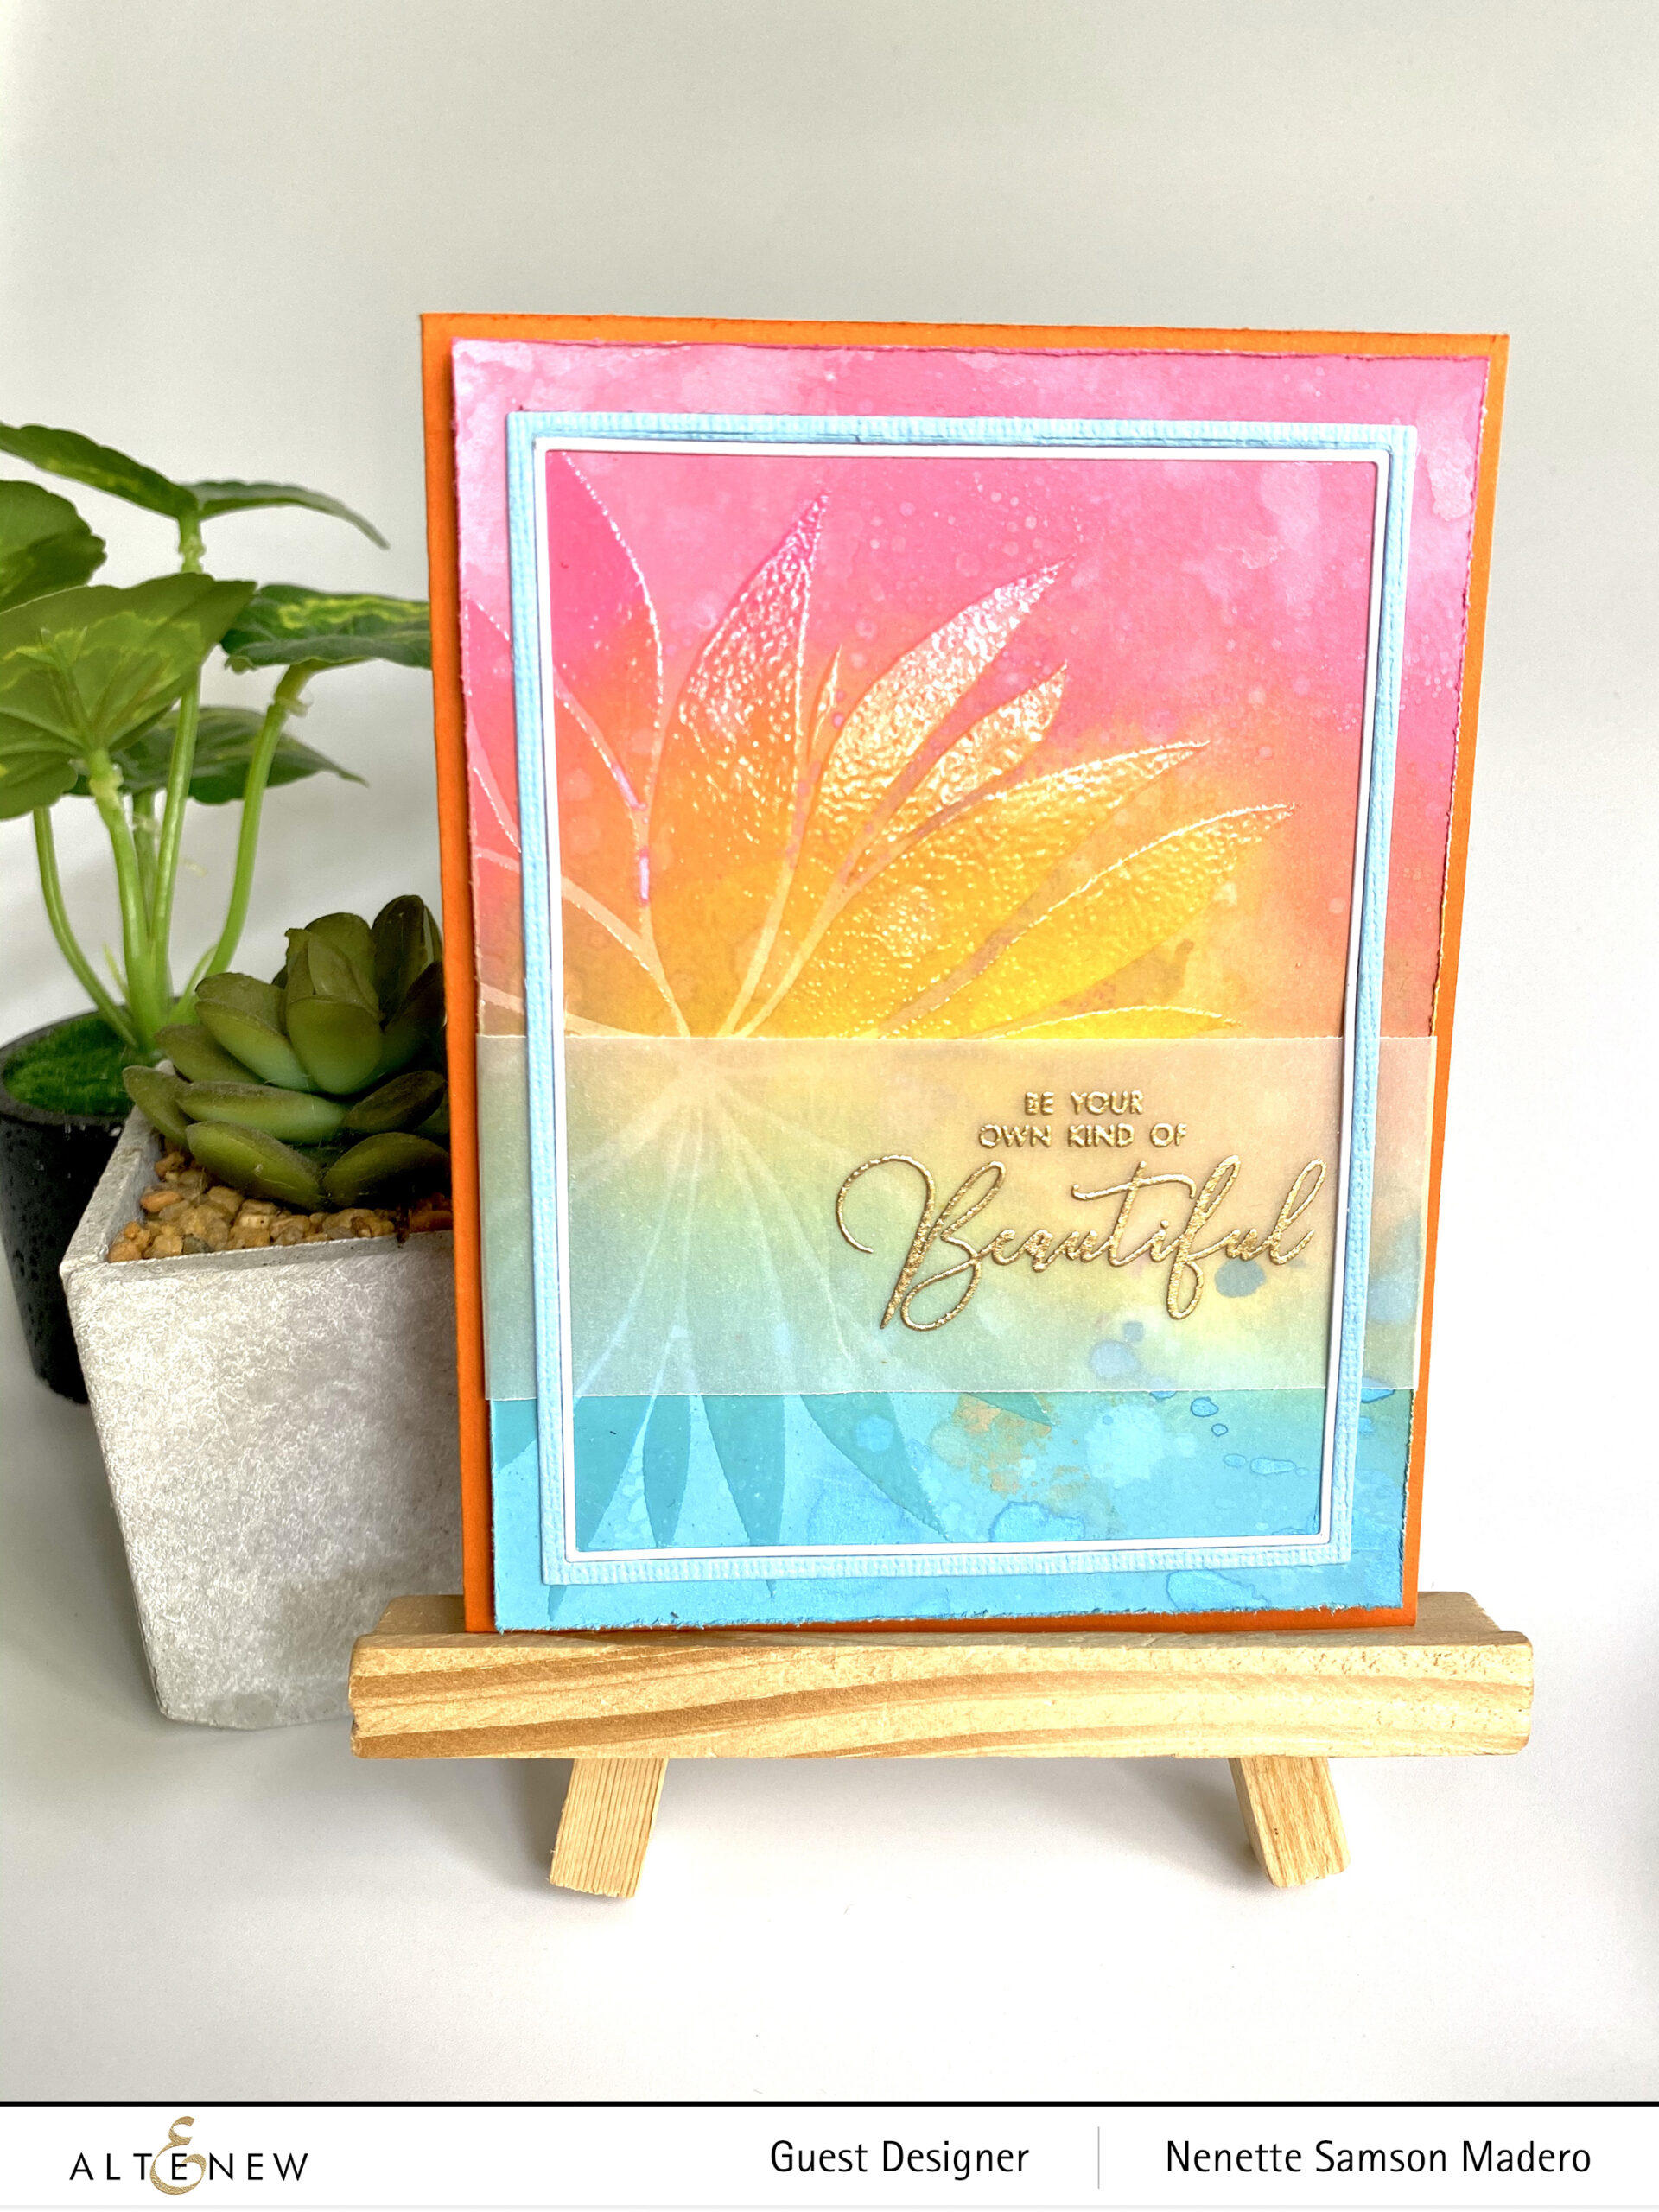
The image was embossed using Crystal Clear embossing powder and this automatically made the image darker than the background. The sentiment from the Paint-A-Flower: Paeonia Japonica was stamped on vellum and embossed using my all-time favorite gold embossing powder- the Rose Gold embossing powder. I added frames to finish the card. The edges of the panel were distressed using a paper distresser then this was mounted on a card front using foam squares.


I’M HERE FOR YOU
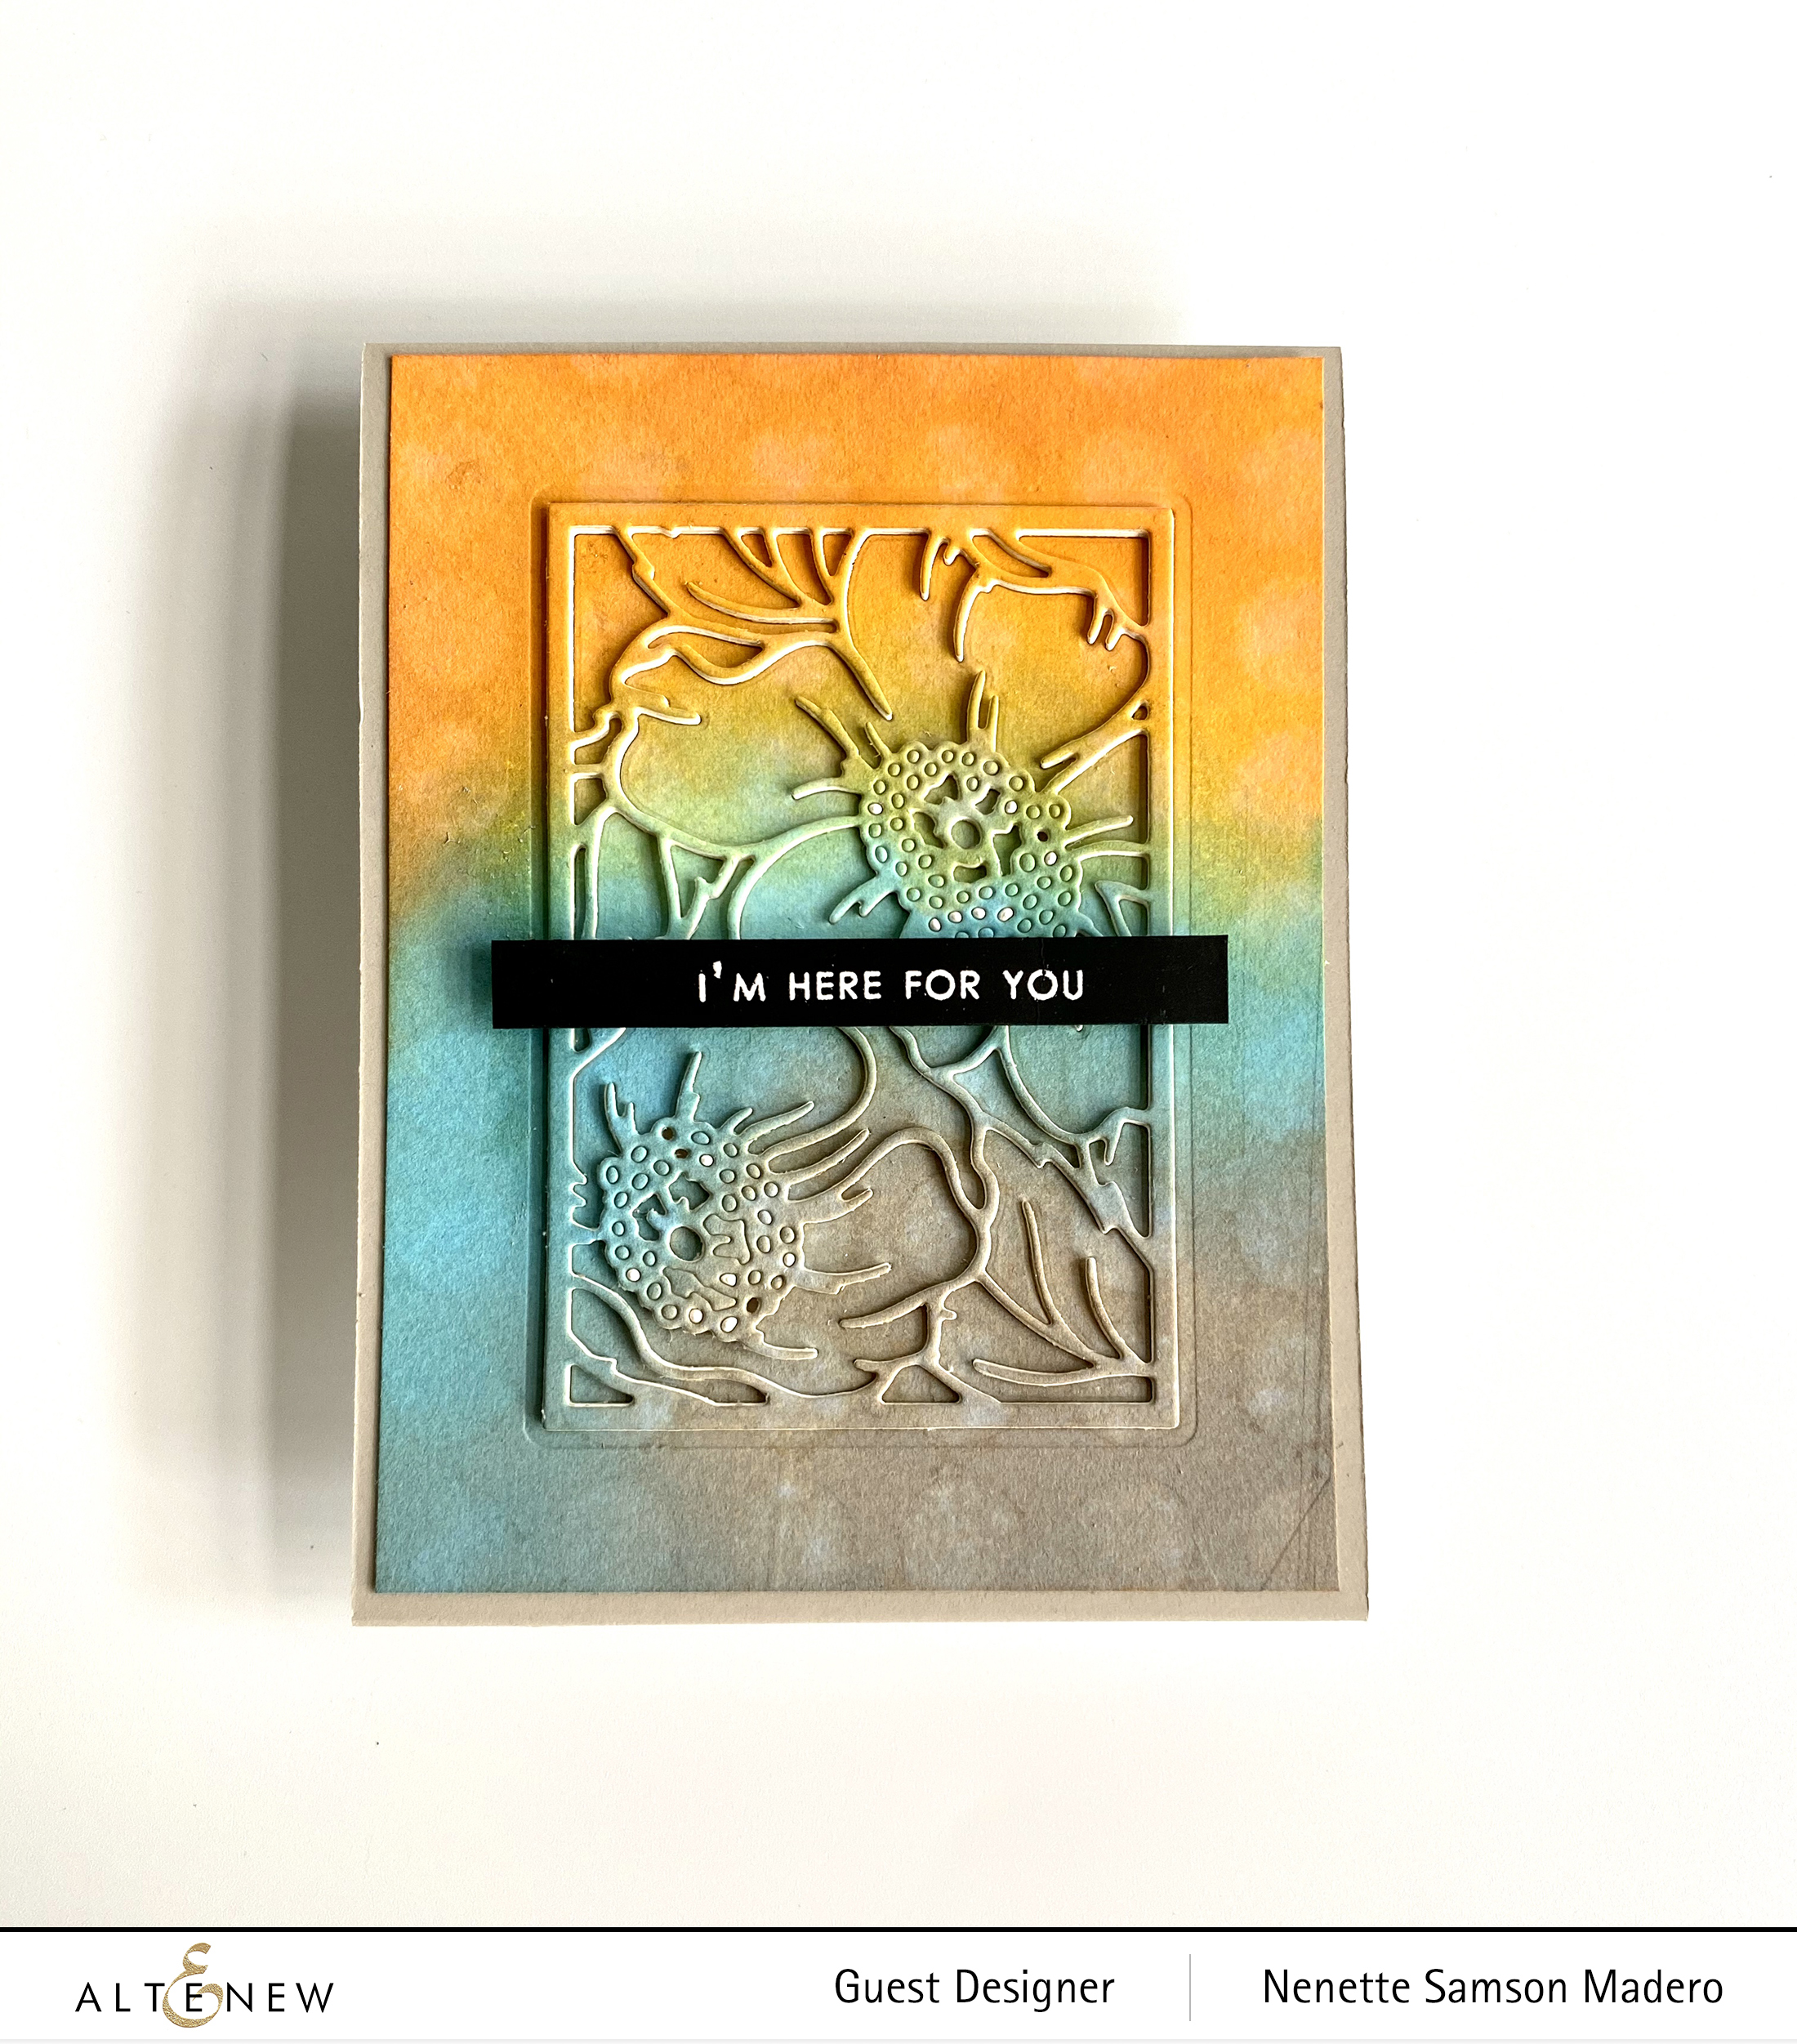

MATERIALS: Dog Rose Panel A die, Distress Oxide inks-Frayed Burlap, Broken China and Carved Pumpkin

Here’s another background I made using distress inks. After applying the inks onto Neenah solar white cardstock, I placed the bubble wrap stencil on top and sprayed over with water using light mist only. Then I used a baby wipe to go over the stencil and remove some ink. This is called the ghosting technique and I love the subtle effect of the dots. I learned this technique from Dyan Reaveley.
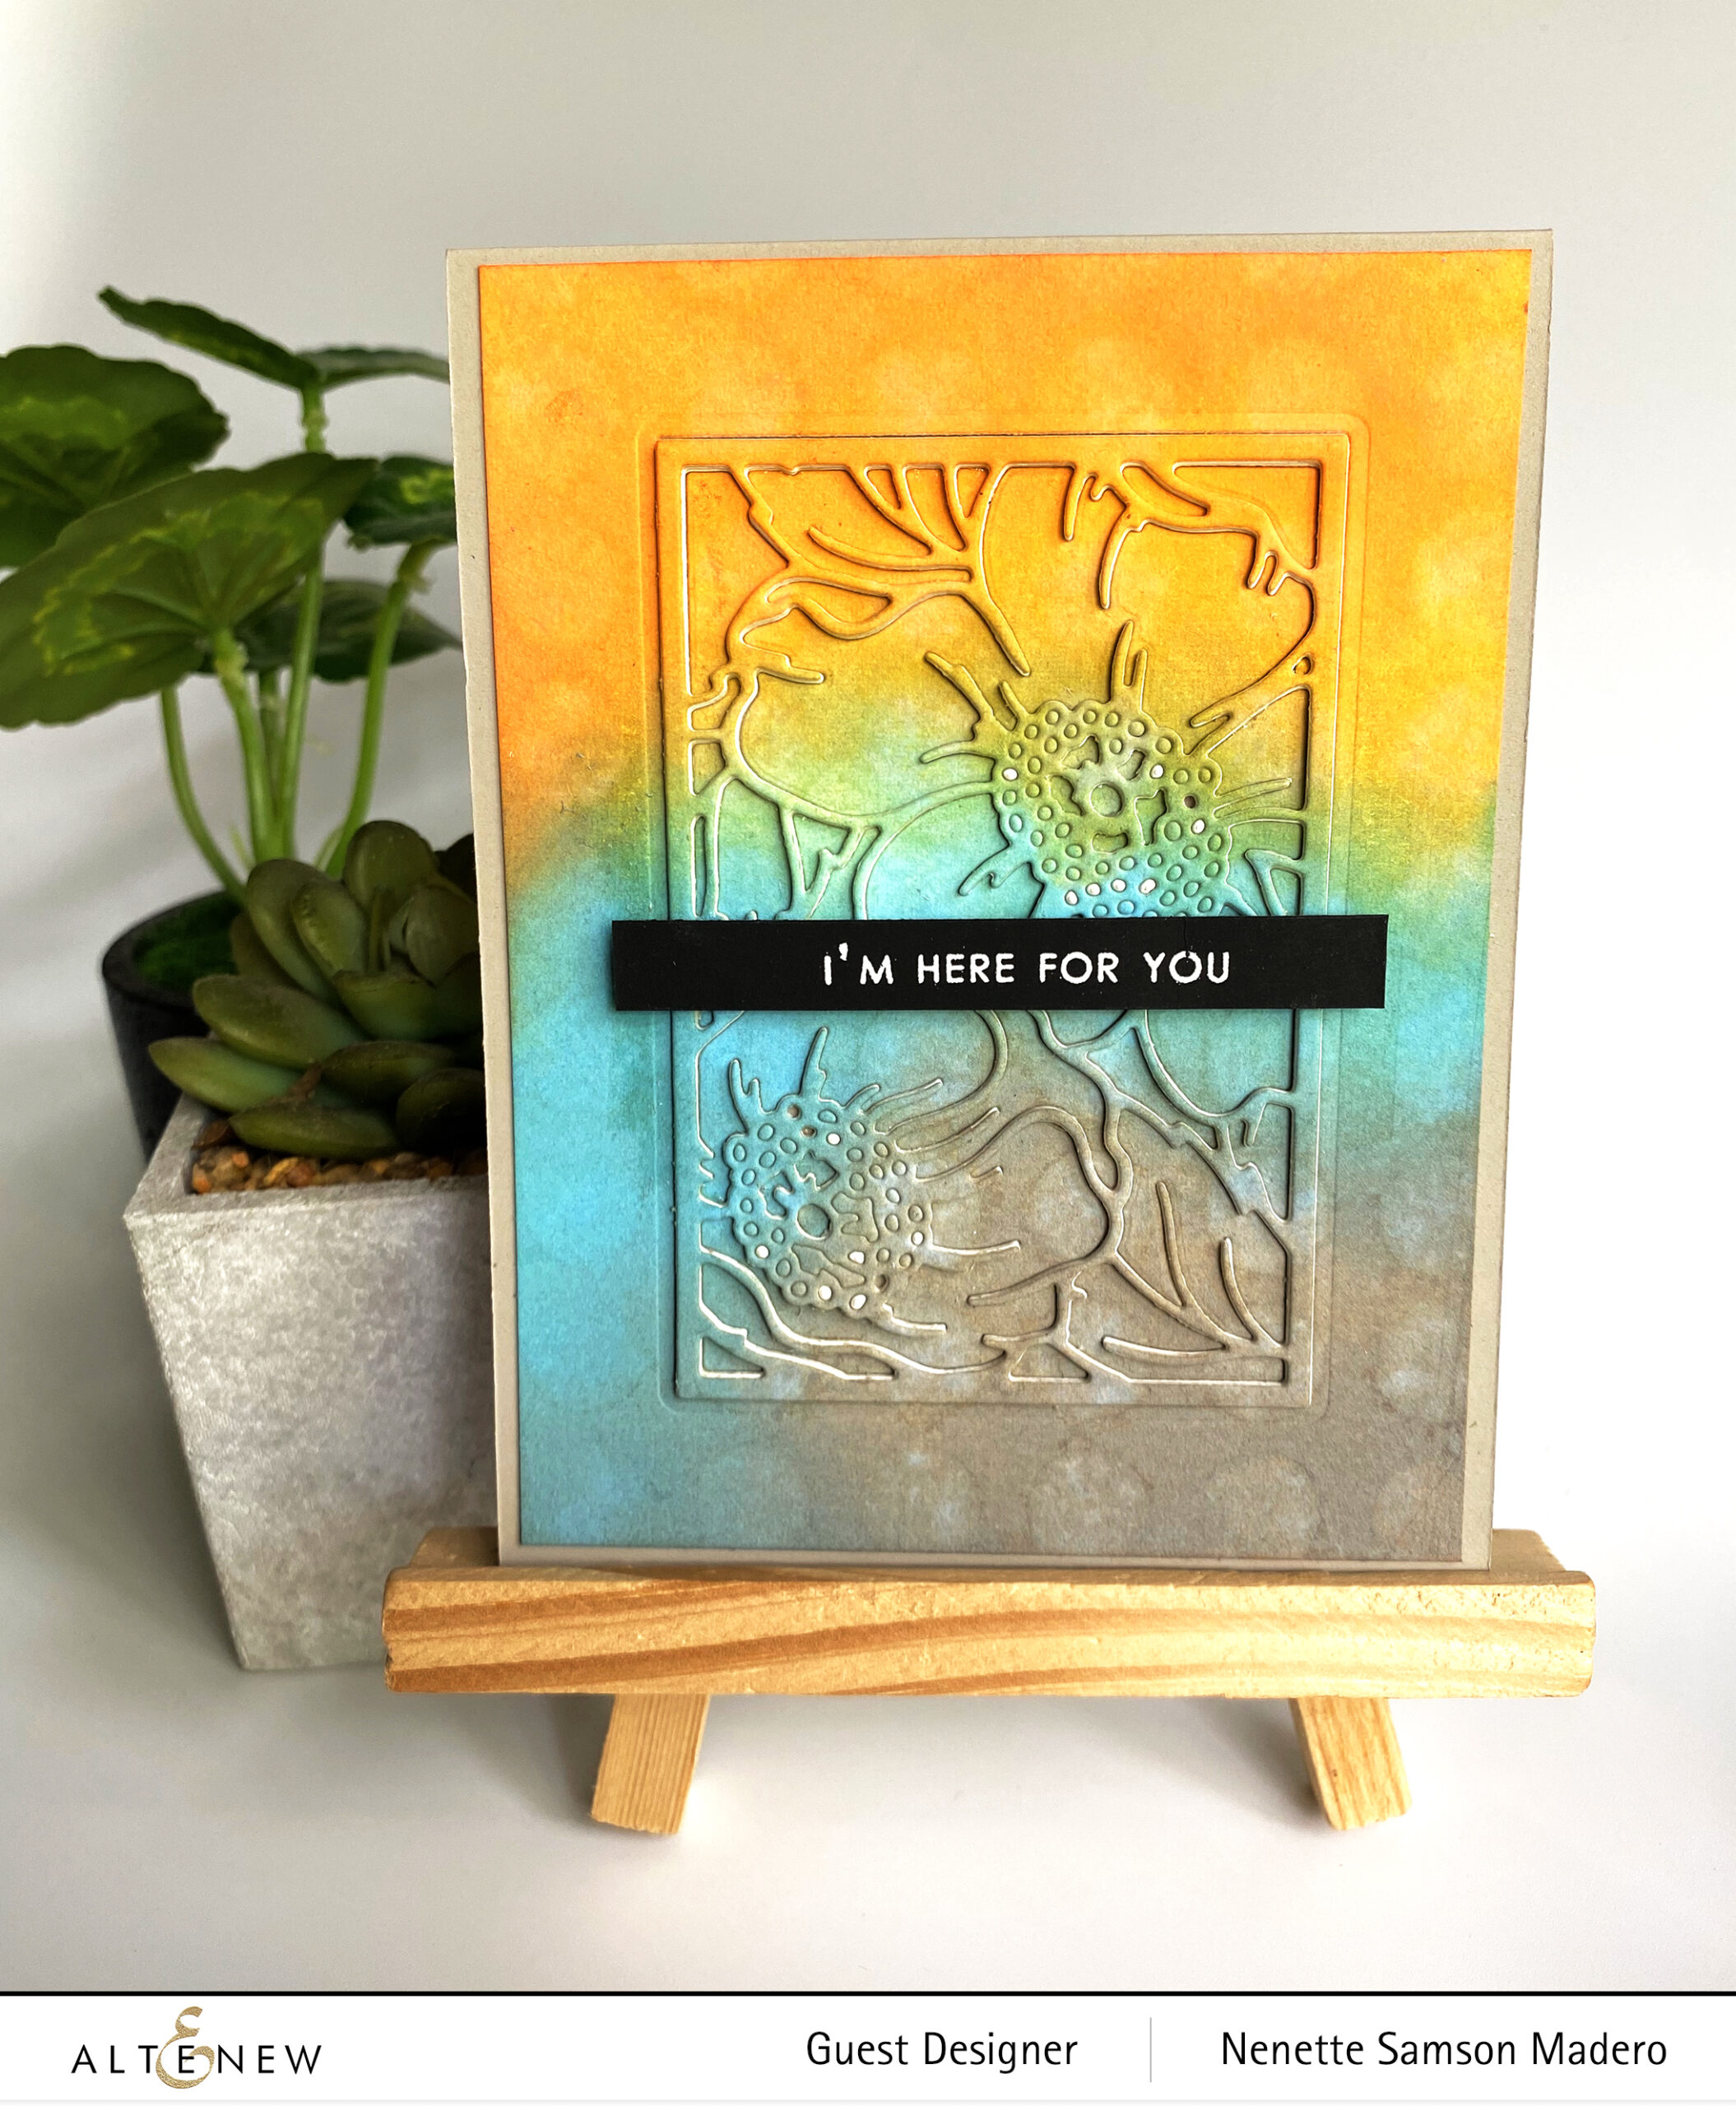
When the panel was dry, I used the Dog Rose Panel A to die cut the floral image. The sentiment was stamped on black cardstock using Versamark Ink and white embossing powder then mounted using foam tape.


THANK YOU
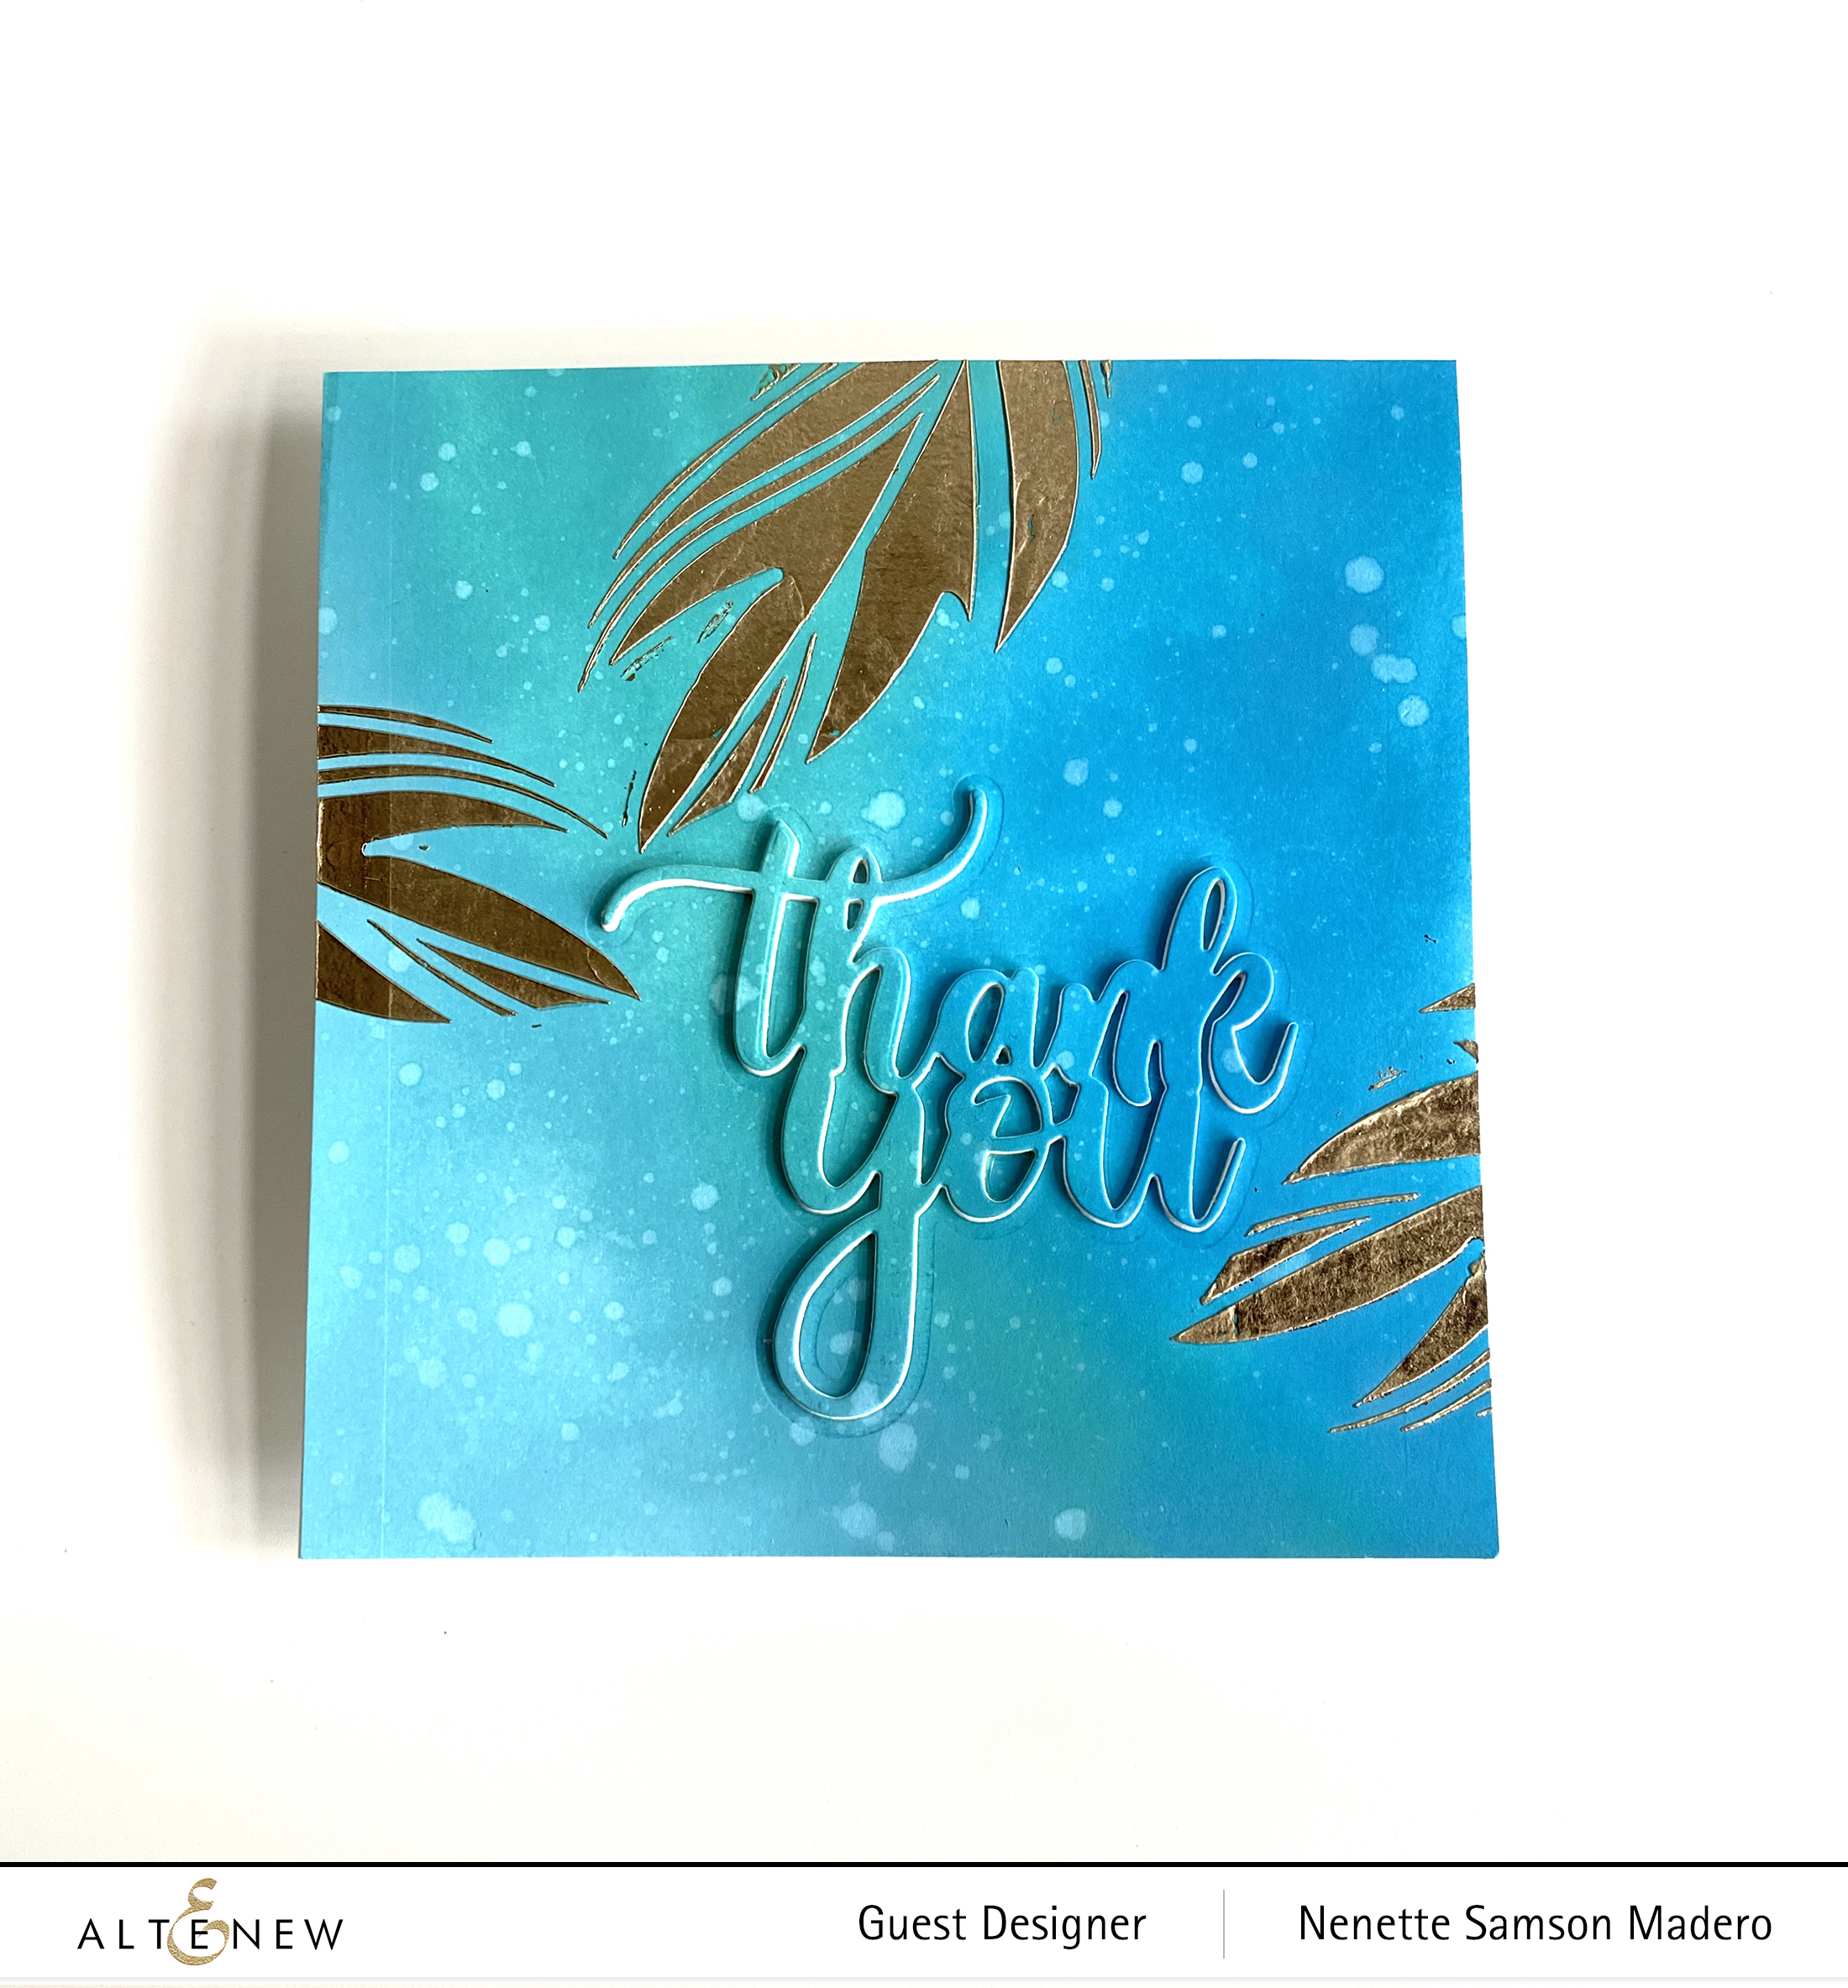

MATERIALS: Feathery Stencil, Simply Thank You die, Distress Oxide inks-Peacock Feathers, Broken China, Tumbled Glass

Here’s a simple card using foil. The background was colored using shades of blues then I selected only certain parts of the stencil to add the transfer gel. The rest of the stencil was covered with post-it notes to prevent the gel from going to the other areas of the stencil.

I should have die cut the thank you sentiment before applying the transfer gel cause when I ran it through the die cutting machine, the shininess of the foil became dull. 😥 So next time, I’ll make sure to do the foiling last.


TRUE FRIENDS ARE EVERYTHING
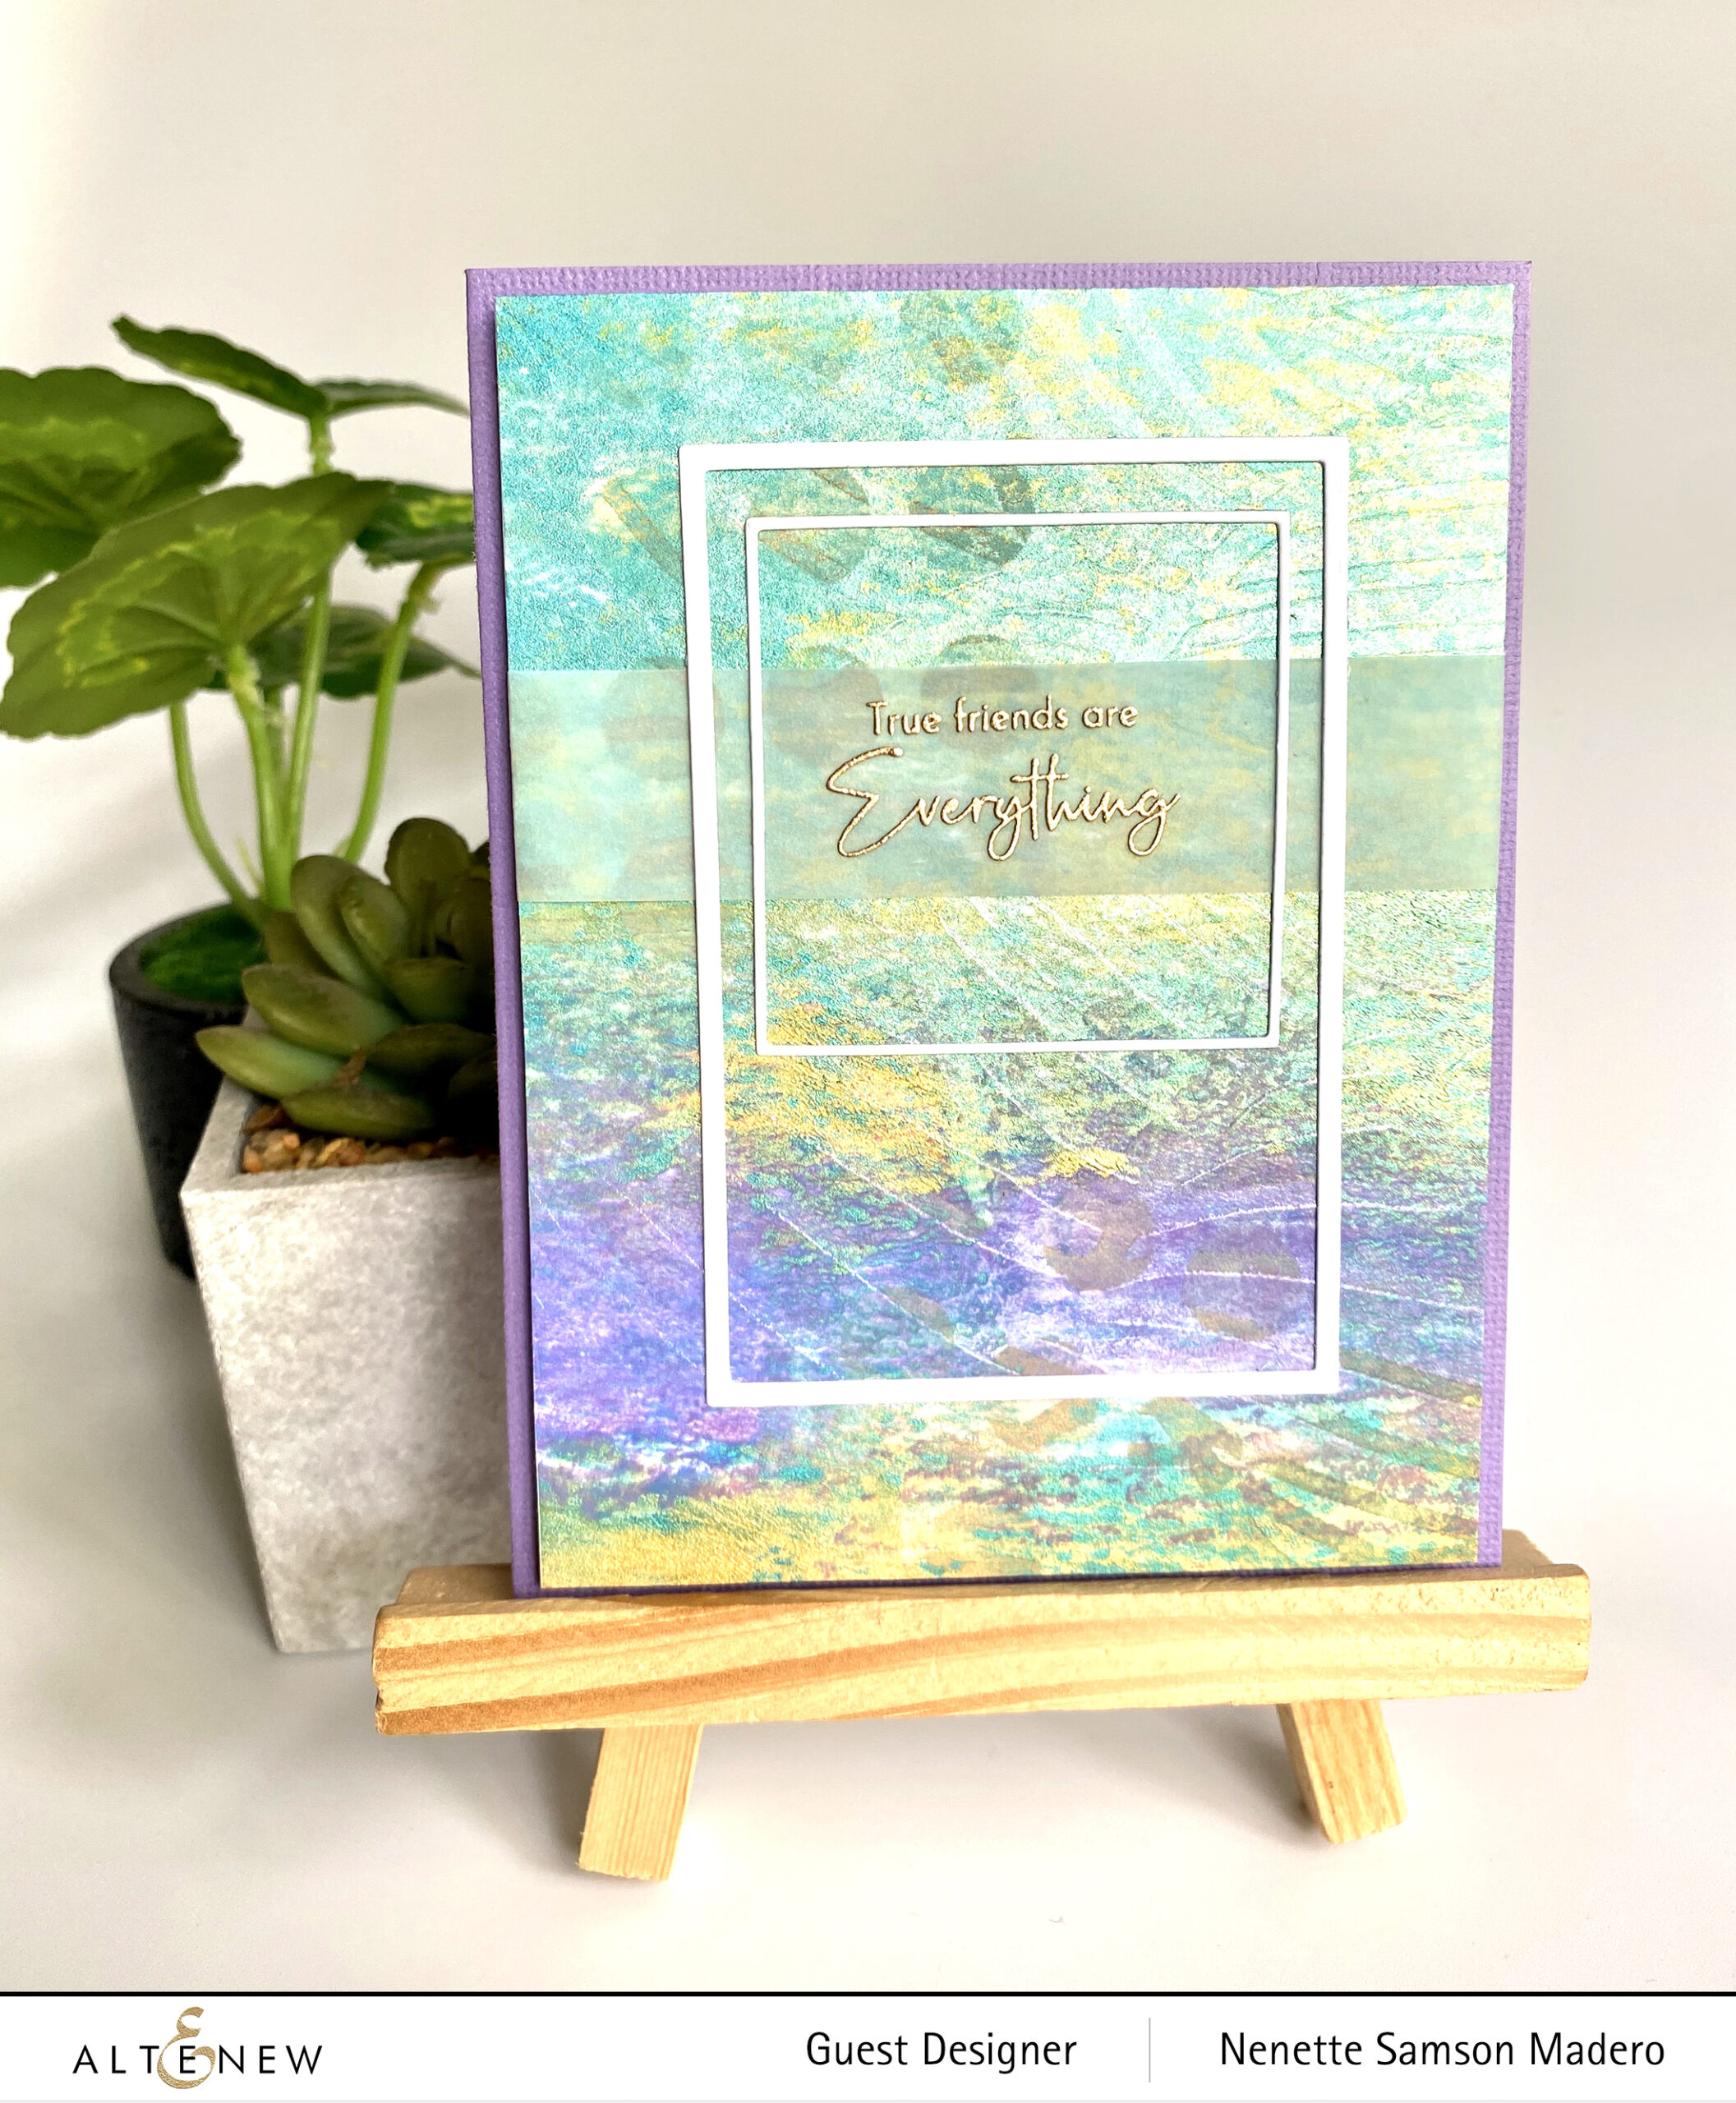

MATERIALS: Feathered Leaves Stencil, Bubble Wrap Stencil, Fine Frames Square Die set , Fine Frames Cover die, Gelli plate, acrylic paints, Versamark Ink, Crystal Clear Embossing powder

I had my Gelli plate out since I recently used it for my last blog hop so I thought of creating more monoprints using stencils. First, I added dots of assorted acrylic paints on the Gelli plate. I made sure to use colors that will go well together. A brayer was used to spread the paint on the plate. This was allowed to dry then a thin coat of white acrylic paint was added. Neenah solar white CS was used to pick up the monoprint.

When this was dry, I used the bubble wrap stencil to add some circles here and there using a distress ink tool and frayed burlap oxide ink. The Feathered leaves stencil was then put on top then Versamark ink and clear embossing powder was used to create another layer. I love the layers on this card and the subtle texture the stencil added.
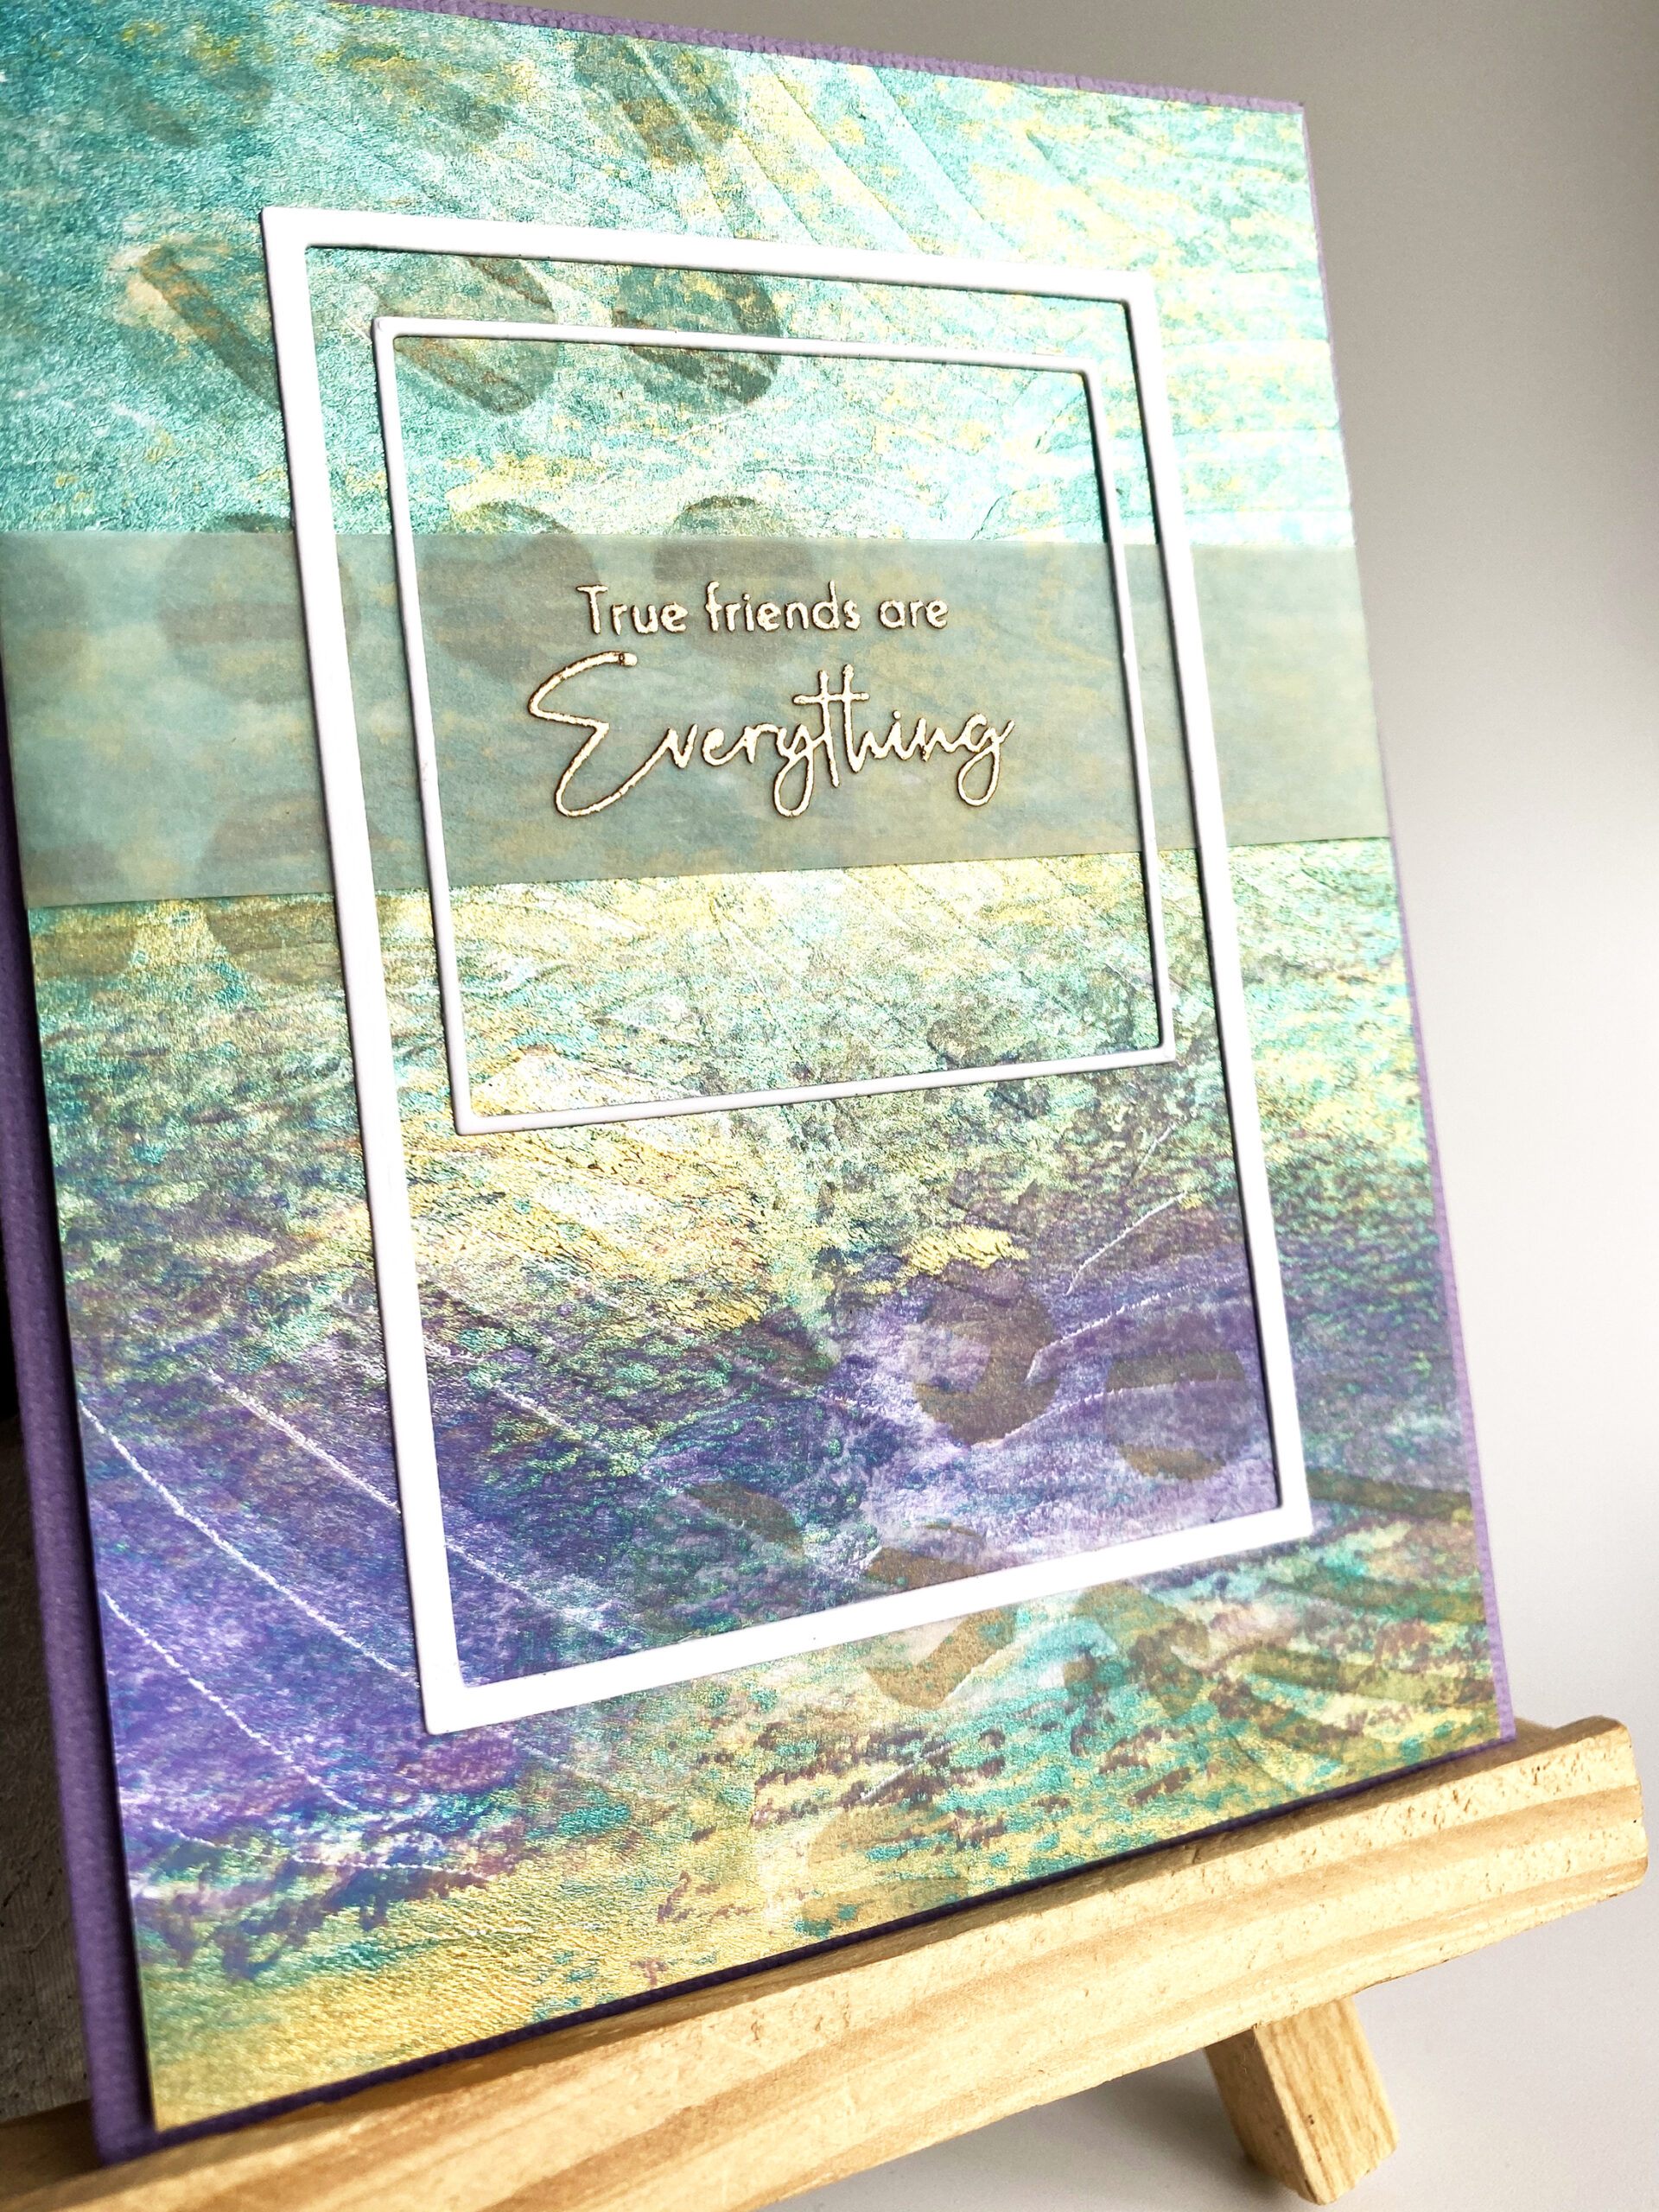
The sentiment was stamped on vellum then I used 2 different sets of frames to highlight the sentiment.


I HAVE BEEN THINKING OF YOU
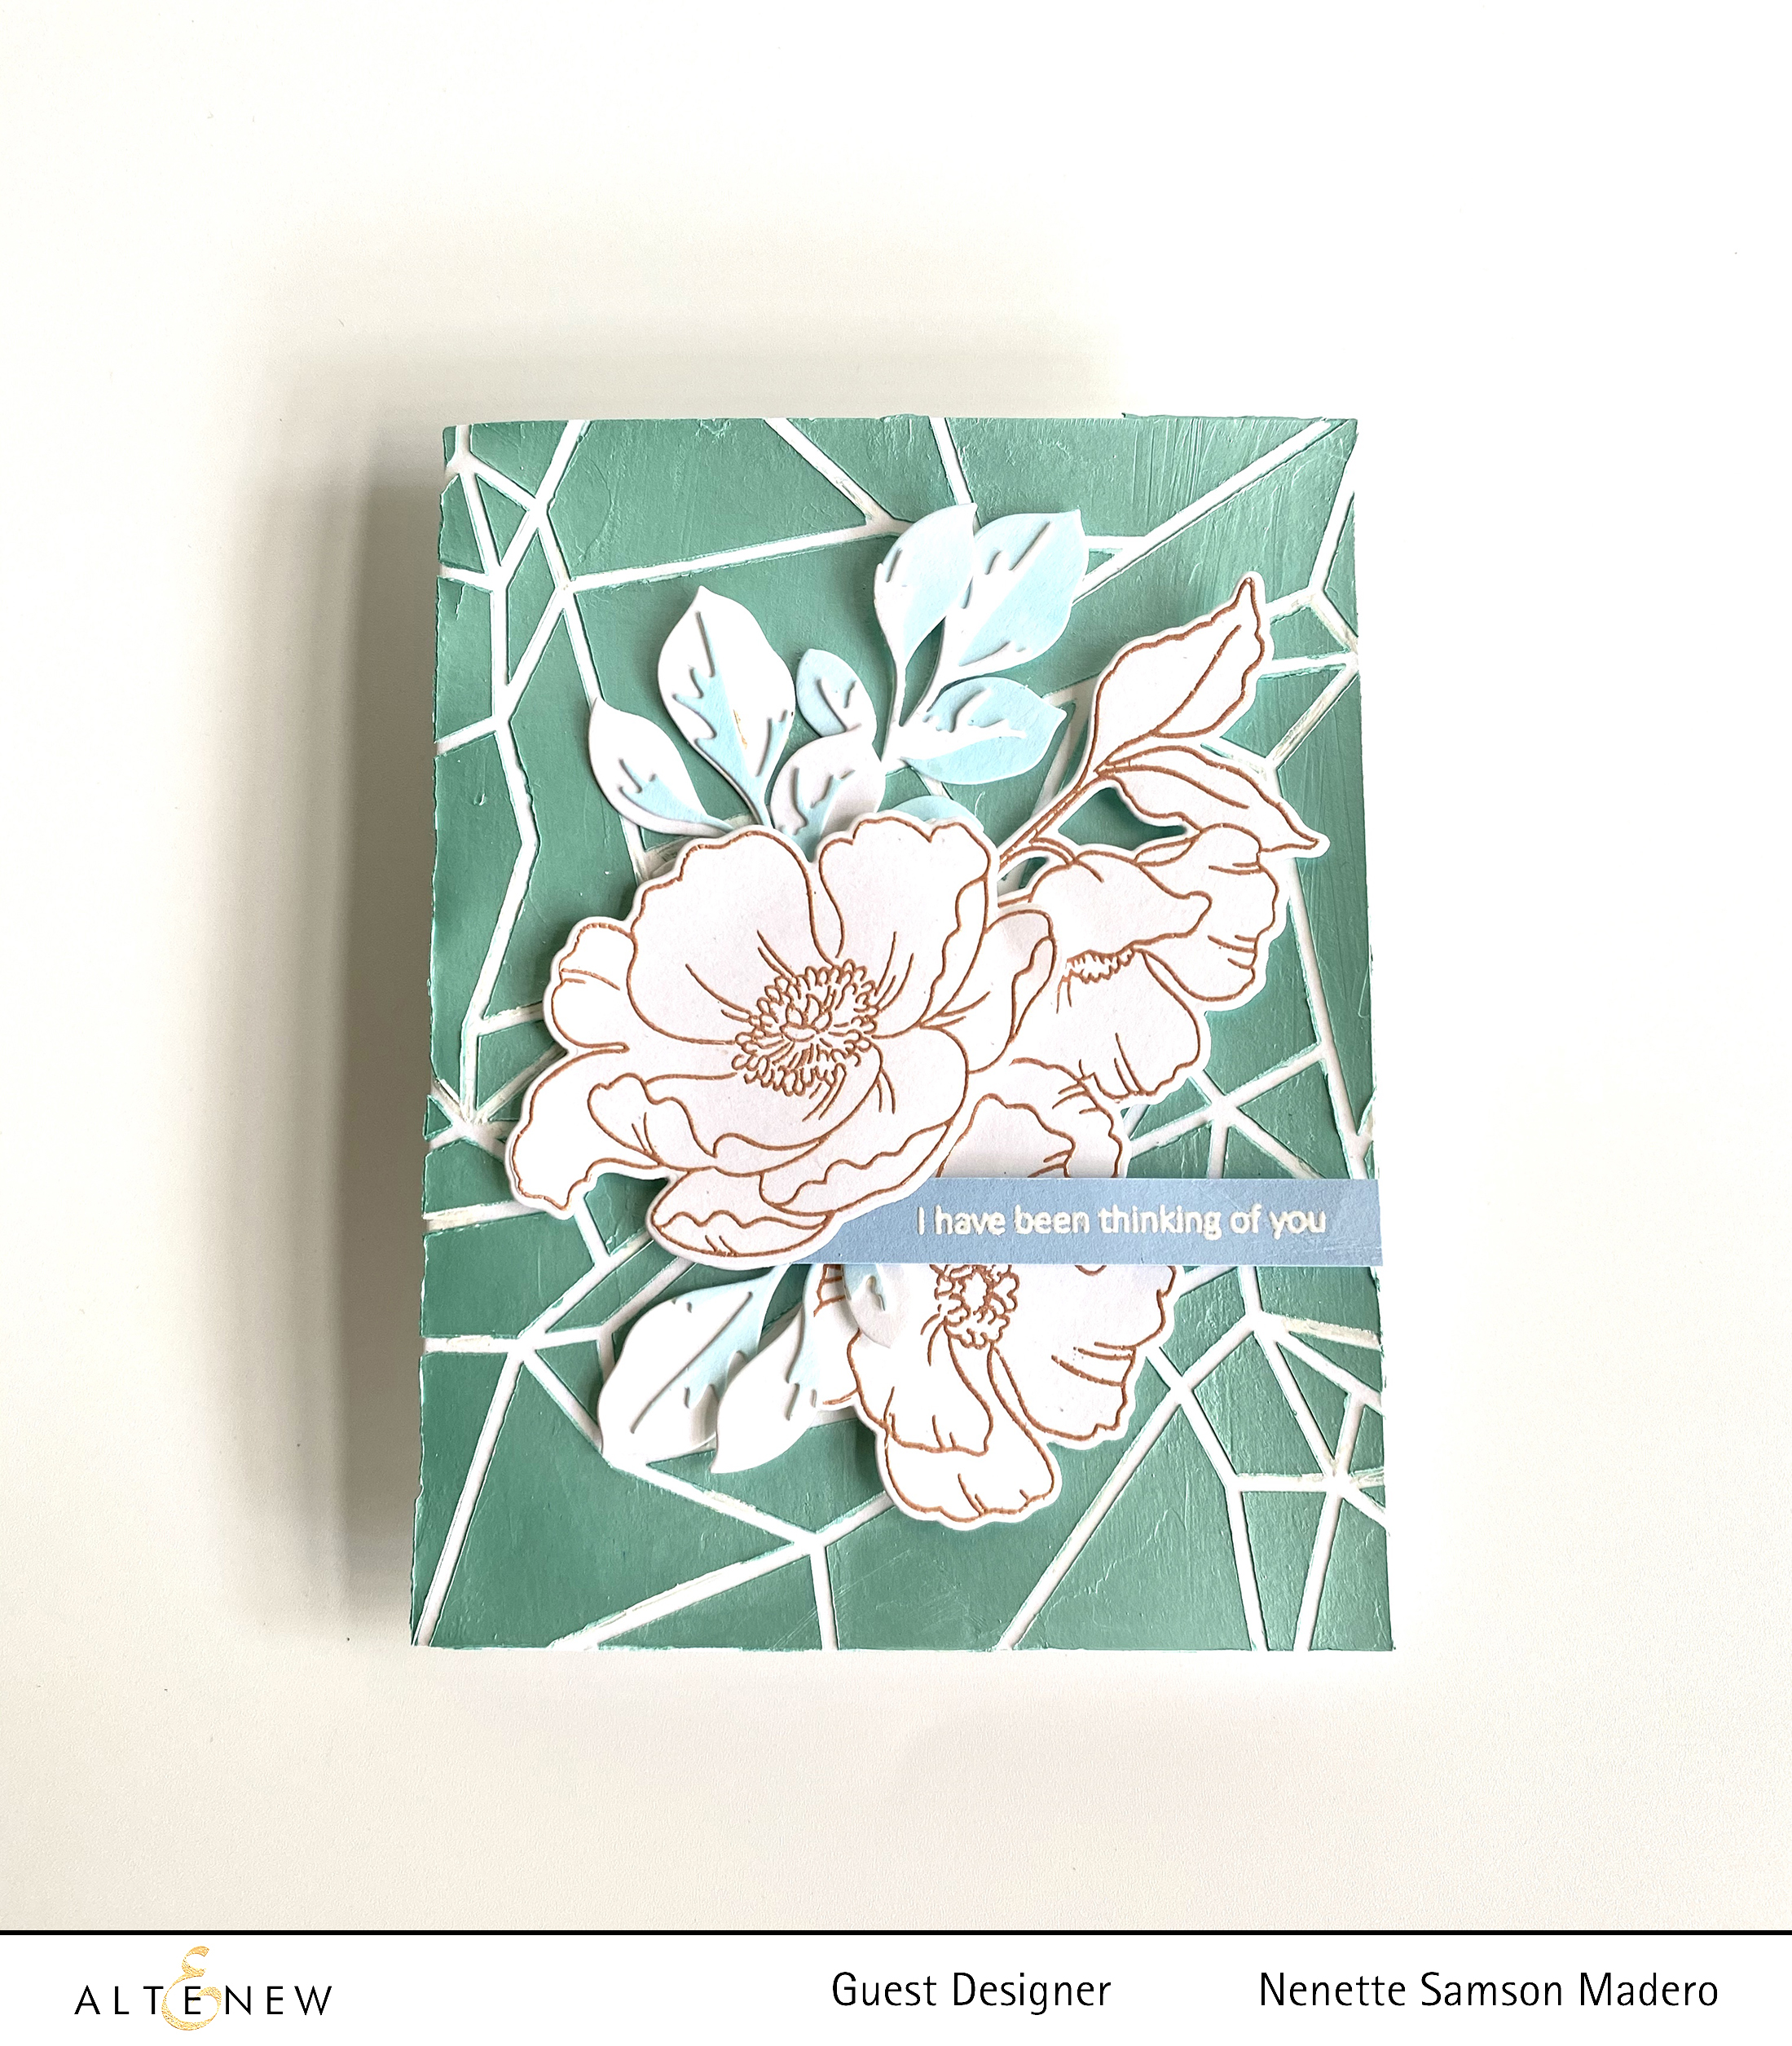

MATERIALS: Geometric Landscape Stencil, Poppy Garden Stamp and die, Garden Picks 3D die, Nuvo Embellishments Mousse Aquamarine, Pure White Embossing powder, Rose Gold Embossing Powder, Versmark Ink , Uniball Signo White gel pen

I made another background using the Geometric Landscape Stencil and the Nuvo mousse for added dimension. I allowed it to dry while stamping and embossing the flowers from the Poppy Garden stamp set. I also die cut the leaves from the Garden Picks 3d die. The sentiment from the Poppy Garden set was embossed using white embossing powder while the flowers were embossed using Golden Peach embossing powder.
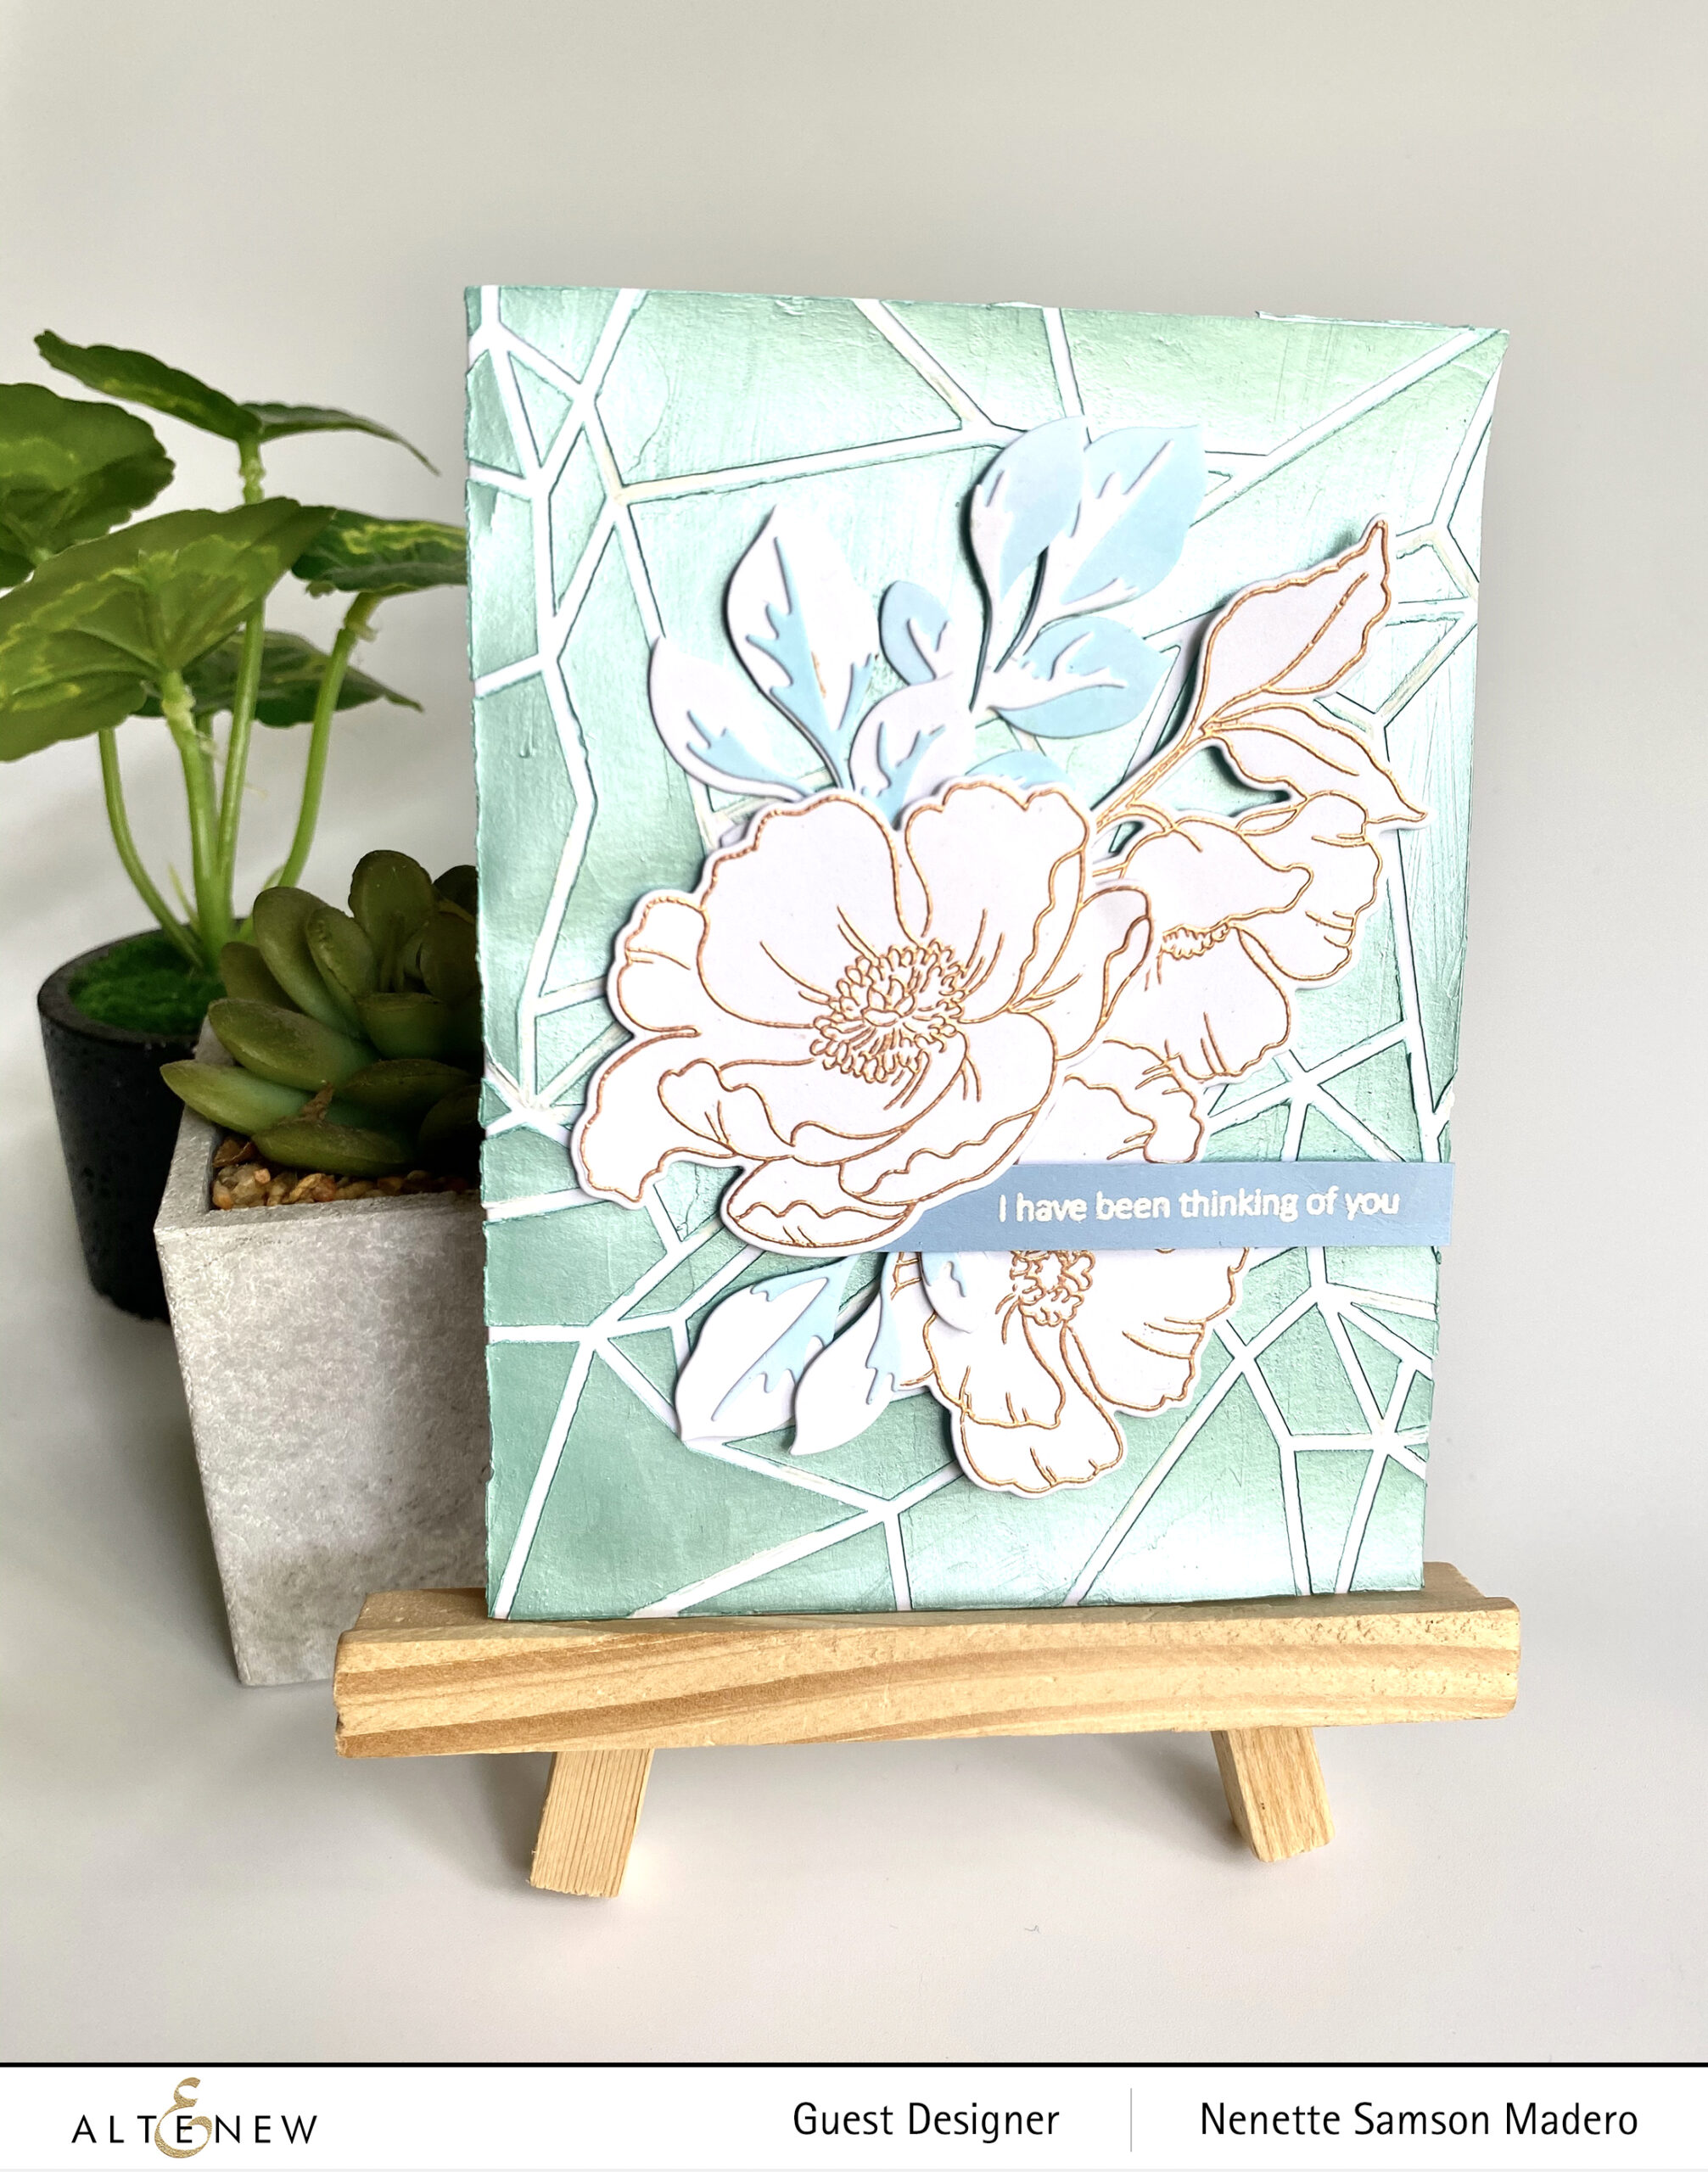
All of the embellishments were arranged using foam squares for added dimension. By the way, when I pulled up the stencil from the paper, I noticed some of the mousse went under the stencil. After it dried, I just used a Uniball Signo white gel pen to cover up the areas. That way, I didn’t have to repeat the whole process and waste material. 😊


YOU INSPIRE ME TO BE BETTER
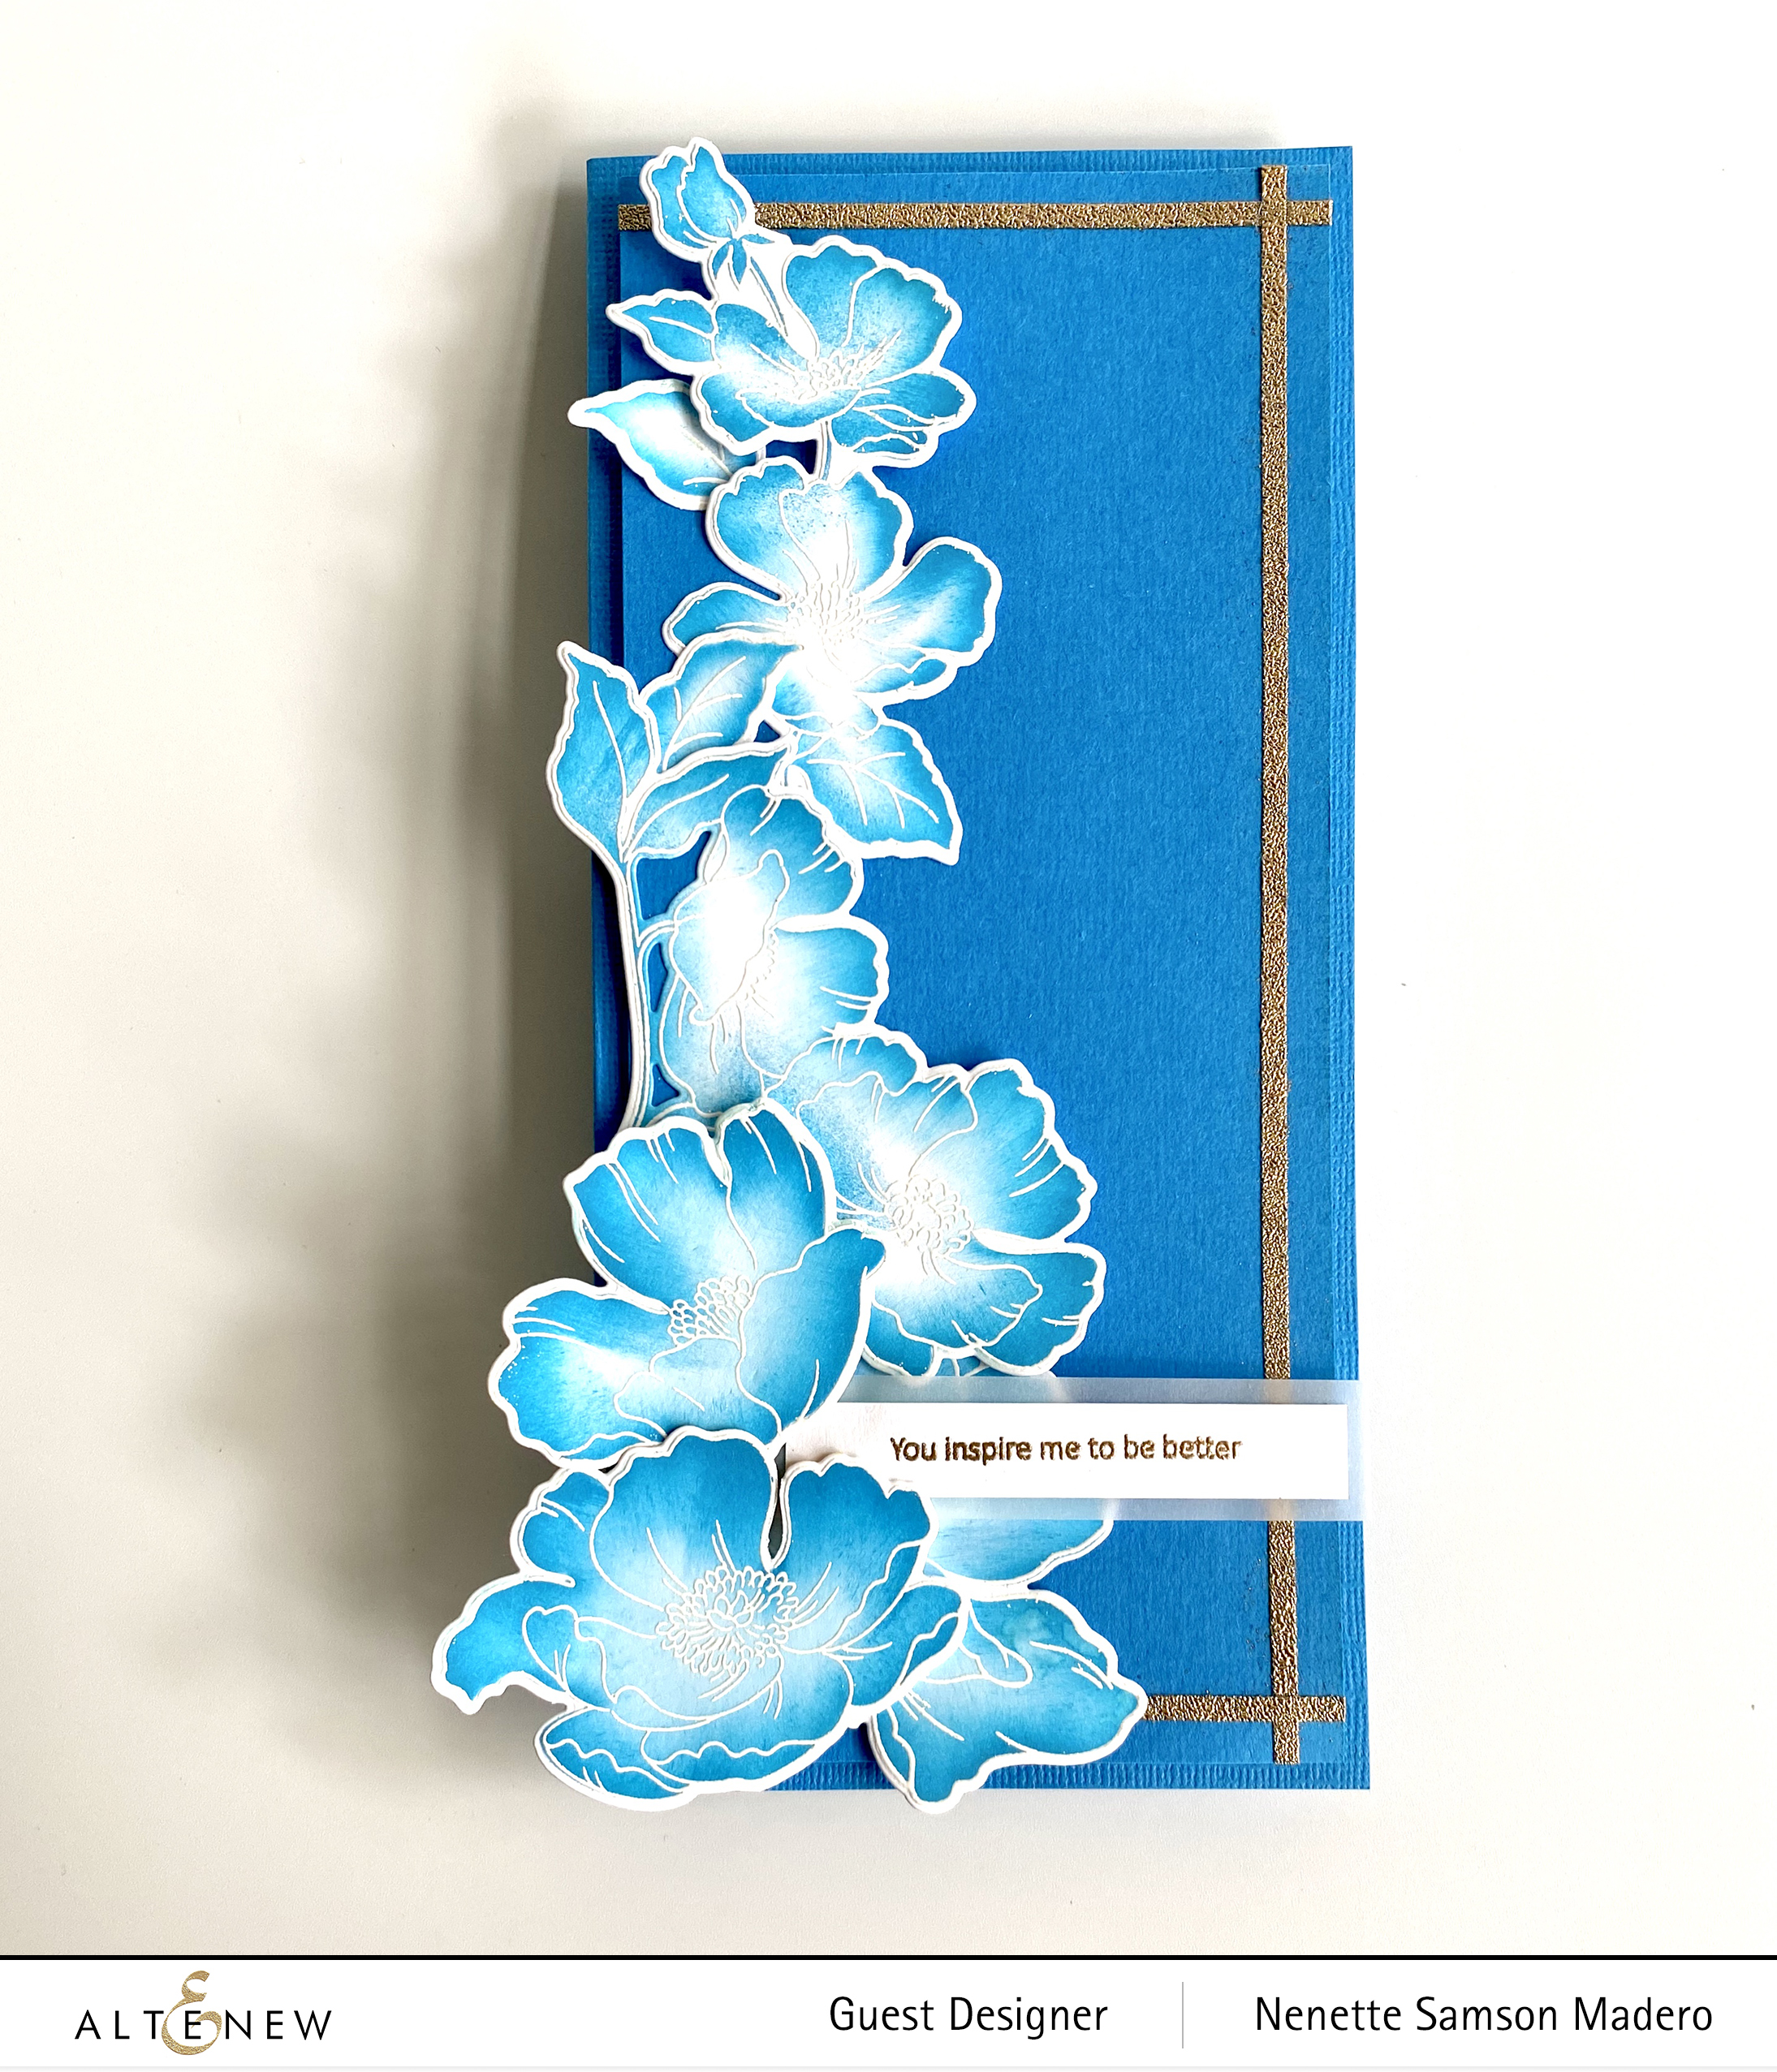

MATERIALS: Poppy Garden Mask Stencil, Distress Oxide-Mermaid Lagoon, Pure White Embossing Powder, Versamark Ink, 1/8″ double-sided tape, Rose Gold Embossing Powder, Foam Squres

For my last card, I wanted to make use of the Poppy Garden Mask stencil. I laid the stencil on a Neenah Solar white cardstock then used a round distress tool to add Mermaid Lagoon distress oxide ink to the edges of the floral images using a swiping motion from outside going in. This way, the middle of the flower remained white while the edges were dark. This is a fun way of coloring images quickly. I like the steaks that the foam created. Just make sure to follow the direction of the petals when applying the ink. When all the mask images of the flowers were colored, I stamped the outline images using Versamark Ink and embossed them with Pure white embossing powder.
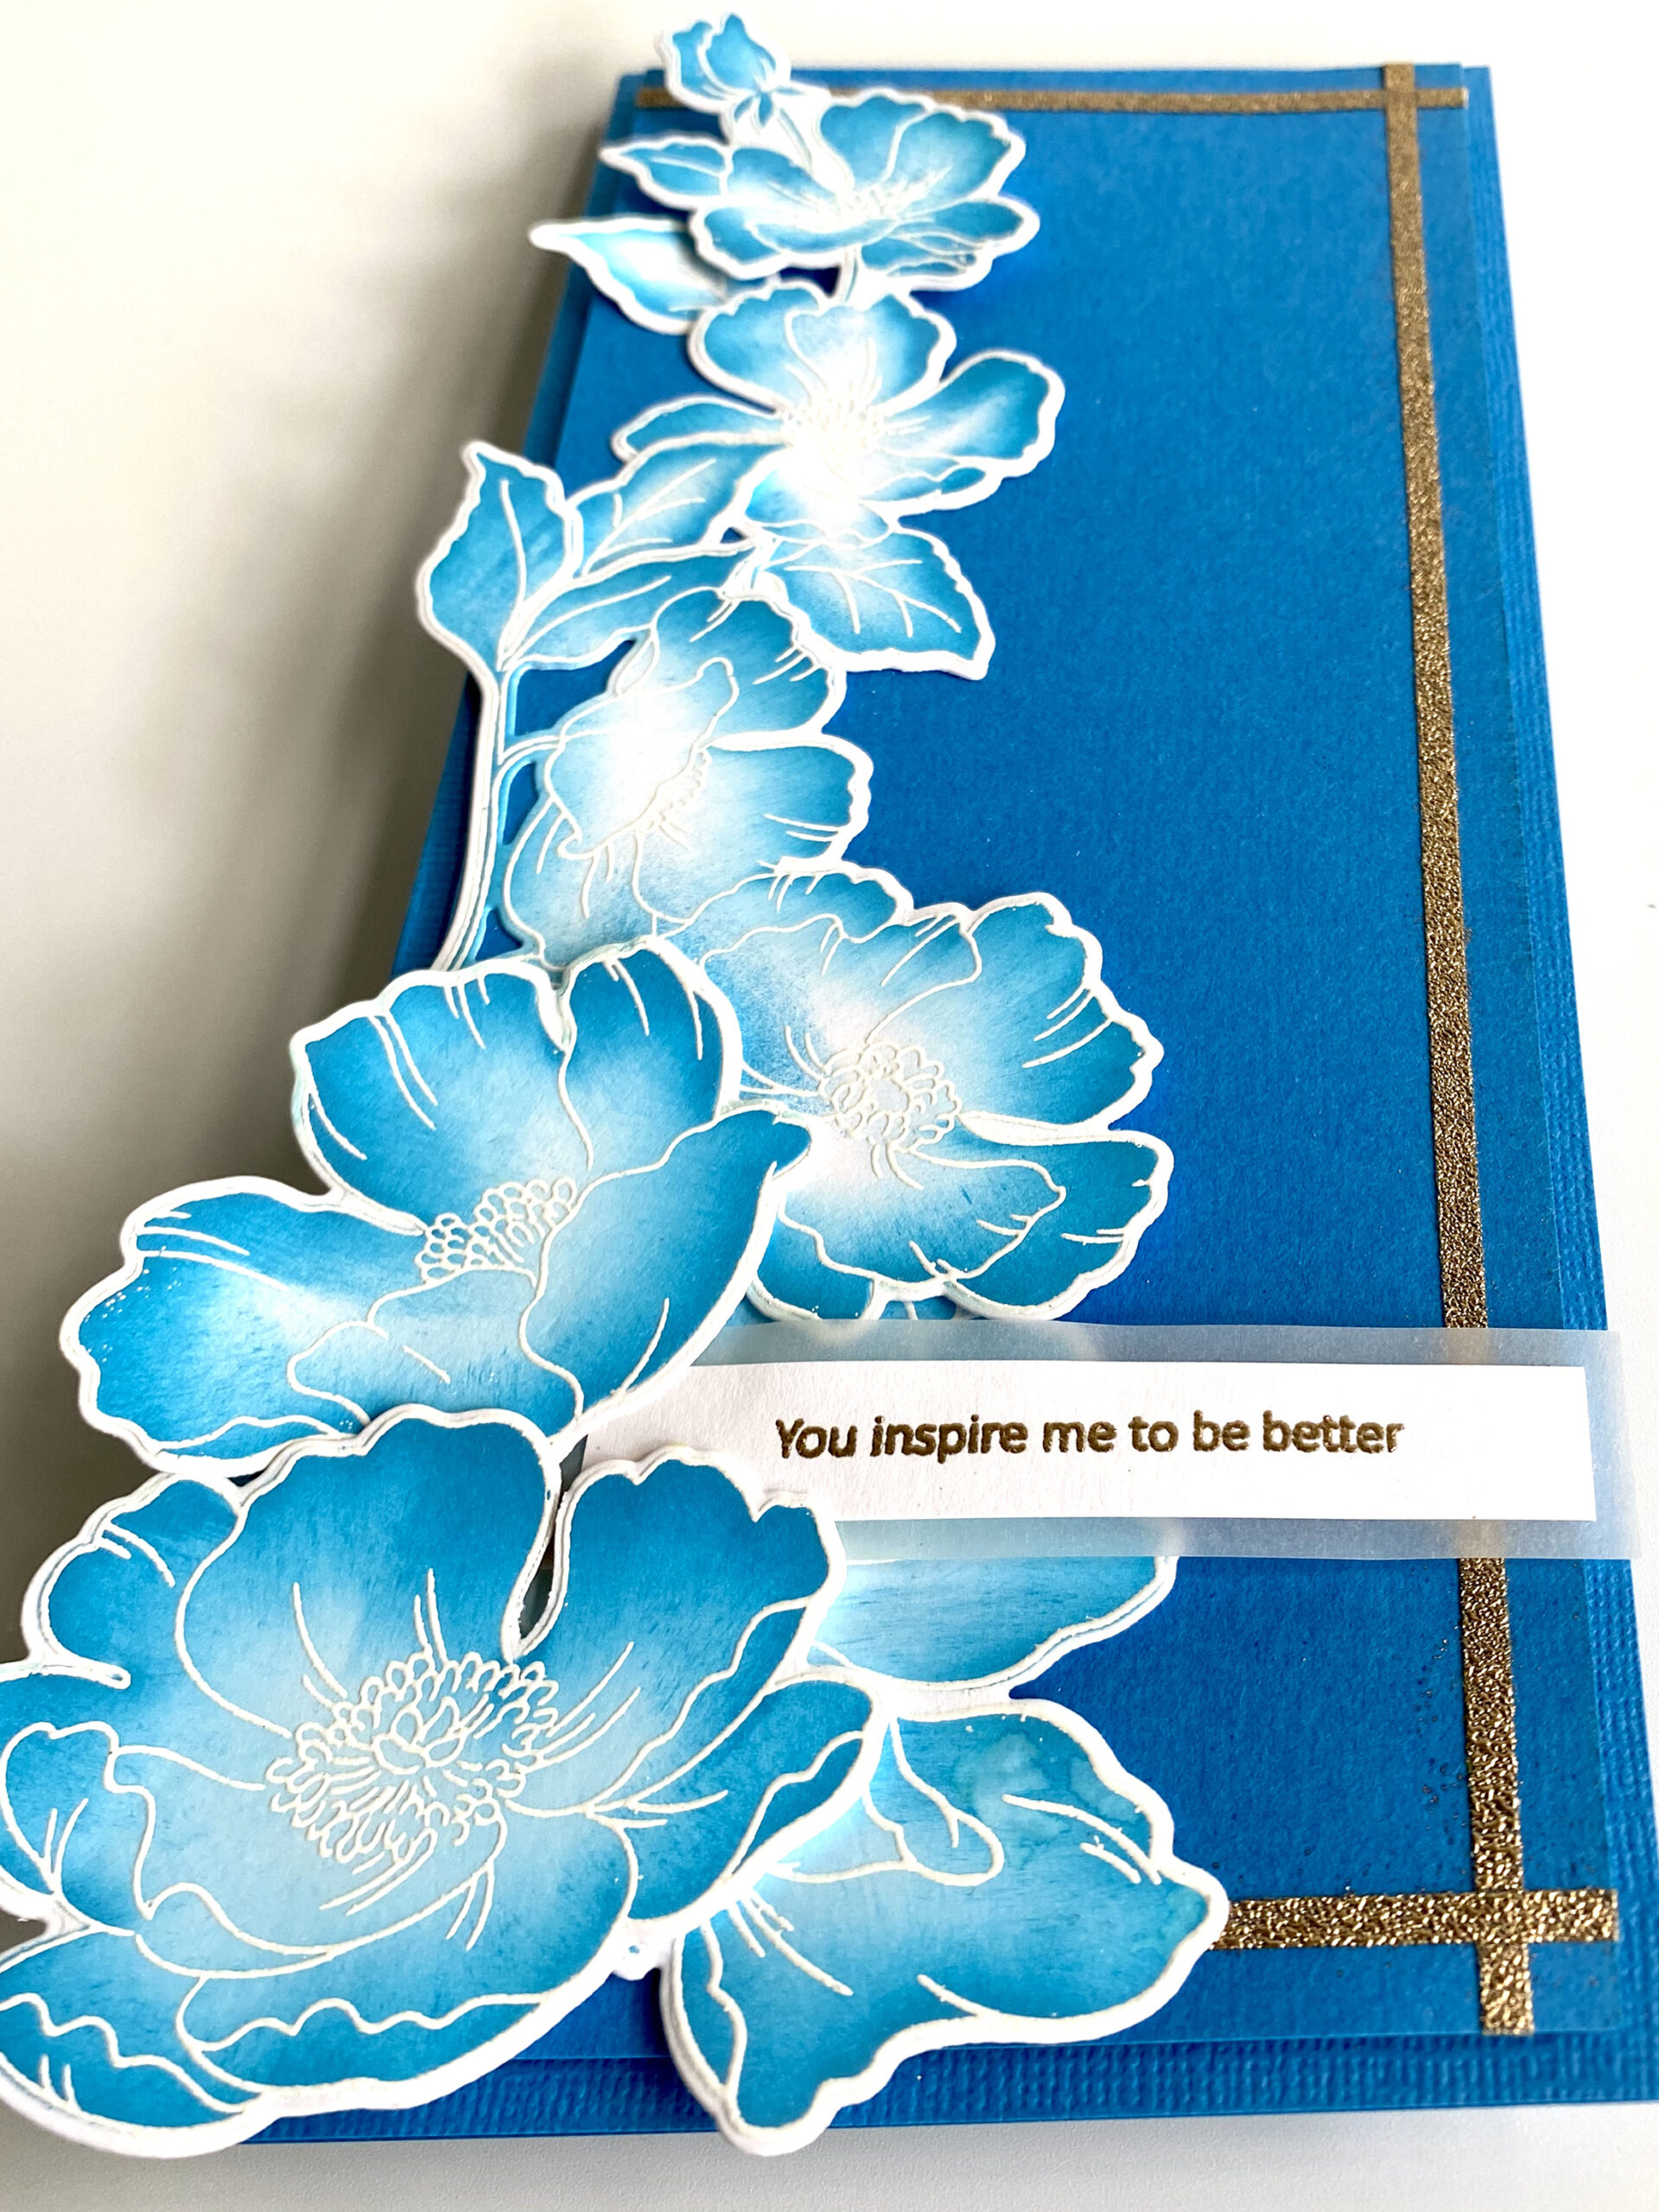
I needed a frame for this slim card so an easy way to do this is to use 1/8″ double-sided tape and heat emboss it using Rose Gold embossing powder. The flowers were arranged on one side and adhered to the card front using glue and foam squares. For a more organic look, just add foam squares to the edges of the petal then glue down the middle of the flower. You can also bend the edges of the flowers and leaves so that they won’t look so stiff.
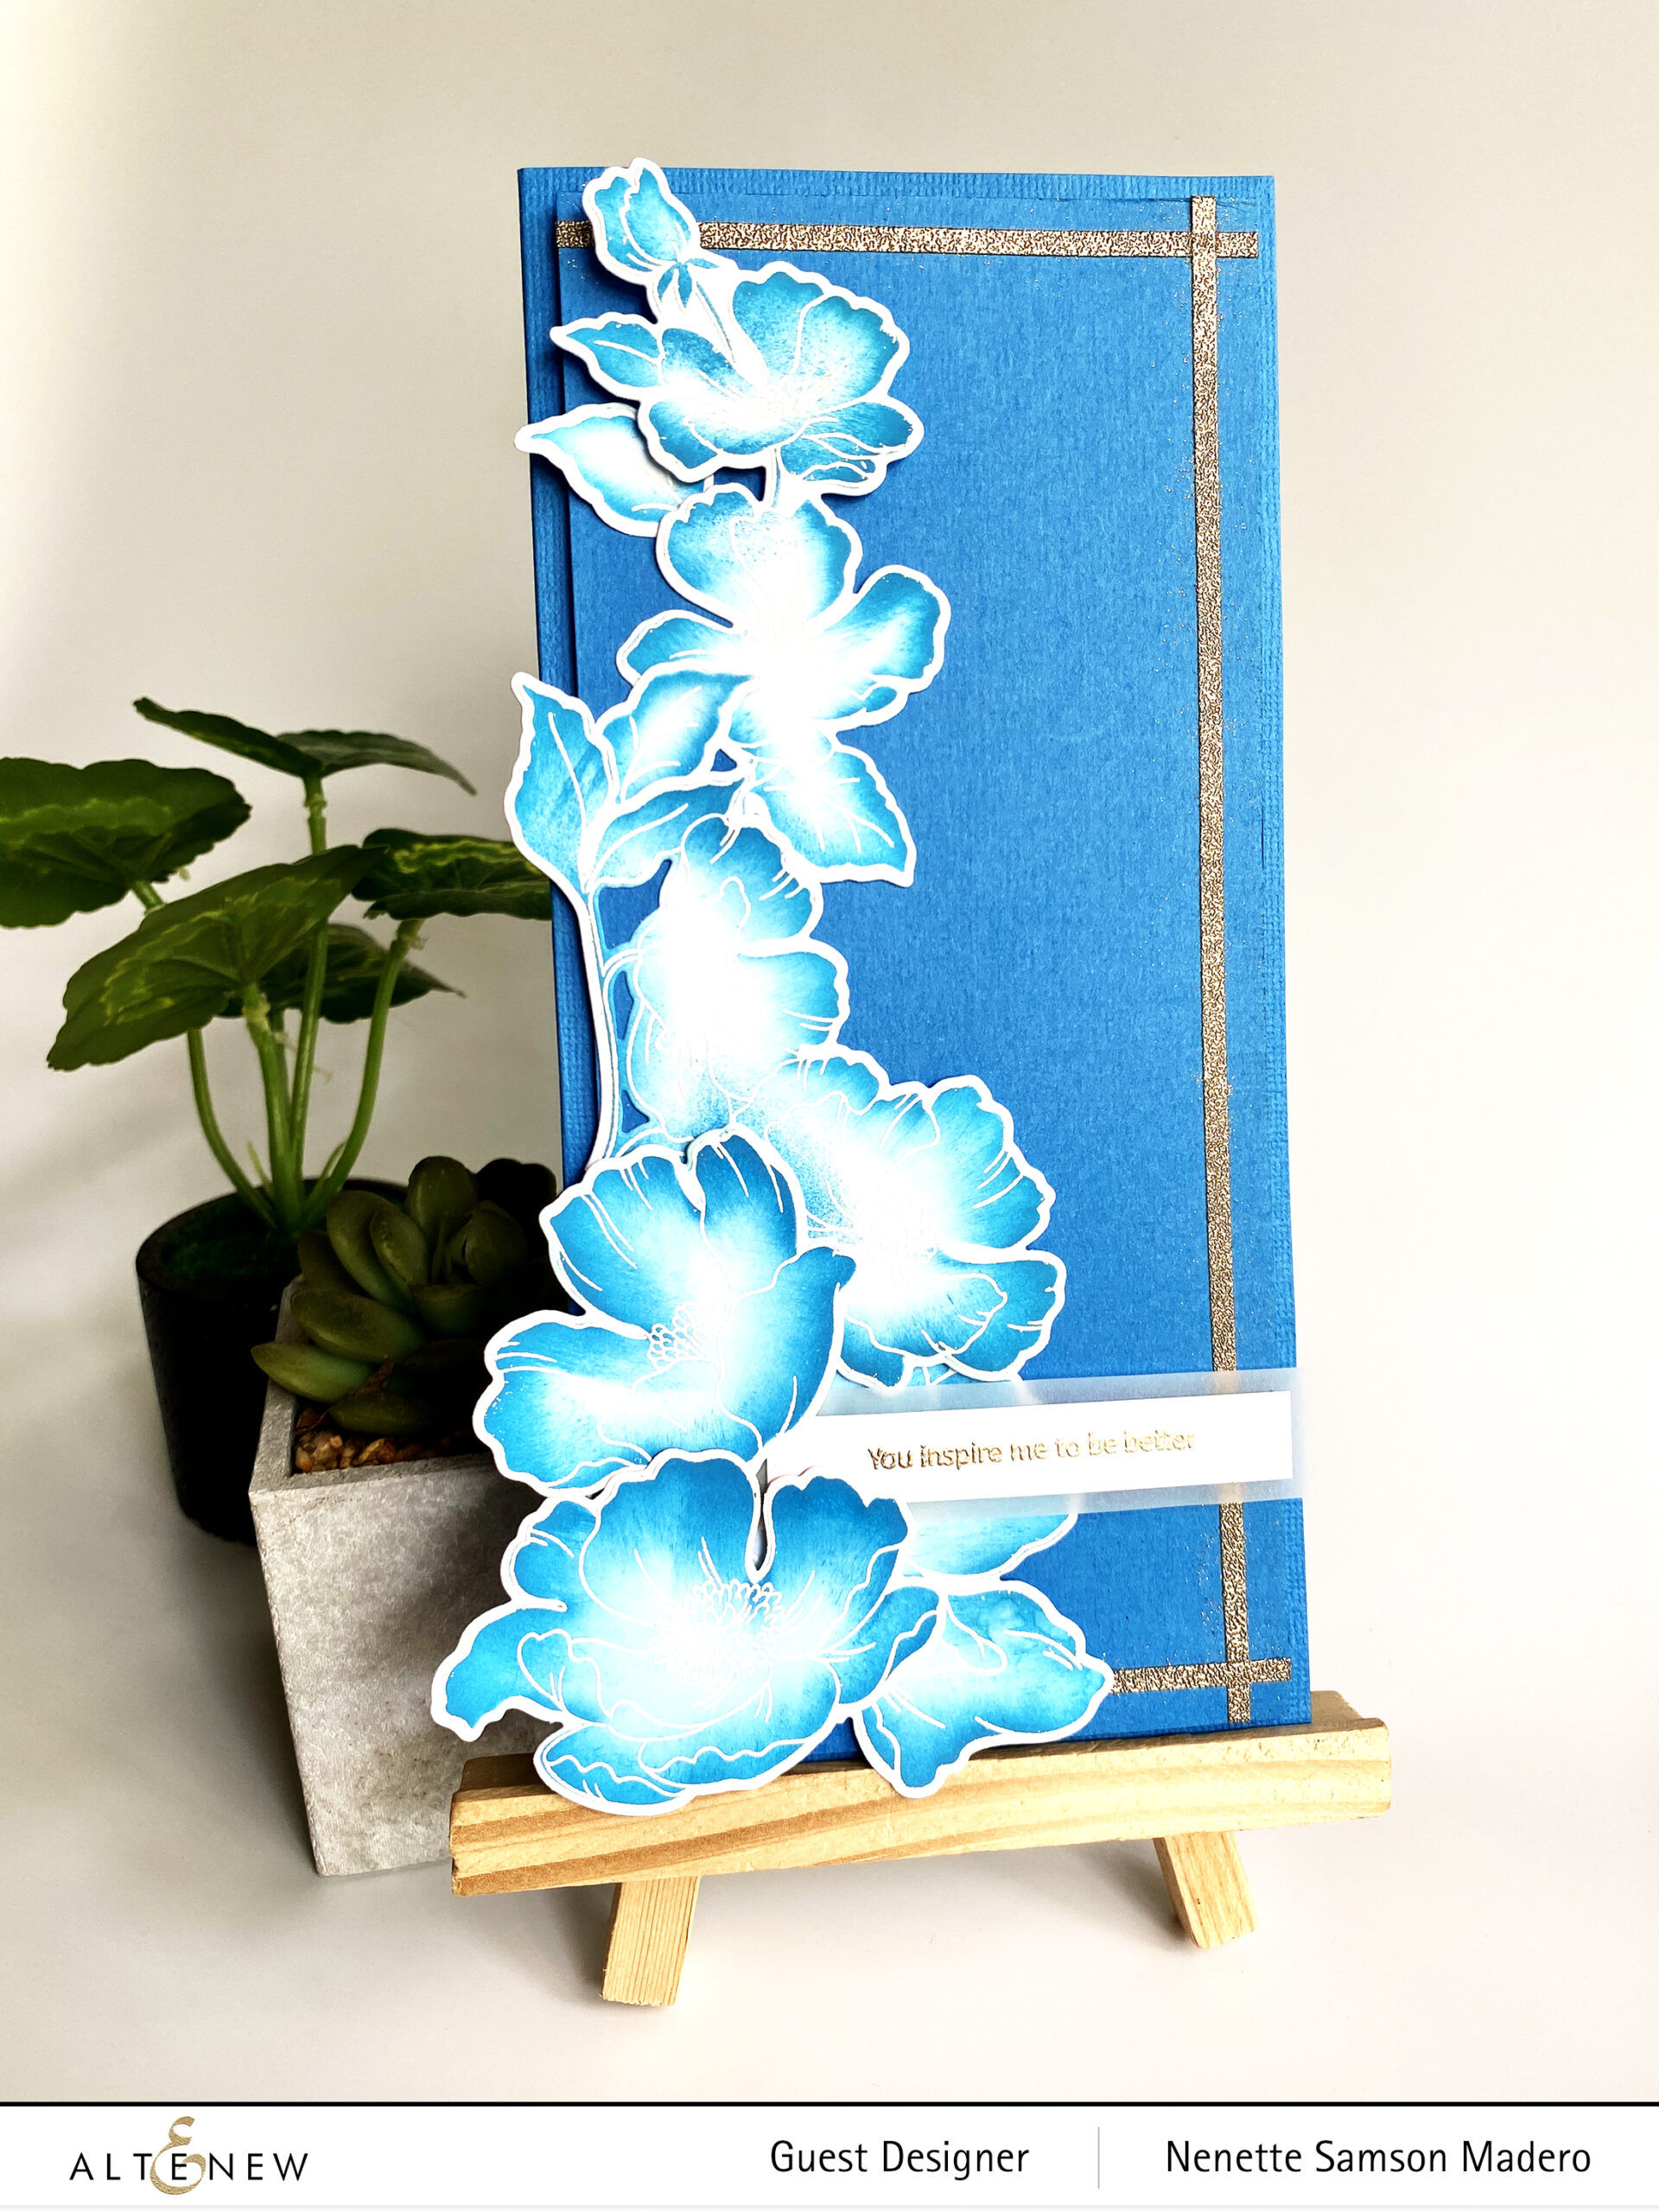
You can watch a video on how to create these flowers by clicking this link: https://youtu.be/AORyc3Rr2hs . I’m very new at making videos so please bear with me. 😥 Do let me know if the video is helpful so that I can plan to include more videos in the future.


PRIZES


Altenew is giving away a $20 gift certificate to 5 lucky winners! Please leave a comment on the Altenew Card Blog by 9/19/2020 for a chance to win.

Altenew will also draw a winner to receive a $15 Altenew gift certificate from the comments left on each designer’s blog on the blog hop list below so don’t forget to leave a comment! I truly love hearing from all of you. All winners will be announced on the Altenew Winners Page on 9/22/2020.

There’s MORE! Altenew will pick 2 of their favorite handmade creations from those who joined the linky party and they will each receive a $15 Altenew gift certificate!

Next stop is Irina Fonina’s blog. For real-time updates, please follow me on IG: My Little Attic Studio. I also host some giveaways there once in a while so hope to see you there, too. 🙂 Thanks so much for dropping by and please stay safe and well. Take care, everyone! Until my next blog post!

BLOG HOP LIST: ALTENEW CARD BLOG | AMBER RAIN DAVIS | NEHA AGGARWAL | NICOLE WATT | ERIN THOMPSON | TERI WILSON | HELEN KALB | RACHAEL SHEDEED | TERRI MARIE KOSZLER | ROSIE NEUSTAEDTER | AMY HILL | NANDINI KARMARKAR | MARYAM SHARARA | NENETTE S. MADERO | IRINA FONINA | VICKI FINGER | VIRGINIA LU


IG: MY LITTLE ATTIC STUDIO | FB: MY LITTLE ATTIC STUDIO | WWW.MYLITTLEATTIC.COM

ALTENEW SEPT 2020 STAMPS/DIES/ EMBOSSING FOLDERS RELEASE BLOG HOP

ALTENEW SEPT 2020 STAMPS/DIES/ EMBOSSING FOLDERS RELEASE BLOG HOP

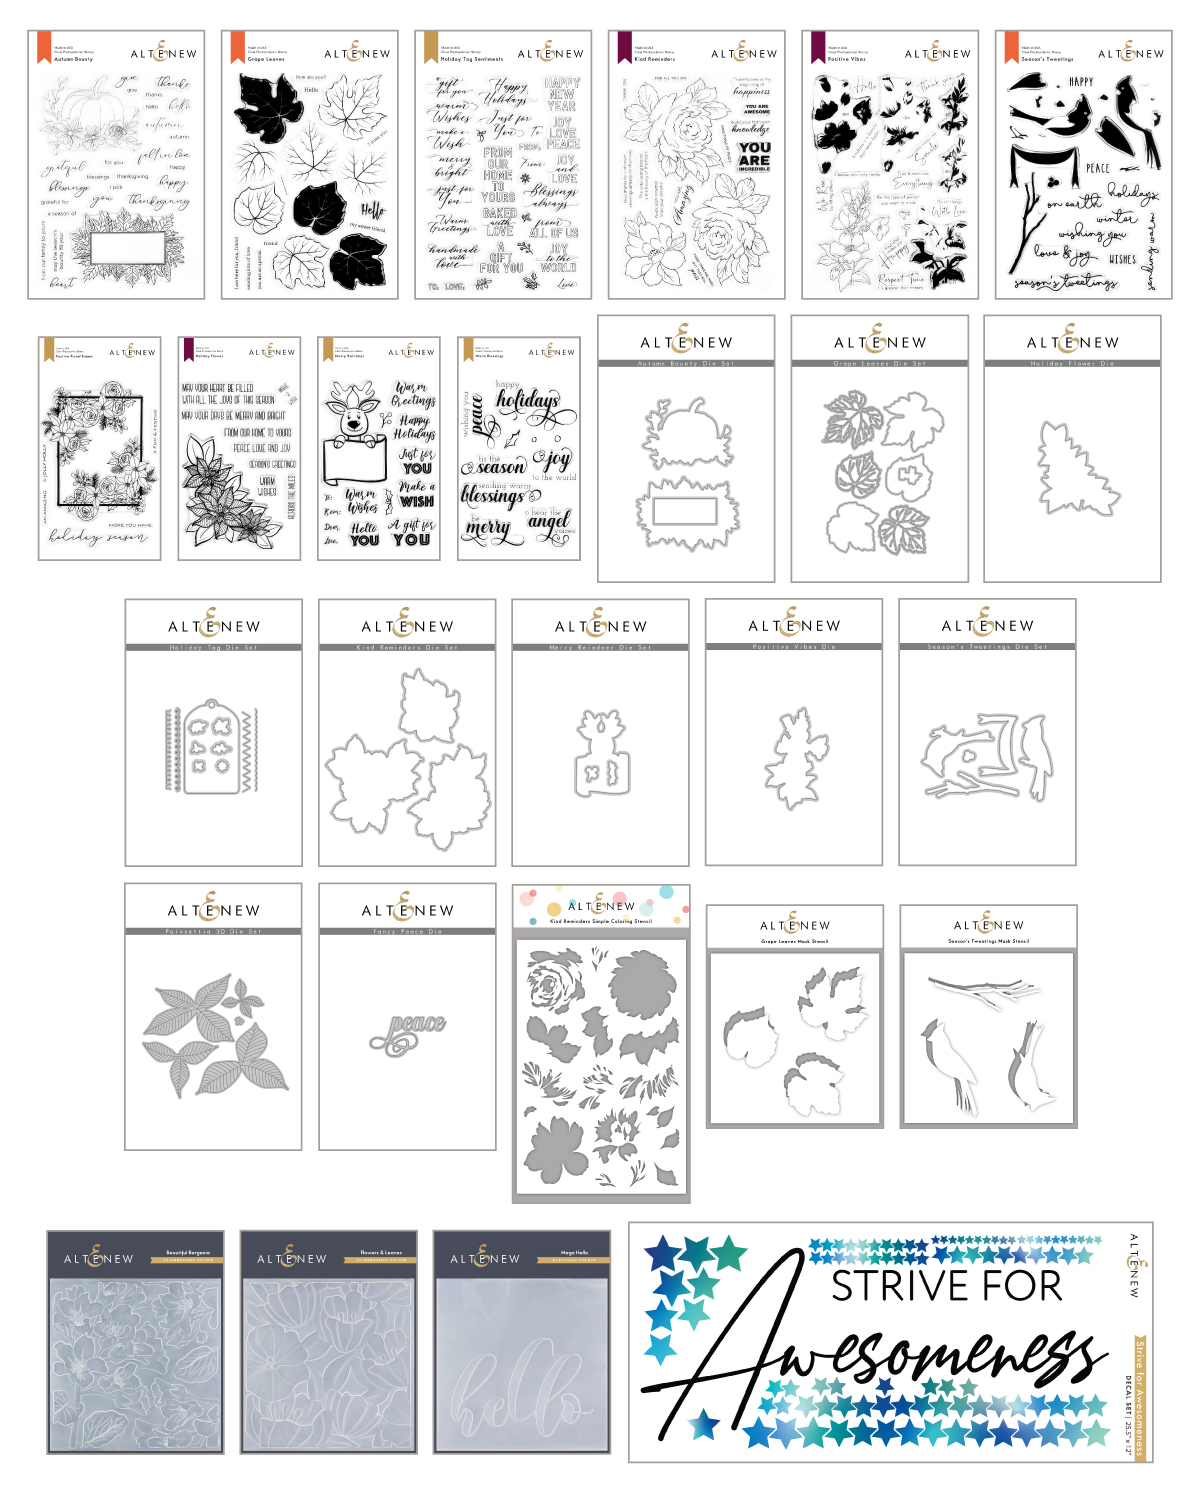
Hello everyone! I hope you are all safe and well. I’m thrilled to be a part of the September release from Altenew. If you just came from the blog of the talented Norine Borys, then you’re on the right track. This release is filled with beautiful stamps, dies and stencils that can be used for seasonal cards or everyday cards. Take a look at the September 2020 Beauty of the Season release!!!

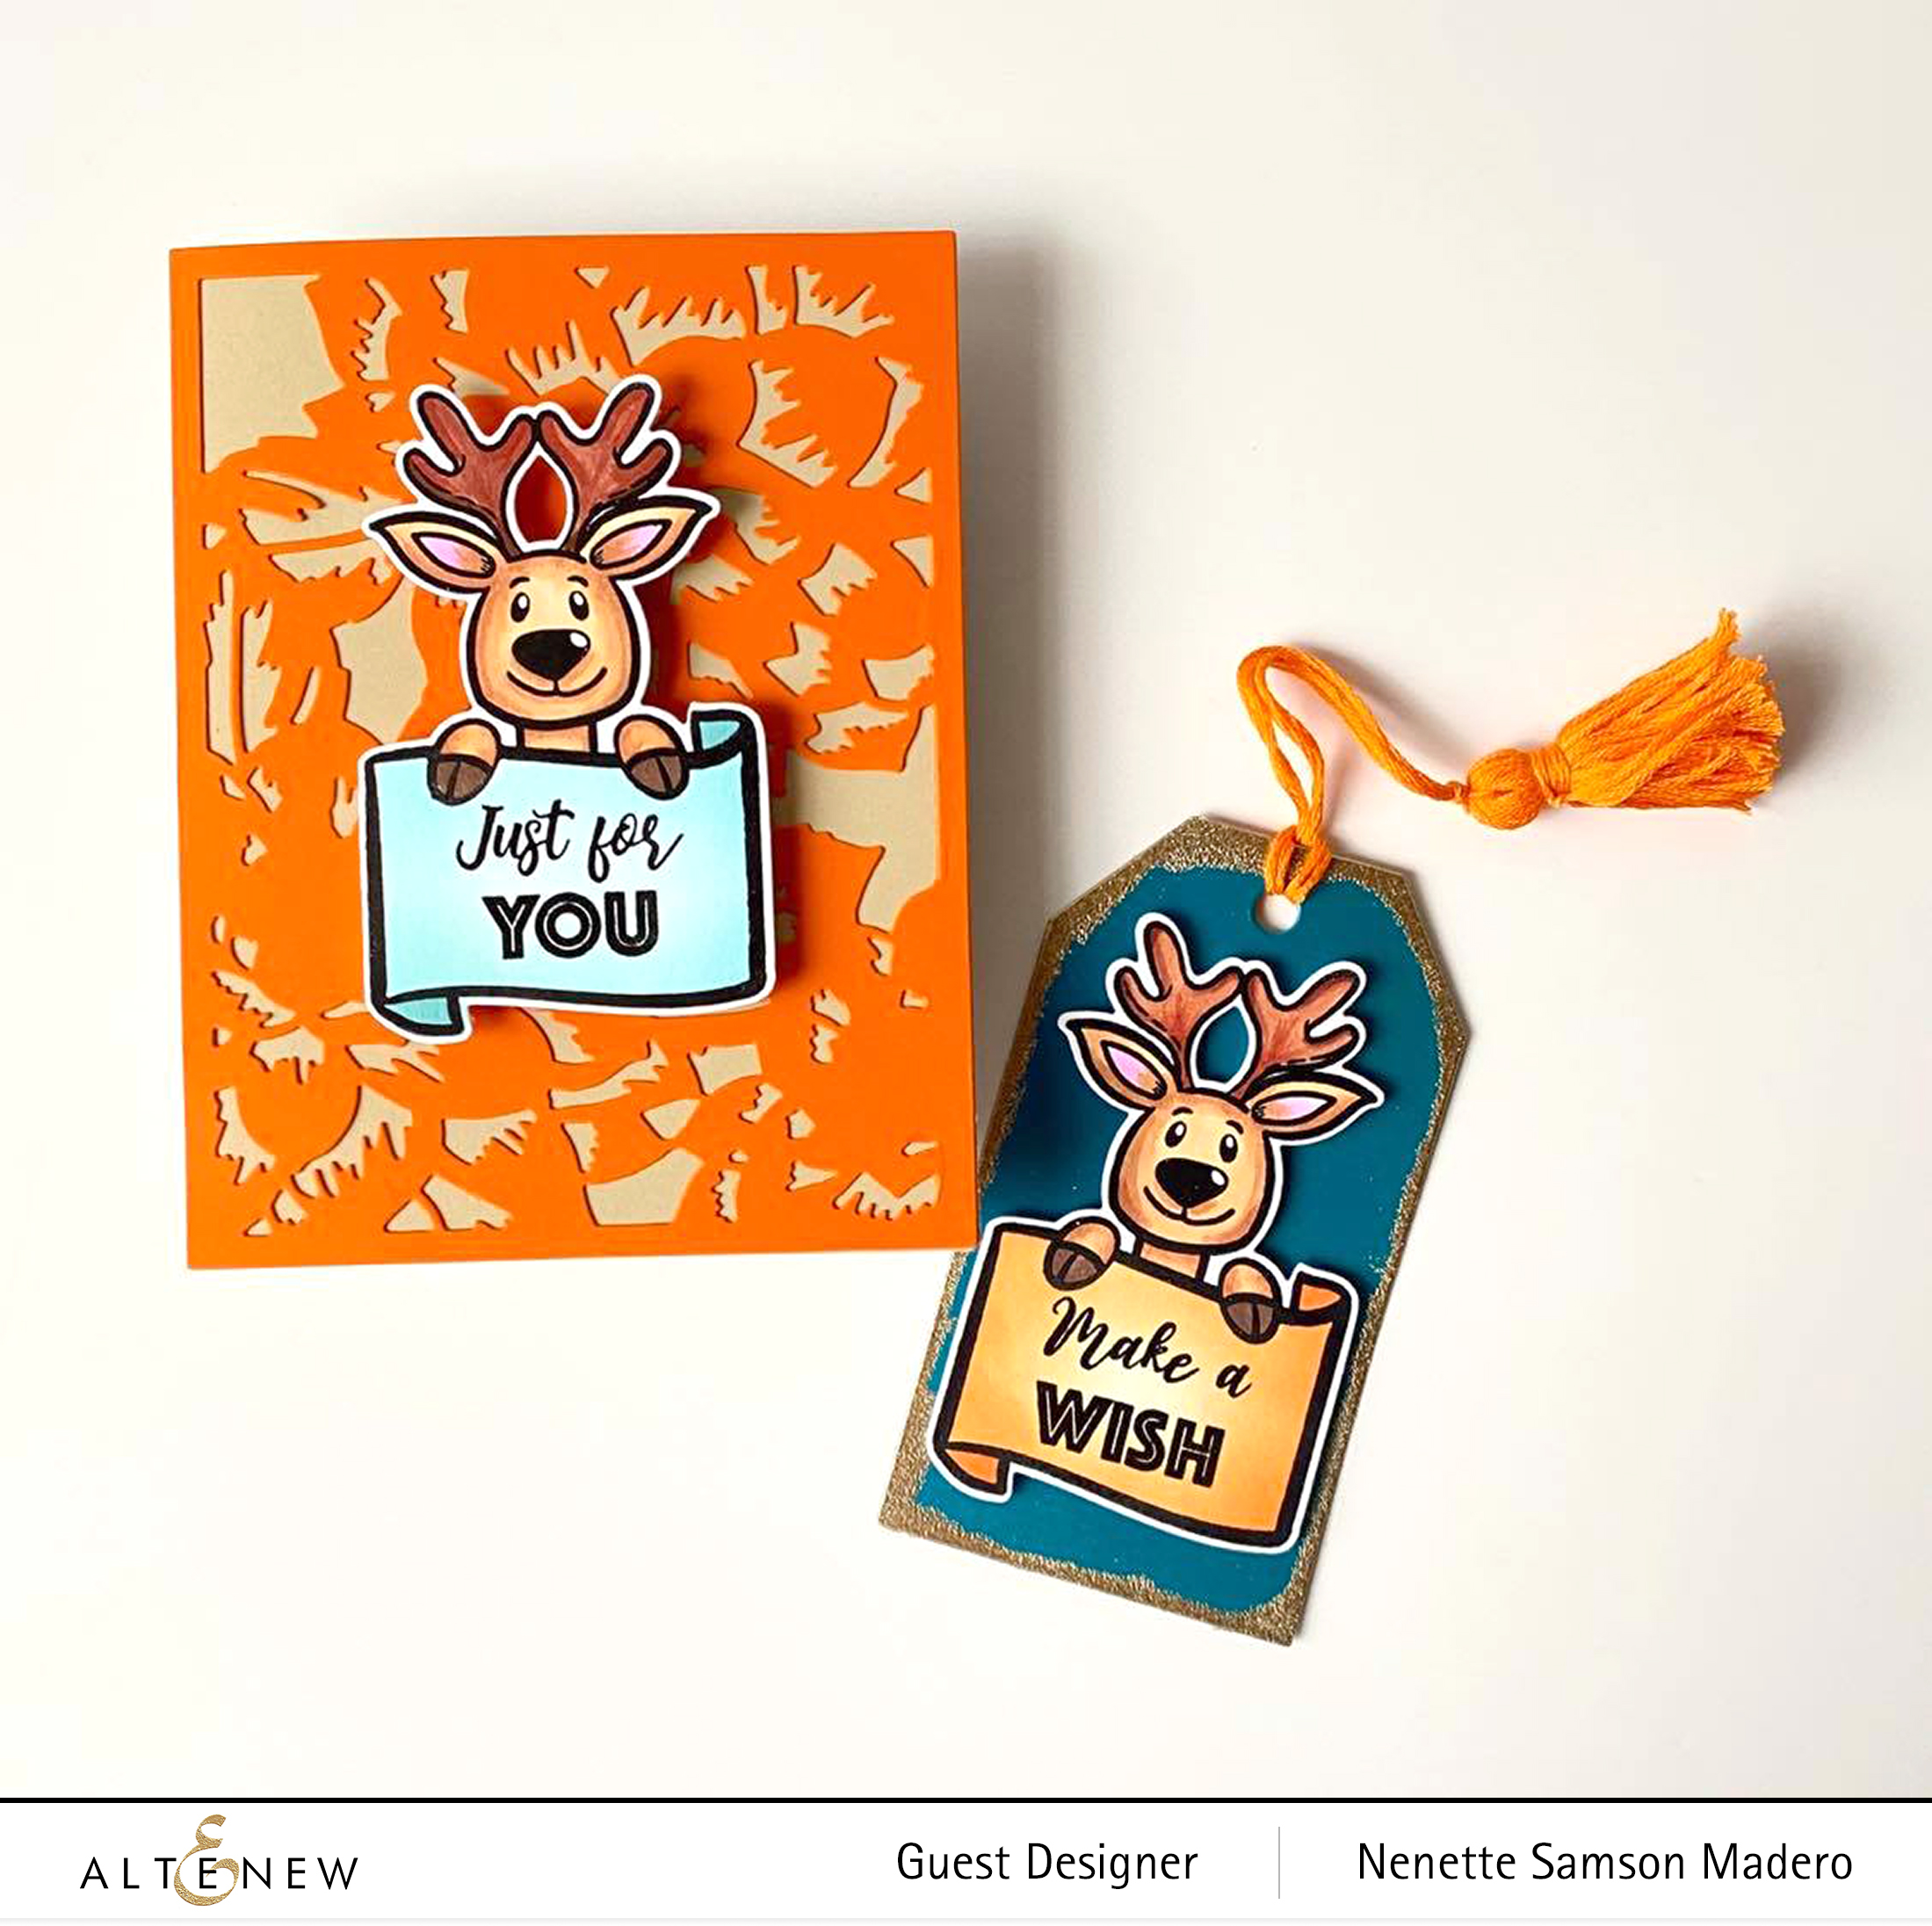
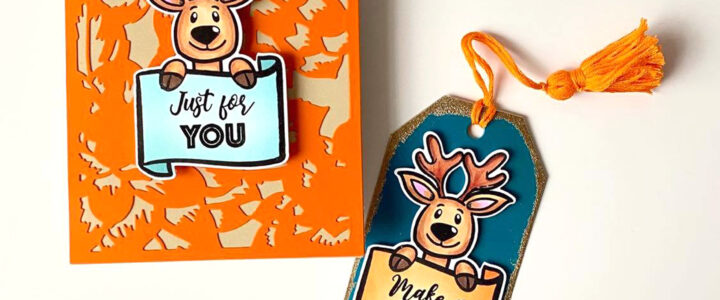
I love that Altenew released some Christmas themed stamp sets this early!!! Year after year, I vowed to start my Christmas cards/tags early so that I won’t get stressed out come December so the timing of this release is perfect. ❤️ Below are some samples using the Merry Raindeer stamp and die. This is an adorable stamp set with lots of greetings that you can mix and match. Below are samples on how you can use it on a card or as a tag.


JUST FOR YOU/MAKE A WISH


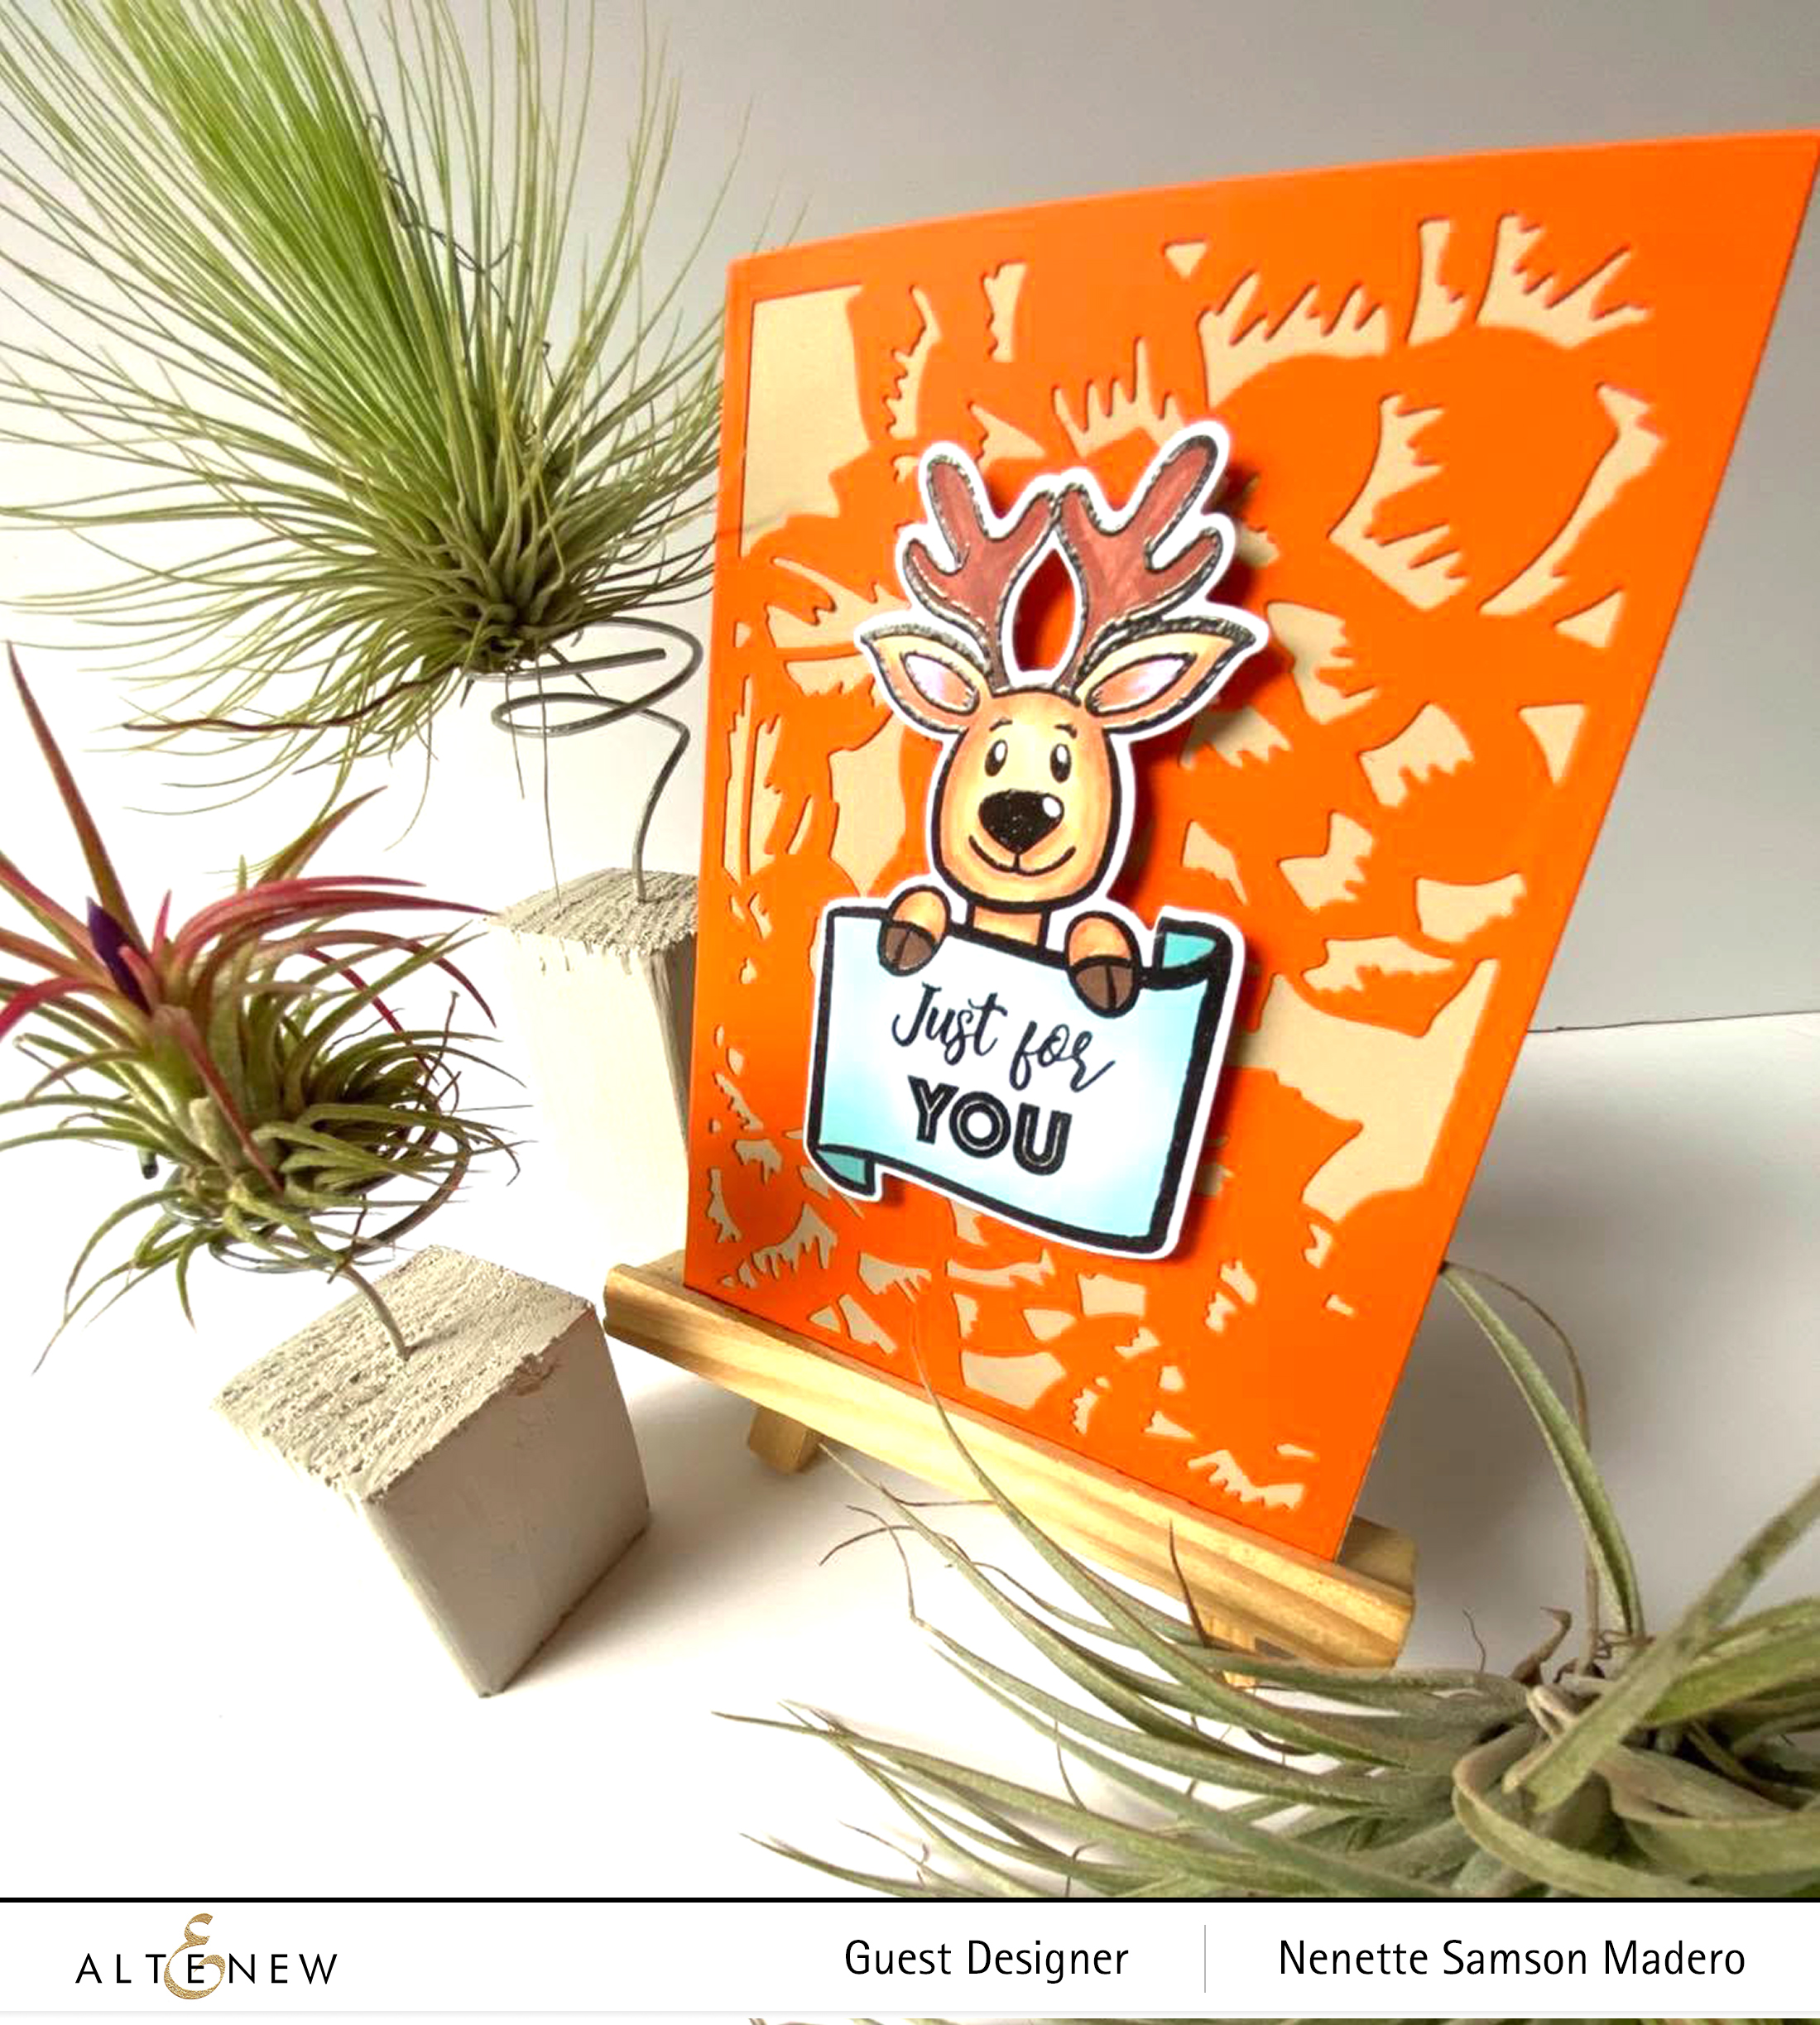
I stamped the reindeer image twice using the Obsidian ink then embossed with clear embossing powder. The following colors were used to color the head, antlers and hooves–COPIC MARKERS E-53,33,13,18,17,47,29 AND RV 63. After coloring, the reindeer was masked so that the banner can be colored using Altenew inks and a blender brush.

For the background of the card, I used the Layered Floral cover die B. The edge of the tag was inked with Versamark ink then heat embossed using Rose Gold embossing powder.


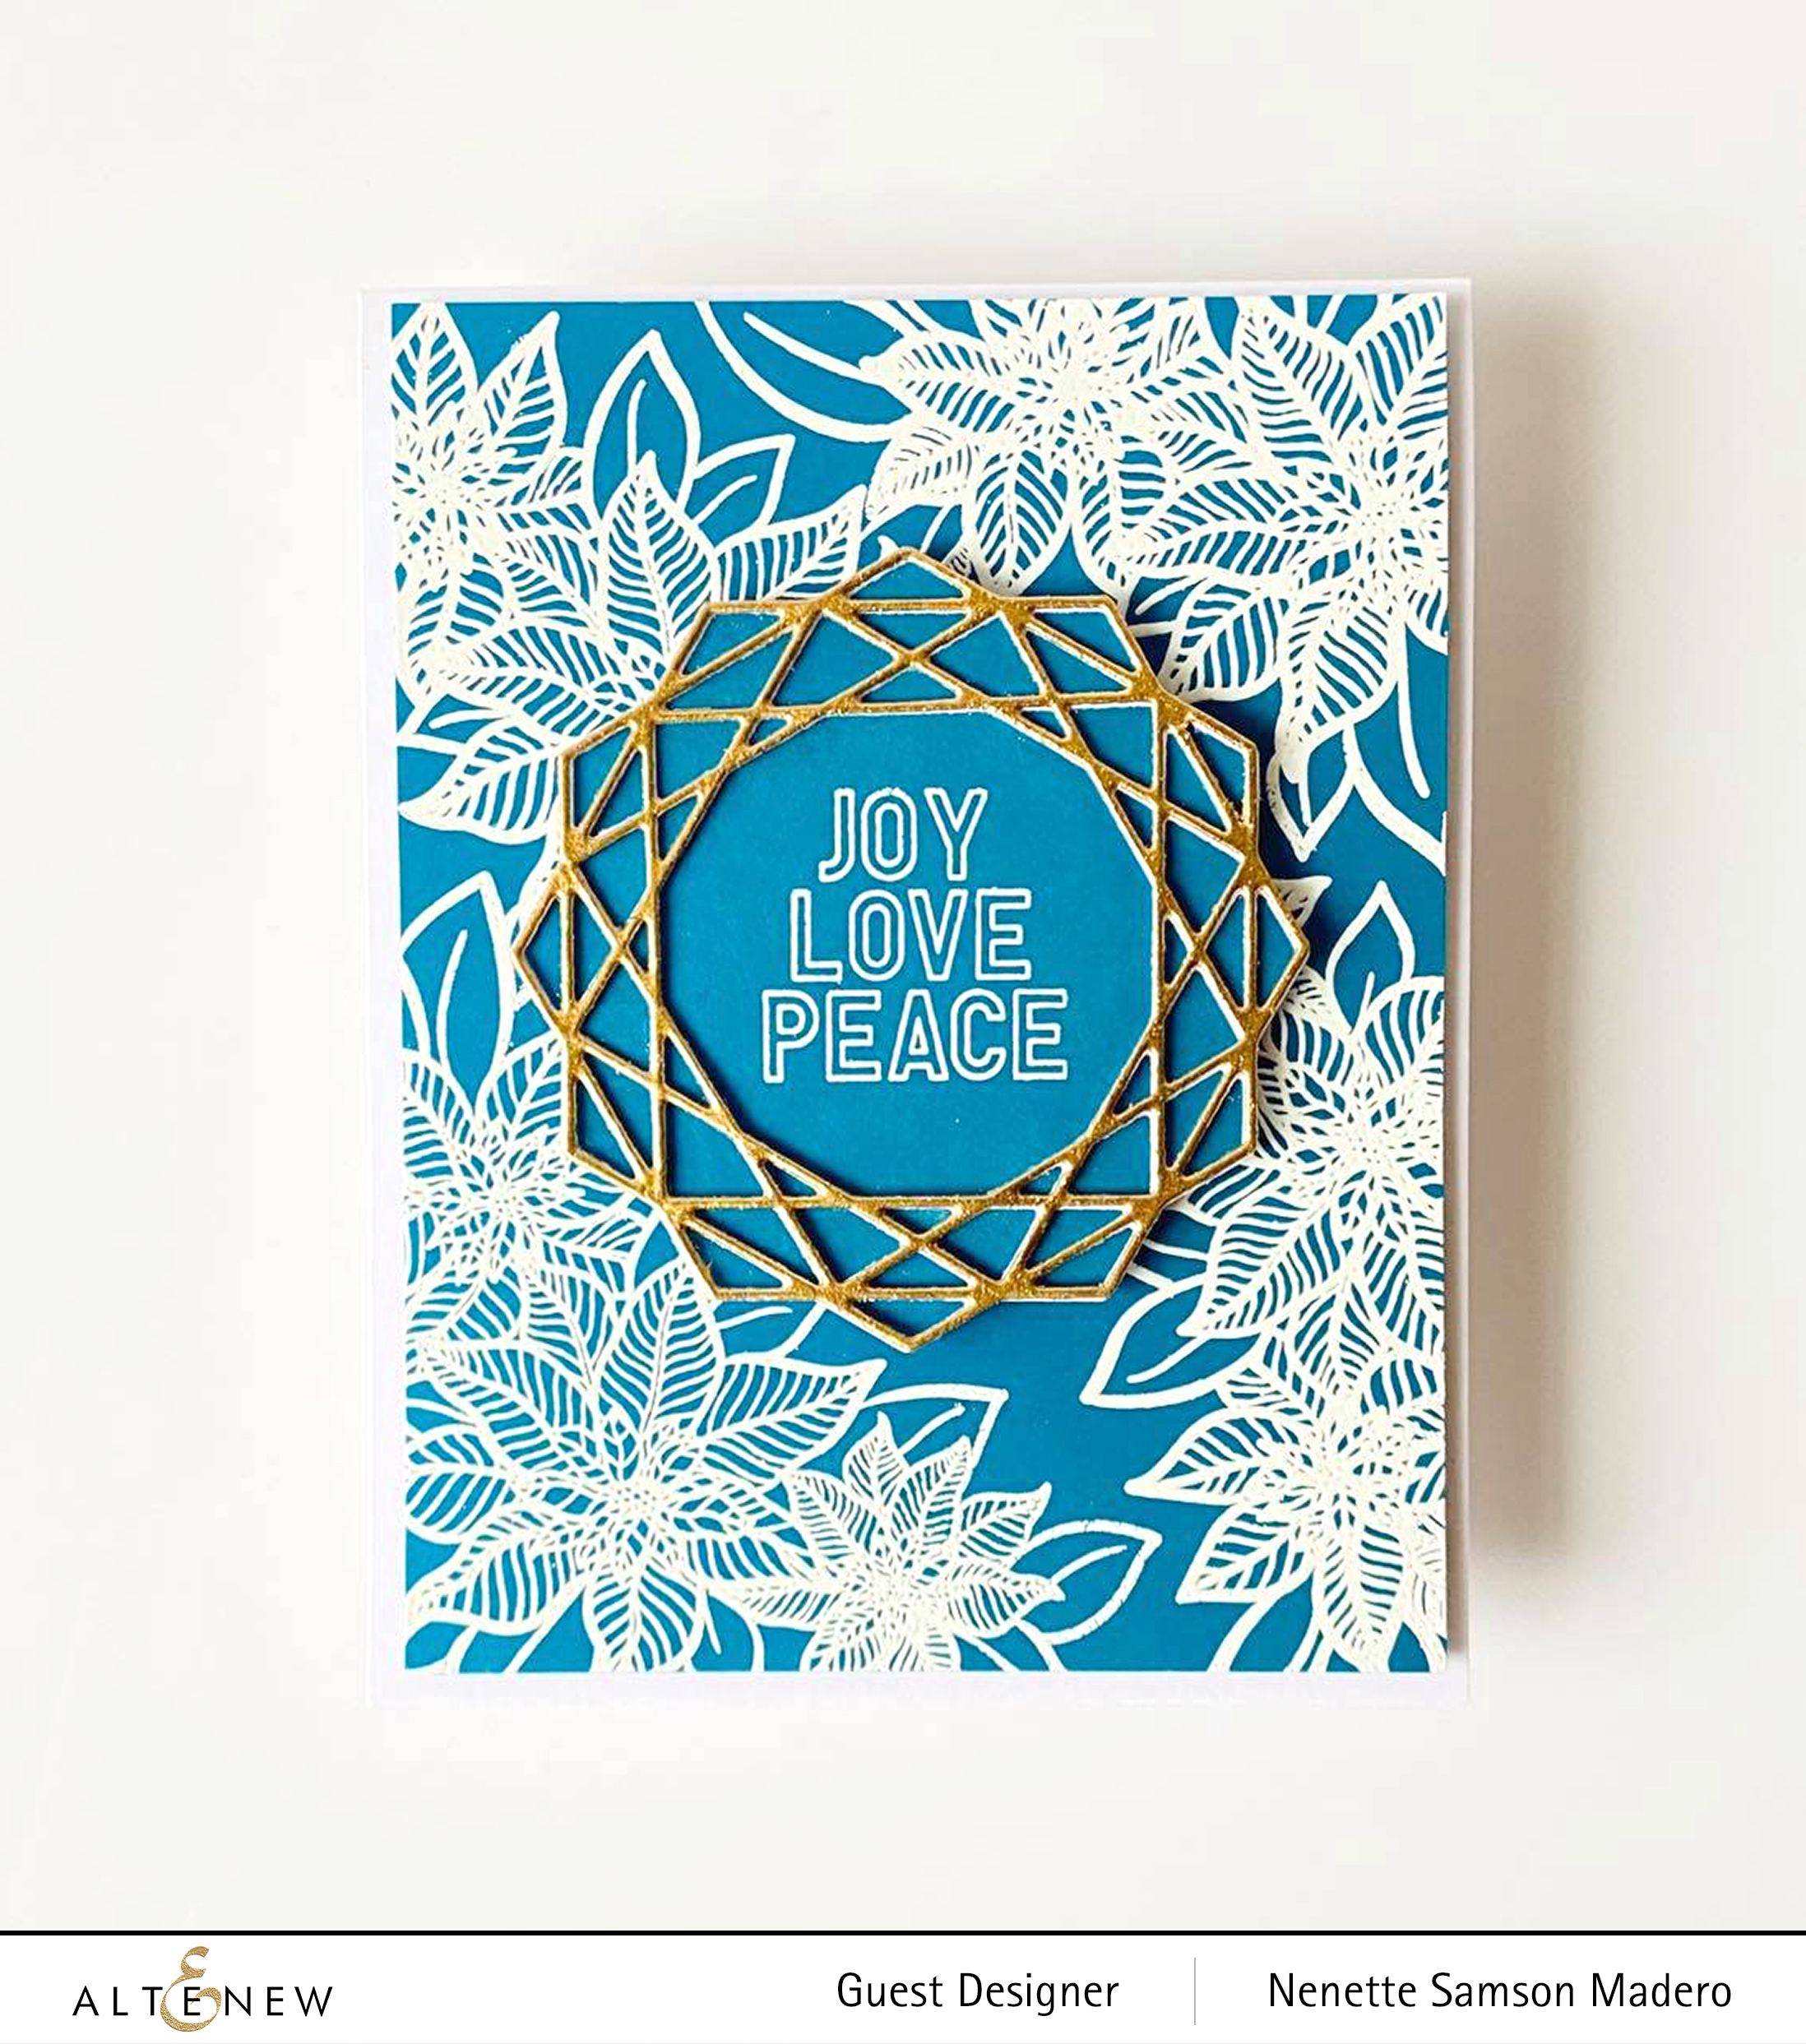
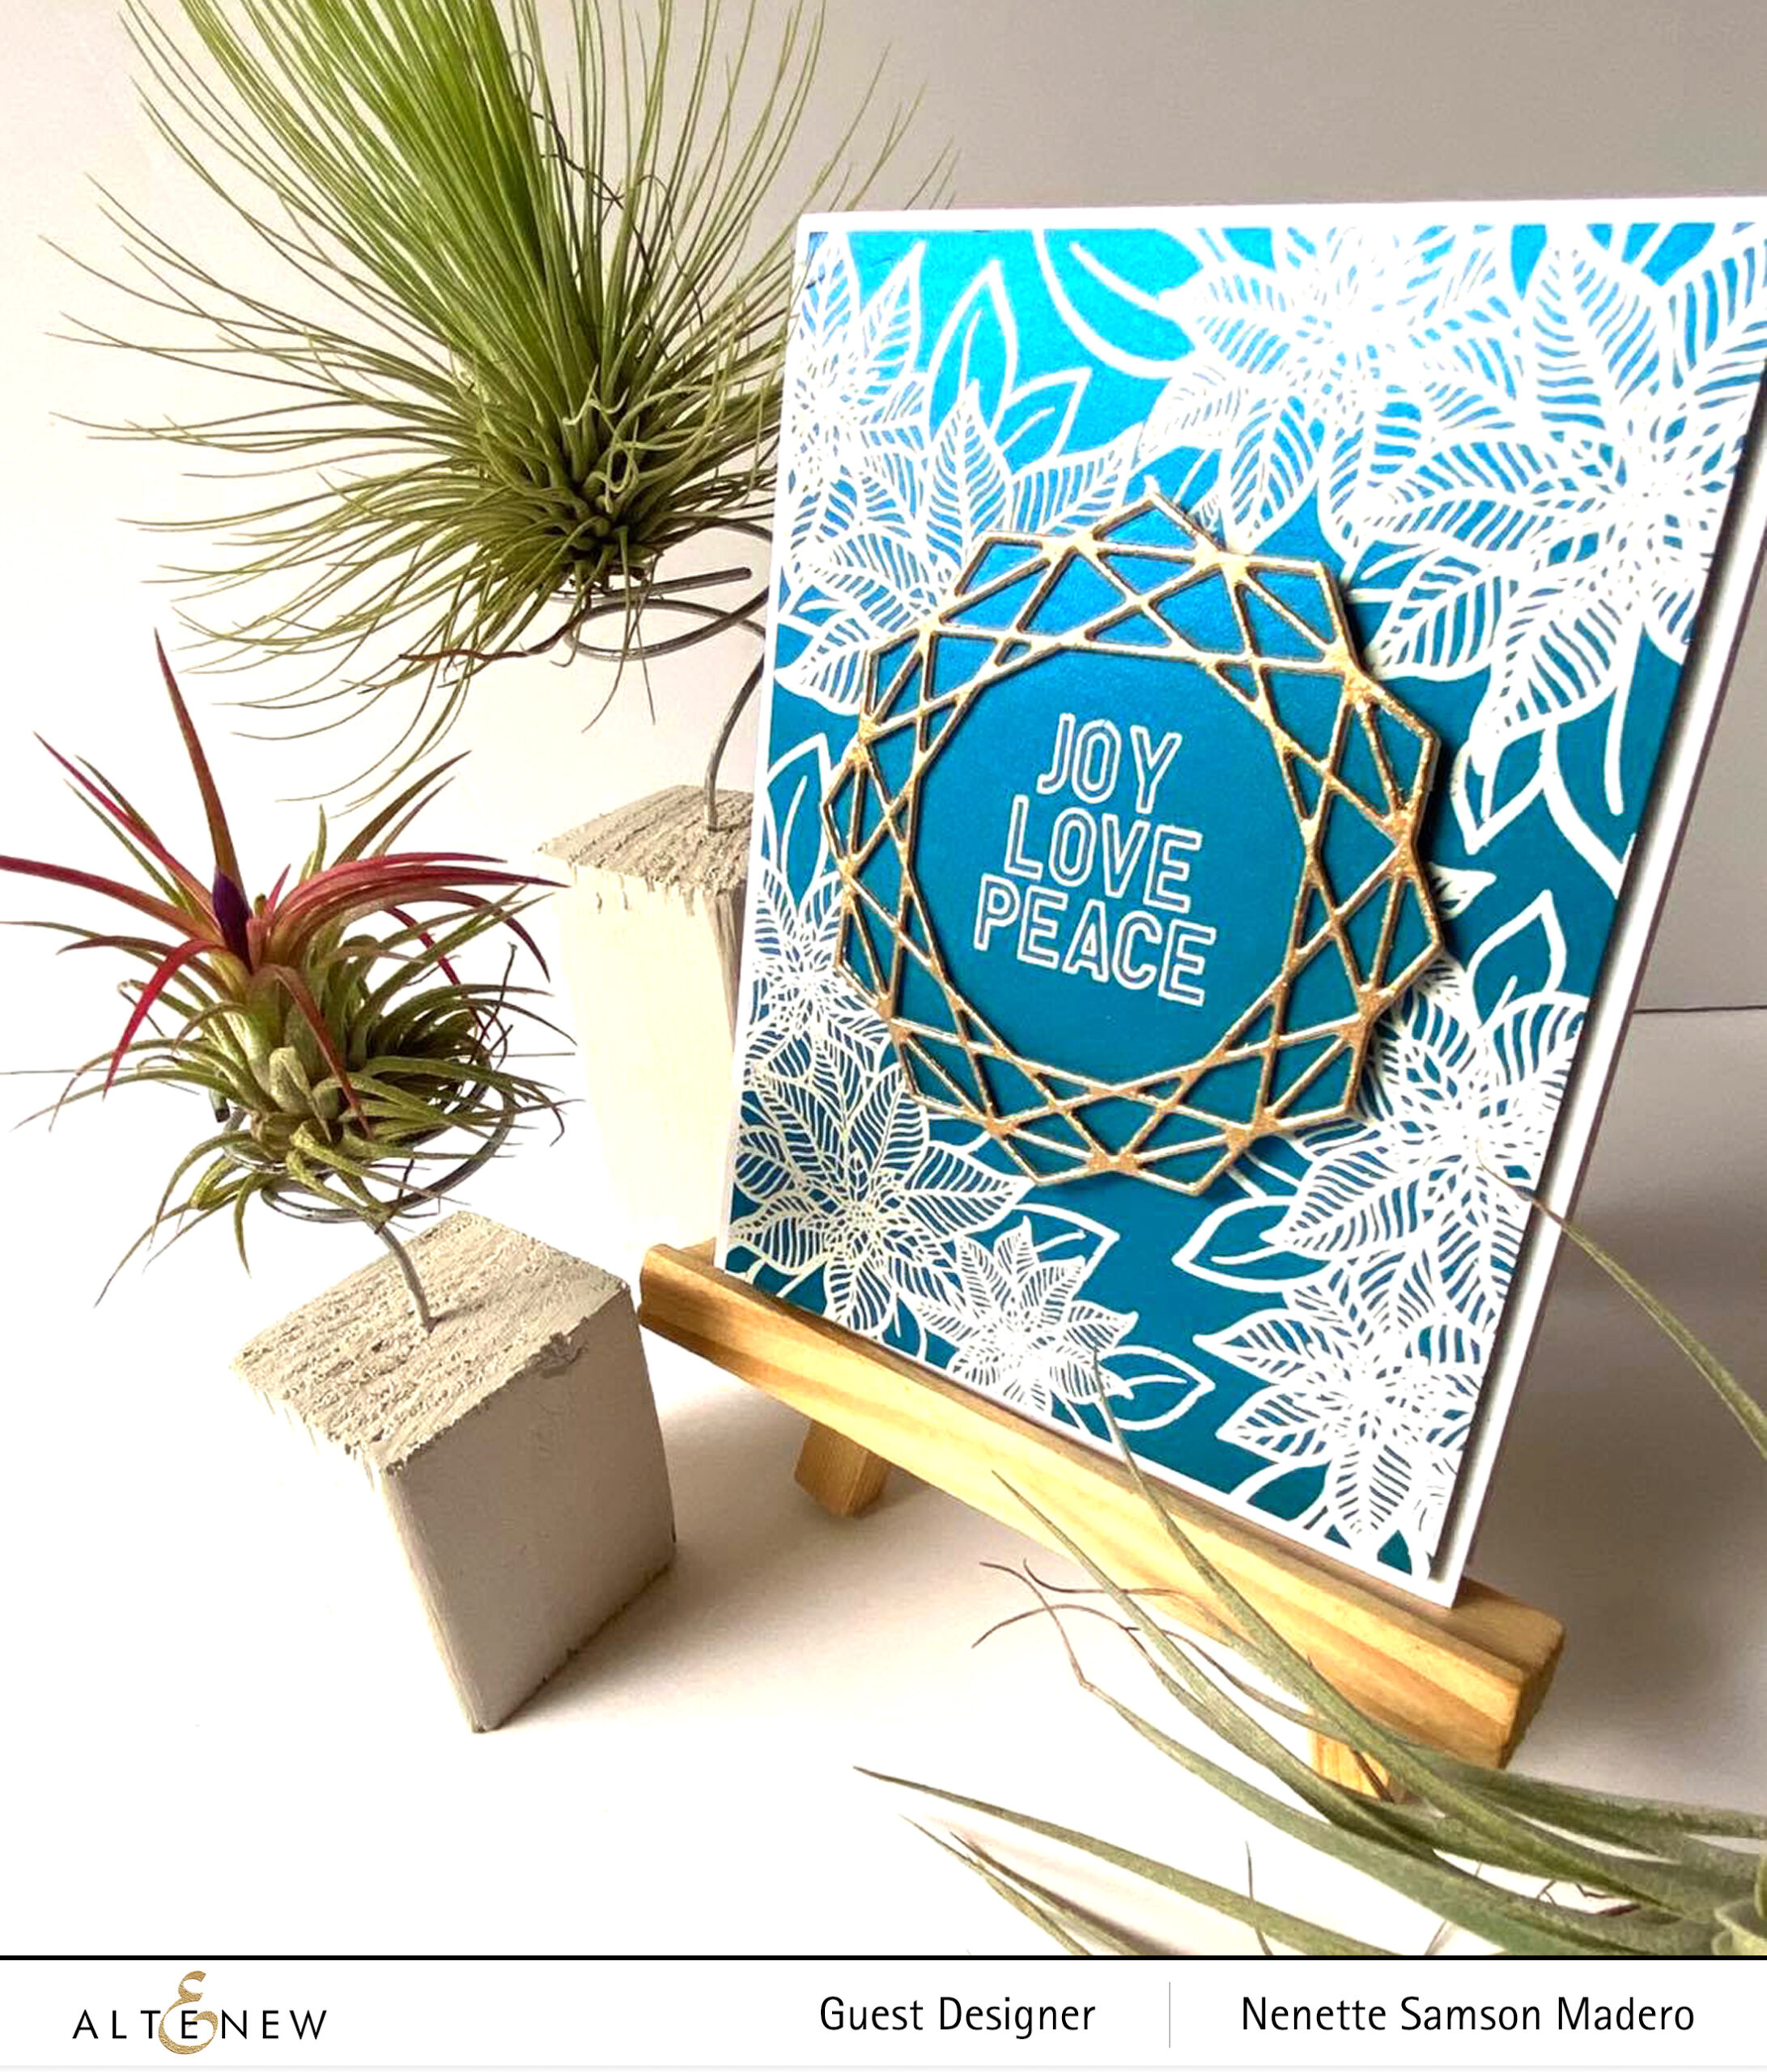
JOY LOVE PEACE


The Holiday Flower stamp set was used to create the background for this card. I used Versamark ink to stamp the poinsettia clusters then heat embossed it using white embossing powder. The gem frame die fitted perfectly on top one of the soda top nesting dies.

I wanted some contrast so I inked up the gem frame die with Versamak Ink then embossed it using Rose Gold embossing powder. The sentiment from the Holiday Tag Sentiments stamp set was stamped and embossed then the gem frame was adhered using glue. Foam tape was used to adhere the sentiment to the card front for added dimension.


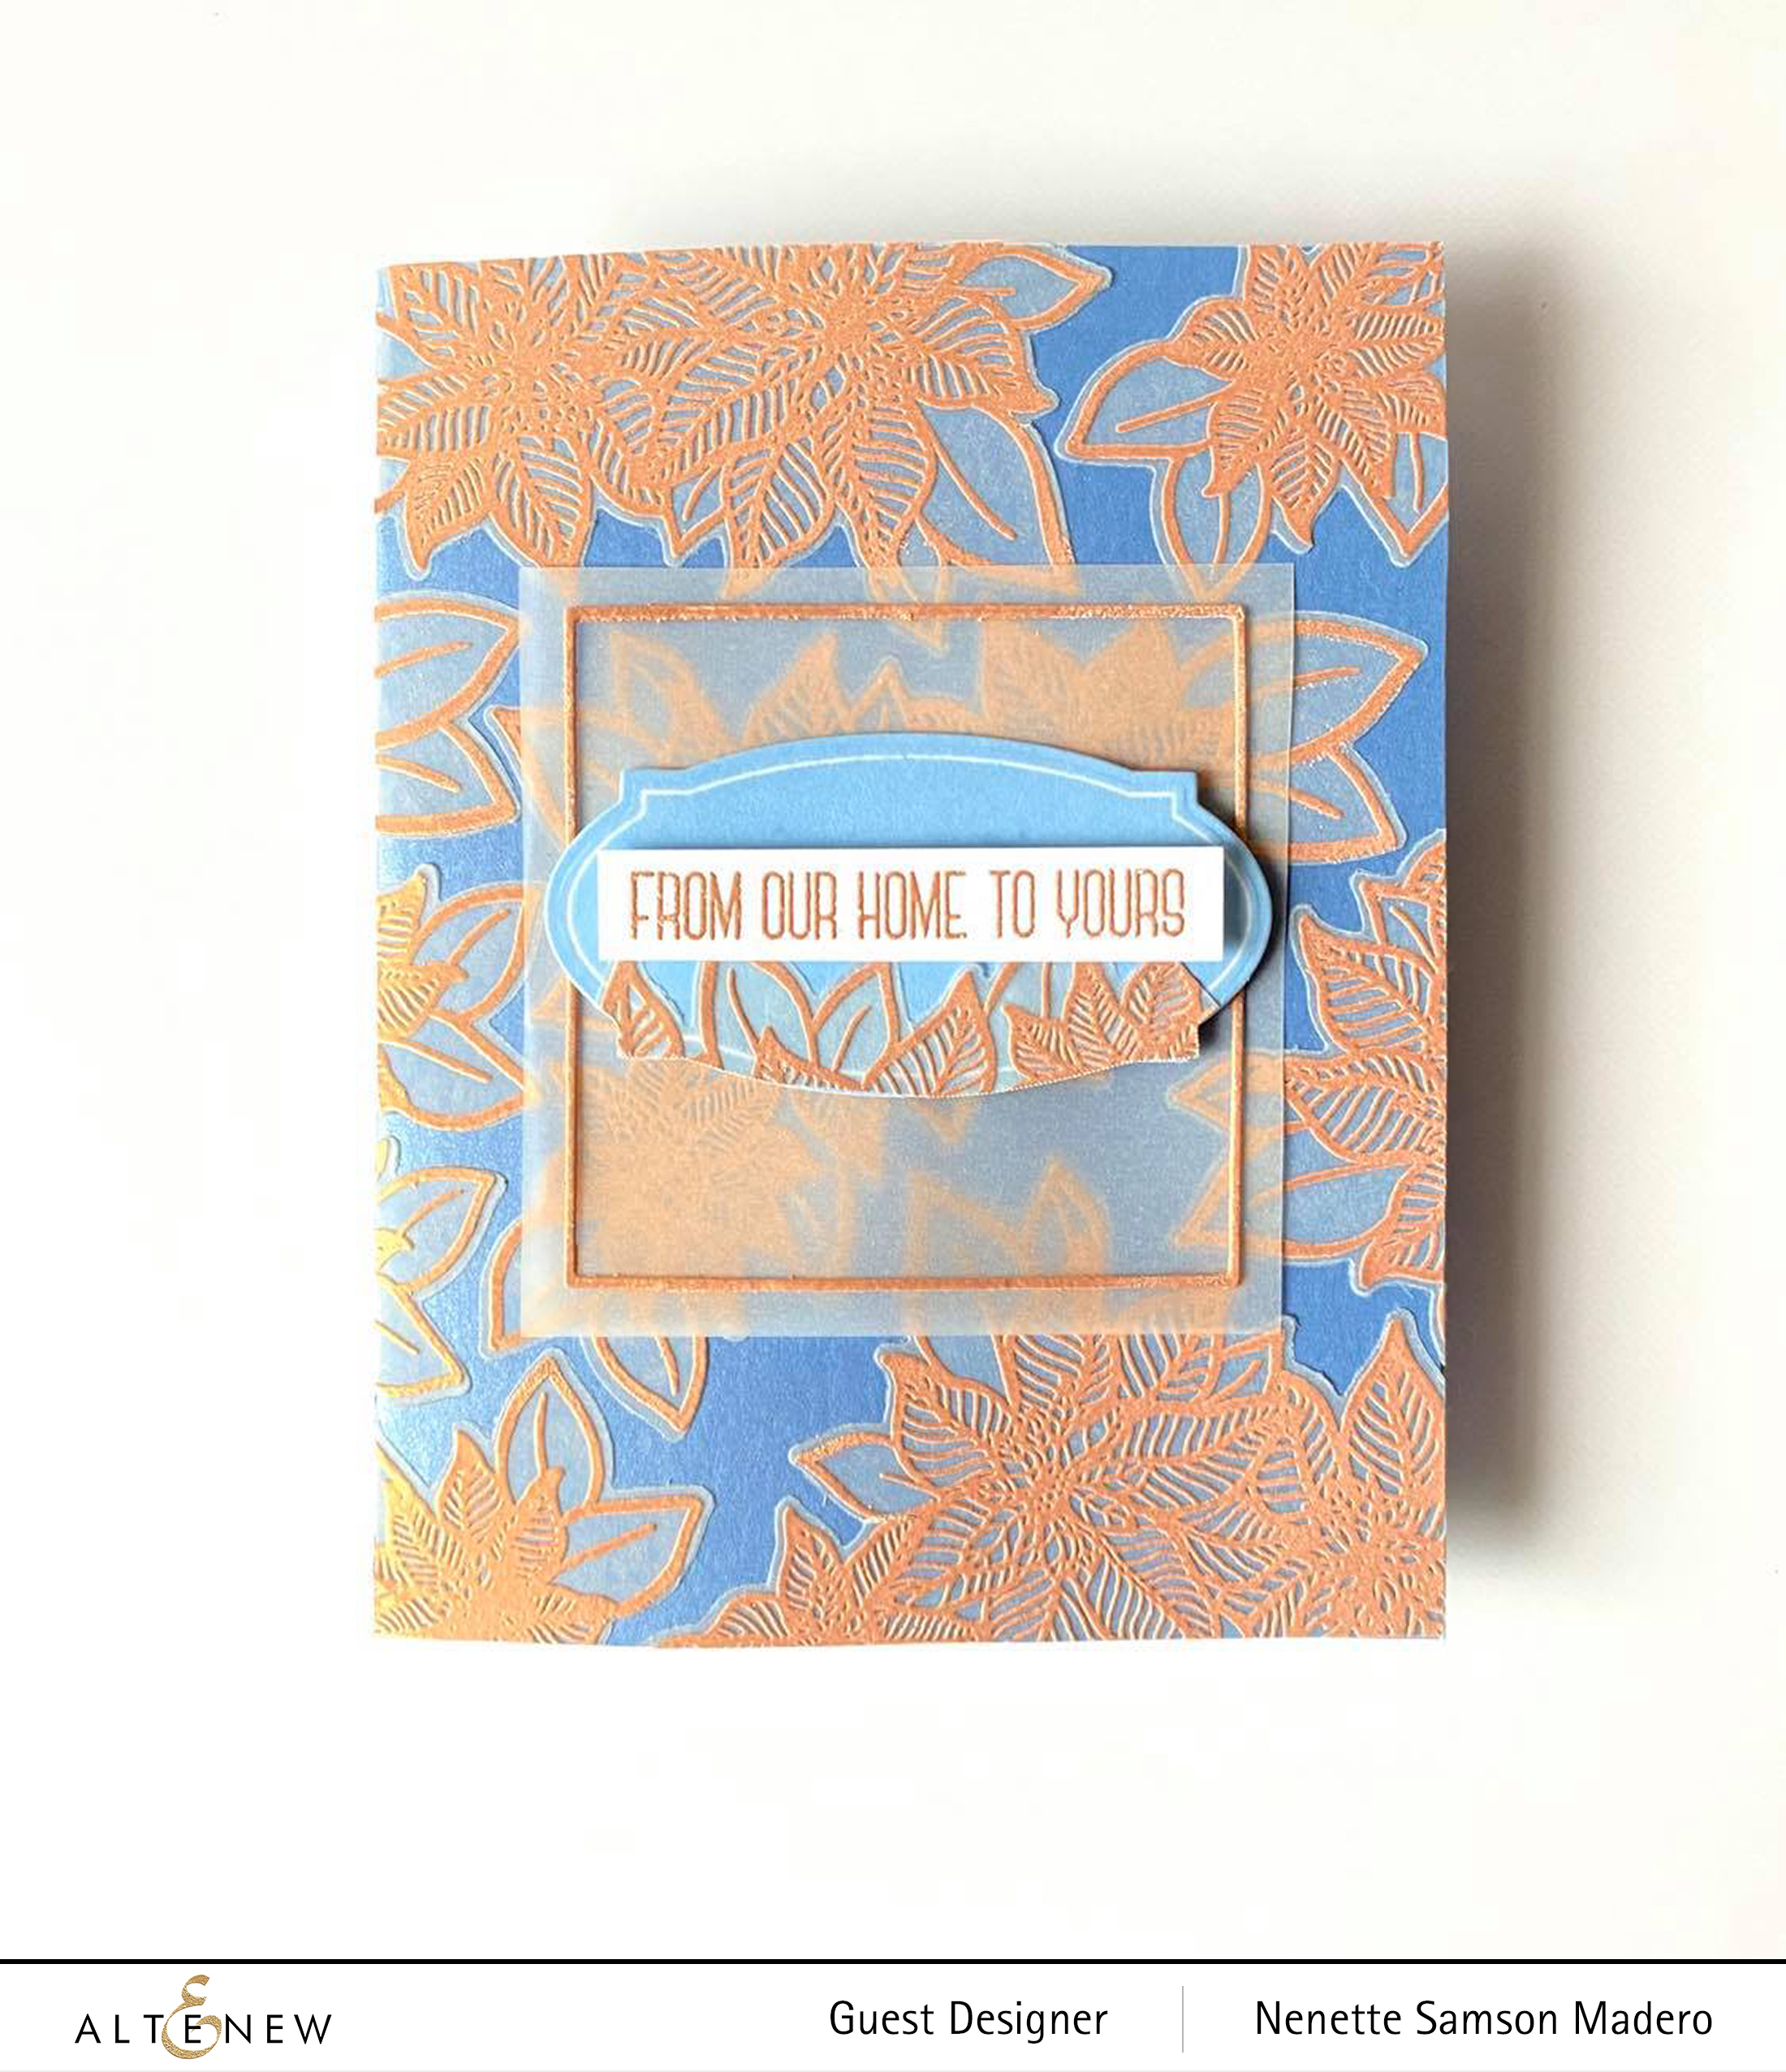
FROM OUR HOME TO YOURS


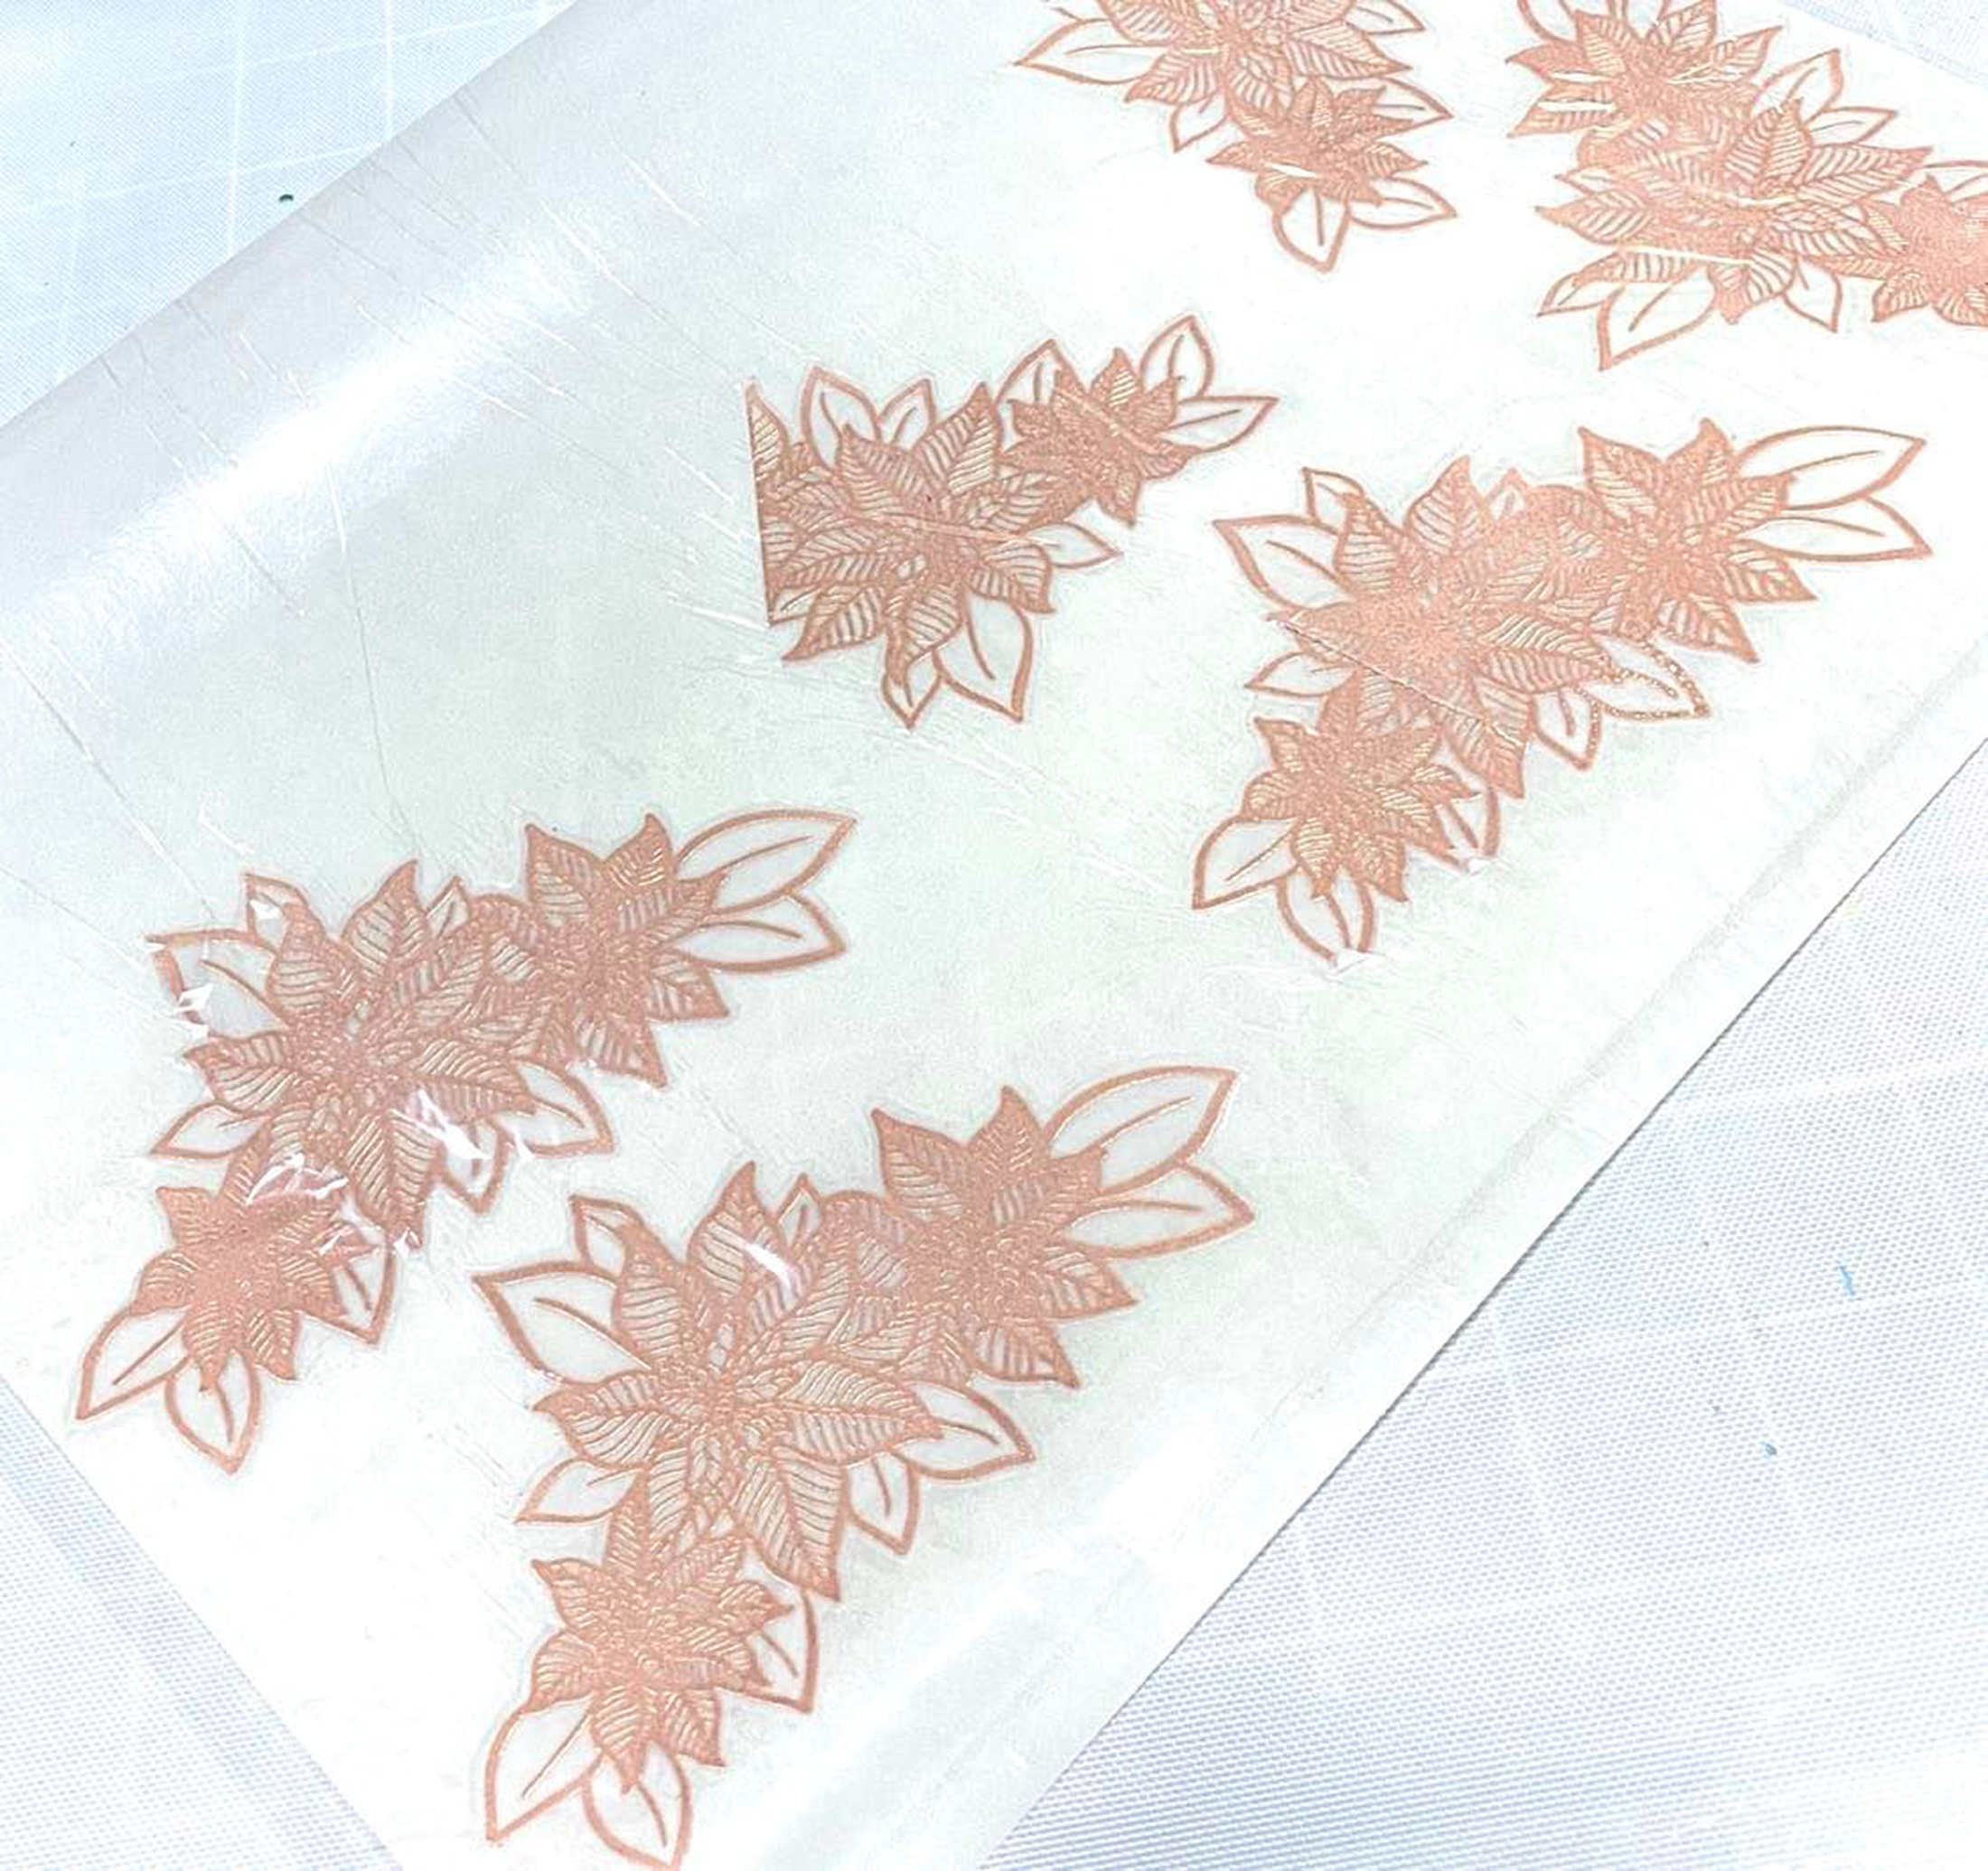
I love the look of sheer lace and stamping the image from the Holiday flowers stamp on vellum gives this effect. I stamped several images on vellum then heat embossed using Golden Peach embossing powder. These were then die cut using the coordinating die. A good way to adhere vellum onto cardstock is to use the Zyron sticker maker.

After embossing the image and die cutting the vellum, I ran them through the zyron machine and made the die cuts into stickers. This way, you don’t get to see the adhesive behind the vellum. I also used the Apothecary Labels stamp and die set for the tag and the Fine Frames Square die to add a frame around the tag. Versamark Ink was added to this thin frame then embossed with Golden Peach embossing powder to match the flowers. These were added to the card front using foam squares.


WE RISE BY LIFTING OTHERS


The Positive Vibes stamp is easy to align. The image was stamped then partially die cut. The Rounded rectangle die was used to cut the other side of the stamped image. The card front was embossed using We R Memory Keepers Quilted embossing folder for added texture. The sentiment was stamped and embossed using Rose Gold embossing powder.


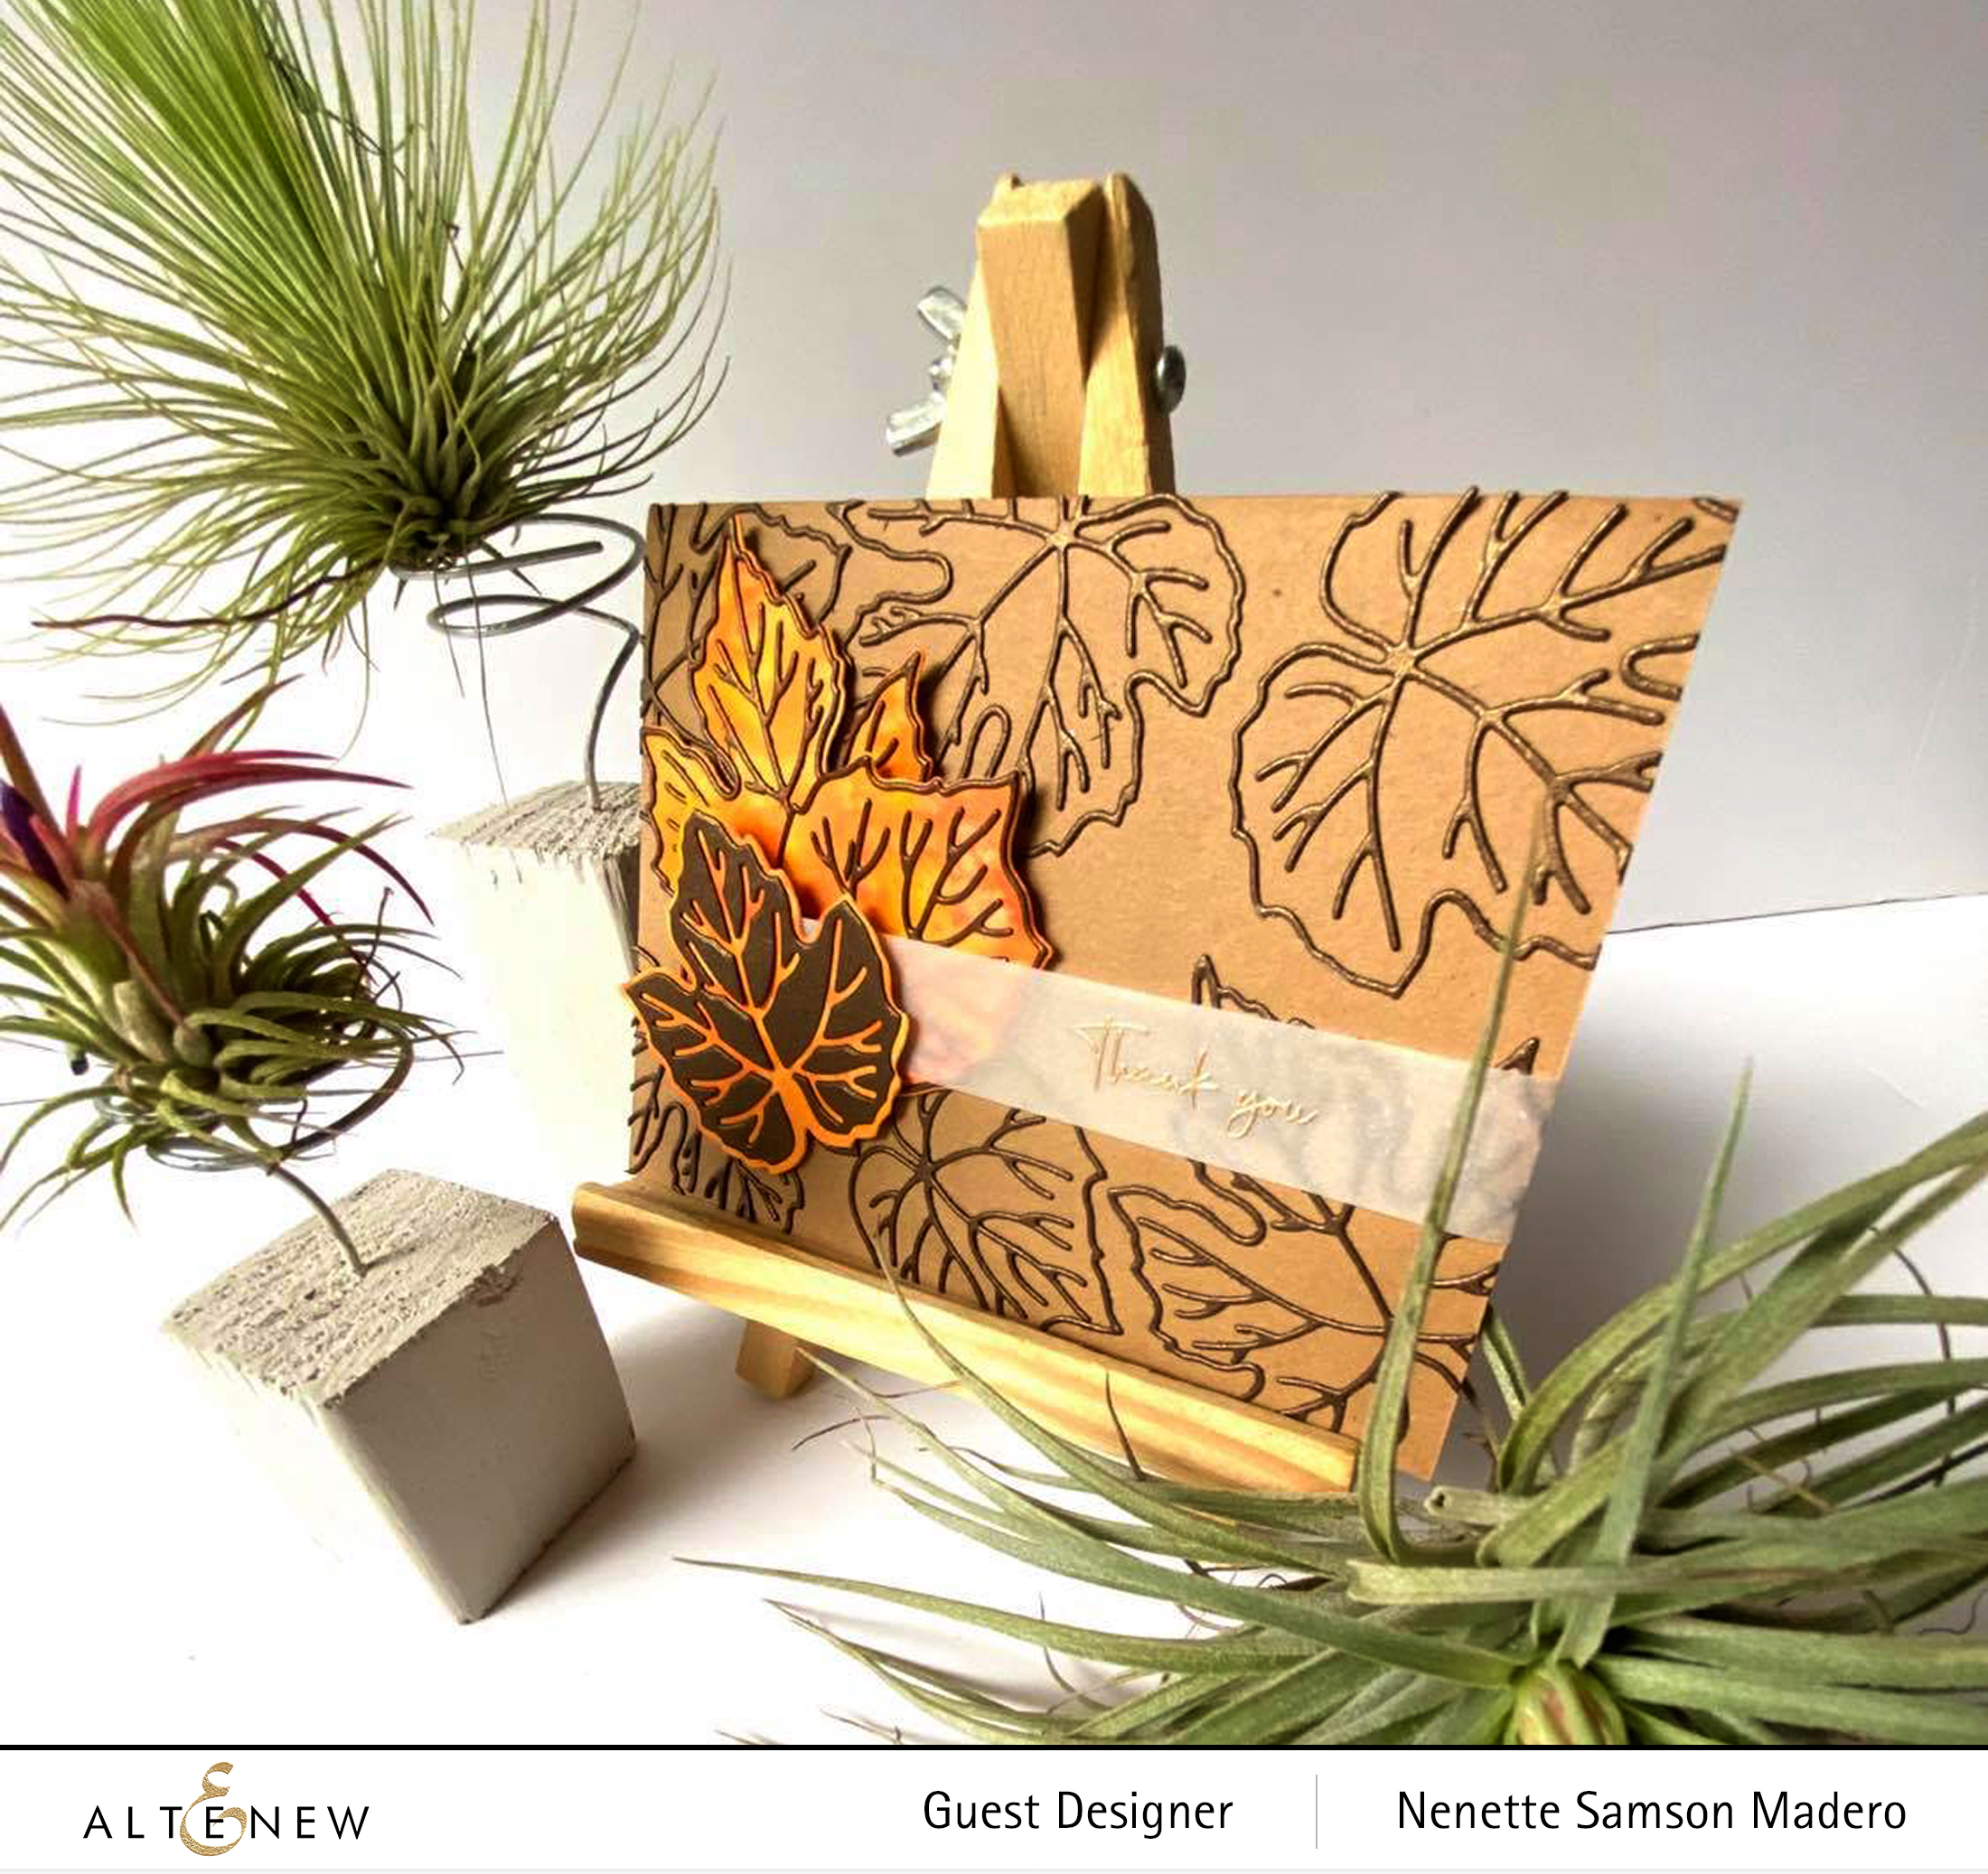
THANK YOU


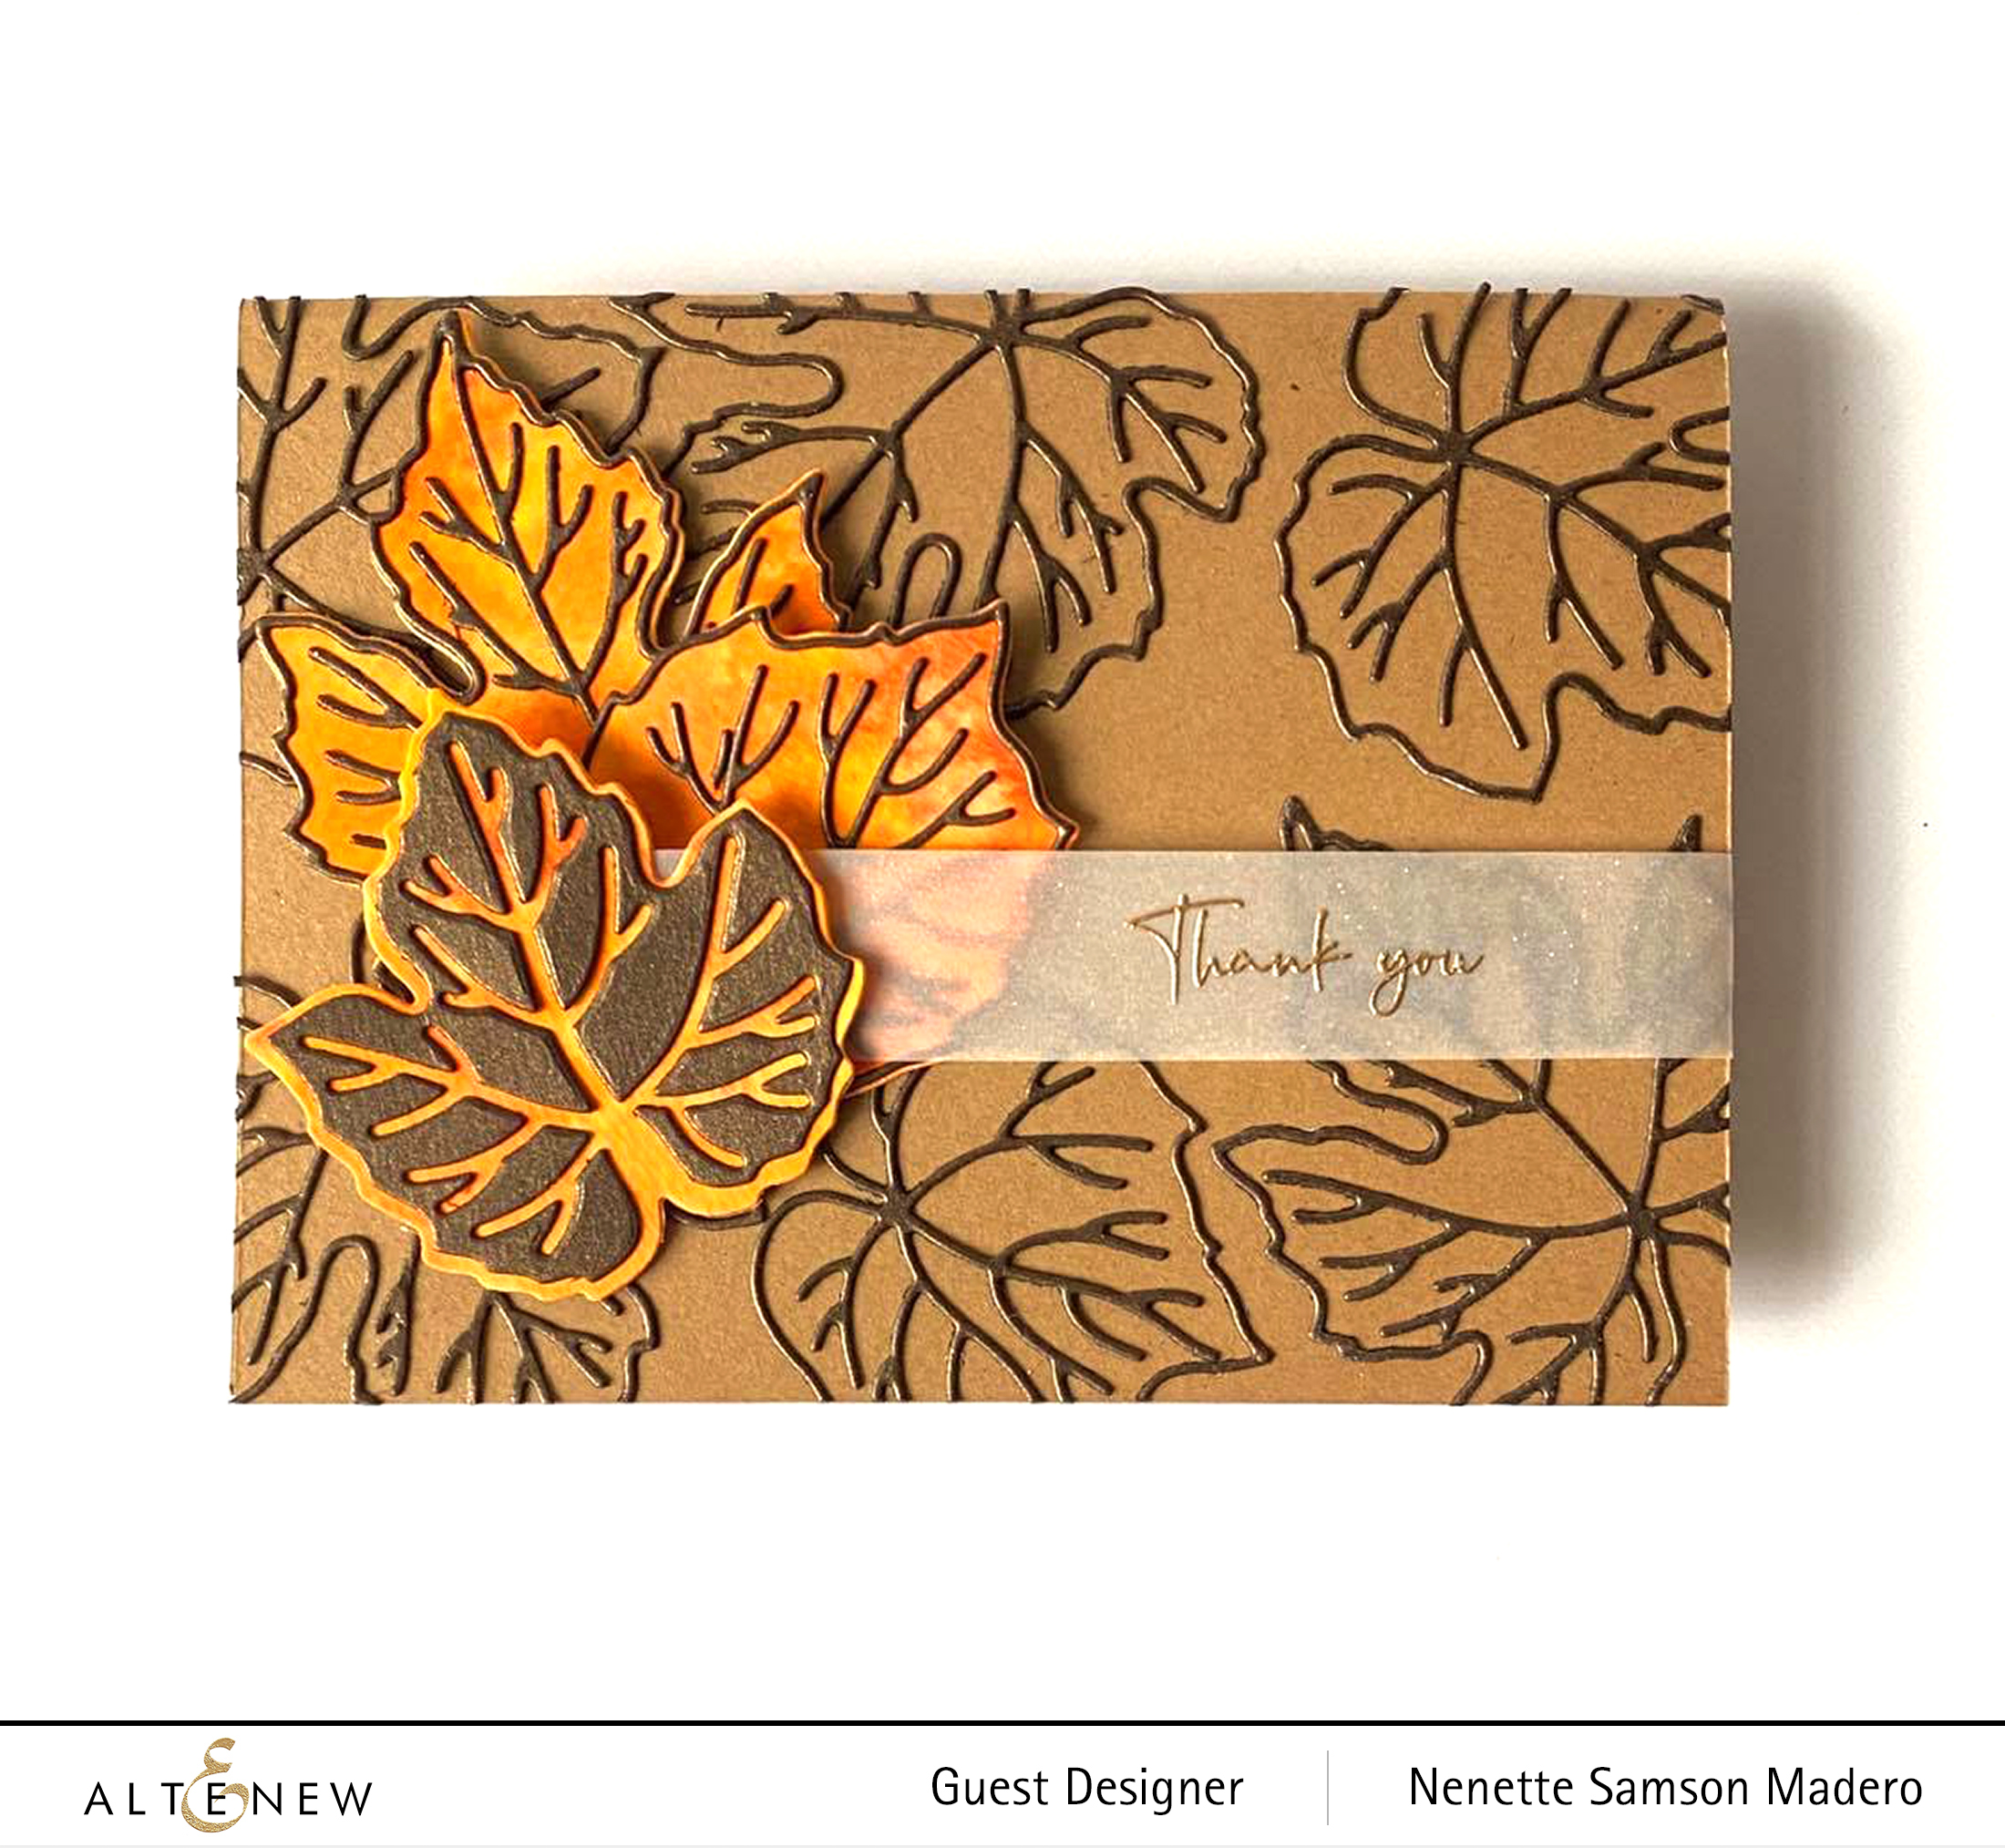
There are so many ways to use the Grape Leaves die set. For this card, I used all the elements of the die-cut. First, I watercolored a sheet of watercolor paper with different shades of orange using the wet on wet technique.

After drying, I used the solid die-cut to cut out the background of the leaf. Brown glitter paper was used for the vines and outline of the leaf. These were adhered to the card front using glue then the rest of the leaves were clustered together using both negative and positive parts of the leaf die-cut. Foam squares were used to adhere them to the card front for added dimension. The sentiment was heat embossed on vellum.


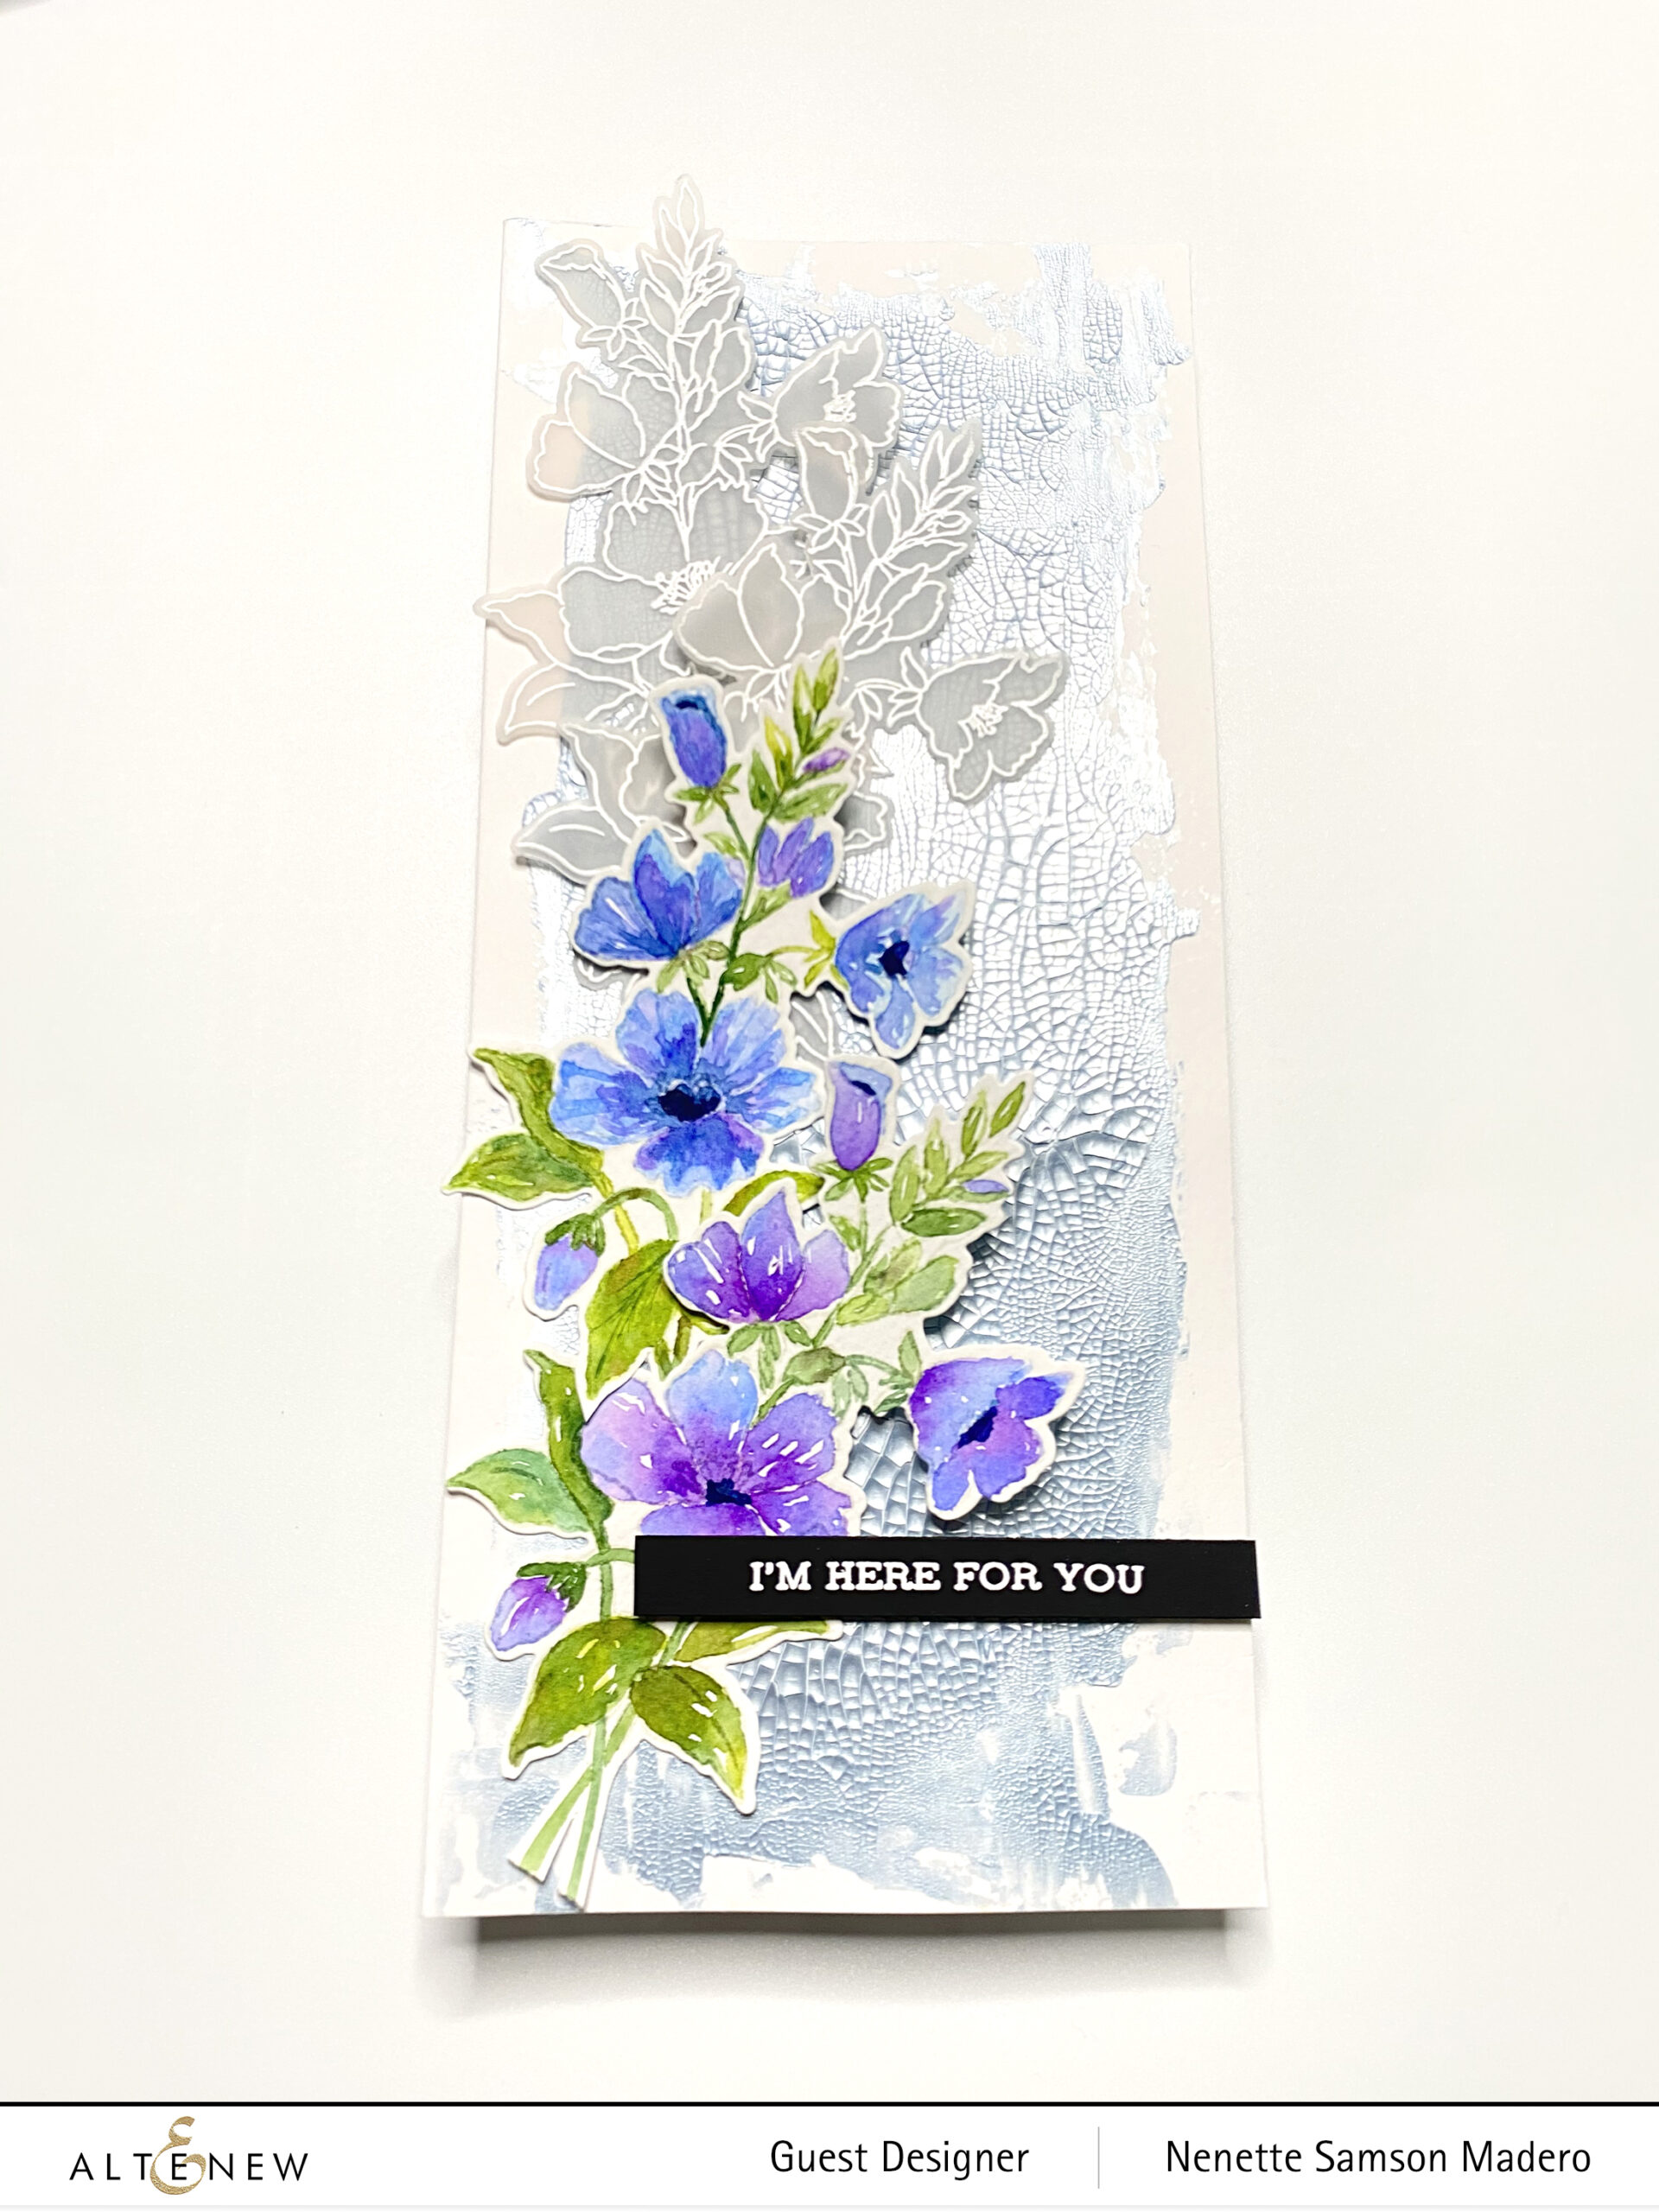
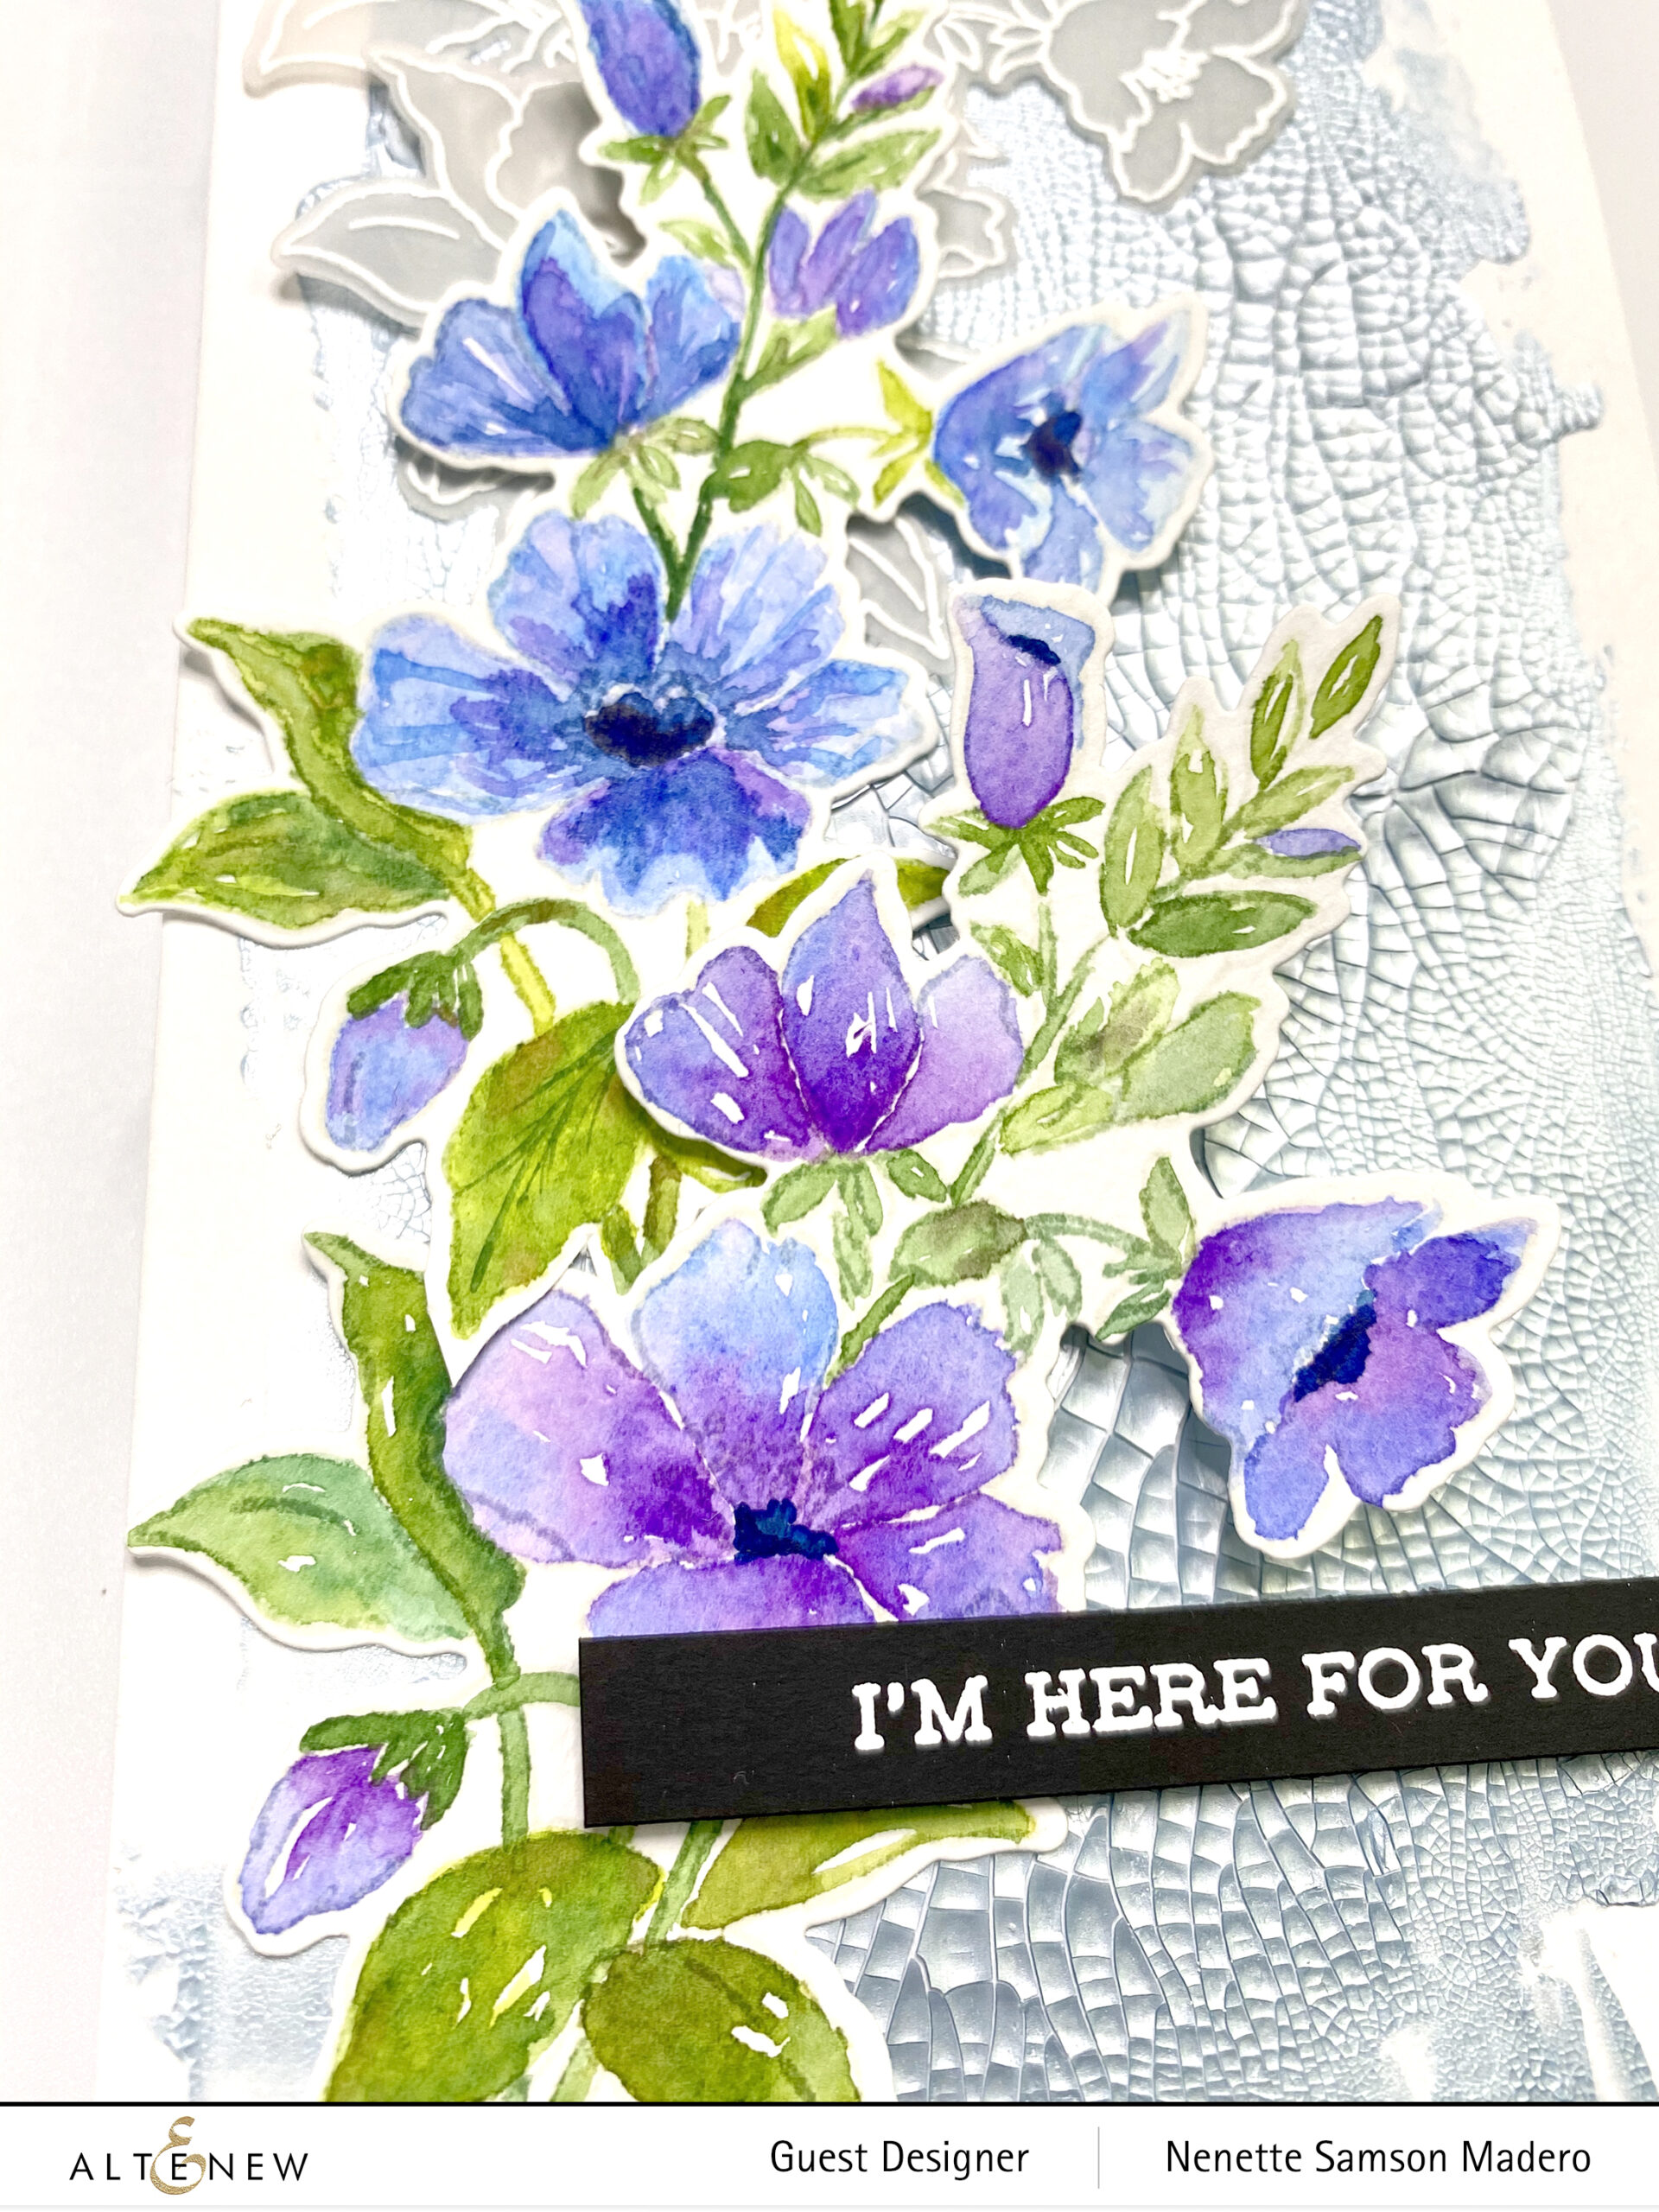
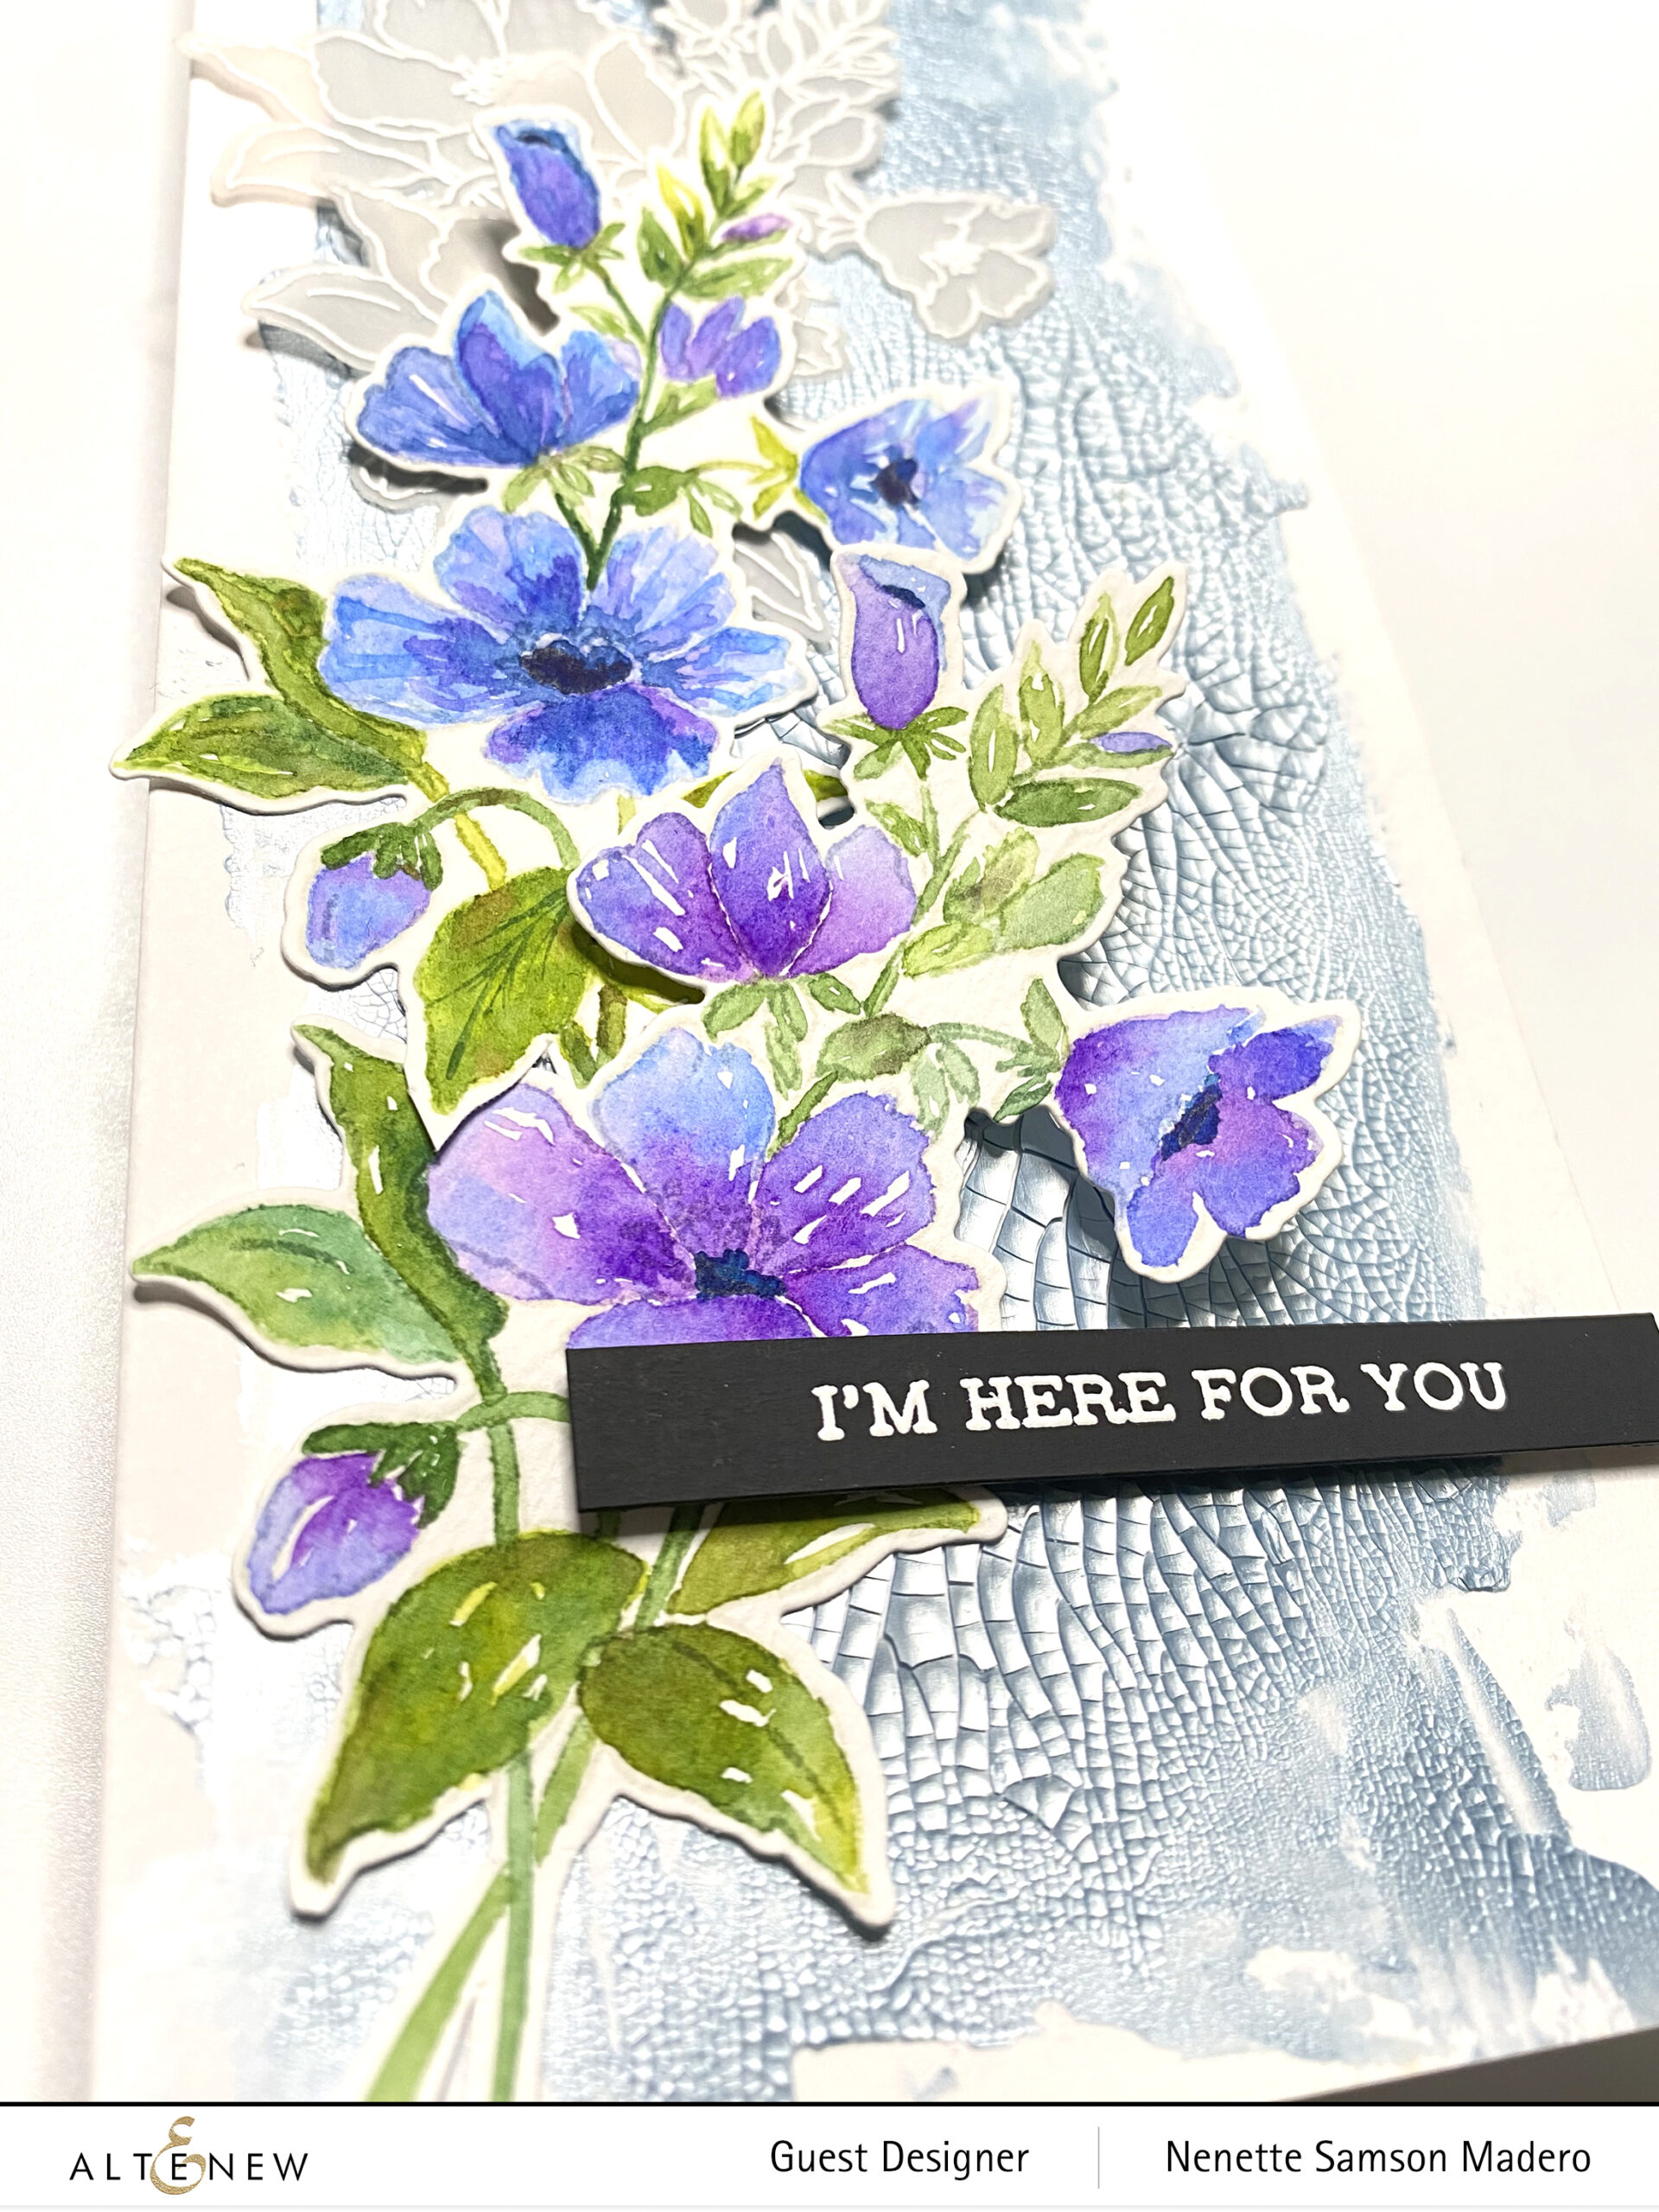
I’M HERE FOR YOU


MATERIALS: Positive Vibes Stamp and die set, Pure White Embossing Powder, Artist Watercolor Pan set, Nuvo Crackle Mousse, Strathmore Mixed Media paper

I did some no-line watercoloring with the Positive Vibes florals using the Artist Watercolor pan set. This was the first time for me to try this watercolor pan set and the pigments reacted differently compared to the watercolor brush markers. With the pan set, I noticed that the pigments didn’t flow as much as the brush markers did so there was more control. The colors were also muted and not as bright as the brush markers which I liked for this particular card.

I first applied the Nuvo crackle mousse on thick mixed media paper and allowed it to dry. I stamped the floral images from the Positive Vibes stamp set twice and watercolored them using the artist pan set. I started with a light wash of Lapis Lazuli mixed with Deep Blue Sea. While it was still wet, I mixed shades of purple and Starry Night.

For the leaves, I used a light wash of Green Hills mixed with Fall Harvest then I layered Green Meadows mixed with Tropical Forest, Rain Forest, Sea Shore, Delectable Delights and Coffee Break. I made sure to leave some parts white to act as highlights. I also stamped 2 images on vellum them embossed them with pure white embossing powder.


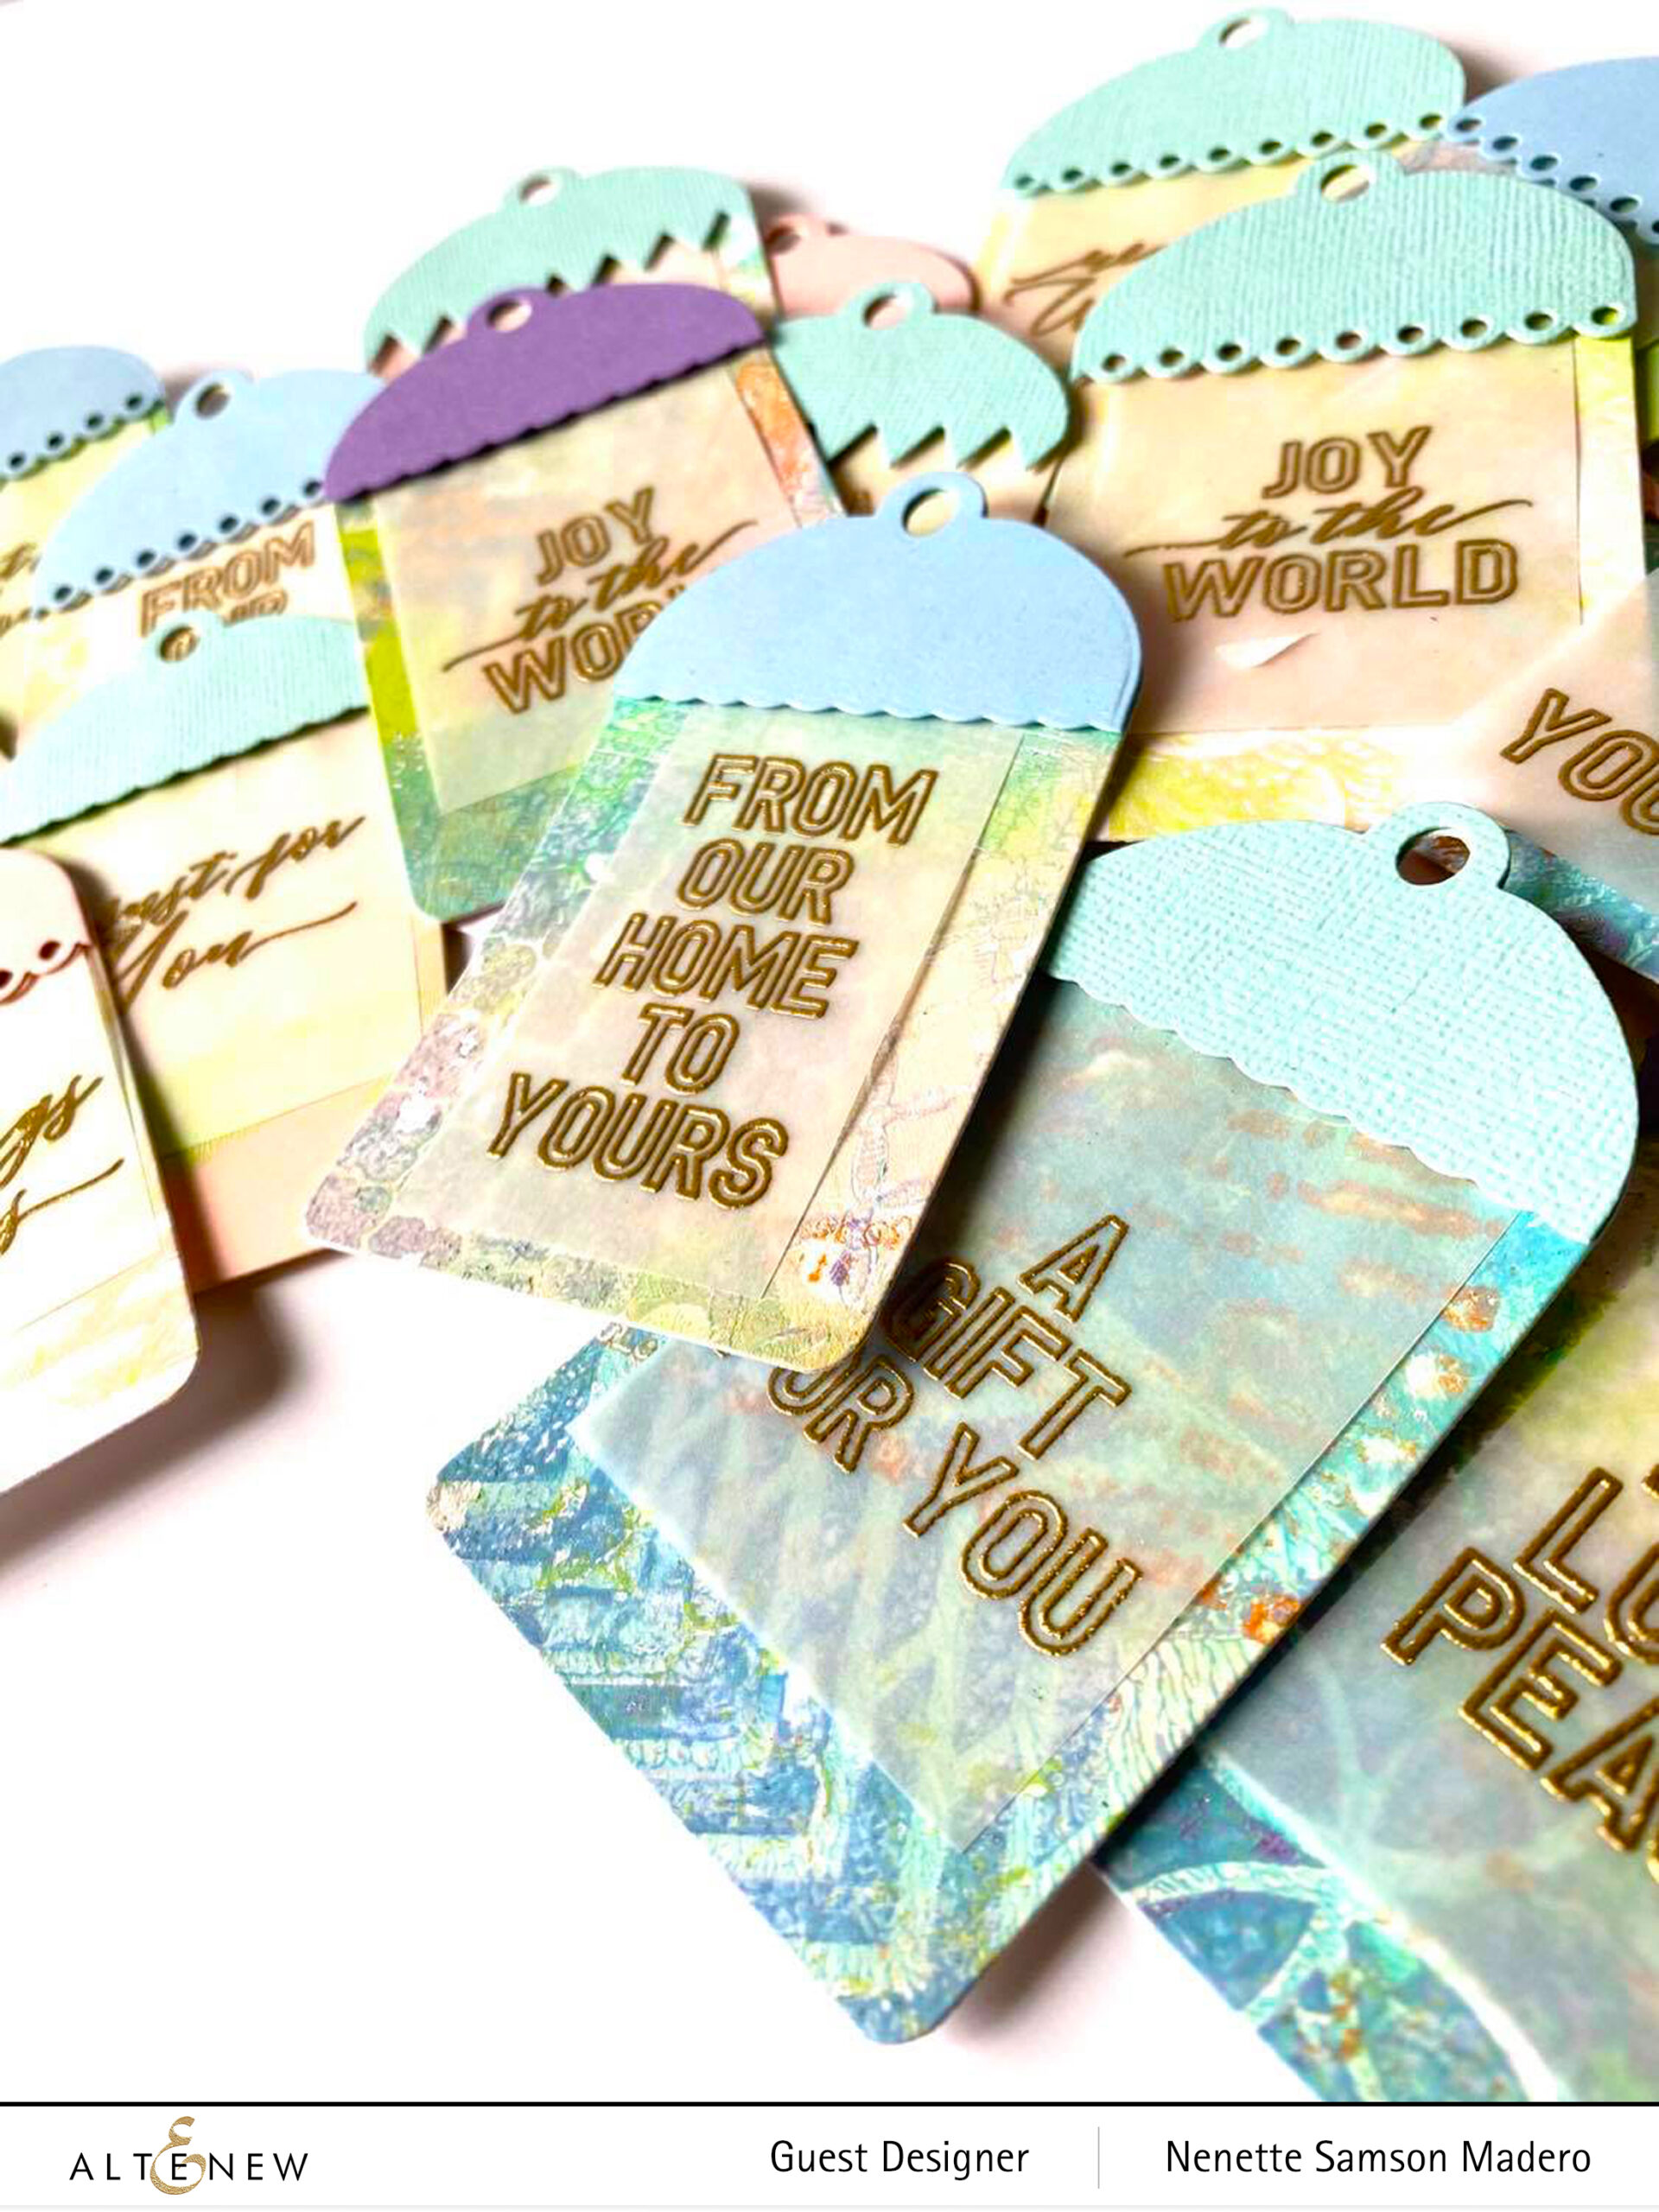
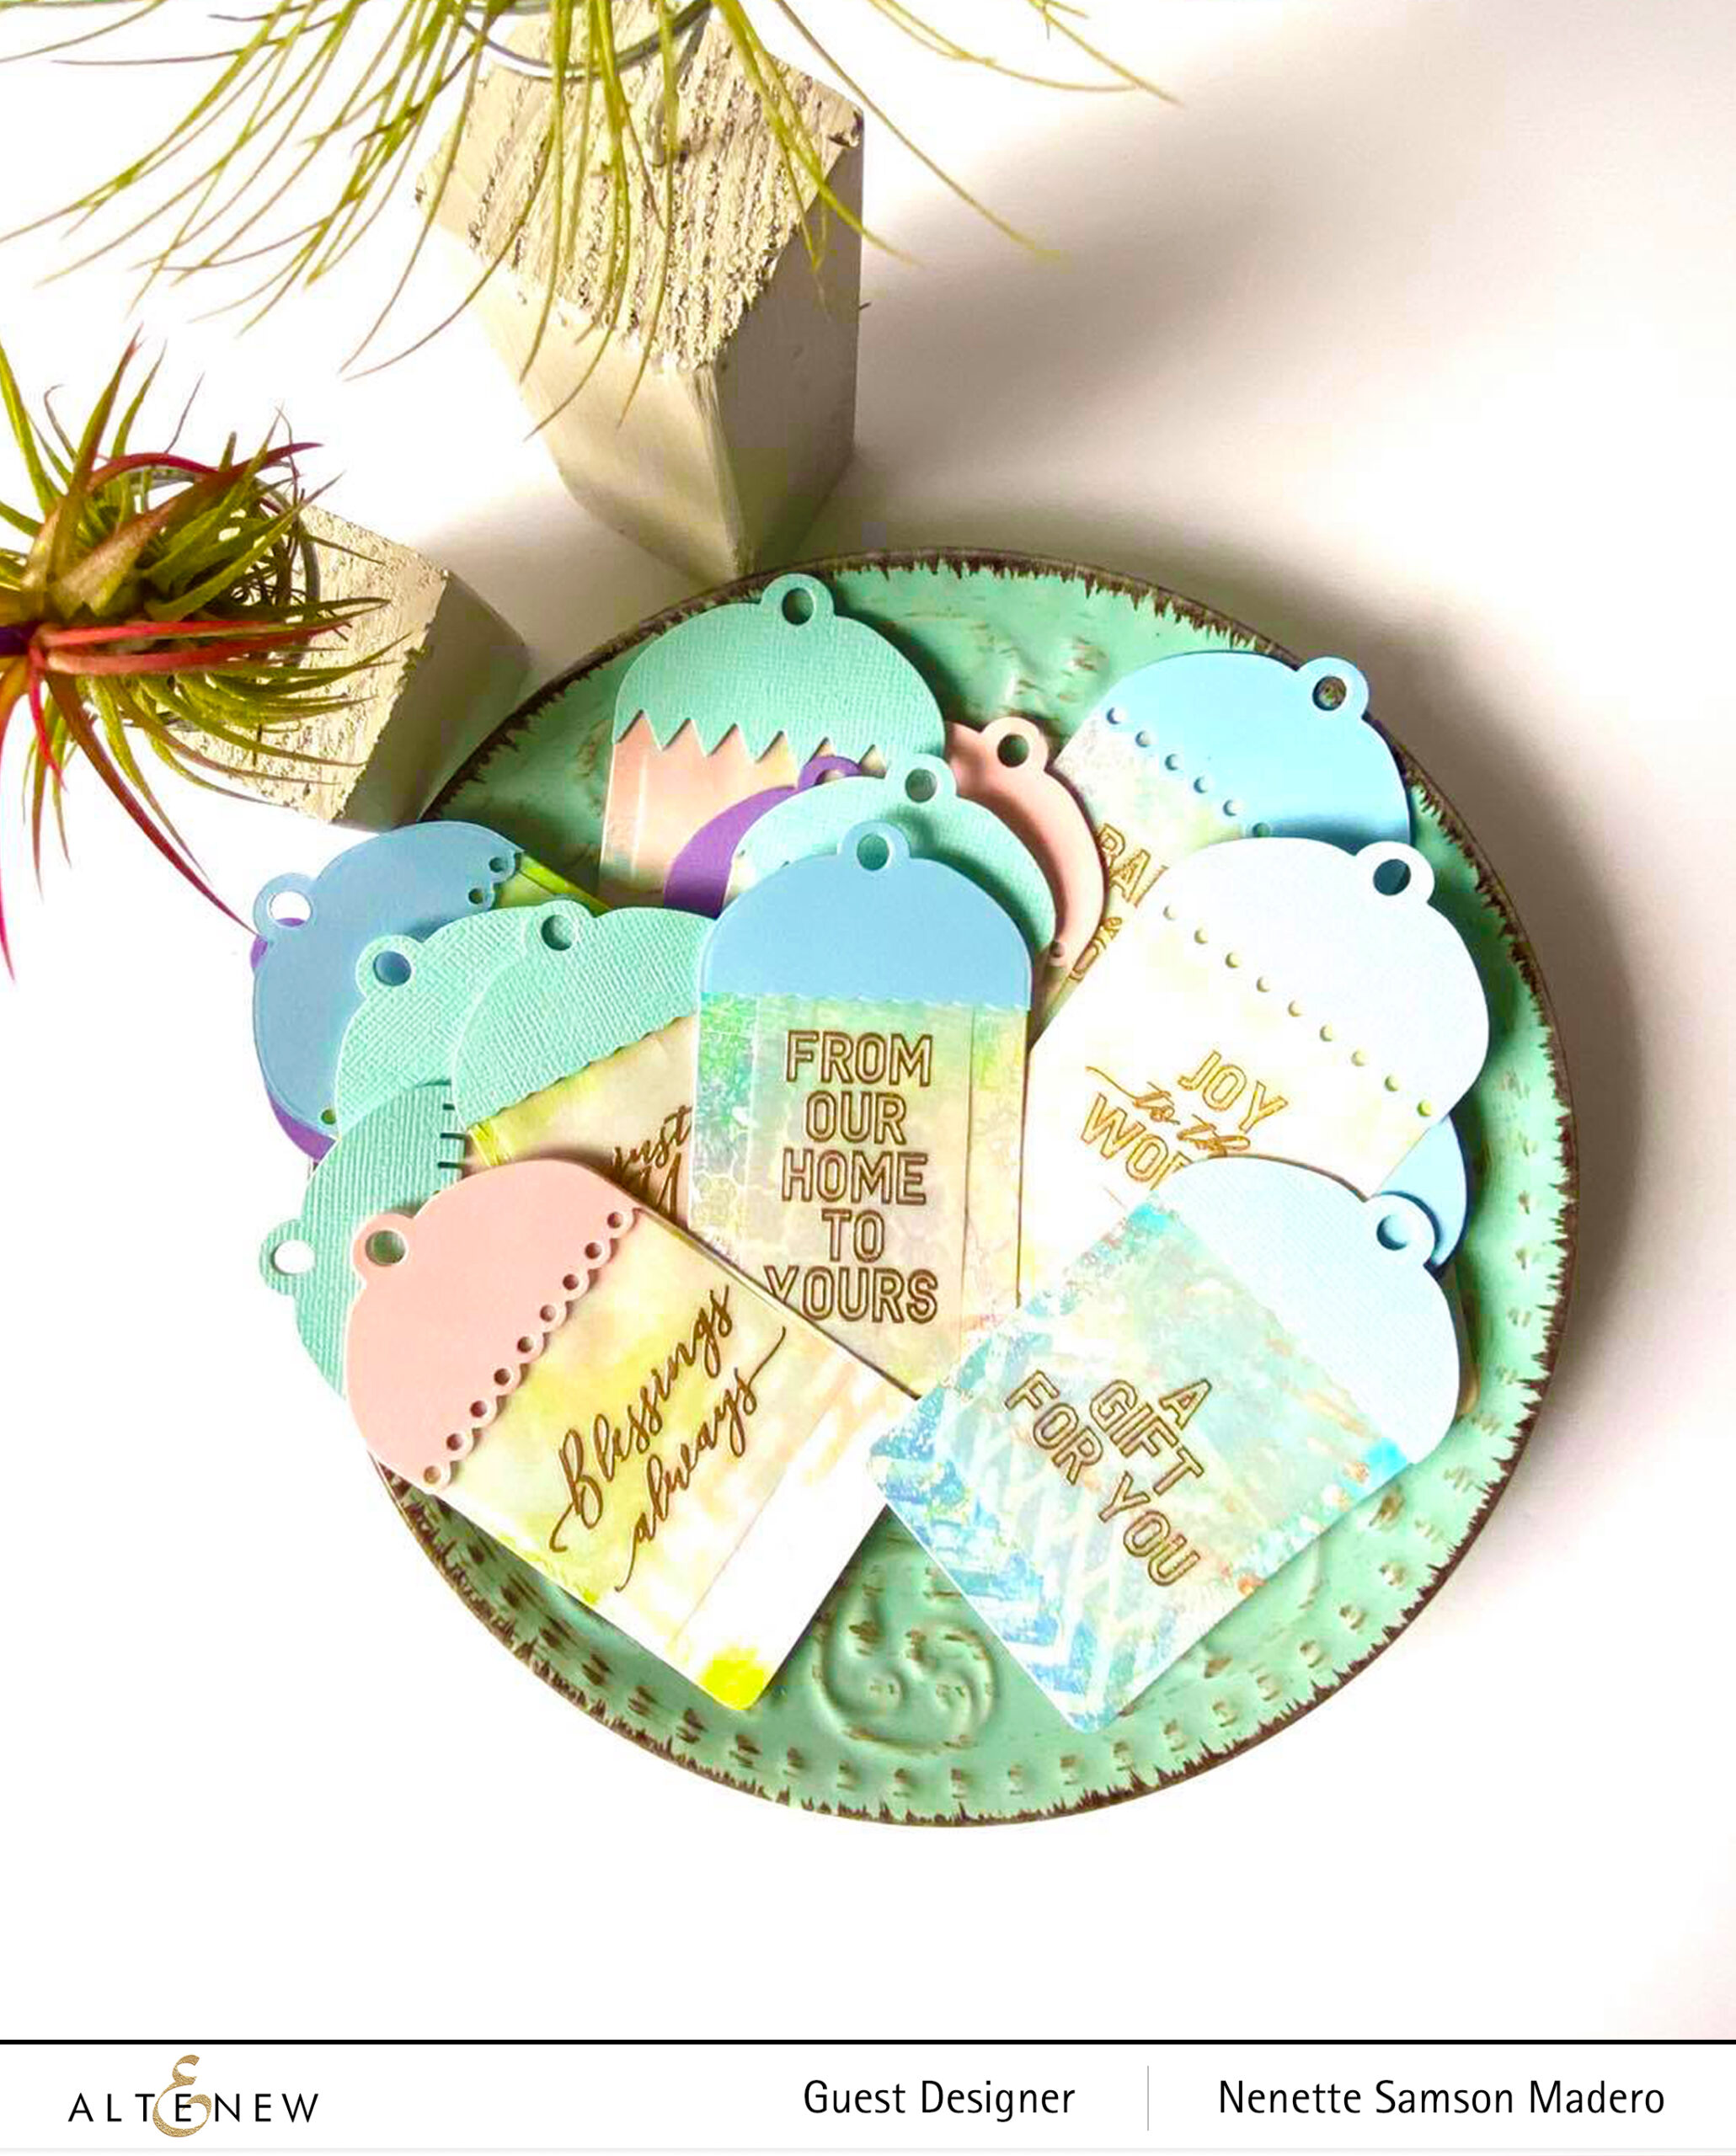
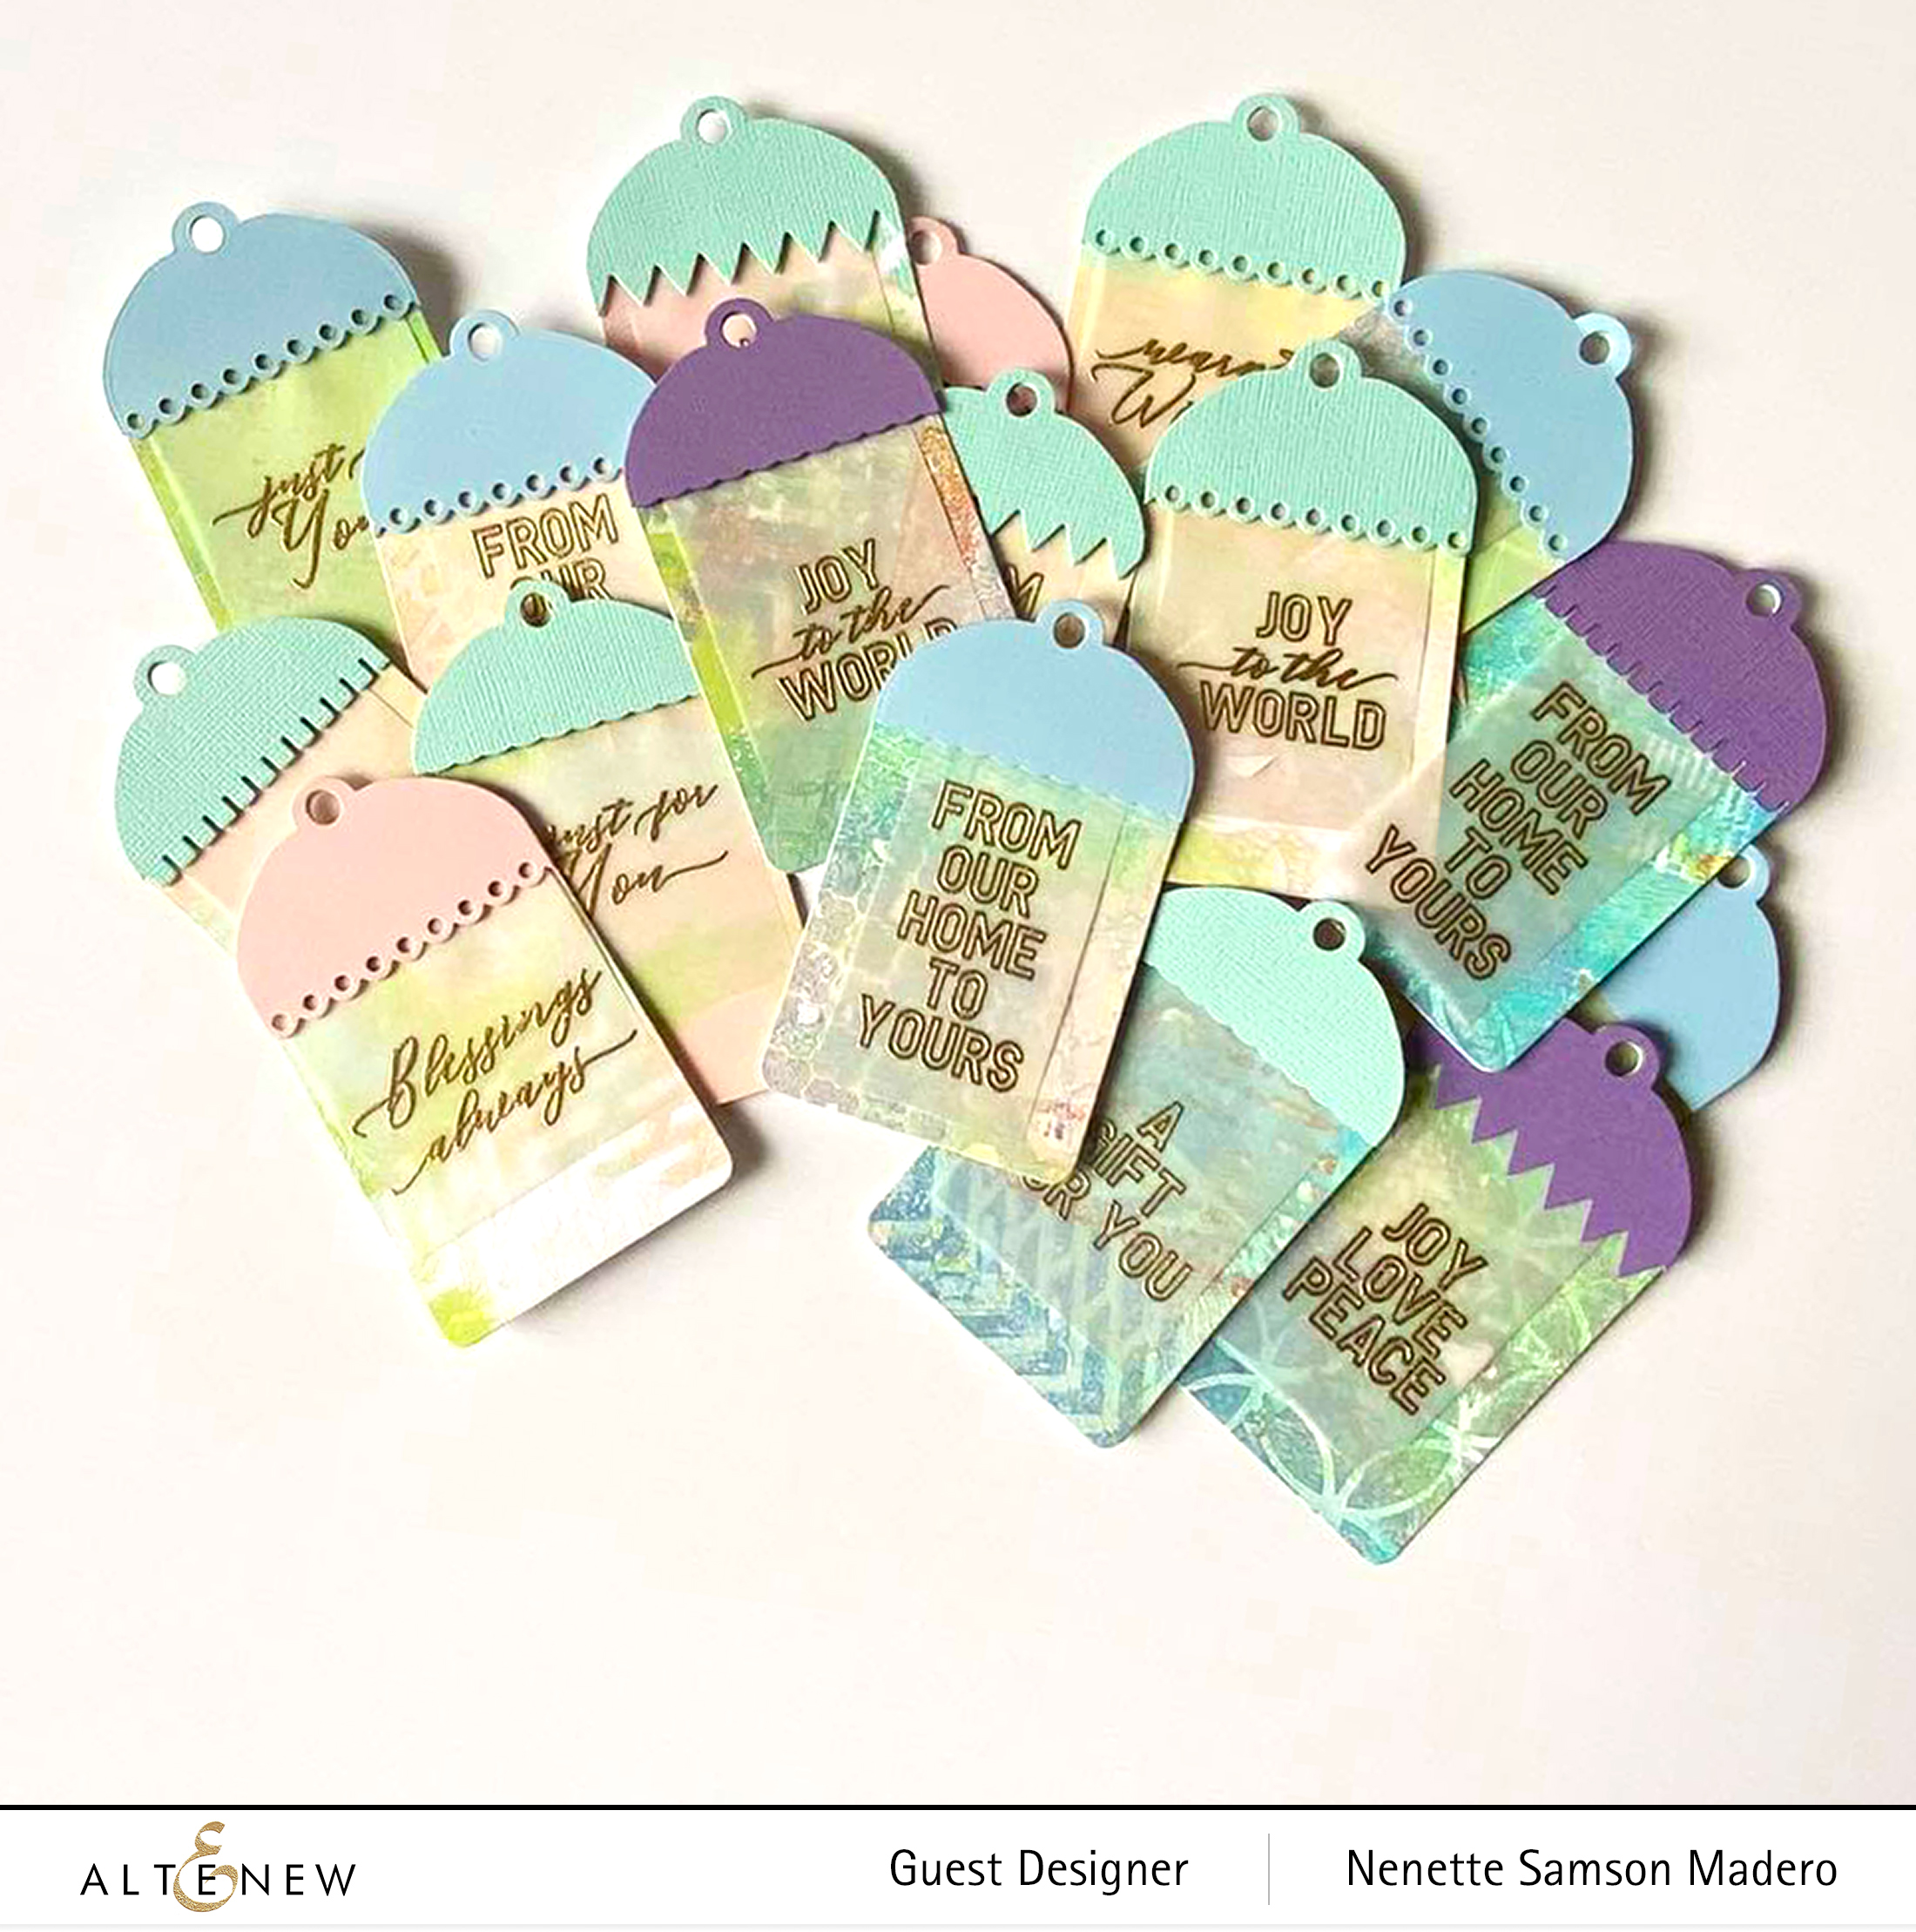
ASSORTED CHRISTMAS TAGS


I love the Holiday Tag Sentiments stamp and die set! It is loaded with a variety of sentiments with a mix of beautiful script and sans serif fonts. It’s also not limited to Christmas sentiments only — such a versatile set that can be used alone or in conjunction with other stamp sets.

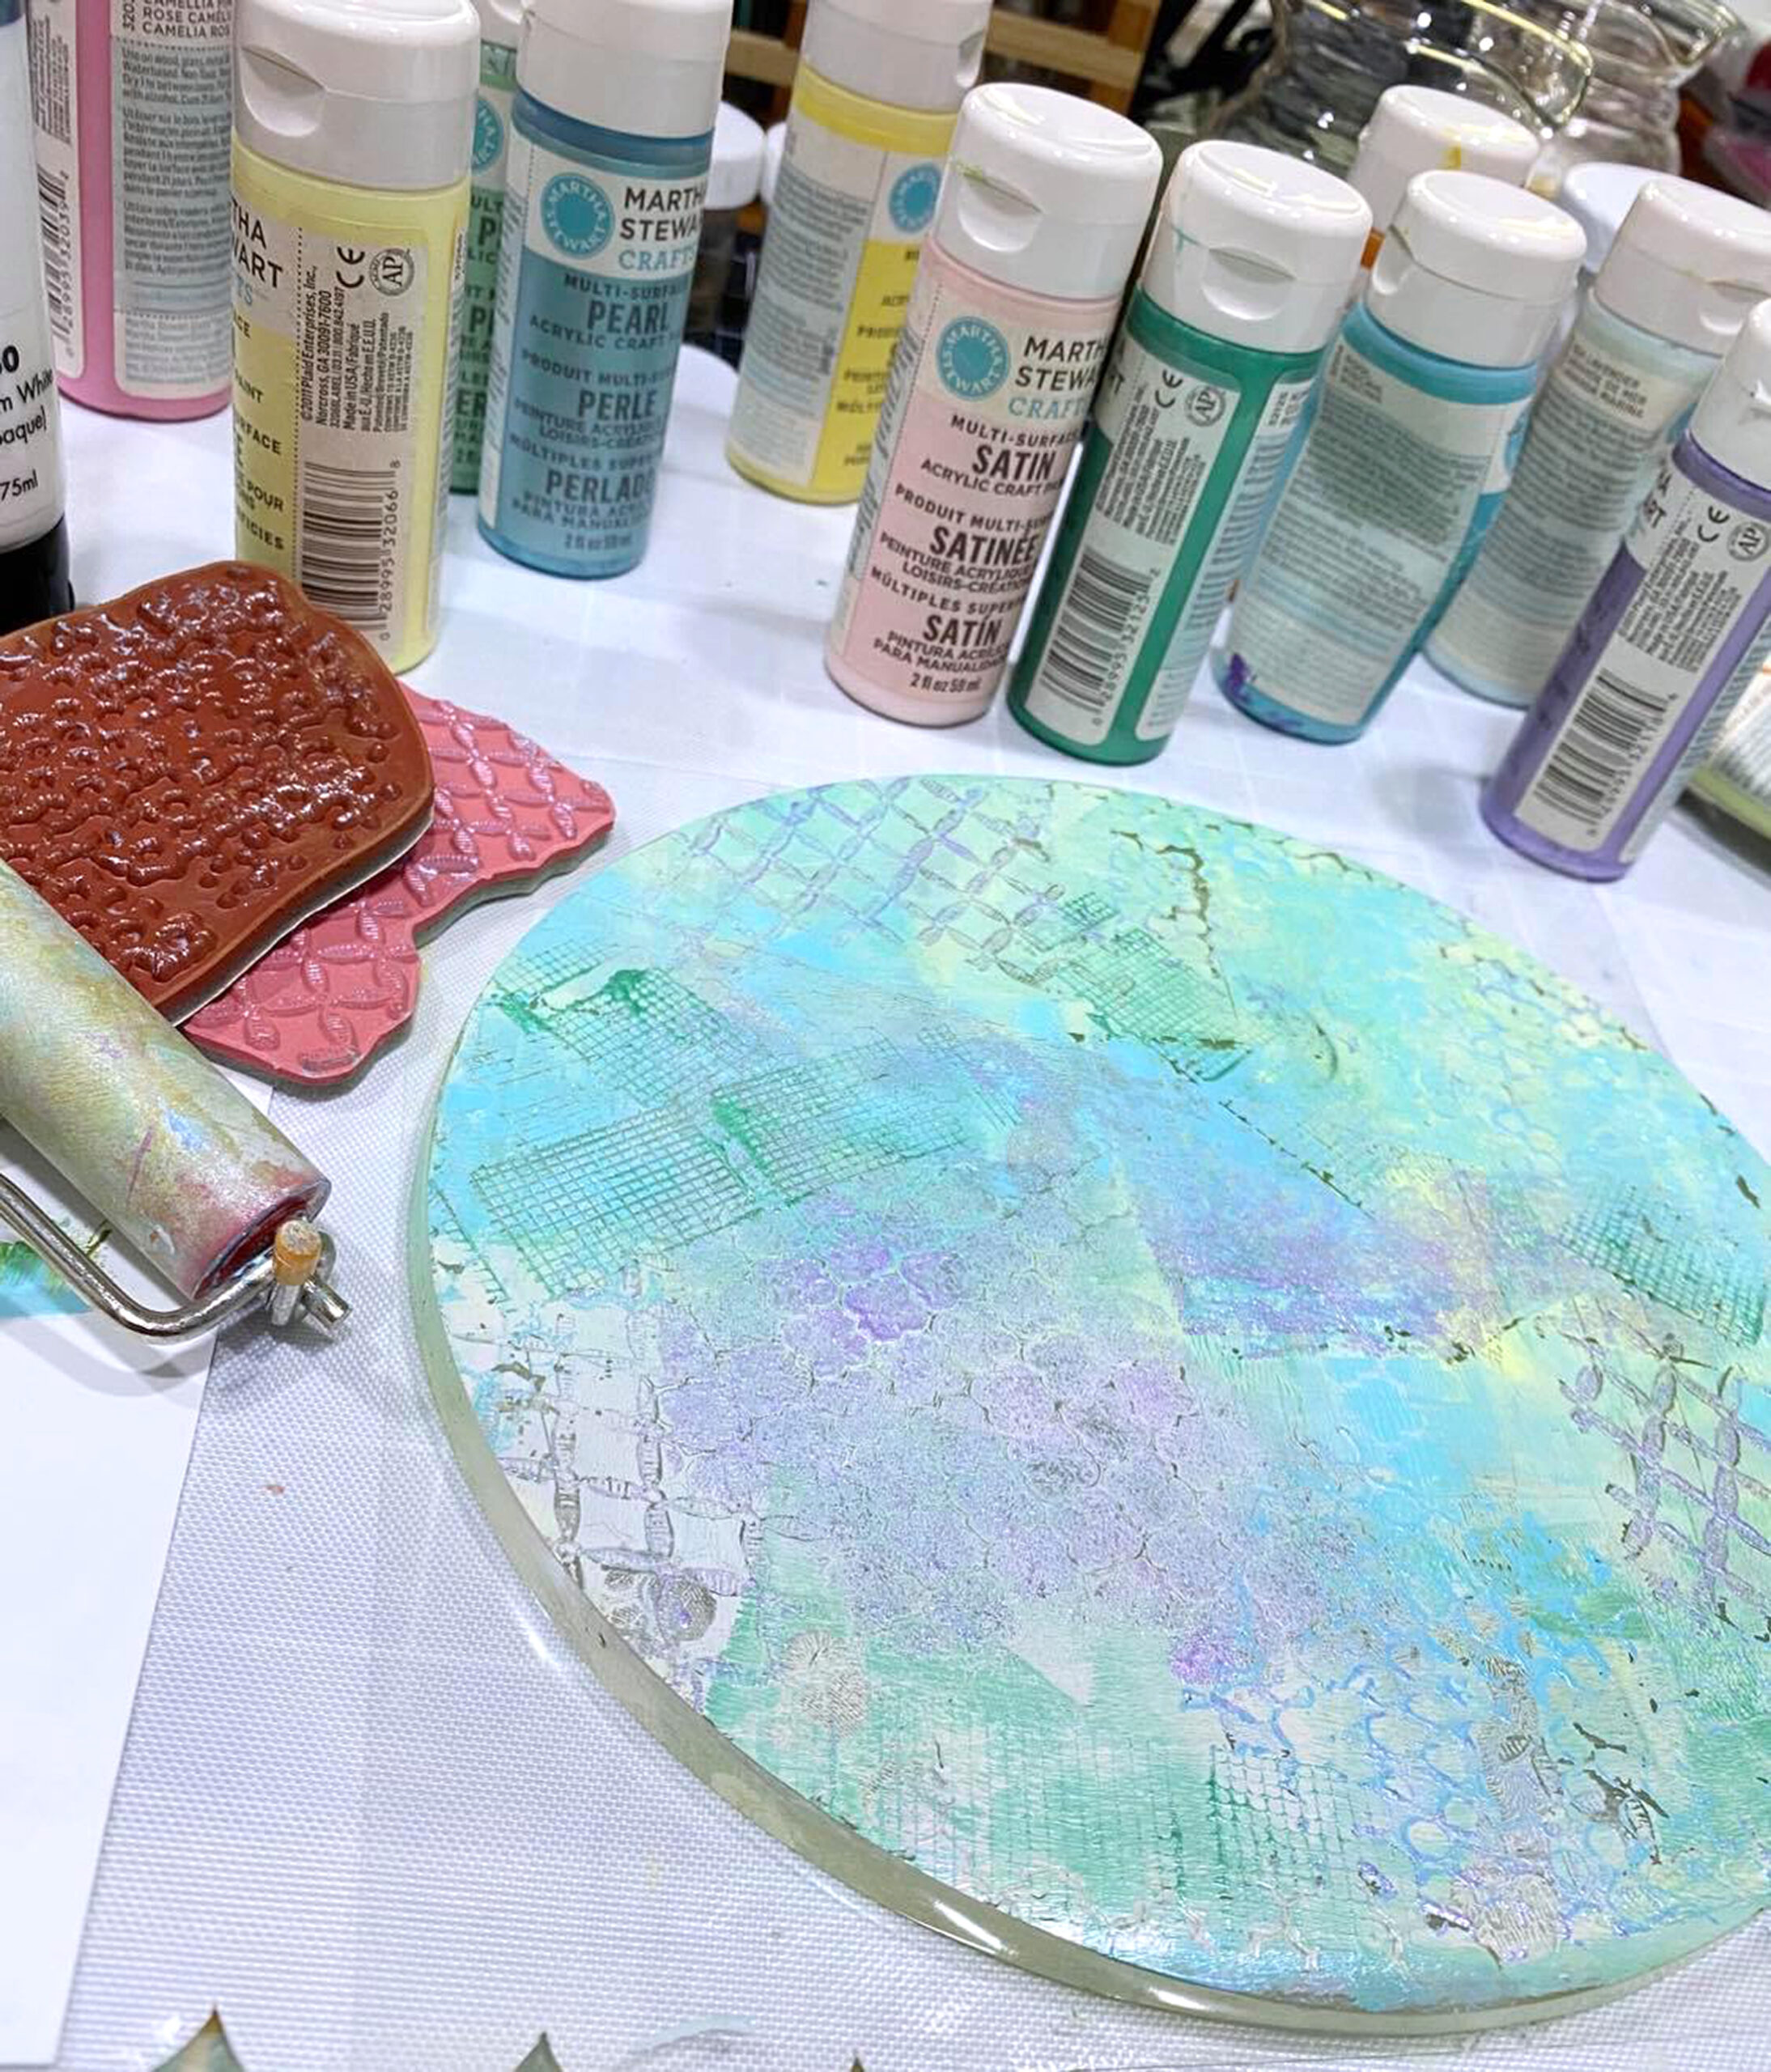
For the background, I brought out my Gelli arts gel printing plate and some pastel colored acrylic paints.

Paints were added to the surface using a brayer than layers of stencils and stamps were used to add more layers for more texture. The whole gel plate was allowed to dry before adding a thin white coat of acrylic paint. A clean white cardstock was then placed on top to pick up all the layers of paint to create a monoprint.

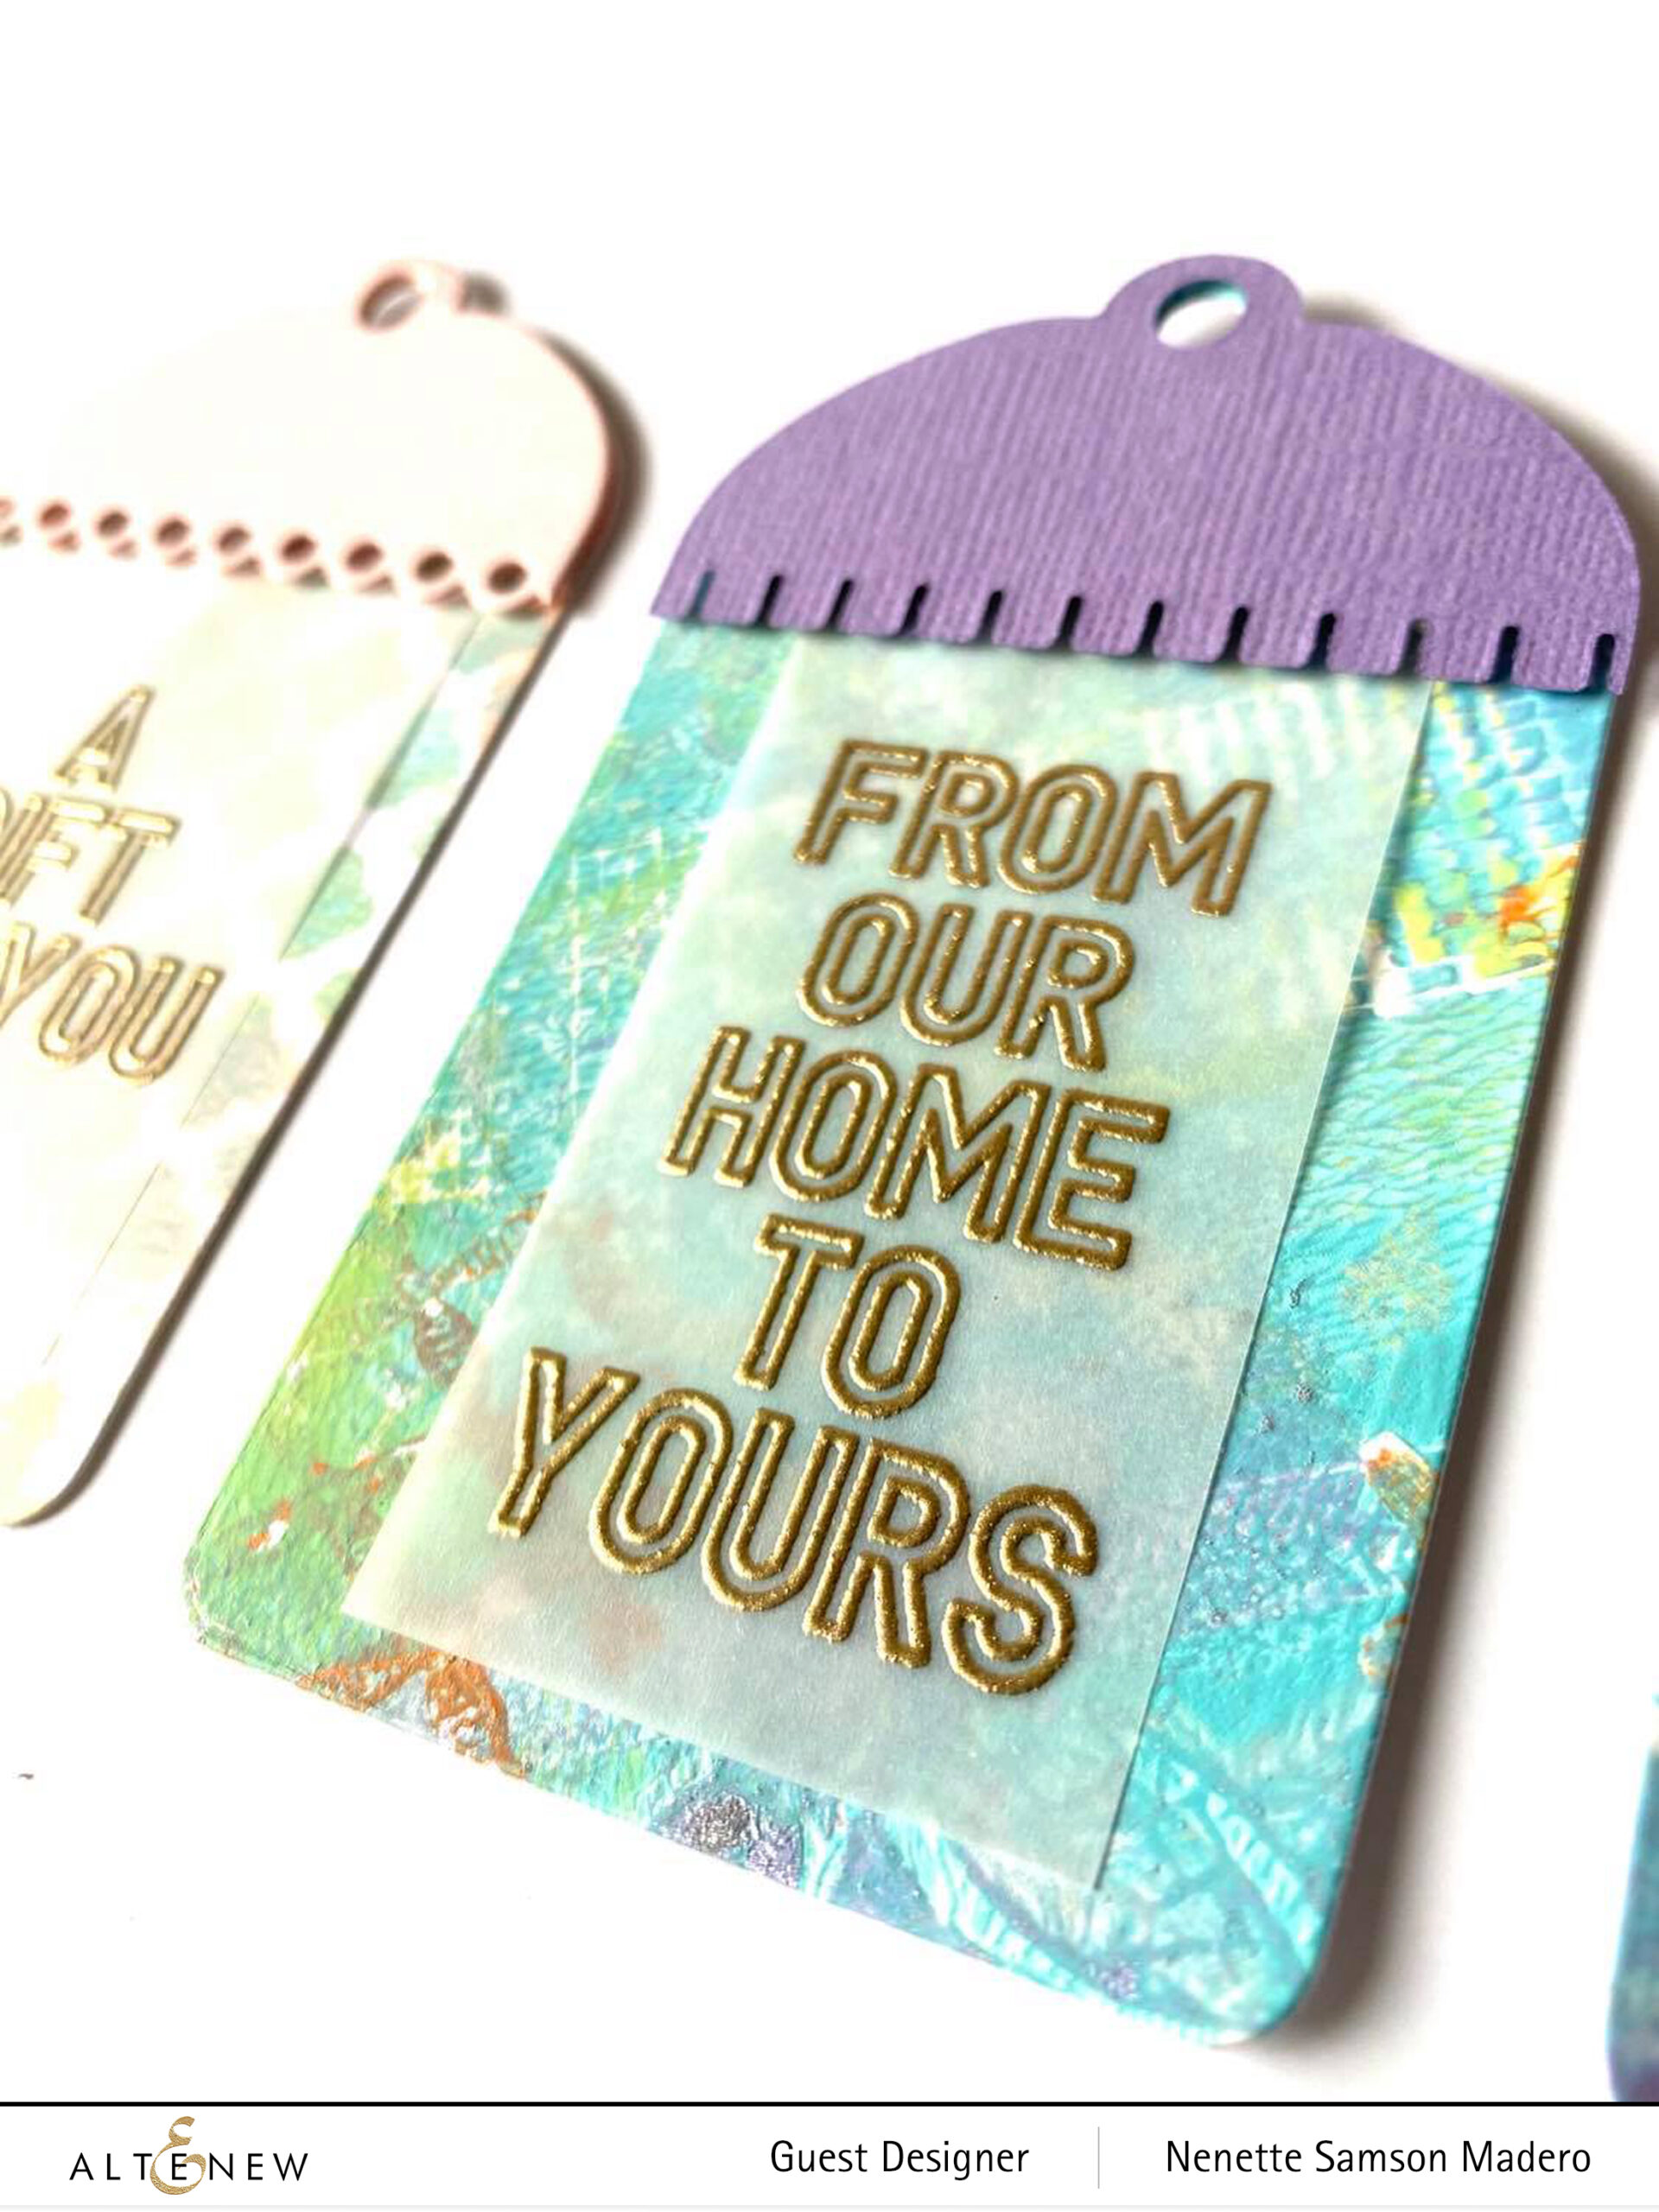
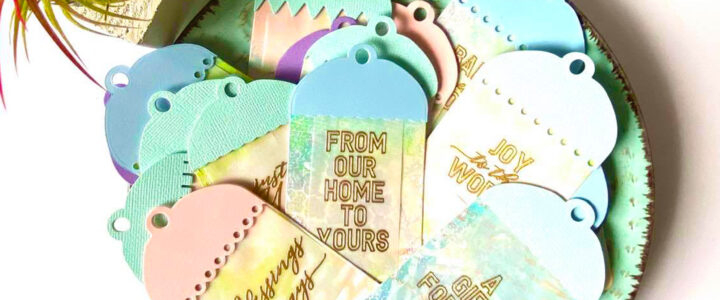
The Holiday Tag Die was used to cut out the tags. Sentiments were stamped on vellum and embossed using Rose Gold Embossing powder. I love the translucency of vellum cause it allows the background to still be seen.

Here’s a time-saver tip–I partially die cut the tag on cardstock a few times so that I can die cut the different borders all at the same time.

Different colors of cardstocks were chosen to match the background. I really enjoyed making these tags. It’s a great feeling knowing that I already have tags made for this coming Christmas season. 😄


GIVEAWAY PRIZES


To celebrate this release, Altenew is giving away a $50 gift certificate to 3 lucky winners! Please leave a comment on the Altenew Card Blog by 9/15/2020 for a chance to win.

Altenew will also draw a winner to receive a $15 gift certificate from the comments left on each designer’s blog on the blog hop list below. All winners will be announced on the Altenew Winners Page on 09/18/2020.

I hope you liked the cards/tags I made for this release. Next stop is my uber-talented friend, Jaycee Gaspar. Make sure you check out his blog… for sure you will be blown away by his talent.

I always love hearing from you so please drop a line in the comment section. By doing so, you also get a chance to win some fab prizes from Altenew! For real-time updates, do follow me on IG @mylittleatticstudio. Thanks for dropping by. Please take care and be safe!

BLOG HOP ORDER: ALTENEW CARD BLOG | AMBER RAIN DAVIS | TERRI KOSZLER | THERESE CALVIRD | LAURA BASSEN | ERUM TASNEEM | TENIA NELSON | VIRGINIA LU | NATHALIE DESOUSA | LAURAJANE | SVITLANA SHAYEVICH | VICKY PAPAIOANNOU | NICOLE WATT | VICTORIA CALVIN | MARYAM PEREZ | TANIA AHMED | KEISHA CHARLES | KELLY GRIGLIONE | LILITH EECKELS | VICKI FINGER | NORINE BORYS | NENETTE S. MADERO | JAYCEE GASPAR


IG: MY LITTLE ATTIC STUDIO | FB: MY LITTLE ATTIC STUDIO | WWW.MYLITTLEATTIC.COM


Altenew March 2020 Washi Tapes Release Blog Hop + Giveaway

Altenew March 2020 Washi Tapes Release Blog Hop + Giveaway

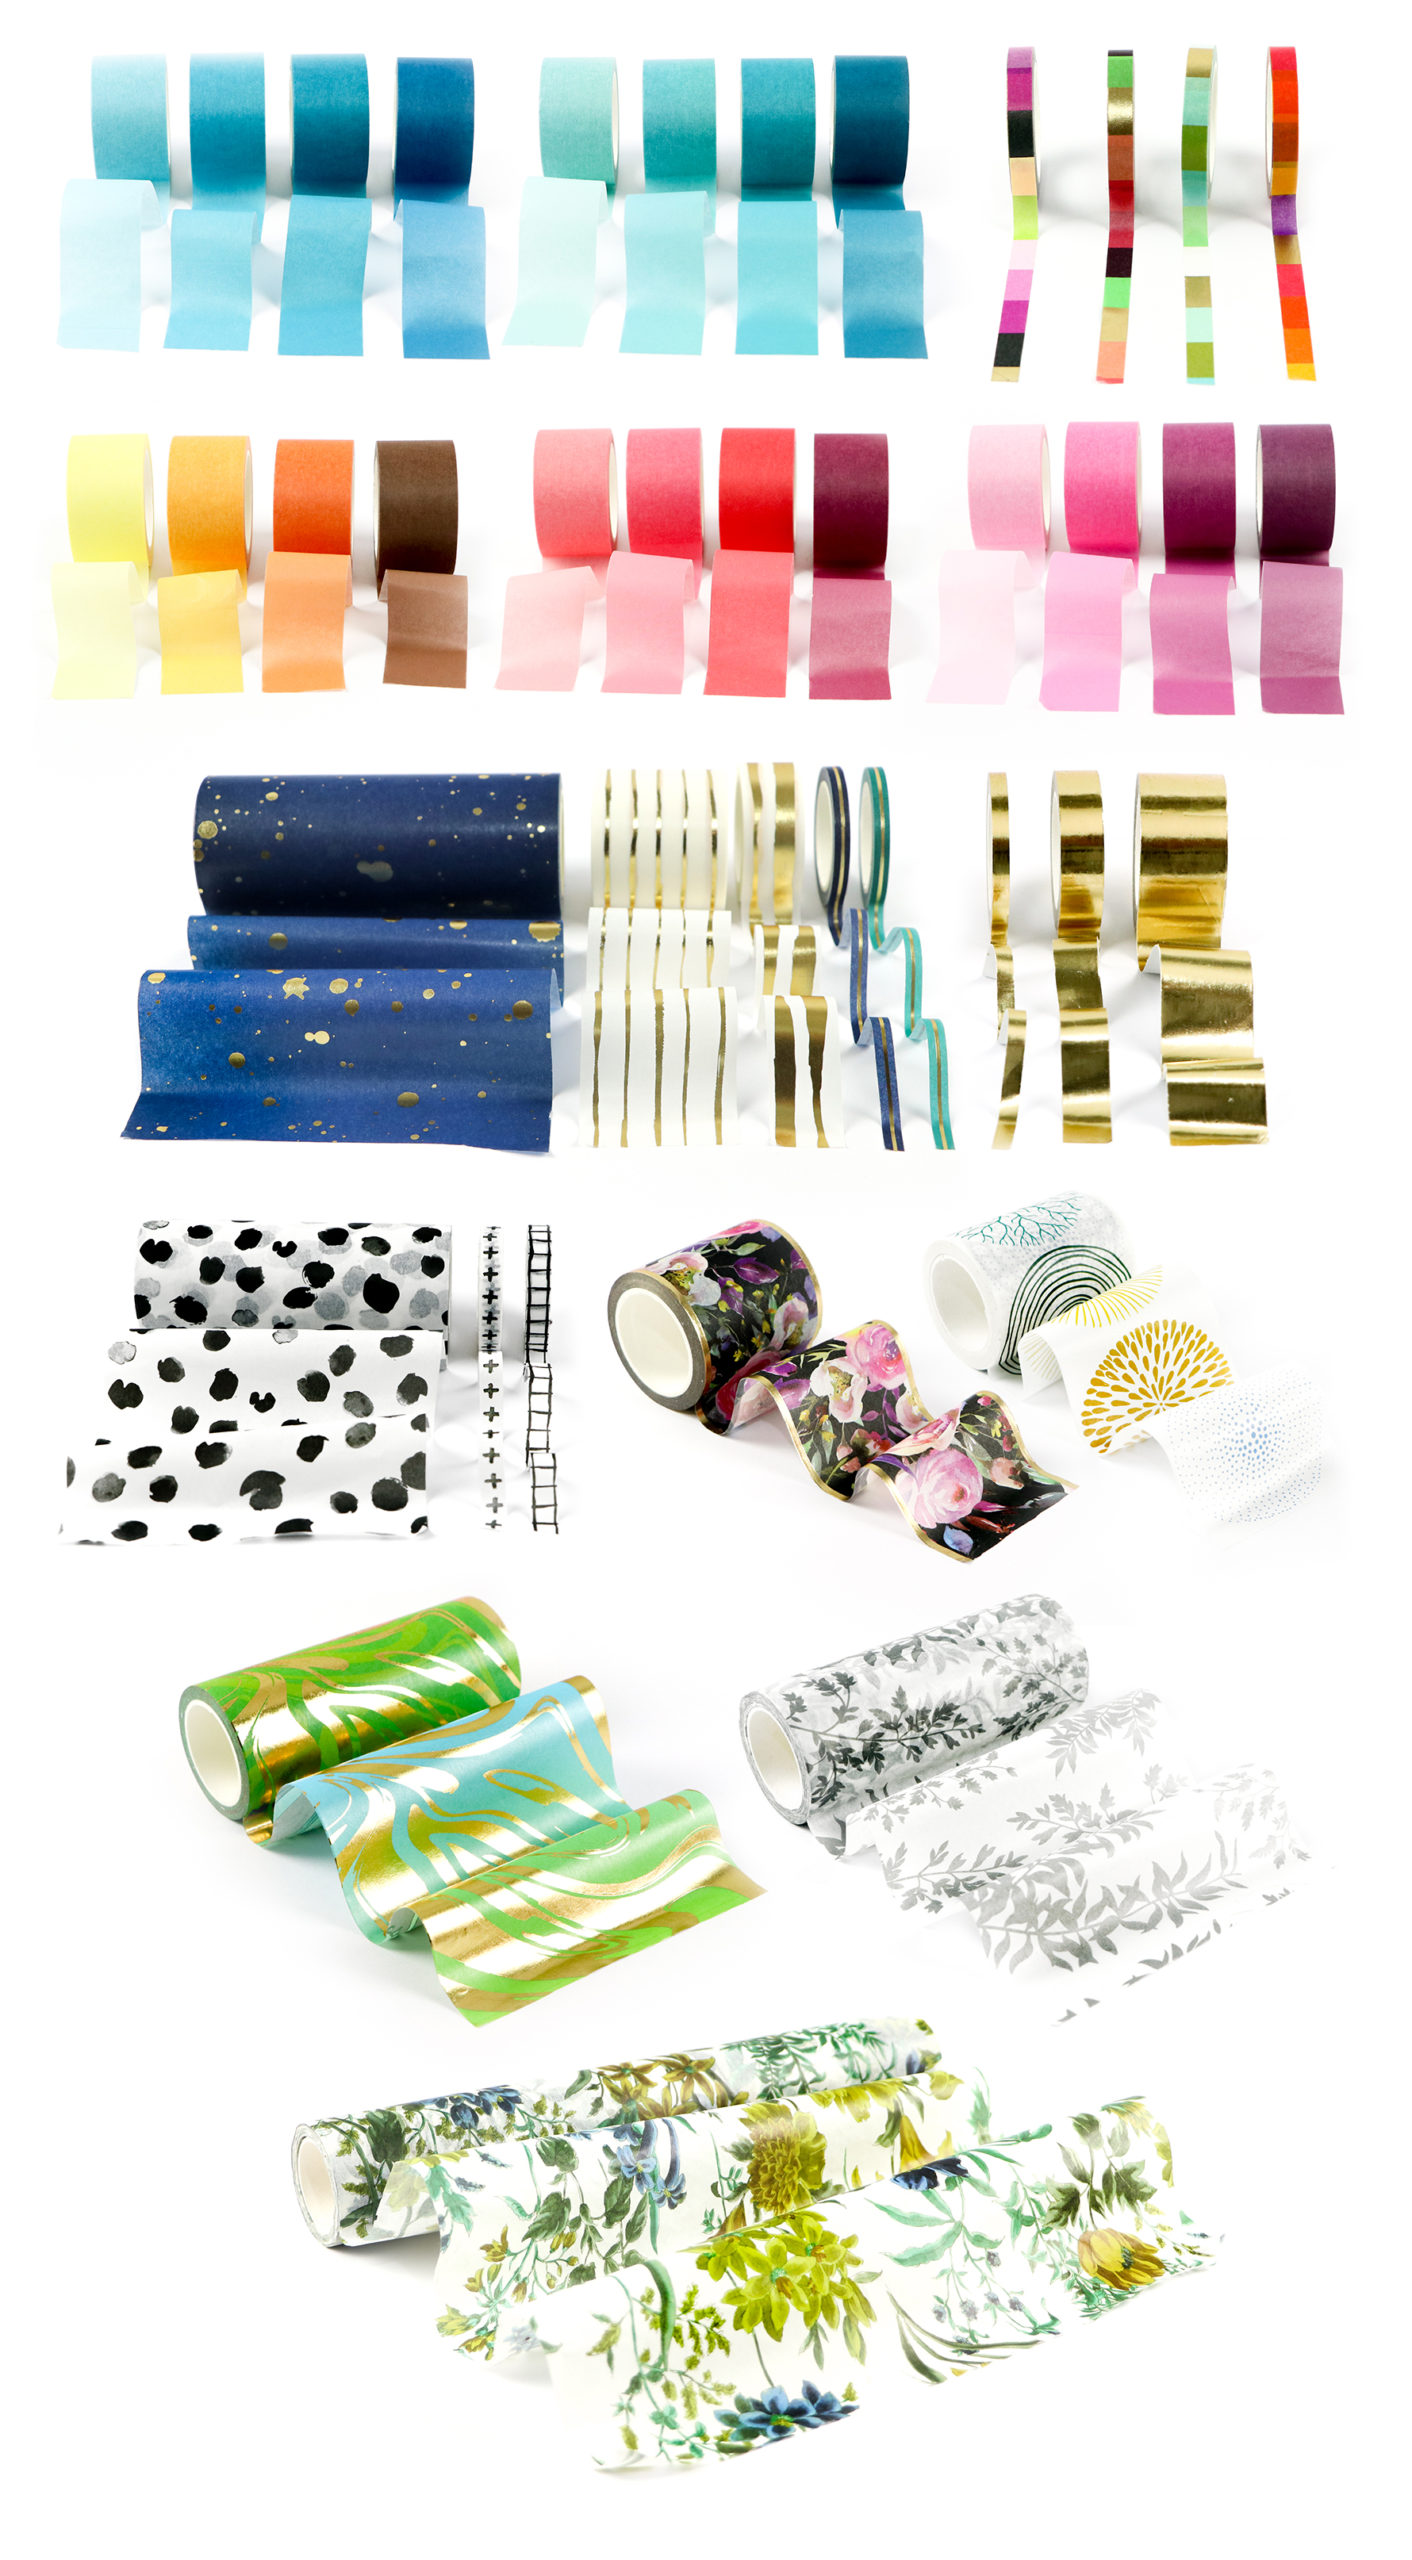
Hello everyone!!! I’d like to thank Sveta Fotinia from sending all of you over. I’m so thrilled to be a part of this blog hop because this release is just full of colors! I’m sure you will fall in love with them 😍 To view the entire collection, make sure you visit the Altenew Blog or you can check out their online store here. Take a look at these gorgeous summer washi tapes!!!

There are so many ways you can use these amazing washi tapes and below are some examples. I just love how you can create wonderful cards in no time at all just by using washi tapes.


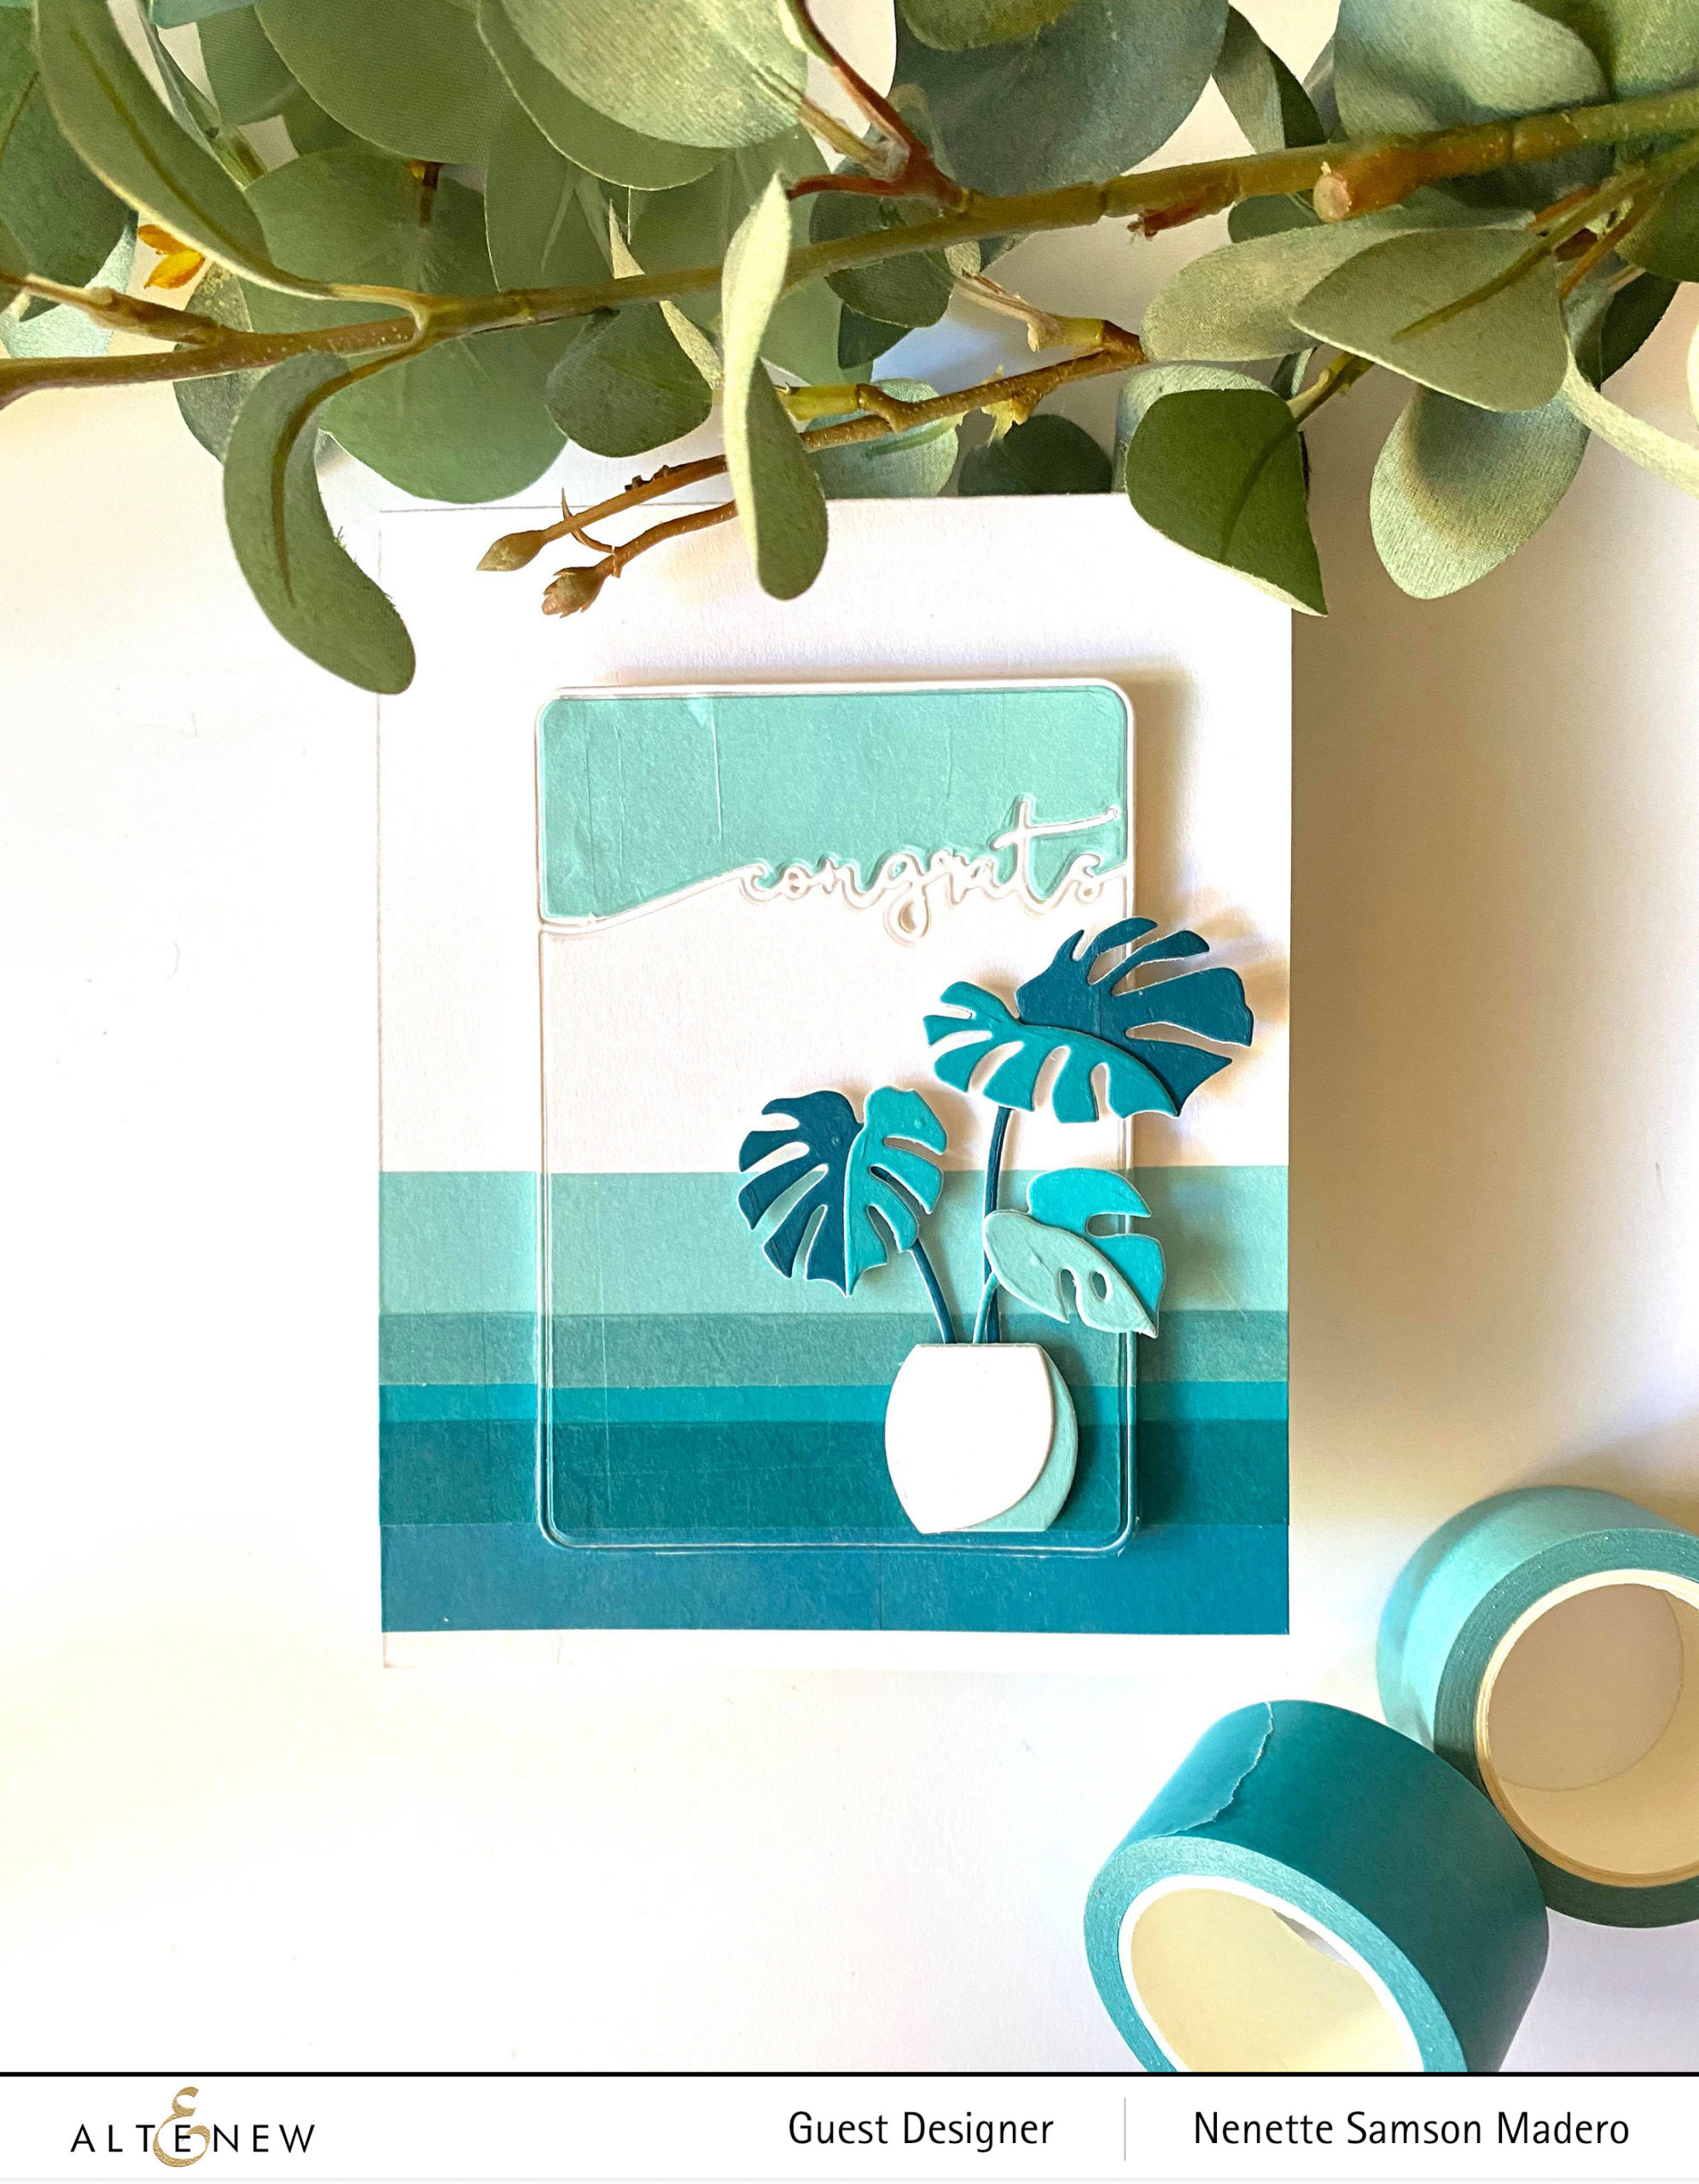
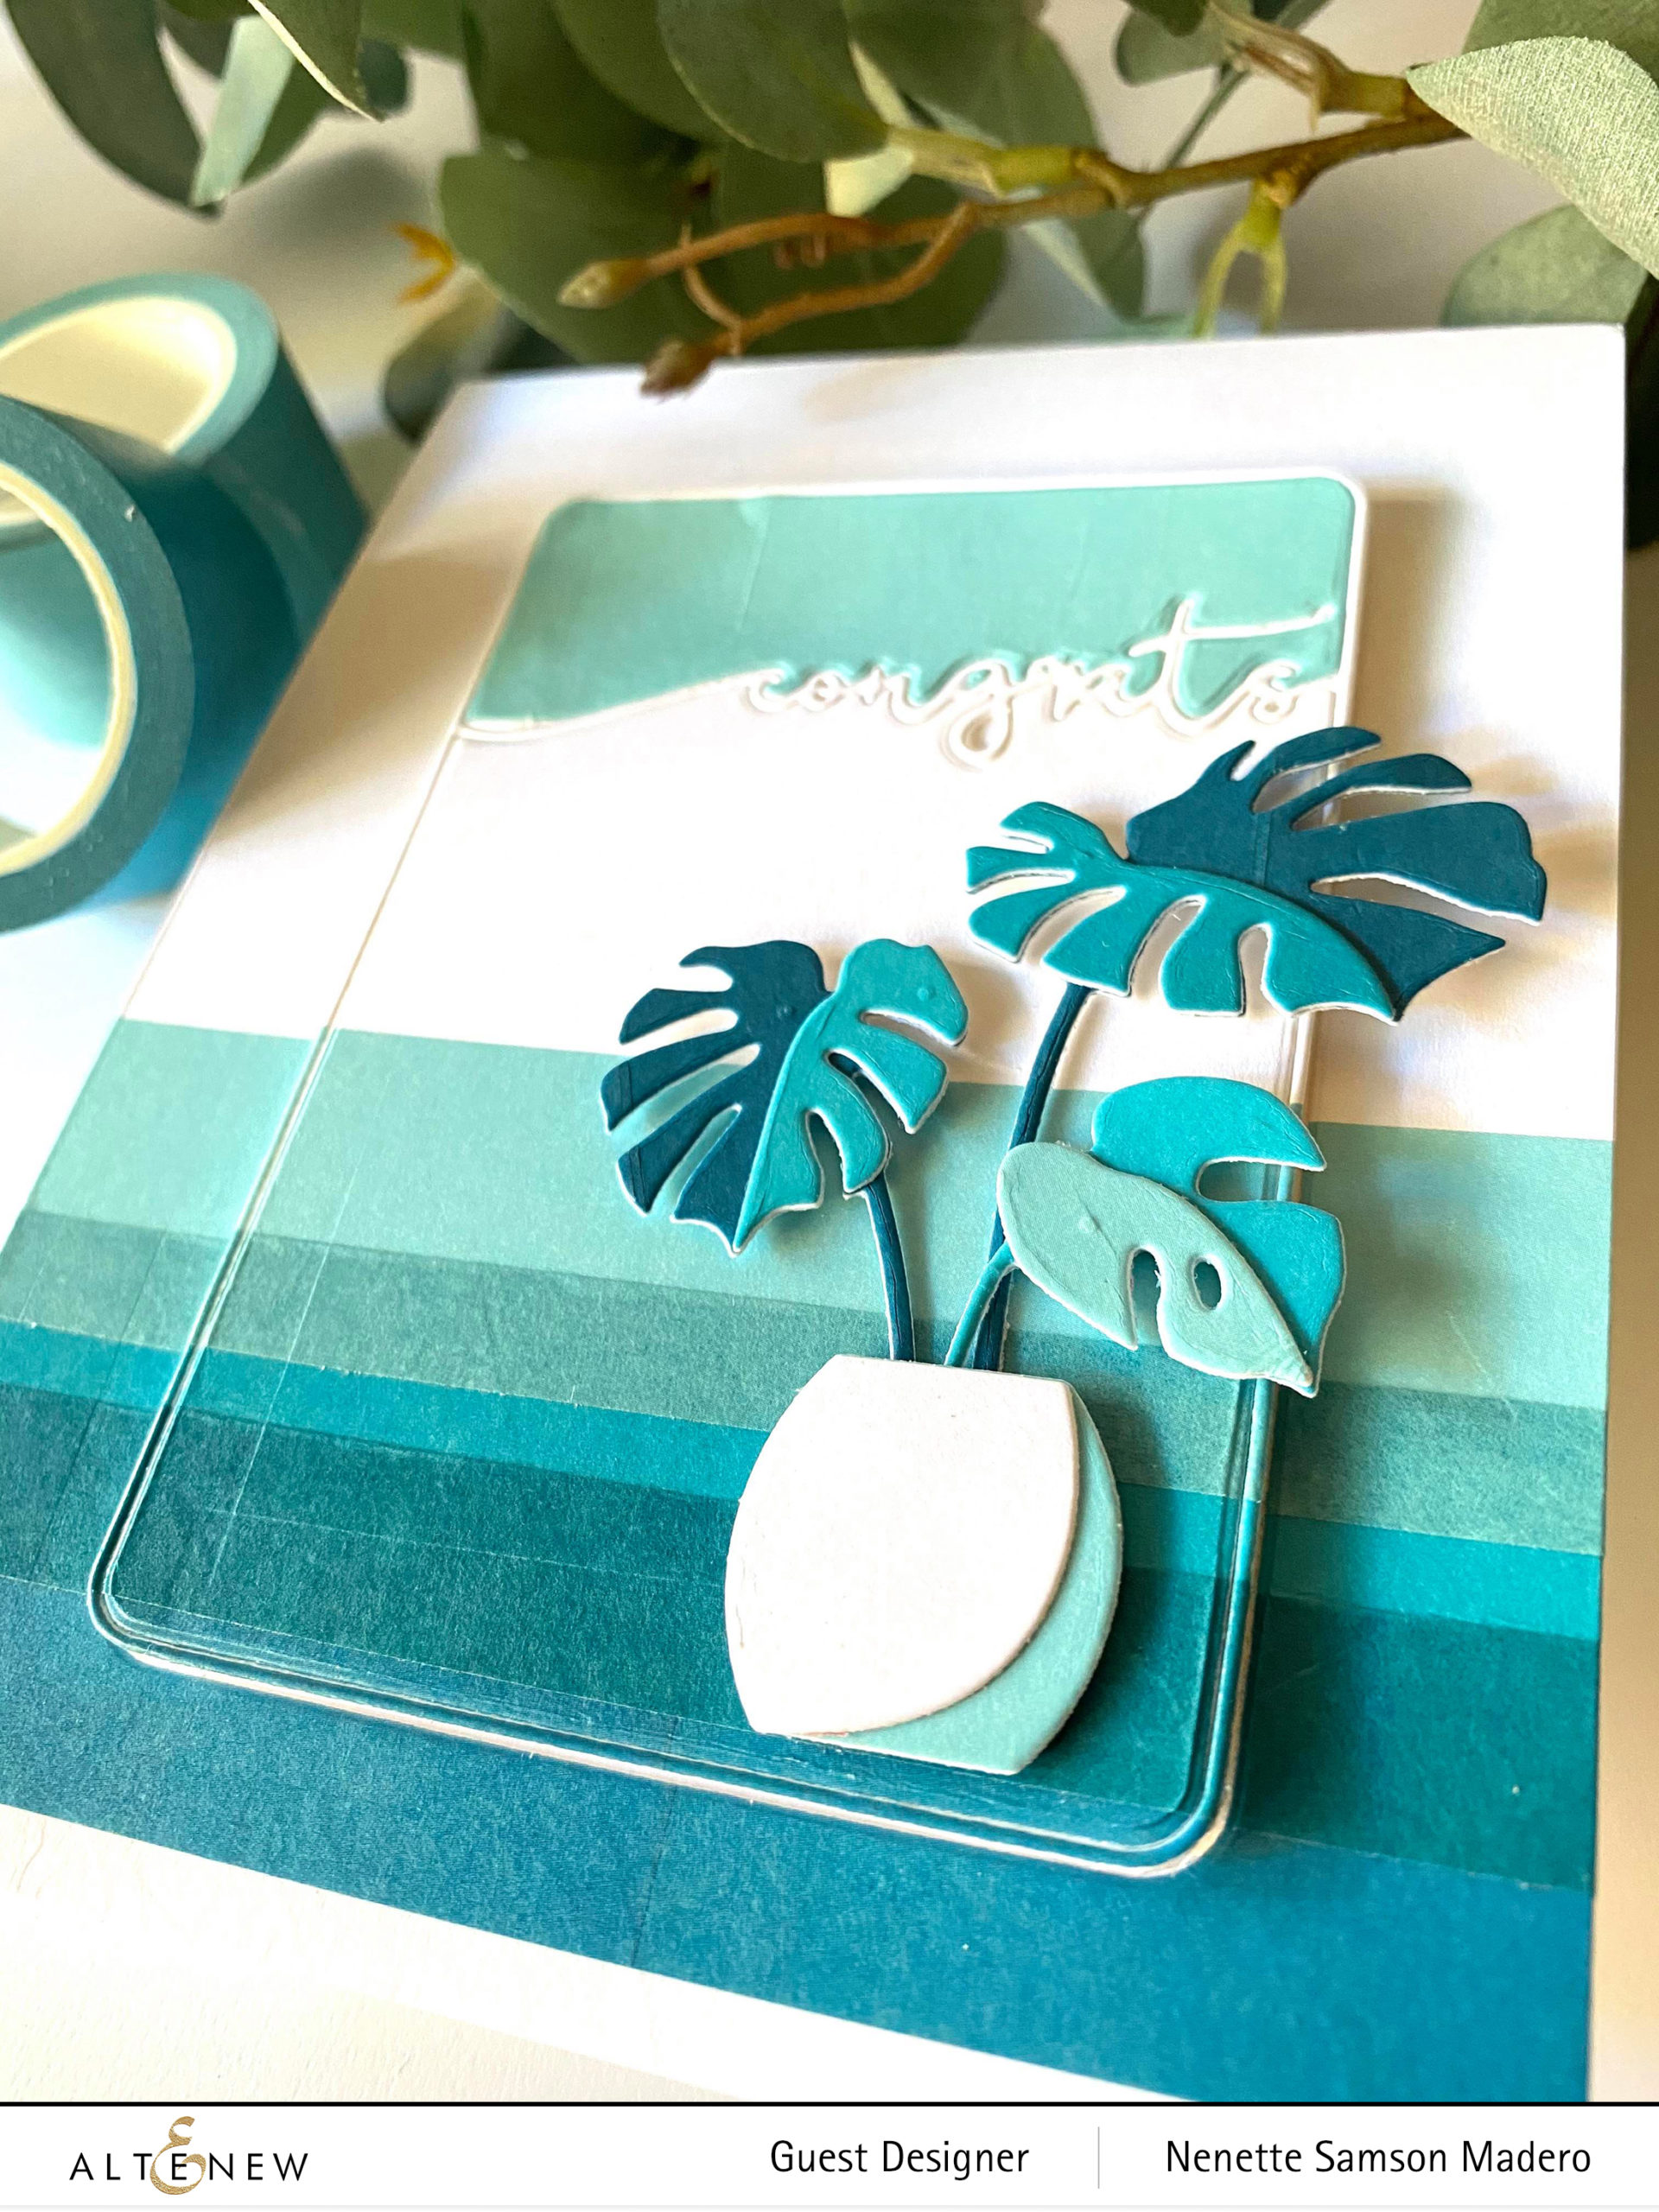
CONGRATS CARD


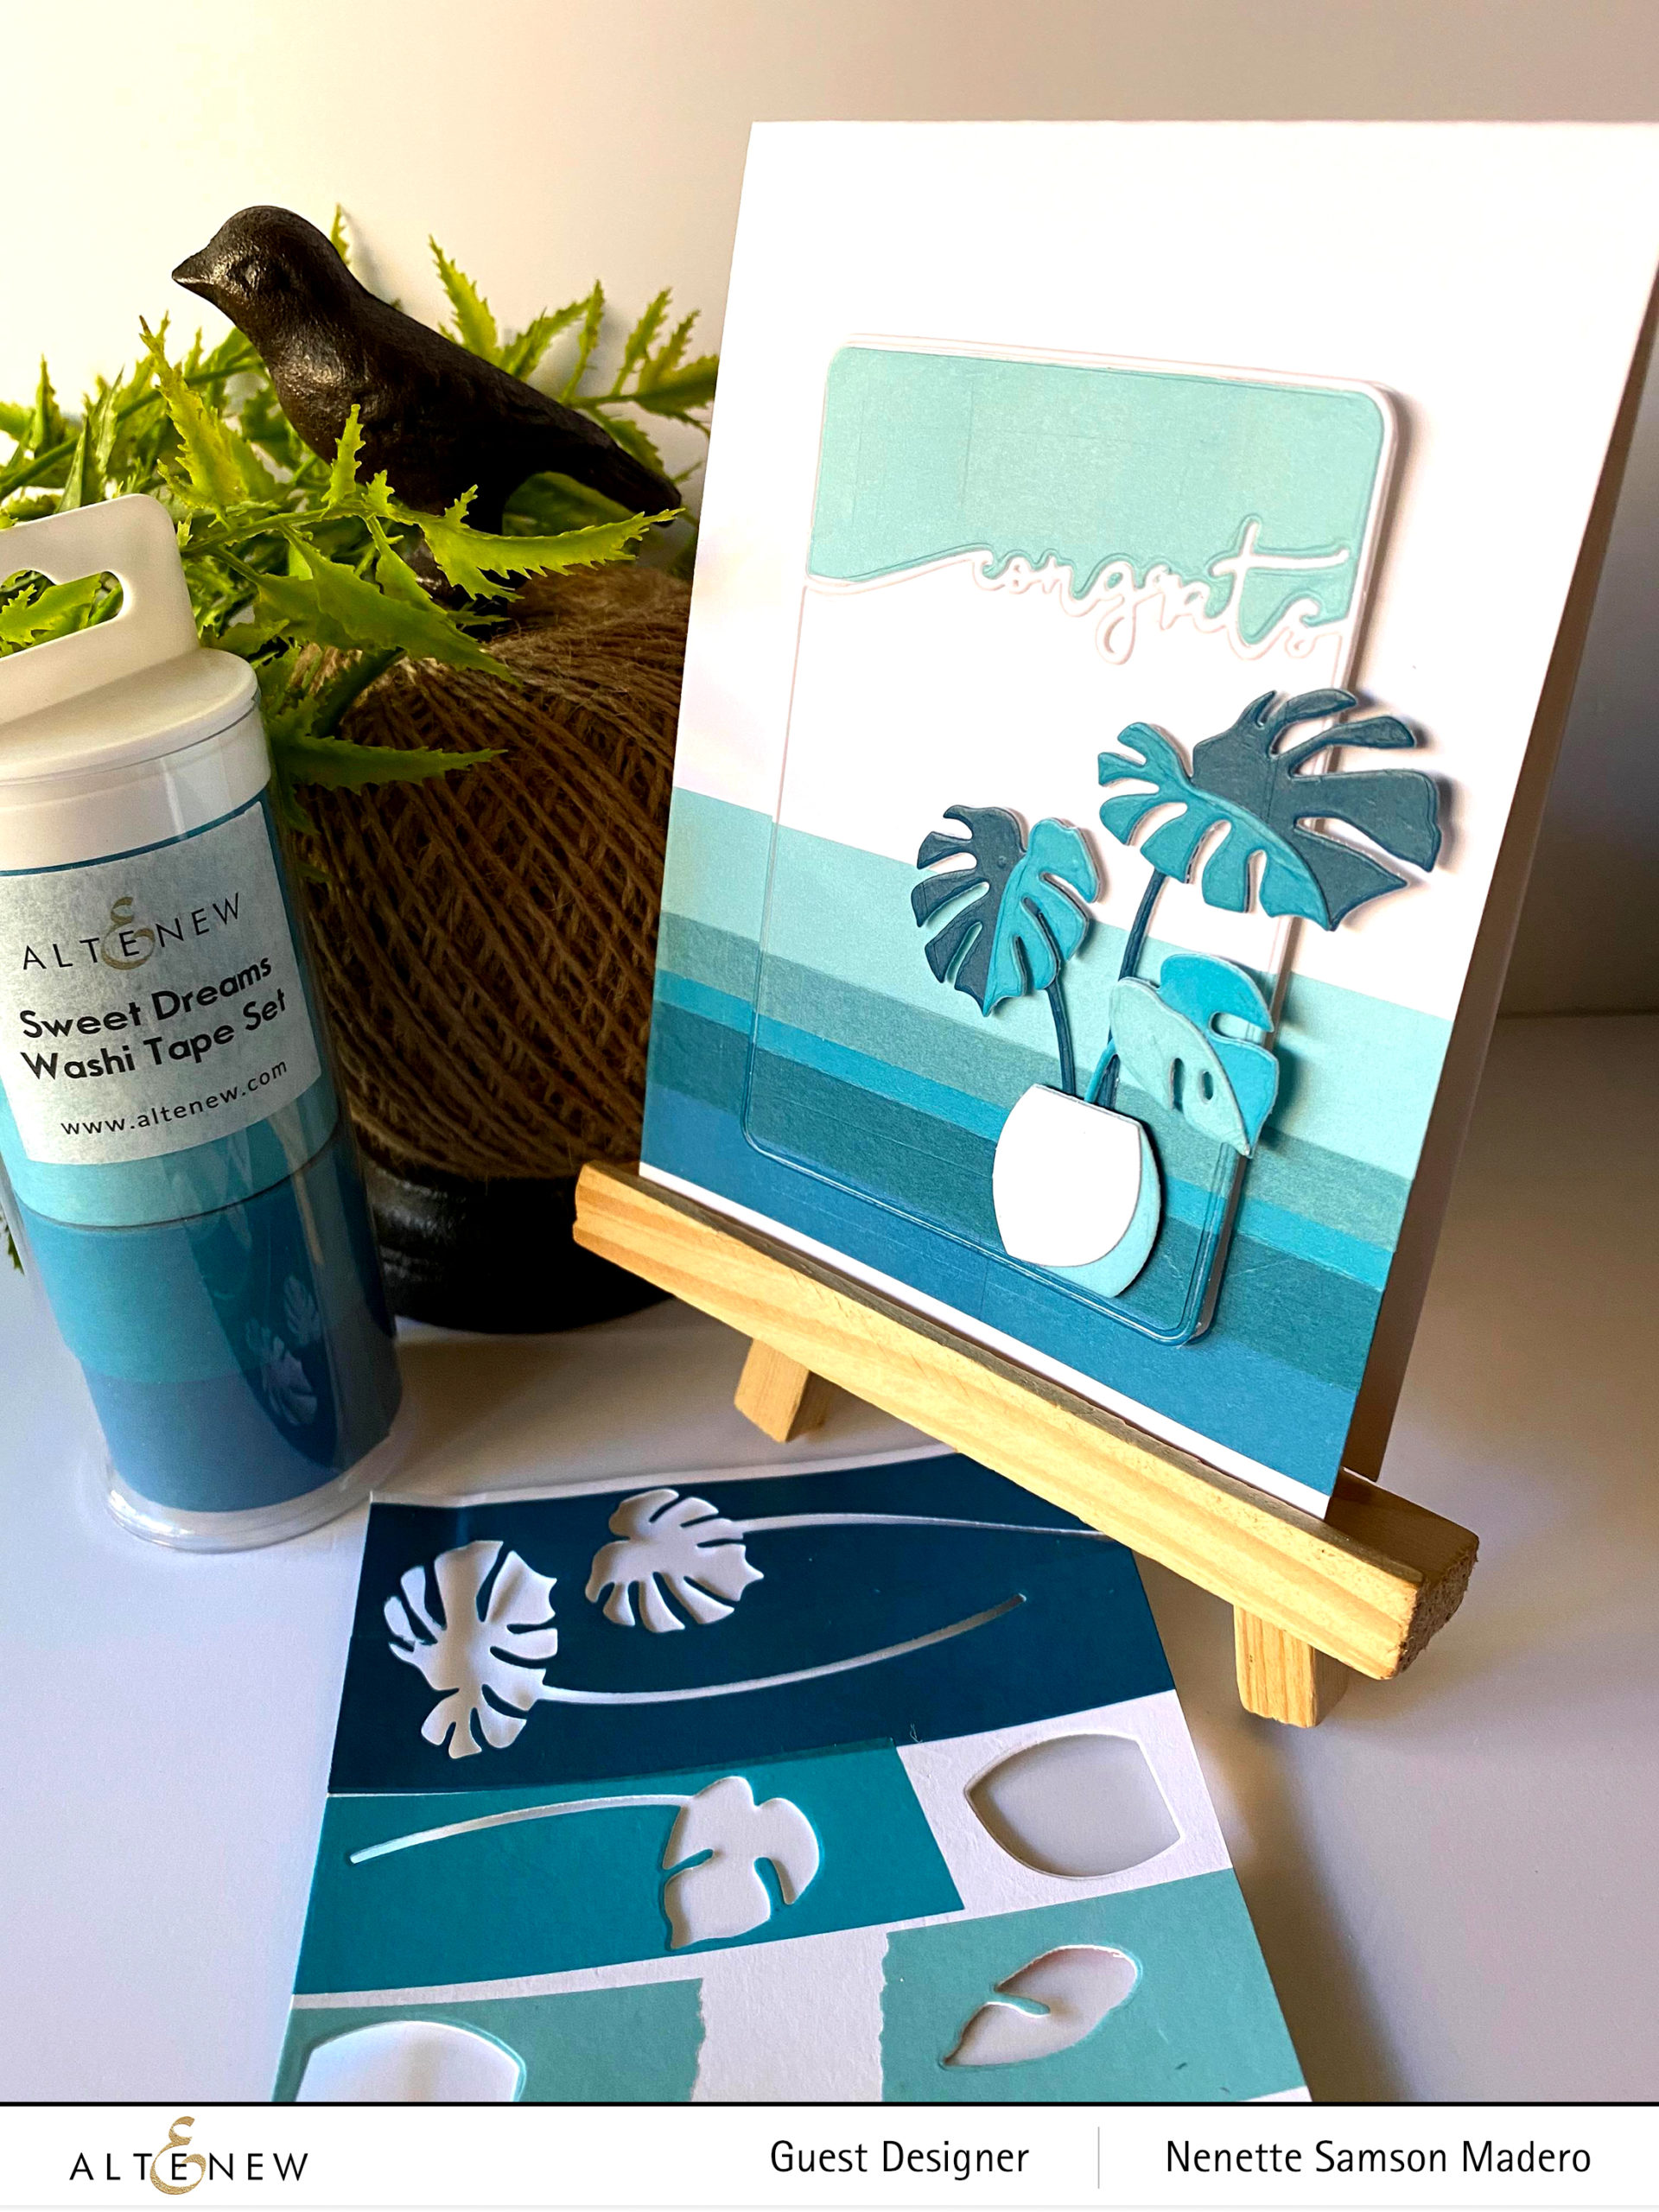
This card was inspired by the talented Norine Borys‘ card from last month’s stand-alone dies. I just loved how simple yet stunning the card was so I created a similar card using washi tape. Materials used for this card are the following: Framed Congrats die, Monstera 3D die and the Sweet Dreams Washi tape.

I love how easy it is to add color to a card front using washi tapes. For this card, I used the different shades of blues by sticking them onto Neenah solar white cardstock then die cutting the pieces using the Monstera 3d die. Next, I layered the different shades of washi, sometimes overlapping to create a new shade of blue. I left the upper portion of the card white for more contrast. I cut out the middle part using the Framed Congrats die then cut another 4 more to layer behind it to add some dimension then adhered the plant and pot.


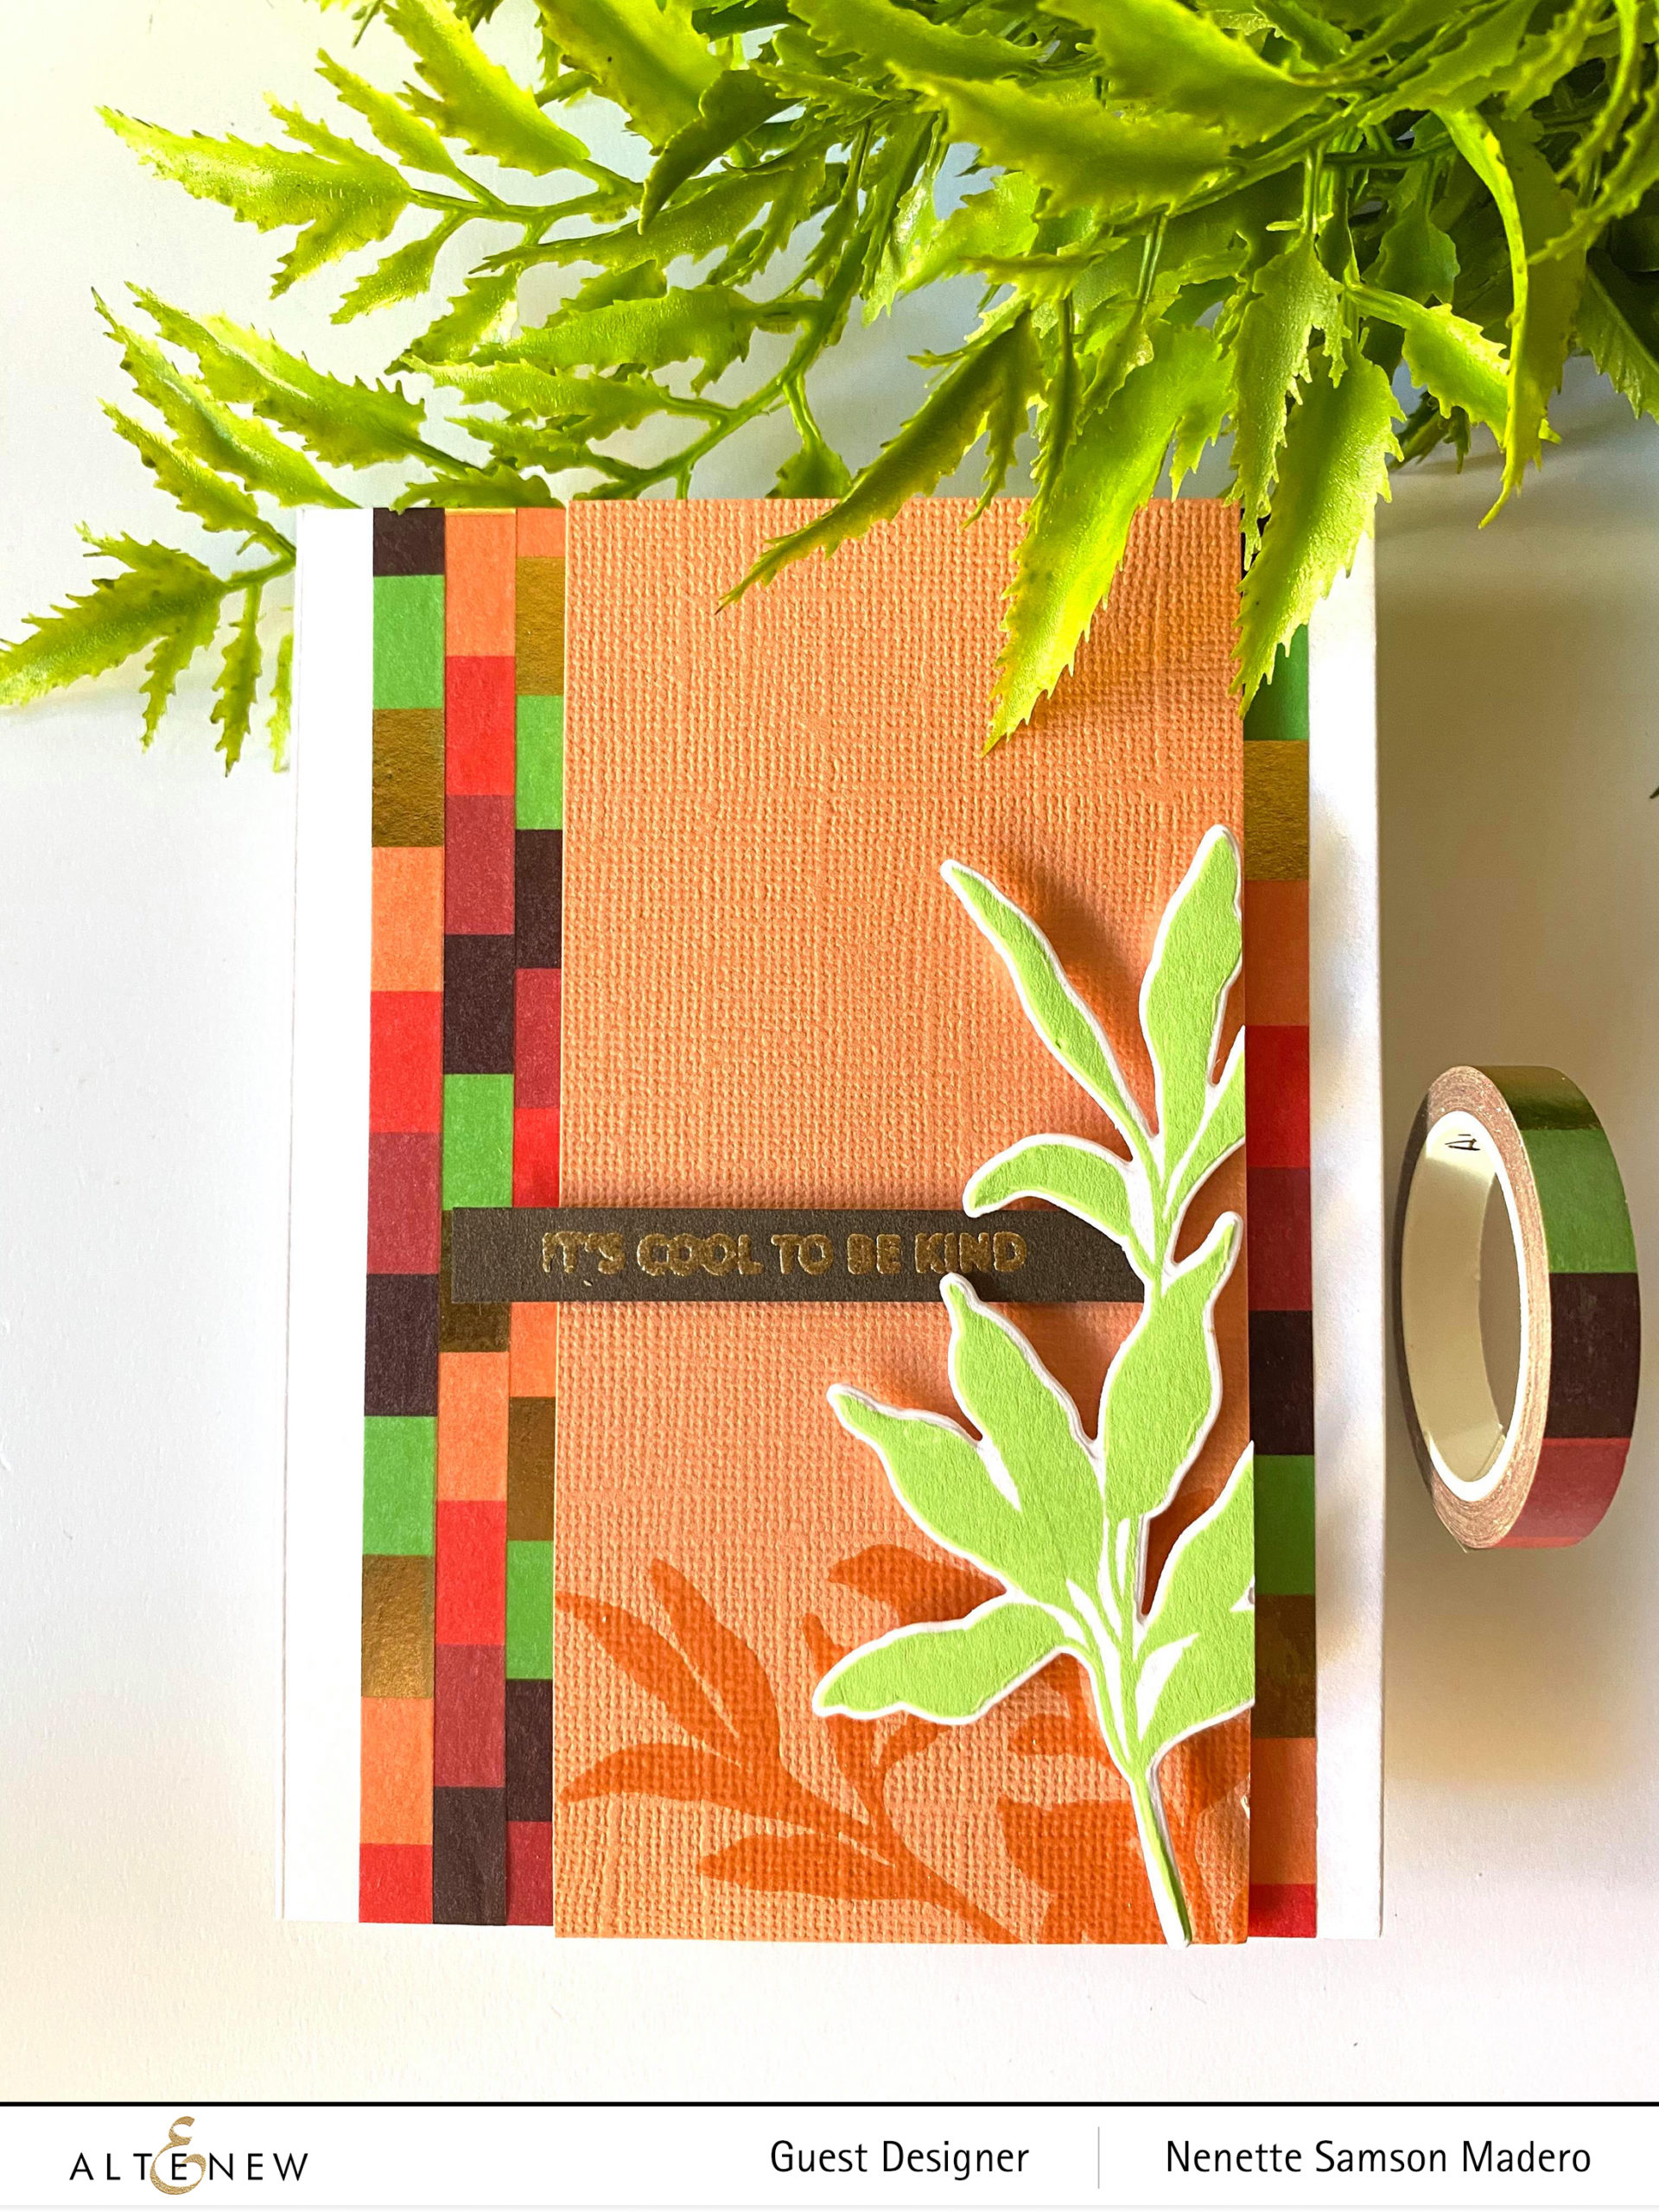
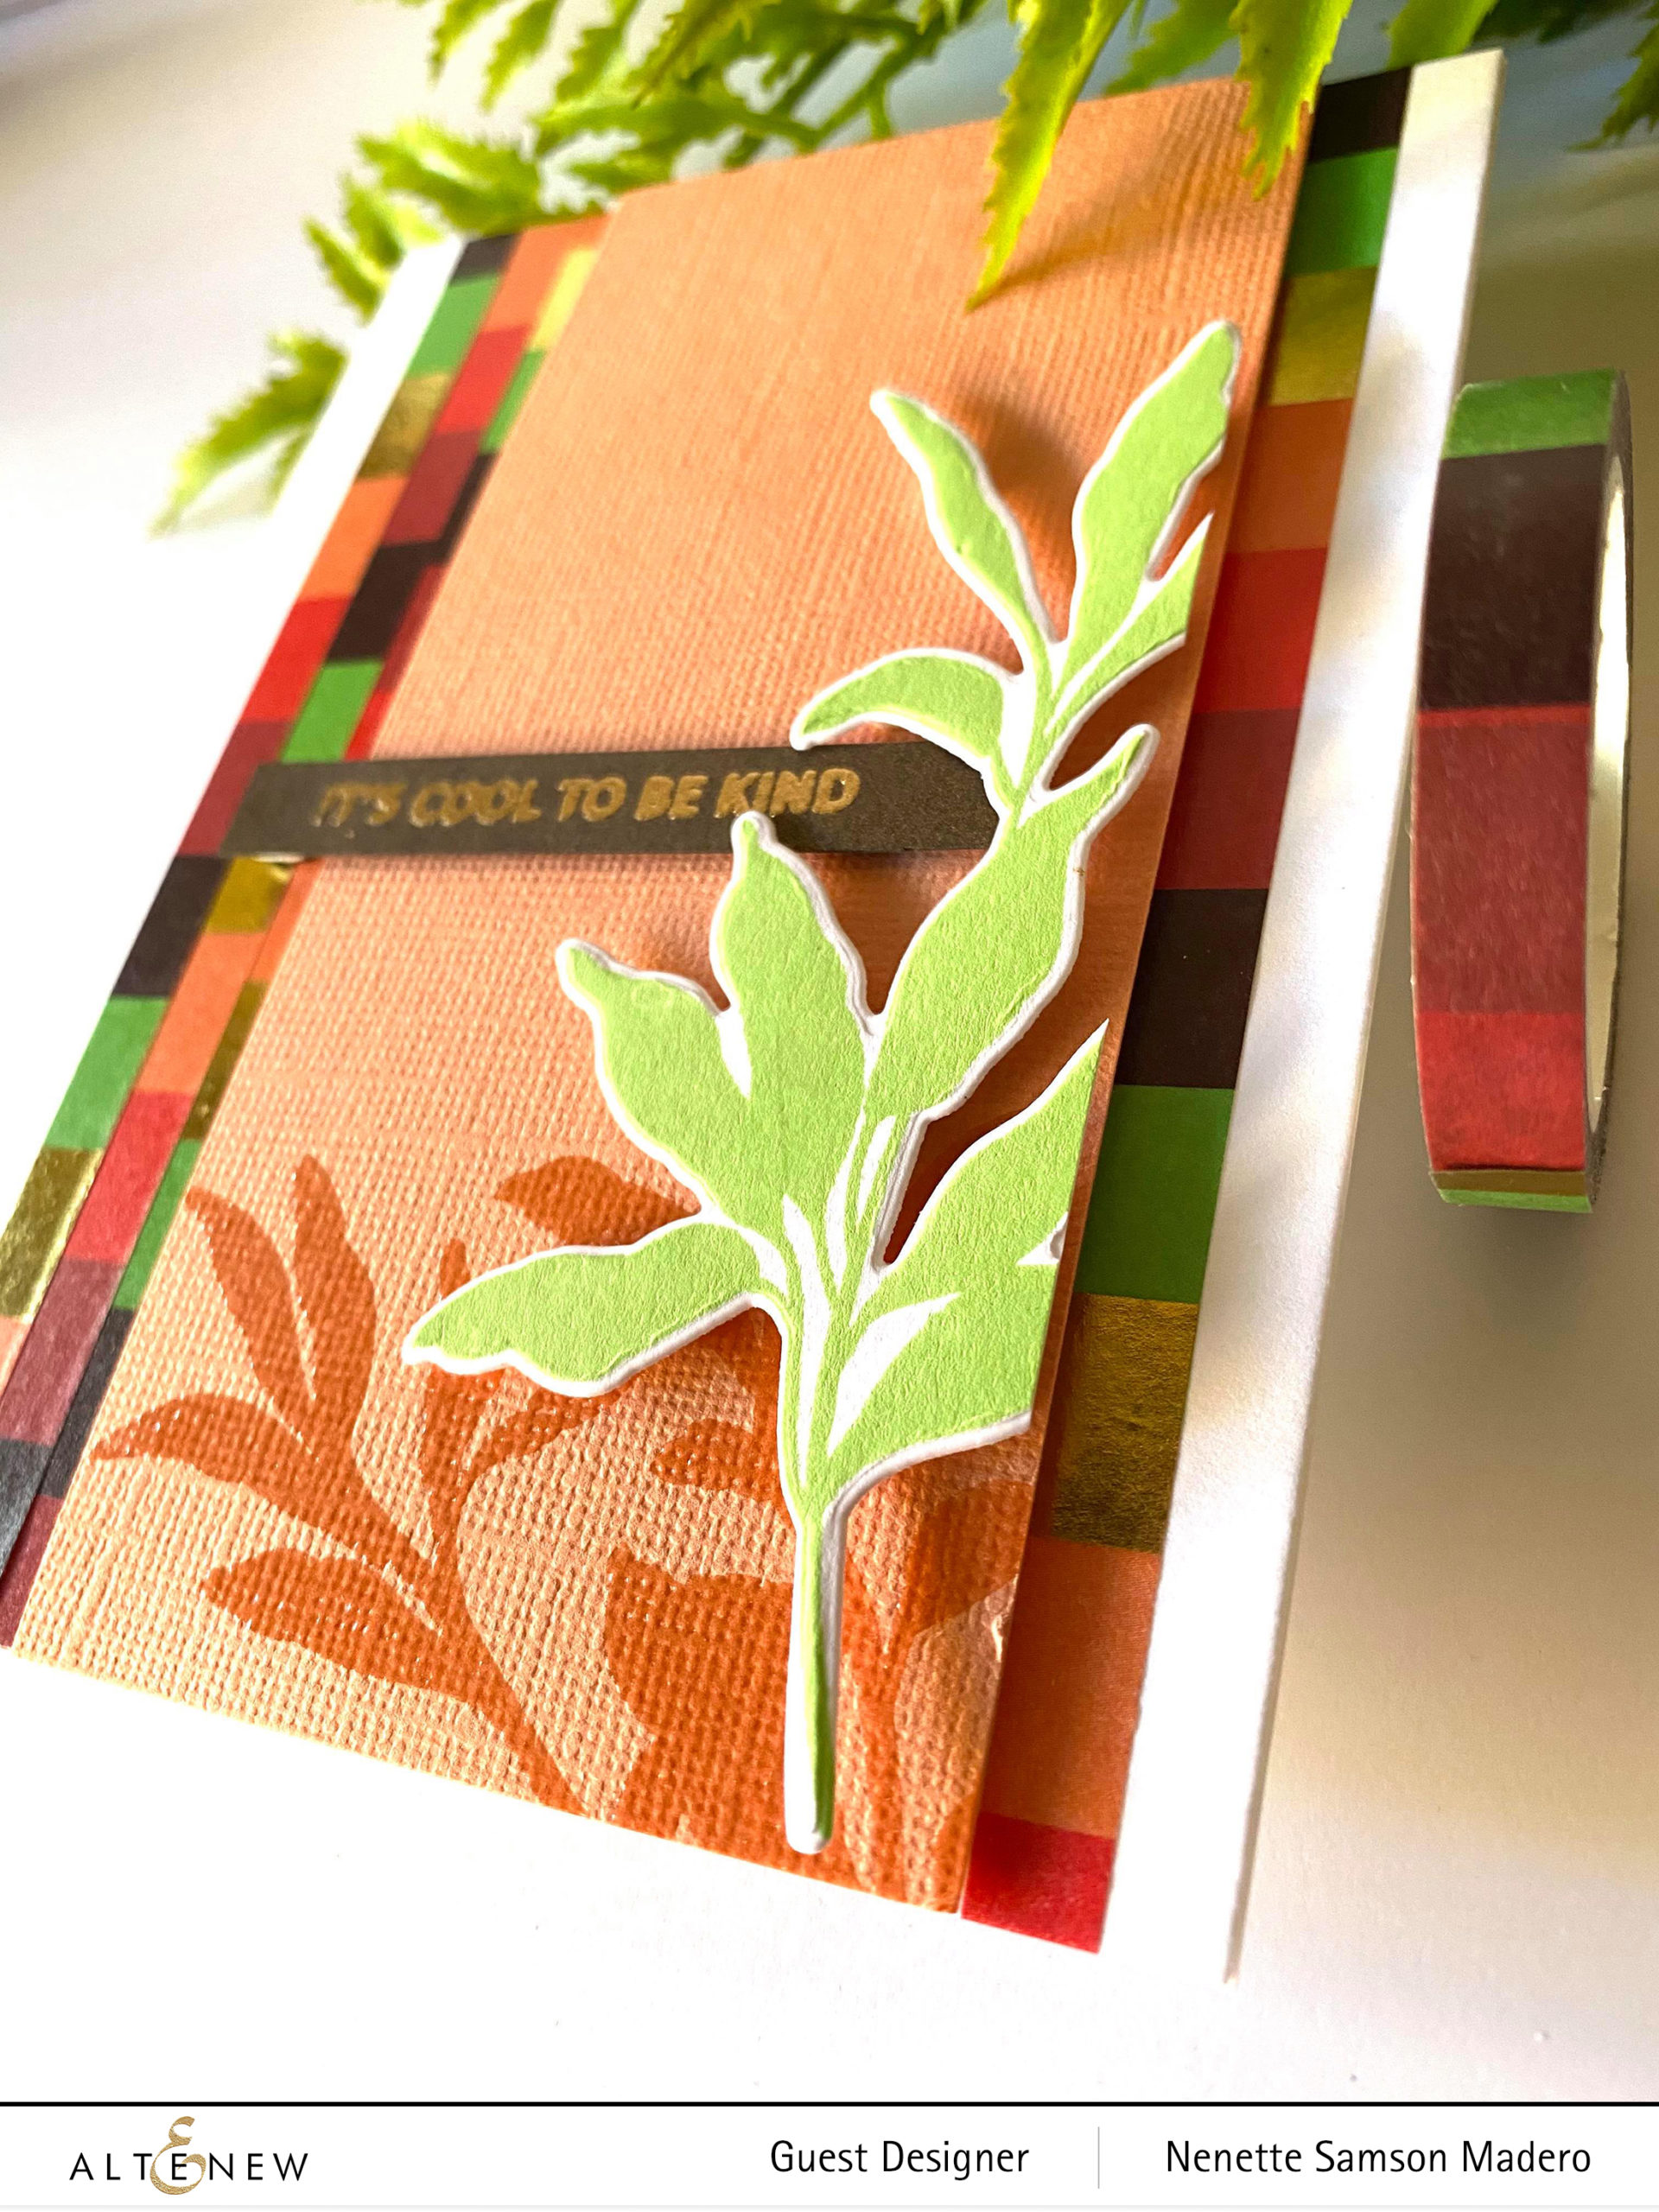
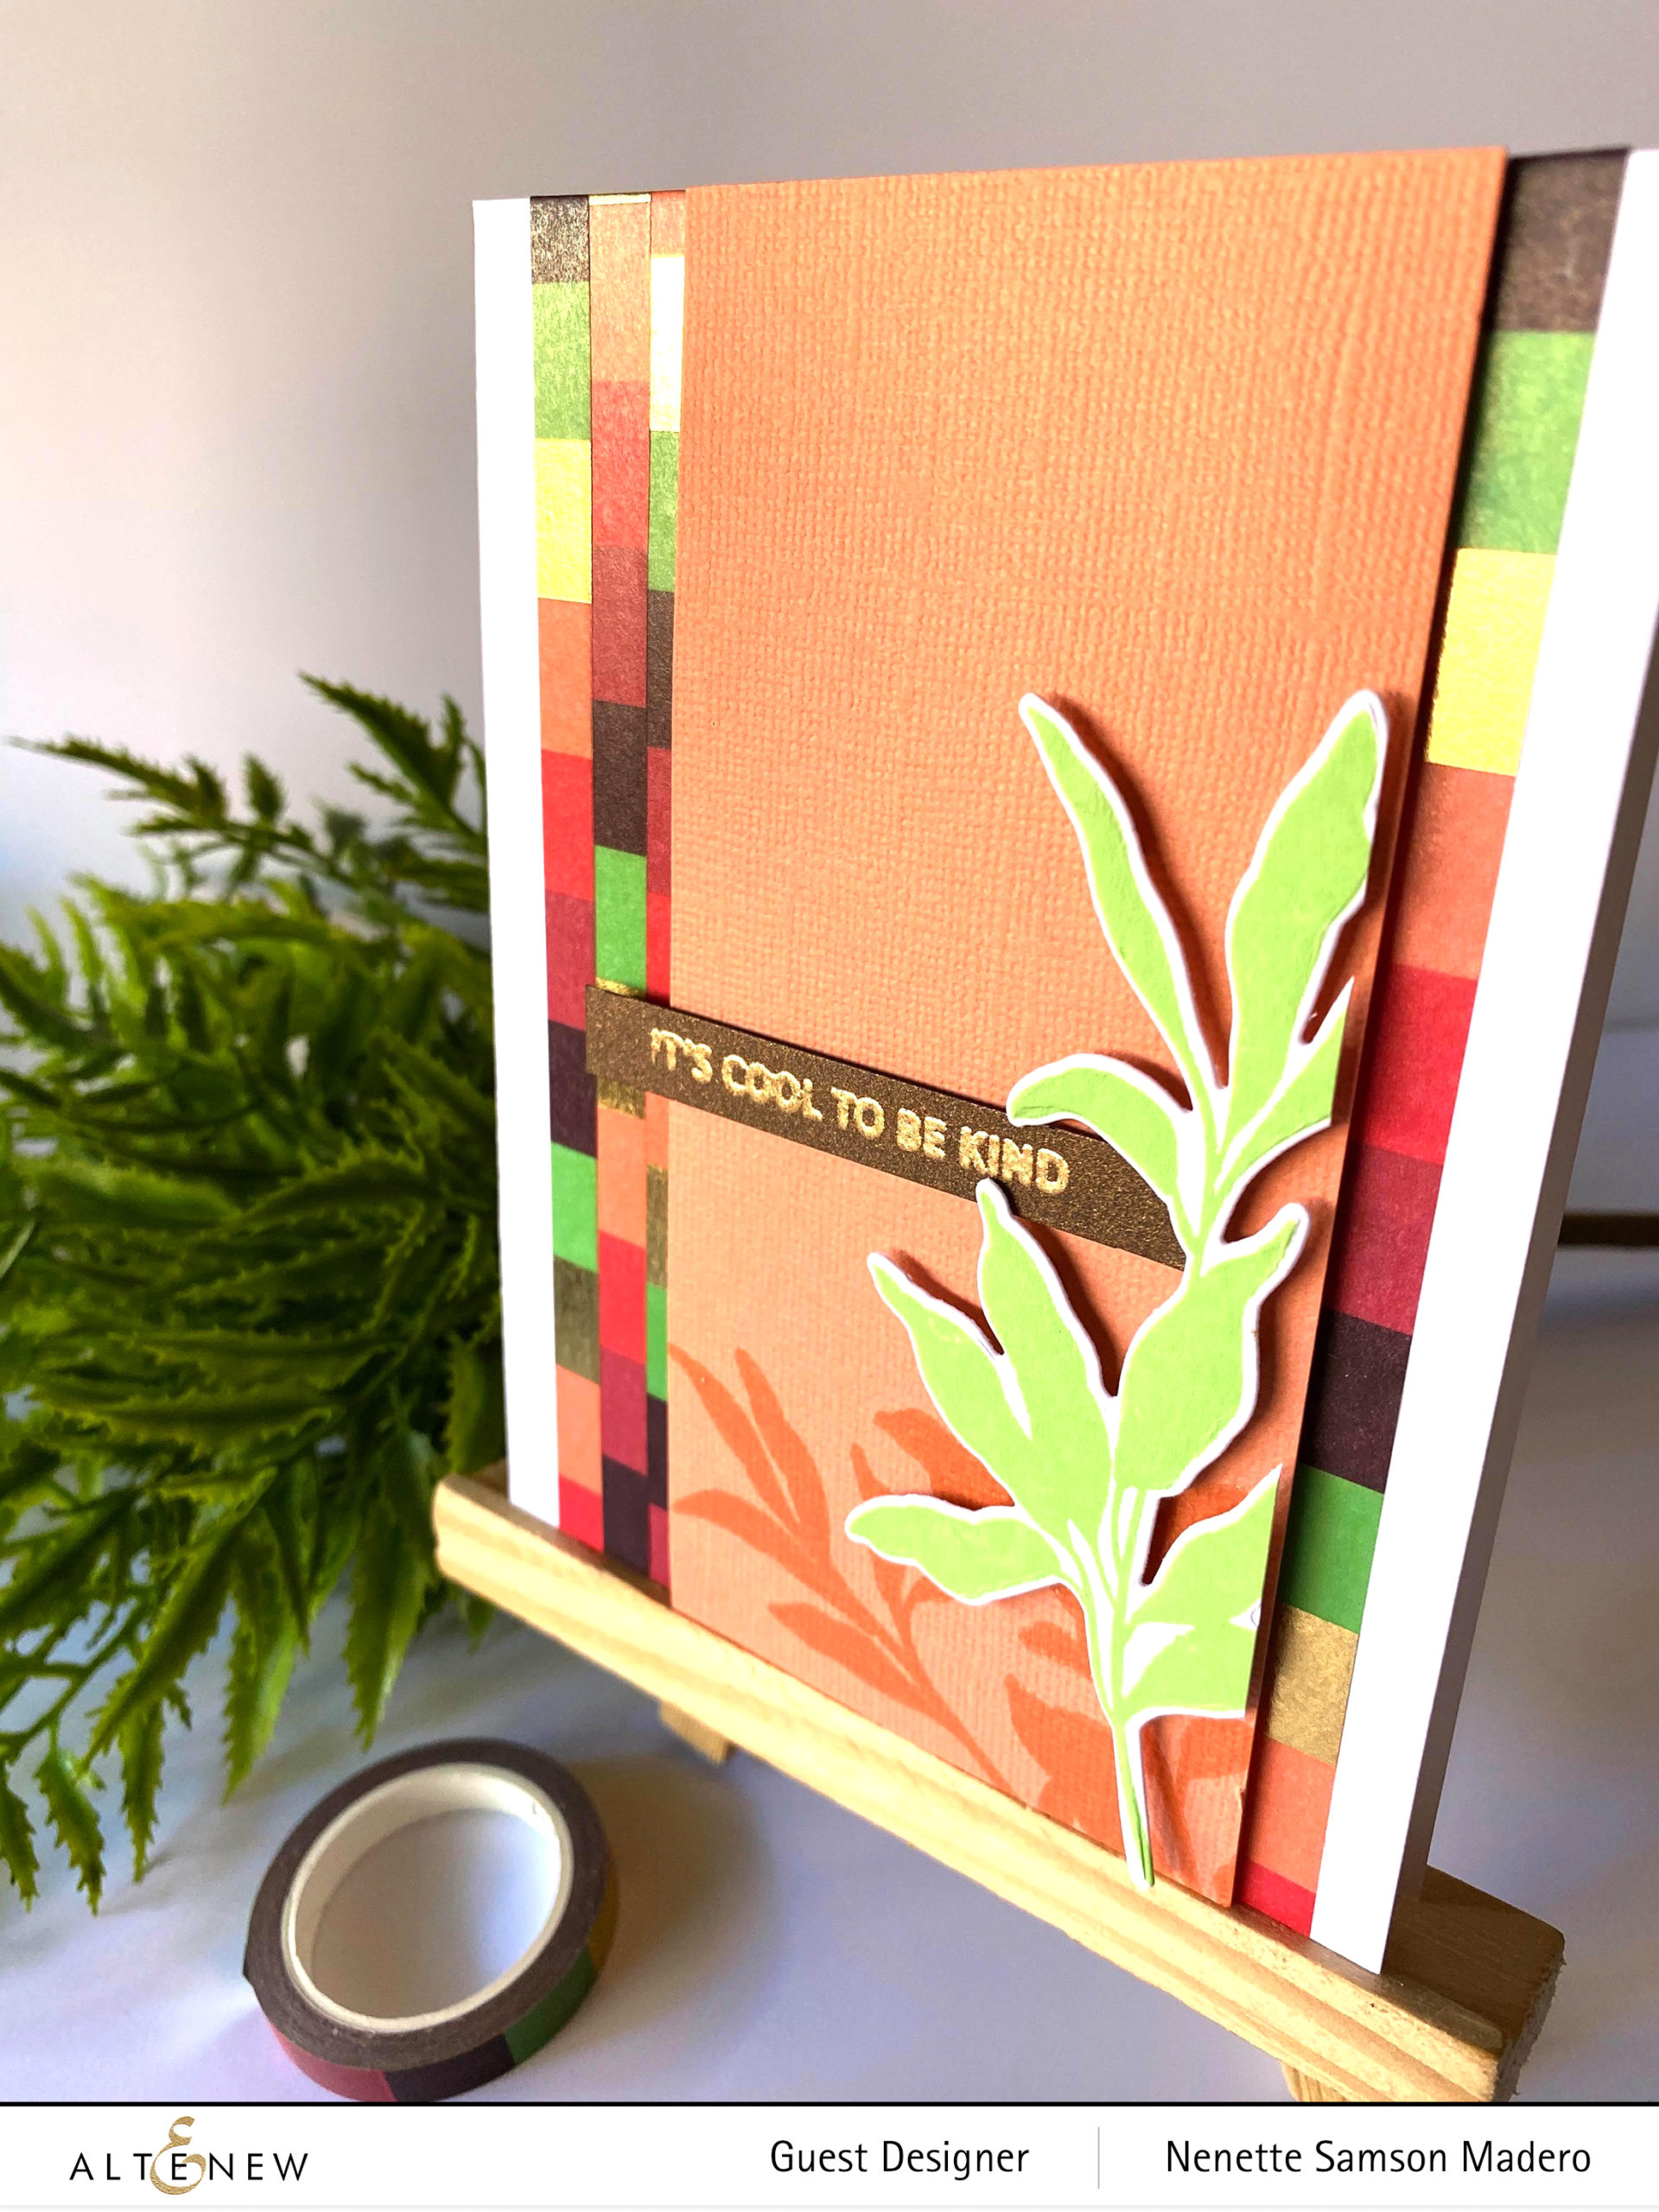
IT’S COOL TO BE KIND CARD


For this card, I used the following: Allium Palette Washi tape, Leaf Clusters Stamp and die set, Firefly crisp dye ink, Rose Gold Crisp Embossing powder, Versamark Ink and cardstocks.

I stamped the leaves onto Neenah Solar White cardstock then die cut it. Another set of leaves was stamped onto the orange cardstock using Versamark ink then embossed with clear embossing powder. the panel was cut and the Allium Palette Washi tape was used to frame the panel on both sides for some accents. I love the color combo used in this tape.❤️ The panel was attached to the card front using foam tape.


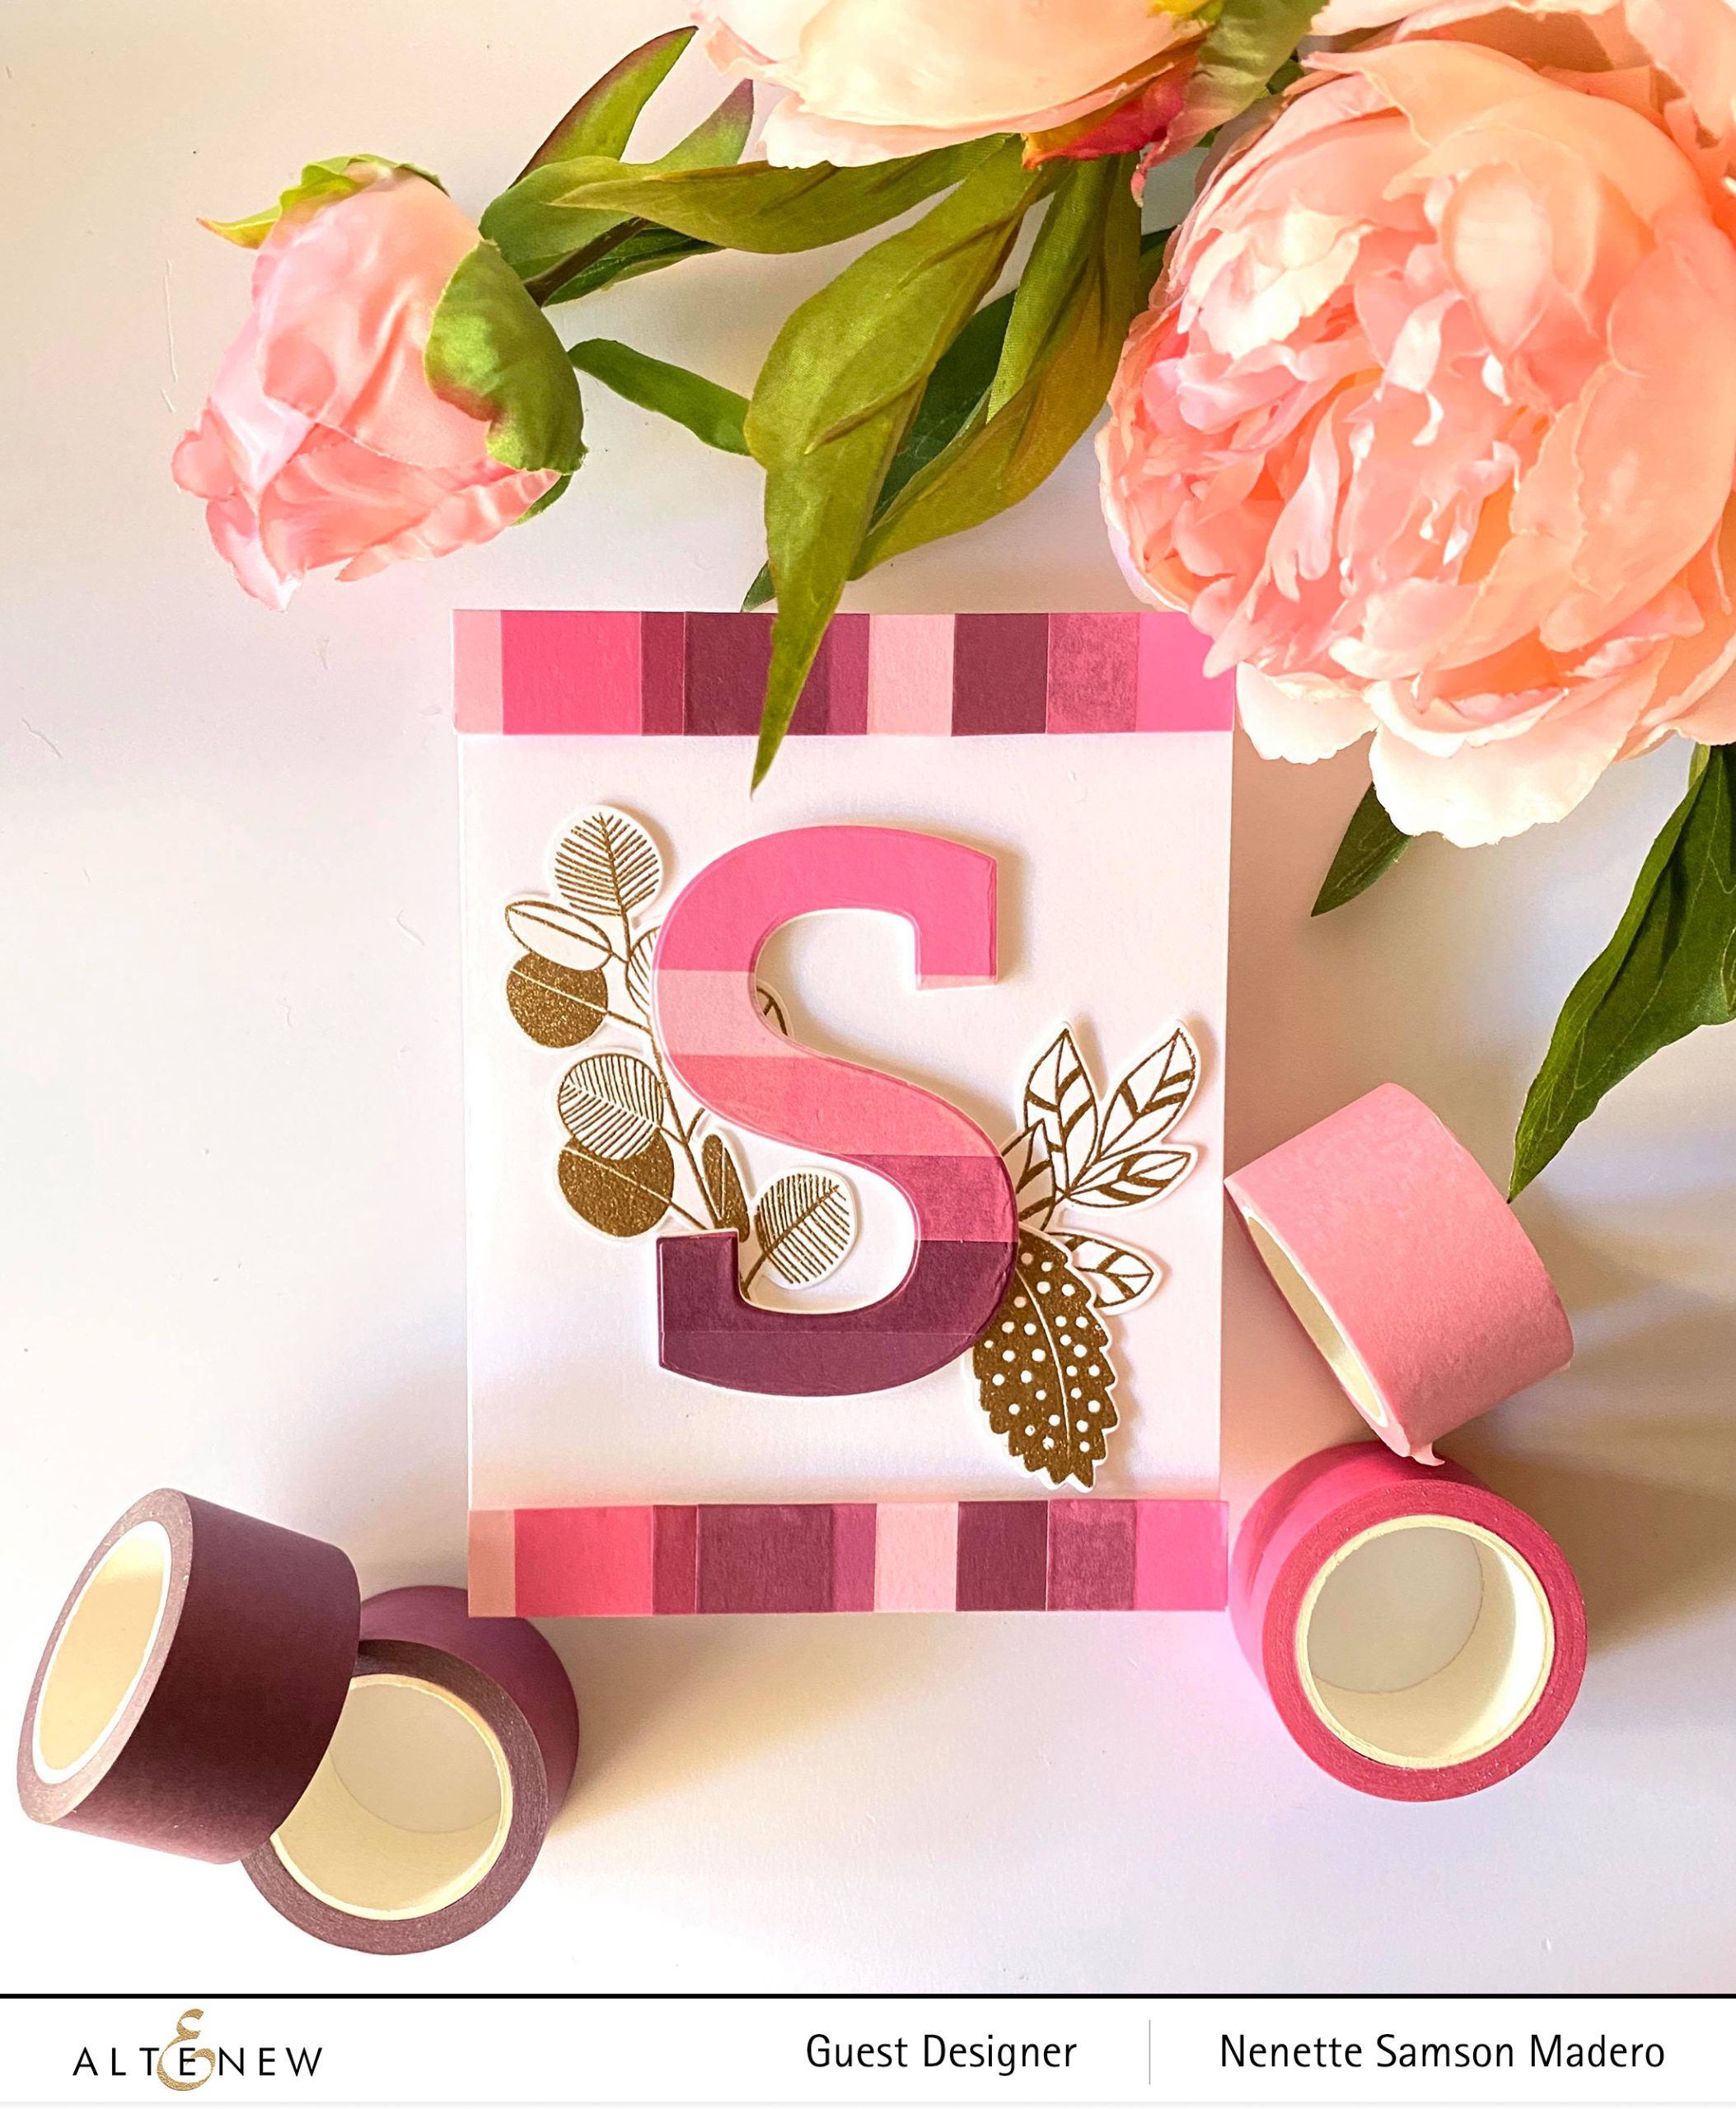
MONOGRAM S CARD


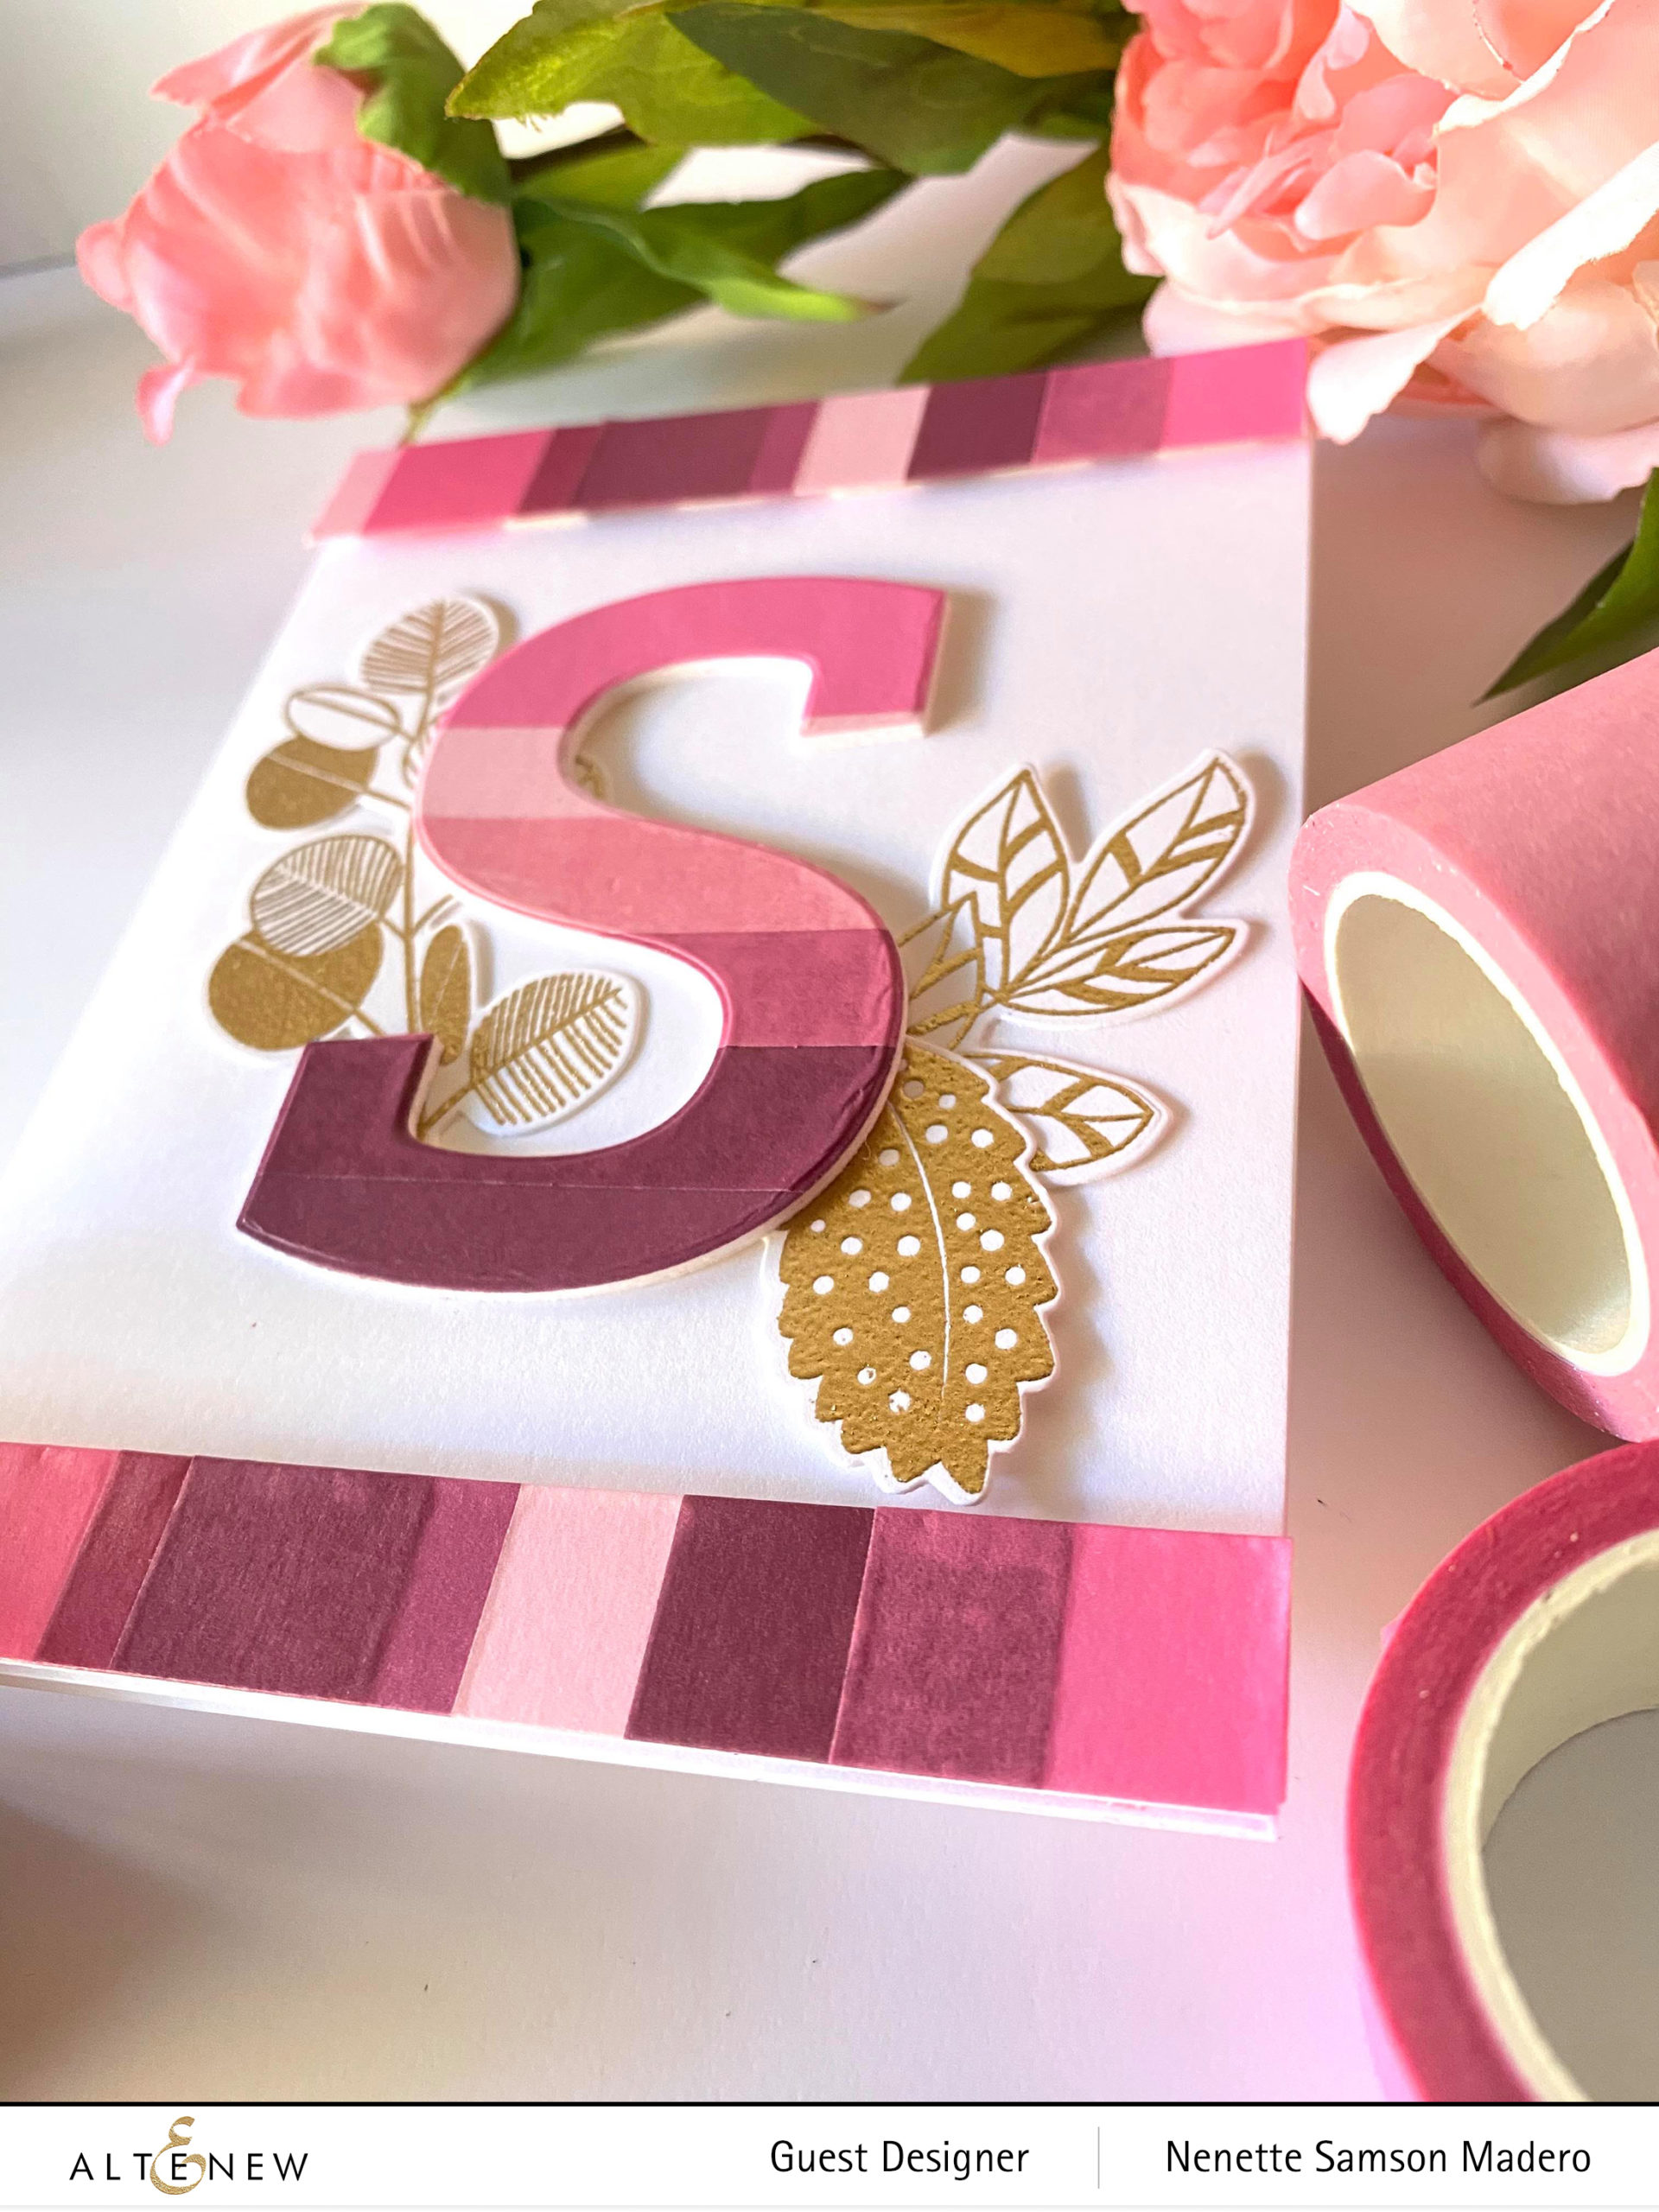
This is another easy card to create. I used the Rose Petal Washi tapes, Mega Alpha S die, Retro Plantines stamp and die set, Rose Gold Embossing powder and Versamark ink.

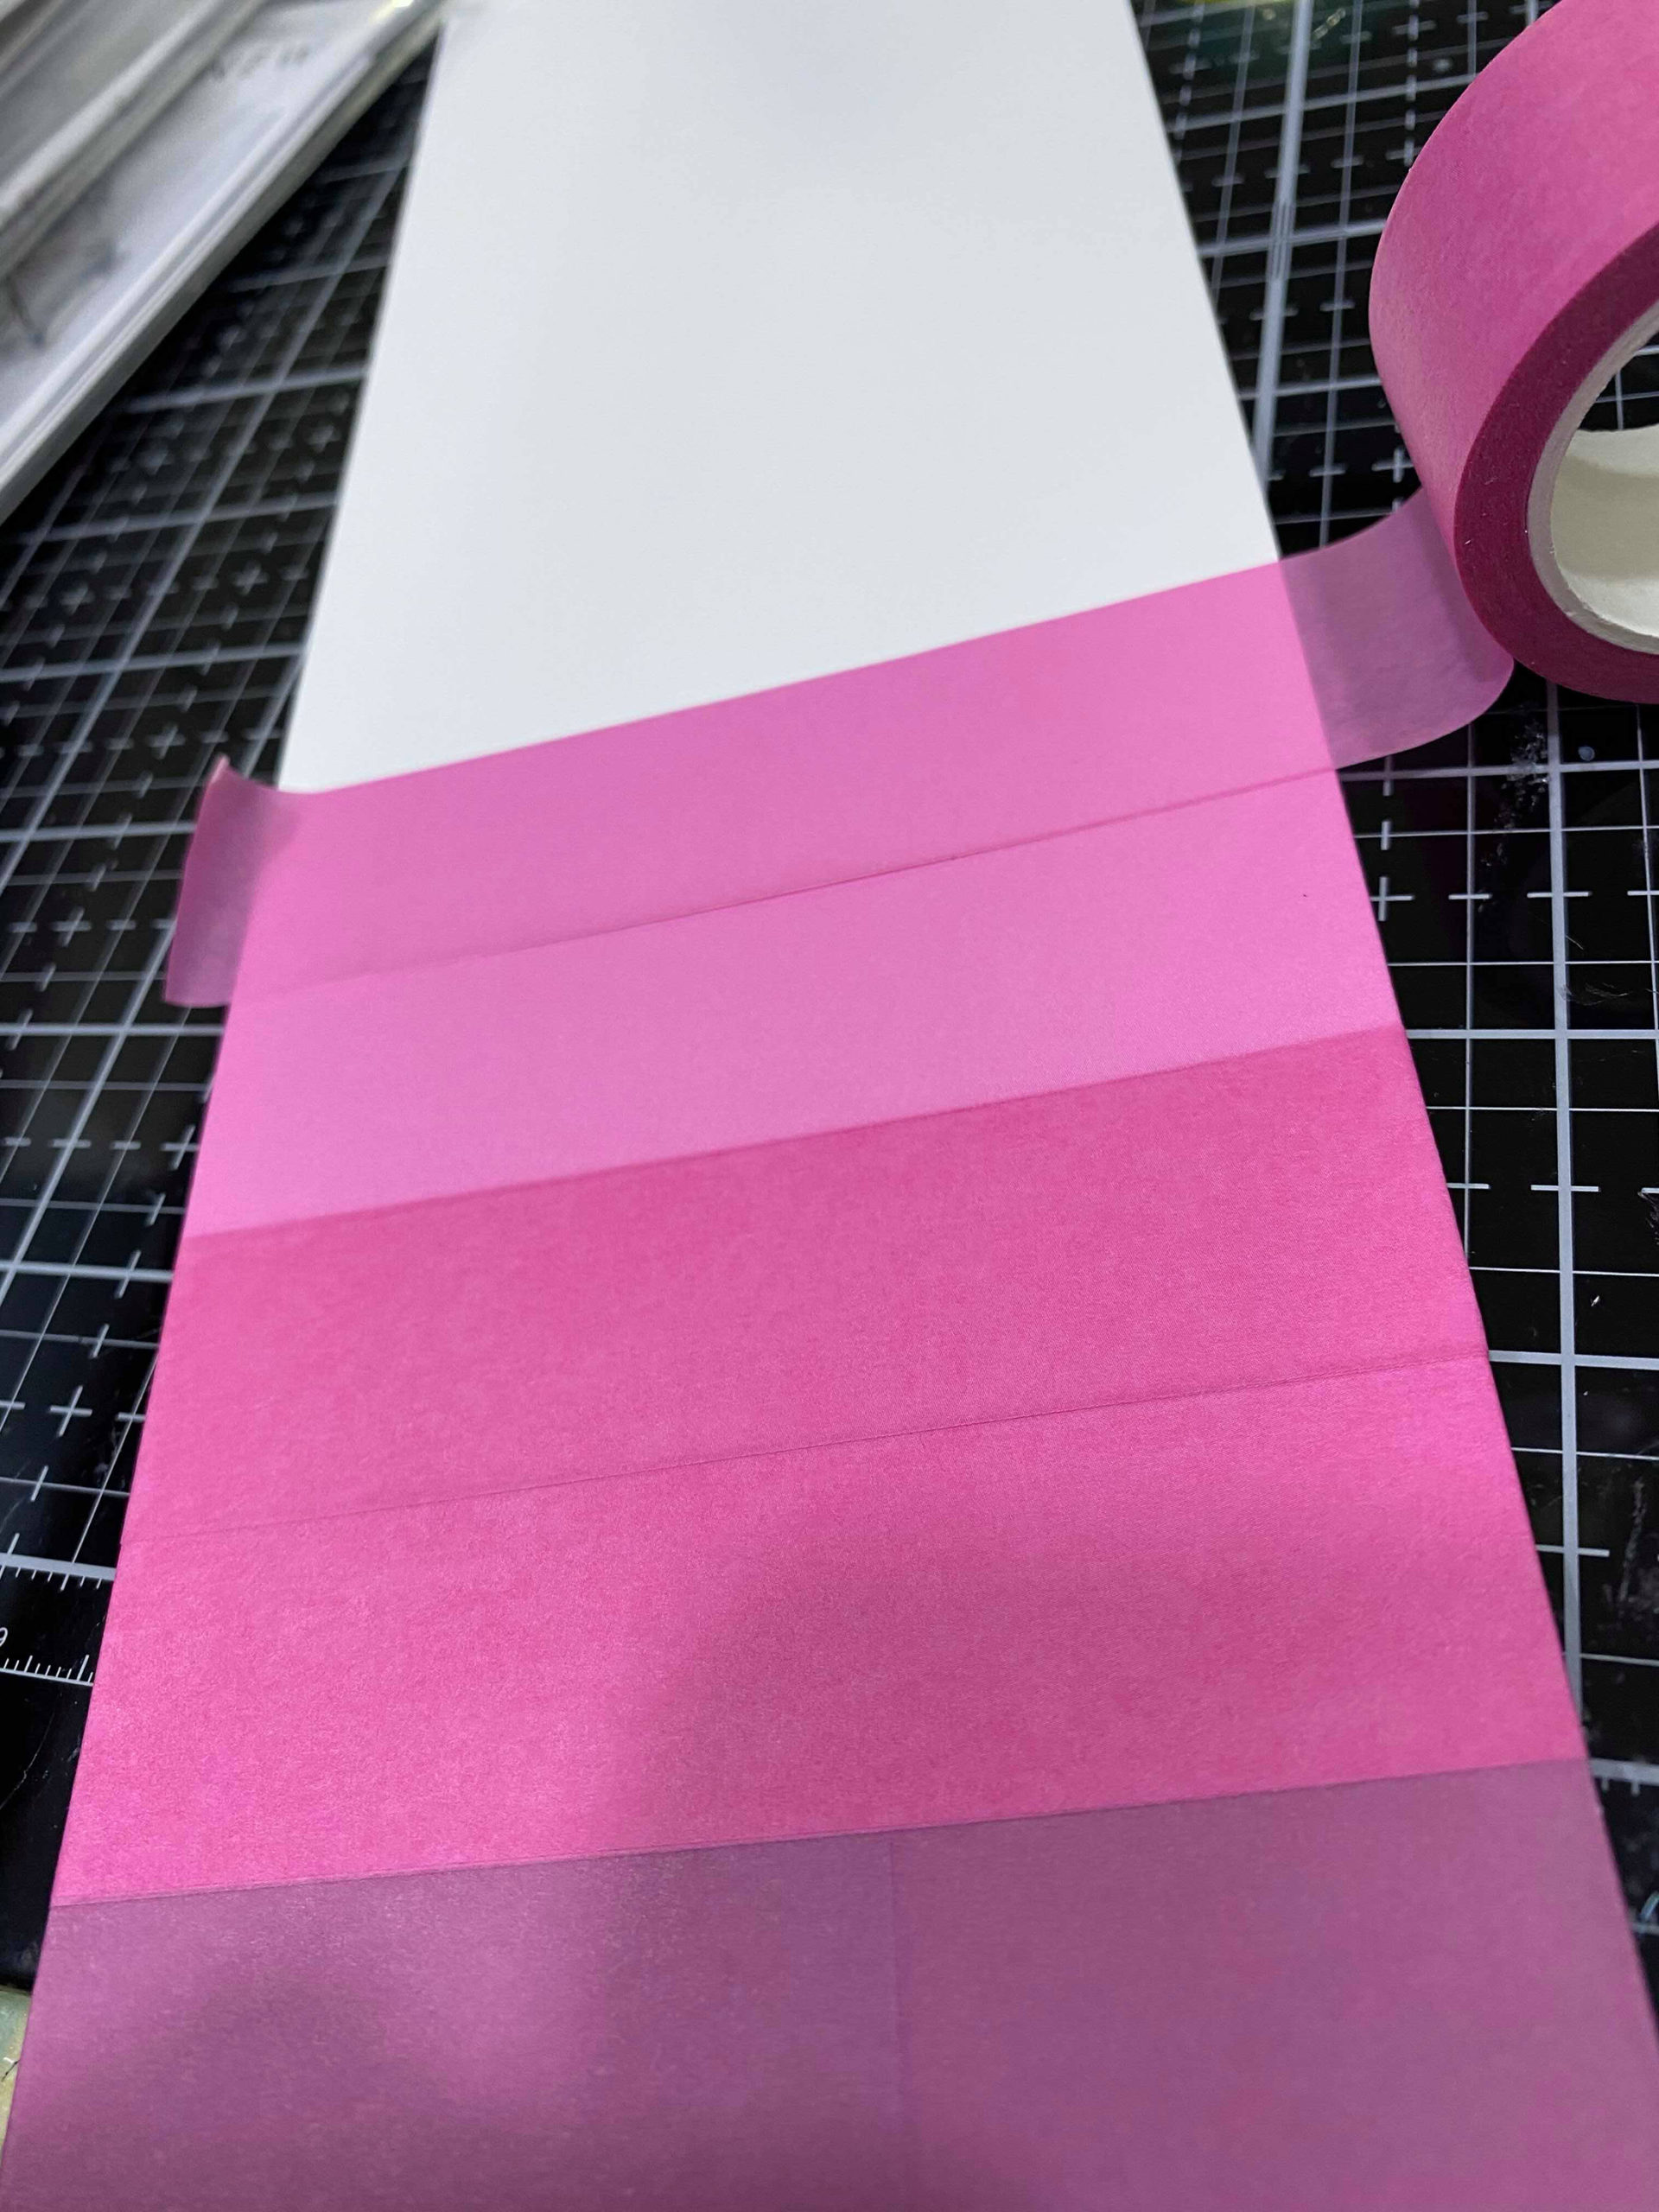
First, I covered a sheet of Neenah Solar White cardstock scrap with the different shades of pink to create an ombre effect. I die cut the letter S then added dimension by adhering 4 more other S die cuts. The leaves from the Retro Plantines stamp set were embossed using the rose gold embossing powder then die cut.

Another strip f cardstock was covered using the washi tape but I made sure to overlap the tapes to create more shades of pink. This was cut into two to create the top and bottom strips on the card. Foam tape was used to add dimension to these strips.


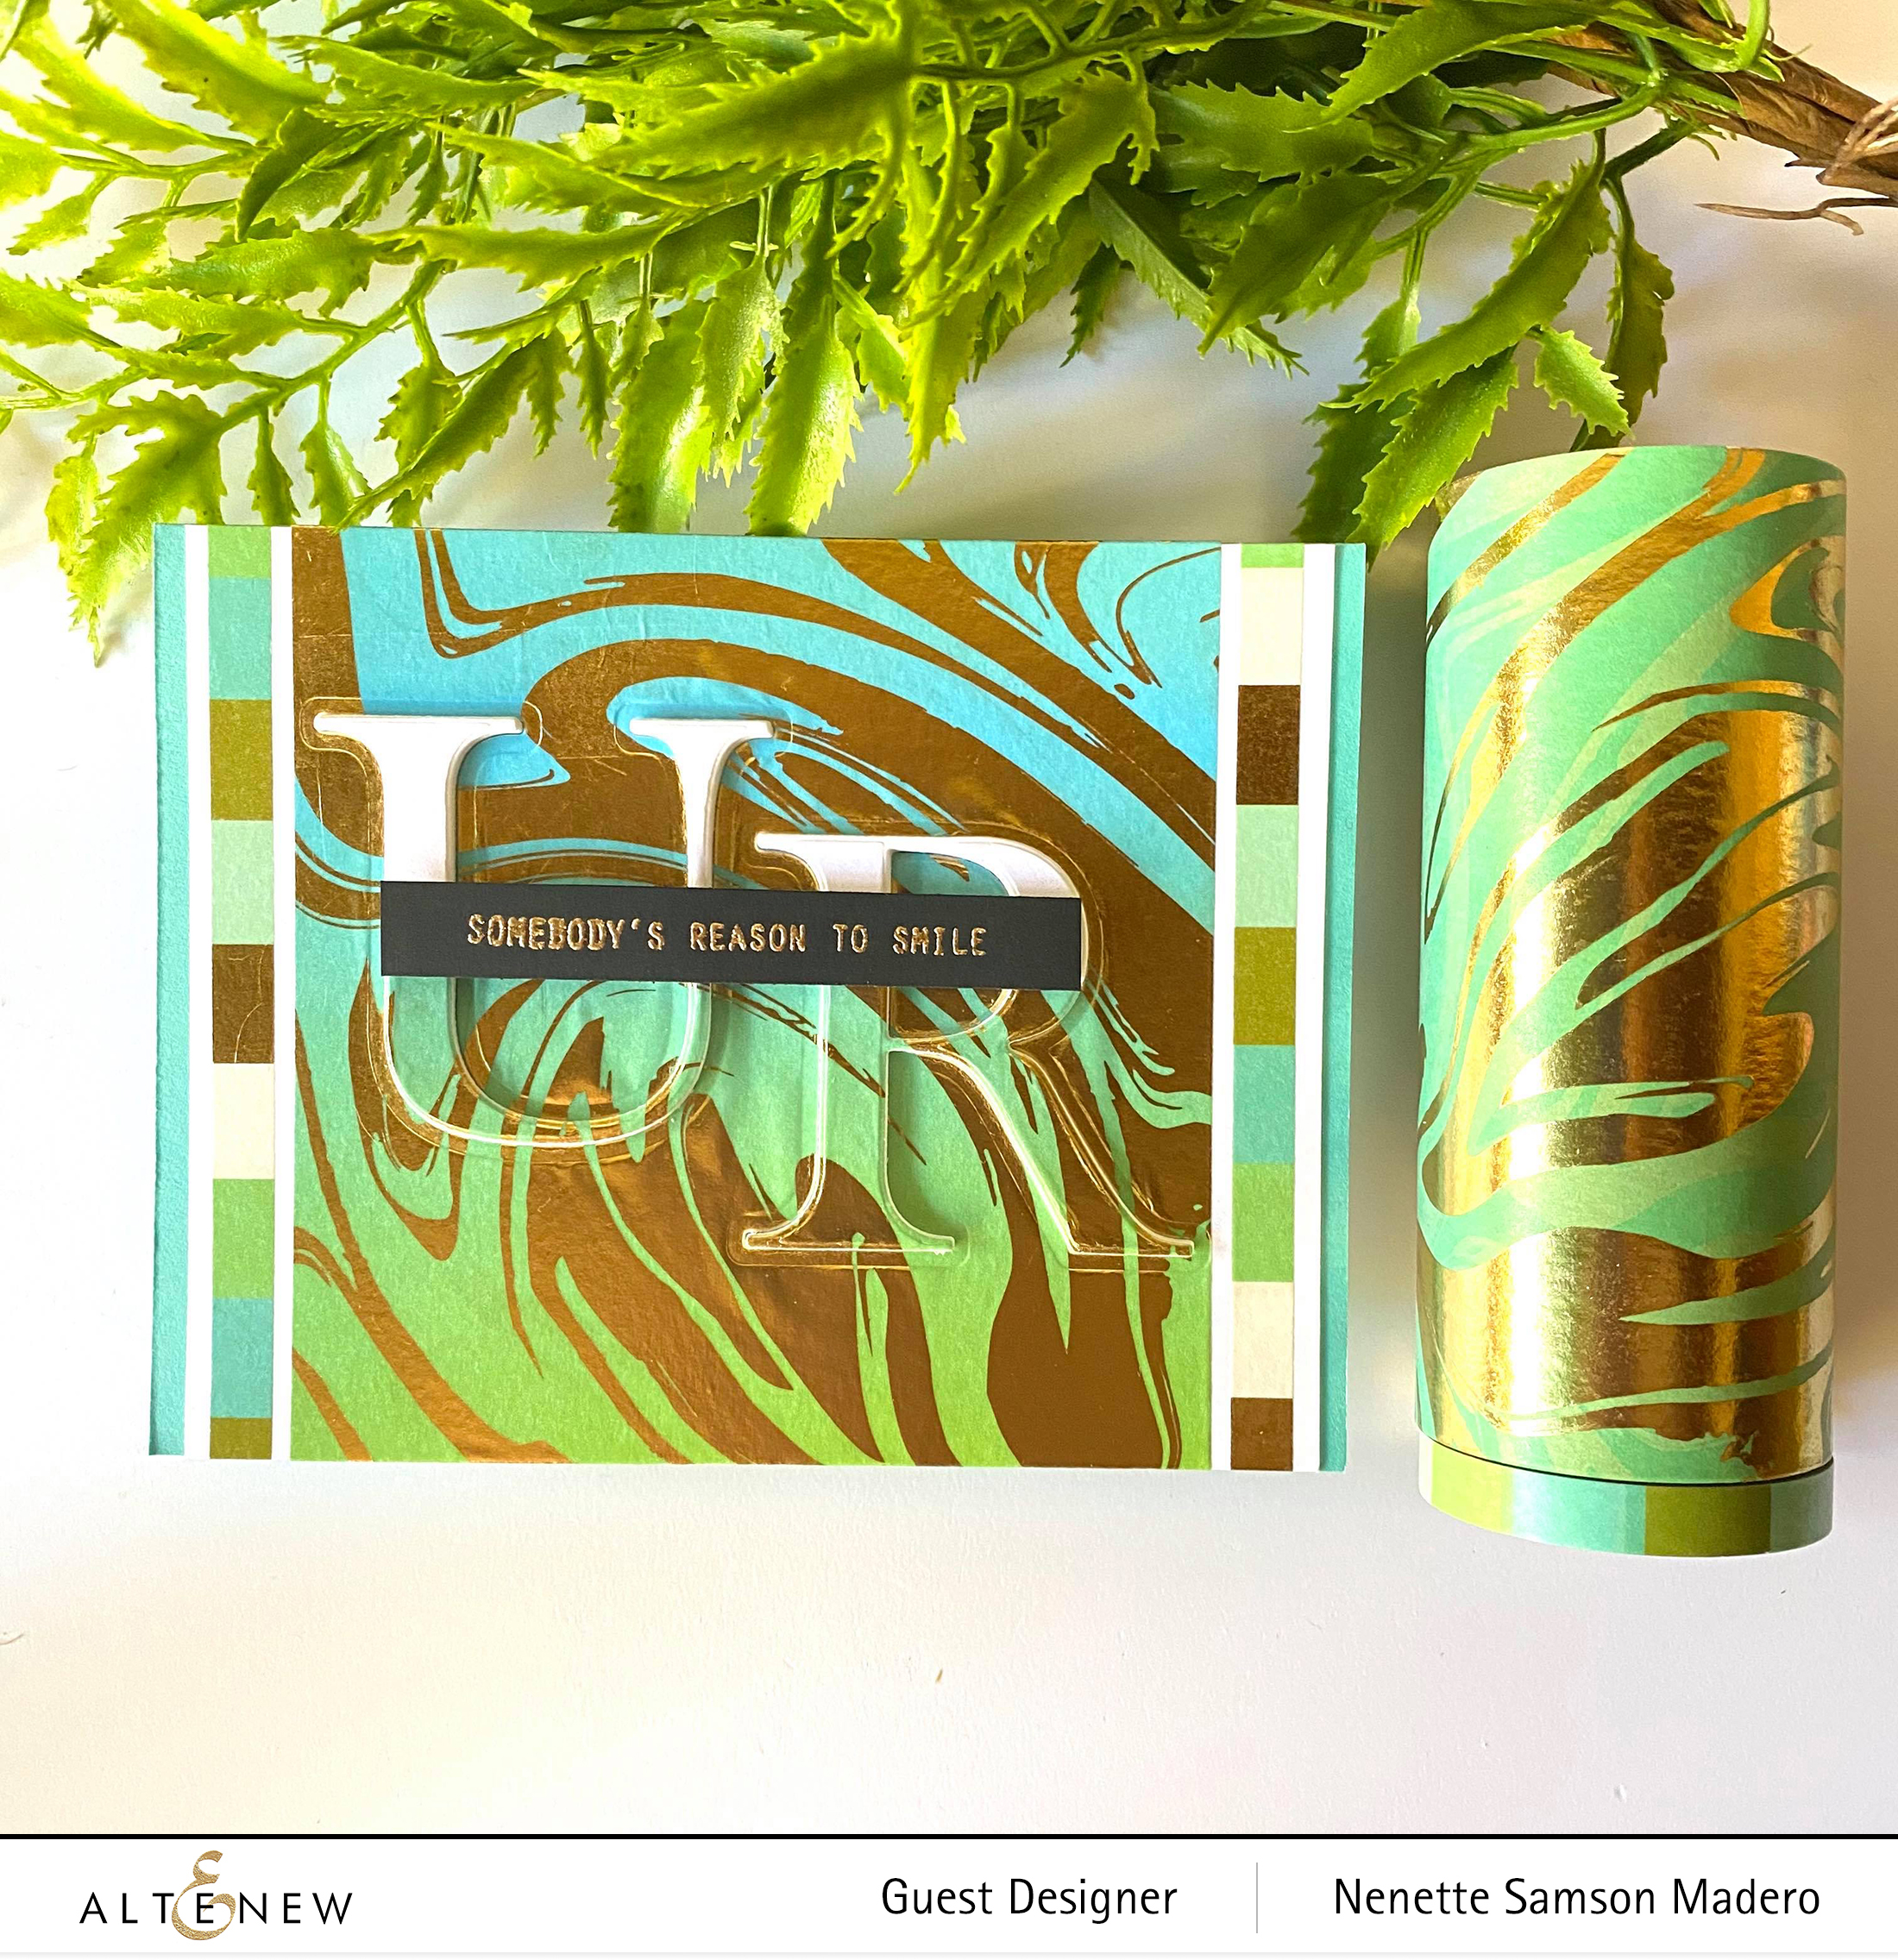
U R SOMEBODY’S REASON TO SMILE CARD


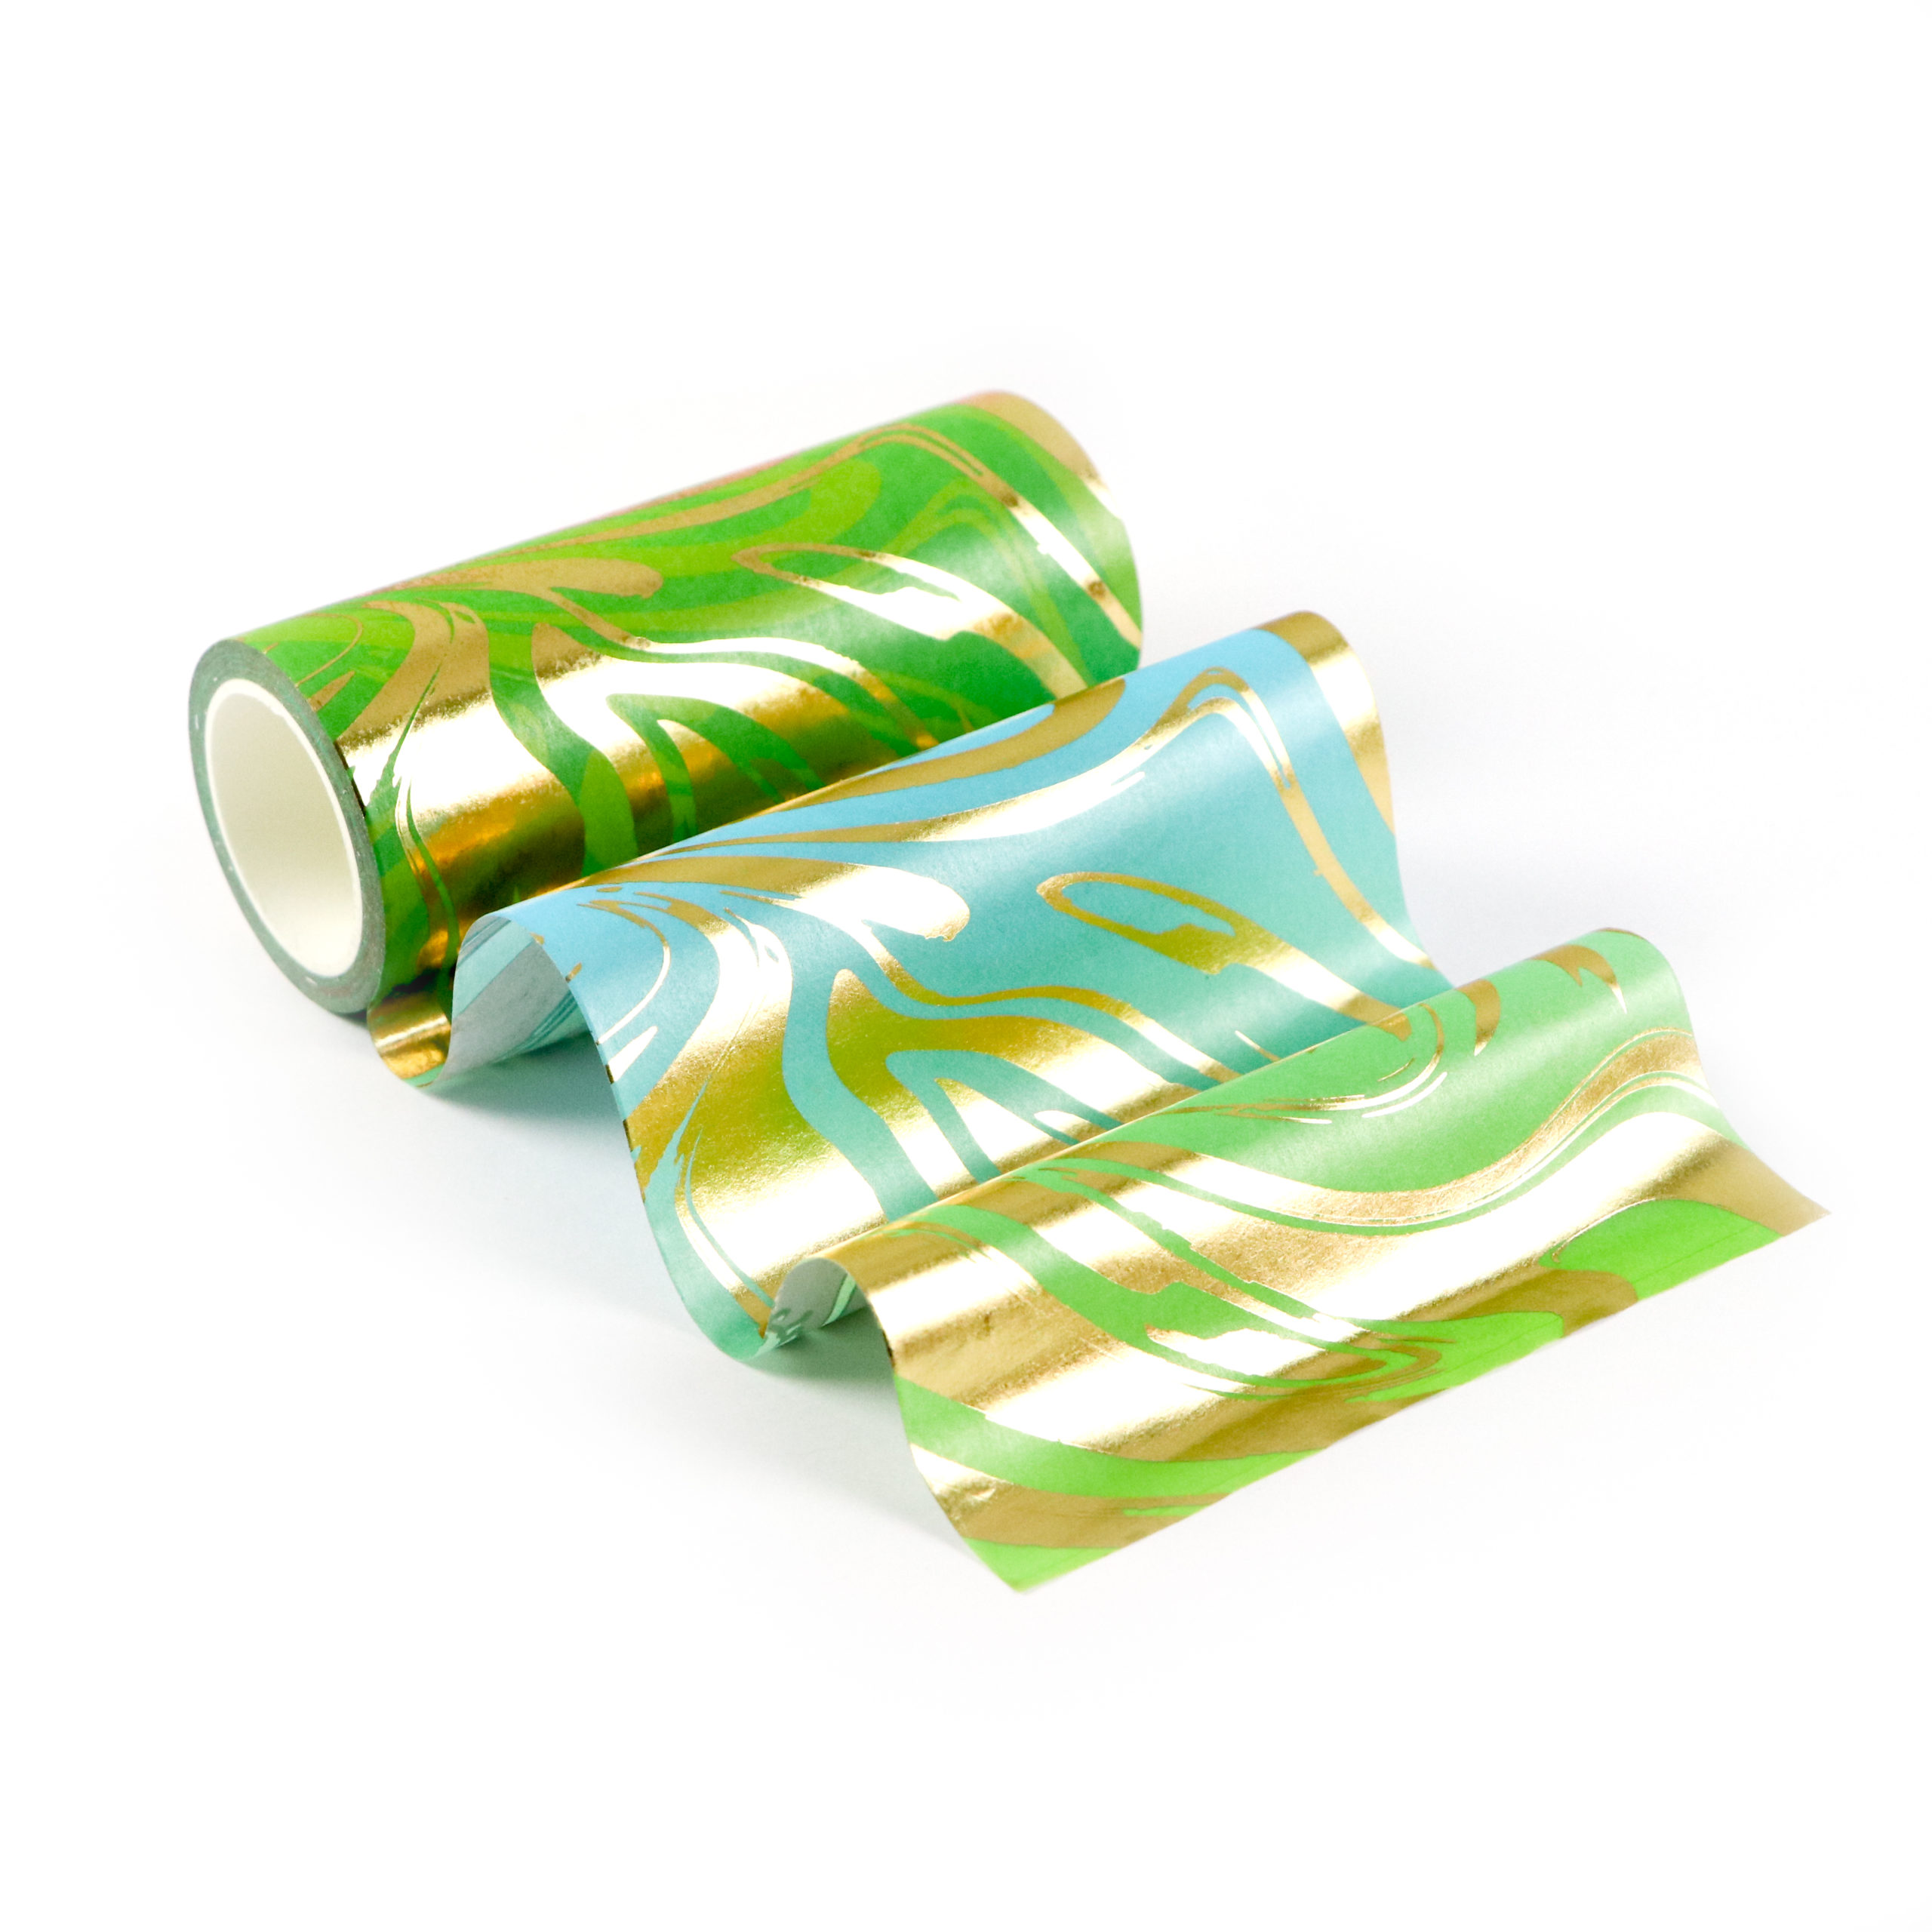
Isn’t this Marbled Dream washi tape just beautiful???

The other materials used for this card are the following: Morning Glory Palette Washi tape, Classic Alphabet die, Reason to Smile stamp set and cardstocks. I covered the center of the white cardstock panel with the Marbled Dream washi tape. The Morning glory palette washi tape was used to add a strip to the left and right of the card since it had similar colors to the Marbled dream. I die cut the letters U and R then added 4 more layers for dimension. The sentiment was stamped using Verasmark Ink and was embossed with Rose Gold embossing powder.


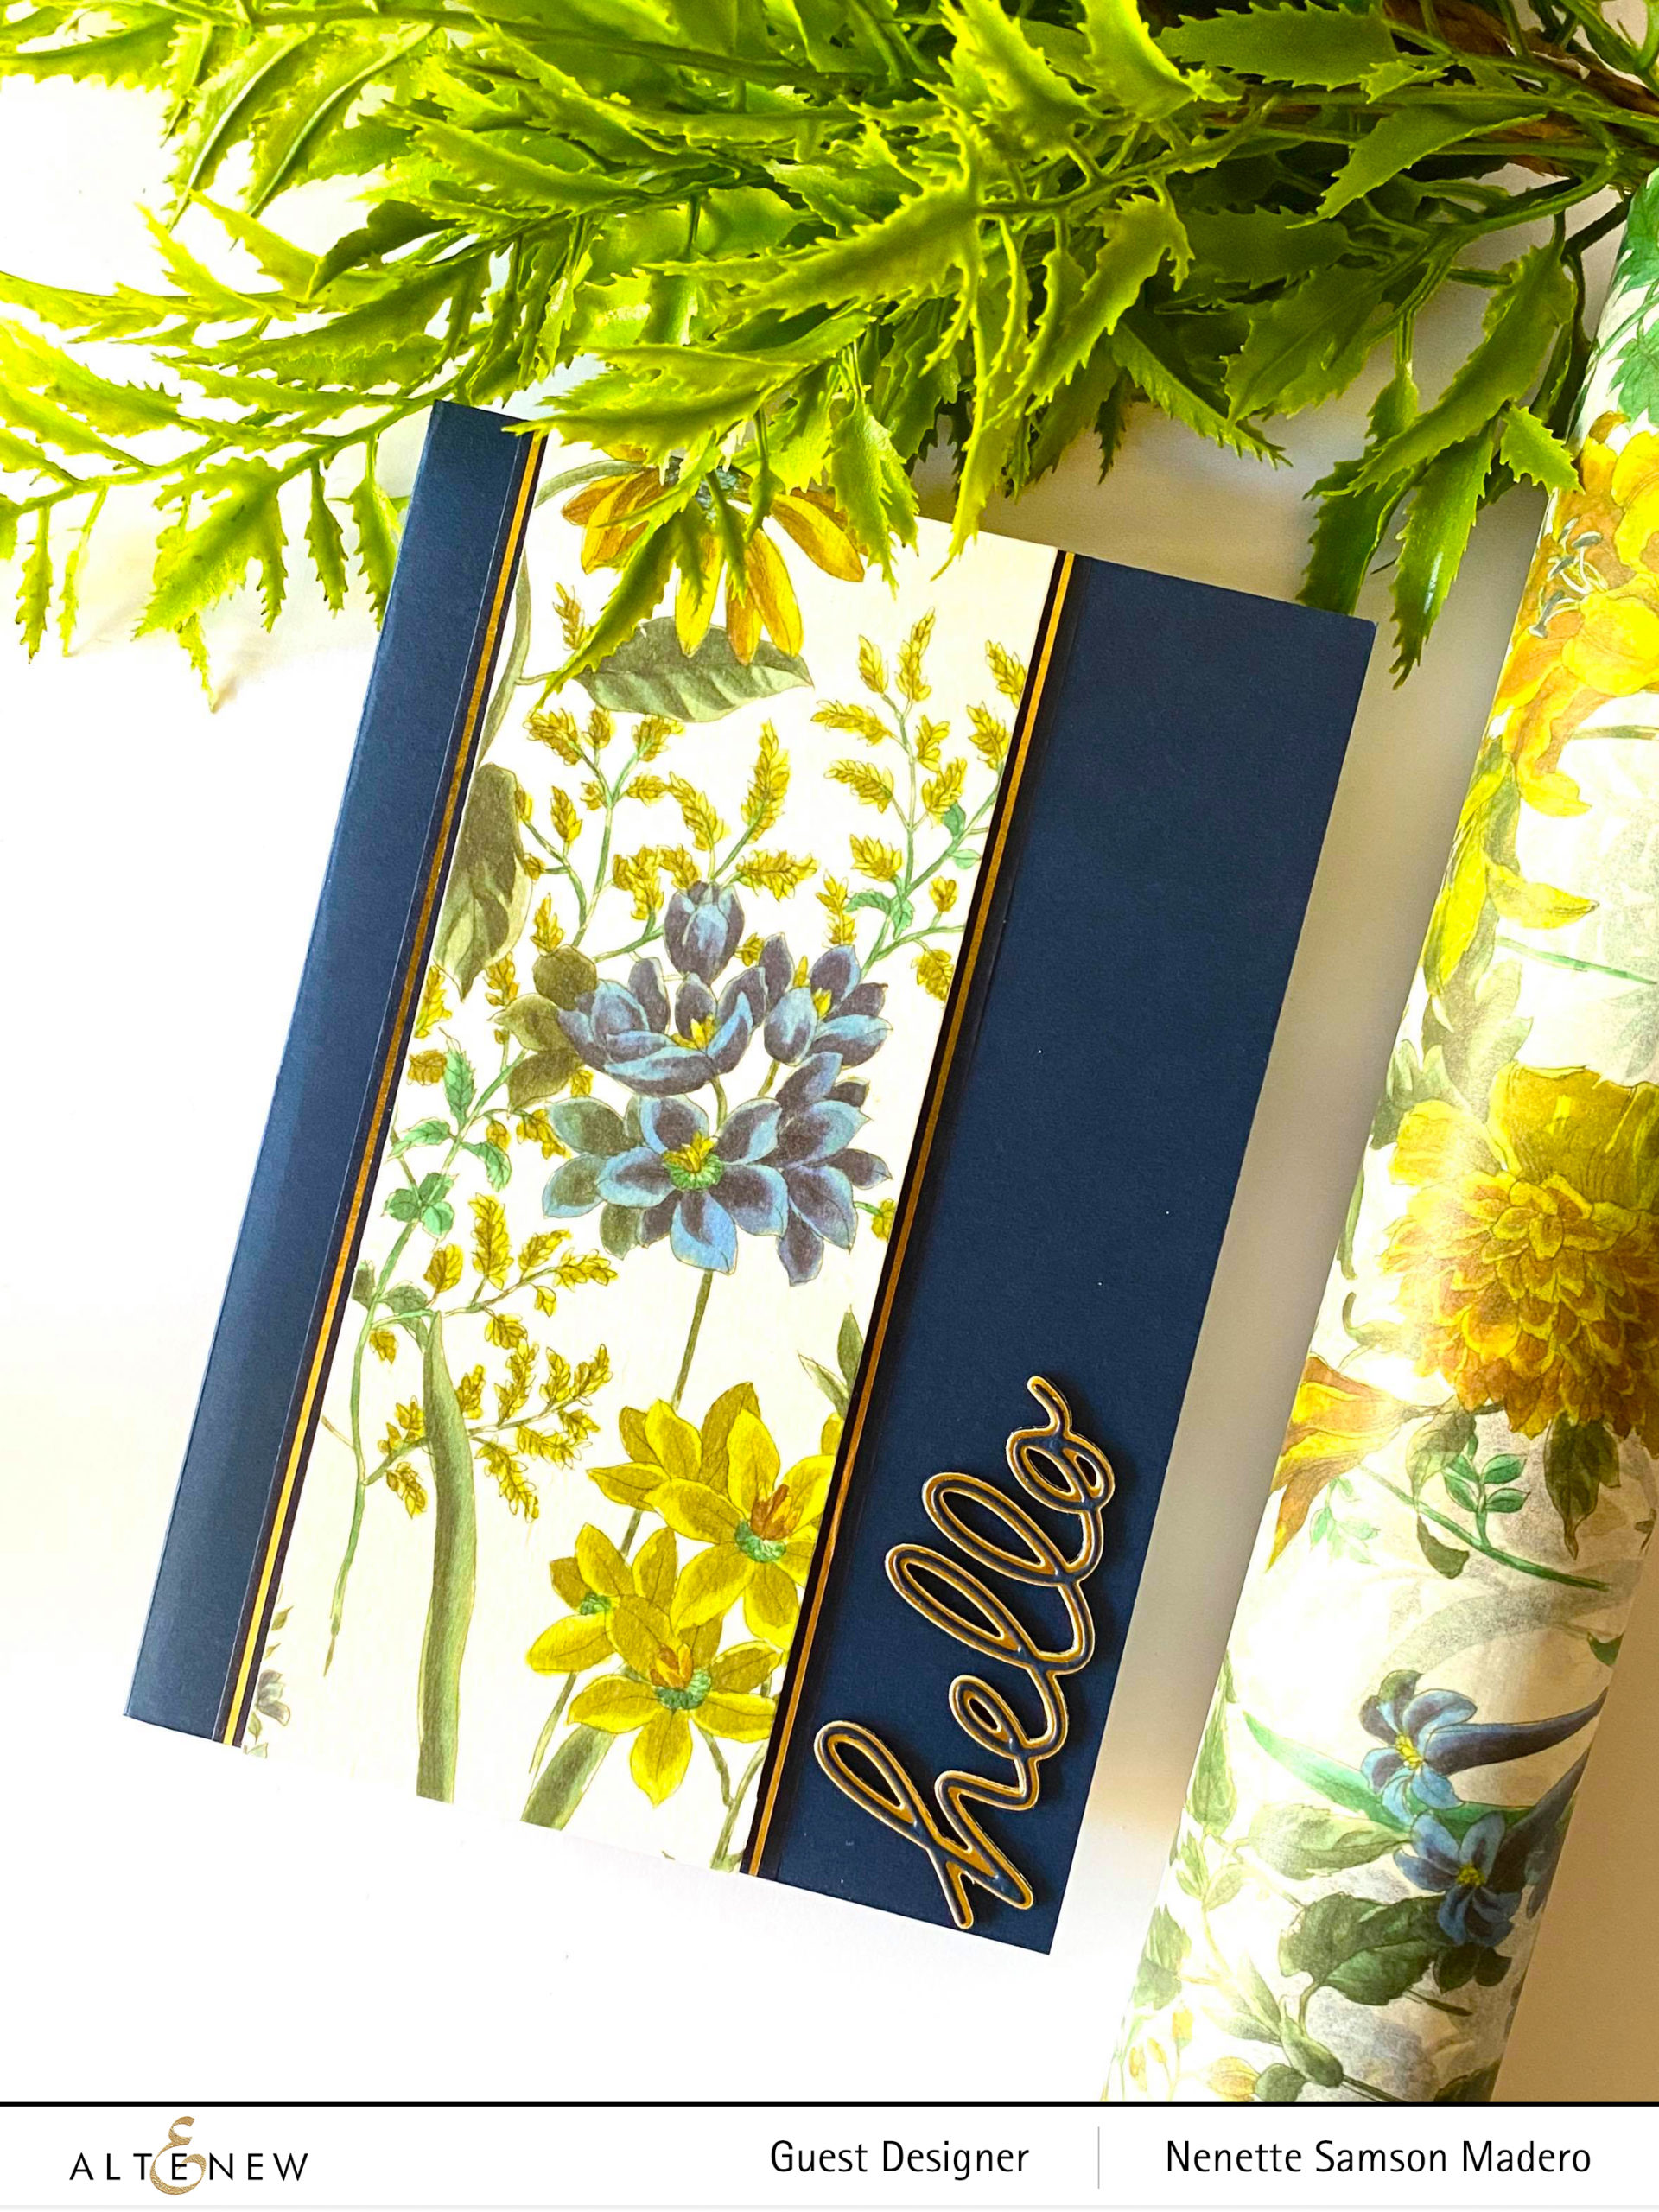
HELLO CARD


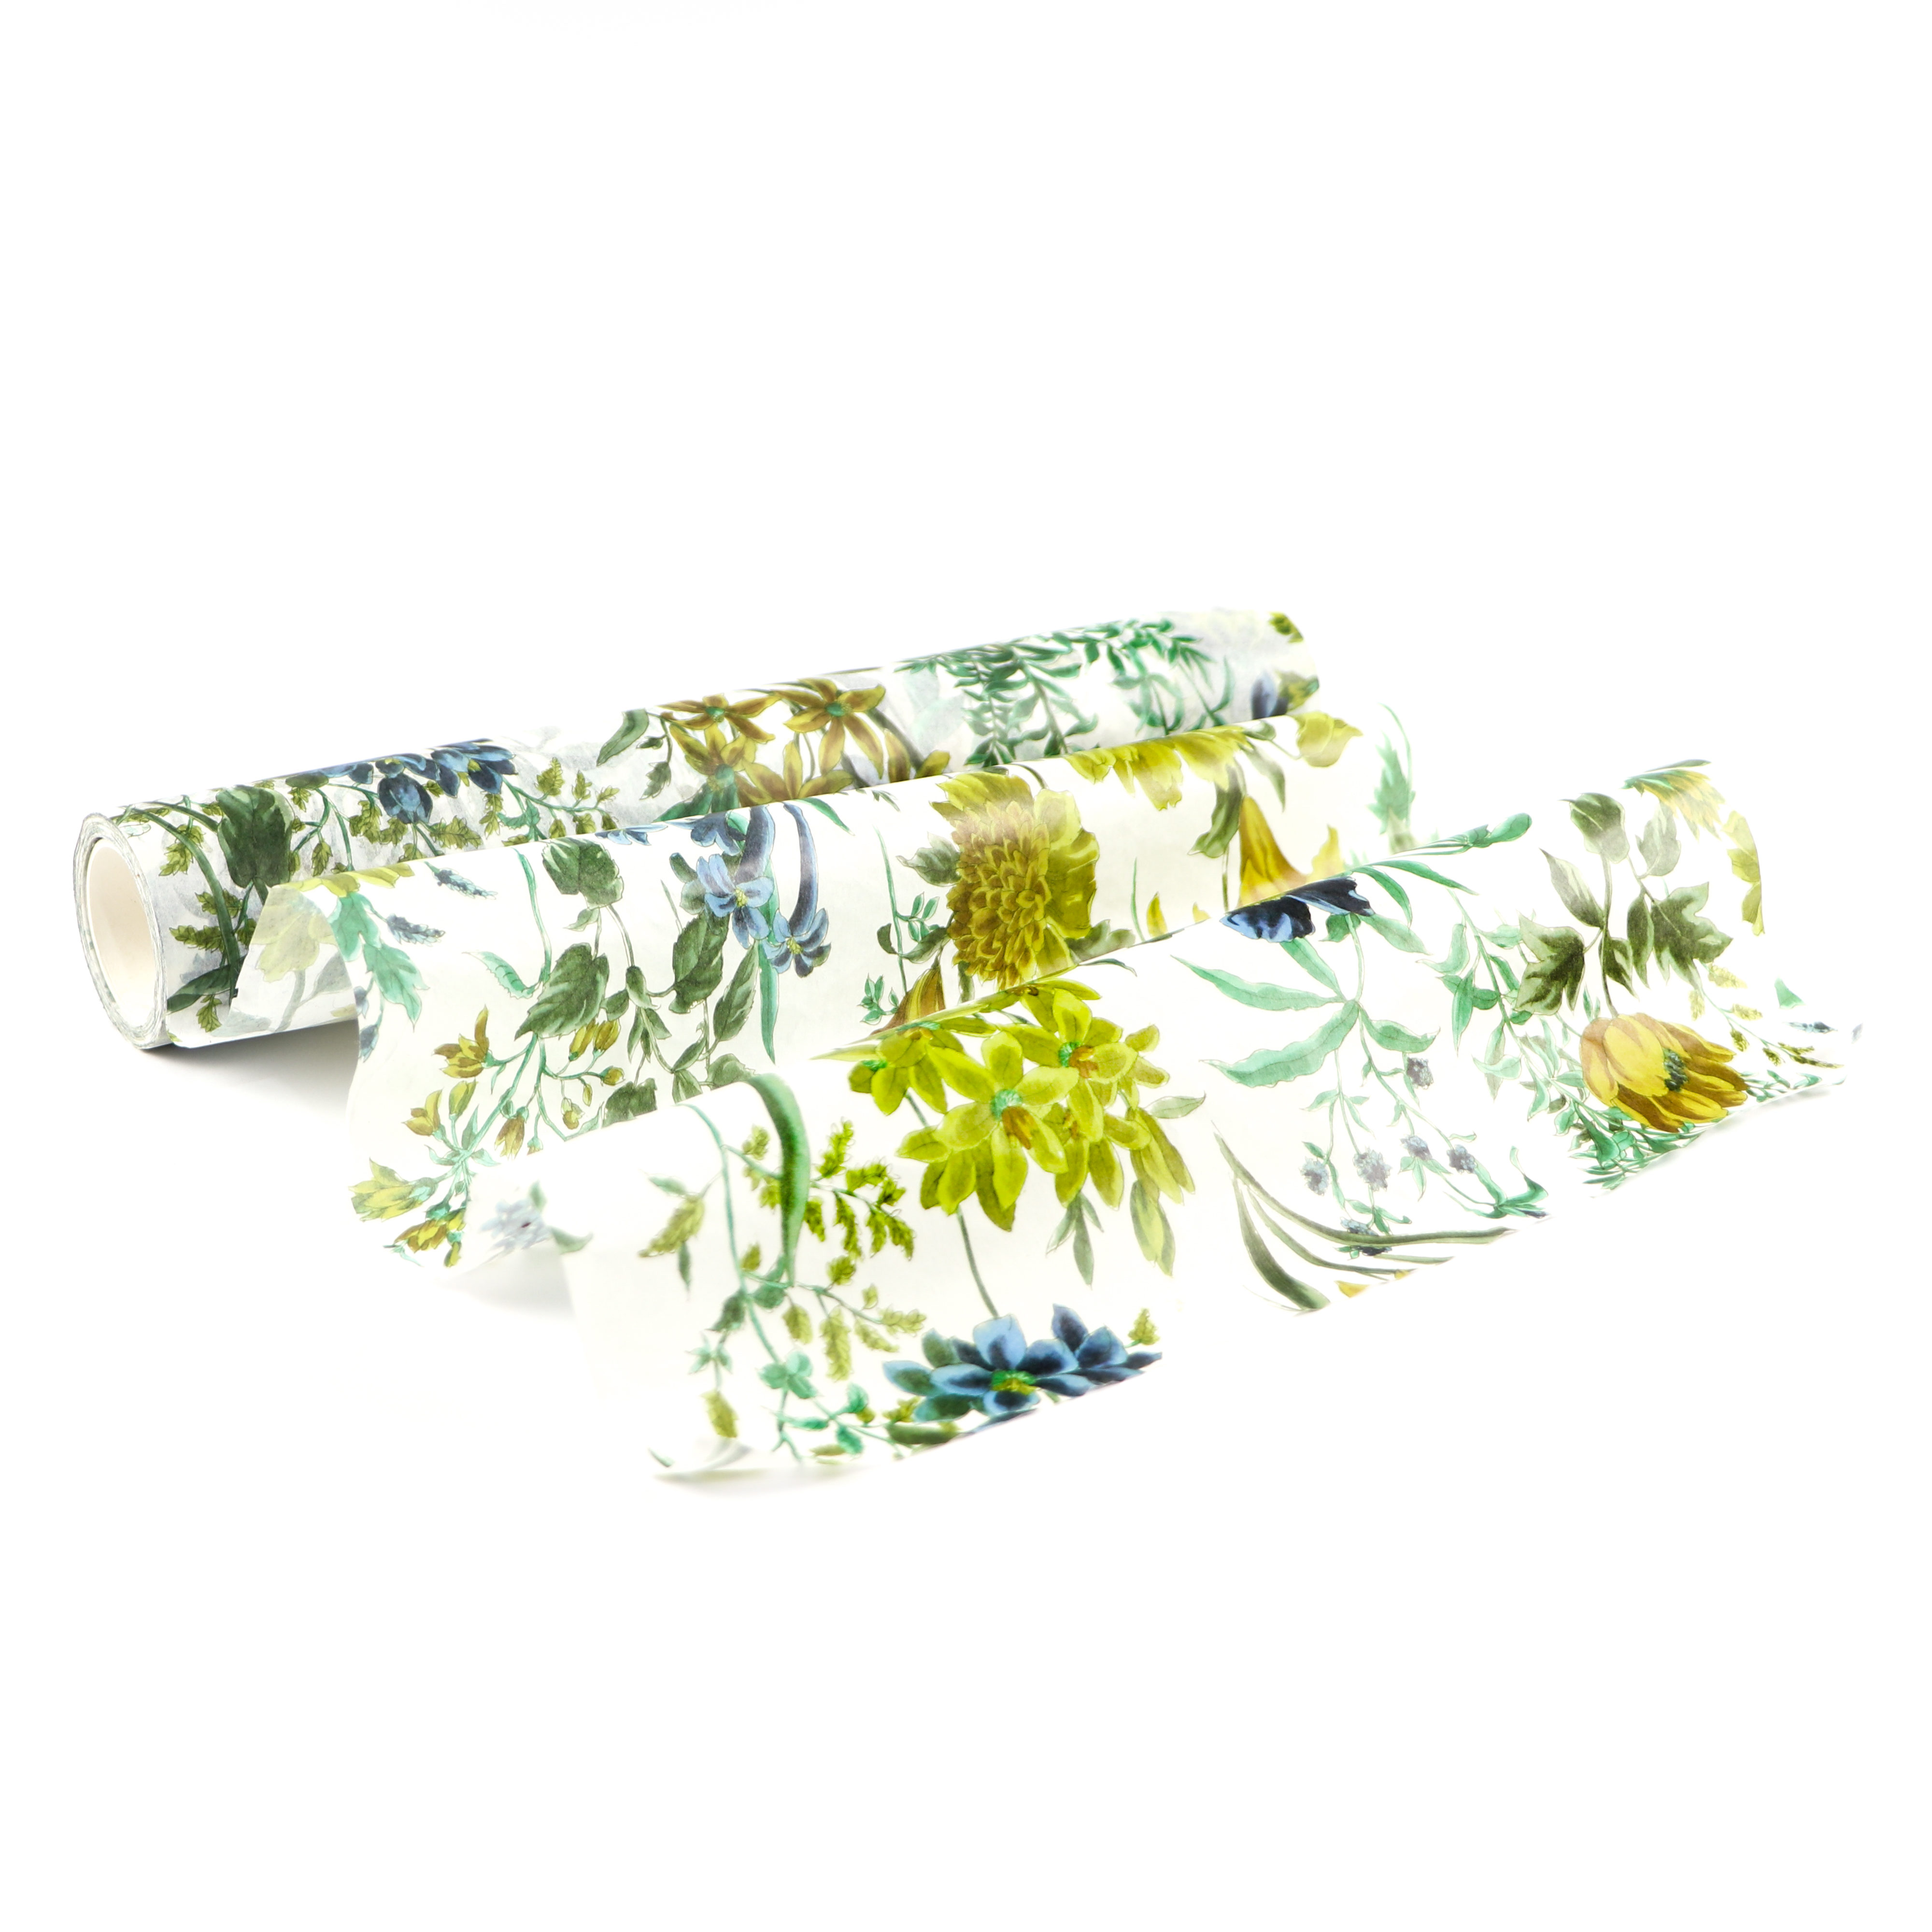
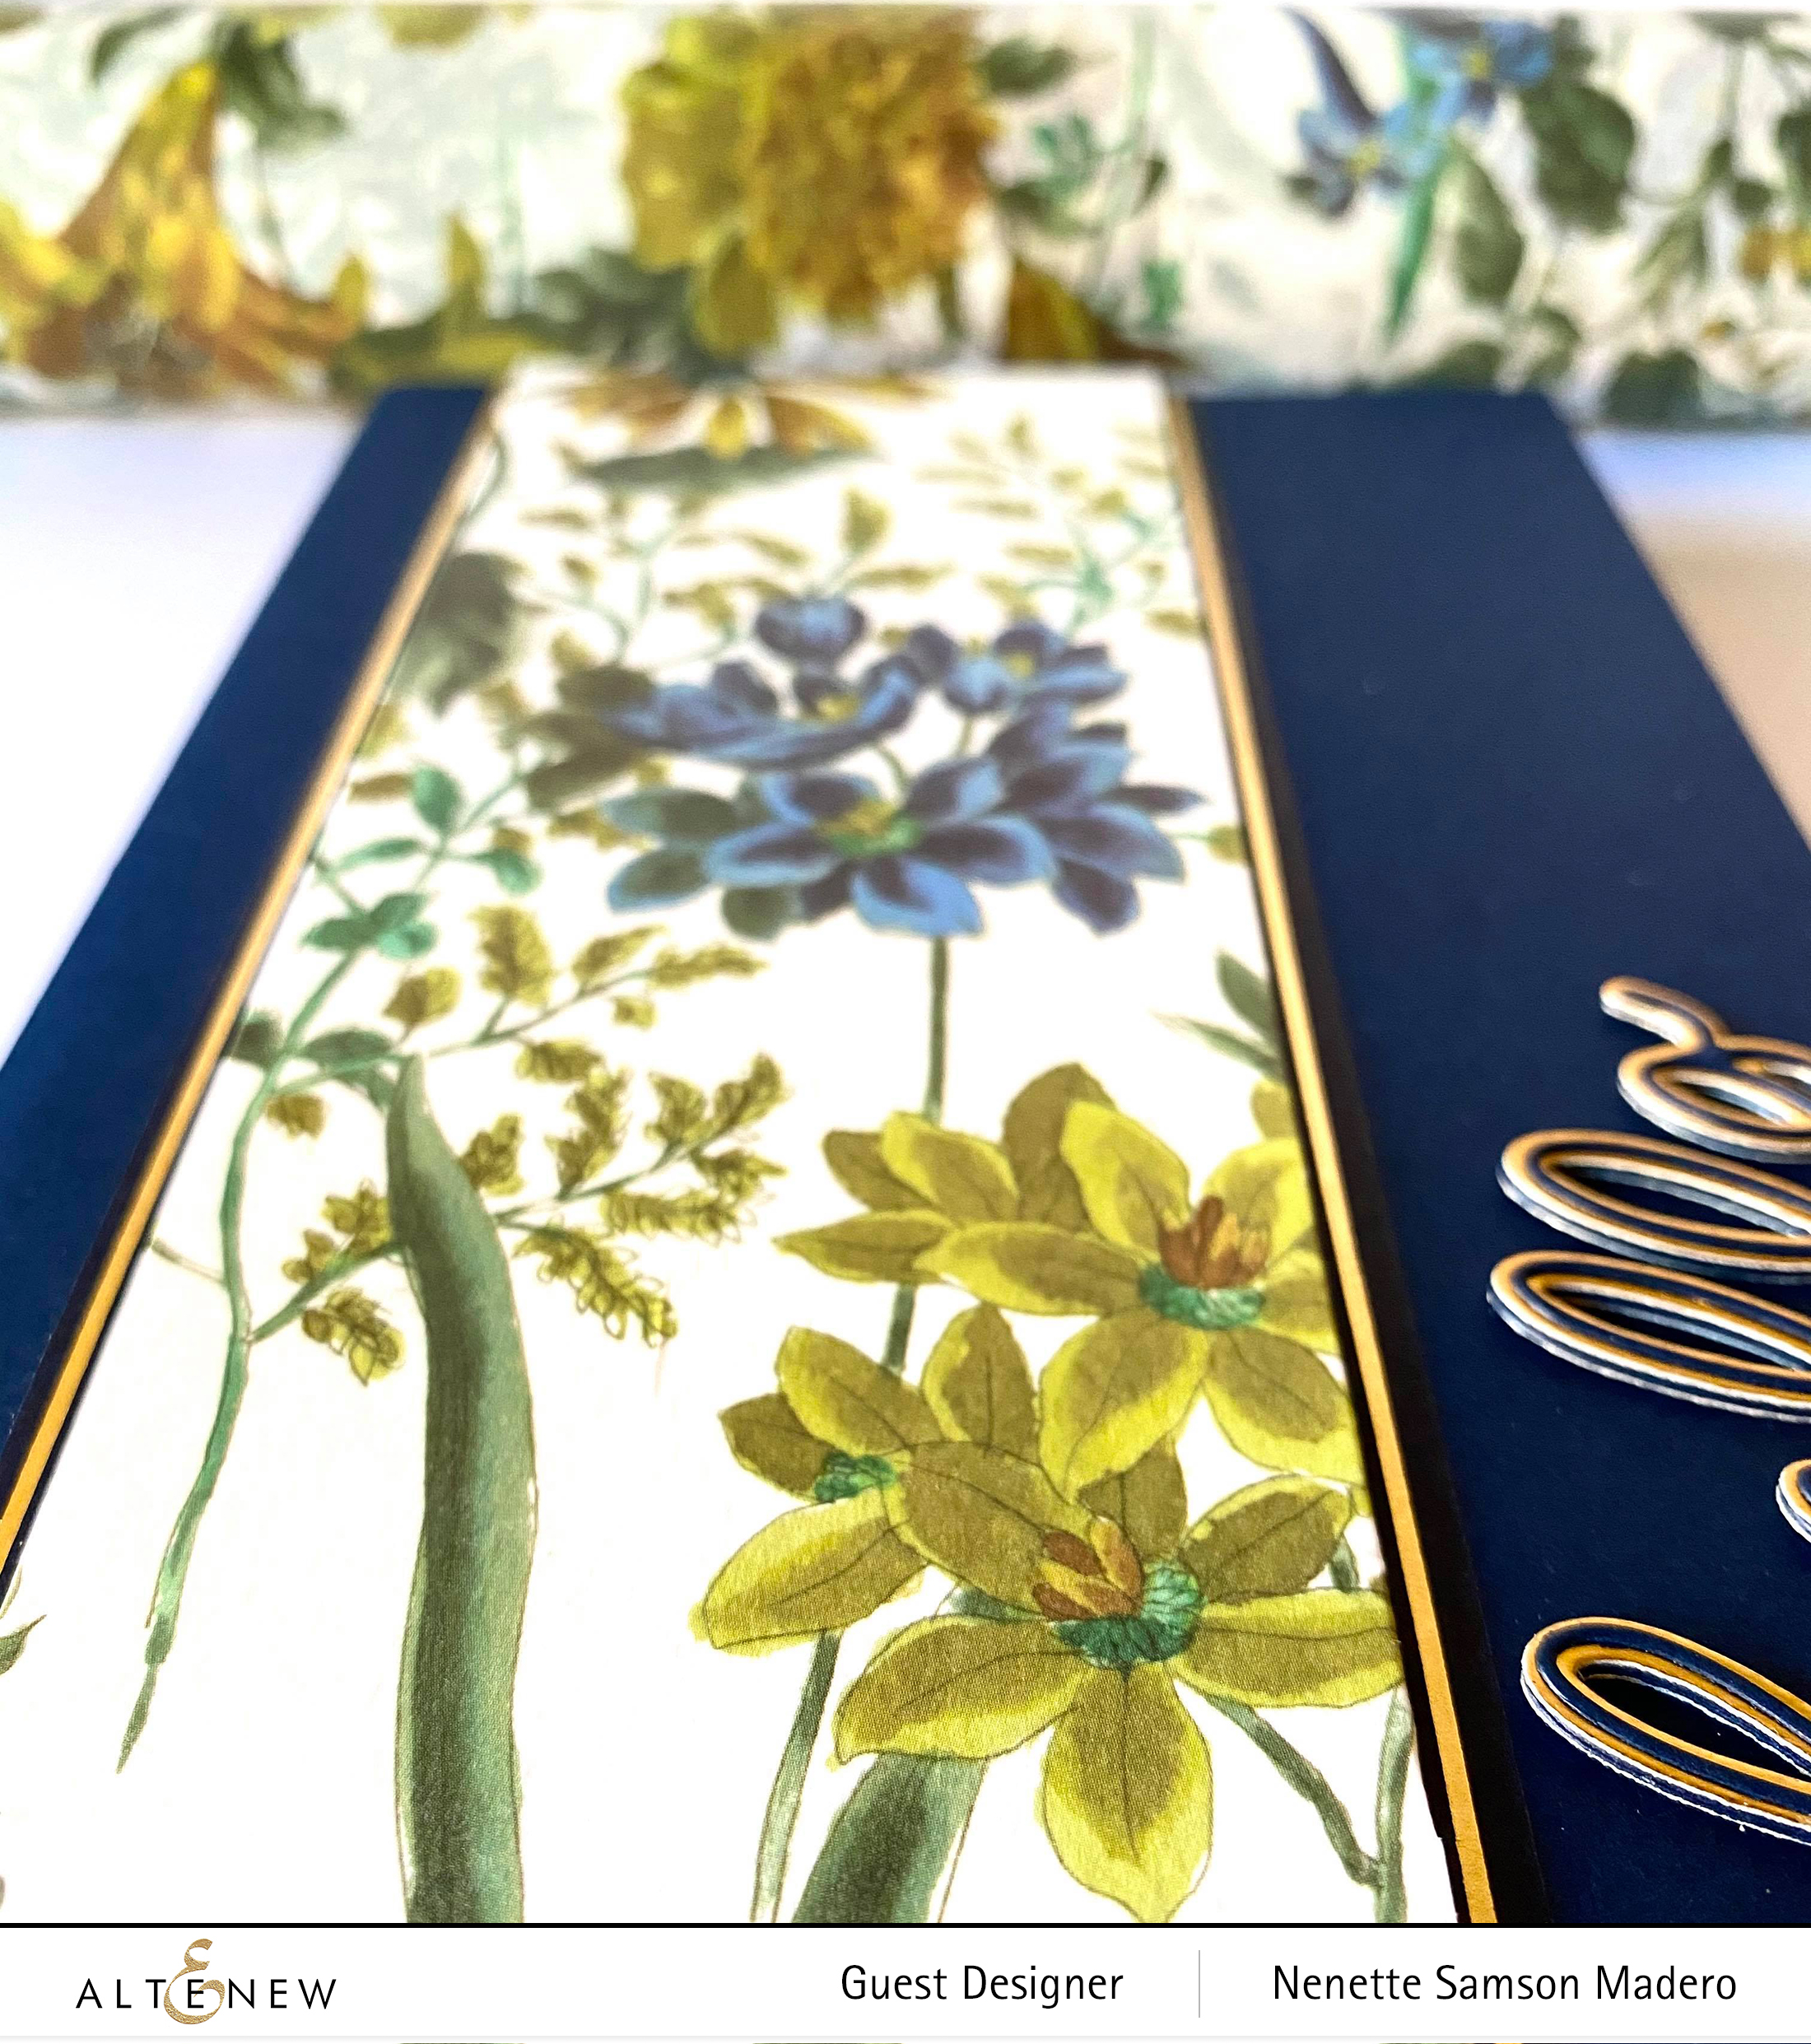
I’ve never seen a washi tape this big!!! The total length of this washi tape is 11.5 inches!!! The design is so beautiful that you just want to use it as is!

I also used the Navy gold trim washi tape and the handwritten hello die . This is a 5×7 card cause I wanted to maximize the washi tape. I adhered the tape onto white cardstock then trimmed it down to 3×7. I used the Navy Gold trim washi tape as an added accent to the floral panel. The hello was die cut using gold paper for the background and navy blue for the thinner portion of the die. I love how it matched the Navy gold trim washi tape. Super easy card to make!


PRIZES


To celebrate this release, Altenew is giving away a $30 gift certificate to 6 lucky winners! Please leave a comment on the Altenew Card Blog and/or Altenew Scrapbook Blog by 3/18/2020 for a chance to win.

We’ll also draw a winner to receive a $15 gift certificate from the comments left on each designer’s blog on the blog hop list below. All winners will be announced on the Altenew blogs on 3/21/2020.

Thank you so much for dropping by! I truly appreciate the time you take to go through my blog post. Next up is my idol, Erum Tasnim. Make sure to drop by her blog for more inspiration! If you haven’t yet, do follow me on IG or FB for announcements, giveaways and inspiration! Subscribe to this blog as well for the latest update. Until my next post. Happy crafting everyone!❤️


INSTAGRAM | FACEBOOK | WEBSITE | PINTEREST

BLOG HOP ORDER

Altenew Card Blog
Maryam Perez
LauraJane
Ashlea Cornell
Nicole Watt
Virginia Lu
Mindy Eggen
Lilith Eeckels
Svitlana Shayevich
Kelly Griglione
Laurie Willison
Terri Koszler
Norine Borys
Amber Rain Davis
Nathalie DeSousa
Altenew Scrapbook Blog
Amanda Baldwin
Kymona Tracey
Nancy McClelland
Sveta Fotinia
Nenette S. Madero–> YOU ARE HERE
Erum Tasneem
Seeka
Agnieszka Malyszek

Altenew August 2019 Stamp/Die/Stencil Release Blog Hop + Giveaway

Altenew August 2019 Stamp/Die/Stencil Release Blog Hop + Giveaway

Welcome to Altenew’s August Release!! I’m so thrilled to be a part of this blog hop consisting of 34 blogs with all the wonderful card designers I admire! If you have been following along, you have just arrived from the super talented Alex Syberia. Thanks for sending them over, Alex! 🙂 If you find a broken link, you’ll find a master list at the end of this post and at the Altenew Card Blog.

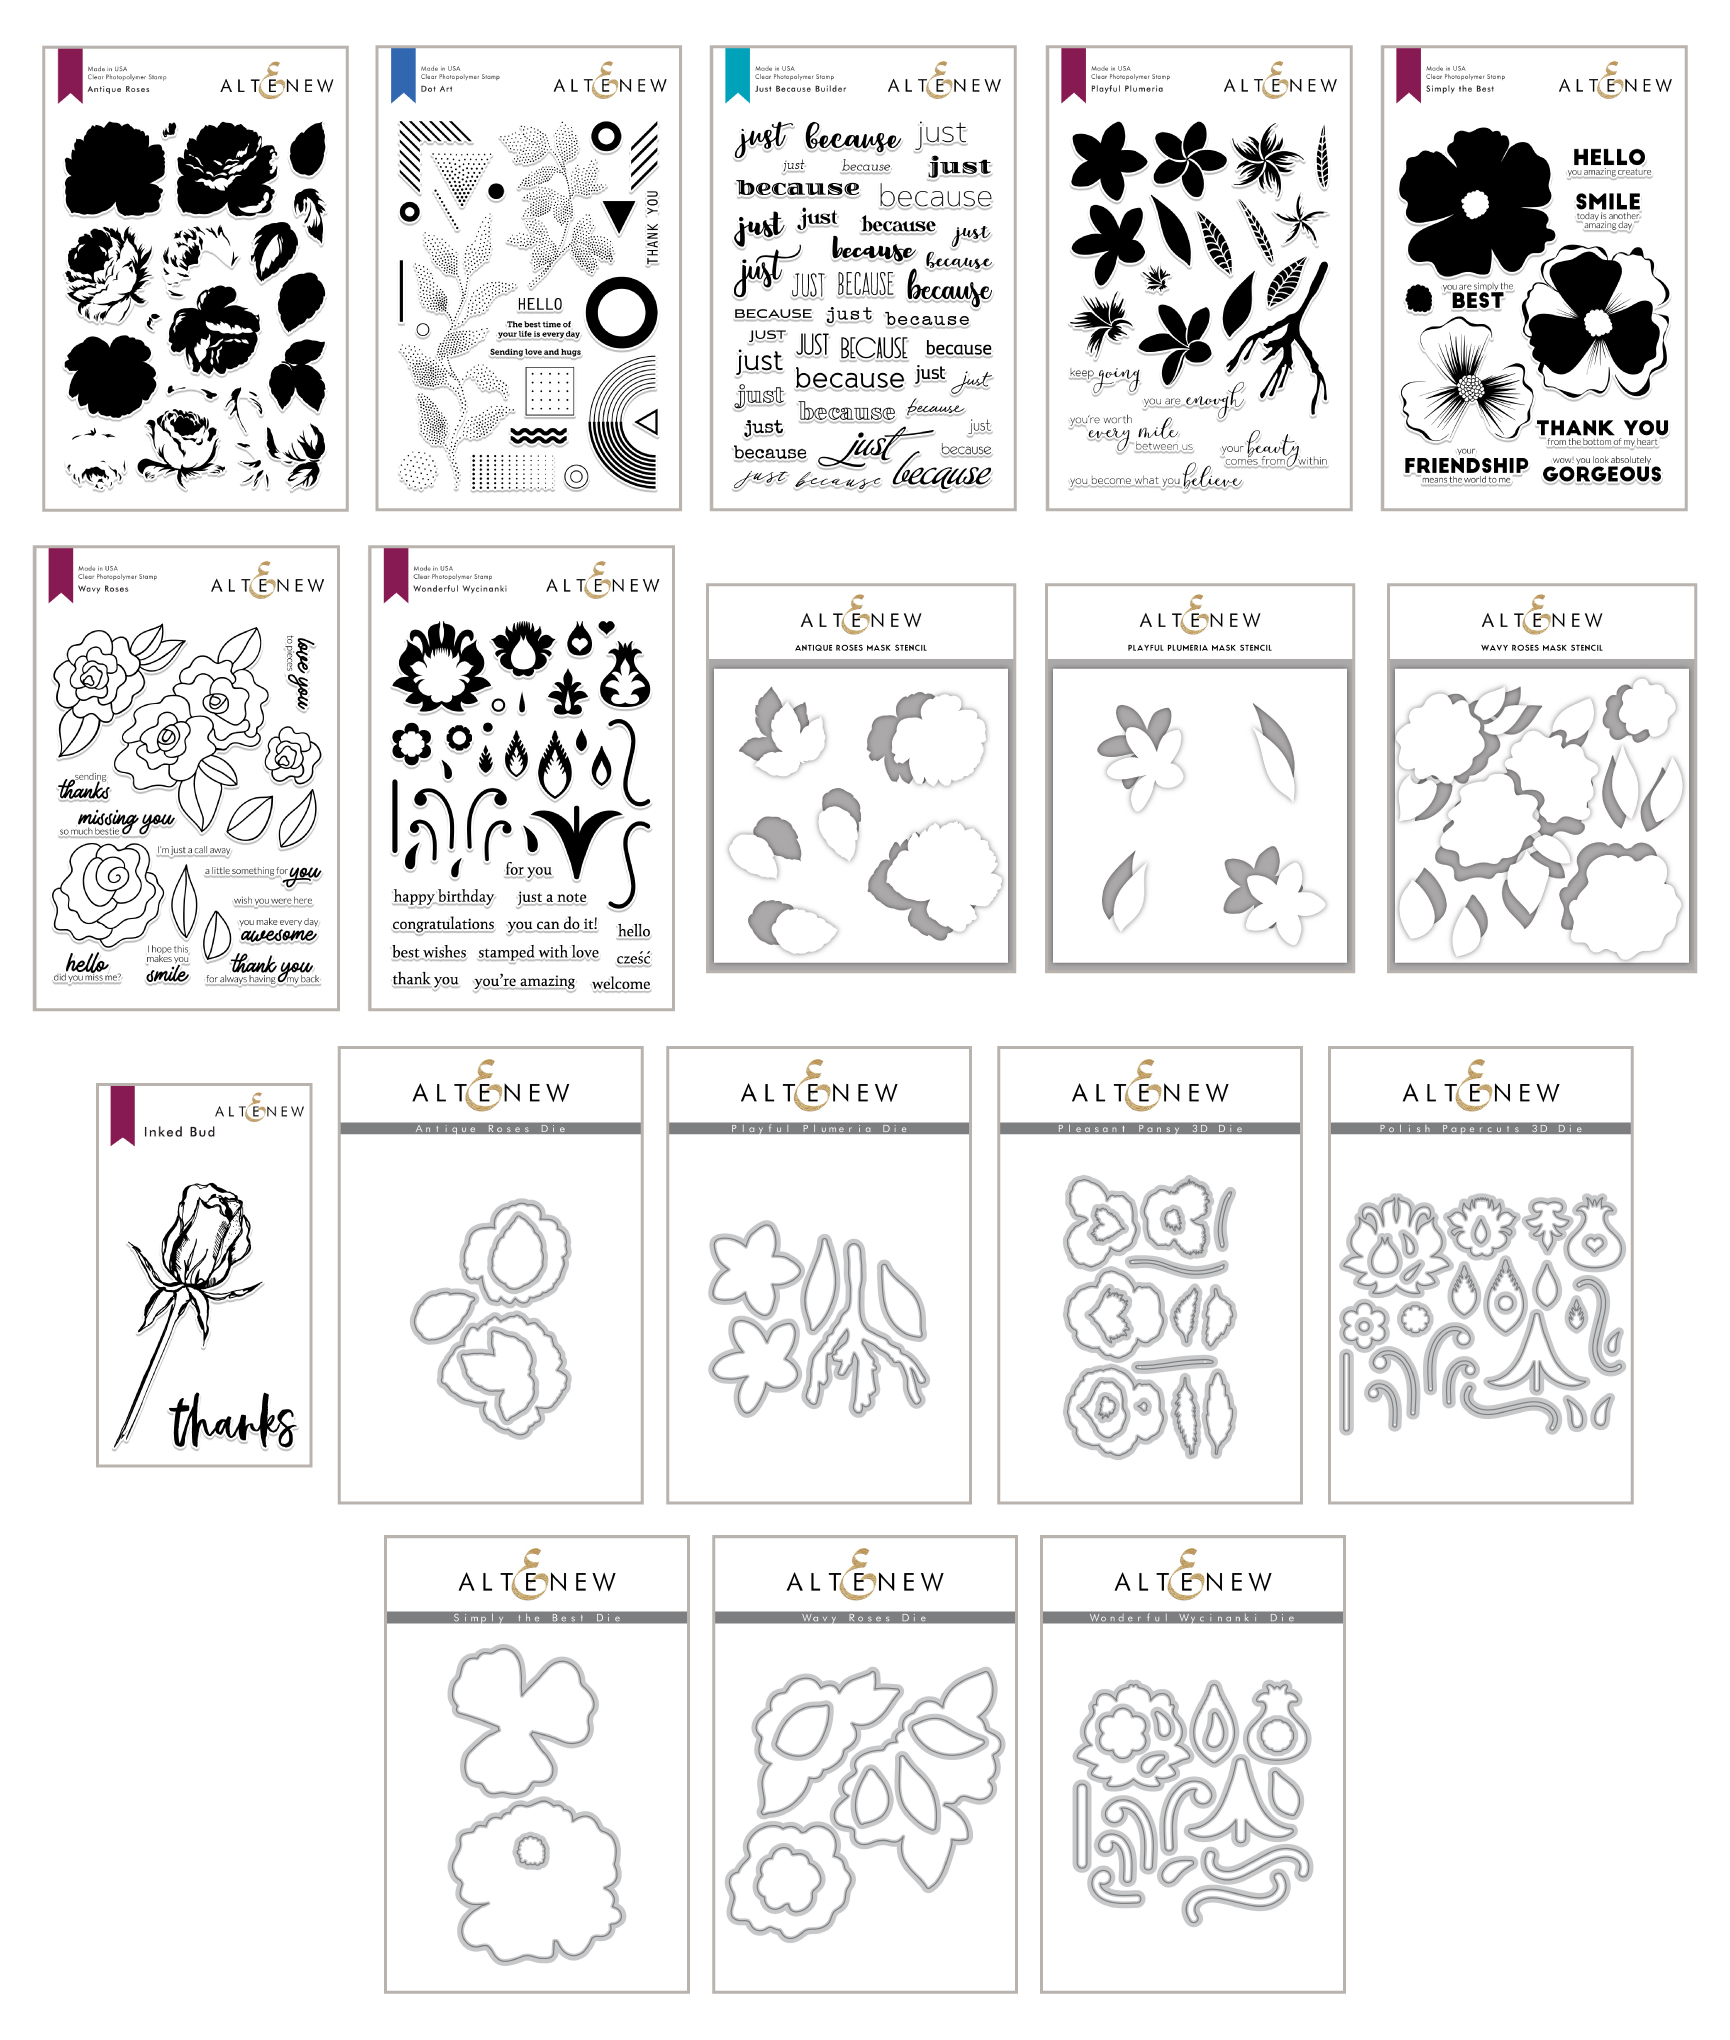
Take a look at the August 2019 Release! There are so many beautiful stamps, stencils, and dies that I found it difficult to choose which ones to use for my card samples! 🙂

ALTENEW AUGUST 2019 RELEASE COLLECTION

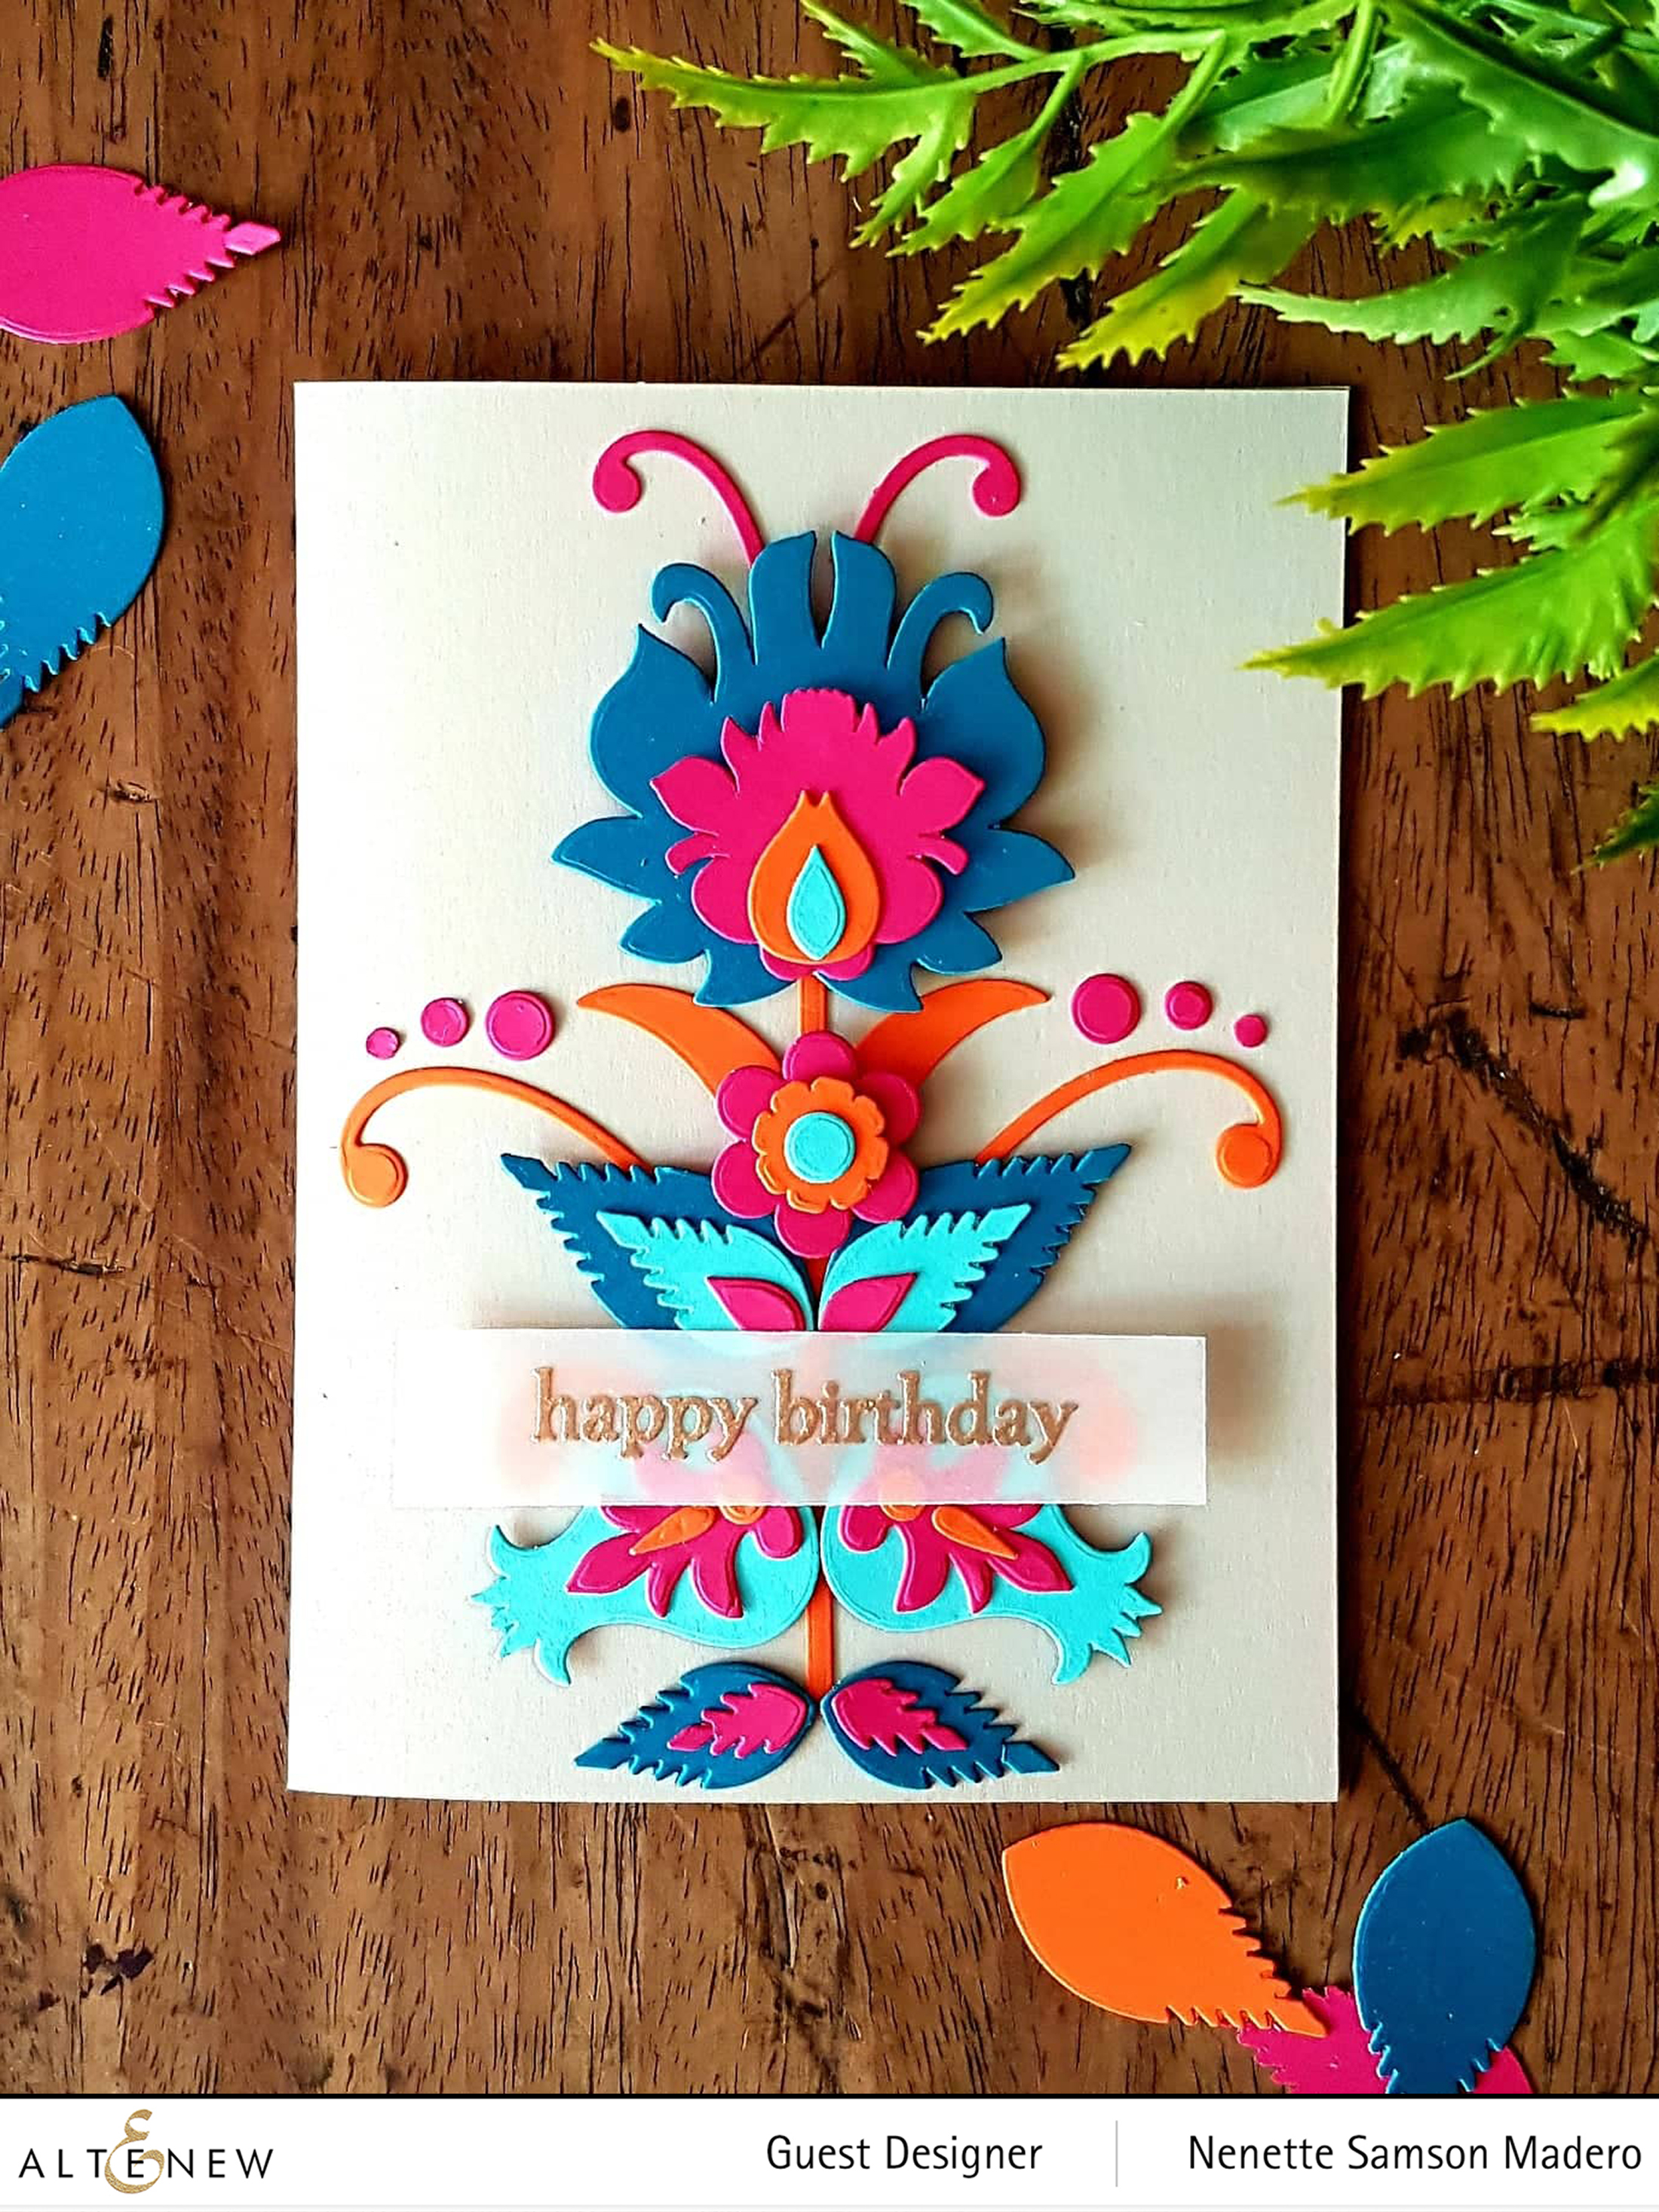
HAPPY BIRTHDAY CARD

MATERIALS:

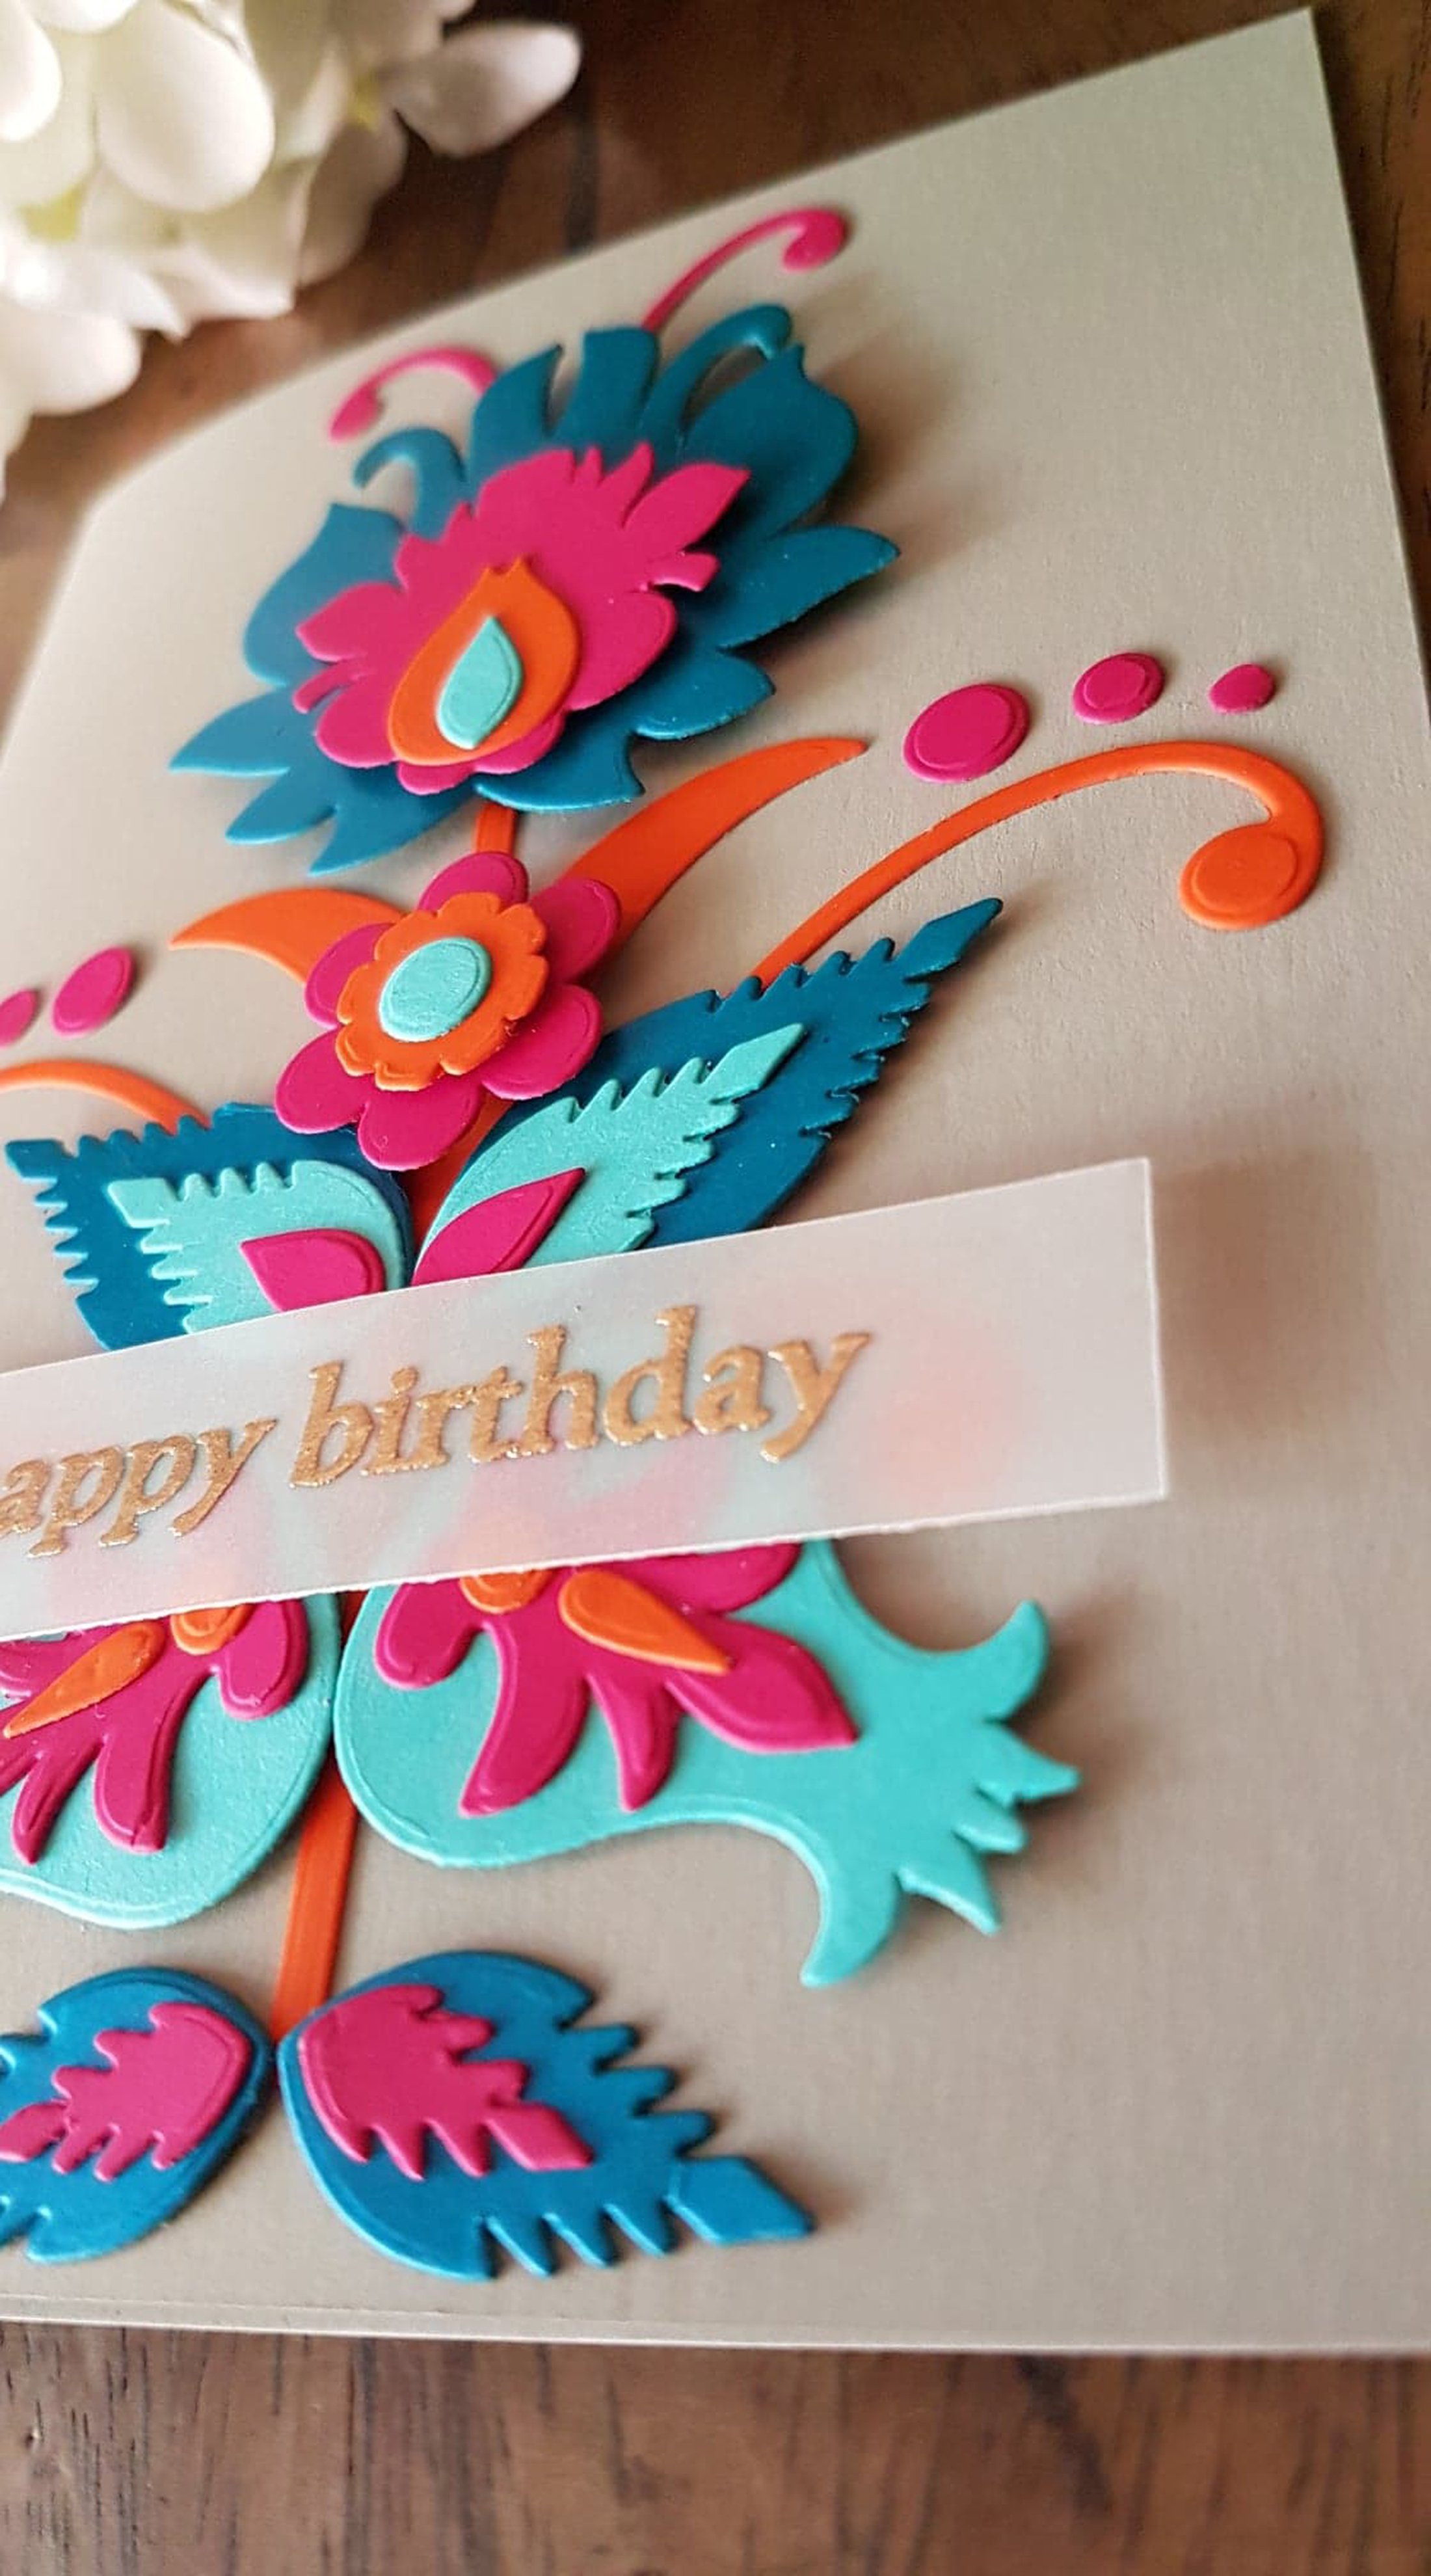
The first thing you have to do to create a card like this is to figure out the colors you want to use. I suggest you choose 3-5 colors only. I decided to go with high contrasting colors for some added pop. 🙂 Next, I made a rough sketch of how I wanted the design keeping in mind the die designs available. I spent some time die-cutting the different images with different colored cardstocks. It does take time but it’s better to have a lot of colors for each die-cut image to make the process of laying out the design much faster. Make sure to use foam squares when adhering some of the parts for added dimension.

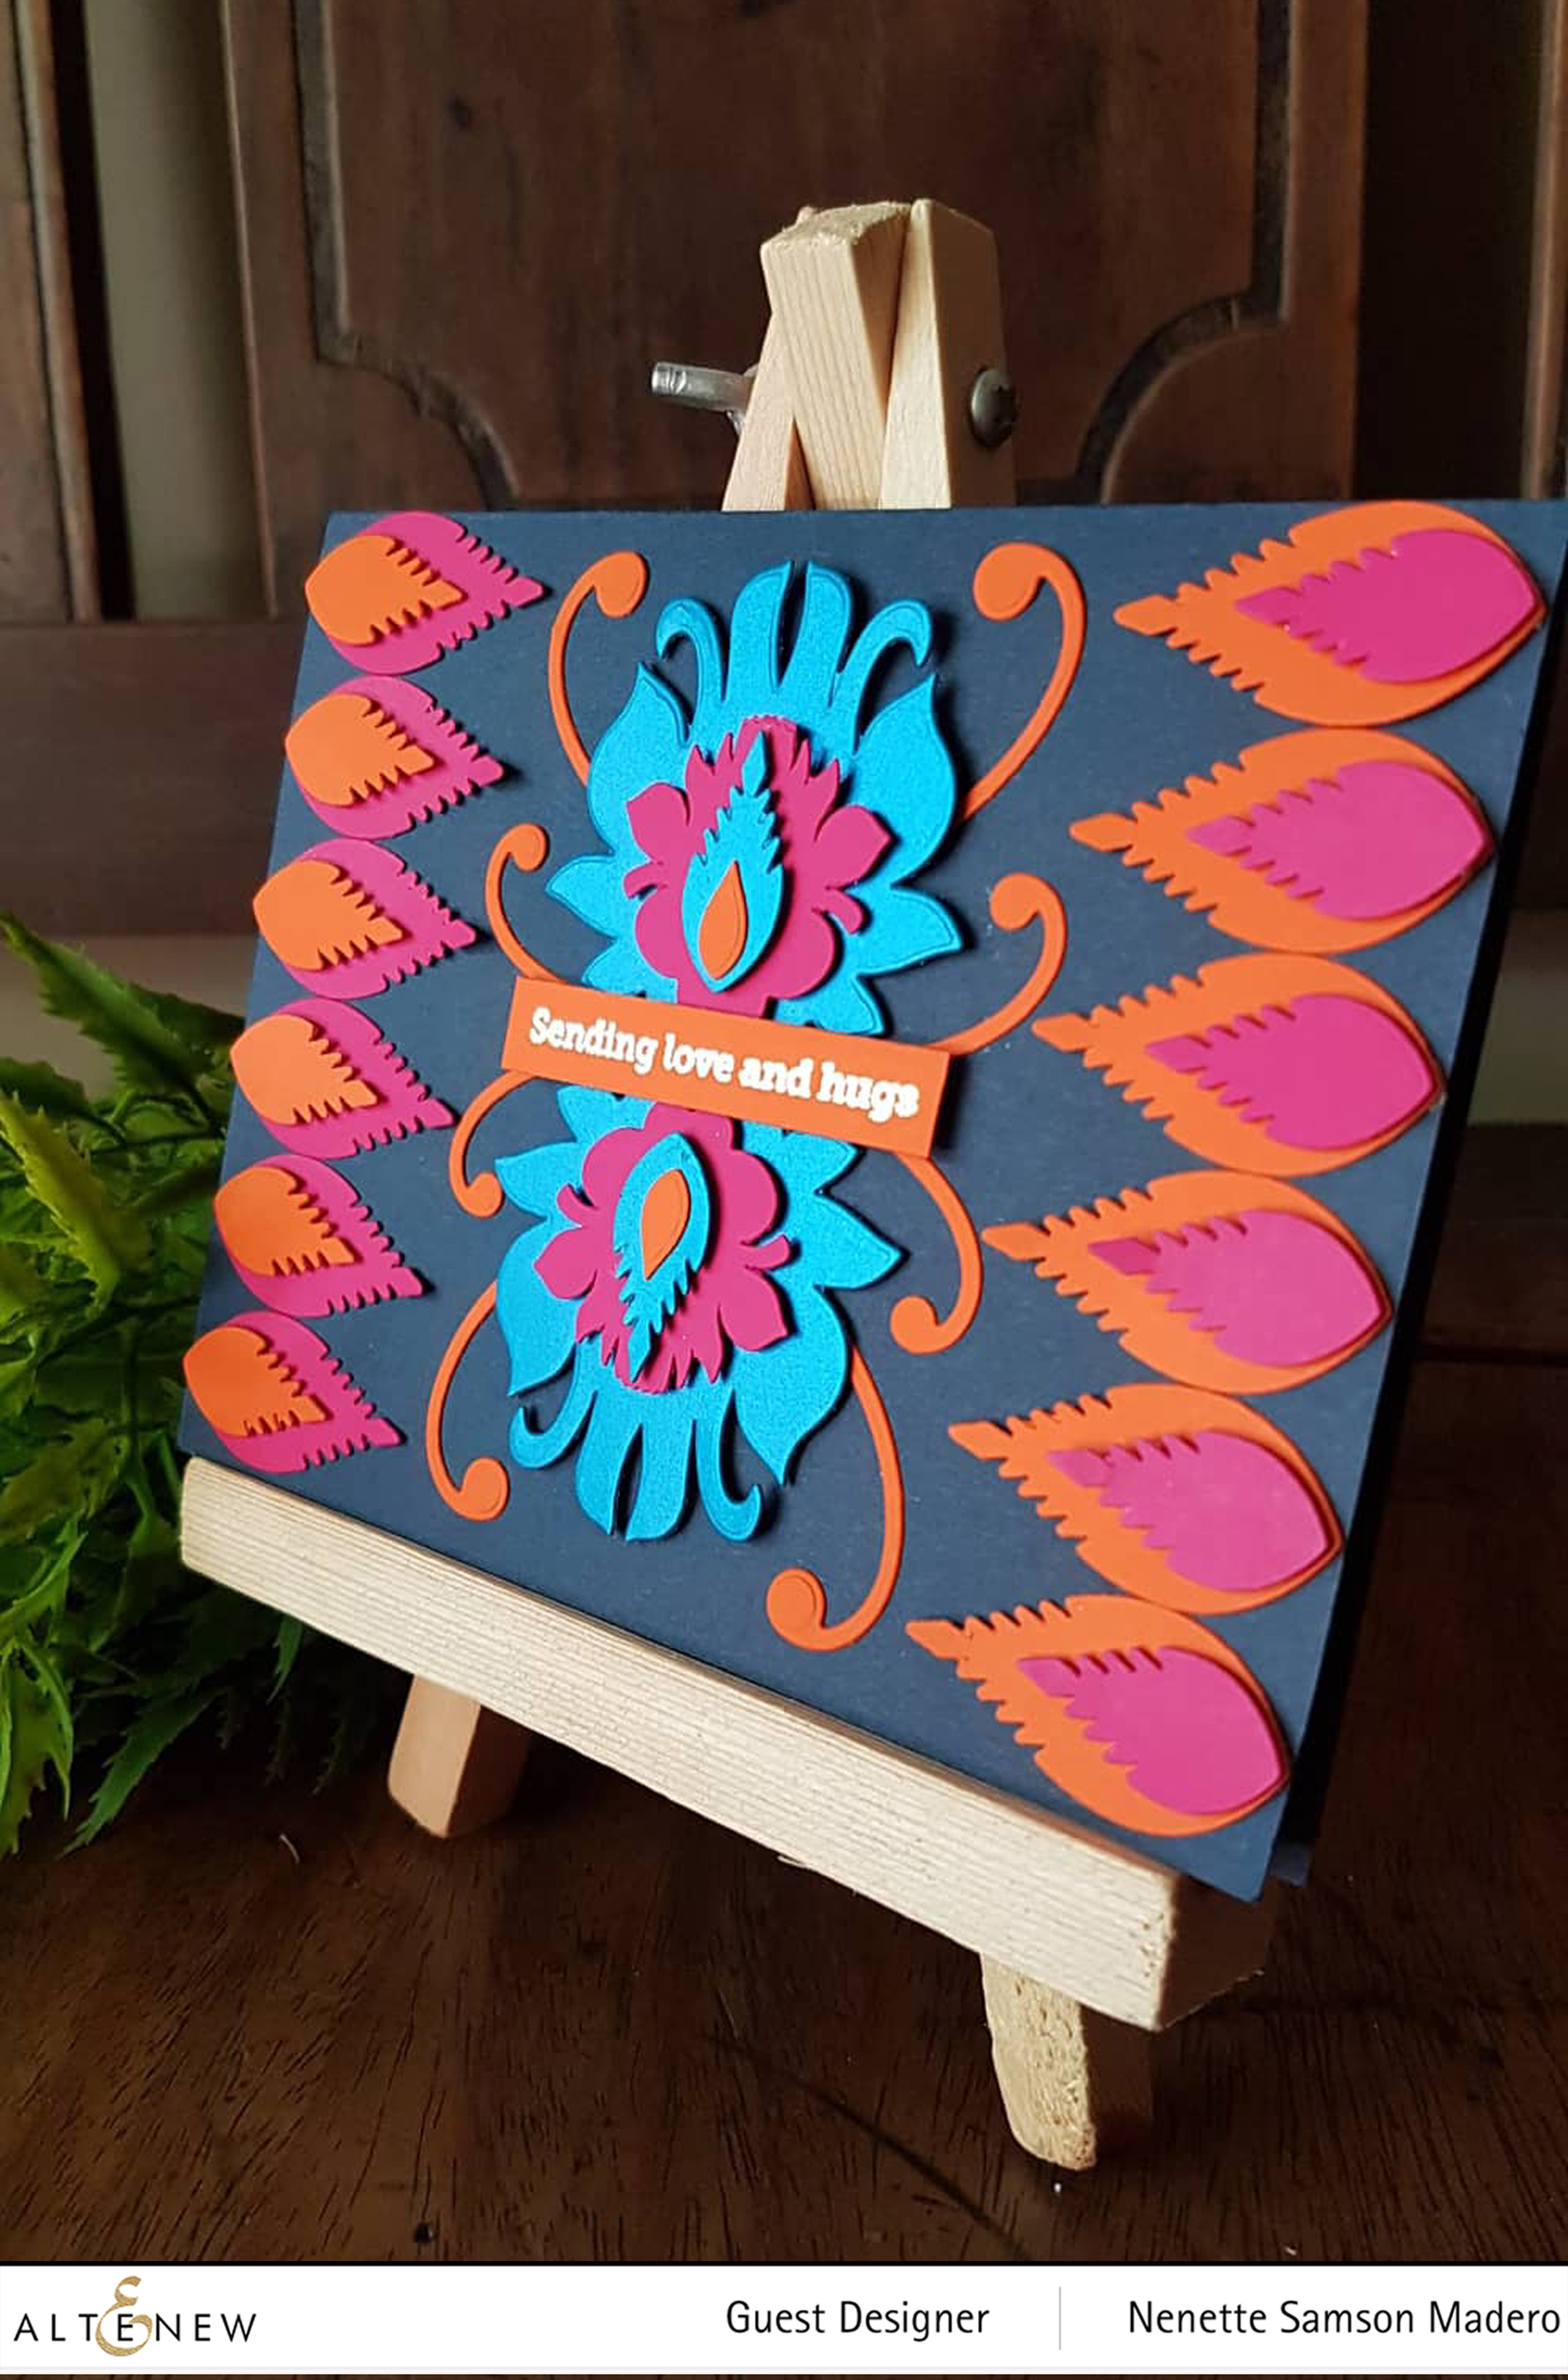
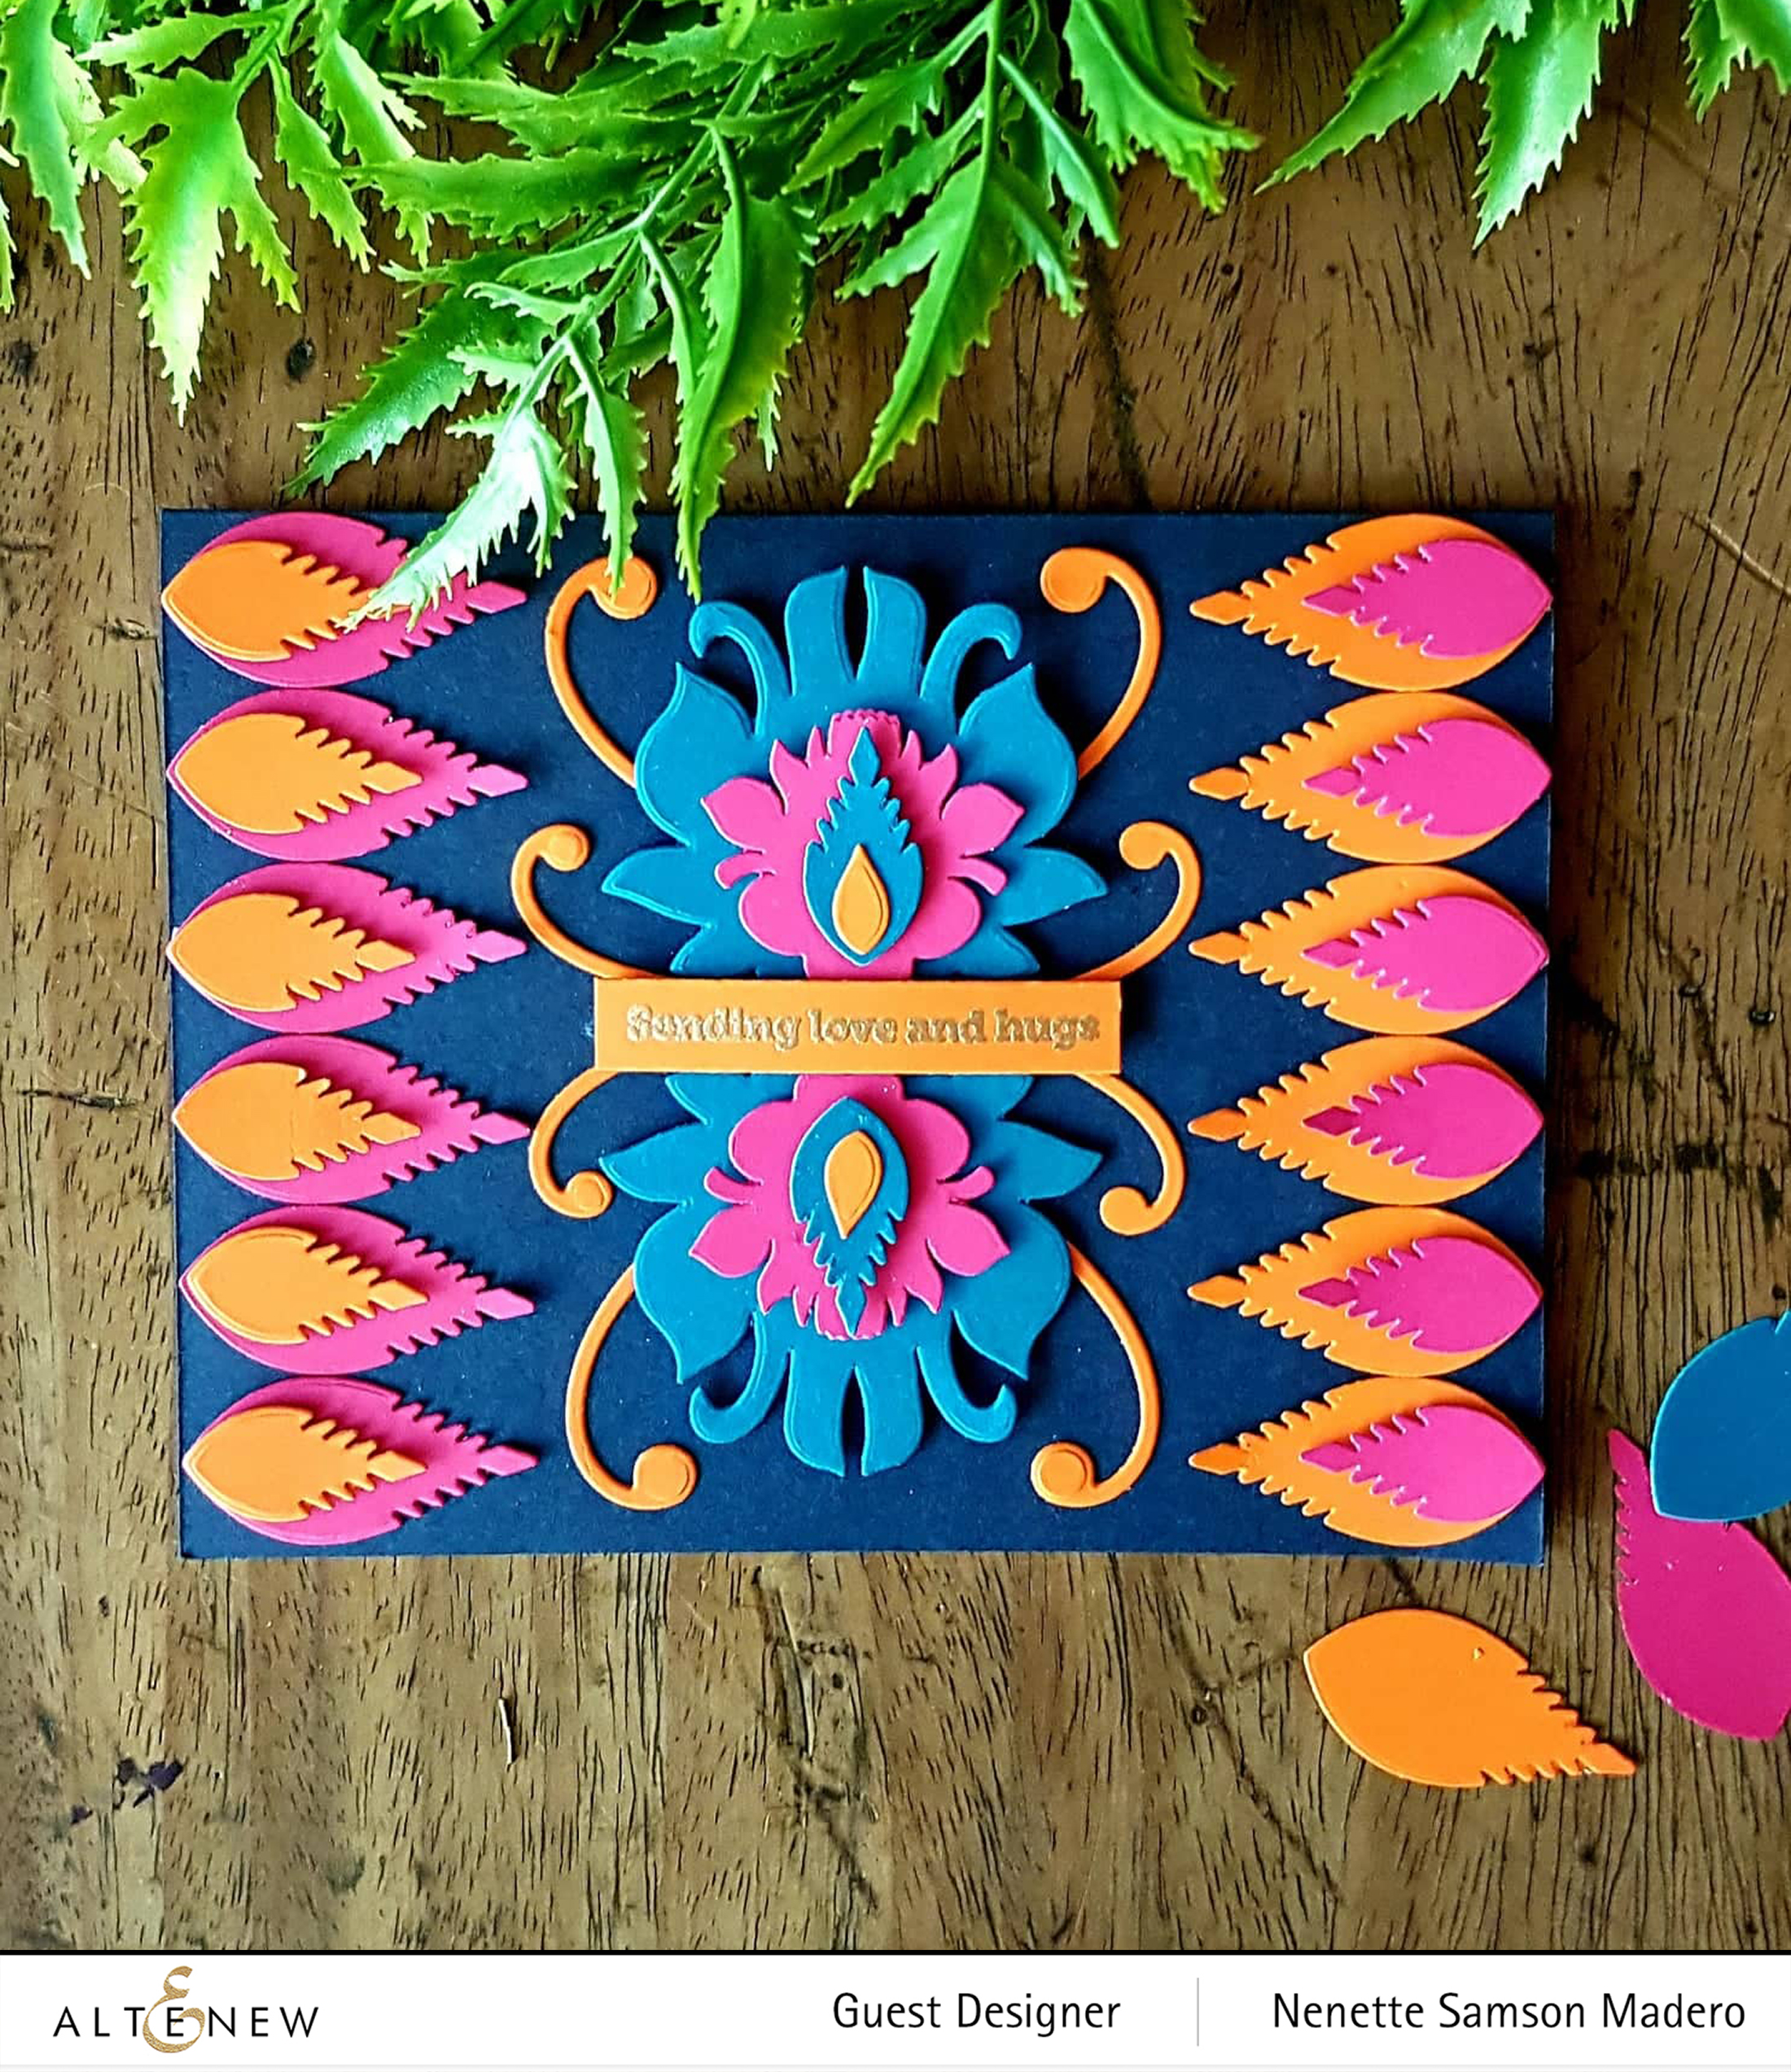
SENDING LOVE AND HUGS CARD

MATERIALS:

Here’s a second card using the Polish Paper Cuts 3D die once again but this time I used them on dark cardstock. The leaves created side borders. This is why it’s important to do all the die-cutting at once. It will make the designing much easier. 🙂 Again, foam squares were used to add dimension to the card.

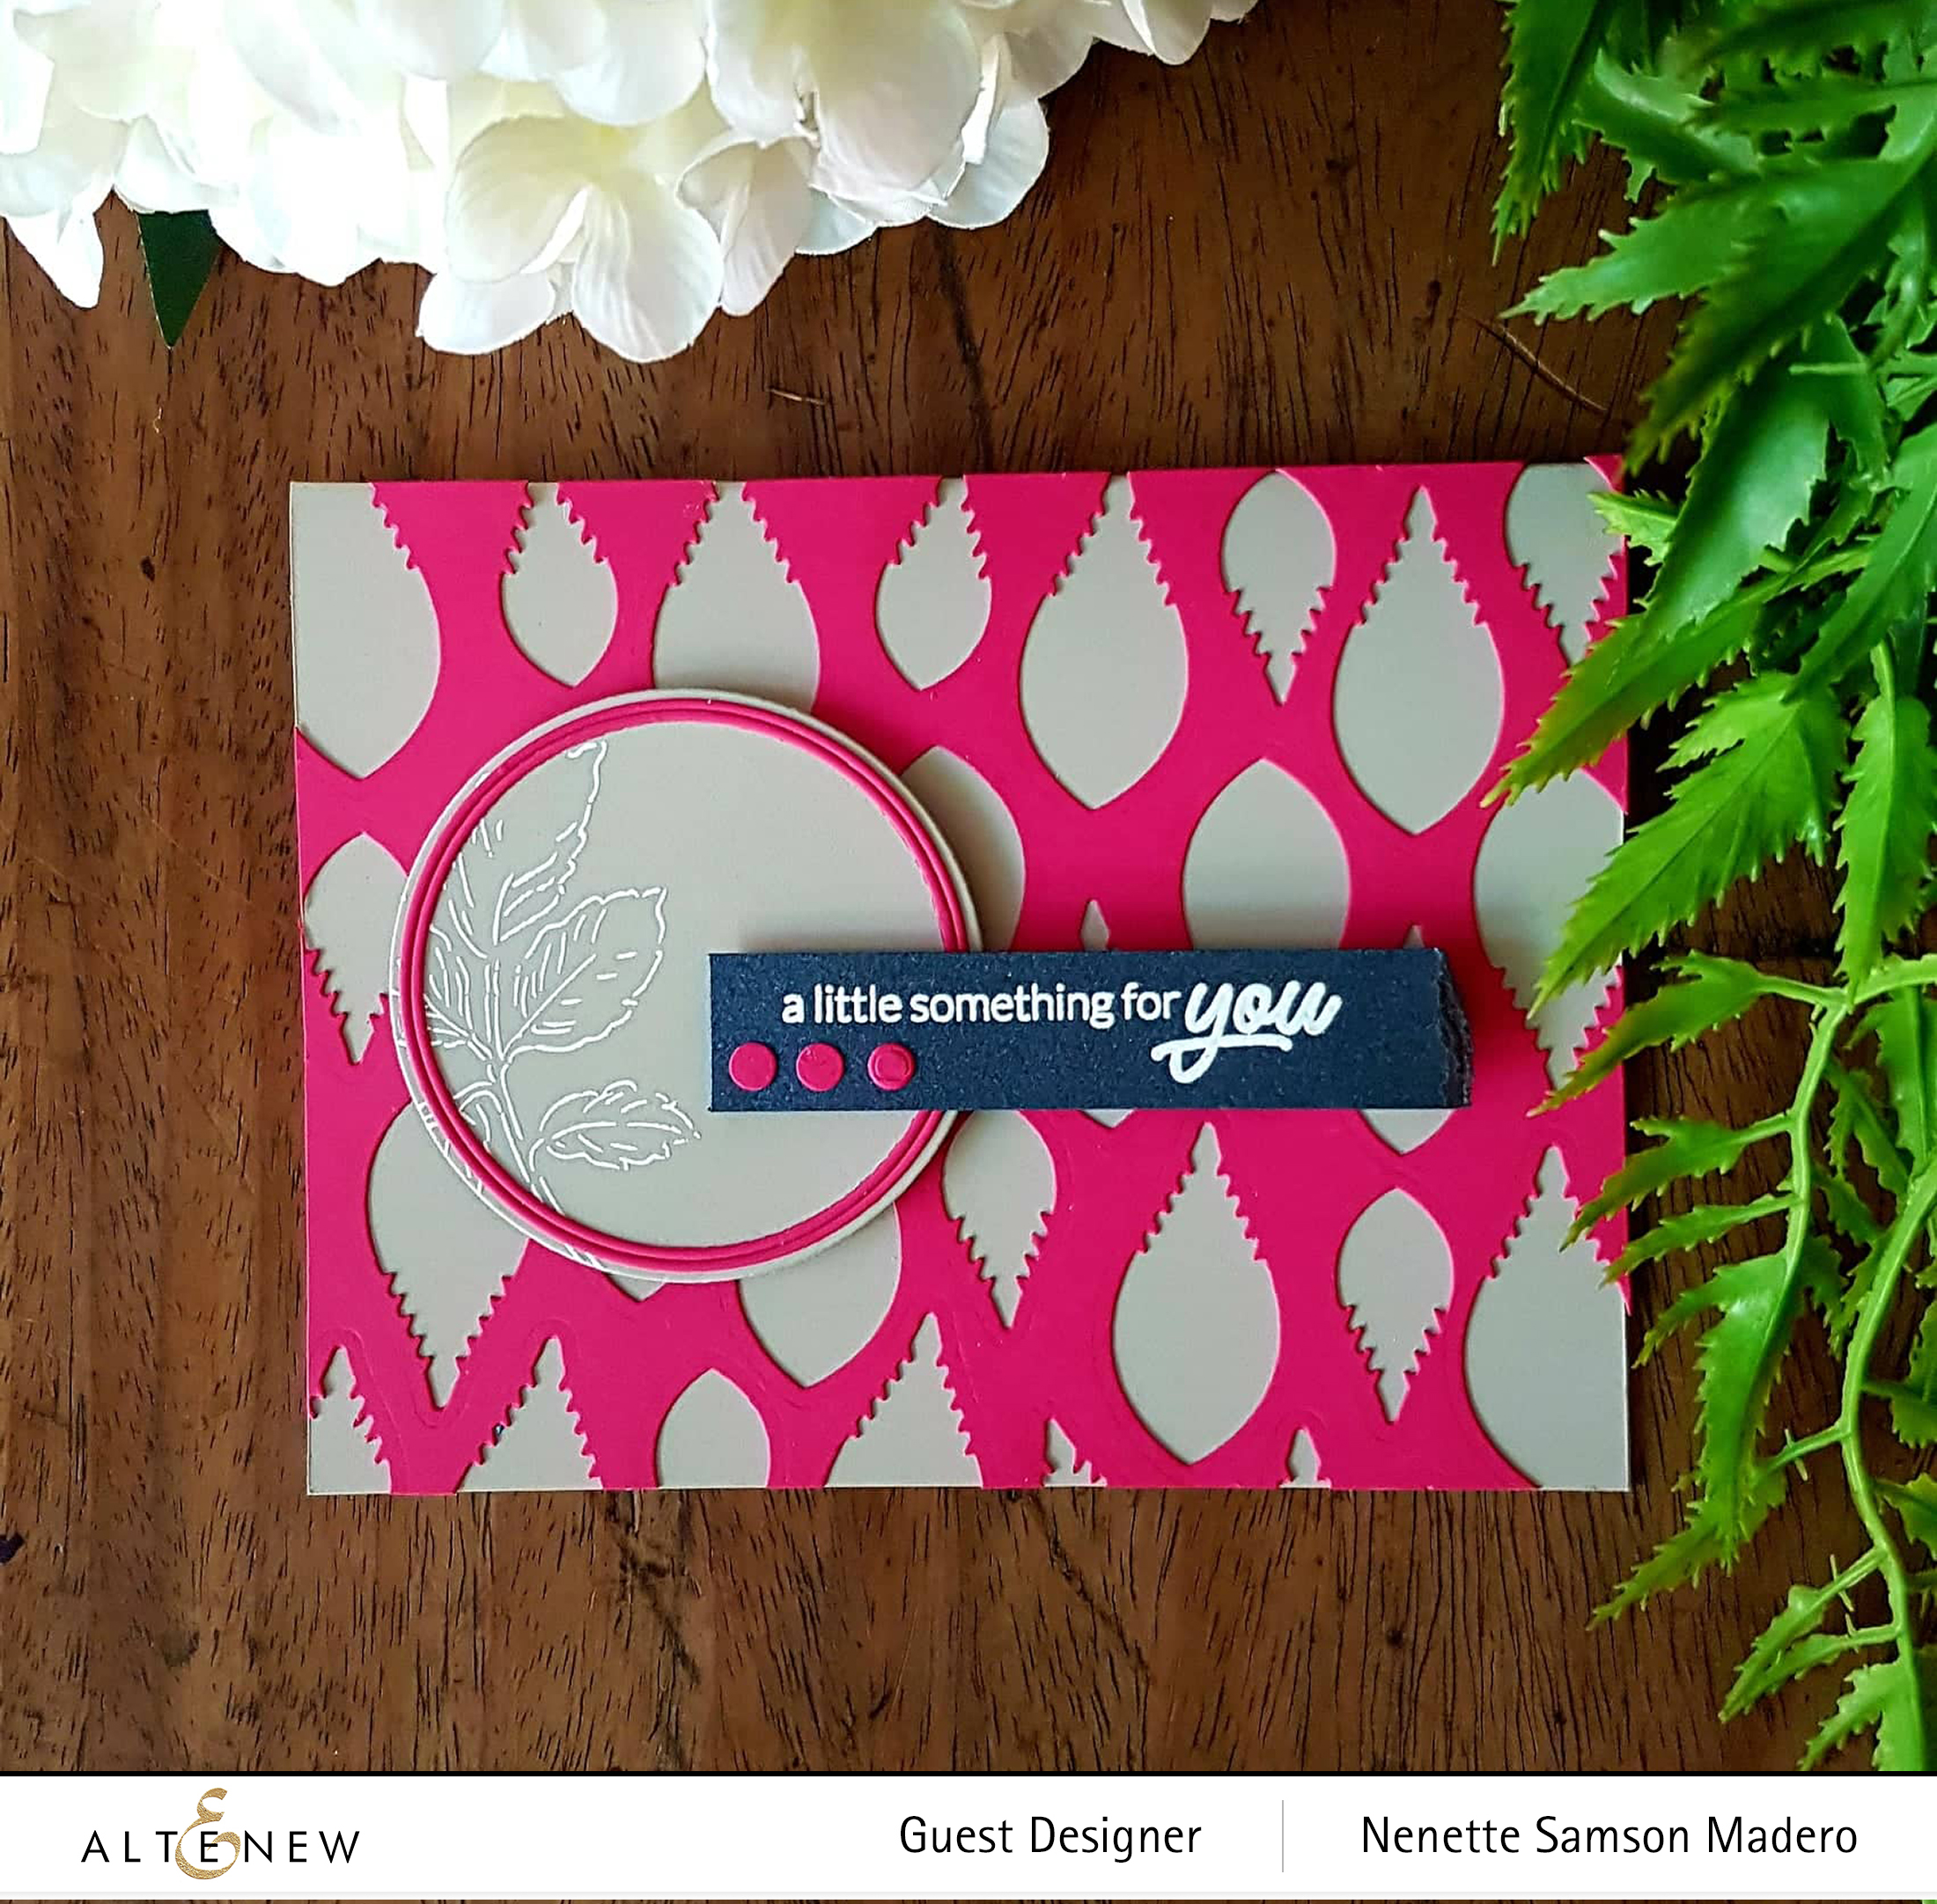
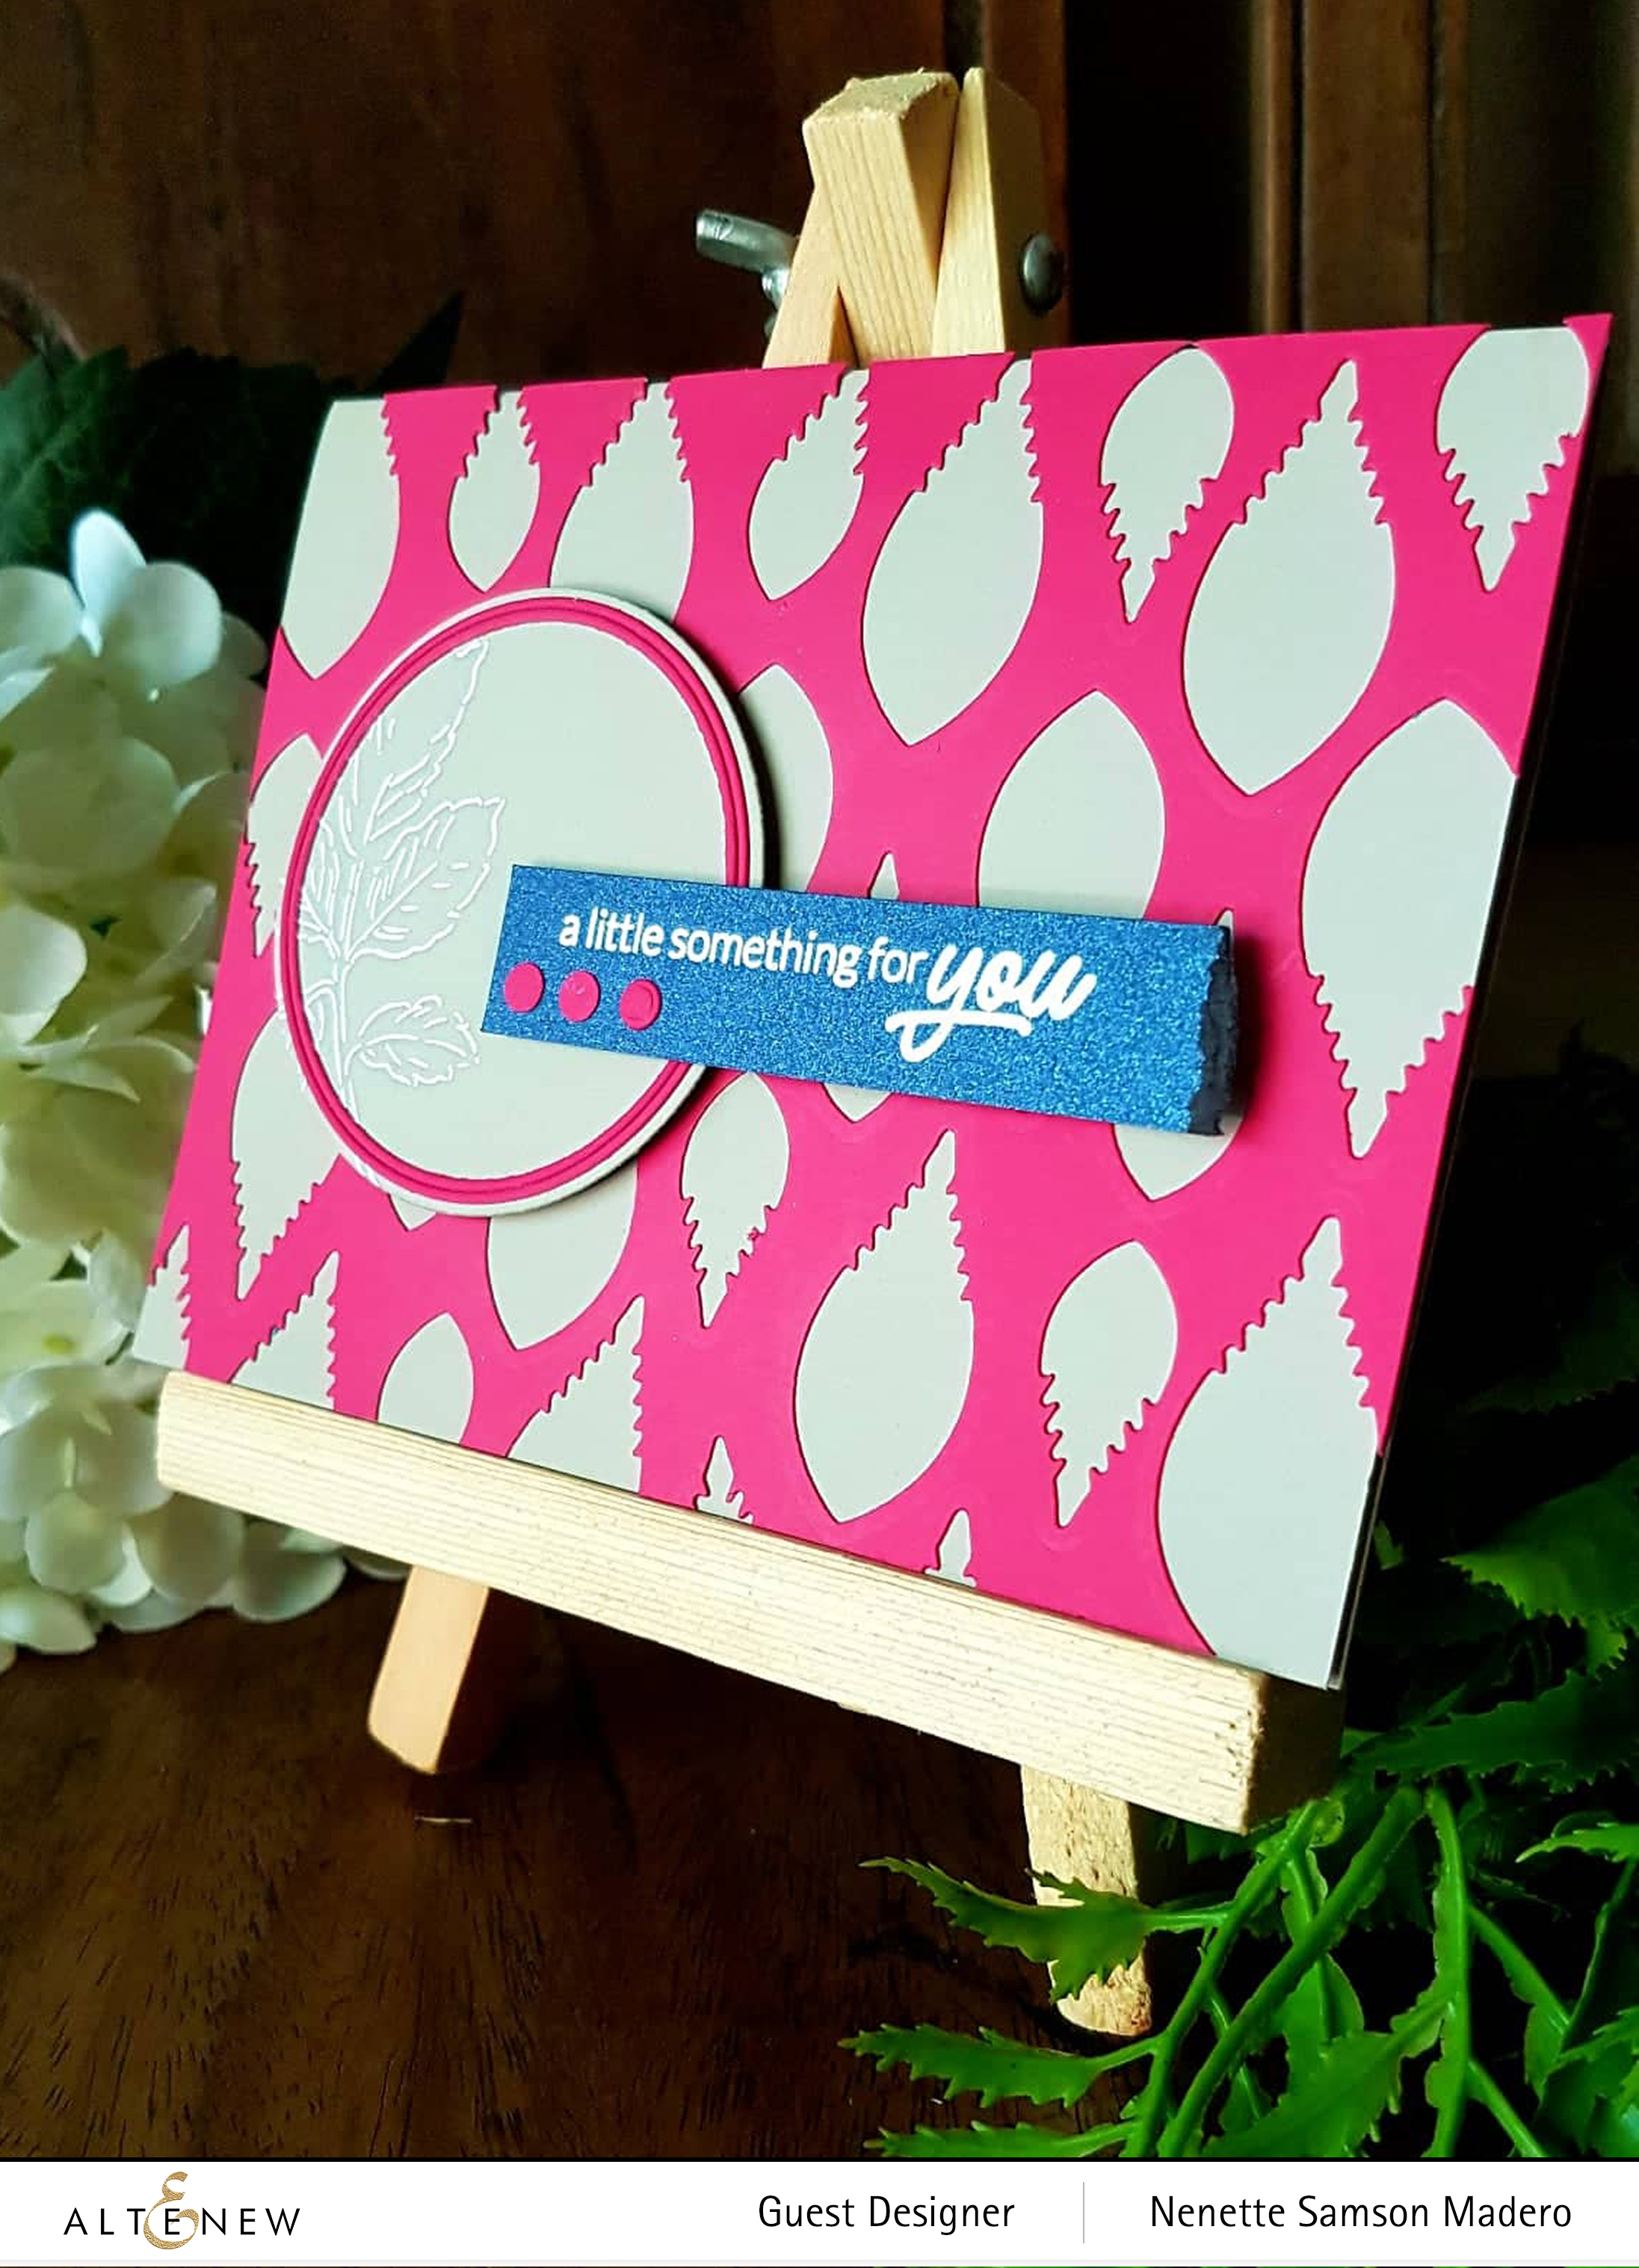
A LITTLE SOMETHING FOR YOU CARD

MATERIALS:

After 2 detail-intensive cards, I wanted to relax a bit and create some CAS cards. Almost always, I try to find use from the leftovers. I loved the negative pattern that the leaf dies created so I adhered it on top of the grey cardstock. A circle die cut was made using the Halftone Circles Nesting die then fine circle frames were created out of the pink cardstock using the Fine Lines Circle die.

The detailed leaf from the Beautiful Day stamp set was stamped using Versamark Ink and embossed with pure white embossing ink. I love that the sentiment from the Wavy Rose Stamp set combines cursive and block writing. This was stamped on navy blue cardstock using Versamark ink and embossed again with the white embossing powder. The edge of the sentiment strip was torn to give some texture. 3 pink dots were placed on the lower left side of the sentiment strip to counterbalance the bold and heavy YOU.

THANK YOU CARD

MATERIALS:

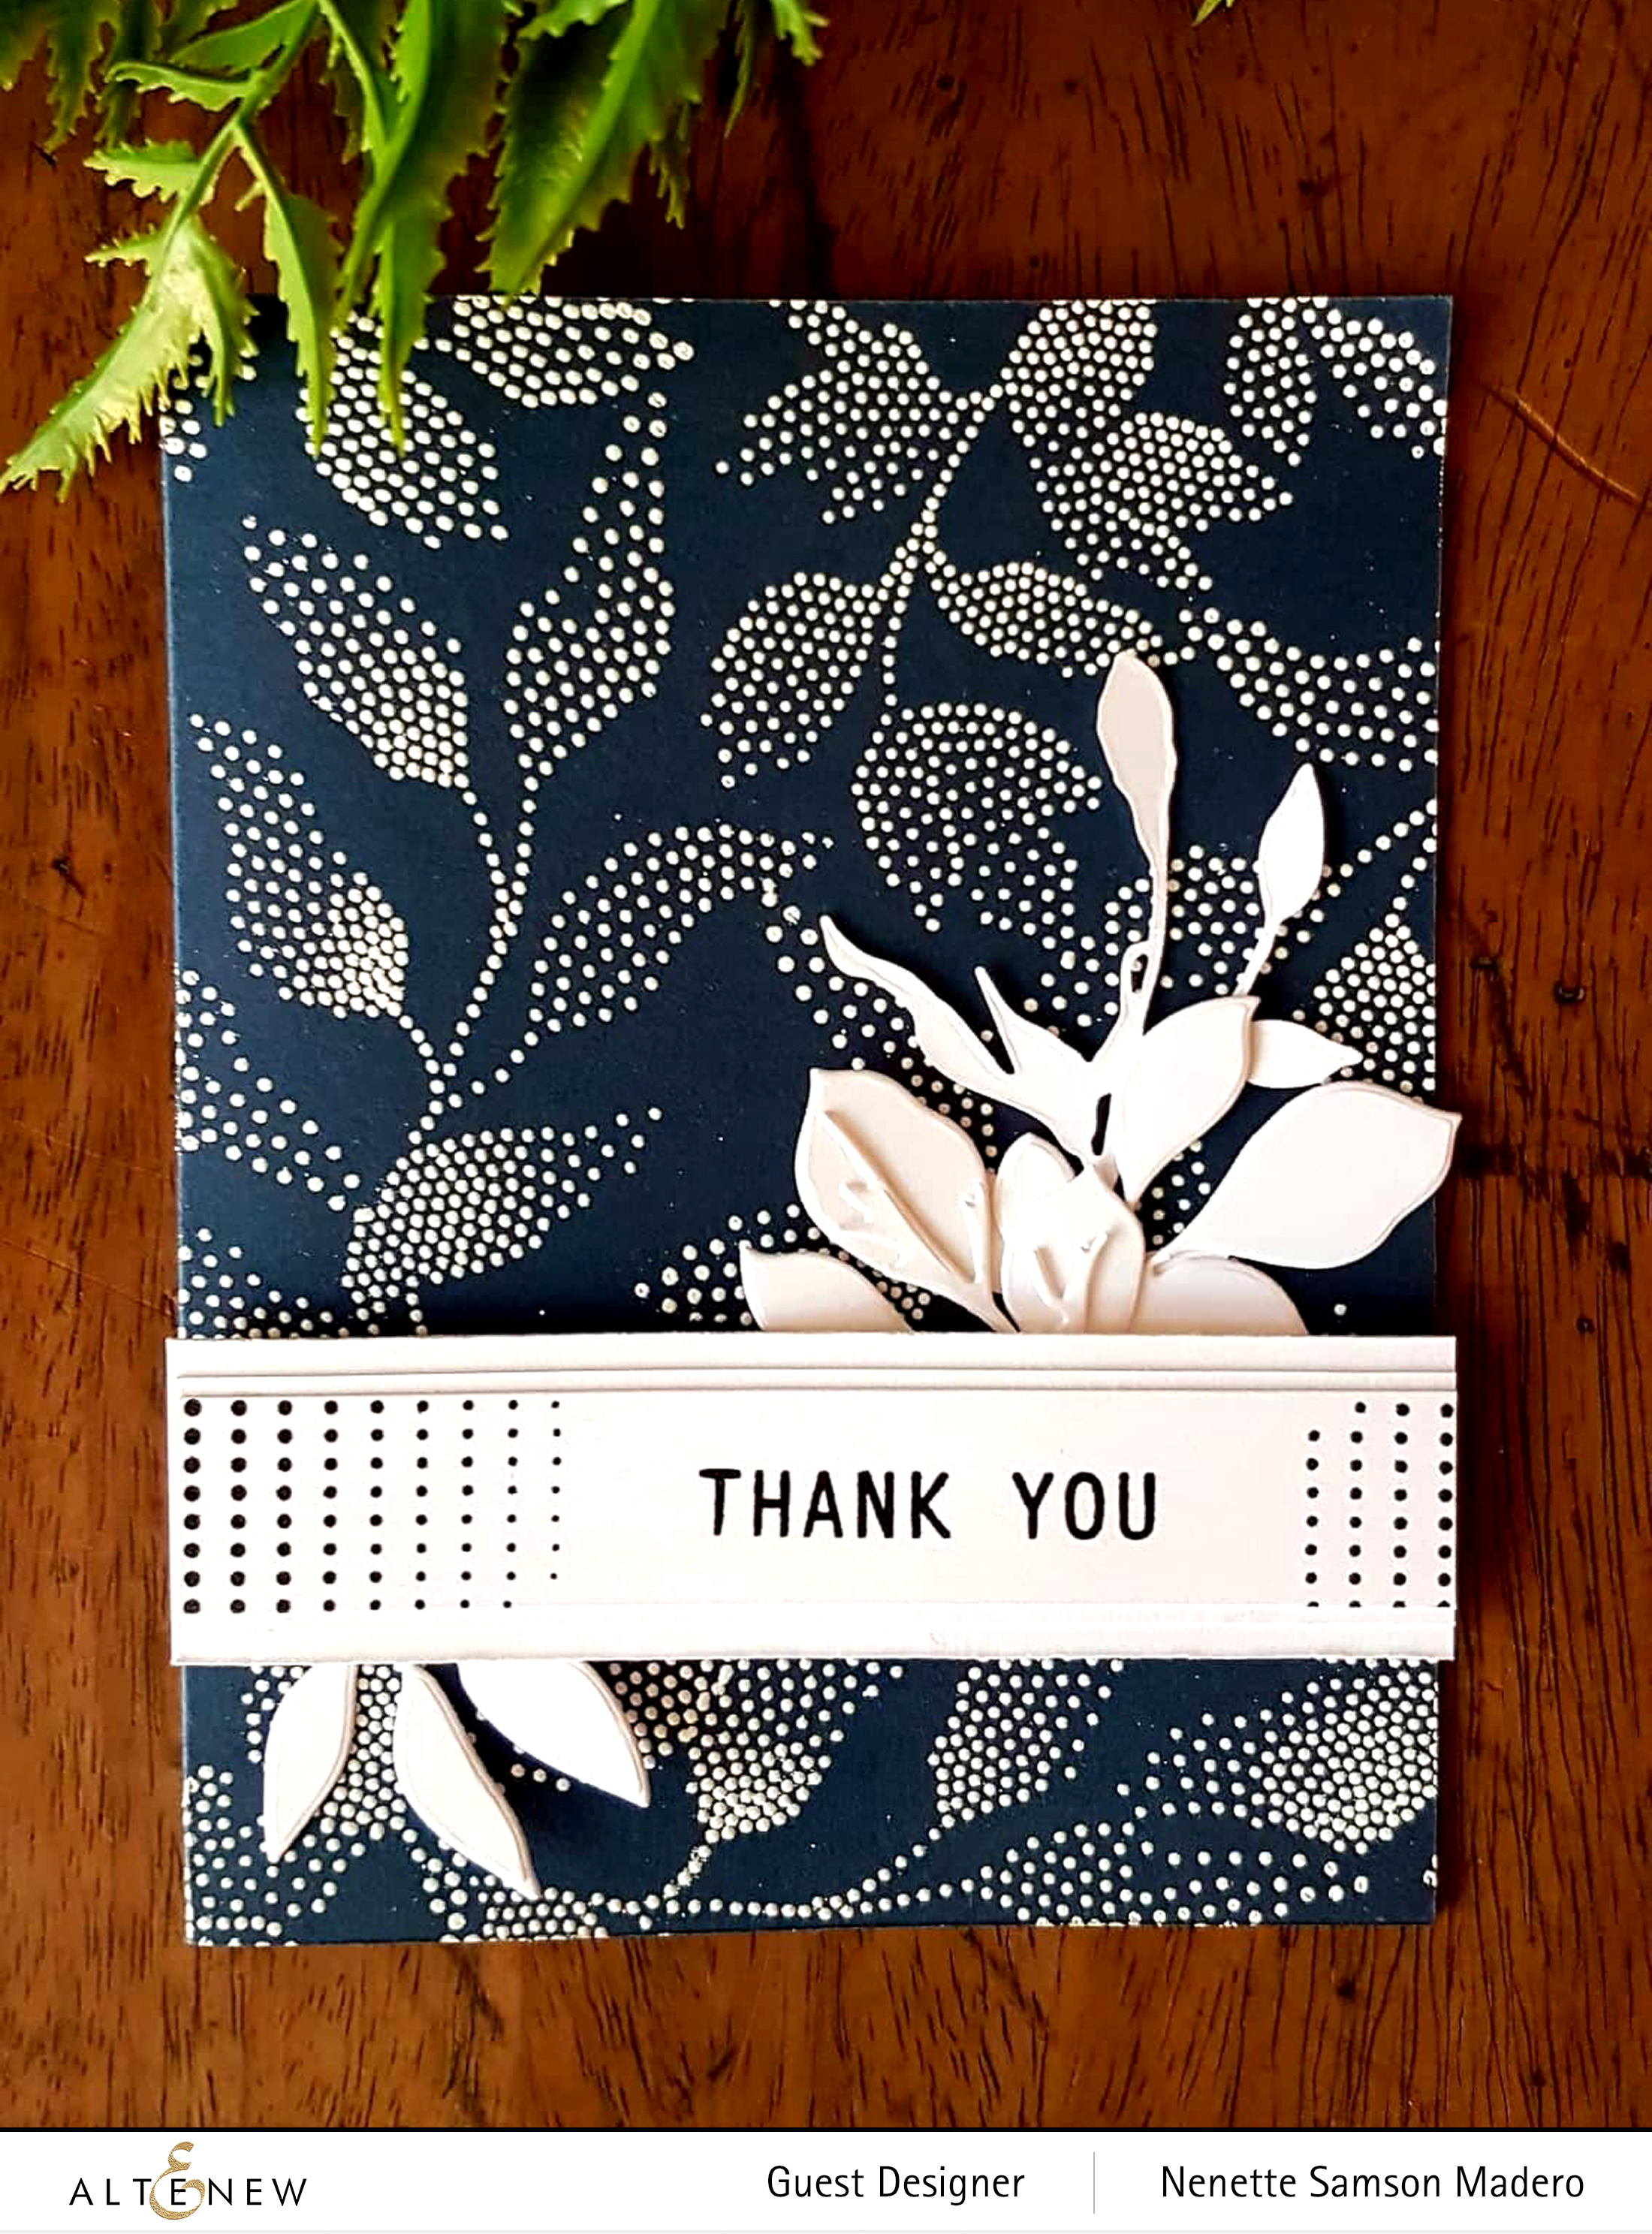
Here’s another CAS card. The leaf images from the Dot Art stamp set were stamped onto a navy blue cardstock to cover the entire card front using Versamark ink then embossed with white embossing powder. This was the first time for me to try out the Obsidian pigment ink and I’m in love with it!!! You only need some light tapping on the stamp set and the ink covers the entire surface! This will be my go-to black ink from now on. The sentiment and dots were stamped on white cardstock then 2 more layers of the same white cardstock were used to mat the sentiment strip. The edges of the strip were distressed using a paper distresser. The leaf die-cuts from the Rose Flurries 3D die set were added to the back of the sentiment strip to give some added interest.

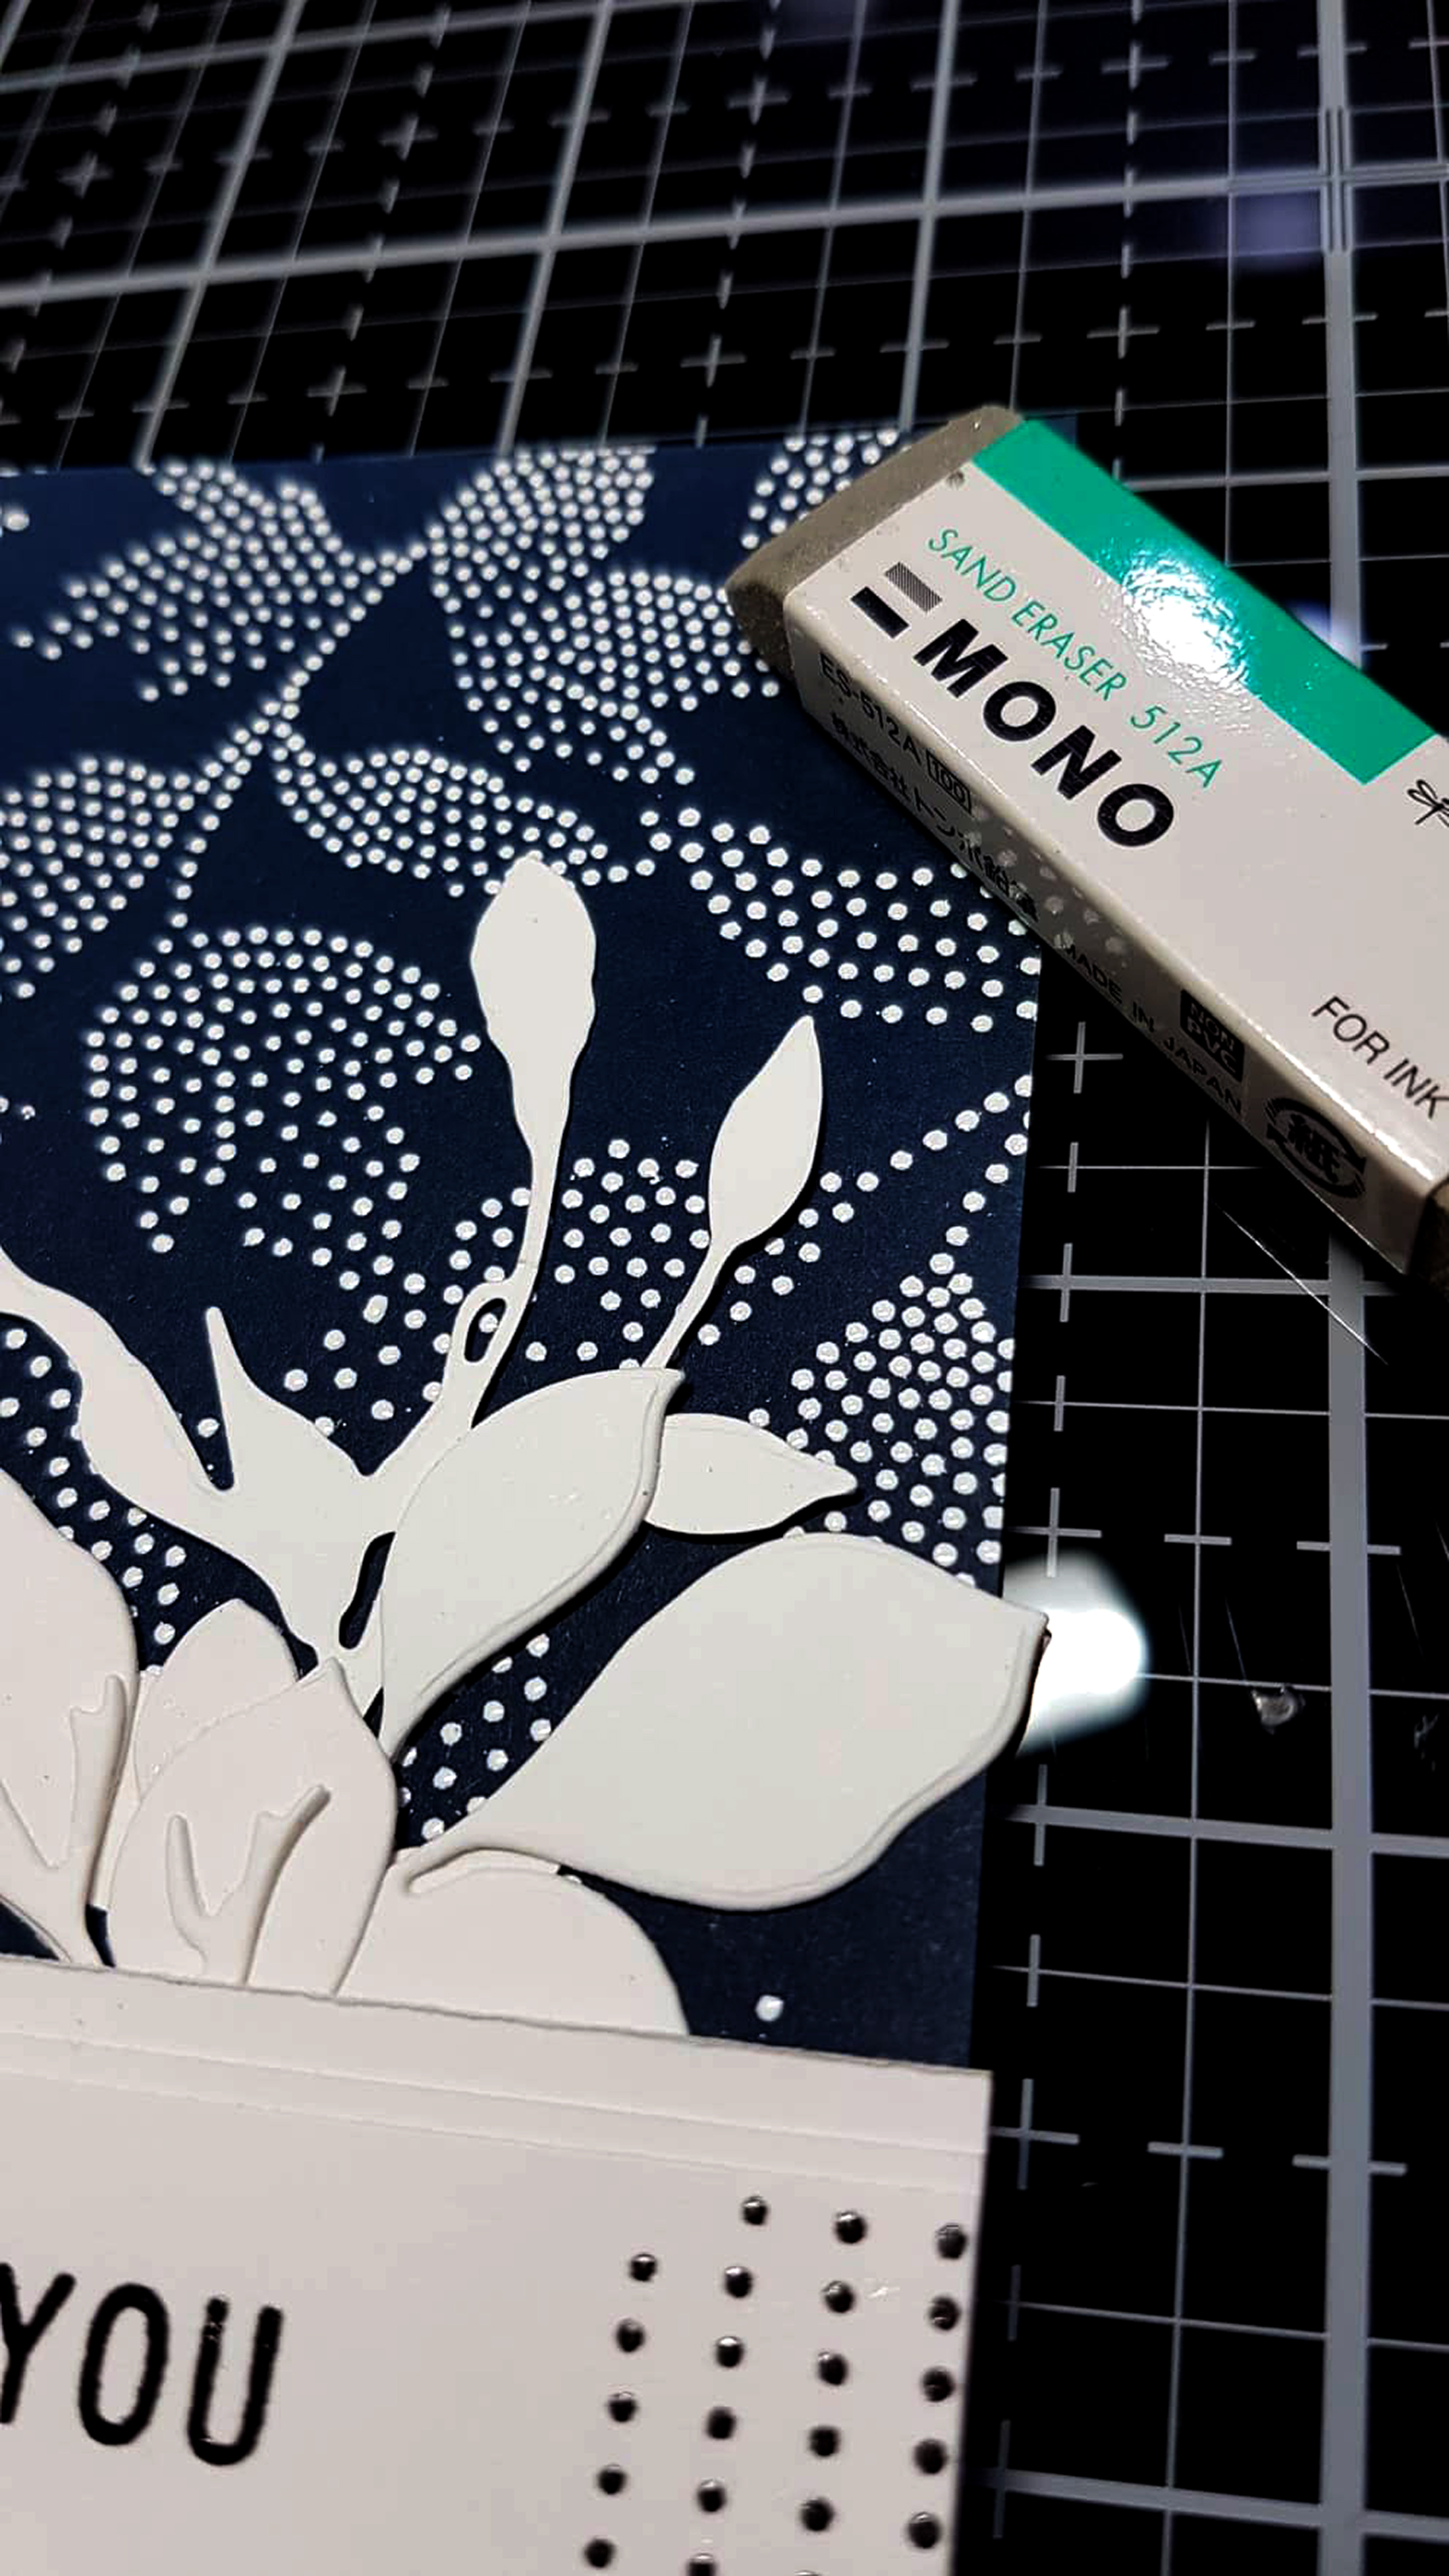
I usually struggle with keeping the background clean especially on dark-coloured cardstocks. Even if I use the antistatic tool before stamping and embossing and then using a fine tip paintbrush to remove the excess powder, most often than not, there will still be excess white specks of embossing powder after you heat emboss. A sand eraser can be used to remove the specks of excess white embossing powders on the background for a cleaner, more finished look.

JUST BECAUSE CARD

MATERIALS:

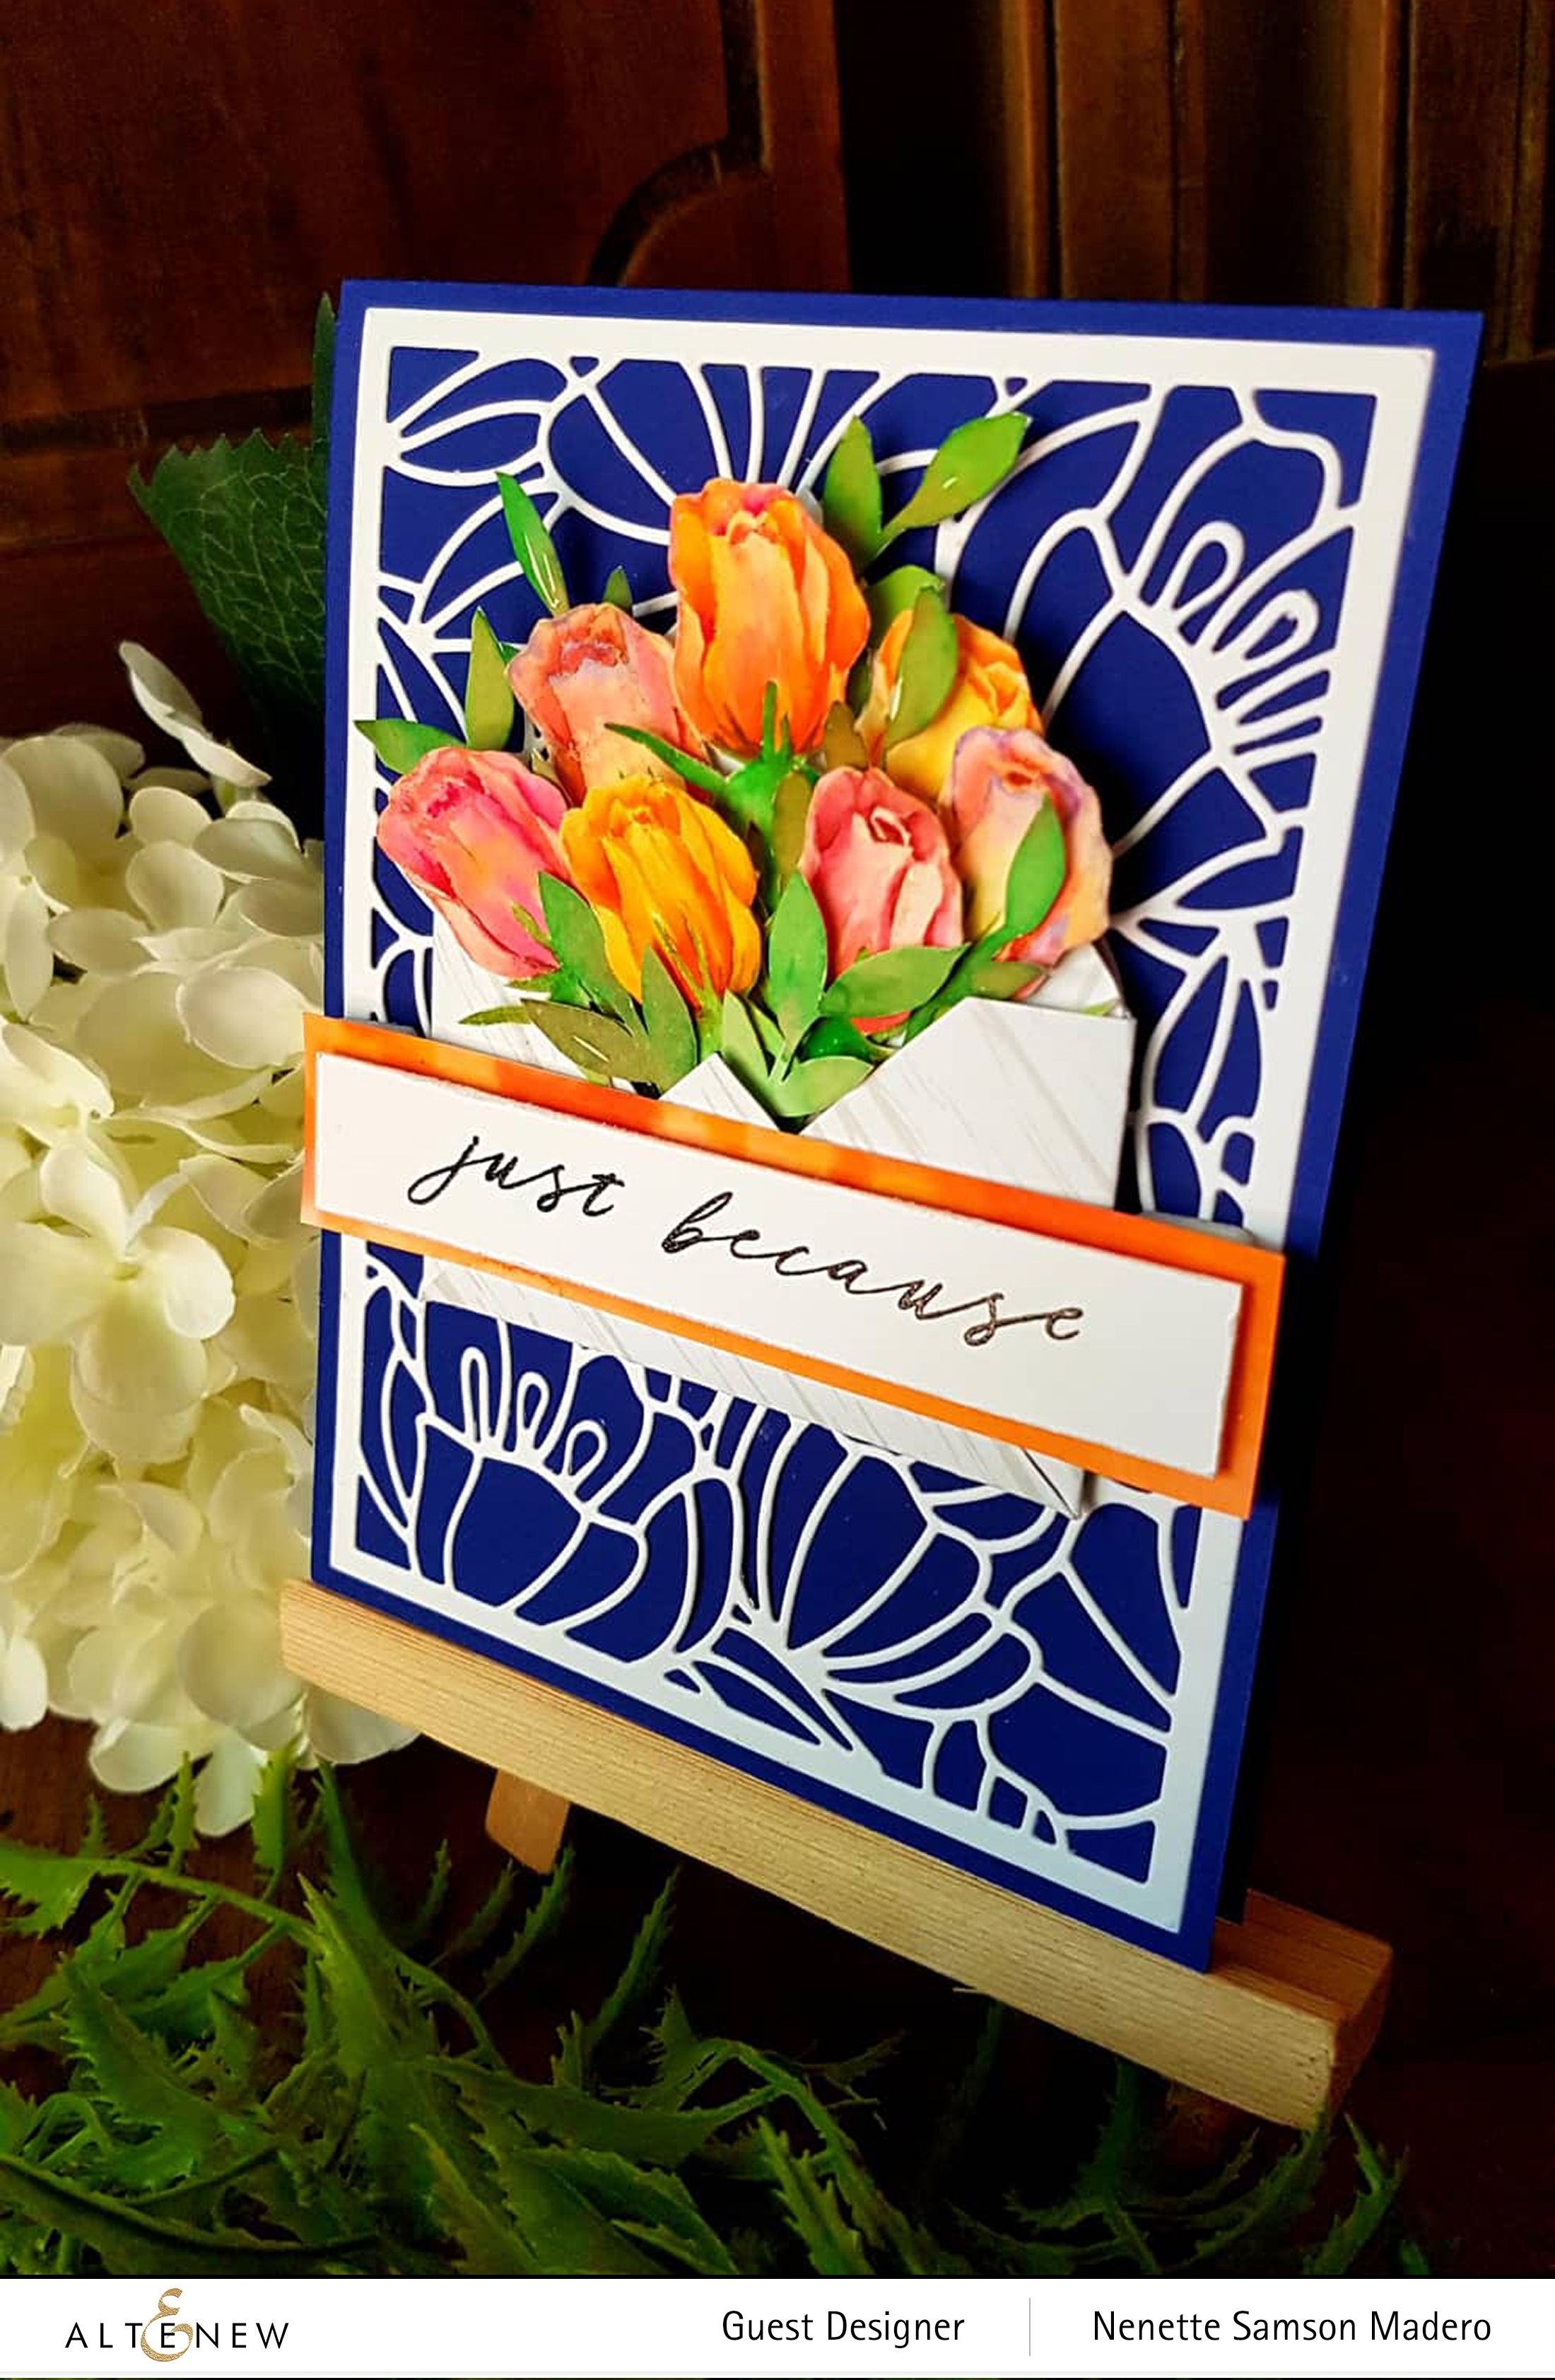
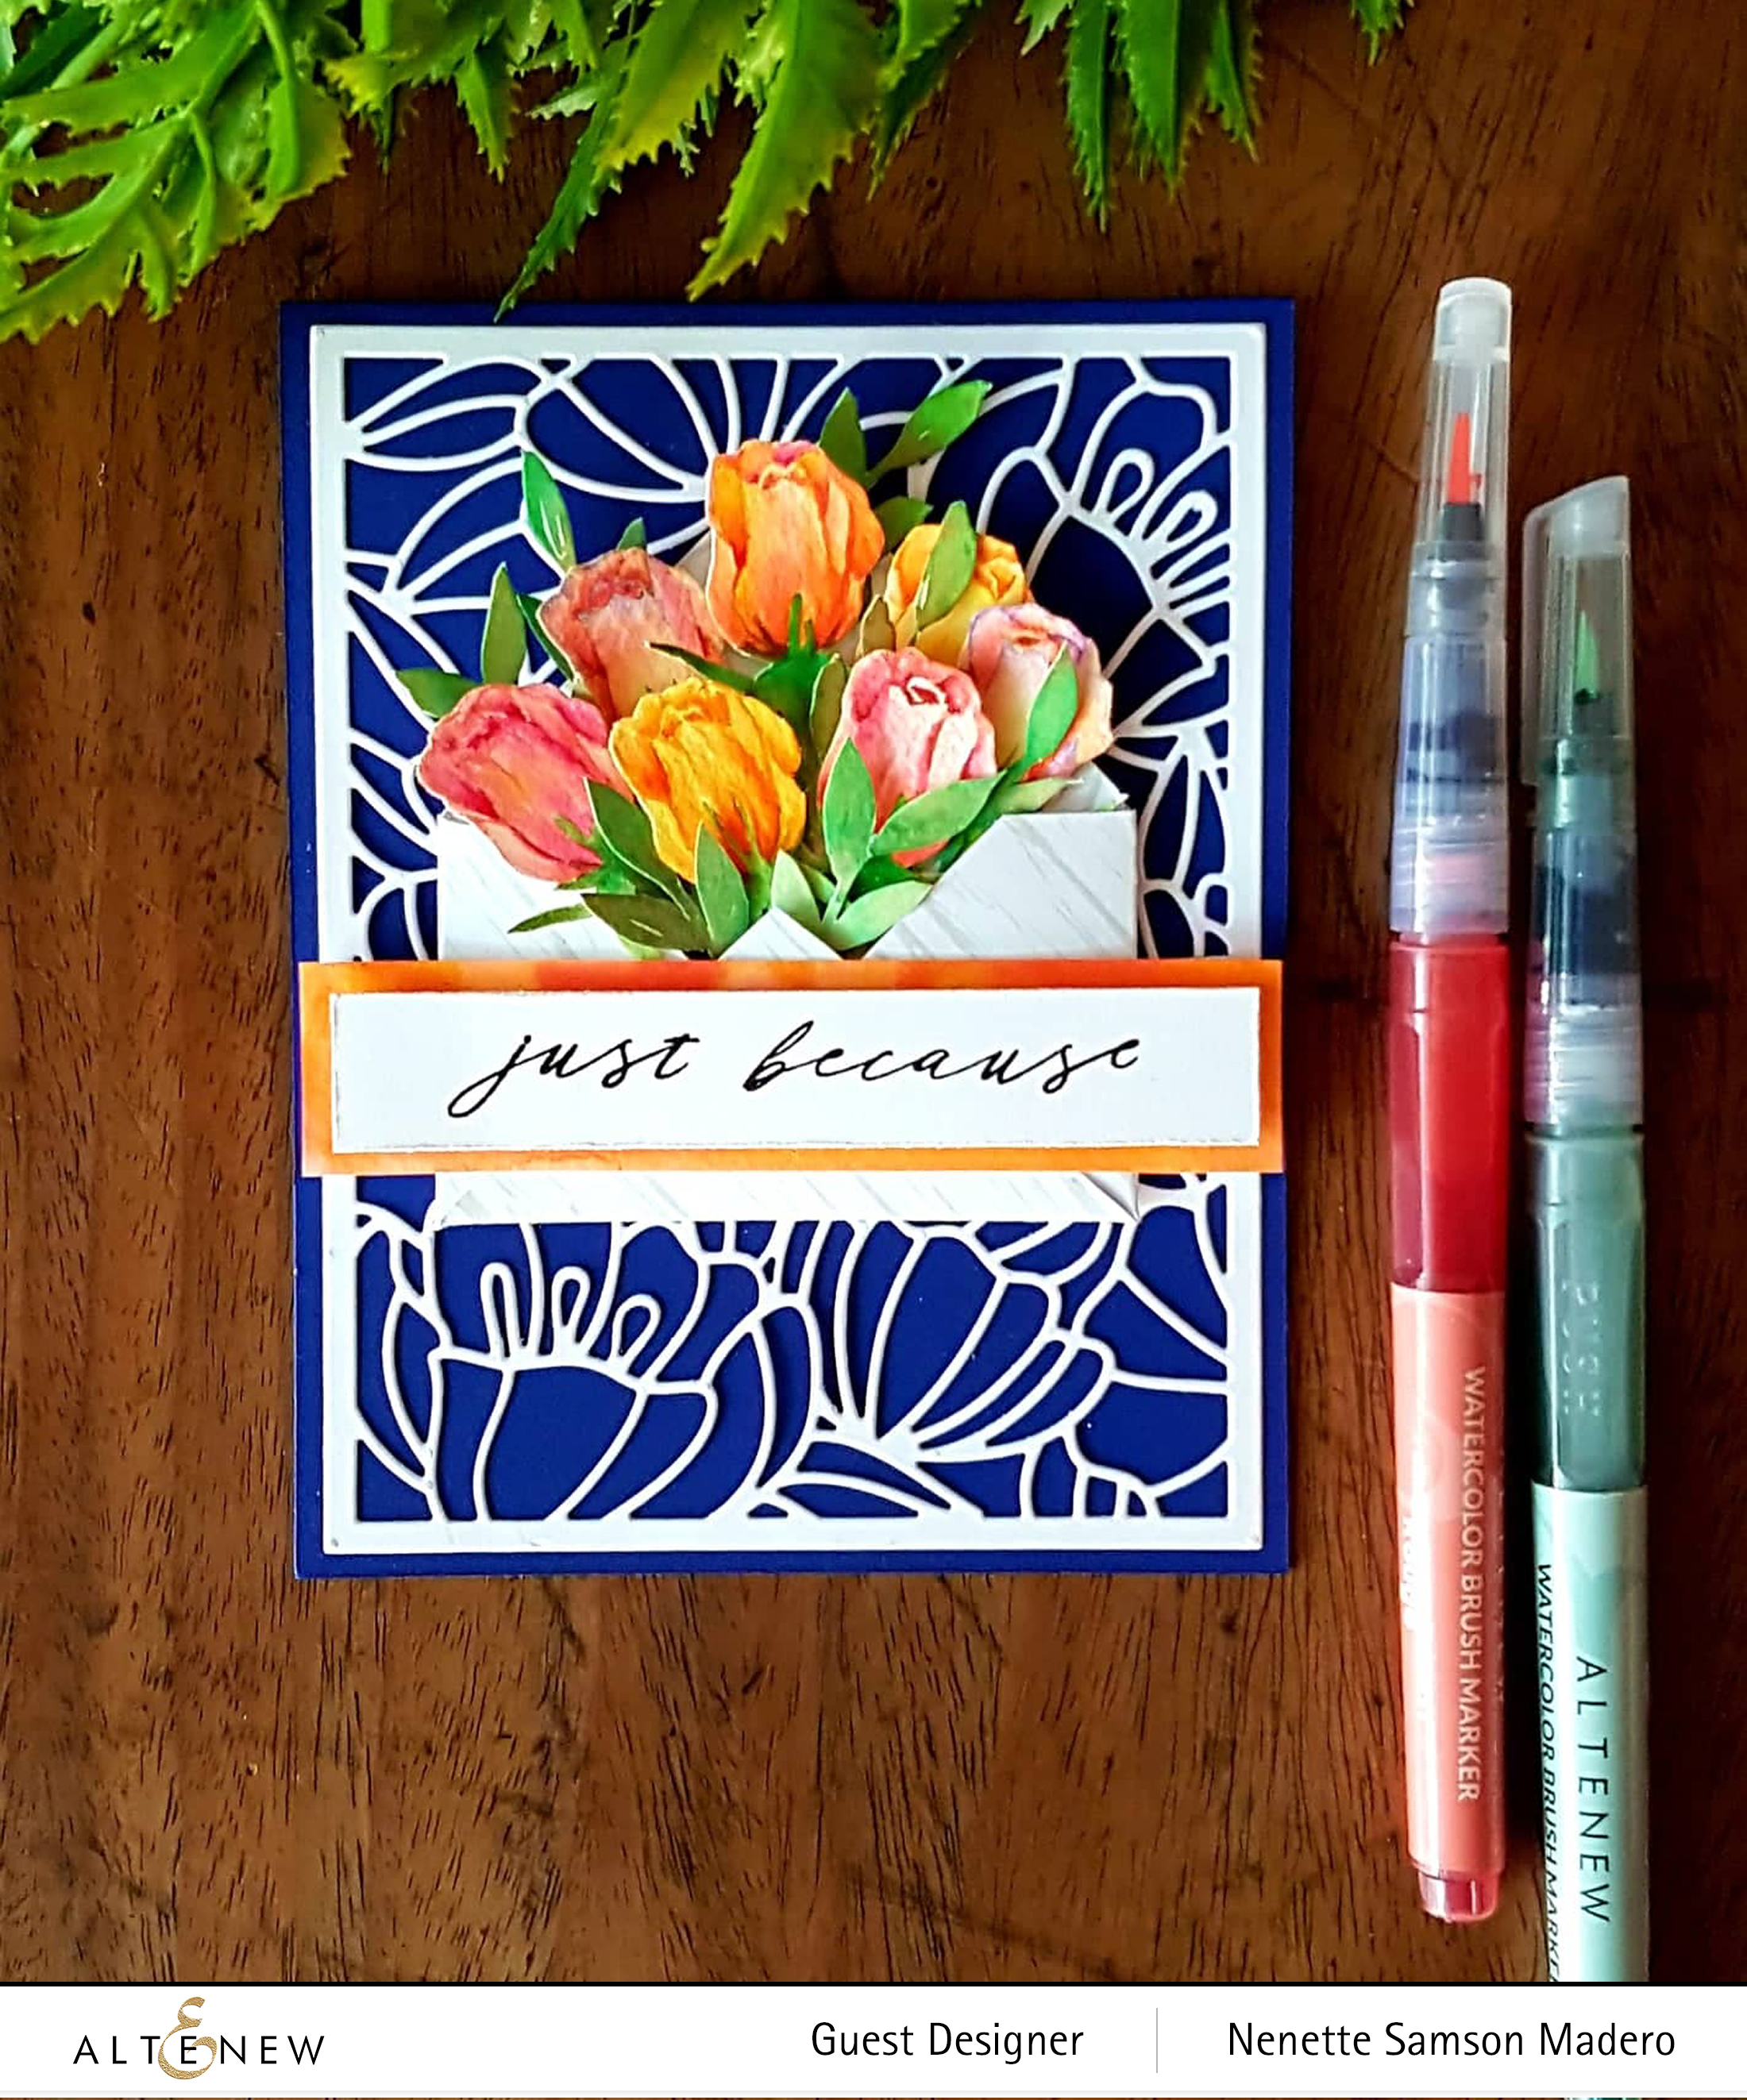
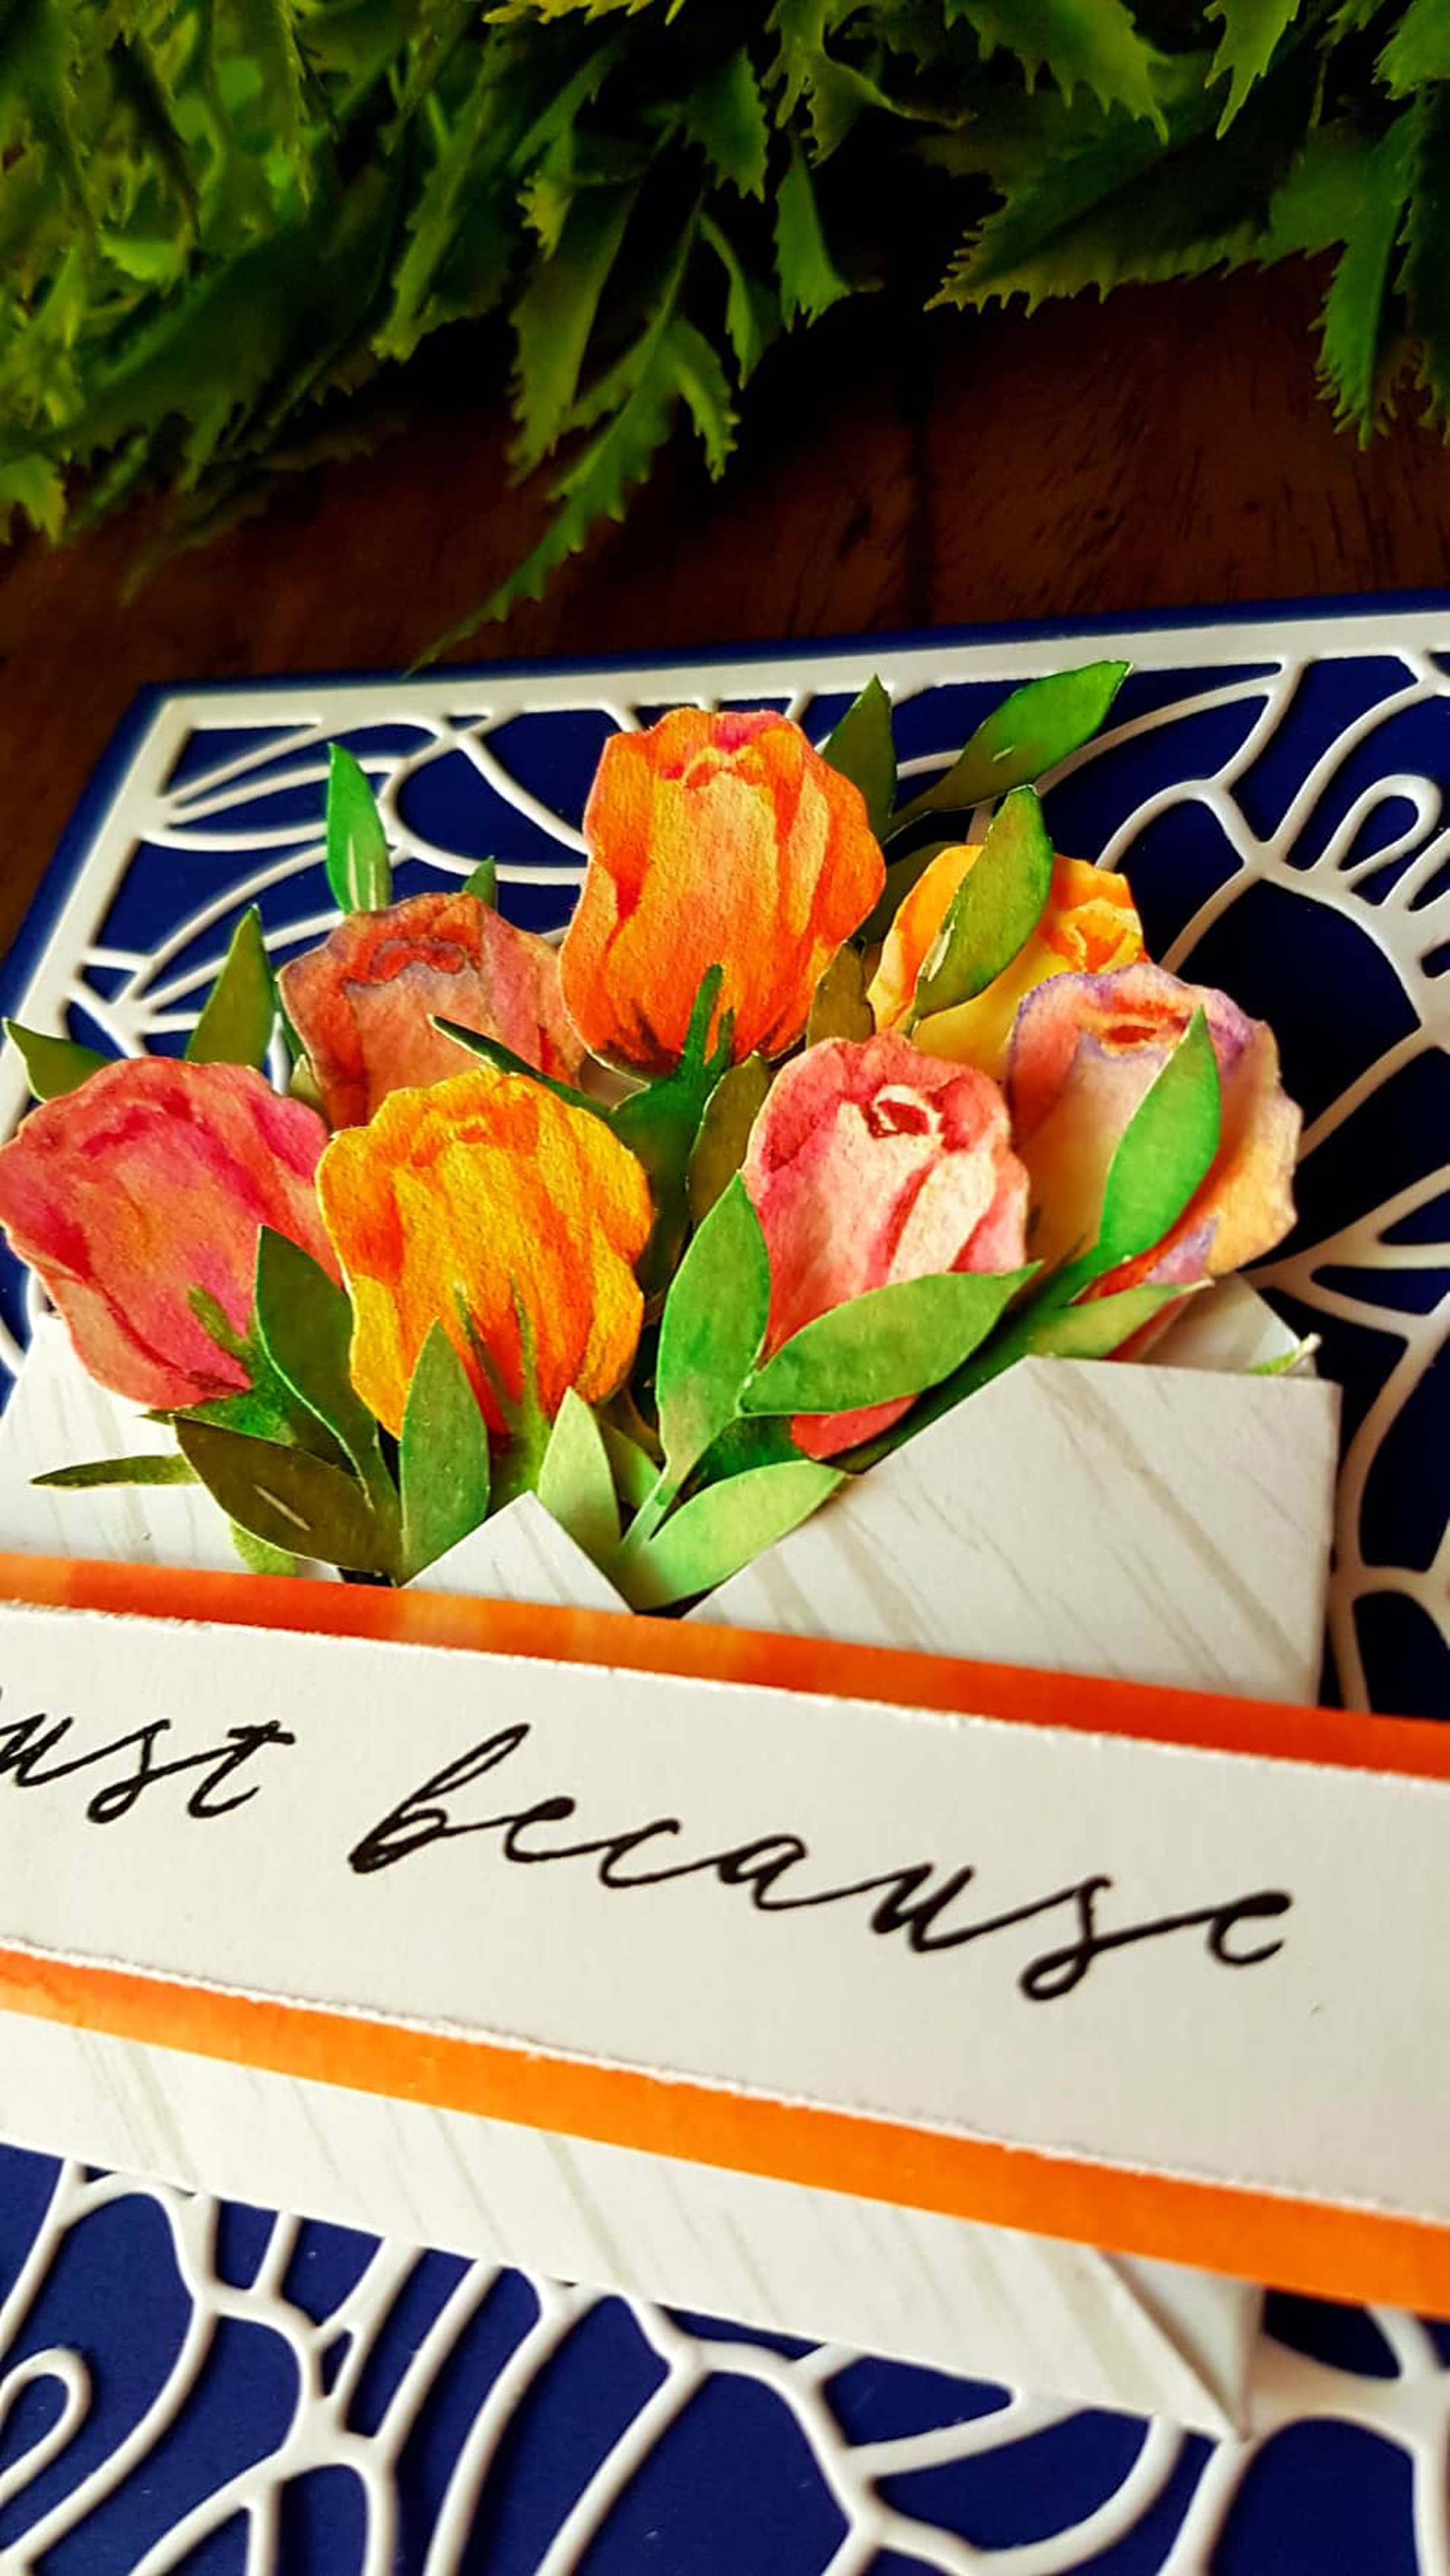
I love roses especially the buds and when I saw this stamp set, I immediately knew what I wanted to create. First, I stamped several images using Antique Linen distress ink on watercolor paper a few times to get a good impression of the image. After, I used the wet on wet technique to color the petals and sepals. Since this stamp set did not come with leaves, I just watercolored my own and fussy cut them. Instead of a vase, I thought of making a small envelope using one of the Essential Rock Collection papers to hold the flowers together. I only put glue on the stems to adhere it inside the envelope so that the flowers will have more dimension. The Altenew Dainty Blooms cover die was used to cut out the image on Neenah Solar white CS and this was then glued on a top folding A2 card. The envelope was then glued onto the card front using a strong adhesive.

I chose the cursive writing of “JUST BECAUSE” to add to the feminine feel of the card and this was stamped with my new favorite Altenew Obsidian Pigment Ink. This was then embossed using Altenew Crystal Clear embossing powder. A watercolor wash was then painted to mat my sentiment.

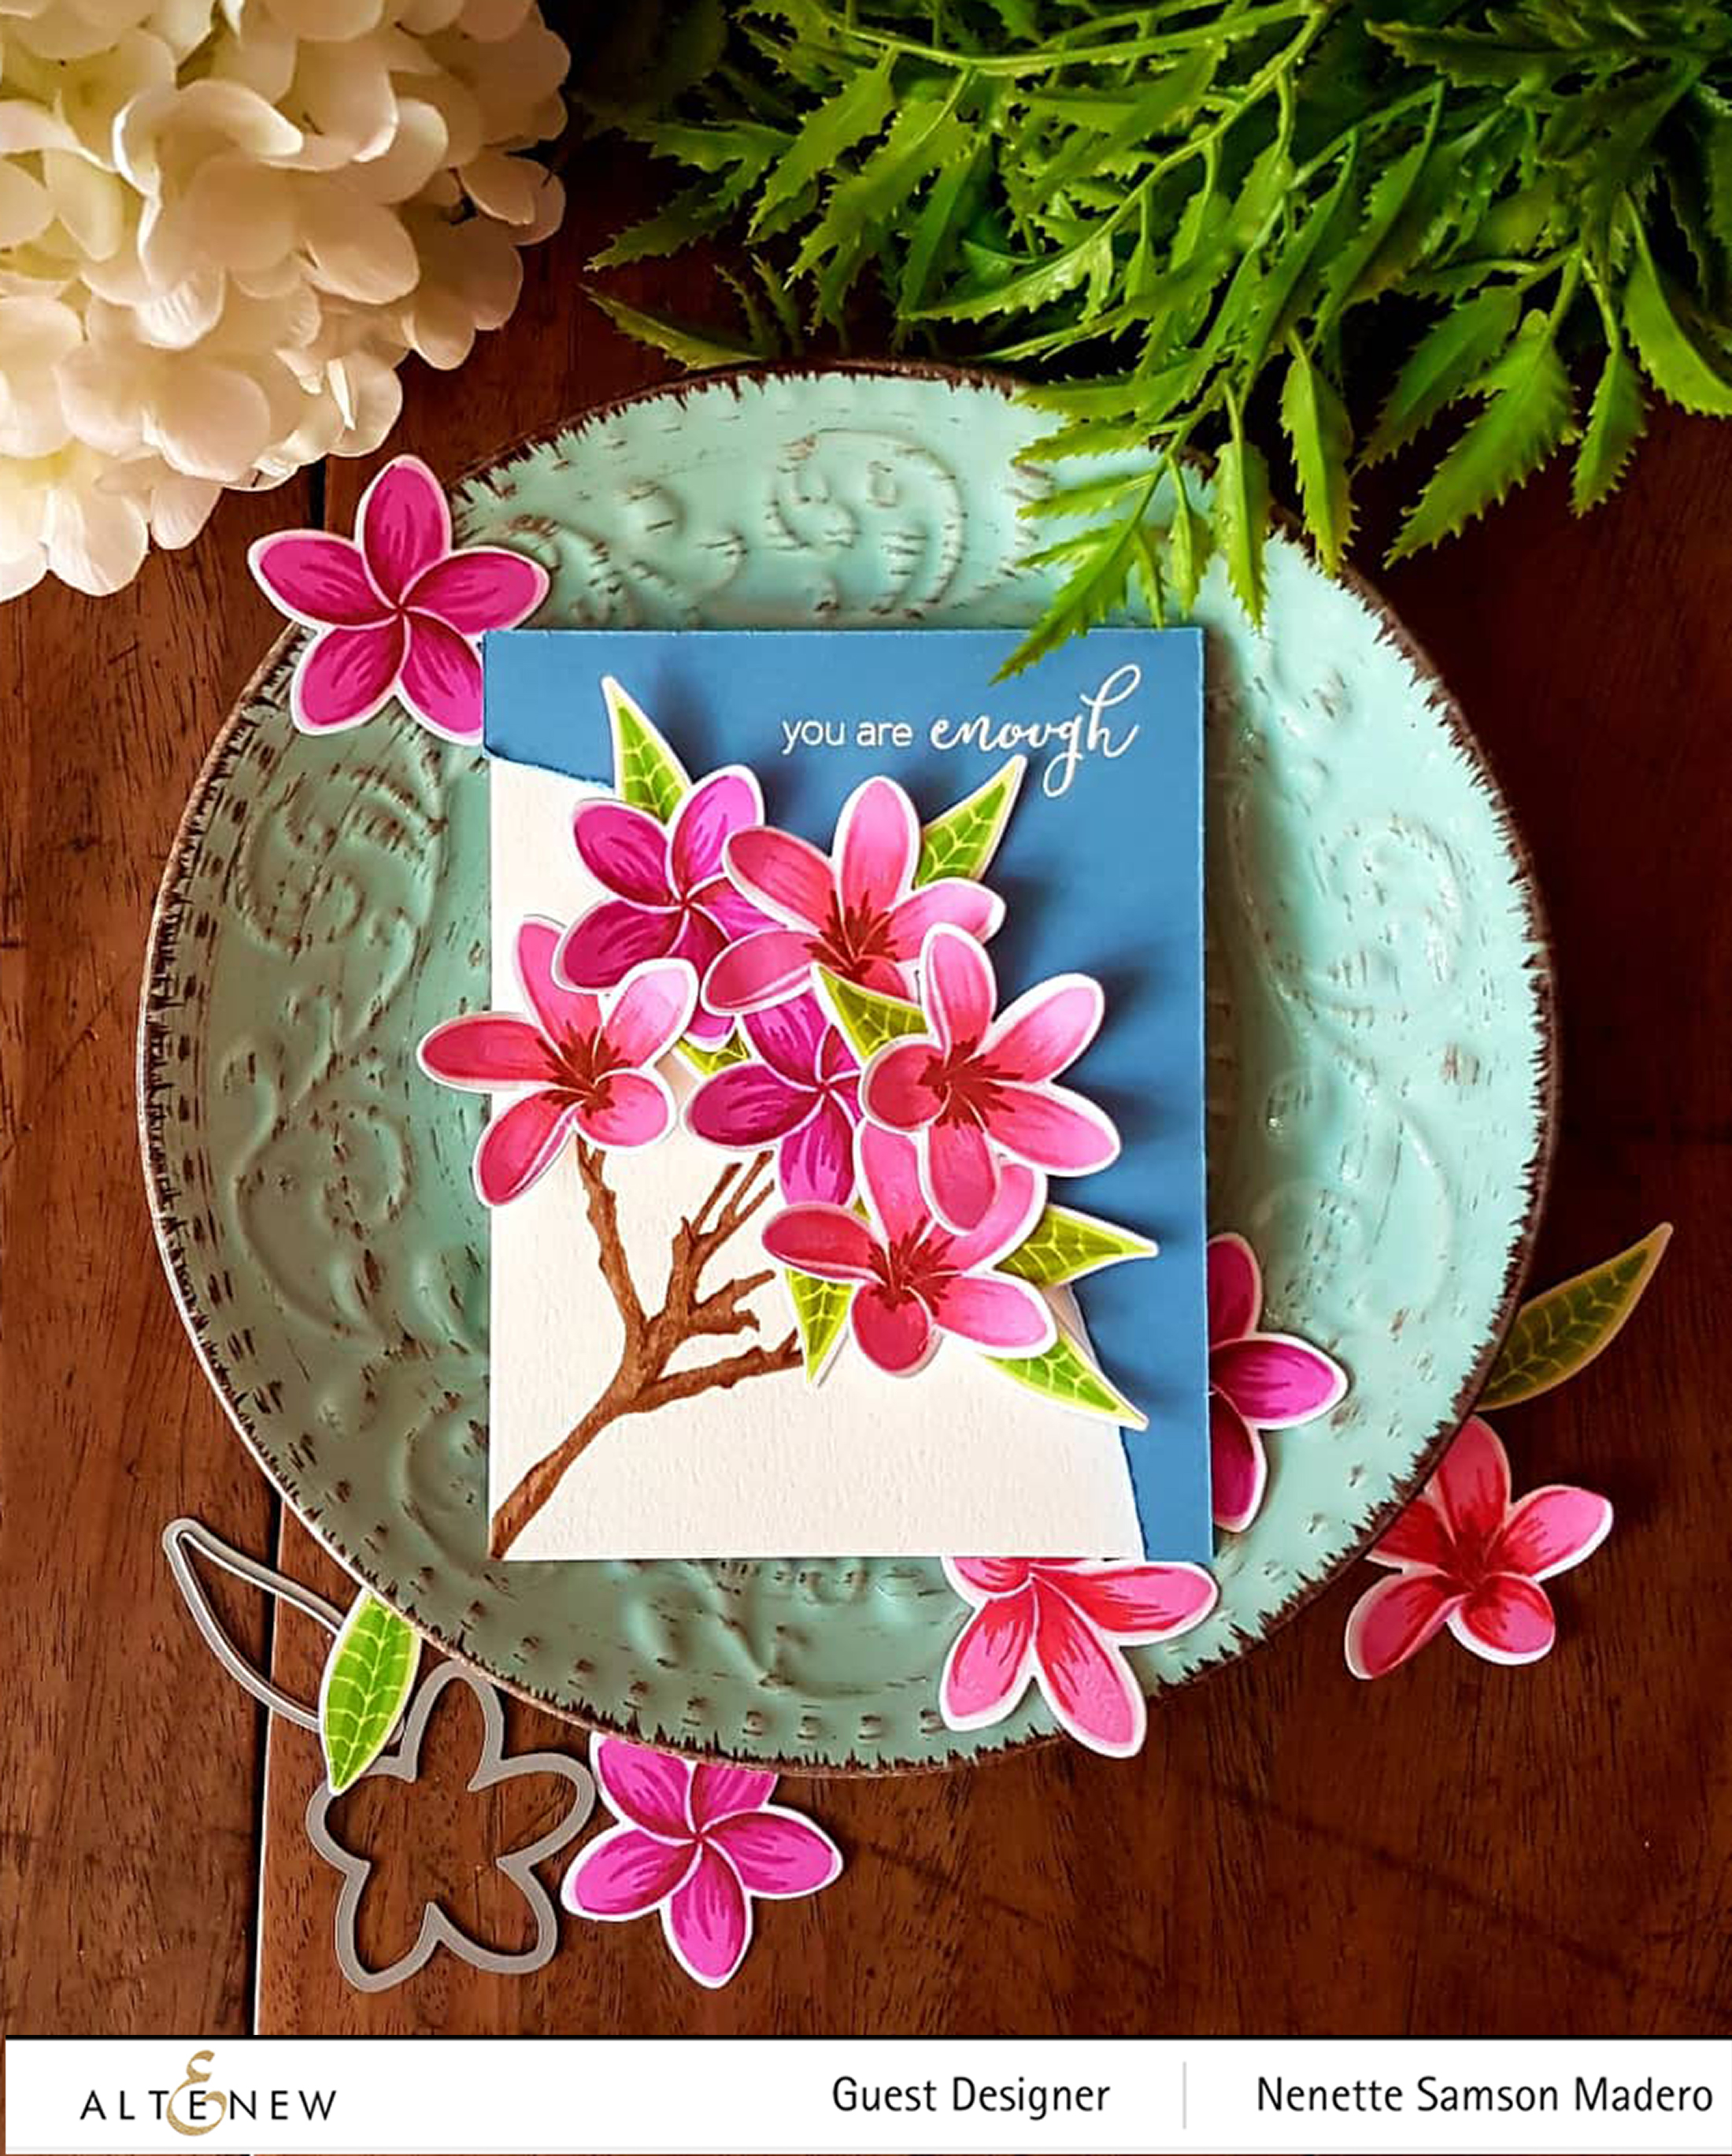
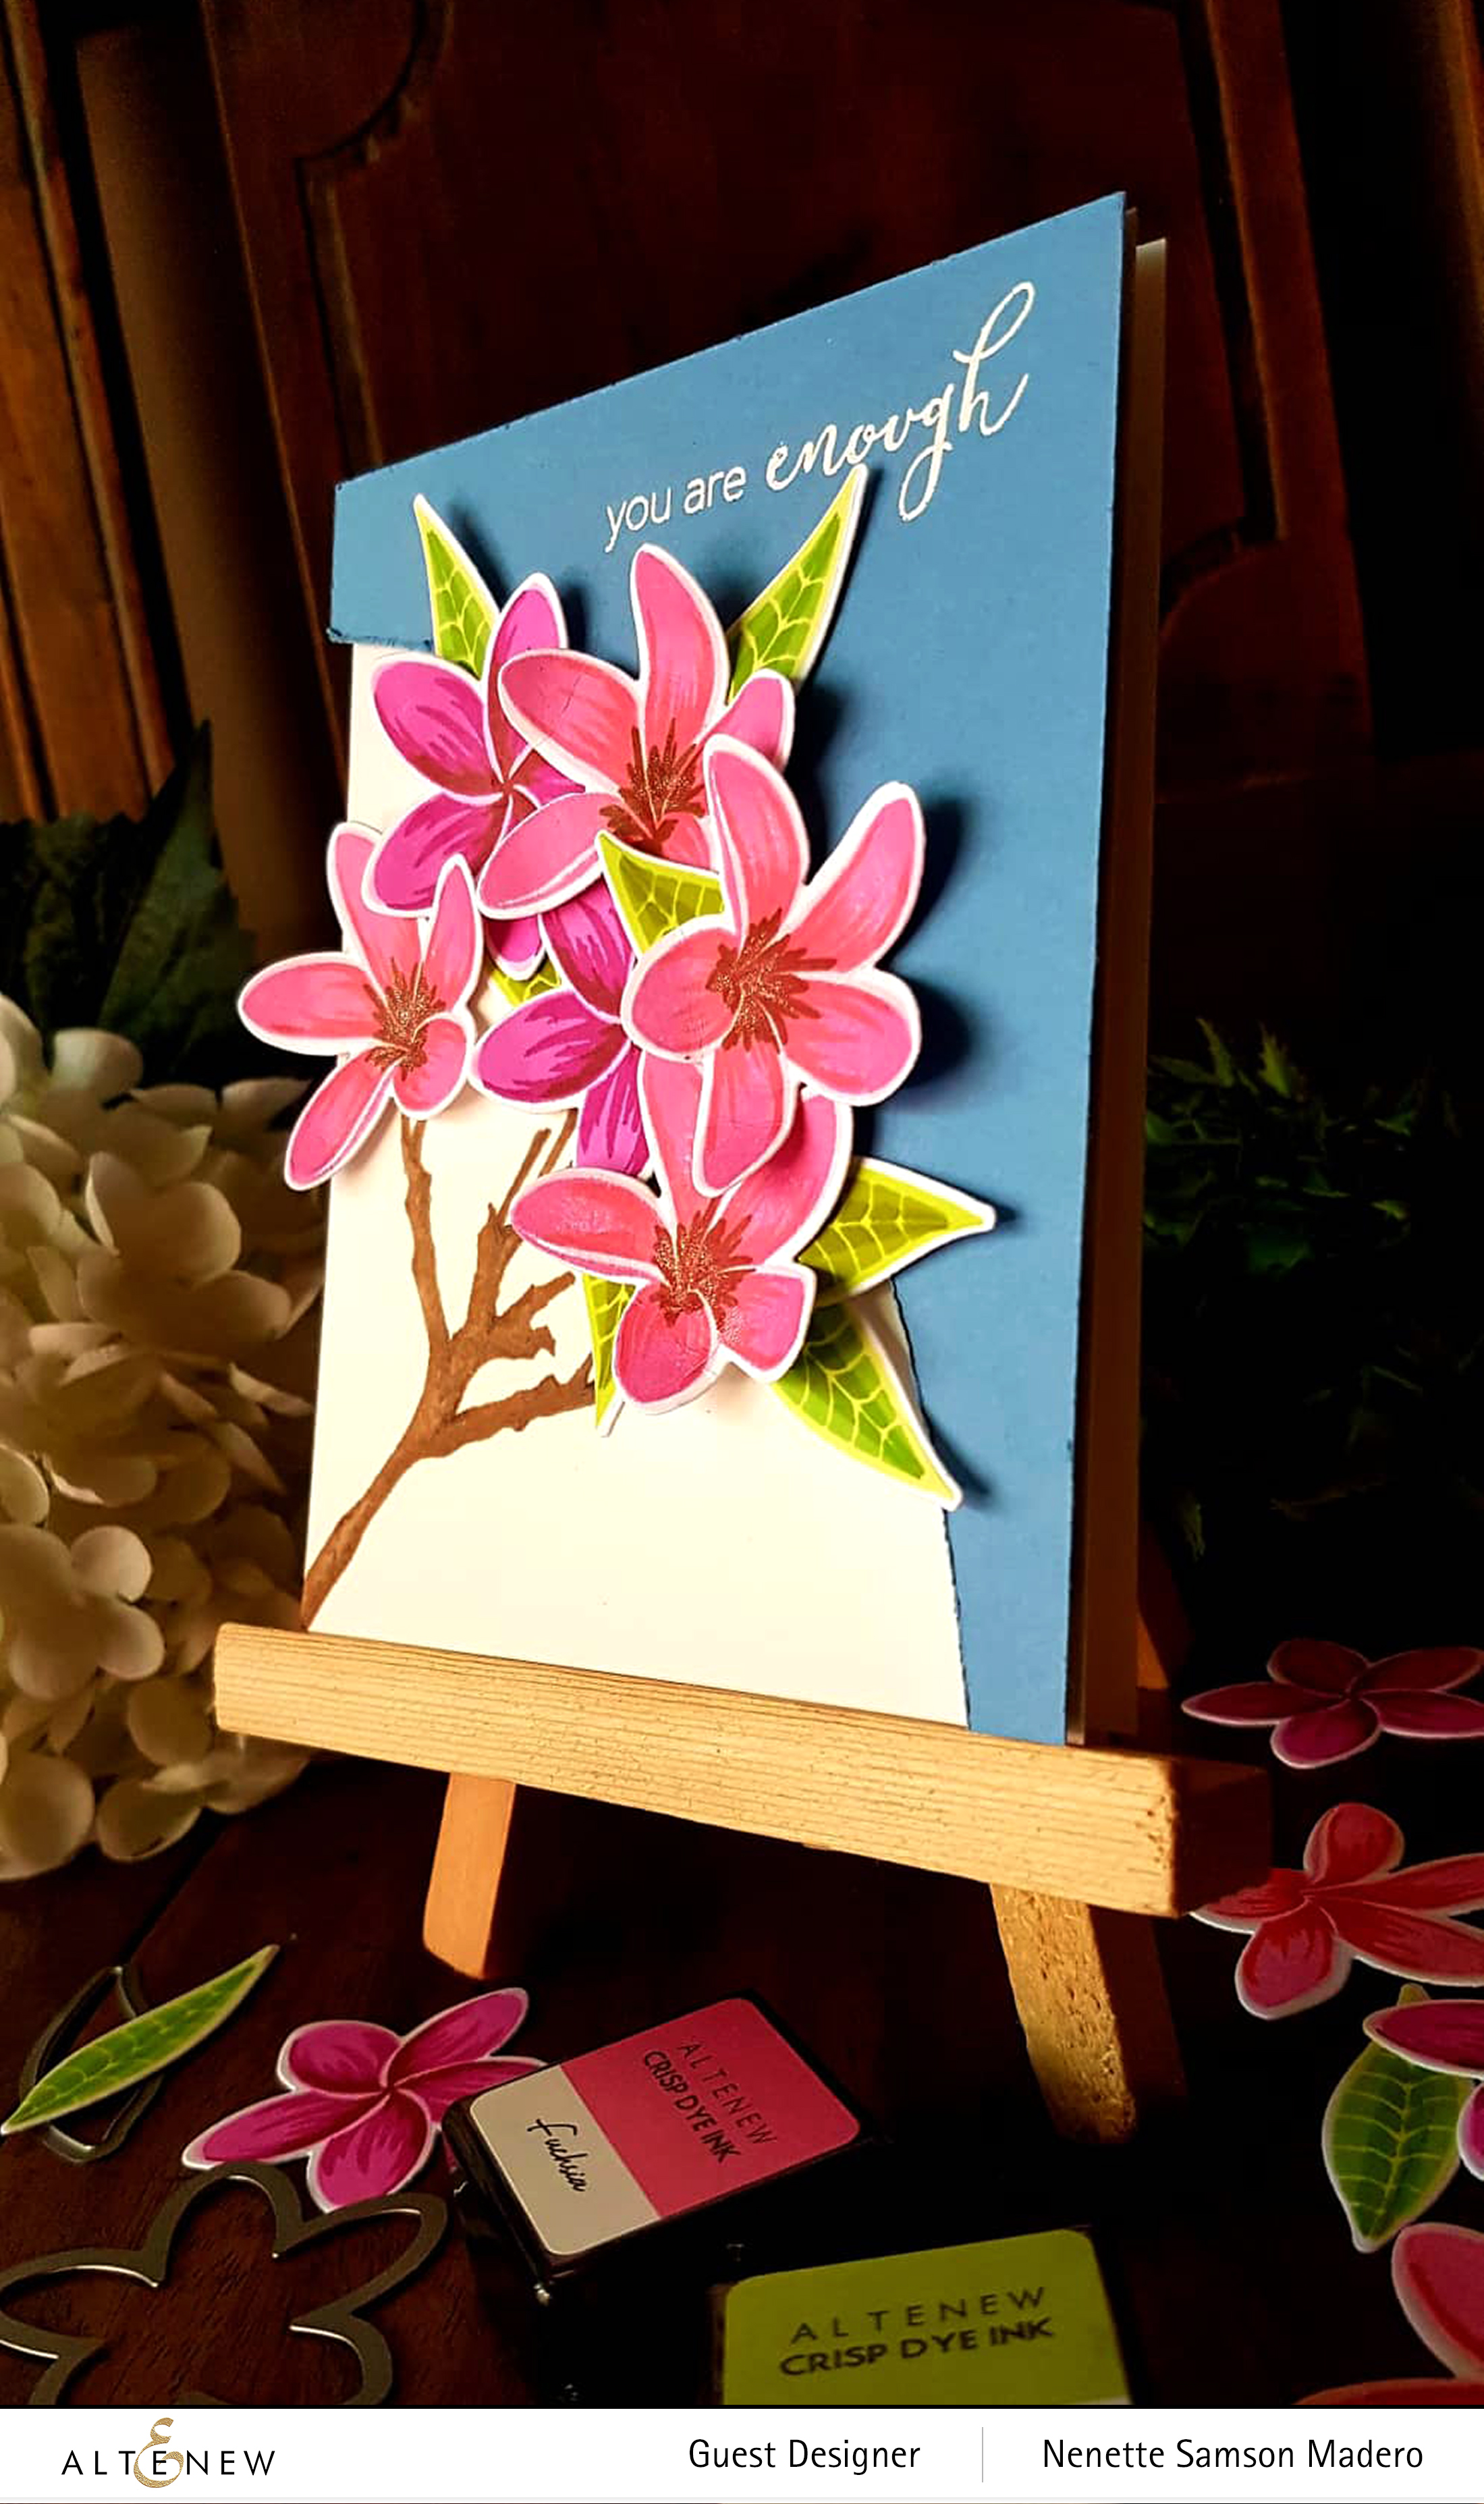
YOU ARE ENOUGH CARD

MATERIALS:

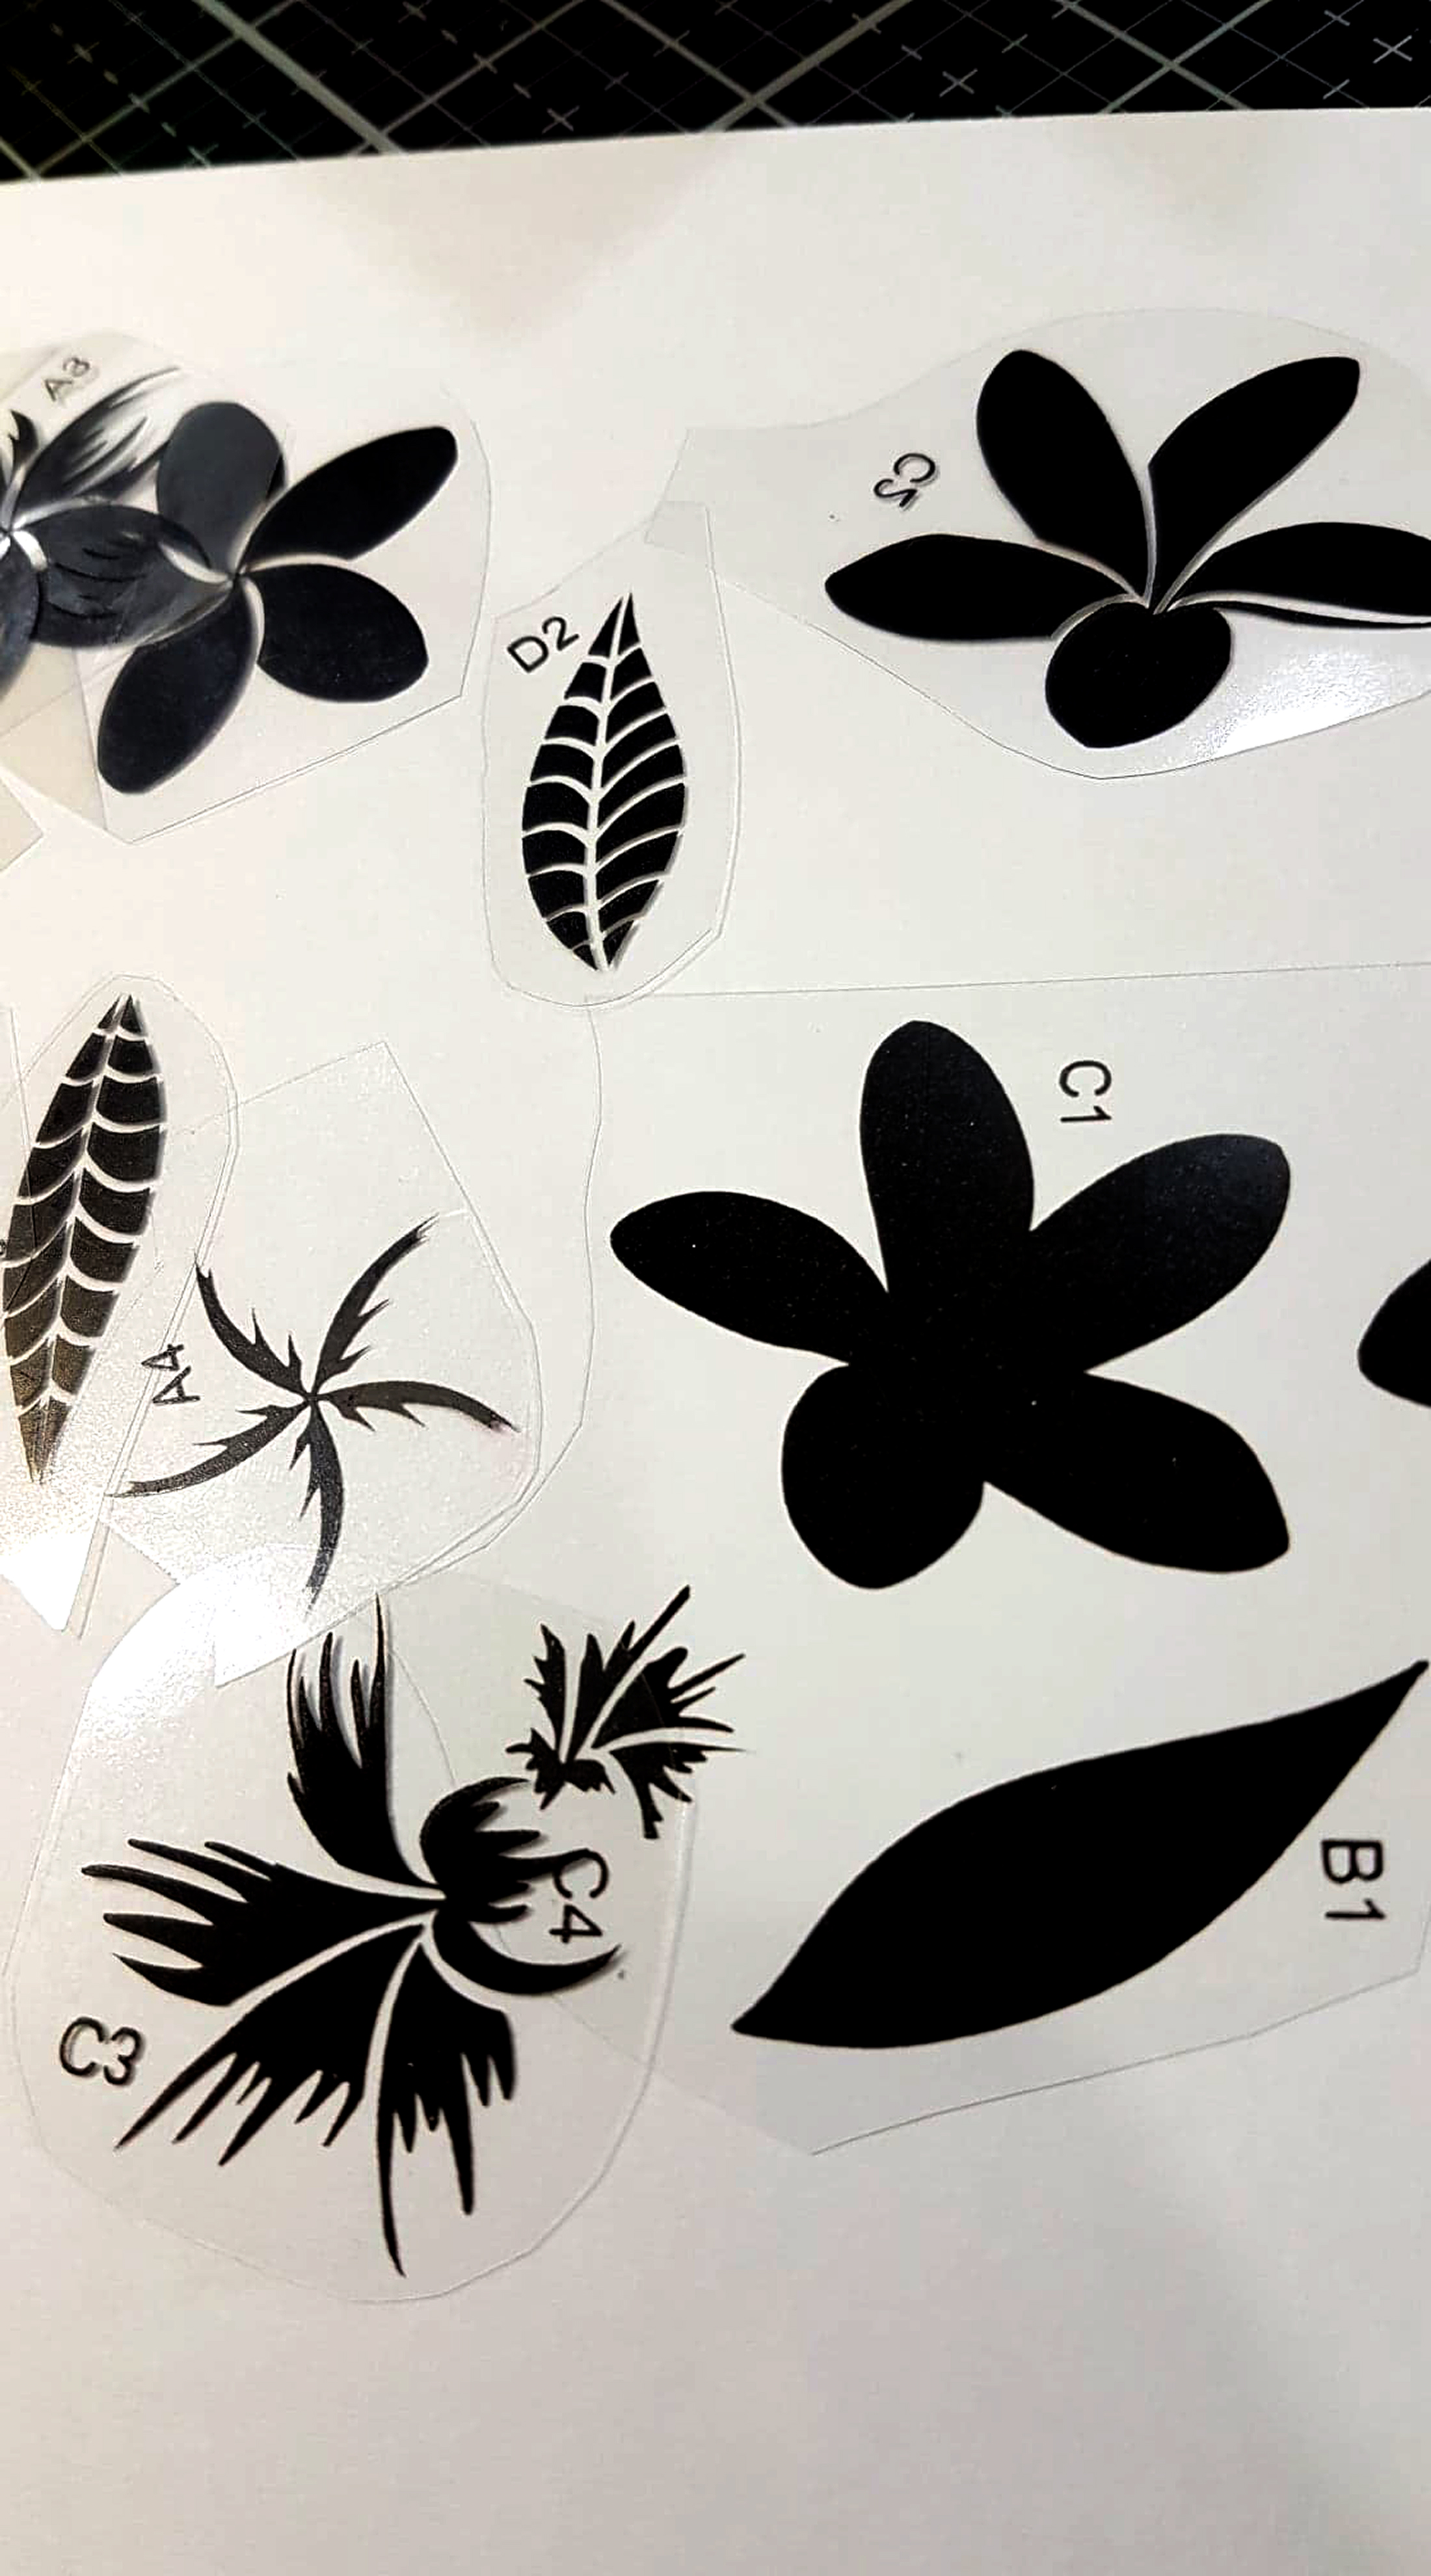
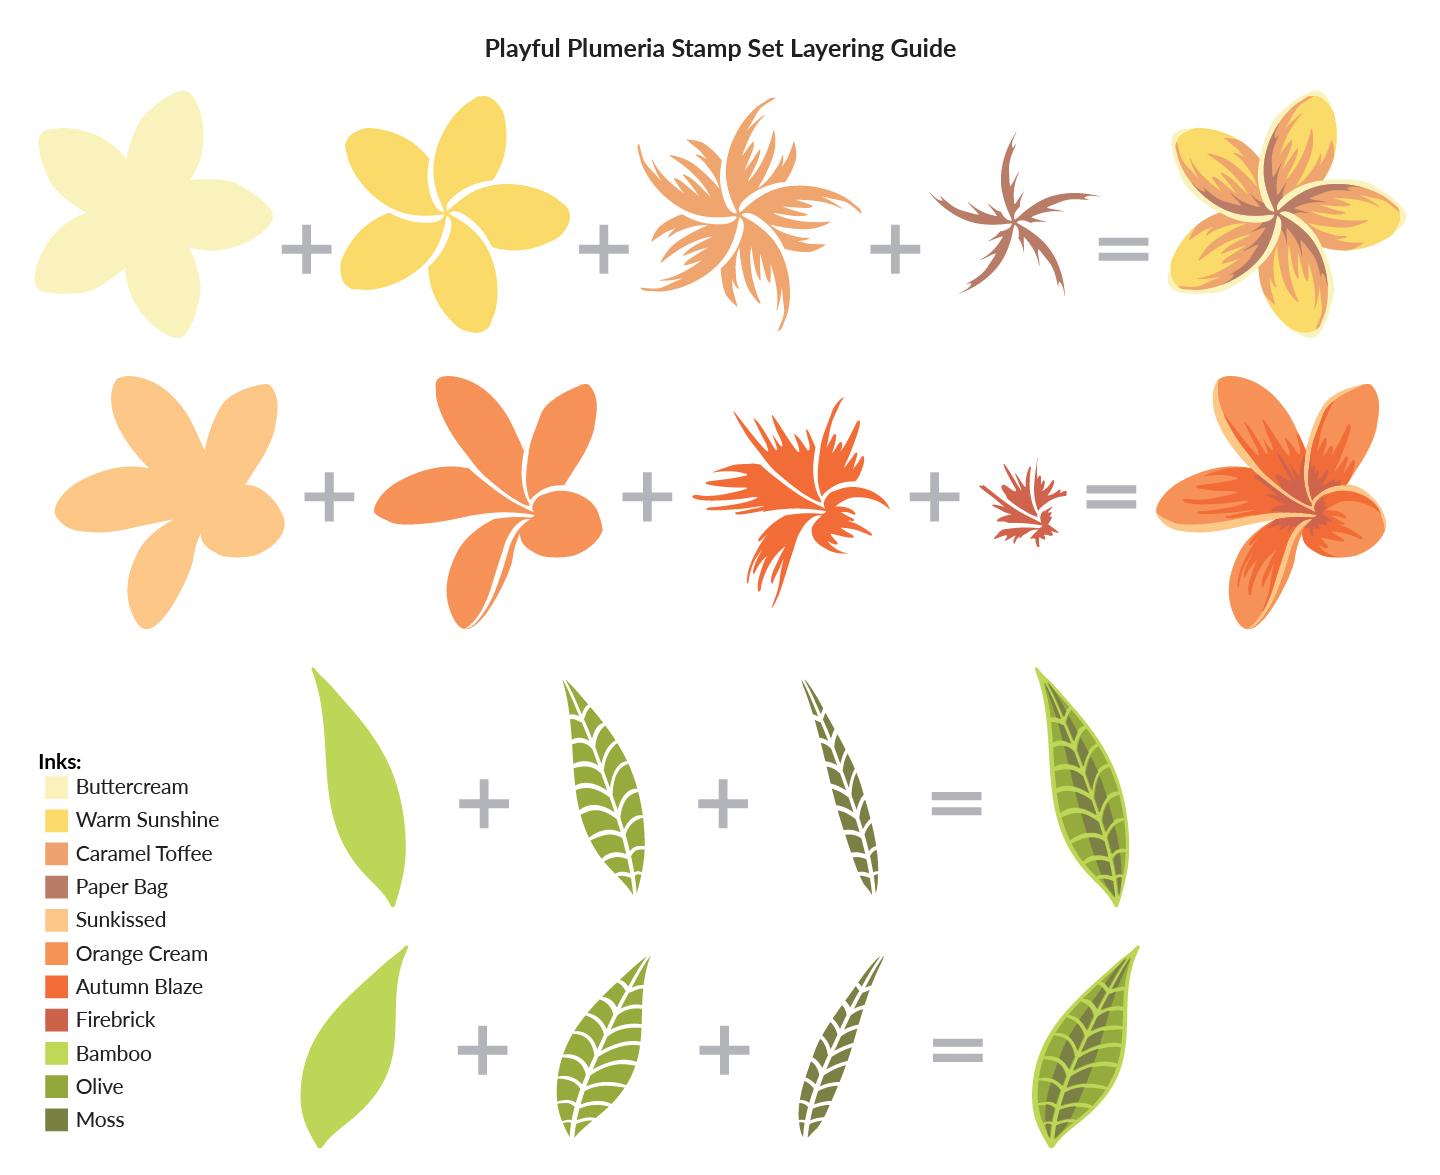
First thing I do when I get a layered stamp set is to scan the black images onto a transparency so that I can cut them up per image.

I then stamped the first layer with the lightest color. I placed the scanned 2nd layer on top of the first and maked sure it lined up properly. I then lined up the stamp image on top of the transparency and picked it up with the misti. This process will ensure that the layers line up properly. You can also stamp on vellum if you do not have transparencies. This is an invaluable tip by Jennifer Mcguire and it is so helpful for layered stamp sets.

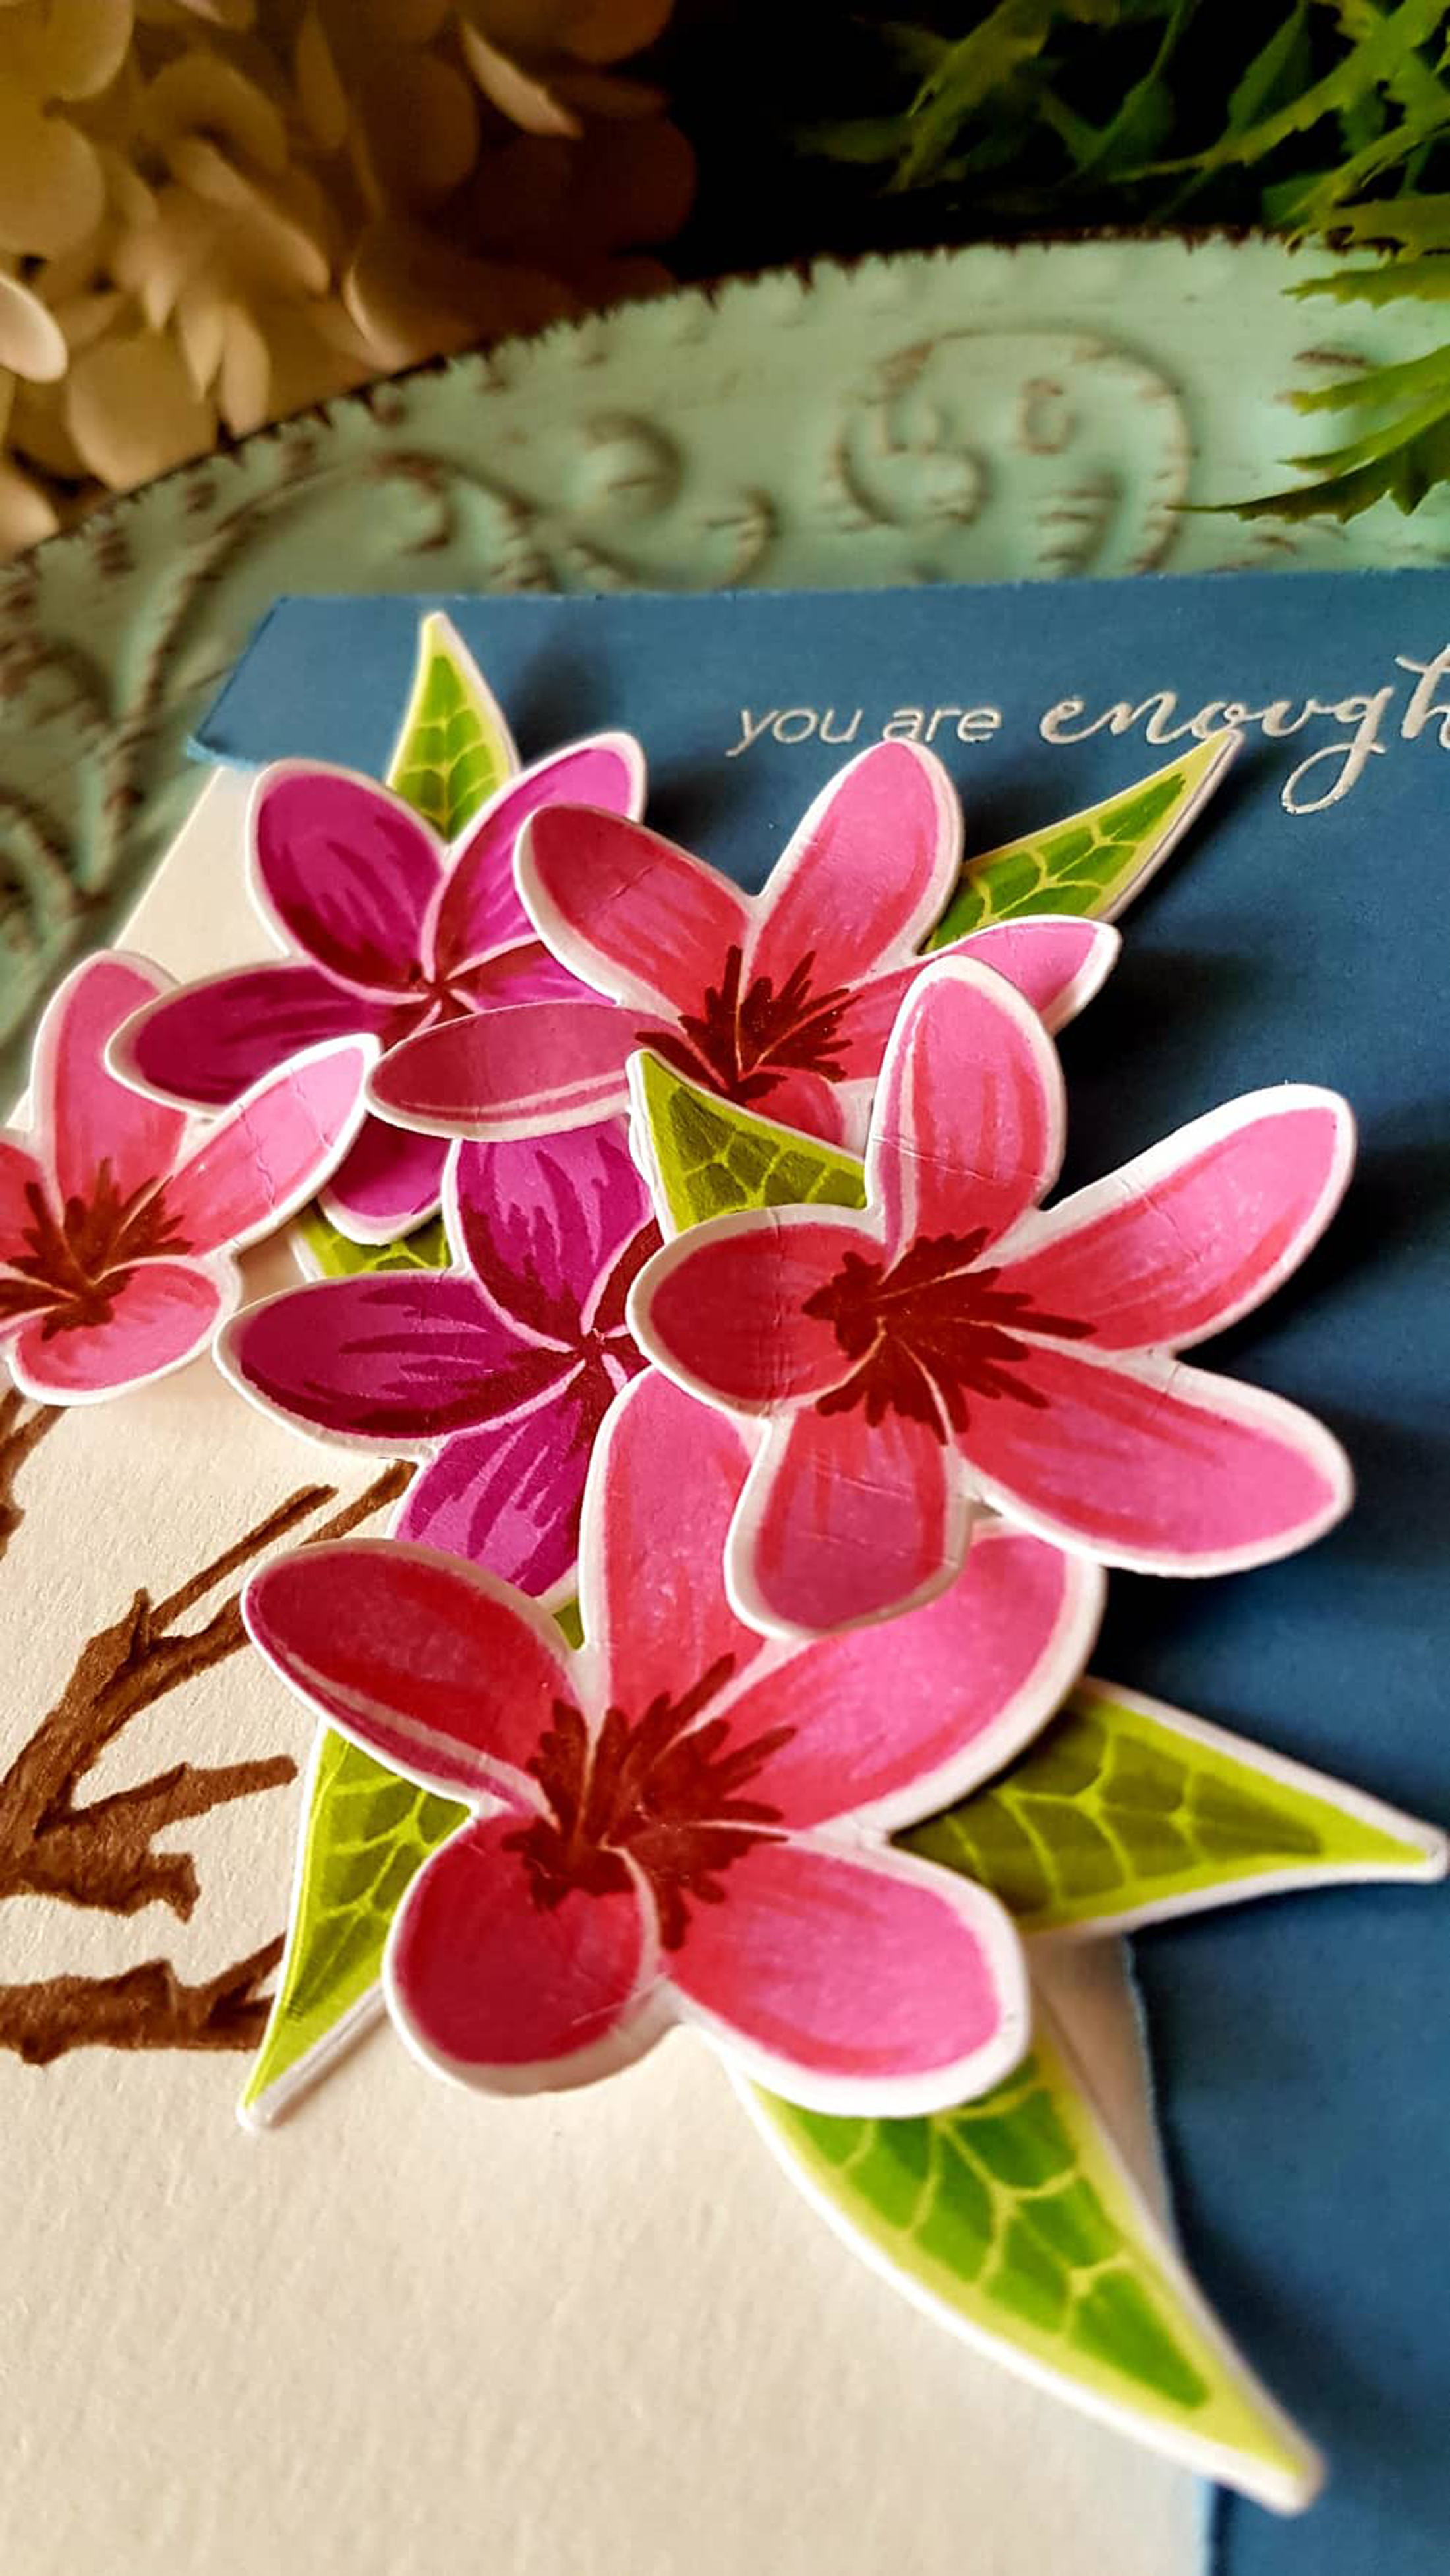
I almost did not finish this card. I stamped another branch from the top right corner towards the center but was not happy with the outcome. Then I encountered some problems stamping the flower itself and was ready to give up! 🙂 But instead of throwing it away, I thought of covering up the upper right side with blue cardstock and I used the Artist Marker to create my own 2nd layer design.

The flowers were burnished to curl up the petals then adhered with foam tape for dimension. I used some Wink of Stella to add some sparkle at the center of the flowers. Dark brown colored pencil was used to add more detailed shadows to the branch of the tree.

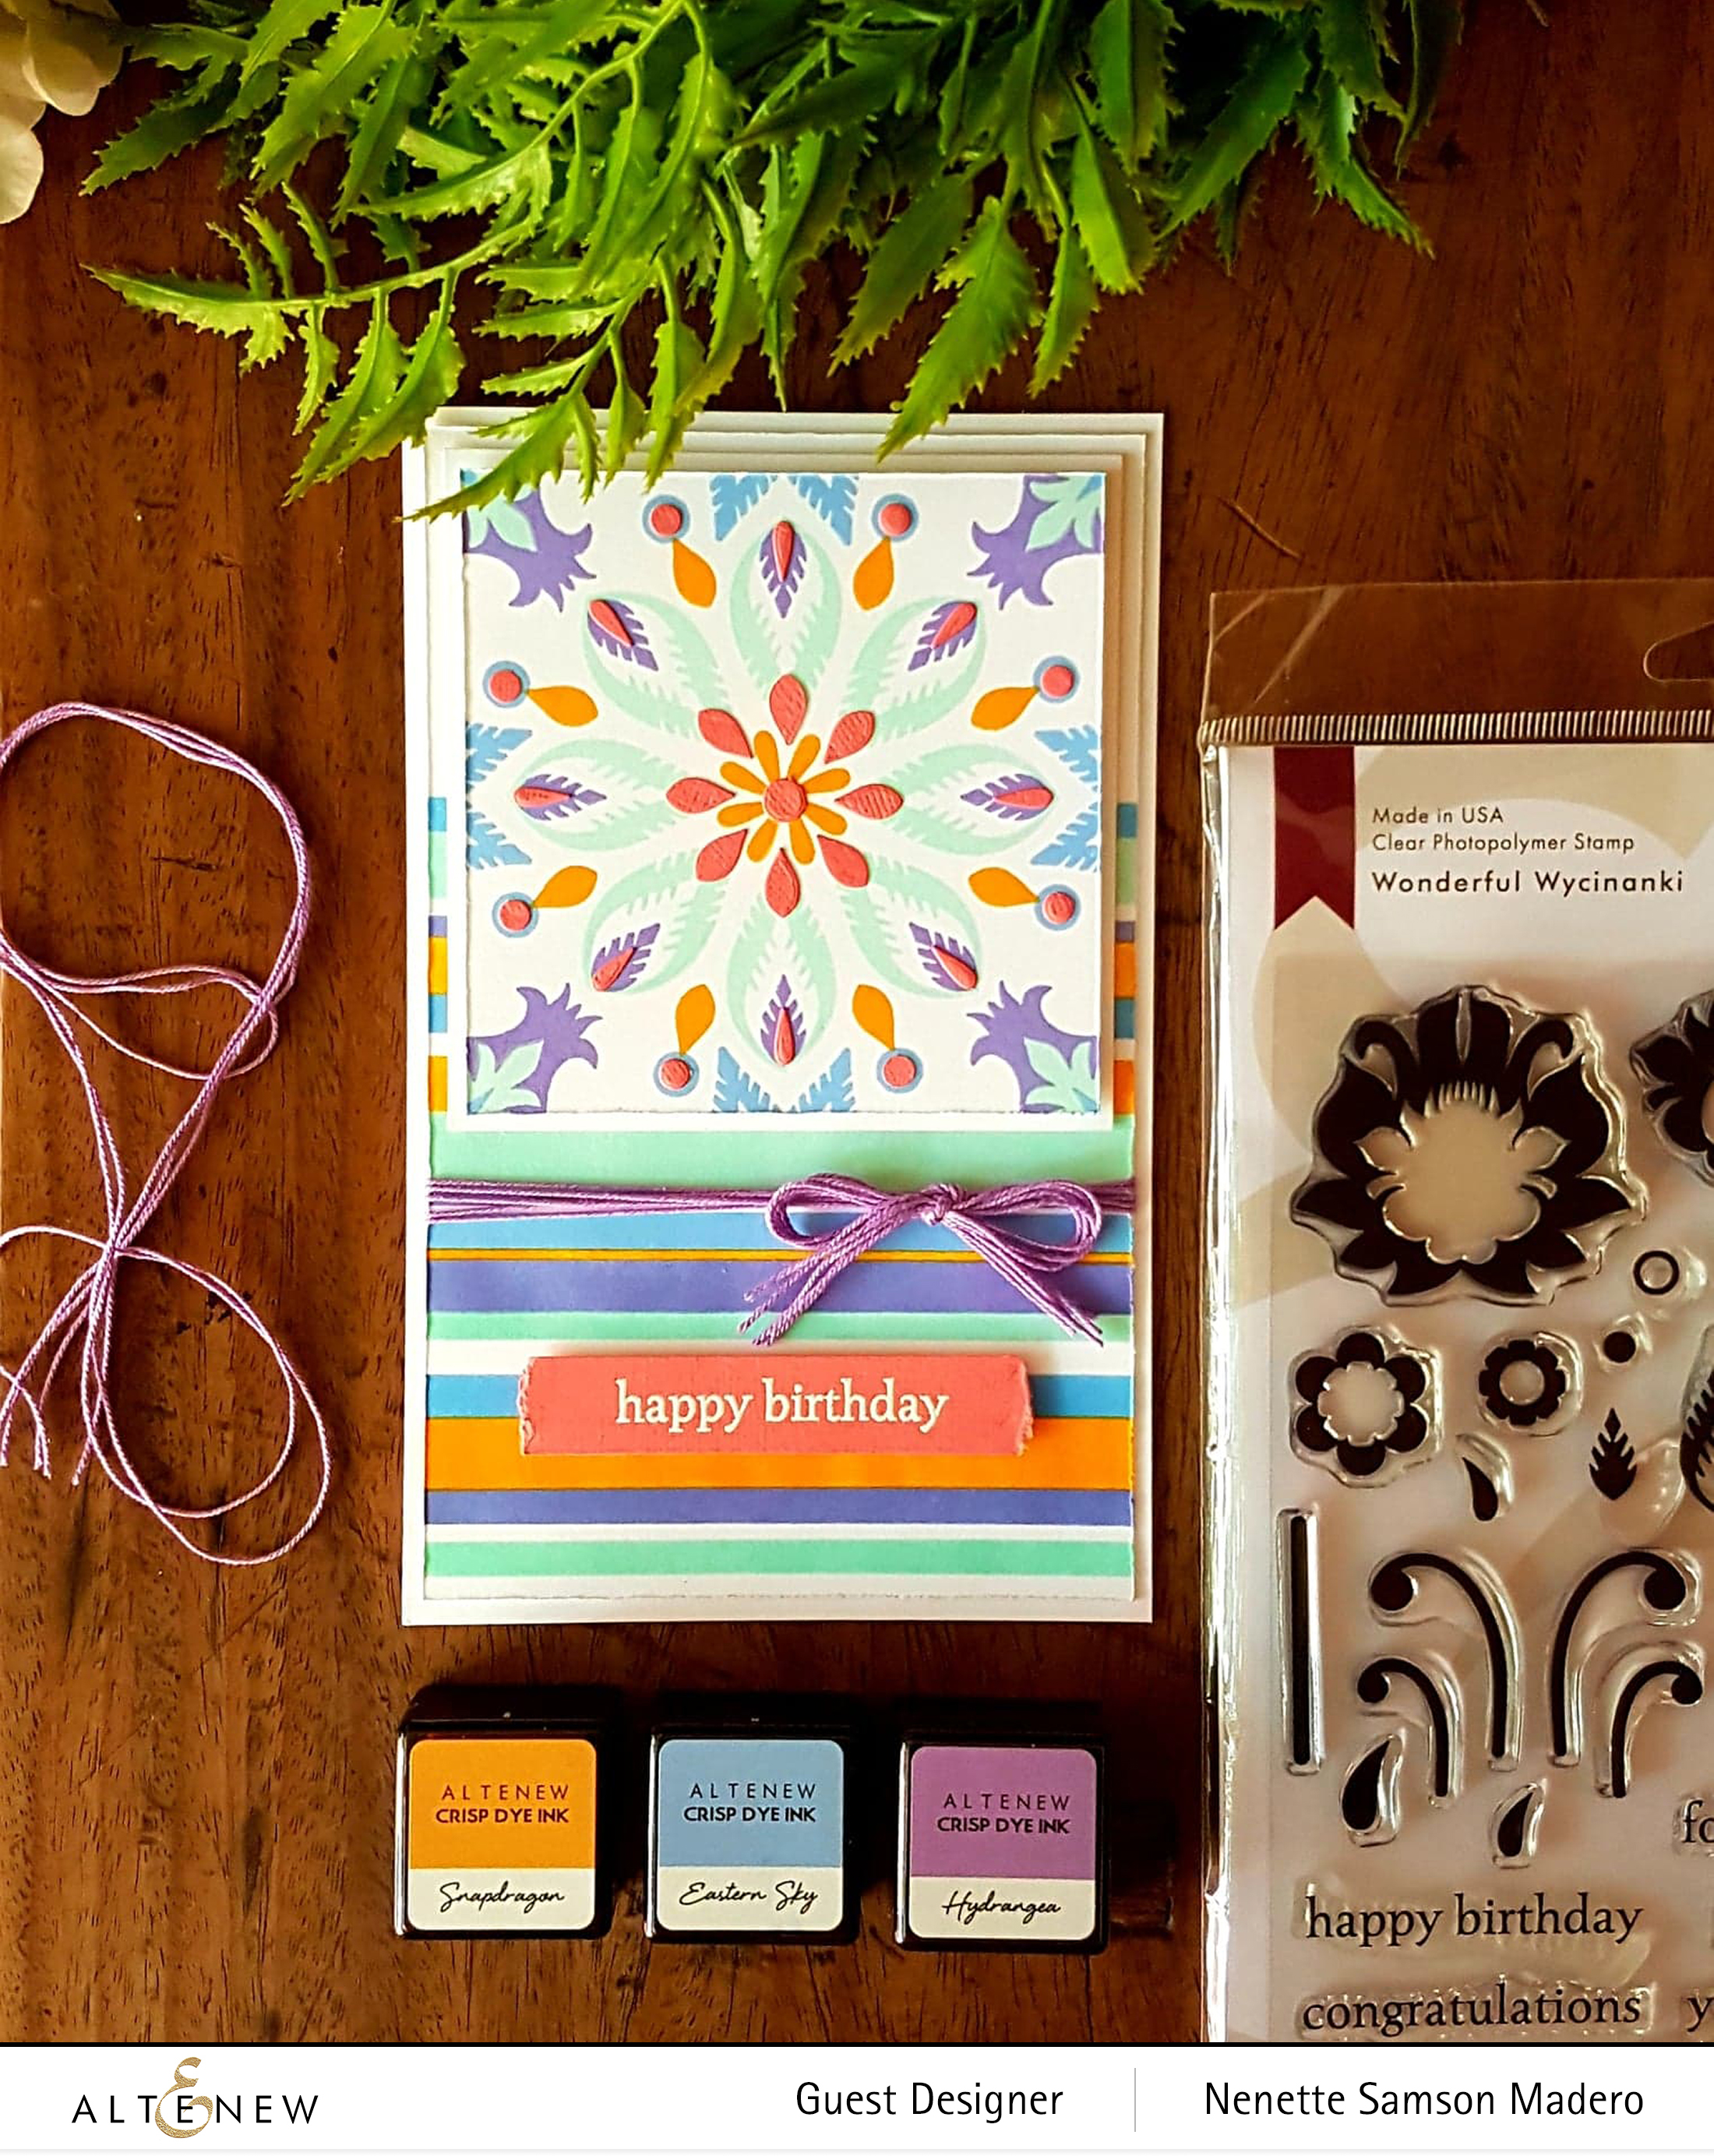
HAPPY BIRTHDAY CARD

MATERIALS:

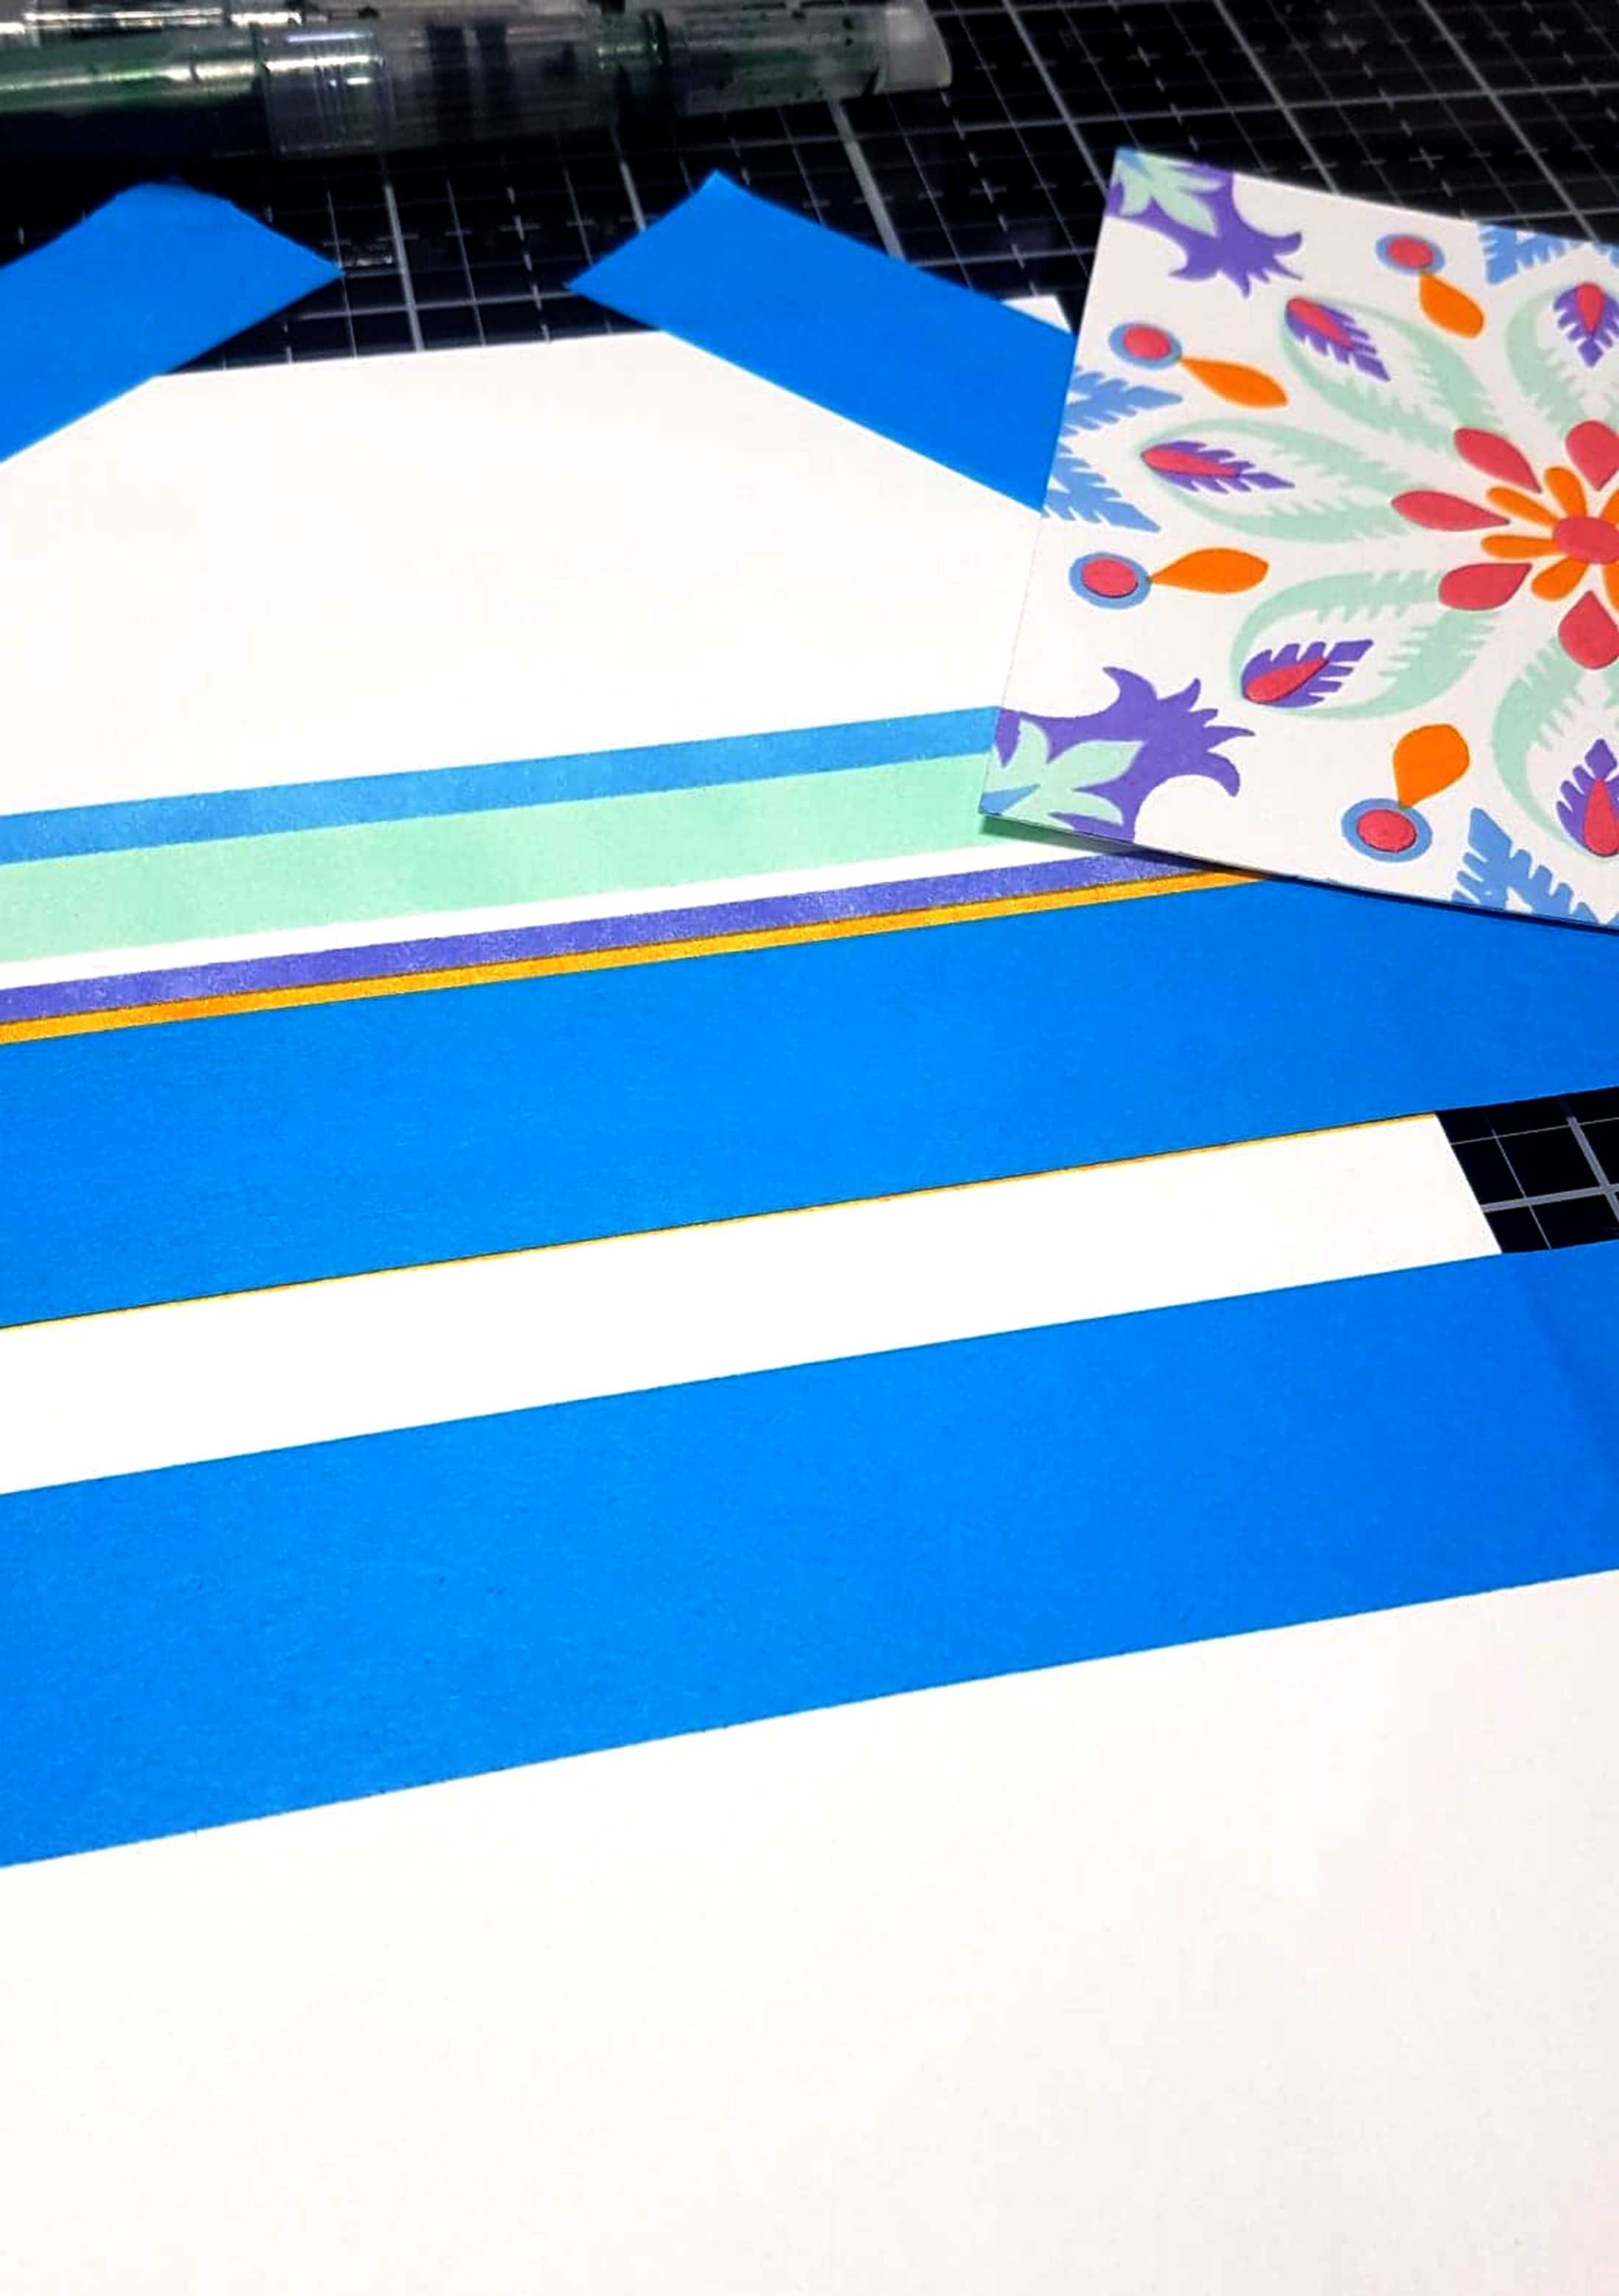
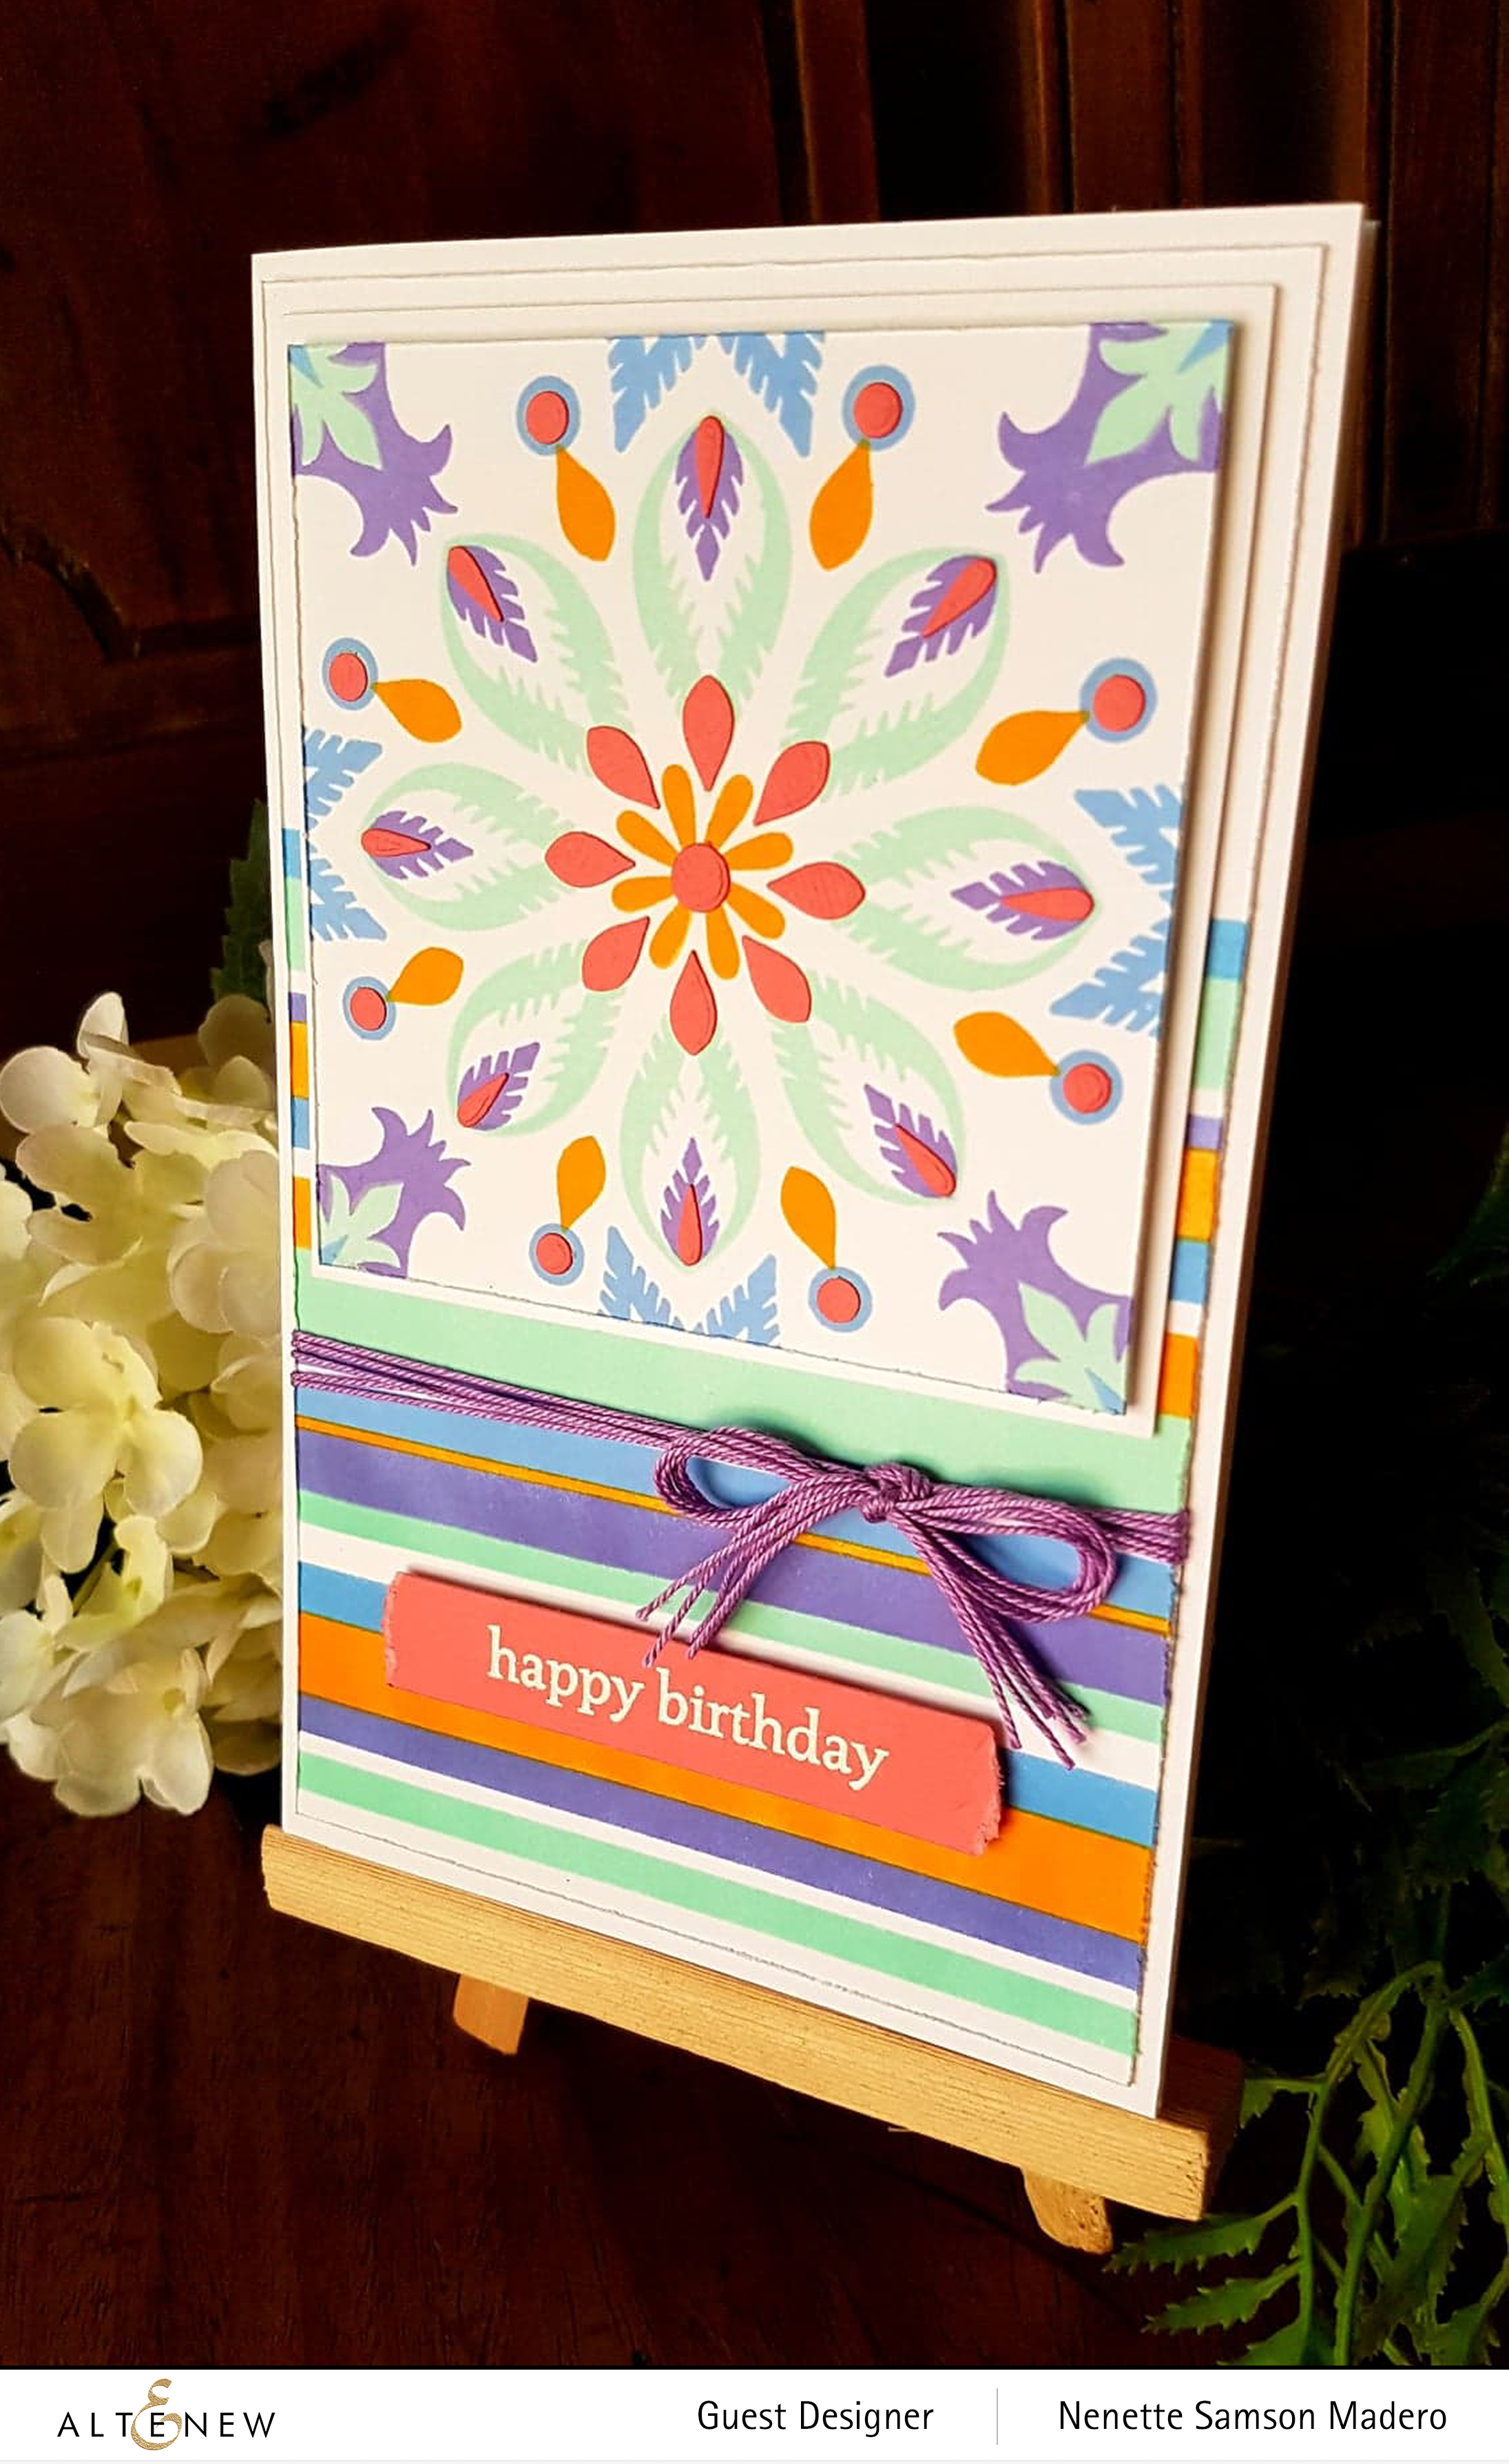
I wanted to create my own simple mandala design using the Wonderful Wycinanki stamp set so I used the Misti with the Gina K wreath builder template. I marked the center of the square cardstock and positioned one of the small images and stamped. The paper was then rotated clockwise (45″) guided by the template then stamped once more. This process was done 8 times. Then a second image was stamped using a different color until the whole square panel was filled with images.

I created some striped patterns with varying widths using post-it strips, coordinating dye inks and a distress blending tool. Crochet thread was tied around the striped panel to make a bow for added accent. The edges of the panel were distressed using the paper distresser and adhered to a side folding card with foam squares. Some of the elements were die cut using the coordinating dies and glued on top of the image to create some dimension.

PRIZES

To celebrate this release, Altenew is giving away a $50 gift certificate to 6 lucky winners! Please leave a comment on the Altenew Card Blog and/or Altenew Scrapbook Blog by 8/14/2019 for a chance to win. Altenew will also draw a winner to receive a $20 gift certificate from the comments left on each designer’s blog on the blog hop list below. All winners will be announced on the Altenew blogs on 8/17/2019.

Next up is the lovely Laura Volpes . The complete Blog Hop Order is listed below. Thank you so much for dropping by! I appreciate all the wonderful and heartwarming comments you leave which just make me more inspired to create. <3 Don’t forget to subscribe (I have a wonderful surprise coming up for all of my blog subscribers :-) and follow me on IG @mylittleatticstudio for my latest creations. Happy crafting! ❤️

FACEBOOK | INSTAGRAM | PINTEREST | WWW.MYLITTLEATTIC.COM
Altenew Sketch Challenge #13

Altenew Sketch Challenge #13

Hi everyone!!! Welcome back to my blog. This is the first time I’m joining the Altenew Sketch challenge. I’m not sure if you have to follow the sketch exactly or if you can use it as a reference. I did my own take on the sketch and moved the circular arrangement to the lower left. I love this sketch challenge cause it made it easier to come up with a layout since you already have a sketch to follow. It also helped me get back to scrapbooking again so that I can continue to document the lives of my children!!! <3

The following were the materials used:

  • Altenew Handpicked Bouquet
  • Altenew Rose Flurries 3D dies
  • Altenew Cap Bold Alpha dies
  • MFT Bottlecap alpha dies
  • Distress oxide inks
  • Webster’s Pages paper
  • brads

I look forward to joining other sketch challenges in the future. Thanks for dropping by!