Altenew Craft Your Life Project Kit: Dynamic Blossoms Release Blog Hop + Giveaway ($300 in total prizes)

Altenew Craft Your Life Project Kit: Dynamic Blossoms Release Blog Hop + Giveaway ($300 in total prizes)

Hello, friends! Welcome to my blog! Thanks so much to my talented friend SathyaKala Sankaran for sending everybody over. For more information regarding this hop, make sure to drop by the Altenew Blog.

Take a look at this beautiful kit!!!
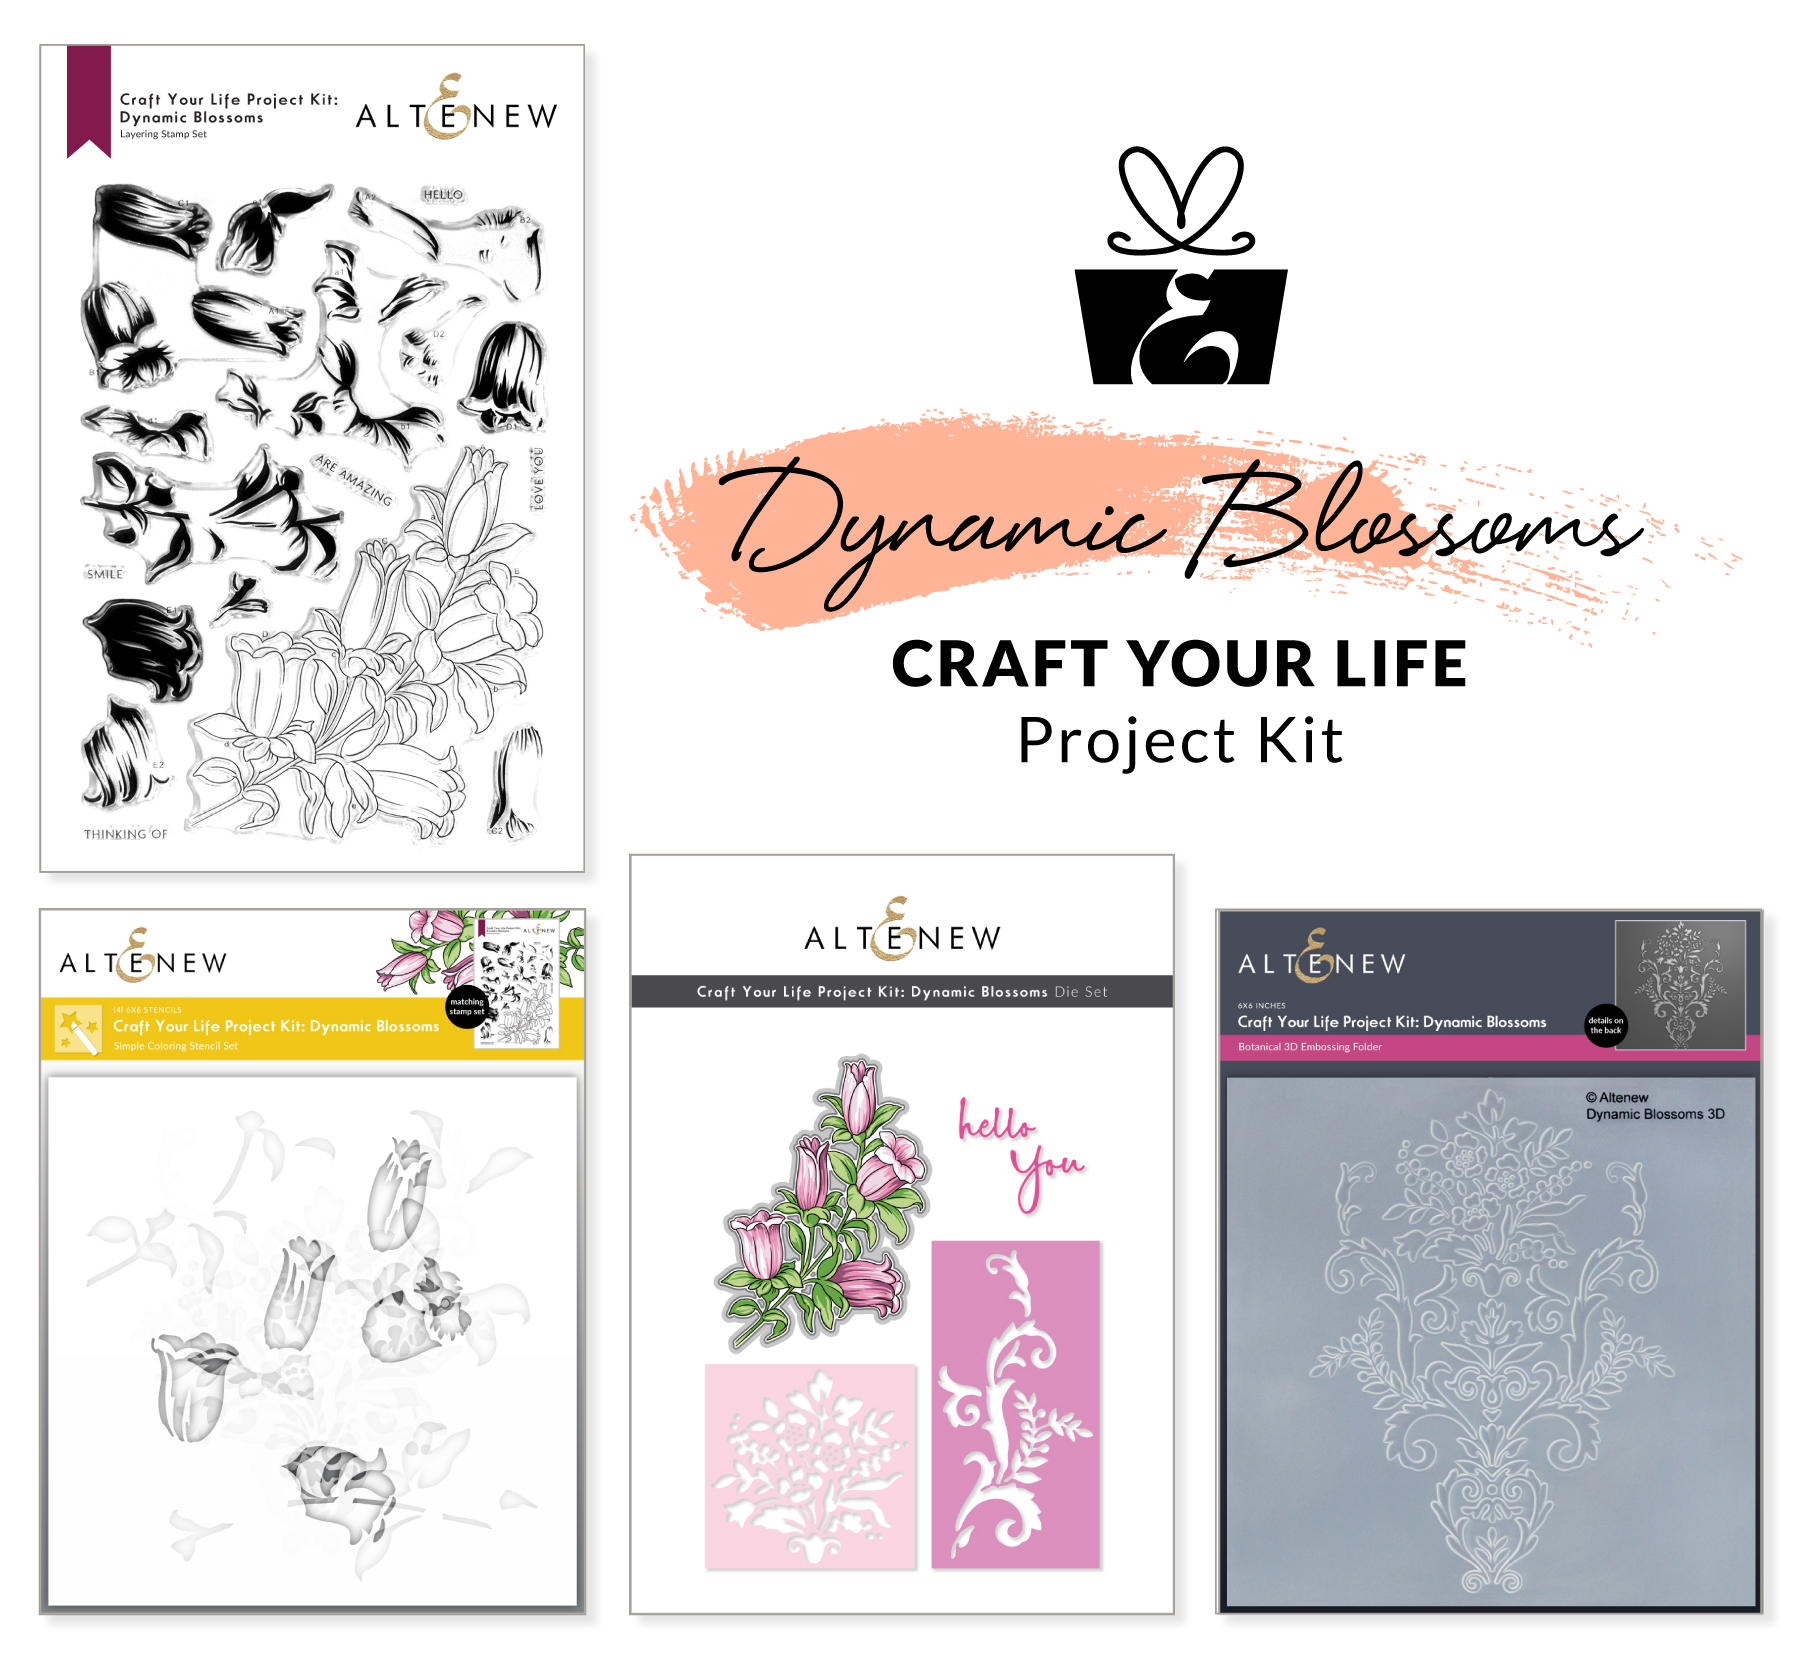
CRAFT YOUR LIFE PROJECT KIT: DYNAMIC BLOSSOMS

Here are the cards I came up with using this beautiful kit. I tried to stick a certain color scheme for this release. I hope you will find something that will inspire you!

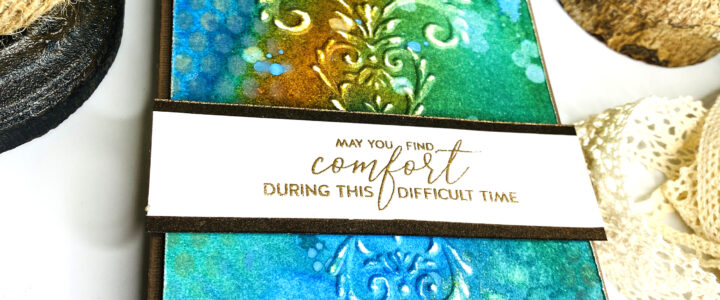
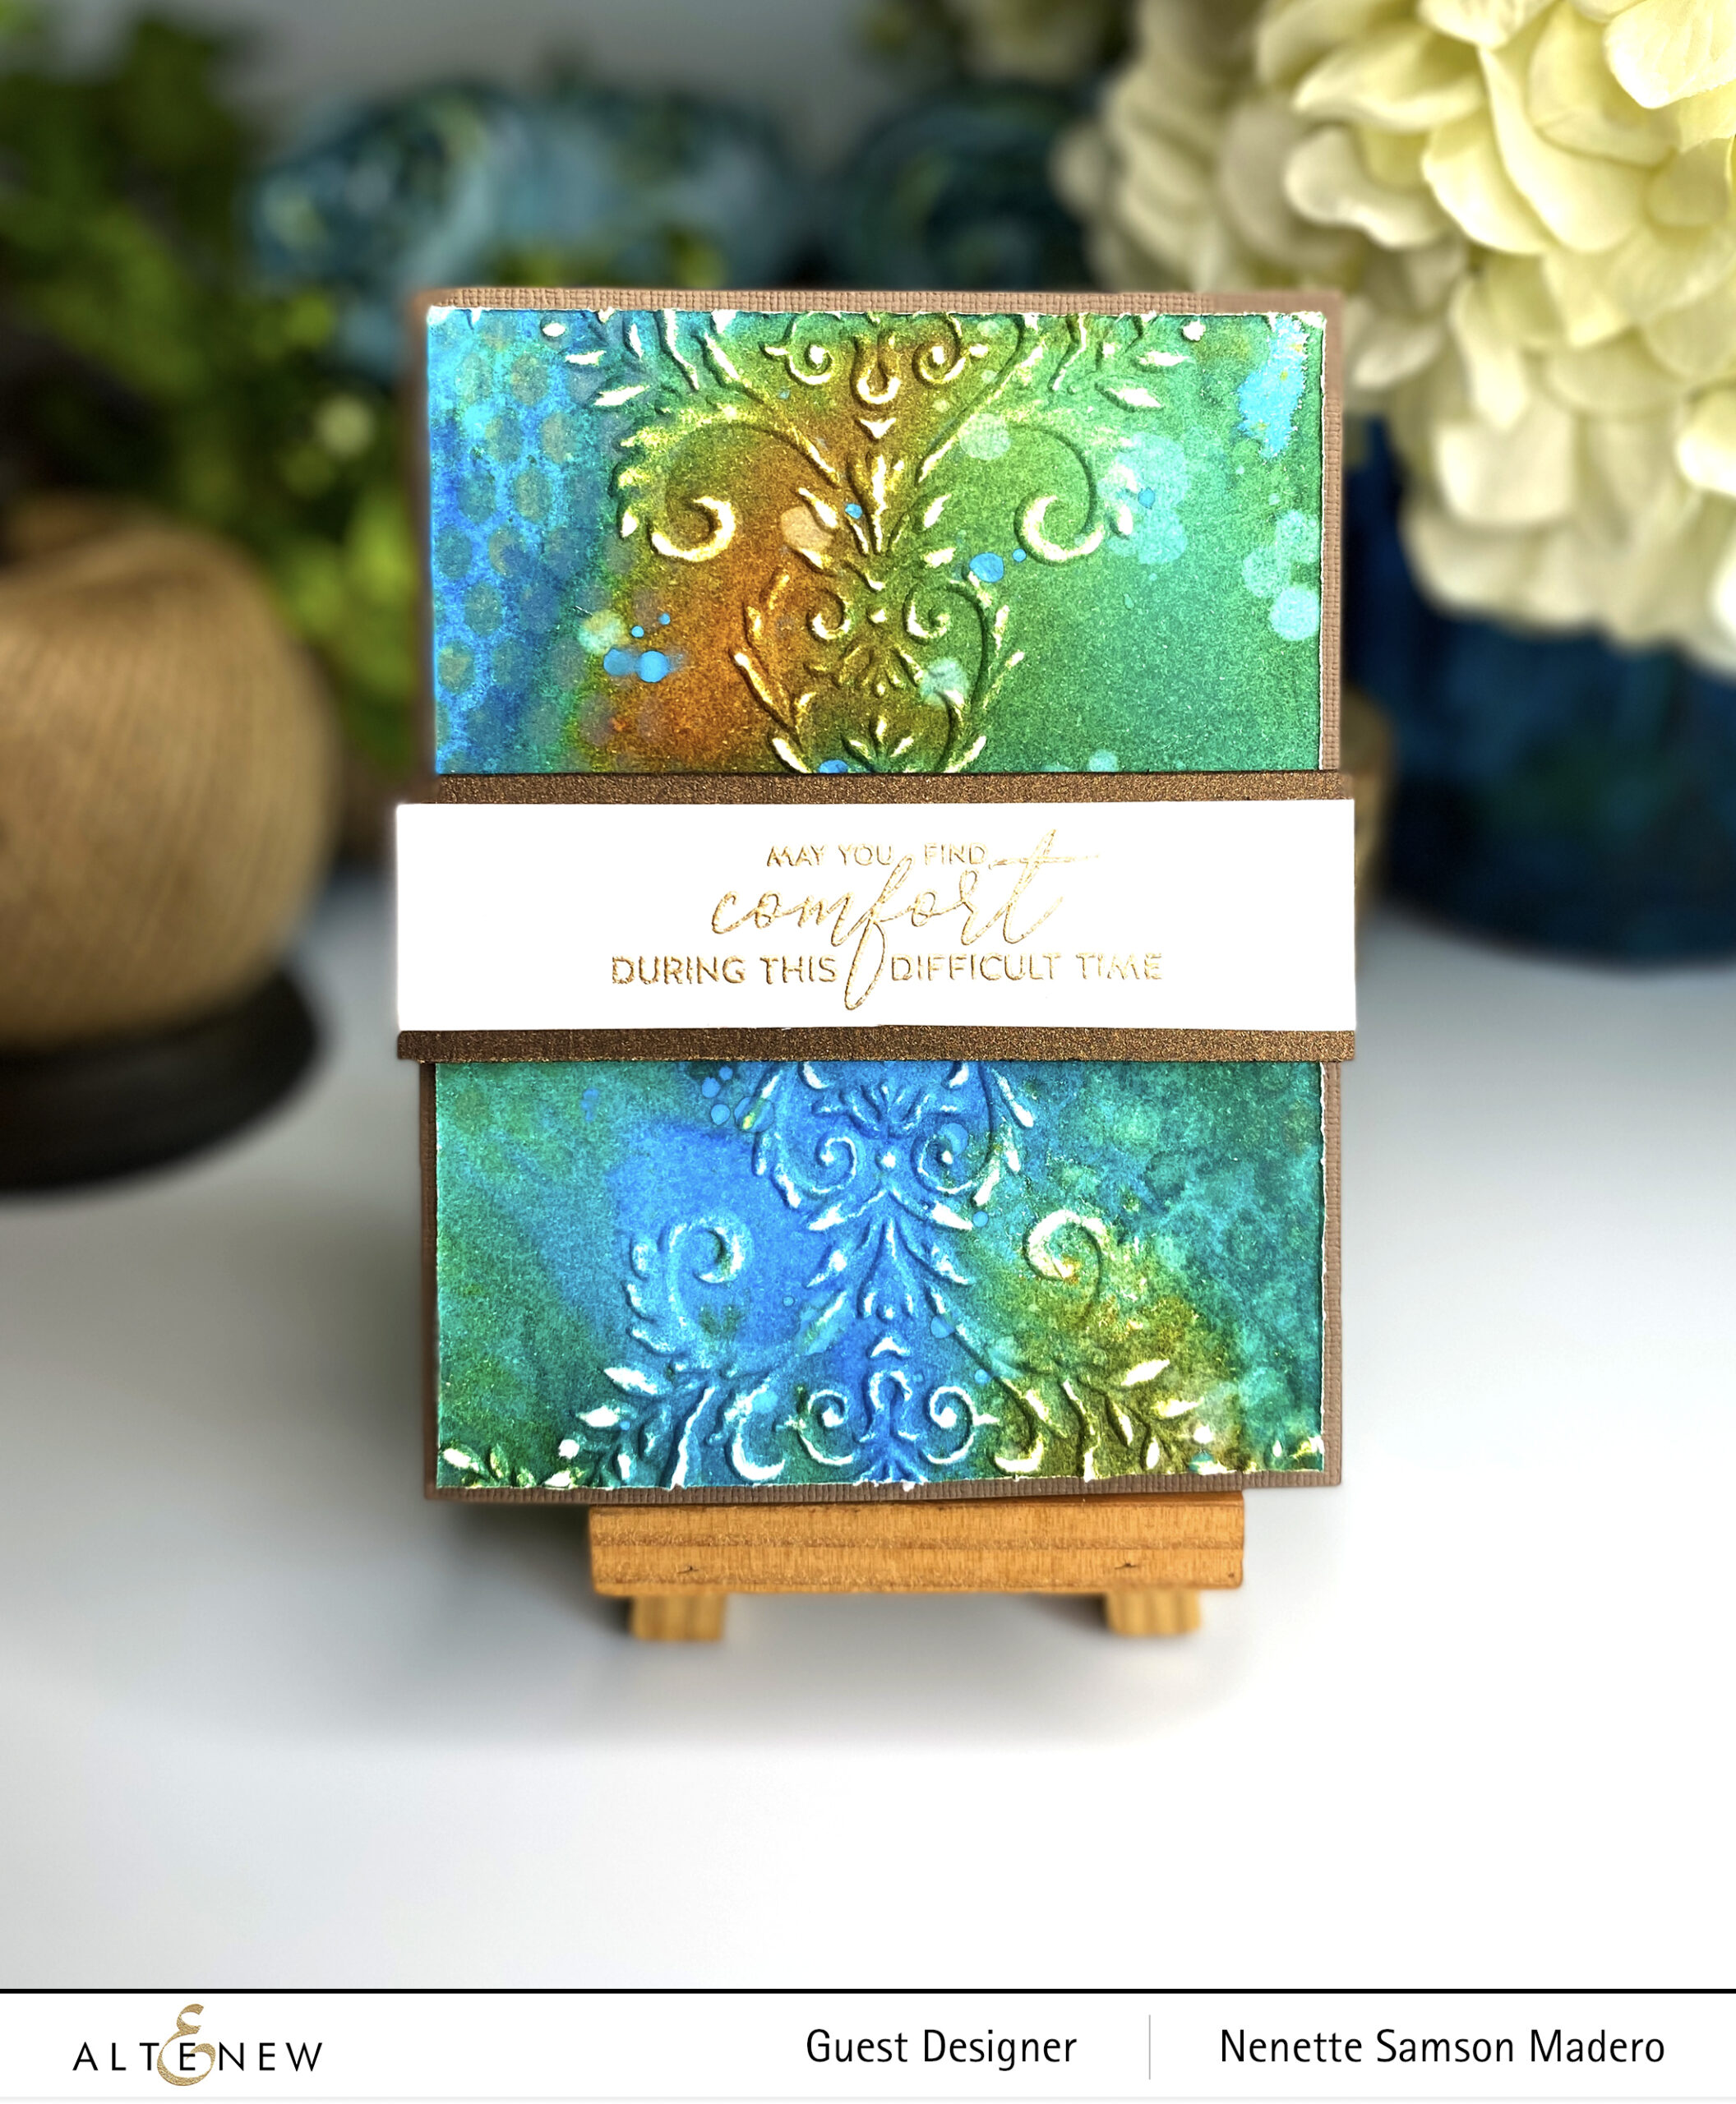
MAY YOU FIND COMFORT DURING THIS DIFFICULT TIME

STEPS:

  1. Create a background using the following: Peacock Feathers Distress Oxide, Salty Ocean, Rusty Hinge Distress Sprays. Add splatters of water to help move the pigments.
  2. Use the Fine Tulle Stencil and the Beveled Squares Stencil with Frayed Burlap Distress Ink to add layers.
  3. Emboss the background using the Dynamic Blossoms 3D embossing folder.
  4. Use a fine sand paper to sand the embossed parts.
  5. Stamp the sentiment using Versamark Ink and emboss with Rose Gold embossing powder.
HAPPY BIRTHDAY
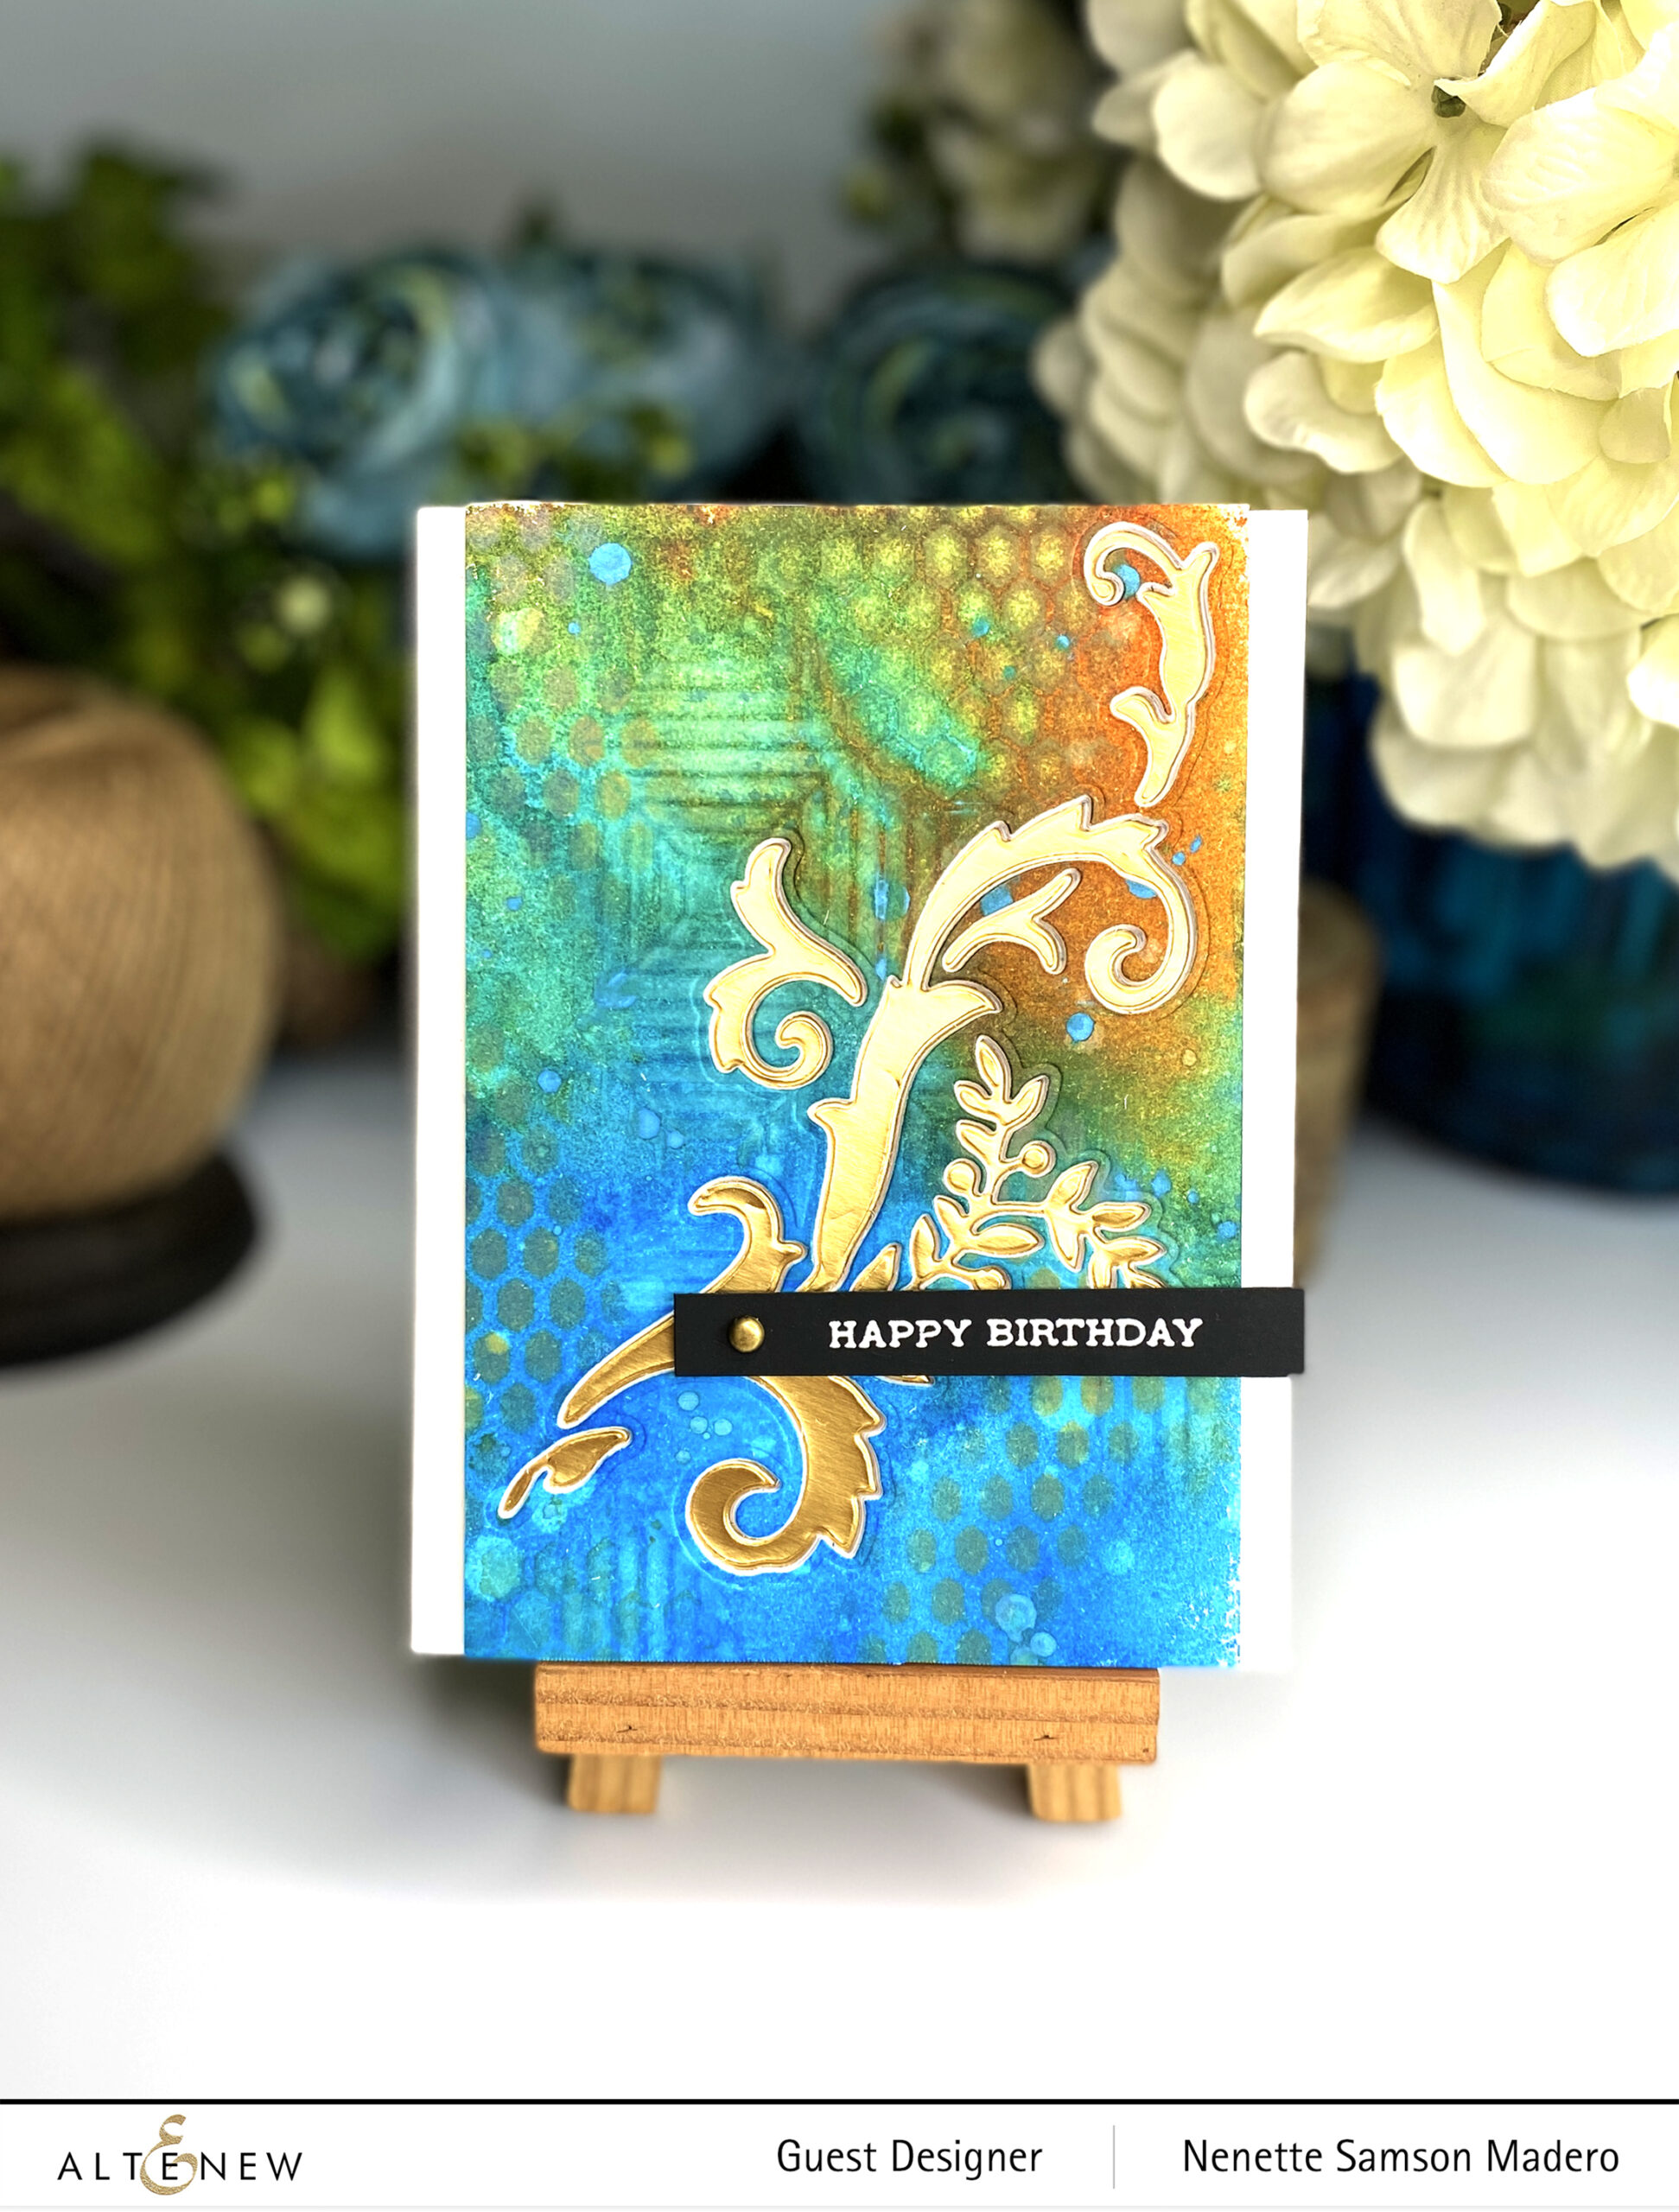
This is part of the same background I created for the 1st card. The Dynamic Blossoms die was used to die cut the image. I used the negative part of the die cut and added gold cardstock underneath.

TIP: Aside from adding color, you can also remove some pigments by using a baby wipe on top of the stencils.
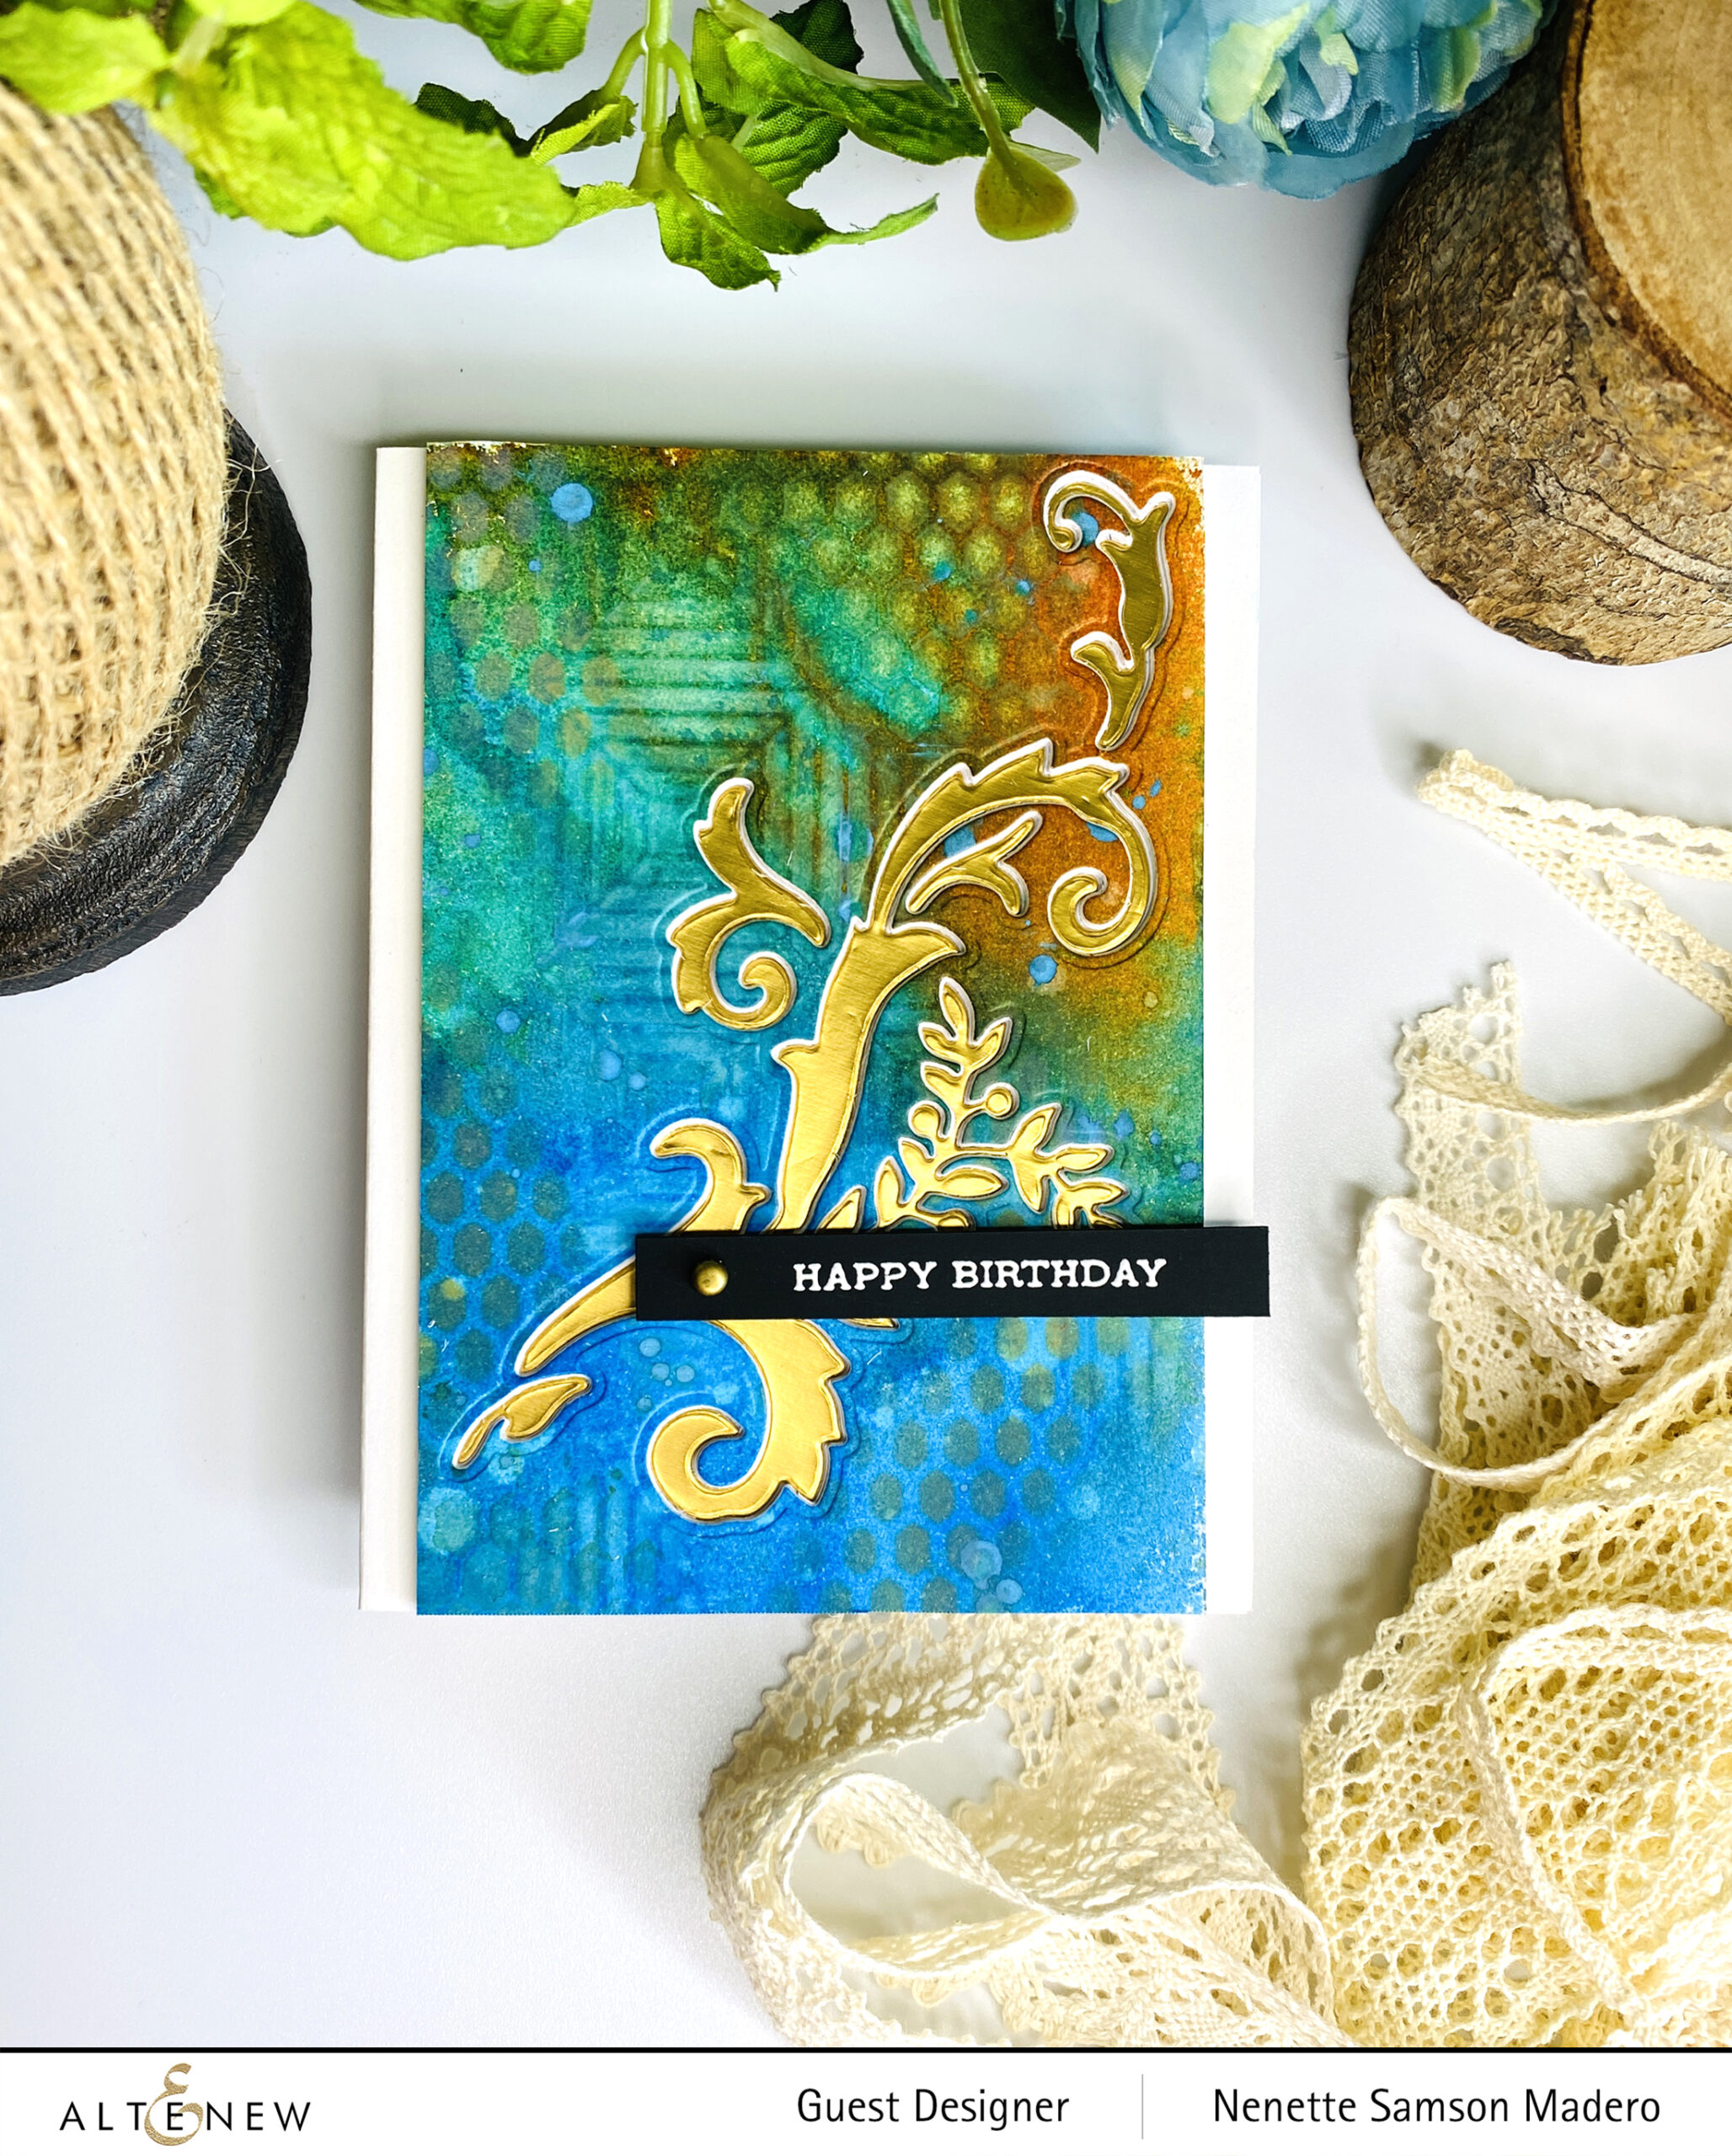
TIP: You can emboss the brad using Versamark Ink and an embossing powder to match your card. I didn’t have a gold brad so I just made one using my gold embossing powder.

The positive die cut was used on a 3rd card. I added gold using Craft Gilding glue and Pebeo mirror effects for a gold finish. Distress oxides were added to the background and images were stamped using Obsidian Ink.

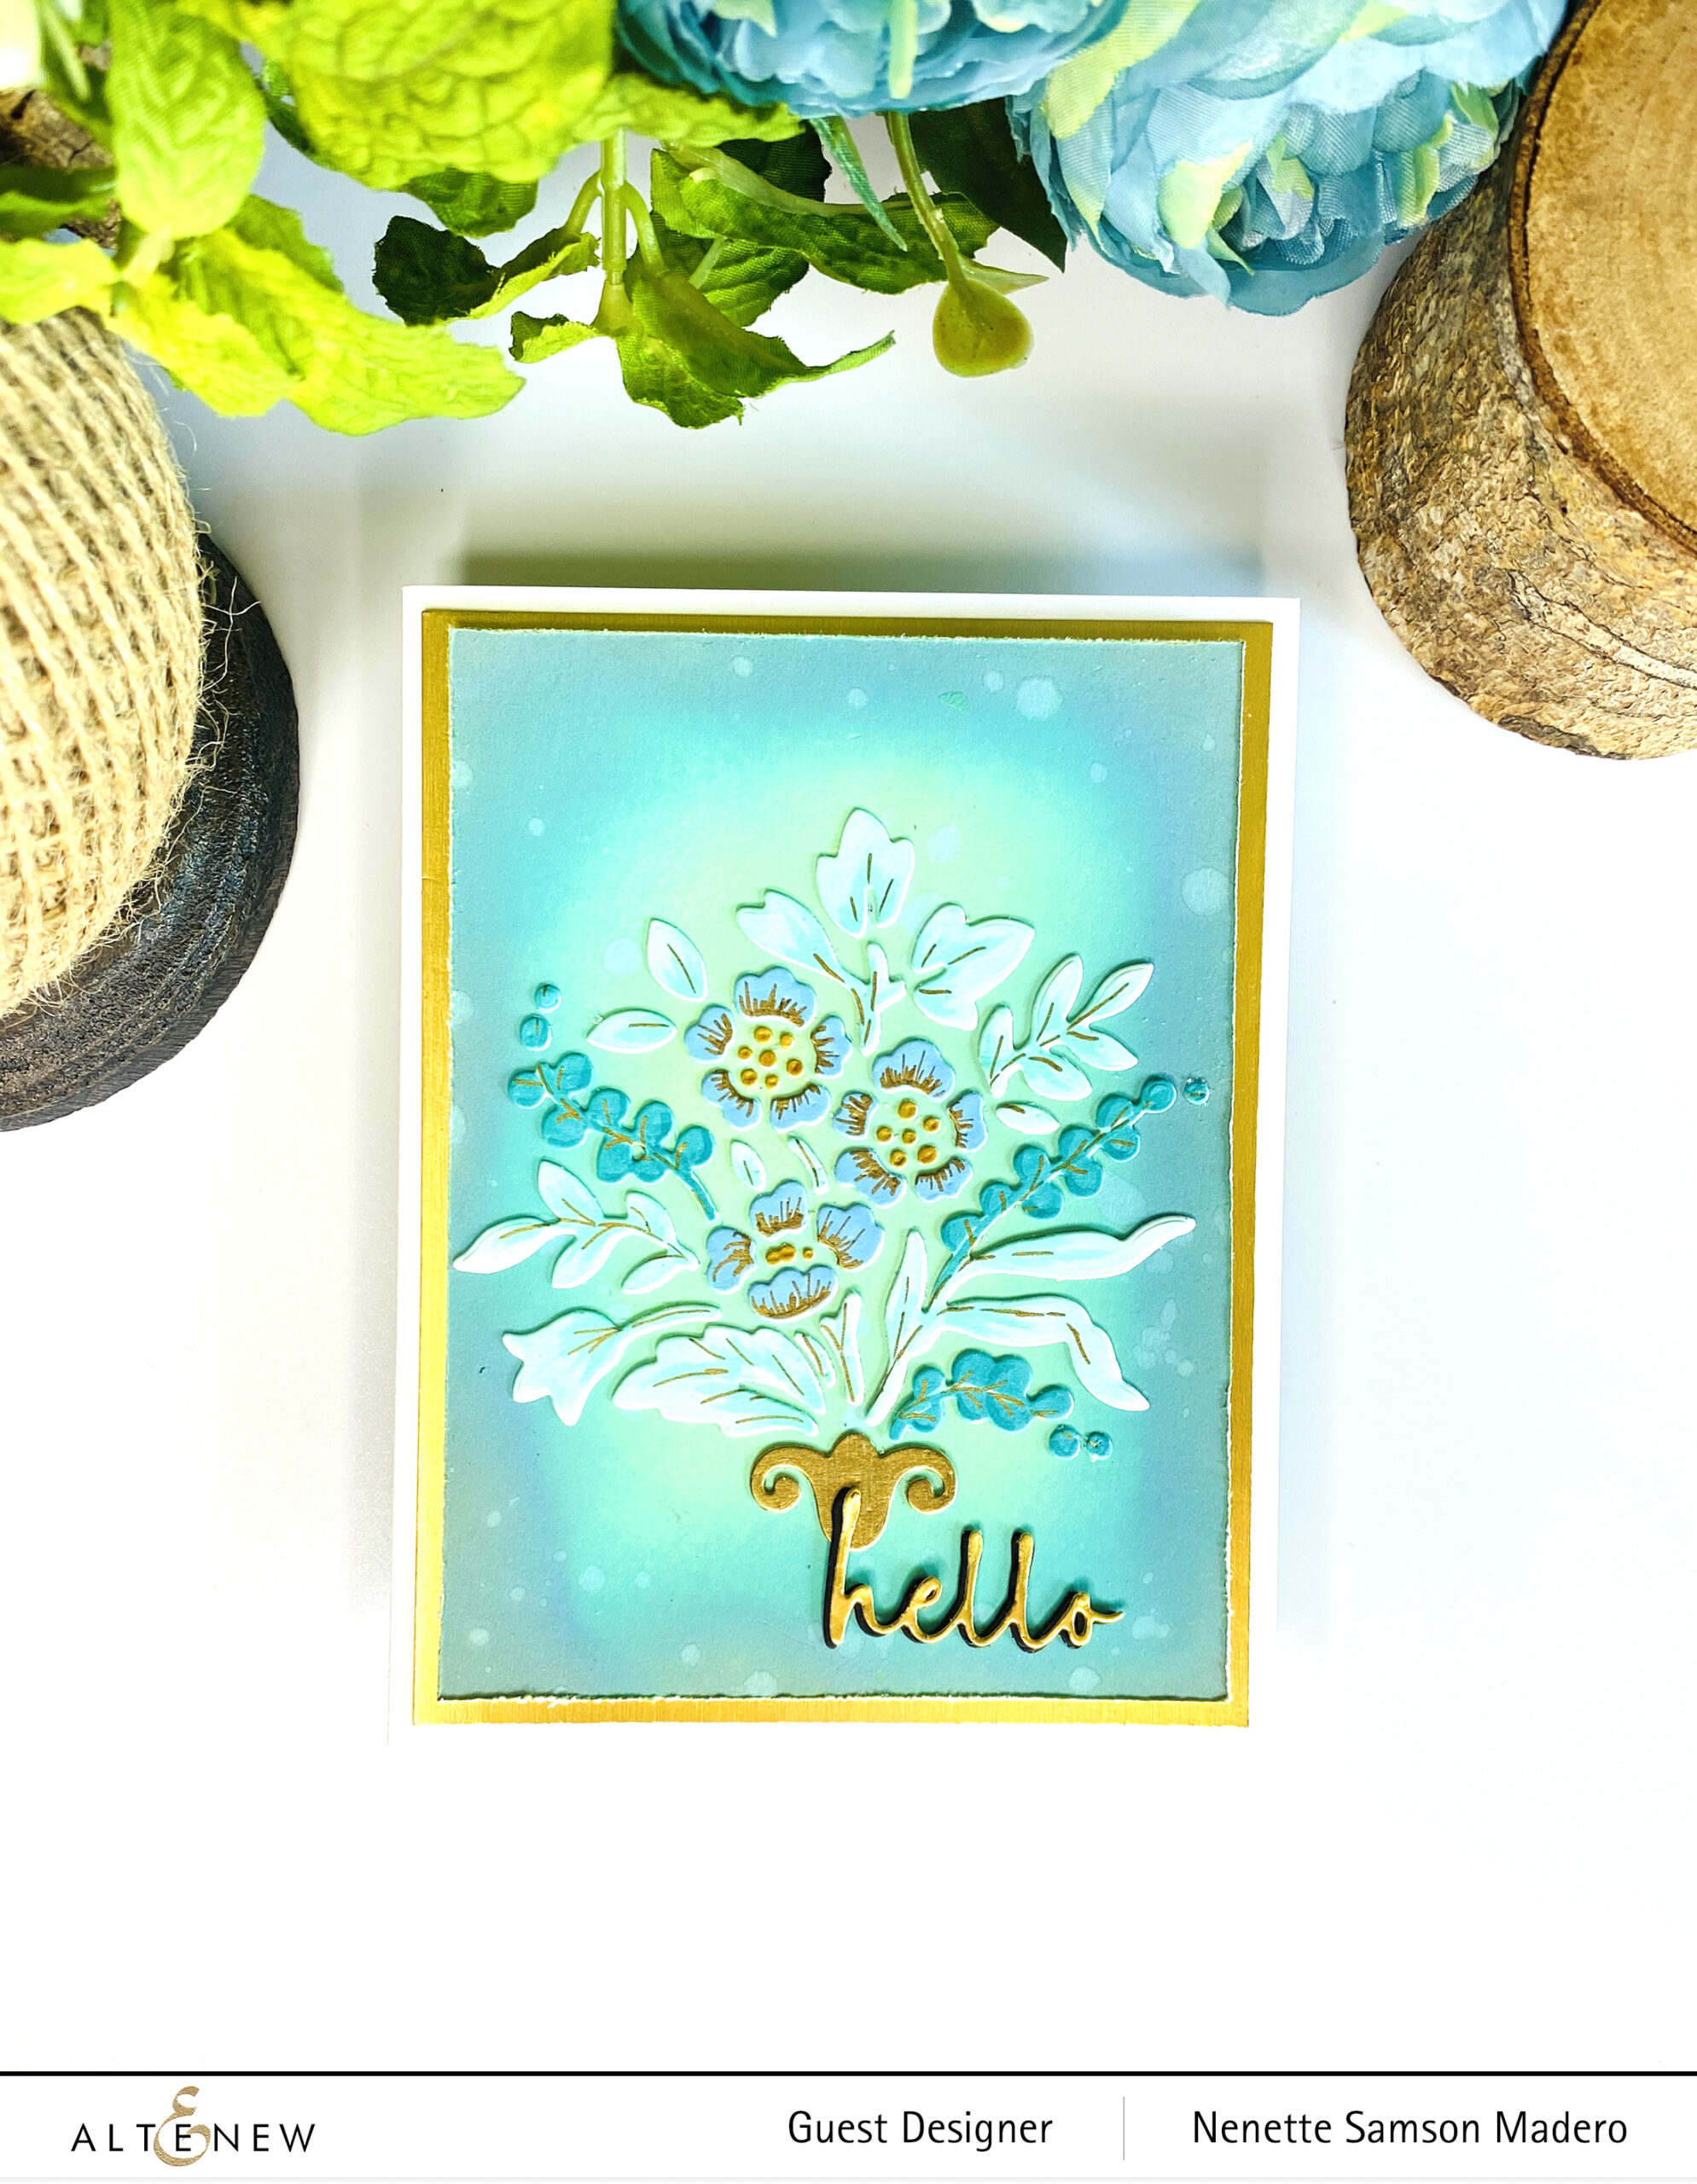
HELLO
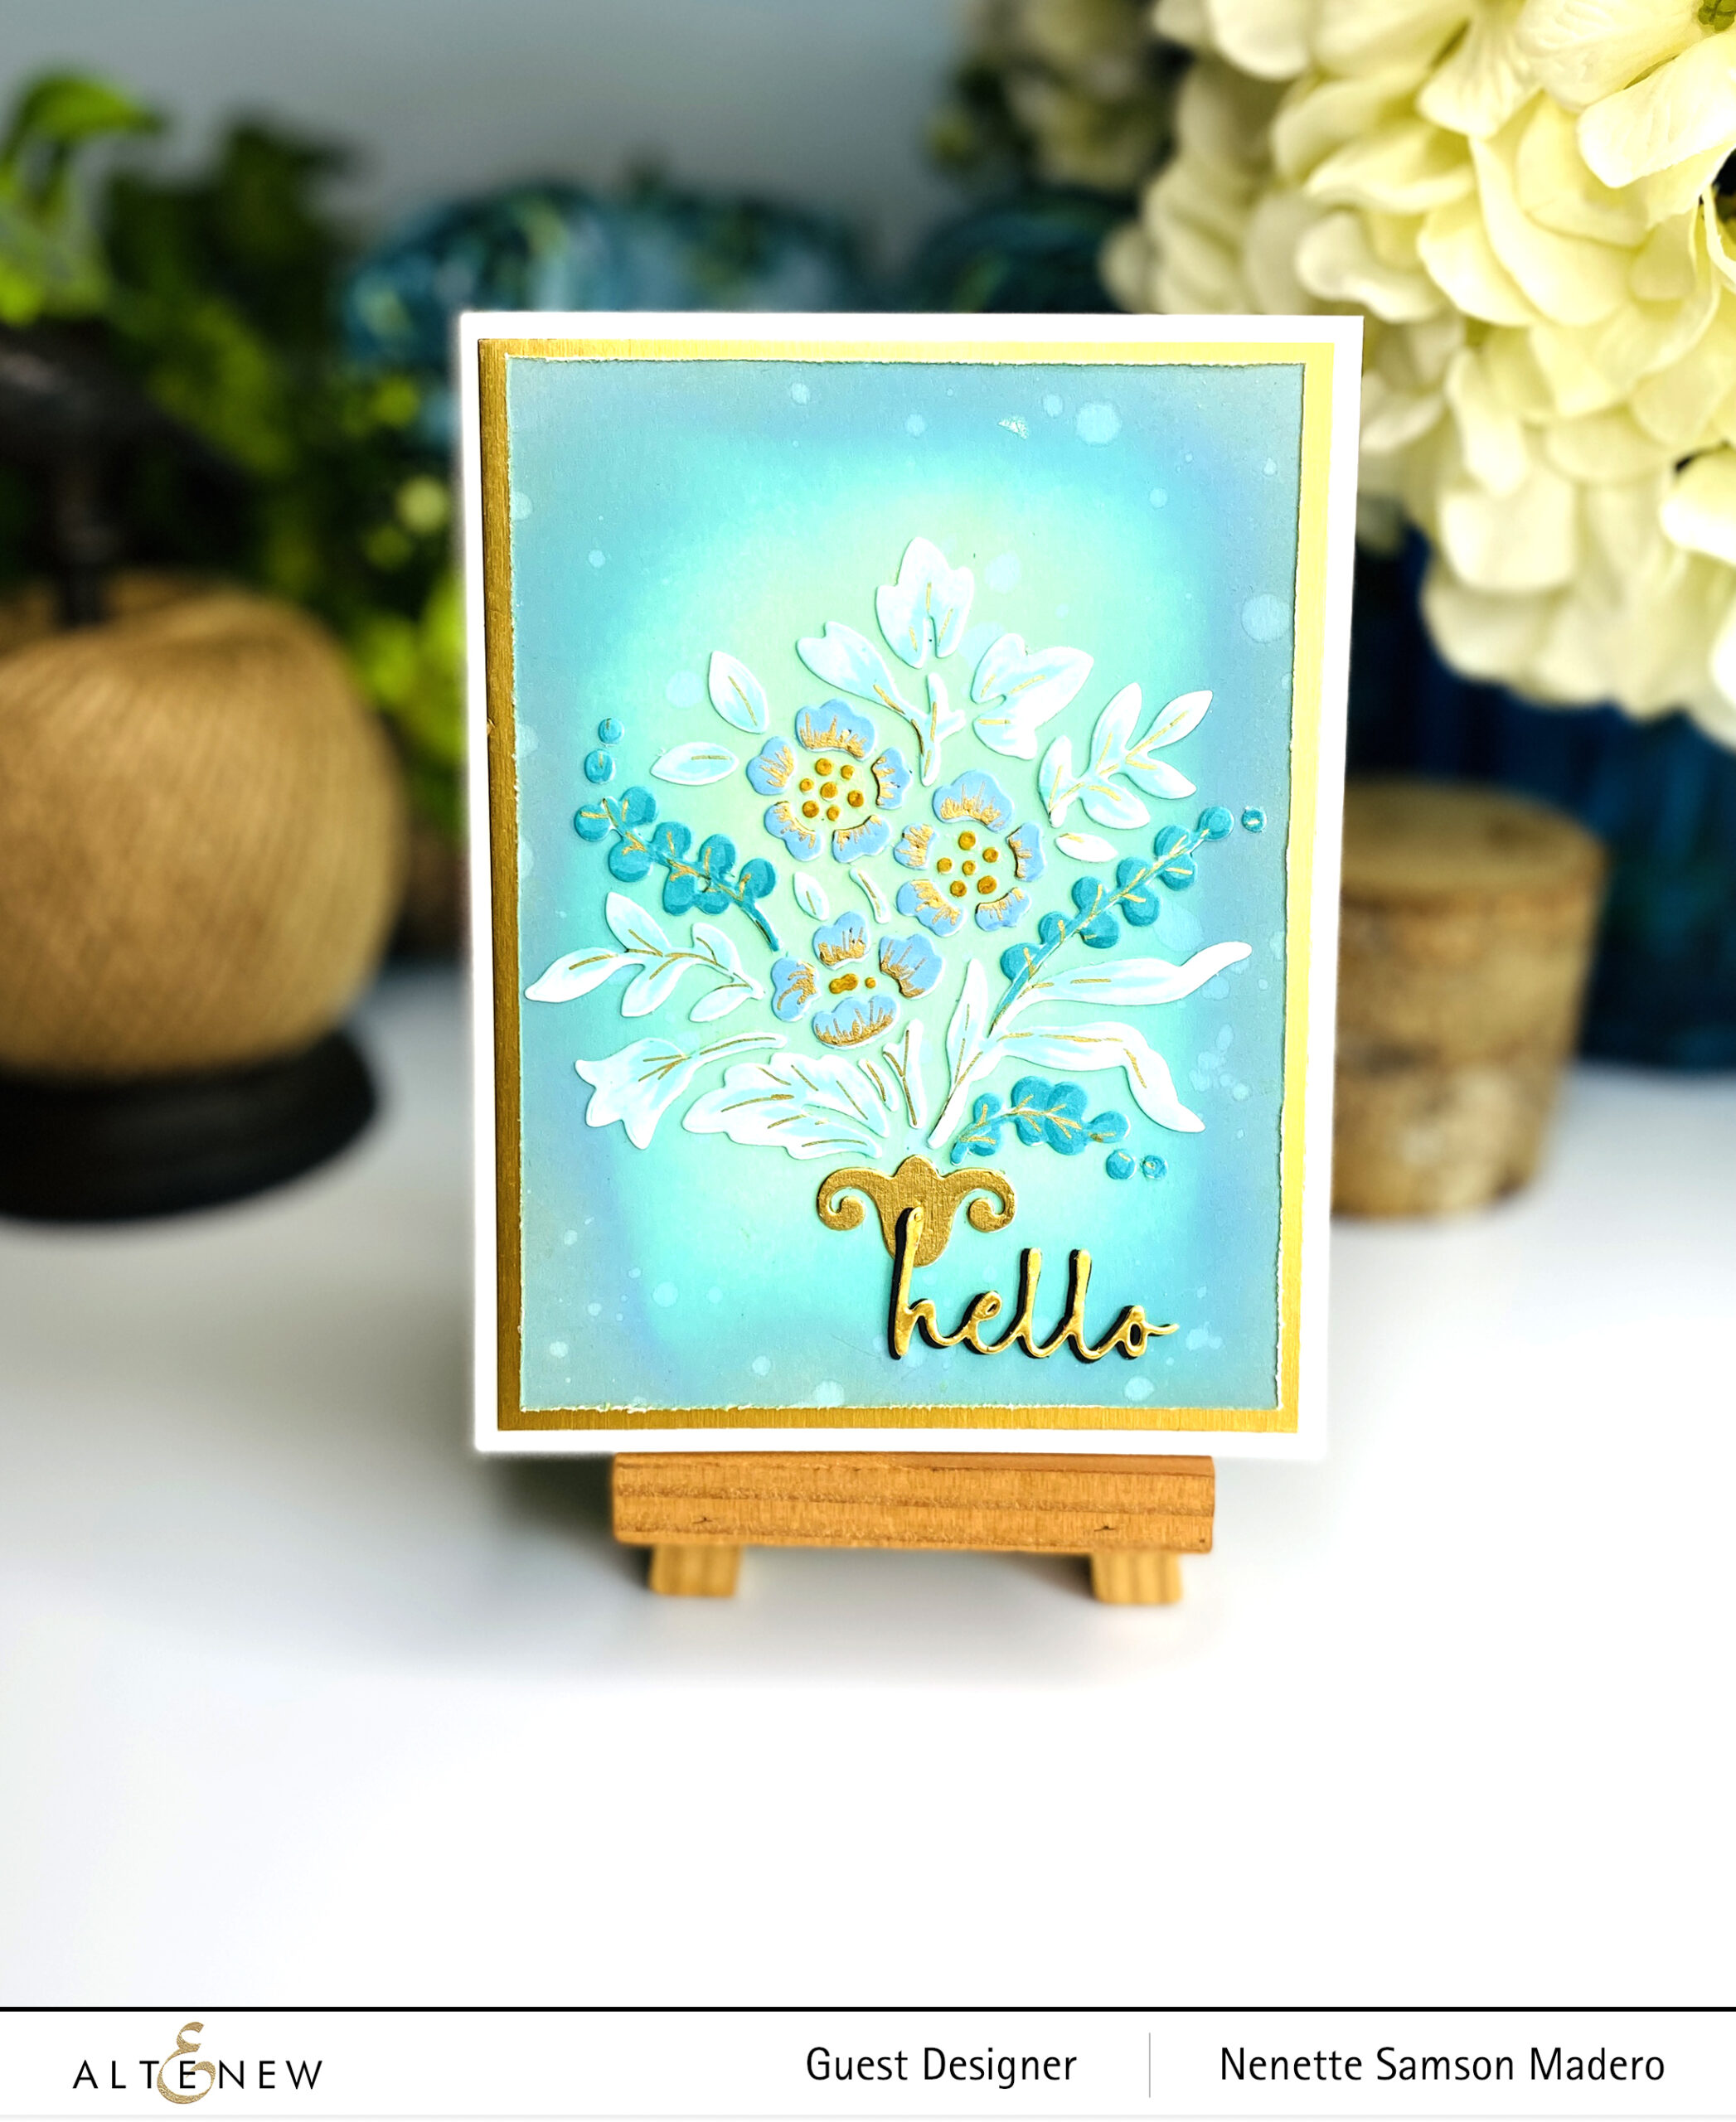
STEPS:

  1. Color the image using the Dynamic Blooms stencil and Distress Oxides Frayed burlap, Peacock Feathers, Cracked Pistachio. Color also using Artist Markers set C and Water Garden.
  2. Die cut the image.
  3. Add distress oxides to the card front and splatter water.
  4. Adhere the die cut pieces and add details using Sakura Pen Touch gold.
  5. Die cut the sentiment.
  6. Mat the colored card in gold and assemble the card with foam squares.
BE HAPPY
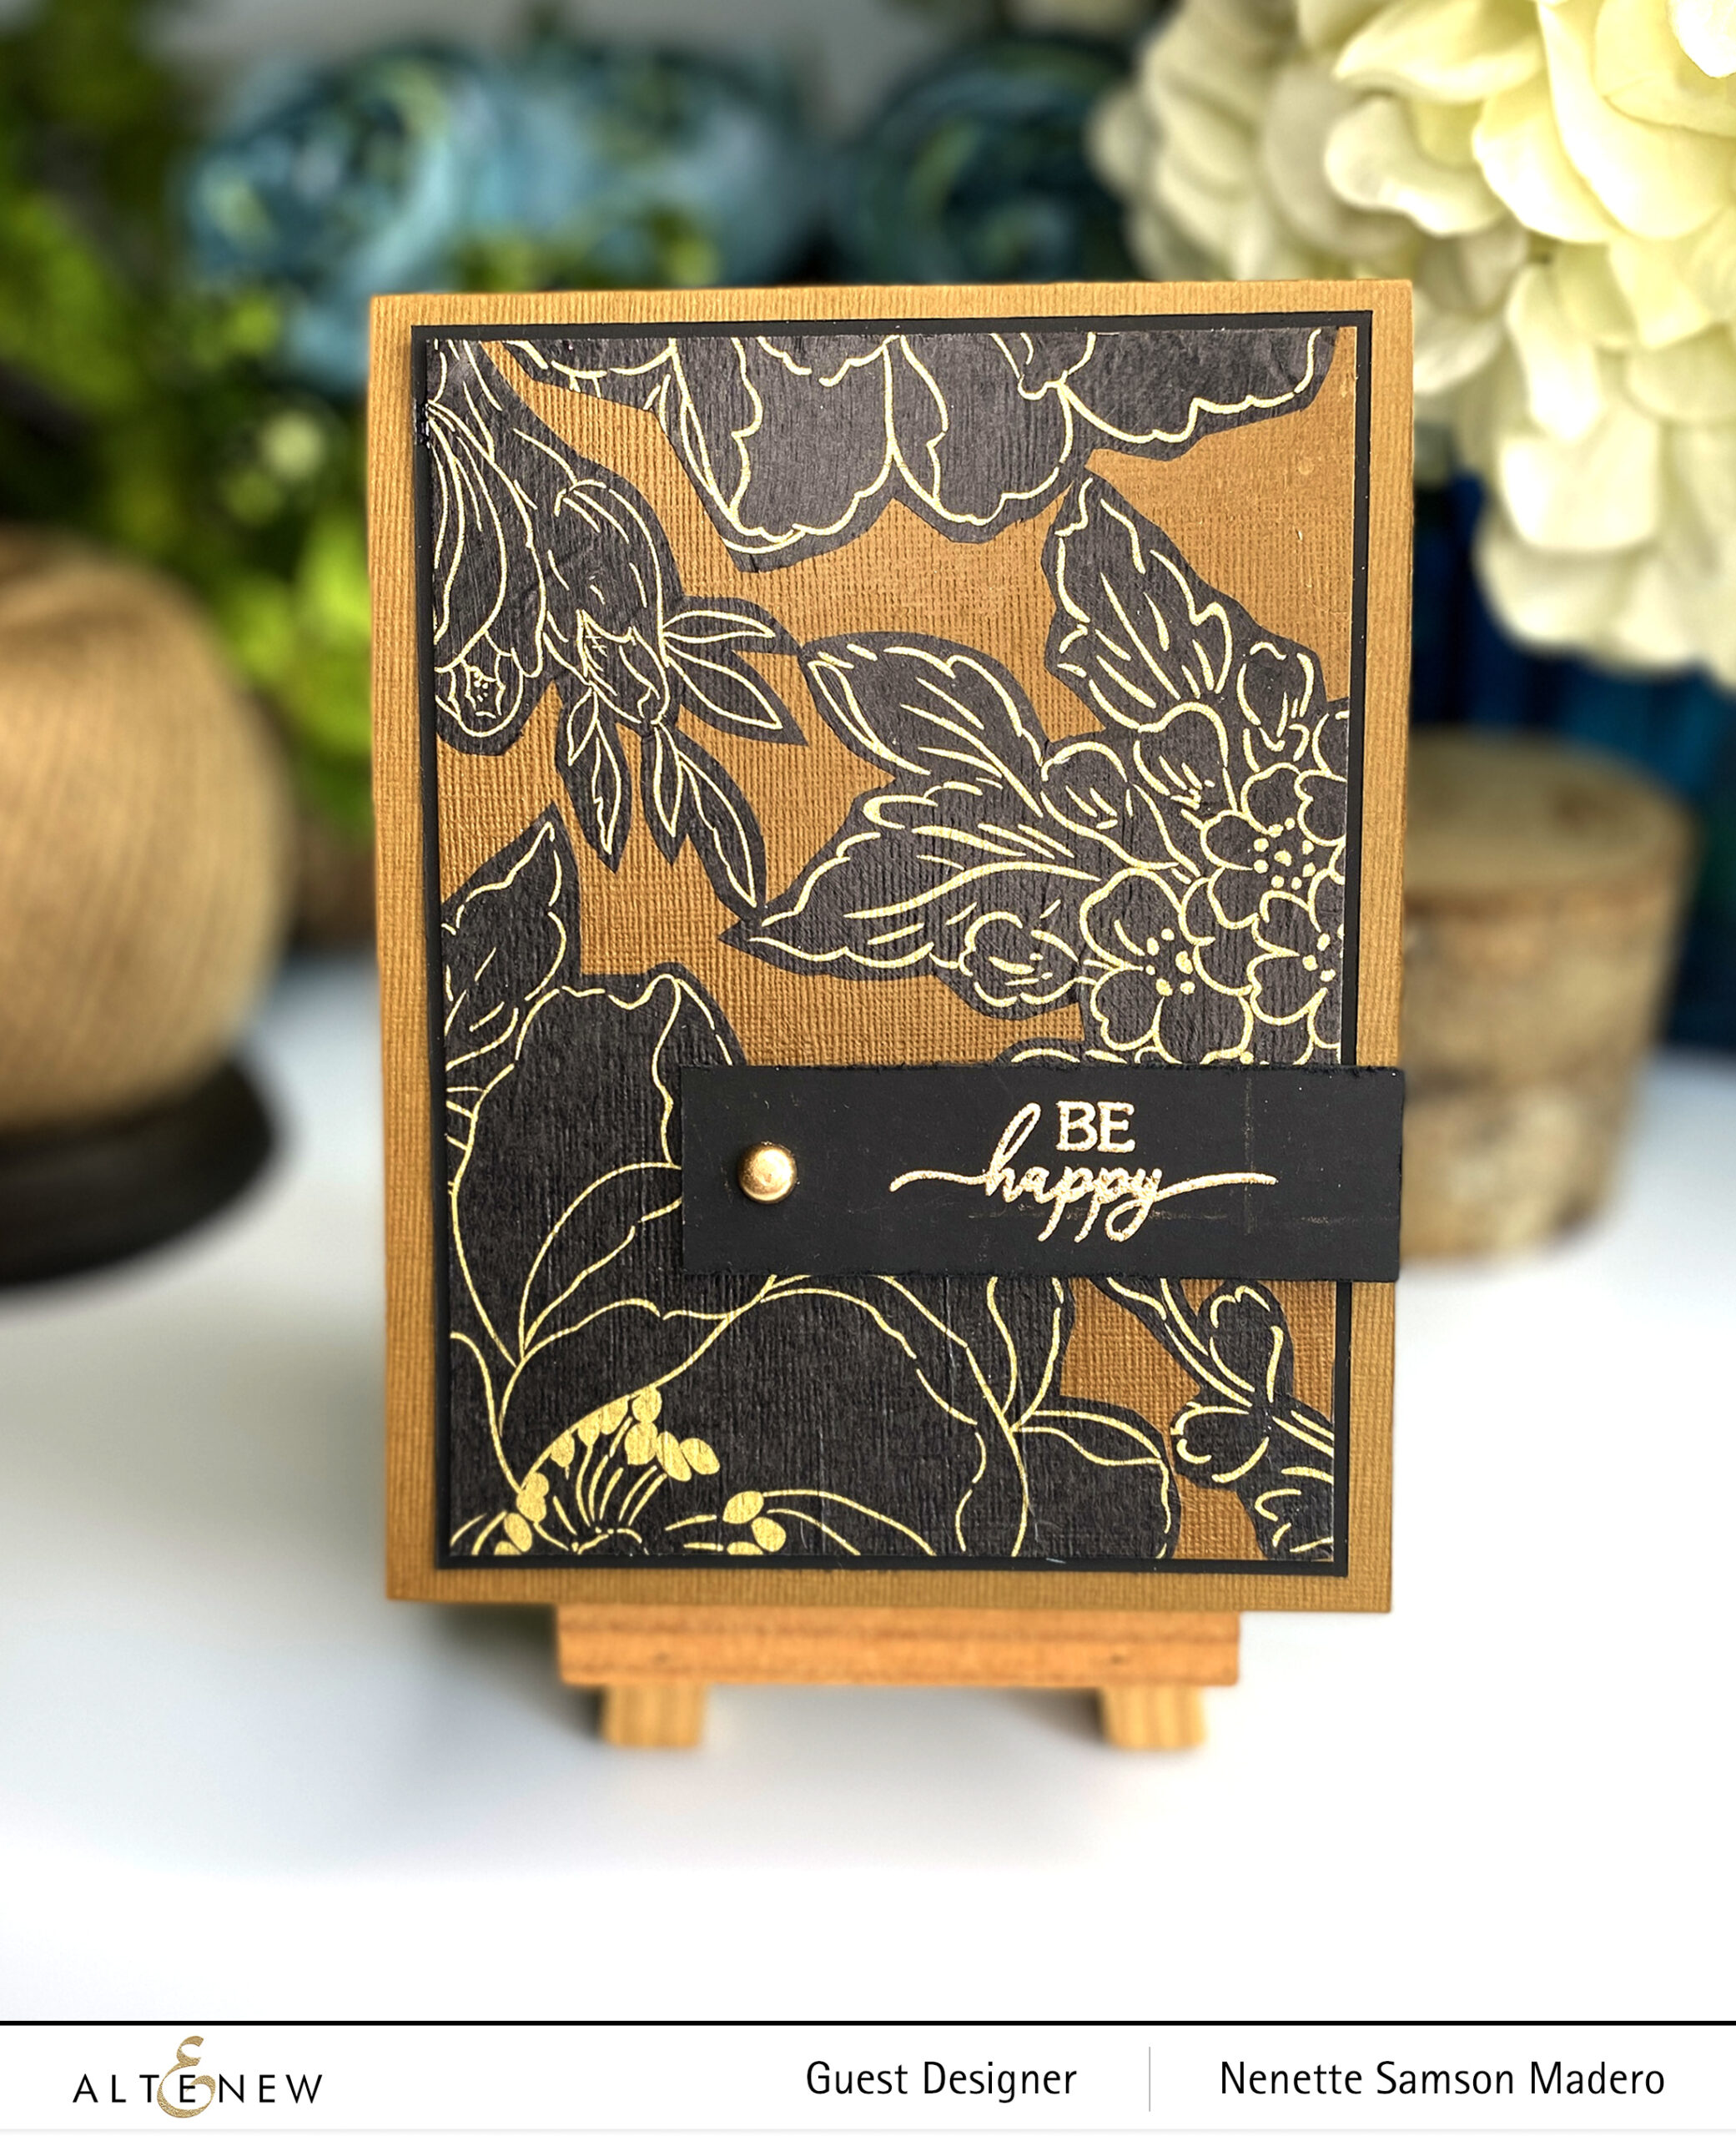
The packaging of the kit was too pretty to throw away so I created a card using the printed Japanese paper that came with the kit. Since I didn’t have a gold brad, I simply embossed the brad using Versamark Ink and Rose gold embossing powder to match my sentiment coming from the Pots and Plants Stamp set

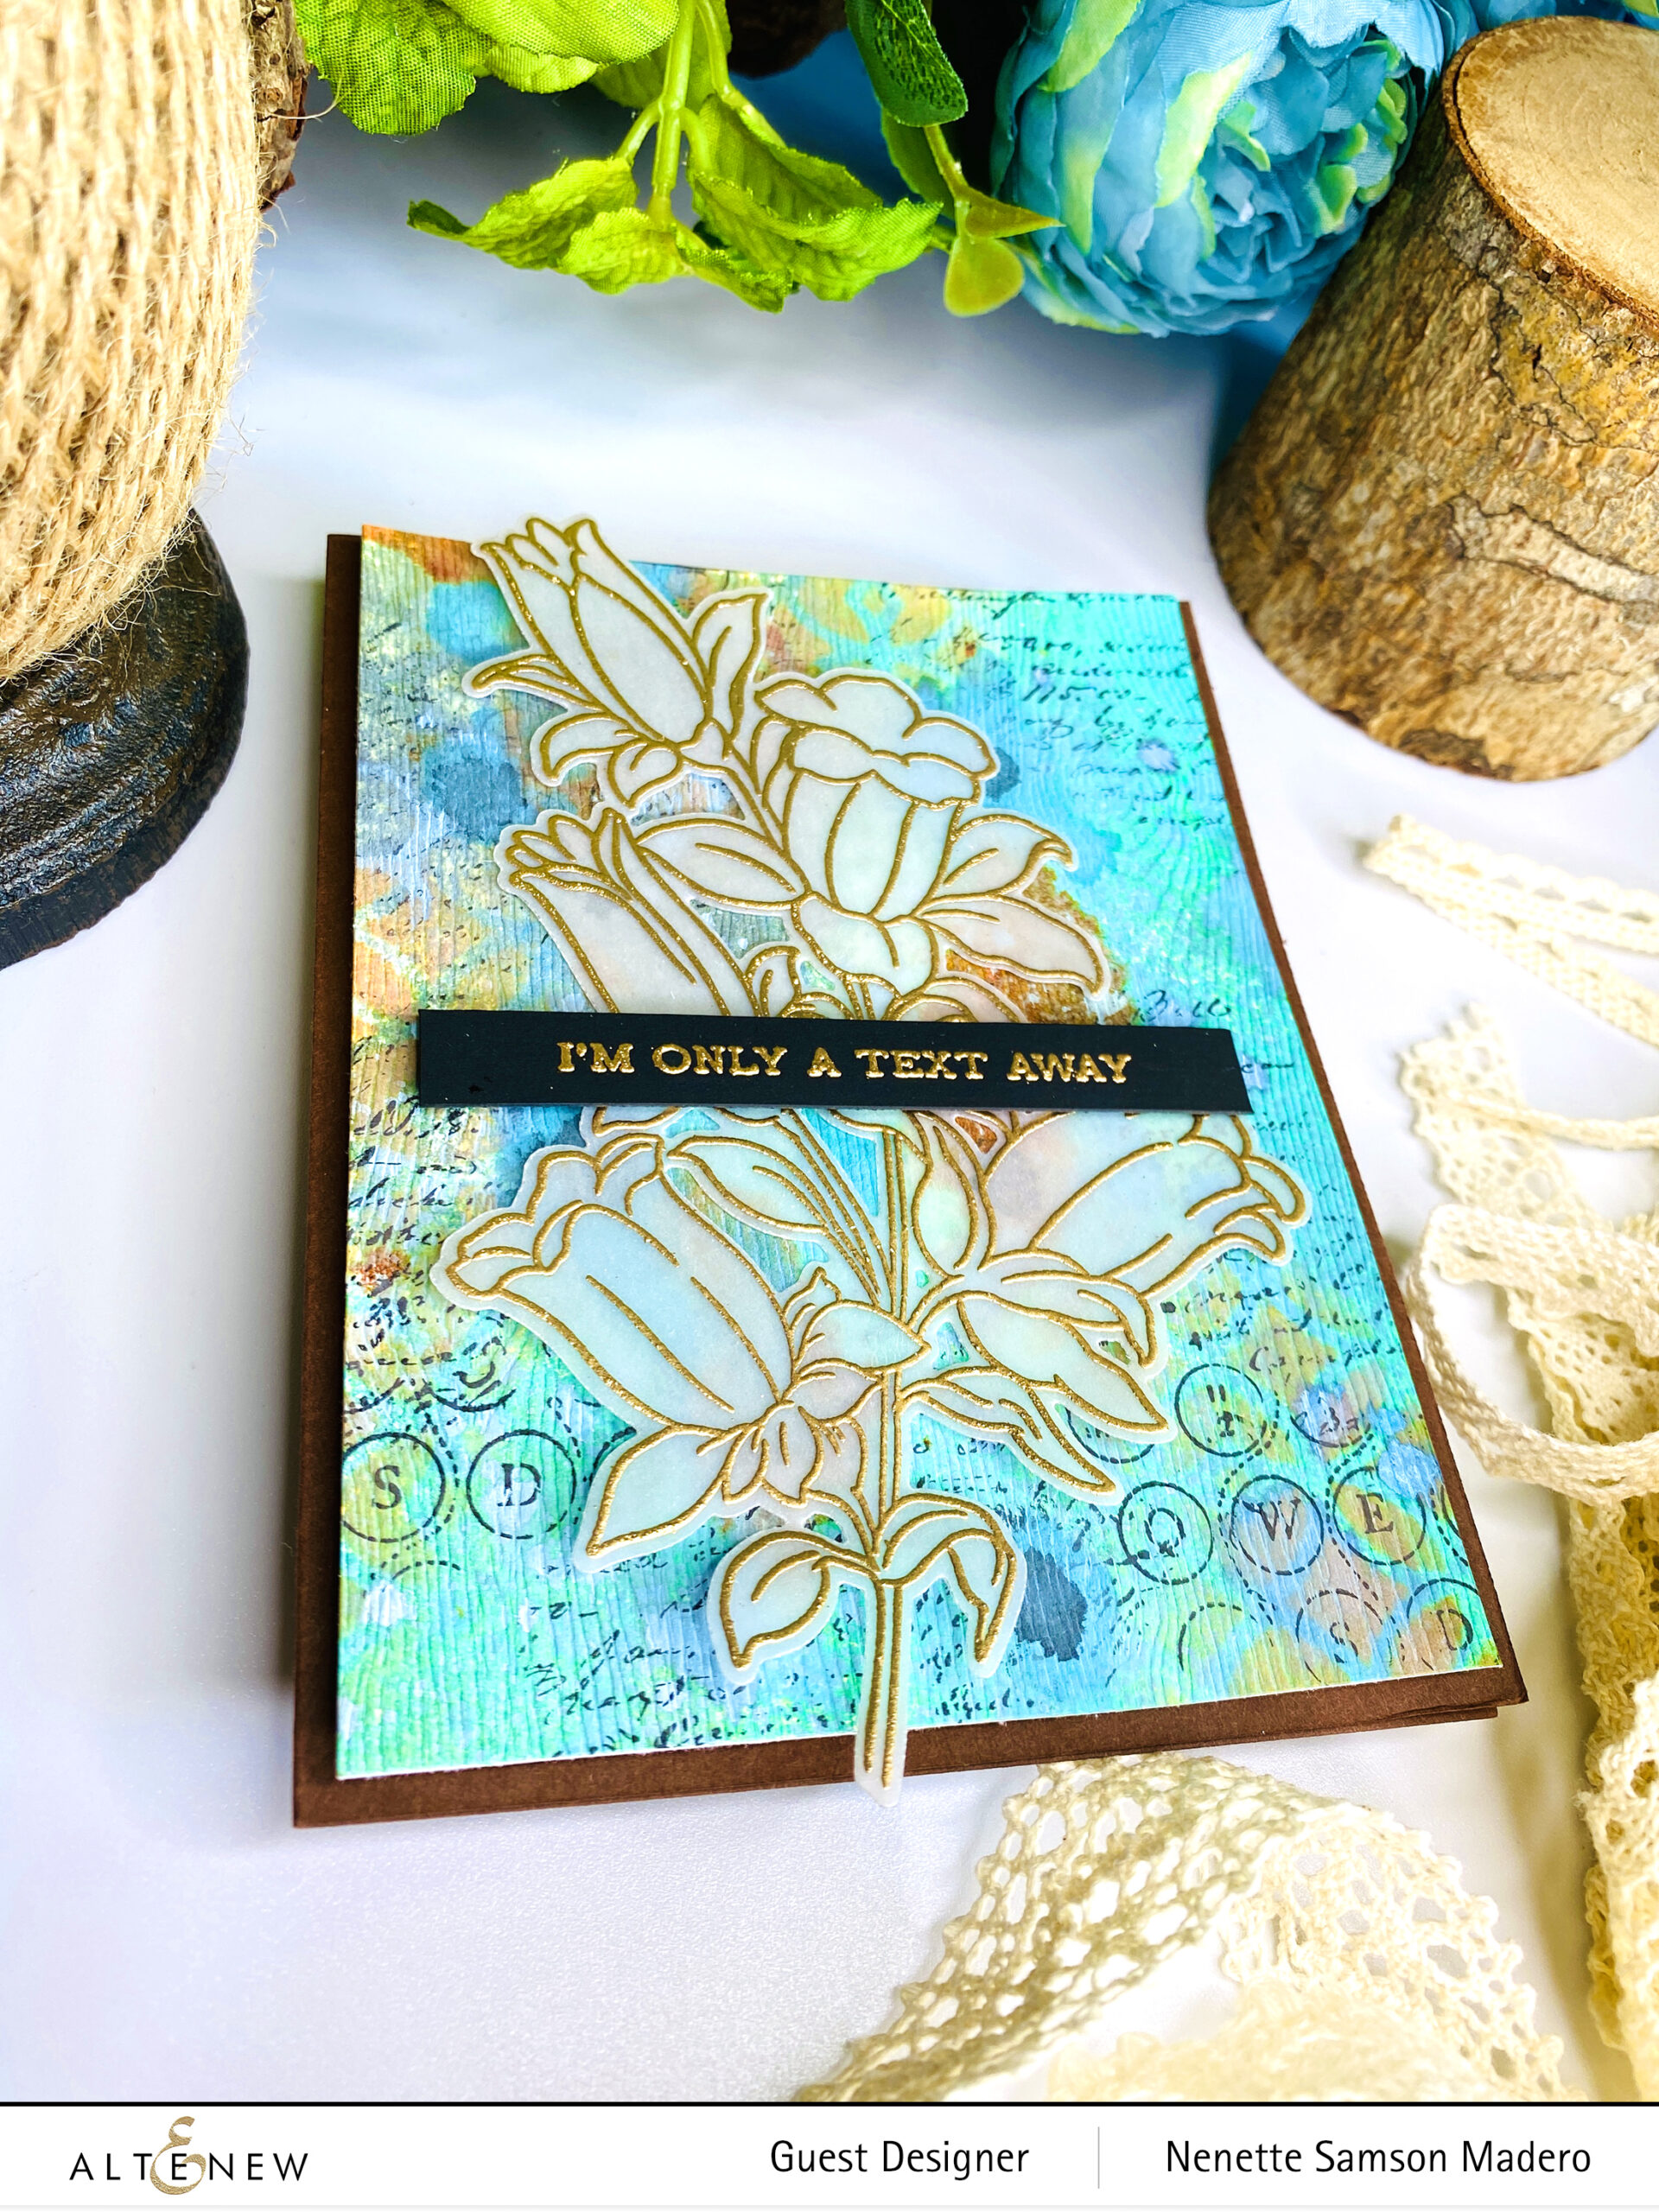
I’M ONLY A TEXT AWAY
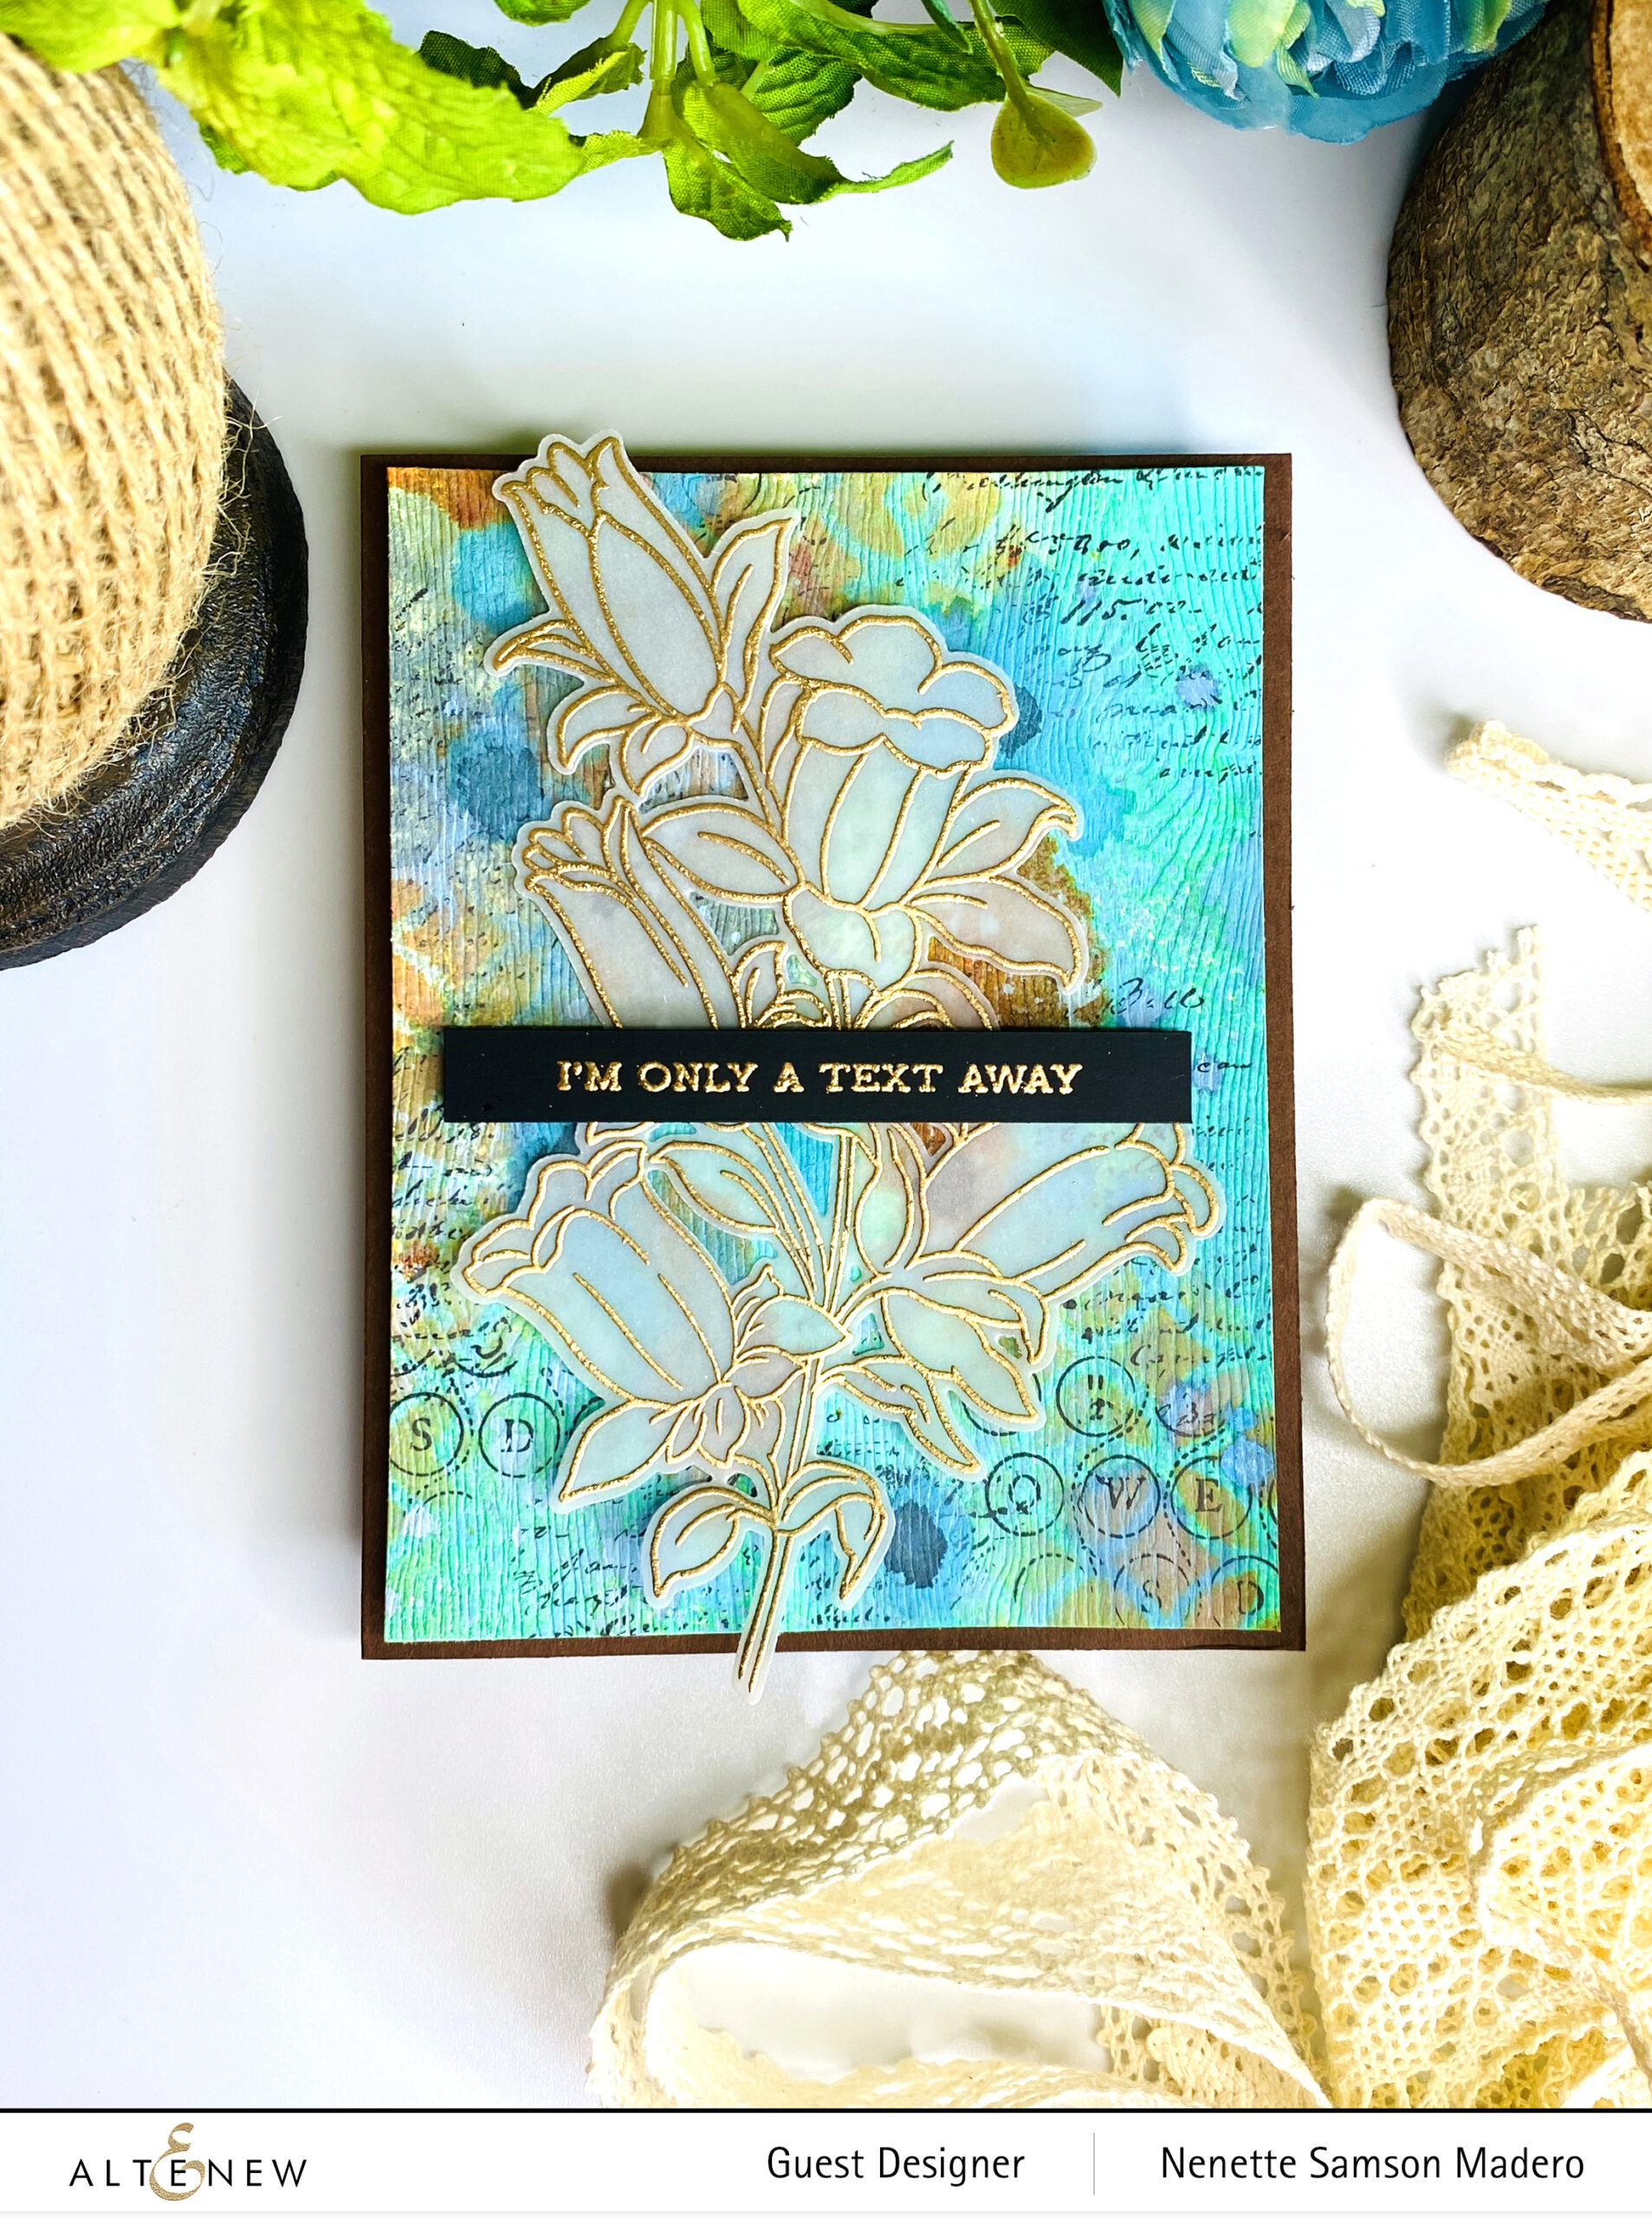
STEPS:

  1. Stamp the image from the Dynamic Blossoms Stamp into vellum using Versamark Ink and Rose Gold embossing powder.
  2. Create a background using Distress inks, script and number stamps and stencils.
  3. Stamp the sentiment from the Sentiment Strips 3 on black cardstock.
  4. Assemble the card.
TIP: Make the stamped image simple and uncolored so that it will stand out more against the busy background. Stamping it on vellum will also allow some of the colors to shine through the paper.

GIVEAWAYS

$300 in total prizes! To celebrate this release, Altenew is giving away a $50 gift certificate to 2 lucky winners and a $ 25 gift certificate to 8 winners! Please leave a comment on the Altenew Card Blog and/or each designer’s blog post on the blog hop list below by 03/18/2022 for a chance to win. Altenew will draw 10 random winners from the comments left on each stop of this blog hop and announce the winners on the Altenew Winners Page on 03/20/2022.

Next up: Rosie Neustaedter. Thank you so much for reading through! I hope you liked the cards I created for this hop. Do let me know in the comment section below which one is your favorite! I’d love to know 🙂 Also, if you like what you see, hope you can follow me on Instagram (@mylittleatticstudio). Hope these cards will inspire you to create more. Stay safe everyone and happy crafting!

Altenew Craft-A-Flower: Sunburst Azalea Release Blog Hop + Giveaway ($200 in total prizes)

Altenew Craft-A-Flower: Sunburst Azalea Release Blog Hop + Giveaway ($200 in total prizes)

Hello, my crafty friends! Welcome to my blog! If you just came from Reiko Tsuchida, then you’re on the right track. Make sure to drop by the Altenew blog for all the information needed about this hop.

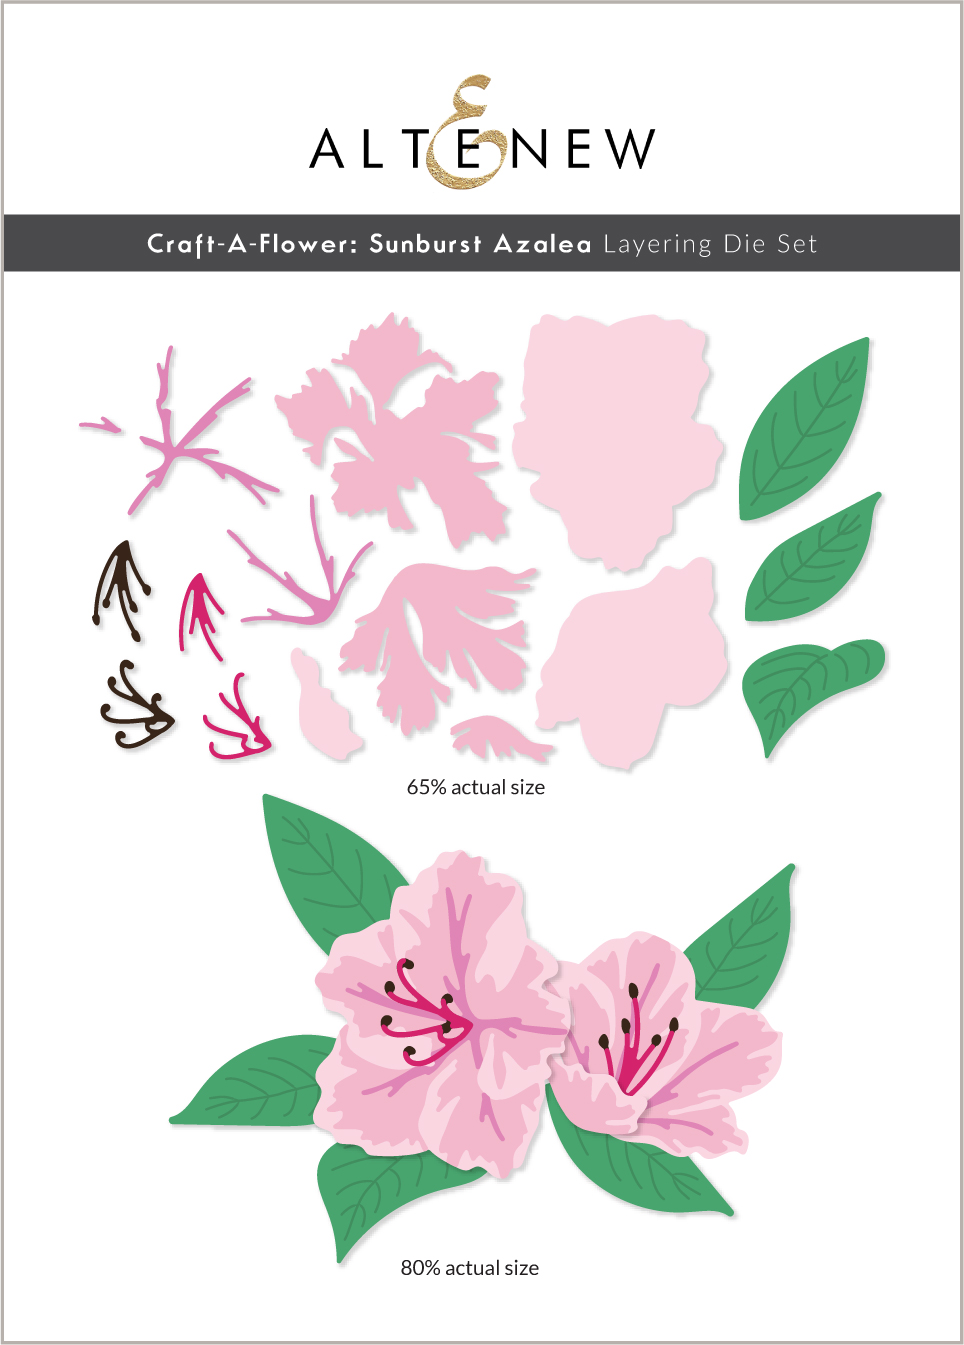
Take a look at this gorgeous Craft-A-Flower Sunburst Azalea die set!

Craft-A-Flower: Sunburst Azalea Layering Die Set

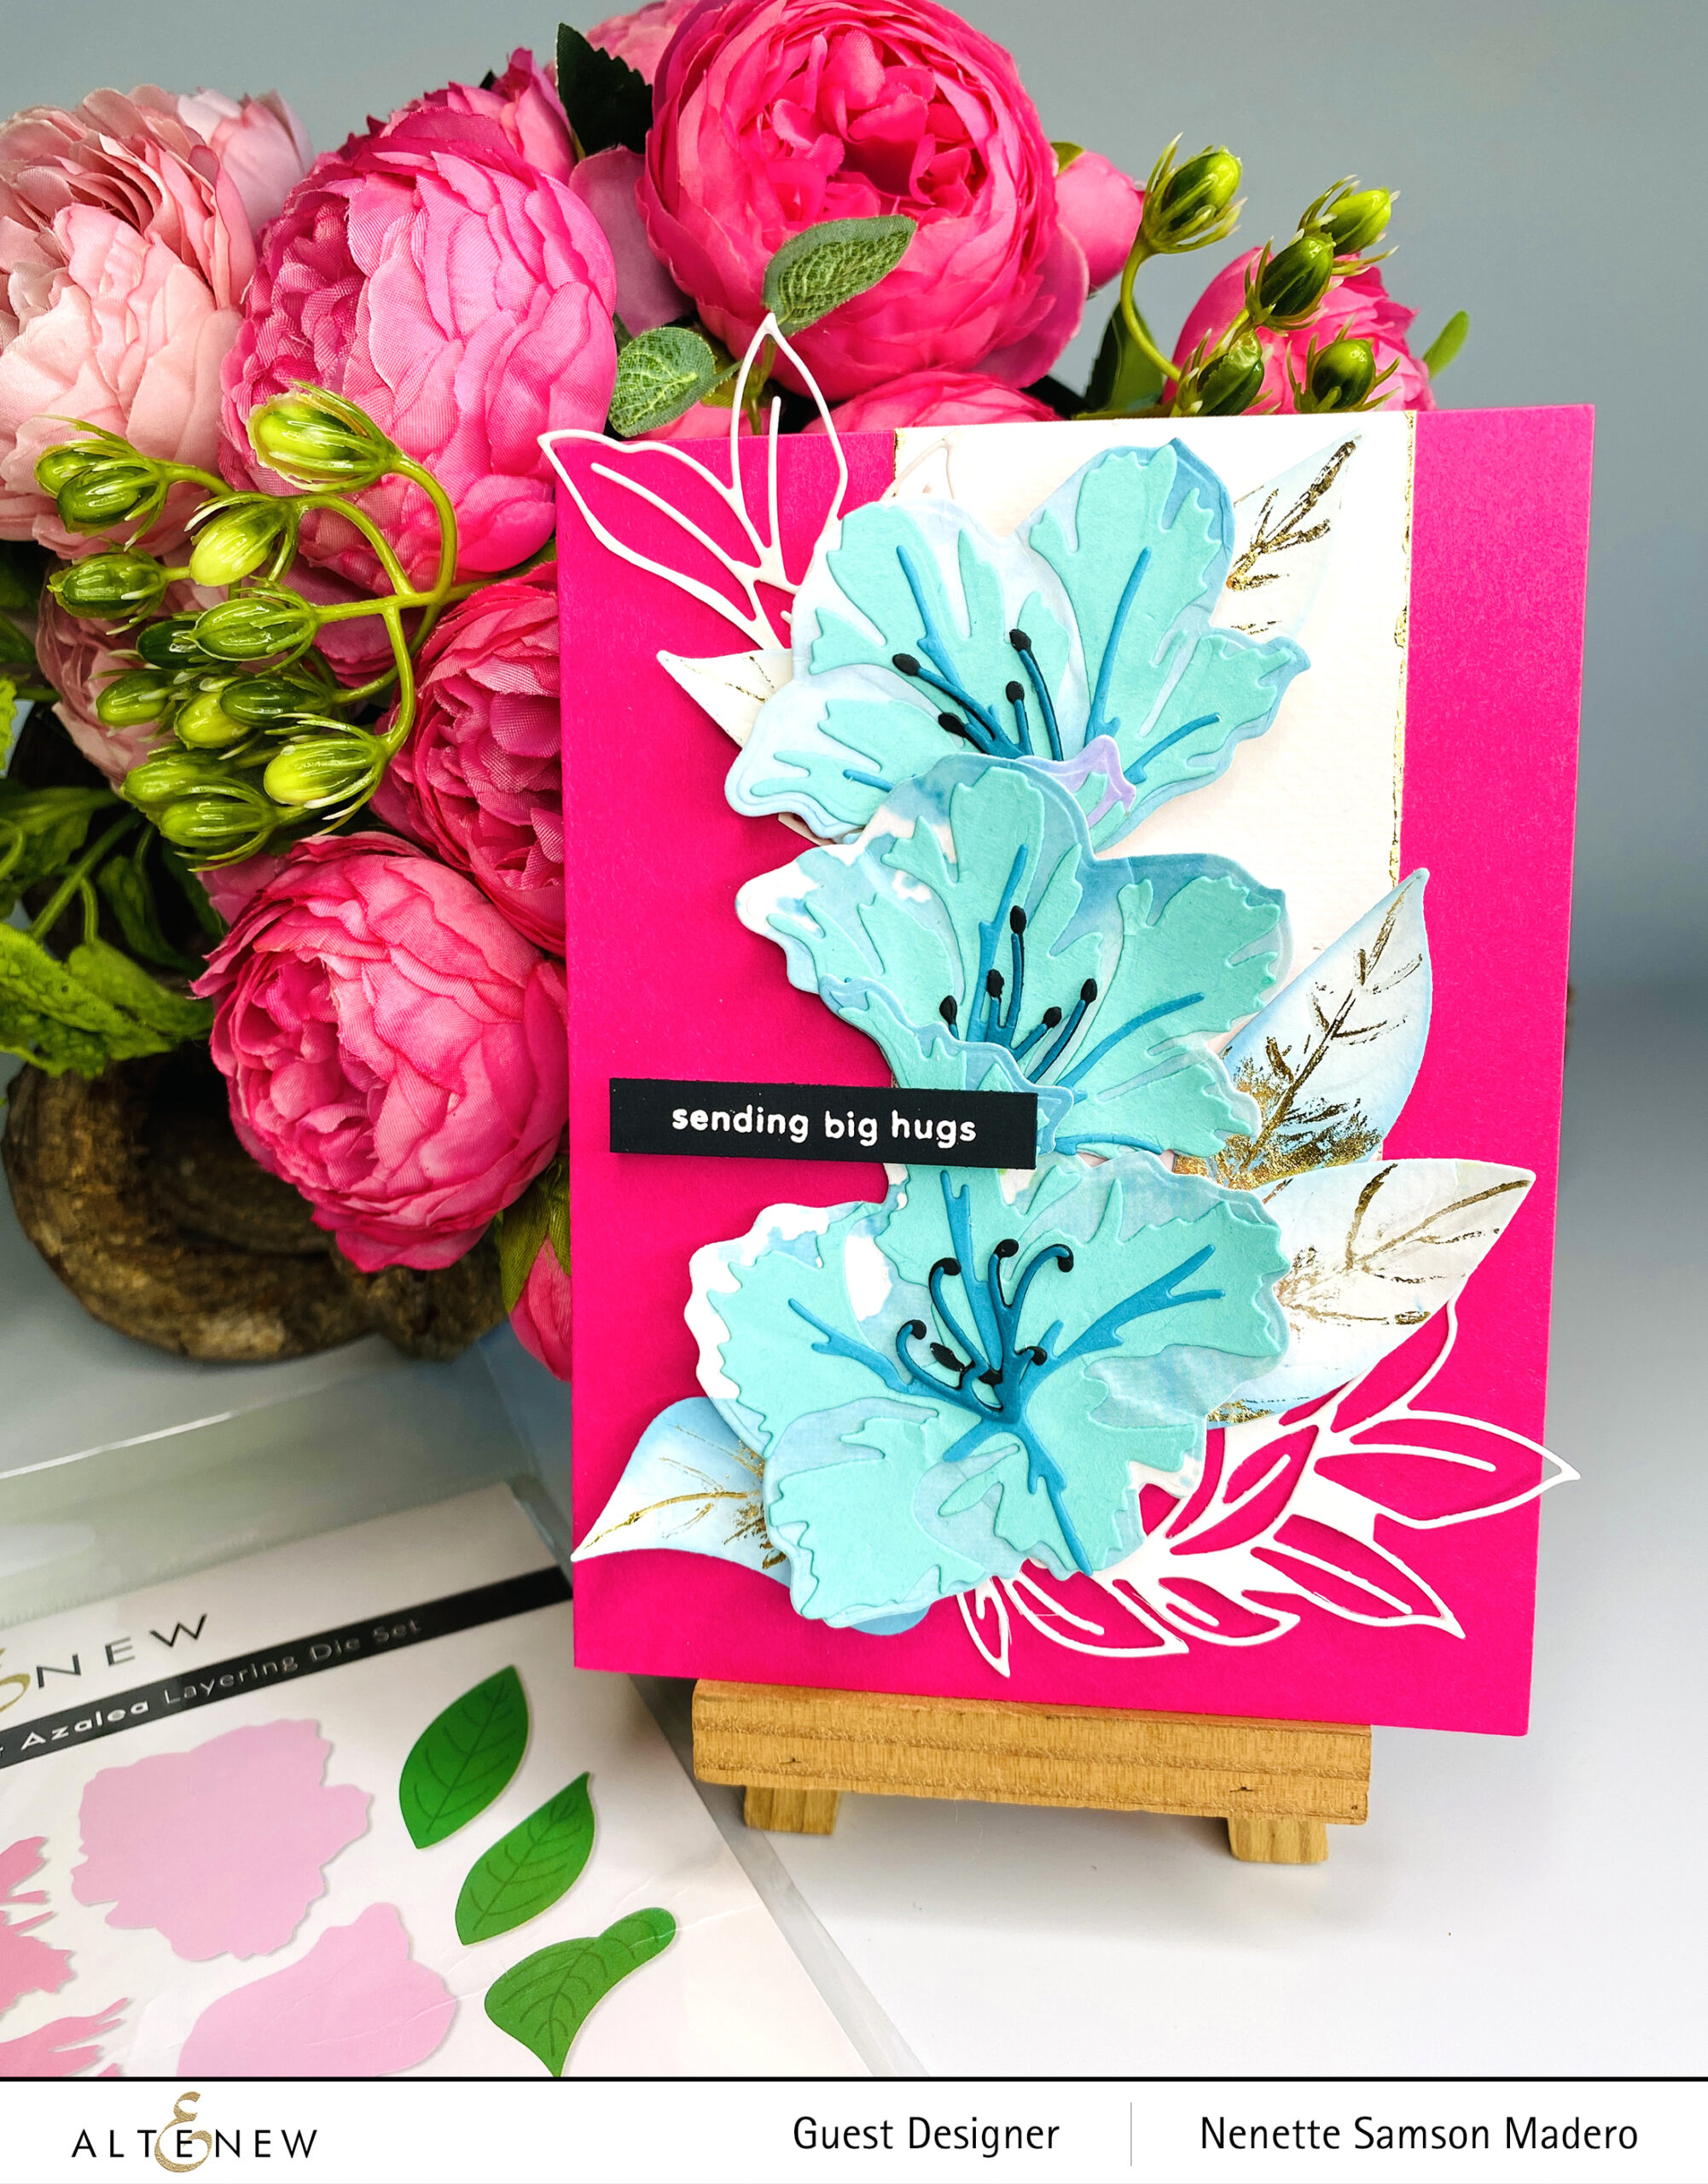
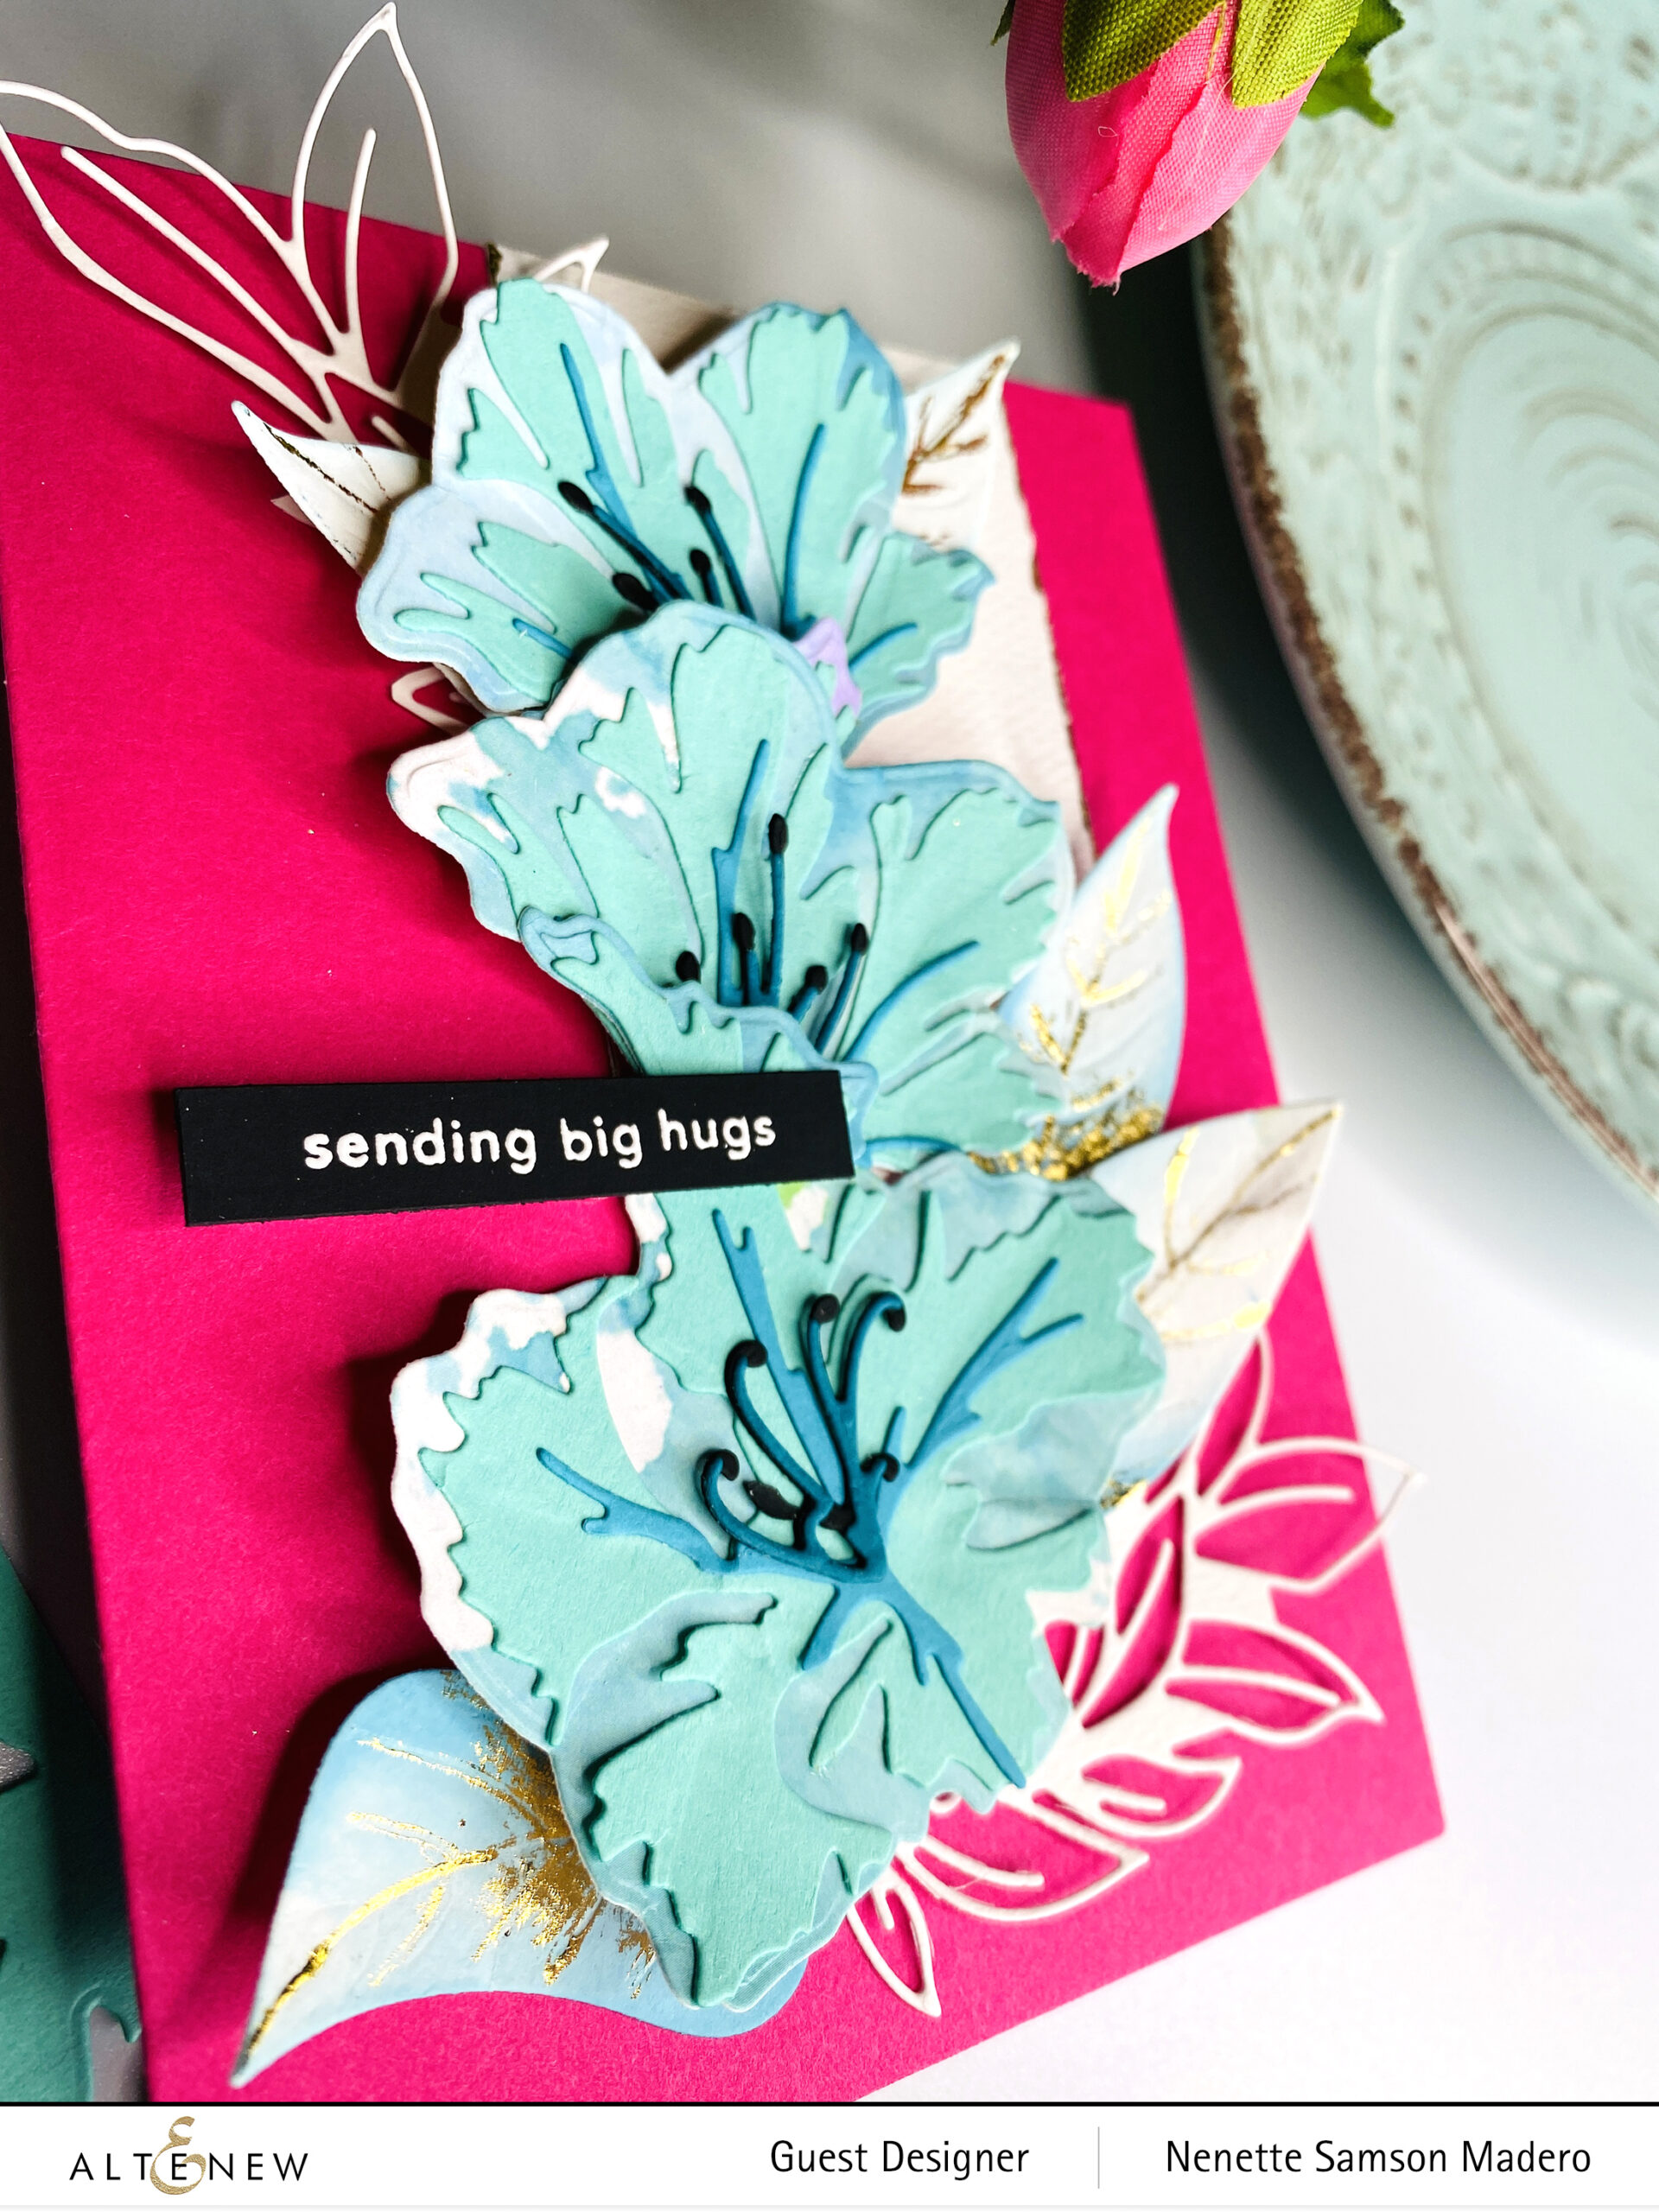
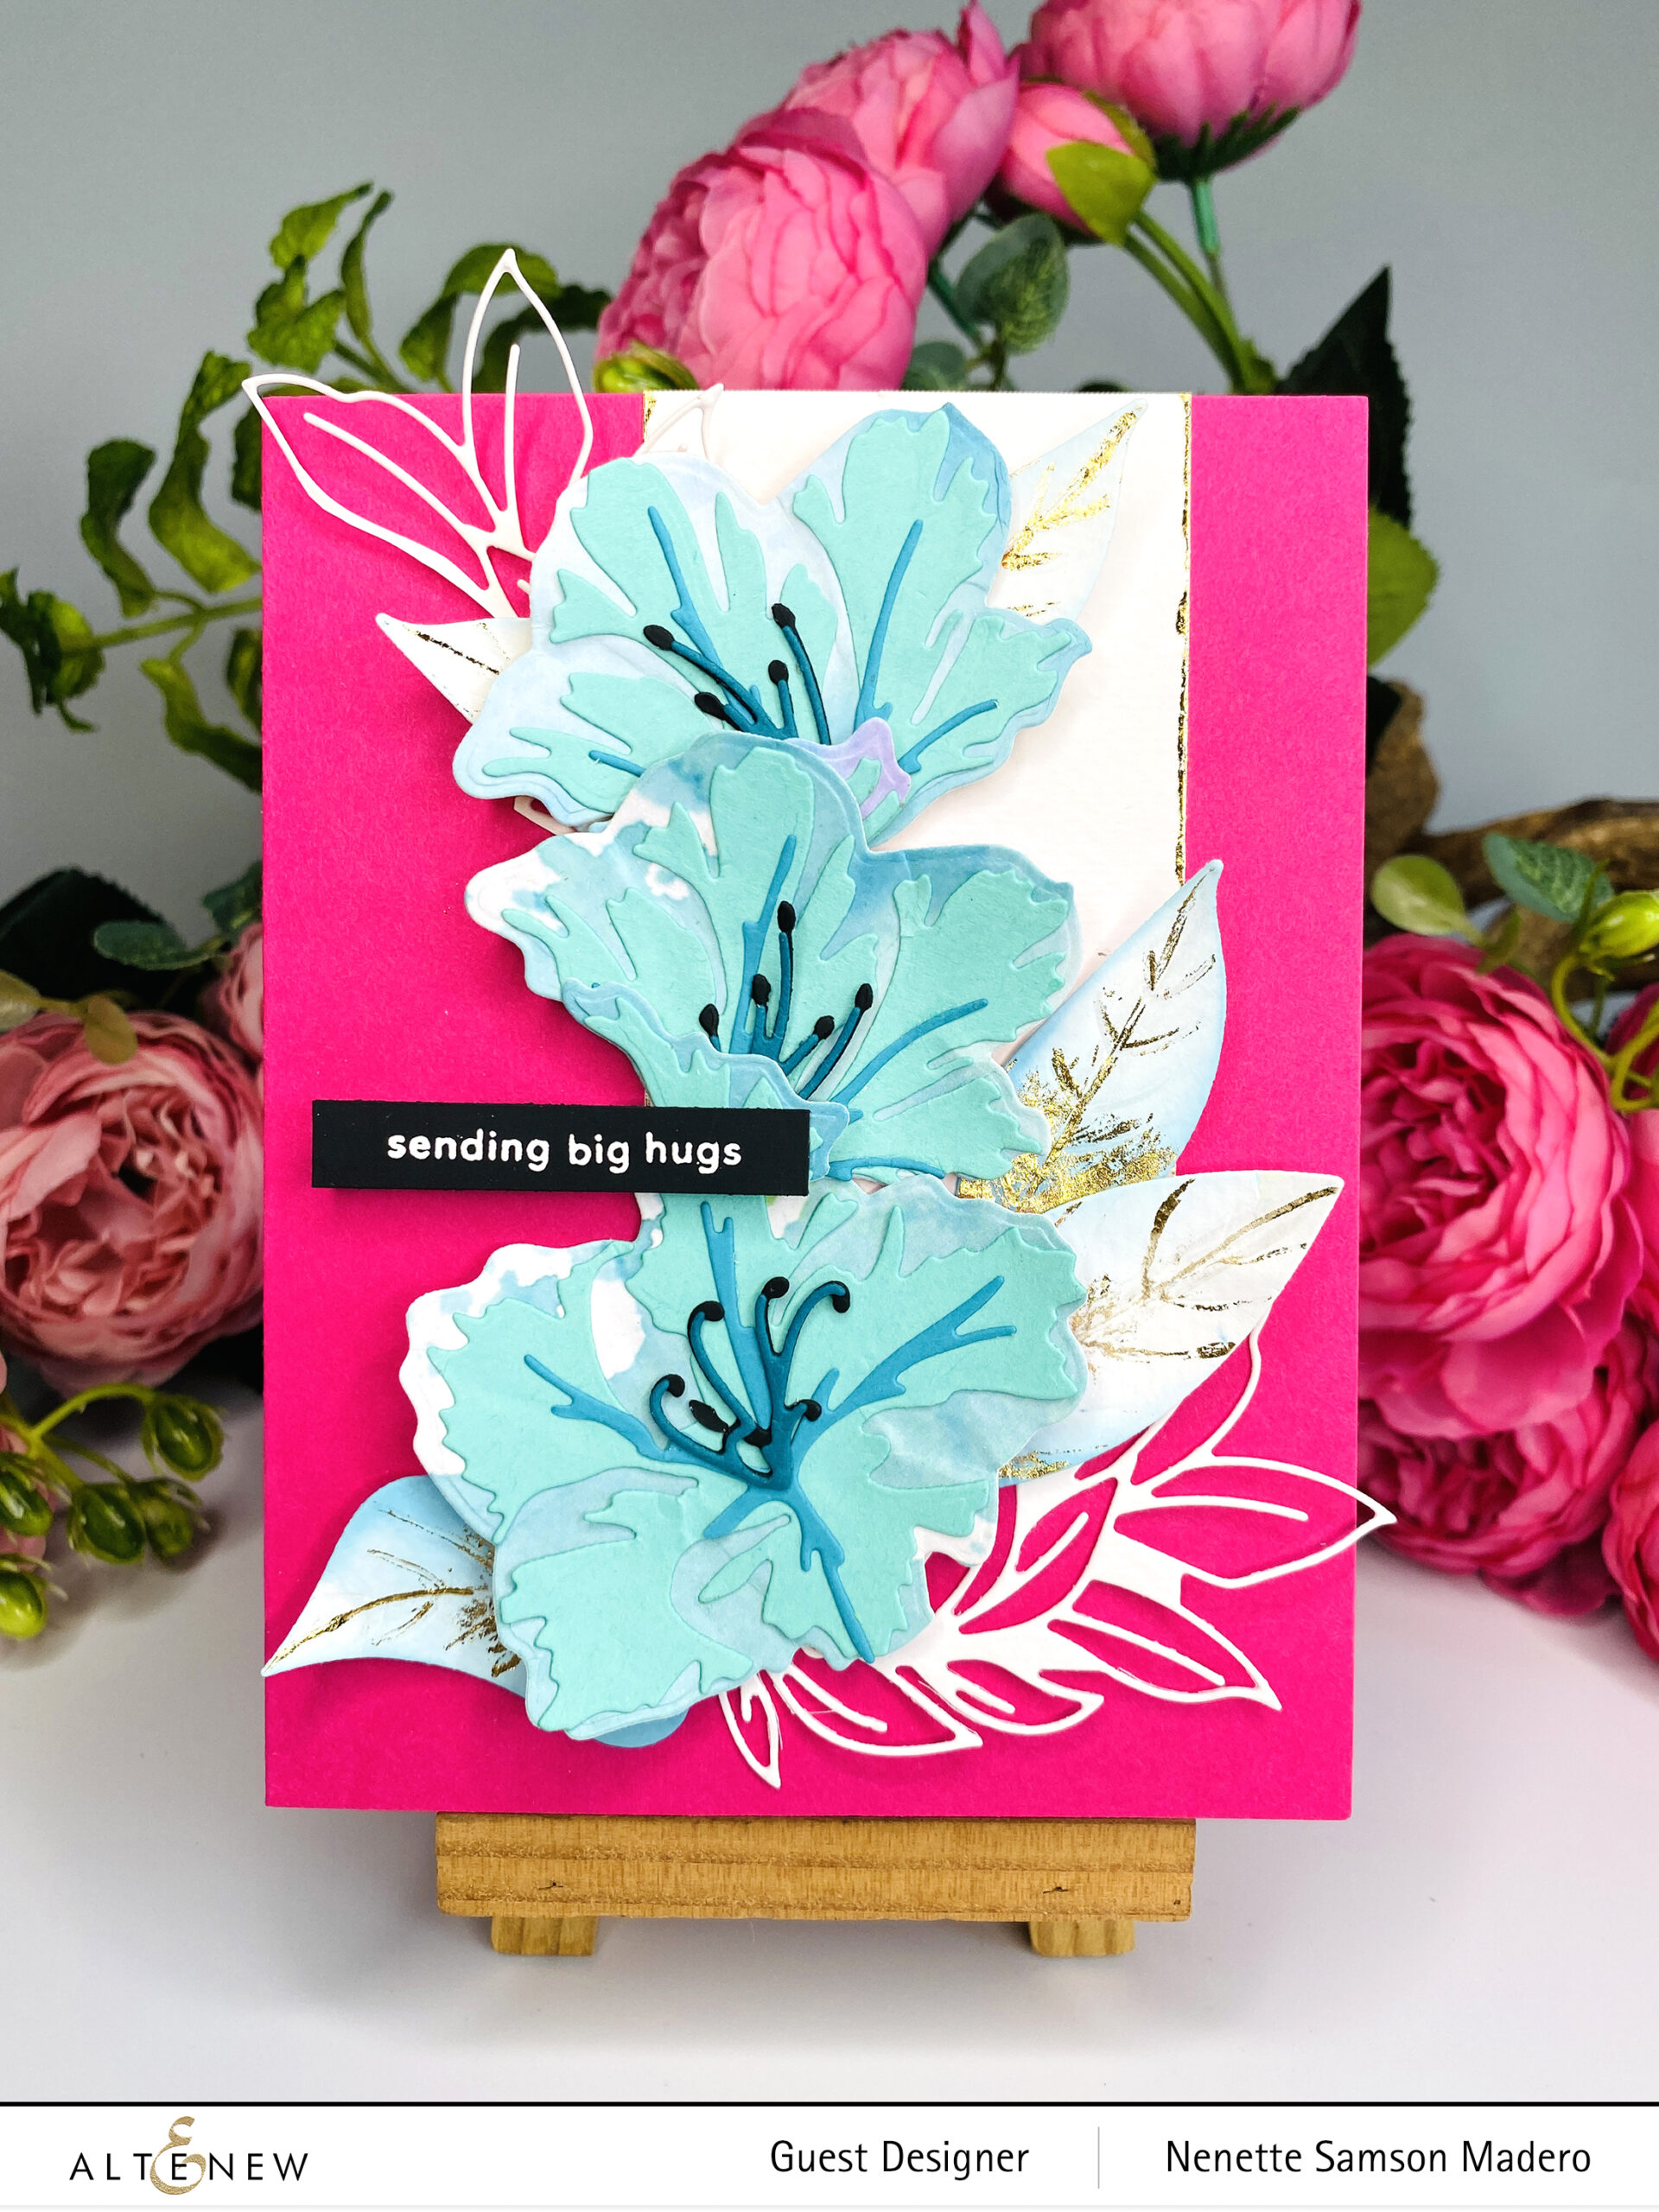
Here’s my card using this die set.

Sending Big Hugs

STEPS:

  1. Die cut gradient cardstocks Sea Shore and Gel Printing: Soft Washes using the Craft-a-Flower: Sunburst Azalea.
  2. Partially die cut white cardstock using the Decorative Tags die. Die cut an extra for the leaves.
  3. Use Distress Oxides Broken China and Tumbled Glass to color the edges of the die cut leaves.
  4. Add Craft Gilding glue to certain areas and add gold leaf.
  5. Assemble the card.
Tip: Partial die cutting can expand the use of your dies. By doing so, I was able to create a longer panel to fit the card front.

GIVEAWAYS

$200 in total prizes! To celebrate this release, Altenew is giving away a $50 gift certificate to 2 lucky winners and a $20 gift certificate to 5 winners! Please leave a comment on the Altenew Card Blog and/or each designer’s blog post on the blog hop list below by 03/13/2022 for a chance to win. Altenew will draw 7 random winners from the comments left on each stop of this blog hop and announce the winners on the Altenew Winners Page on 03/15/2022.

Next up:Rosie Neustaedter. Thank you so much for dropping by! If you like what you see, please subscribe to this blog and follow me on Instagram (@mylittleatticstudio). Don’t forget to leave a comment below to get a chance to win a prize from Altenew! Until my next post– stay safe and happy crafting!
Altenew Bouquet Basket Mini Stamp Release

Altenew Bouquet Basket Mini Stamp Release
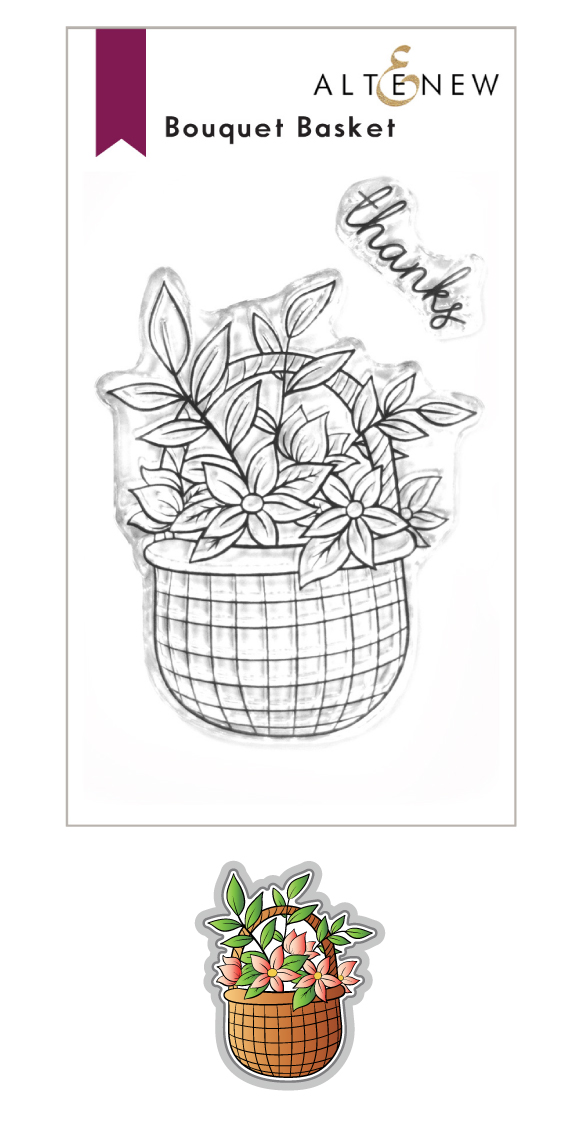
Bouquet Basket Stamp and Die

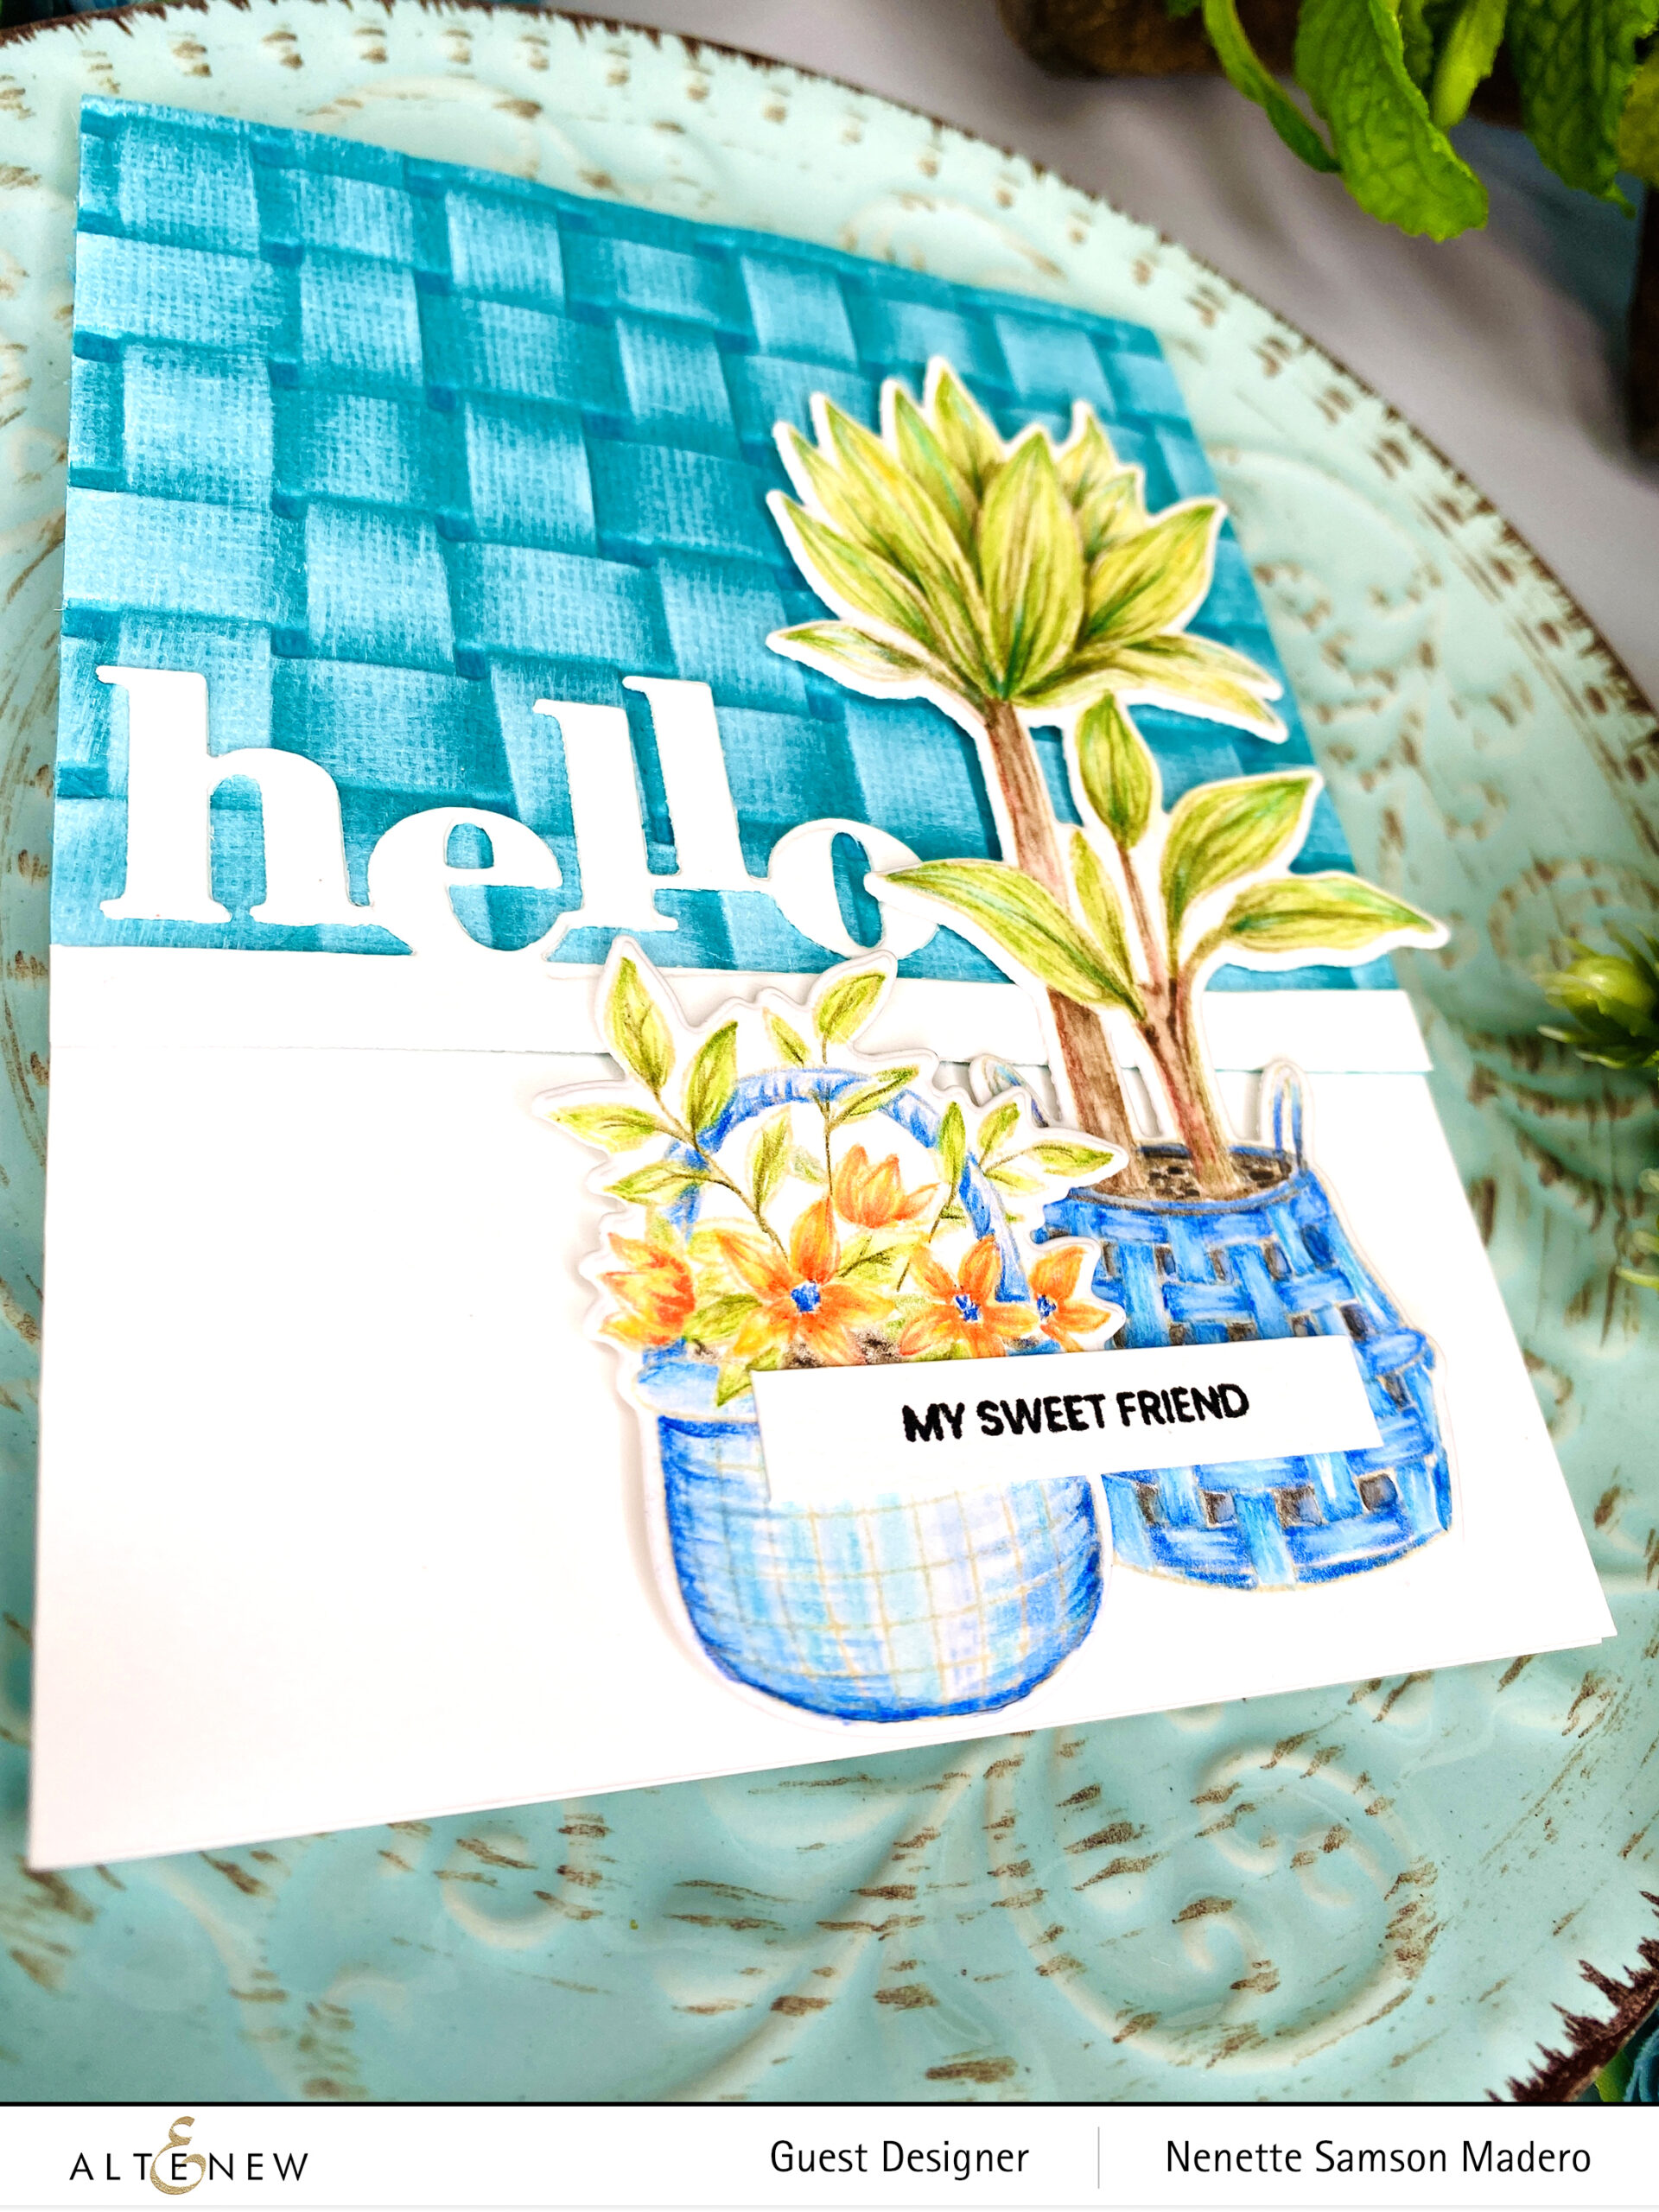
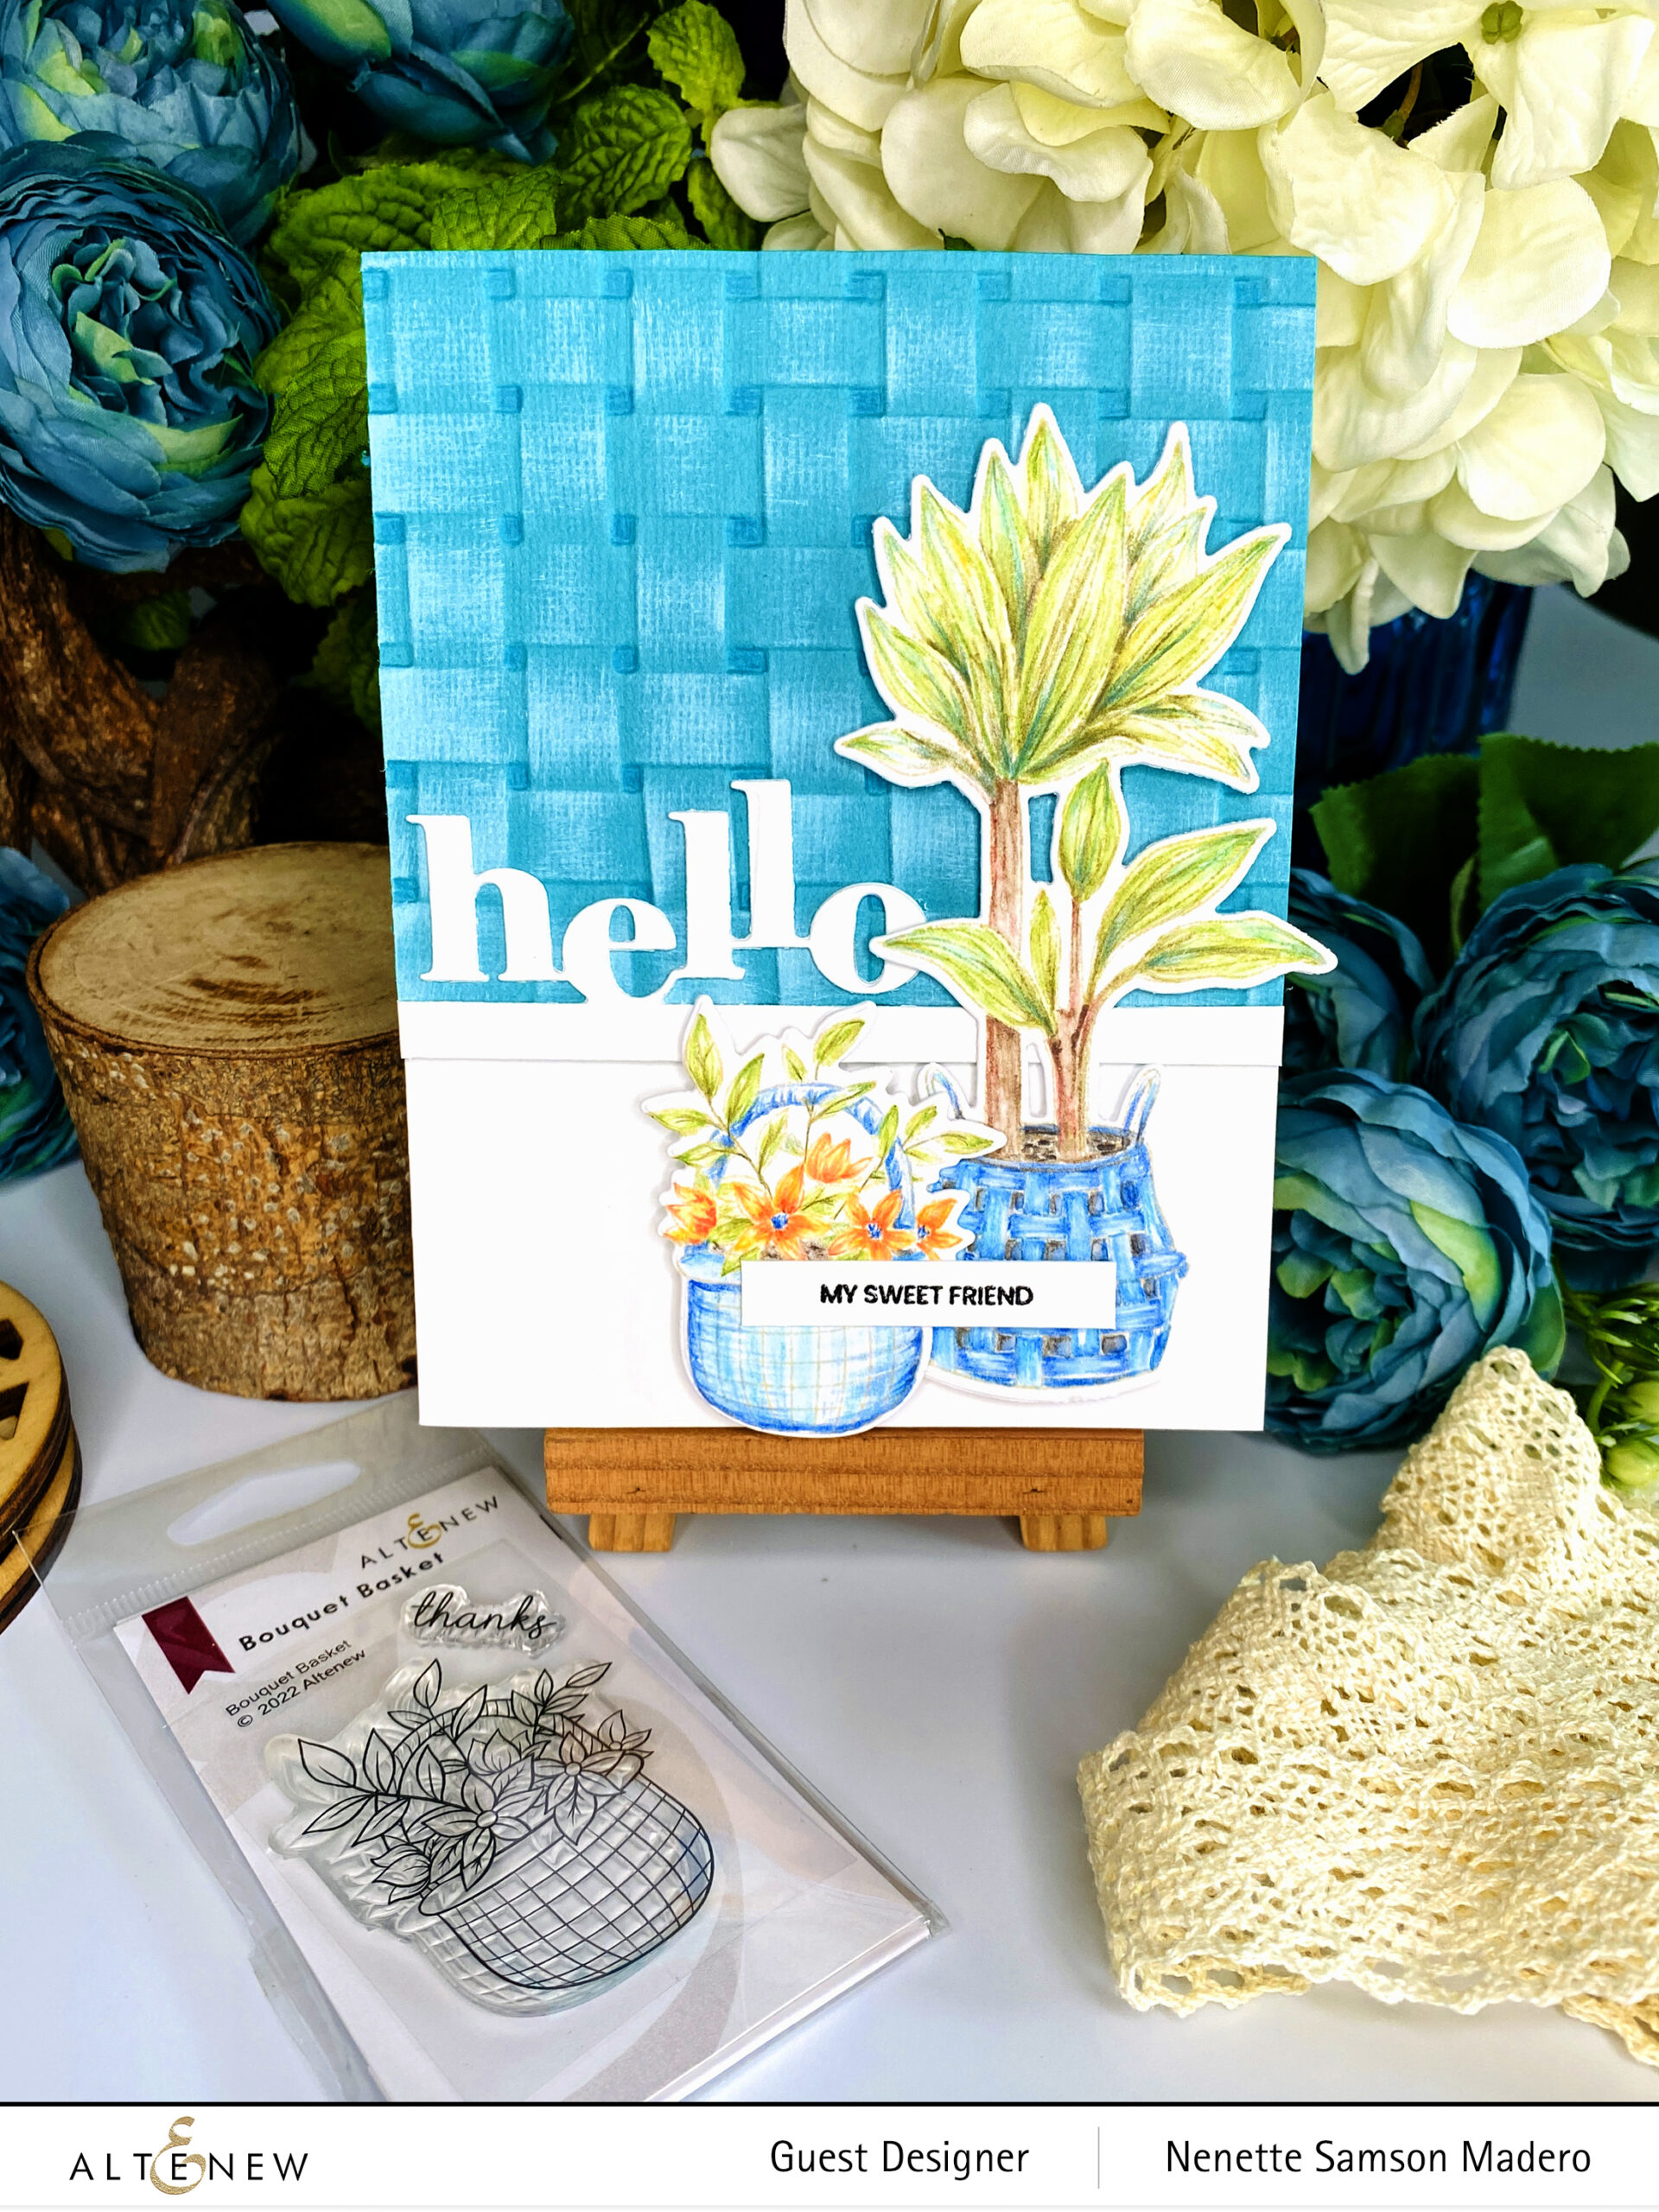
Hello, everyone! Sharing with you this super cute mini stamp set from Altenew called the Bouquet Stamp and die set. Below is a card I made using this adorable set.

I paired this up with the other gorgeous Pots and Plants stamp and die and the Woven Basket 3d embossing folder. The plants and basket were colored using watercolored pencils. In order to emphasize the weaving, I colored the recessed parts with a darker shade of alcohol ink marker and used a white pigment ink to brush the embossed surface. I used the Tiny Sentiments: Hello die as well.

I hope you liked this card I made using the Bouquet Basket Stamp and die set. Make sure to check out the Altenew blog for more cards created by the other designers! Thanks for dropping by and happy crafting! <3

Altenew March 2022 Folktales & Stories Collection Release Blog Hop + Giveaway ($300 in total prizes)

Altenew March 2022 Folktales & Stories Collection Release Blog Hop + Giveaway ($300 in total prizes)
FOLKTALES AND STORIES RELEASE

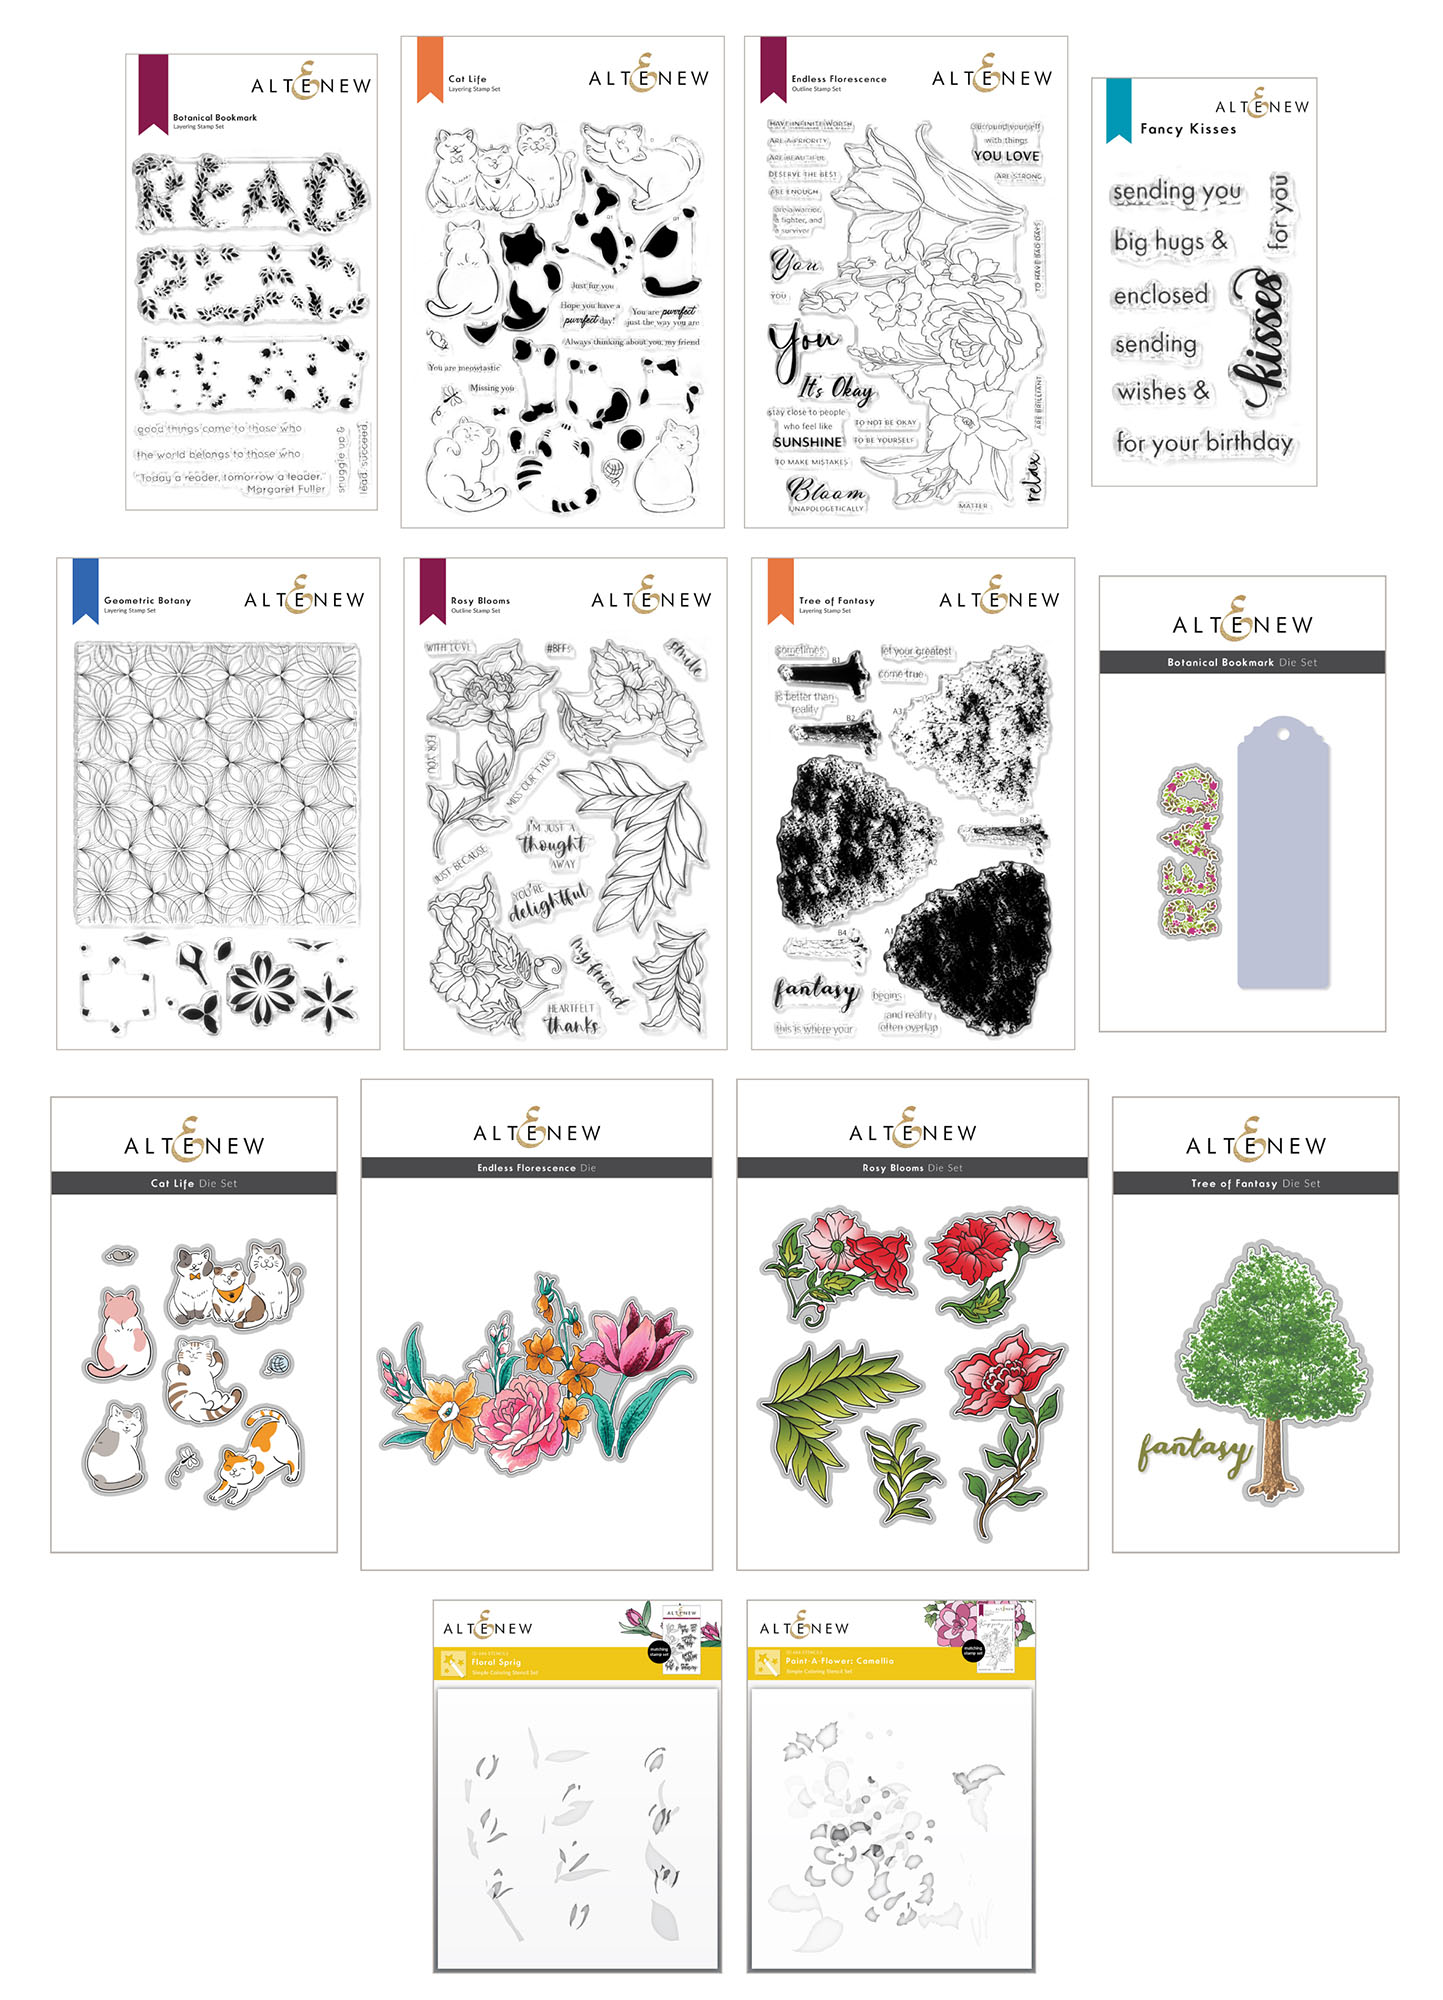
Hello, everyone! Welcome to my blog! If you just came from Lilith Eeckels, then you’re on the right track. For the complete information about this release, please visit the Altenew blog. I’m so excited to share with you what I created because there were many beautiful products from the NEW RELEASE to work with!!! I made a number of cards and I hope you will like them.

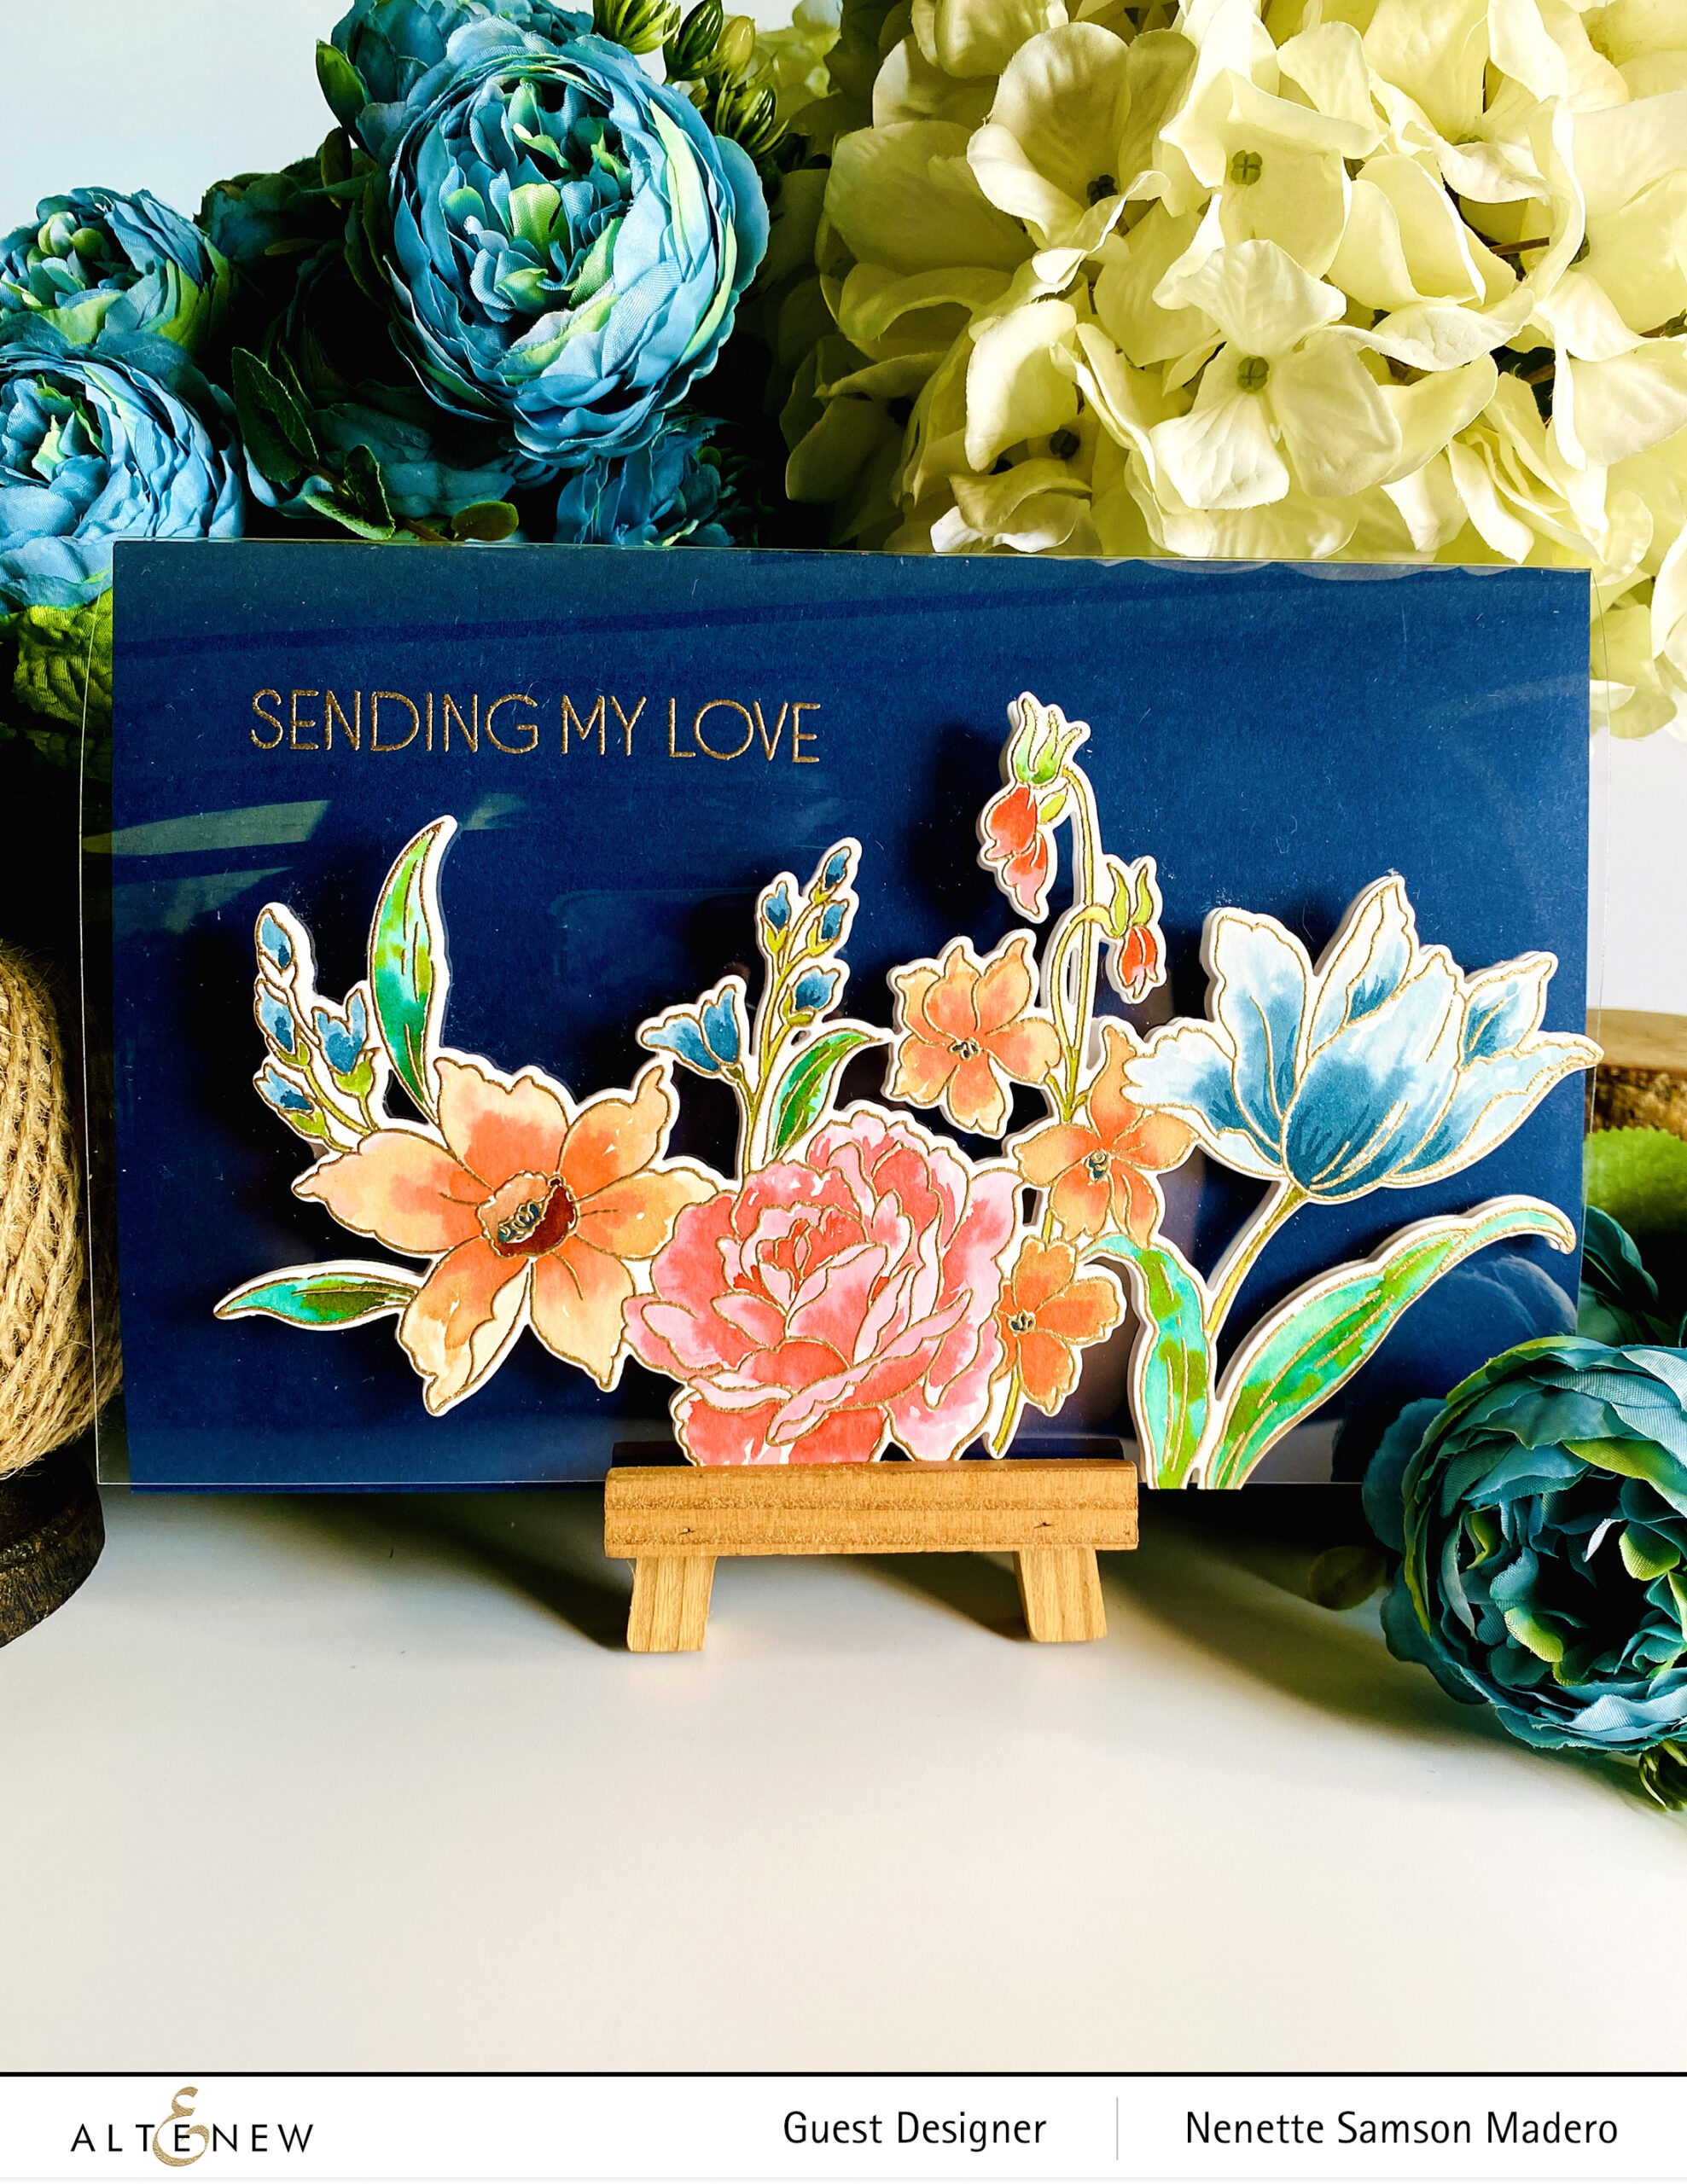
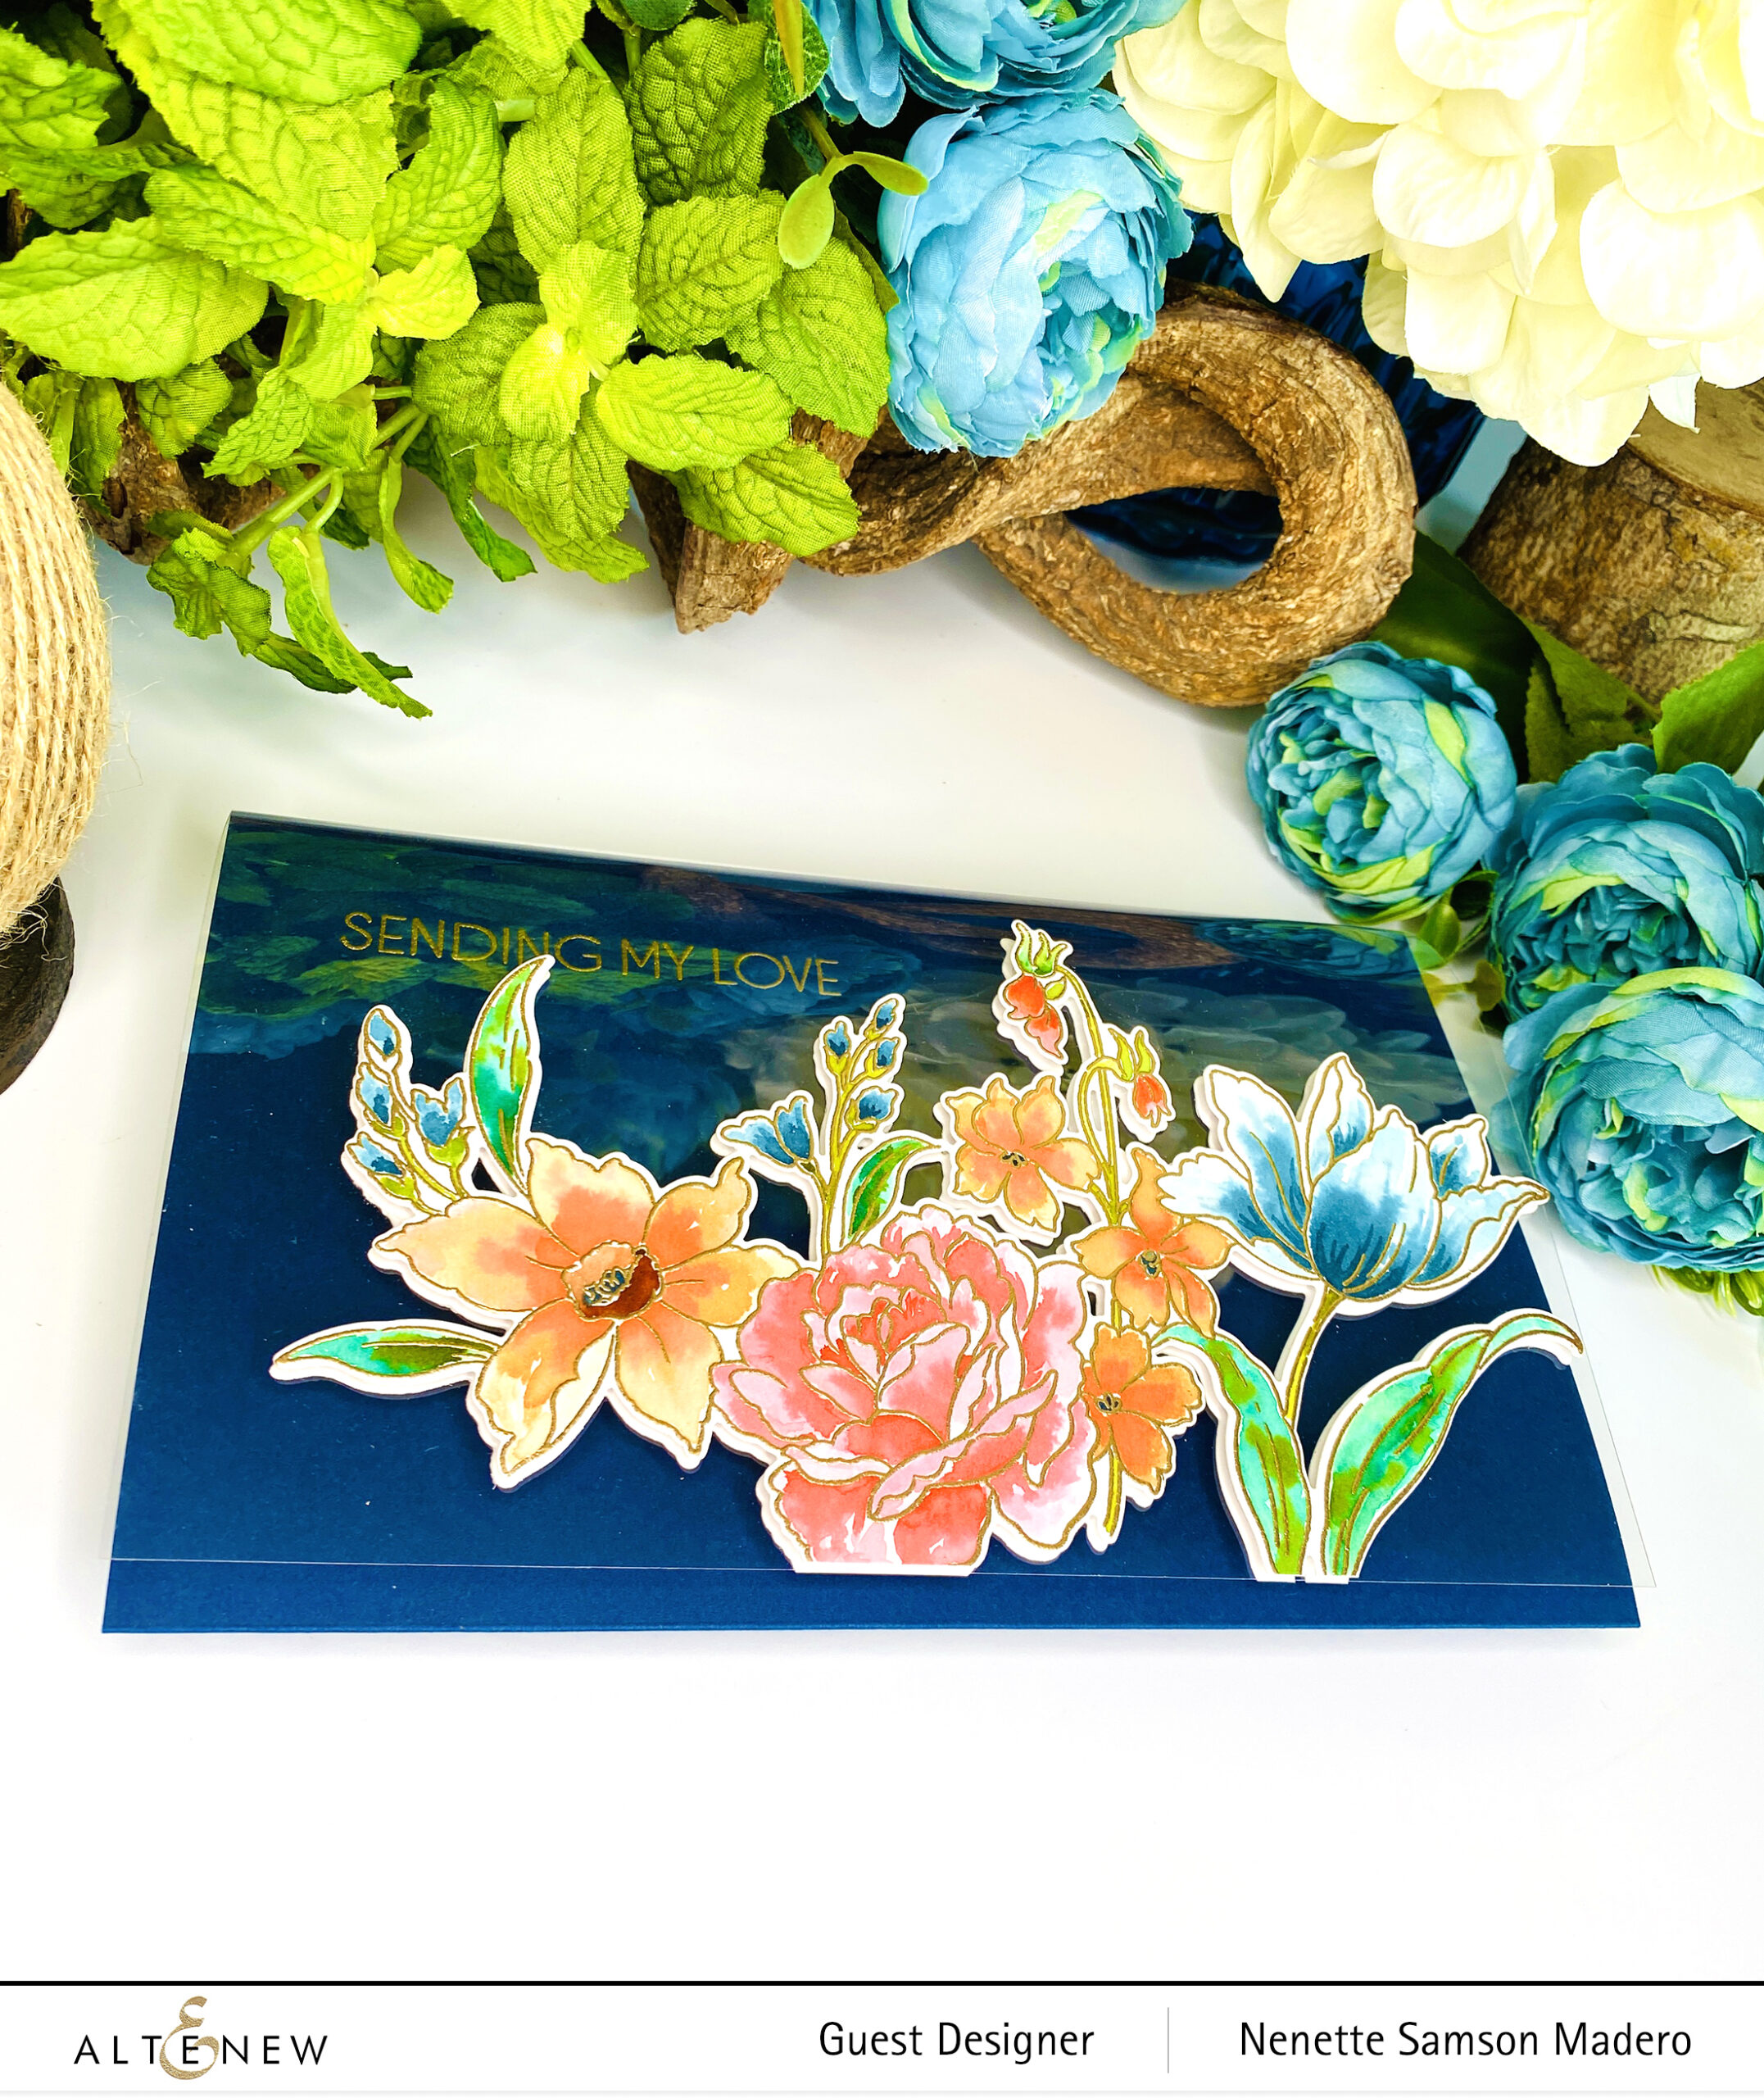
SENDING MY LOVE

STEPS:

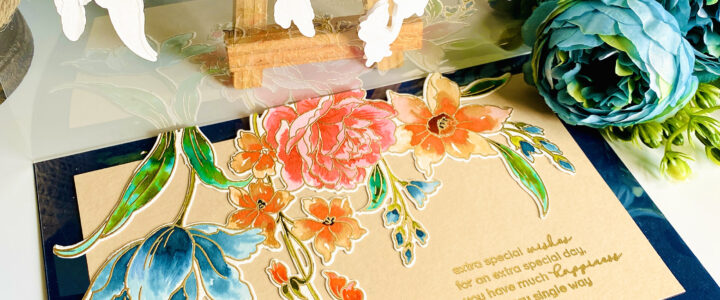
  1. Emboss the image from the Endless Florescence Stamp twice on Neenah Solar White CS using Rose Gold Embossing Powder.
  2. Watercolor the images using the following Watercolor brush markers— Paperbag, Expresso, Emerald, Moss, Dusk, Persian Blue, Crimson and Rouge
  3. Die cut the watercolored images. Die cut an extra on plain white cardstock to cover the back of the image since the front panel is transparent.
  4. Create a trifold card using clear cardstock and Navy cardstock.
  5. Emboss the sentiments from Ornamental Bliss and Say It with Love Stamp sets using Rose Gold embossing powder.
  6. Assemble the card using foam squares and adhesive.

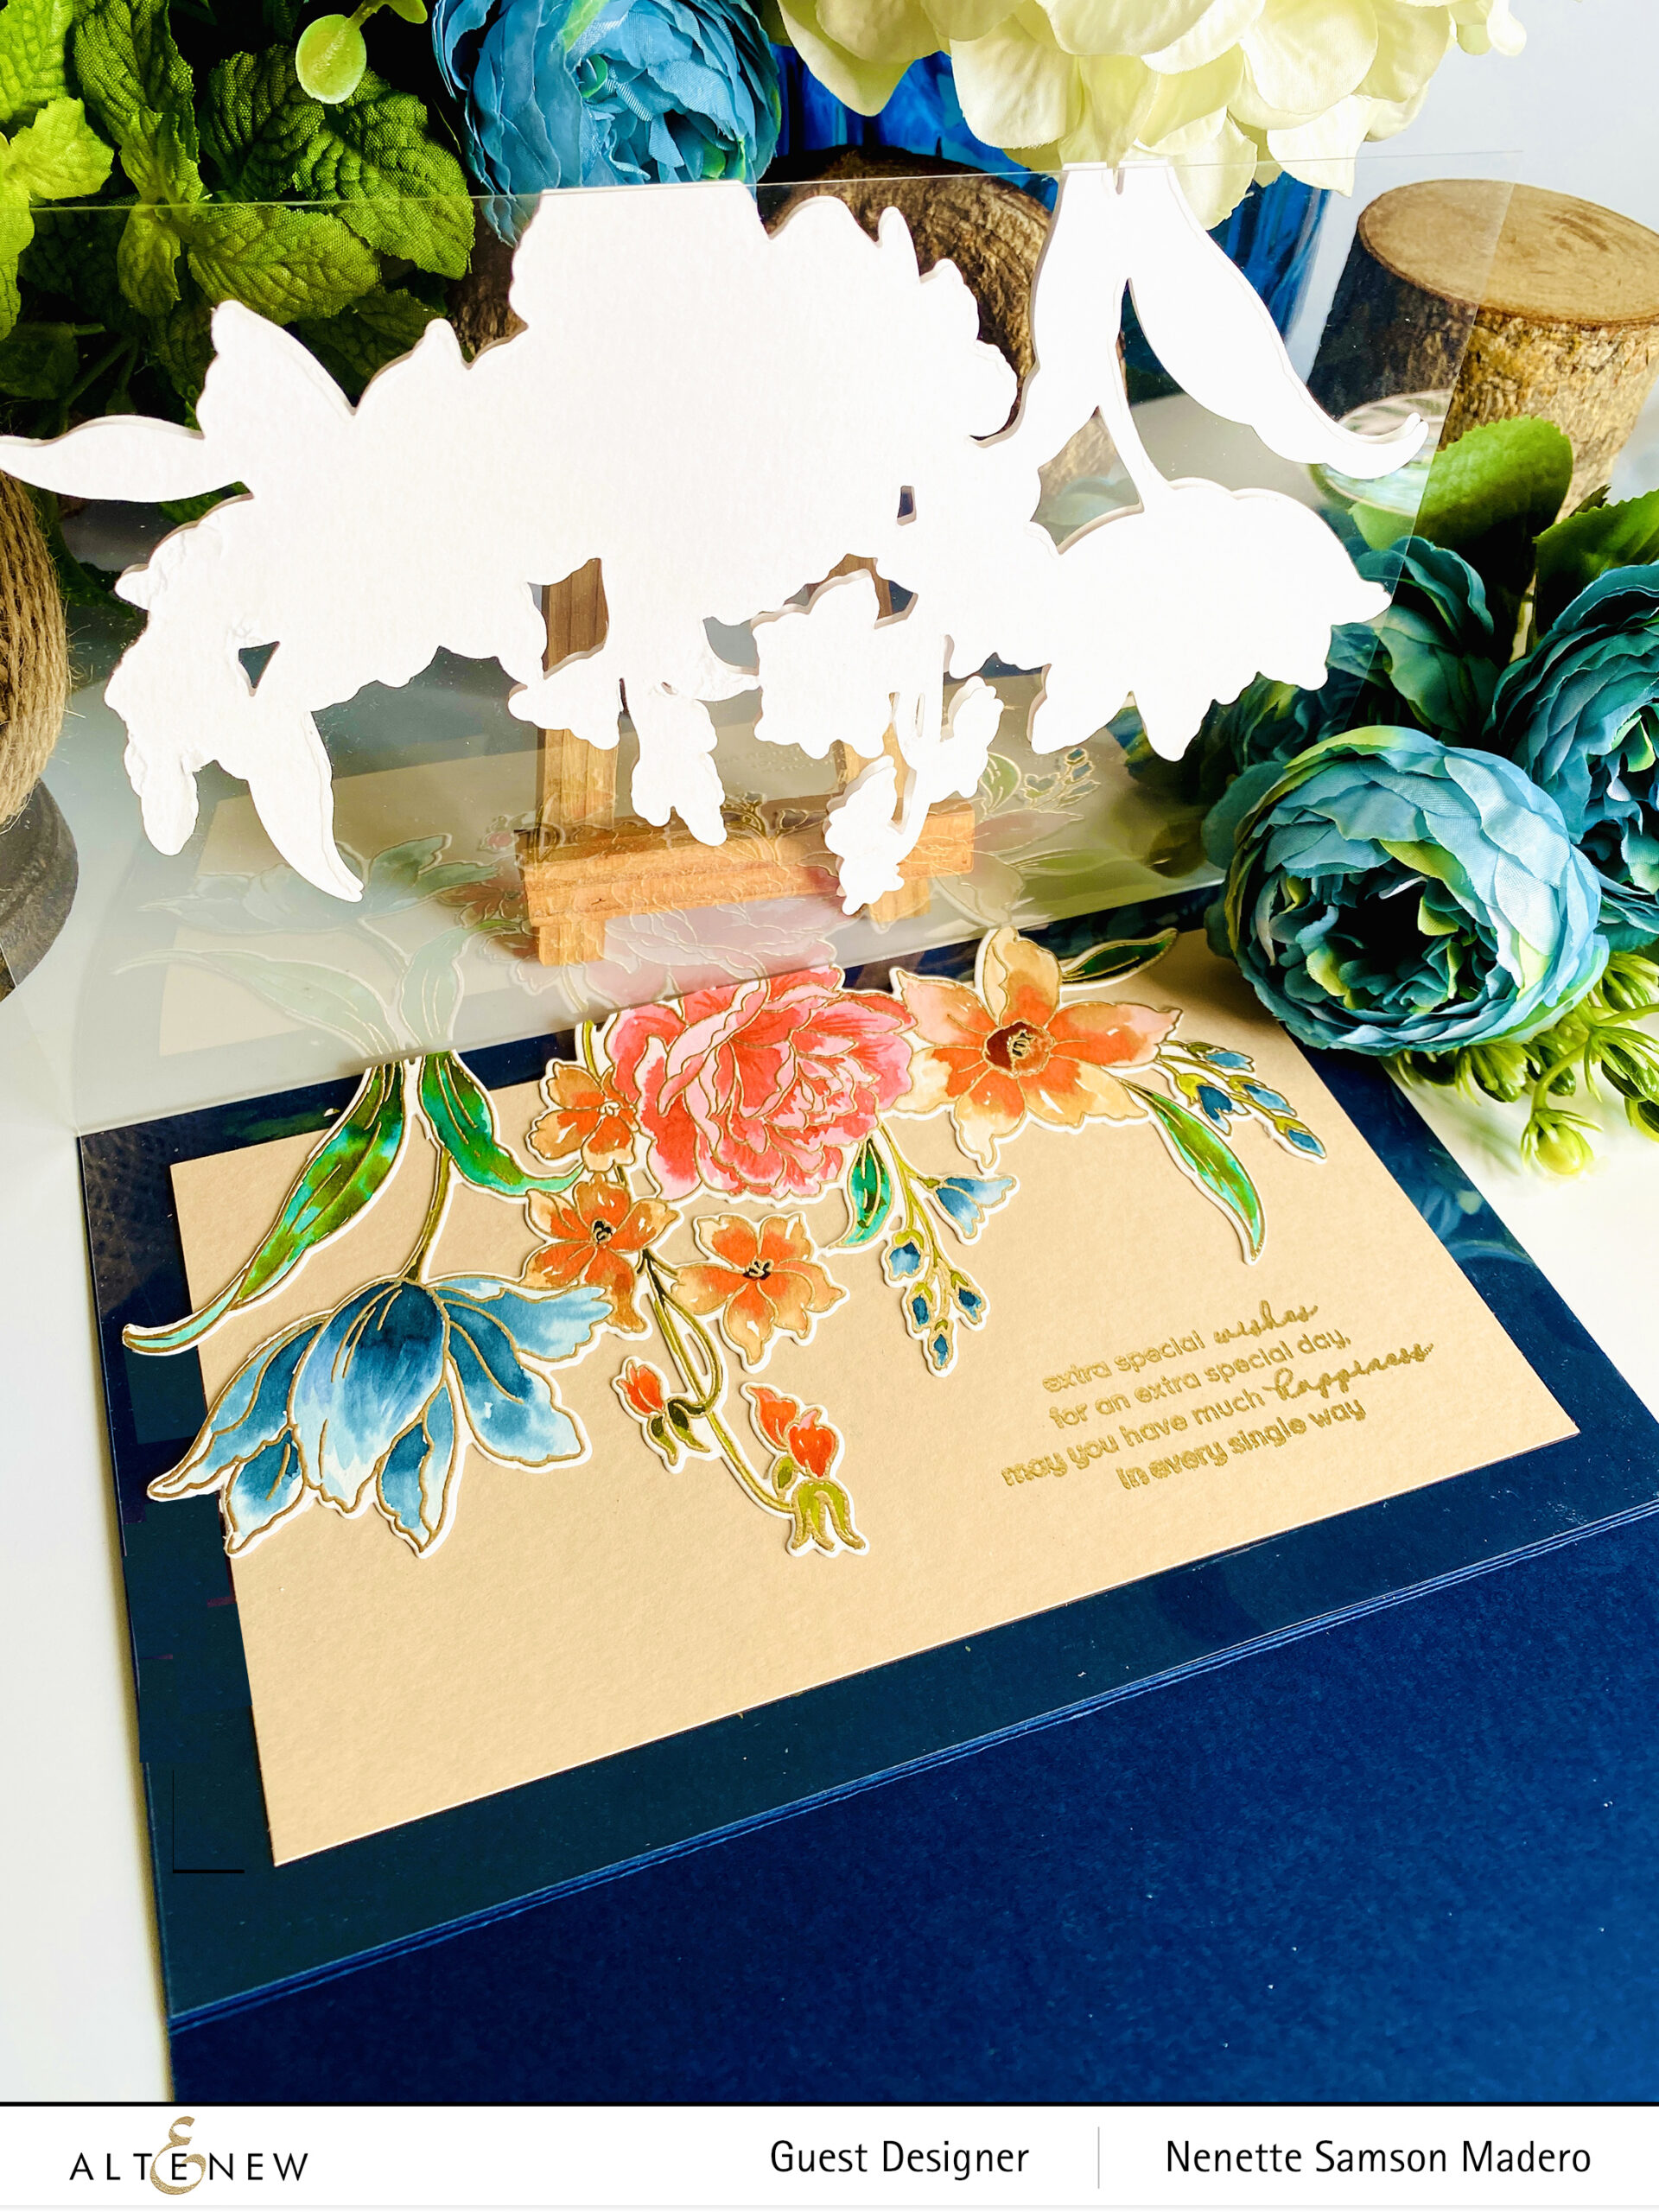
I love how this card turned out. It is a huge image and I didn’t want to cut it so I just made a 5×7 card. I also added a second image inside the card for an added surprise to the recipient.

TIP: When doing loose water-coloring, intentionally do not color some areas of the petals (leaving them white) to mimic highlights.

Add a plain die cut cardstock to the back of the clear cover panel to hide the glue/foam squares. I added another watercolored image inside the card to make it a little more special when the recipient opens it. <3

GOOD THINGS COME TO THOSE WHO READ and THE WORLD BELONGS TO THOSE WHO READ

STEPS:

  1. Stamp the different layers of the Botanical Bookmark and die cut.
  2. Paint a background using Watercolor brushmarkers in shades of blue and green and use the die to cut out a bookmark.
  3. Watercolor the strips of watercolor paper and die cut using the Creative Edges: Lace die.
  4. Cut 2 slits on the card front and insert the bookmark. Add the lace die cuts on both sides.
  5. Add strings to the end of the bookmark.

TIP: Add water splatters on the watercolored background and allow to sit for a few seconds then pat with a dry towel to create more texture.

I wanted to make interactive cards– cards and bookmarks in one.

HELLO I’M ONLY A TEXT AWAY AND HAPPY BIRTHDAY

STEPS:

  1. Partially stamp the Geometric Botany Stamp on Neenah Solar White CS. Emboss using Pure White embossing powder.
  2. Color using the following Artist markers– (Blue card) B002, B201, B204 and B227 (Green card) G503, G804, G554, G825, G915.
  3. Die cut the green card using the Fancy Hello die. Die cut another 4 on white cardstock and stack on top of each other .
  4. Emboss the sentiment from the Sentiment Strips 3 Stamp using Pure White embossing powder.
  5. For the blue card, die cut Happy Birthday from the Essential Sentiment Strips die 5 times. Color plain white paper using one of the blue alcohol ink markers and add to the back of the sentiment.
  6. Die cut the panel using the Mix and Match die.
  7. Assemble the cards using foam squares and adhesive.

TIP: The easiest way to color a background with lots of shapes is to use a monochromatic color scheme. Color all of the same shape at once them move on to the next shape using a different color.

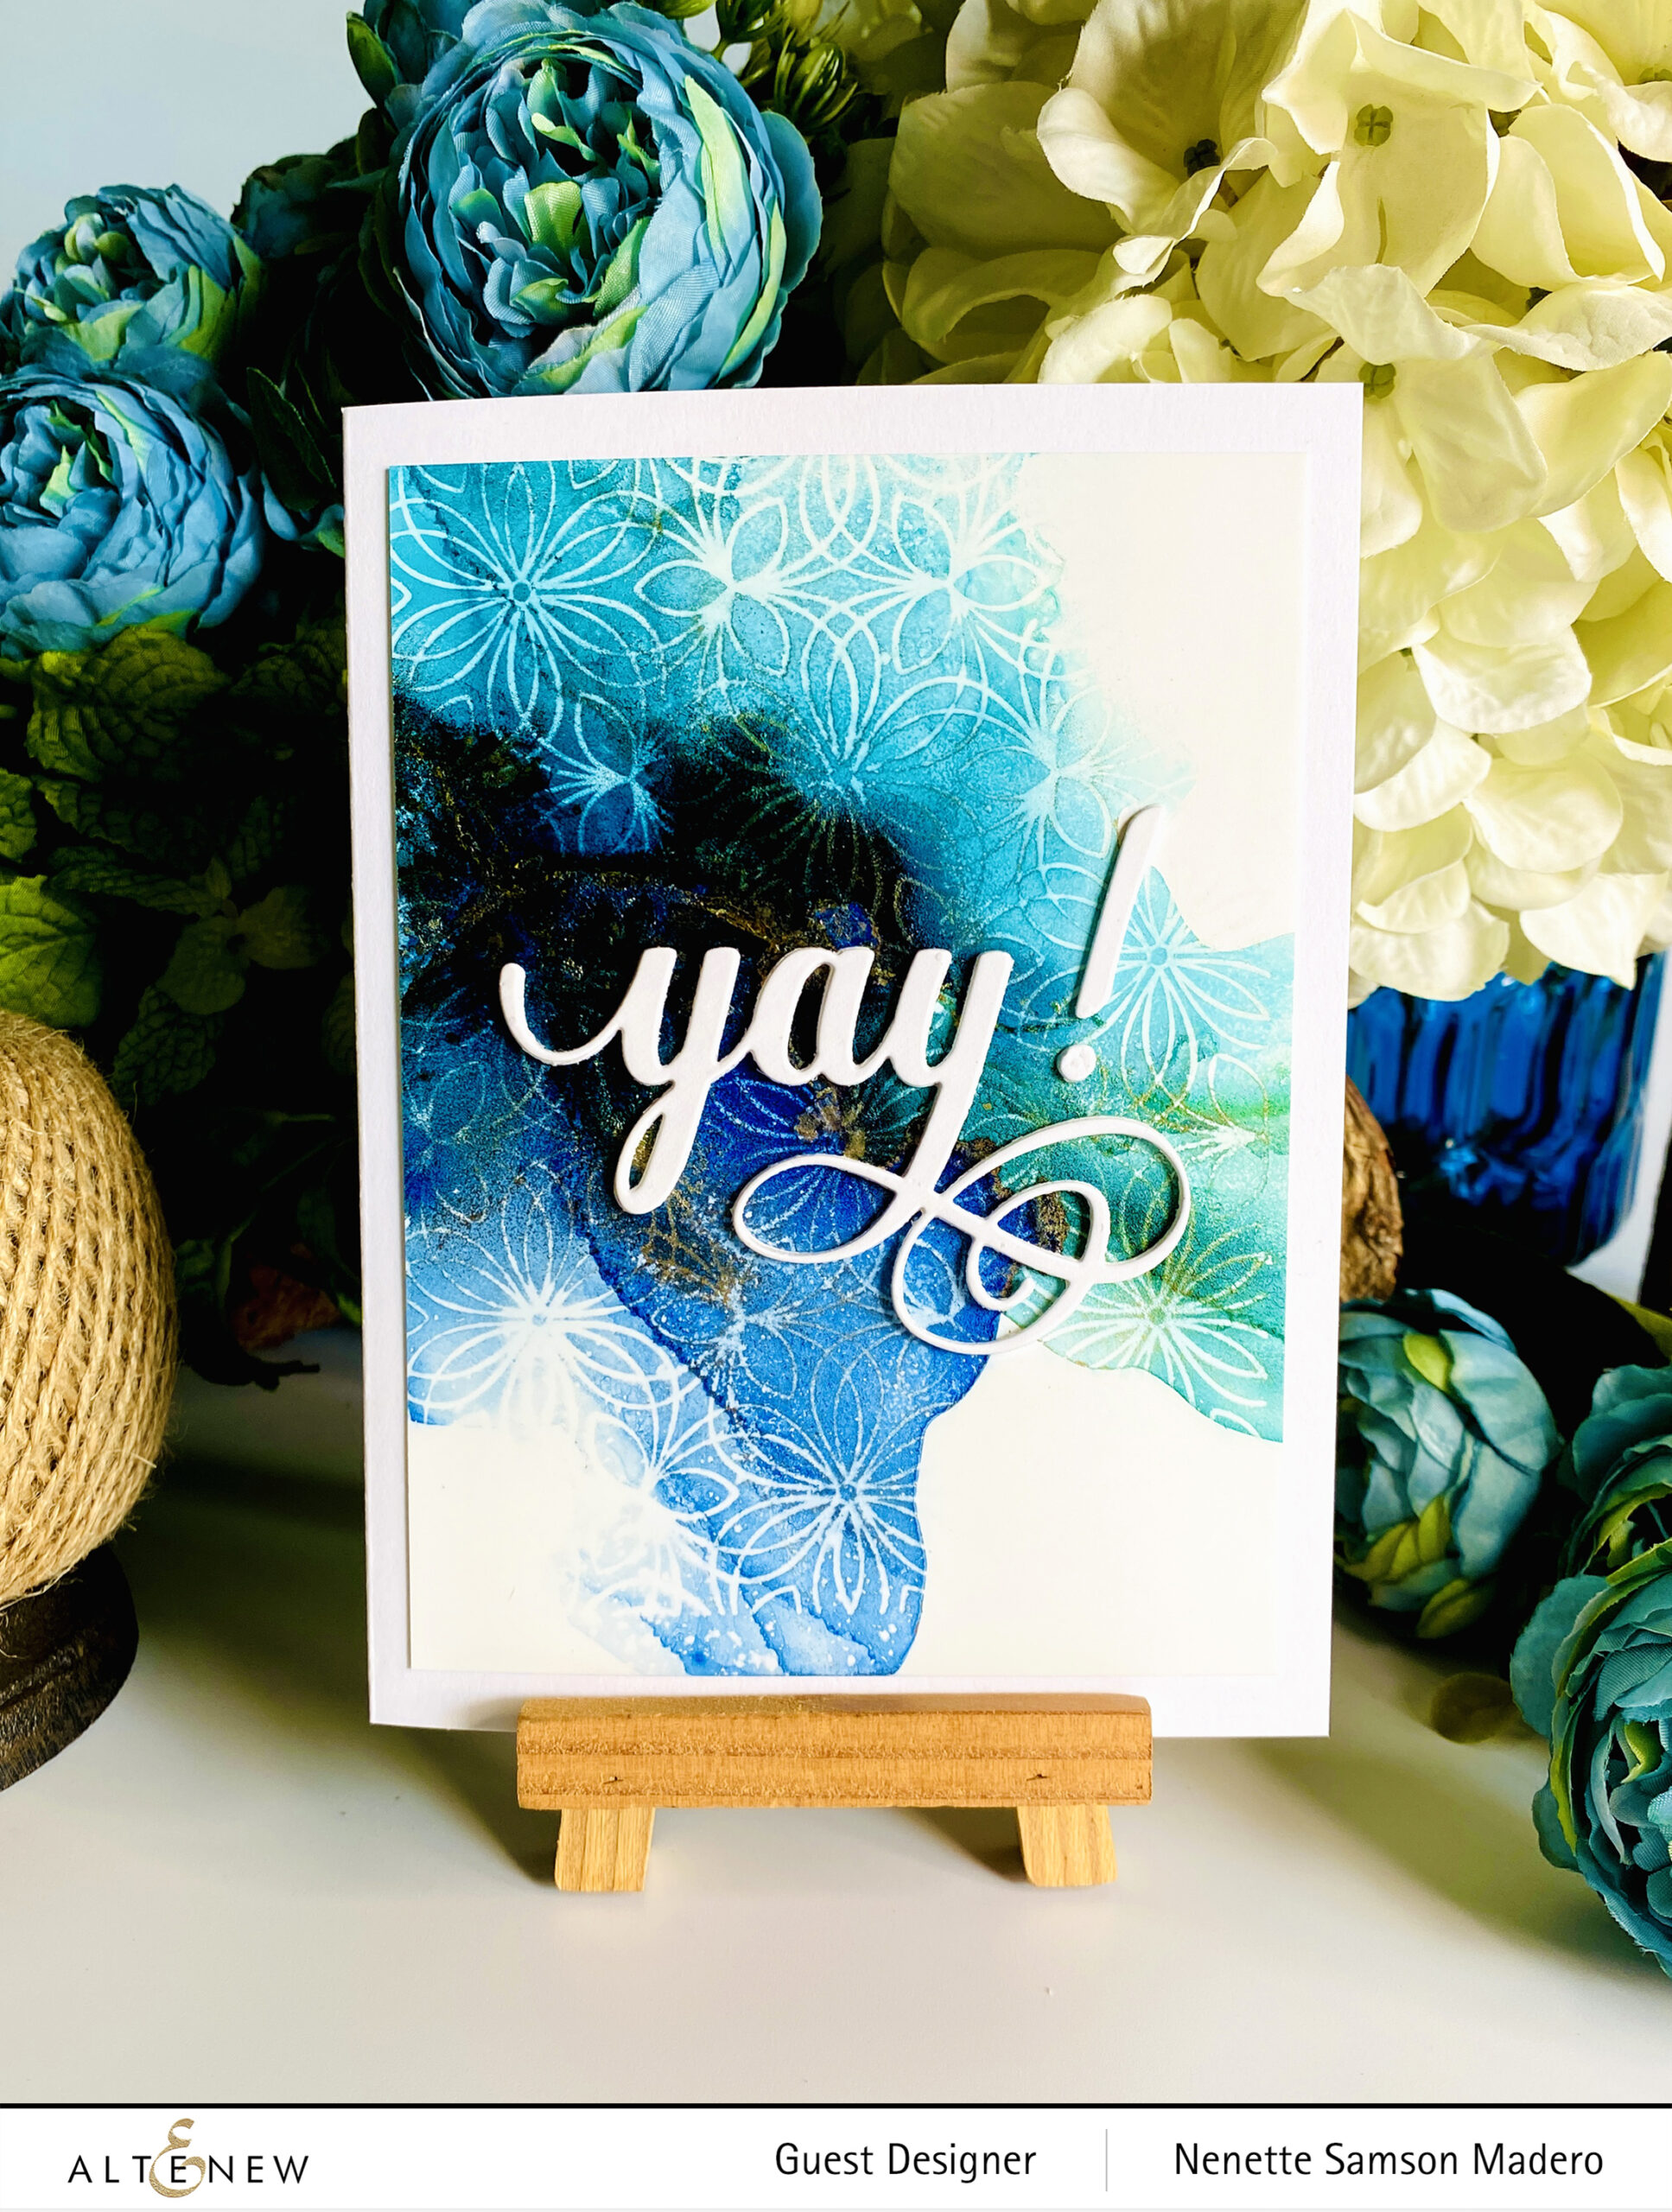
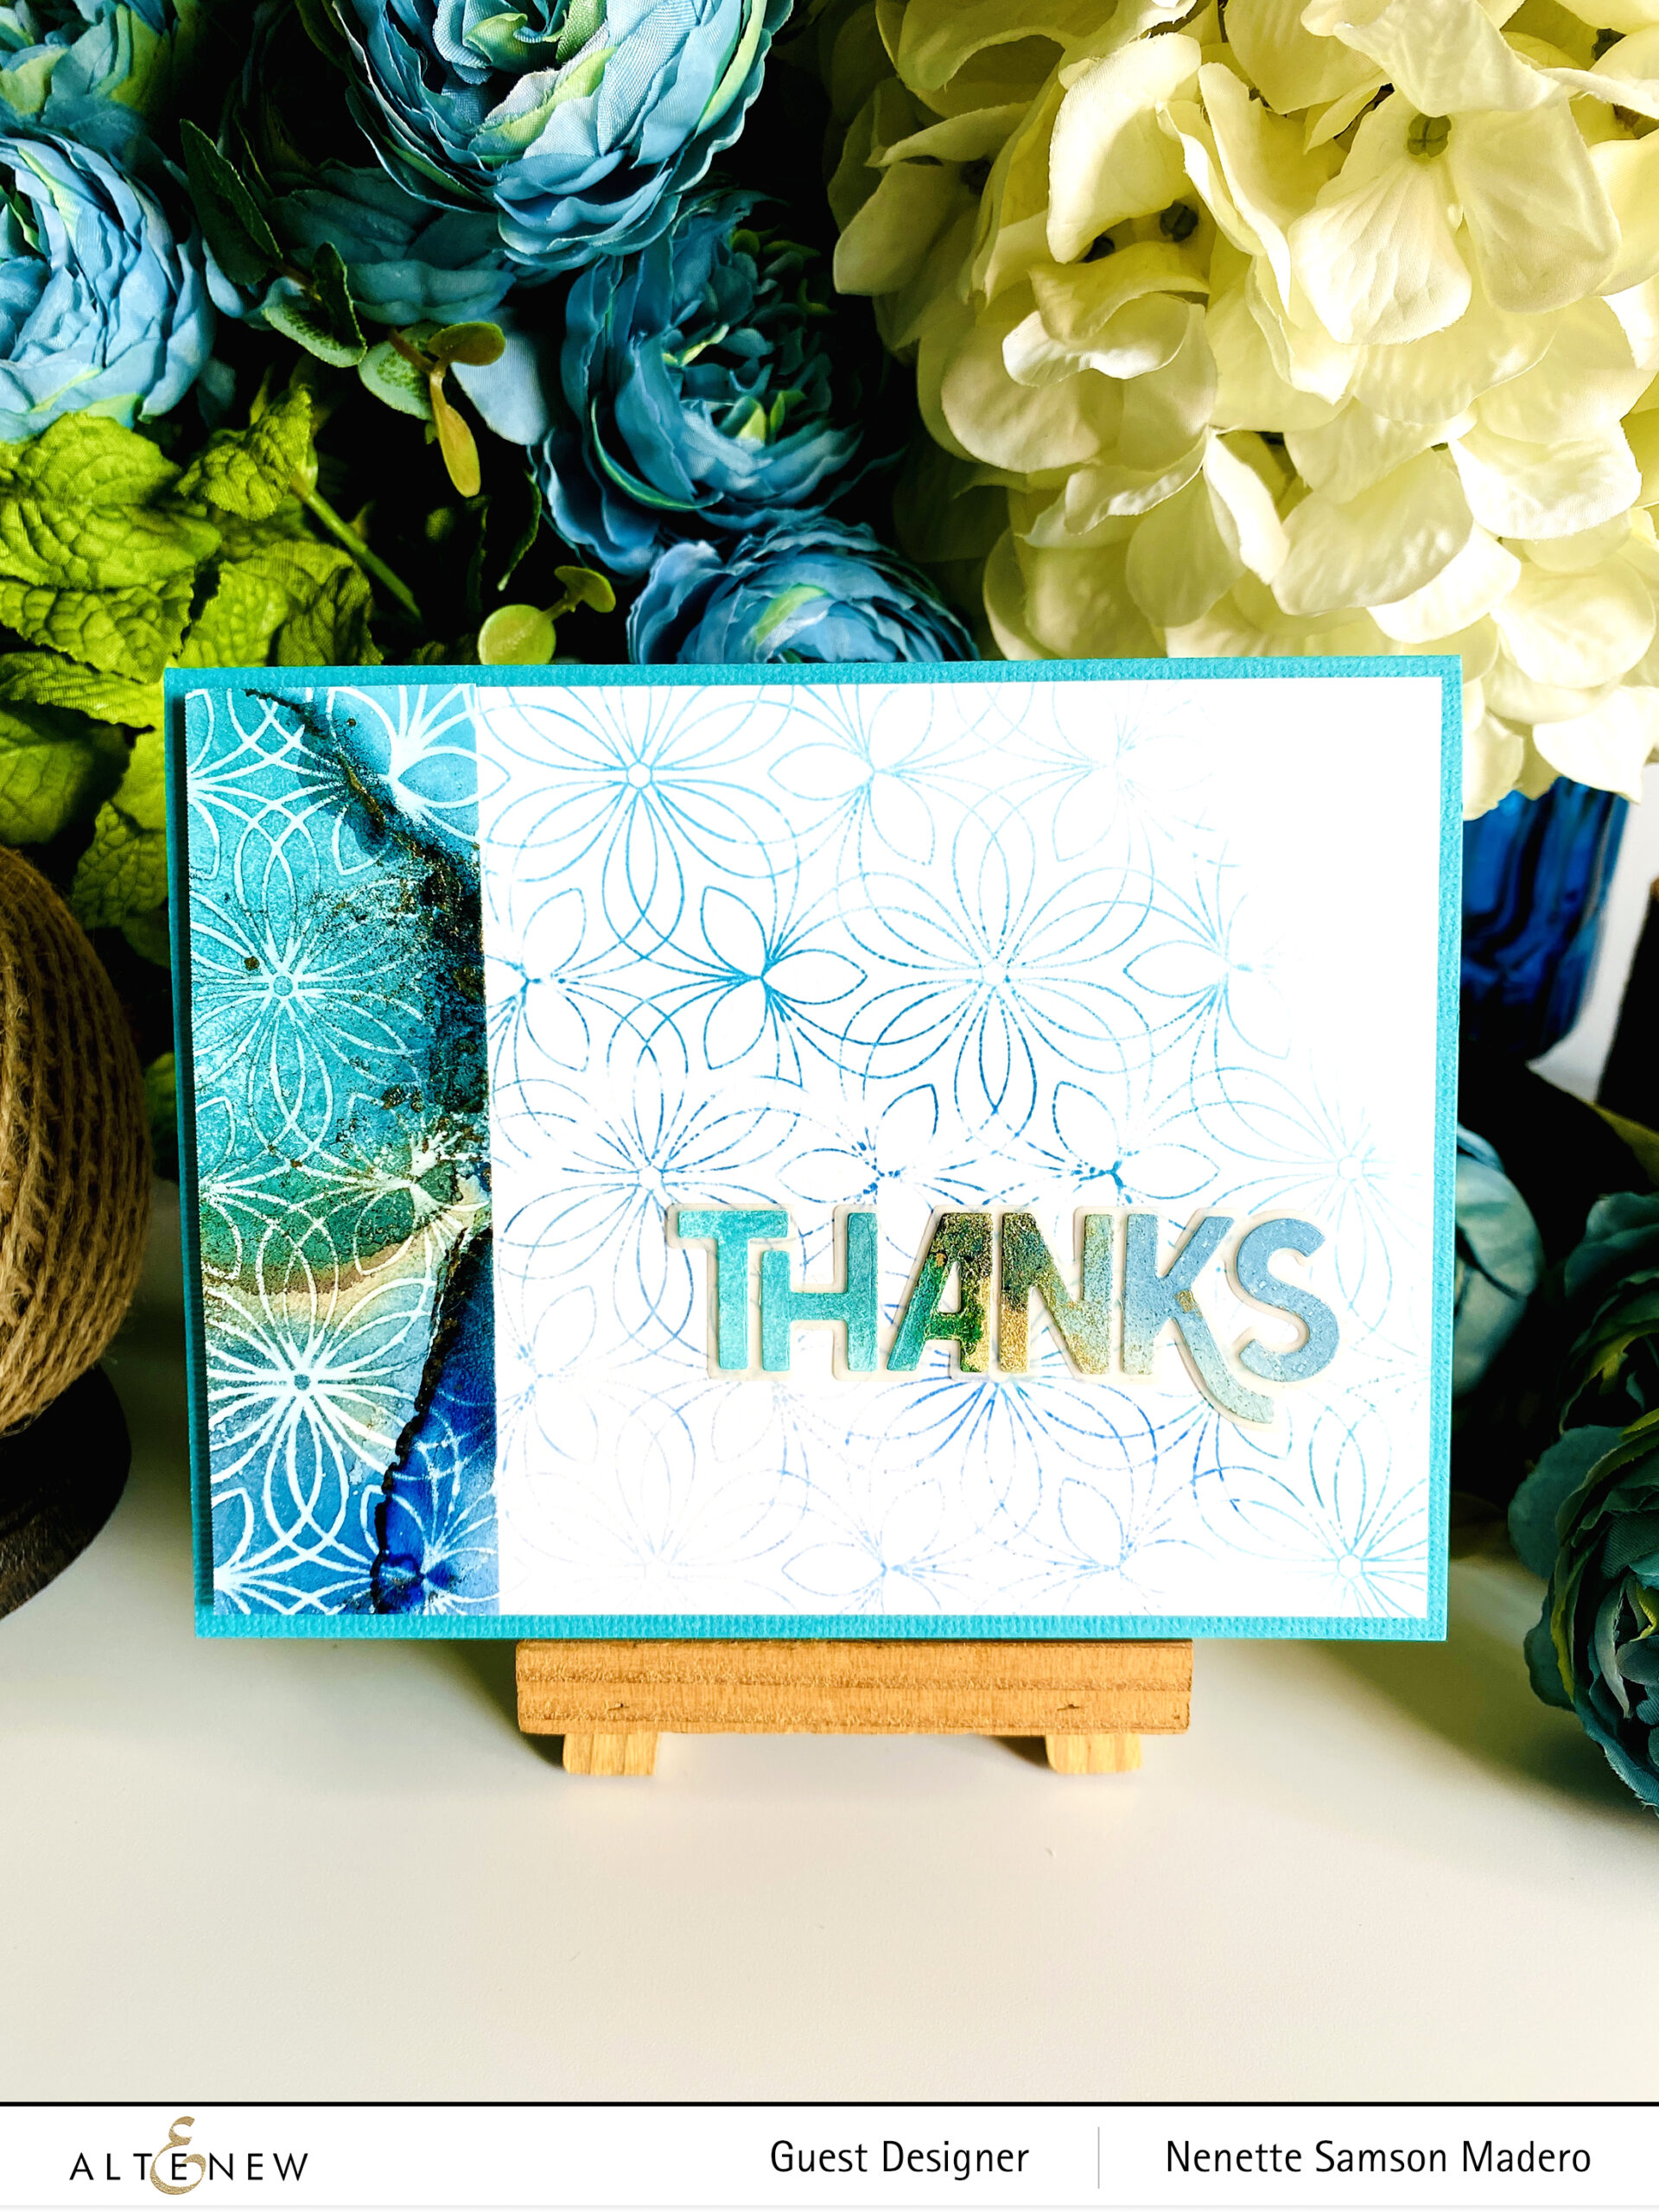
YAY! AND THANKS

STEPS:

  1. Create a background using the following alcohol inks: Galactic Stream, Teal Cave, Dusk, and Piñata Gold on Nara Paper. Use 90% isopropyl alcohol to dilute the inks. Allow to dry.
  2. Stamp the image from the Geometric Botany background stamp set using Alcohol Lift Ink.
  3. While the ink is still wet, stamp the image on another plain white cardstock to create a second card front.
  4. Die cut the Fancy Yay! 5 times on white cardstock and adhere on top of each other.
  5. Cut the alcohol inked background and adhere to a white card front. Adhere the Yay die cut.
  6. Use the excess alcohol inked background as a border and a die cut sentiment for the 2nd card.

TIP: Dab the excess alcohol lift ink with a paper towel– remember to use a clean part of the towel every time you dab. When it’s dry, buff the surface and the image will magically become crisper. (I got this tip from everyone’s idol– Jennifer Mcguire).

TIP: Do not throw away your scraps! You can always use them as a border or for word dies like the Thanks card I made using scraps.

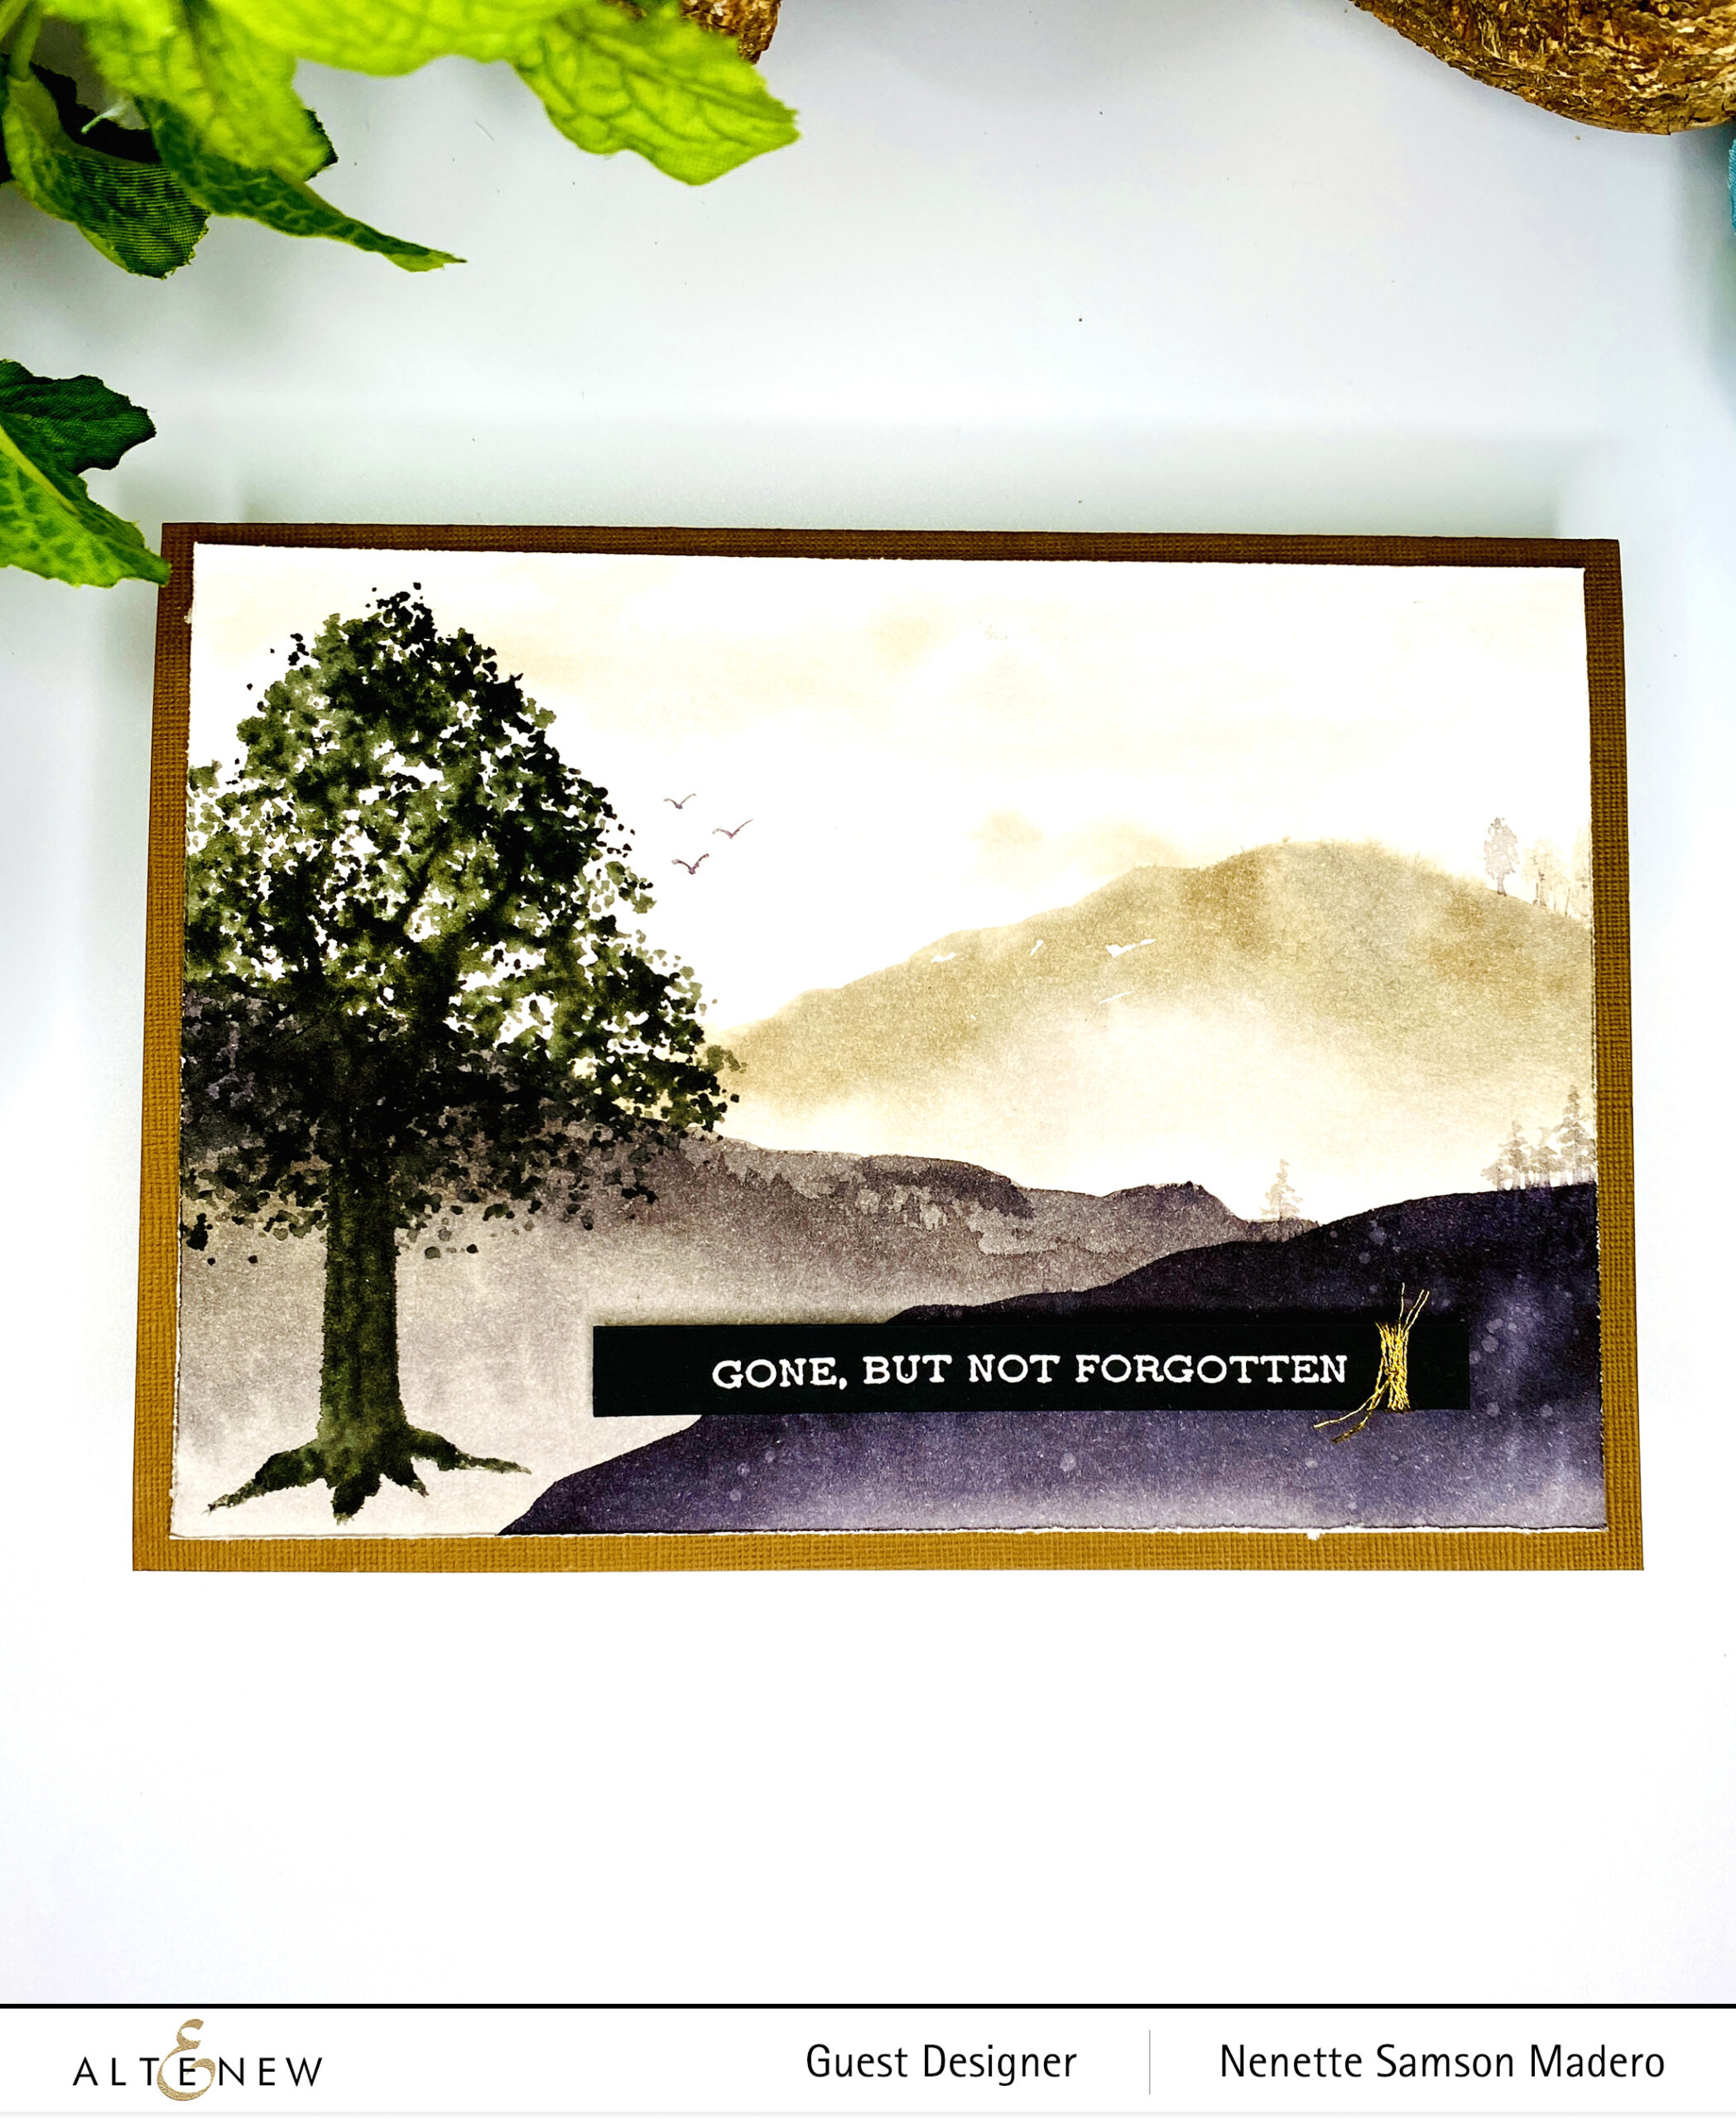
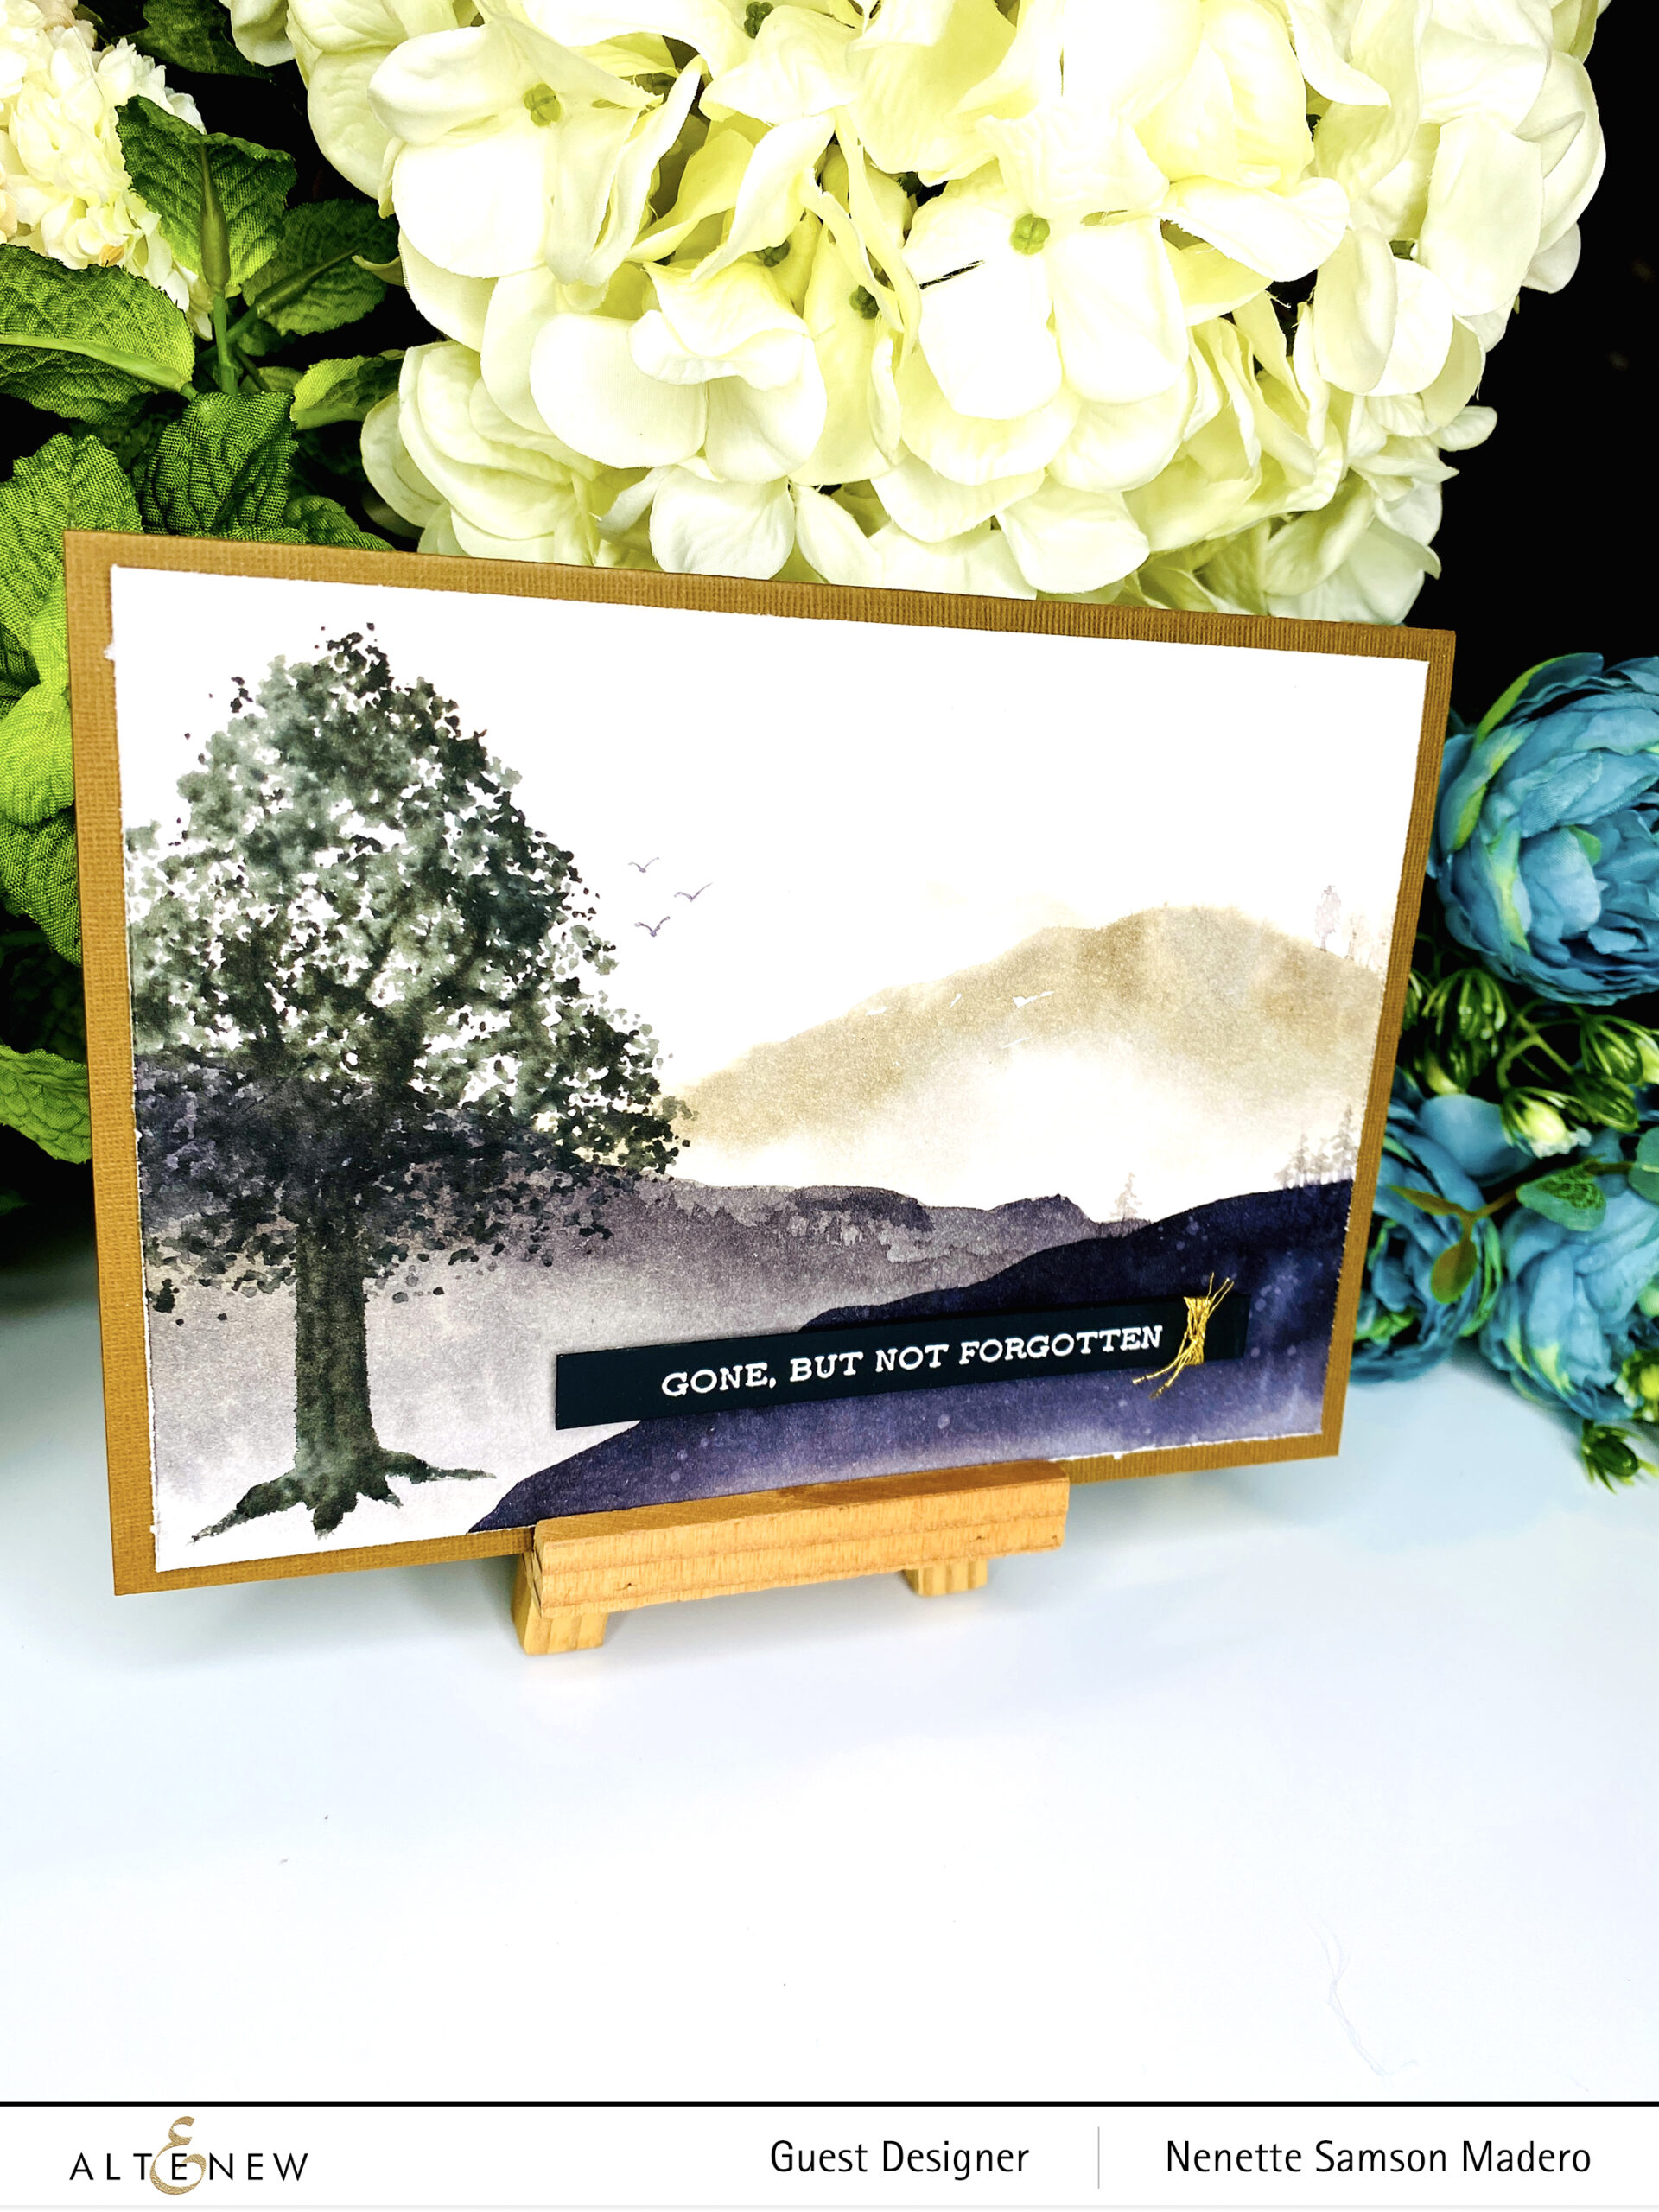
GONE BUT NOT FORGOTTEN

STEPS:

  1. Create a watercolored background using Watercolor brush markers. Add water for the pigments to bleed.
  2. Stamp the image from the Tree of Fantasy Stamp using dye inks and sprits water on the stamp before stamping. Add additional defined branches with watercolor.
  3. Add small trees on the hills with diluted watercolor.
  4. Stamp the sentiment from the Sentiment Strips 3 set and emboss using Pure White Embossing powder. Tie the Metallic Thread for added accent on the card.

I wanted to keep this card simple and the colors subdued since it’s a sympathy card. It’s sad that I need to create more of these cards lately. Hopefully, this card will make my friend feel how much I also hurt for the loss of his Mom.

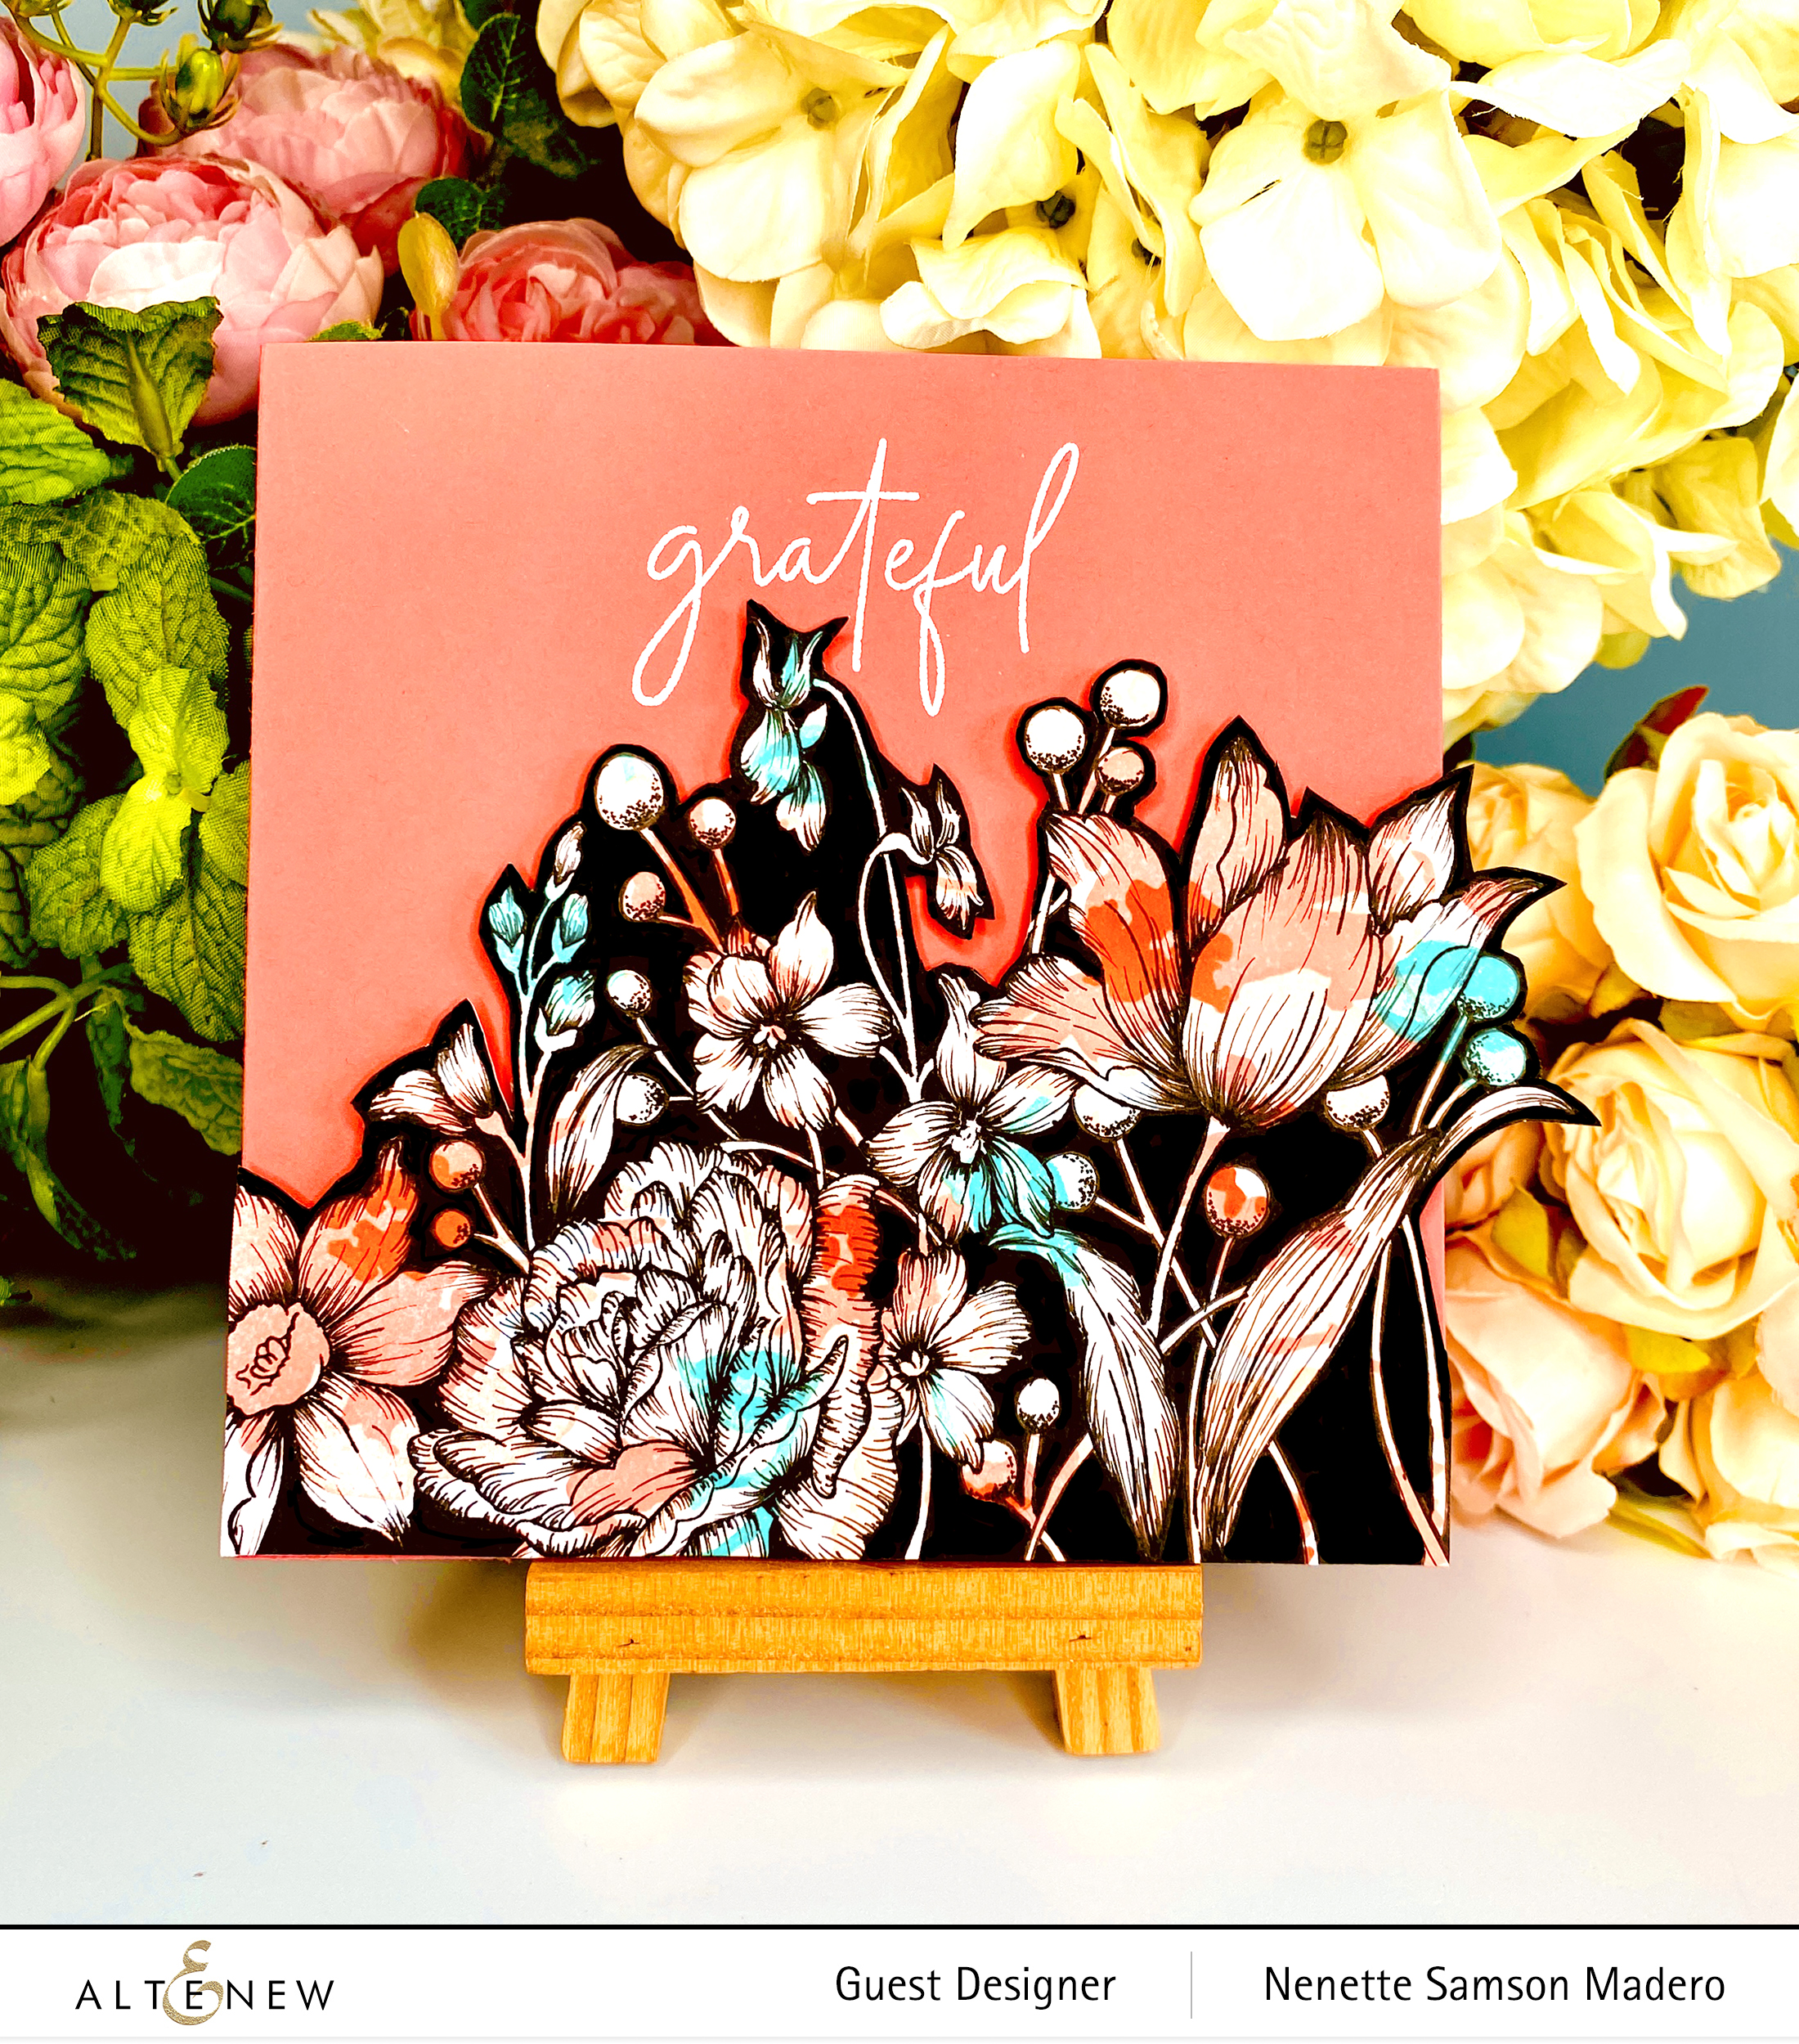
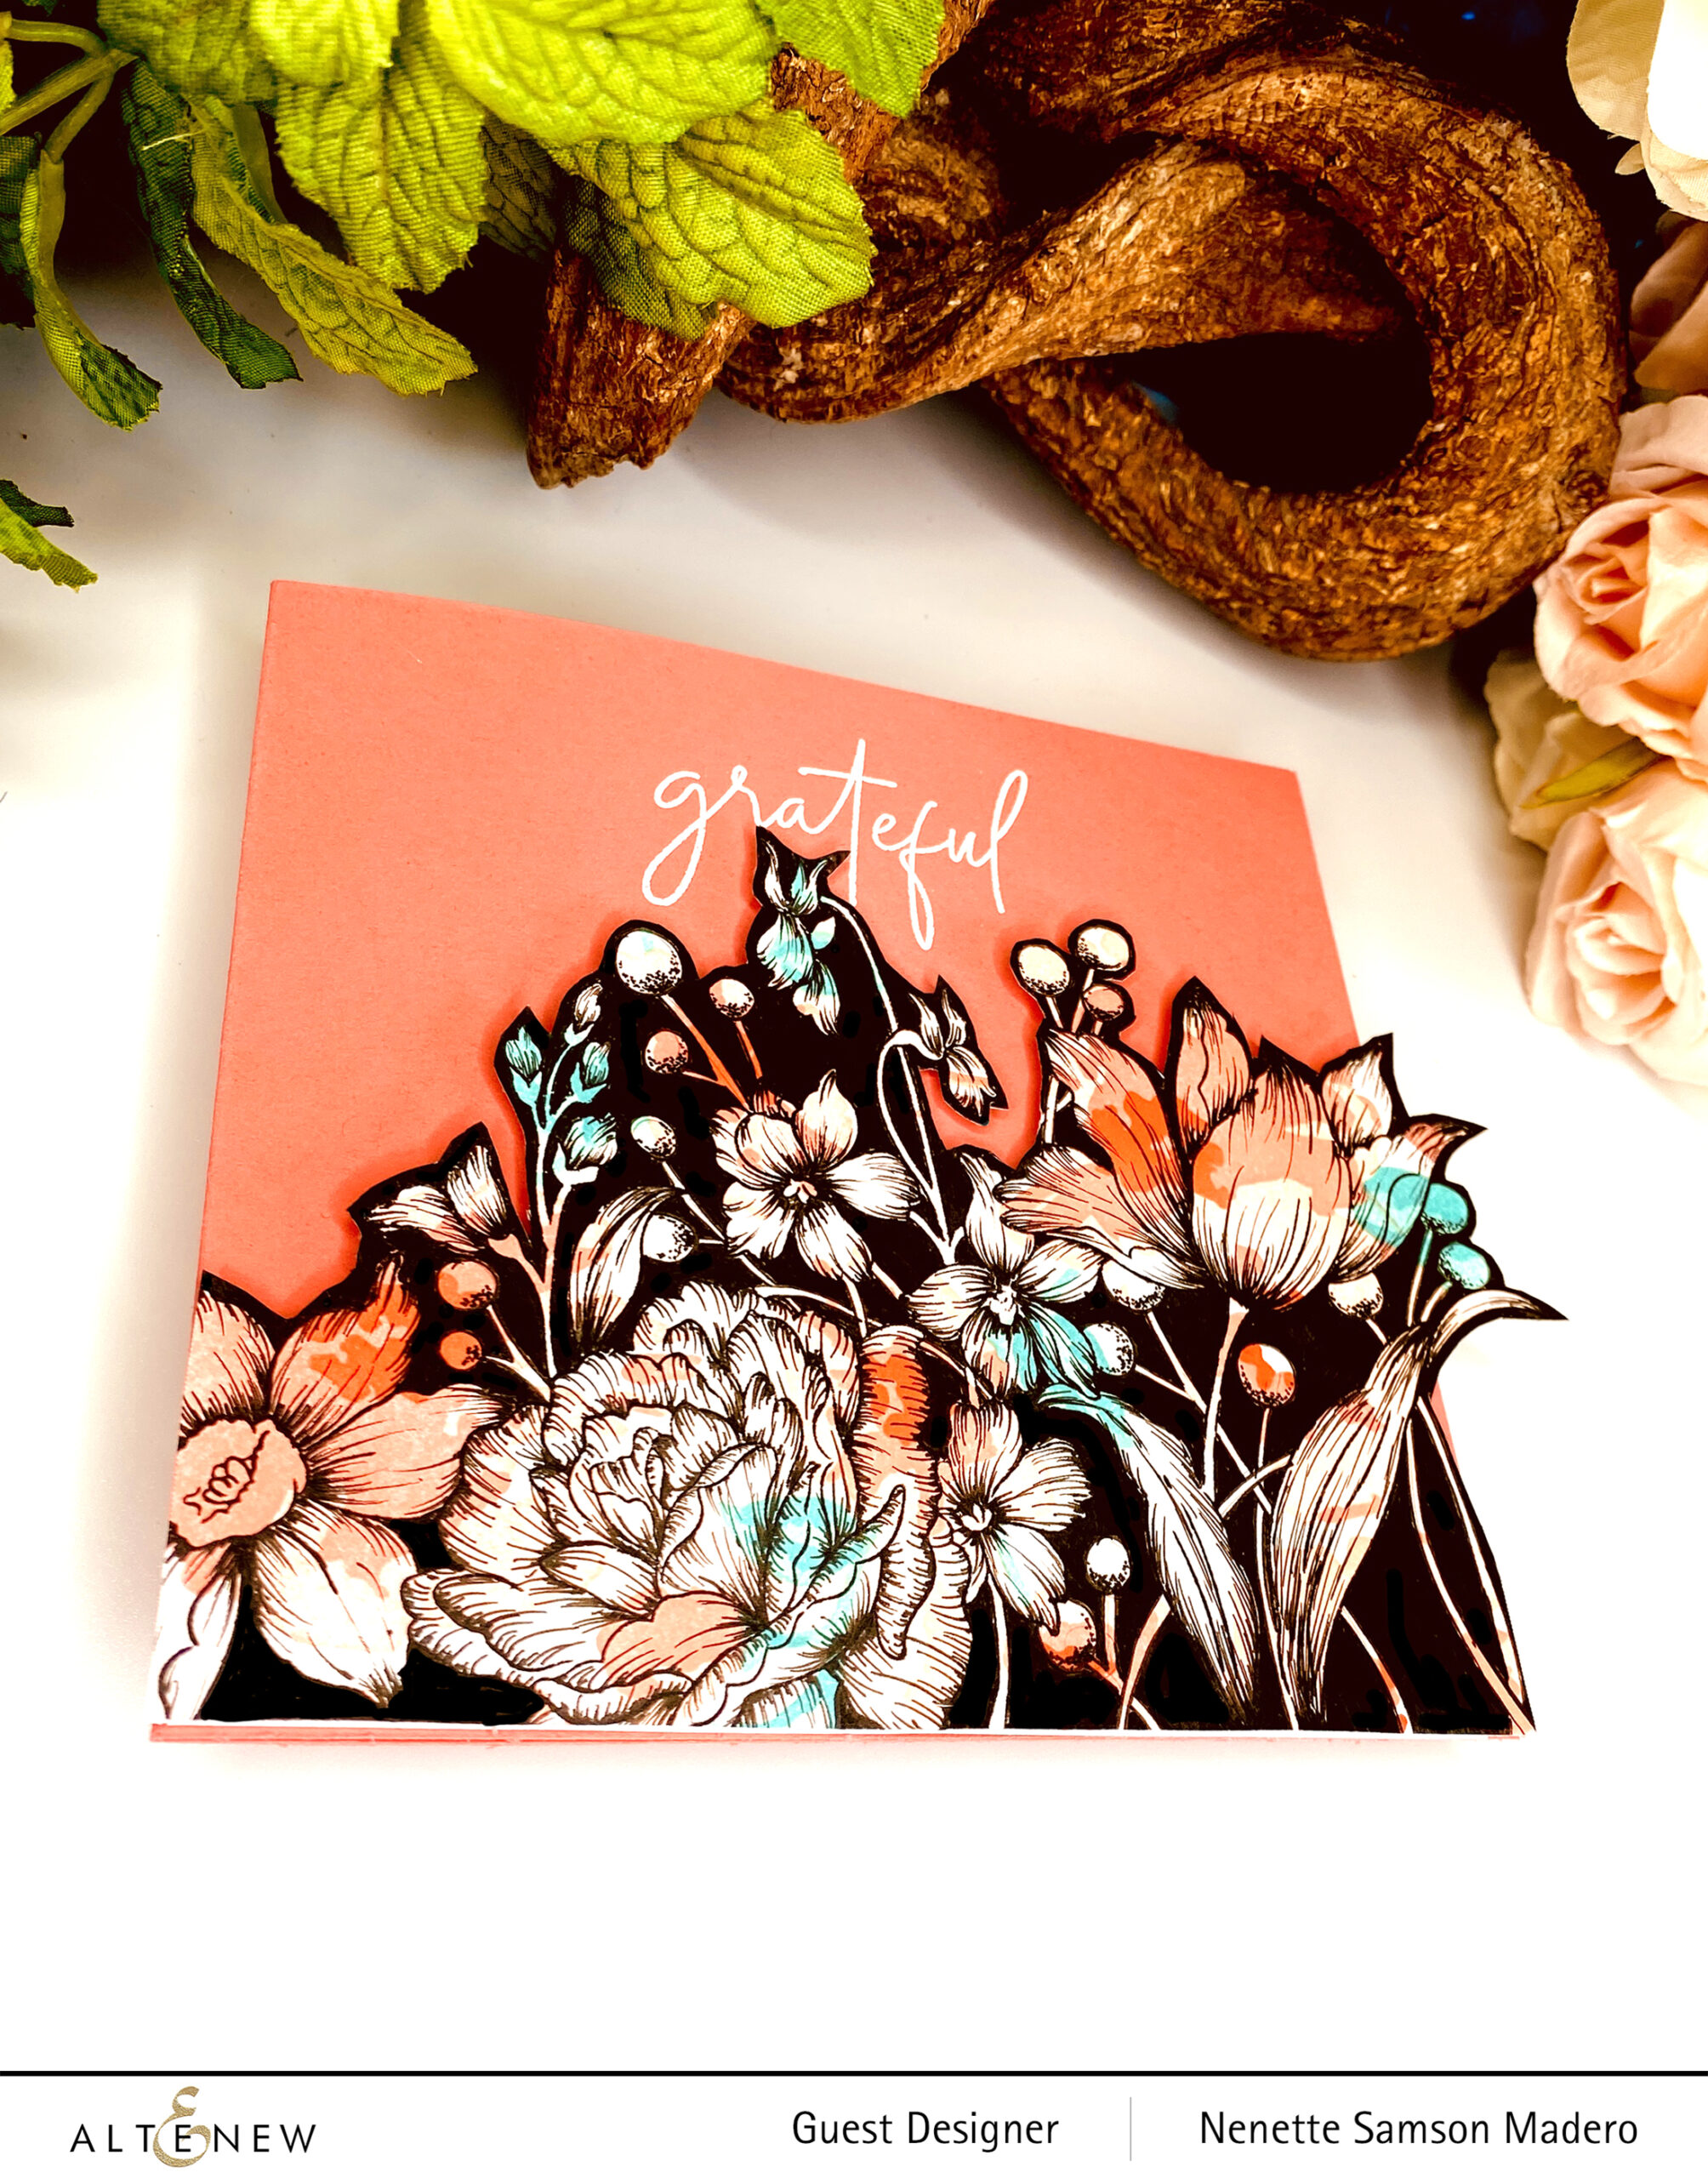
GRATEFUL

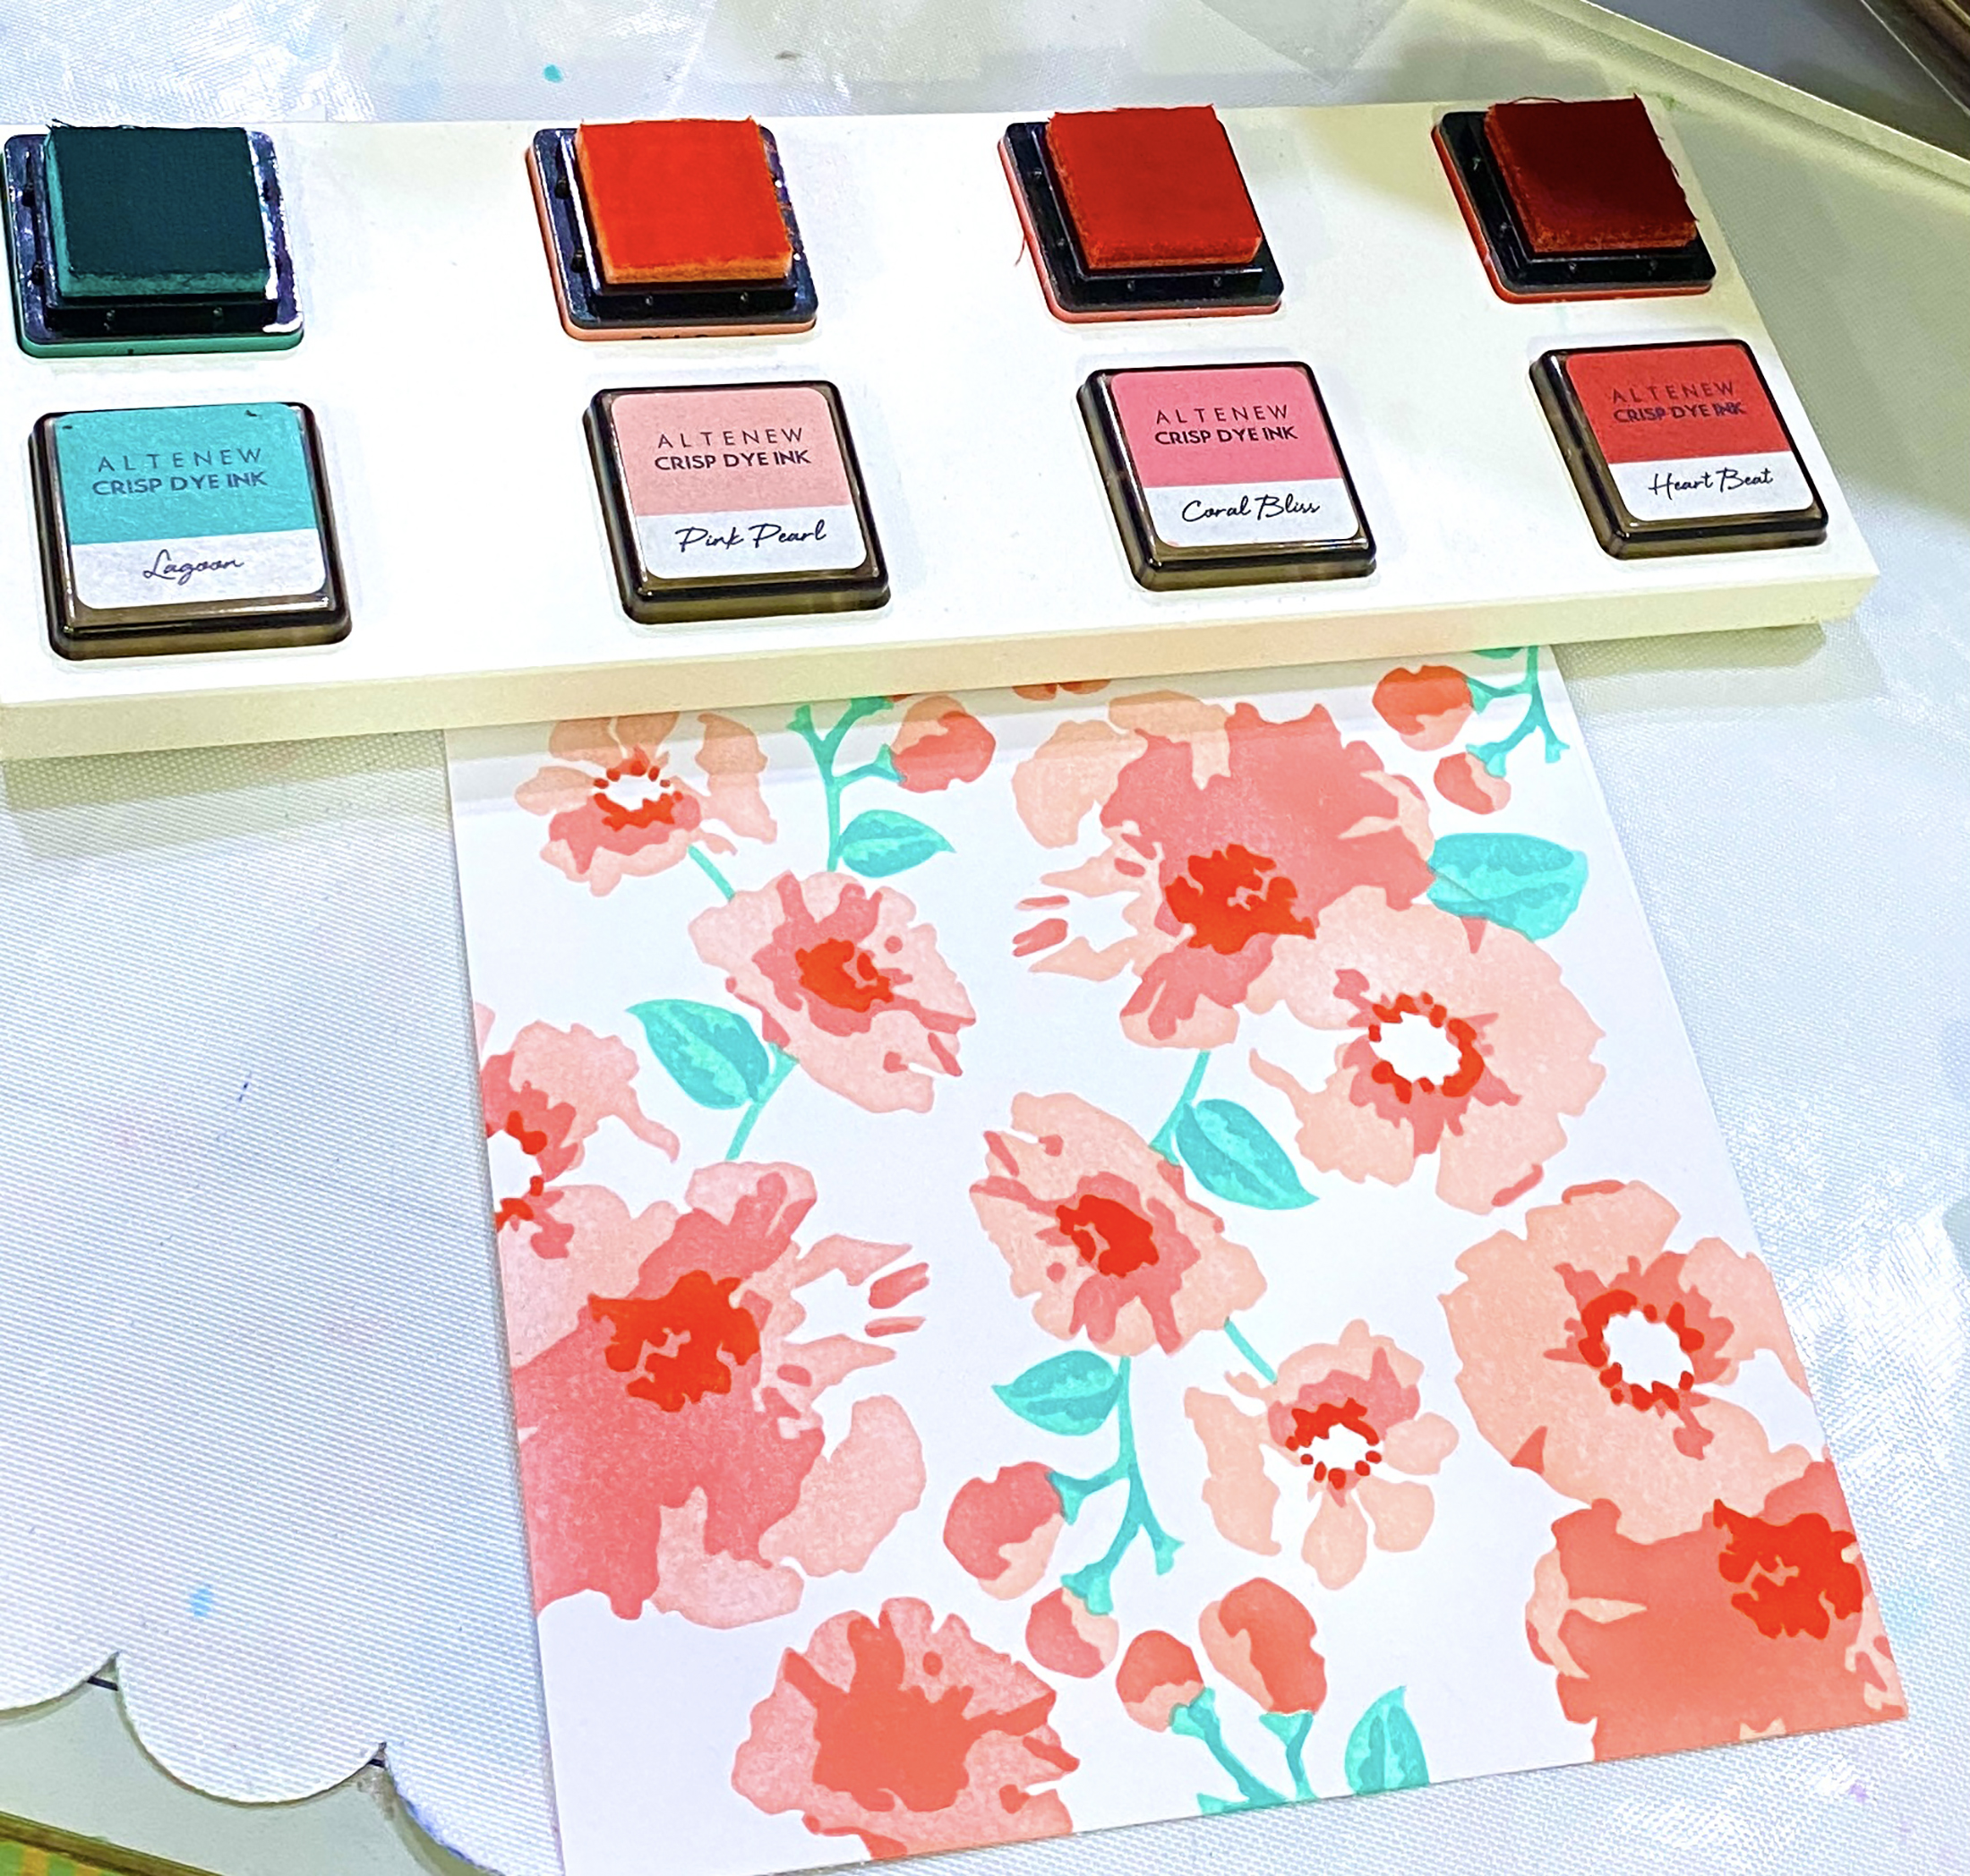
Create a background with the Impressionist Bouquet layered Stencil using colors from the Tea Party and the Sea Shore dye ink sets.

Stamp the image from the Endless Florescence Stamp Set on top of the stamped background and add botanical lines on the leaves and stems using Tombow drawing pens 0.1, 0.3 and 0.5. Add additional berries and branches in certain spaces then color the background black. Stamp the sentiment on the front cover using the Inside and Out: Thanks Stamp set.

TIP: I recently took a Botanical Line Drawing Workshop with Thea Po and I got so excited thinking of all the stamp sets I can use this technique with!!! The key here is to follow the curvature of the petal, leaf or bud so that it will not look stiff. Add different lengths of lines, too!

GIVEAWAYS

$300 in total prizes! To celebrate this release, Altenew is giving away a $50 gift certificate to 2 lucky winners and a $25 gift certificate to 8 winners! Please leave a comment on the Altenew Card Blog and/or each designer’s blog post on the blog hop list below by 03/10/2022 for a chance to win. 

Altenew will draw 10 random winners from the comments left on each stop of this blog hop and announce the winners on the Altenew Winners Page on 03/12/2022.

Next up: Laurie Willison. Thank you so much for dropping by! I hope you liked the cards I created for this release. Would love to hear what your favorite is. If you have any questions, just let me know and if you like what you see, I hope you can follow me on IG as well (@mylittleatticstudio) Don’t forget to leave a comment below to get a chance to win a prize from Altenew! Until my next post– stay safe and happy crafting!

P.S. I hope, as a crafting community, we can all be together in prayer for Ukraine and that the world leaders will always choose peace over war and aggression. 🙏🏼🙏🏼🙏🏼

Altenew Educators “New Favorite” Blog Hop and Linky Party + Giveaway

Altenew Educators “New Favorite” Blog Hop and Linky Party + Giveaway

HAPPY NEW YEAR everyone and welcome to my blog! If you just came from Irina Fonina’s blog, then you’re on the right track. For the complete list and details of the hop, please visit the Altenew blog.

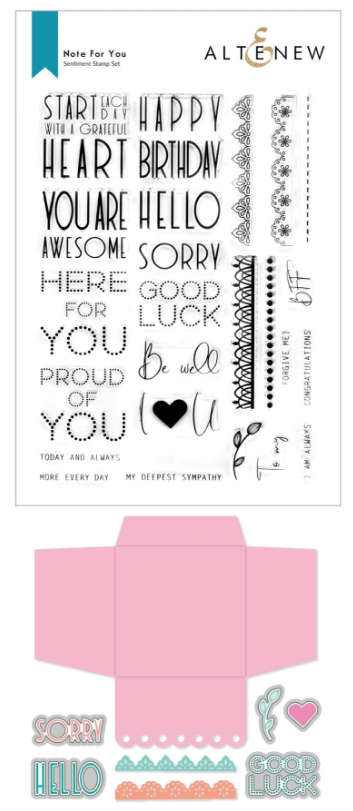
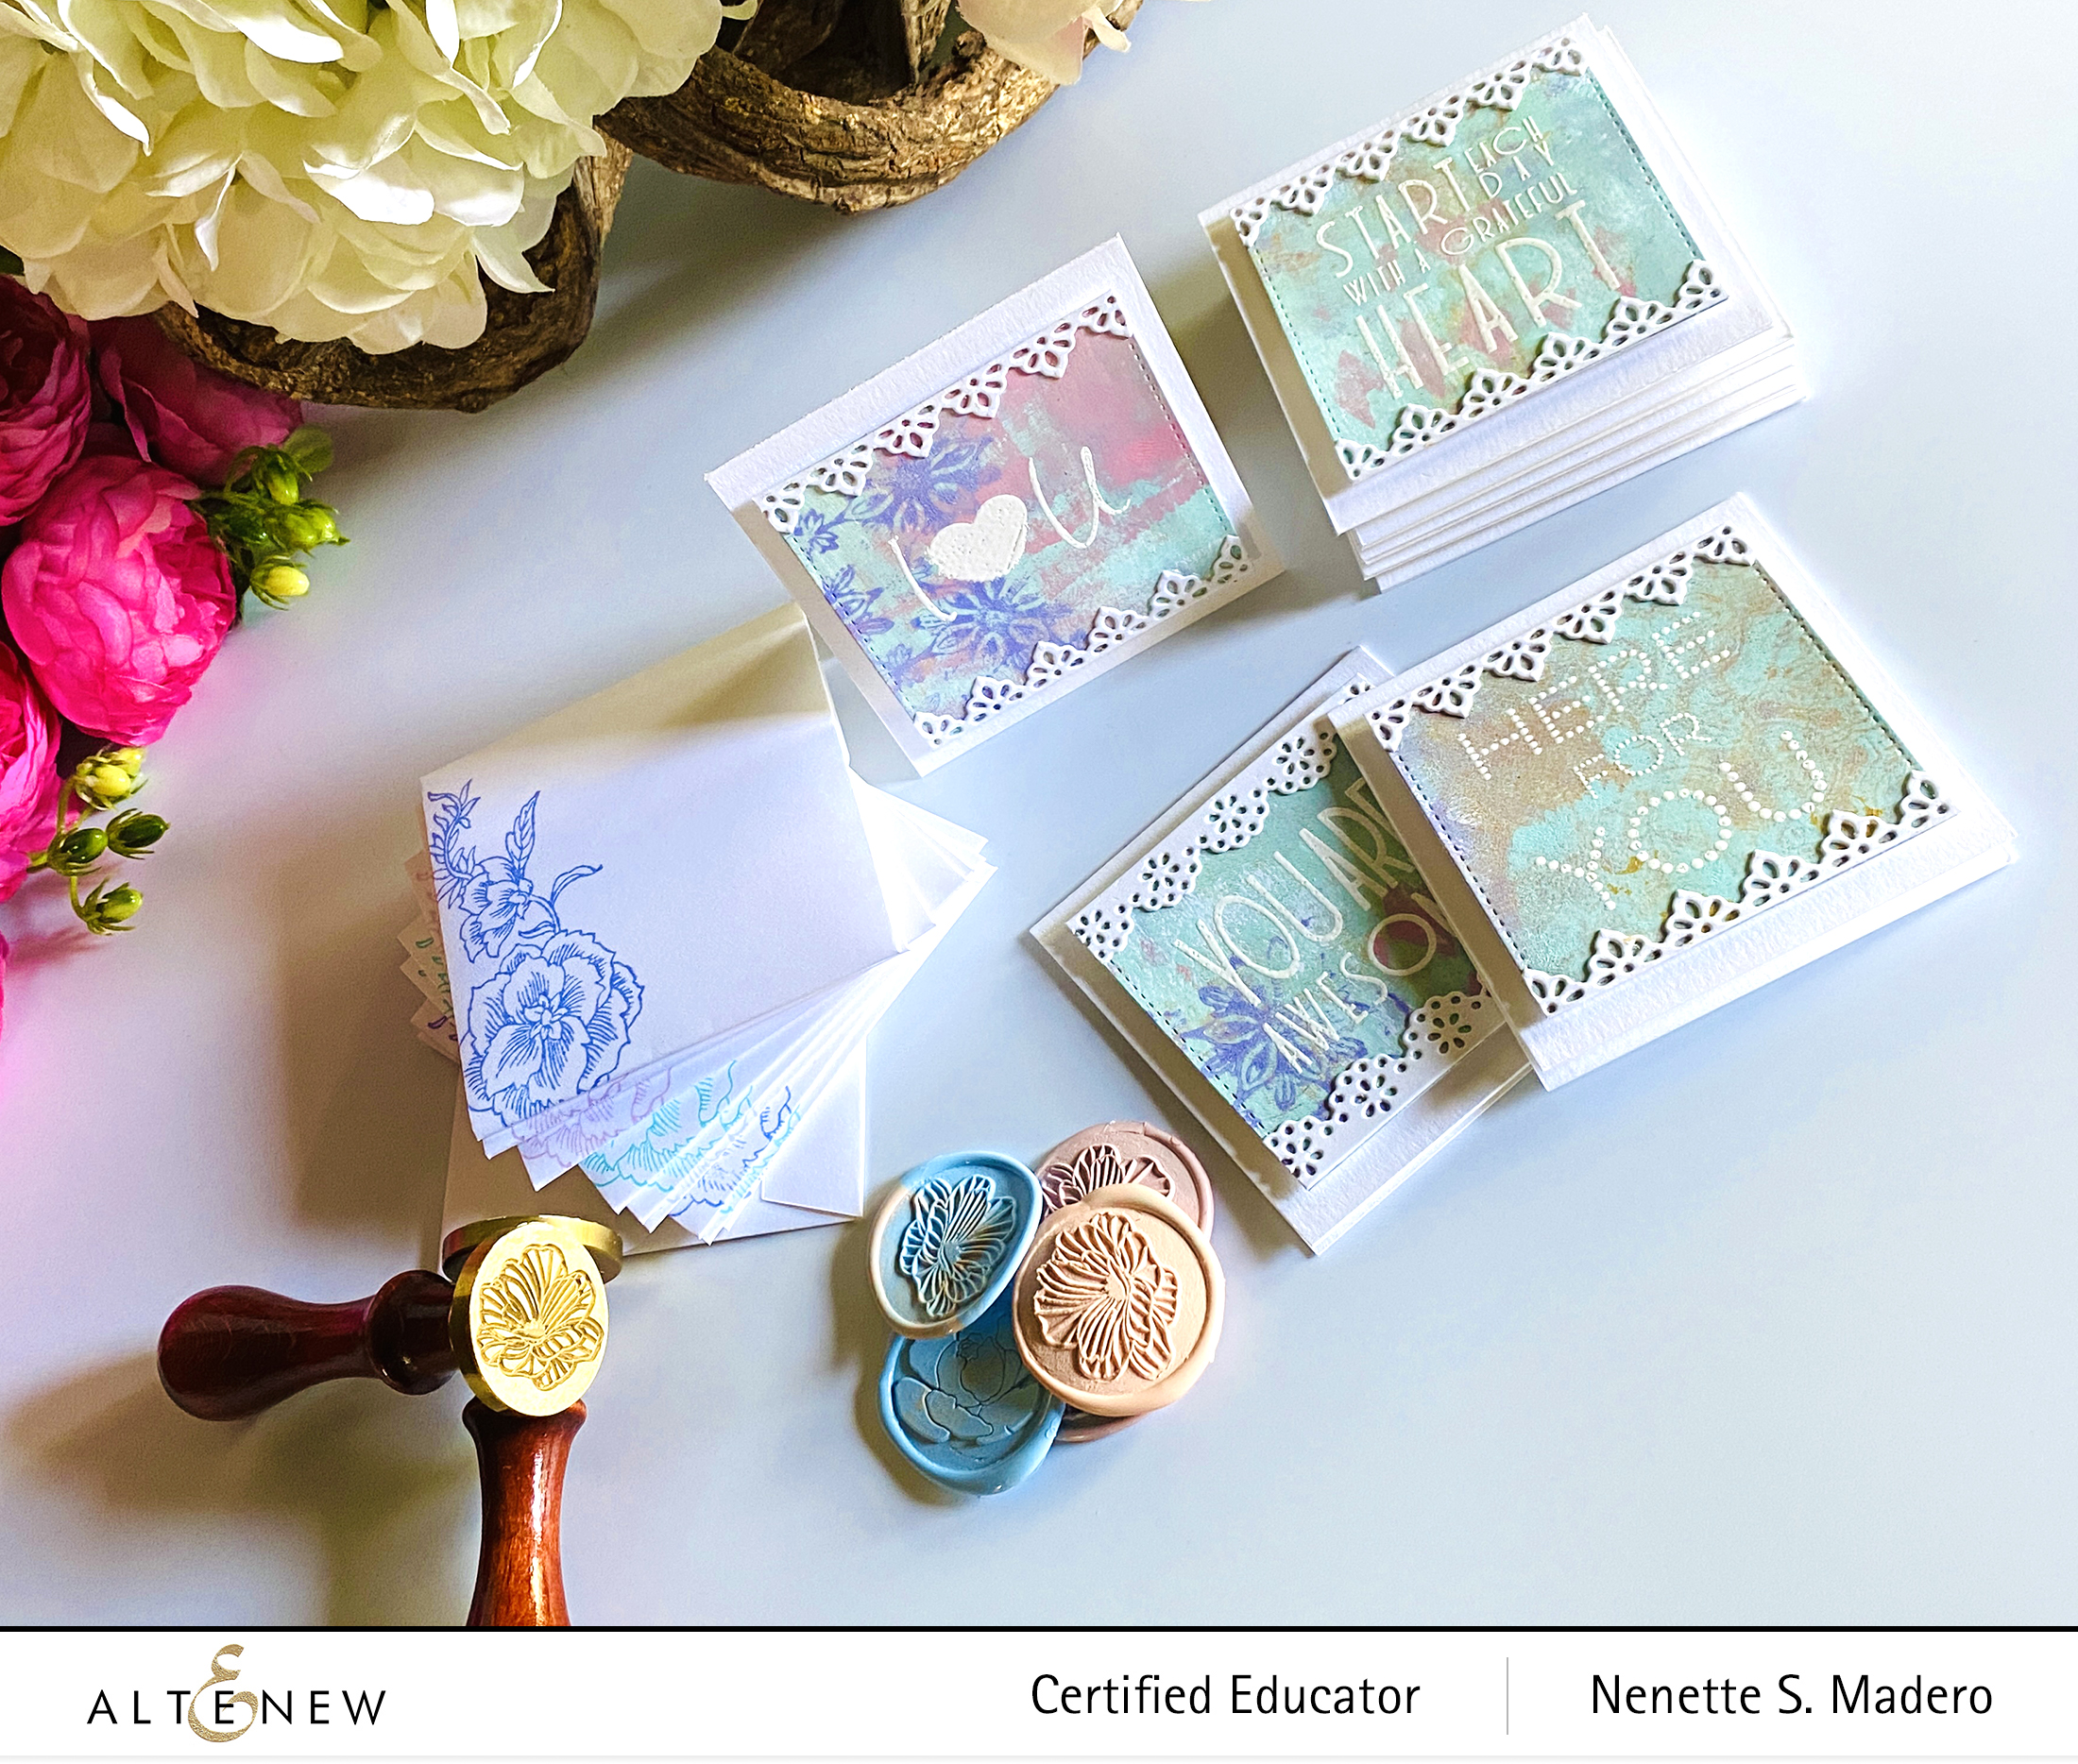
For this hop, we were asked to choose a new favorite product and mine is the Note for You Stamp and die set.

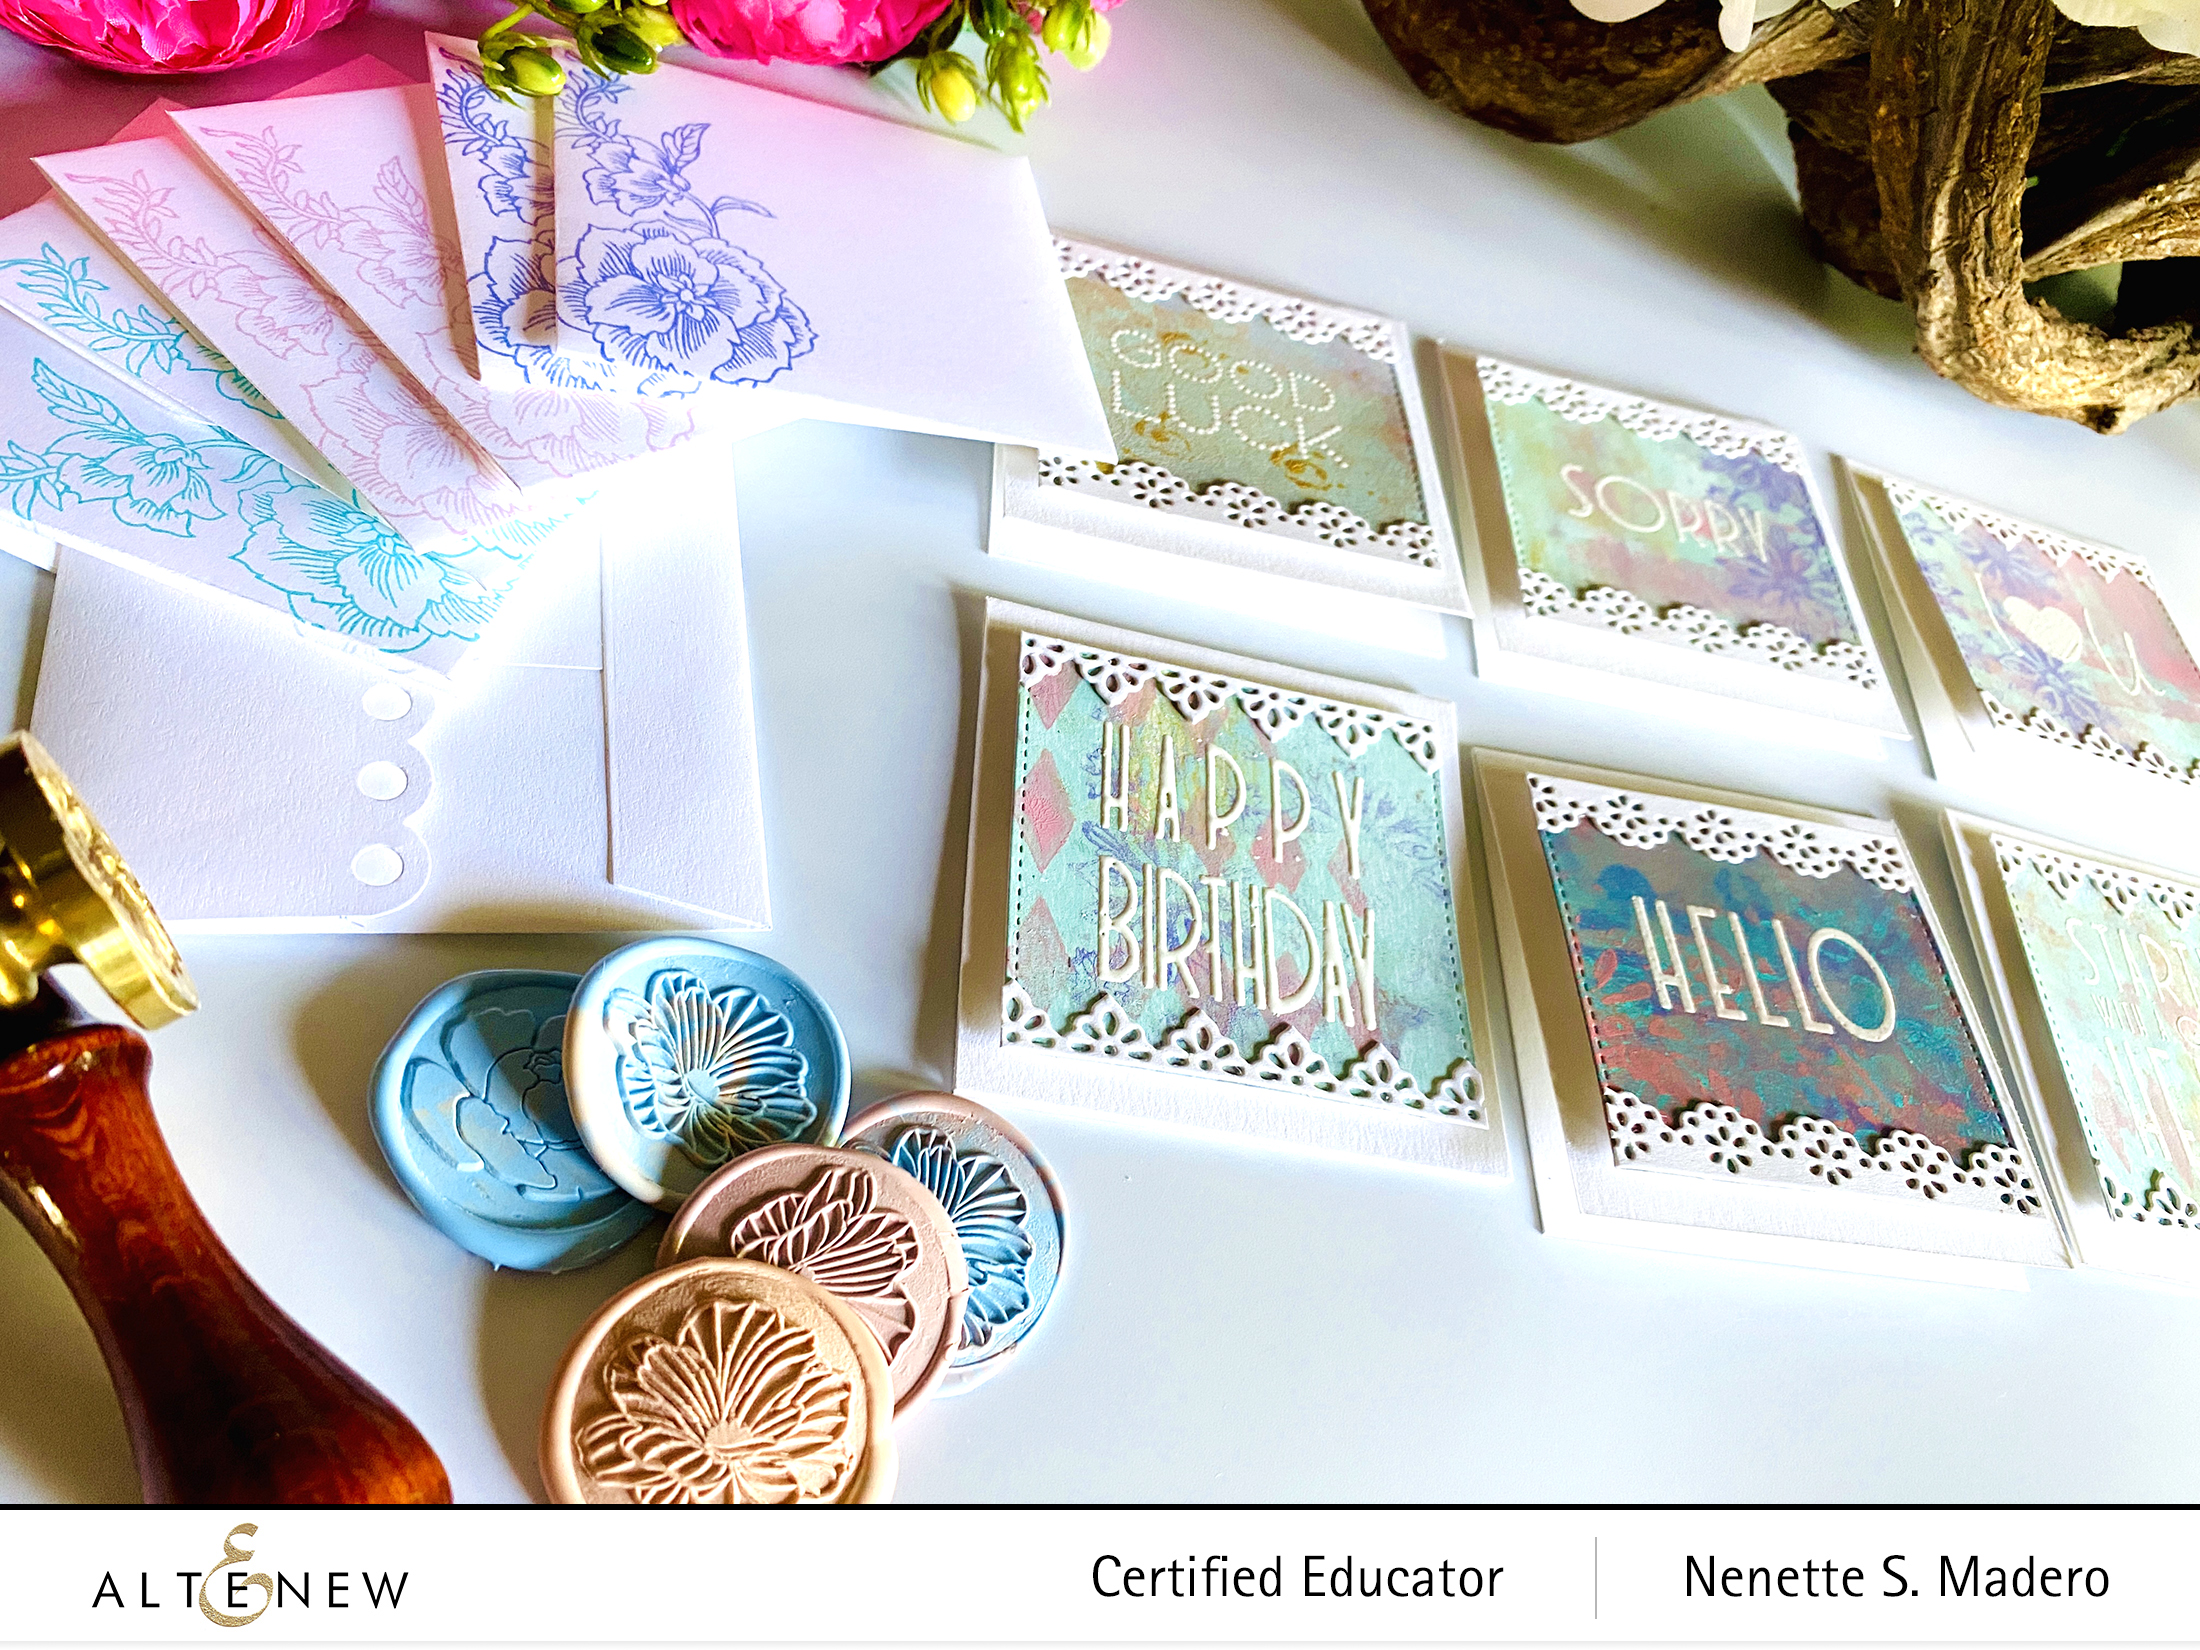
The bundle arrived just in time for Christmas, so I created some handmade Christmas gifts. I love that there are a variety of sentiments that will fit into a 3×3 card base. It also comes with a cute envelope die with an embellished flap! So cute!!! You can stamp or die-cut some borders for a very dainty look.
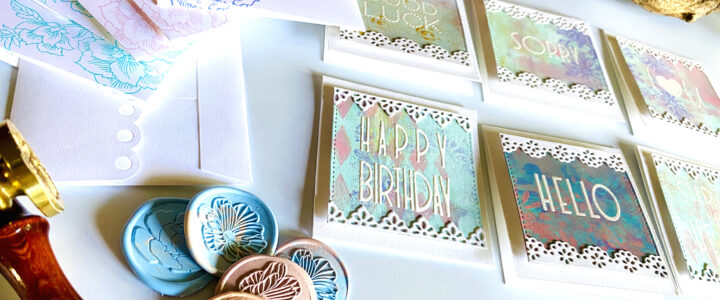
I used my Gelli prints as my base for all the cards. These were die-cut into squares slightly smaller than 3×3; I stamped the different sentiments using Versamark Ink and Pure White Embossing powder.

II also stamped a floral image from the Engraved Flowers stamp set on the front of the envelopes for added interest. The borders were die-cut using white cardstock and adhered to the top and bottom of the sentiments. These strips are so dainty and look like lace!!! I also included some wax seals created with the Blooming Bud and Delicate Blossom Wax Seal stamps in the gift set. 

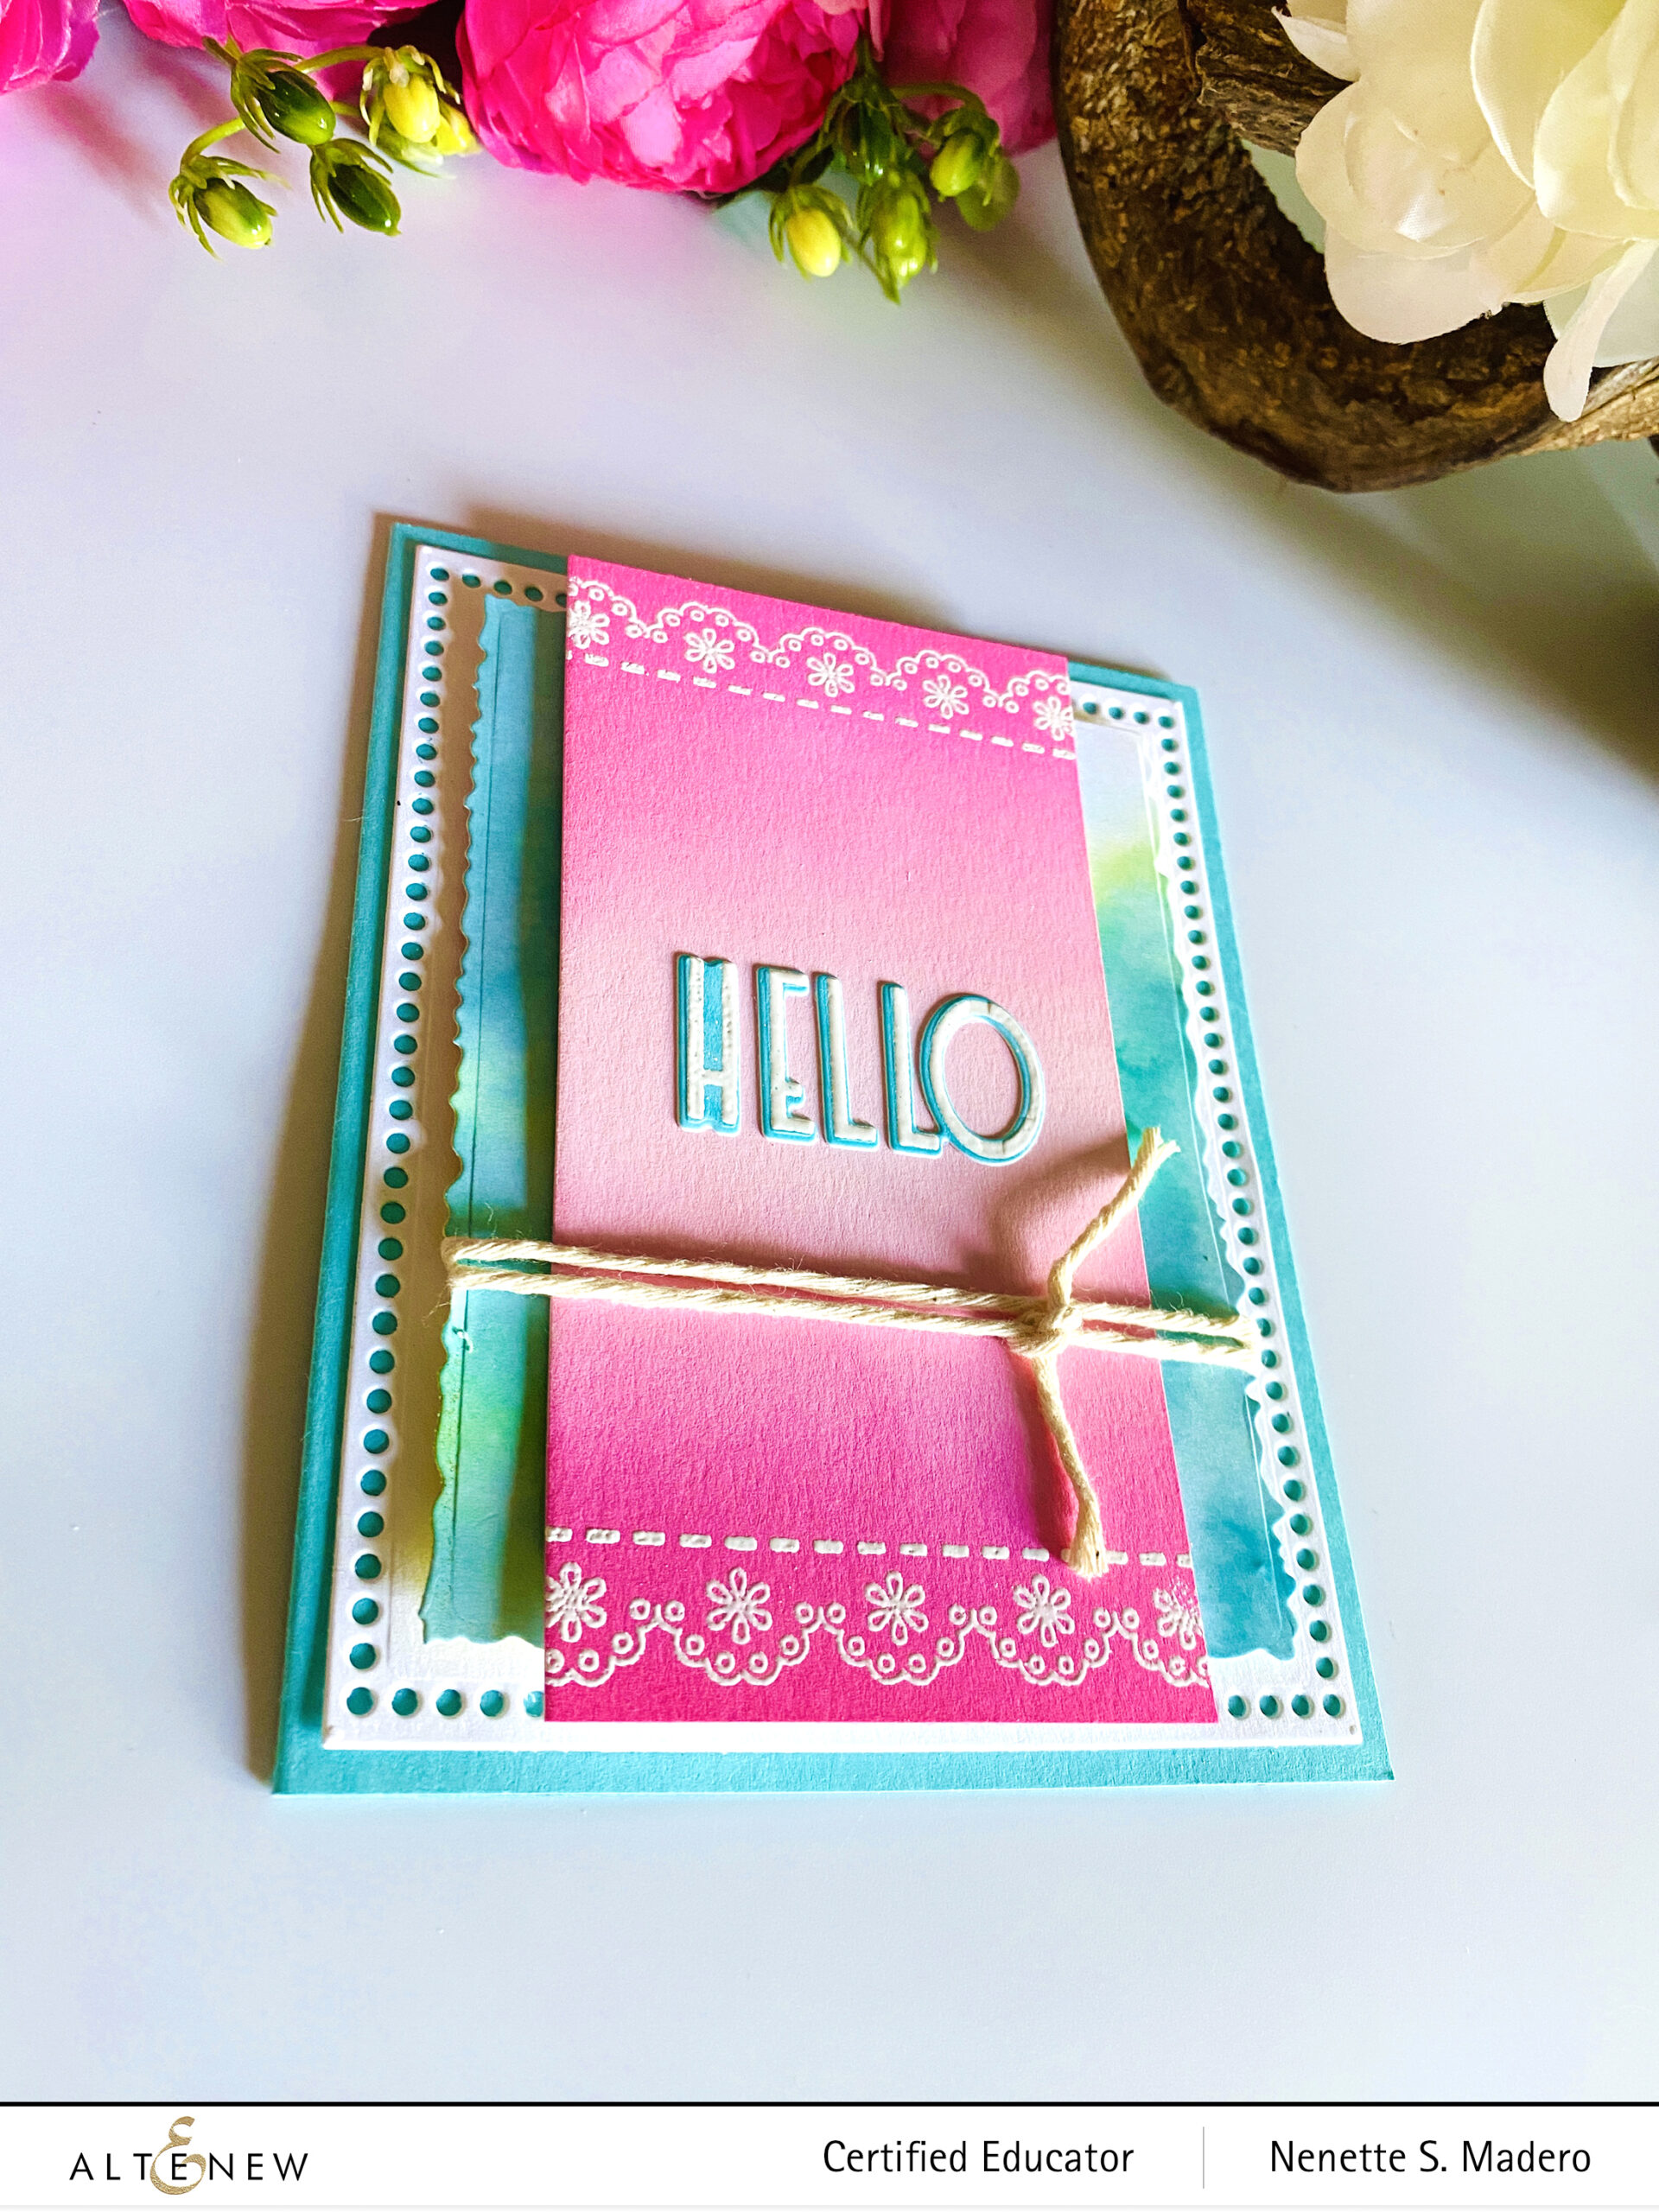
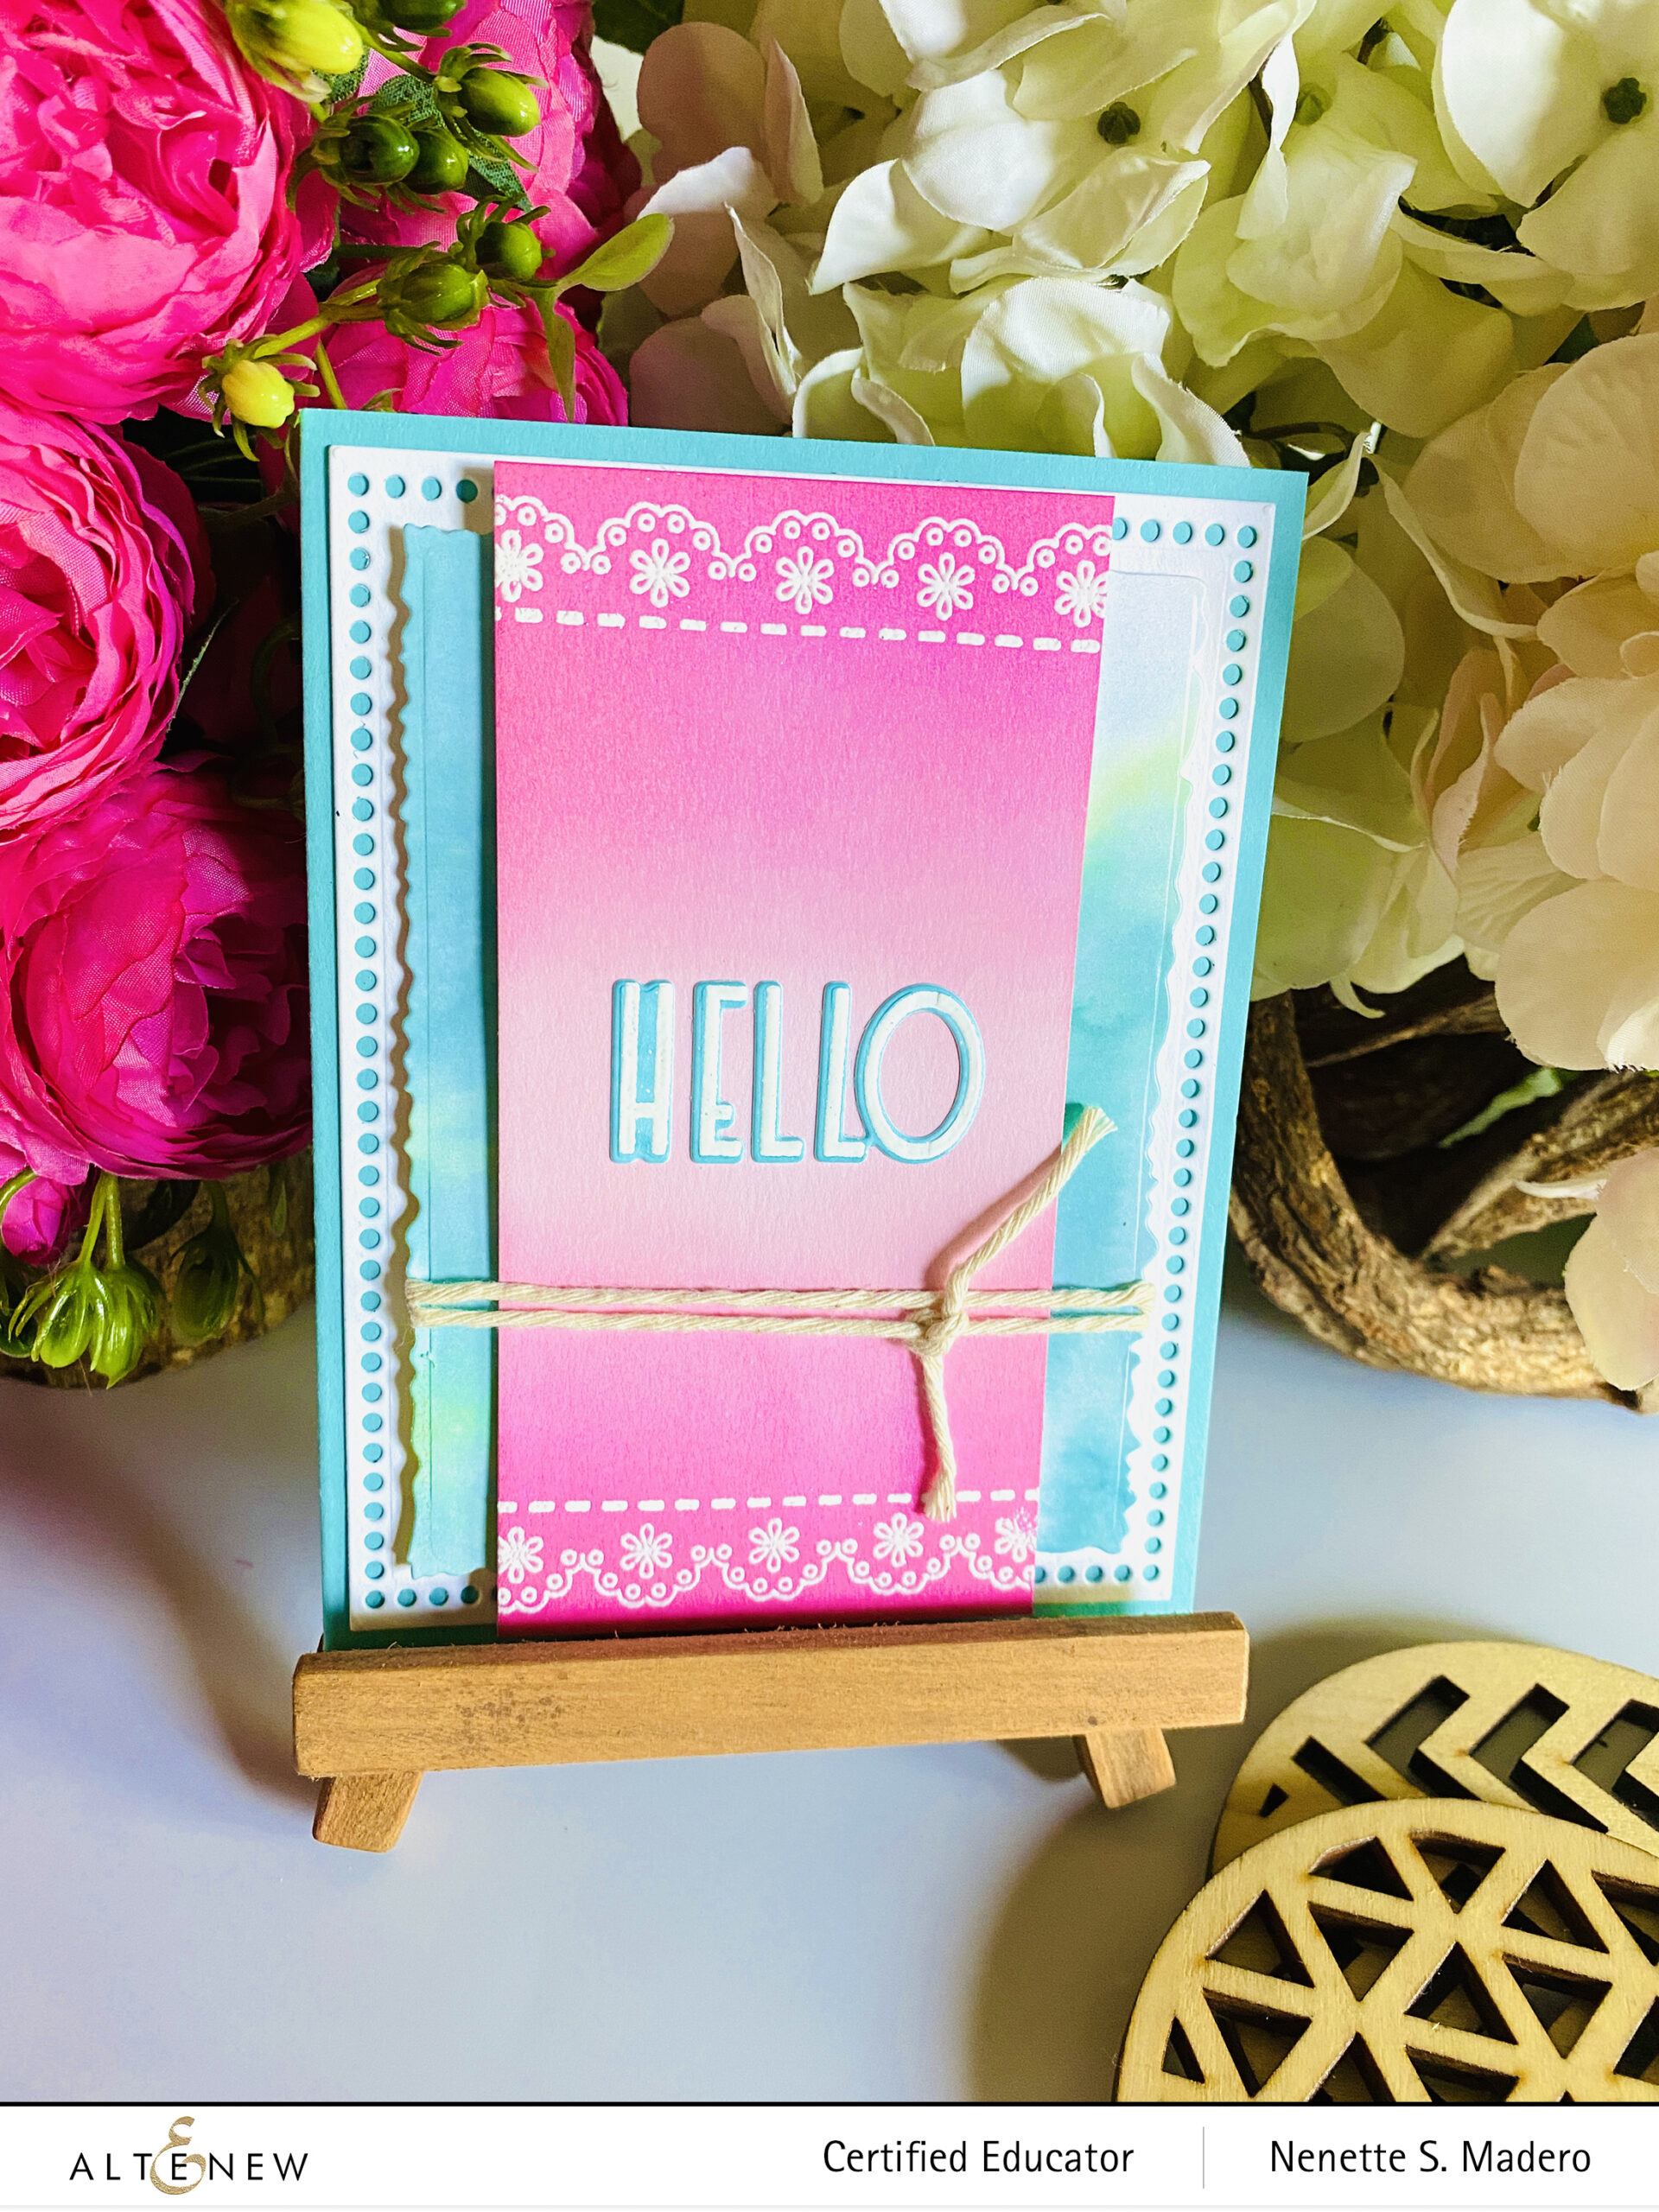
I used the Note for You Stamp set for my second project, using the stamp lace borders instead of the dies. After stamping and embossing in white, Distress Inks were used in creating an ombre background. The sentiment was stamped, embossed, then die-cut.

I also used another favorite of mine– The Mix & Match Frames die set. 

2 of the dies from the Mix & Match Frames dies were used for this card. I layered the die-cut pieces and used foam squares to add dimension. The lacy border and dashed line were stamped using Versamark Ink then embossed with Pure White Crisp Embossing powder.


PRIZES


$130 in total prizes! Altenew is giving away a $20 gift certificate to 3 lucky winners and a $15 gift certificate to 4 winners! Please leave a comment on the Altenew Card Blog and/or each designer’s blog post on the blog hop list below by 01/09/2022 for a chance to win. 

There’s MORE! What’s a hop without YOU?! We have included an Inlinkz at the Altenew blog for you to enter your gorgeous Altenew “New Favorite” creations. We will pick one of our favorite handmade creations from those who joined the linky party and they will receive a $10 Altenew gift certificate!

Altenew will draw 7 random winners from the comments left on each stop of this blog hop and announce the winners on the Altenew Winners Page on 01/10/2022.

NEXT UP: Ann Taylor. Thank you so much for dropping by! If you want to see more of my latest creations, please follow my Instagram account @mylittleatticstudio. Don’t forget to leave a comment below to get a chance to win a prize from Altenew.

The Altenew Educators are all looking forward to a productive and creative year ahead!! Stay safe and happy crafting, everyone! 💜

COMPLETE HOP LIST

Altenew Blog

Virginia Lu

Pam Boedeker

Nancy Souza

Nandini Karmarkar

Bridget Casey

Karen Brown

Neha Aggarwal

Lana Taber

Terri Marie Koszler

Helen Kalb

Joylita Dsouza

Teri Stokes

Rosie Neustaedter

Irina Fonina

Nenette S. Madero–>you are here

Ann Taylor

Susan Stagno

Annemarie Caister