")

Welcome, my crafty friends and thank you, Tenia Nelson, for sending everyone over to my blog! For the full list, please visit the Altenew Blog. You can also find the full release here.
I just love 3D embossing folders!!! Technology has made it possible to make the designs look more 3D and this release does not disappoint. For this set of cards, I chose to use light and pastel colors. Take a look at the 4 cards I made below using some of the 3D embossing folders.
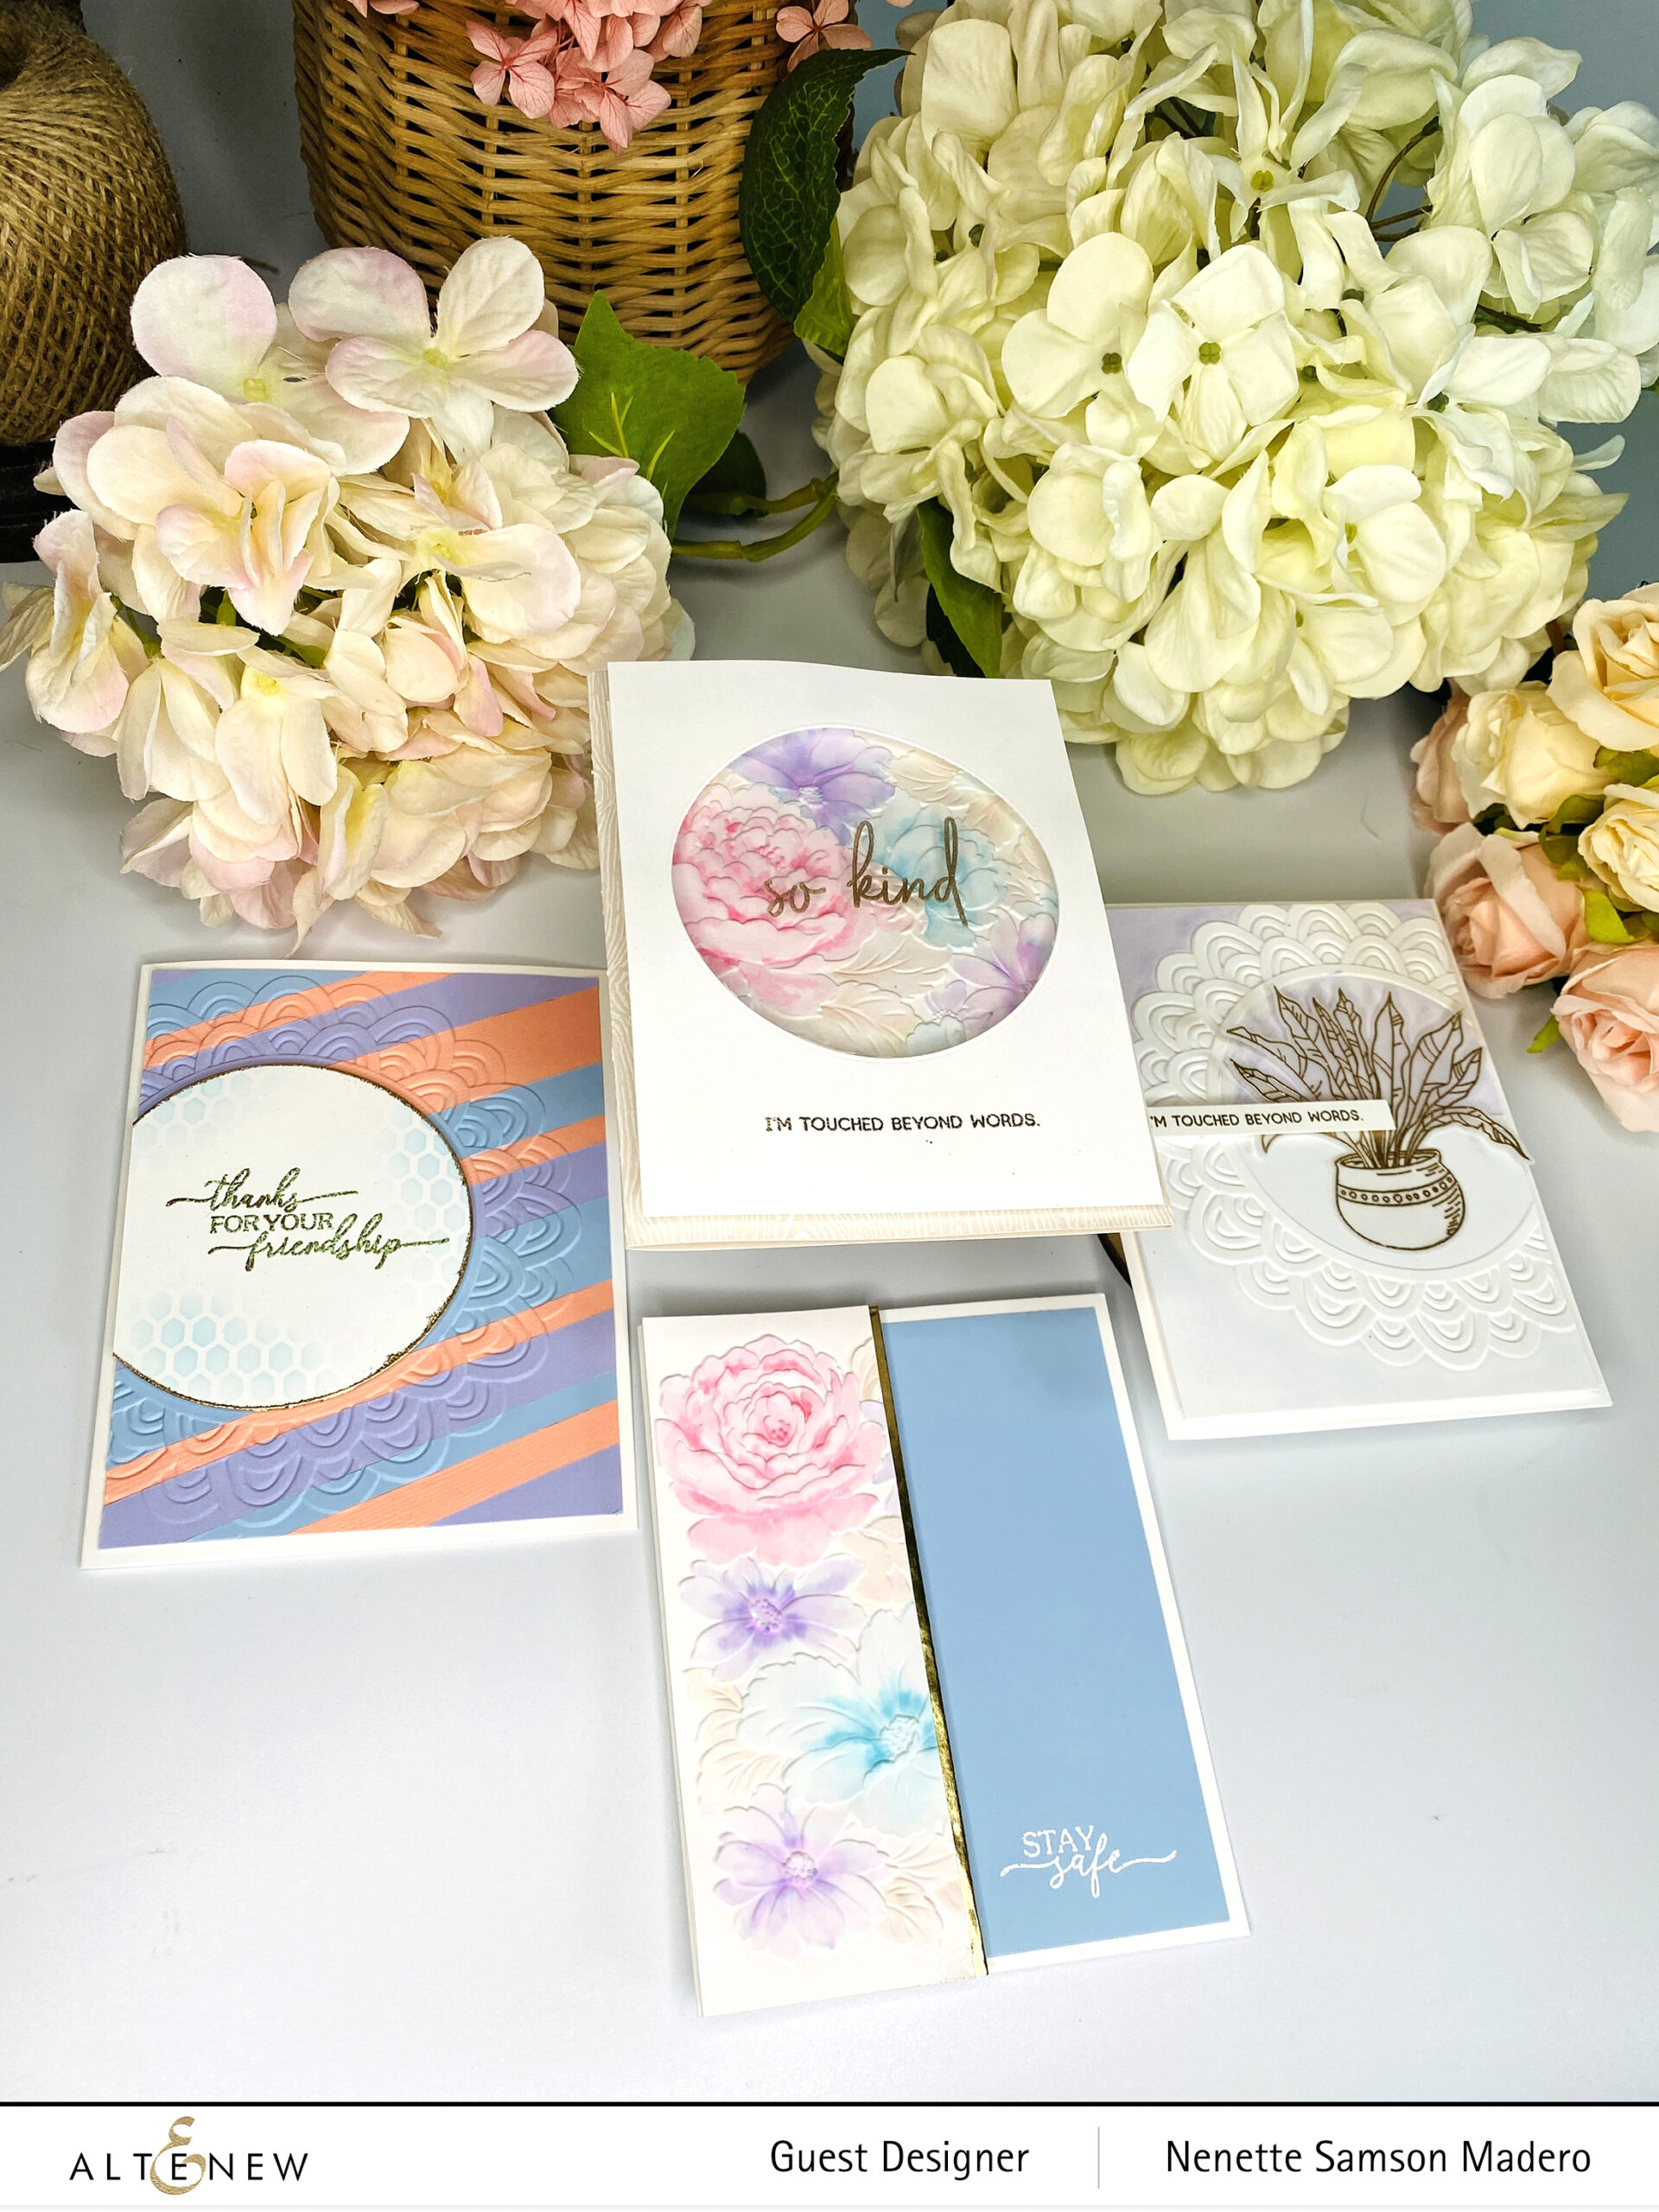
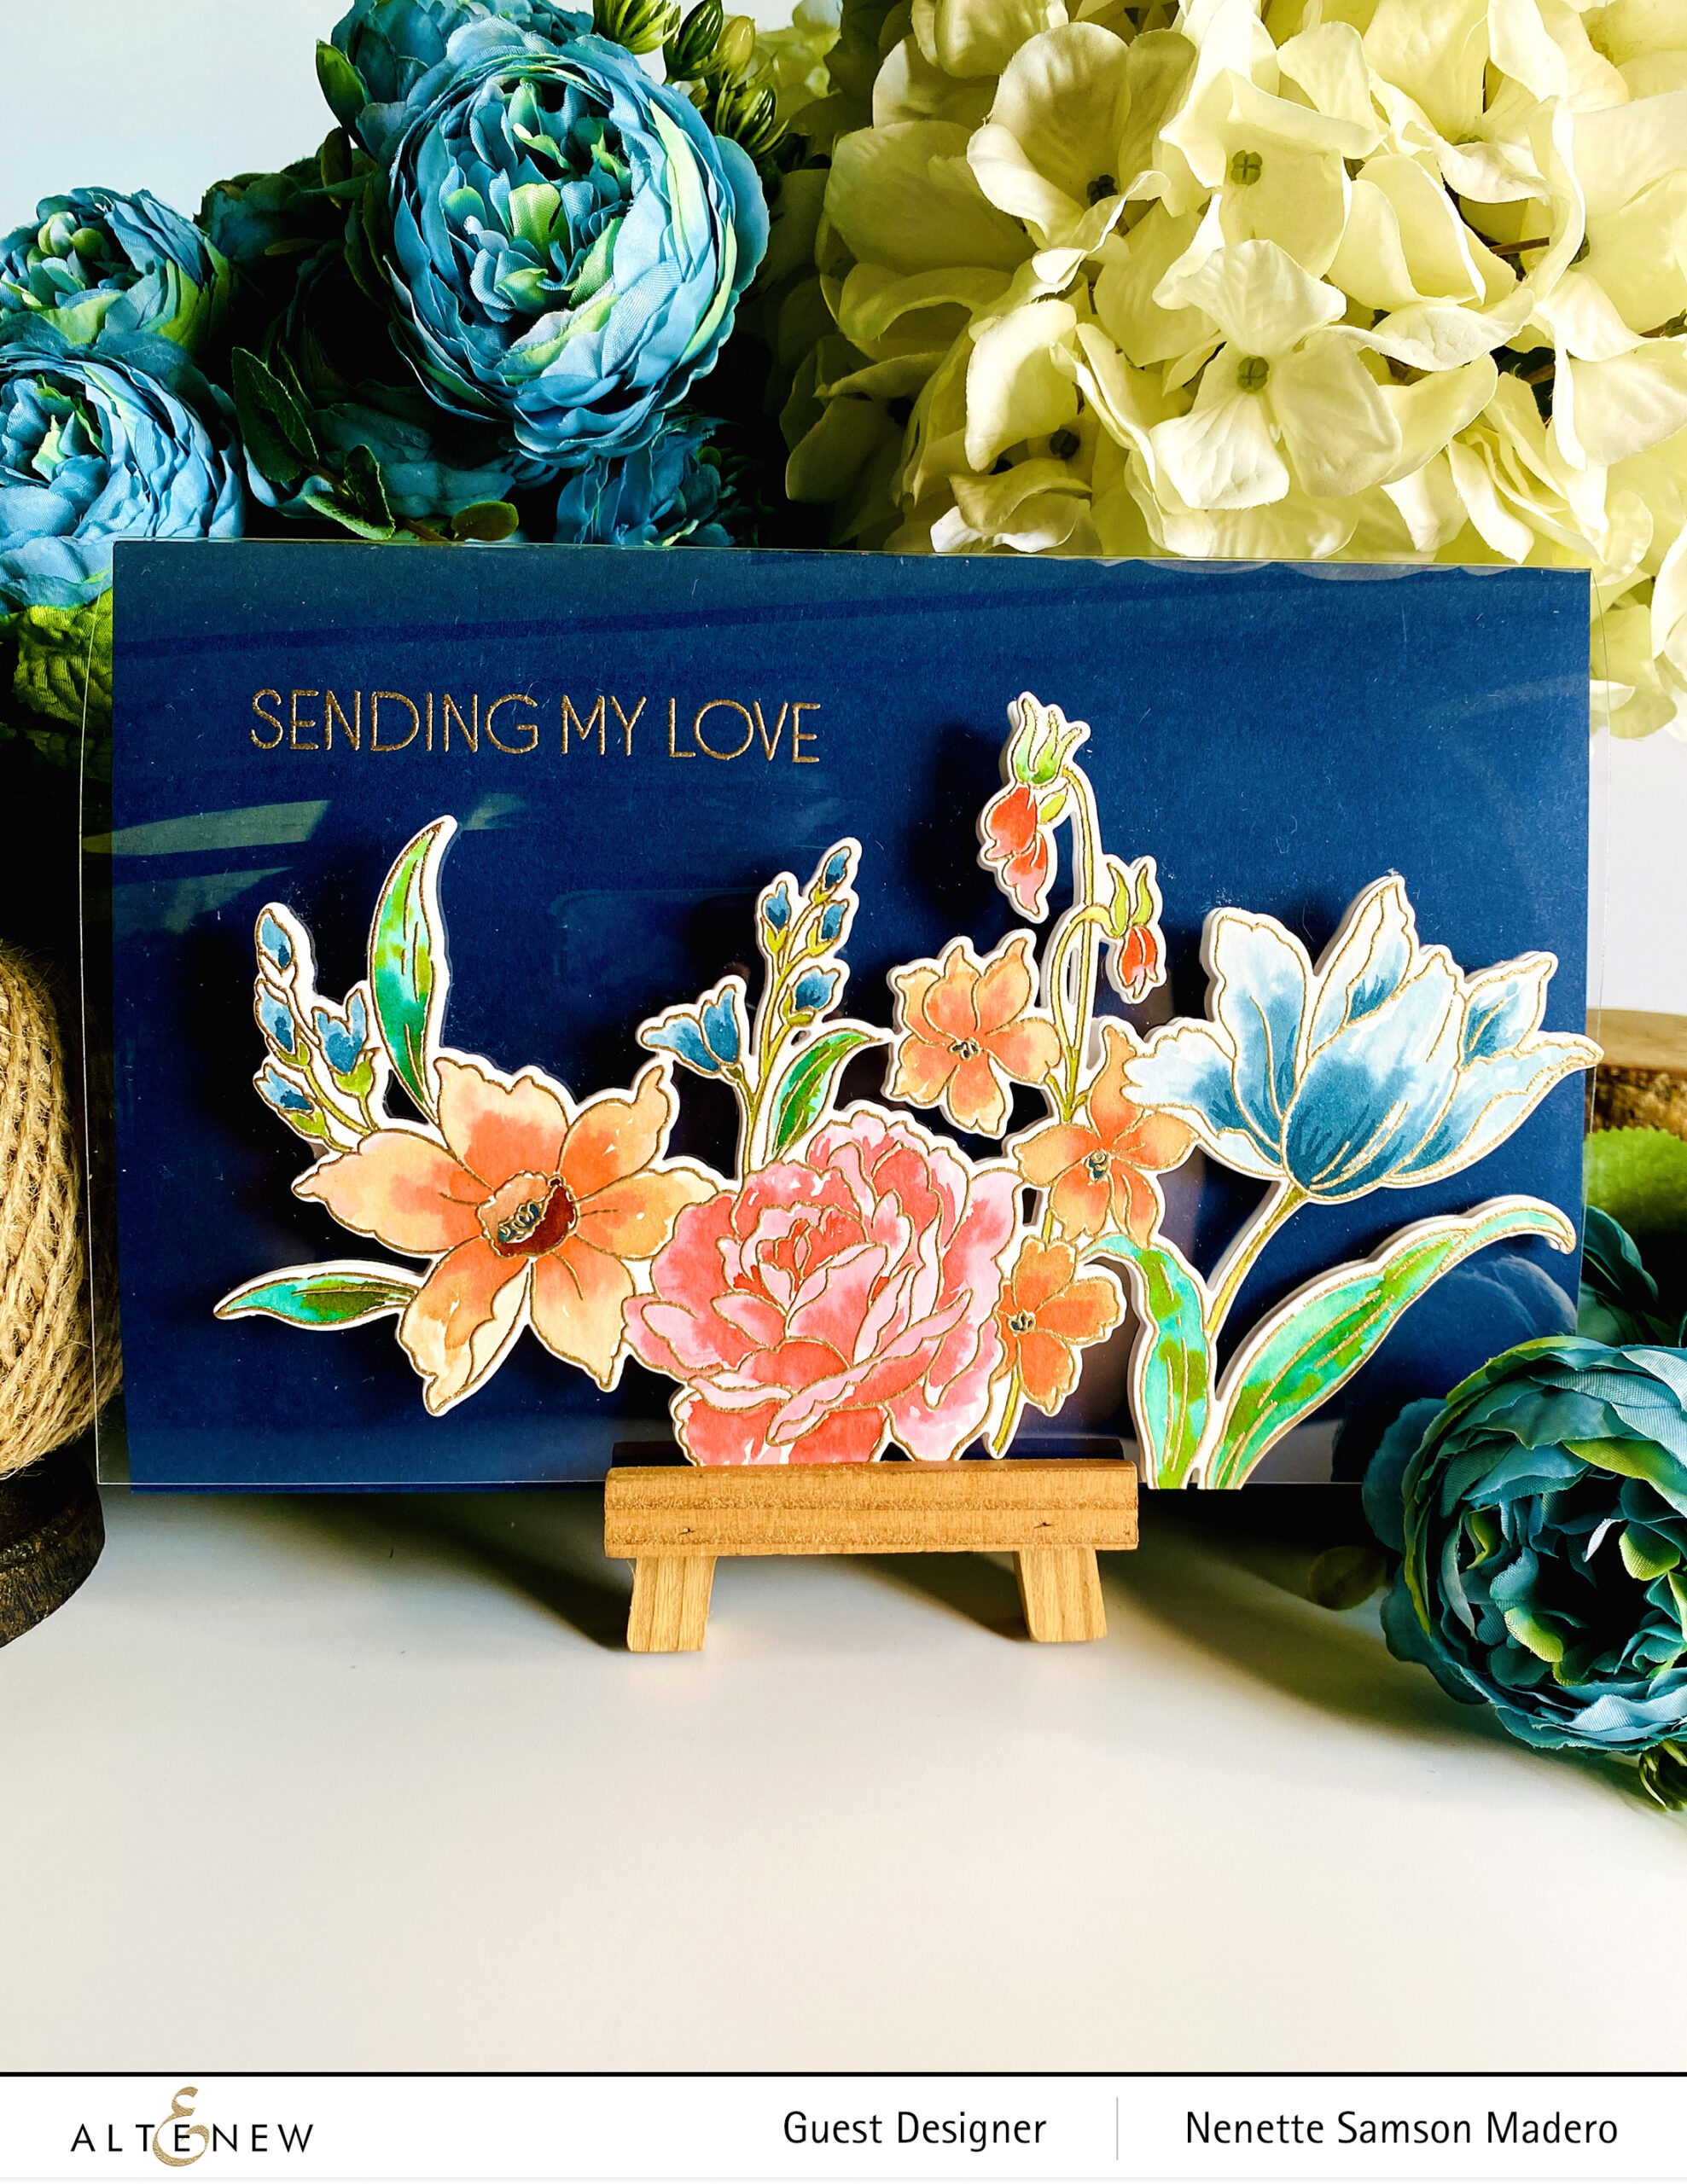
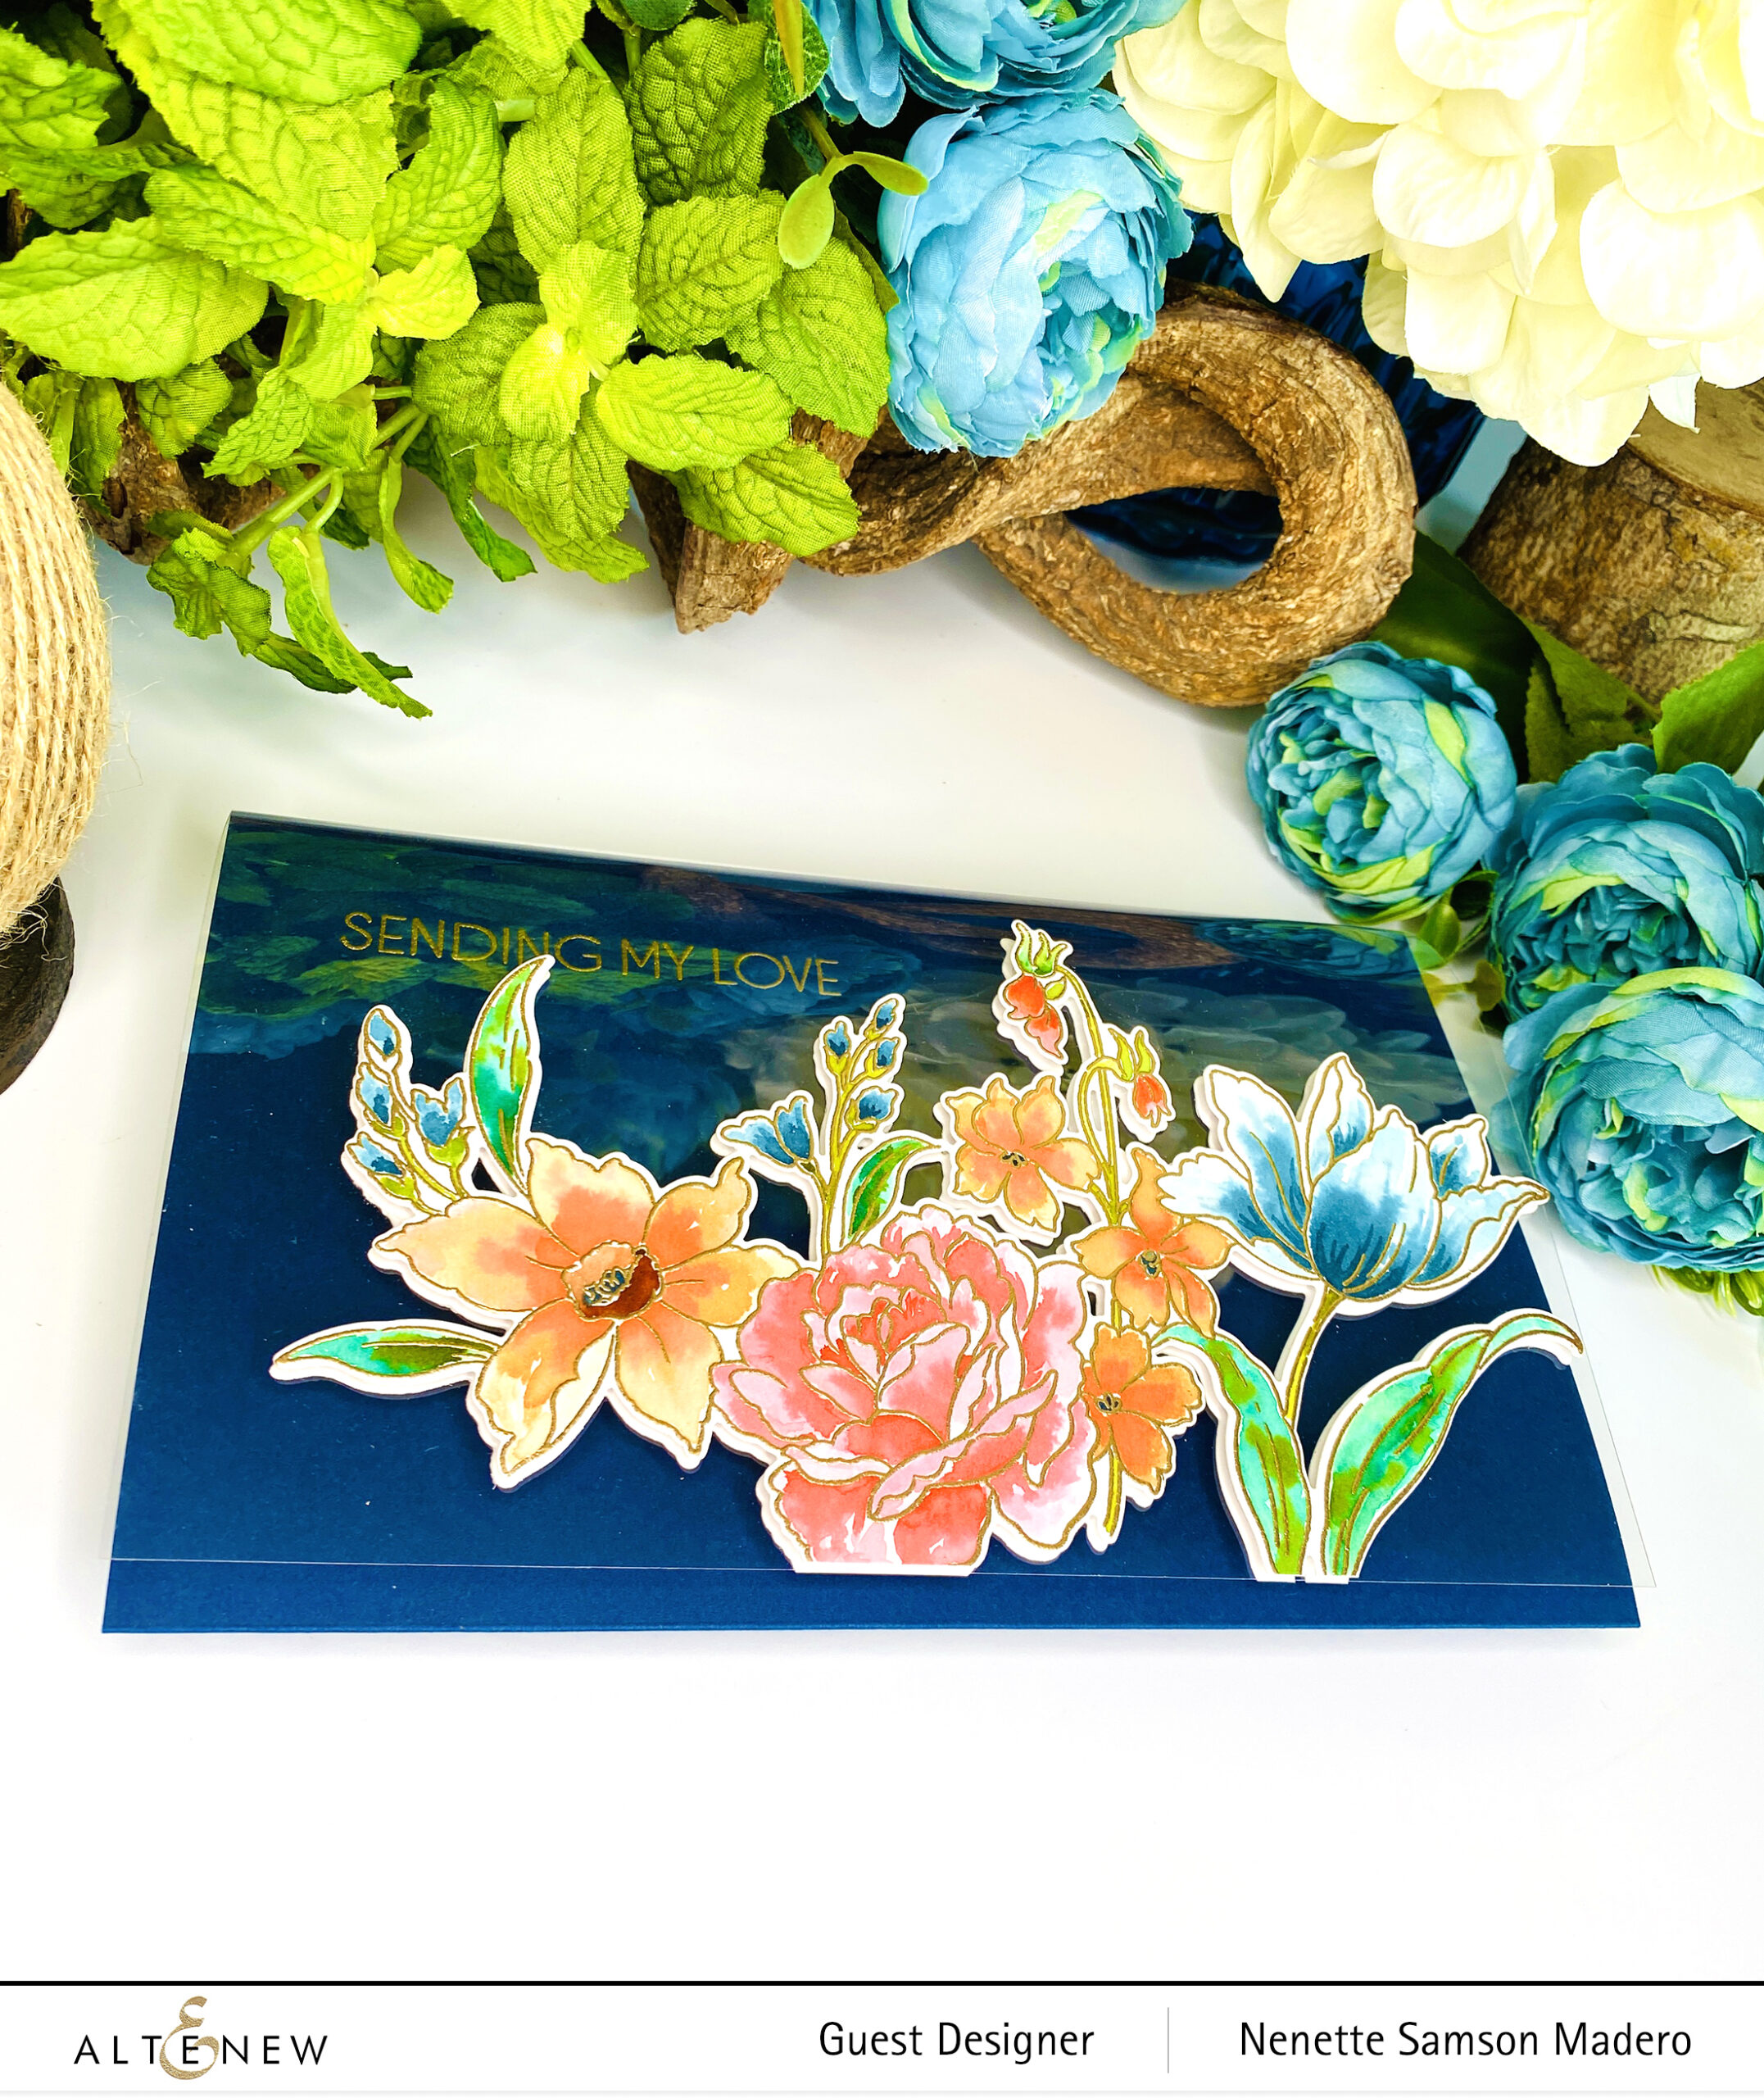
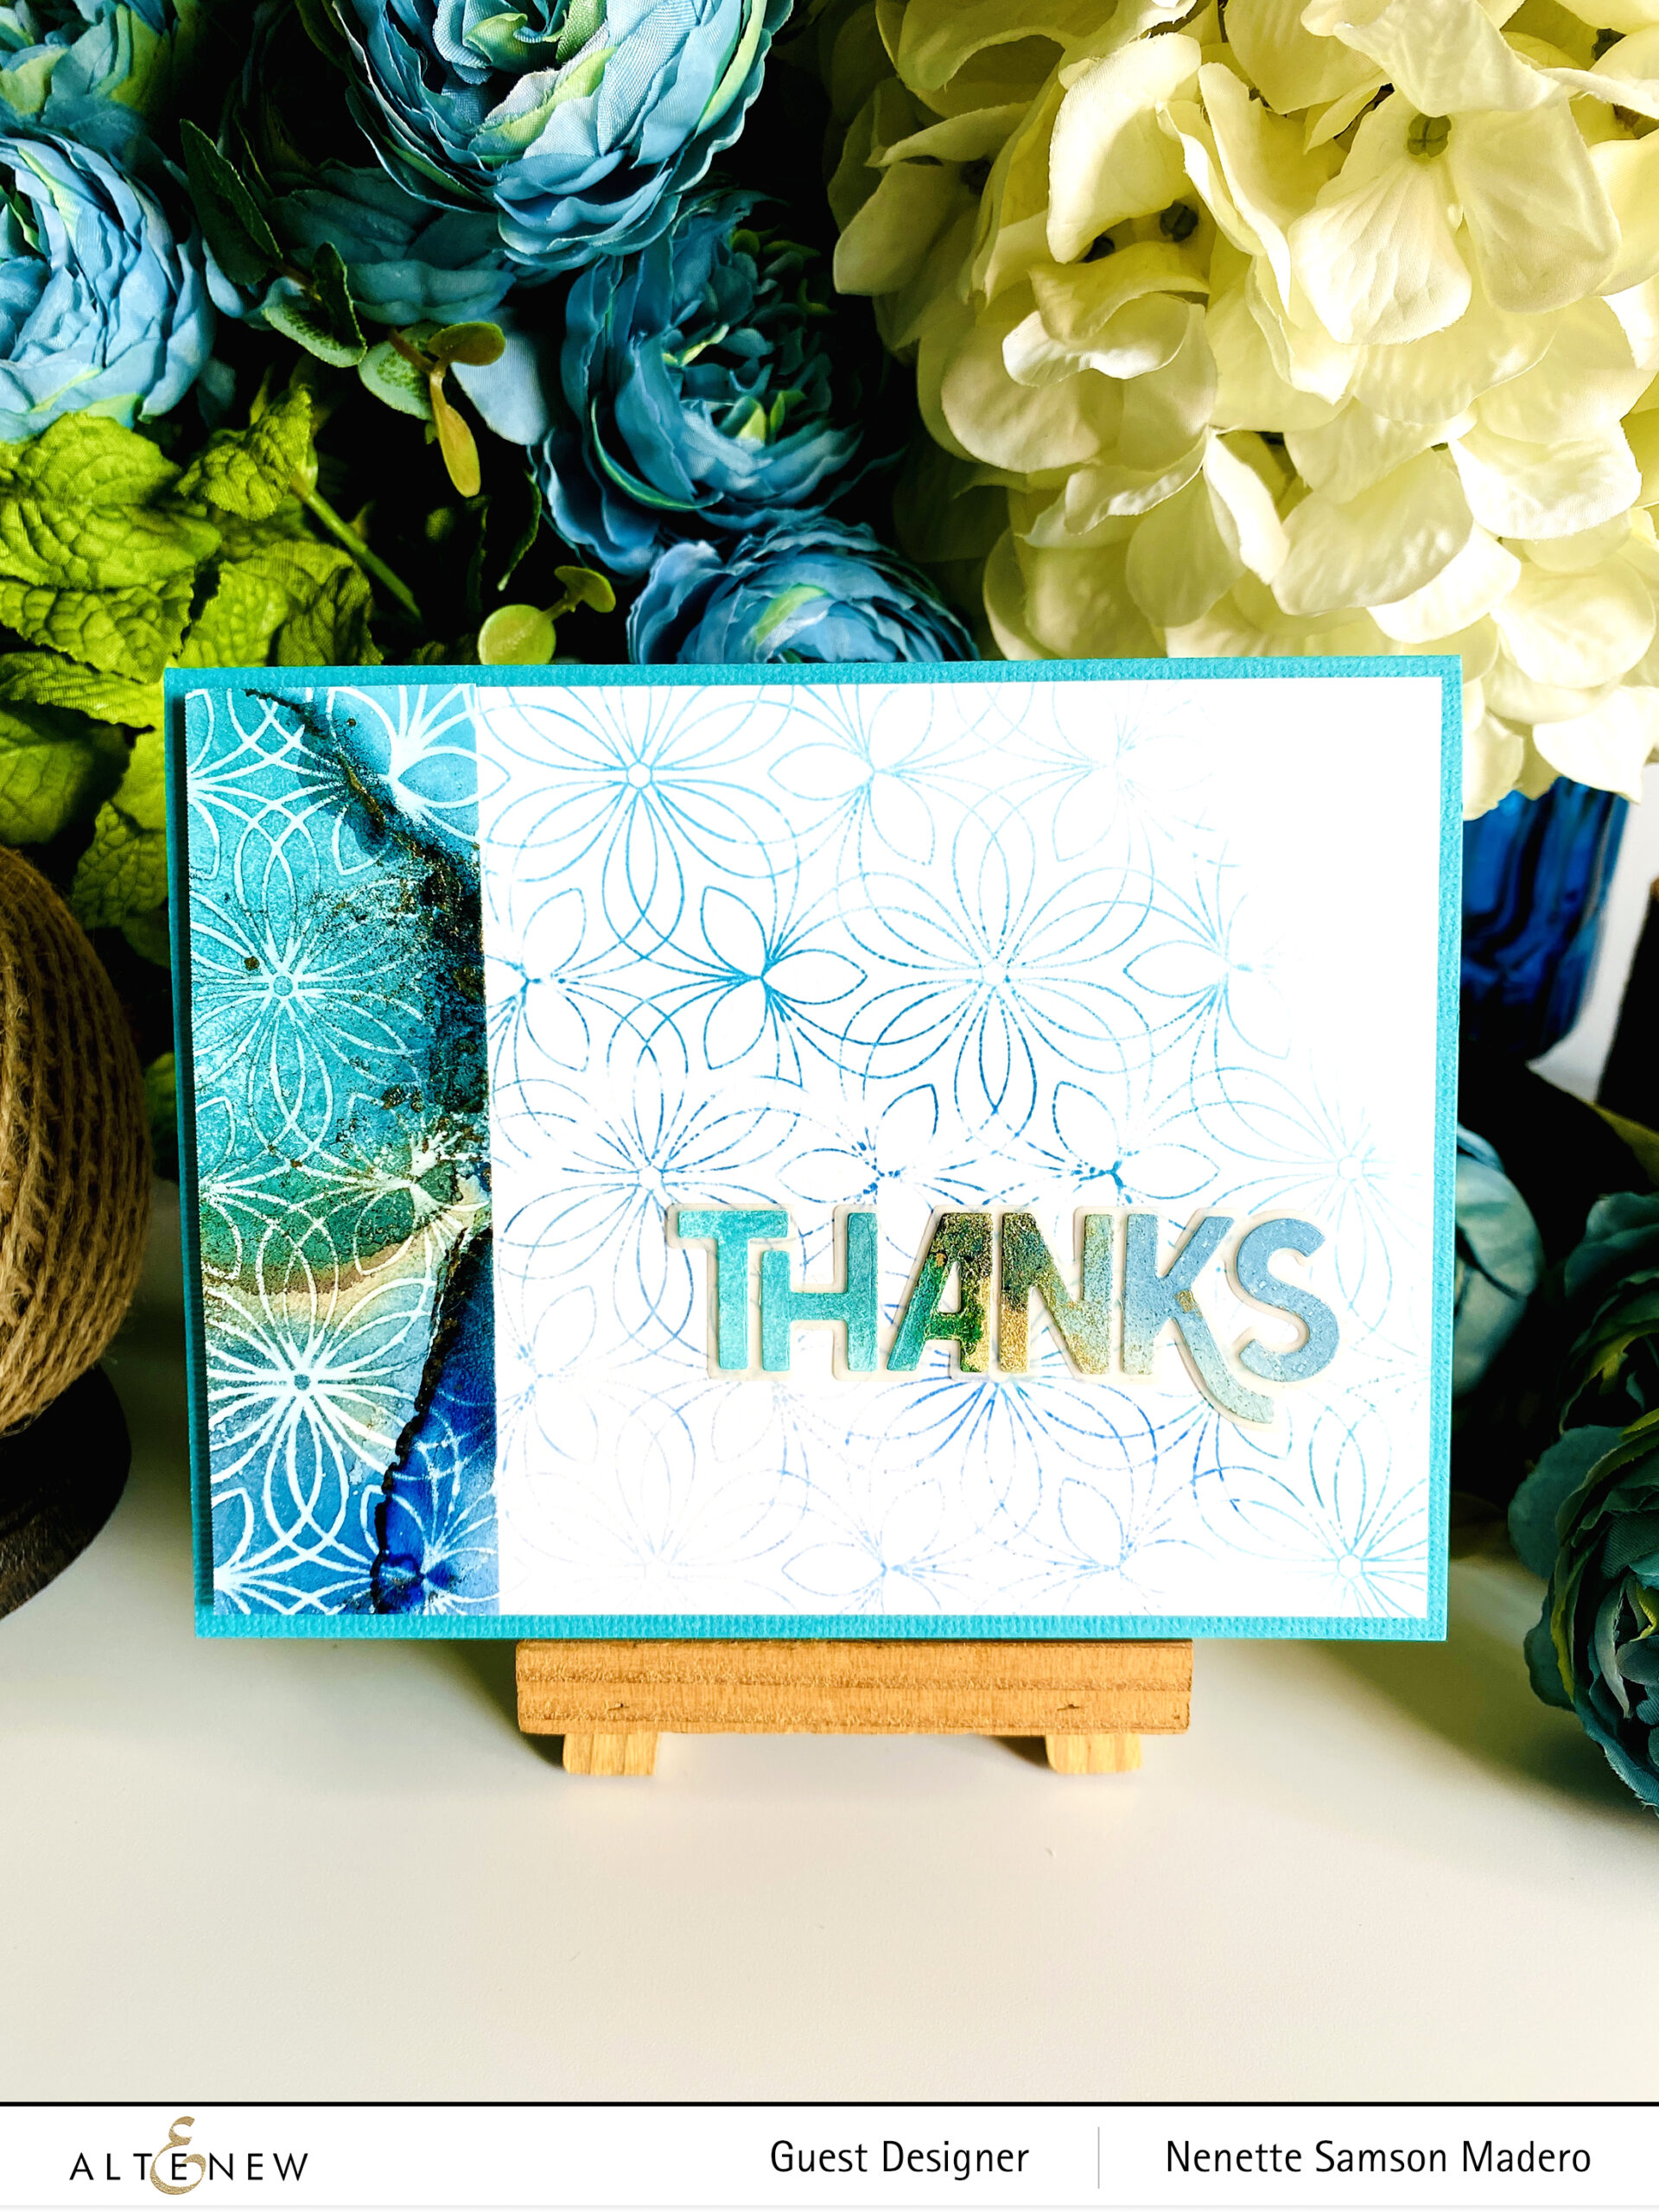
SO KIND… I’M TOUCHED BEYOND WORDS

STEPS:
- Wet the front and back of a Mixed Media white cardstock.
- Emboss using the Flower Bed 3D Embossing folder.
- Color the flowers and leaves using the following dye inks– Aqualicious, Hydrangea, Sand Dunes and Coral Berry using the wet on wet technique. Add more concentrated pigments for the shadows.
- Die cut a circle to form a window.
- Emboss the sentiment from the Inside and Out: Thanks stamp set on clear acetate and at the bottom of the die cut window.
- Assemble the card using foam squares.


I love how this card turned out. I wanted to create a set of cards using pastel colors to keep them light. The flowers in this card look so ethereal and delicate! And because the panel was big, I was able to create a second card.
TIP: Make sure to paint flowers/ leaves that are separated from each other to prevent the different colors of inks from blending with each other. Also, mist the front and back of the paper before embossing. This will give it a more crisp image and it will also prevent the paper from tearing.
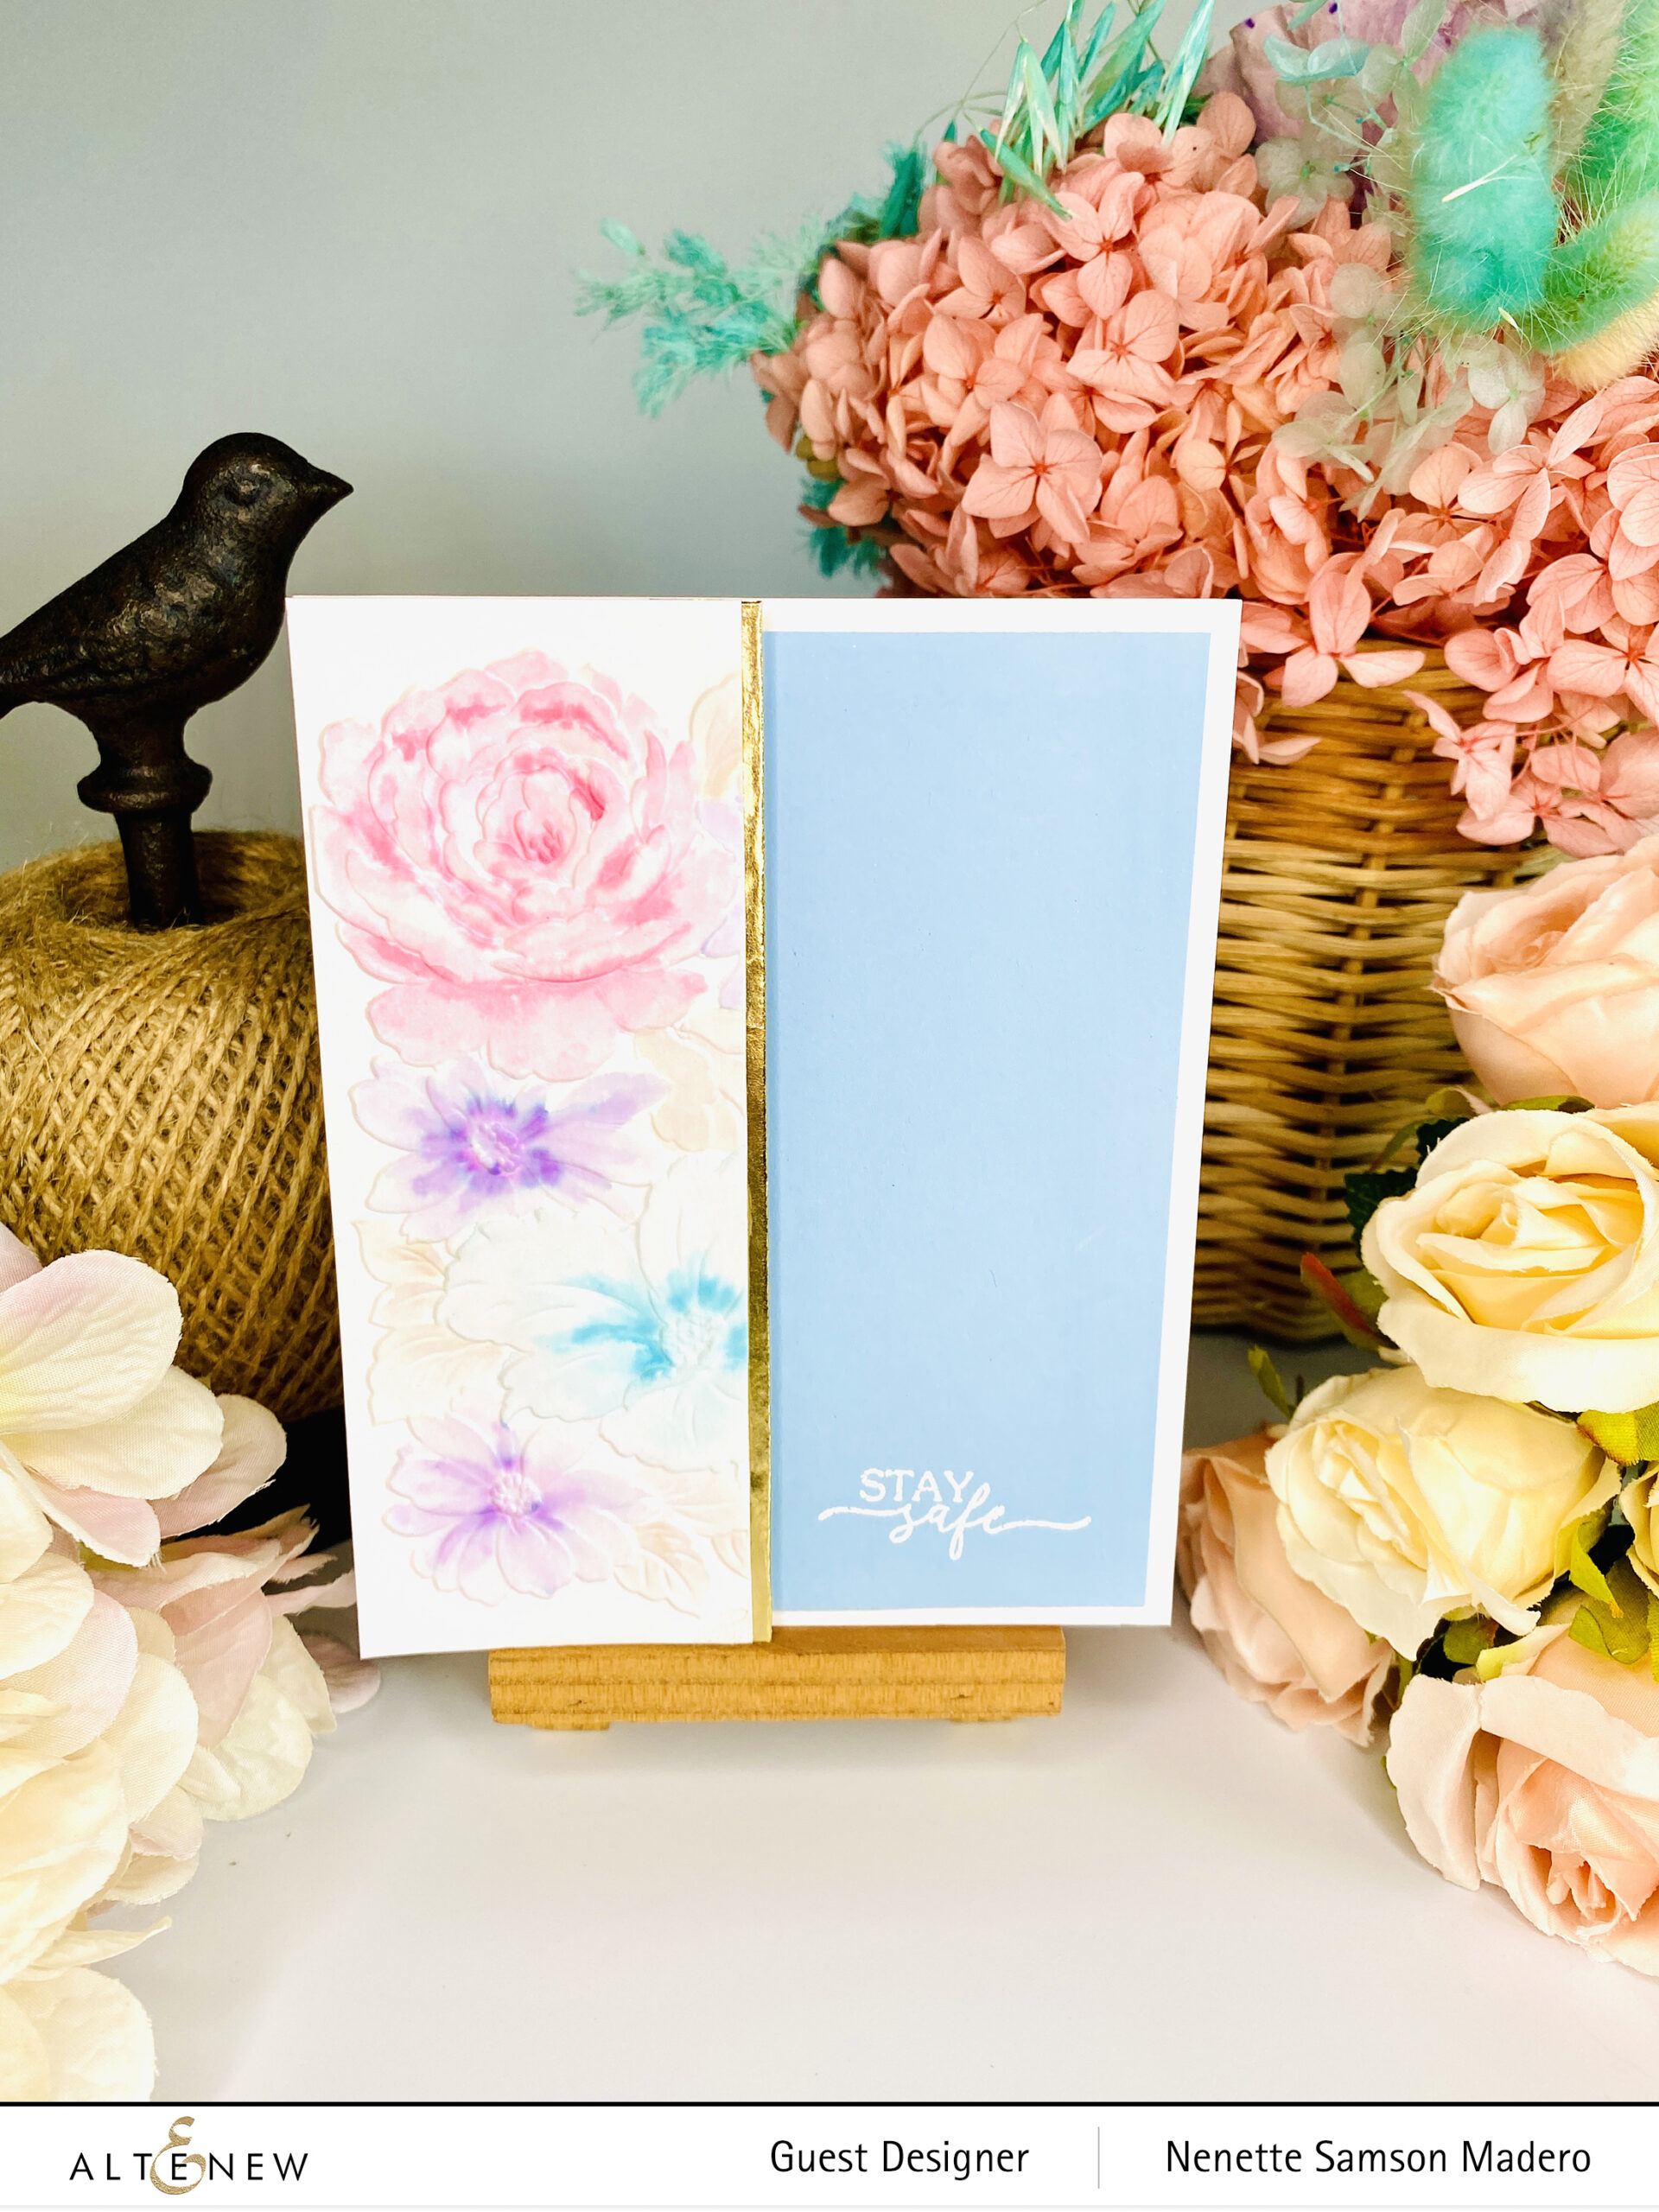
STAY SAFE
STEPS:
- Trim the embossed panel to 2″ x 5.5″.
- Add a gold trim using Gold foil washi tape.
- Stamp the sentiment from the Pot and Plants stamp set on light blue cardstock and emboss with Pure White embossing powder.
- Assemble the card with foam squares and adhesive.
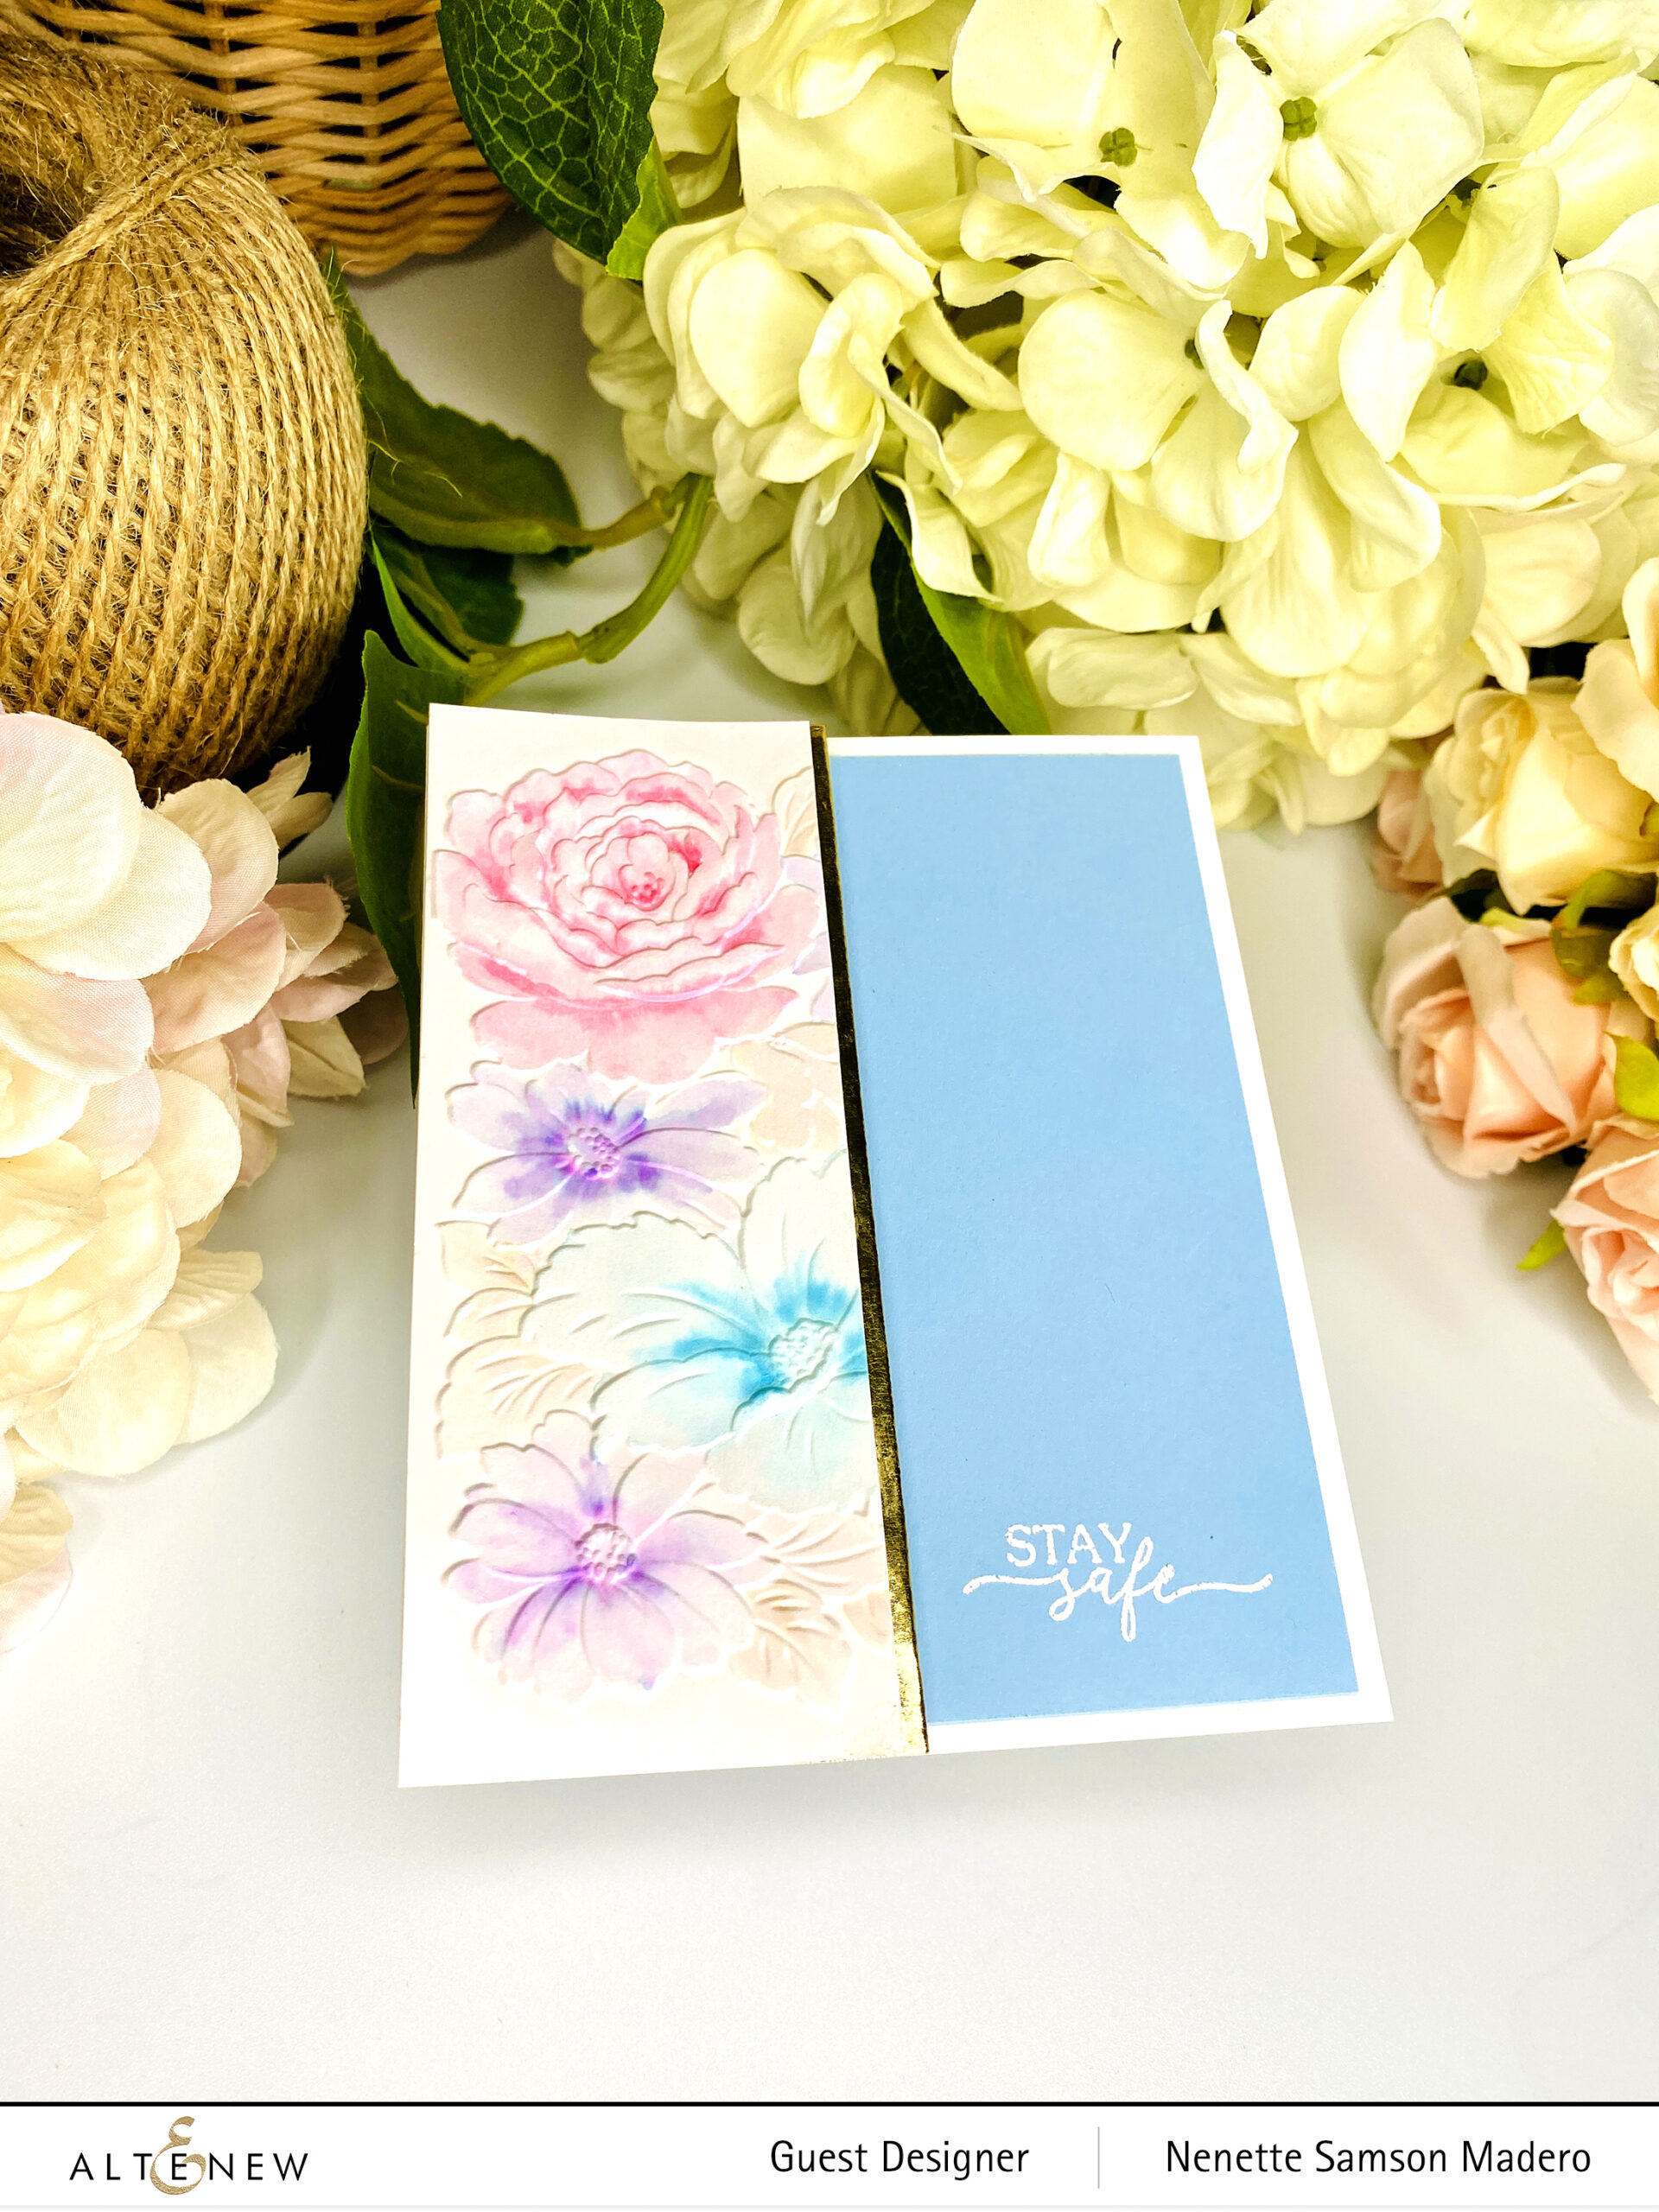
I kept this card clean and simple by using the leftover embossed image from the first card as a border. I love it when I can create more than one card using a single embossed image.
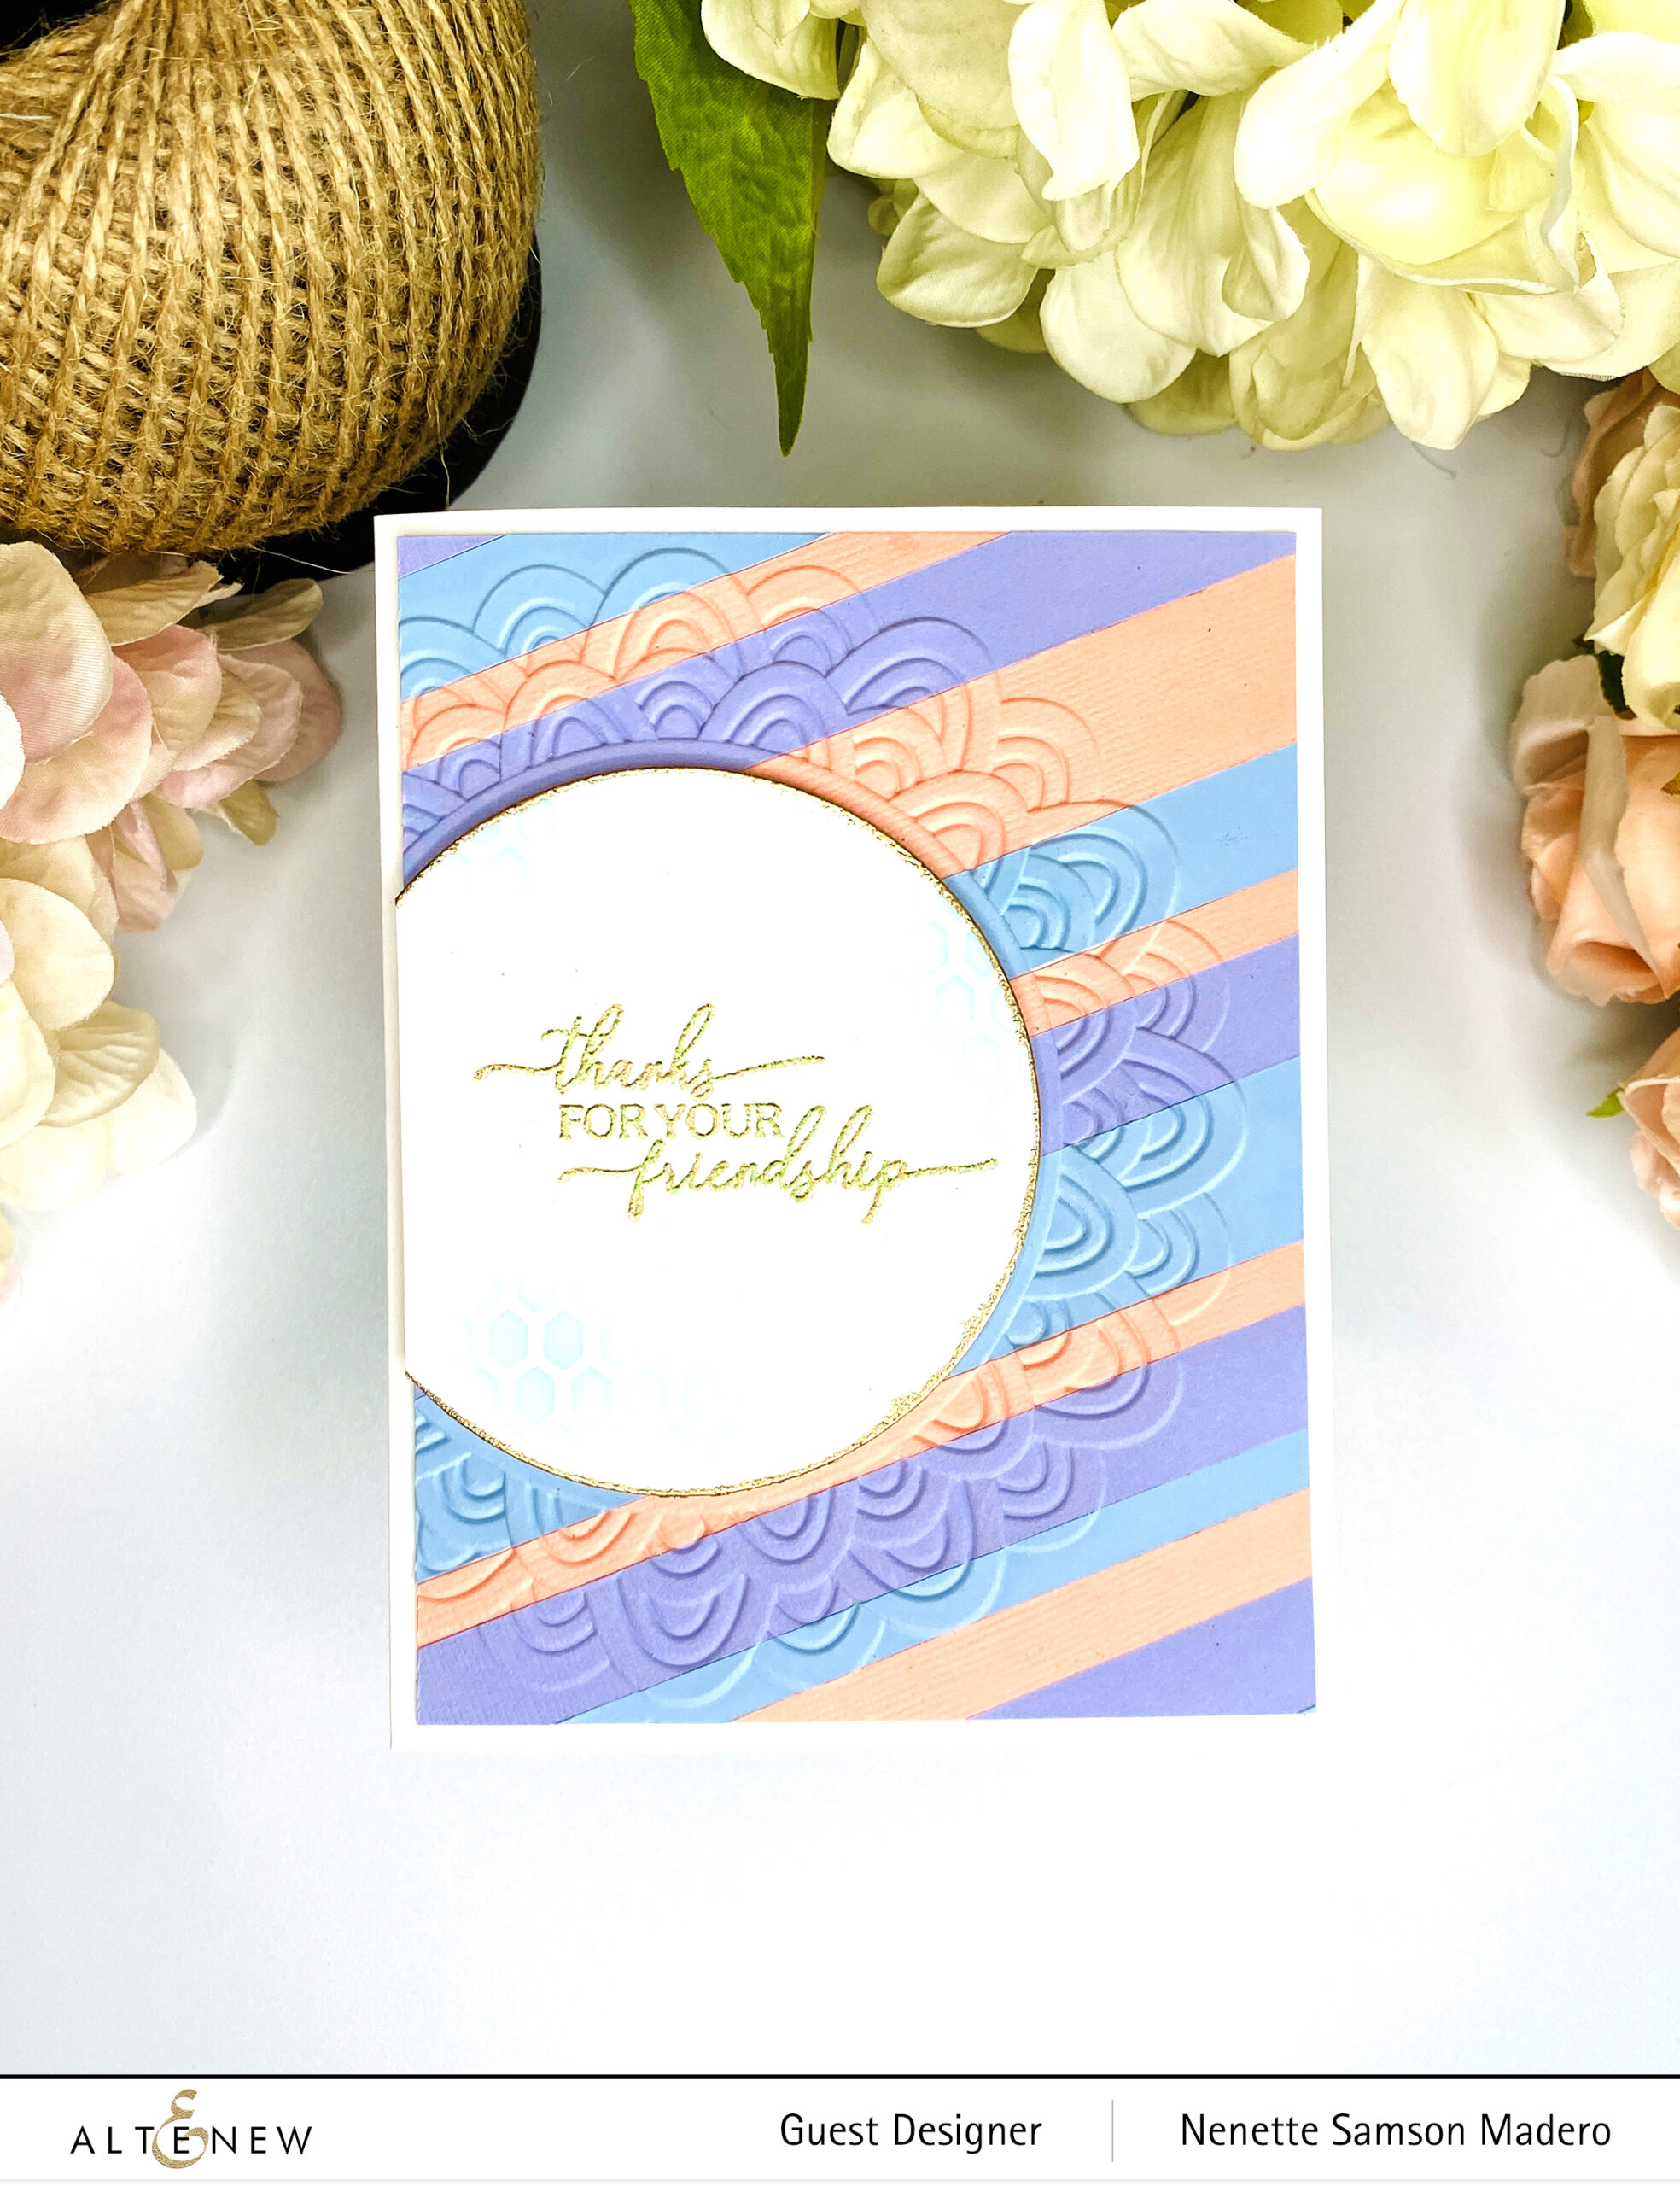
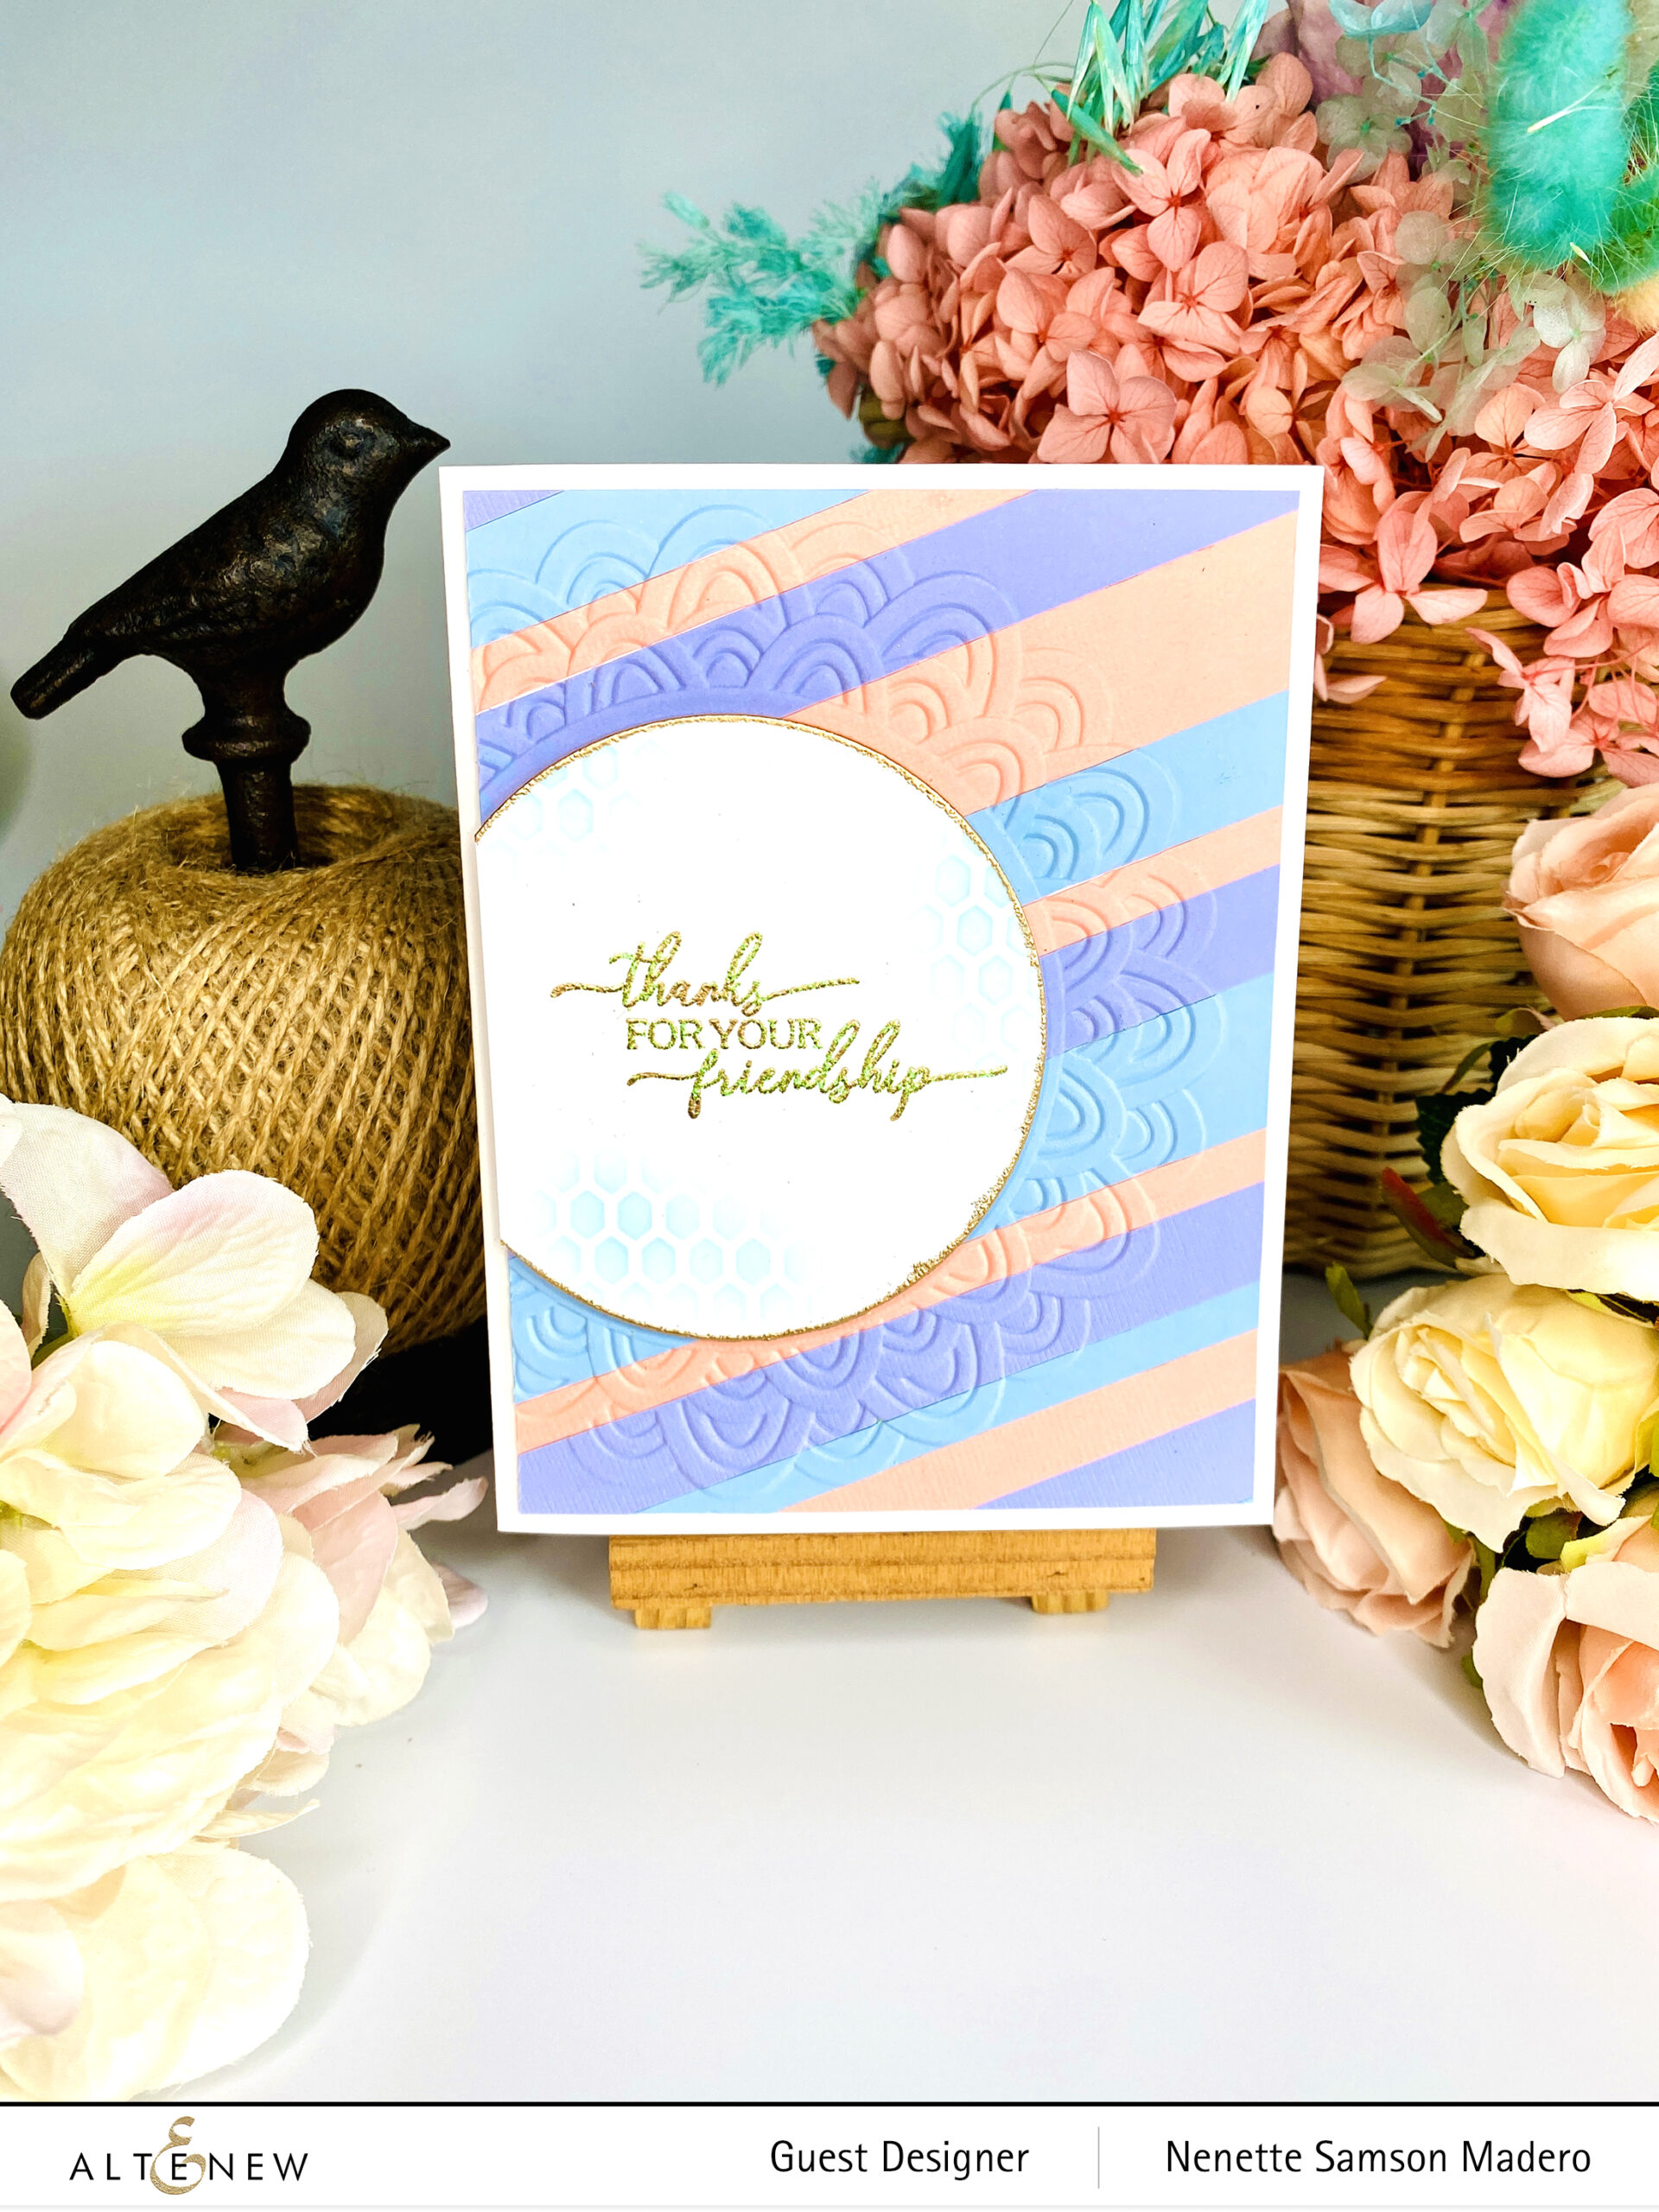
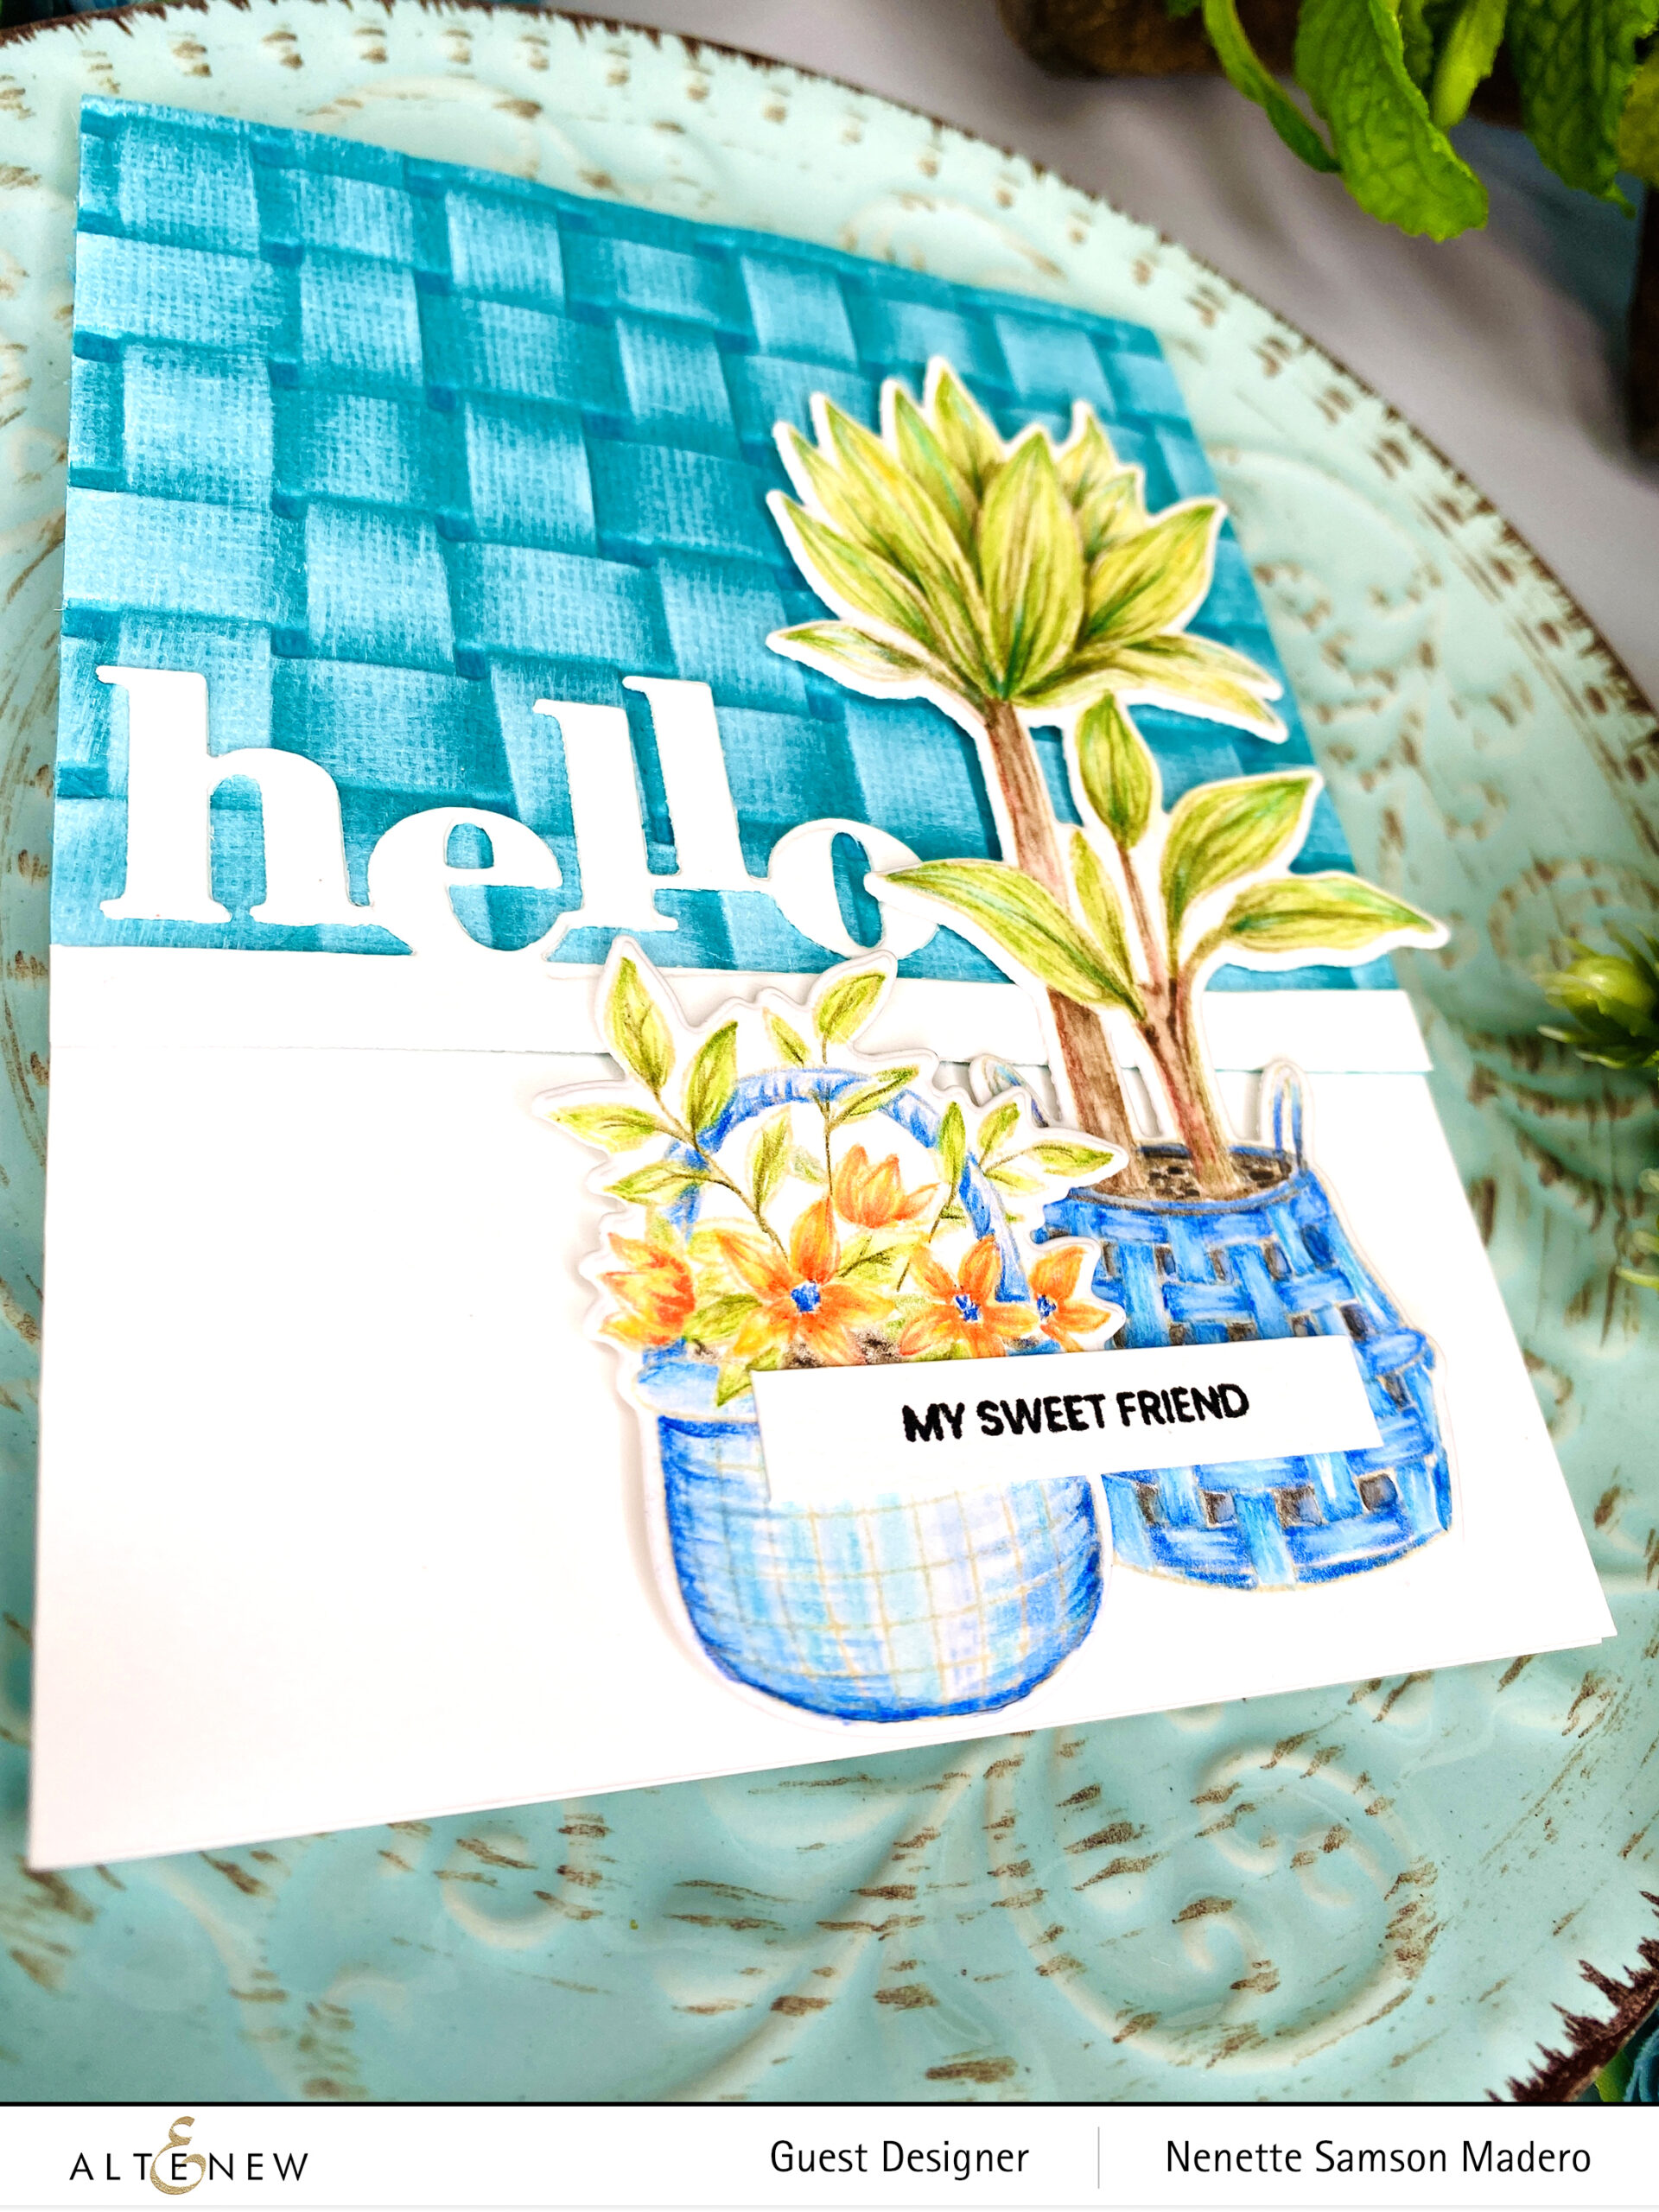
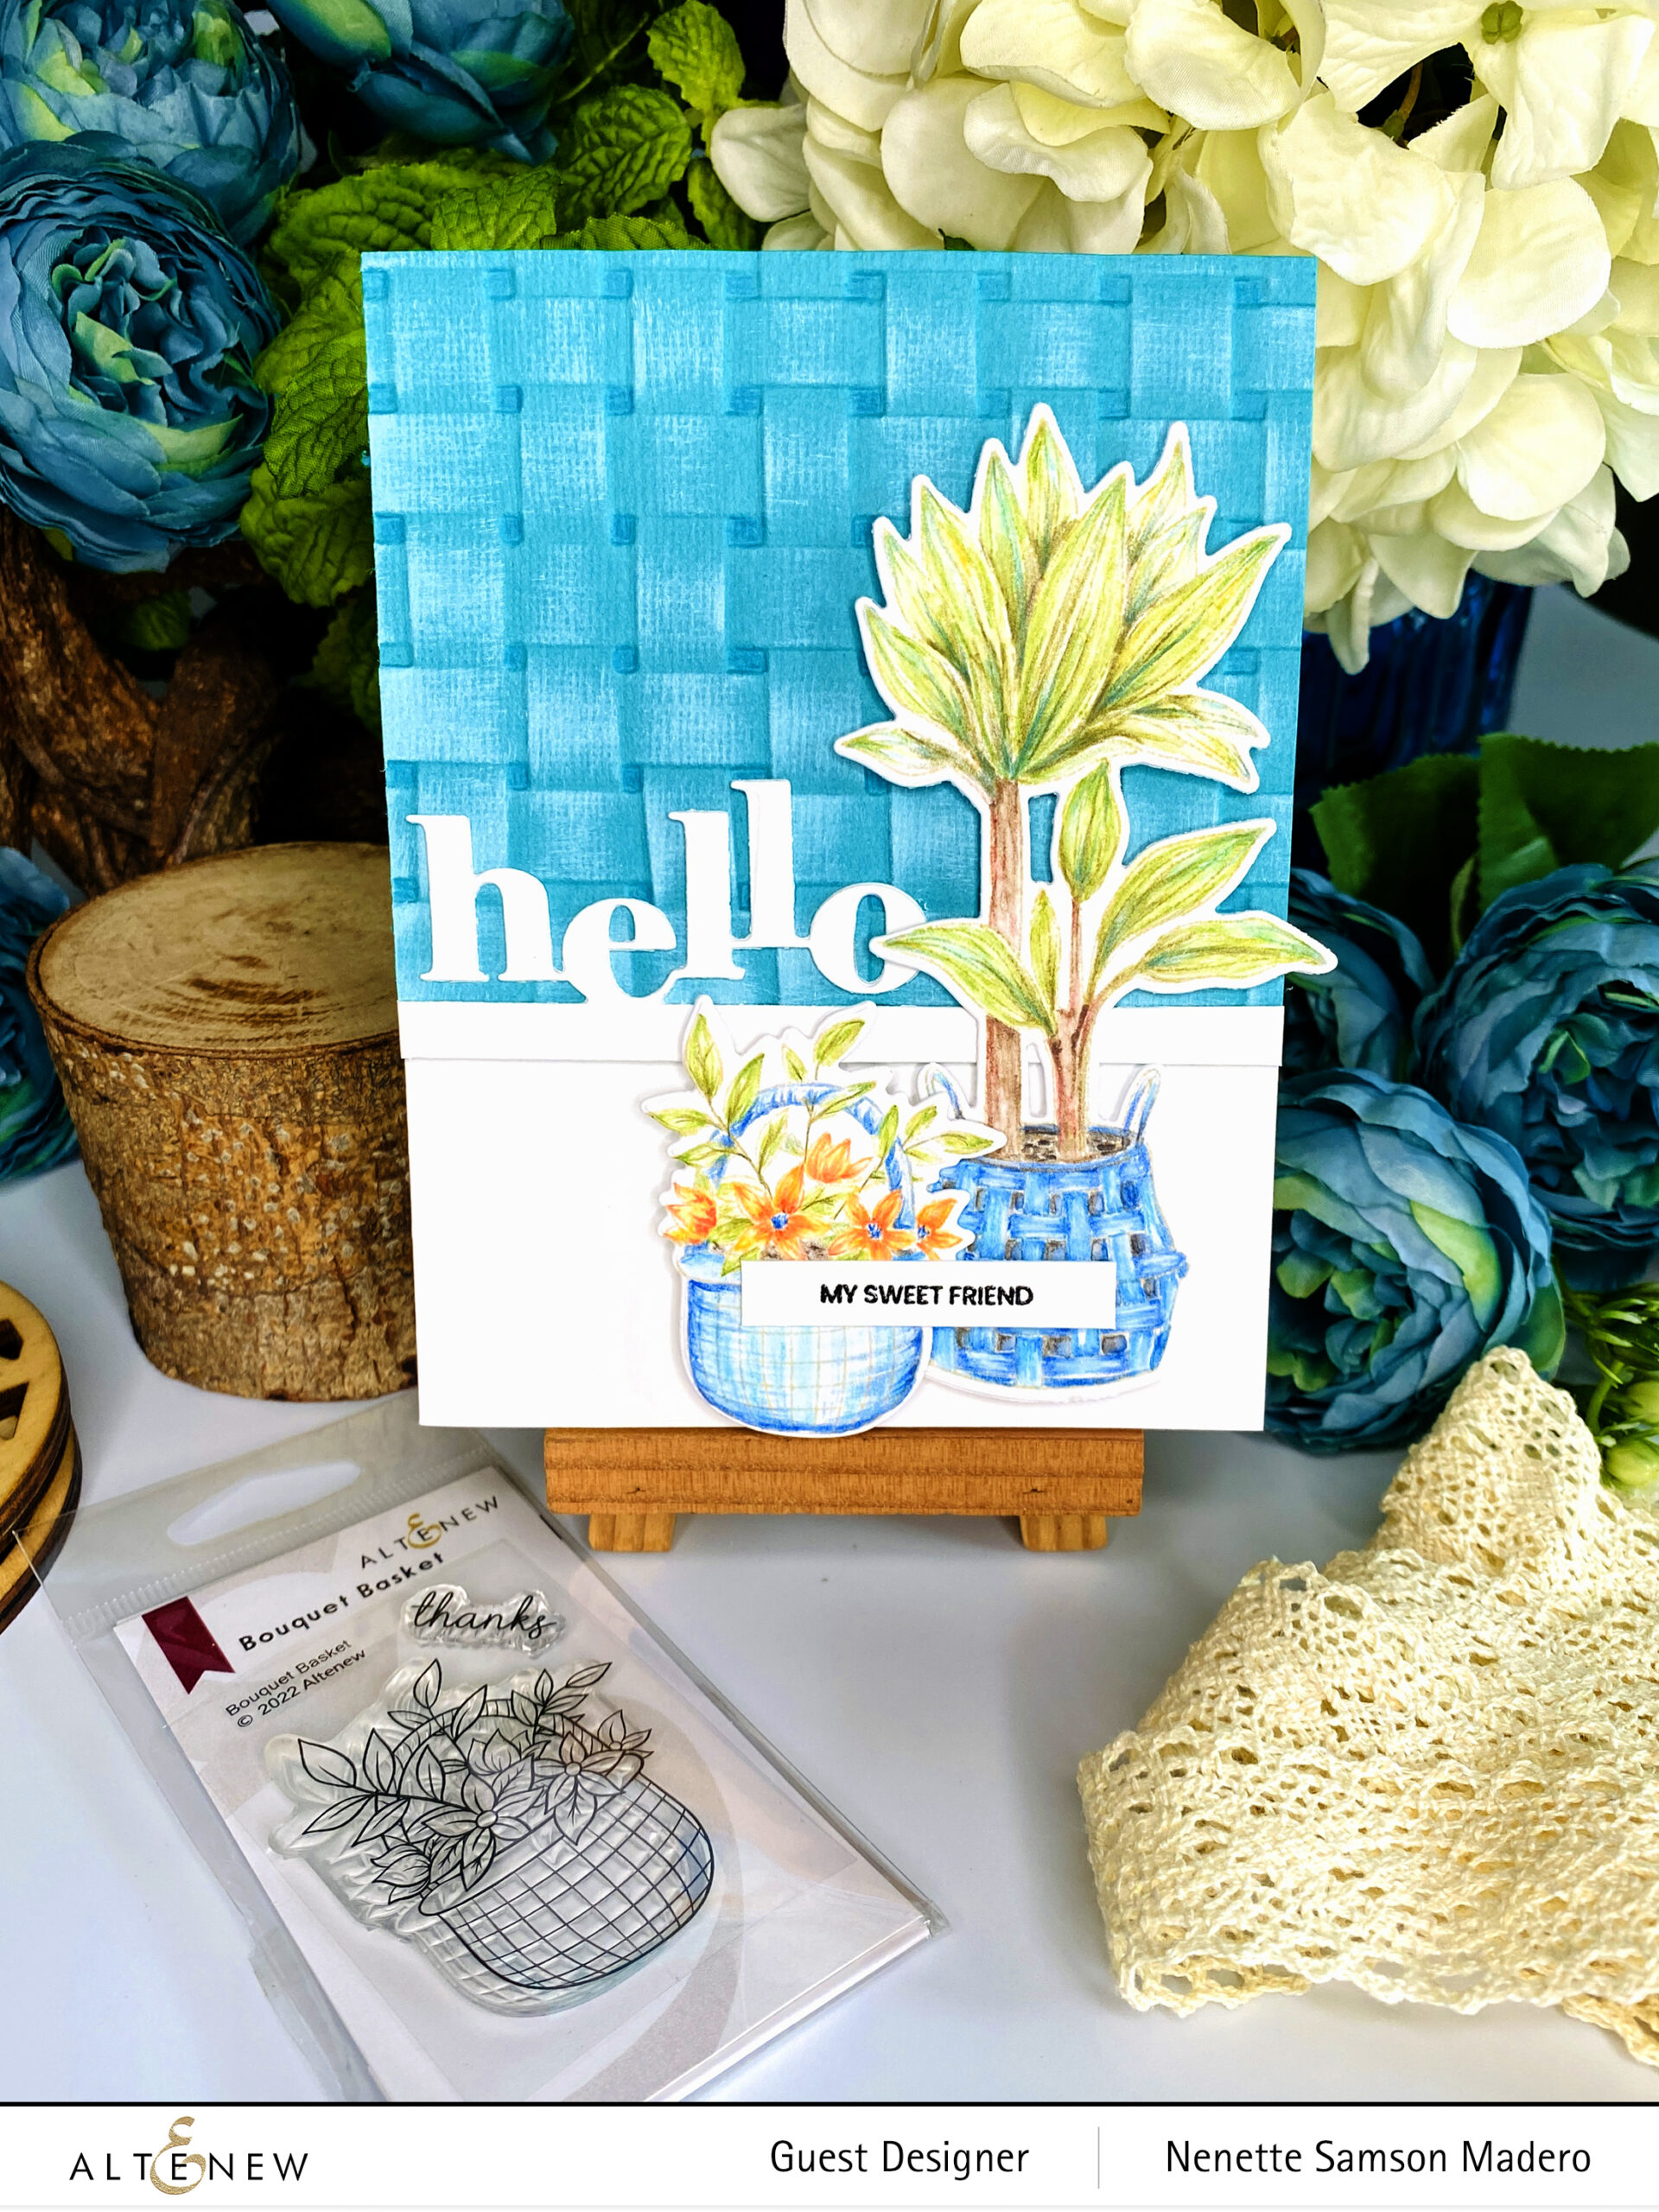
THANK YOU FOR YOUR FRIENDSHIP
STEPS:
- Cut different widths of strips from paper scraps.
- Adhere to a thin sheet of paper with adhesive.
- Emboss using the Scalloped Frame 3D embossing folder.
- Die cut a circle that will fit the center of the Scalloped Frame embossing folder then add pattern using the Fine Tulle stencil and dye ink.
- Stamp the sentiment from the Pots and Plants stamp set and emboss using a mixture of Fluorescent Green and Rose Gold embossing powder.
- Assemble the card using foam squares and adhesive.
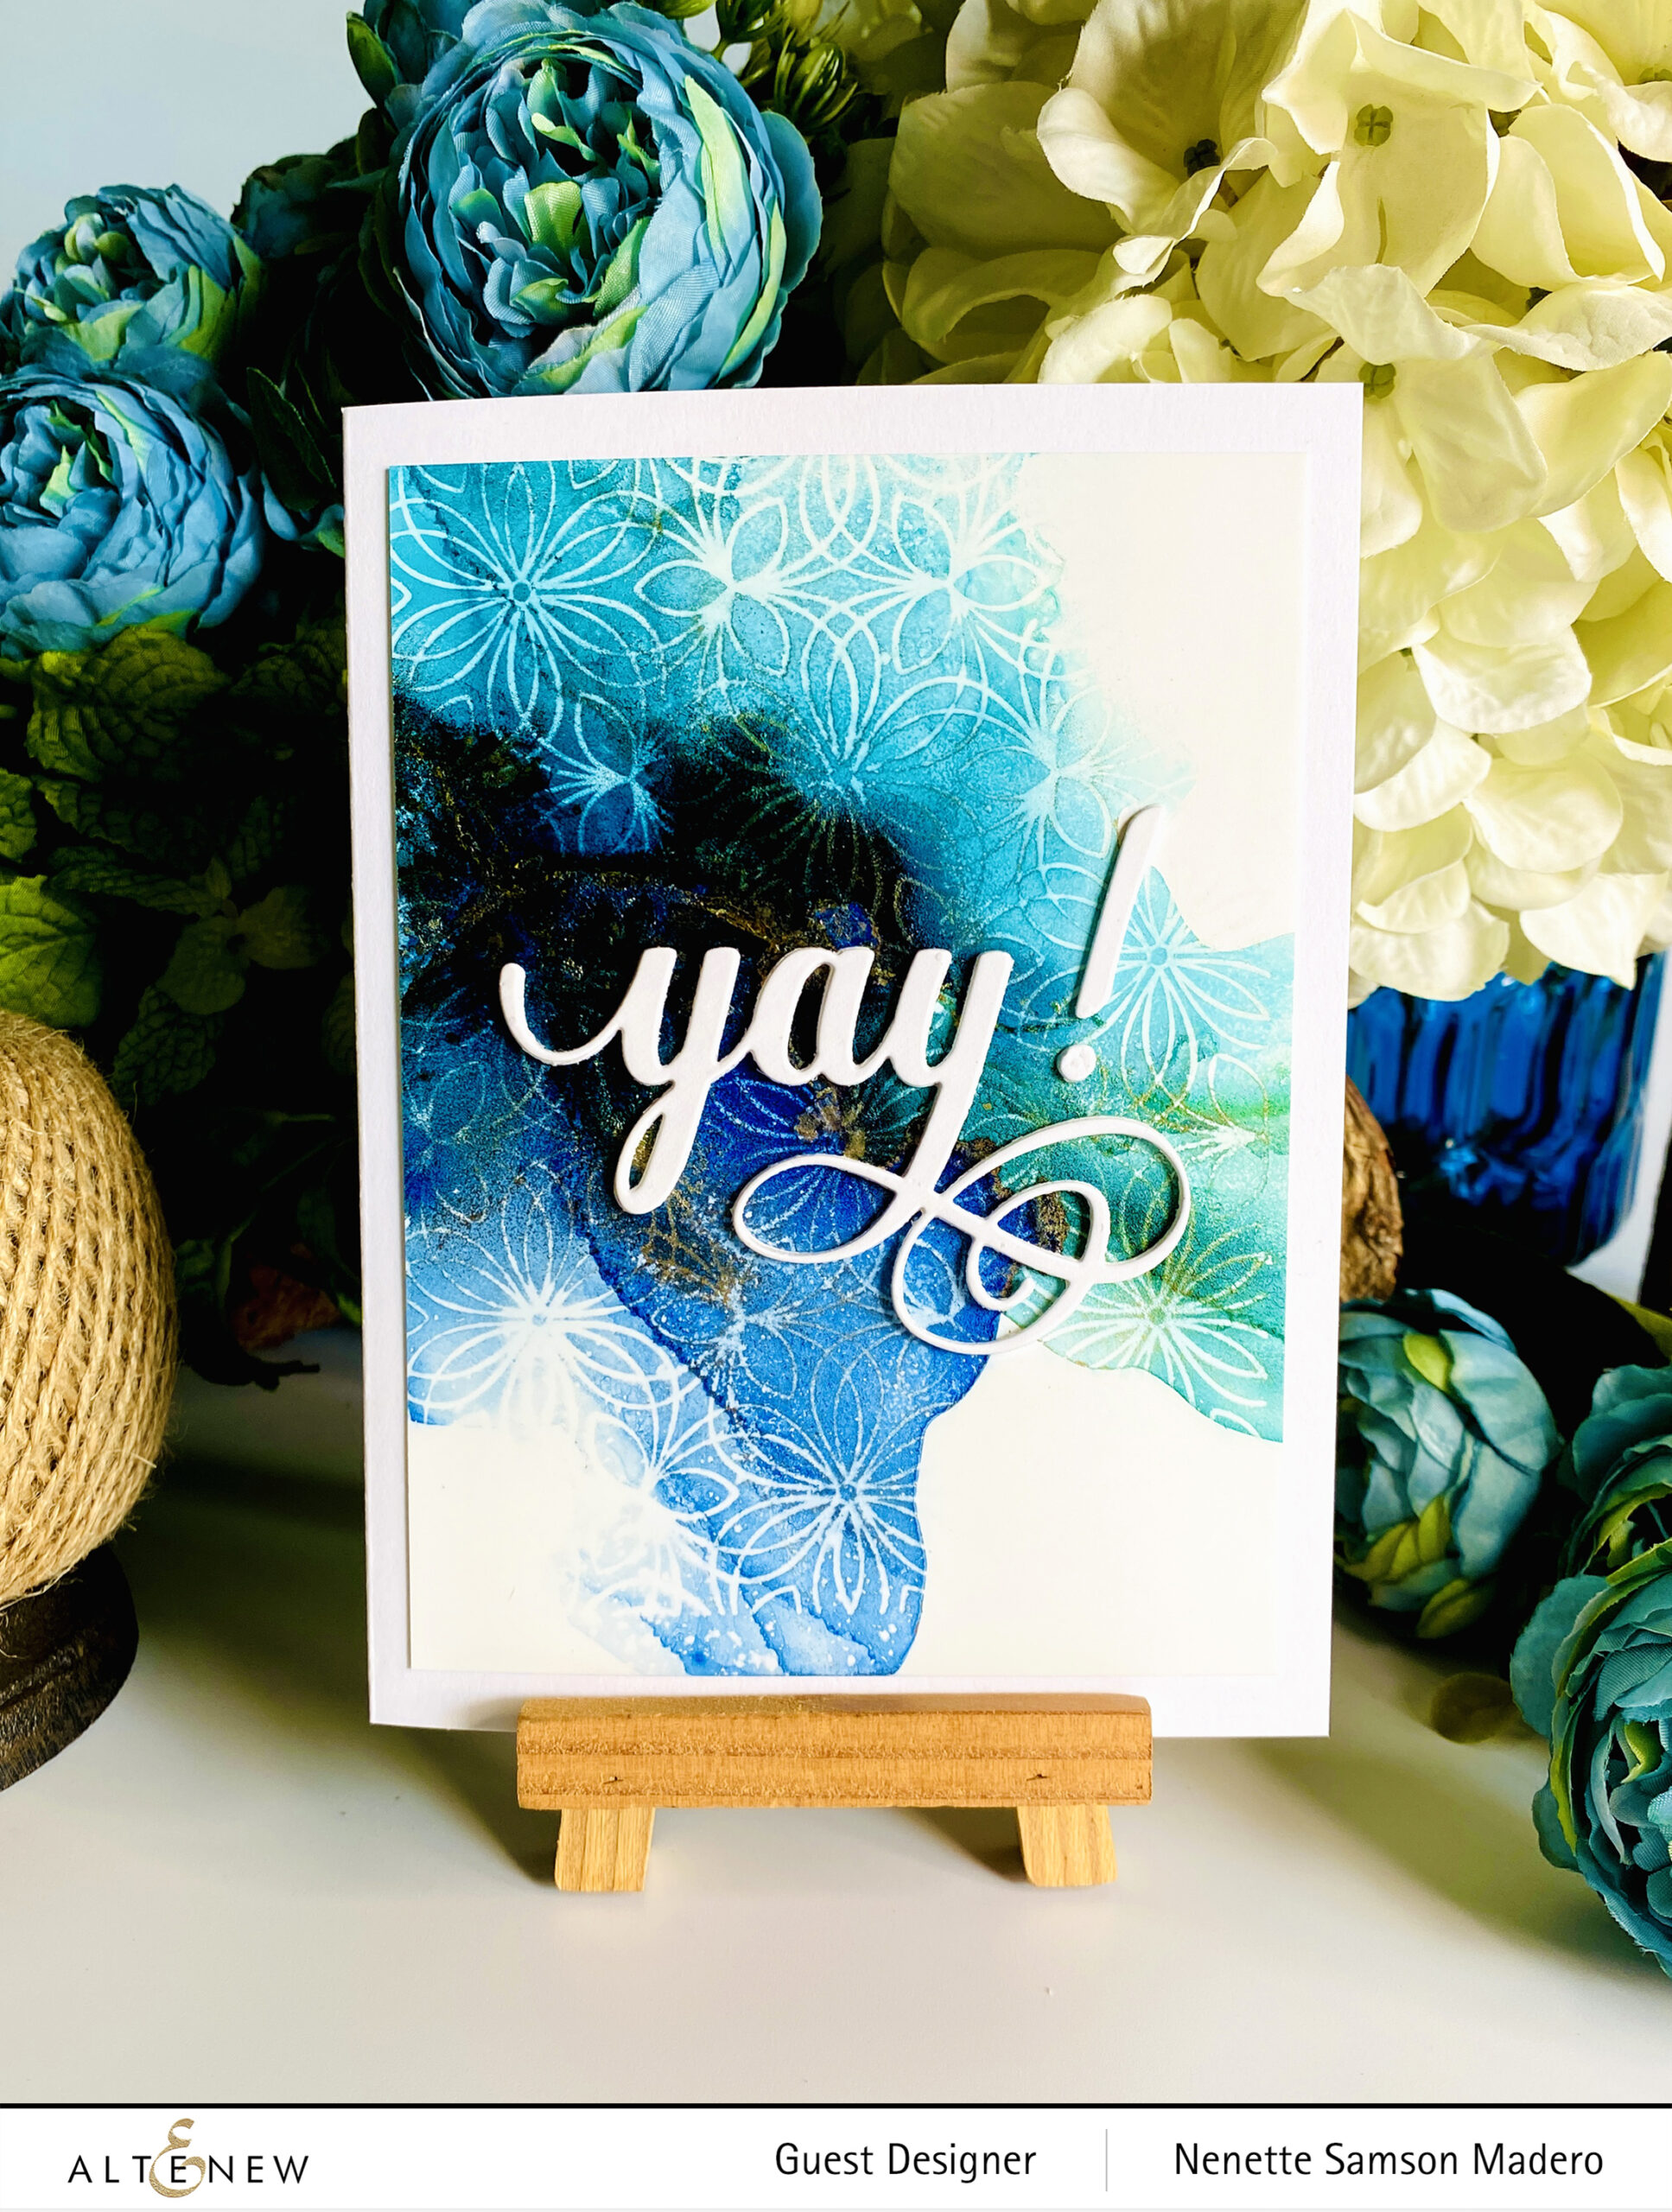
I’M TOUCHED BEYOND WORDS

STEPS:
- Ink up the flat side of the embossing folder and emboss. Repeat using a 2nd color.
- Cut the panel to form the embossed circle.
- Stamp the plant image from the Pots and Plants stamp set on vellum and emboss with Rose Gold embossing powder. Die cut the image.
- Stamp the sentiment.
- Assemble the card with foam squares and adhesive.
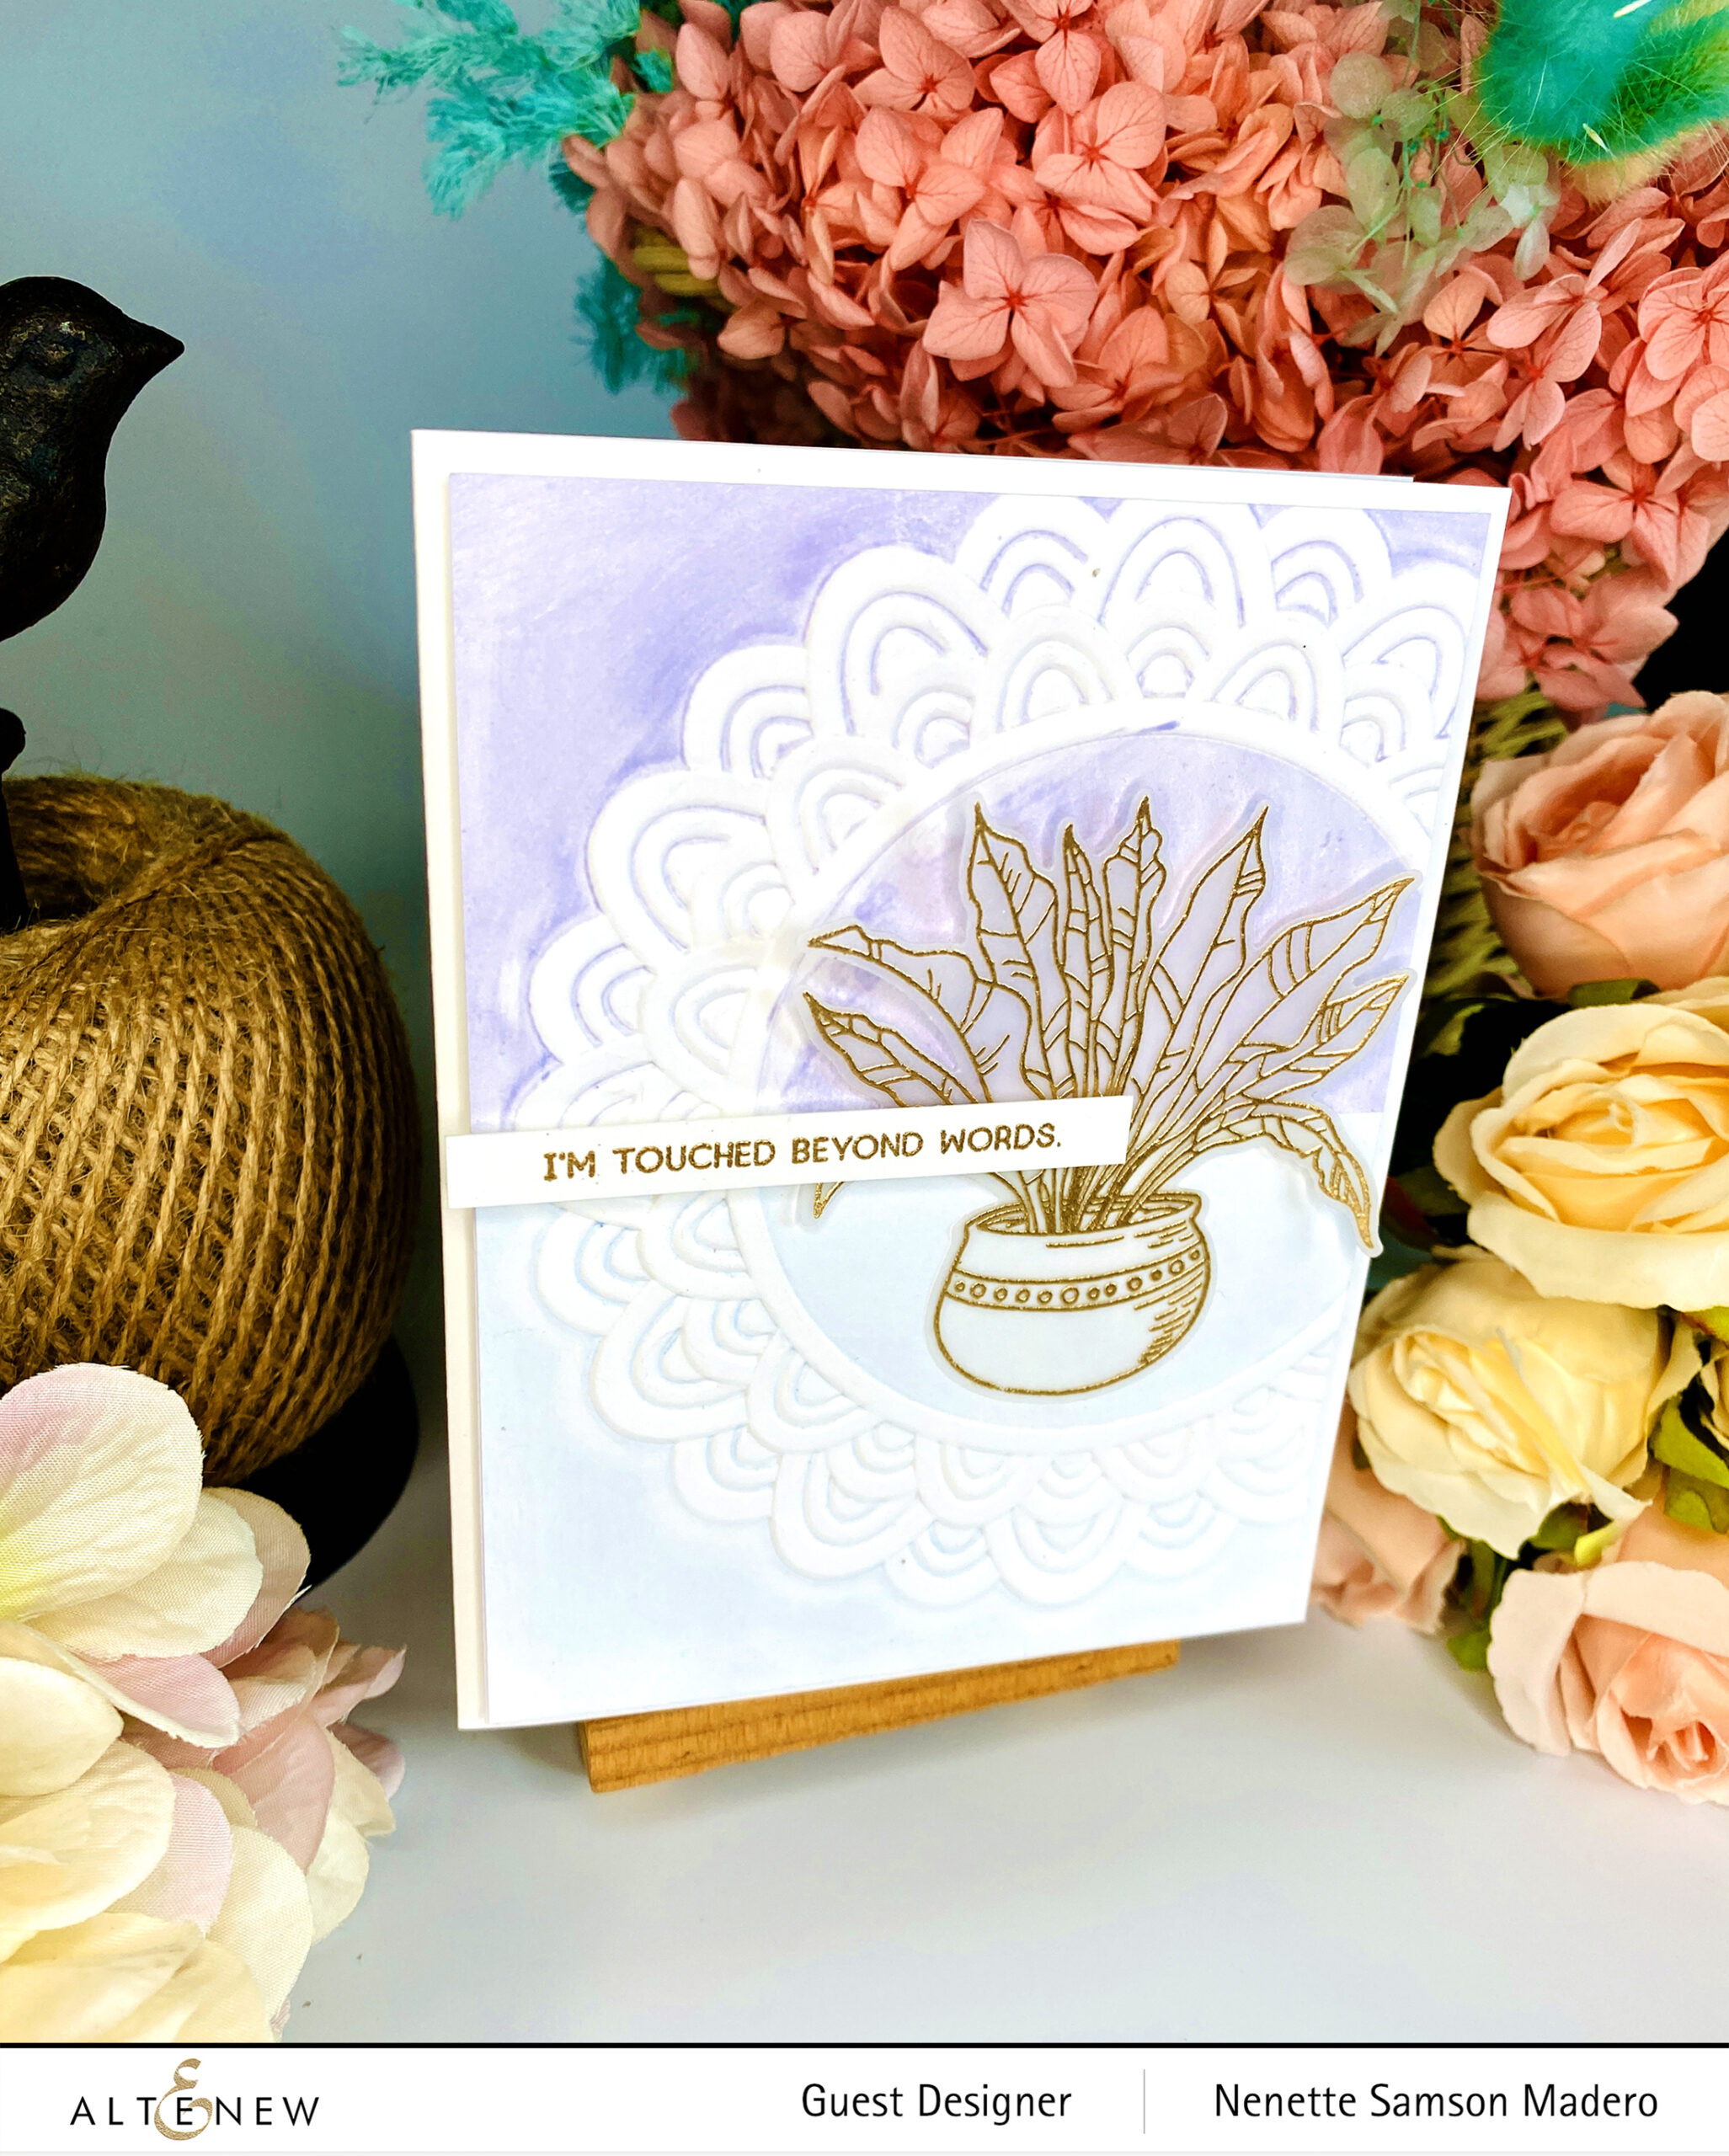
The embossed circle acts as a frame for the plant image. I can imagine so many other possibilities with this embossing folder.
GIVEAWAYS

$300 in total prizes! To celebrate this release, Altenew is giving away a $50 gift certificate to 2 lucky winners and a $25 gift certificate to 8 winners! Please leave a comment on the Altenew Card Blog and/or each designer’s blog post on the blog hop list below by 03/31/2022 for a chance to win.
Altenew will draw 10 random winners from the comments left on each stop of this blog hop and announce the winners on the Altenew Winners Page on 04/02/2022.
Next up: Amy Hill. I hope you found something that inspired you to create. Do let me know which one was your favorite in the comment section below to get a chance to win a prize from Altenew. If you like what you see, I hope you can subscribe to my blog, YouTube channel, and Instagram (@mylittleatticstudio). Thanks so much for dropping by! Until my next post– happy crafting!

")


")