Altenew Modern & Edgy Stamps/Dies/Stencils/Embossing Folders Collection Release Blog Hop + Giveaway

Altenew Modern & Edgy Stamps/Dies/Stencils/Embossing Folders Collection Release Blog Hop + Giveaway

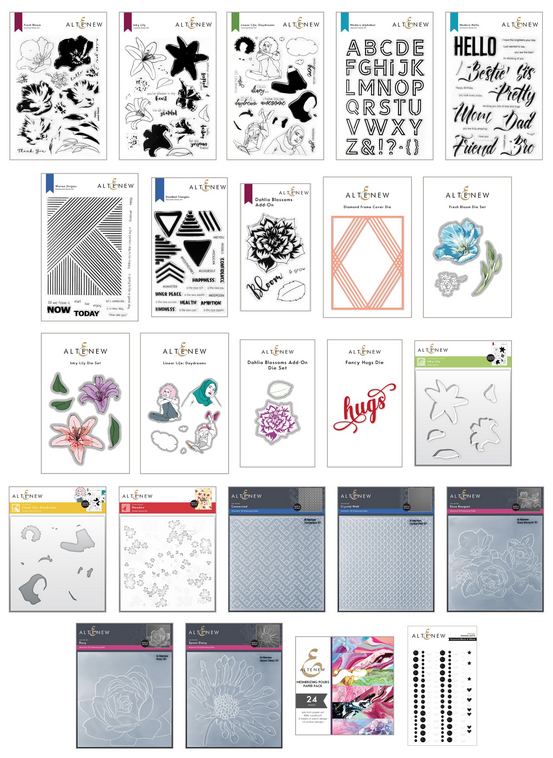
Hello, crafty friends! Welcome to the Altenew Modern & Edgy Stamps/Dies/Stencils/Embossing Folders Collection Release Blog Hop + Giveaway! If you just came from Daniel Diaz’s blog, then you’re on the right track. For the full list, kindly visit the Altenew Blog. Take a look at the unique designs from this August release:
I created a few cards for this release– some quite different from my older ones. Let me know which one you like the most.
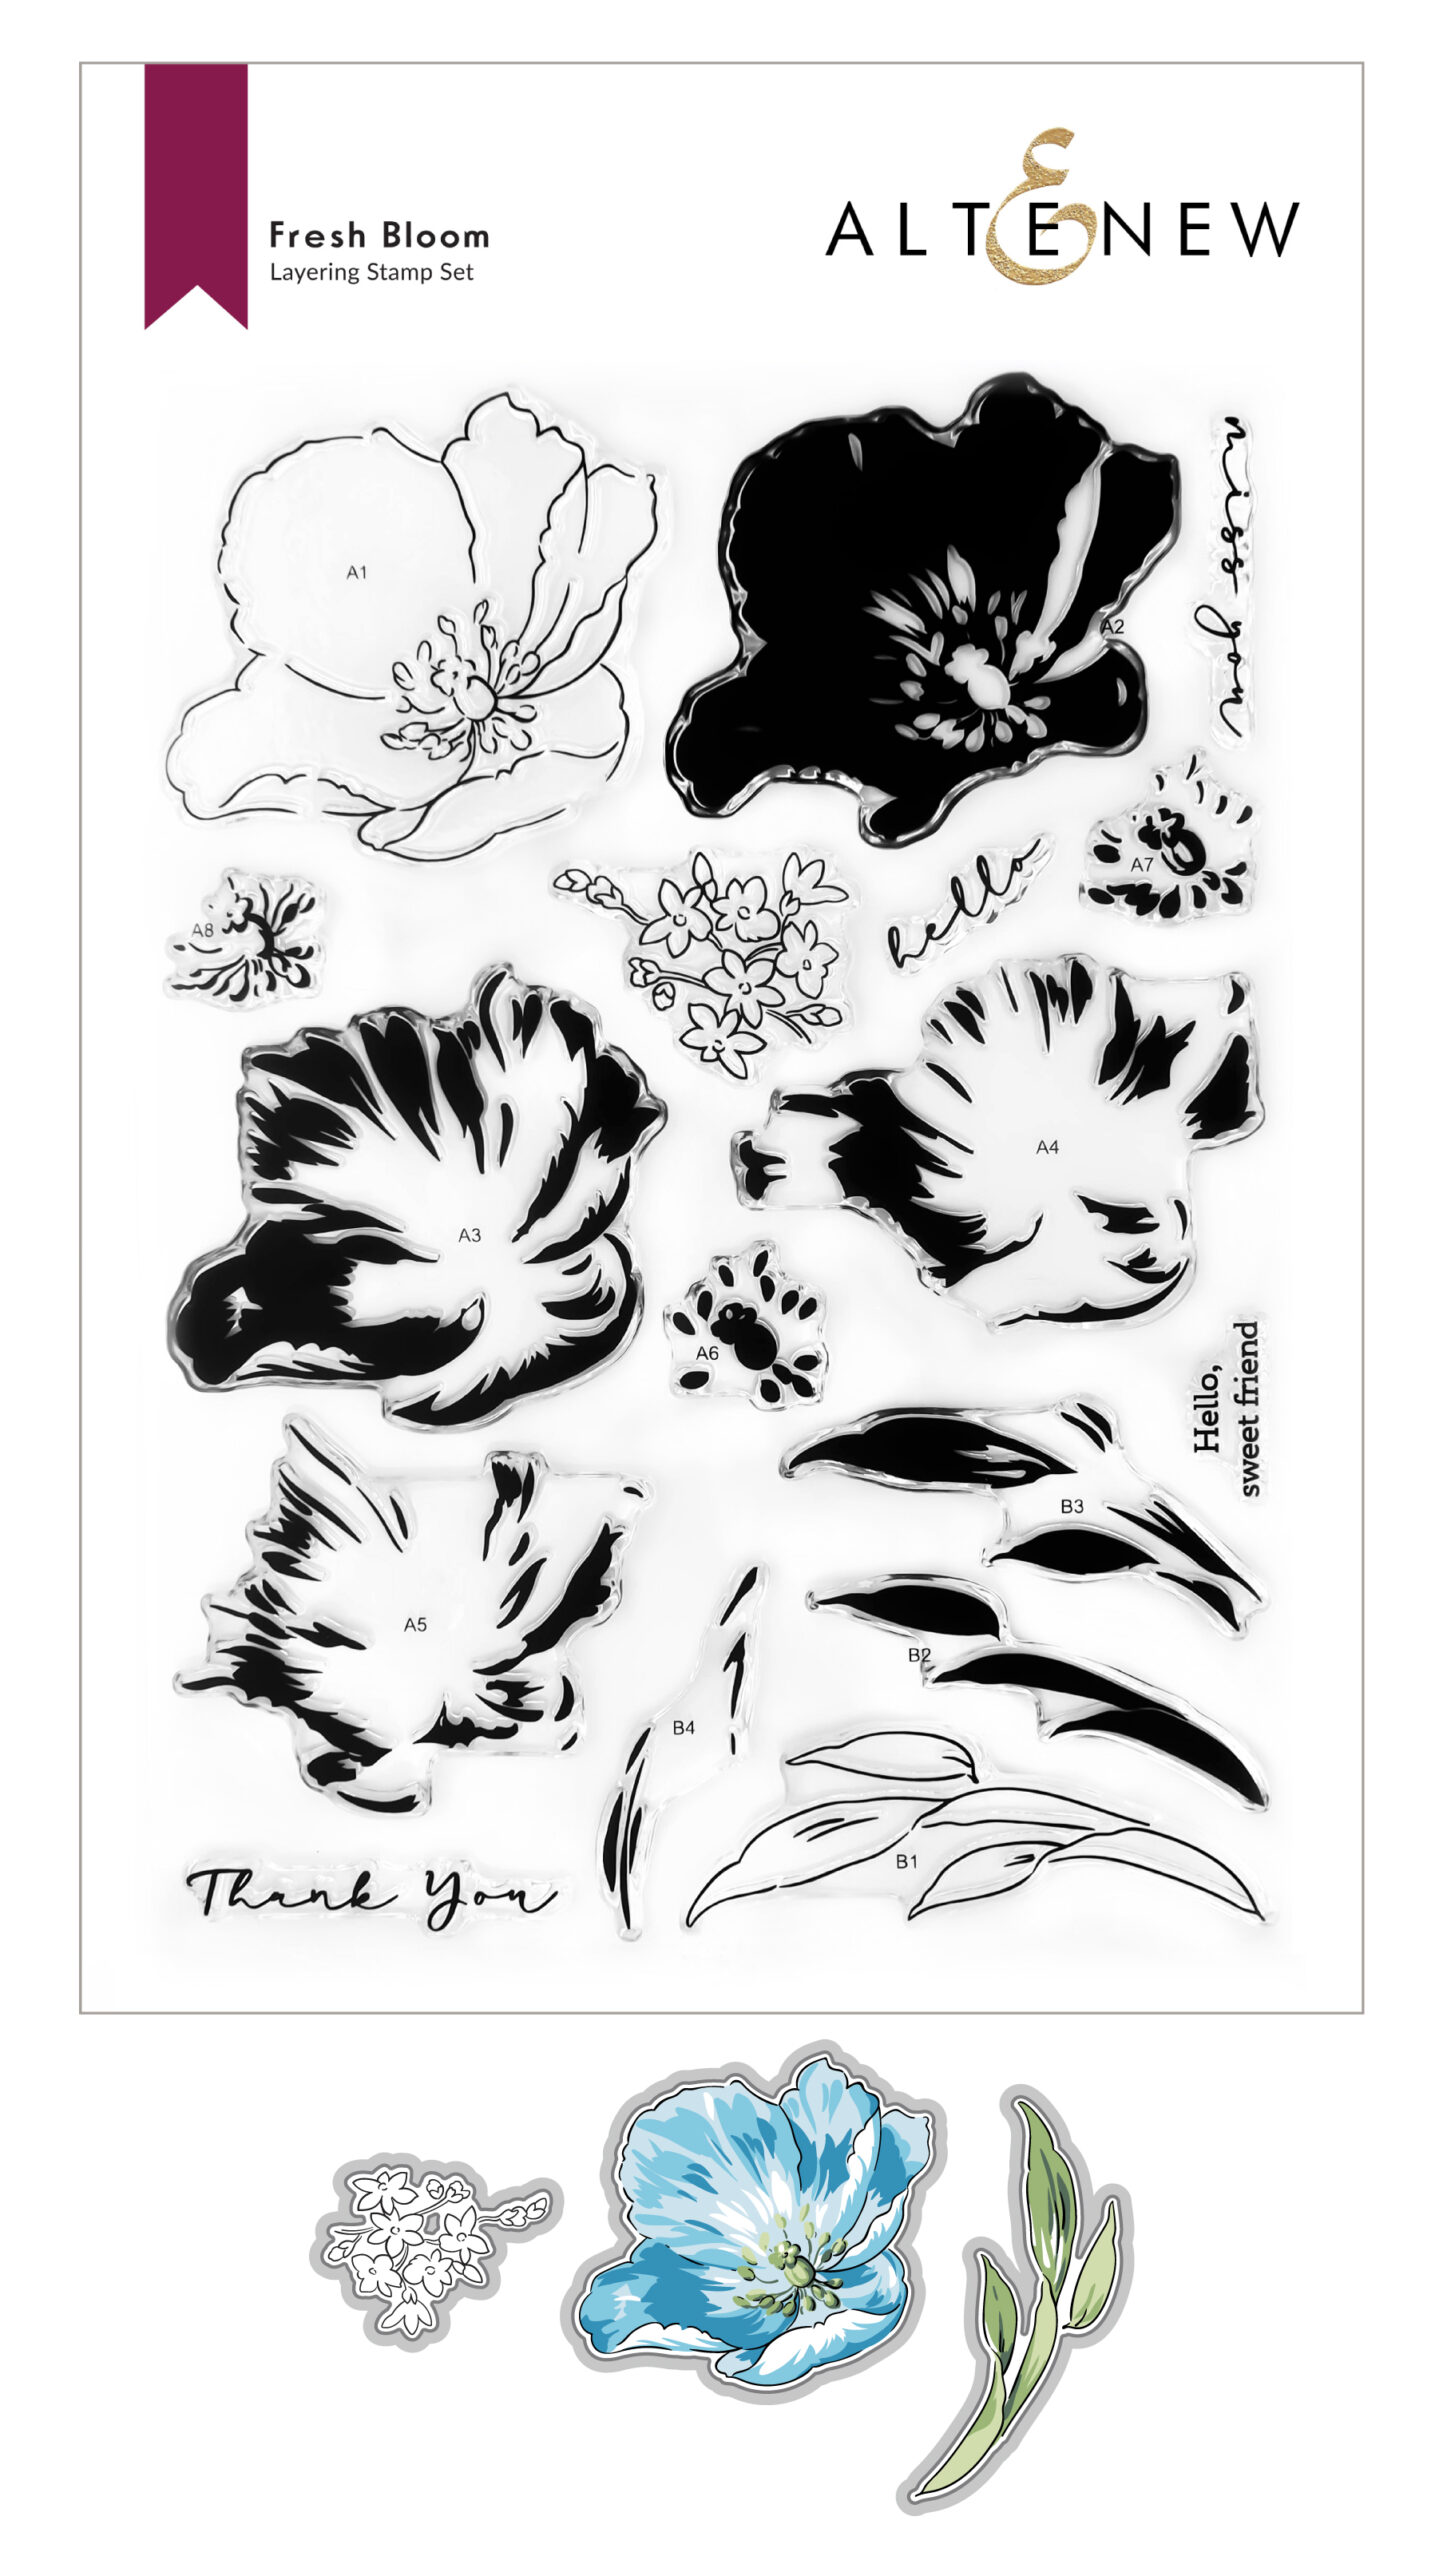
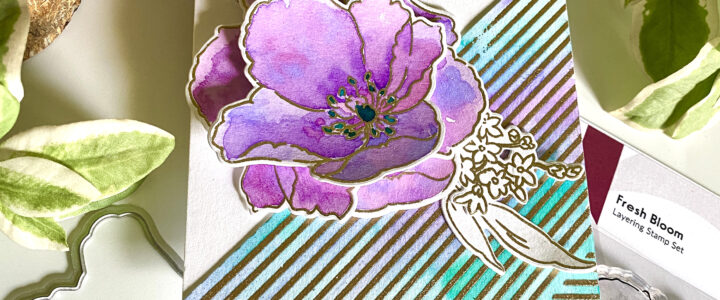
FRESH BLOOM STAMP AND DIE SET
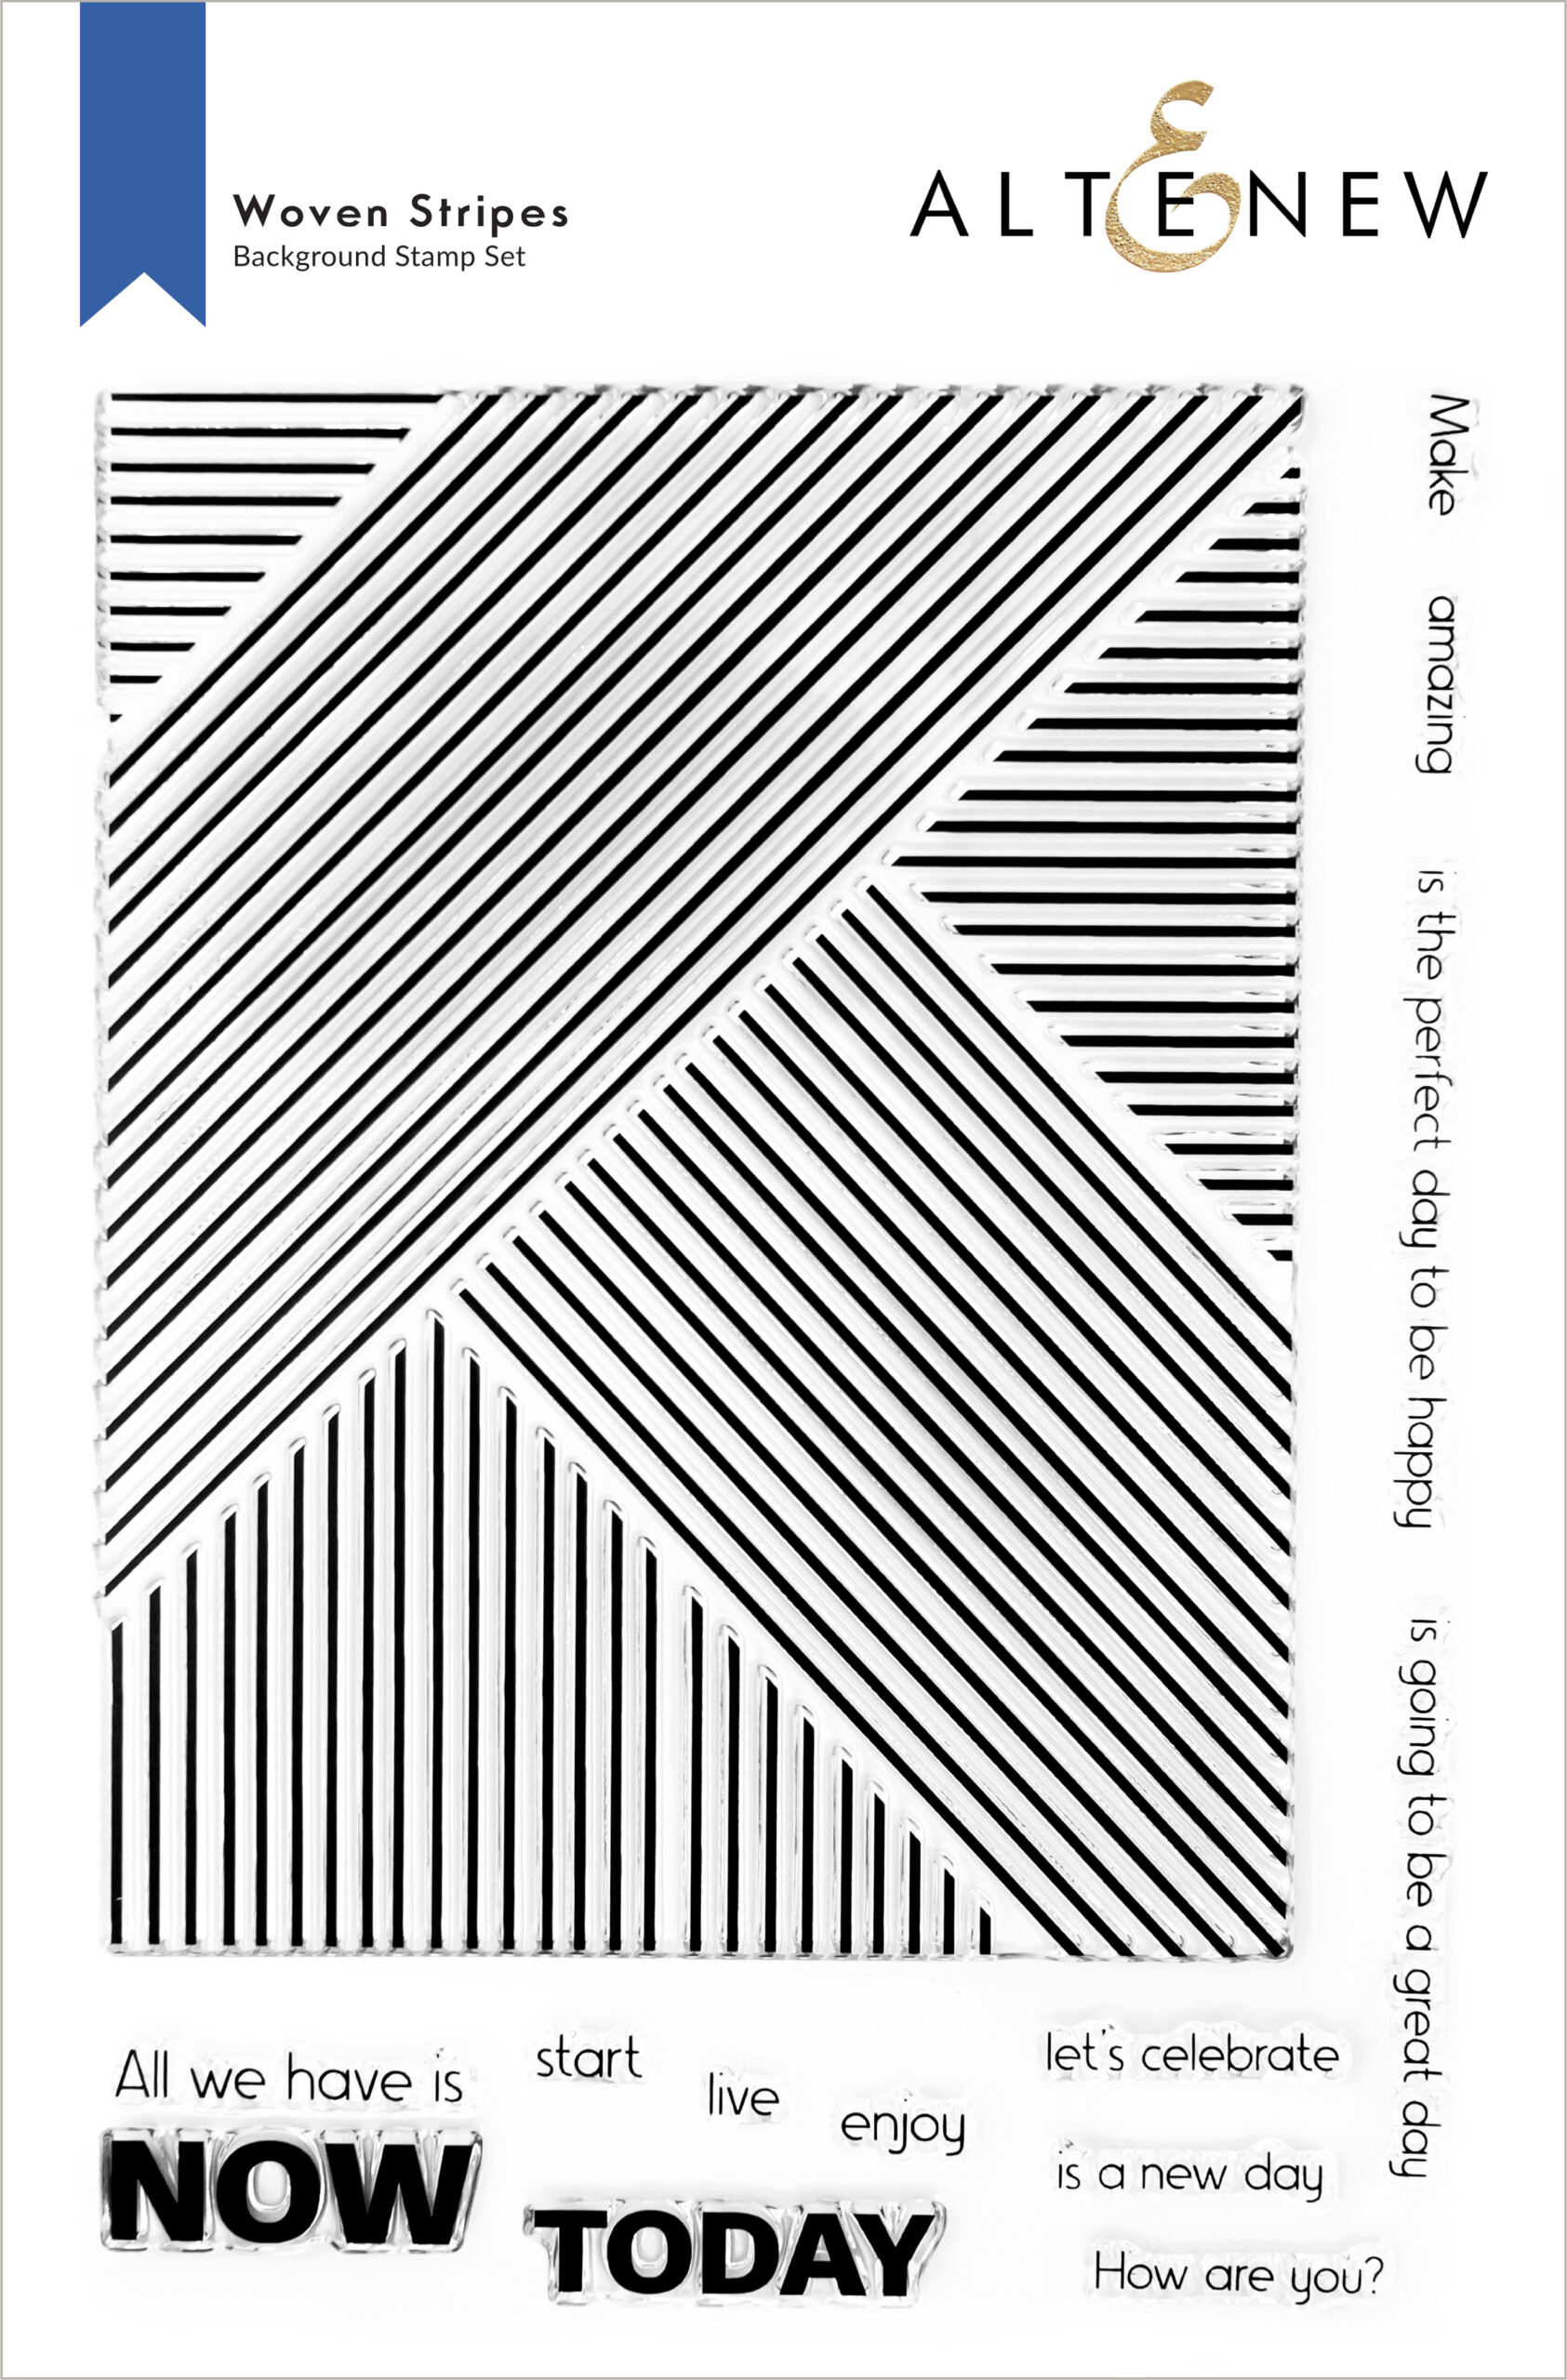
WOVEN STRIPES STAMP SET
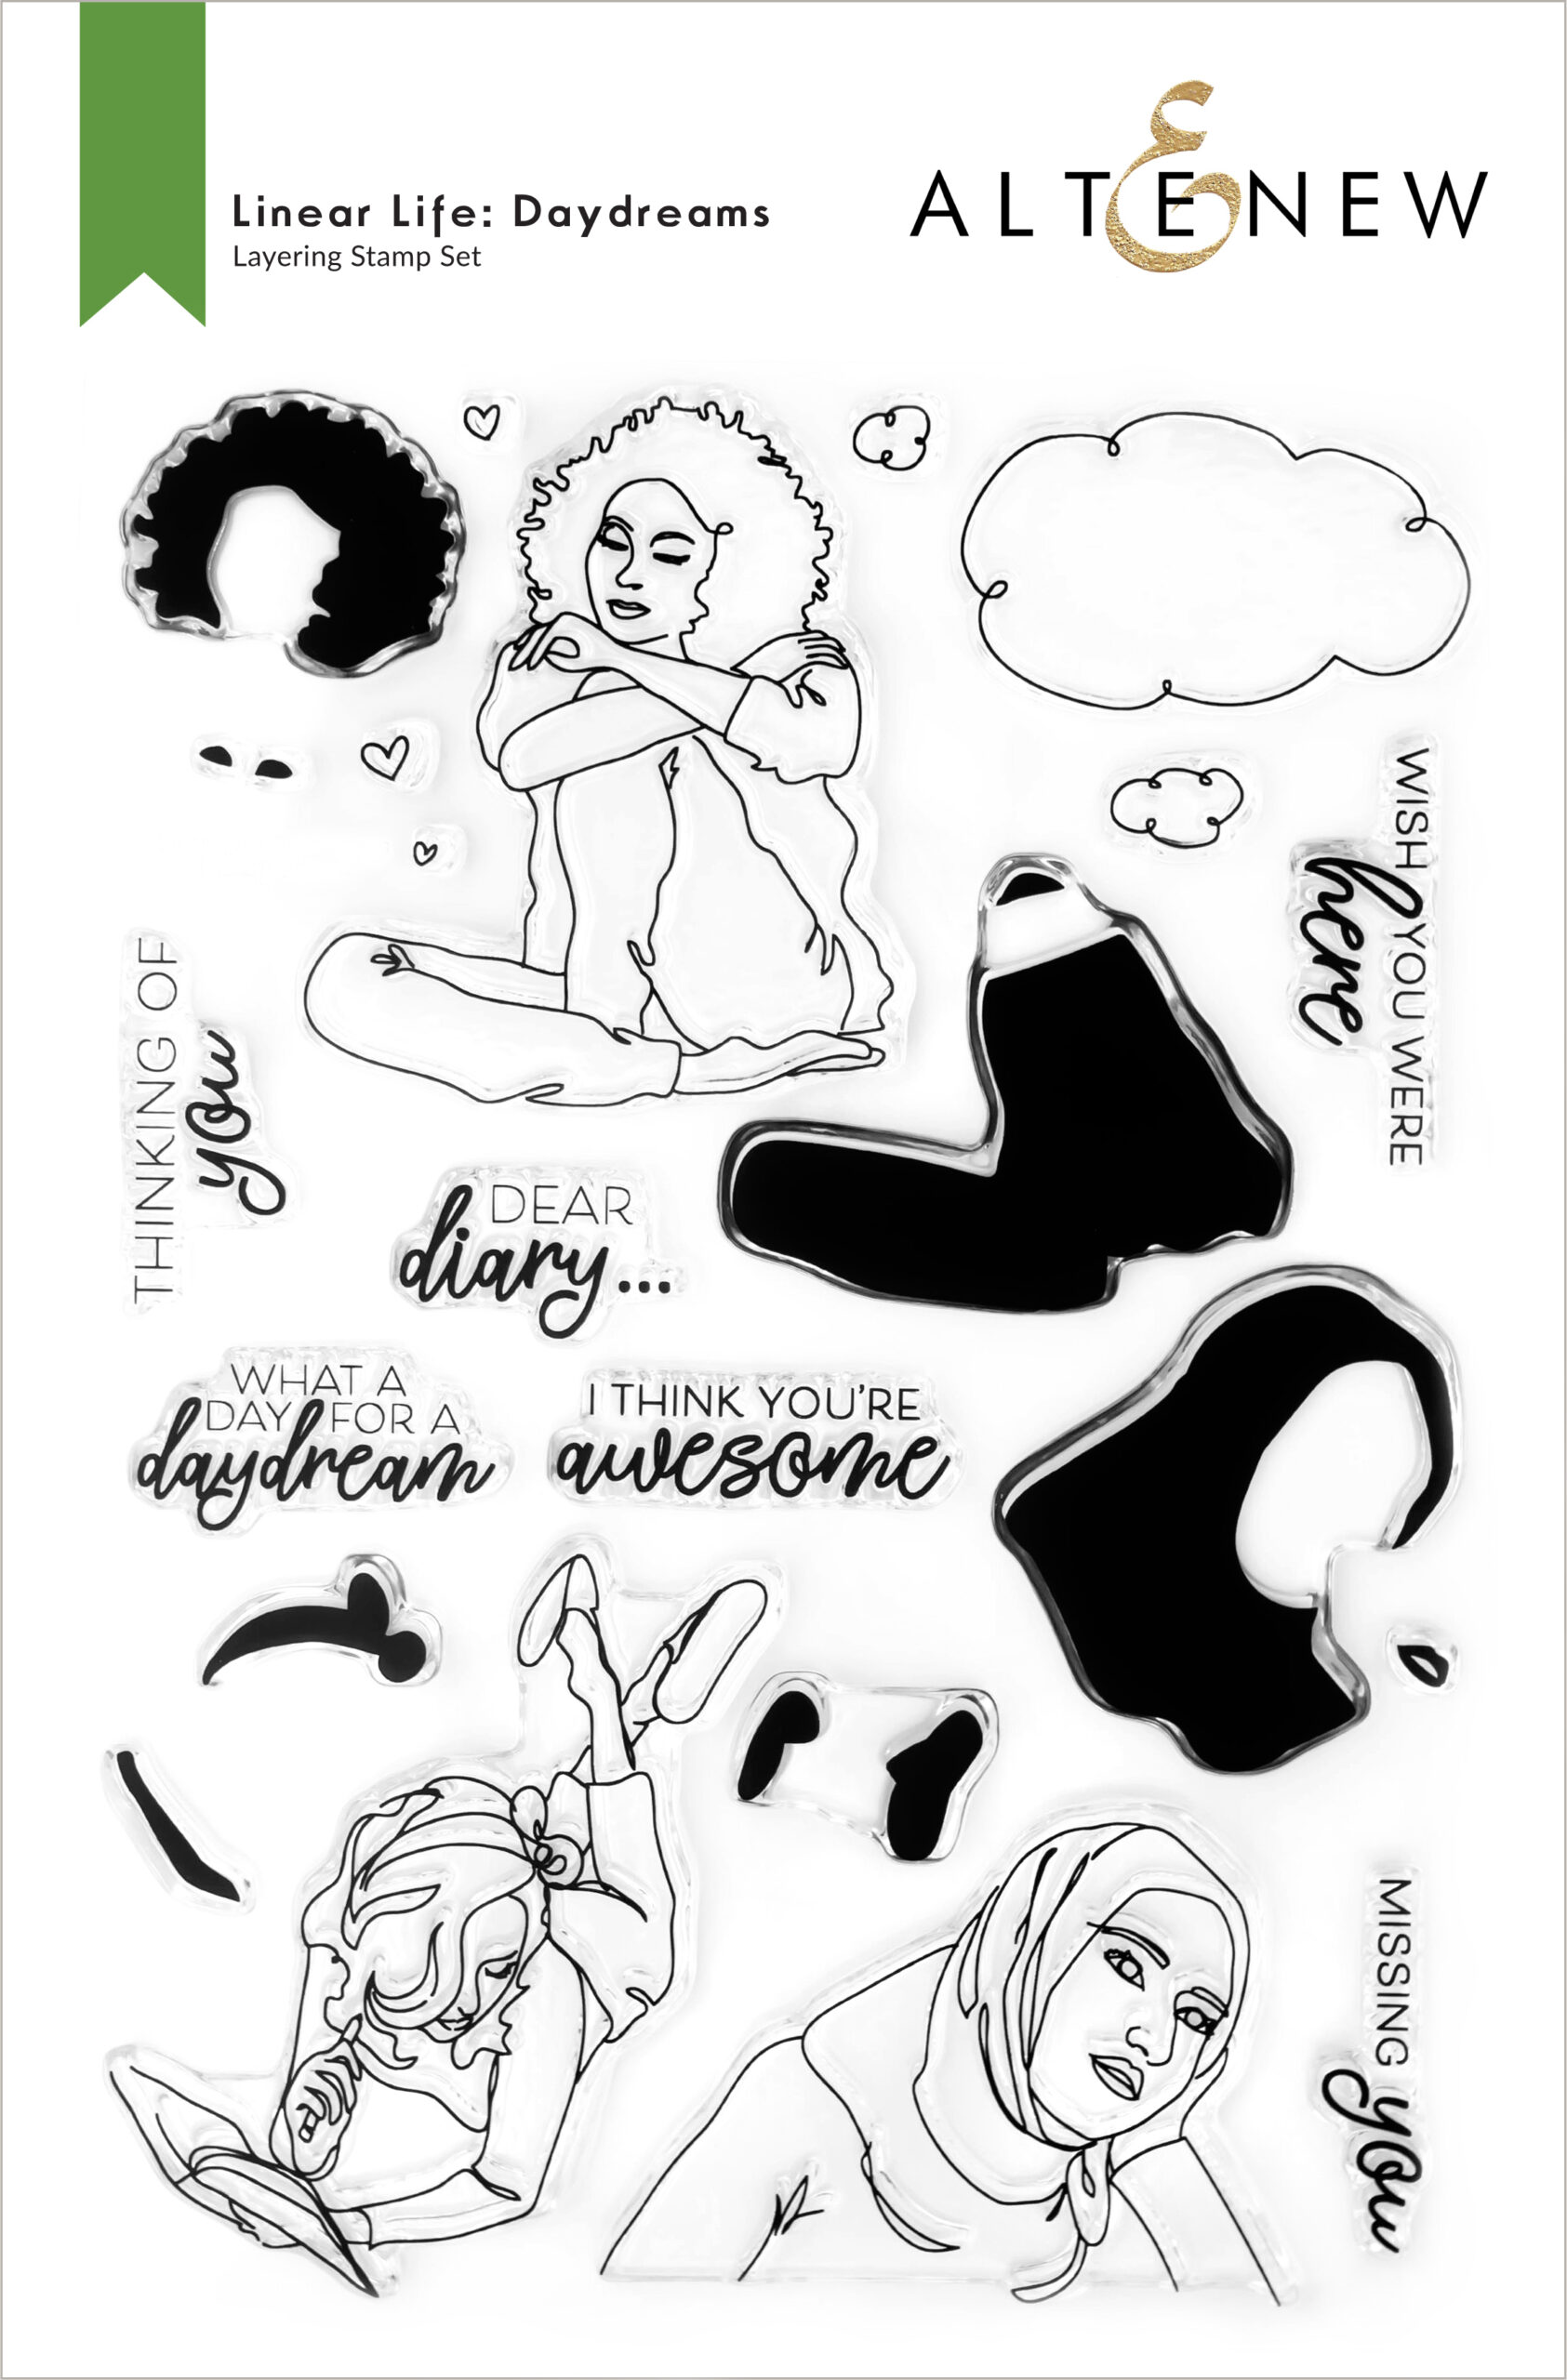
LINEAR LIFE: DAYDREAMS STAMP SET

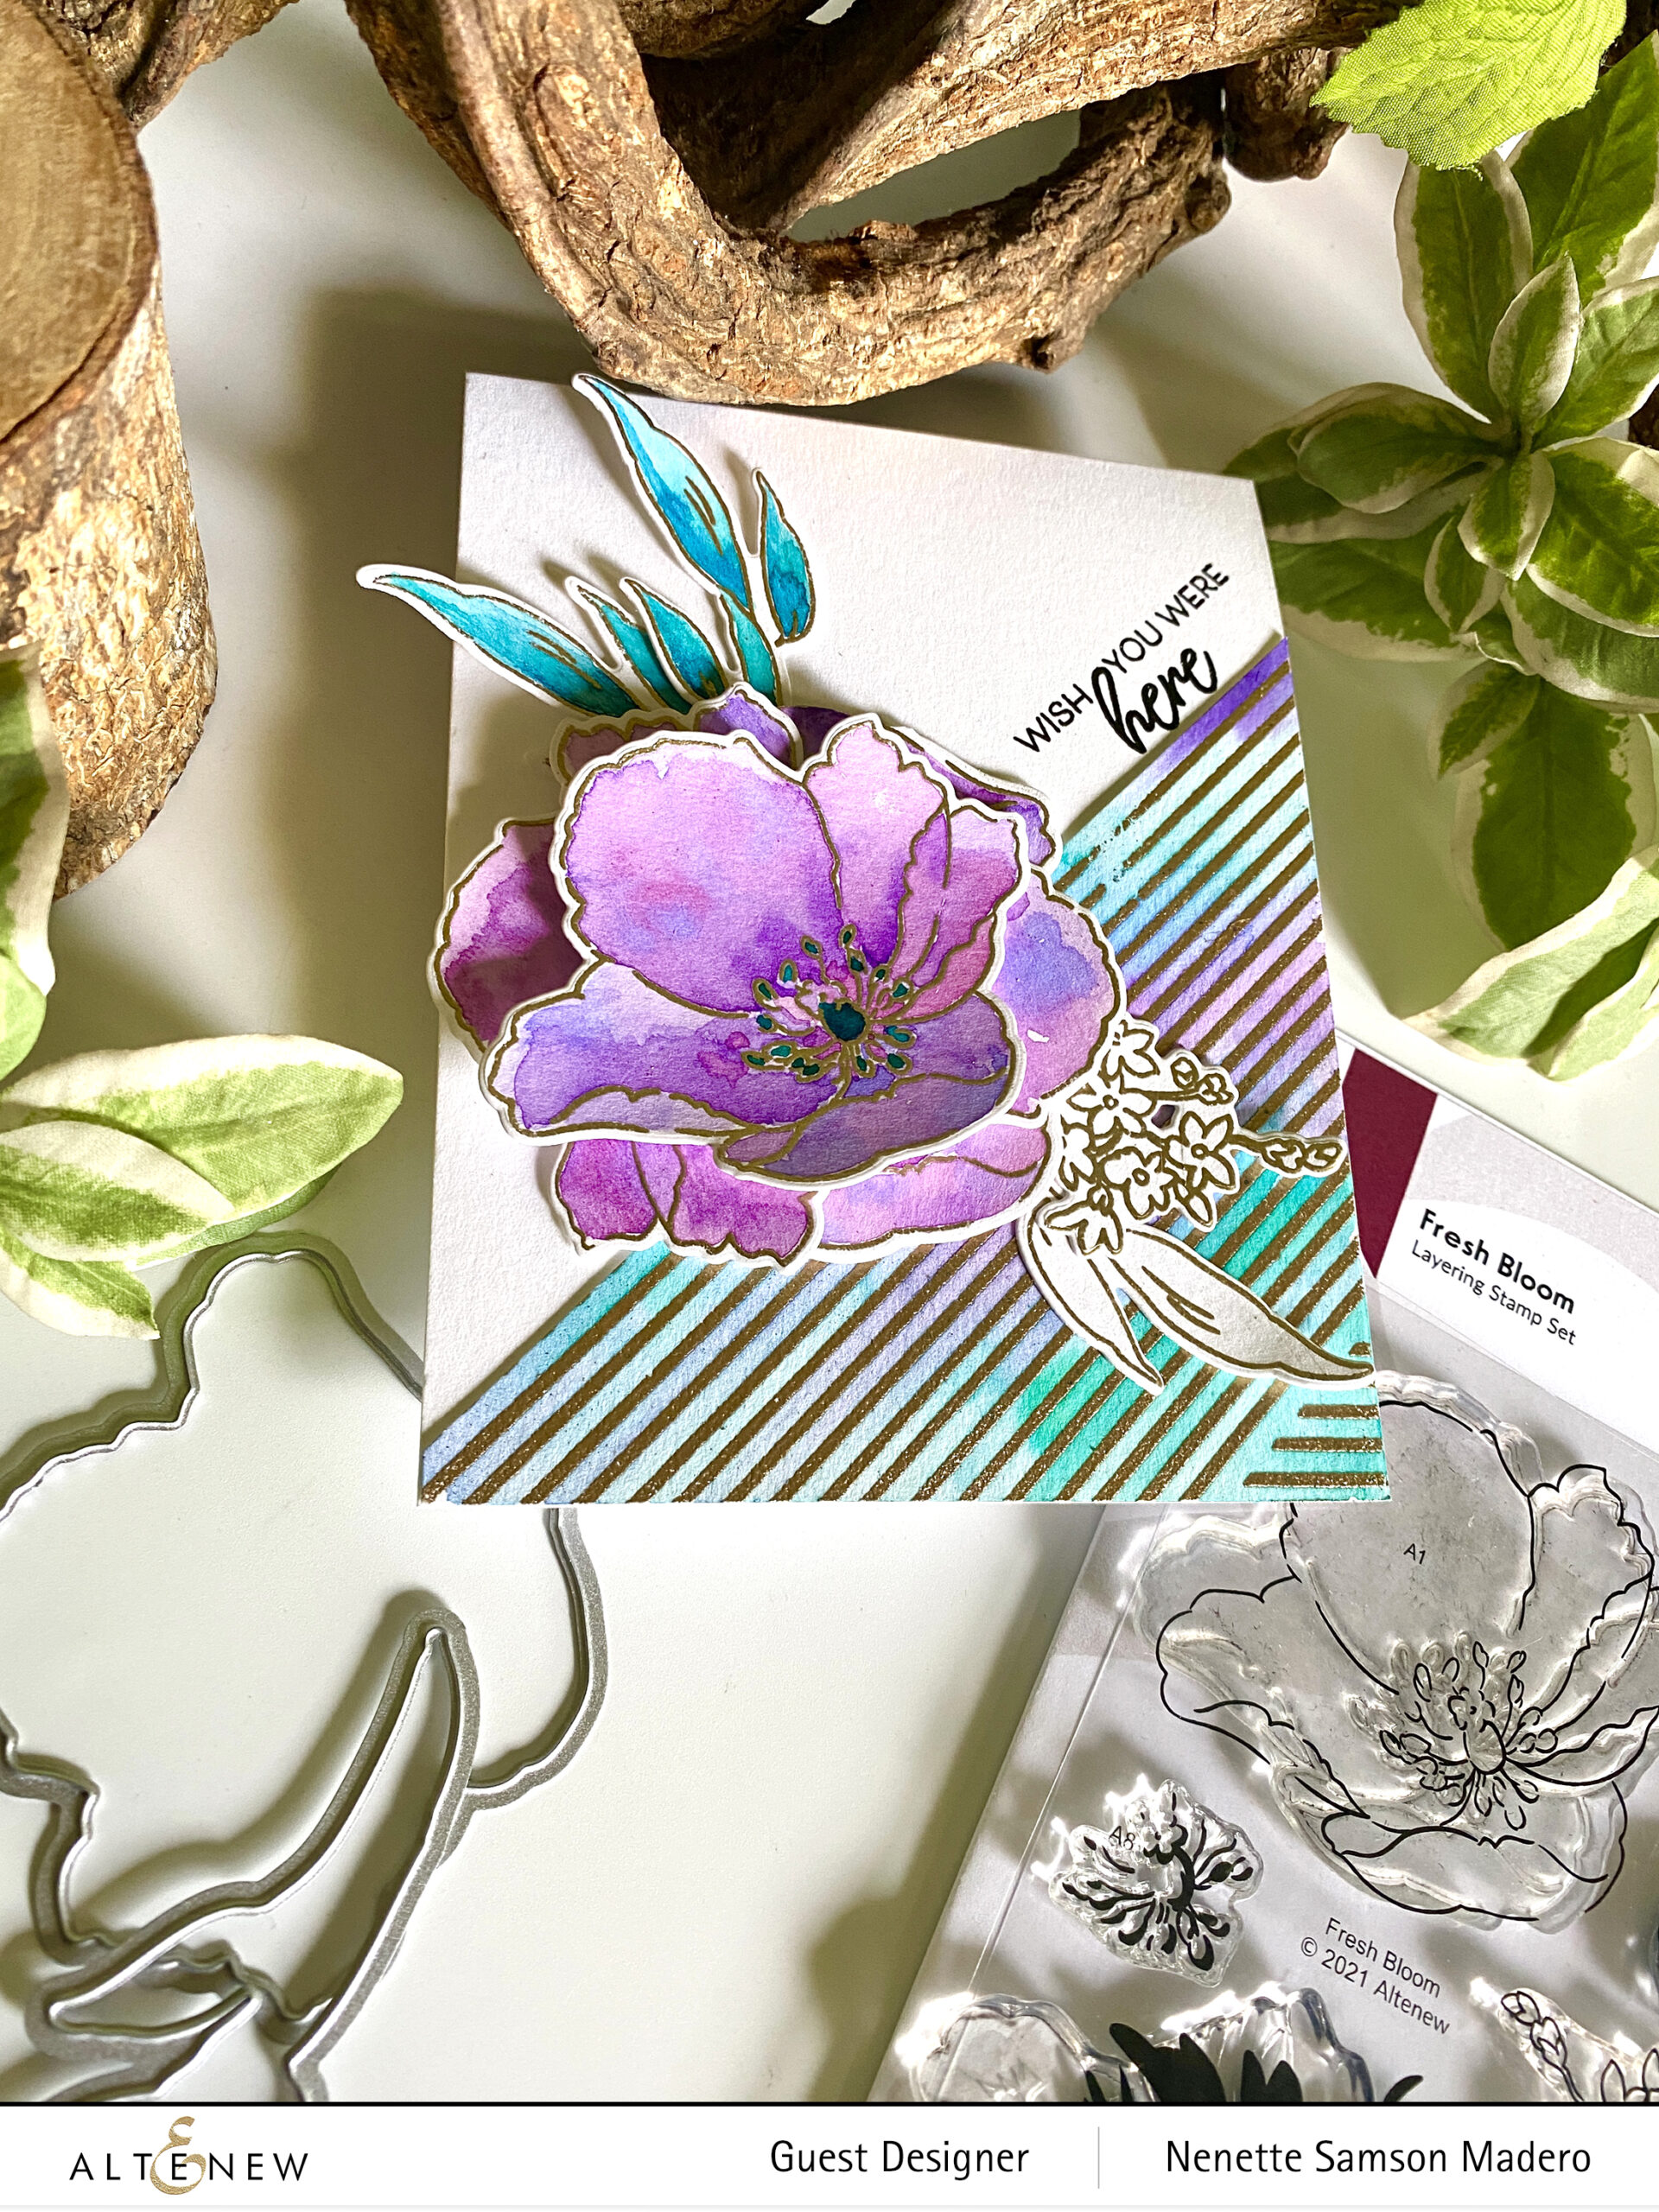
WISH YOU WERE HERE


Here is a card using 3 stamp sets from this release– The Fresh Bloom Stamp and Die set, the sentiment from the Linear Life: Daydreams stamp set and the Woven Stripes Stamp. I stamped 2 floral images using Versamark Ink and embossed them with Rose Gold embossing powder. Watercolor was used to color the flowers. I then fussy cut one of the flowers so that I can layer the petals behind the stamped image to create a bigger and fuller flower with actual layers.
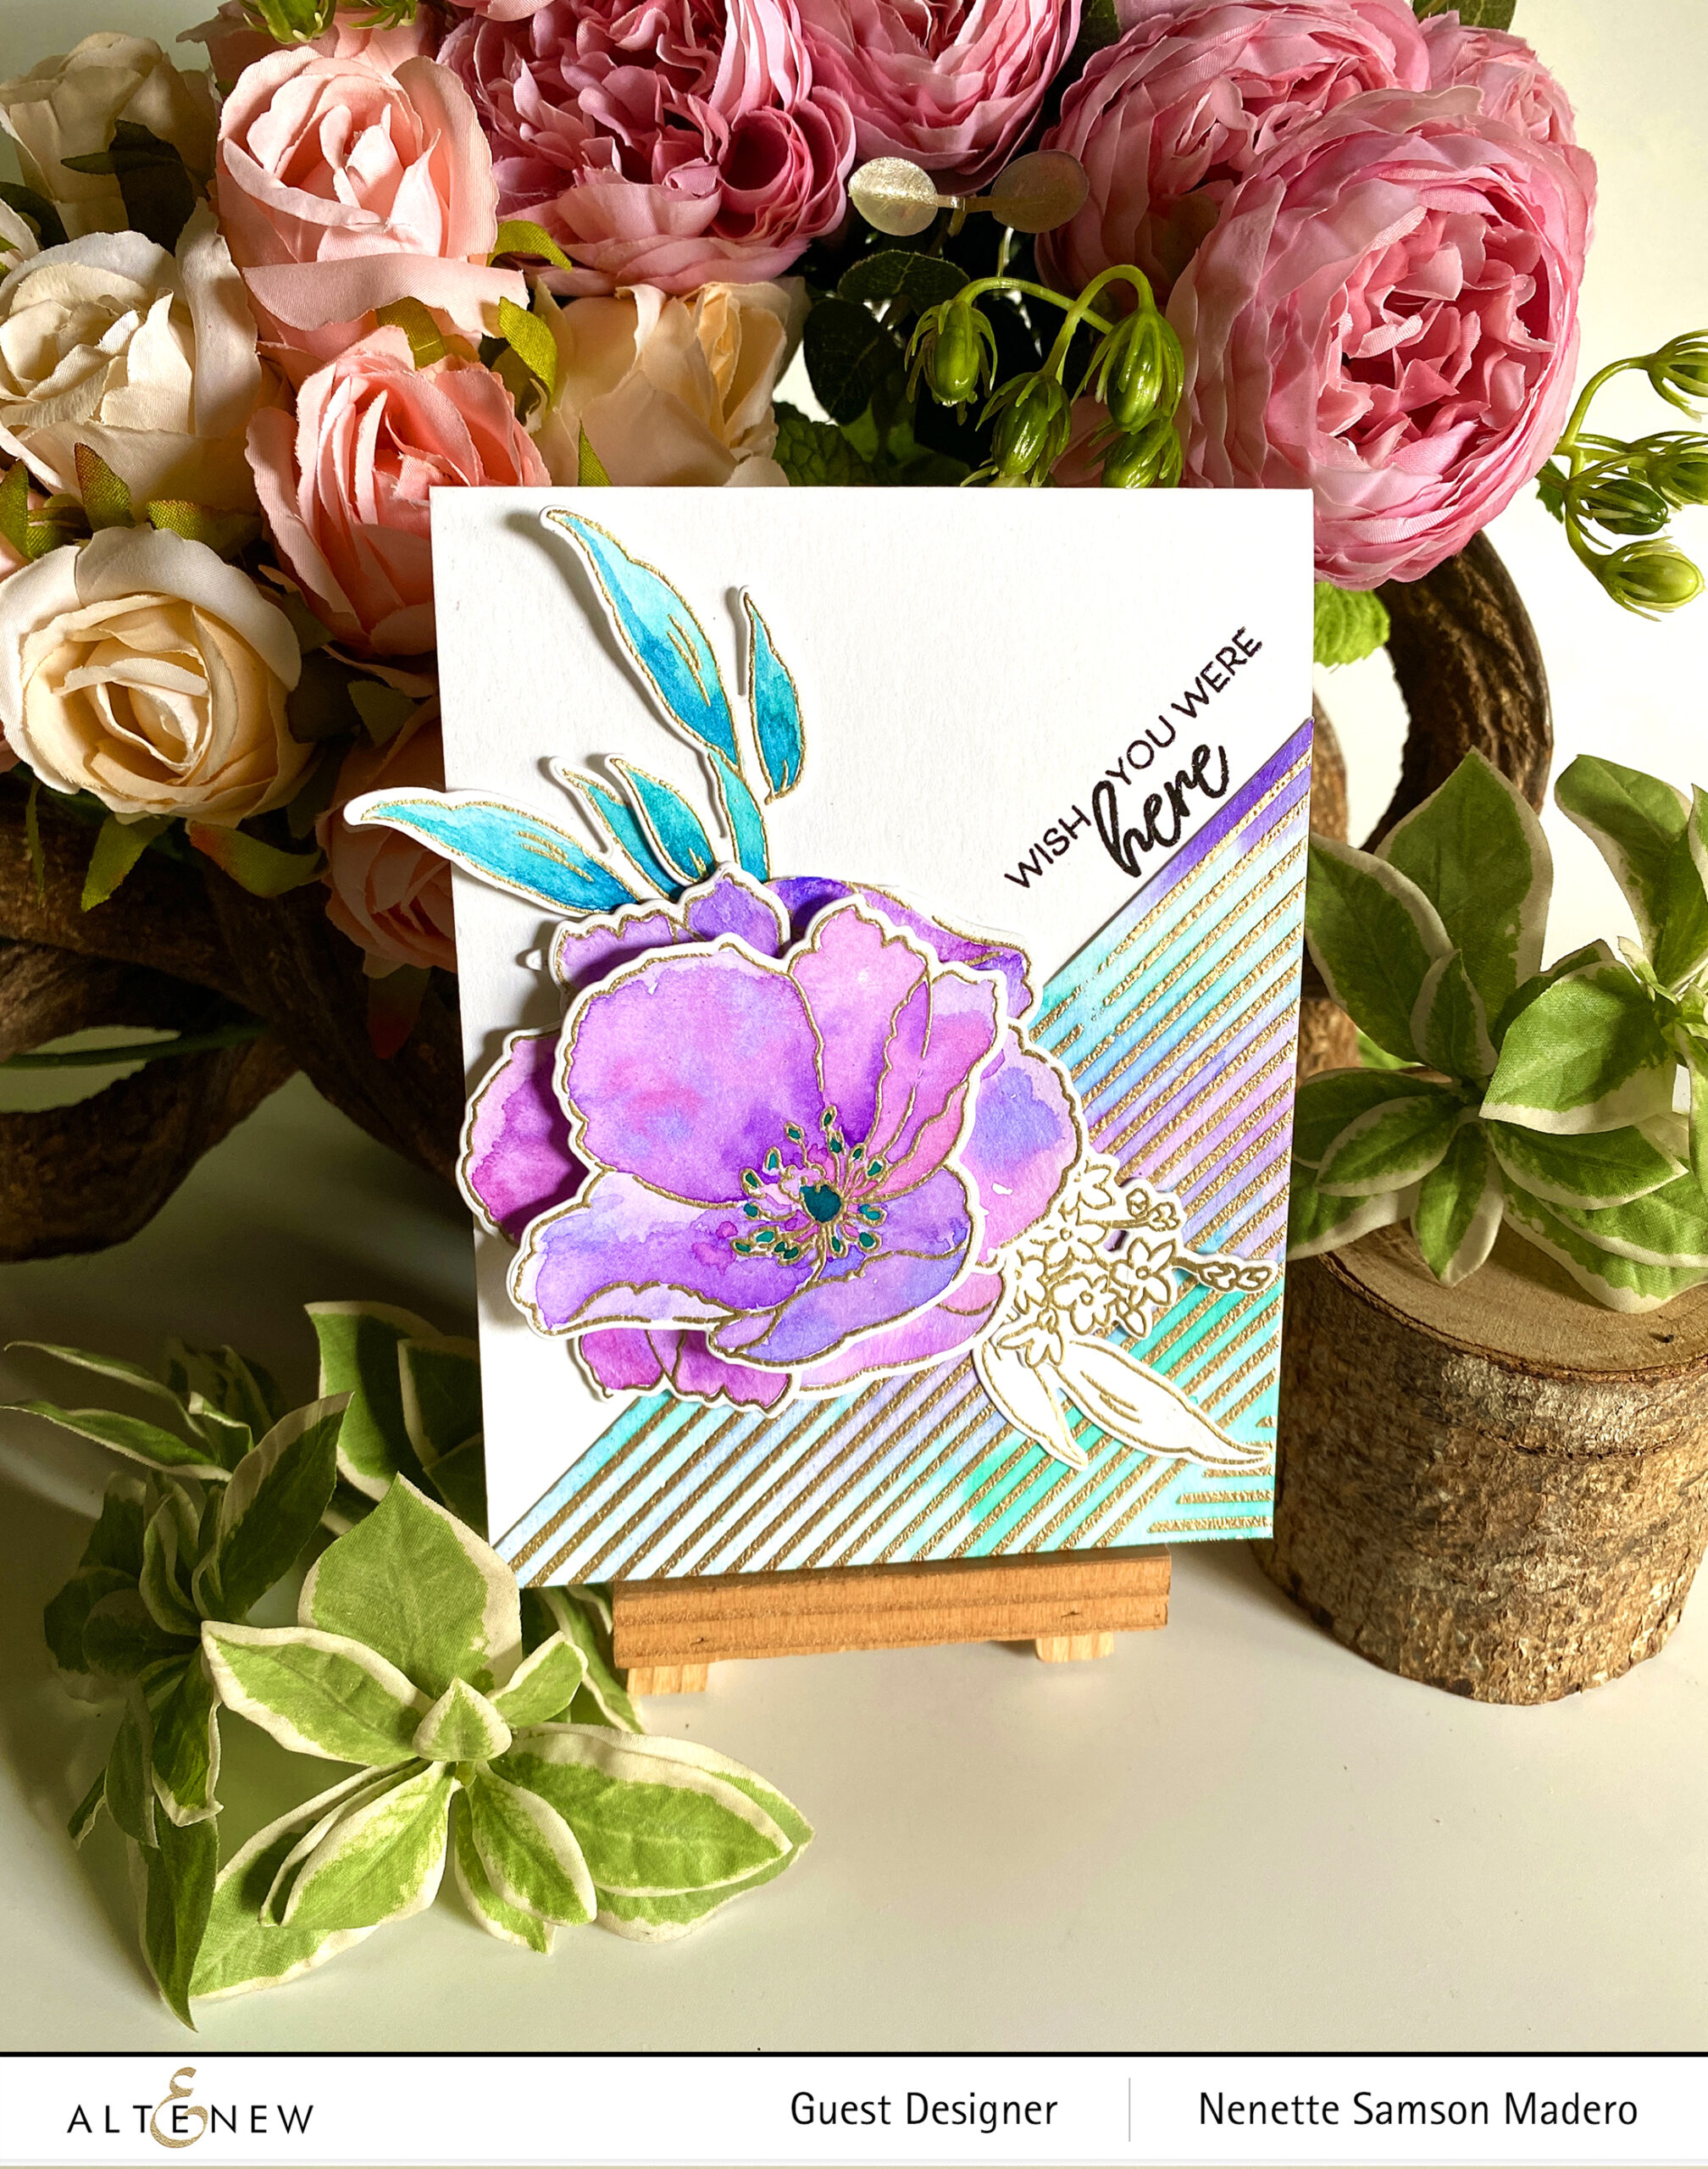
Foam squares were used to make it look more 3D. I partially stamped the Woven stripes onto watercolor paper using Versamark Ink then embossed it with Rose Gold Embossing powder. I then watercolored the background using the leftover colors on the palette. Notice how I also colored the leaves that were on the white space and left the leaves uncolored on the colored background white. This way, I created more contrast.
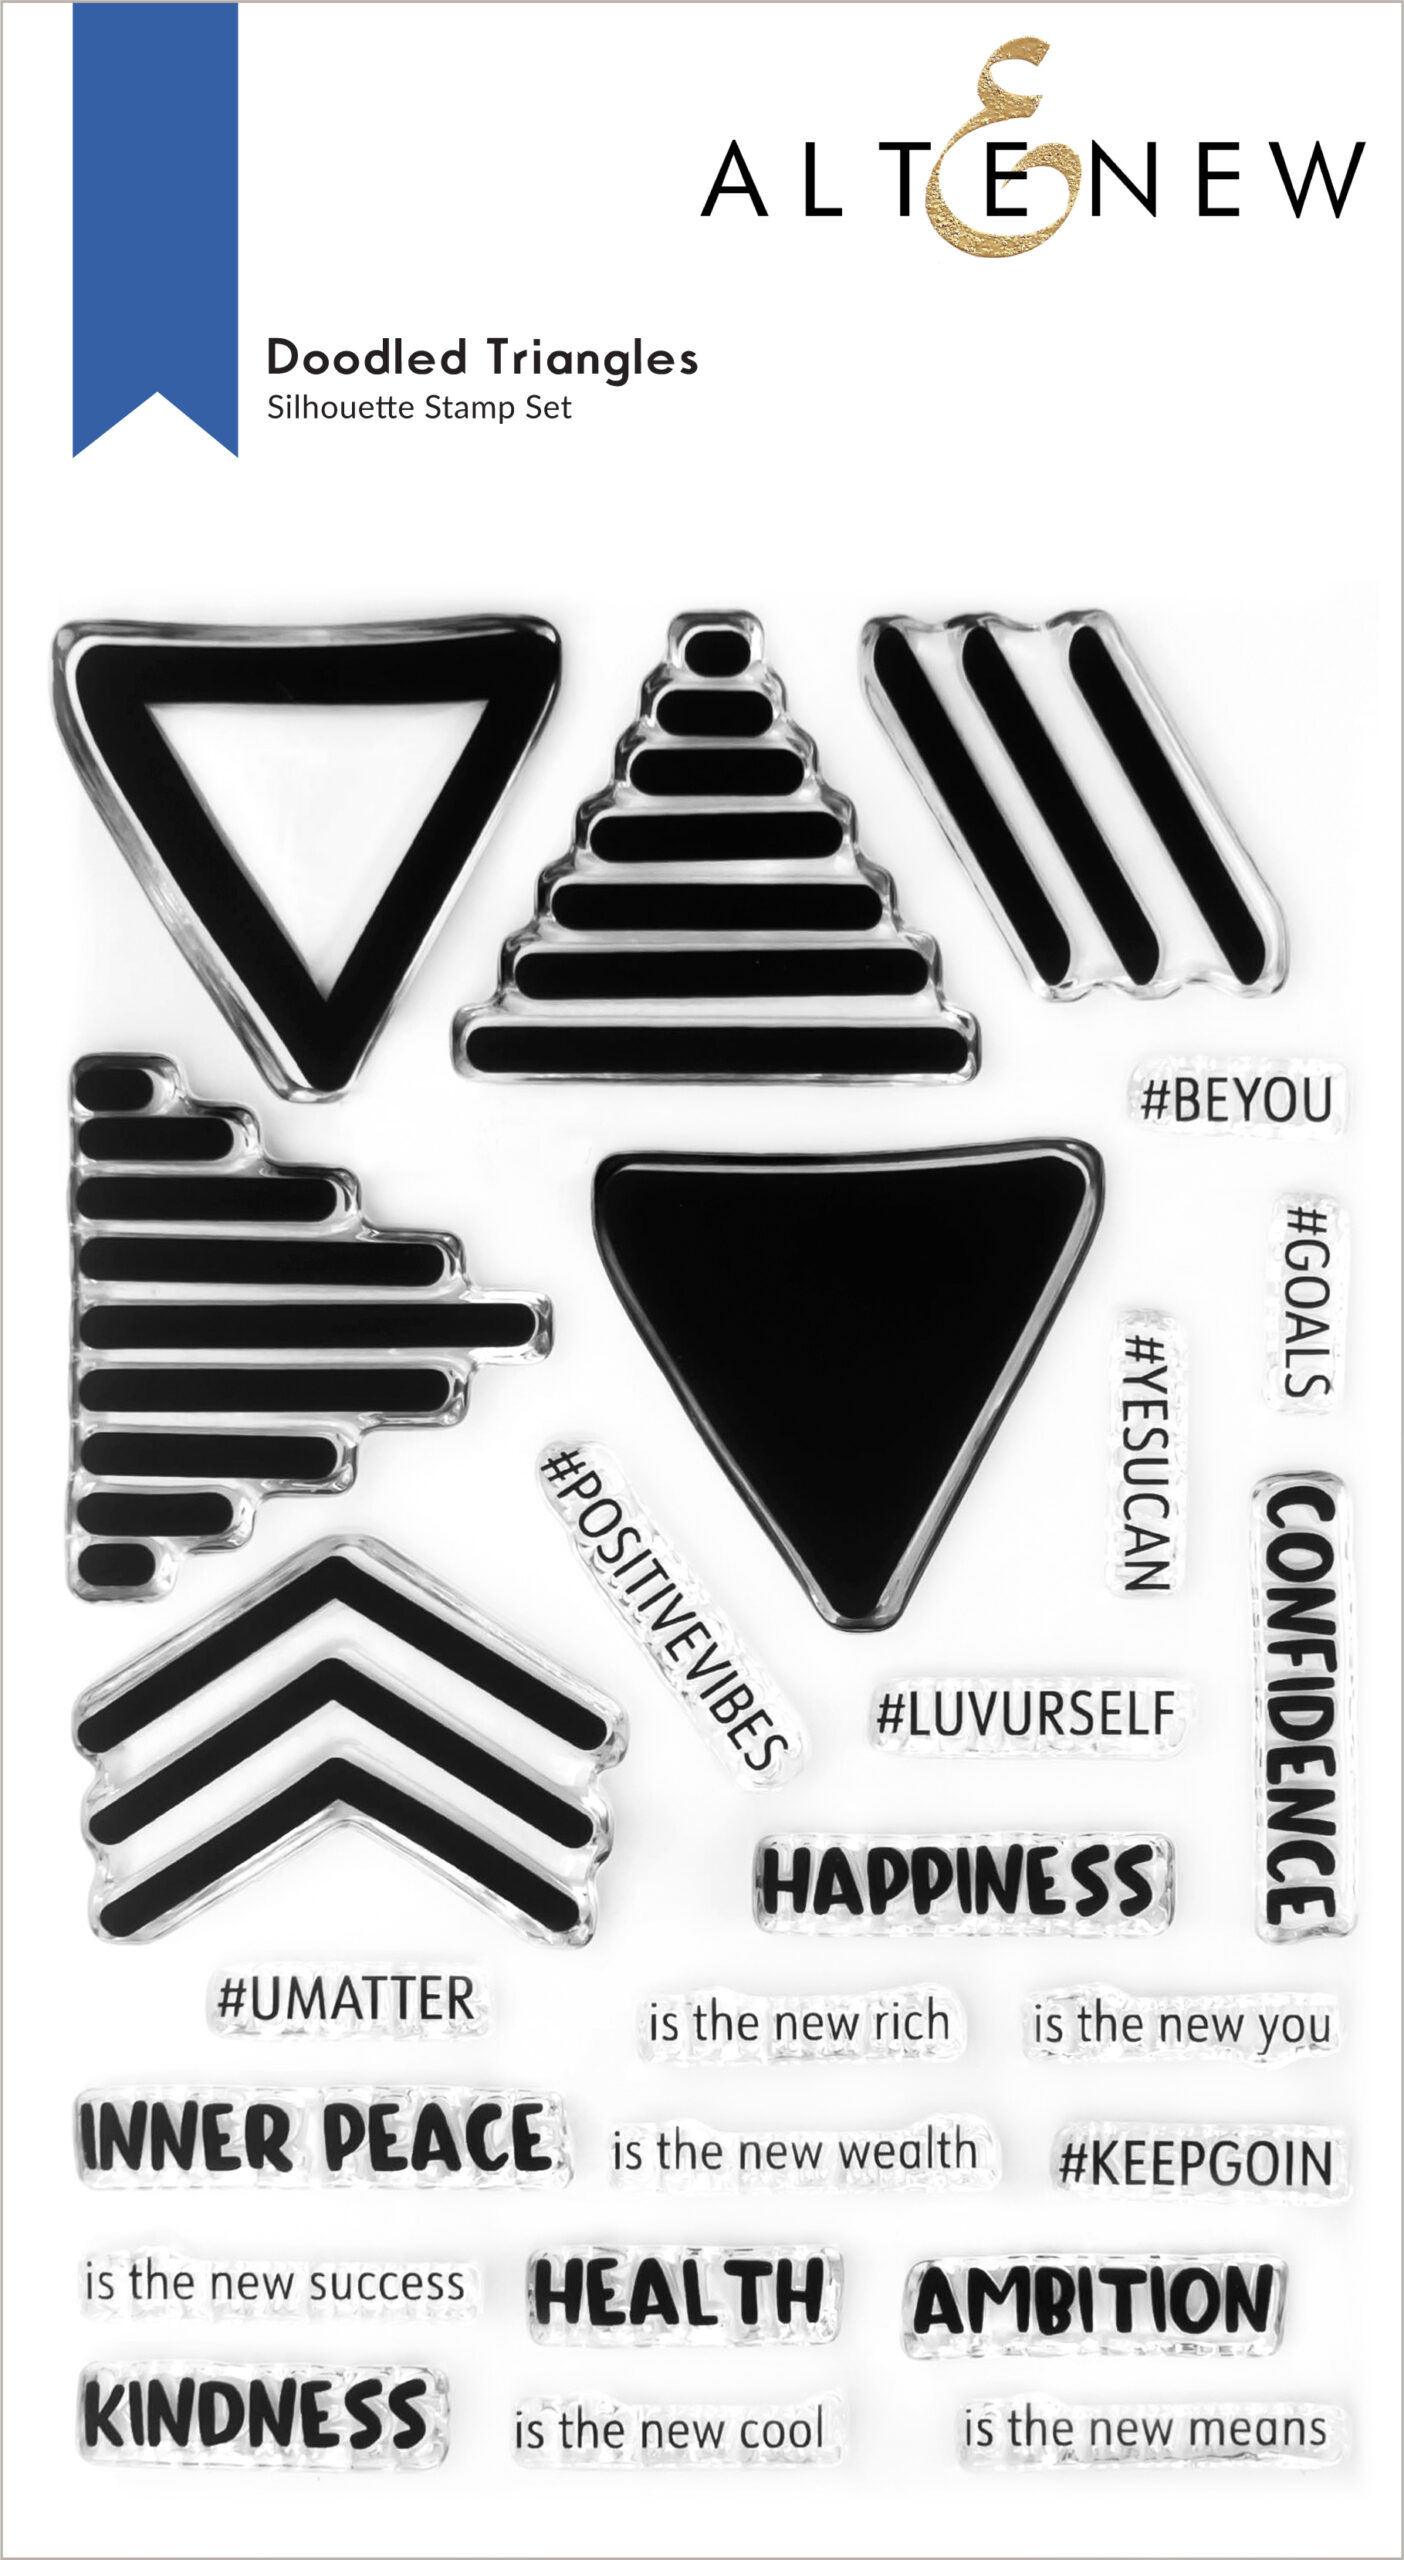
DOODLE TRIANGLES STAMP SET
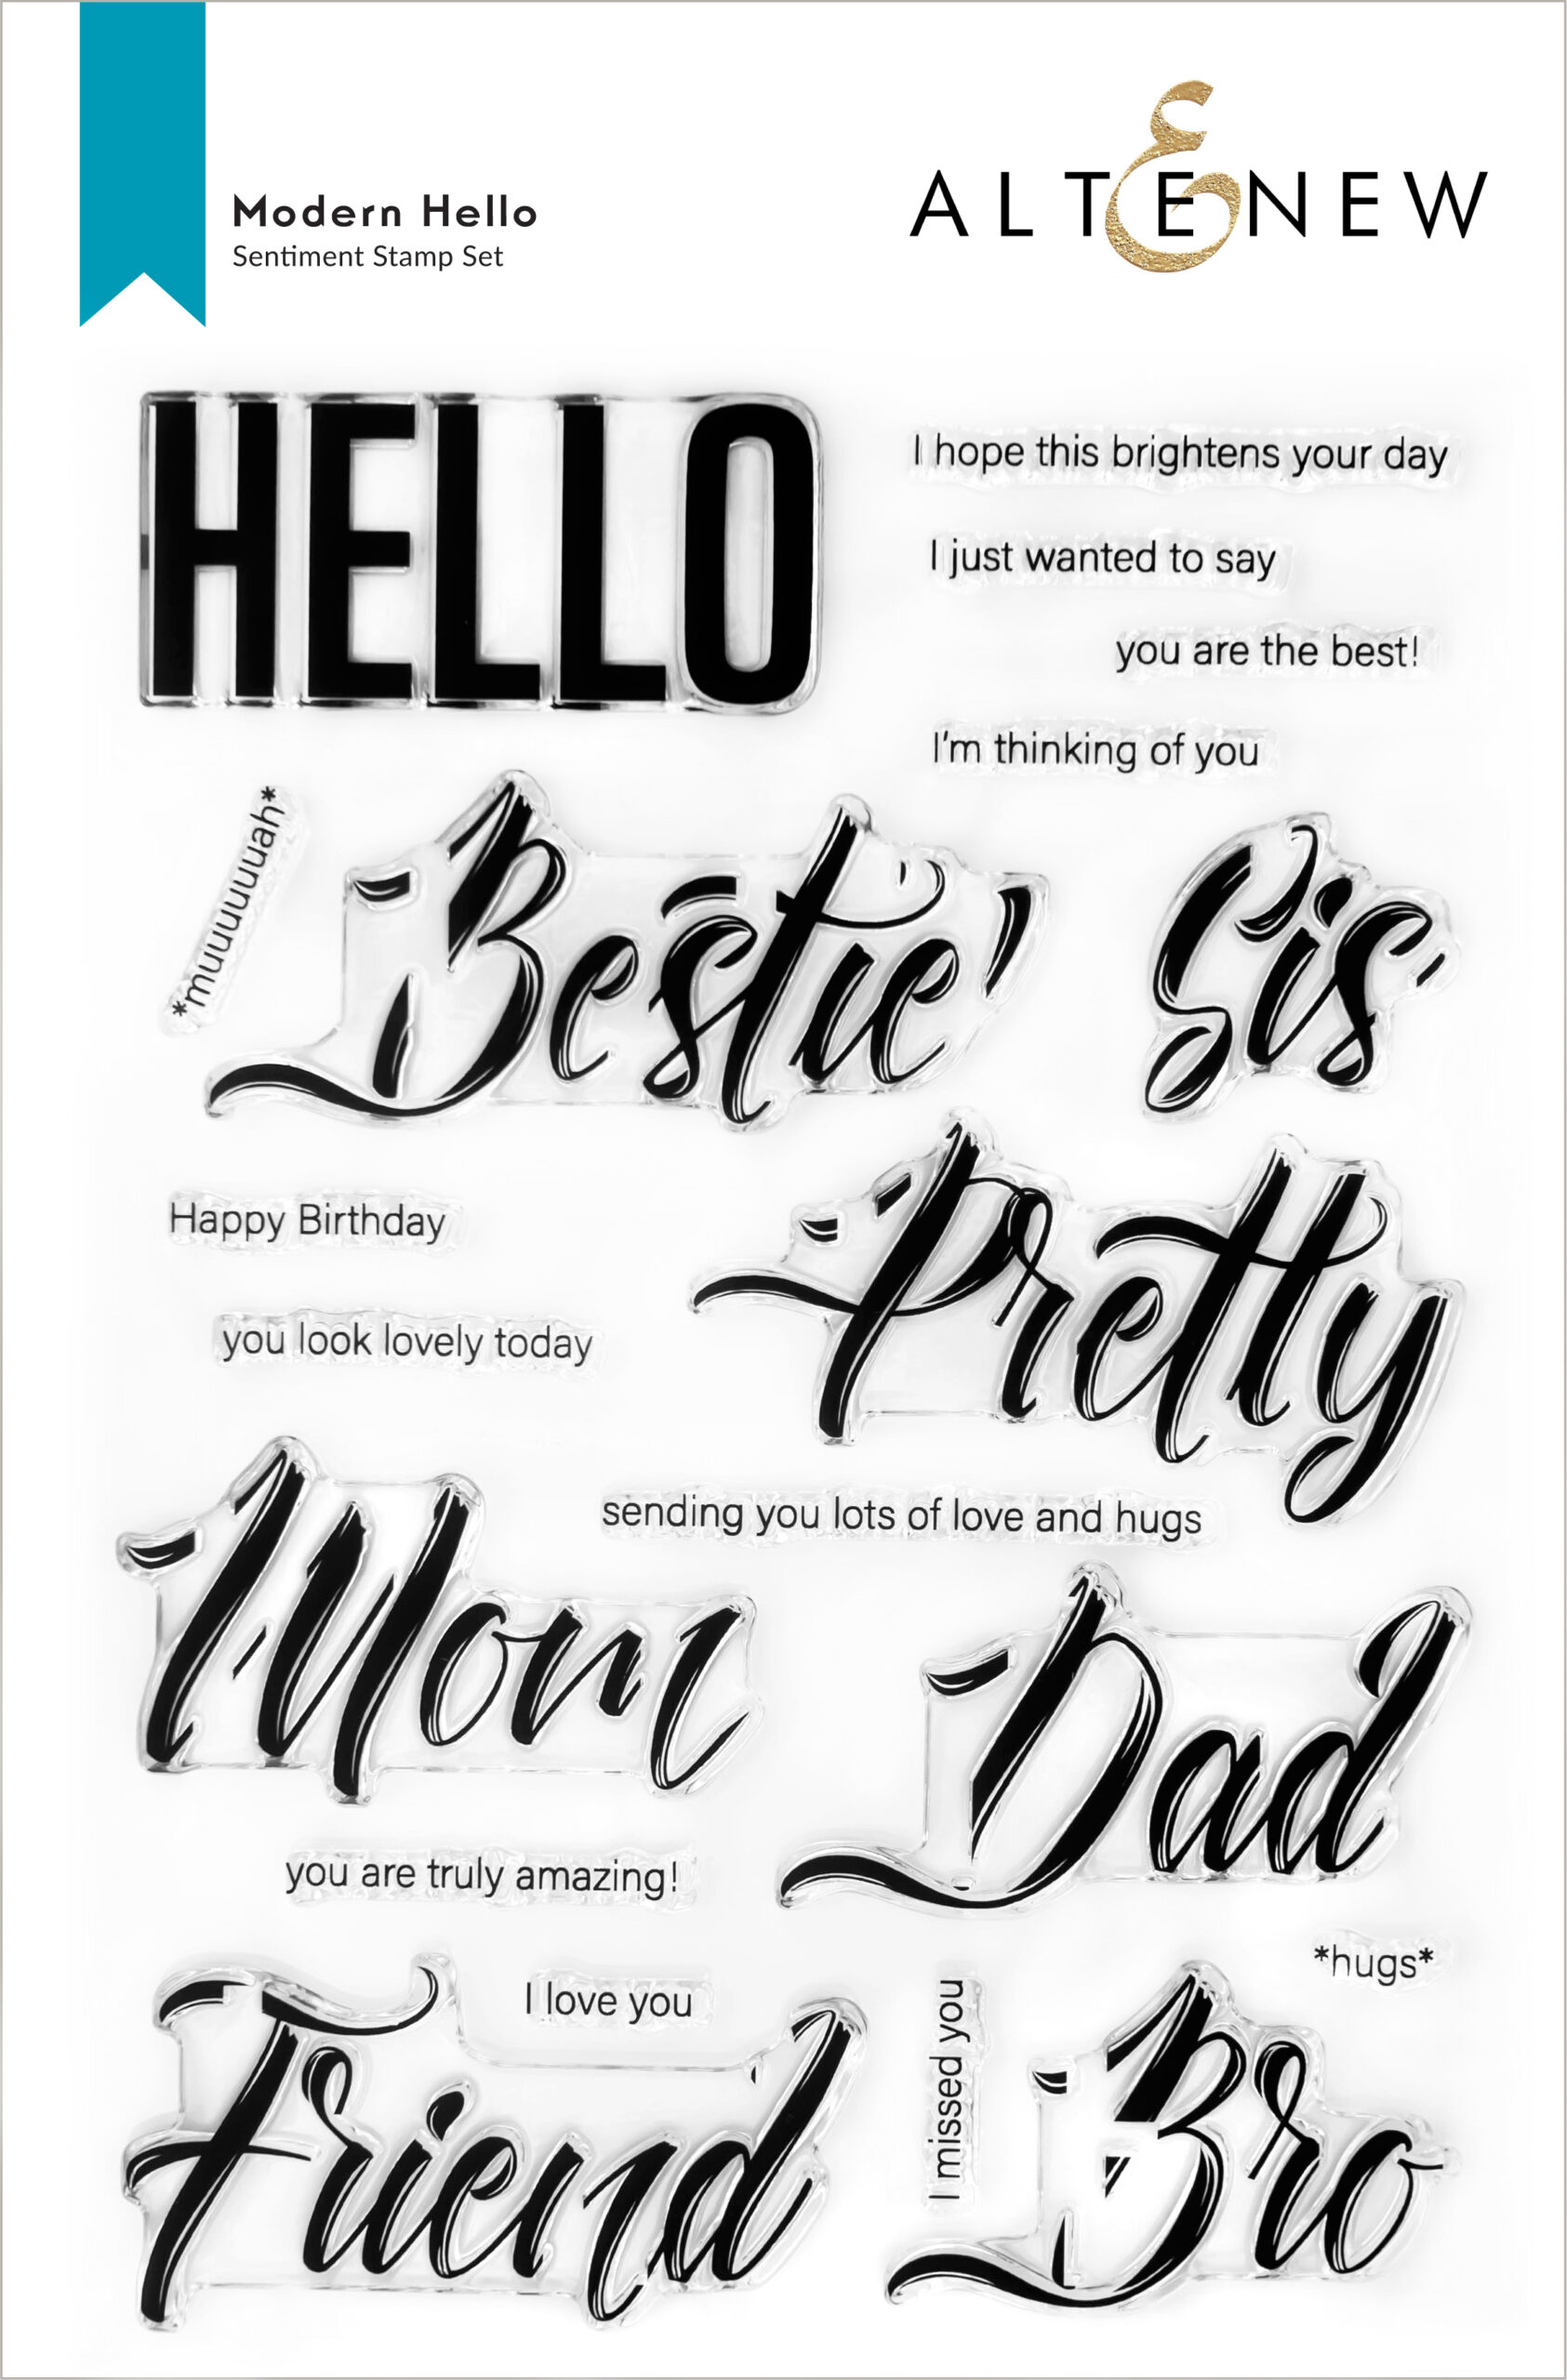
MODERN HELLO STAMP

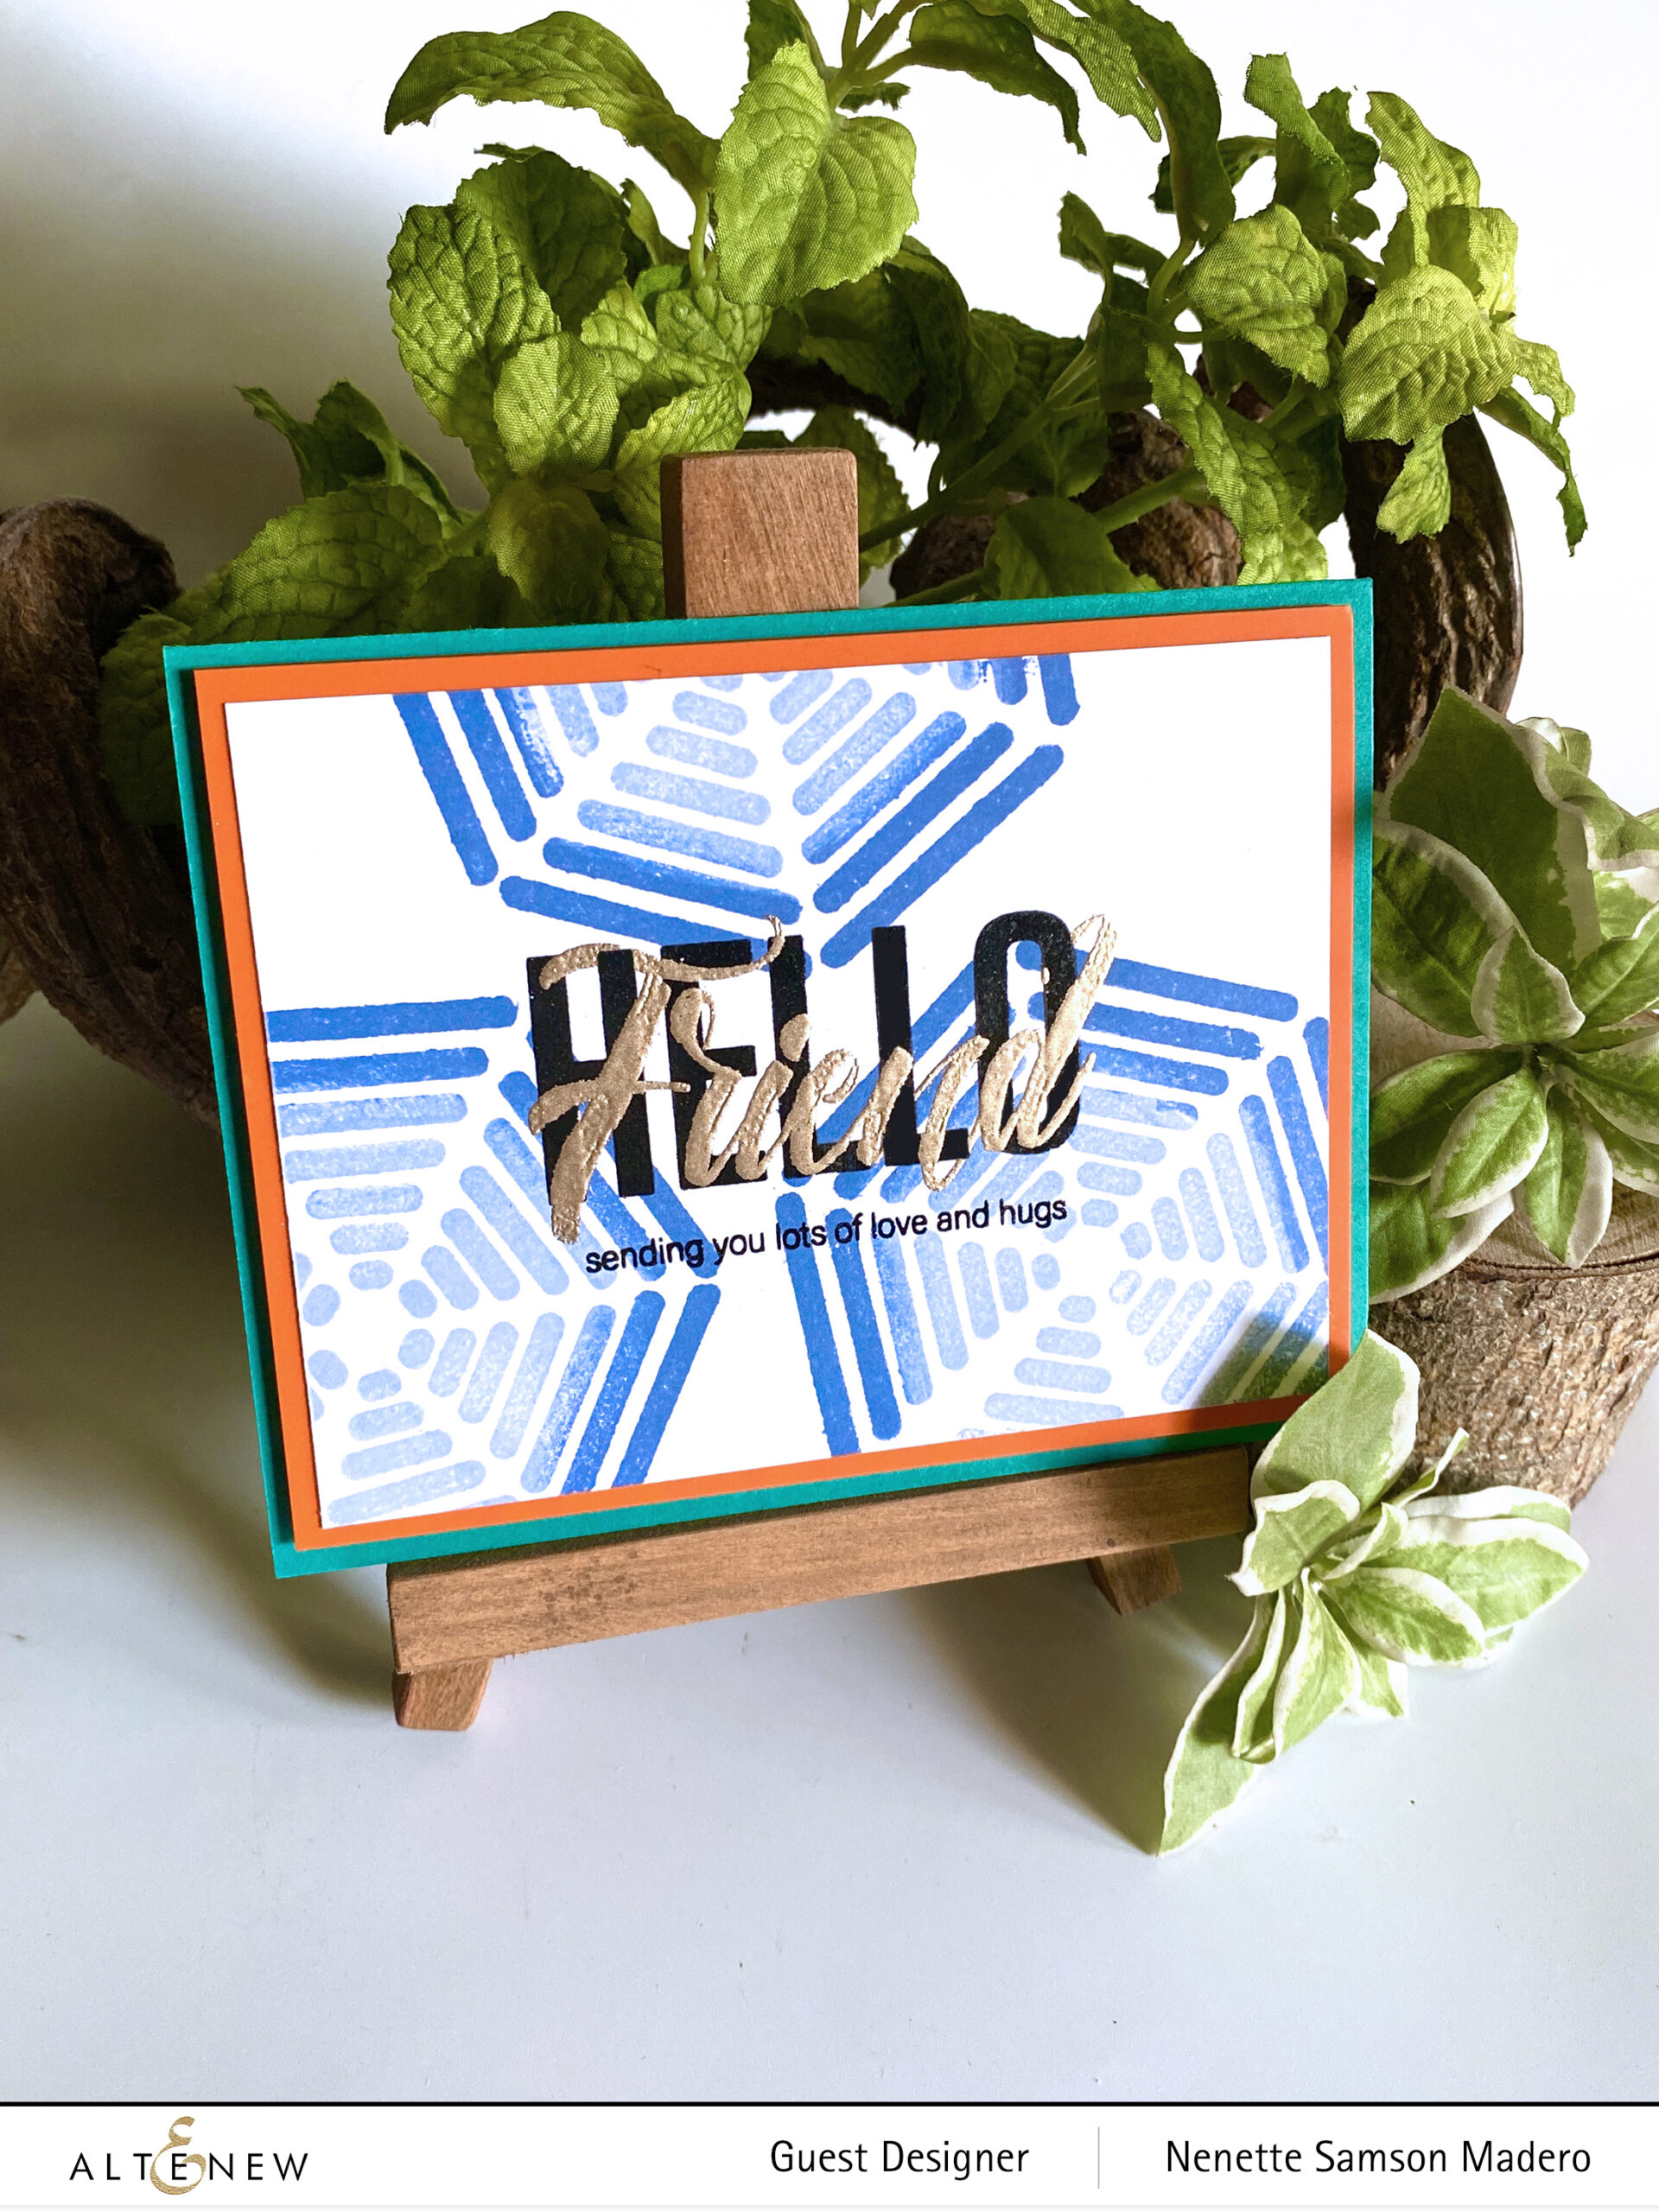
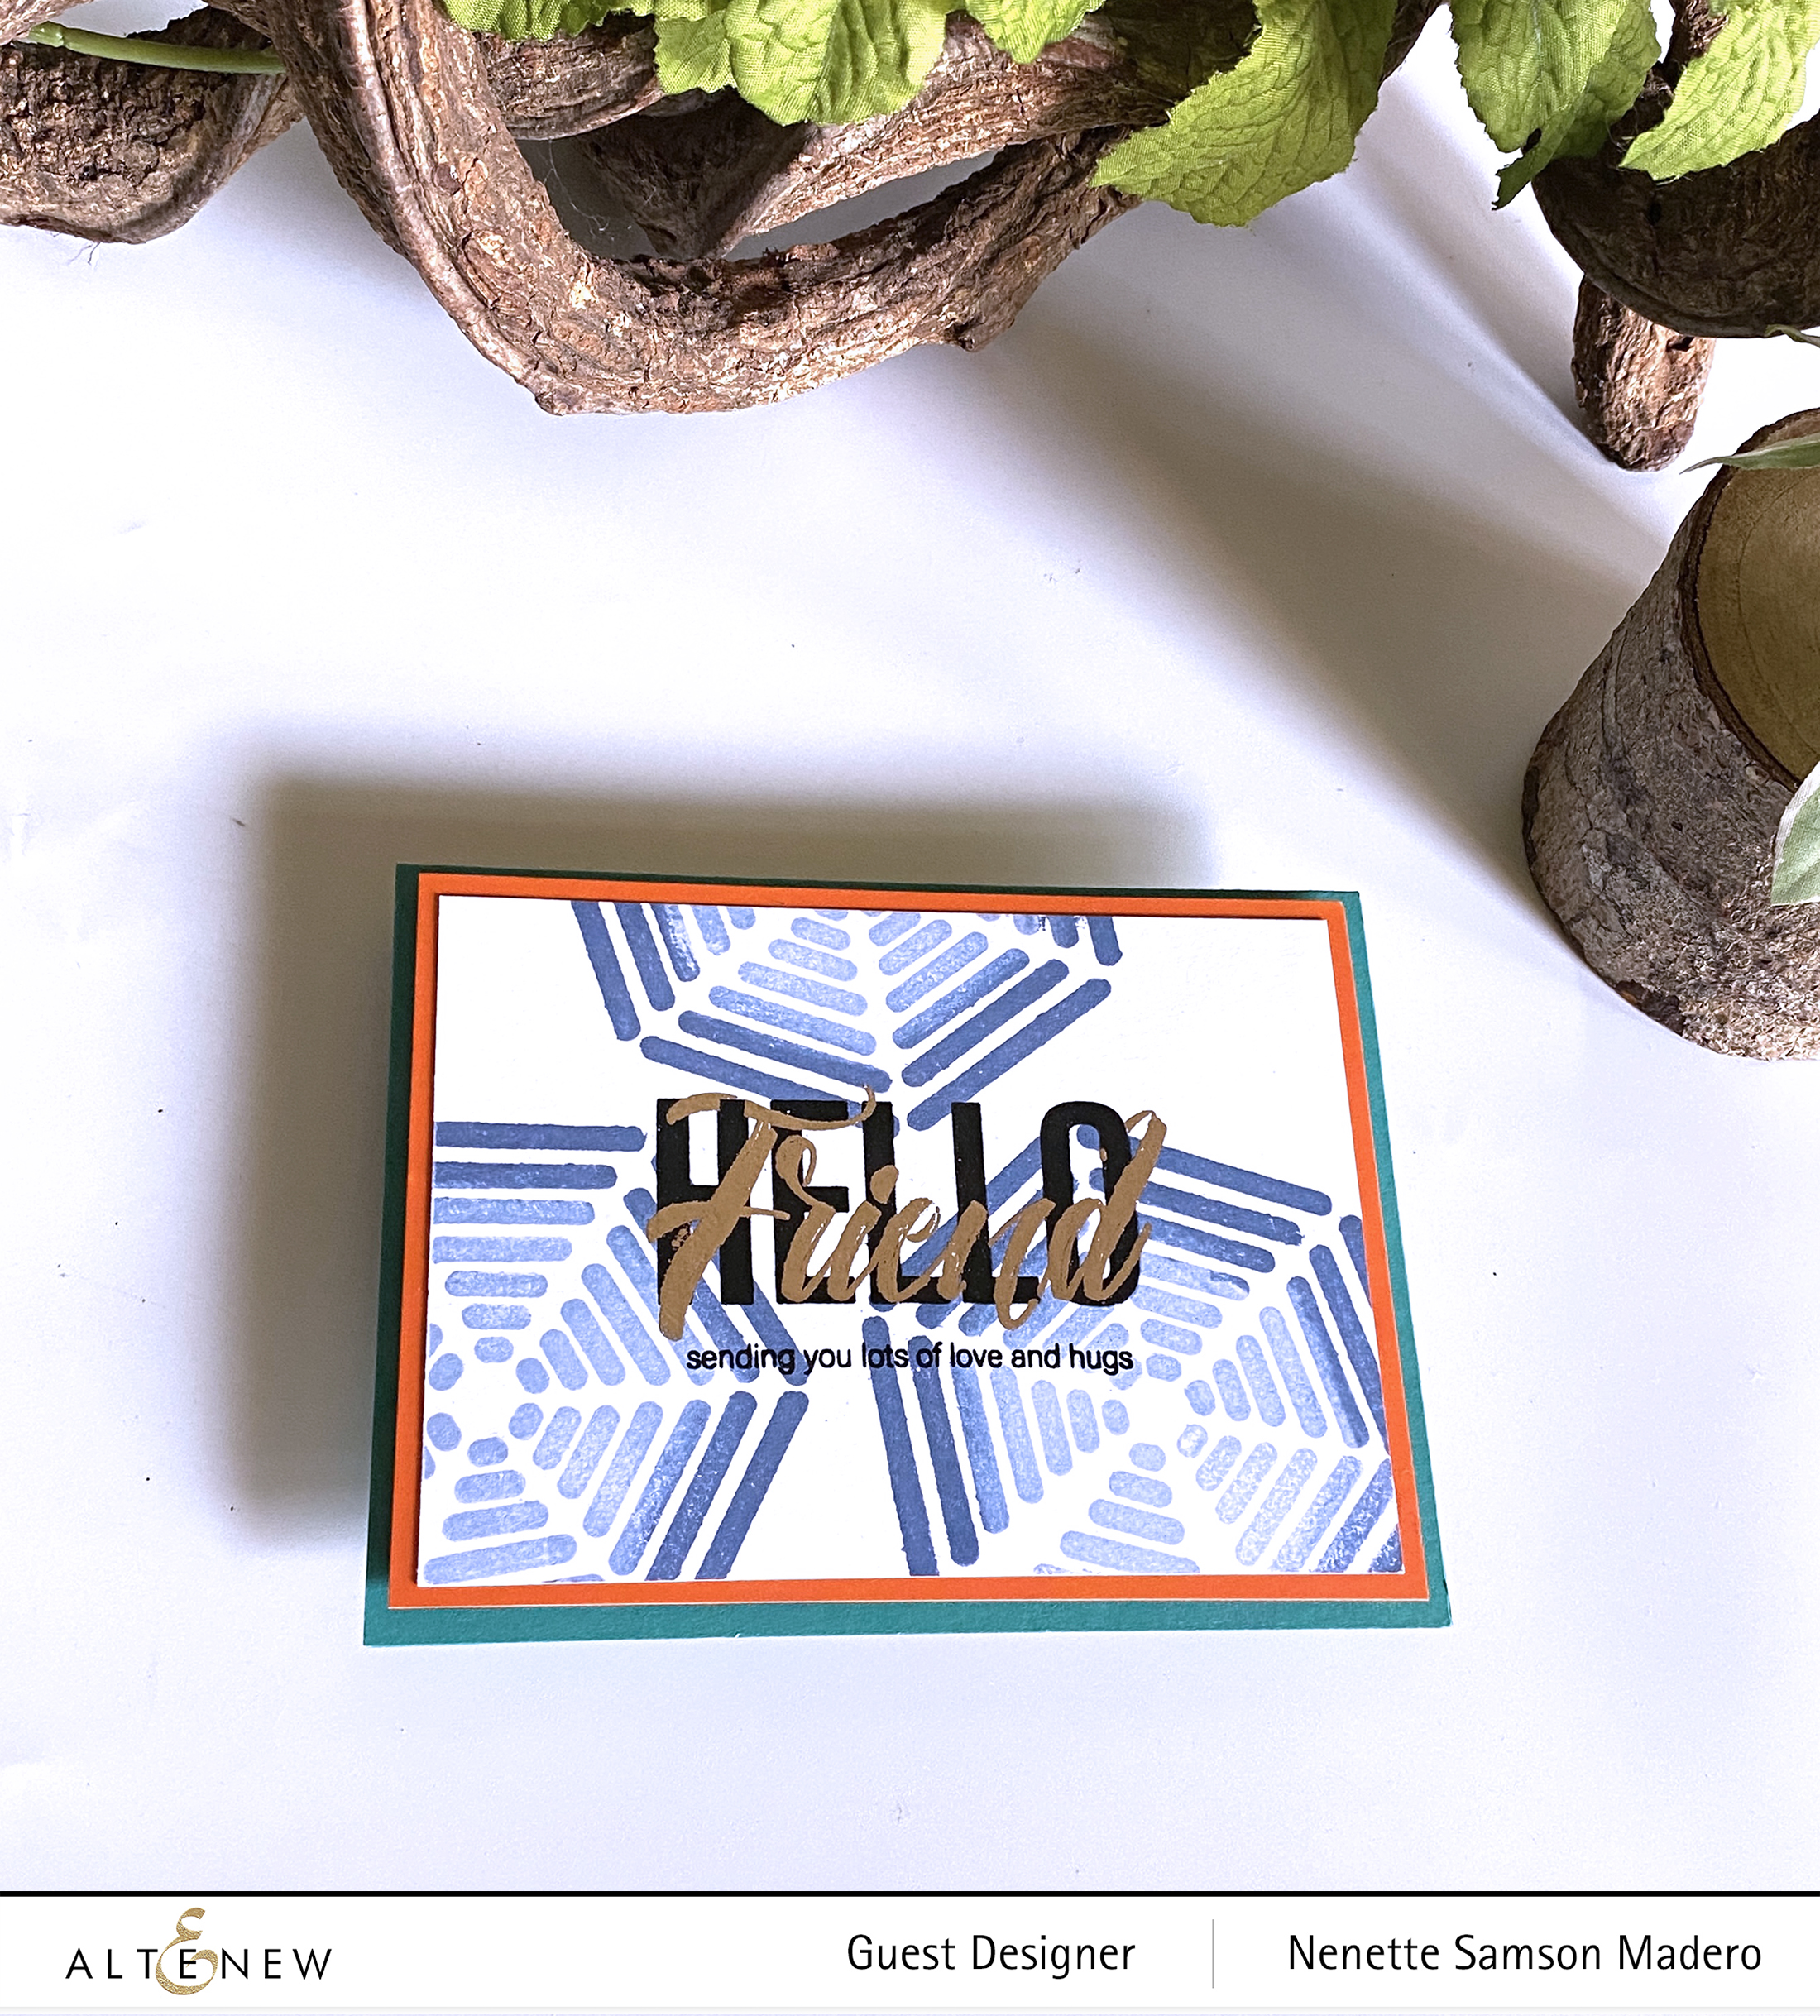
HELLO FRIEND


For this card, I used the Doodled Triangles Stamp set and the Modern Hello Stamp set. 2 dye inks were used to color the triangle to create an ombre effect then this was stamped onto Neenah Solar White Cardstock. The Hello sentiment was stamped using Versafine Onyx Black and the friend with Versmark Ink so that I can emboss with Rose gold embossing powder. I added an orange border before adhering the whole panel to the teal card base using foam squares for dimension. This looks like a masculine card (which I rarely make 😄) — no flowers this time 🙂
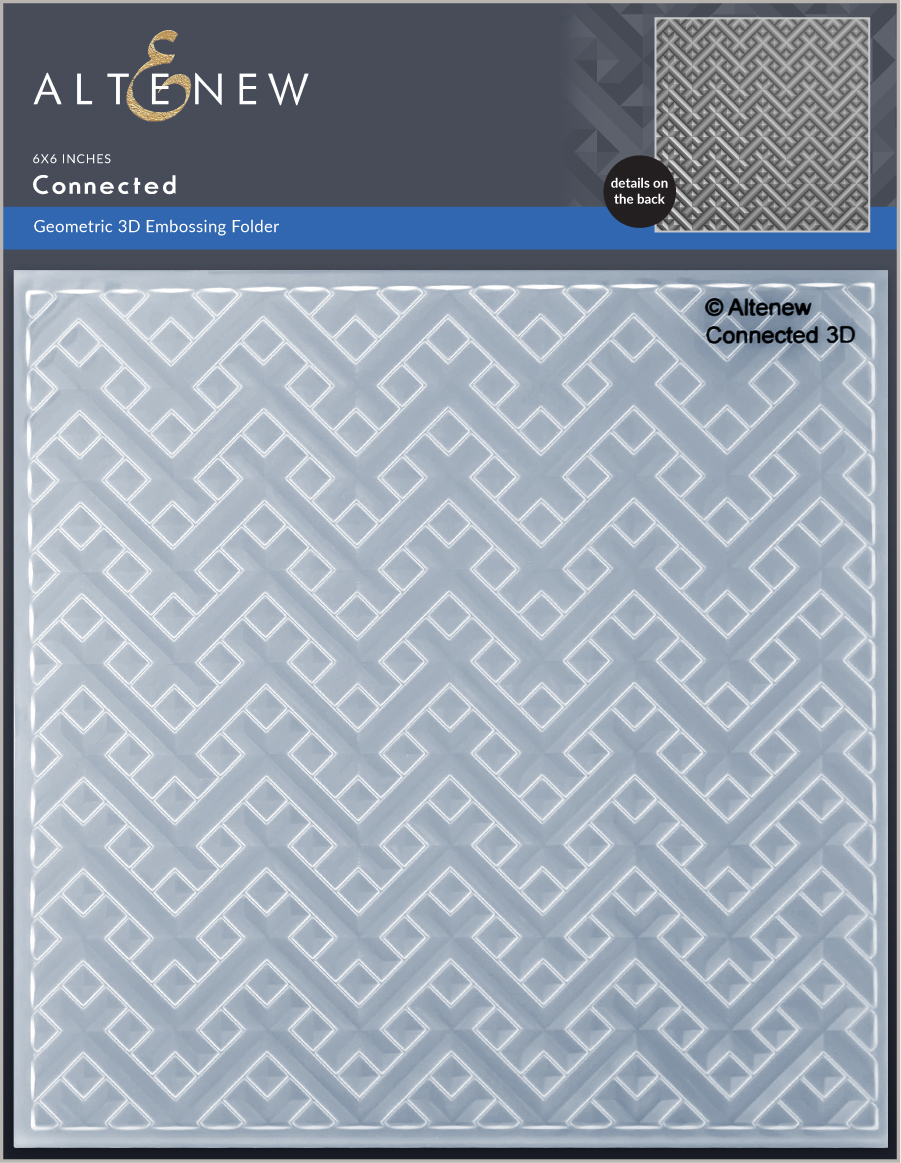

CONNECTED 3D EMBOSSING FOLDER
FANCY HUGS DIE

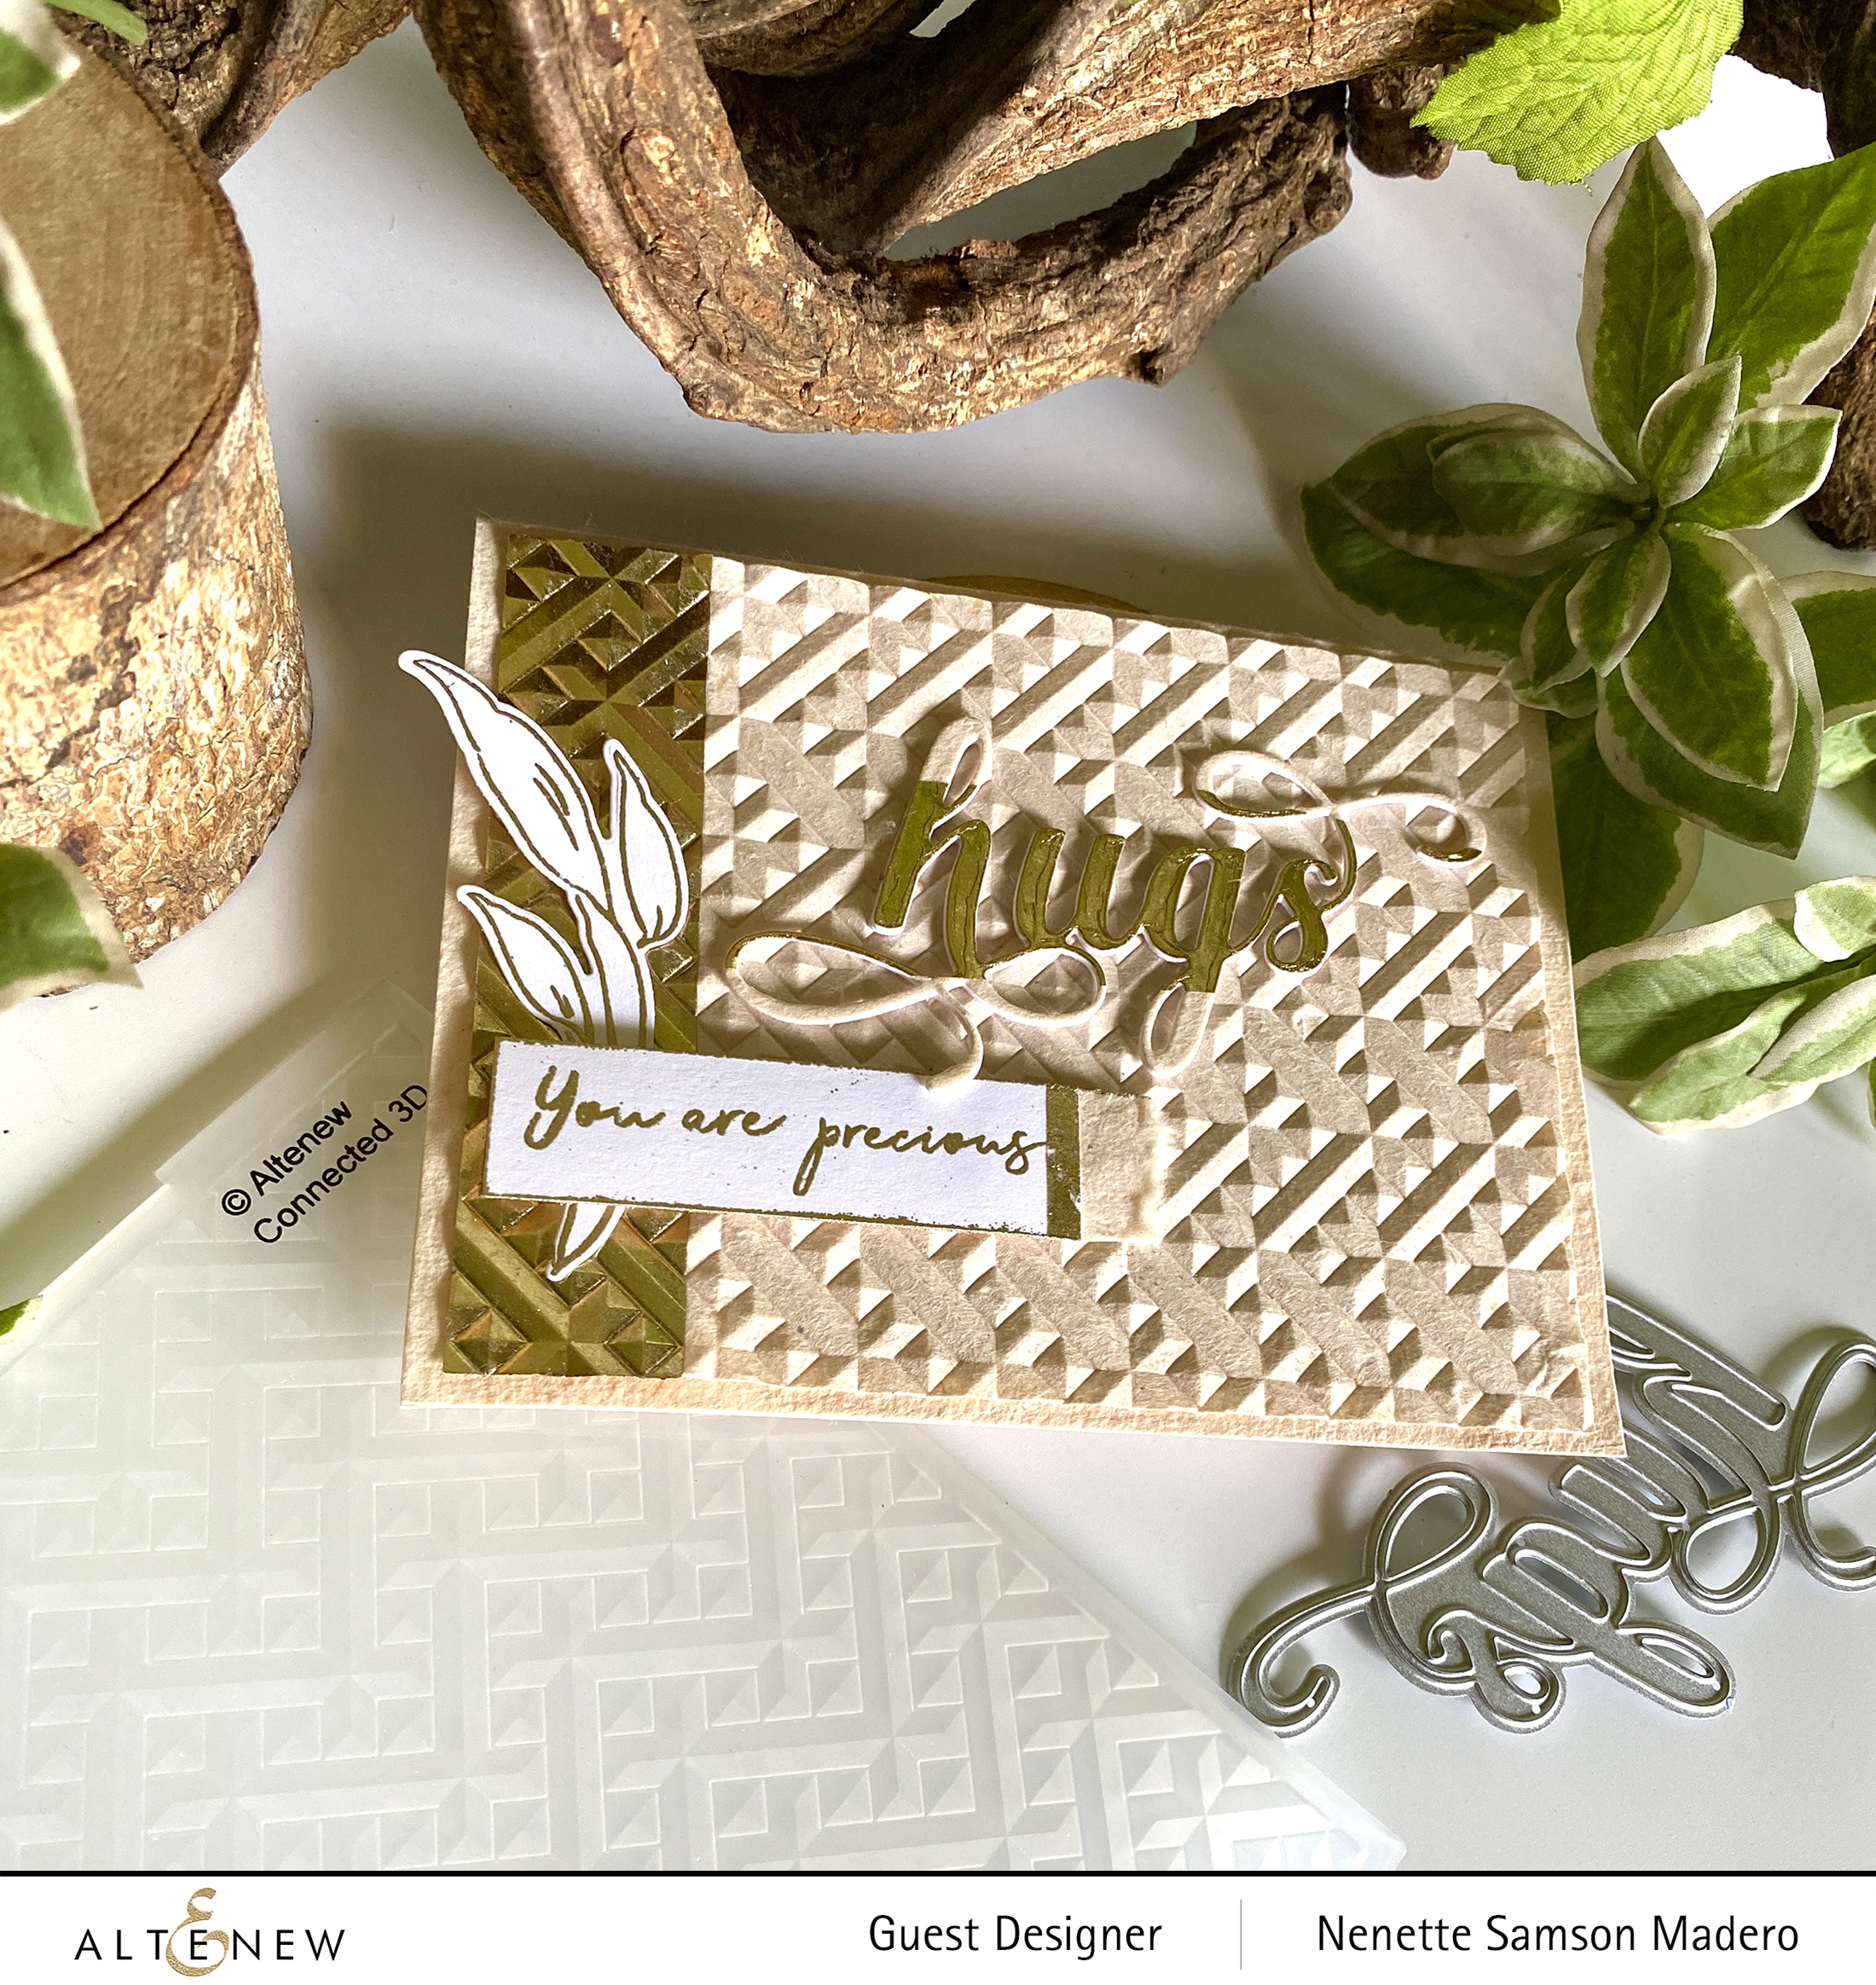
HUGS


For this card, I wanted to see the outcome of using handmade paper with the Connected 3D embossing folder. And since the handmade paper is lightweight paper as compared to cardstock, the intricate designs were more visible!!! Take a look at the design on the washi tape too!! So so pretty!!!
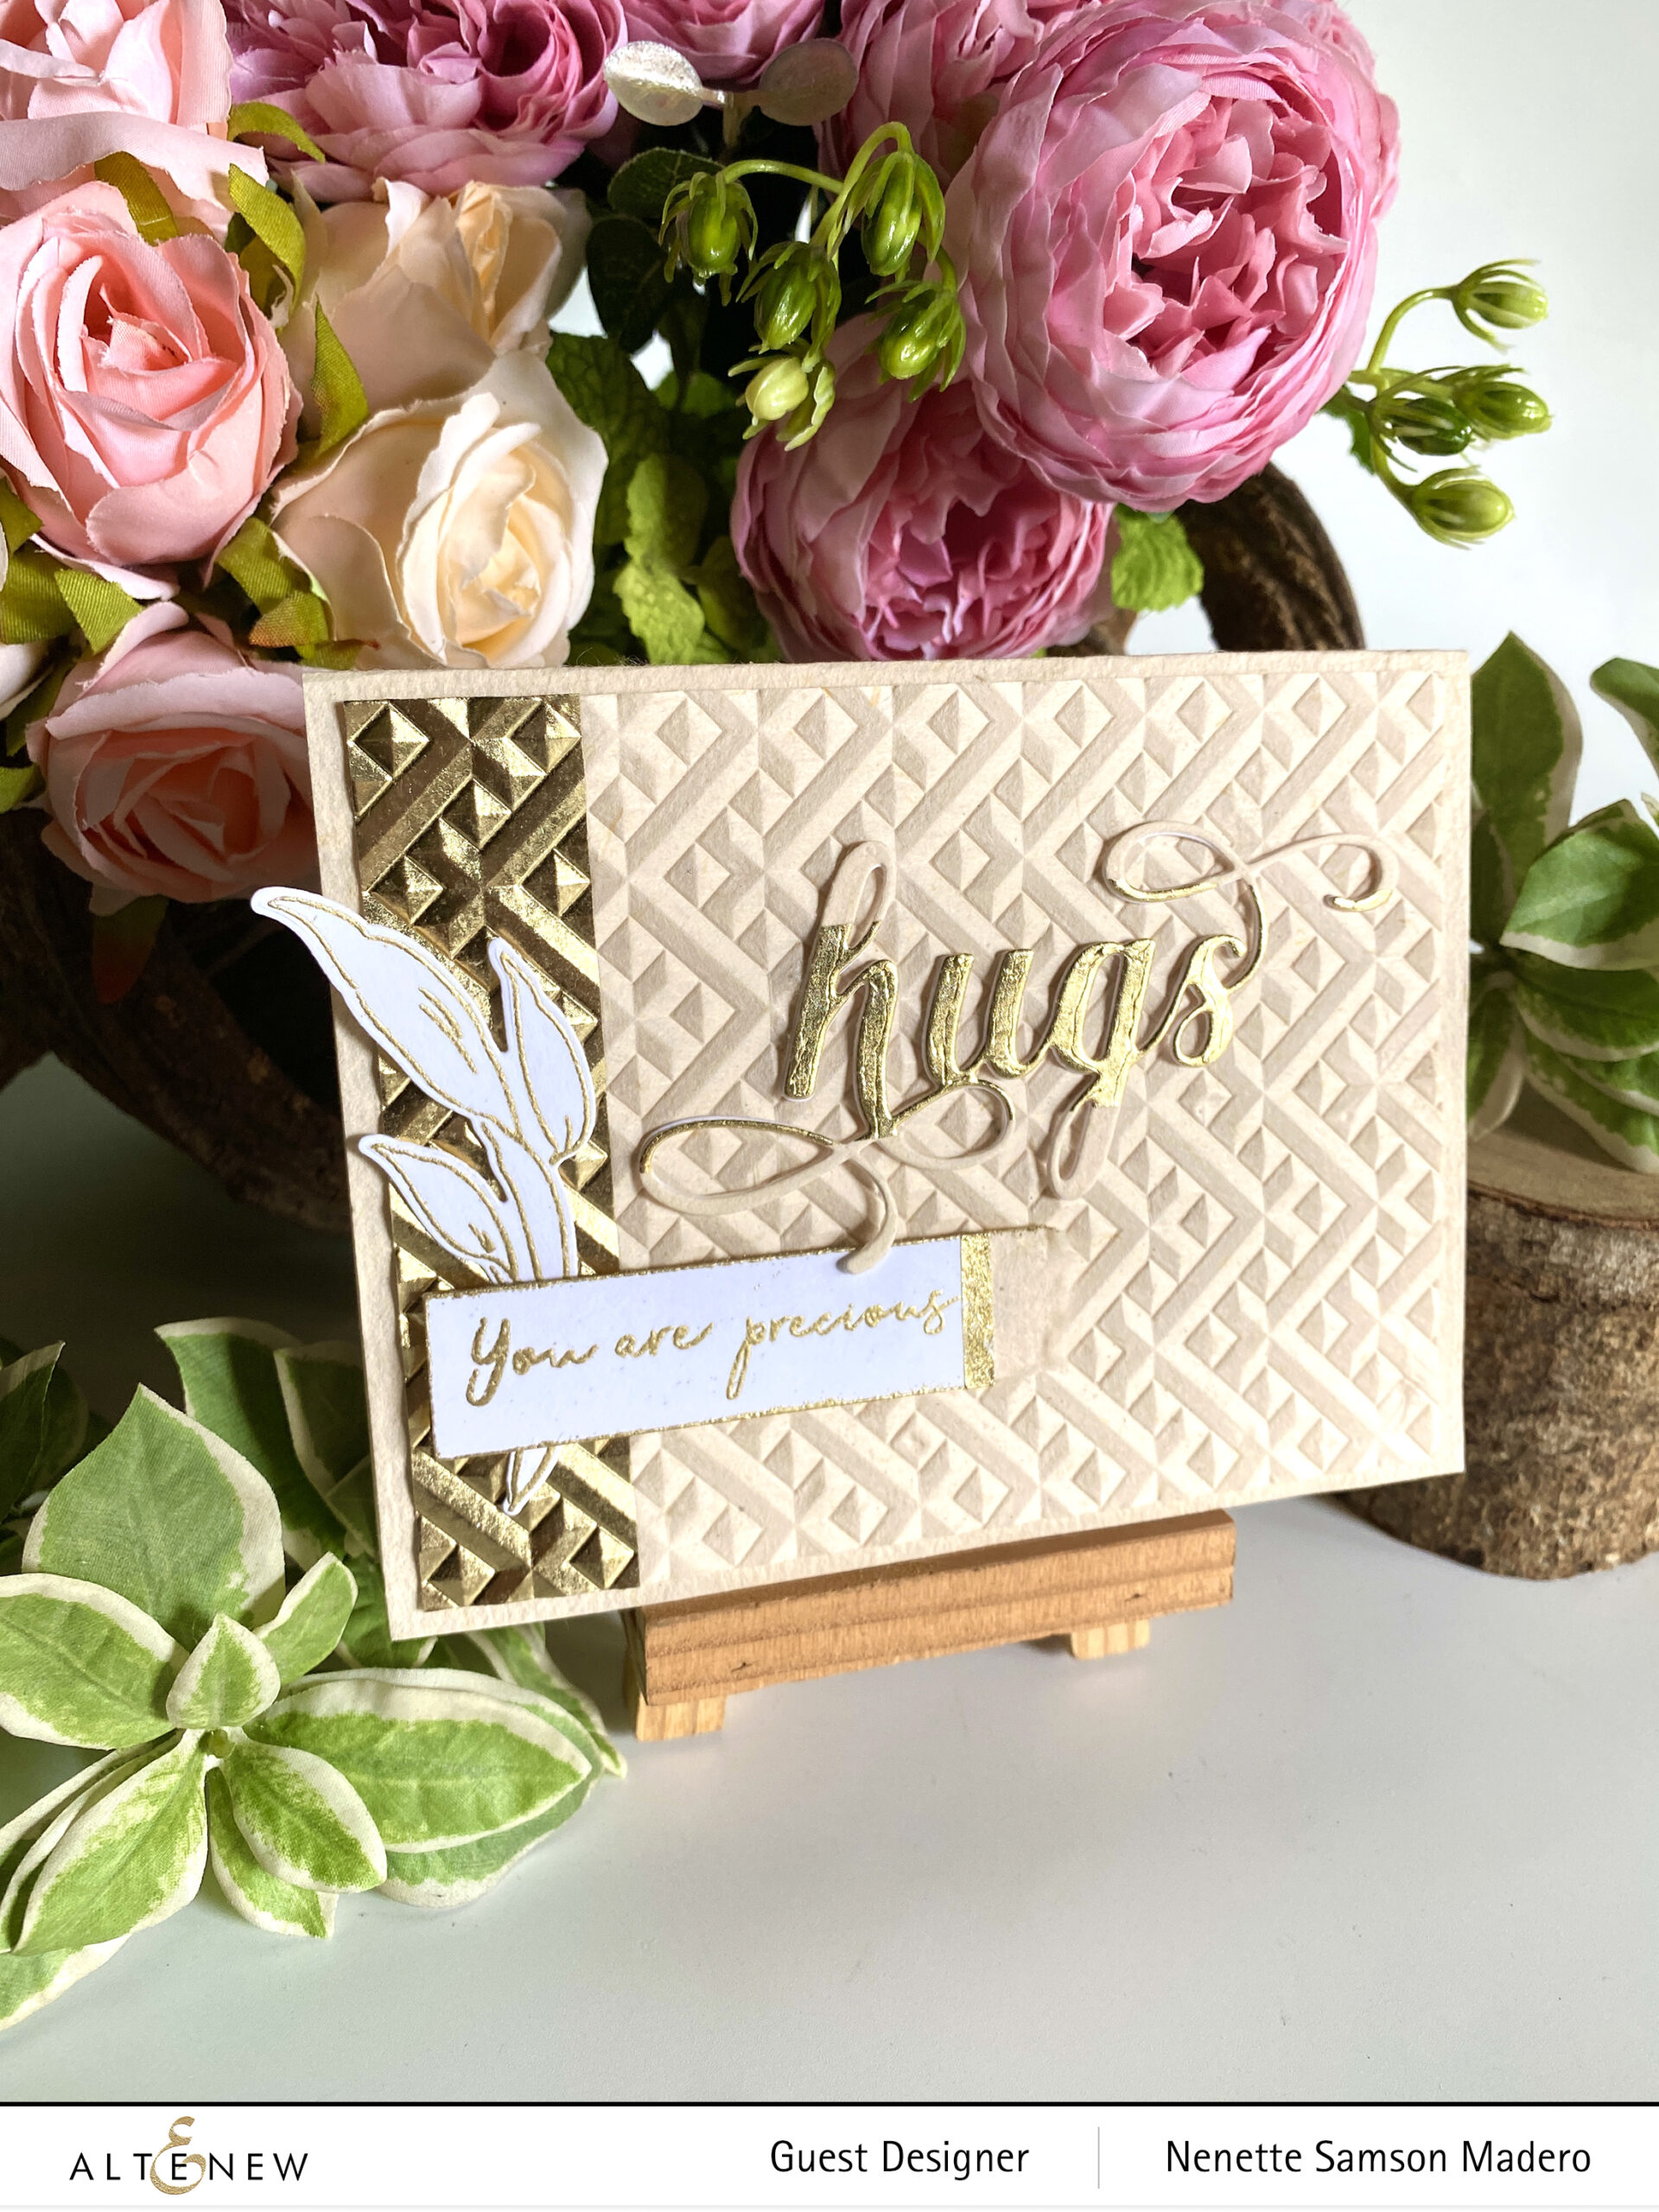
I also stamped the foliage image from the Fresh Blooms stamp set on Neenah Solar White cardstock then embossed it with Rose Gold embossing powder for added accent. The Fancy Hugs die was used to cut 2 layers from cardstock then the last one from the handmade paper with the gold foil on it. Sometimes, simple cards can be elegant, too. I will definitely be experimenting more using handmade paper. 🙂
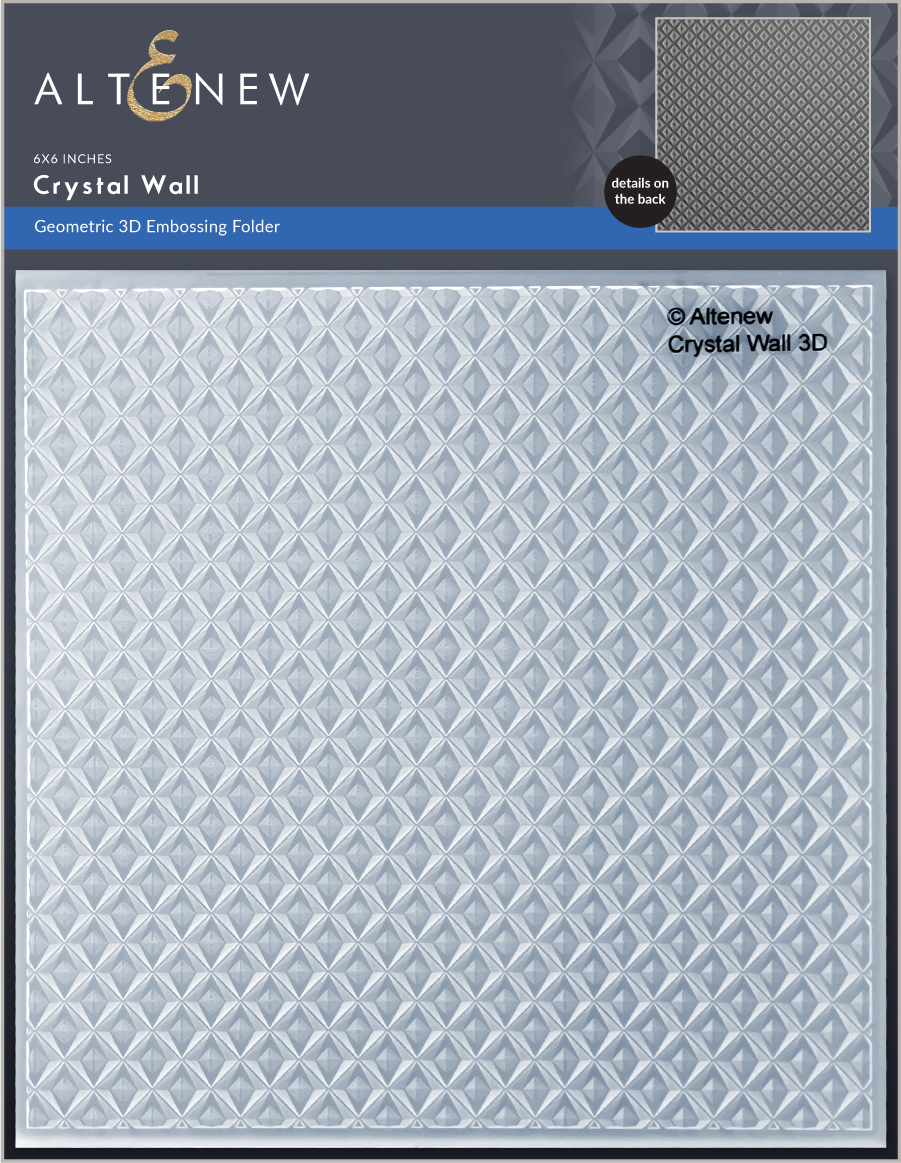

CRYSTAL WALL 3D EMBOSSING FOLDER

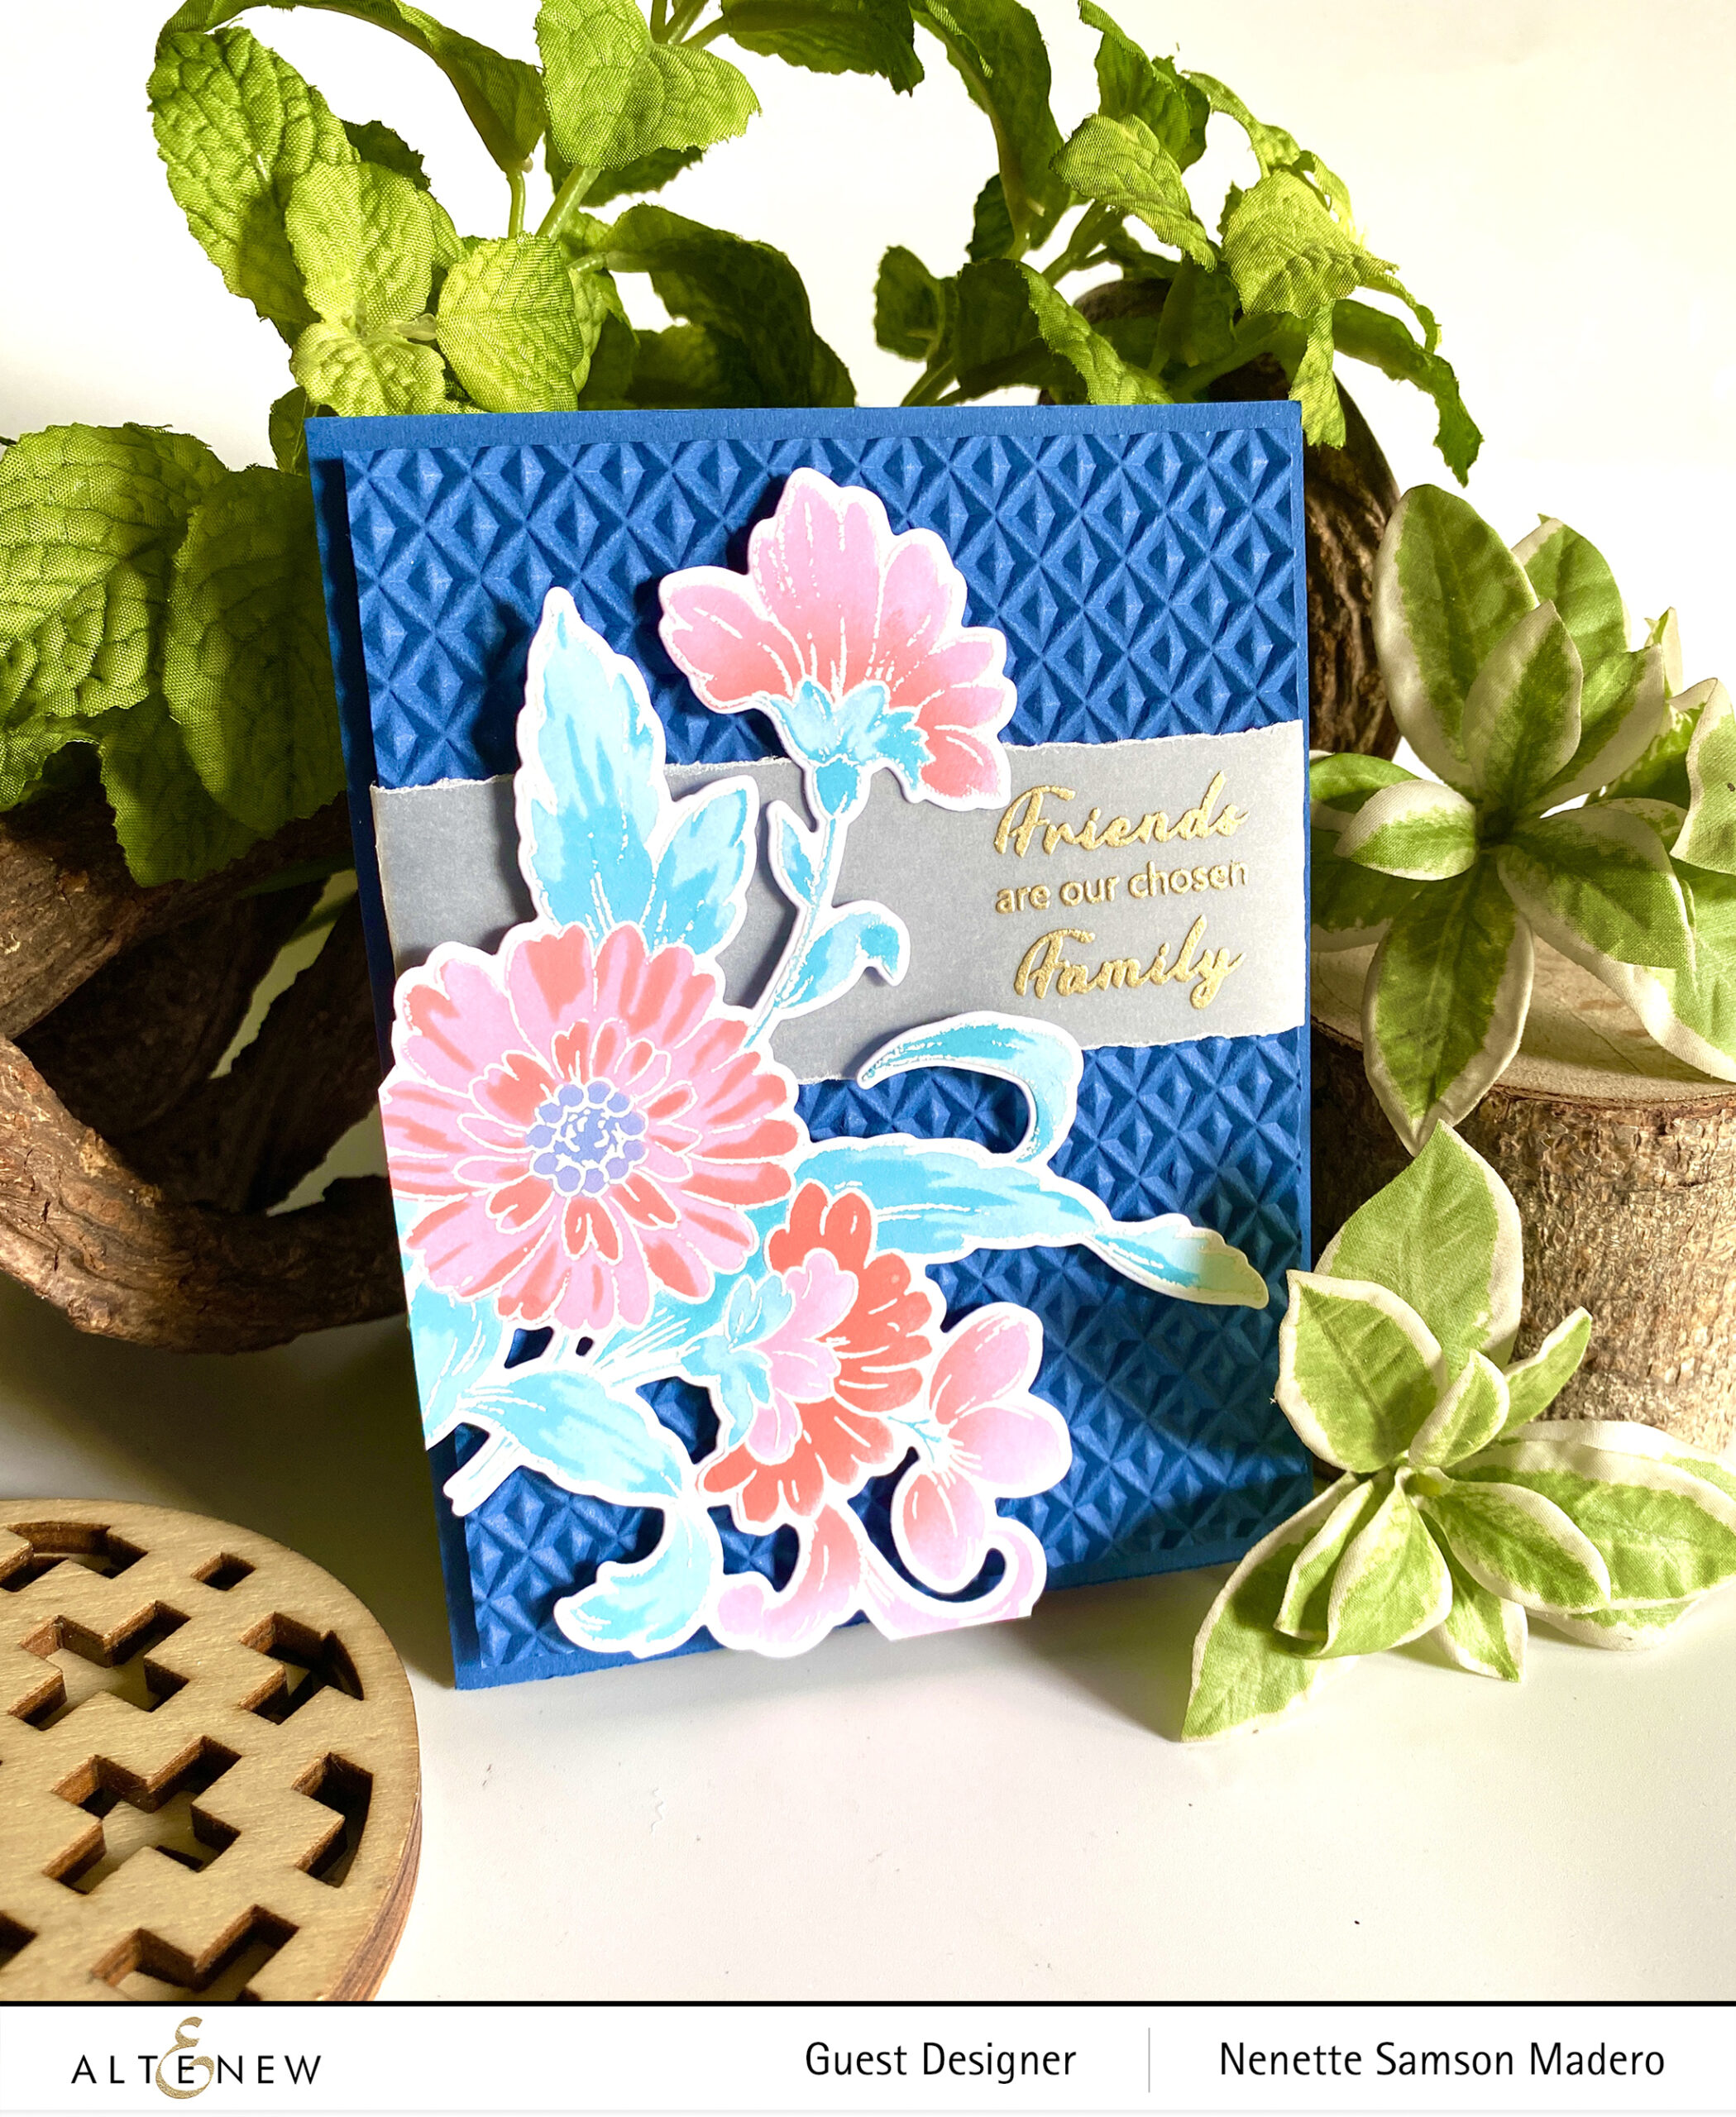
FRIENDS ARE OUR CHOSEN FAMILY


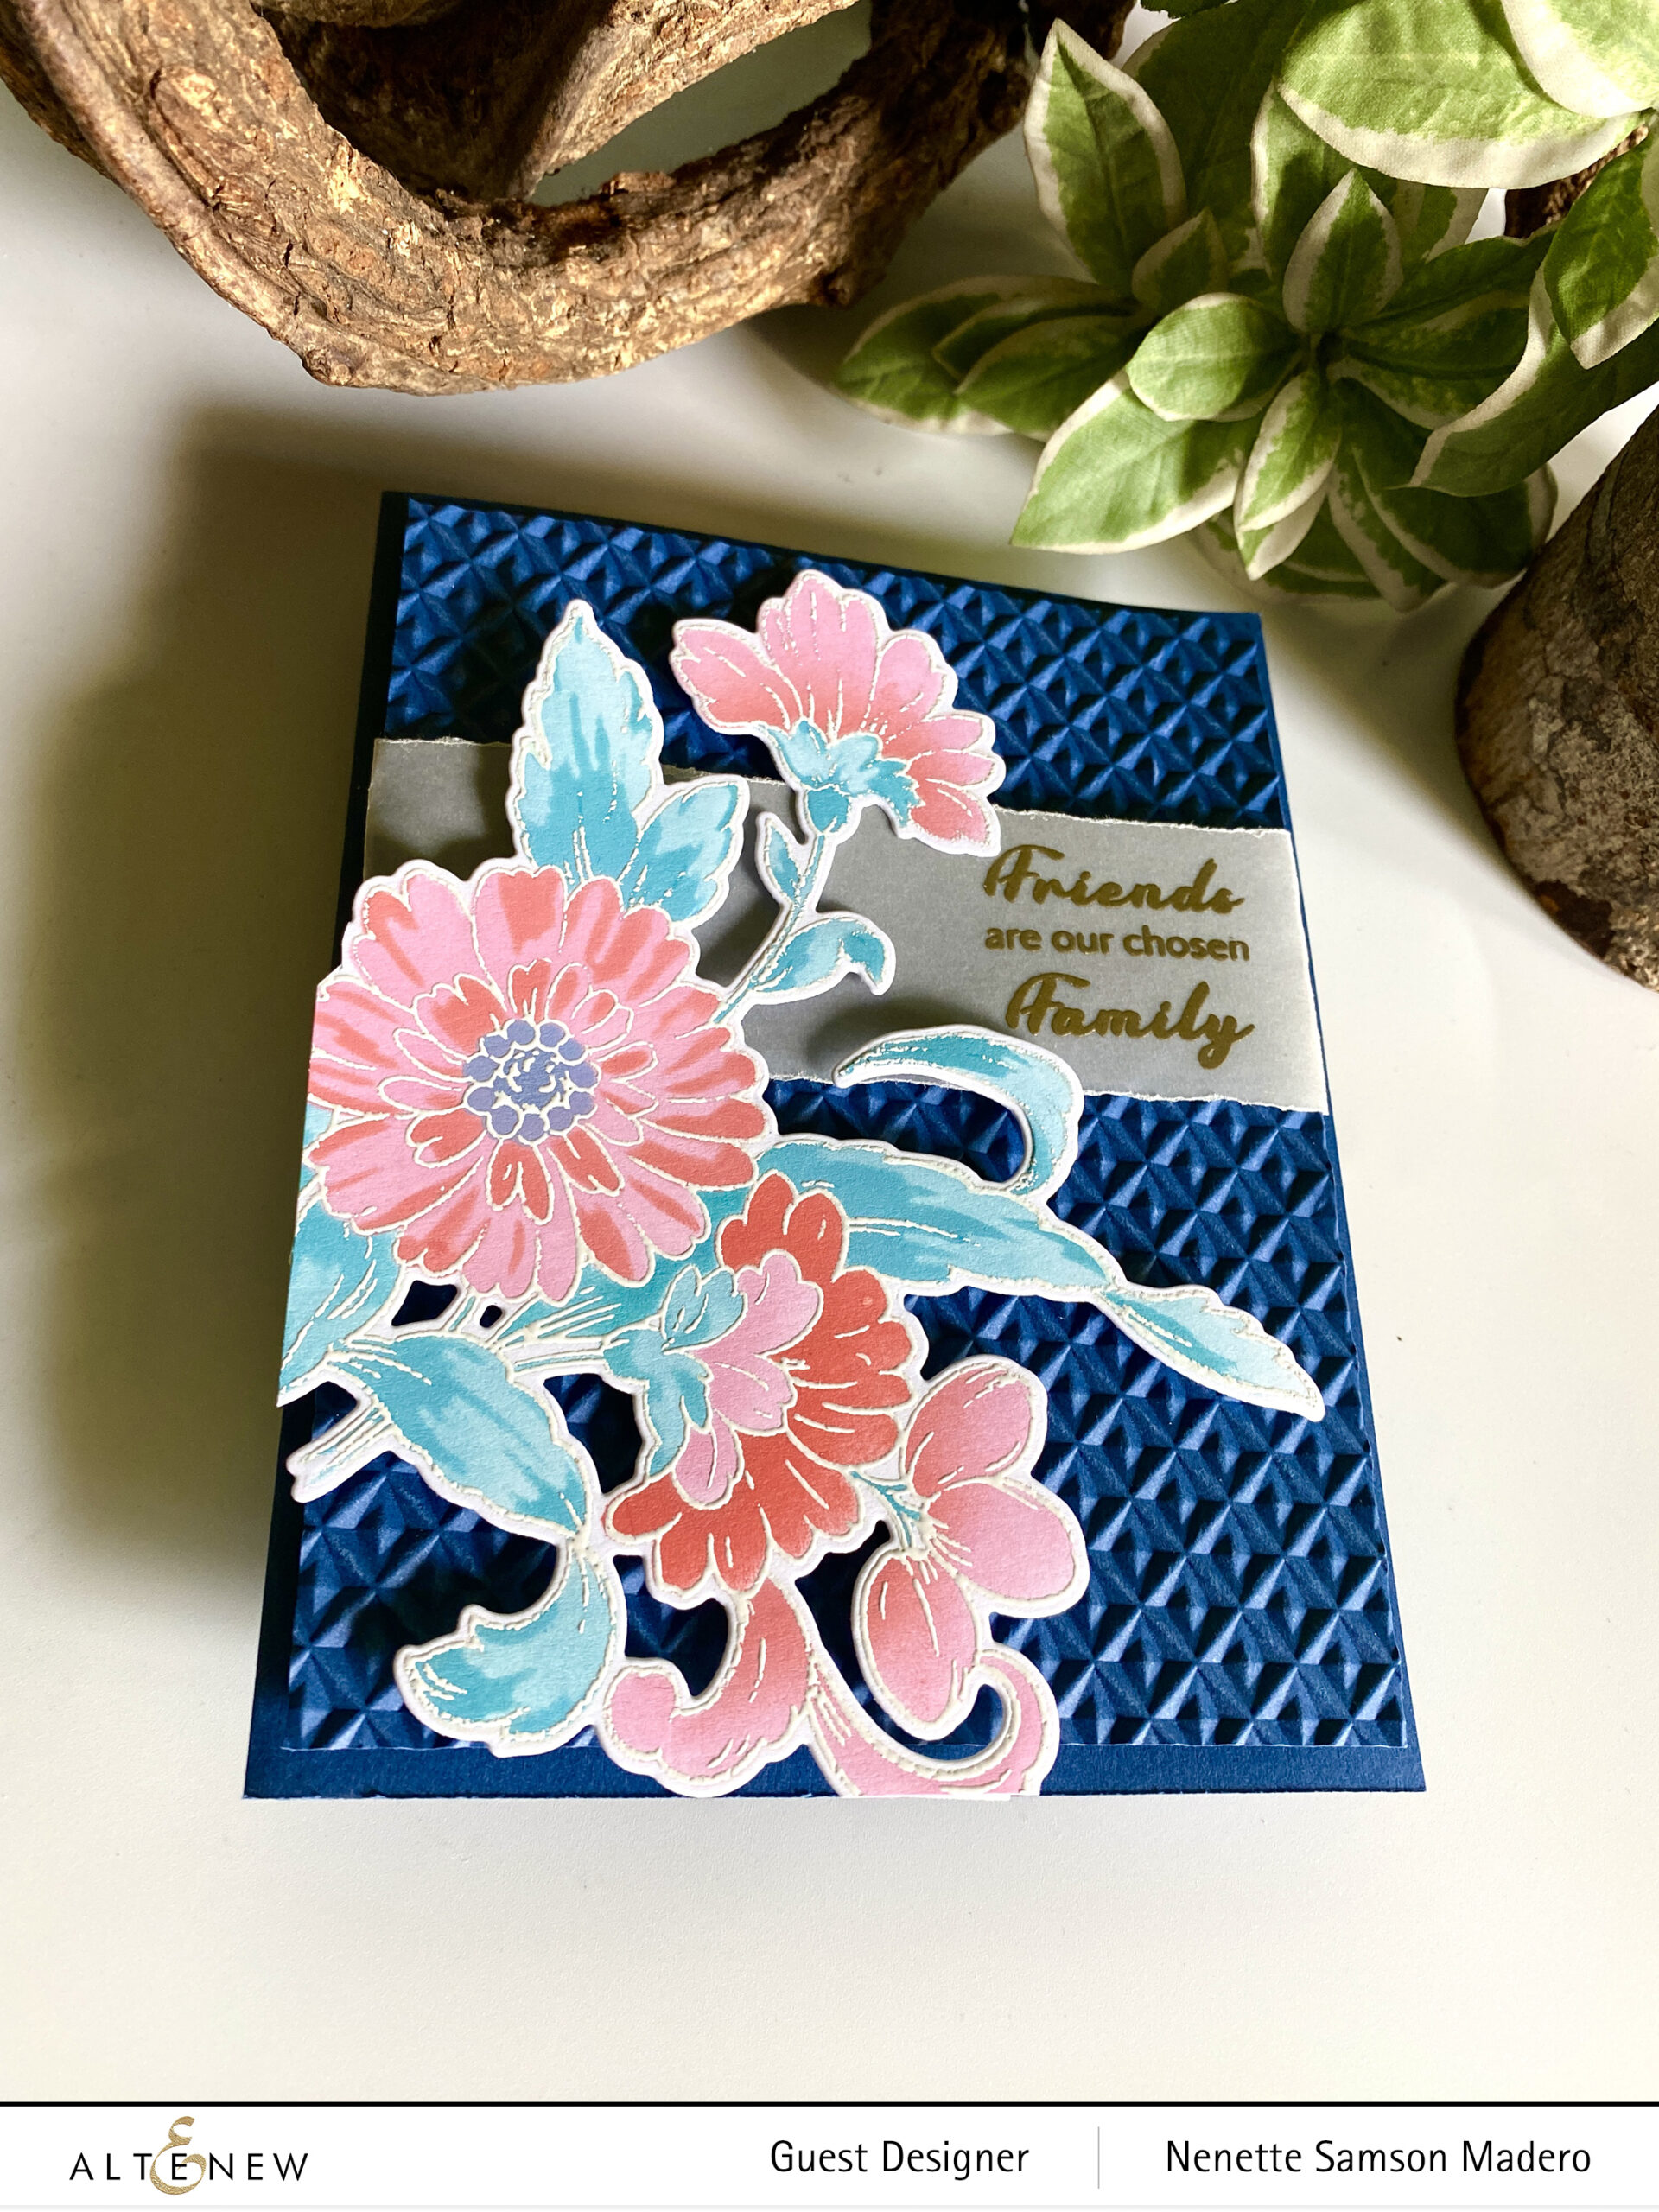
For this card, I used the Crystal Wall 3D embossing folder to create the background. I colored the Sisters of the Heart stamp image using the coordinating stencils with the following Distress Oxide inks–Abandoned Coral, Kitch Flamingo, Tumbled Glass and Stormy Sky. The image was embossed with Pure White Embossing Powder. The sentiment was stamped on vellum with Versamark Ink and embossed with Antique Gold embossing powder.

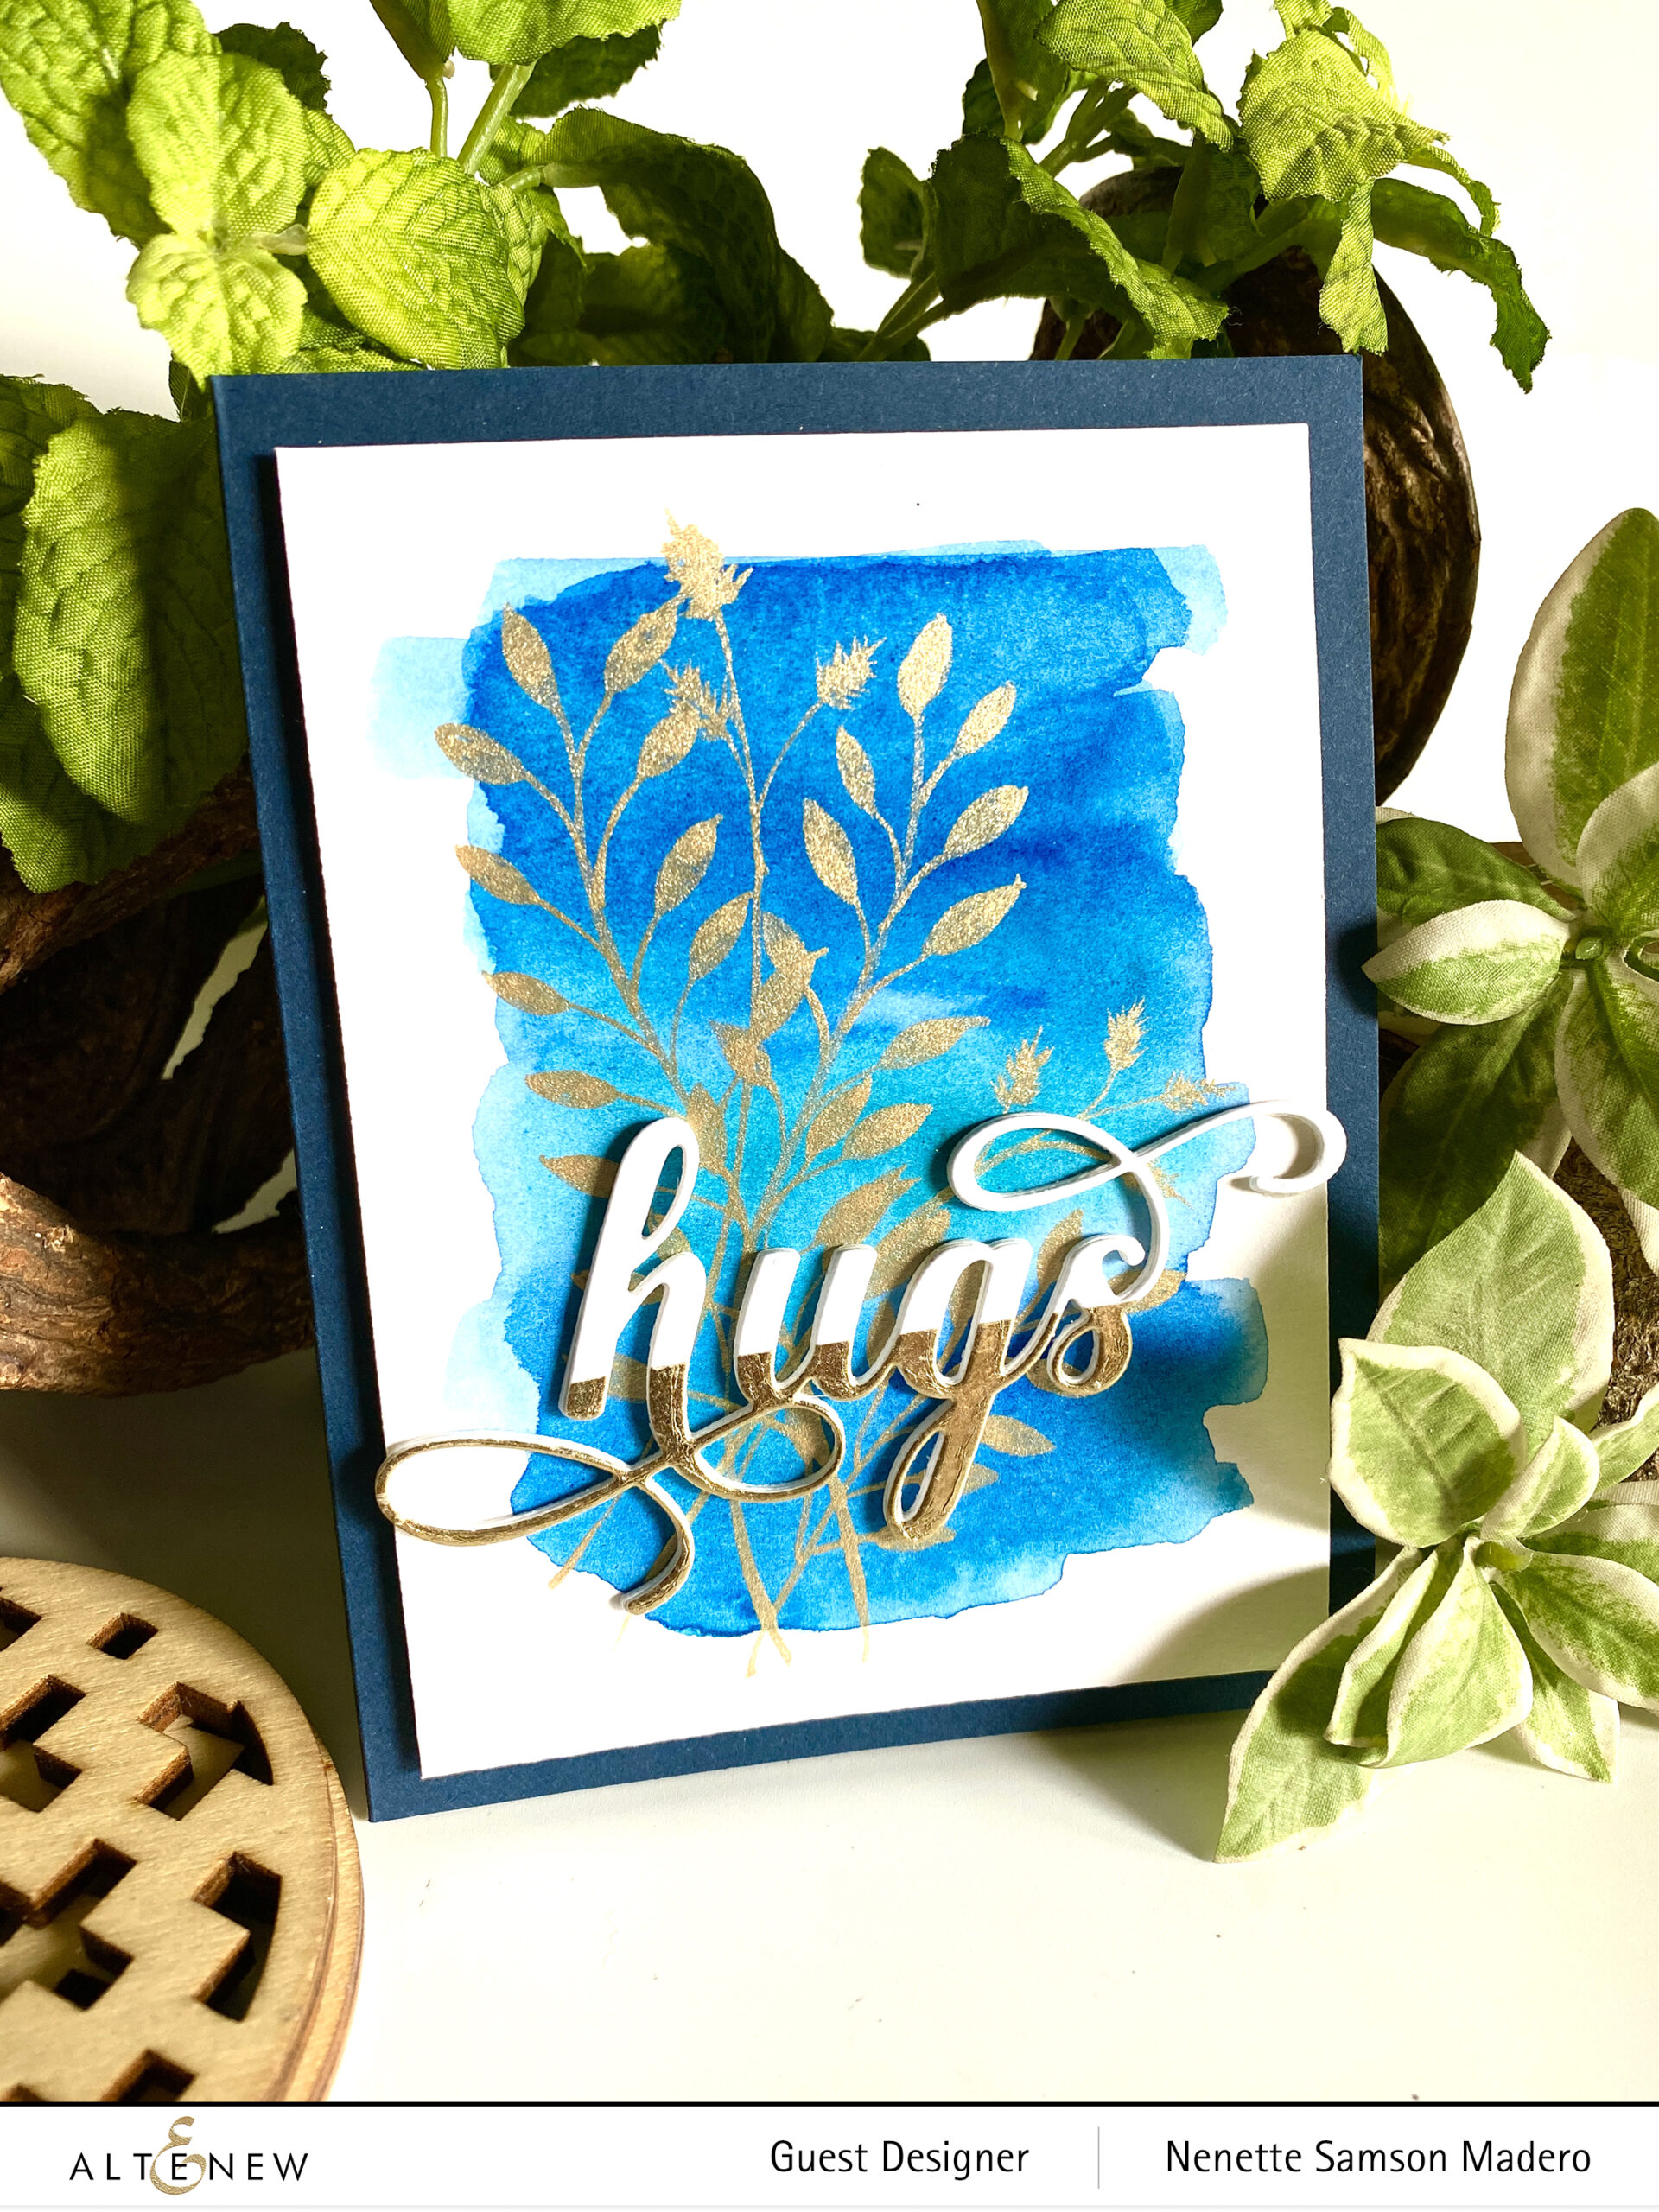
HUGS
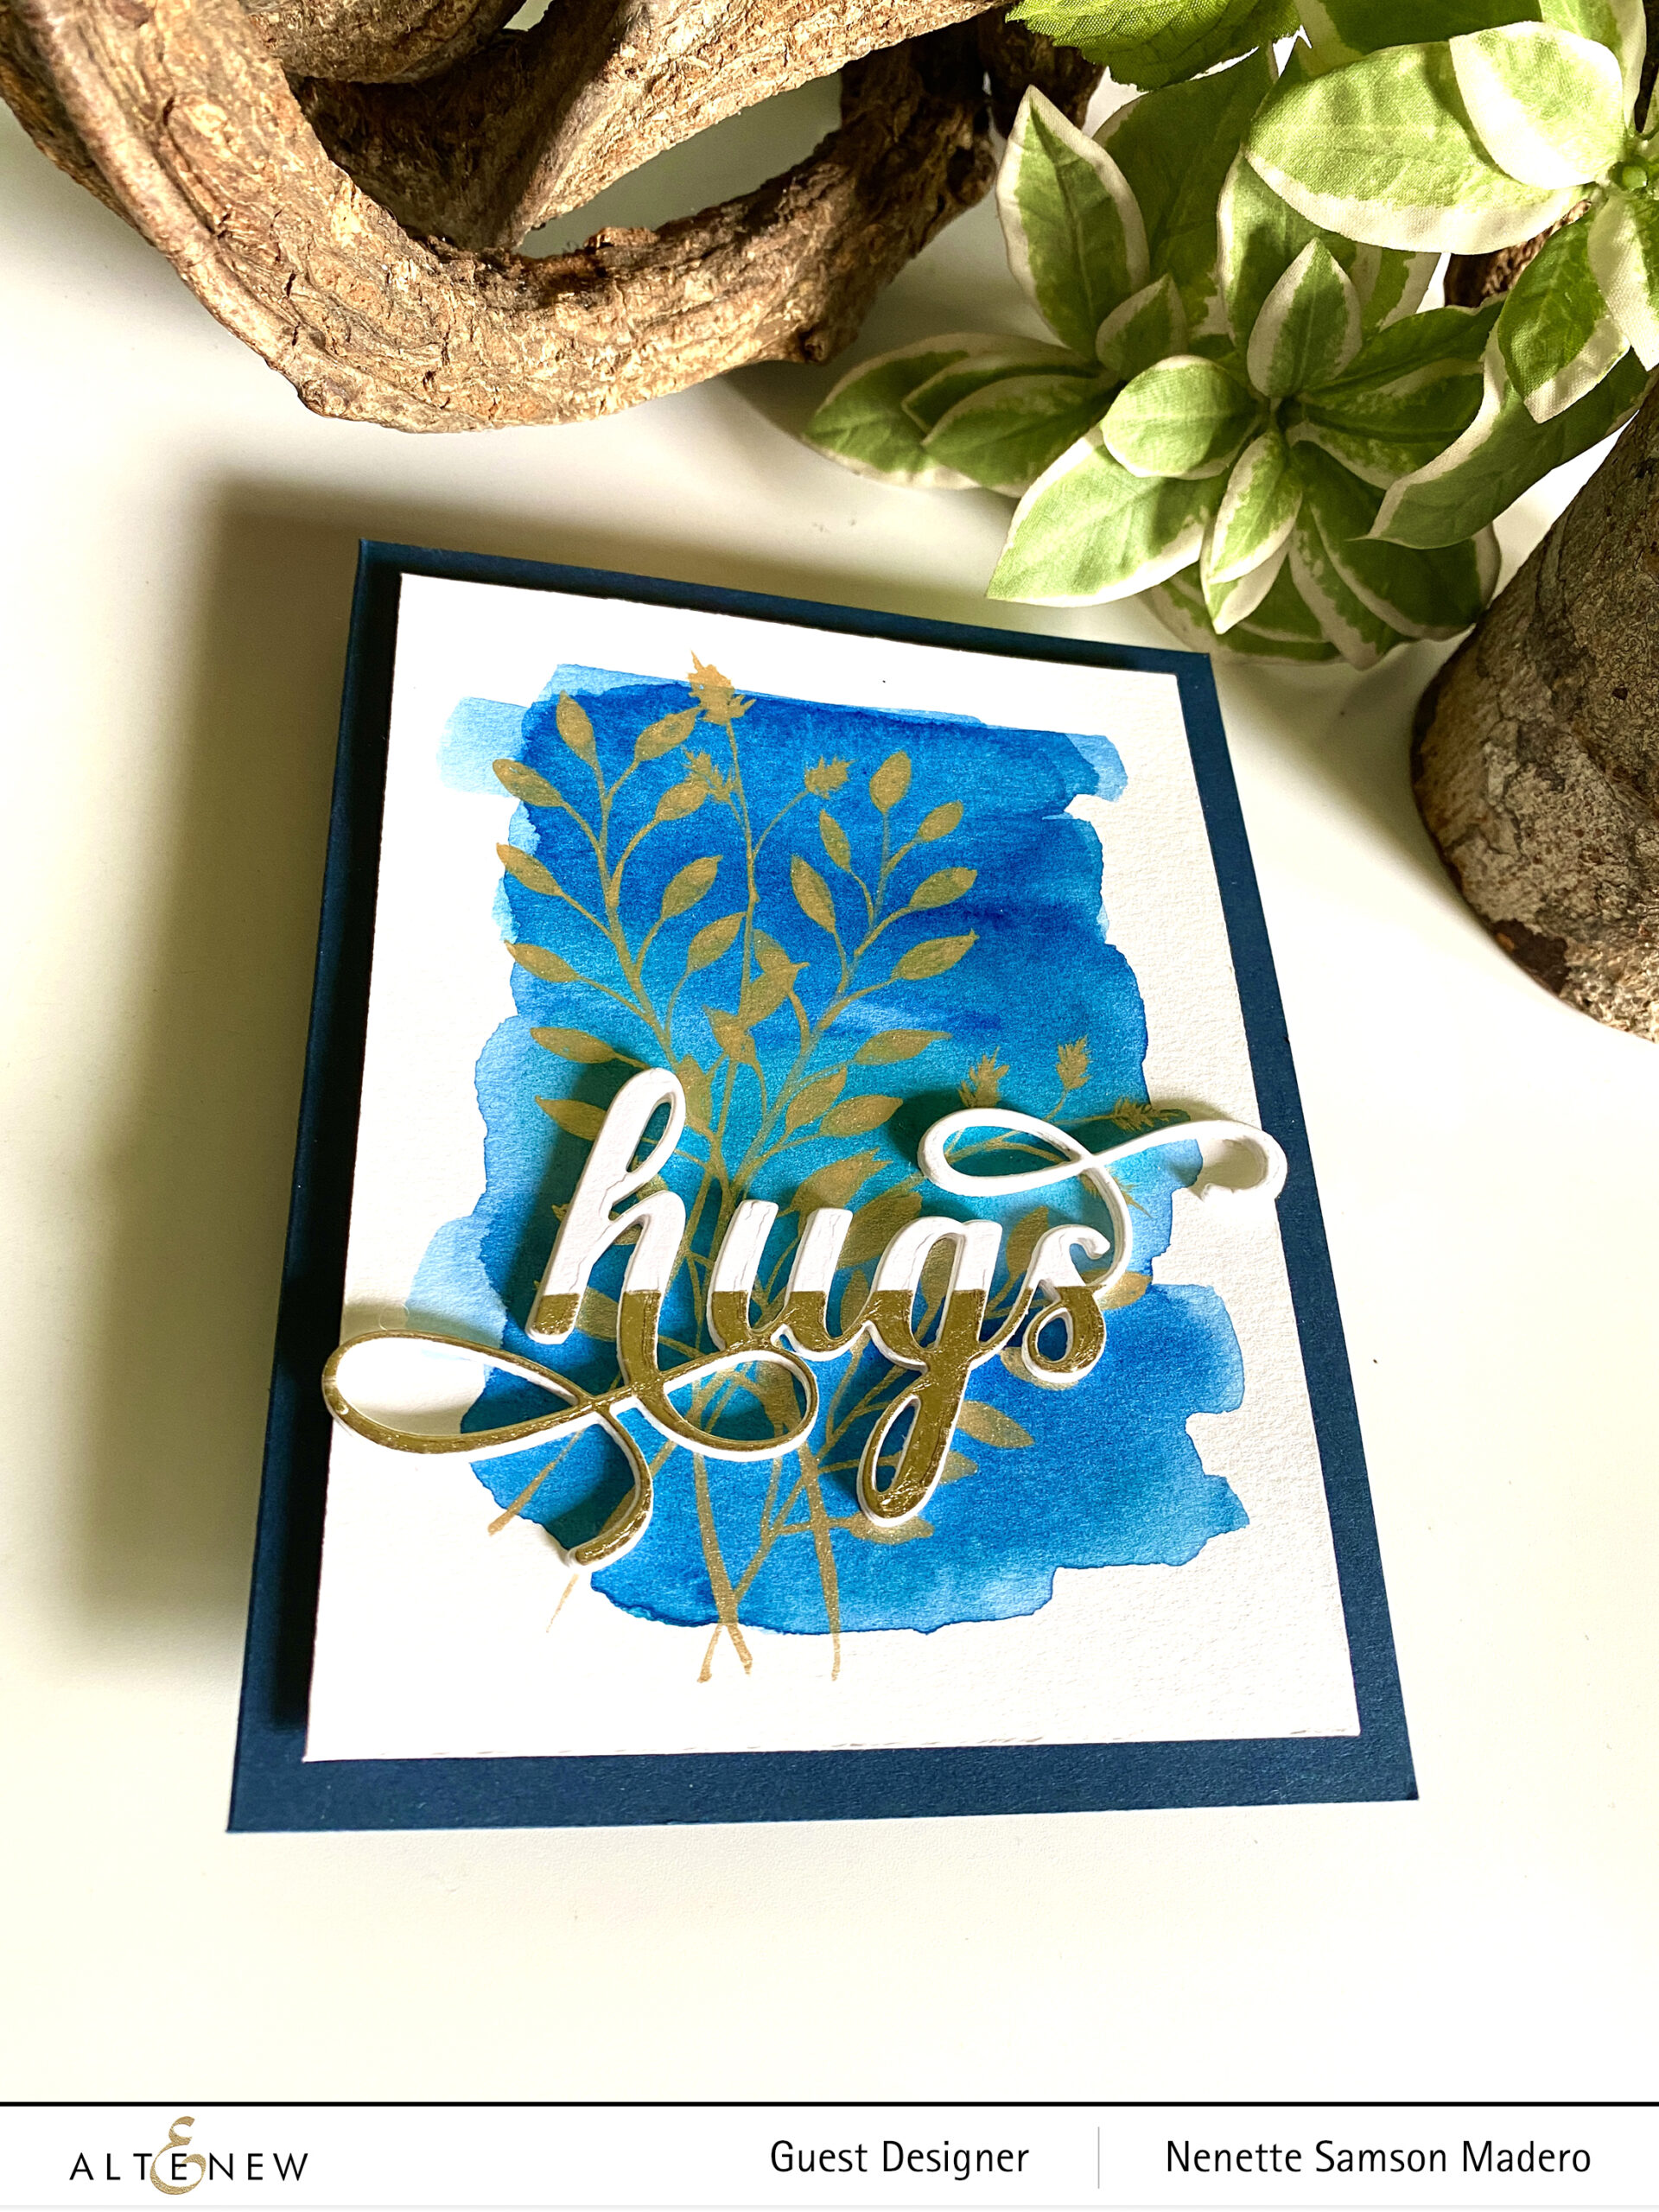

For my last card, I wanted to incorporate some glitter. I die cut the Fancy Hugs die 4 times and on the fifth, I added the gold washi tape. These were layered on top of each other for dimension. The background was watercolored using watercolor brush markers and I painted some foliage using metallic paints.


FREE GIFTS


Here are THREE ways to get a FREEBIE to kickstart your creativity! Free gift will be added to cart automatically. 

  • Get a FREE brand new Modern & Edgy Release Inspiration Guide (worth $5.99) with every order of high-value Modern & Edgy release bundles. Shop HERE! *Exclusions apply.
  • Get a FREE brand new Creative Jump Start Class with every order from the new Modern & Edgy release collection from 08/04/2021 through 08/10/2021. Shop HERE
  • Get a FREE brand new Modern & Edgy Release Mini Inspiration Guide with every order from 08/04/2021 through 08/06/2021. Shop HERE!

GIVEAWAY PRIZES


$300 in total prizes! To celebrate this release, Altenew is giving away a $50 gift certificate to 2 lucky winners and a $25 gift certificate to 8 winners! Please leave a comment on the Altenew Card Blog and/or each designer’s blog post on the blog hop list below by 08/10/2021 for a chance to win. 

Altenew will draw 10 random winners from the comments left on each stop of this blog hop and announce the winners on the Altenew Winners Page on 08/12/2021.

Thank you so much for dropping by! Next up: Joylita Dsouza. Please don’t forget to leave a comment to get a chance to win a prize from Altenew. Your messages truly make my day. Thank you so much for finding time to drop by and leave some love! Until my next post… stay safe and happy crafting! ❤️

Altenew Build-A-Flower: Fashion Monger Dahlia Release Blog Hop

Altenew Build-A-Flower: Fashion Monger Dahlia Release Blog Hop

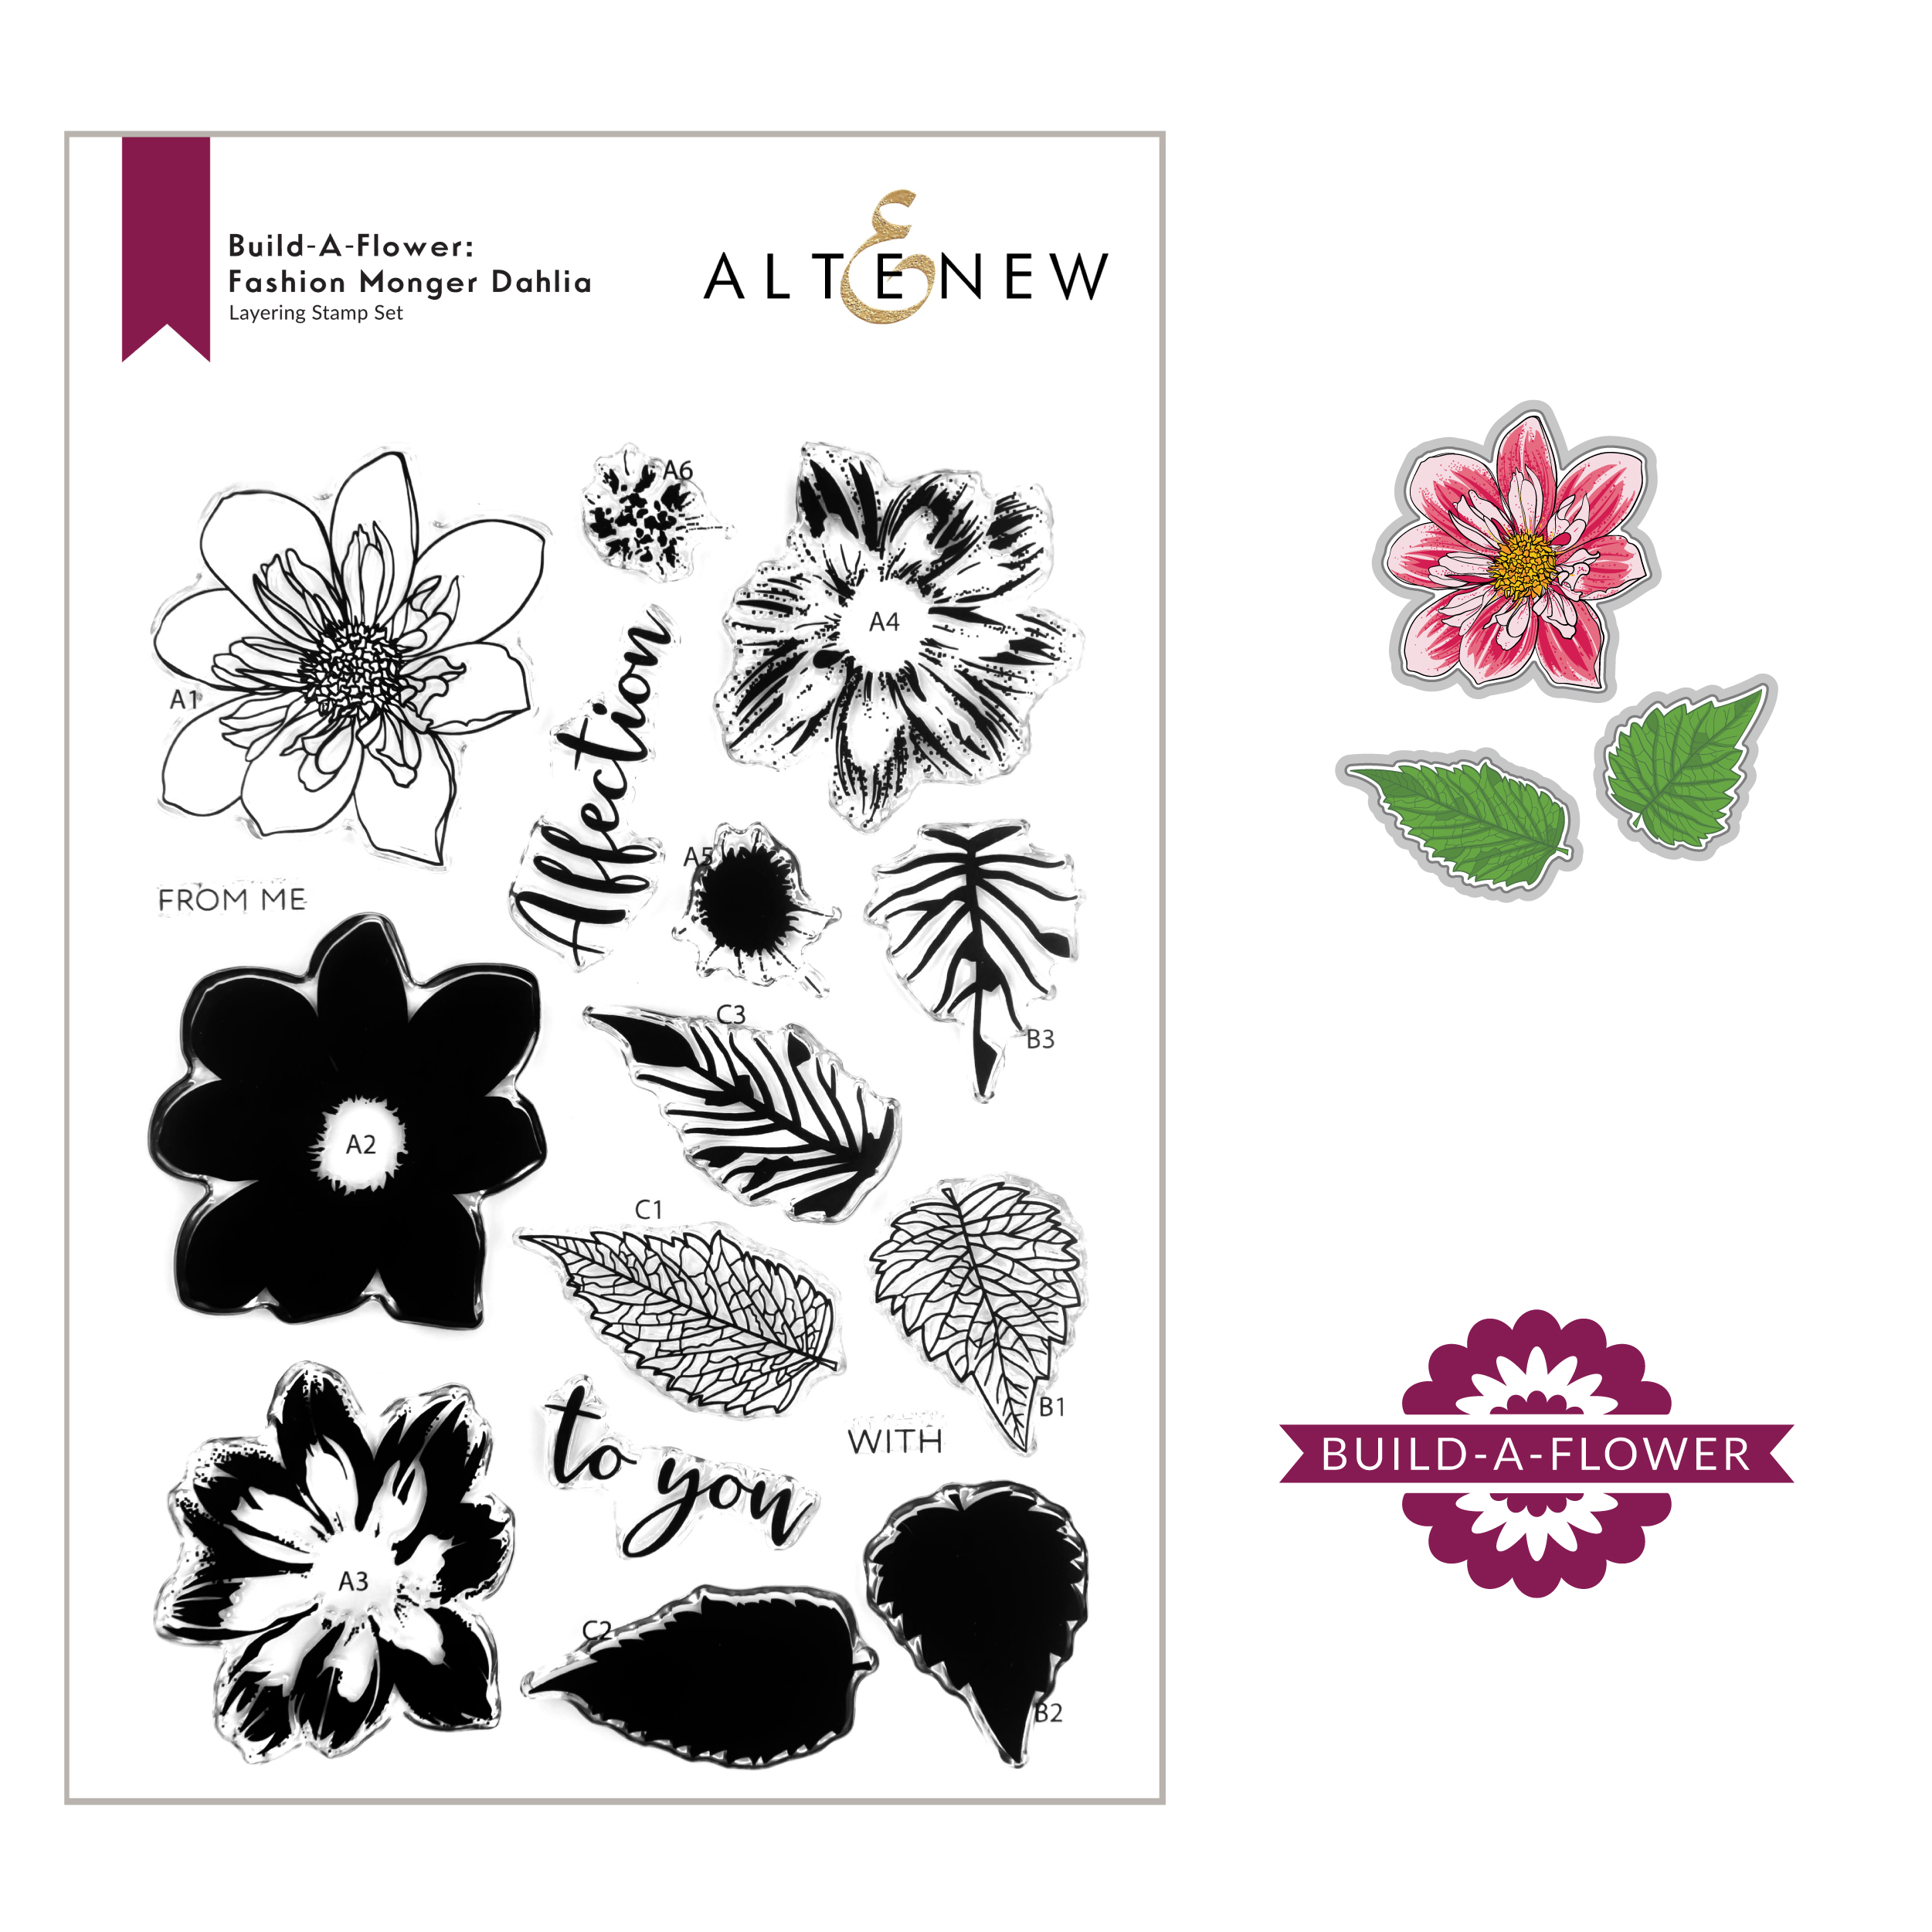
Welcome, everyone! If you just came from Joylita Dsouza blog, then you’re on the right track. For the full list of the hop, do drop by the Altenew Card Blog. Want to make a bold statement on your handmade cards? The Fashion Monger Dahlia is the flower for you! This set features one six-layer flower and two three-layer leaves. The leaves have a delicate and lacy feel to them to help you achieve a richer look on your projects. The included sentiments feature a gorgeous pairing of fonts to accompany your floral creations.  Gorgeous, right?

Below are a 2 samples of cards I made using the stamp set.


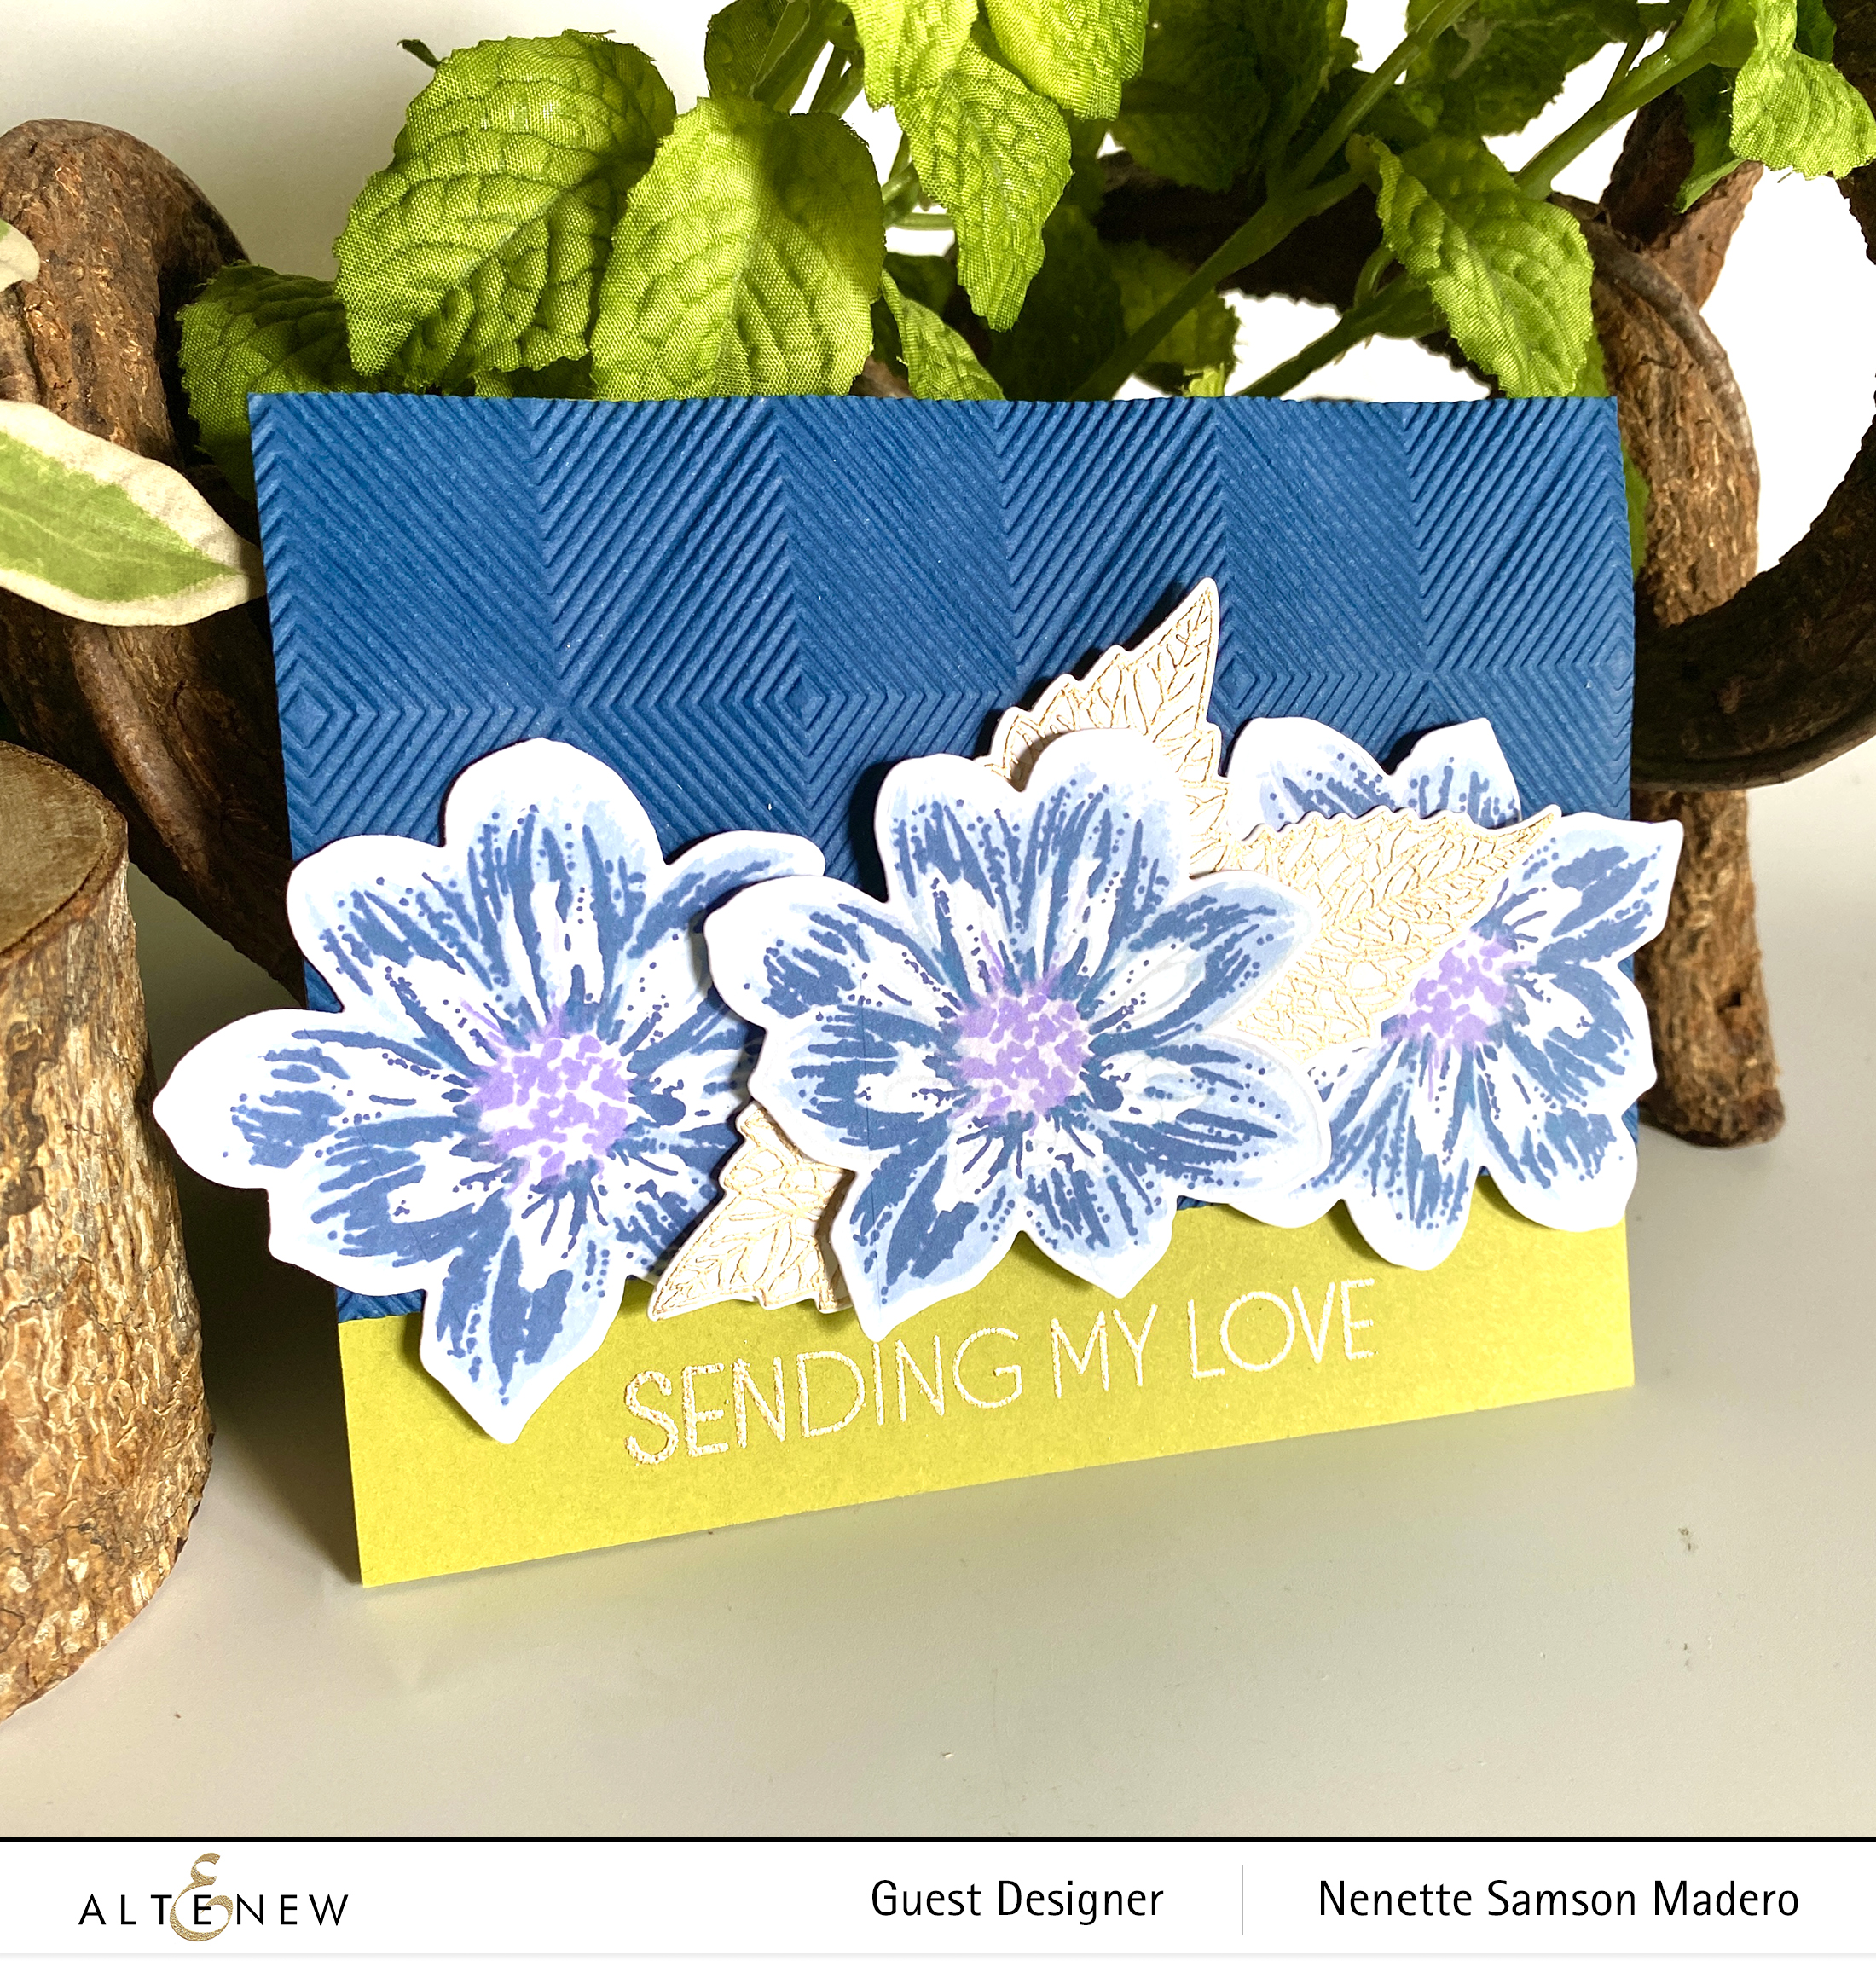
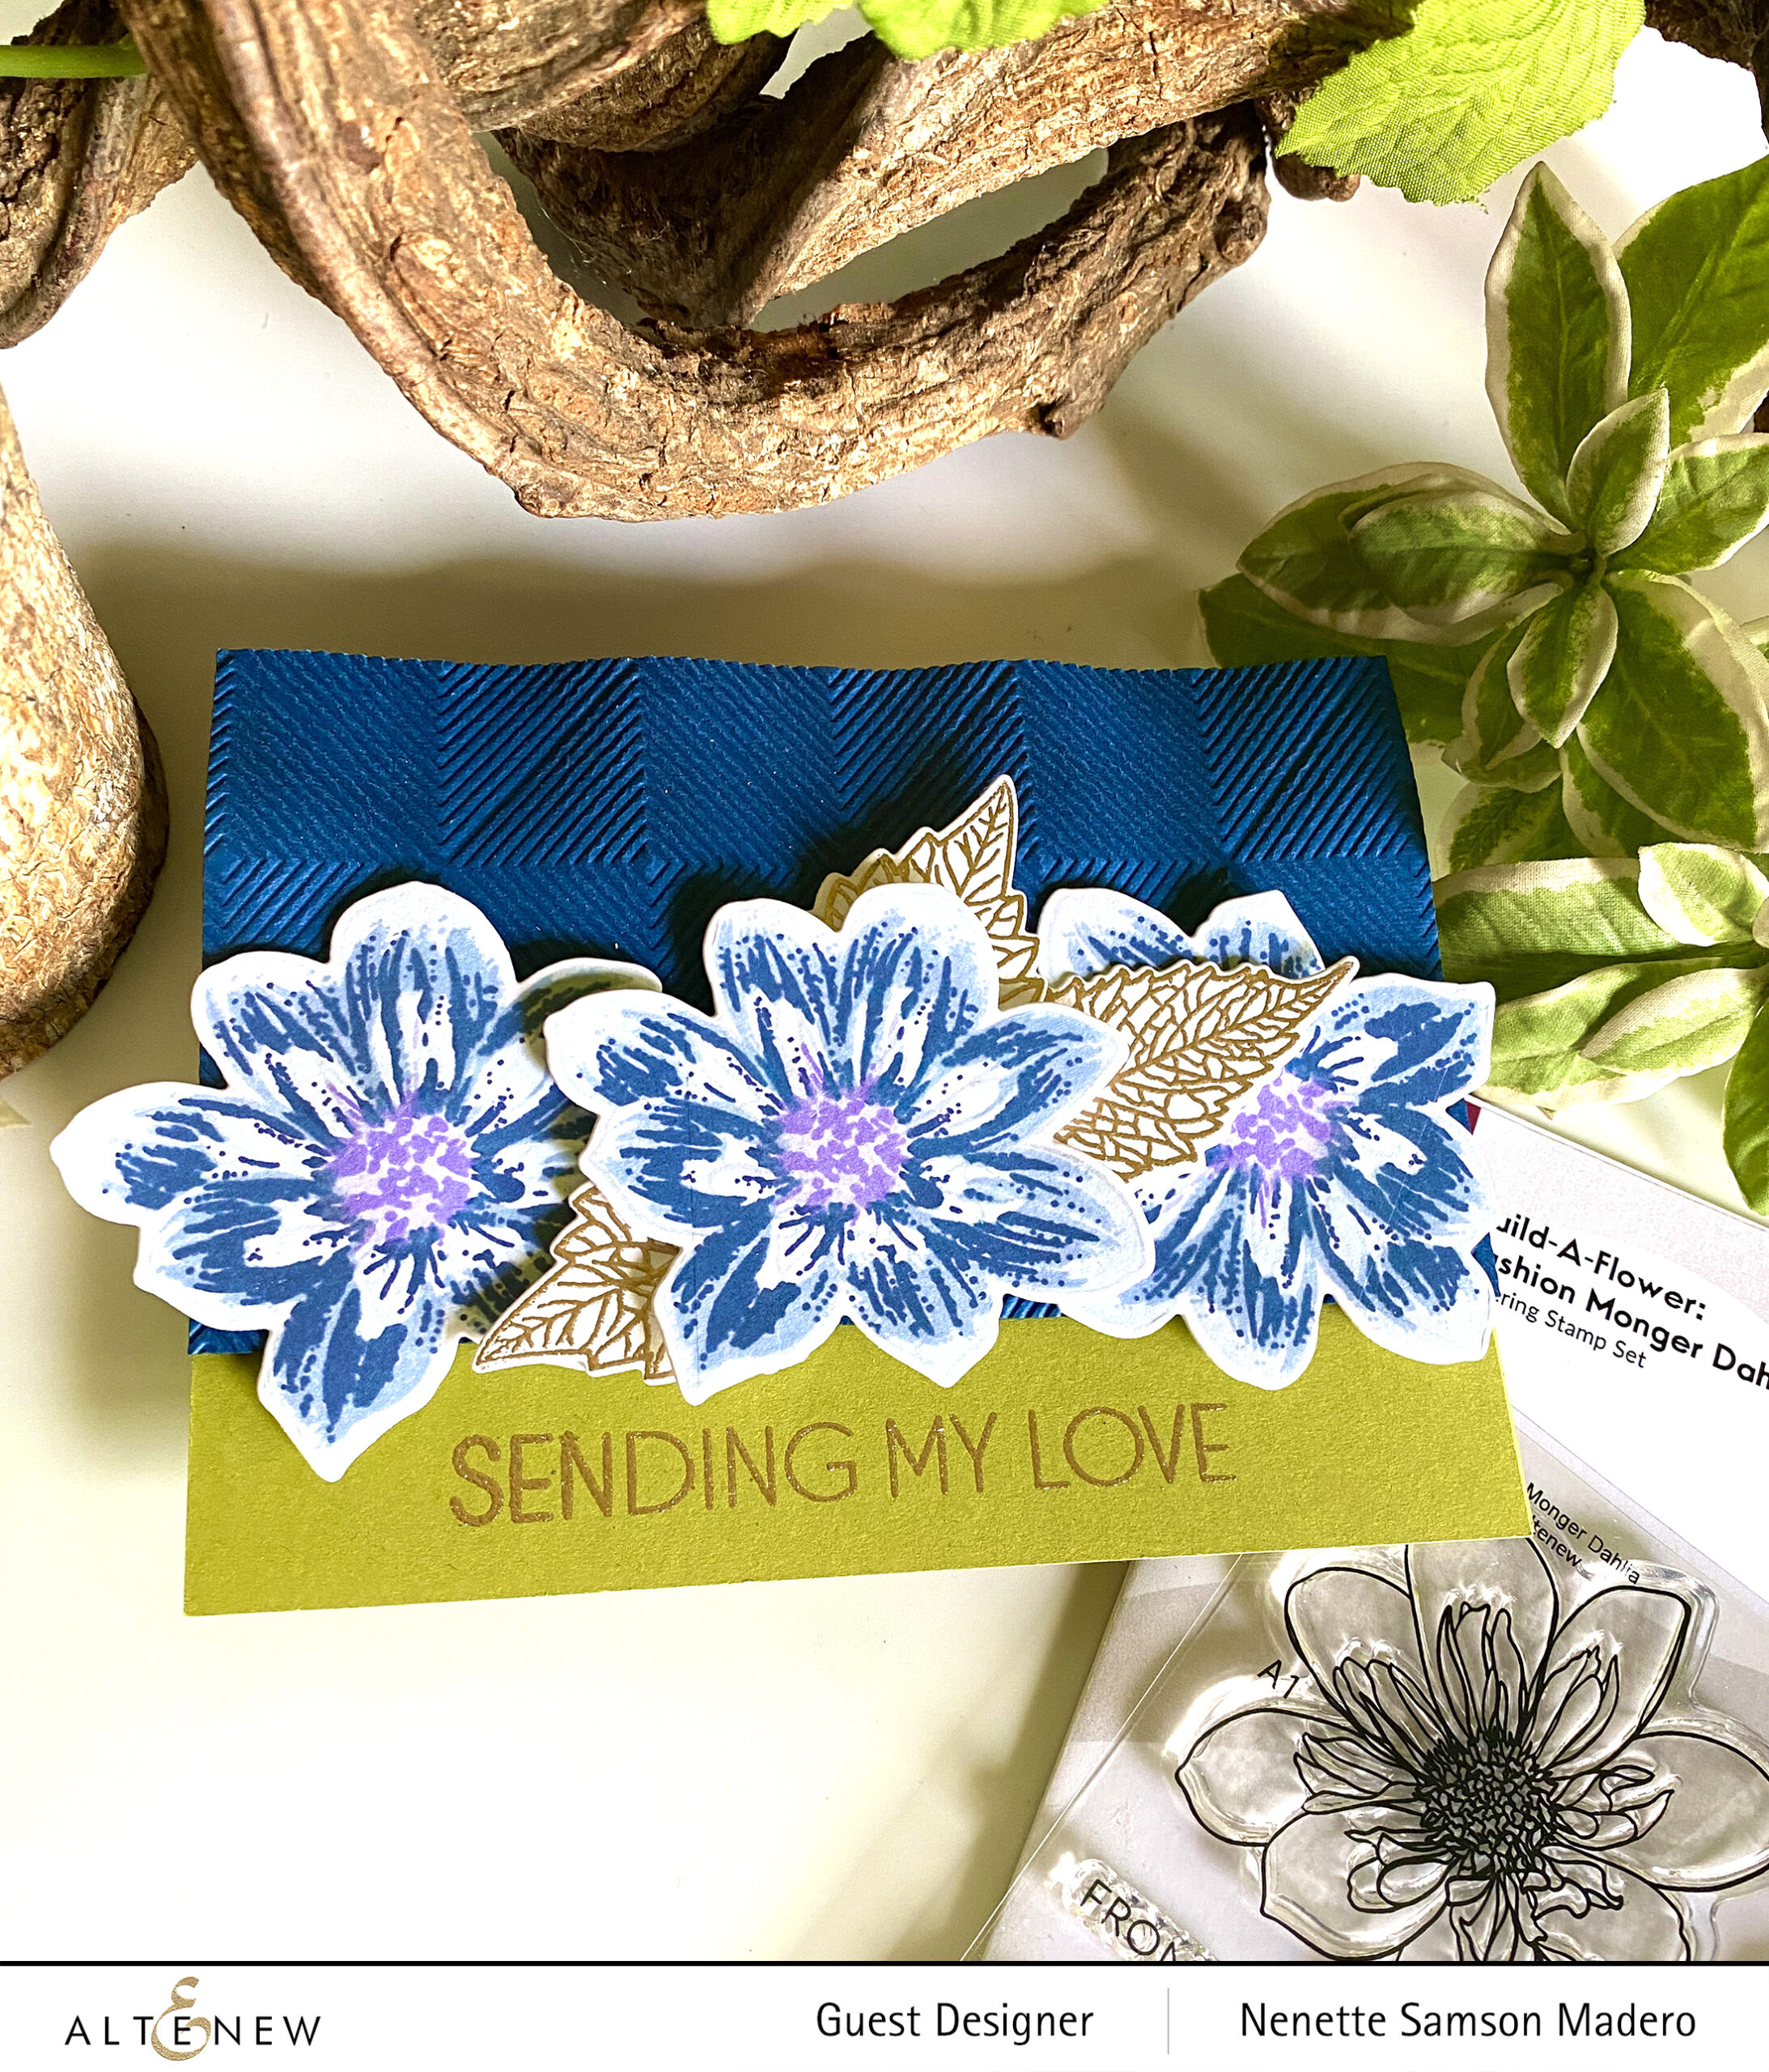
SENDING MY LOVE


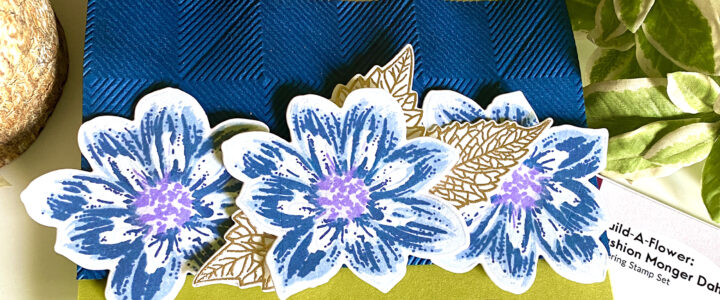
I stamped the Build-a-Flower: Fashion Monger Dahlia using the Altenew dye inks from the Northern Shore ink set– Polar Bear, Icy Water. From the Enchanted Garden Dye Ink set, I used the Wisteria Lake and Hydrangea. The flowers were die cut using the coordinating die set. A blue cardstock was embossed using the Waffled Diamonds 3D embossing folder. The sentiment from the Ornamental Bliss stamp set was stamped using Versamark Ink and embossed with Rose Gold embossing powder.


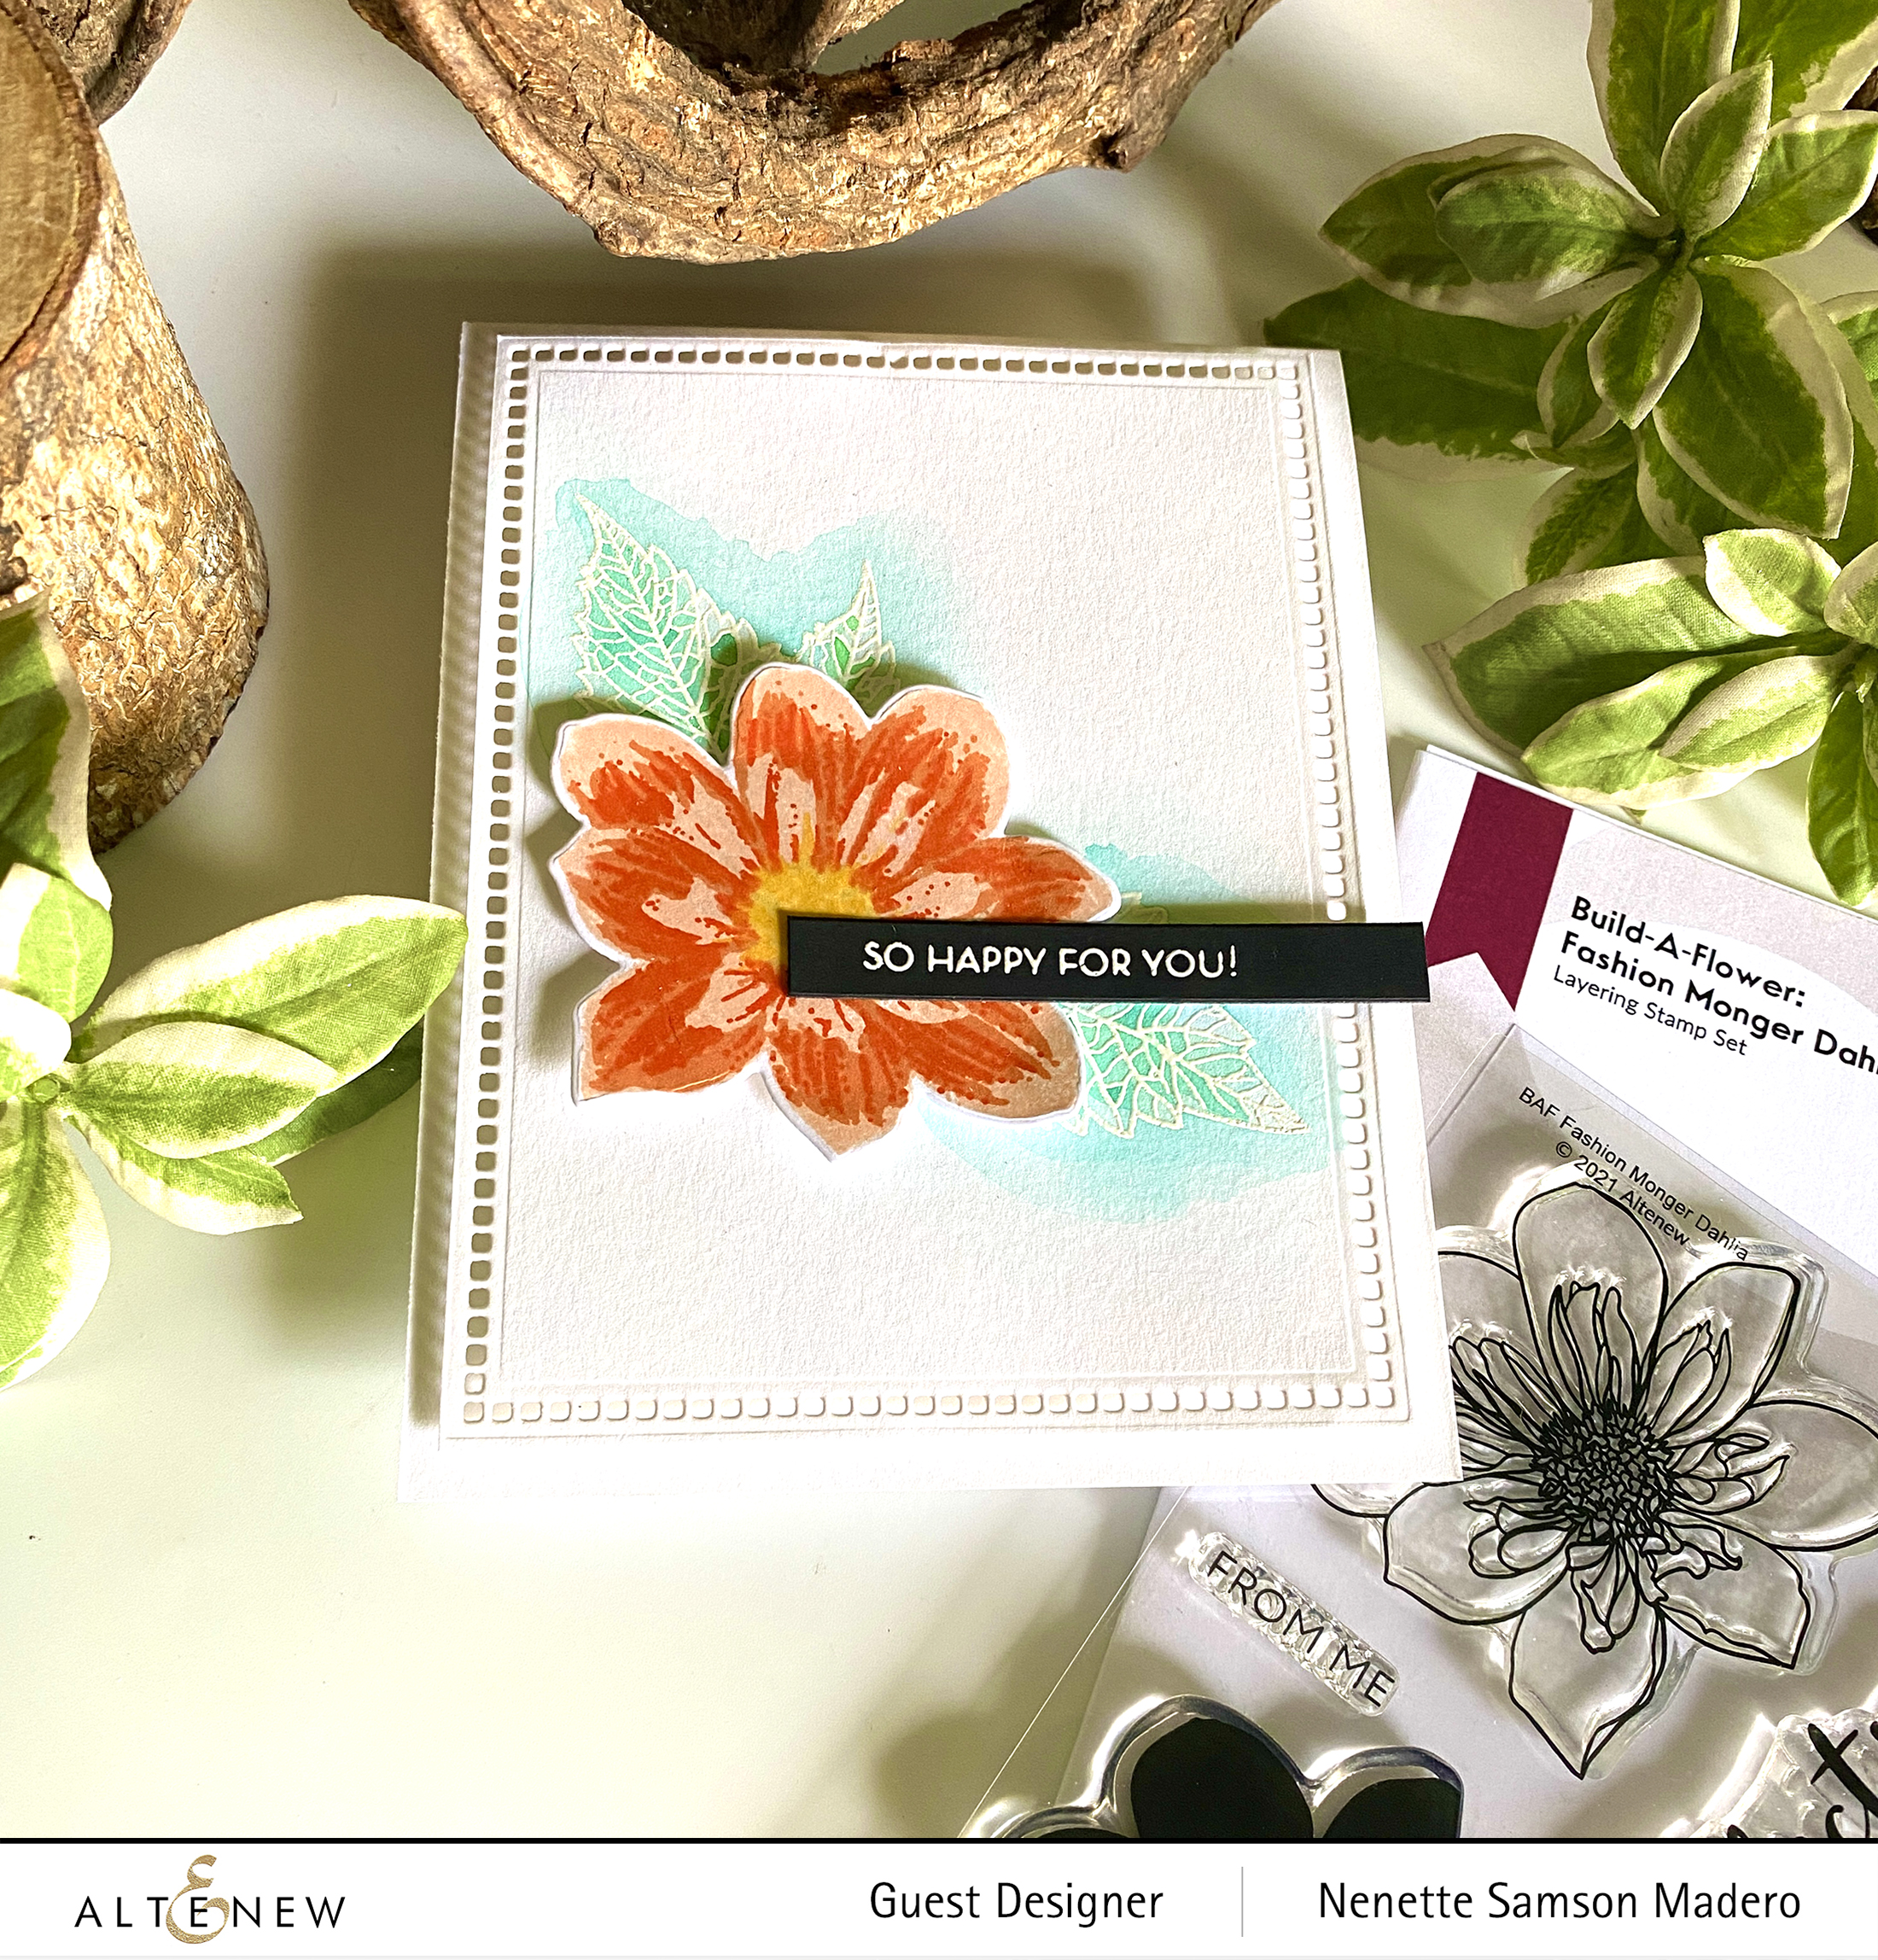
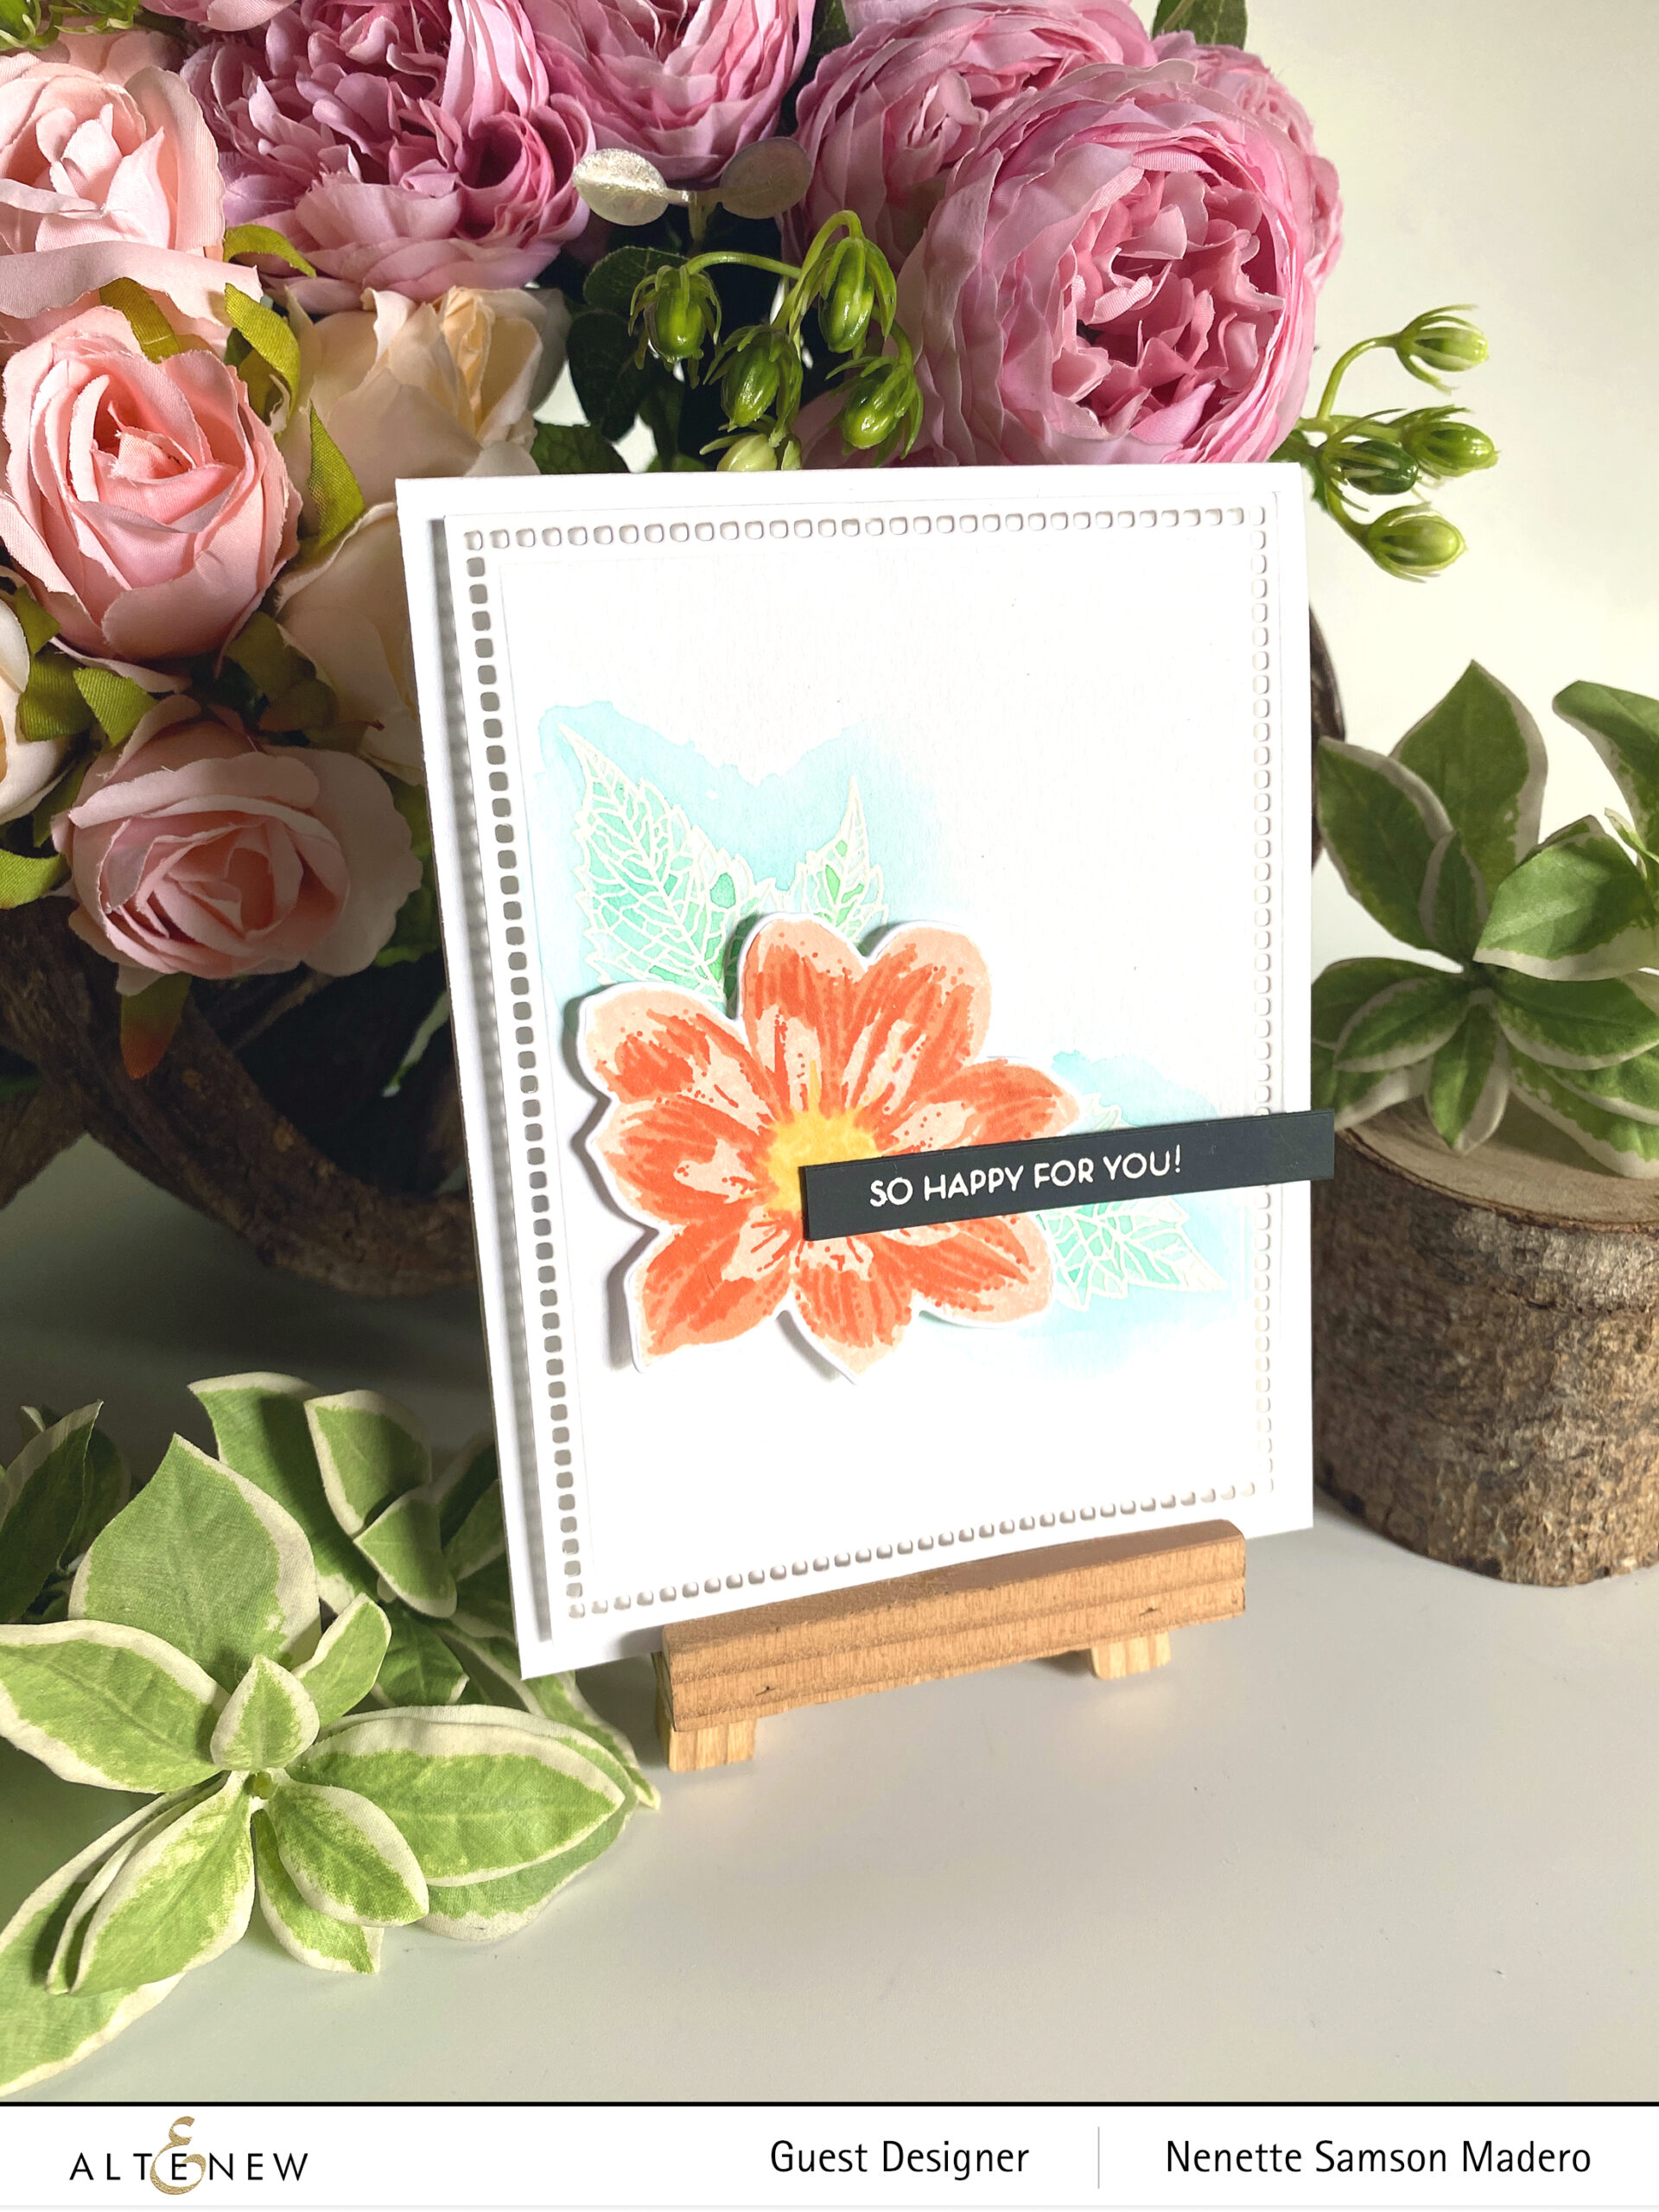
SO HAPPY FOR YOU


Here’s a simple card I made using this stamp set. I made sure there was a lot of white space to give more emphasis to the flower itself. The leaves were directly stamped on the card front with Versamark Ink then embossed using Pure White embossing powder. Artist watercolor markers were used to color the leaves. The Fashion Monger Dahlia was colored using the following dye inks–Pastel Sunrise, Canyon Clay, Burnt Red, Sunray and Chamomile then cut using the coordinating die cut. The sentiment was stamped on black cardstock then embossed using Pure White embossing powder.

If you don’t want to miss any of the Build-A-Flower series, you can avail of the subscription plan at a discounted rate.

SUBSCRIPTION PLAN

GIVEAWAYS


$200 in total prizes! To celebrate this release, Altenew is giving away a $50 gift certificate to 2 lucky winners and a $20 gift certificate to 5 winners! Please leave a comment on the Altenew Card Blog and/or each designer’s blog post on the blog hop list below by 08/07/2021 for a chance to win. Altenew will draw 7 random winners from the comments left on each stop of this blog hop and announce the winners on the Altenew Winners Page on 08/09/2021.

Next up is the talented Natasha Davies. Don’t forget to leave a comment below to get a chance to win a prize from Altenew! Thank you all for dropping by. I love hearing from all of you and hope we can be friends on IG as well (@mylittleatticstudio). Stay safe and happy crafting!!!

Altenew Paint-A-Flower: Fashion Monger Dahlia Release Blog Hop + Giveaway

Altenew Paint-A-Flower: Fashion Monger Dahlia Release Blog Hop + Giveaway

Welcome to my blog, friends! Today is the release of Altenew’s Paint-a-Flower: Fashion Monger Dahlia! Thanks so much, Daniel Diaz for relaying everyone over to my blog. For the complete list, you may start at Altenew’s card blog.

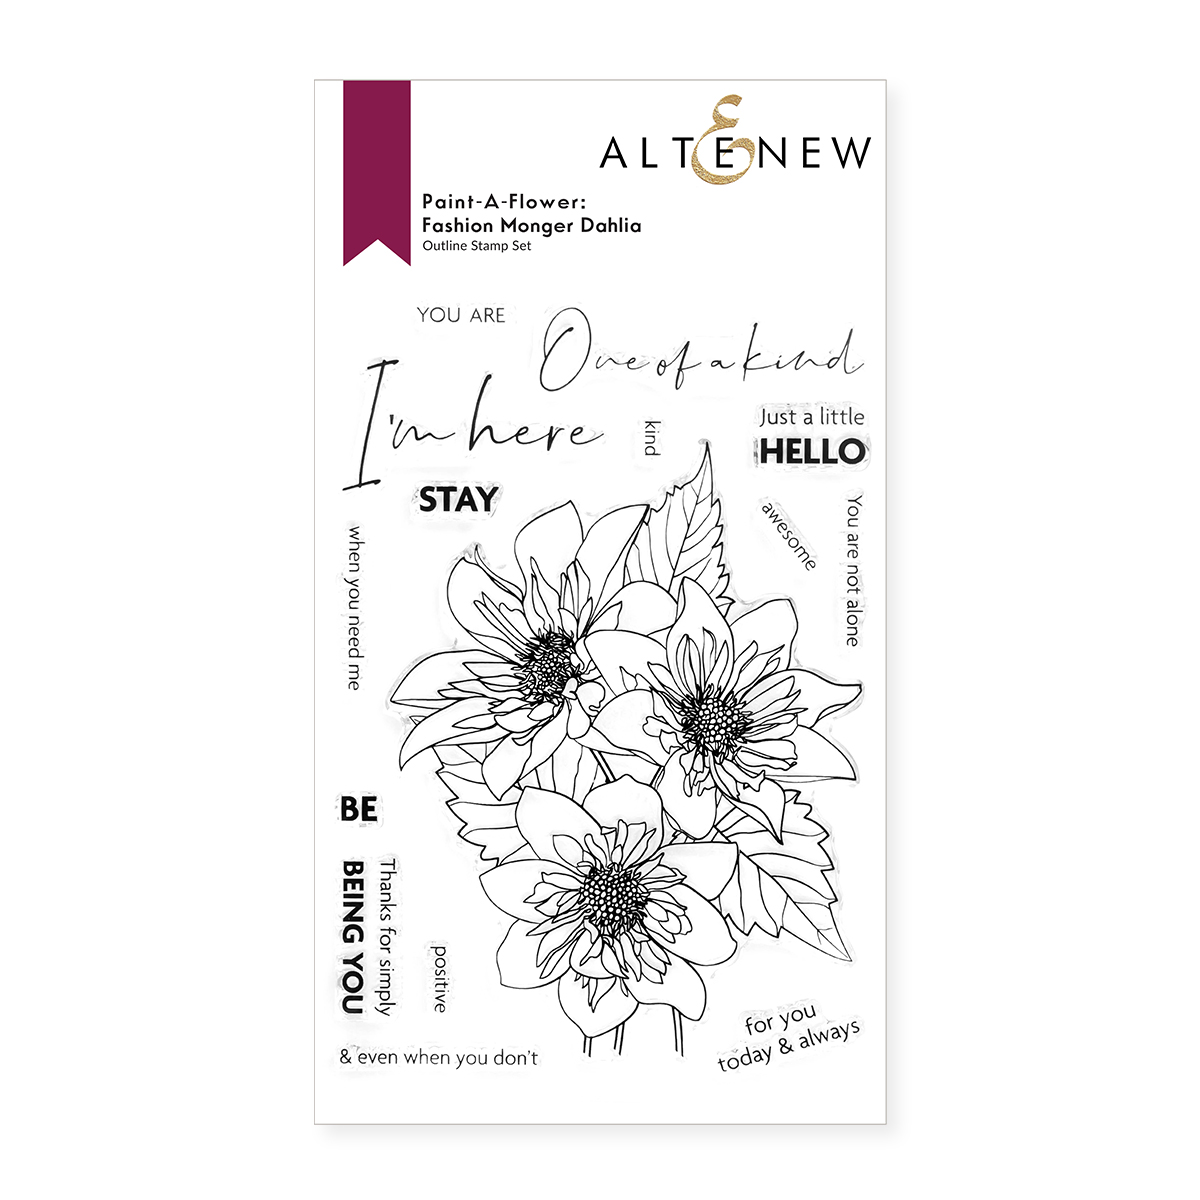
PAINT A FLOWER: FASHION MONGER DAHLIA STAMP AND DIE SET CAN BE FOUND HERE

Sometimes, the images from a stamp set have a lot of details that it seems a bit complicated to color because of the intricate designs. Below, I will show you 3 ways to easily color detailed stamp images.


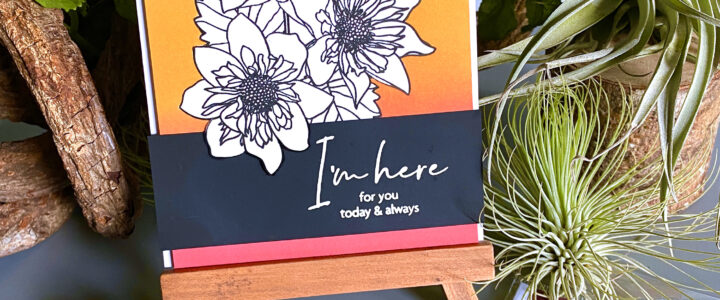
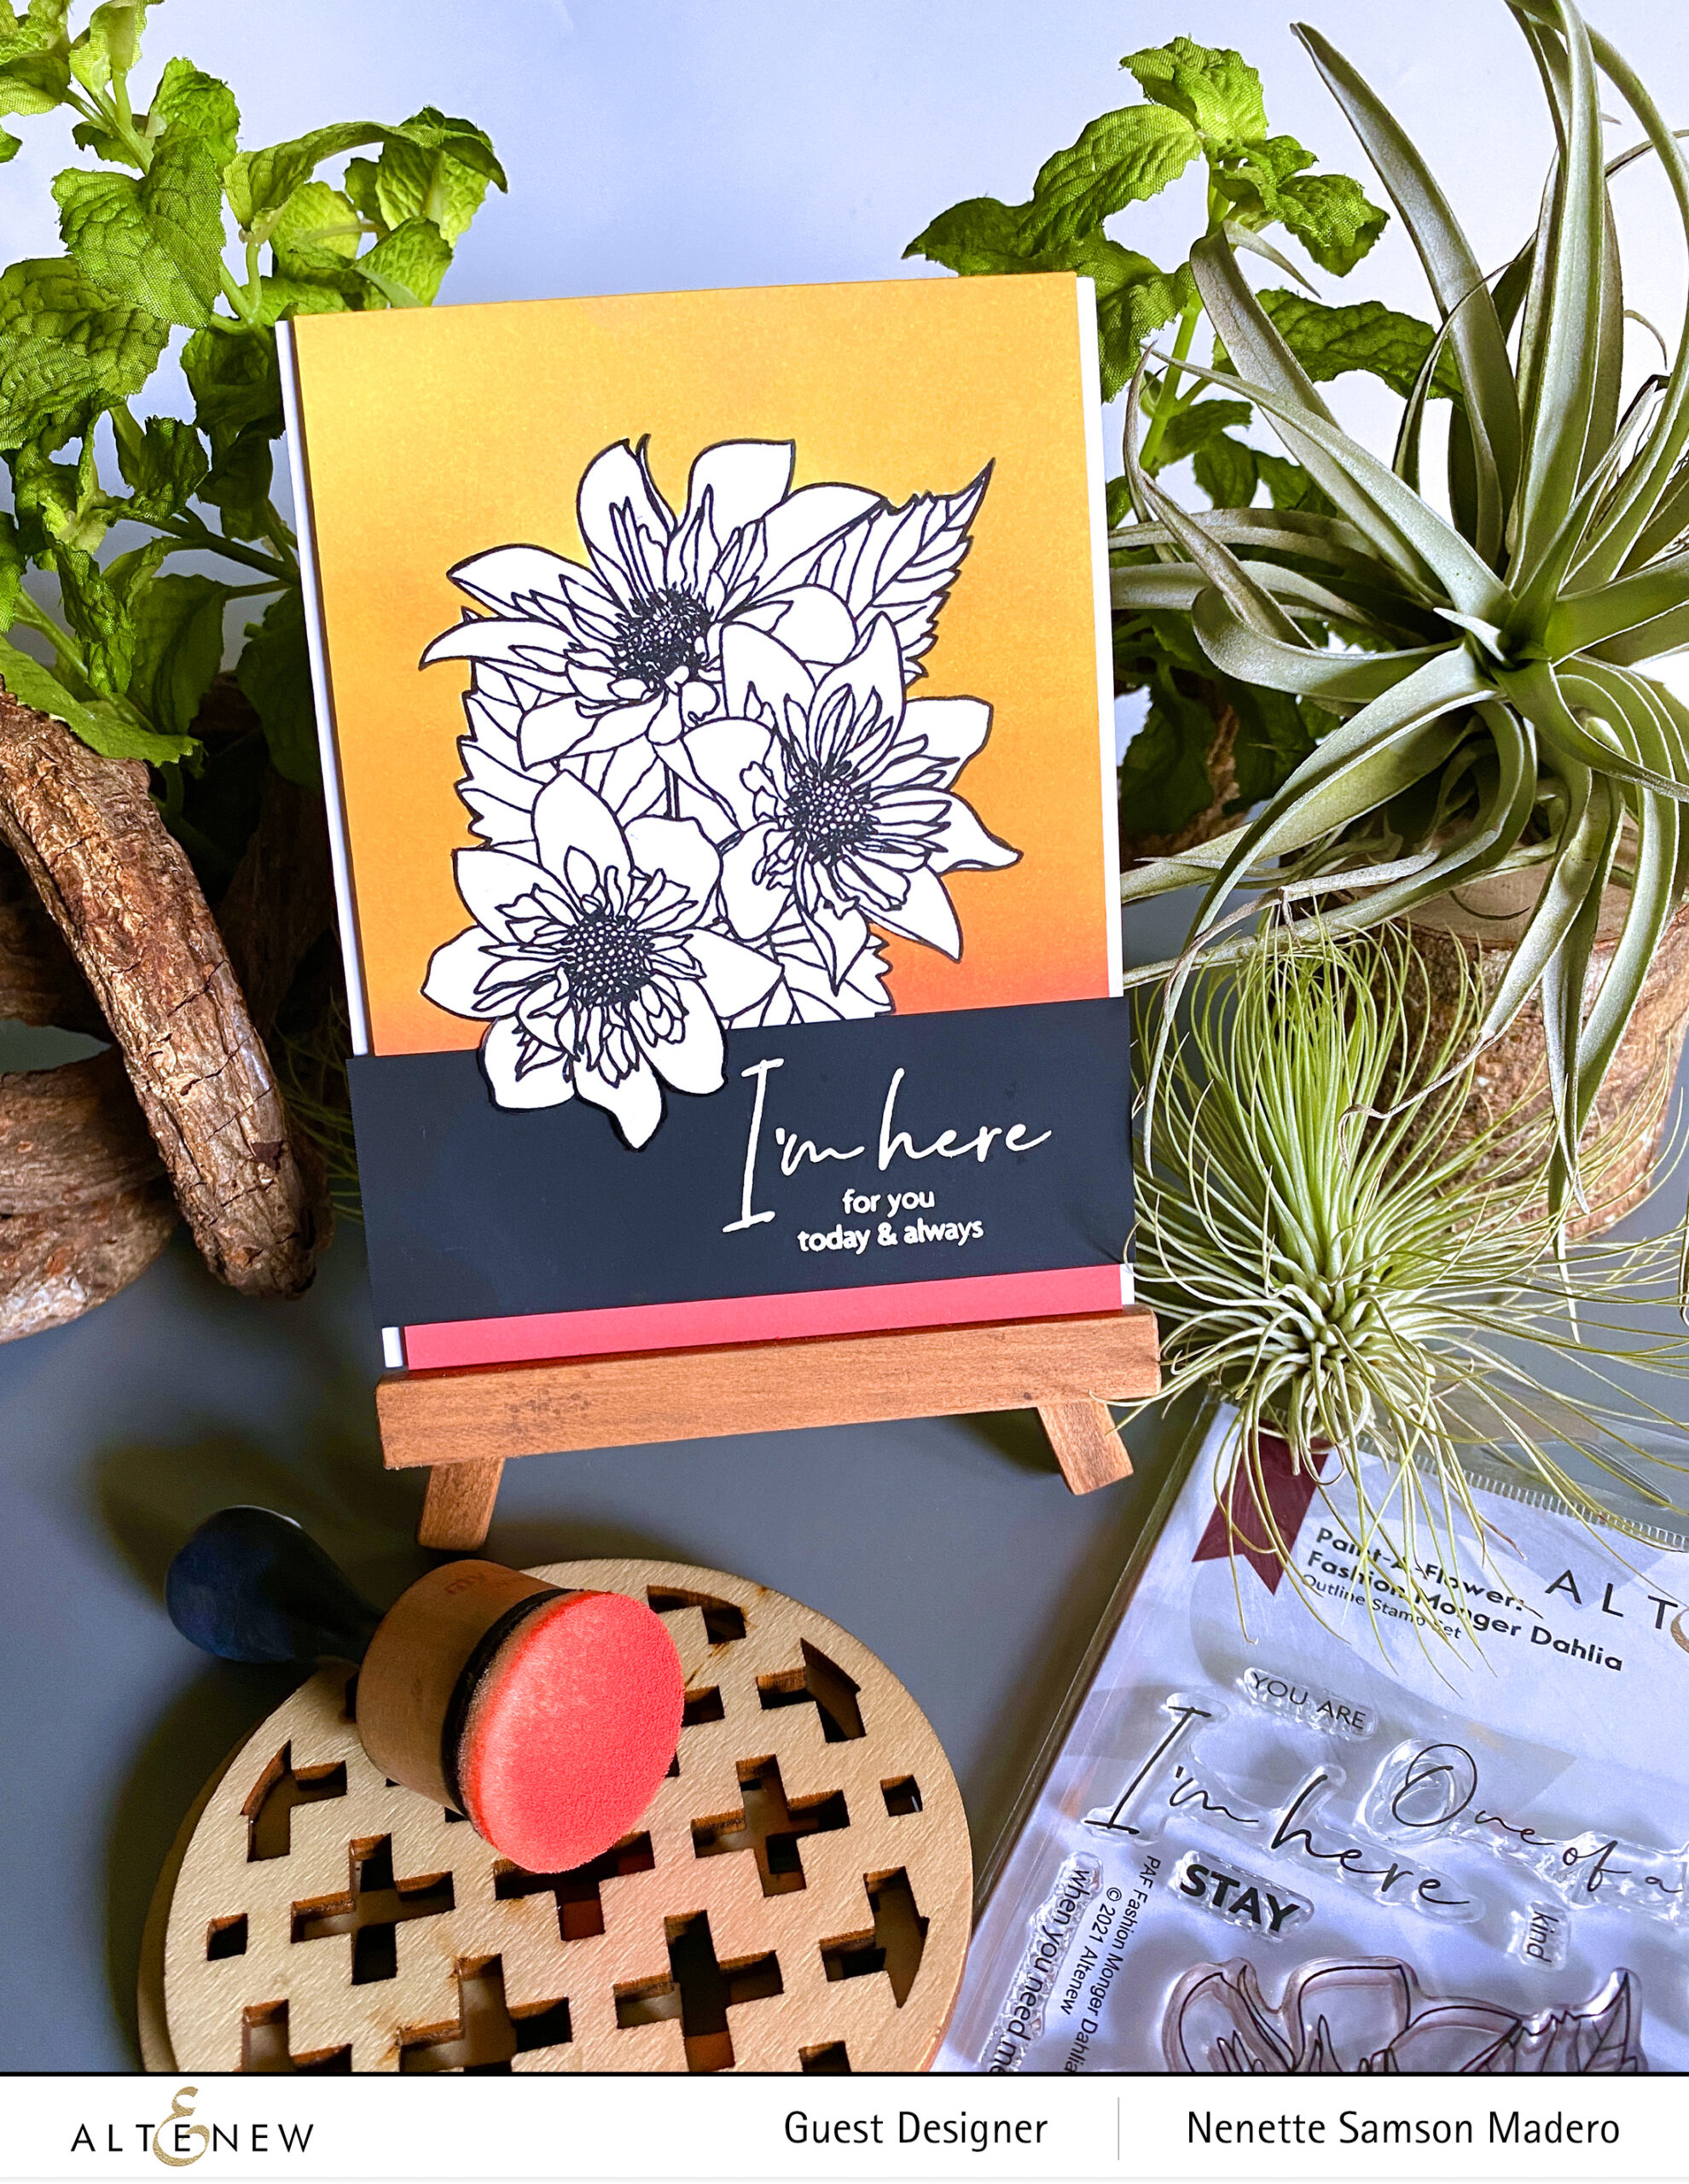
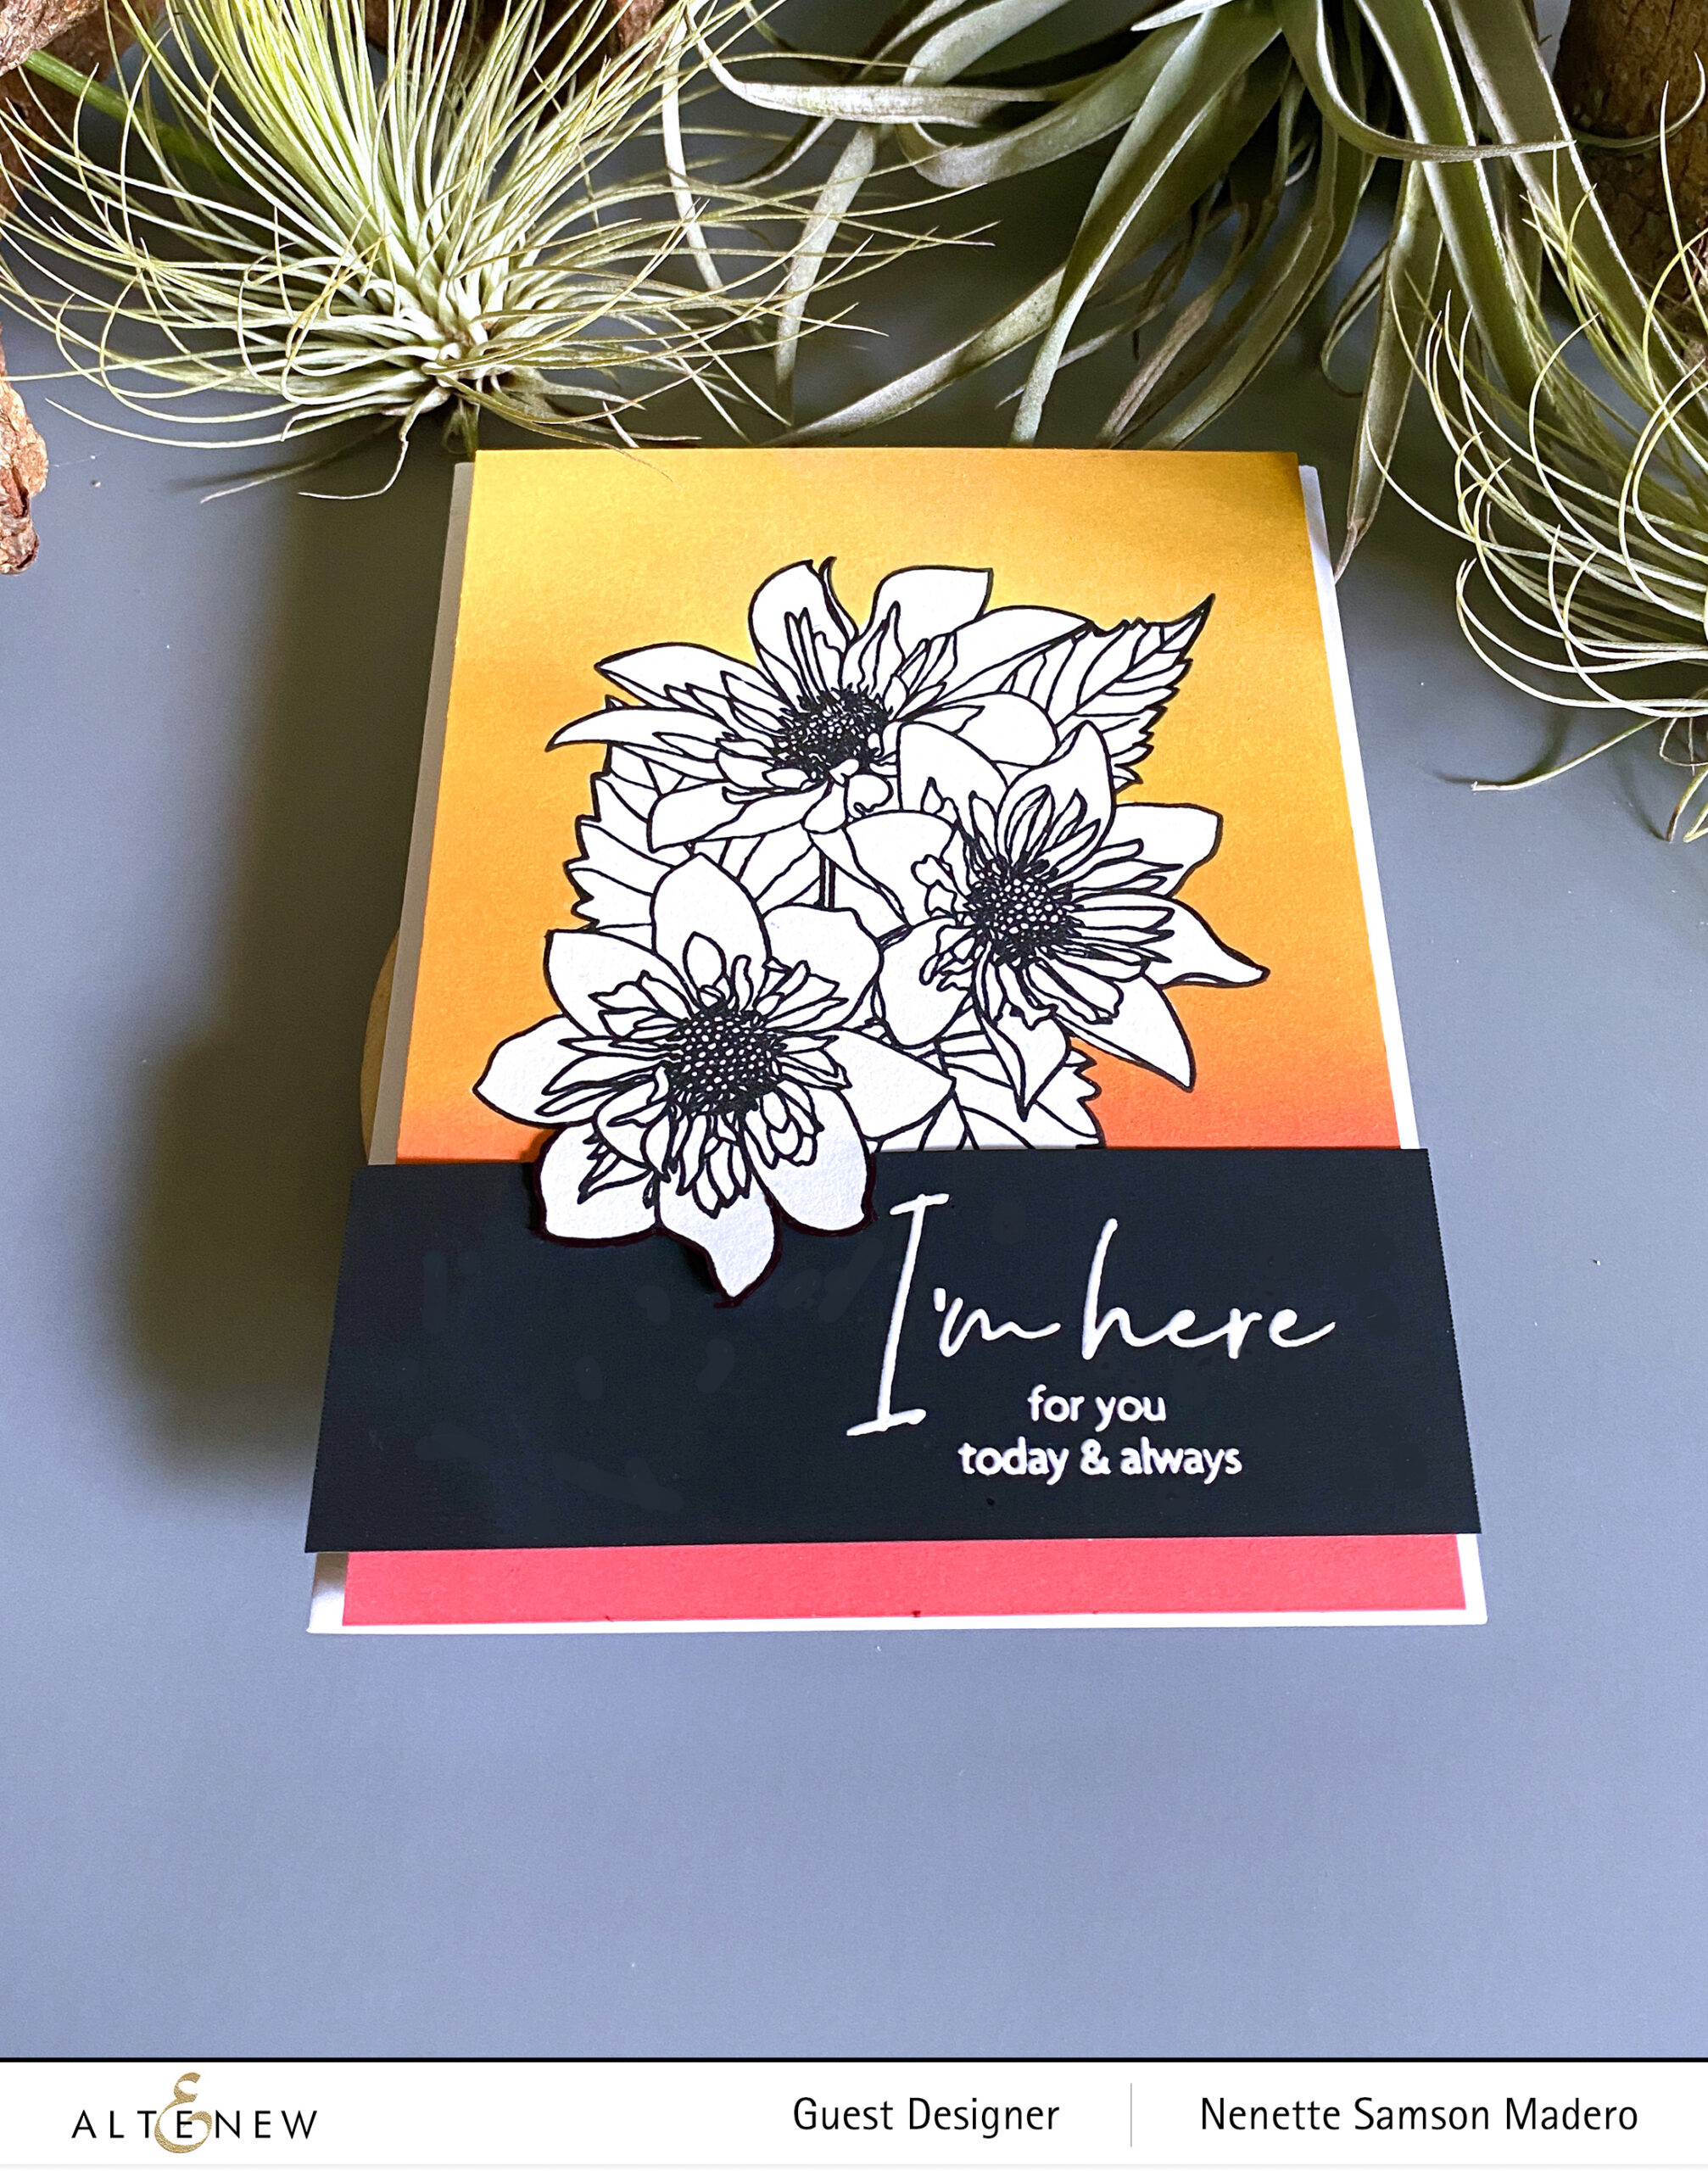
I’M HERE FOR YOU TODAY & ALWAYS


MATERIALS: PAF: FASHION MONGER DAHLIA, PURE WHITE EMBOSSING POWDER, OBSIDIAN INK, VERSAMARK INK, MASKING PAPER,DISTRESS OXIDE INKS- BARN DOOR, WILD HONEY, CARVED PUMPKIN, NEENAH SOLAR WHITE CARDSTOCK, BLACK CARDSTOCK, FOAM SQUARES AND ADHESIVE, EXACTO KNIFE

STEPS:

  • Stamp the image onto Neenah Solar white cardstock using Obsidian Ink
  • Stamp the image on masking paper and fussy cut the outline of the whole image
  • Line up the mask then add color to the background. Blend the oxide inks well
  • Stamp the sentiment using Versamark Ink on black cardstock then emboss with white embossing powder
  • With an Exacto knife, cut a portion of the outline of the flower so that you can tuck the sentiment underneath it for added interest
  • Assemble the card

Sometimes, when an image seems to be complicated to color, you can always choose to color the background and keep the image black and white. This way, the image stands out more. Since I love layering in my cards, I cut out a portion of the stamped image so that I can tuck in the sentiment strip underneath the petal. It just gives the card a different twist than just adding the sentiment on top of the image.


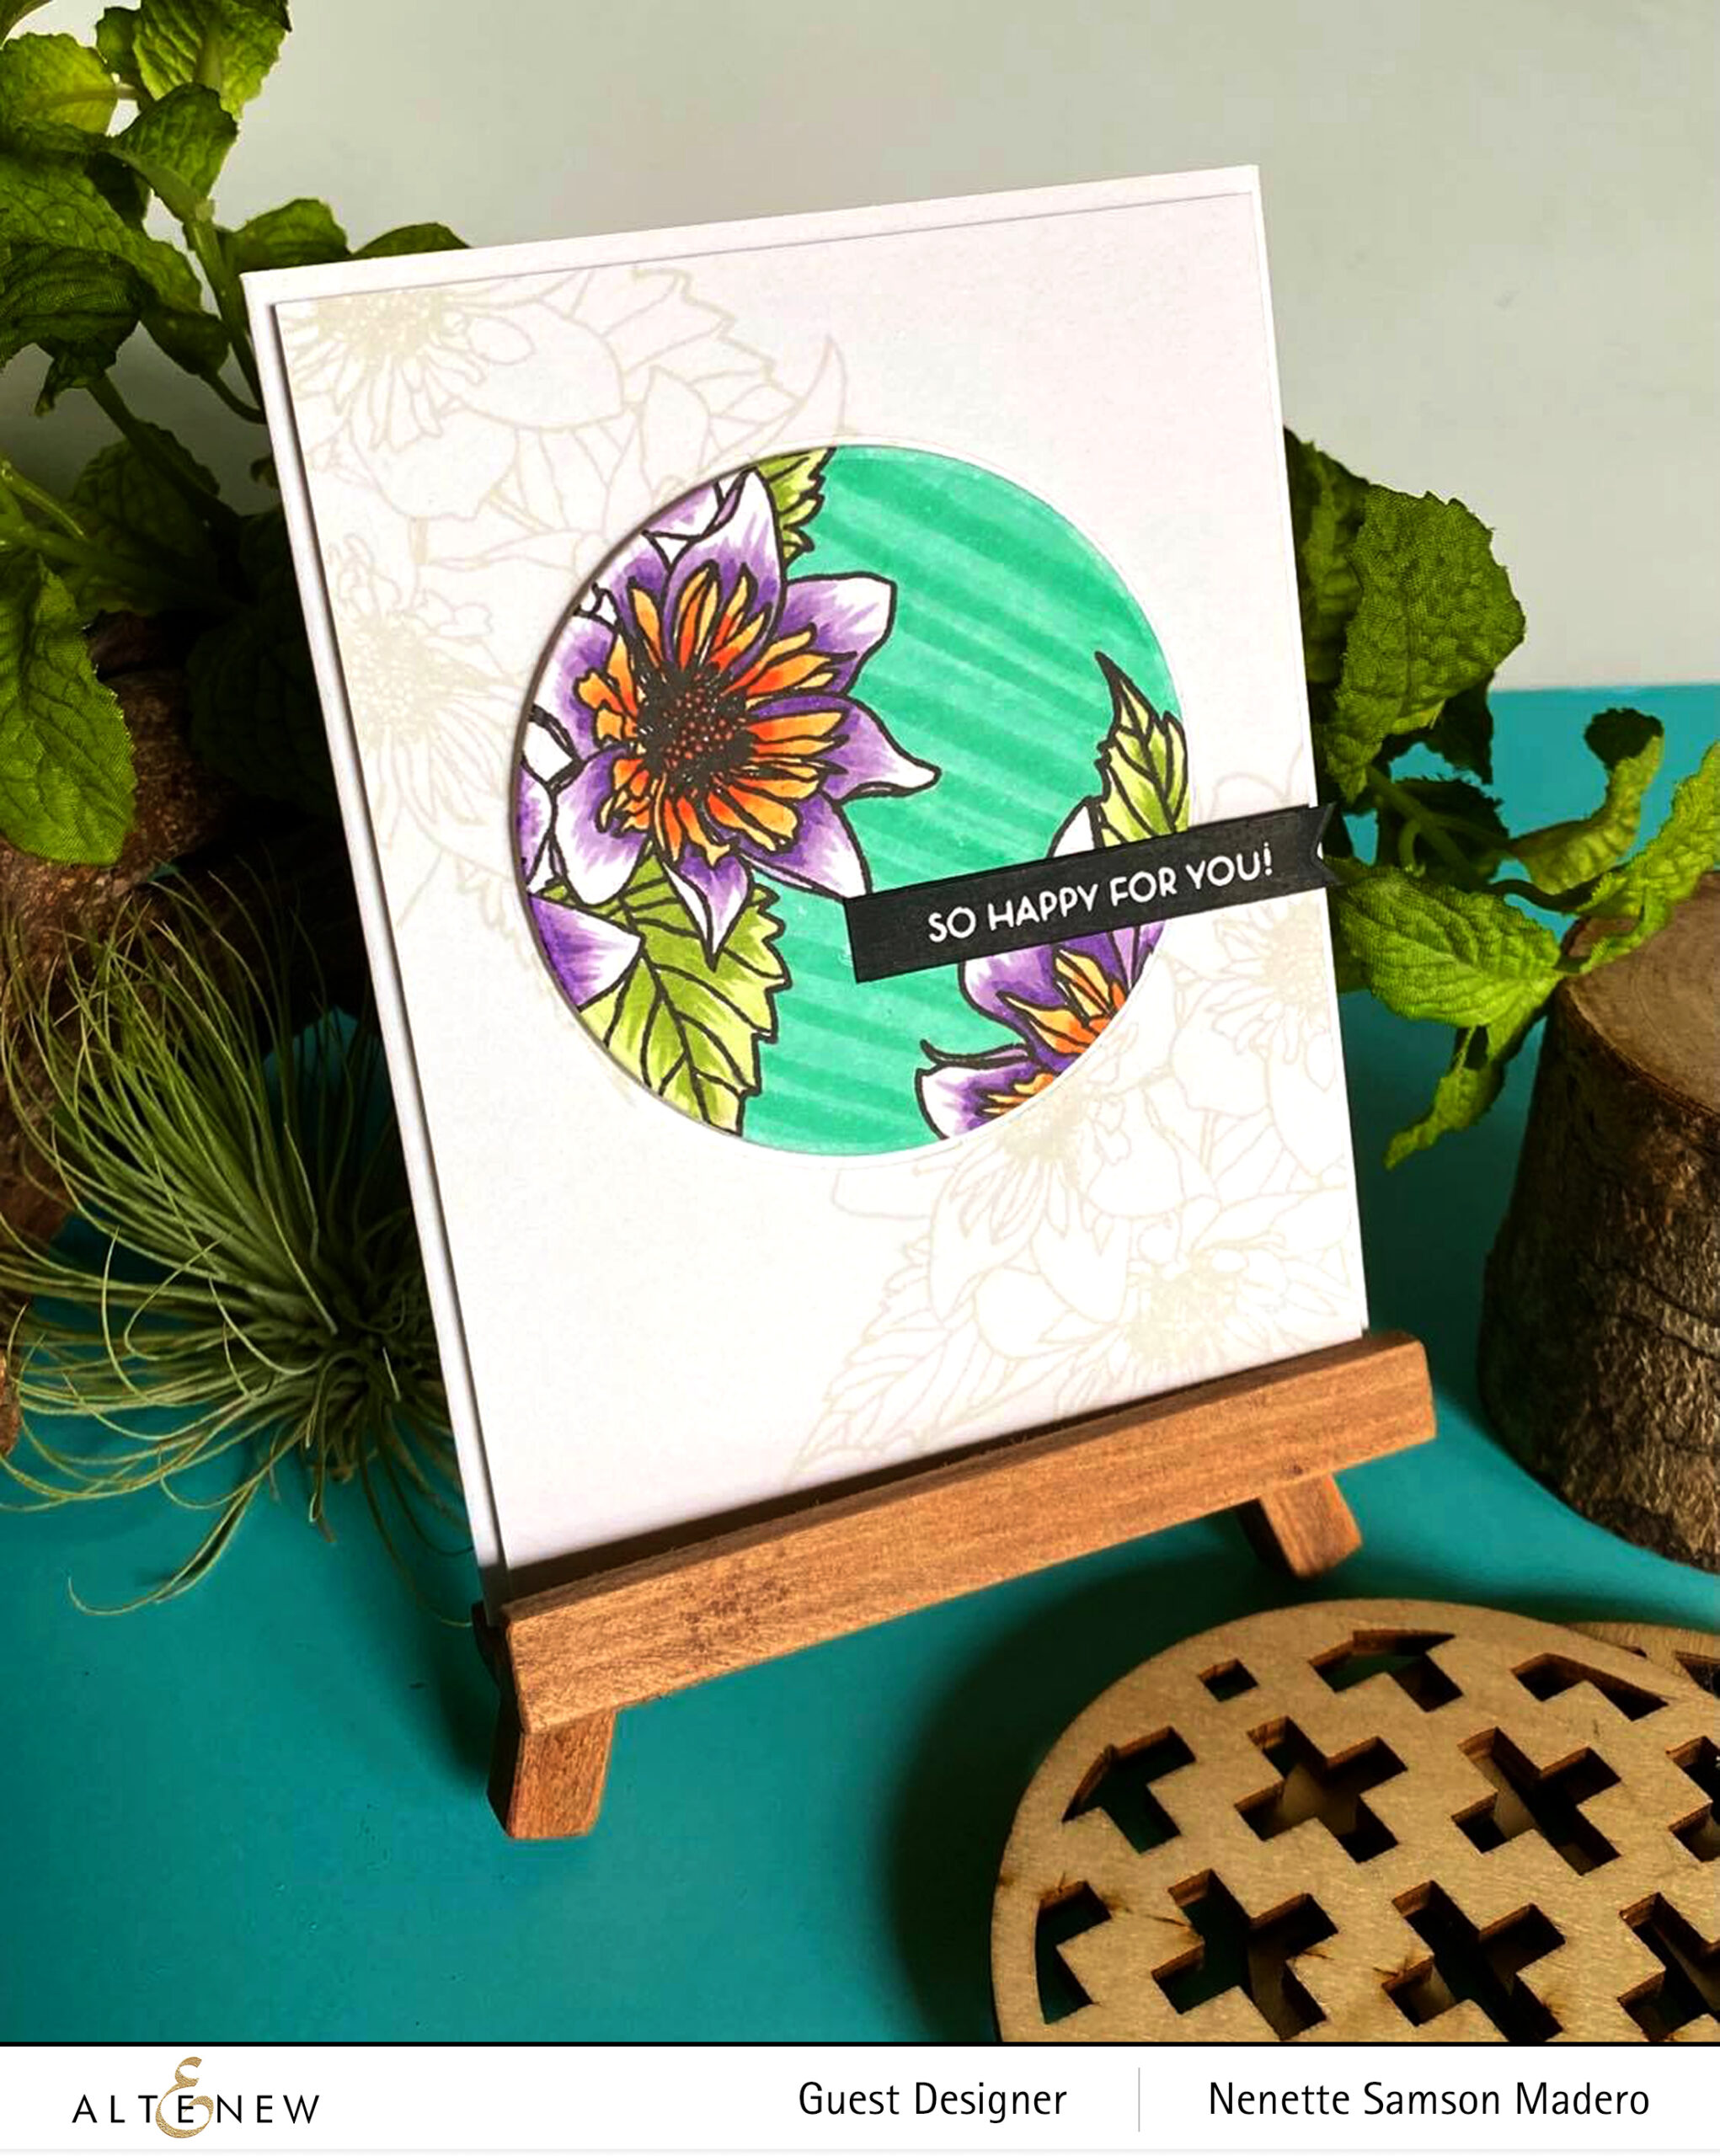
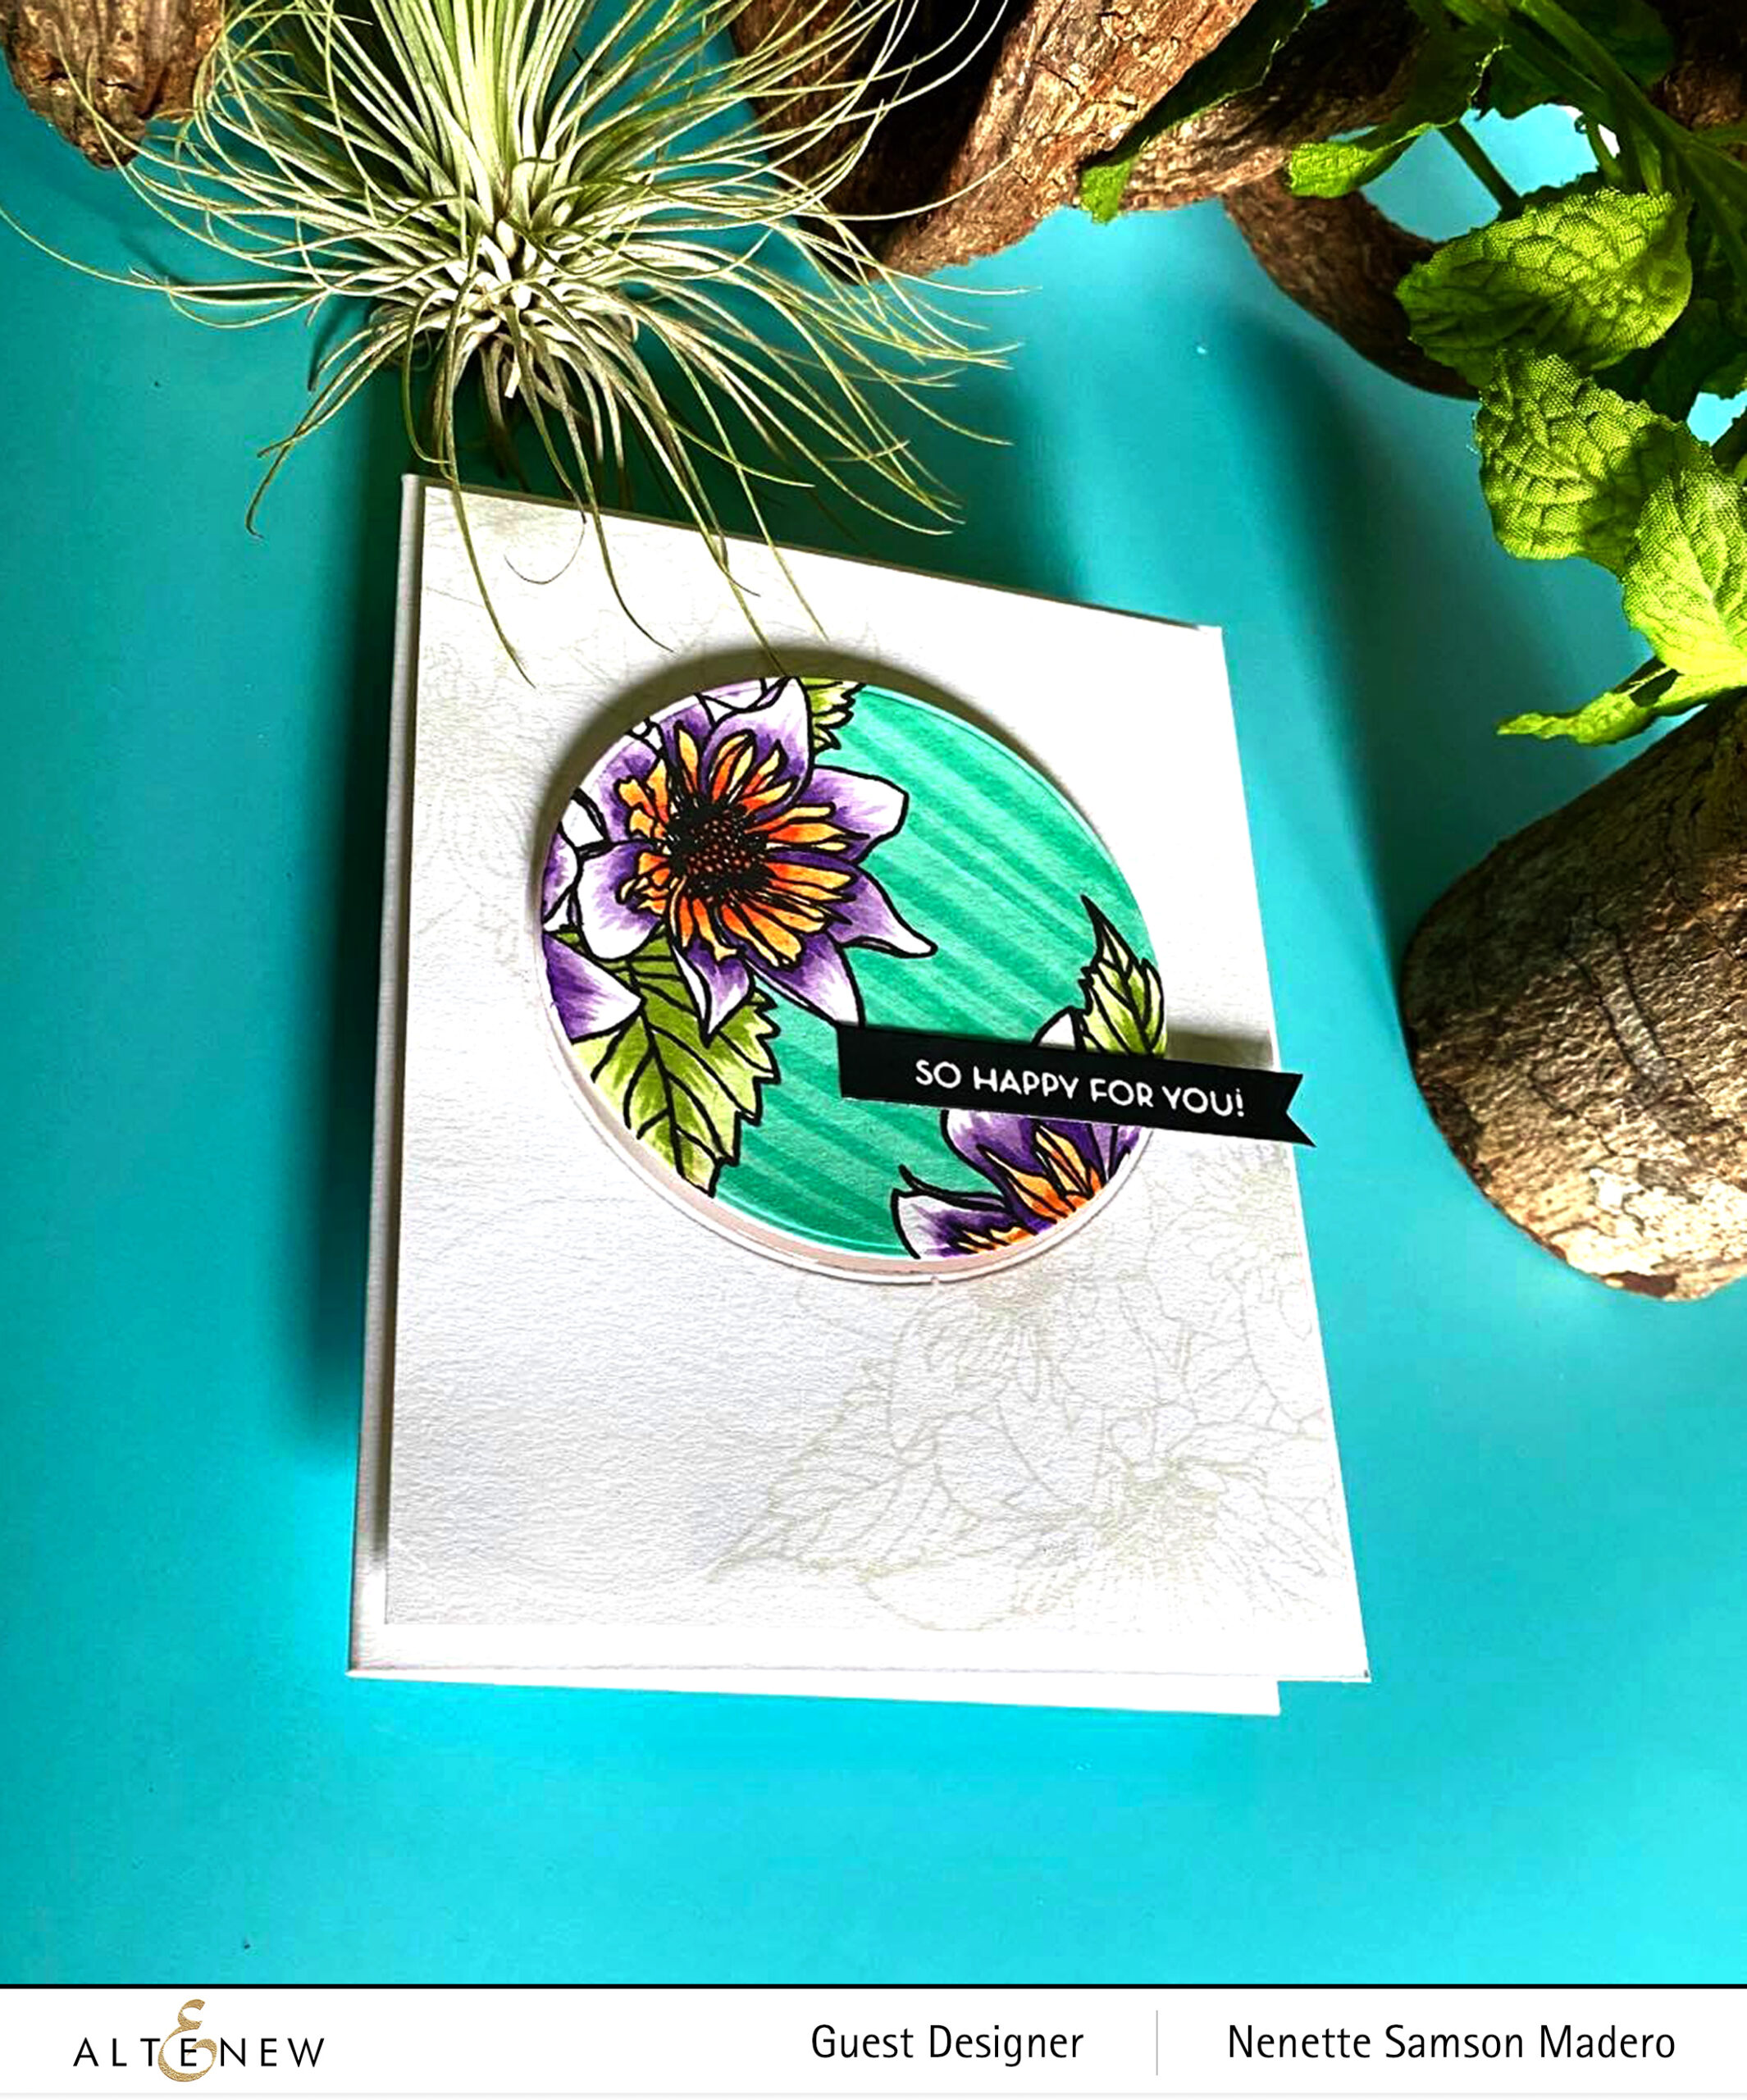
SO HAPPY FOR YOU


MATERIALS: PAF: FASHION MONGER DAHILIA, ALCOHOL MARKERS B815, R 702, R823, R705, G702, G715, KARIN BRUSH MARKERS PALE ORANGE 357, AMBER 195 AND OMBRE RED 051, NO LINE INK, OBSIDIAN INK, PURE WHITE EMBOSSING POWDER, CIRCLE DIE , NEENAH SOLAR WHITE CARDSTOCK, FOAM SQUARES AND VERSAMARK INK

STEPS:

  • Using a Misti, stamp the image on Neenah Solar White cardstock using Obsidian Ink. Allow to dry
  • Align the paper using the Misti and stamp the image on Neenah Solar White cardstock using no line ink
  • Die-cut the circle from the stamped image using Obsidian ink
  • Color using Alcohol Ink markers
  • Stamp the sentiment with Versamark ink and emboss with Pure White embossing powder
  • Assemble the card by lining up the colored image with the background image and adhere using foam squares. Add the sentiment

A second way of coloring a very detailed image is spotlight colorcoloring… choose an area to spotlight and color that part only. Leave the rest of the image uncolored. This way, you only have small portion to color instead of coloring the whole image!


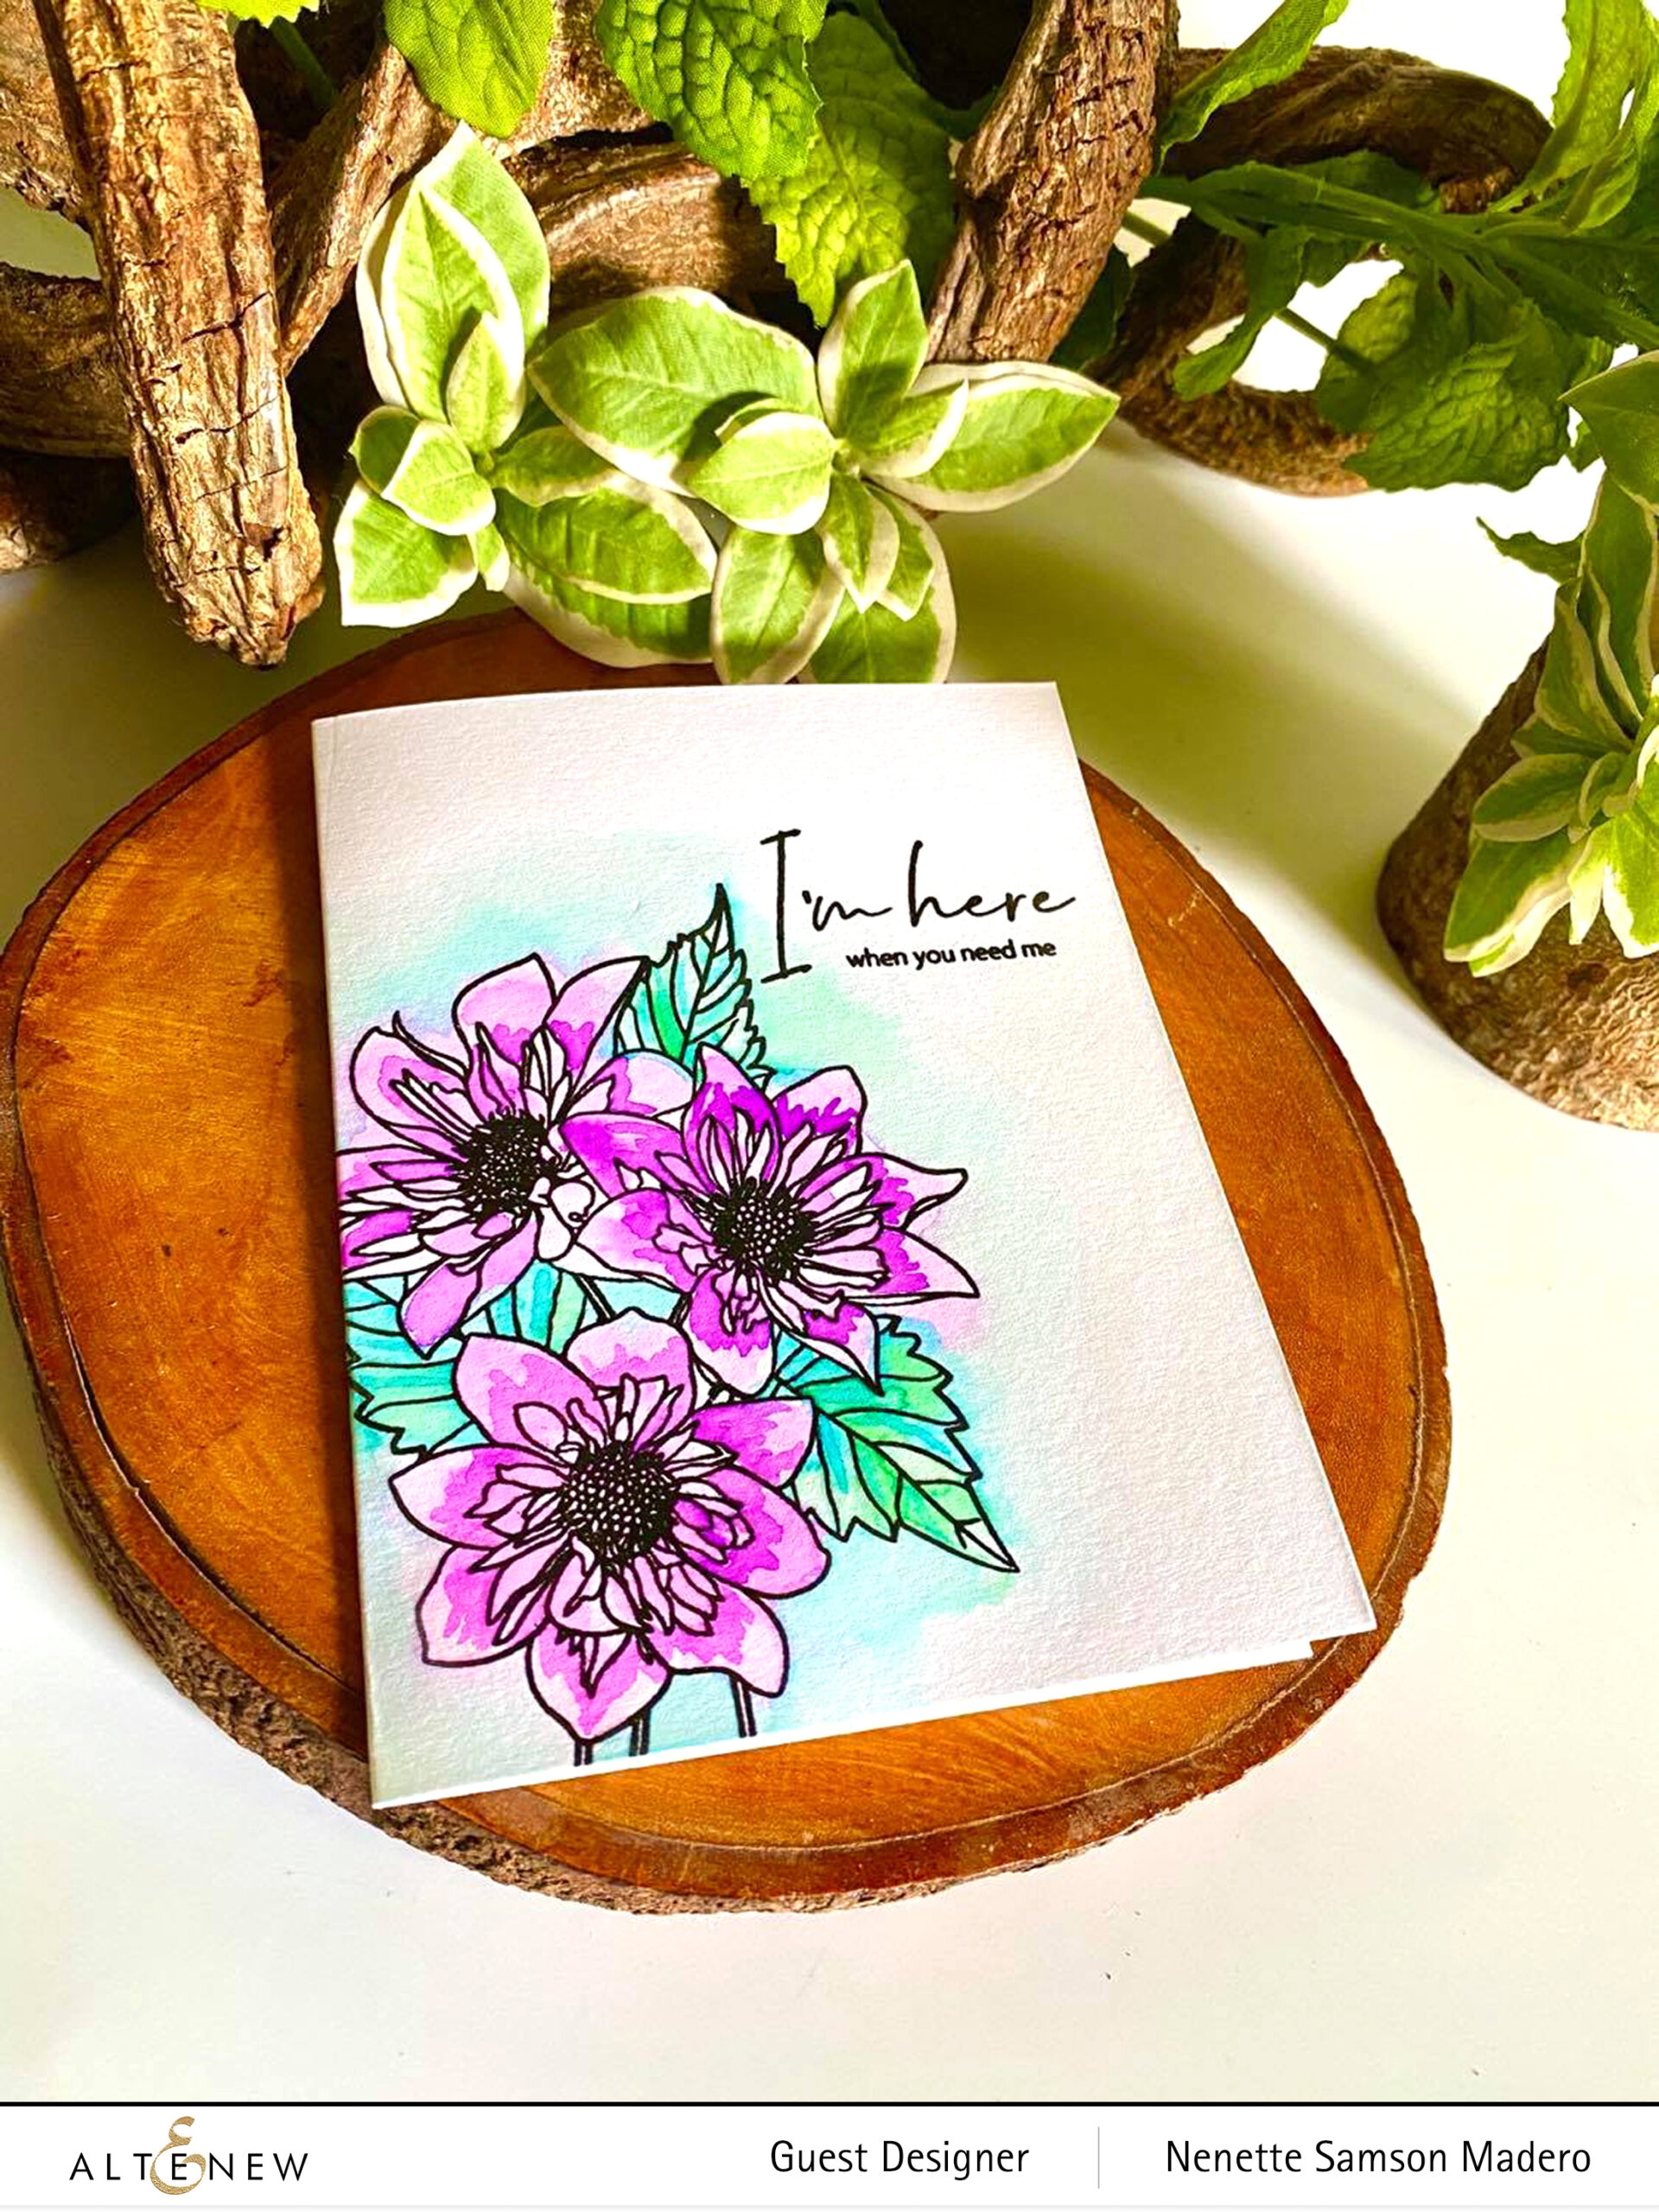
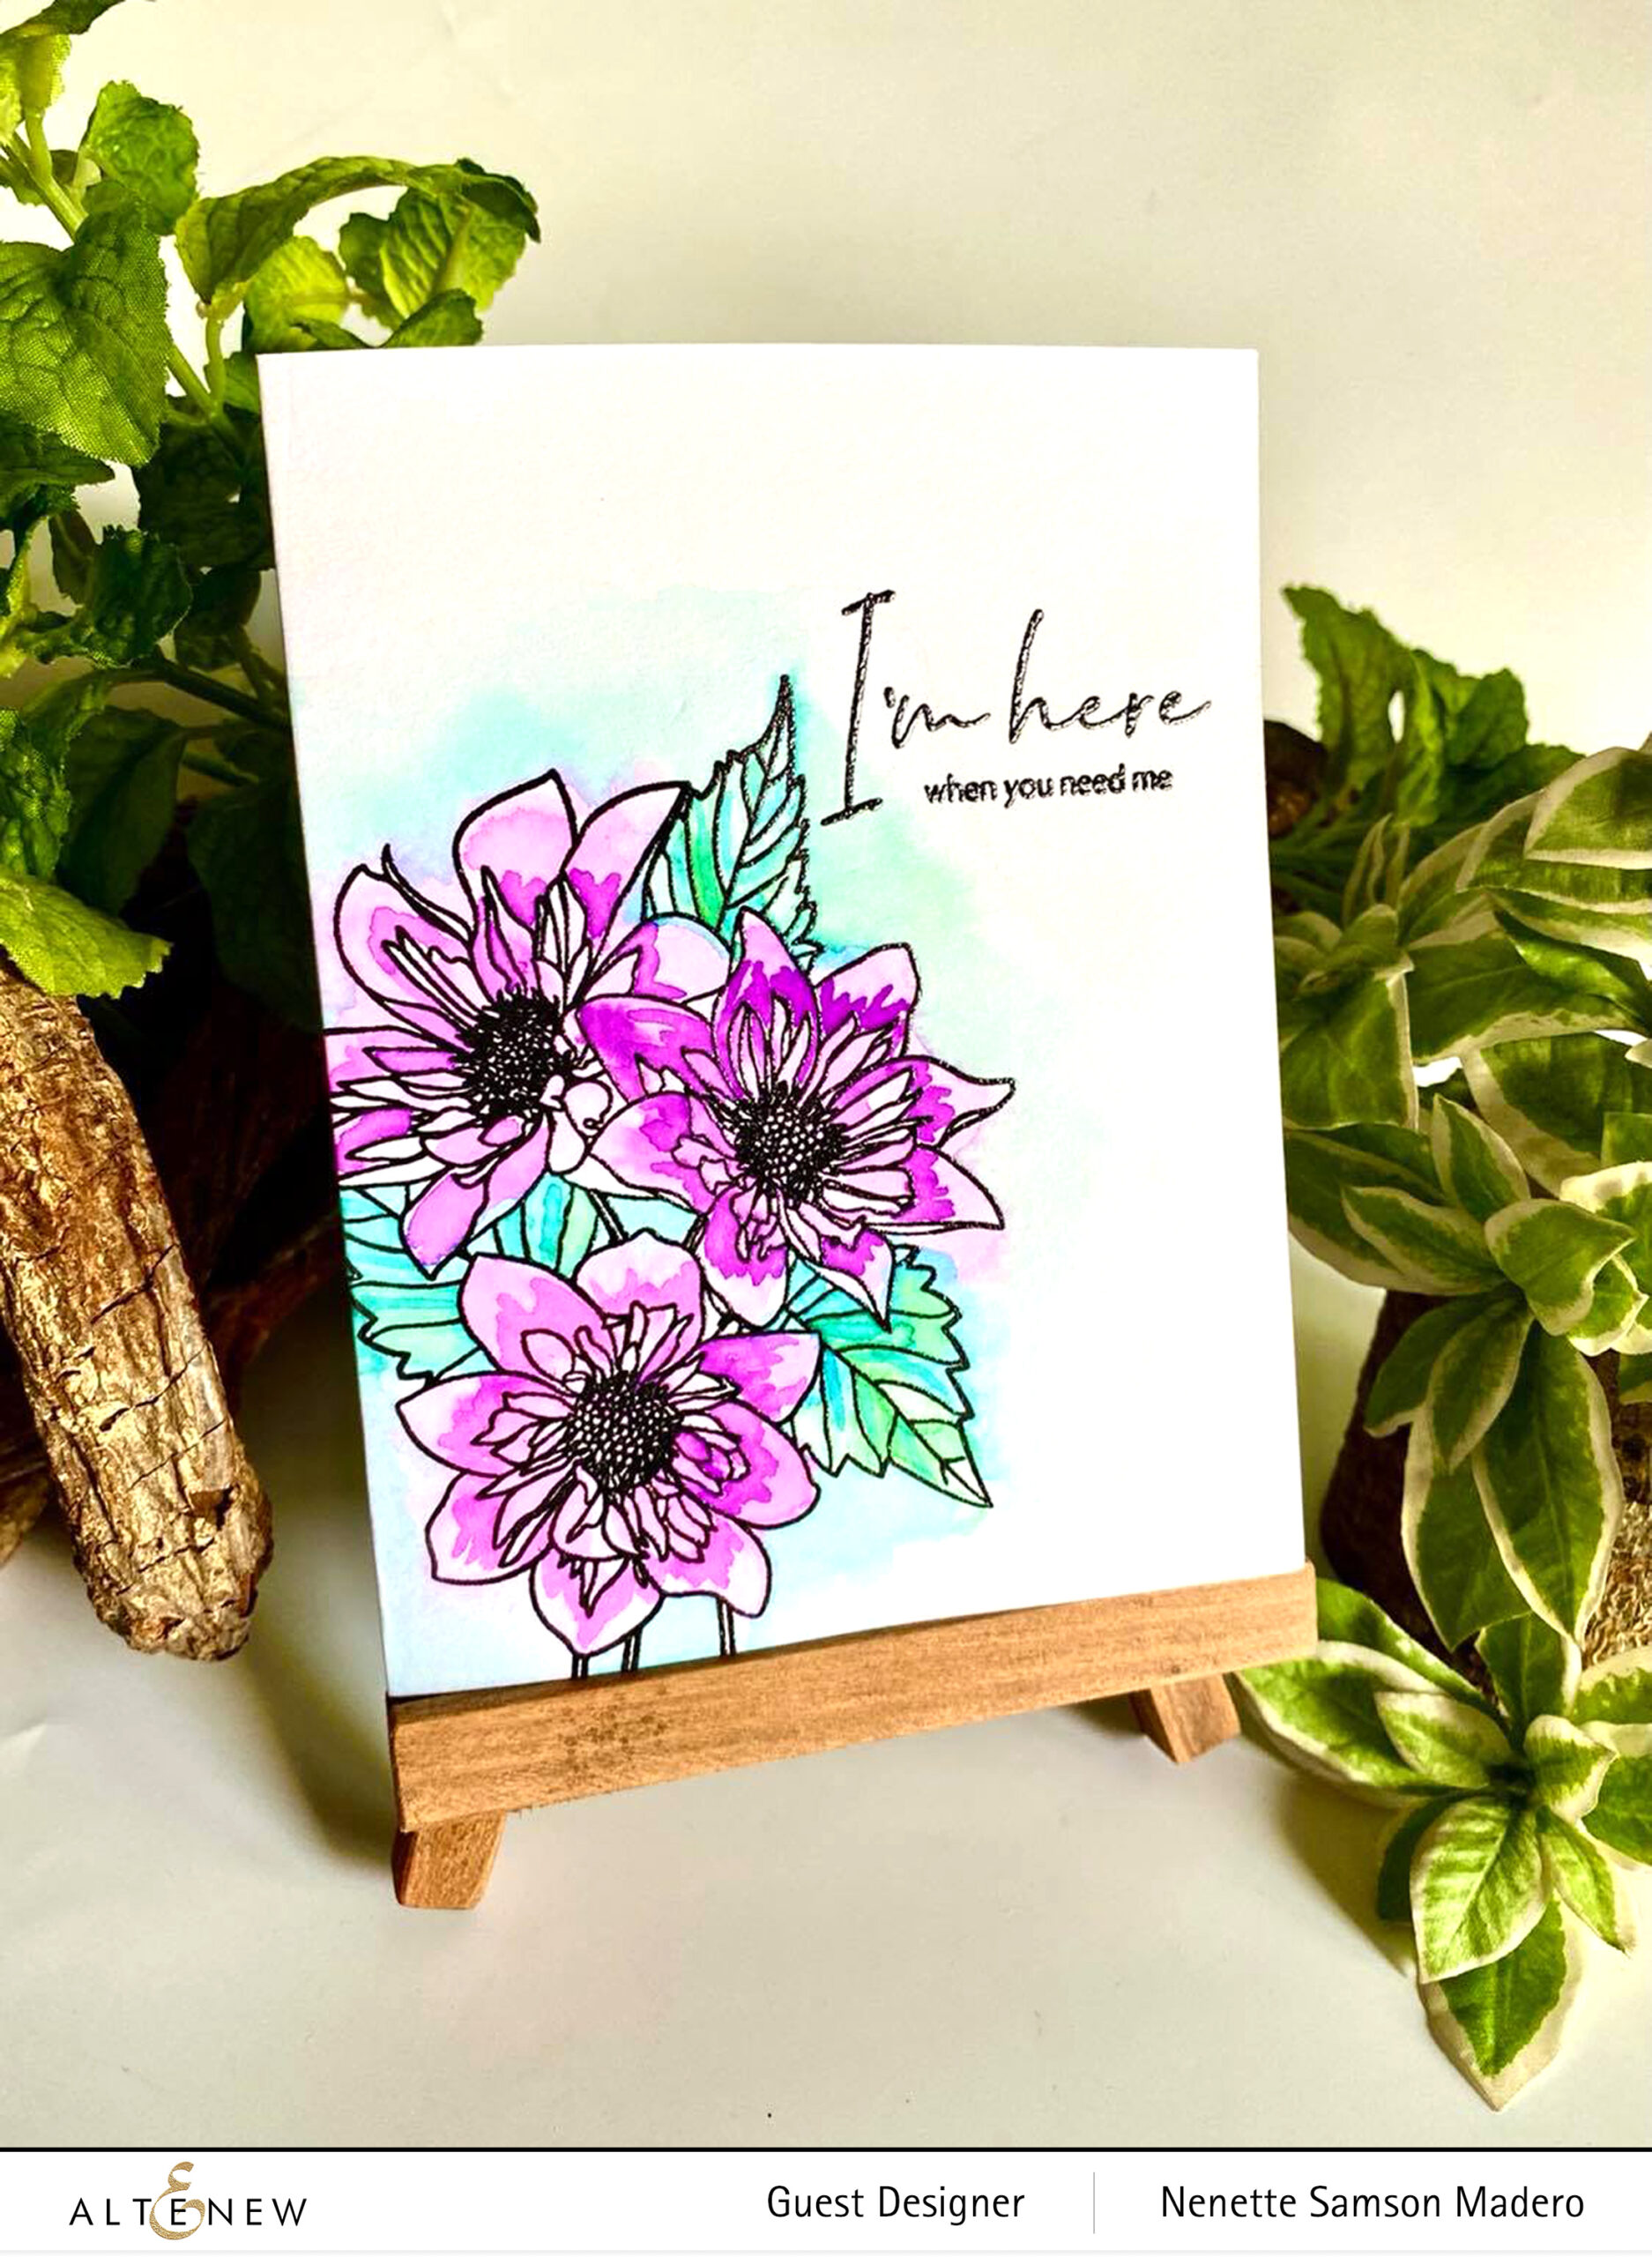
I’M HERE WHEN YOU NEED ME


MATERIALS: PAF: FASHION MONGER DAHLIA, WATERCOLOR BRUSH MARKERS, WATERCOLOR PAPER, OBSIDIAN INK, CLEAR EMBOSSING POWDER

STEPS:

  • Stamp the image and sentiment with Obsidian ink and emboss using clear embossing powder
  • Loosely color the images with a light wash of pinks, greens and blues using the wet on wet technique
  • Allow to dry then color with a more pigmented wash of darker shades to add texture

Loose watercolor technique is when you intentionally leave out the details and allow the water to move the pigments more freely… no need to worry about staying within the lines for this type of coloring. The only time you have to pay attention is when you are adding the second layer which is the highly pigmented watercolor.

If you don’t want to miss any of the BAF releases, you can subscribe monthly and get a 14% off discount!


GIVEAWAYS

$200 in total prizes! To celebrate this release, Altenew is giving away a $50 gift certificate to 2 lucky winners and a $20 gift certificate to 5 winners! Please leave a comment on the Altenew Card Blog and/or each designer’s blog post on the blog hop list below by 07/28/2021 for a chance to win. 

Altenew will draw 7 random winners from the comments left on each stop of this blog hop and announce the winners on the Altenew Winners Page on 07/30/2021.

I hope you learned a thing or two on how to color detailed images easily. Let me know which technique you’d like to try next time you create a card with a very detailed stamp image. The next stop is the talented Bridget Casey. Please don’t forget to leave a comment to get a chance to win a prize from Altenew. Hope you can follow me on Instagram as well @mylittleatticstudio cause that’s where I post all my works. Enjoy the rest of the week! Stay safe and happy crafting!

Altenew Build-A-Flower: Bearded Iris Release Blog Hop + Giveaway

Altenew Build-A-Flower: Bearded Iris Release Blog Hop + Giveaway

Hello, everyone! Welcome to Altenew’s Build-a-Flower: Bearded Iris Release blog hop + giveaway!!! I’m so thrilled to be joining the designers for this hop! If you just came from Linda Westfall‘s blog, then you almost made it to the finish line!!! You will find the complete blog hop list on the Altenew card blog.

BUILD-A-FLOWER: BEARDED IRIS STAMP AND DIE SET

Take a look at this beautiful layering set! For my samples, I made one using only the outline layer and the other using all the layers.

All Altenew products are linked to Altenew’s online store so that it’s easy for you to find them. These are not affiliate links… I just want it to be easier for you to find the items in the store. 😊


SENDING LOTS OF LOVE


MATERIALS: BAF: BEARDED IRIS STAMP AND DIE SET, DOTTED STARBURST DEBOSSING DIE, NESTING FRAMES DIE, WATER GARDEN ARTIST MARKER SET, DISTRESS OXIDE INKS-RIPE PERSIMMON, ABANDONED CORAL AND TEA DYE, NEENAH SOLAR WHITE CARDSTOCK, VELLUM, VERSAMARK INK, ROSE GOLD AND PURE WHITE EMBOSSING POWDER, EDGE DISTRESSING TOOL

STEPS:

  1. Stamp with Versamark ink and emboss the outline image using Rose Gold embossing powder.
  2. Color the image using the Water Garden Artist Alcohol Markers set G
  3. Die-cut Neenah solar white using the Nesting frames die then deboss with the Dotted Starburst debossing die
  4. Stamp the sentiment on black cardstock using Versarmark ink and emboss with Pure white embossing powder.
  5. Create an ombre background using distress oxide inks.
  6. Distress the edges of the background with a paper distresser.
  7. Assemble the card with foam squares for added dimension.

Because the vellum is a non-porous surface, it it’s easier to move and blend the the pigments. With paper, the ink will seep into the fibers very quickly. It wasn’t difficult to create the texture on the flowers by using different shades of the same color.


JUST BECAUSE


MATERIALS: BAF: BEARDED IRIS STAMP AND DIE SET, MARTIAN TERRAIN DYE INK SET, WARM AND COZY DYE INK SET, NATURE’S WONDERS DYE INK SET, ROSE GOLD EMBOSSING POWDER, ESSENTIAL SENTIMENT STRIPS DIE, MASKING PAPER, INK ON 3 NO LINE COLORING INK, VERSAFINE ONYX BLACK, MFT Stitched Rectangle Scalloped Edge die

STEPS:

For this card, I used both the outline stamp set and the layering stamps.

  1. Stamp Neenah solar white cardstock using the outline stamp and Ink on 3 no line coloring ink.
  2. Layer the stamp layers to create a flower using the Warm and Cozy dye ink set. Stamp the leaves using Nature’s Wonders ink set.
  3. Stamp the outline image on making paper then cut out the image to create a mask.
  4. Cover the layered flower with the cut out masking paper and stamp the outline image using Versafine Onyx black.
  5. Create a scalloped edge using the die.
  6. Mat with gold cardstock.
  7. Die-cut the sentiment 5 times. Add Versamark Ink to the lower part of the die-cut and emboss using Rose Gold embossing powder.
  8. Assemble the card with foam squares.

PRIZES


$200 in total prizes! To celebrate this release, Altenew is giving away a $50 gift certificate to 2 lucky winners and a $20 gift certificate to 5 winners! Please leave a comment on the Altenew Card Blog and/or each designer’s blog post on the blog hop list below by 07/07/2021 for a chance to win. Altenew will draw 7 random winners from the comments left on each stop of this blog hop and announce the winners on the Altenew Winners Page on 07/09/2021.

Next up is Svitlana Shayevich I hope you liked the cards I made for this hop. Don’t forget to leave a comment to get a chance to win some prizes from Altenew! Thanks so much for dropping by and stay safe, everyone!!!

Altenew Educators “Anything But A Card” Blog Hop and Linky Party + Giveaway

Altenew Educators “Anything But A Card” Blog Hop and Linky Party + Giveaway

Hello, everyone! Welcome to the Altenew Educators blog hop with the theme “Anything But a Card” !!! If you just came from Eva Bussom’s blog, then you’re on the right track. If you get lost, you can find the complete blog hop list on Altenew’s blog or at the end of this post.

When Erum invited me to join this hop, I was so excited because of the theme! I enjoyed creating projects that were not cards for a change, and I hope you will like them, too!


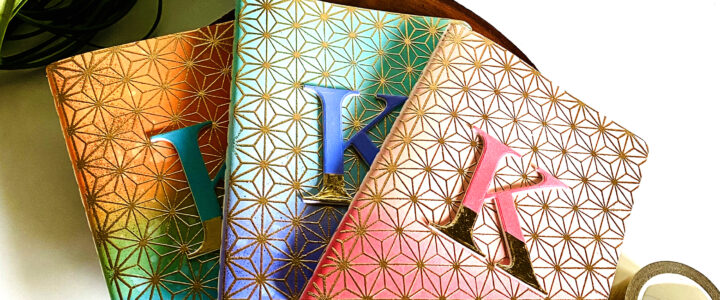
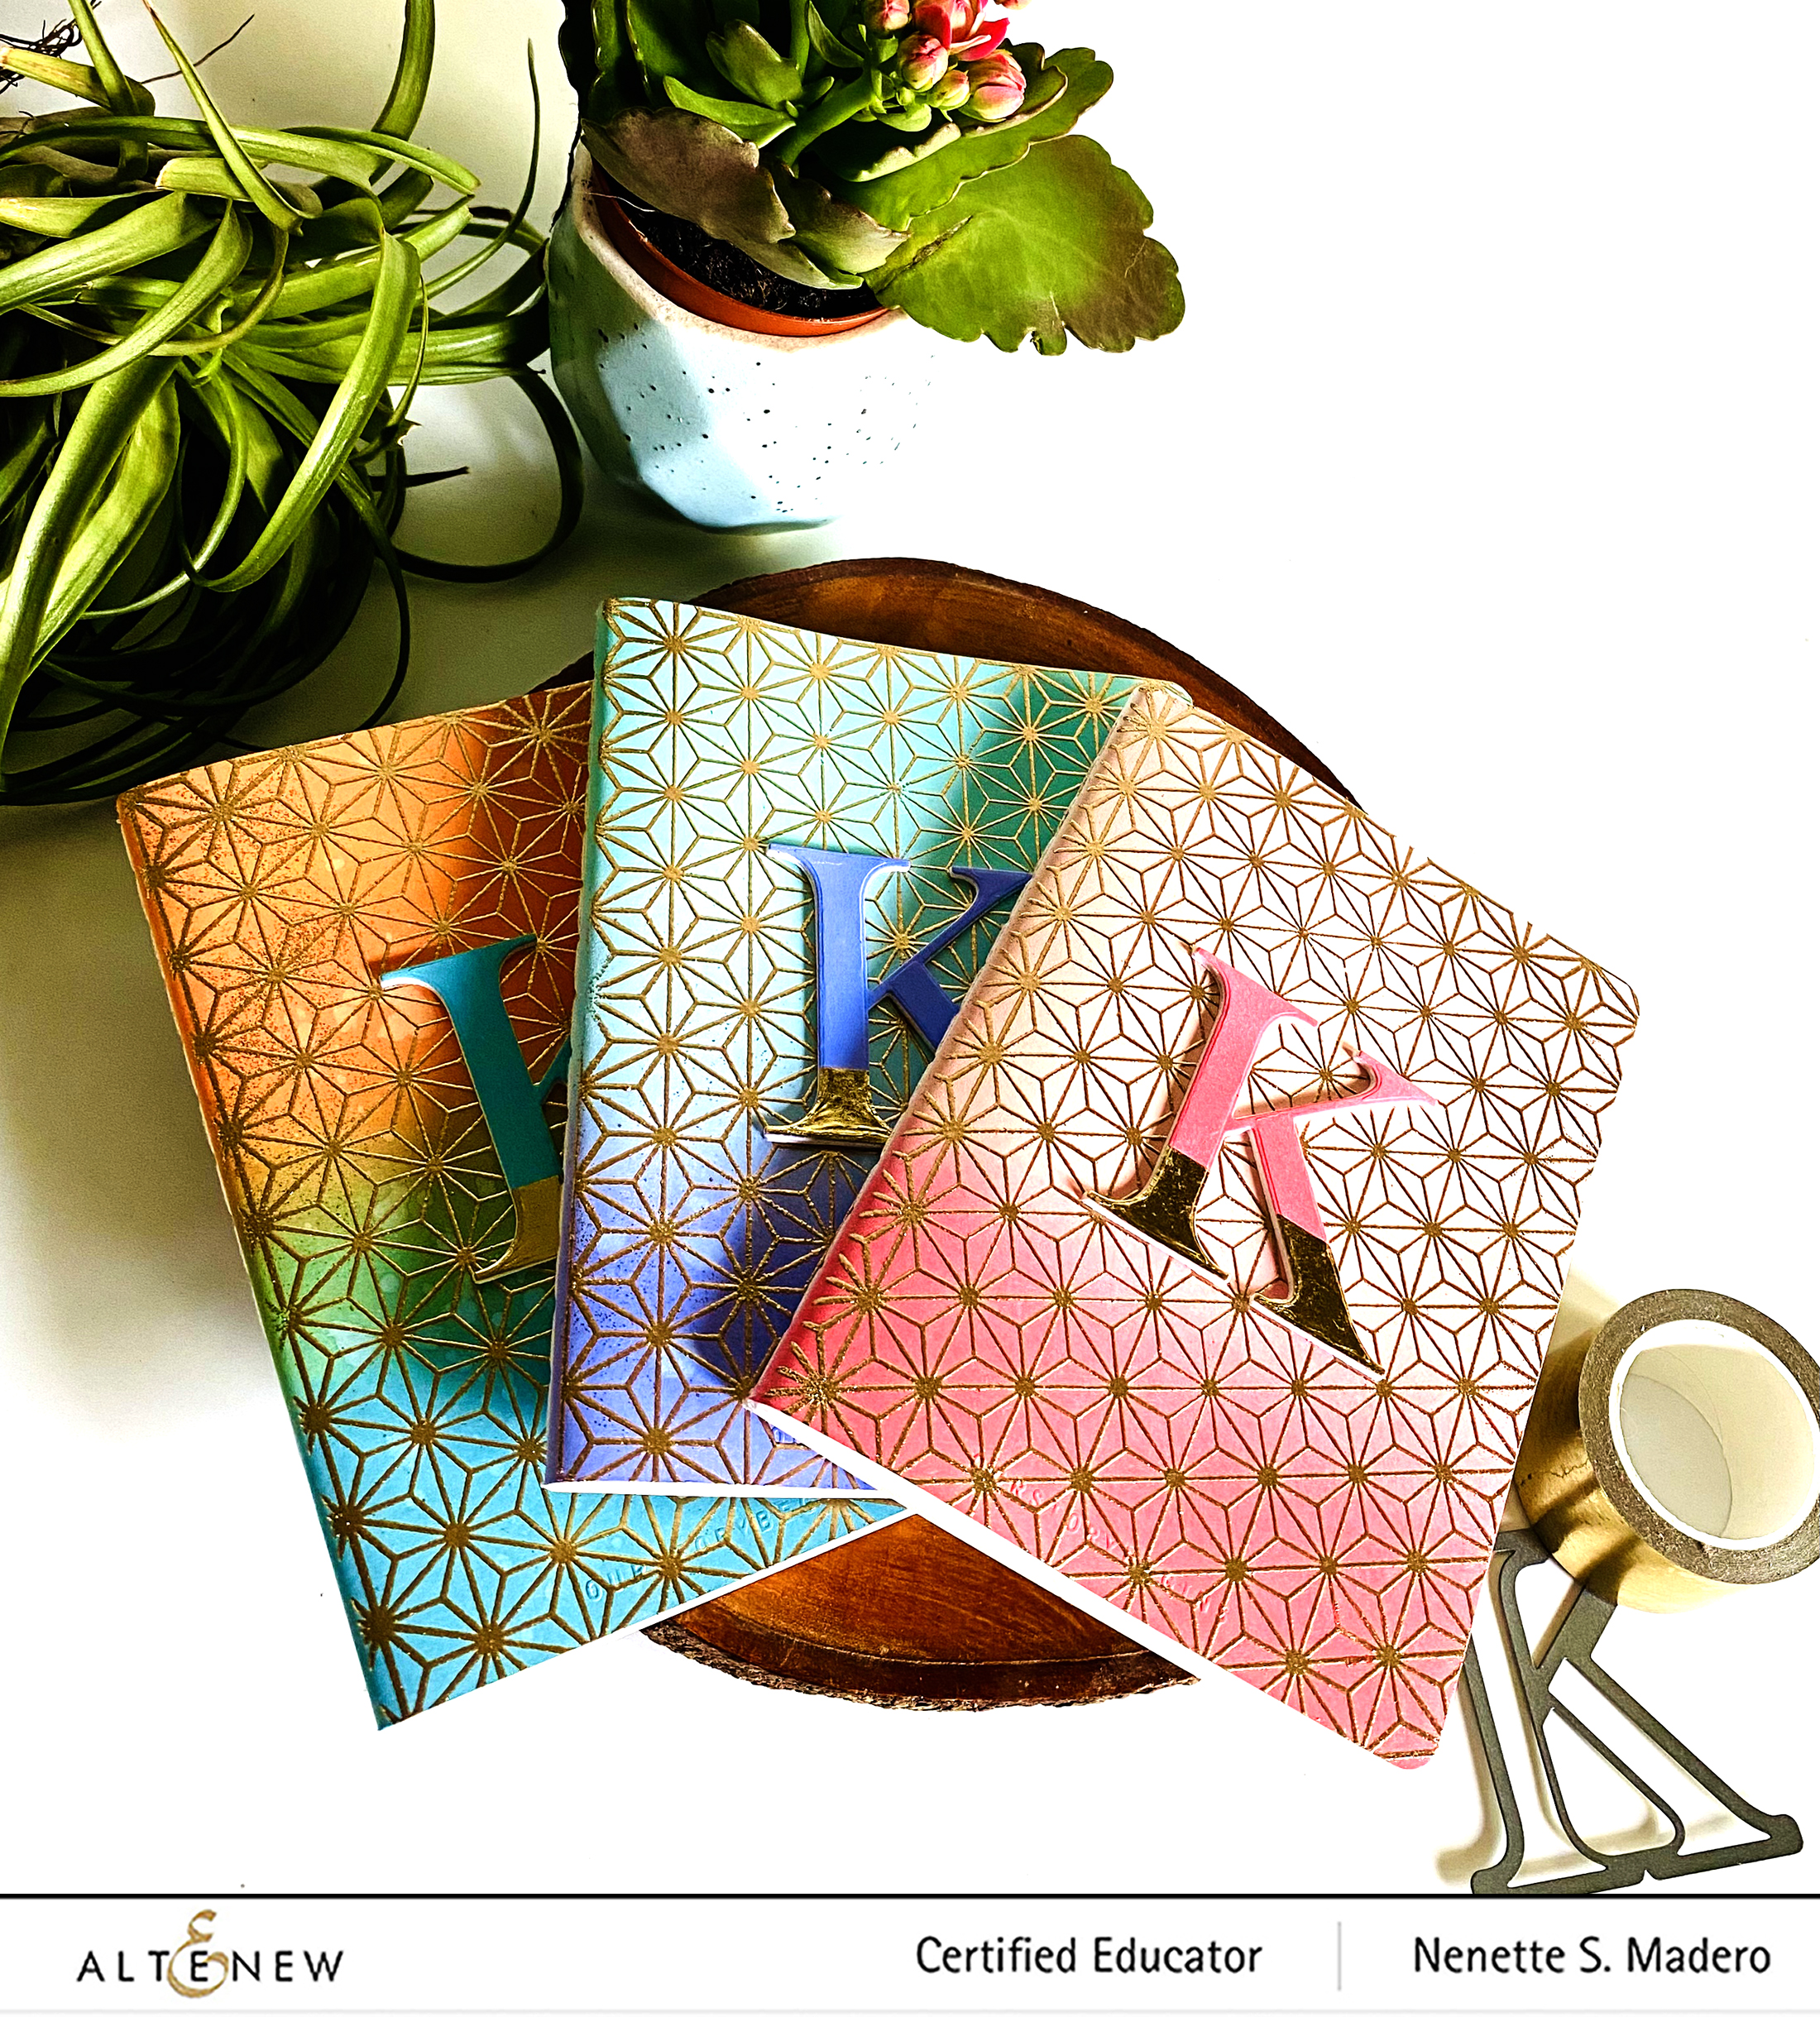
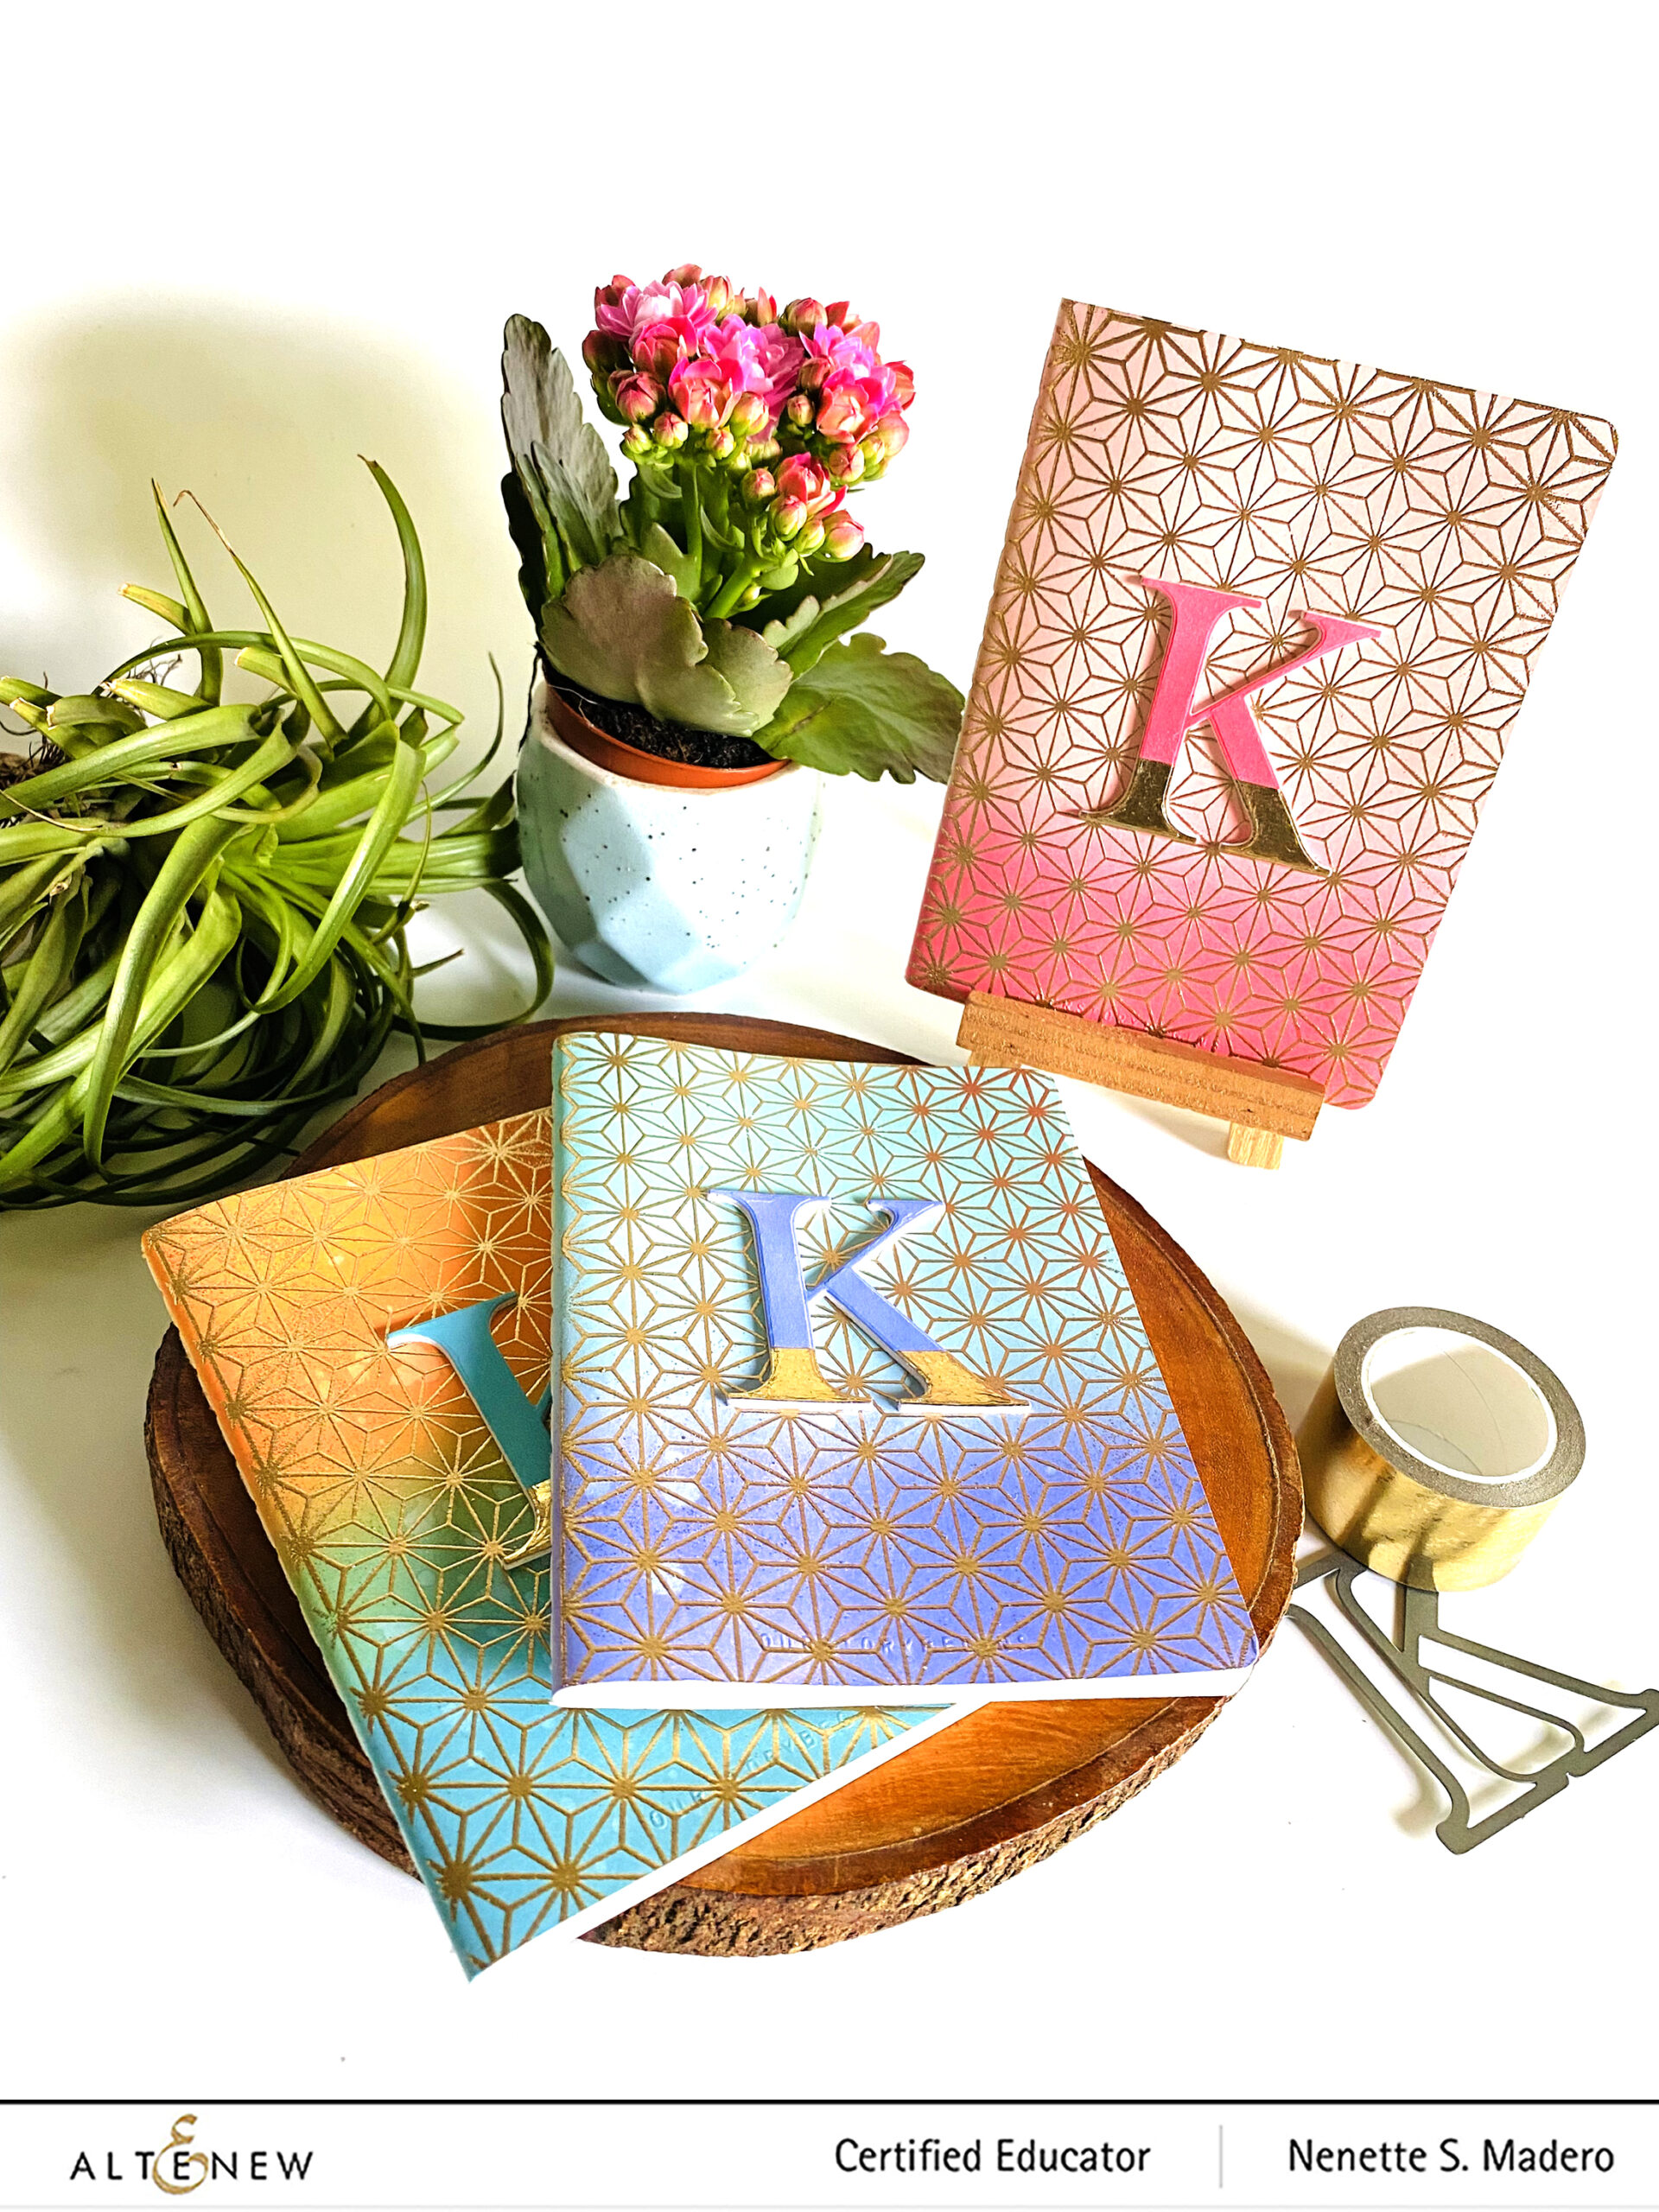
MINI MONOGRAM NOTEBOOKS


MATERIALS: ALTENEW FACETED STARS STAMP SET, ROSE GOLD EMBOSSING POWDER, CLASSIC ALPHABET DIE, GOLD FOIL 1 INCH WASHI TAPE, DISTRESS OXIDE INKS-SHADED LILAC, TUMBLED GLASS, SPICED MARMALADE SALVAGED PATINA, VERSAMARK INK, NEENAH SOLAR WHITE CARDSTOCK, TOMOBOW MONO MULTI LIQUID GLUE, SMALL BLANK COVERED NOTEBOOKS

STEPS:

  1. With a blending tool, blend two to three colors on the front cover of the notebook. Add water splatters. Make sure the inks are dry before going to the next step.
  2. Prepare the surface with the antistatic tool. Using a Misti, stamp the background image using Versamark ink and emboss with Rose Gold embossing powder.
  3. Color the top part of Neenah Solar White cardstock. Add the gold foil washi tape on the lower portion and die cut the letter K. Die cut extra 4 letter Ks and adhere on top of each other for added dimension. Glue to the cover.

I created these mini notebooks for a sweet friend of mine. I hope she will like them! Make sure to blend the distress inks well or create an ombre look. I also added some water splatters for added interest. This will also look good using stencils or cover dies, too!


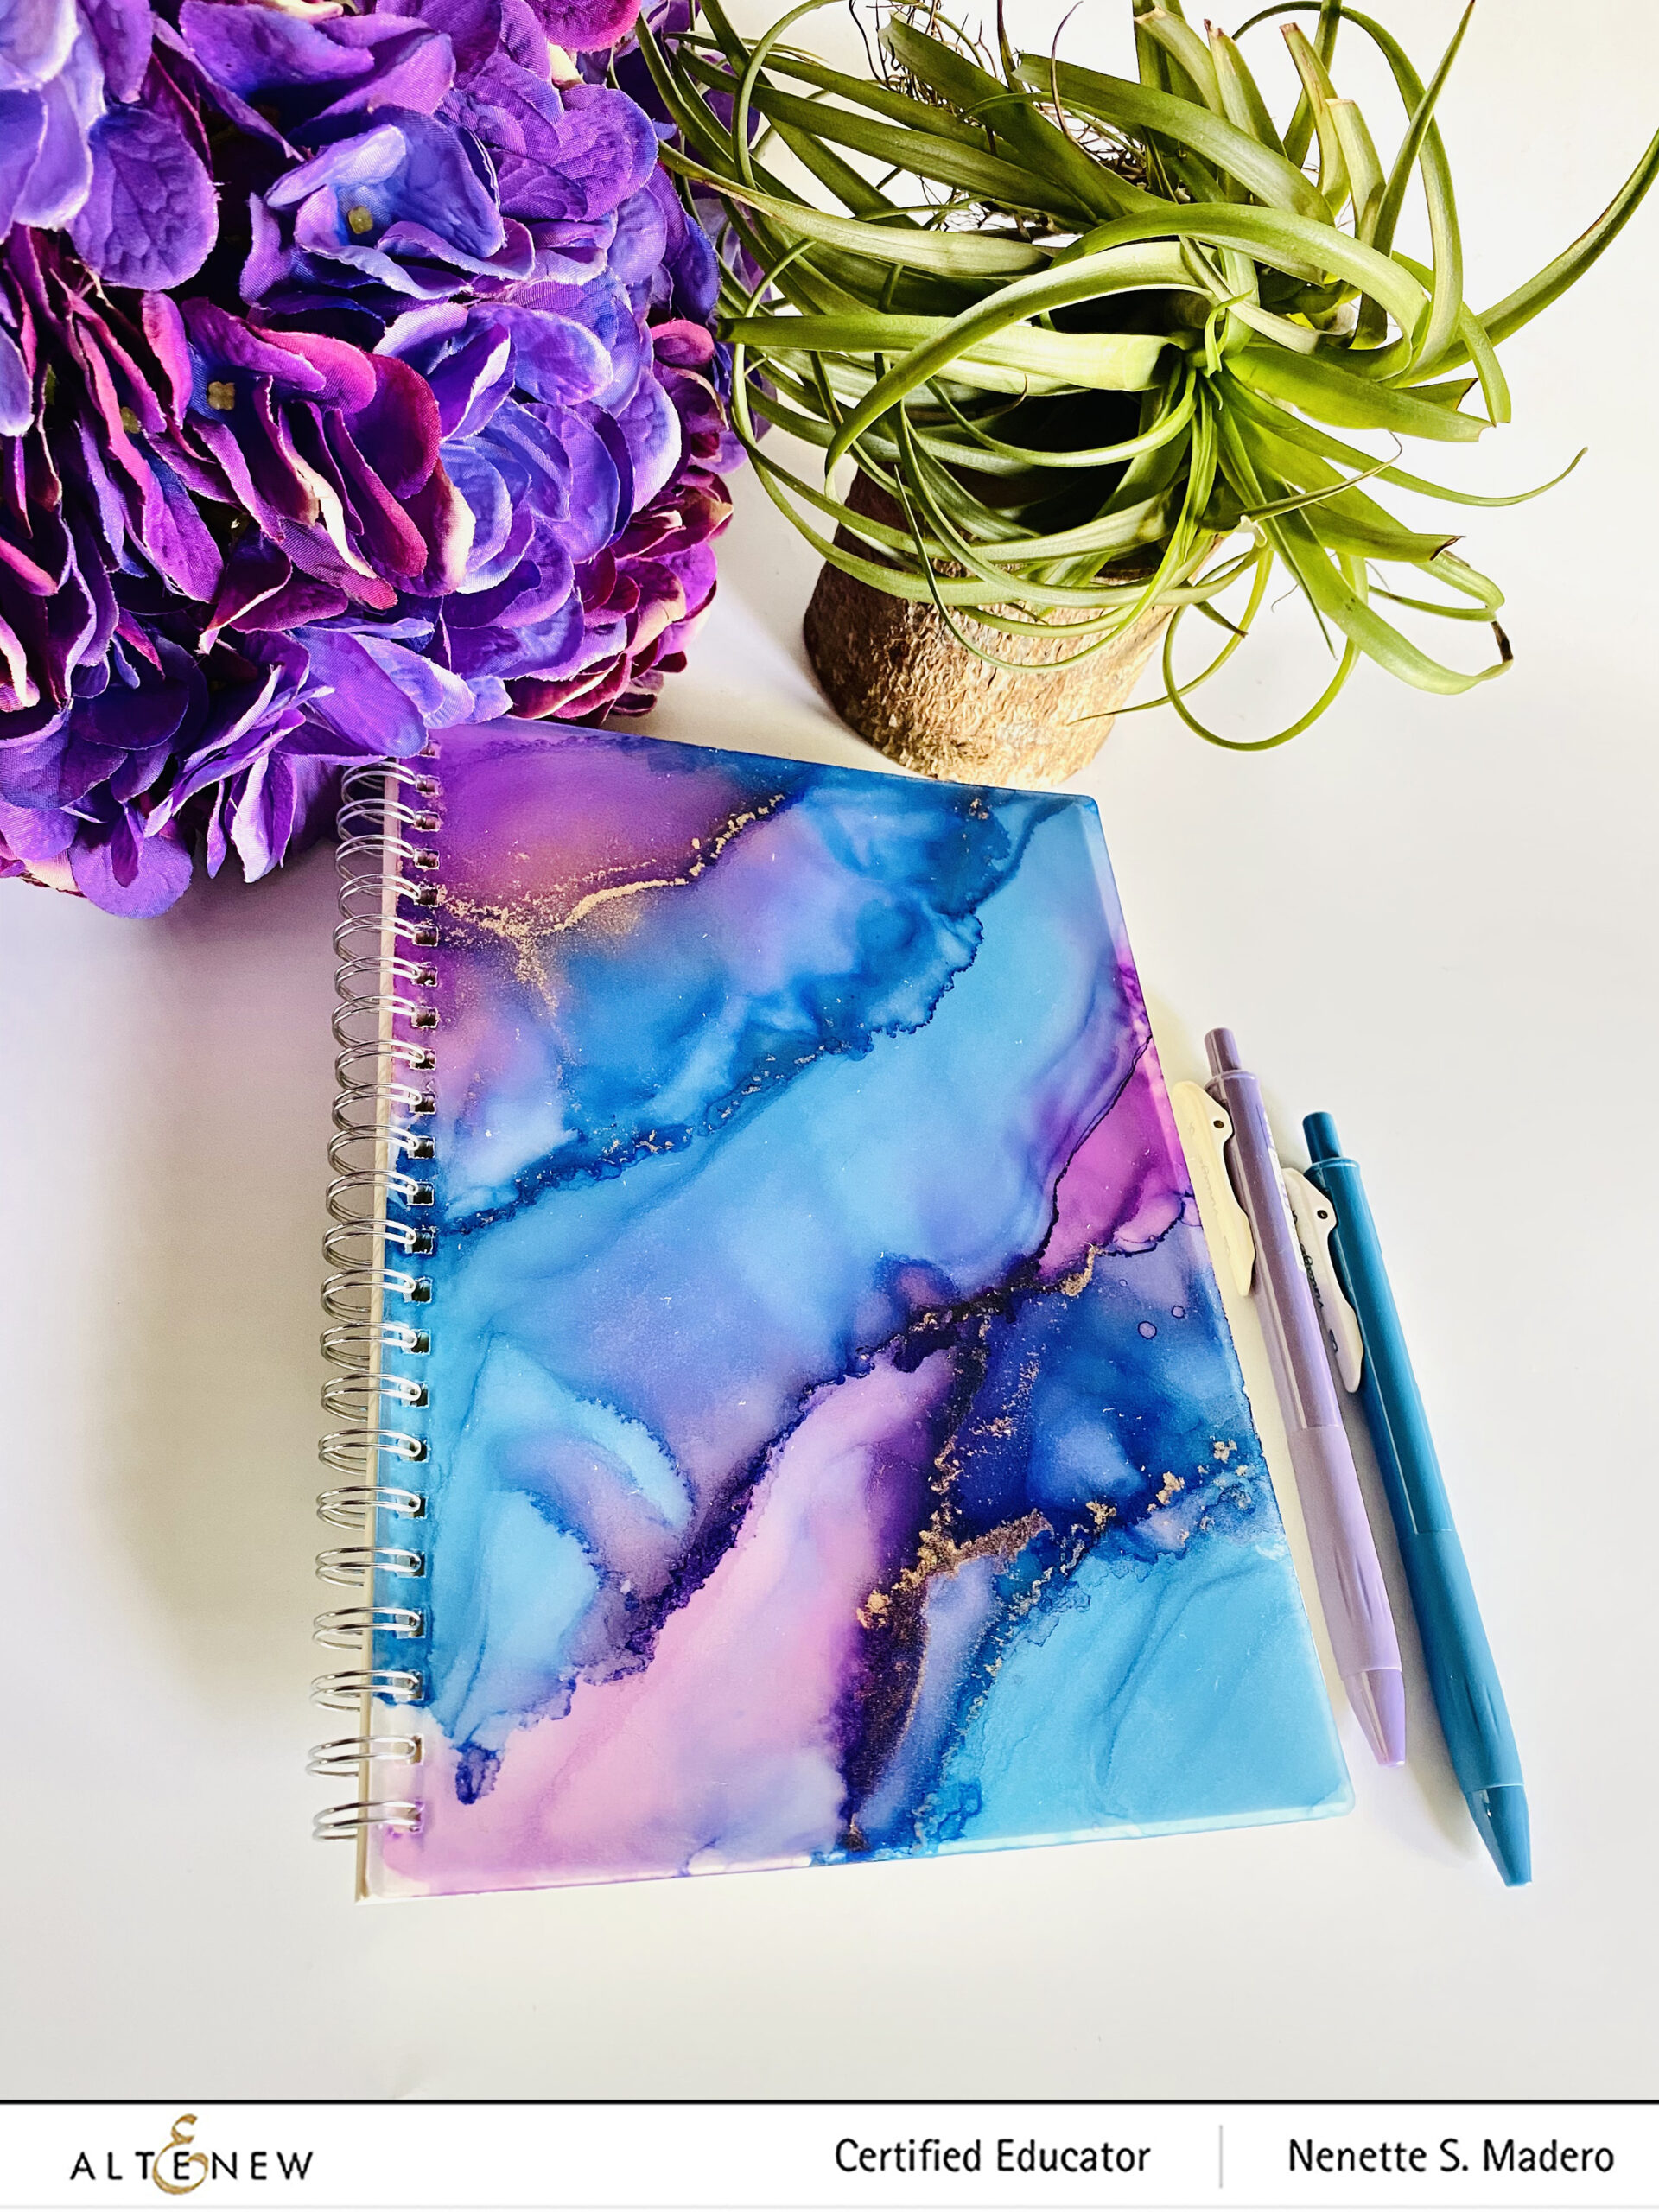
ALCOHOL INKED NOTEBOOK COVER


WARNING: Alcohol inks are highly toxic when fumes are inhaled. The alcohol evaporates very quickly and leaves vapors in the environment and the air you are breathing in so it is imperative to wear proper protective gear such as the correct type of respirator mask to protect you from the harmful airborne particles. Best to work outdoors where there is air circulation. If not, make sure a window/door is opened, have a fan blowing and an air purifier in the room while wearing a respirator mask. It is also important to wear gloves when working with alcohol inks to protect your skin and hands. A mask is likewise required when sealing your artowork with Kryon Kamar Varnish and clear crystal.

MATERIALS: ARTIST MARKER REFILL DEEP IRIS AND DESERT NIGHT, 99% ISOPROPYL ALCOHOL, PIÑATA BRASS, KRYON KAMAR VARNISH, KRYON CLEAR CRYSTAL, NOTEBOOK WITH PLASTIC COVERING

STEPS:

  1. Clean the surface with alcohol.
  2. Add alcohol and alcohol inks and move the pigments using a hair dryer. Work in sections. Add Piñata brass in certain areas.
  3. When the inks are dry, protect the image using Kryon Kamar Varnish. (Make sure you’re wearing protective mask when spraying this!). Spray 3 times with 30 minutes in between sprays to allow the surface to dry bewteen applications.
  4. Lastly, spray the cover with Kryon Clear Crystal.

I might add a die cut word later on or maybe a name or a monogram on the cover. Still not sure.


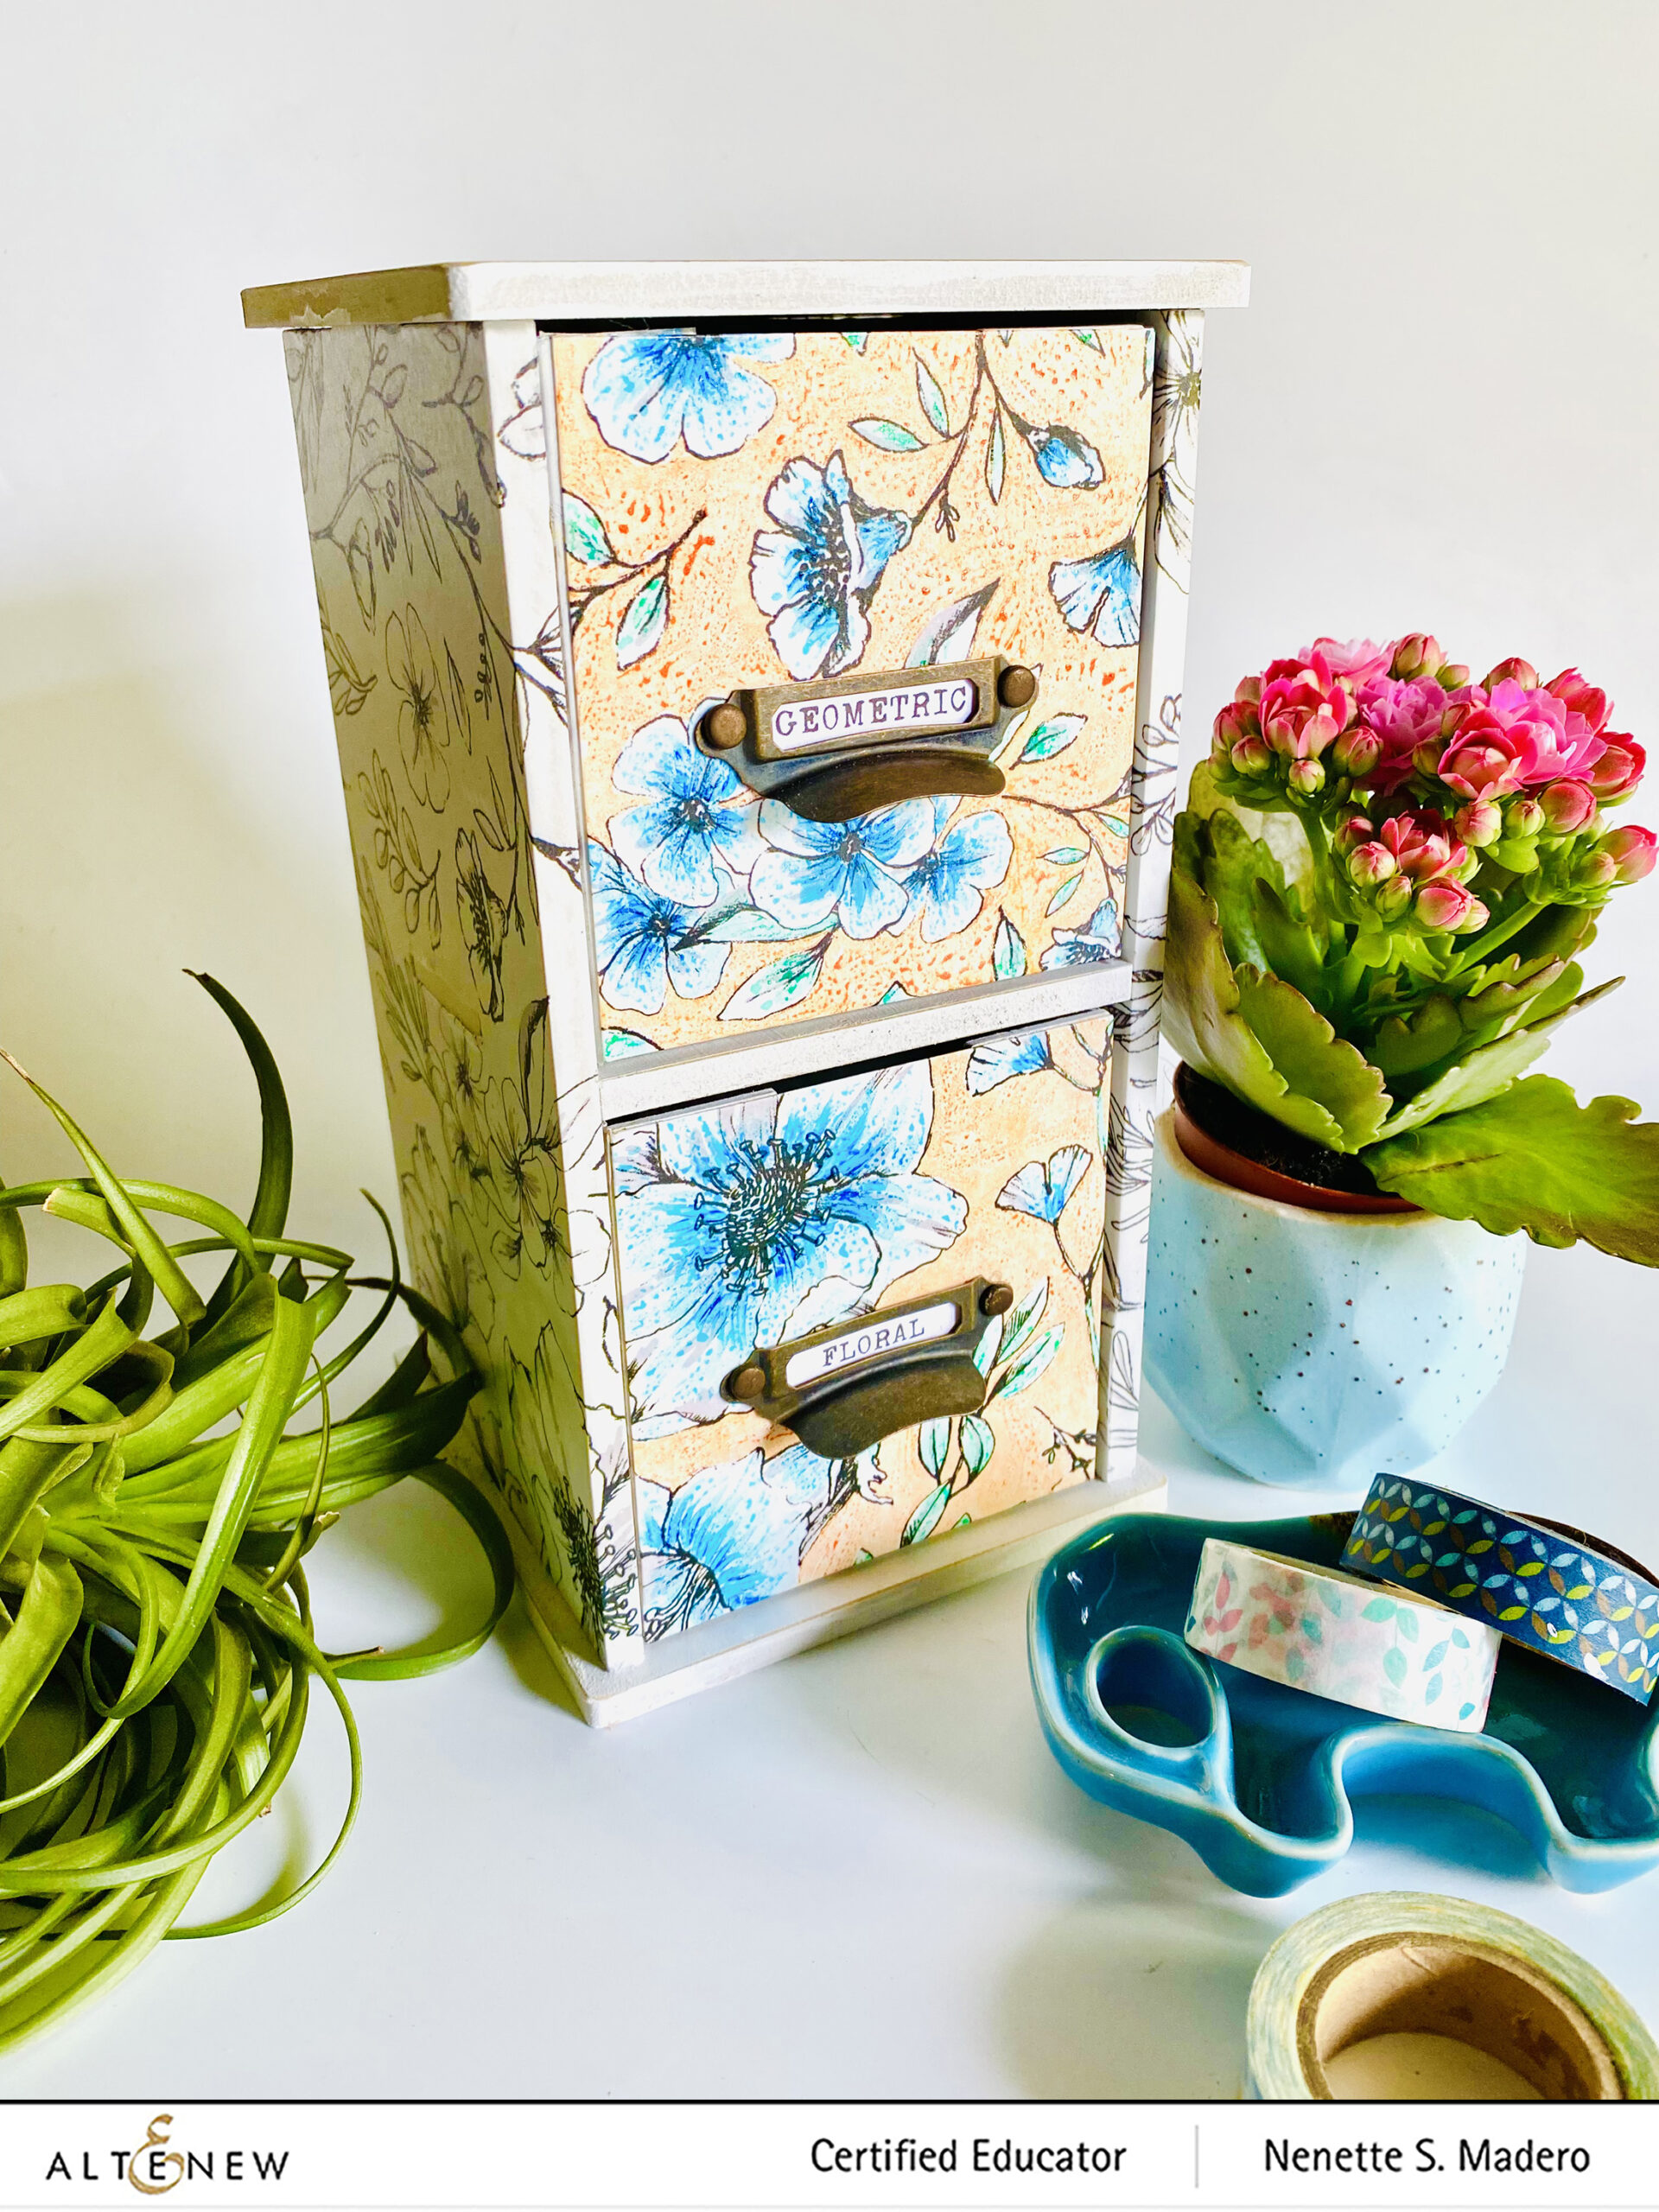
WASHI TAPE ORGANIZER


MATERIALS: BOTANICAL RHAPSODY WIDE WASHI TAPE, KAISERCRAFT 2 DRAWER UNIT, TIM HOLTZ LABEL PULLS, TOMBOW MONO LIQUID GLUE, DISTRESS GLAZE, WHITE ACRYLIC PAINT, COPIC MARKERS

STEPS:

  1. Paint the entire surface of the drawer units with white acrylic paint.
  2. Cover the sides with washi tape.
  3. Measure the front of the drawer and cut out Neenah Solar white with the same measurement as the front of the drawer.
  4. Cover this with washi tape and color using Copic markers.
  5. Adhere this to the front of the drawer with glue.
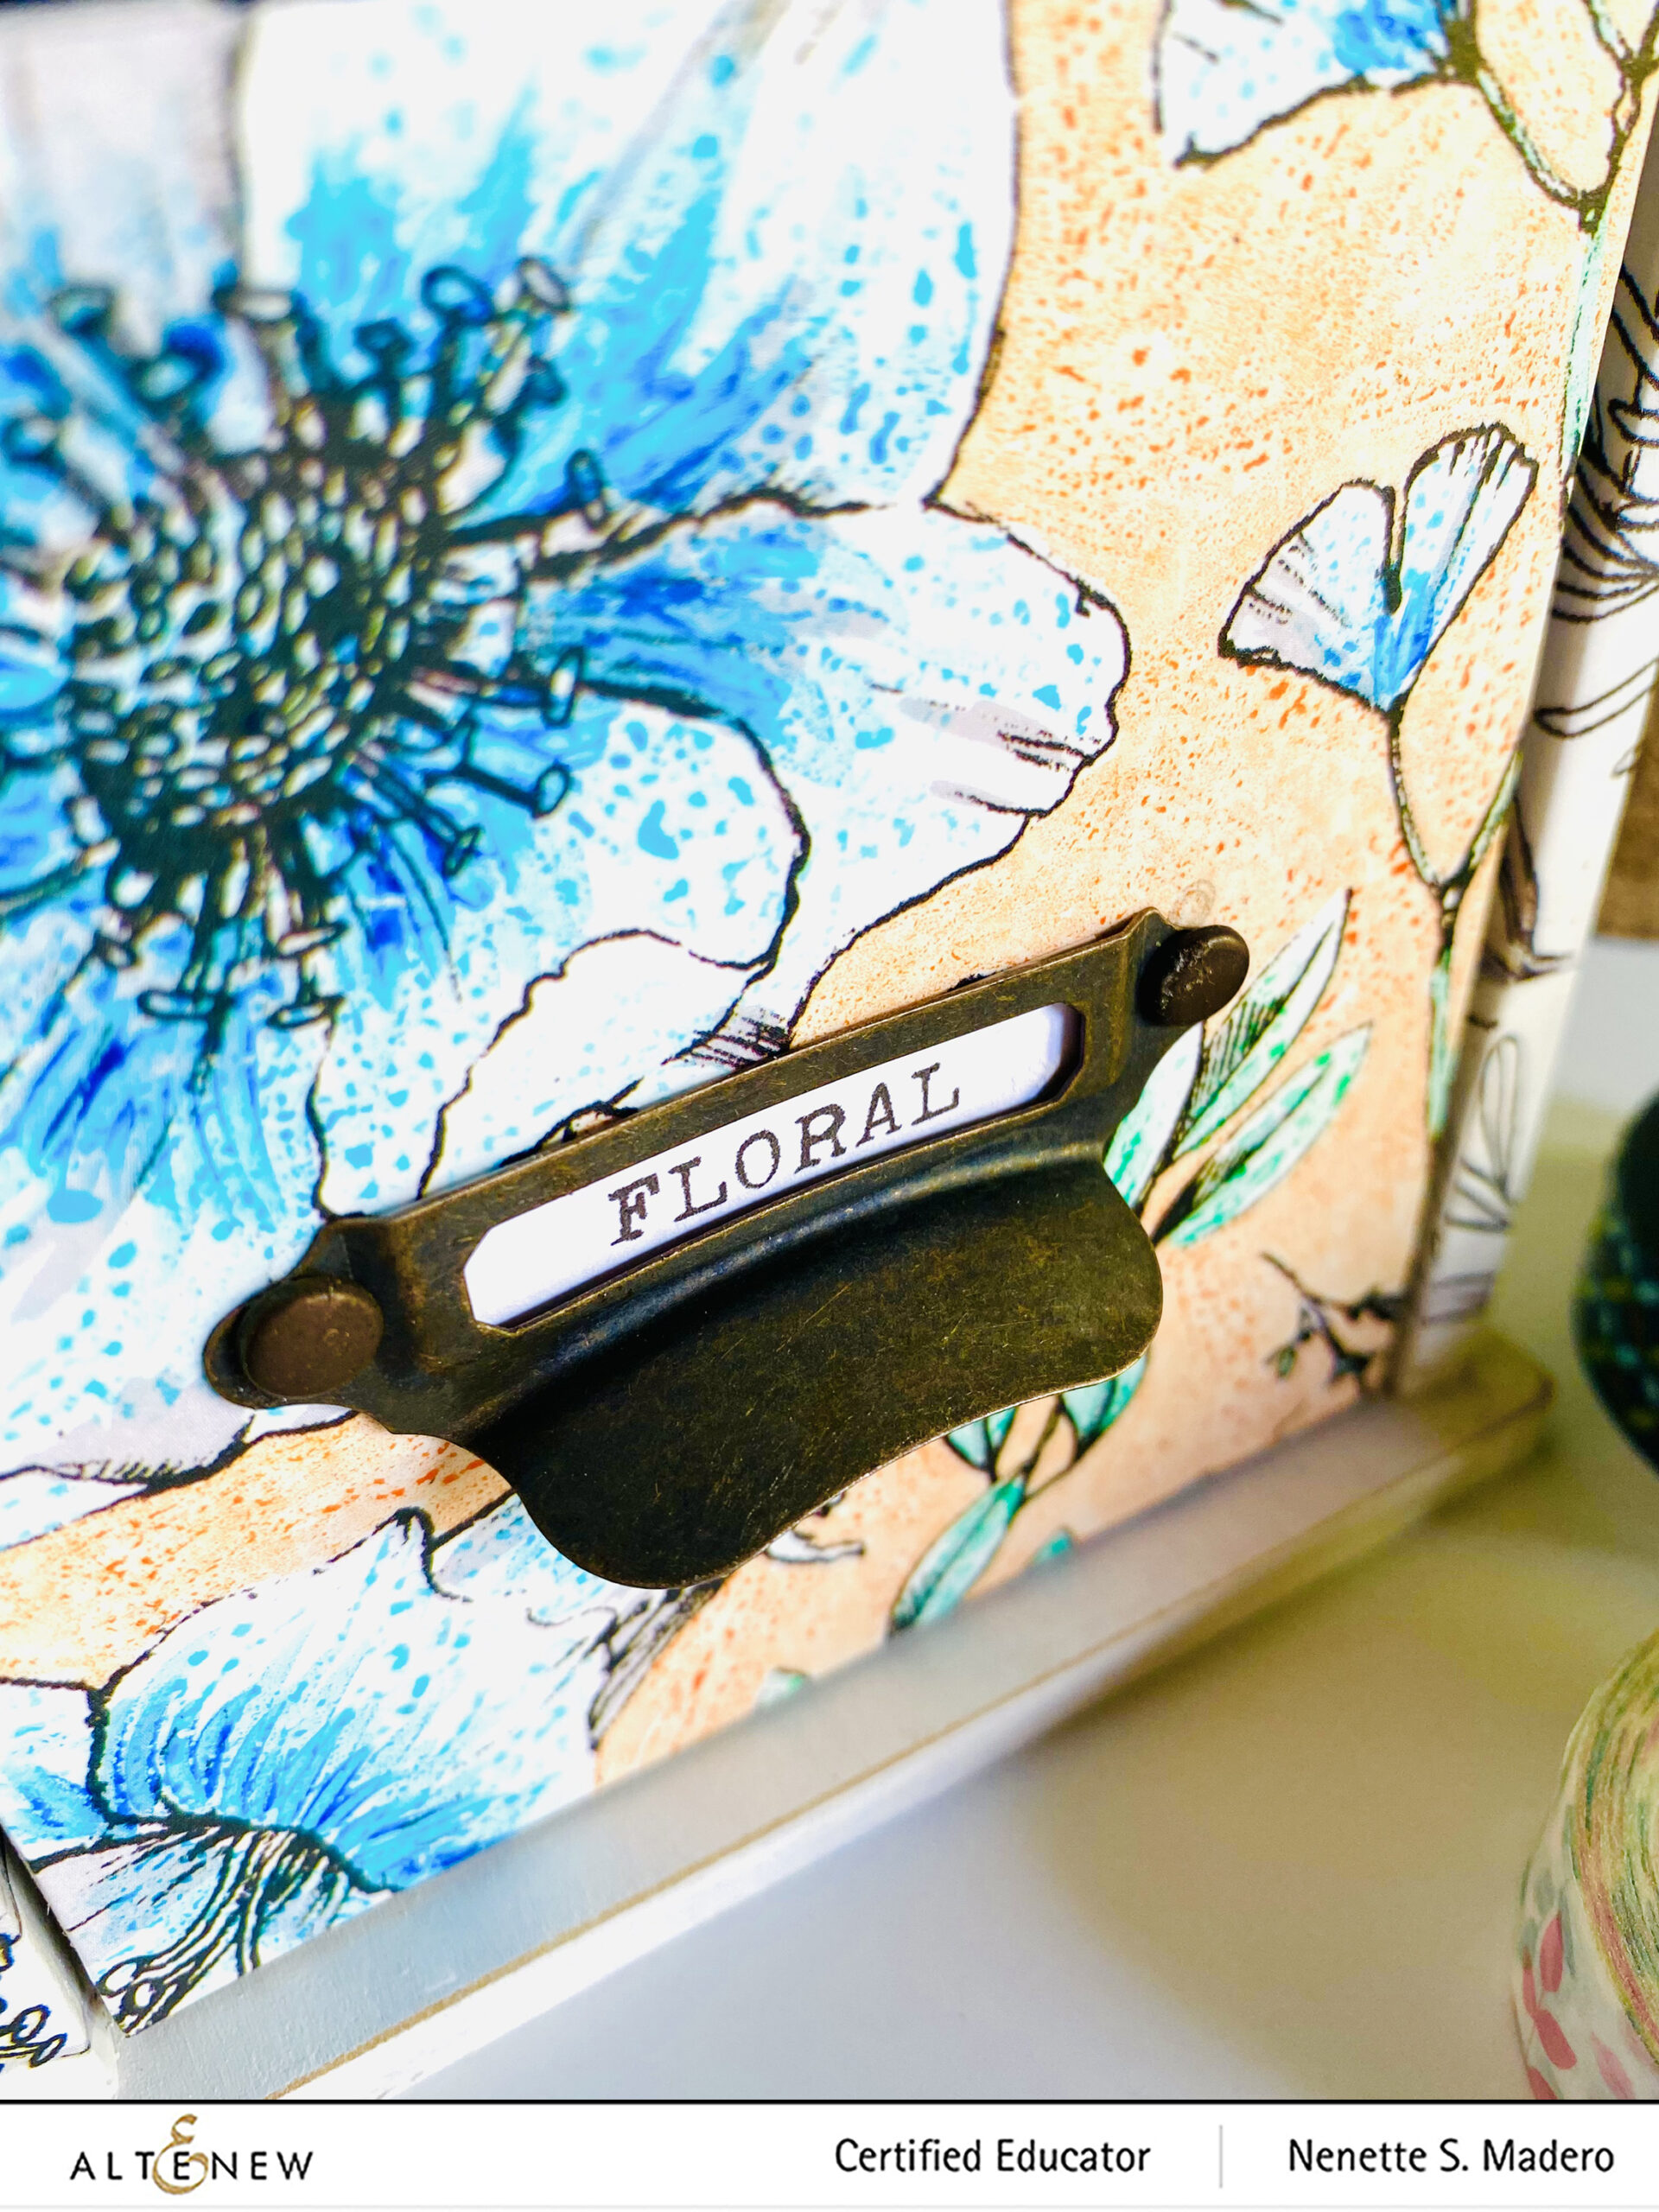
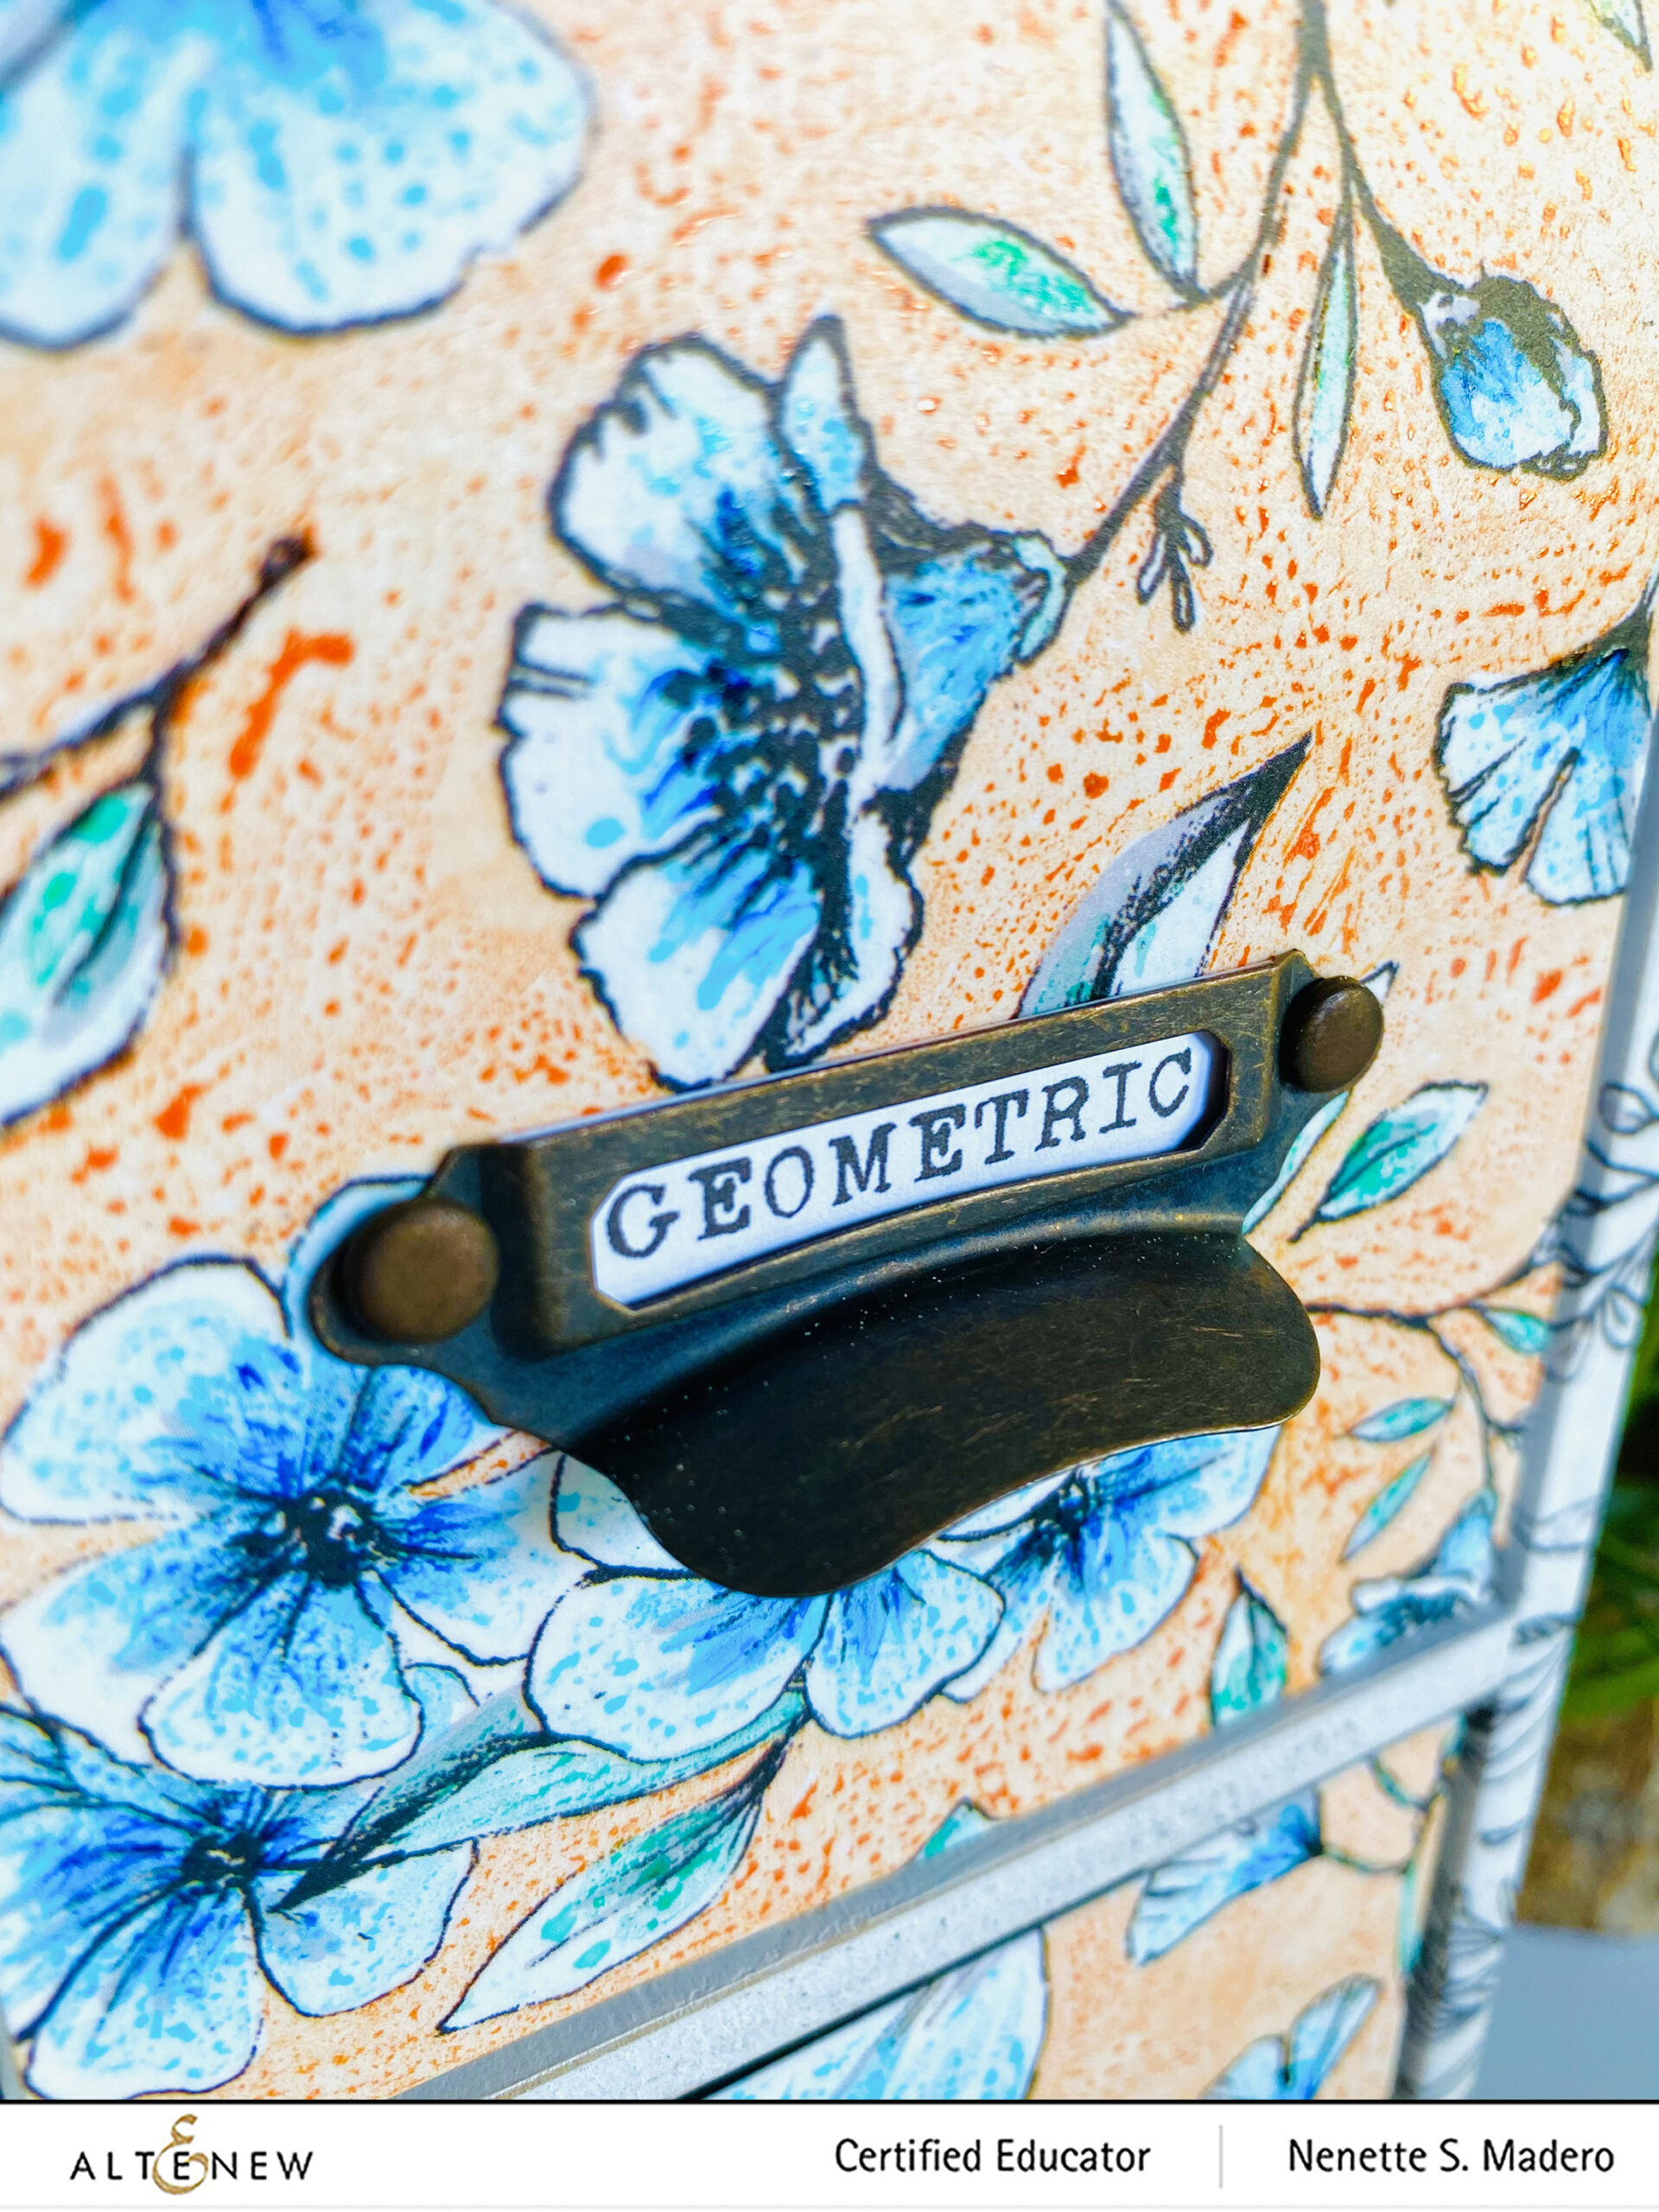
  6. Attach the label pulls.

I had fun making this cute organizer. I was planning to use this to organize some of my washi tapes but when my daughter saw it, she asked if she can use it as storage for her jewelry. 🙂 I colored the Botanical Rhapsody washi on the cover of the drawers only for added contrast to the black and white print. Somehow, the alcohol inks beaded up in certain areas of the tape which just added more dimension. I love it when materials react a certain way unexpectedly. When the surfaces were dry, I sealed the colored portion with Distress Glaze.


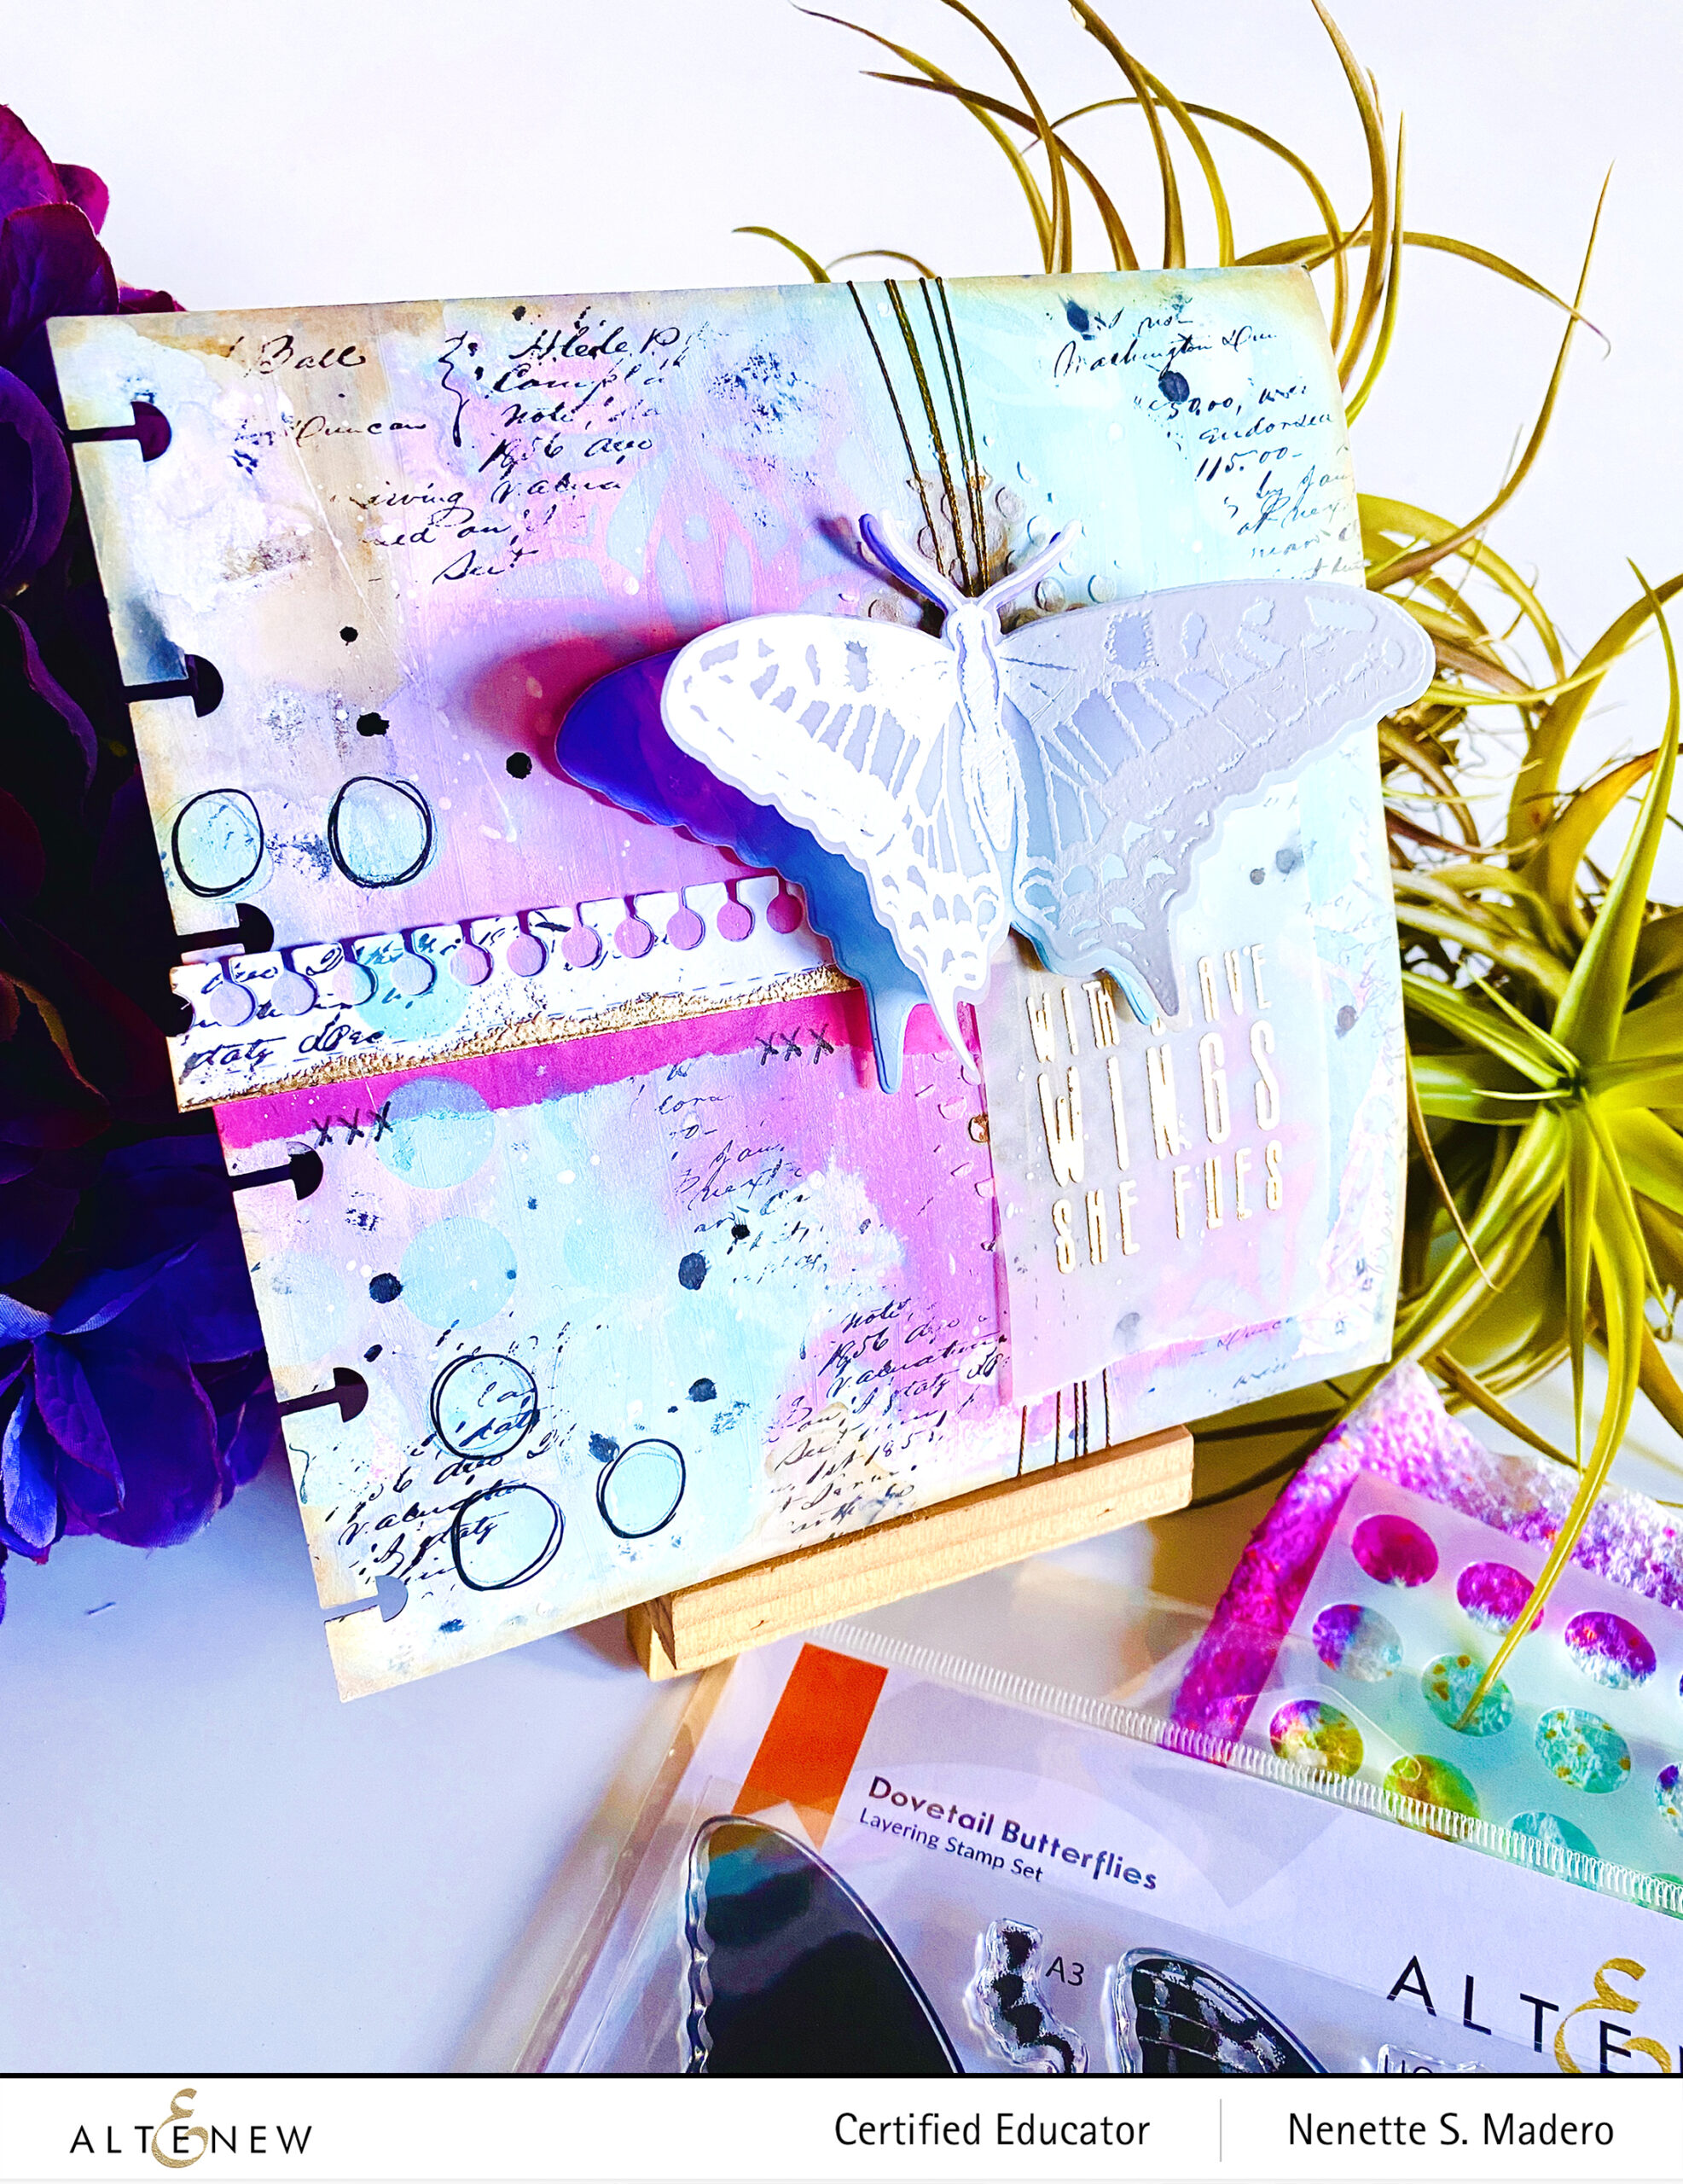
ART JOURNAL


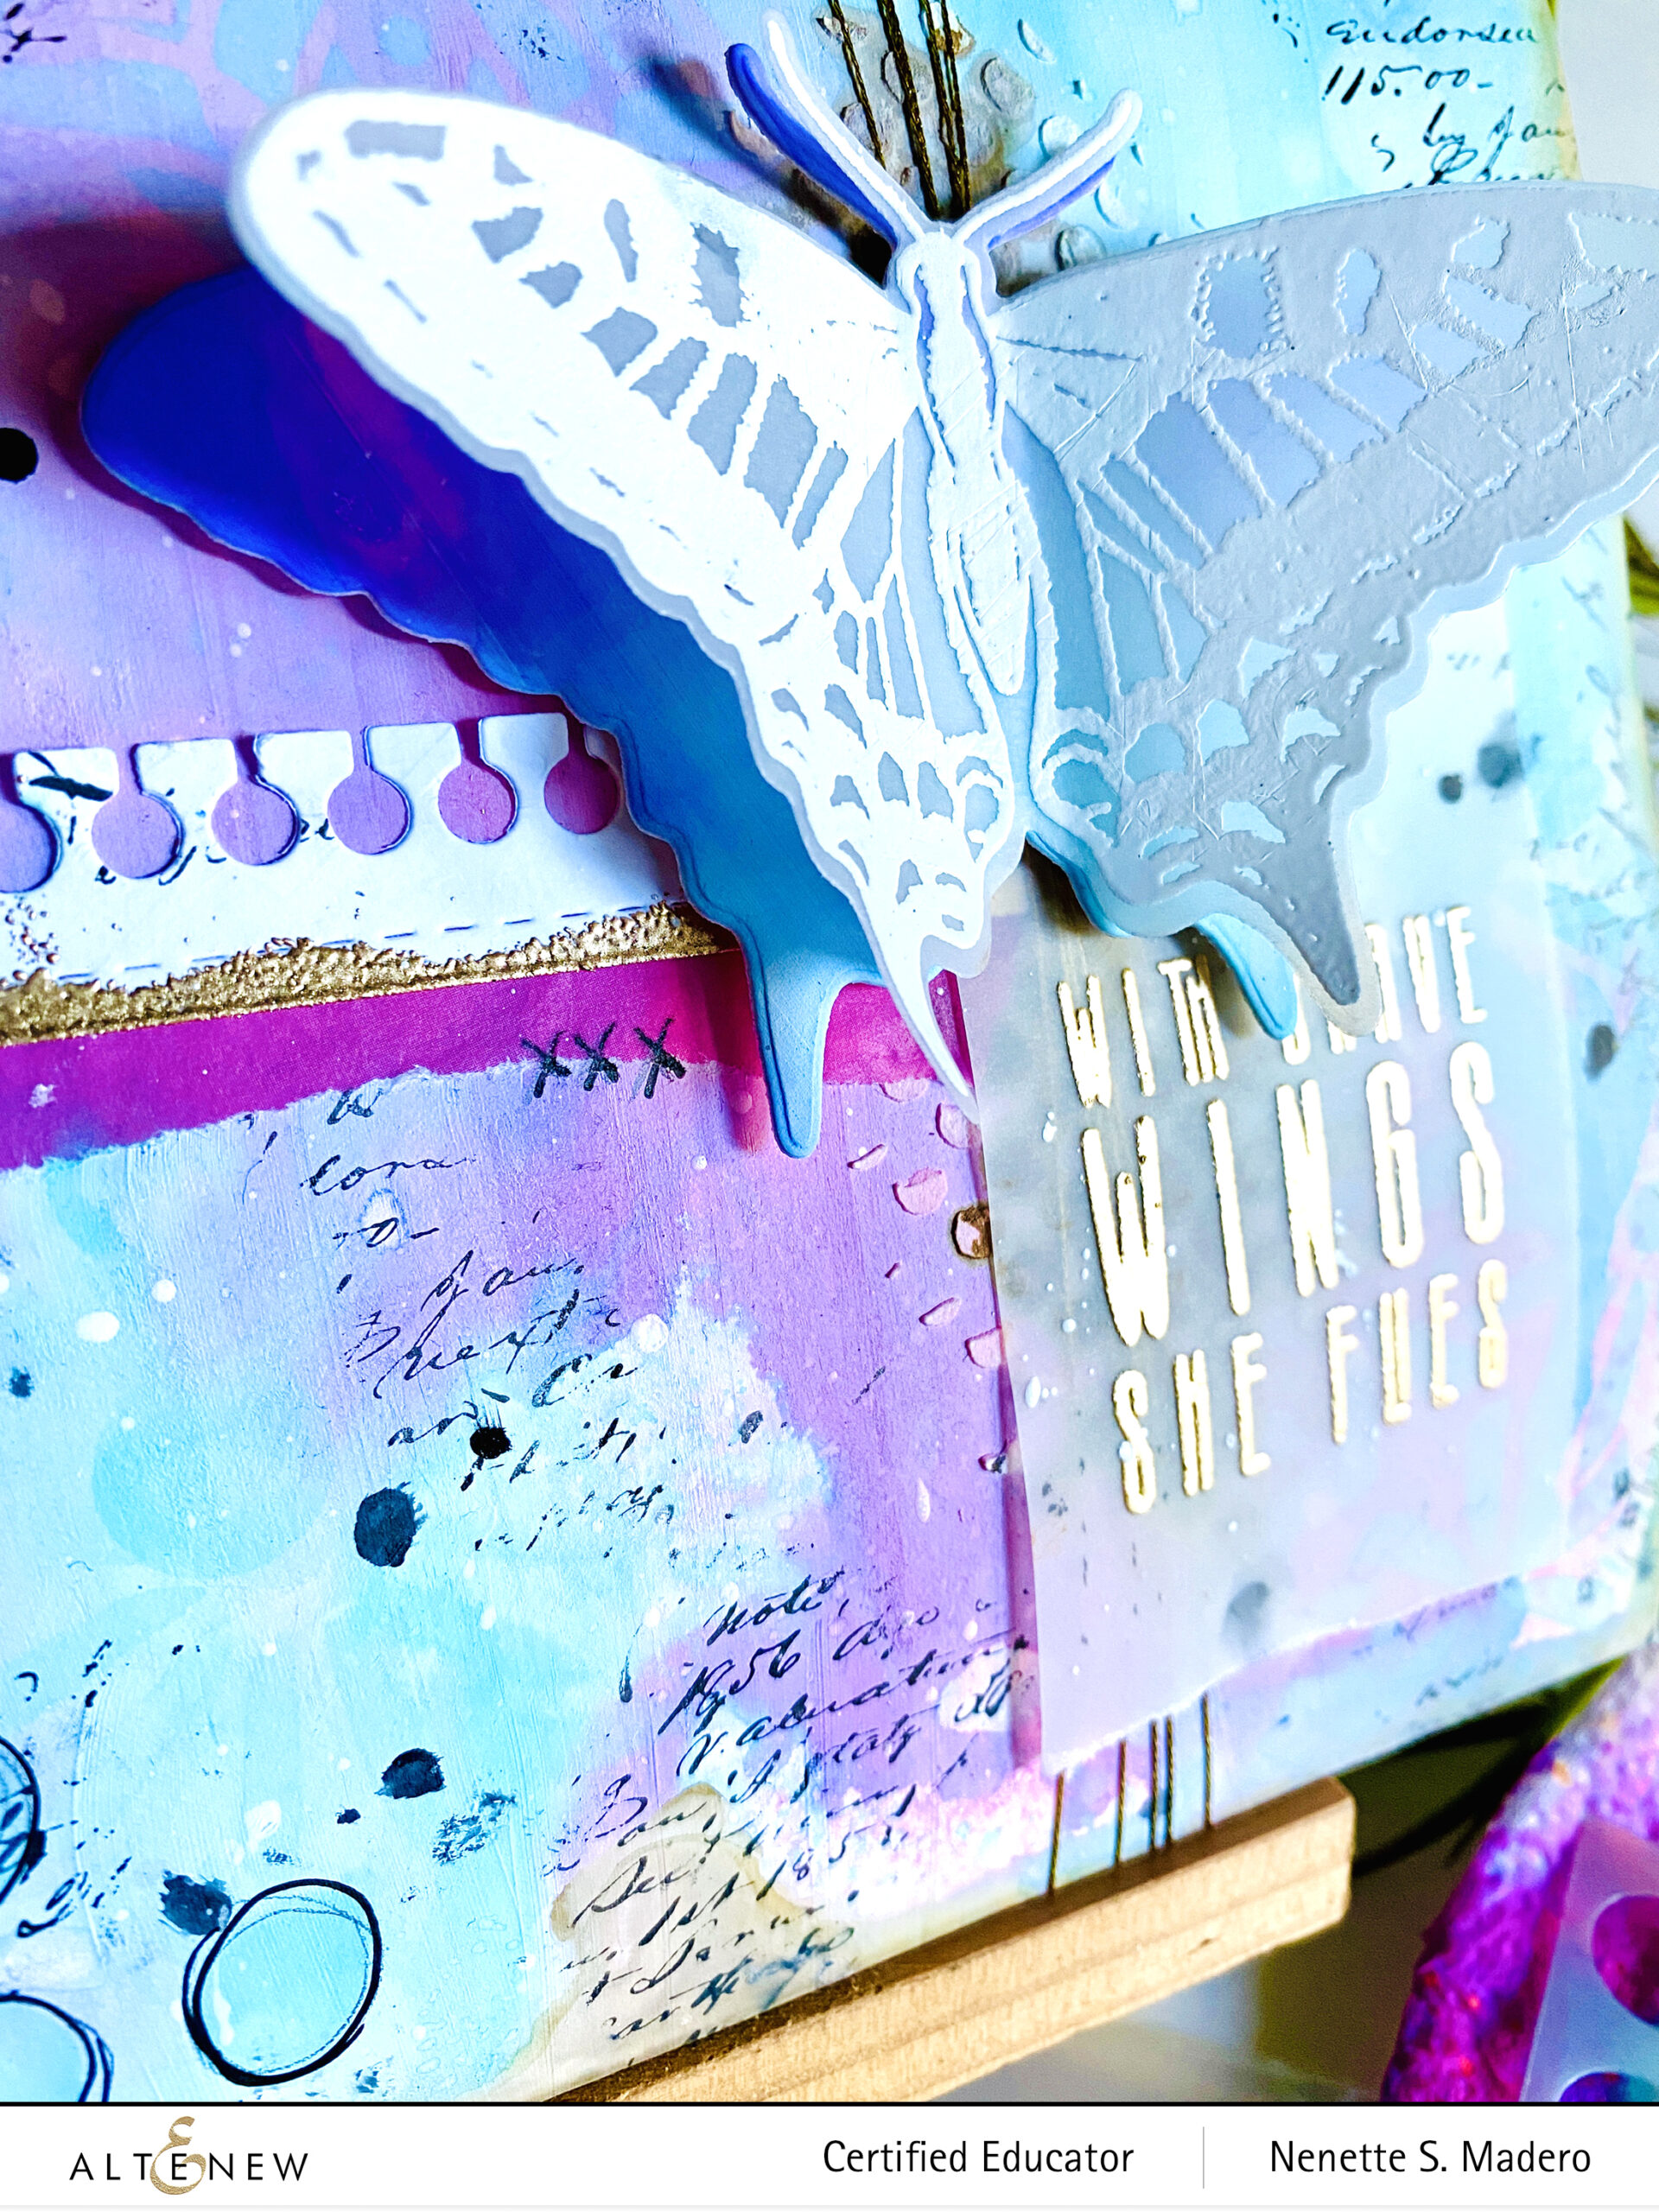
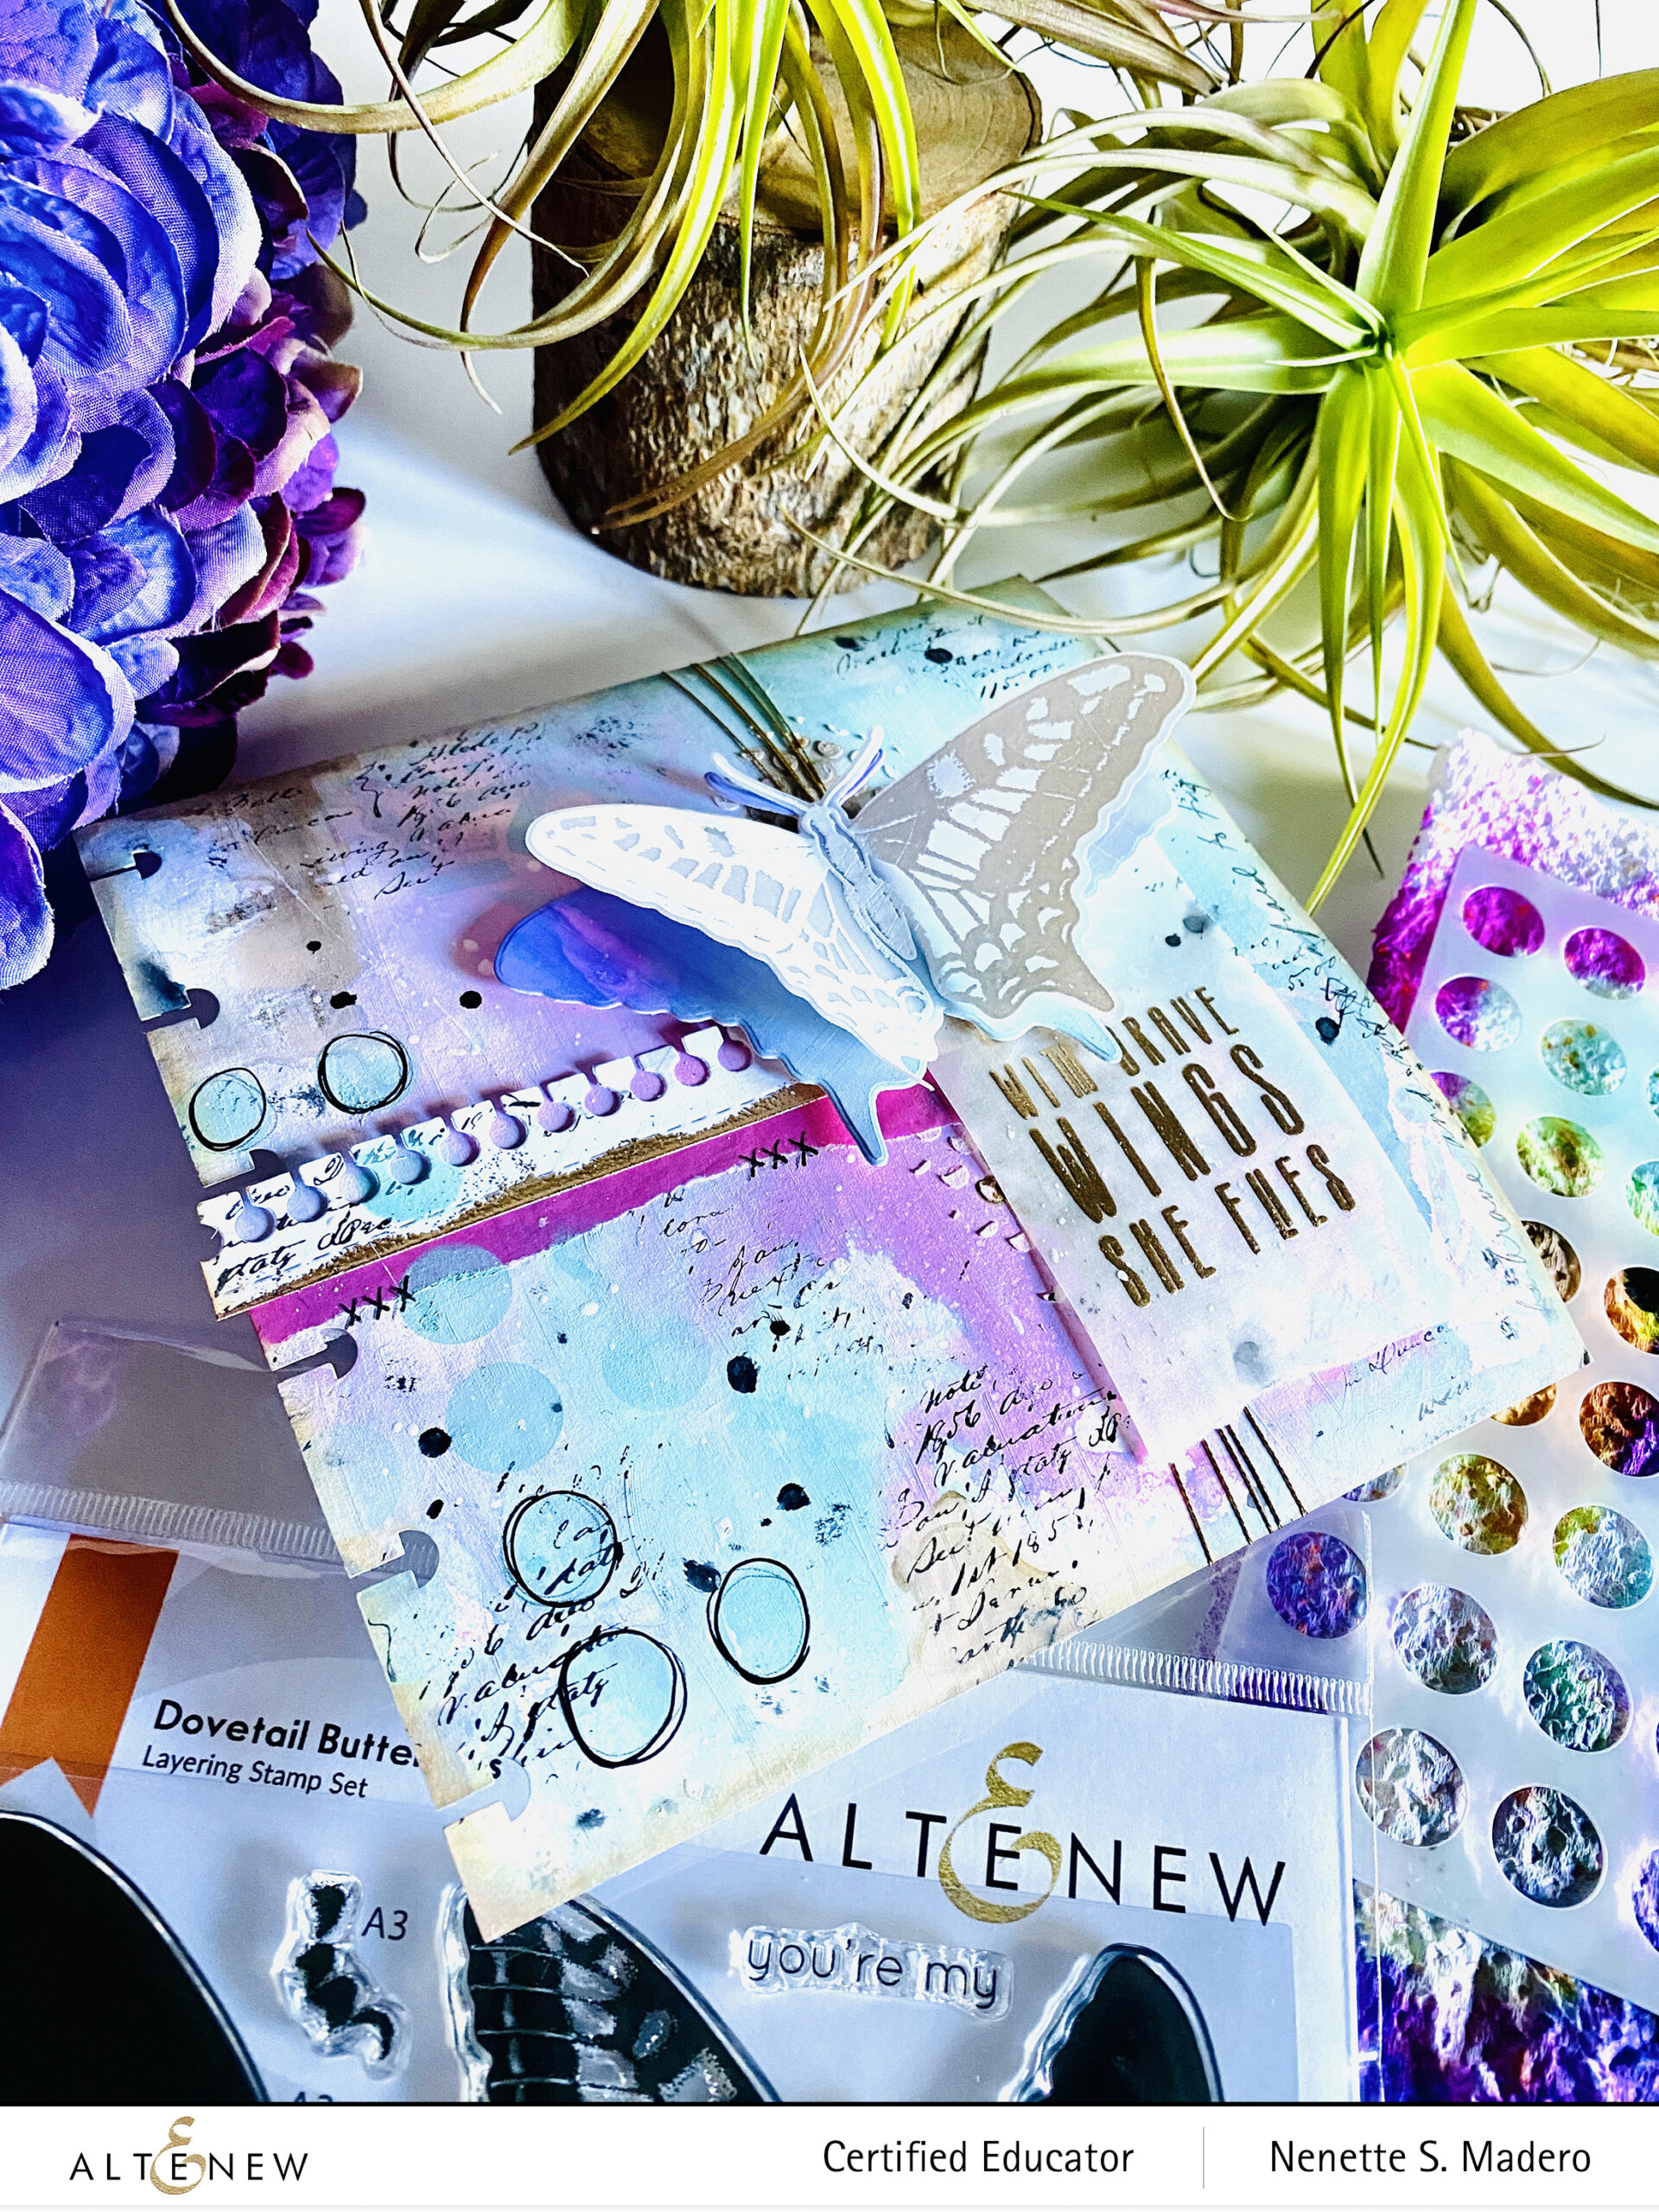
MATERIALS: STAMPS- DOVETAIL BUTTERFLIES, BLOCK SENTIMENTS, STAMPERS ANONYMOUS LEDGER SCRIPT DIES- CREATIVE EDGES: NOTEBOOK DIE, DOVETAIL BUTTERFLIES DIE, STENCILS- ALTENEW BUBBLE WRAP, FEELING DOTTY, CARABELLE STUDIO VINTAGE WALLPAPER #8, ALTENEW METALLIC THREAD, INKS- VERSAMARK INK, VERSAFINE ONYX BLACK, DISTRESS OXIDES, DISTRESS STAIN-BLACK SOOT, KITCH FLAMINGO, SALVAGED PATINA, VINTAGE PHOTO, WILTED VIOLET DISTRESS OXIDE, ROSE PETAL WASHI TAPE, EMBOSSING PASTE, LIQUITEX GESSO, FOAM SQUARES, TOMOBOW MONO MULTI LIQUID GLUE

STEPS:

  1. Apply gesso to the entire surface of the journal page and allow to dry.
  2. Use different distress stains and oxide sprays and add water. Tilt the page to allow pigments to move. Dry with a craft tool.
  3. Add spatters of water using your hand.
  4. Create ghosting effect by using stencils and a baby wipe.
  5. Add patterns using the bubble wrap stencil and doodle around some of the circles with a permanent black pen.
  6. Add white and black splatters.
  7. Stamp and emboss the wings and the sentiment on vellum and emboss with Rose gold embossing powder.
  8. With a blending tool, create the base of the butterfly and glue the wings on it.
  9. Tie the gold metallic thread.
  10. Die cut white paper using the Creative Edges notebook die.
  11. Add a strip of torn washi tape from the Rose Petal washi tape.
  12. Glue the notebook edge die cut on top.
  13. Stamp sentiments using Versafine Onyx Black.
  14. Glue the sentiment and adhere the butterfly using foam squares.

“To practice any art, no matter how well or badly, is a way to make your soul grow. So do it.”

Kurt Vonnegut

I’ve been wanting to start an art journal but I haven’t because I was fearful of the outcome–until now. I’ve been so inspired by Tiffany Solorio and Tania Ahmed with all their beautiful mixed media work so I took the plunge and went for it. Tania’s Altenew class, Demystifying Mixed Media, helped me a lot in freeing myself from the fear of a blank page. She talked about composition, color theory and so much more. I have a feeling the more I practice, the less worried about the outcome I will be. The sentiment is perfect– you just have to be brave to try, experiment and just let go!!!


PRIZES


$200 in total prizes! Altenew is giving away a $35 gift certificate to 2 lucky winners and a $20 gift certificate to 5 winners! Please leave a comment on the Altenew Card Blog and/or each designer’s blog post on the blog hop list below by 07/04/2021 for a chance to win. 

There’s MORE! What’s a hop without YOU?! We have included an Inlinkz at the Altenew blog for you to enter your gorgeous Altenew “Anything But A Card” creations. We will pick 2 of our favorite handmade creations from those who joined the linky party and they will each receive a $15 Altenew gift certificate!

Altenew will draw 7 random winners from the comments left on each stop of this blog hop and announce the winners on the Altenew Winners Page on 07/06/2021.

I hope you liked the Anything-But-A-Card projects I made for this hop. The next stop is Roteja Galvan . I love hearing from you so I hope you’ll leave a comment and let me know which project you liked the most. This way, you’ll get a chance to win some fab prizes from Altenew. ❤️ It would be nice if you can follow me too on Instagram @mylittleatticstudio. I post all of my works there. Thanks so much for dropping by!!! Stay safe everyone and happy crafting!

COMPLETE BLOG HOP LIST


Altenew Card Blog 

Terri Marie Koszler 

Neha Aggarwal 

Bridget Casey 

Tenia Nelson 

Nandini Karmarkar 

Teri Stokes 

Rachael Shedeed 

Fiona Duff 

Eva Bussom  

Nenette S. Madero 

Roteja Galvan 

Karen Brown 

Sandra Woodson 

Helen Kalb 

Maryam Sharara 

Penny Pynnonen 

Rosie Neustaedter 

Irina Fonina 

Rebecca Sogn  

Nancy Souza 

Virginia Lu