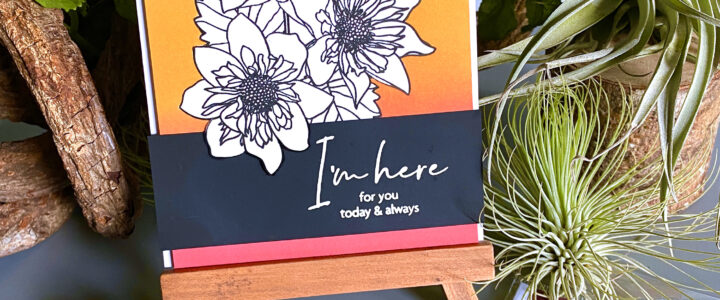
Altenew Paint-A-Flower: Fashion Monger Dahlia Release Blog Hop + Giveaway

Altenew Paint-A-Flower: Fashion Monger Dahlia Release Blog Hop + Giveaway

Welcome to my blog, friends! Today is the release of Altenew’s Paint-a-Flower: Fashion Monger Dahlia! Thanks so much, Daniel Diaz for relaying everyone over to my blog. For the complete list, you may start at Altenew’s card blog.
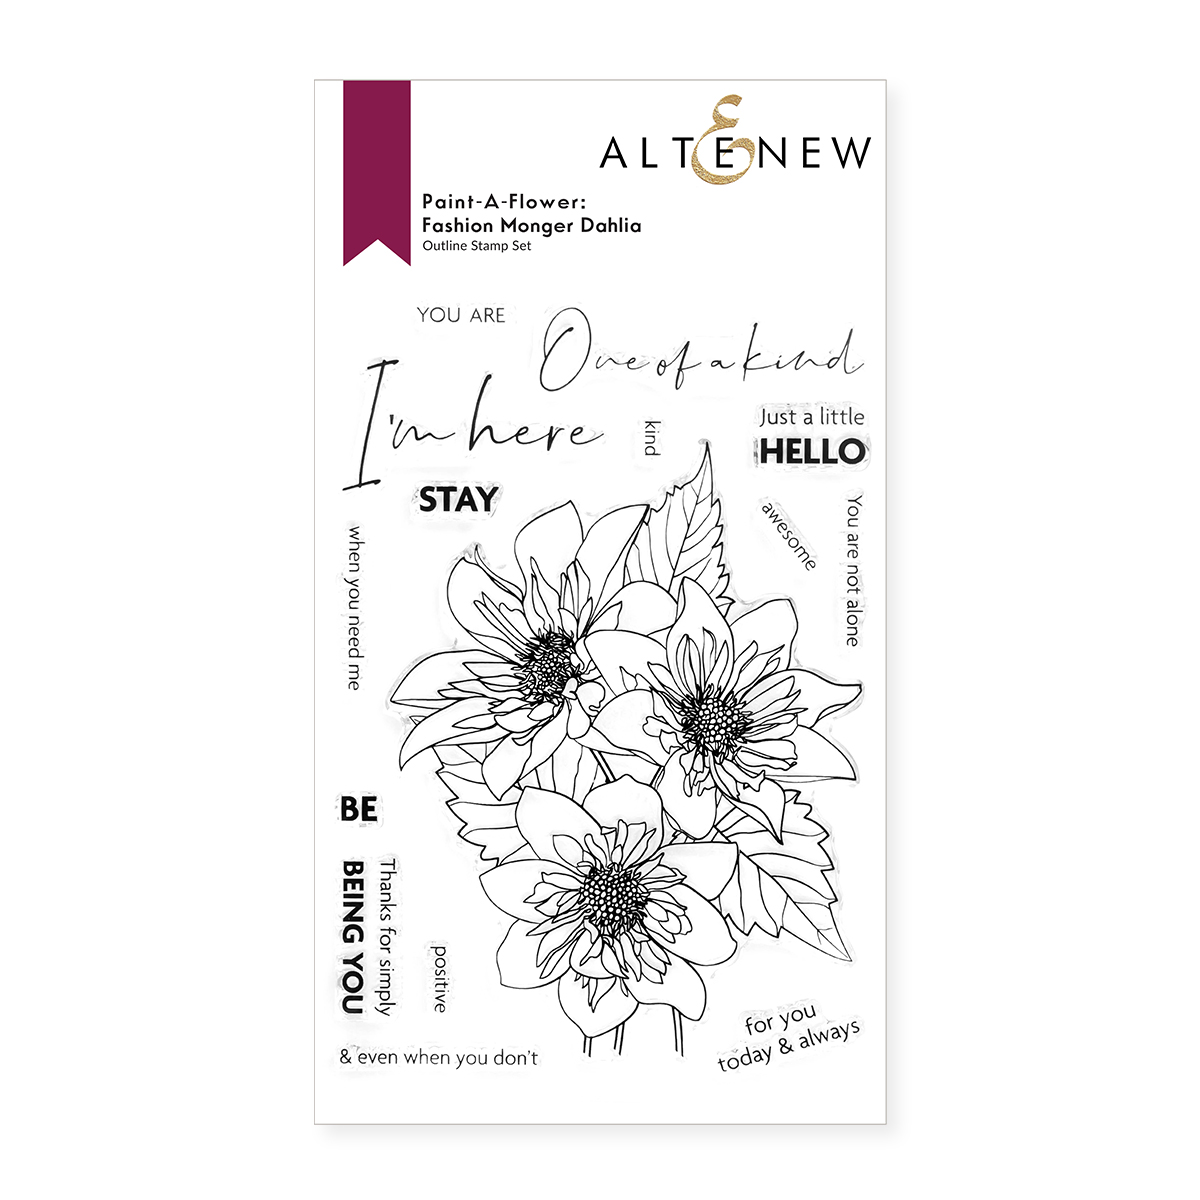
PAINT A FLOWER: FASHION MONGER DAHLIA STAMP AND DIE SET CAN BE FOUND HERE

Sometimes, the images from a stamp set have a lot of details that it seems a bit complicated to color because of the intricate designs. Below, I will show you 3 ways to easily color detailed stamp images.


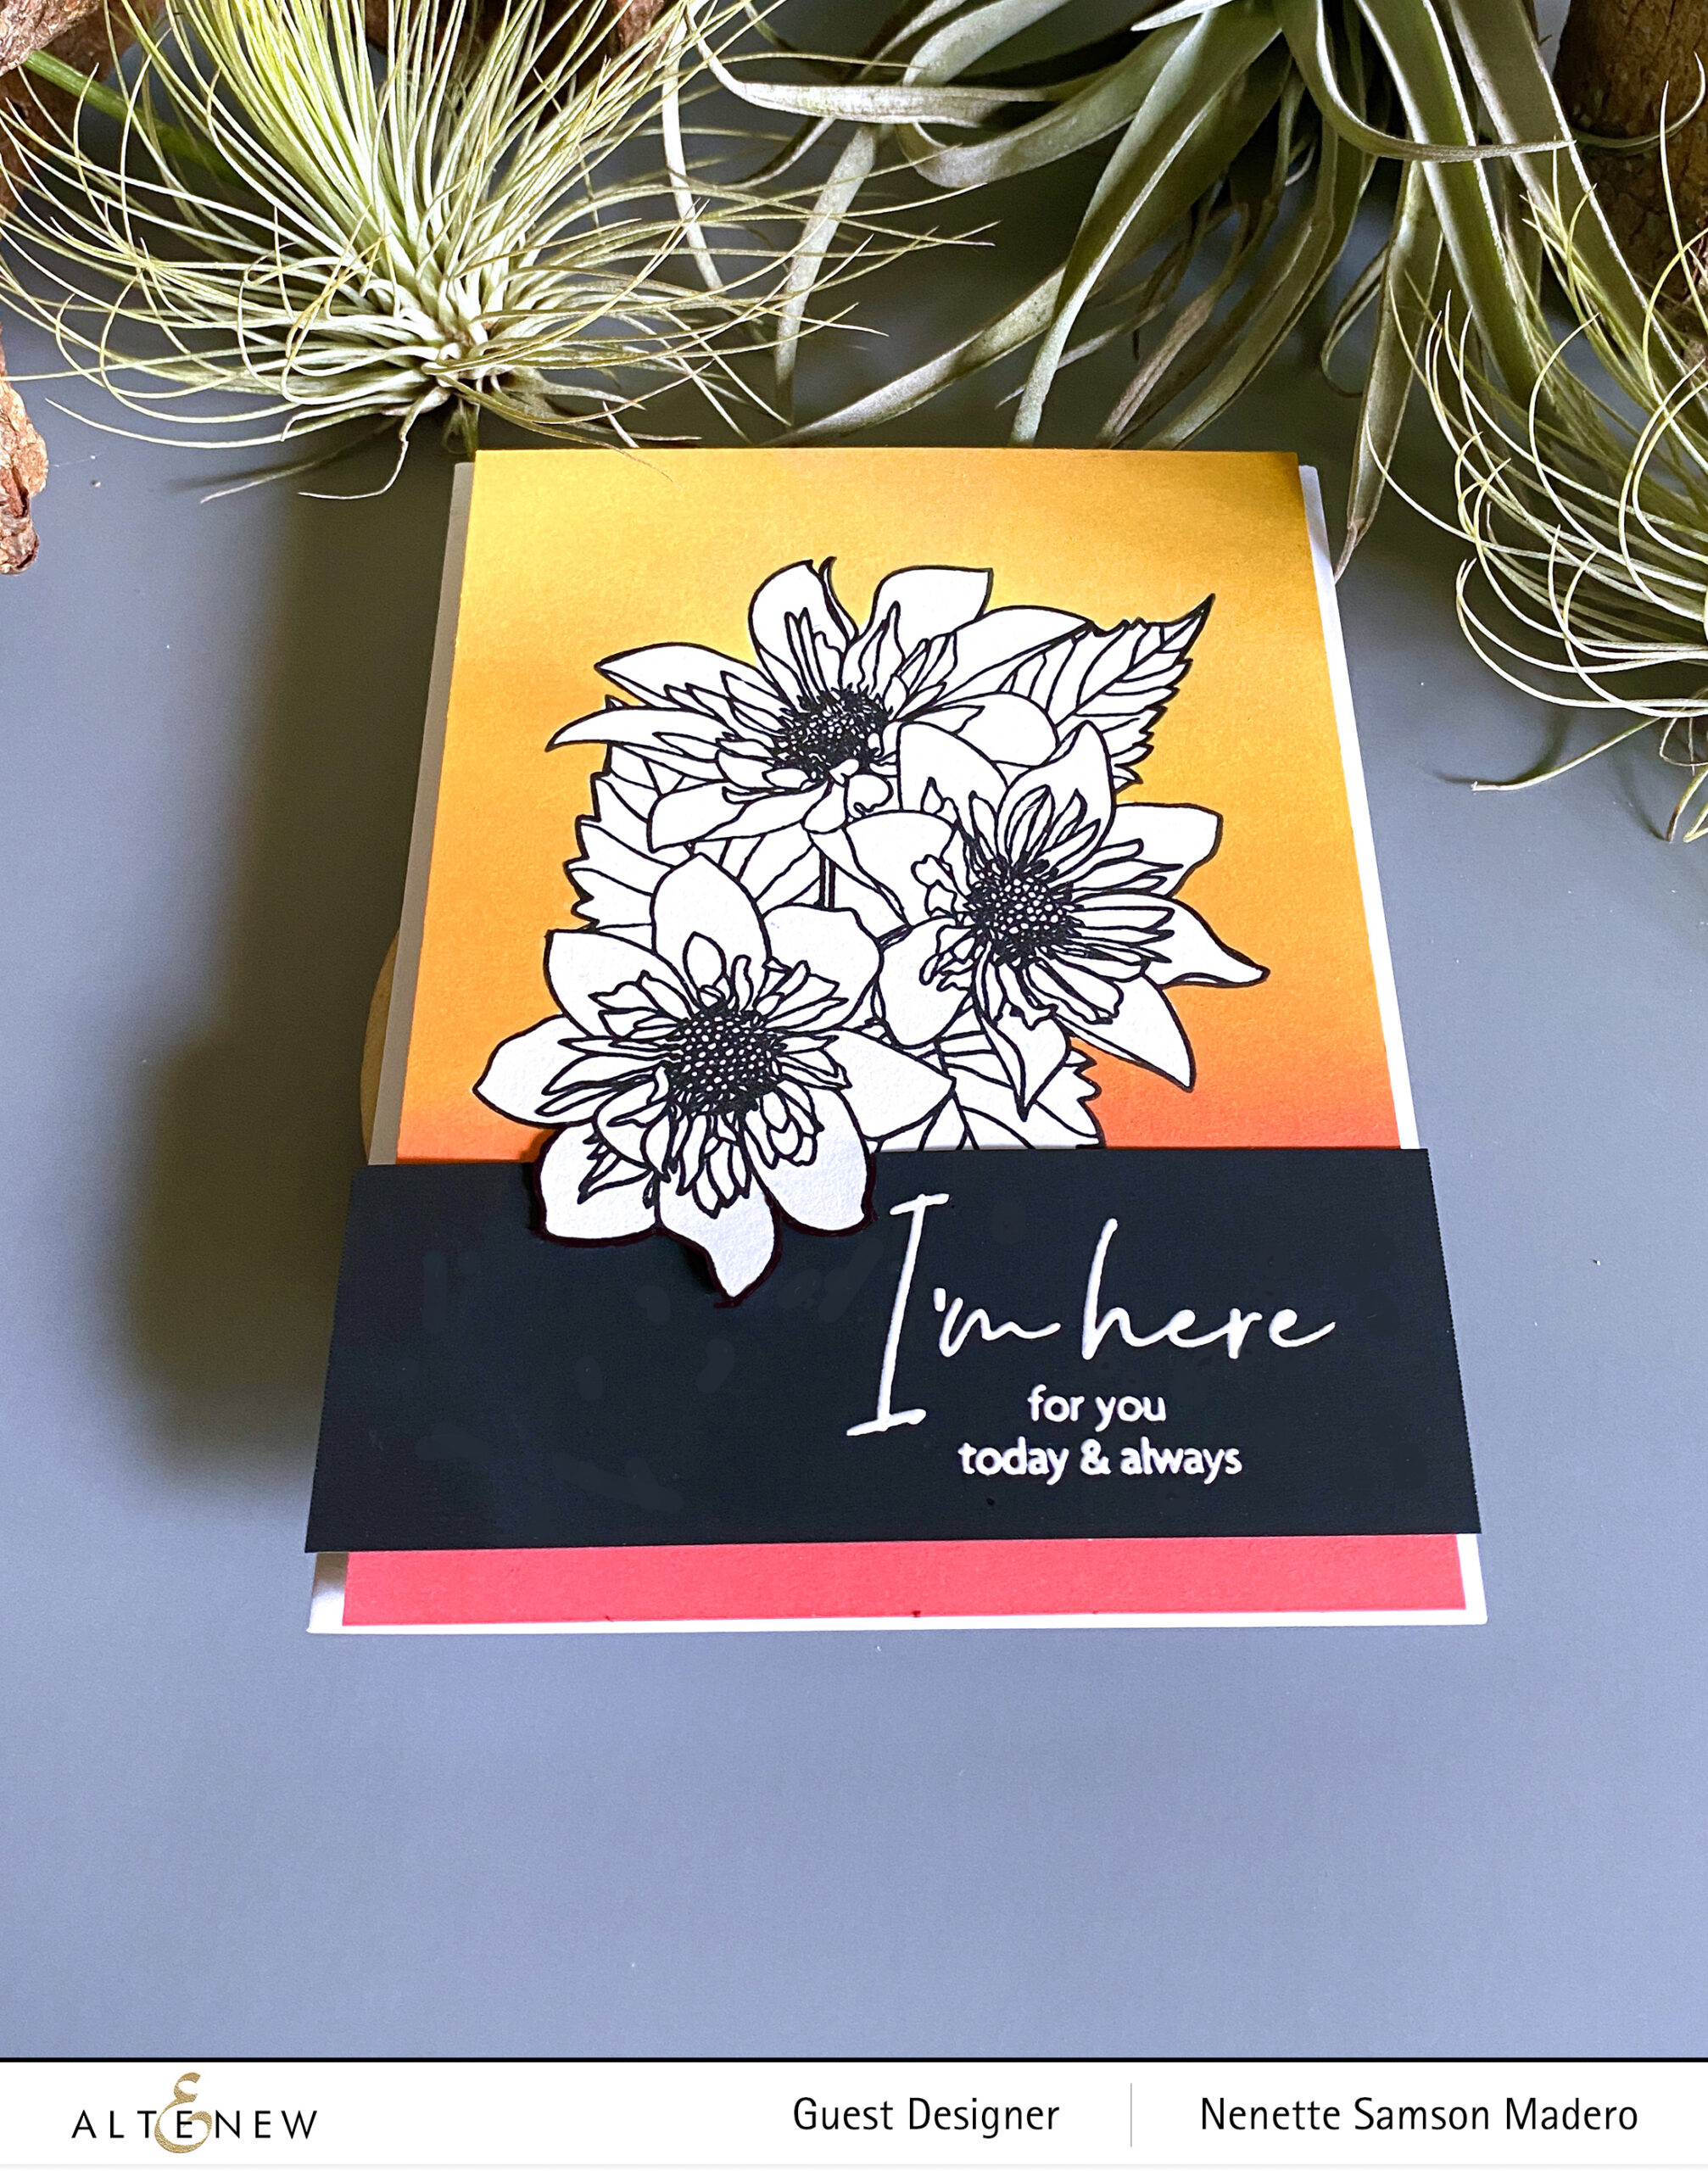
I’M HERE FOR YOU TODAY & ALWAYS
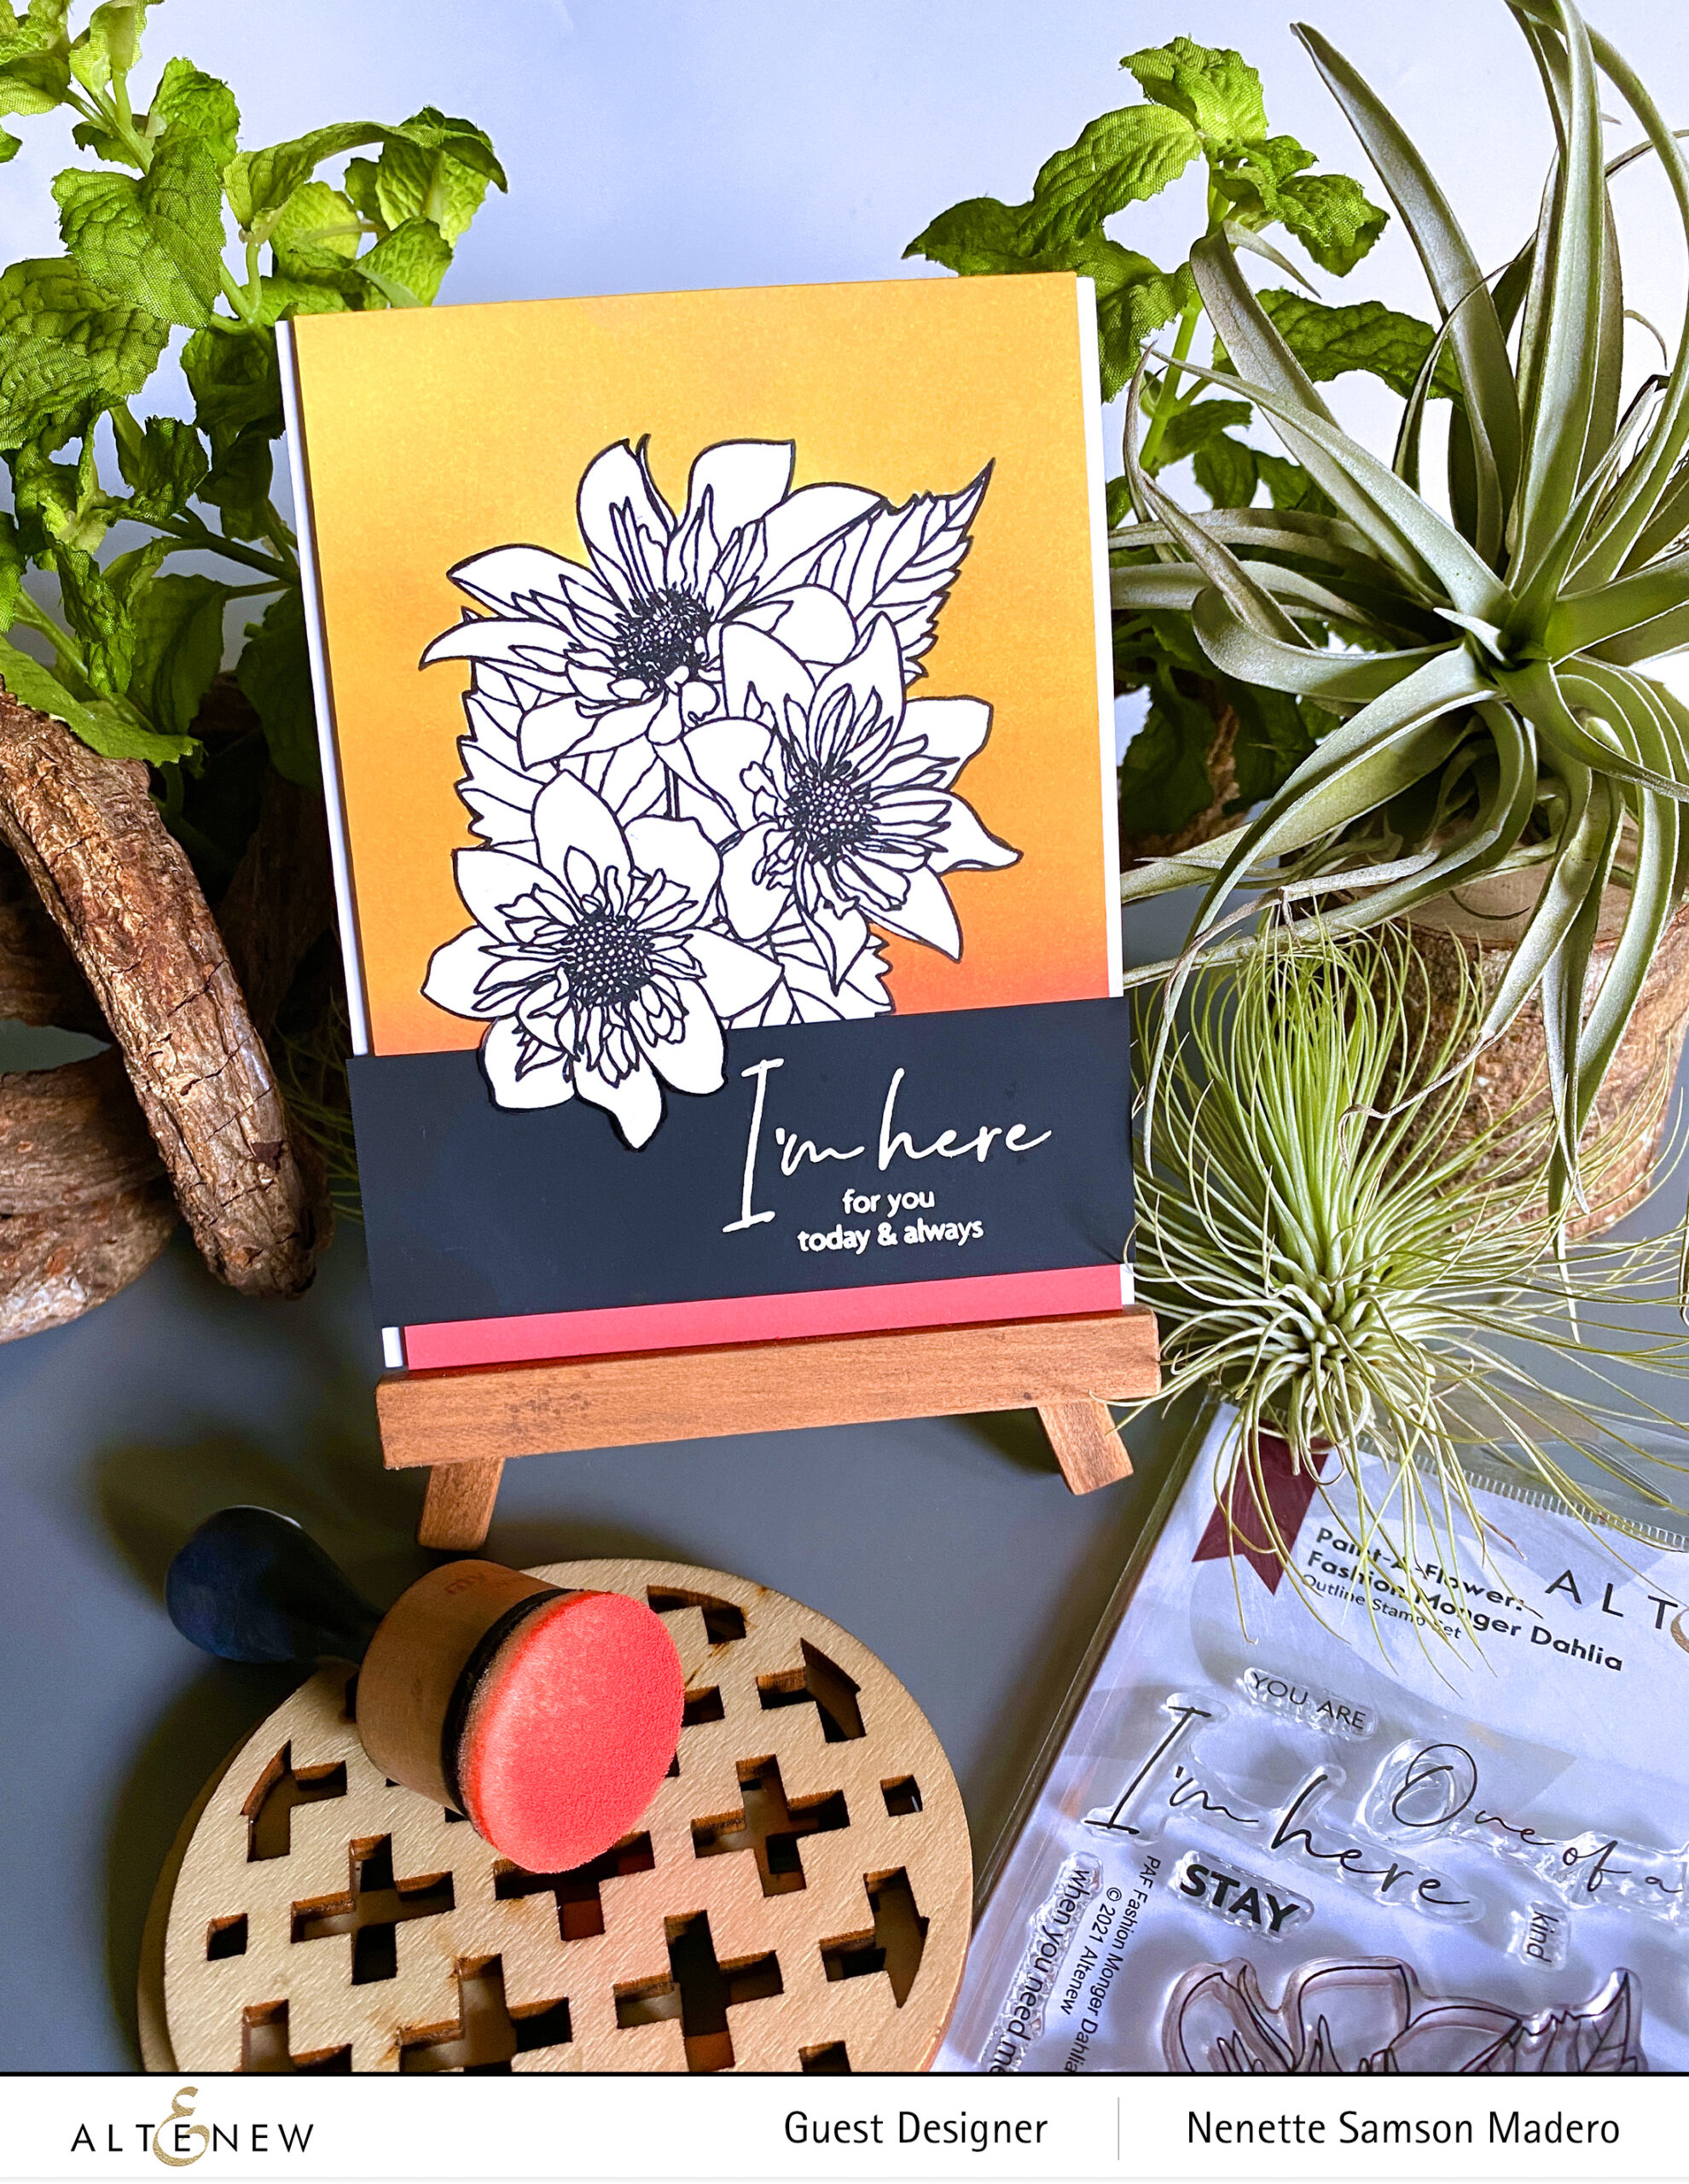

MATERIALS: PAF: FASHION MONGER DAHLIA, PURE WHITE EMBOSSING POWDER, OBSIDIAN INK, VERSAMARK INK, MASKING PAPER,DISTRESS OXIDE INKS- BARN DOOR, WILD HONEY, CARVED PUMPKIN, NEENAH SOLAR WHITE CARDSTOCK, BLACK CARDSTOCK, FOAM SQUARES AND ADHESIVE, EXACTO KNIFE

STEPS:

  • Stamp the image onto Neenah Solar white cardstock using Obsidian Ink
  • Stamp the image on masking paper and fussy cut the outline of the whole image
  • Line up the mask then add color to the background. Blend the oxide inks well
  • Stamp the sentiment using Versamark Ink on black cardstock then emboss with white embossing powder
  • With an Exacto knife, cut a portion of the outline of the flower so that you can tuck the sentiment underneath it for added interest
  • Assemble the card

Sometimes, when an image seems to be complicated to color, you can always choose to color the background and keep the image black and white. This way, the image stands out more. Since I love layering in my cards, I cut out a portion of the stamped image so that I can tuck in the sentiment strip underneath the petal. It just gives the card a different twist than just adding the sentiment on top of the image.


SO HAPPY FOR YOU
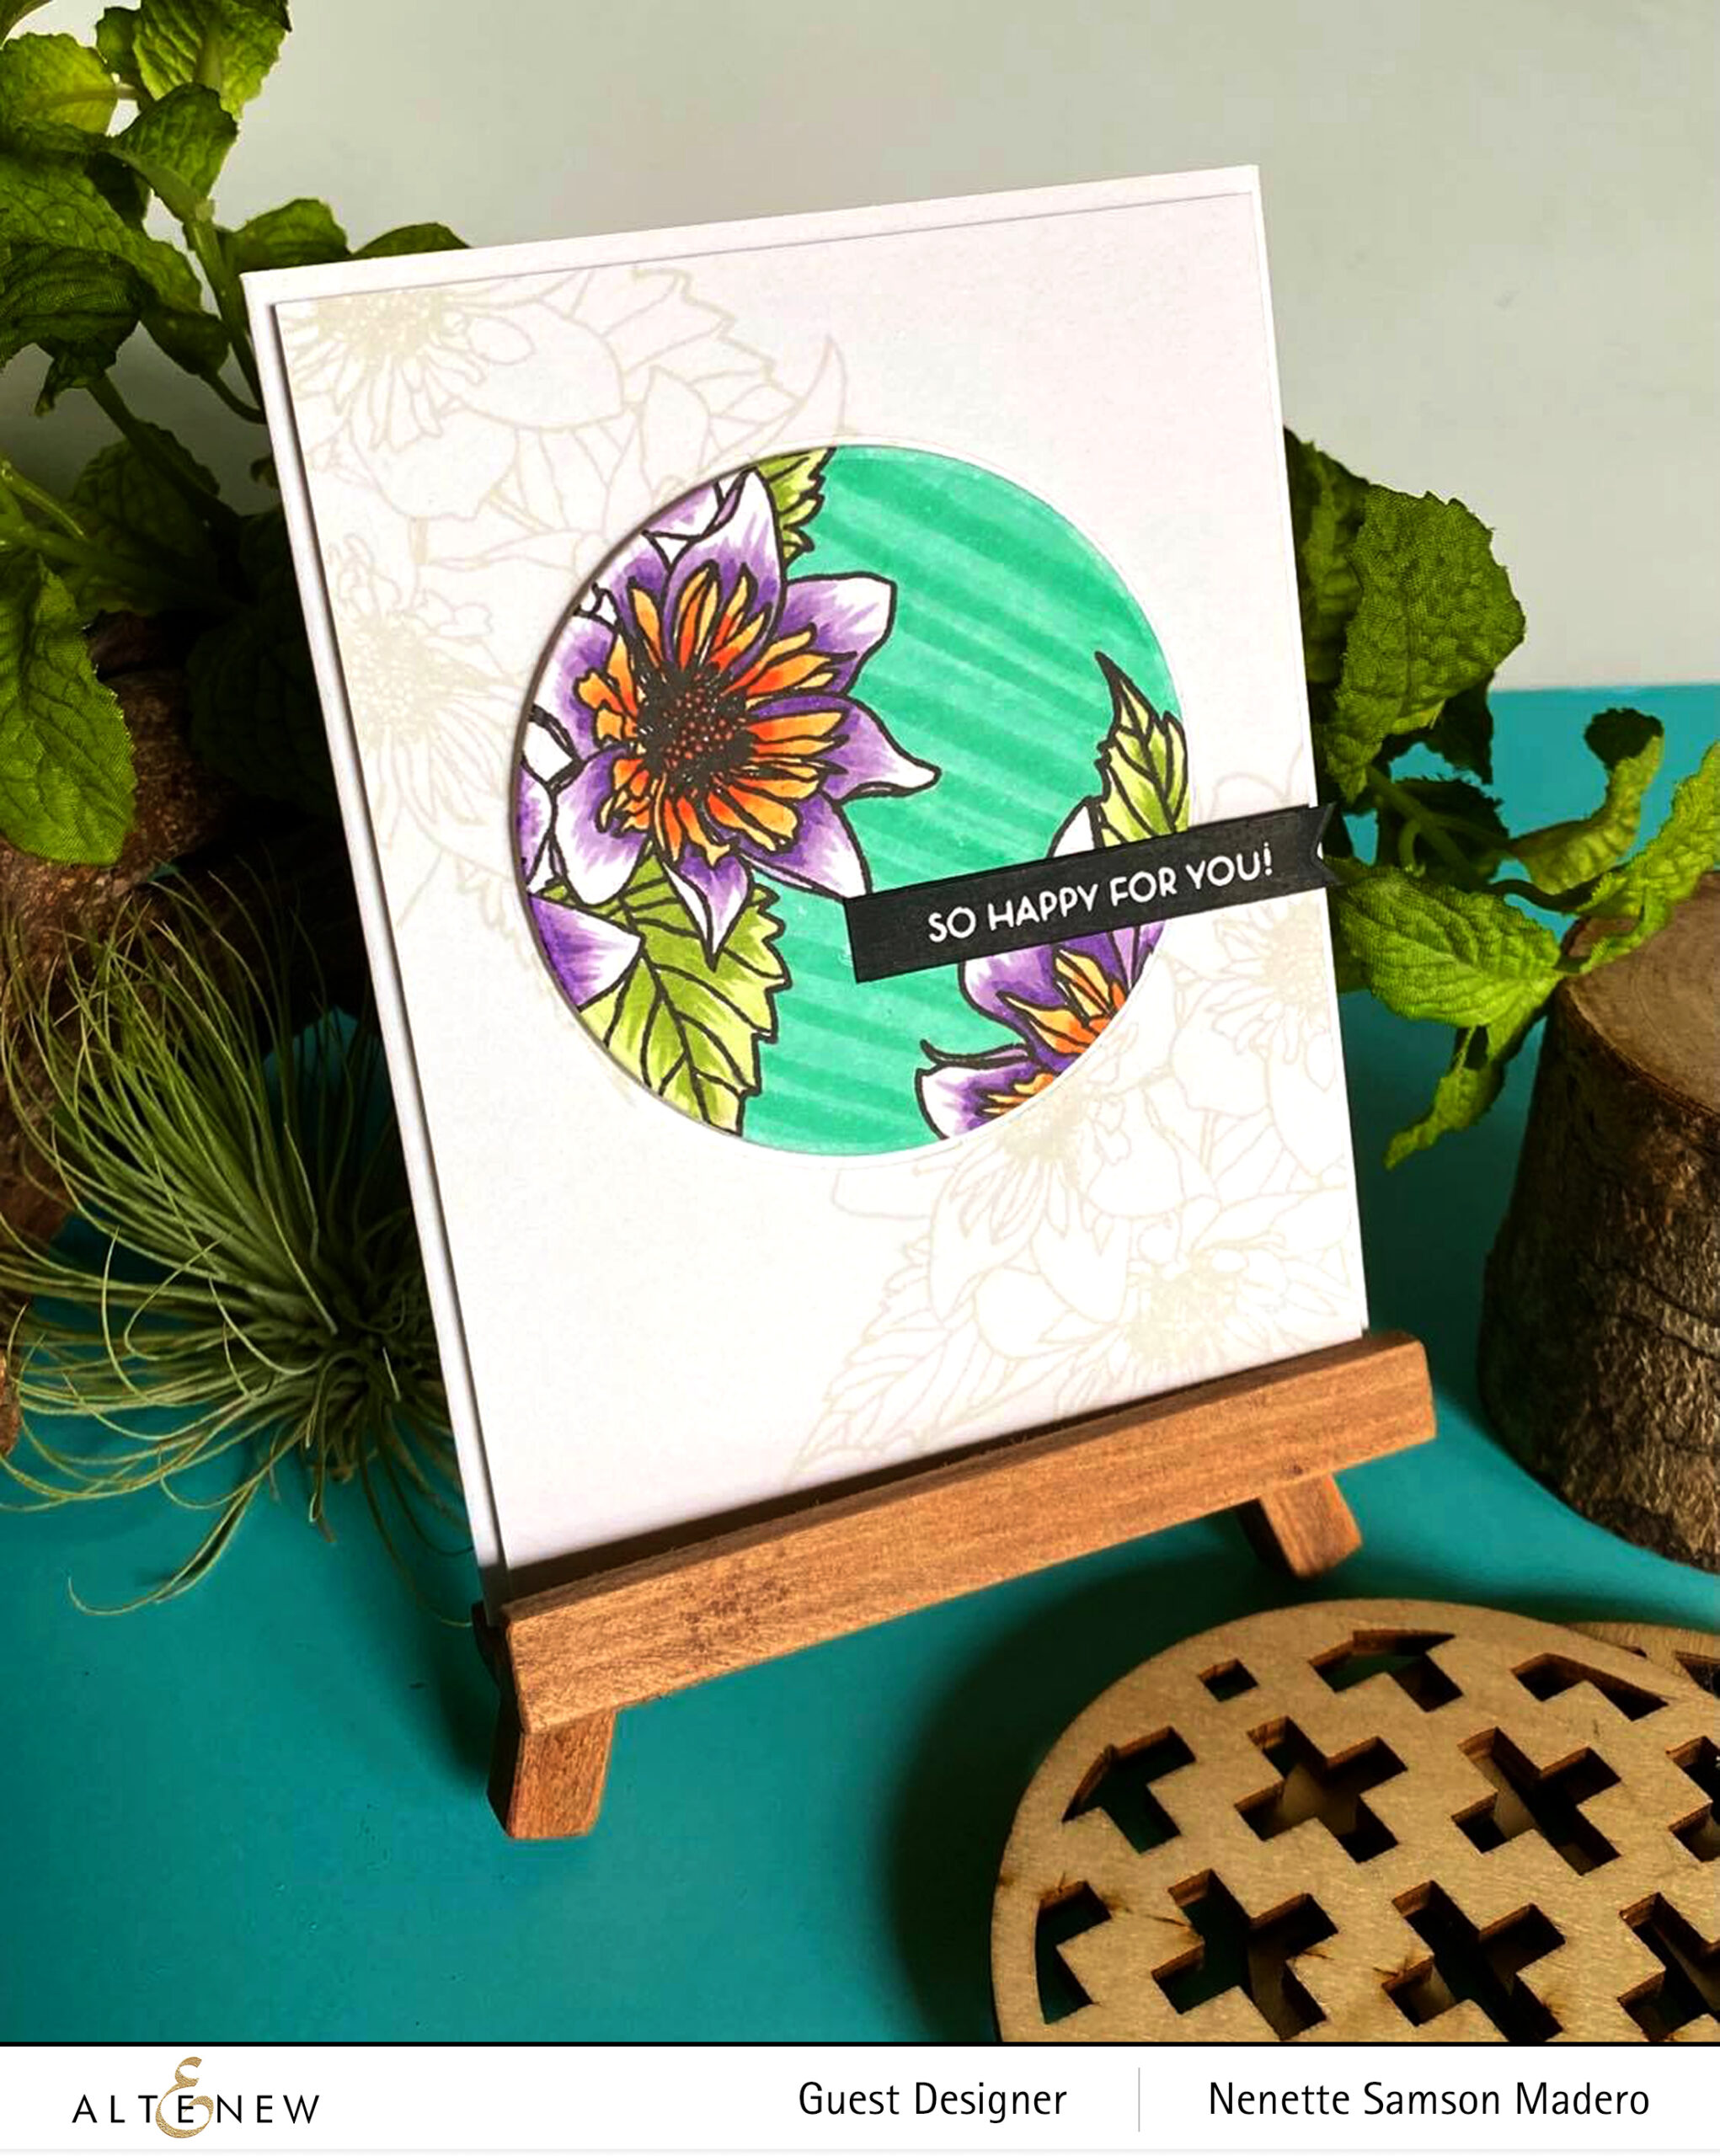

MATERIALS: PAF: FASHION MONGER DAHILIA, ALCOHOL MARKERS B815, R 702, R823, R705, G702, G715, KARIN BRUSH MARKERS PALE ORANGE 357, AMBER 195 AND OMBRE RED 051, NO LINE INK, OBSIDIAN INK, PURE WHITE EMBOSSING POWDER, CIRCLE DIE , NEENAH SOLAR WHITE CARDSTOCK, FOAM SQUARES AND VERSAMARK INK

STEPS:

  • Using a Misti, stamp the image on Neenah Solar White cardstock using Obsidian Ink. Allow to dry
  • Align the paper using the Misti and stamp the image on Neenah Solar White cardstock using no line ink
  • Die-cut the circle from the stamped image using Obsidian ink
  • Color using Alcohol Ink markers
  • Stamp the sentiment with Versamark ink and emboss with Pure White embossing powder
  • Assemble the card by lining up the colored image with the background image and adhere using foam squares. Add the sentiment
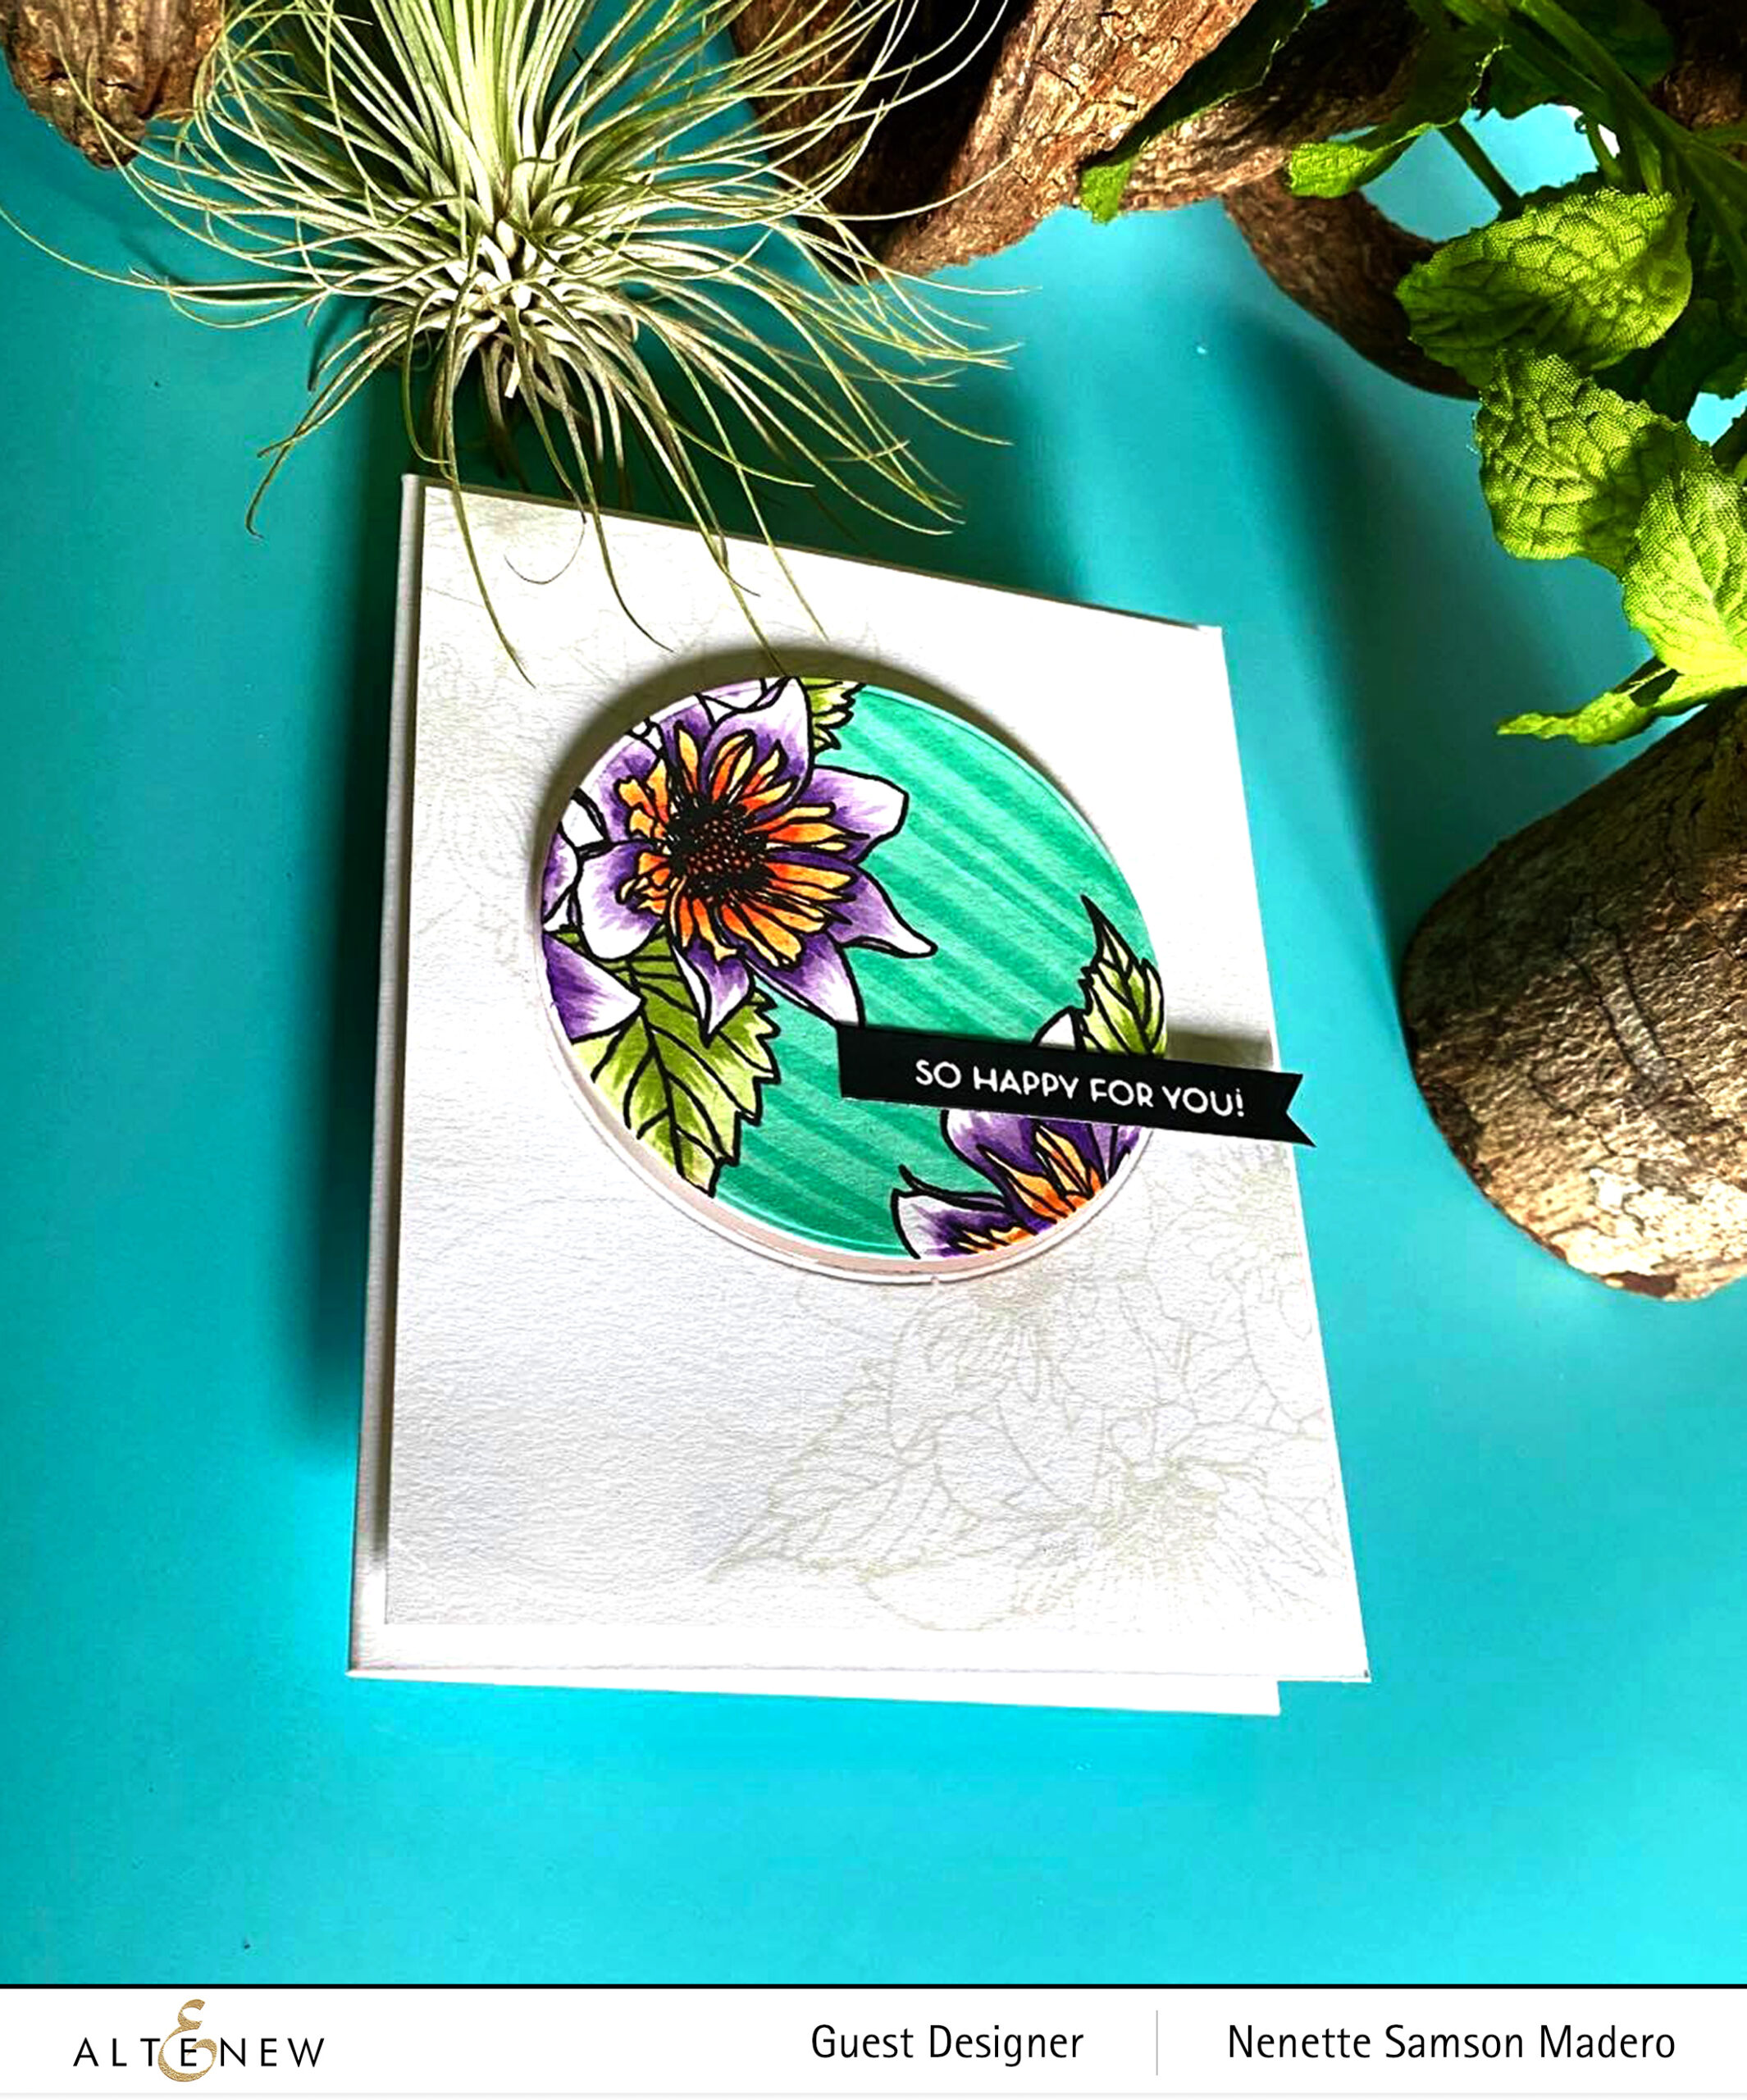
A second way of coloring a very detailed image is spotlight colorcoloring… choose an area to spotlight and color that part only. Leave the rest of the image uncolored. This way, you only have small portion to color instead of coloring the whole image!


I’M HERE WHEN YOU NEED ME
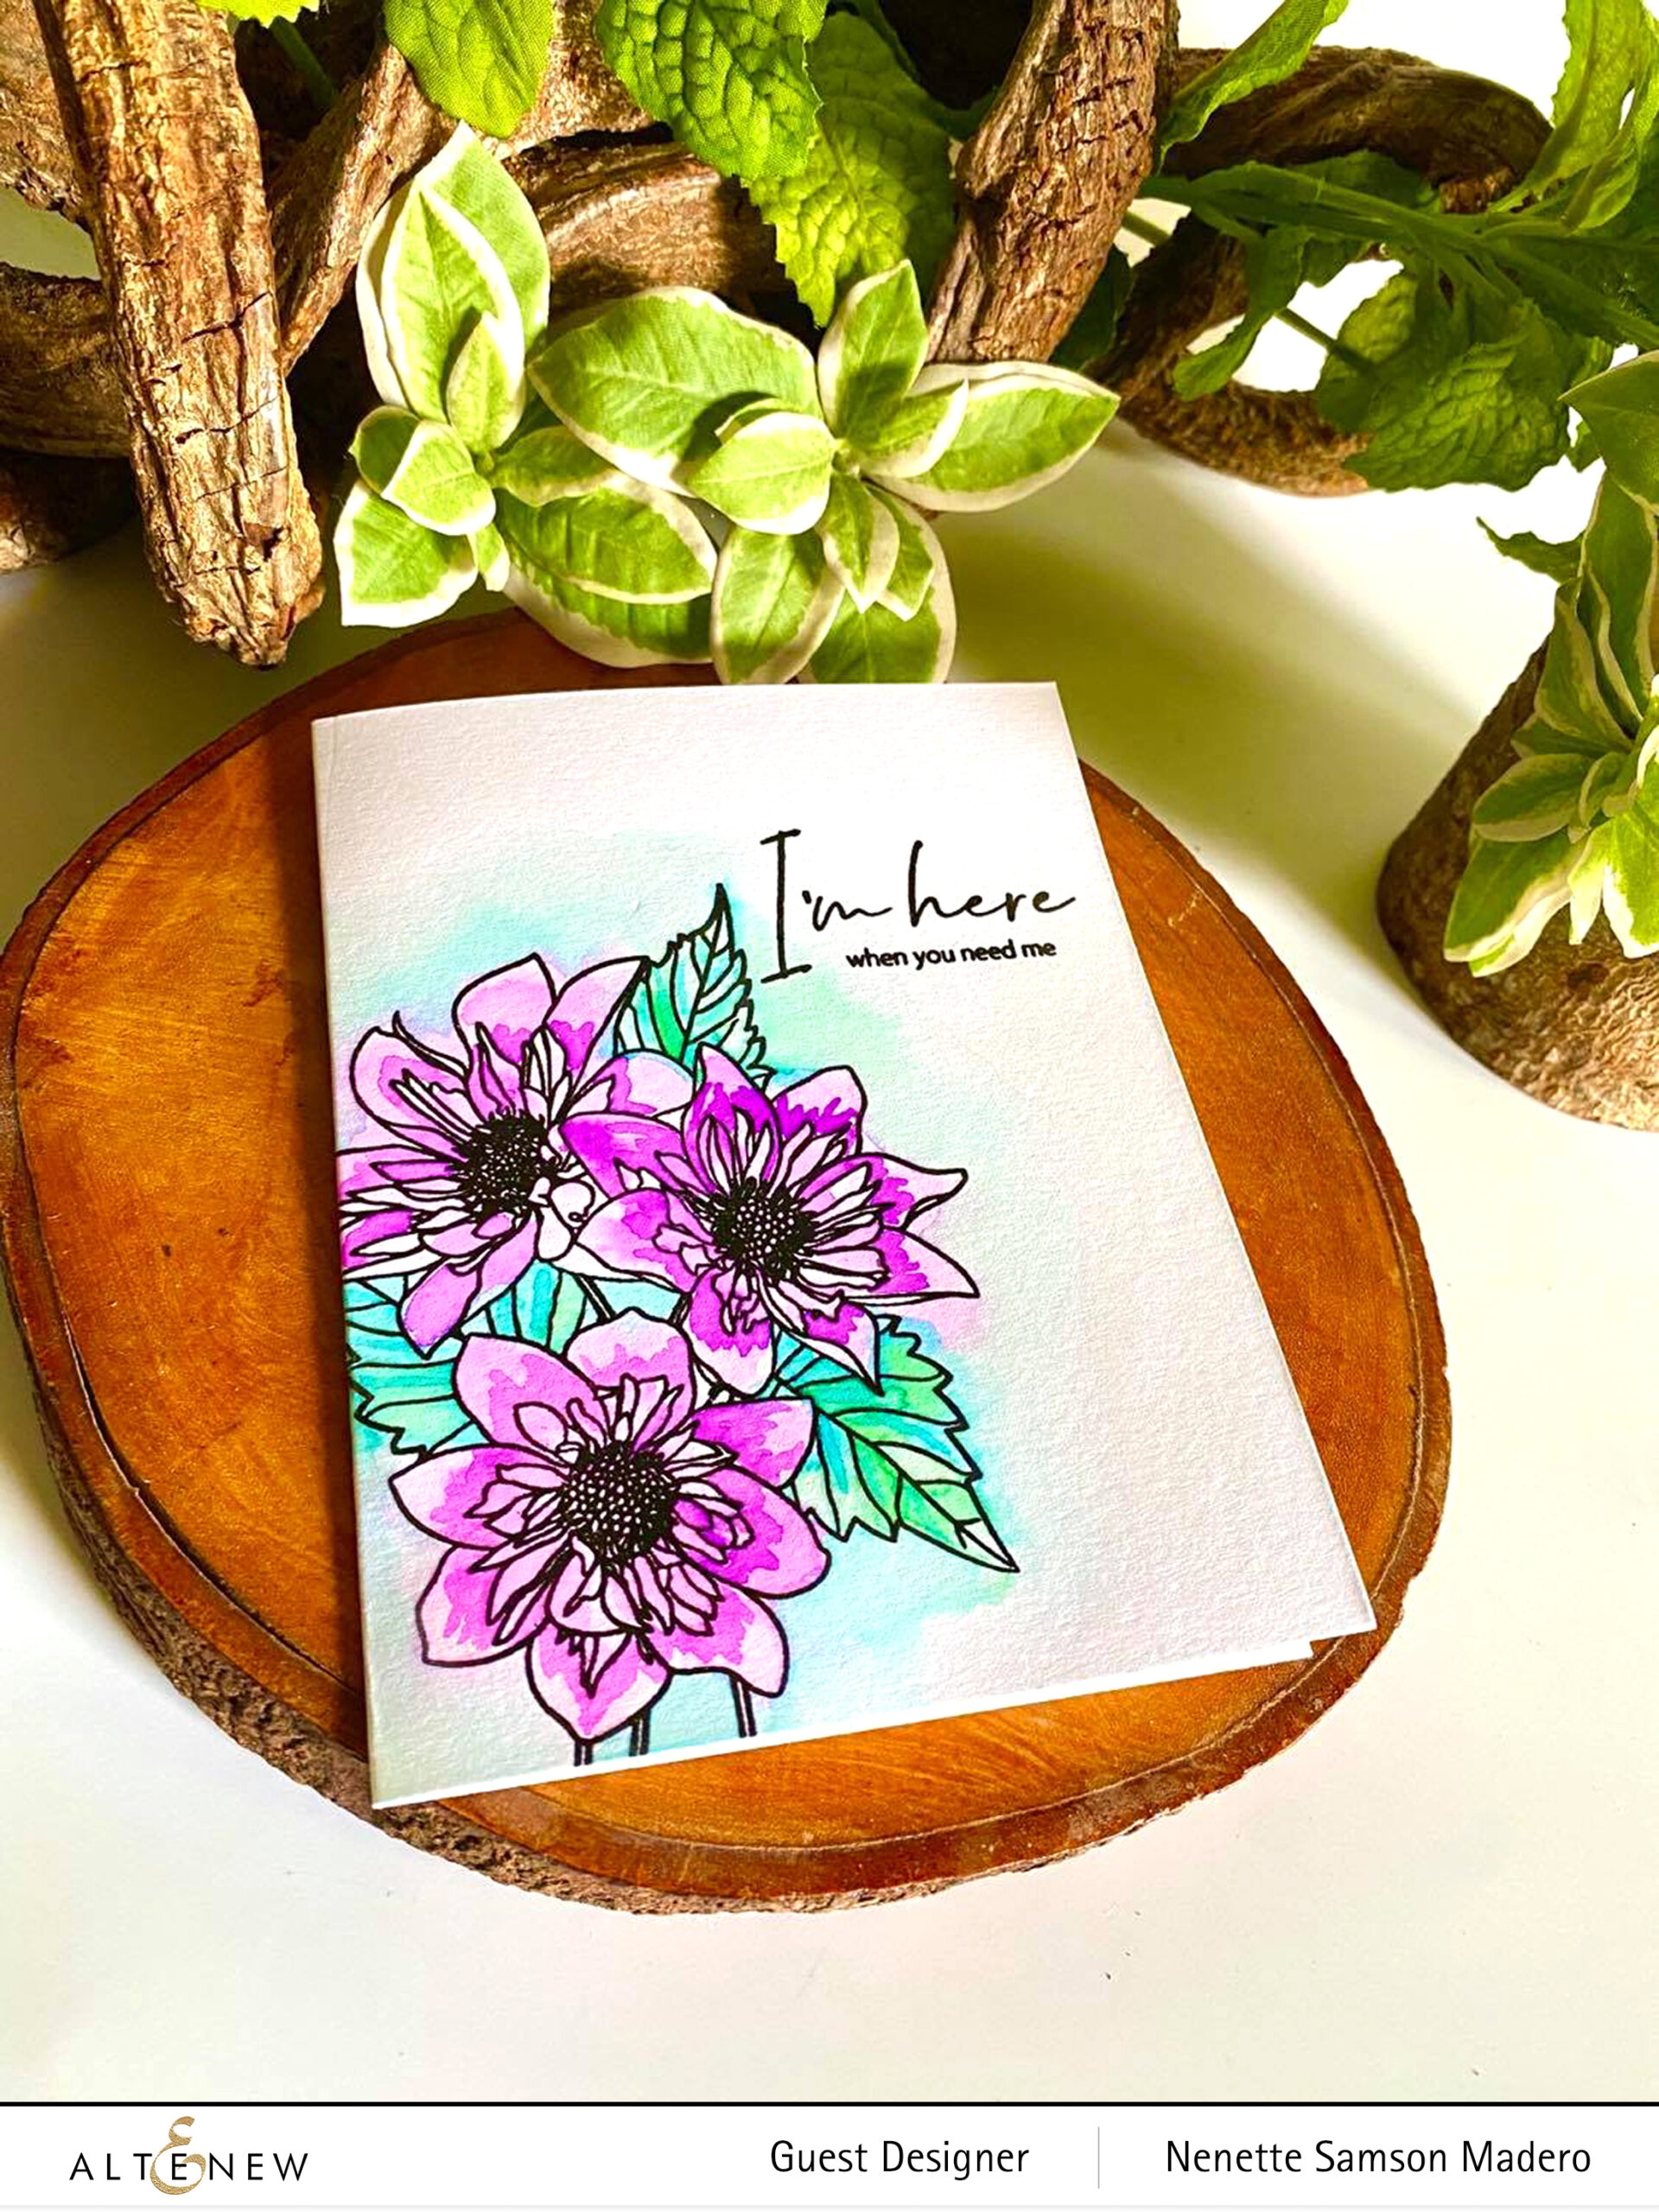

MATERIALS: PAF: FASHION MONGER DAHLIA, WATERCOLOR BRUSH MARKERS, WATERCOLOR PAPER, OBSIDIAN INK, CLEAR EMBOSSING POWDER

STEPS:

  • Stamp the image and sentiment with Obsidian ink and emboss using clear embossing powder
  • Loosely color the images with a light wash of pinks, greens and blues using the wet on wet technique
  • Allow to dry then color with a more pigmented wash of darker shades to add texture
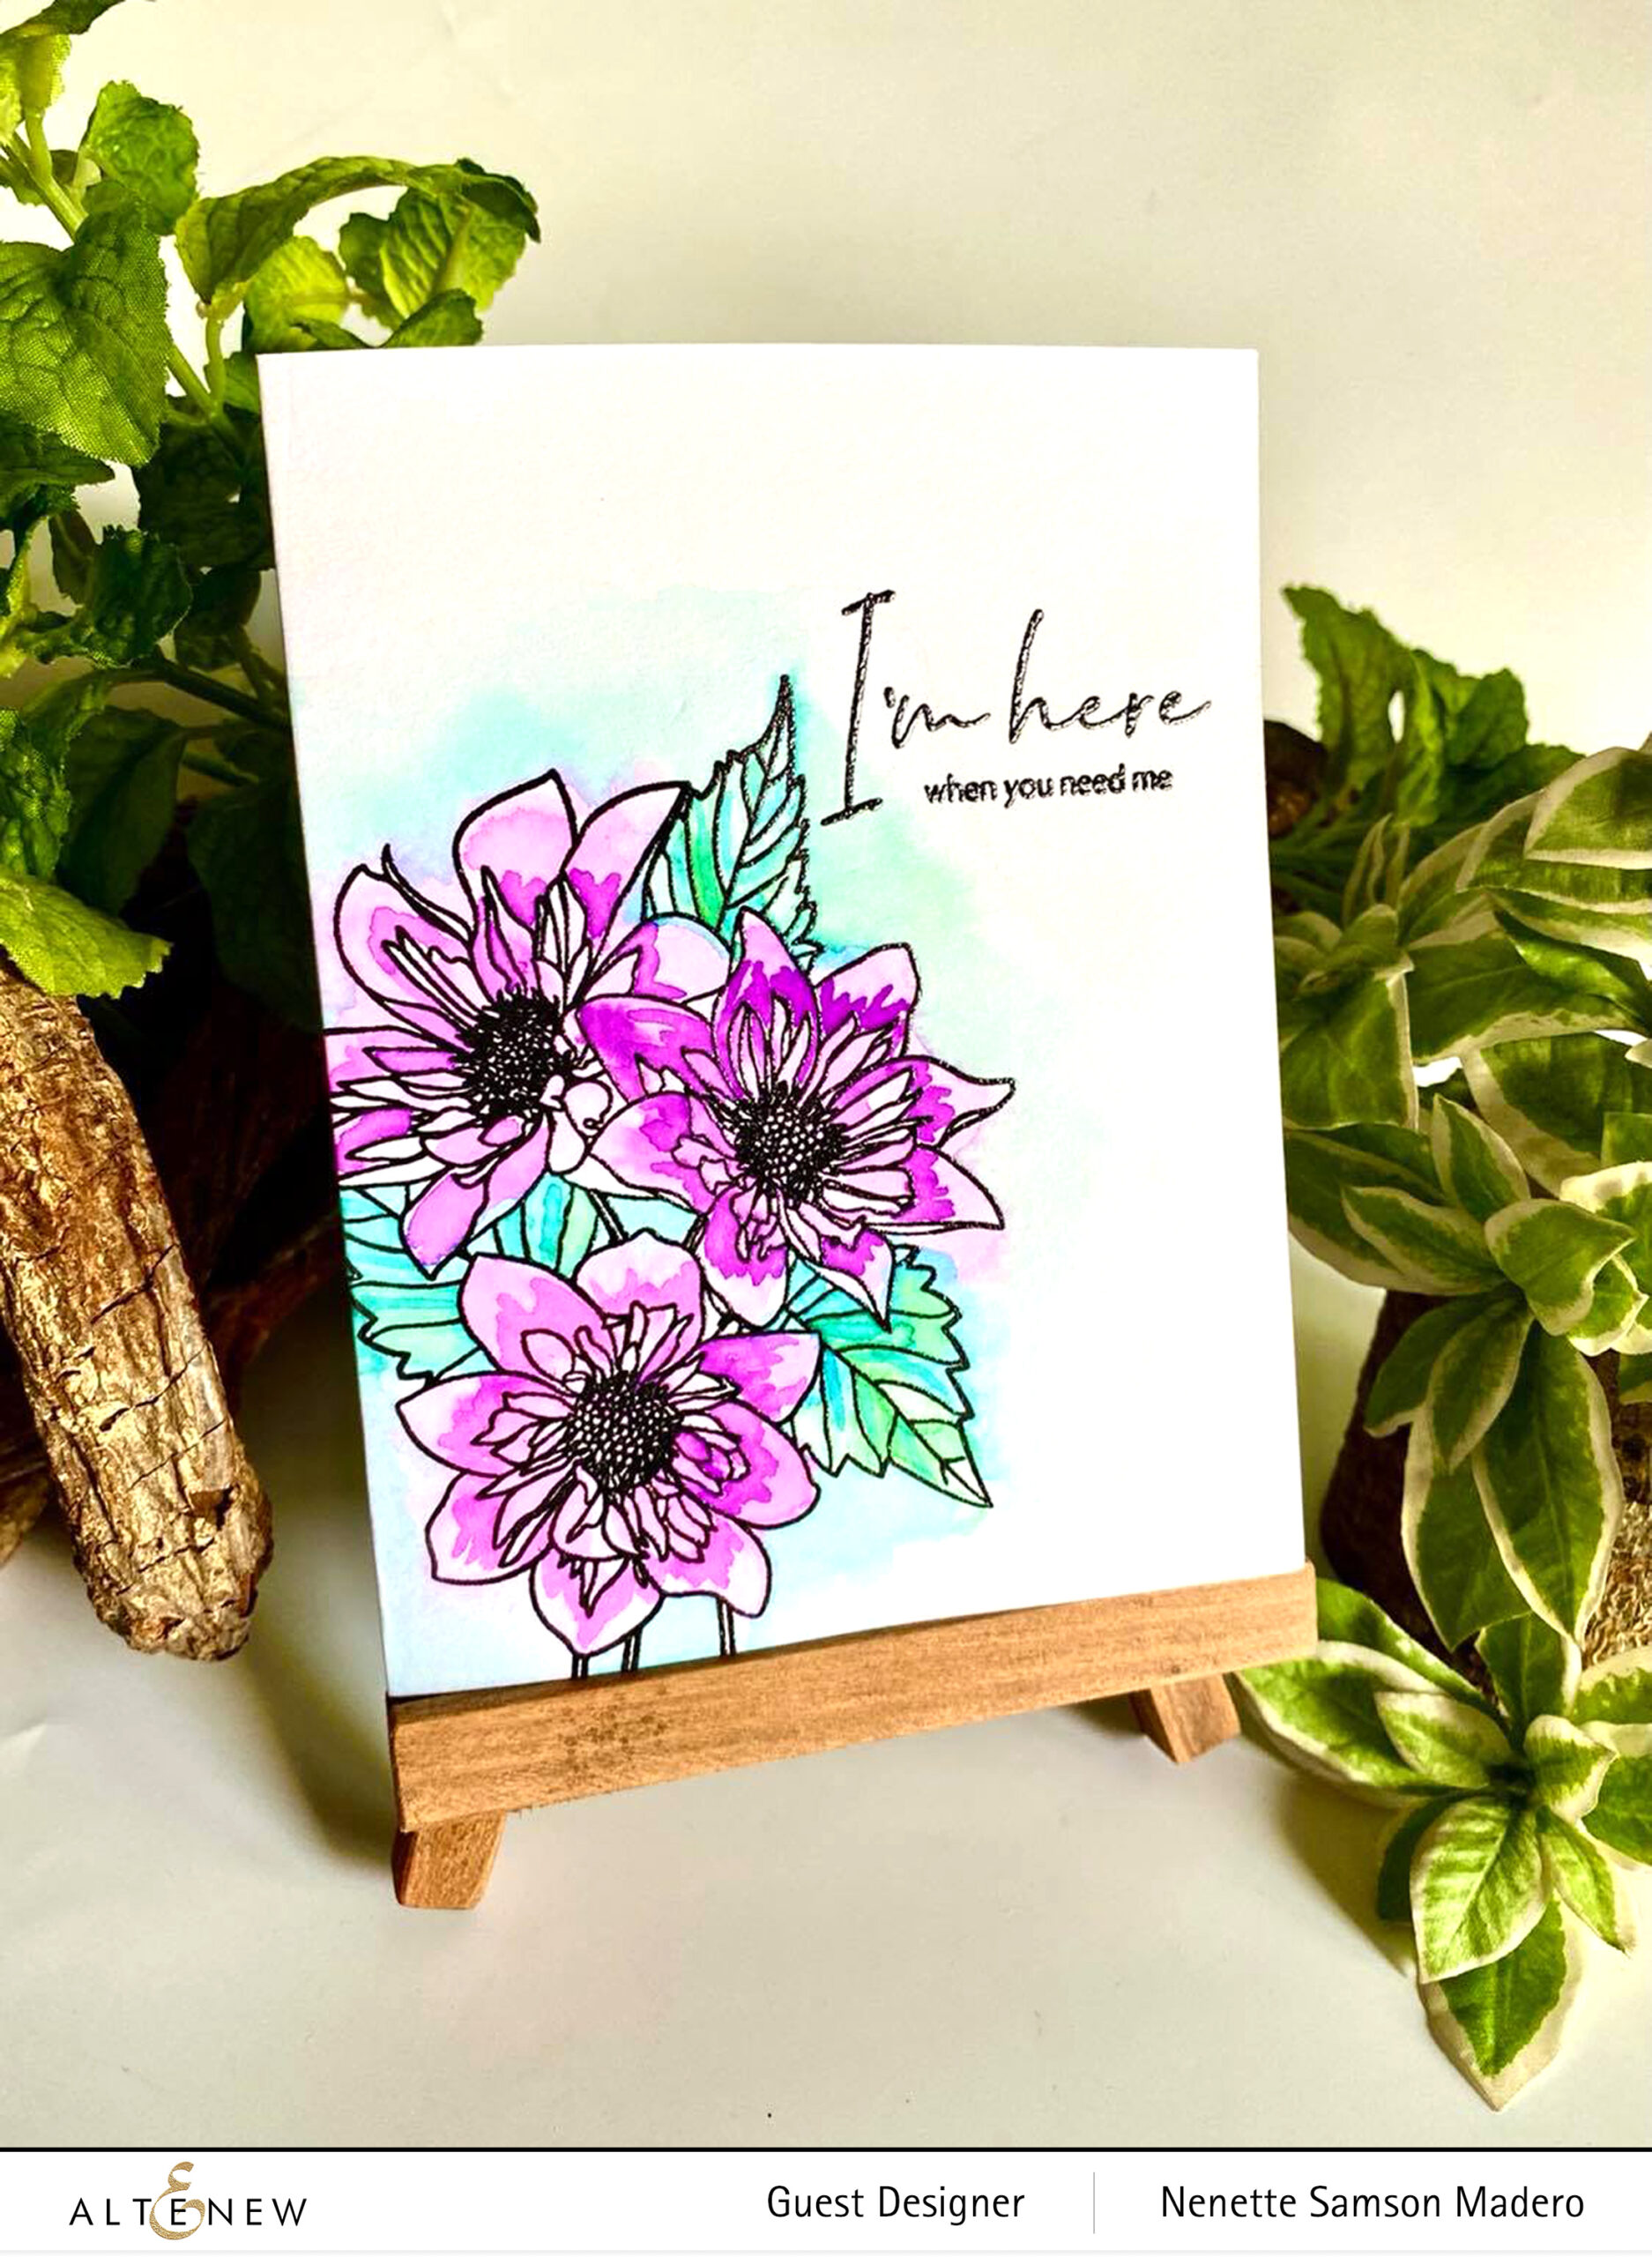
Loose watercolor technique is when you intentionally leave out the details and allow the water to move the pigments more freely… no need to worry about staying within the lines for this type of coloring. The only time you have to pay attention is when you are adding the second layer which is the highly pigmented watercolor.

If you don’t want to miss any of the BAF releases, you can subscribe monthly and get a 14% off discount!


GIVEAWAYS

$200 in total prizes! To celebrate this release, Altenew is giving away a $50 gift certificate to 2 lucky winners and a $20 gift certificate to 5 winners! Please leave a comment on the Altenew Card Blog and/or each designer’s blog post on the blog hop list below by 07/28/2021 for a chance to win. 

Altenew will draw 7 random winners from the comments left on each stop of this blog hop and announce the winners on the Altenew Winners Page on 07/30/2021.

I hope you learned a thing or two on how to color detailed images easily. Let me know which technique you’d like to try next time you create a card with a very detailed stamp image. The next stop is the talented Bridget Casey. Please don’t forget to leave a comment to get a chance to win a prize from Altenew. Hope you can follow me on Instagram as well @mylittleatticstudio cause that’s where I post all my works. Enjoy the rest of the week! Stay safe and happy crafting!

Altenew Project Life Kit: Seasonal Blooms Stamp, Die, Embossing Folder and Stencil Release

Altenew Project Life Kit: Seasonal Blooms Stamp, Die, Embossing Folder and Stencil Release

Welcome to my blog, everyone! I am beyond thrilled to be a part of the first-ever release of the Project Life Kit!!! Thank you so much to Keren Baker for relaying you over to my blog! If you want to start from the beginning, then click on the Altenew card blog.

Just take a look at how beautiful this kit is!!!

I’m blown away by the beauty of this release and can’t wait to show you what I did so let’s get started!


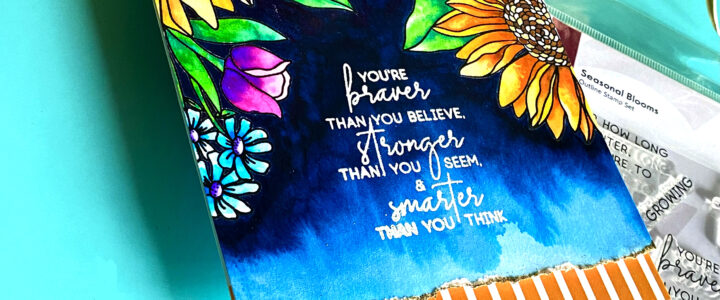
YOU’RE BRAVER THAN YOU BELIEVE, STRONGER THAN YOU SEEM, & SMARTER THAN YOU THINK


MATERIALS: SEASONAL BLOOMS STAMP, WATERCOLOR BRUSH MARKERS TROPICAL FIESTA AND SPRING GARDEN, ROSE GOLD EMBOSSING POWDER, OBSIDIAN PIGMENT INK, PURE WHITE EMBOSSING POWDER, A LOVE FOR STRIPES SET C, WATERCOLOR PAPER, VERSAMARK INK, NEENAH SOLAR WHITE CARDSTOCK, ADHESIVE, FOAM SQUARES

STEPS:

  1. Stamp the image on watercolor paper with Obsidian Pigment ink and emboss with clear embossing powder.
  2. Color image using brush markers.
  3. Color the background with Desert Night watercolor brush marker and allow the pigment to spread creating an ombre effect.
  4. Allow the panel to dry and stamp the sentiment using Versamark Ink and emboss with pure white embossing powder.
  5. Tear the lower part of stamped image, add Versamark ink and emboss using Rose Gold embossing powder.
  6. Assemble card using foam squares and adhesive.

There were so many ideas that came to my mind when I saw this stamp set. You can use it in so many different ways!!! For this card, the flowers were oriented facing downards. You can color the images using watercolor, copic markers, acrylic paints, alcohol markers/inks etc.


HI


MATERIALS: SEASONAL BLOOMS STAMP, DIE AND STENCILS, CRYSTAL CLEAR EMBOSSING POWDER, STACKED DIAMONDS COVER DIE, FINE LINER PEN SET, DISTRESS OXIDES- SPUN SUGAR, SHADED LILAC, SEEDLESS PRESERVES, WILTED VIOLET, TUMBLED GLASS, SALVAGED PATINA, BUNDLED SAGE, PEELED PAINT, FRAYED BURLAP AND VINTAGE PHOTO, NEENAH SOLAR WHITE CARDSTOCK, OLD MILL PREMIUM WHITE LETTERPRESS PAPER 300GSM, BLACK CARDSTOCK, INK ON 3 FADE OUT NO LINE COLORING

STEPS:

  1. Stamp the image using Fade Out Ink on 3 ink.
  2. Use the stencils to color the images using Distress Oxide inks.
  3. Outline the edges of the images using the stencil and the fine liner pen.
  4. Die-cut the image using the coordinating die. Die-cut the sentiment as well.
  5. Die-cut the Neenah solar white cardstock4 times using the Stacked Diamonds Cover Die and adhere on top of each other.
  6. Assemble the card using foam squares and adhesive.

Because this stamp image is so huge, you can cut it into two and create two cards. Below is the second card created using the other half of the stamp and colored image.


THANKS


MATERIALS: SEASONAL BLOOMS STAMP, DIE AND STENCILS, CRYSTAL CLEAR EMBOSSING POWDER, FINE LINER PEN SET, GOLD WASHI TAPE, OBSIDIAN INK, CRYSTAL CLEAR EMBOSSING POWDER, DISTRESS OXIDES- SPUN SUGAR, SHADED LILAC, SEEDLESS PRESERVES, WILTED VIOLET, TUMBLED GLASS, SALVAGED PATINA, BUNDLED SAGE, PEELED PAINT, FRAYED BURLAP AND VINTAGE PHOTO, NEENAH SOLAR WHITE CARDSTOCK, OLD MILL PREMIUM WHITE LETTERPRESS PAPER 300GSM, BLACK CARDSTOCK, INK ON 3 FADE OUT NO LINE COLORING,PRUPLE CARDSTOCK

Here’s the second card using the other half of the colored panel. I added gold washi tape to create a border. I love creating two cards using one stamped image. ❤️


GIVEAWAY PRIZES


Giveaway Prizes

$300 in total prizes! To celebrate this release, Altenew is giving away a $50 gift certificate to 2 lucky winners and a $25 gift certificate to 8 winners! Please leave a comment on the Altenew Card Blog and/or each designer’s blog post on the blog hop list below by 07/18/2021 for a chance to win. Altenew will draw 10 random winners from the comments left on each stop of this blog hop and announce the winners on the Altenew Winners Page on 07/20/2021.

Next up is Preeti Chandran. Which one is your favorite? ❤️ Please leave a comment and let me know. By doing so, you’ll get a chance to win a prize from Altenew! I also post other projects on my Instagram account @mylittleatticstudio so hope you can follow me there, too. Thank you so much for dropping by!!! Stay safe and happy crafting!

Craft-a-Flower: Daffodil and Glitter Cardstock Release Blog Hop

Craft-a-Flower: Daffodil and Glitter Cardstock Release Blog Hop

Hi, everyone! Welcome to the Altenew Craft-a-flower: Daffodil and Glitter cardstock release blog hop! If you just came from Tina Smith, you’re on the right track. For the complete list, you may begin at the Altenew Blog.

I love all the Craft-a-Flower series from Altenew. All you need to do is to die cut the different layers from cardstock, patterned papers etc. and adhere to one another to create beautiful flowers! Below are some samples I made using the CAF Daffodil.


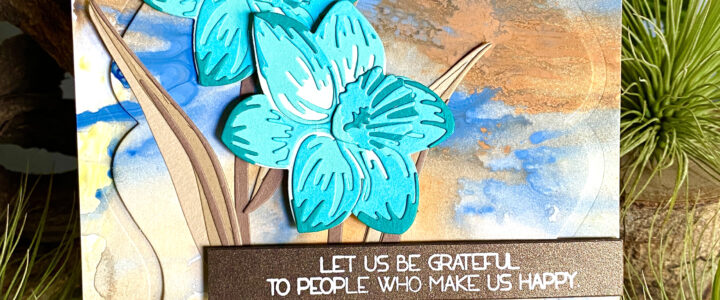
LET US BE GRATEFUL TO PEOPLE WHO MAKE US HAPPY


MATERIALS: CAF: DAFFODIL, FOLK ART STAMP (SENTIMENT), PURE WHITE CRISP EMBOSSING POWDER, GRADIENT CARDSTOCKS-COFFEE BREAK, SEA SHORE, SSS SENTIMENT LABEL DIE, SIZZIX LABELS REGAL DIE, DISTRESS PAINTS- FADED JEANS, FOSSILIZED AMBER AND RUSTY HINGE, VICKI BOUTIN MIXED MEDIA PAPER

STEPS:

  1. Create the background by adding drops of paint then spray the inks with water. Allow the inks to mix by tilting the paper. Allow to dry naturally.
  2. Die cut the flowers using the sea shore gradient cardstocks then die cut the stems using the coffee break cardstocks. Assemble according to the layering guide.
  3. Die cut the regal label and use foam squares to adhere on white cardstock for dimension.
  4. Assemble the card.

When I feel like I lost my mojo, I create backgrounds… something that I can do without really feeling creative. The only thing you need to think of is the color combination. And every time, the outcome is different! This background was created during one of those no-creative-mojo days. I wanted to experiment with distress paints. It’s always good to have backgrounds handy. 🙂


HELLO SWEET FRIEND


MATERIALS: CAF: DAFFODIL, CIRCULAR ELEMENTS DIE, WHIMSICAL GARDEN LAYERING DIE SET (LEAVES), ARTIST WATERCOLOR PAN SET, WATERCOLOR PAPER, NEENAH SOLAR WHITE CARDSTOCCK, VERSAMFINE BLACK ONYX, DISTRESS OXIDES-BLUEPRINT SKETCH, BROKEN CHINA, SALVAGED PATINA,GLOSSY ACCENTS, PEARL EMBELLISHMENTS

STEPS:

  1. Use the distress oxides to create an ombre background on Neenah Solar White cardstock.
  2. Die-cut the front panel using the Circular Elements die
  3. Create a watercolor wash using different shades of pink
  4. Die-cut the different layers of the flowers. (Do not include the middle layers of the flower.) Assemble the flowers and add a pearl accent.
  5. Die-cut the leaves from the Whimsical Garden Layering die set
  6. Assemble the card

I chose not to add the center part of the flower to give it a different look. I kept the base white to allow the watercolored petals to be more noticeable. When creating the watercolor wash, make sure to vary the intensity of the pinks for added interest.

Hope you liked the cards I created for this release. To get a chance to win some fab prizes from Altenew, make sure you leave a comment, ok? For my latest creations, please visit me on Instagram @mylittleatticstudio cause that’s where I post all of my new projects. Next up is the uber-talented (and a dear friend of mine) ANNA MAHTANI . Thank you so much for dropping by!Take care everyone and happy crafting!

P.S. If the glitter cardstock sets are out of stock, please sign up for back-in-stock notification on the product page to get notified by email as soon as the glitter cardstock sets become available again.

Altenew Eclectic Vibes Stamps/Dies/Stencils/Embossing Folders Collection Release Blog Hop + Giveaway

Altenew Eclectic Vibes Stamps/Dies/Stencils/Embossing Folders Collection Release Blog Hop + Giveaway

Hello, everyone! Welcome to Altenew’s Eclectic Vibes Stamps/Dies/Stencils/Embossing Folders Collection Release Blog Hop + Giveaway!!! If you have just visited Keeway Tsao‘s blog, then you’re on the right track. Thanks, Keeway, for sending them over to my blog! I’ve listed the complete hop list at the end of this post. You can also start out from the Altenew blog. I’m so thrilled to be a part of this hop and have created some cards using some of the products. Let me know in the comment section which one you like the most.😊

ADORE YOU ADD ON STAMP AND DIE

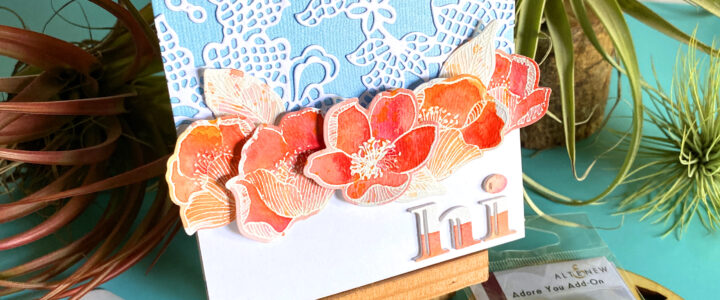
HI


MATERIALS: ADORE YOU ADD ON STAMP AND DIE, INLINE ALPHA DIE, FLORAL LACE DIE, PURE WHITE EMBOSSING POWDER, WATERCOLOR BRUSHES, WATERCOLOR BRUSH SET, Neenah Solar White Cardstock, Light blue cardstock, Versamark Ink

STEPS:

  1. Stamp floral image and leaf on watercolor paper using Versamark Ink and emboss with Pure White embossing powder.
  2. Color using Altenew’s watercolor brush markers.
  3. Die cut the word HI using the Inline alpha die 4 times and layer on top of each other. Add watercolor strip using the leftover inks on the palette.
  4. Die cut the floral lace 3 times and adhere on the card front to create a background for the front panel.
  5. Assemble the card using foam squares and adhesvie.

I loved the original Adore You stamp set and I was so happy seeing this cute add-on. I went ahead and painted a lot of these flowers to create 2 cards using different backgrounds.


STAY AWESOME MY FRIEND


MATERIALS: ADORE YOU ADD ON, HIBISCUS GARDEN FOLIAGE 3D DIE SET, LEAFY CANOPY STAMP, PURE WHITE CRISP EMBOSSING POWDER, FLORAL LACE DIE, ARTISTS’ WATERCOLOR PAN SET, VICKI BOUTIN MIXED MEDIA PAPER, NEENAH SOLAR WHITE CARDSTOCK, BLACK CARDSTOCK, VERSAMARK INK

STEPS:

  1. Die-cut one of the leaves from the Hibiscus Garden Foliage die several times and adhere on top of each other.
  2. Glue these on a 4″ x 5.25 Neenah Solar White cardstock and spray using the Ocean Waves Metallic Ink spray. Allow it to dry.
  3. Stamp the flowers and leaves from the Adore You Add on onto watercolor paper. Emboss using pure white embossing powder.
  4. Color using the Artists’ Watercolor pan set.
  5. Stamp the sentiment on black cardstock using Versamark ink and emboss with pure white embossing powder.
  6. Assemble card using foam squares and adhesive.

I like creating backgrounds with texture and using Altenew dies to create texture is so easy! I wish you can see the sparkle on the cardfront. The metallic shimmer the spray gives is so pretty!


HELLO SWEET FRIEND


MATERIALS: ADORE YOU ADD ON, VERSAFINE ONYX BLACK, WATERCOLOR PAPER, ILLUSION TRIANGLES 3D EMBOSSING FOLDER, NEENAH SOLAR WHITE CARDSTOCK

STEPS:

  1. Cut out a 4″ x 5.25″ panel from watercolor cardstock.
  2. Stamp the sentiment.
  3. Add watercolor to the panel.
  4. Emboss using the Illusion Triangles 3D Embossing folder.
  5. Create a border using the darkest shade of pink from the palette.
  6. Stamp images using Versafine black onyx ink and watercolor.
  7. Assemble card using foam squares and adhesive.

This CAS card was so easy to create. Just make sure to stamp the sentiment first before embossing.


CHALLENGES ARE WHAT MAKES LIFE INTERESTING. OVERCOMING THEM IS WHAT MAKES THEM MEANINGFUL


MATERIALS: PRESSED FLOWERS 3D EMBOSSING FOLDER, BLOCK SENTIMENTS STAMP, WHIMSICAL HERRINGBONE STAMP, ROSE GOLD EMBOSSING POWDER, PURE WHITE CRISP EMBOSSING POWDER, ARTISTS’ WATERCOLOR PAN SET, WATERCOLOR PAPER, NEENAH SOLAR WHITE CARDSTOCK, VERSAMARK INK, VELLUM

STEPS:

  1. Emboss blue cardstock using the Pressed Flowers 3D embossing folder. Cut out the embossed part.
  2. Add Versamark Ink to the embossed part of the images and emboss using Rose Gold embossing powder.
  3. Stamp the watercolor paper with the Whimsical Herringbone stamp set and emboss using Rose Gold embossing powder.
  4. Add color using the Artists’ Watercolor pan set.
  5. Stamp the sentiment using Versamark ink then emboss with the Pure White embossing powder.
  6. Tear the edges to add texture.
  7. Assemble card using foam squares and adhesive.

Here’s another way to use your embossing folders… cut them out! I selected a portion of the embossed image and added it to the cardfront. Don’t you just love the Whimsical Herringbone stamp set? I will definitely be make more backgrounds using this stamp set.

JUST A NUMBER STAMP

COUNT YOUR LIFE BY SMILES, NOT TEARS. COUNT YOUR AGE BY FRIENDS, NOT YEARS


MATERIALS: JUST A NUMBER STAMP , ROSE GOLD EMBOSSING POWDER, OBSIDIAN PIGMENT INK, VERSMARK INK, TIM HOLTZ COLLAGE PAPER, DISTRESS OXIDE INKS AND SPRAYS AND STENCILS, COLLAGE MEDIUM, VICKI BOUTIN MIXED MEDIA PAPER, GESSO

STEPS:

  1. Apply gesso to the entire surface of the mixed media paper.
  2. Add a mix of distress inks, sprays to create a base for the background.
  3. Add collage paper using collage medium.
  4. Use stencils to add more layers.
  5. Add a border by using Versamark Ink and embossing powder.
  6. Stamp the sentiment using Obsidian Ink and emboss with clear embossing powder.
  7. Add this to a top folding cardfront using foam squares.

I was experimenting with this mixed media panel a couple of weeks back and stashed it with my other mixed media projects. When I saw the Just a Number stamp set, I knew that it was perfect for this panel. The sentiment even fit in the blank area! How cool is that?!?! 😊

WATERCOLOR EXTRAVAGANZA LAYERING GUIDE
MATERIALS: WATERCOLOR EXTRAVAGANZA STAMP SET, MASKING PAPER, CRISP DYE INKS-SEA SHORE SET AND CHERRY BLOSSOM, BOLD ALPHA DIE, GOLD FOIL WASHI 1″TAPE, ROSE GOLD EMBOSSING POWDER, LEAF CLUSTERS STAMP, VERSAMARK INK, ARTISTS’ WATERCOLOR PAN SET, LINEN FINO WHITE 120 GSM SHEET

I wanted to create a wrapping paper using the Watercolor Extravaganza stamp set. It’s best to stamp one layer at a time and go over the whole sheet. Since this stamp mimics watercolor, you don’t really need to line it up perfectly. The paper has a linen texture so it adds the same texture to the stamped image.

After stamping the flowers, I filled up the spaces in between with a very faint Leaf clusters stamp image.

I also created a tag to match the wrapping paper. I used some leftover watercolored paper, tore the edges and added Rose Gold embossing powder.

Sprigs of lavender and ribbon were added to finish off the gift.


PRIZES


$300 in total prizes! To celebrate this release, Altenew is giving away a $50 gift certificate to 2 lucky winners and a $25 gift certificate to 8 winners! Please leave a comment on the Altenew Card Blog and/or each designer’s blog post on the blog hop list below by 07/11/2021 for a chance to win. 

Altenew will draw 10 random winners from the comments left on each stop of this blog hop and announce the winners on the Altenew Winners Page on 07/13/2021.

Thank you so much for dropping by! I hope you liked the cards and gift wrapper I made for this hop. Do you have a favorite? I’d love to know!!! Leave a comment and get a chance to win some fab prizes from Altenew. For my latest creations, please follow @mylittleatticstudio on Instagram. Next up is Justine Jovey. Thanks again and stay safe, everyone! 💜

Blog Hop Order

Altenew Blog

Vicky Papaioannou

Norine Borys

Dana Joy

Nathalie DeSousa

Michelle Short

Verity Biddlecombe

Emily Midgett

Jenny Colacicco

Sandhya Iyer

Jaycee Gaspar

Terri Koszler

Seeka

Virginia Lu

Tina Smith

Tenia Nelson

LauraJane

Lilith Eeckels

Svitlana Shayevich

Tania Ahmed

Carol Hintermeier

Maryam Perez

Daniel Diaz 

Reiko Tsuchida

Nicole Watt

Amanda Baldwin

Bridget Casey

Keren Baker

Linda Westfall

Keeway Tsao

Nenette S. Madero

Justine Hovey

Amber Rain Davis

Altenew Build-A-Flower: Bearded Iris Release Blog Hop + Giveaway

Altenew Build-A-Flower: Bearded Iris Release Blog Hop + Giveaway

Hello, everyone! Welcome to Altenew’s Build-a-Flower: Bearded Iris Release blog hop + giveaway!!! I’m so thrilled to be joining the designers for this hop! If you just came from Linda Westfall‘s blog, then you almost made it to the finish line!!! You will find the complete blog hop list on the Altenew card blog.

BUILD-A-FLOWER: BEARDED IRIS STAMP AND DIE SET

Take a look at this beautiful layering set! For my samples, I made one using only the outline layer and the other using all the layers.

All Altenew products are linked to Altenew’s online store so that it’s easy for you to find them. These are not affiliate links… I just want it to be easier for you to find the items in the store. 😊


SENDING LOTS OF LOVE


MATERIALS: BAF: BEARDED IRIS STAMP AND DIE SET, DOTTED STARBURST DEBOSSING DIE, NESTING FRAMES DIE, WATER GARDEN ARTIST MARKER SET, DISTRESS OXIDE INKS-RIPE PERSIMMON, ABANDONED CORAL AND TEA DYE, NEENAH SOLAR WHITE CARDSTOCK, VELLUM, VERSAMARK INK, ROSE GOLD AND PURE WHITE EMBOSSING POWDER, EDGE DISTRESSING TOOL

STEPS:

  1. Stamp with Versamark ink and emboss the outline image using Rose Gold embossing powder.
  2. Color the image using the Water Garden Artist Alcohol Markers set G
  3. Die-cut Neenah solar white using the Nesting frames die then deboss with the Dotted Starburst debossing die
  4. Stamp the sentiment on black cardstock using Versarmark ink and emboss with Pure white embossing powder.
  5. Create an ombre background using distress oxide inks.
  6. Distress the edges of the background with a paper distresser.
  7. Assemble the card with foam squares for added dimension.

Because the vellum is a non-porous surface, it it’s easier to move and blend the the pigments. With paper, the ink will seep into the fibers very quickly. It wasn’t difficult to create the texture on the flowers by using different shades of the same color.


JUST BECAUSE


MATERIALS: BAF: BEARDED IRIS STAMP AND DIE SET, MARTIAN TERRAIN DYE INK SET, WARM AND COZY DYE INK SET, NATURE’S WONDERS DYE INK SET, ROSE GOLD EMBOSSING POWDER, ESSENTIAL SENTIMENT STRIPS DIE, MASKING PAPER, INK ON 3 NO LINE COLORING INK, VERSAFINE ONYX BLACK, MFT Stitched Rectangle Scalloped Edge die

STEPS:

For this card, I used both the outline stamp set and the layering stamps.

  1. Stamp Neenah solar white cardstock using the outline stamp and Ink on 3 no line coloring ink.
  2. Layer the stamp layers to create a flower using the Warm and Cozy dye ink set. Stamp the leaves using Nature’s Wonders ink set.
  3. Stamp the outline image on making paper then cut out the image to create a mask.
  4. Cover the layered flower with the cut out masking paper and stamp the outline image using Versafine Onyx black.
  5. Create a scalloped edge using the die.
  6. Mat with gold cardstock.
  7. Die-cut the sentiment 5 times. Add Versamark Ink to the lower part of the die-cut and emboss using Rose Gold embossing powder.
  8. Assemble the card with foam squares.

PRIZES


$200 in total prizes! To celebrate this release, Altenew is giving away a $50 gift certificate to 2 lucky winners and a $20 gift certificate to 5 winners! Please leave a comment on the Altenew Card Blog and/or each designer’s blog post on the blog hop list below by 07/07/2021 for a chance to win. Altenew will draw 7 random winners from the comments left on each stop of this blog hop and announce the winners on the Altenew Winners Page on 07/09/2021.

Next up is Svitlana Shayevich I hope you liked the cards I made for this hop. Don’t forget to leave a comment to get a chance to win some prizes from Altenew! Thanks so much for dropping by and stay safe, everyone!!!