
")

Hello, everyone! Welcome to my blog! Thanks, Tenia Nelson, for sending everybody over. For complete details about this hop, drop by the Altenew blog. There are so many beautiful products in the latest Stand-Alone Die release by Altenew! Here are a few cards I made using them.
SENDING BIRTHDAY HUGS
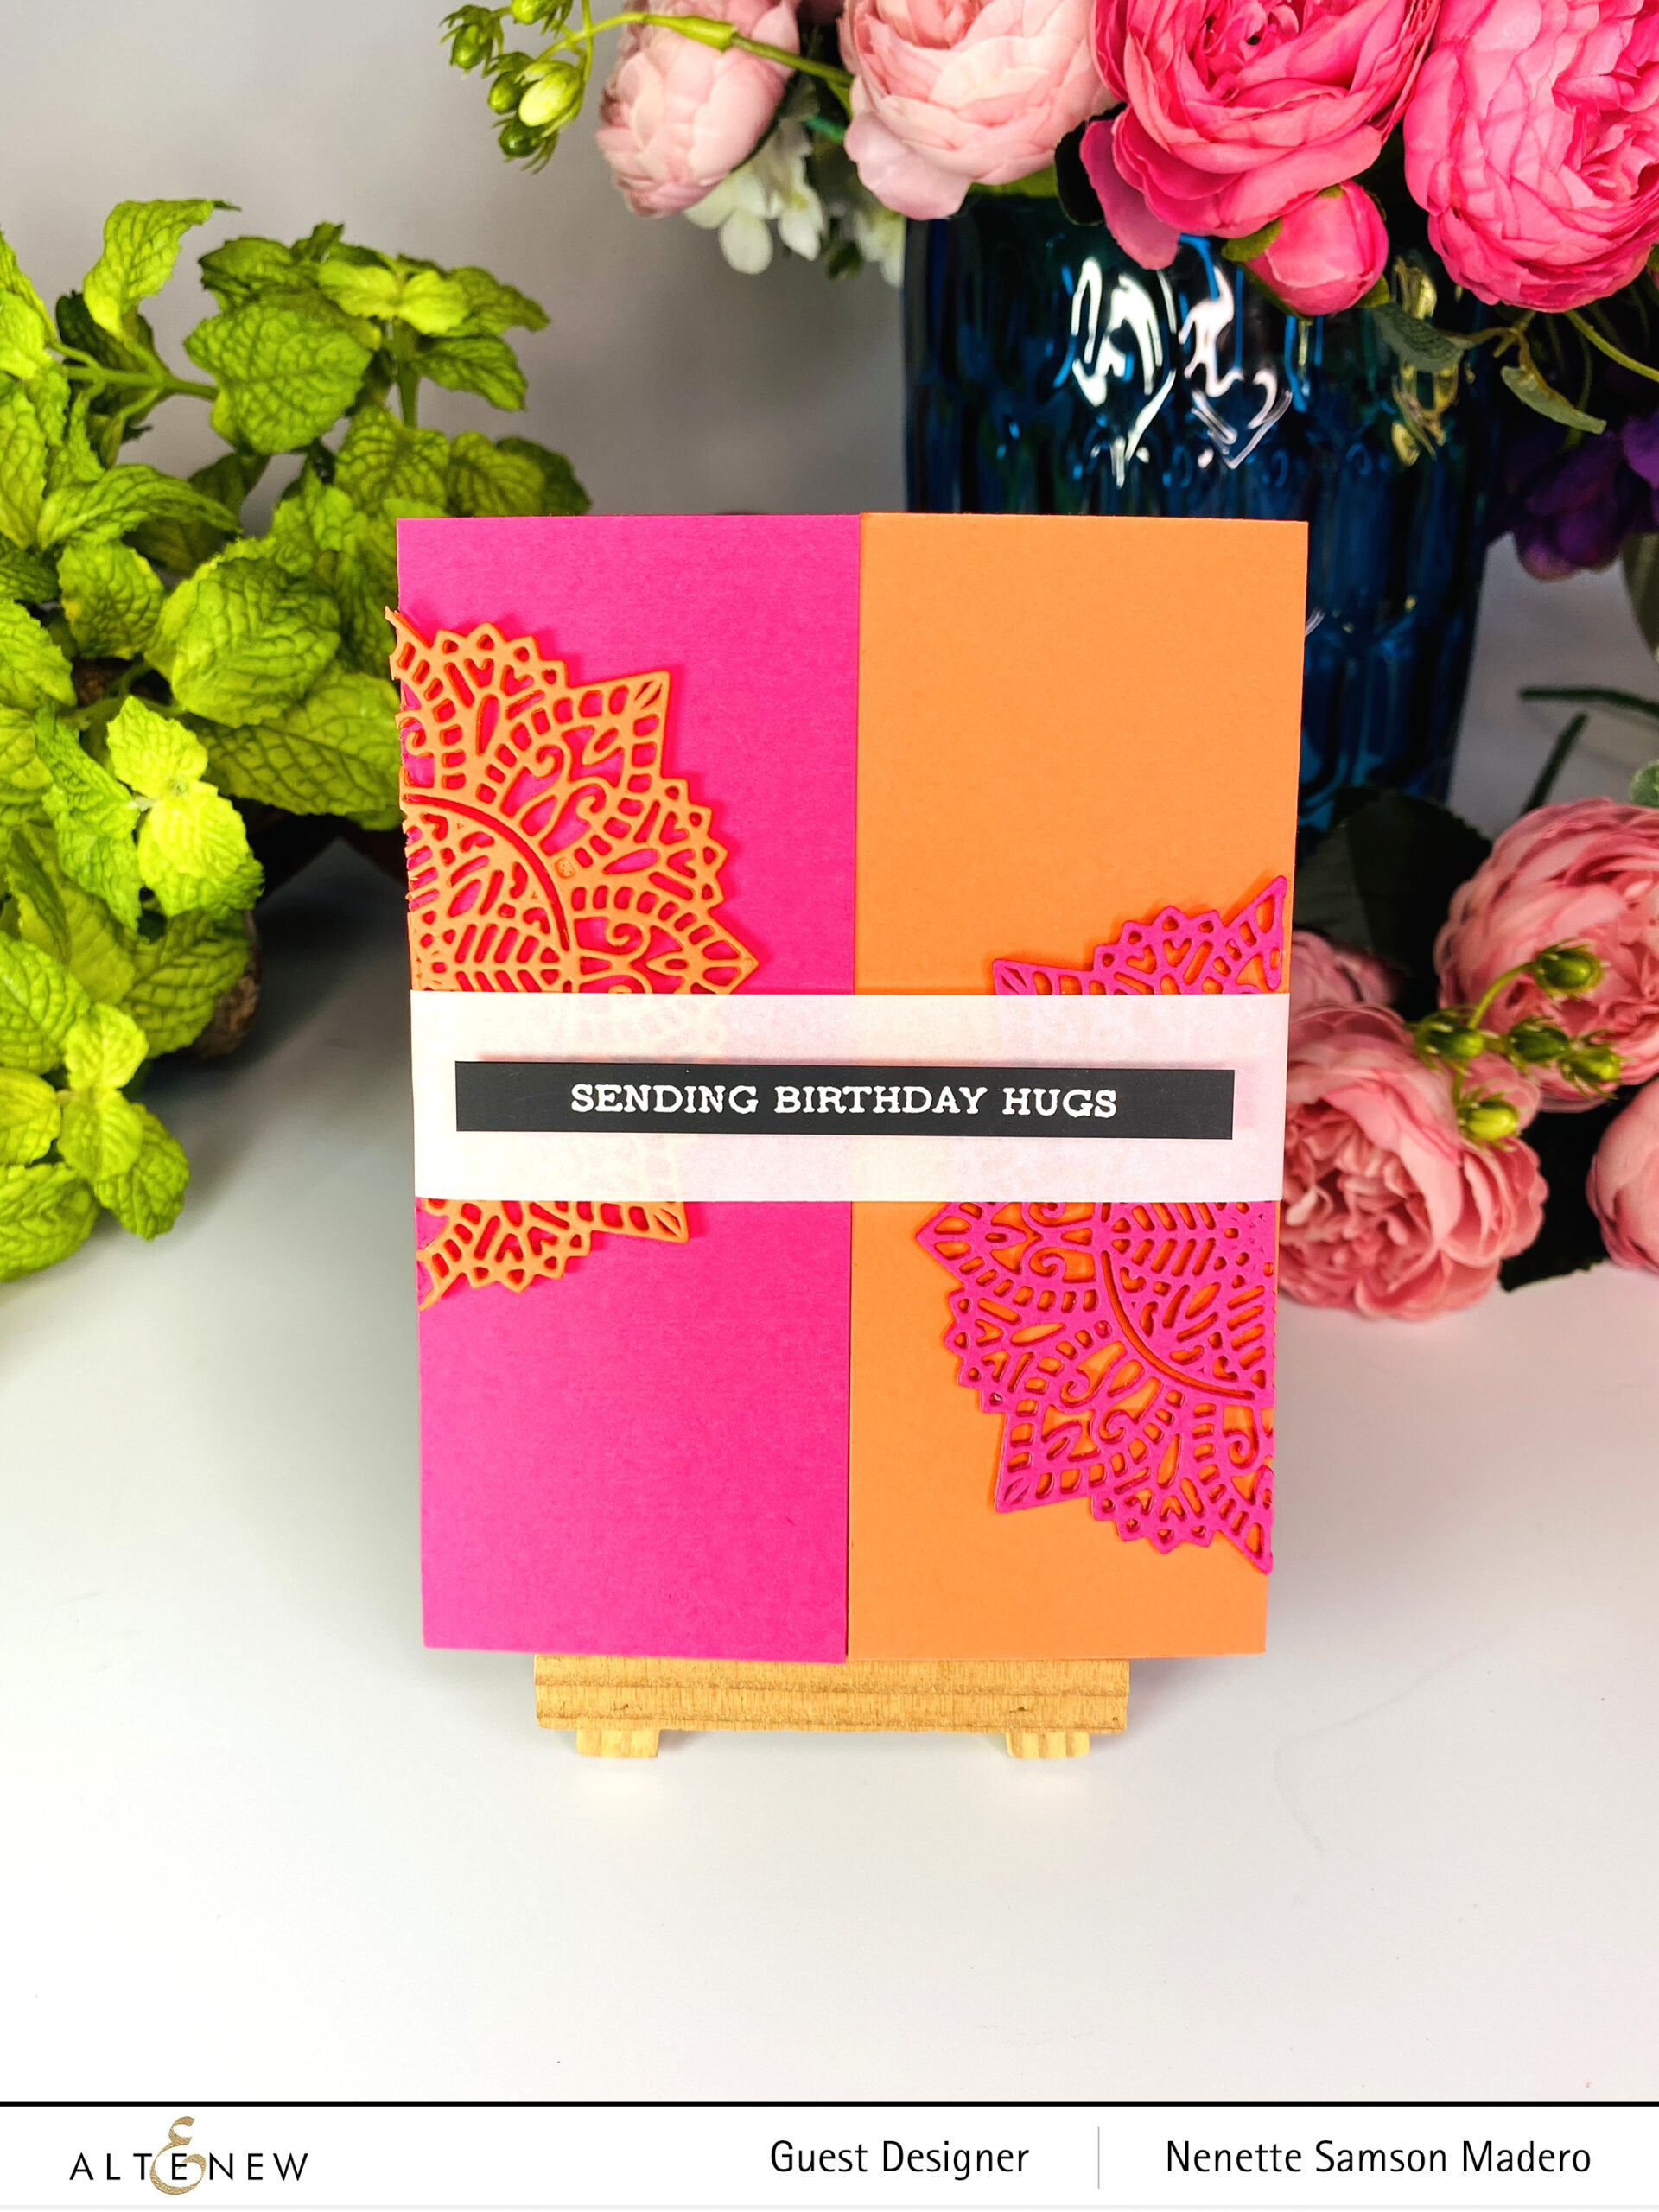
STEPS:
- Die cut colored cardstock using the Lacy Doily die 4 times using pink and 4 times using orange. Cut the die cuts in half.
- Adhere on top of each other.
- Create an A2 gate folded card using orange card stock and add a pink panel to the left side.
- Adhere the doily die cuts using the opposite colors.
- Stamp and emboss the sentiment with Pure White embossing powder on black cardstock.
- Create a vellum band and attach the sentiment.
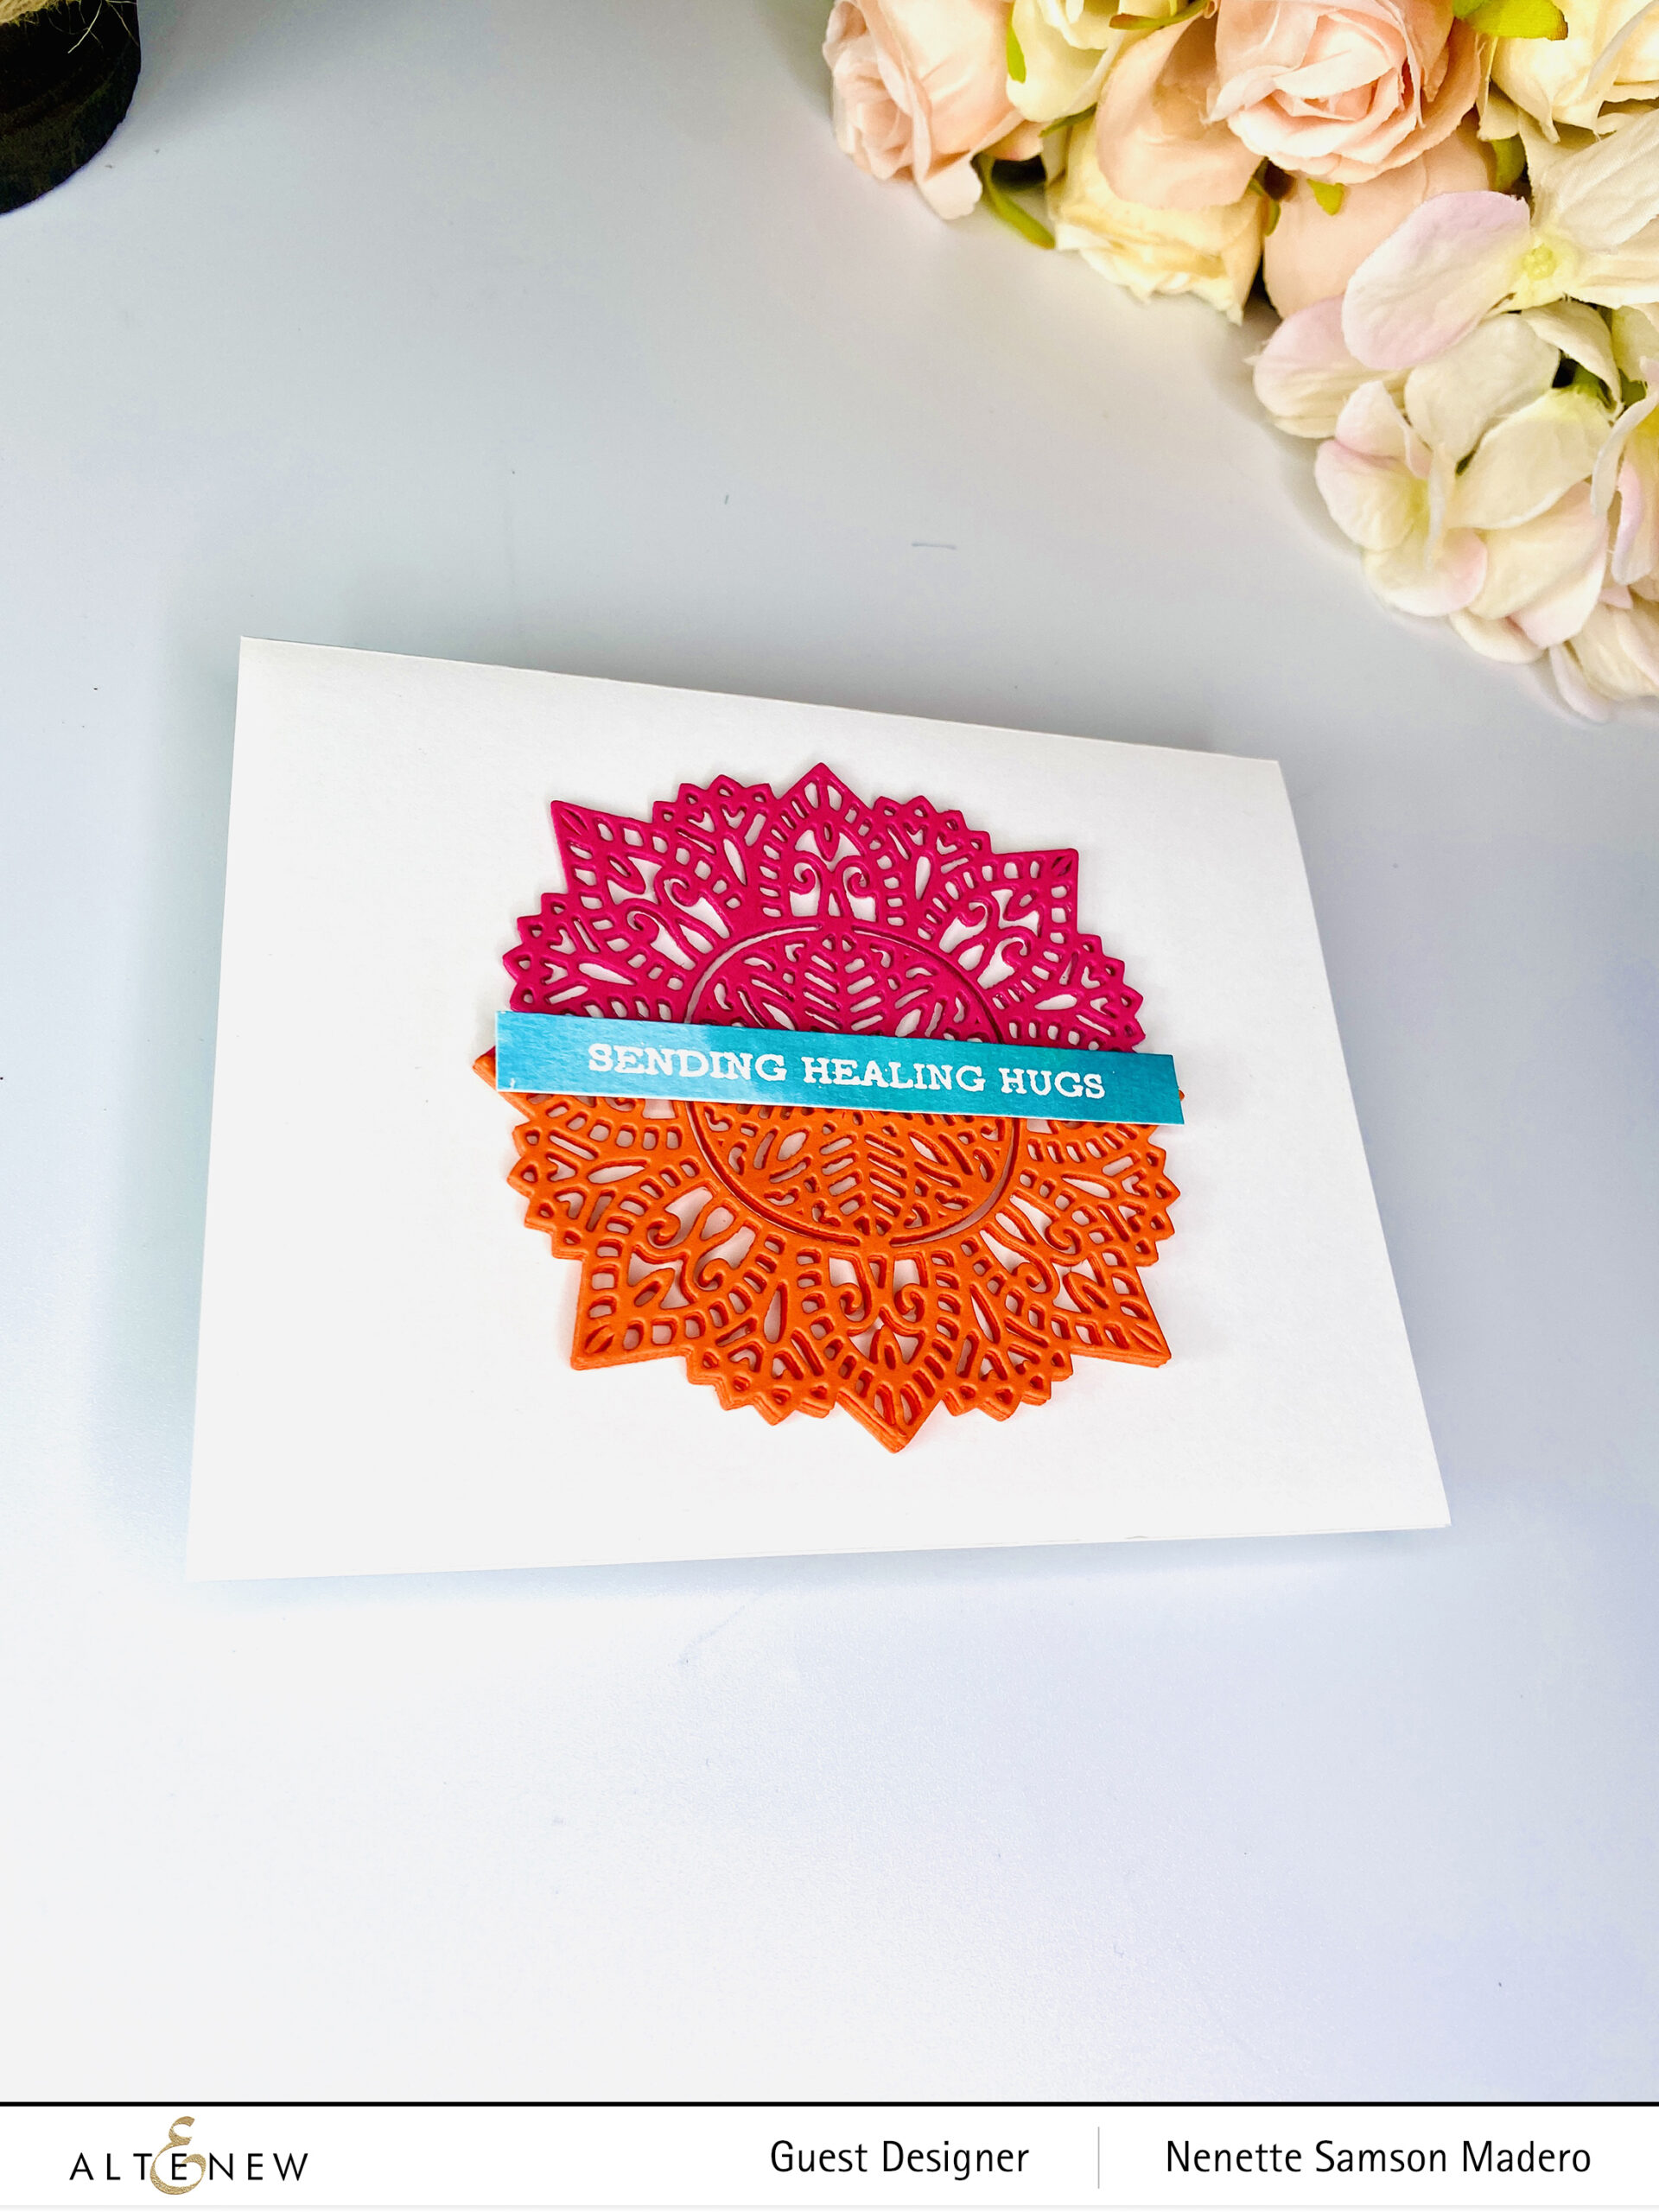
Here’s another card using the other half of the die cuts. Use a sentiment stamped on watercolored strips using Watercolor Brush Markers to hide the edges.
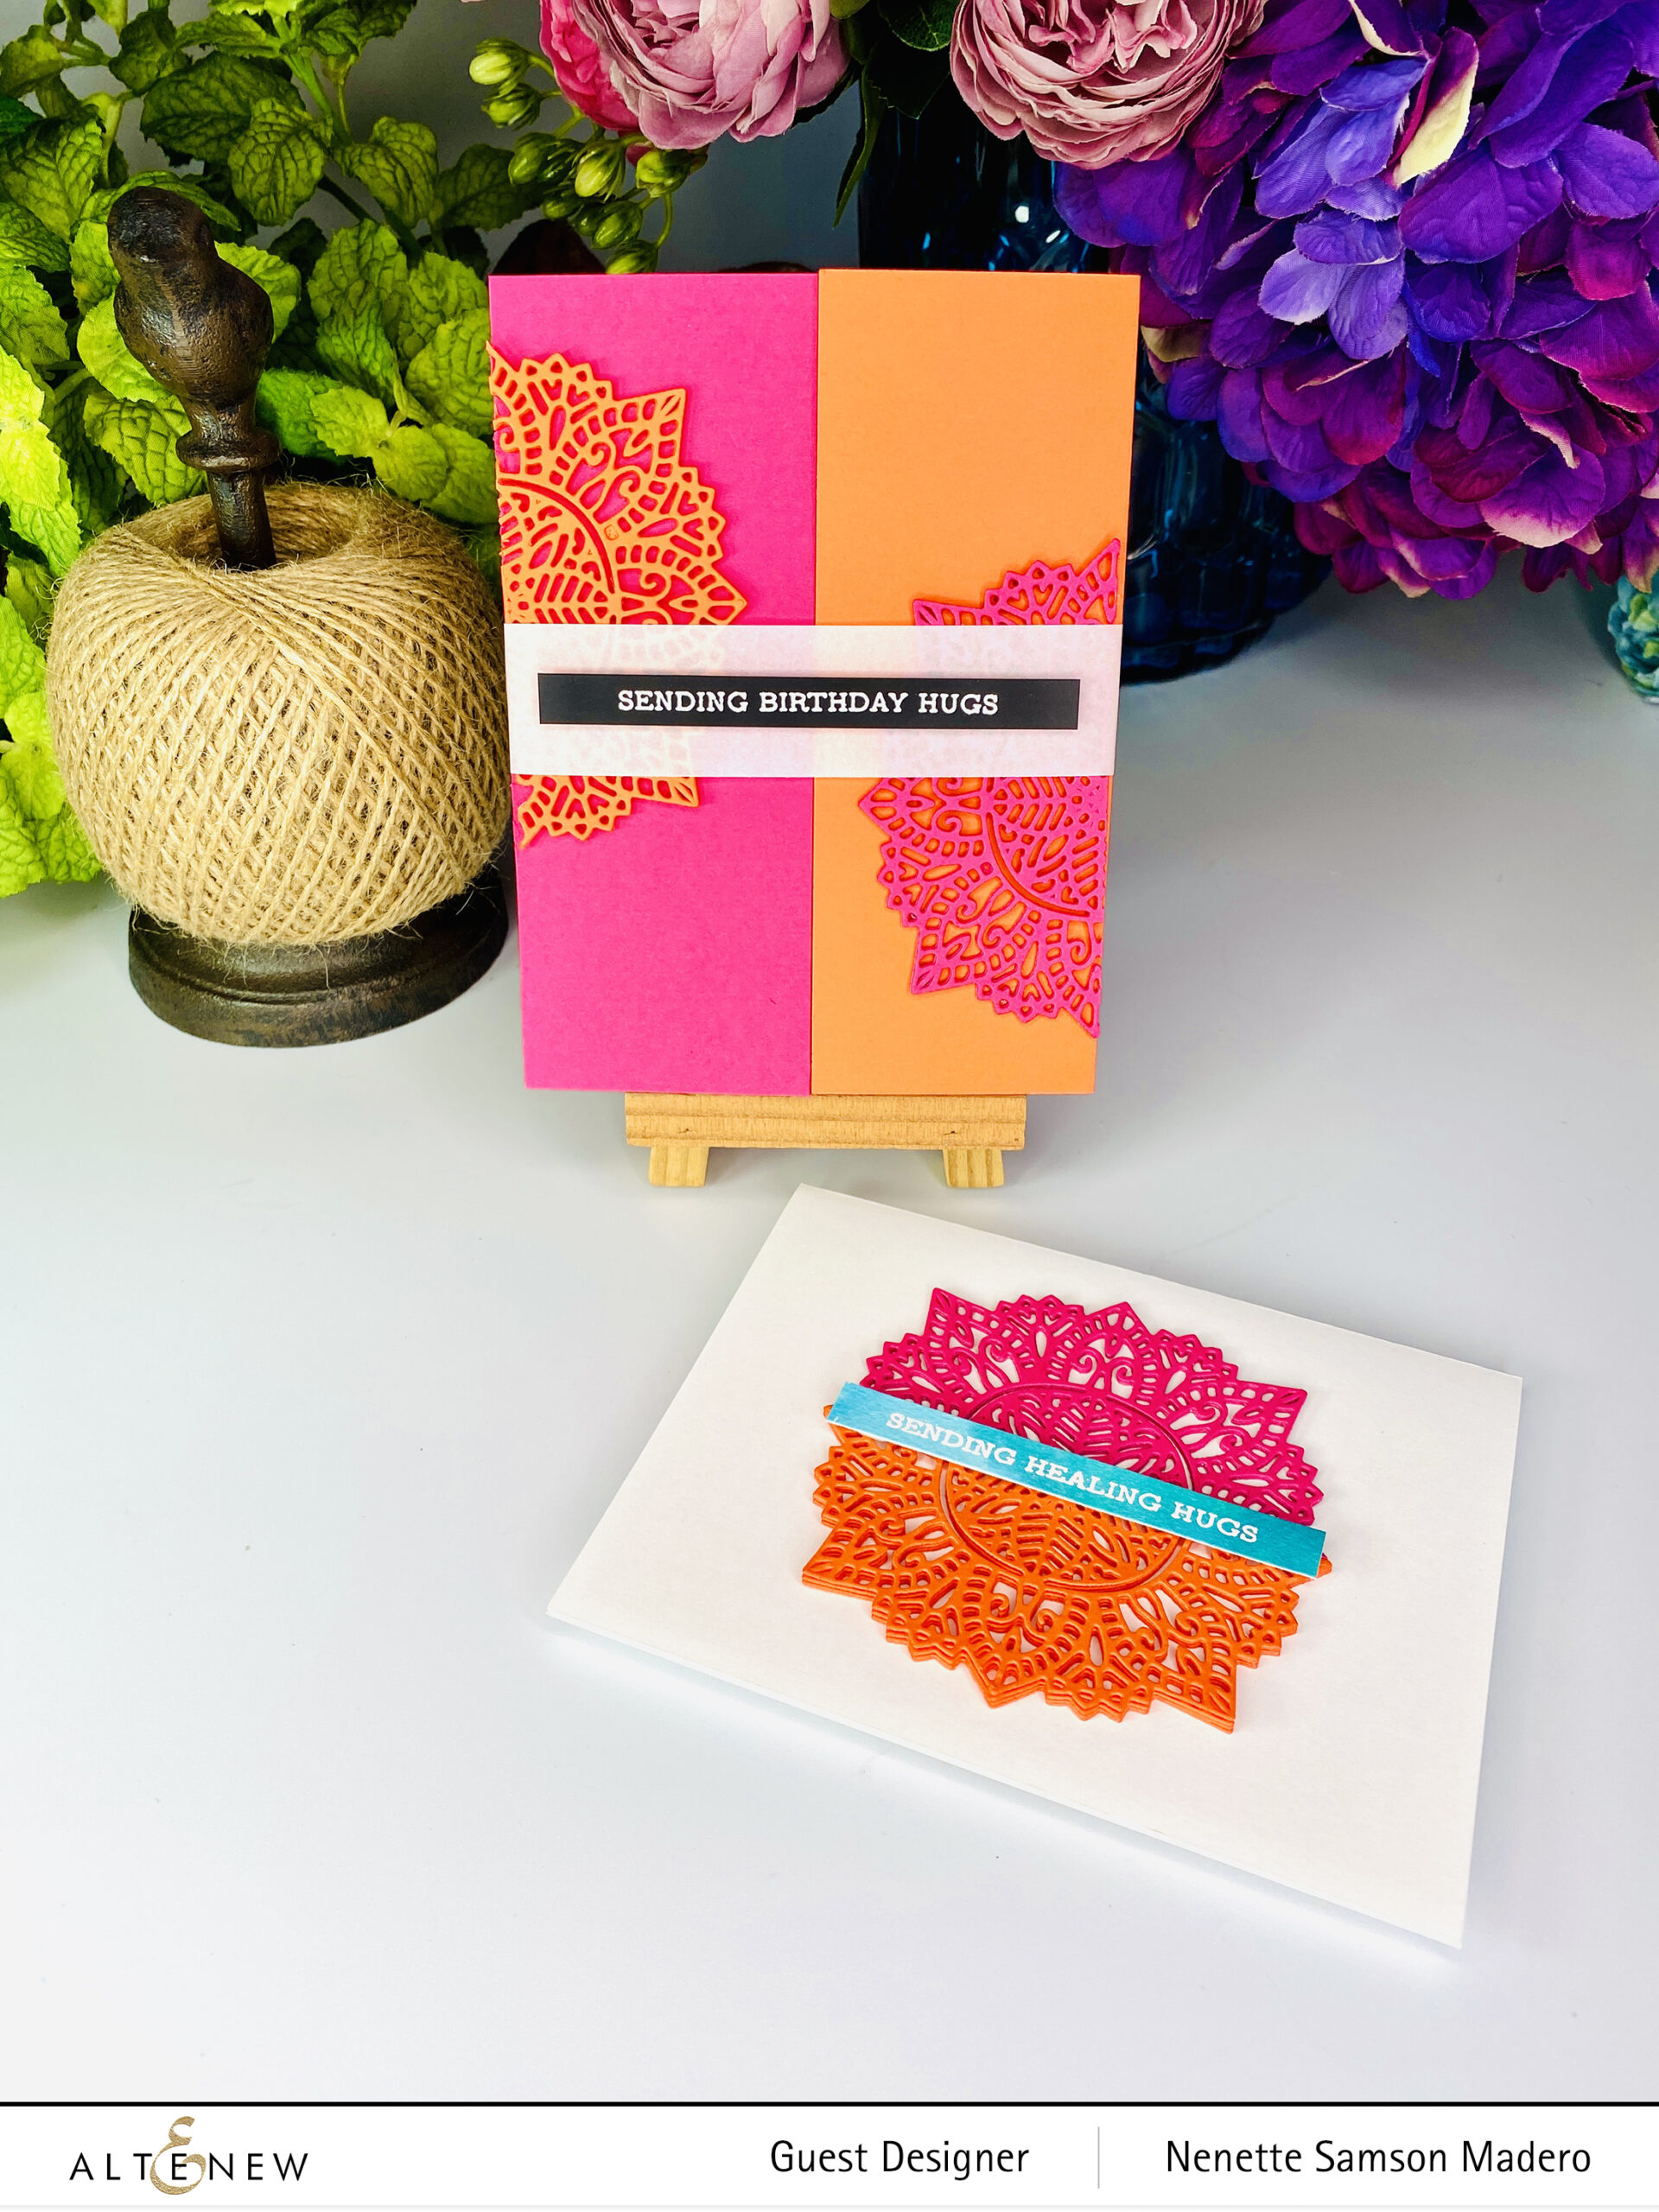
I love when I can make two cards out of one die-cut! Although the 2nd one is a CAS card, the high contrast of the colors makes it stand out.
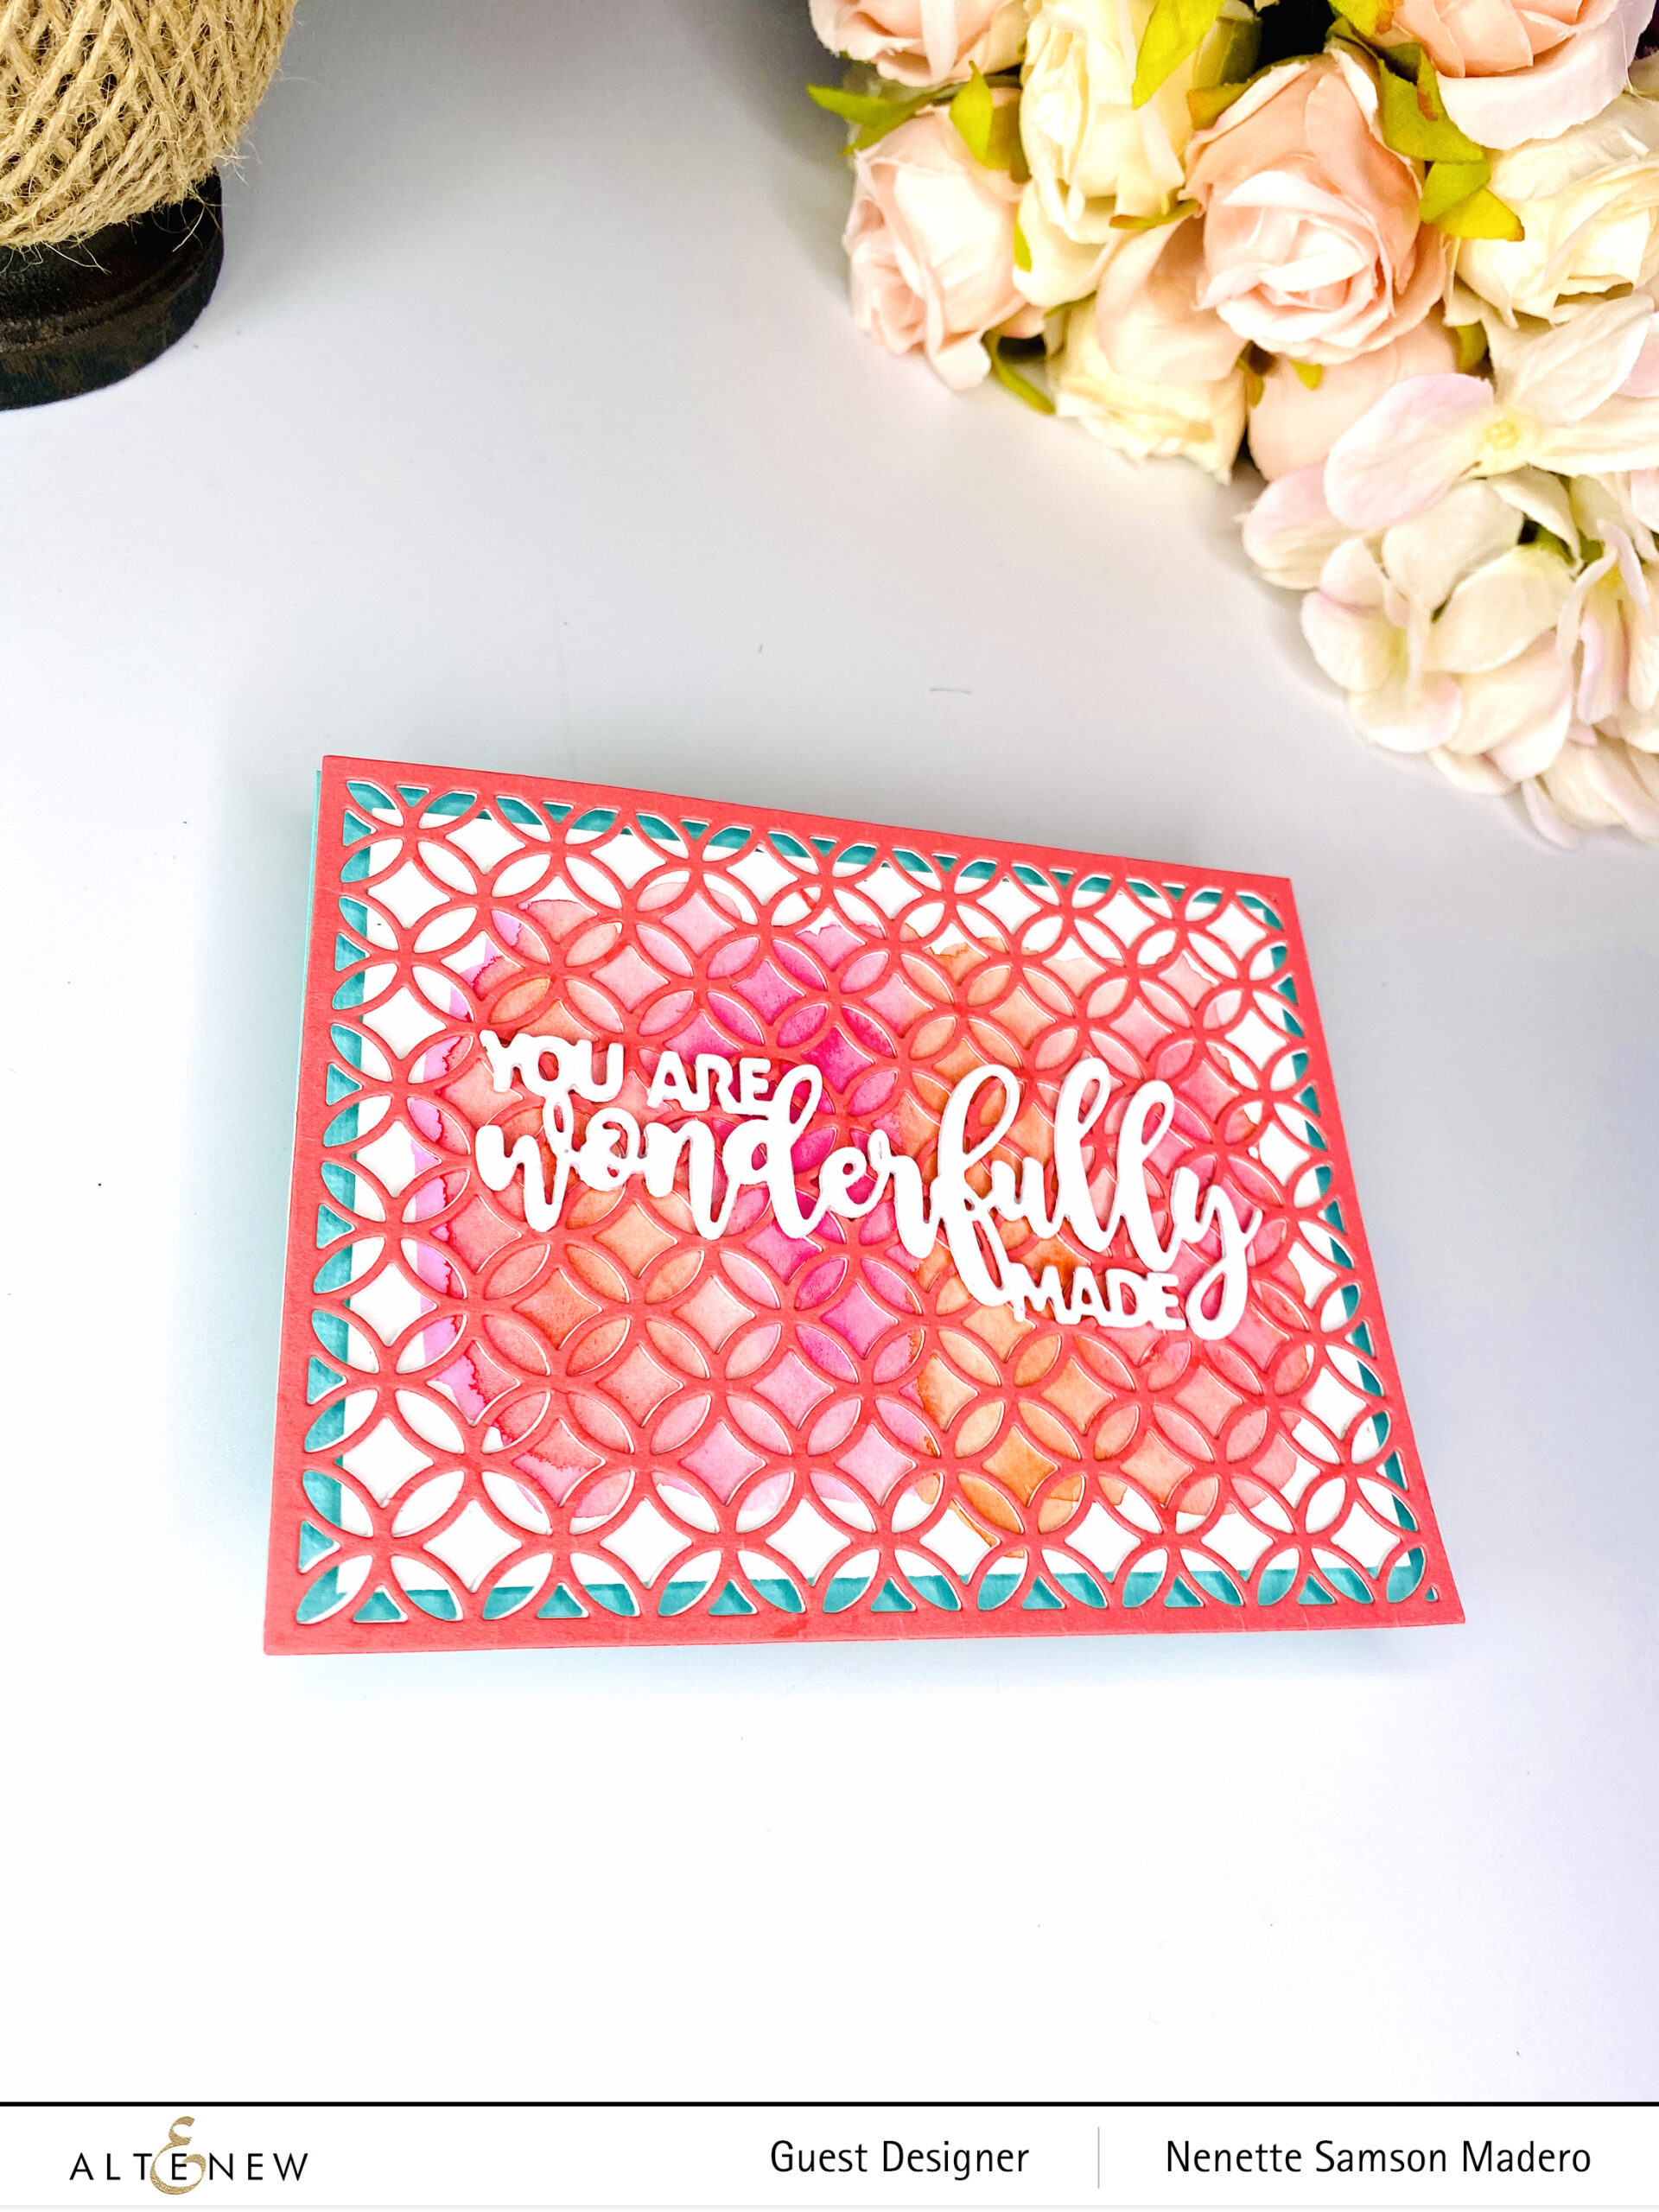
YOU ARE WONDERFULLY MADE
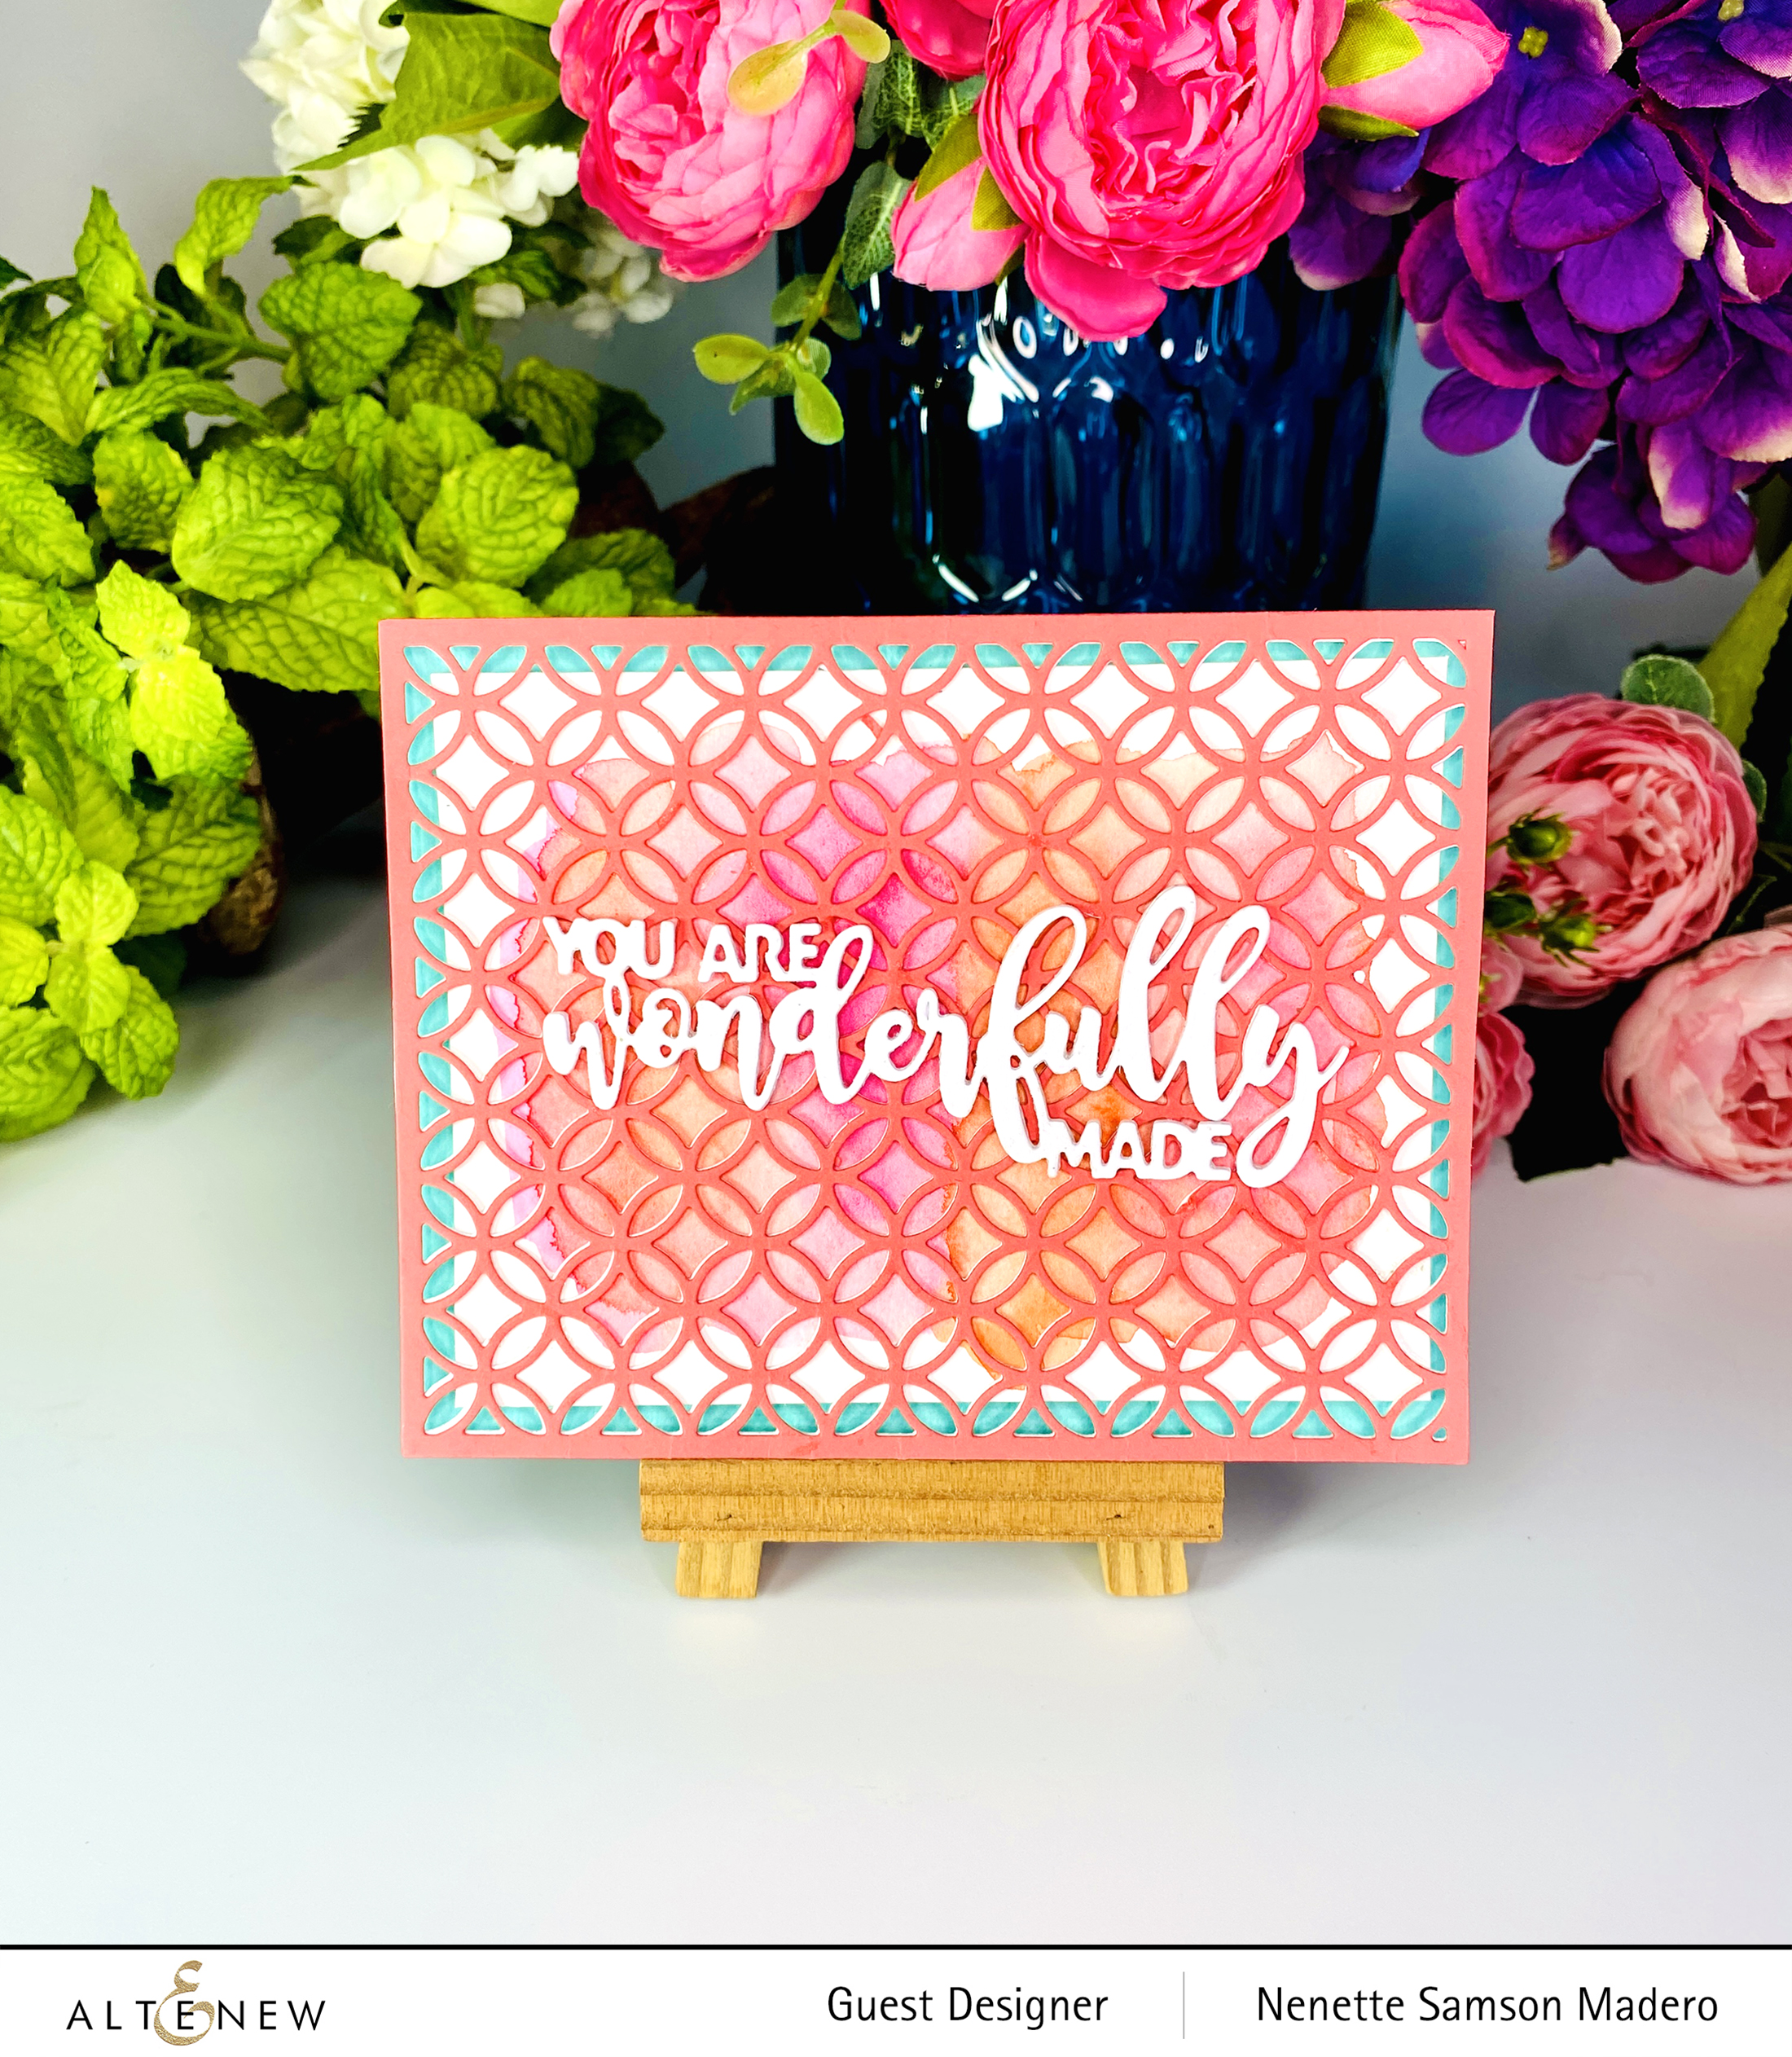
STEPS:
- Watercolor a background using pinks and peaches.
- Die cut the You are Wonderfully Made sentiment 4 times and adhere on top of each other.
- Die cut pink cardstock using the Circle Quilt Cover Die.
- Assemble the card.
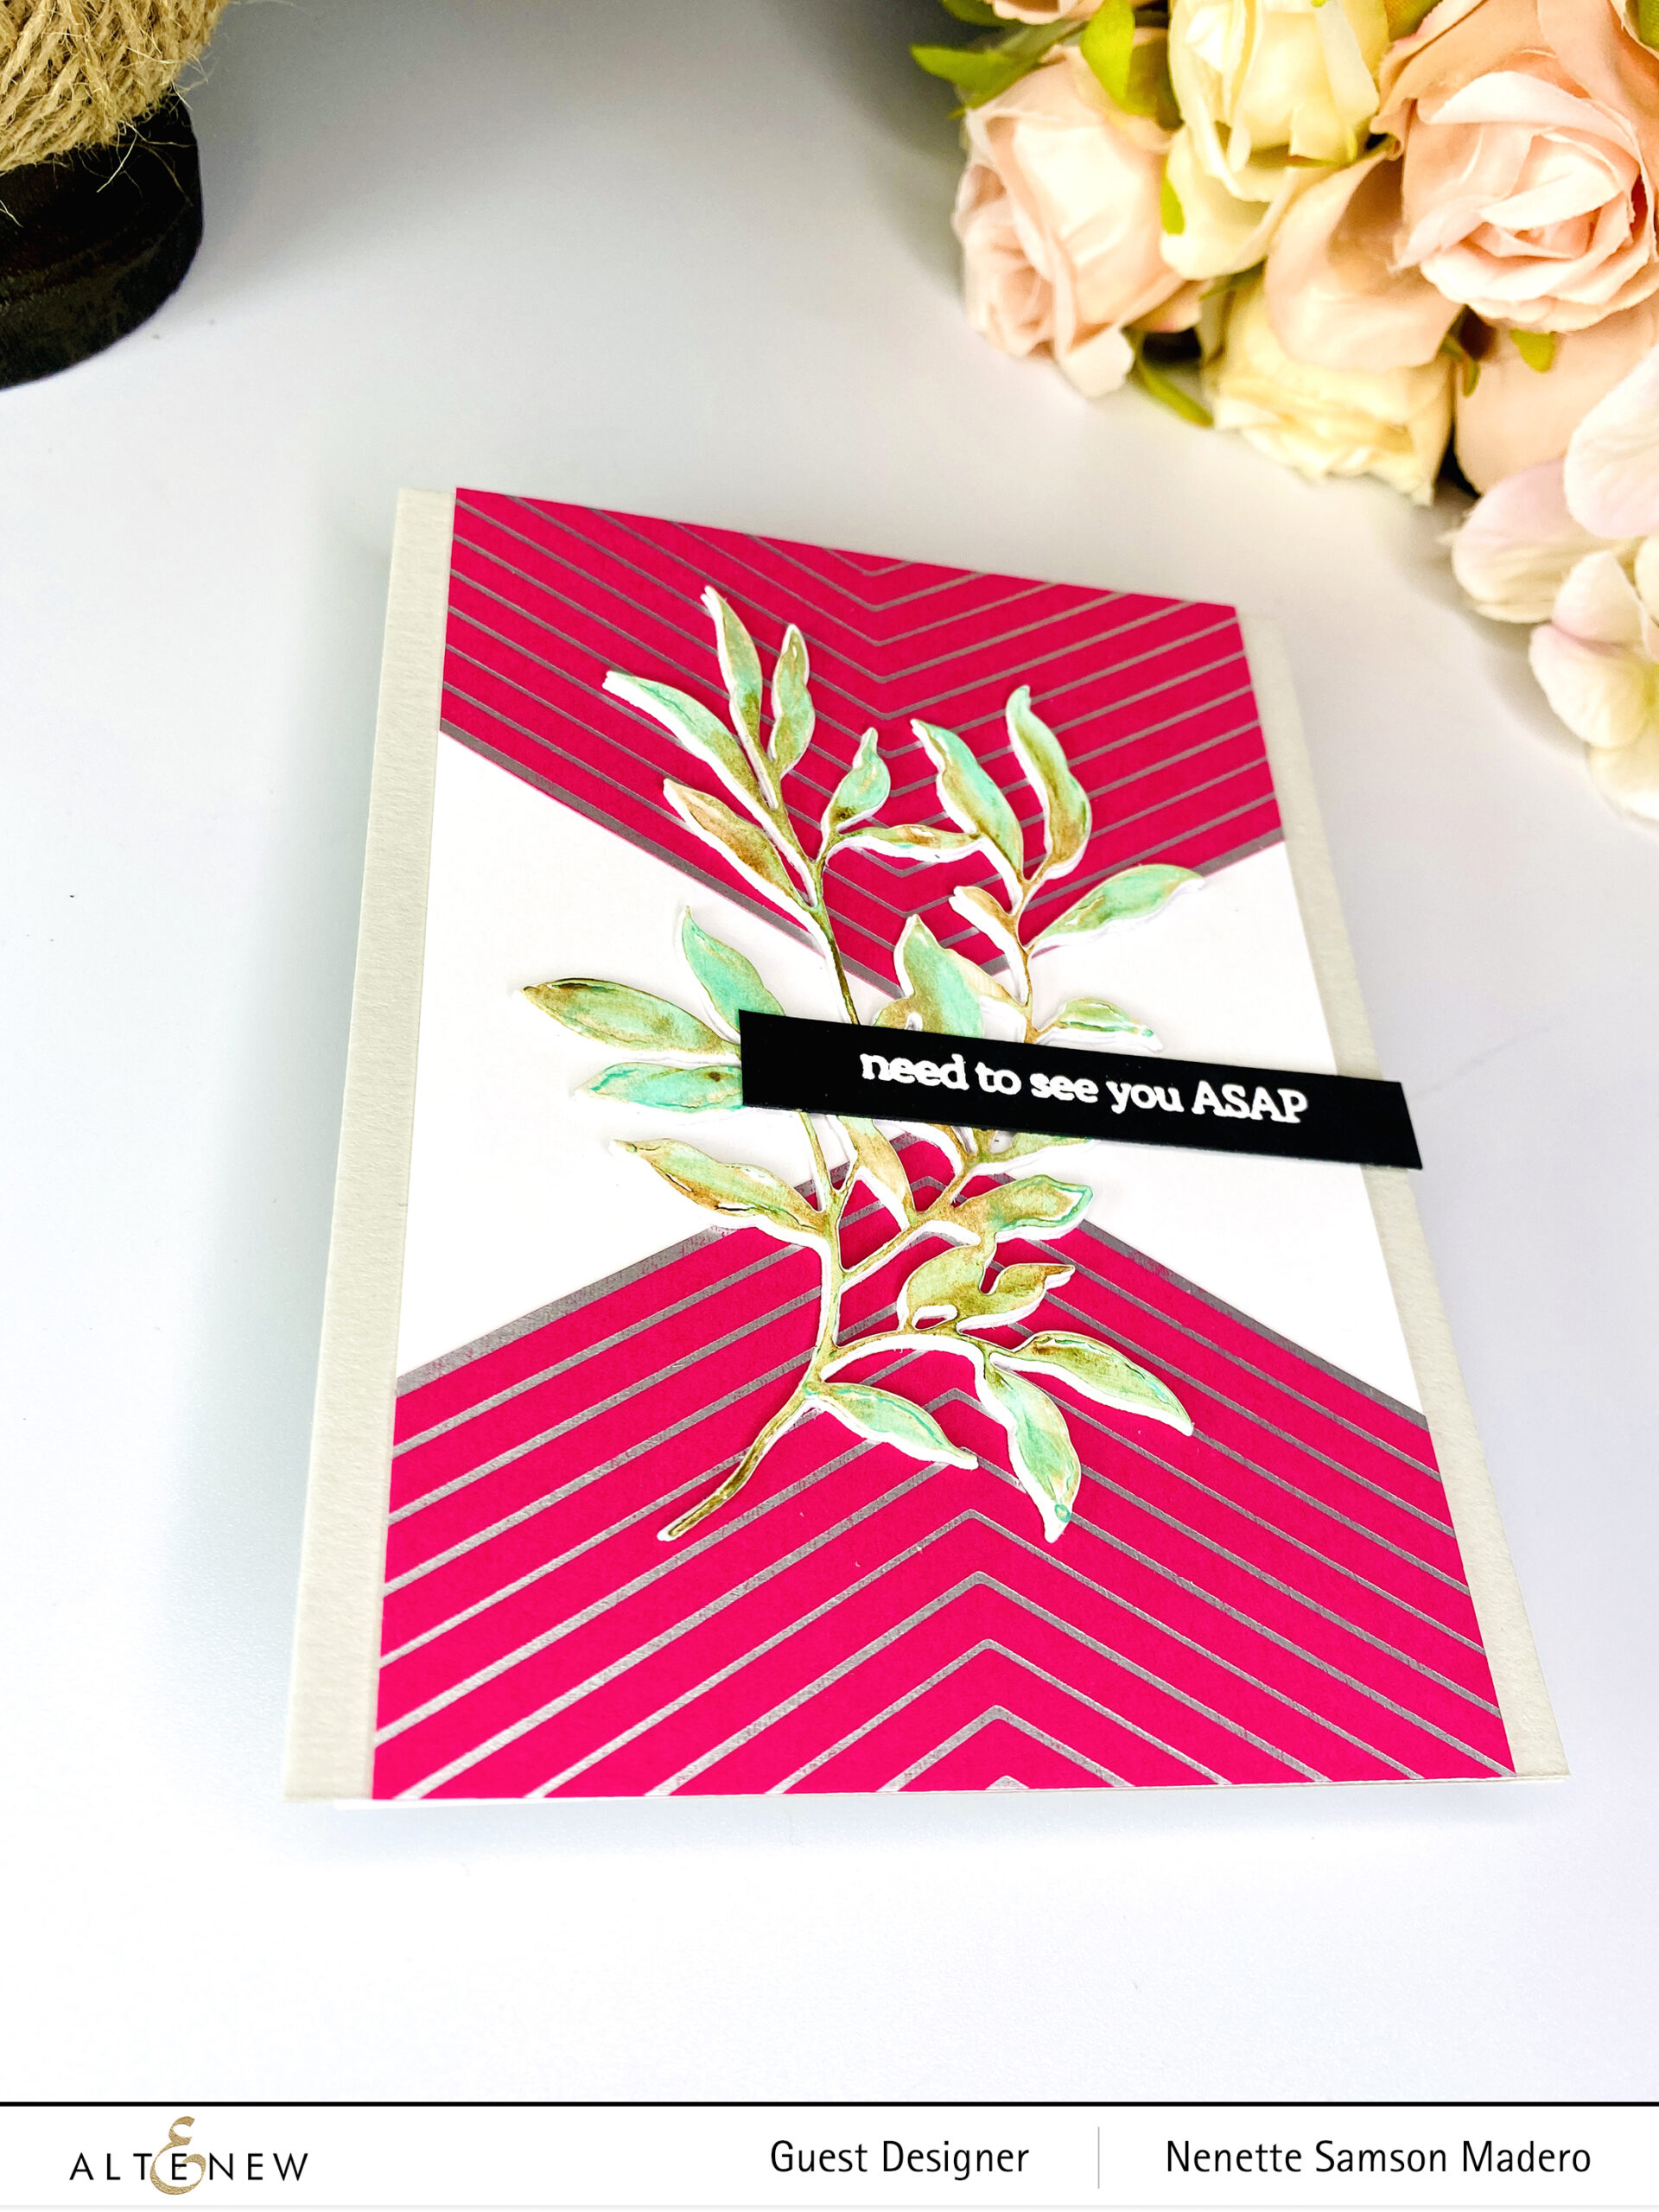
NEED TO SEE YOU ASAP
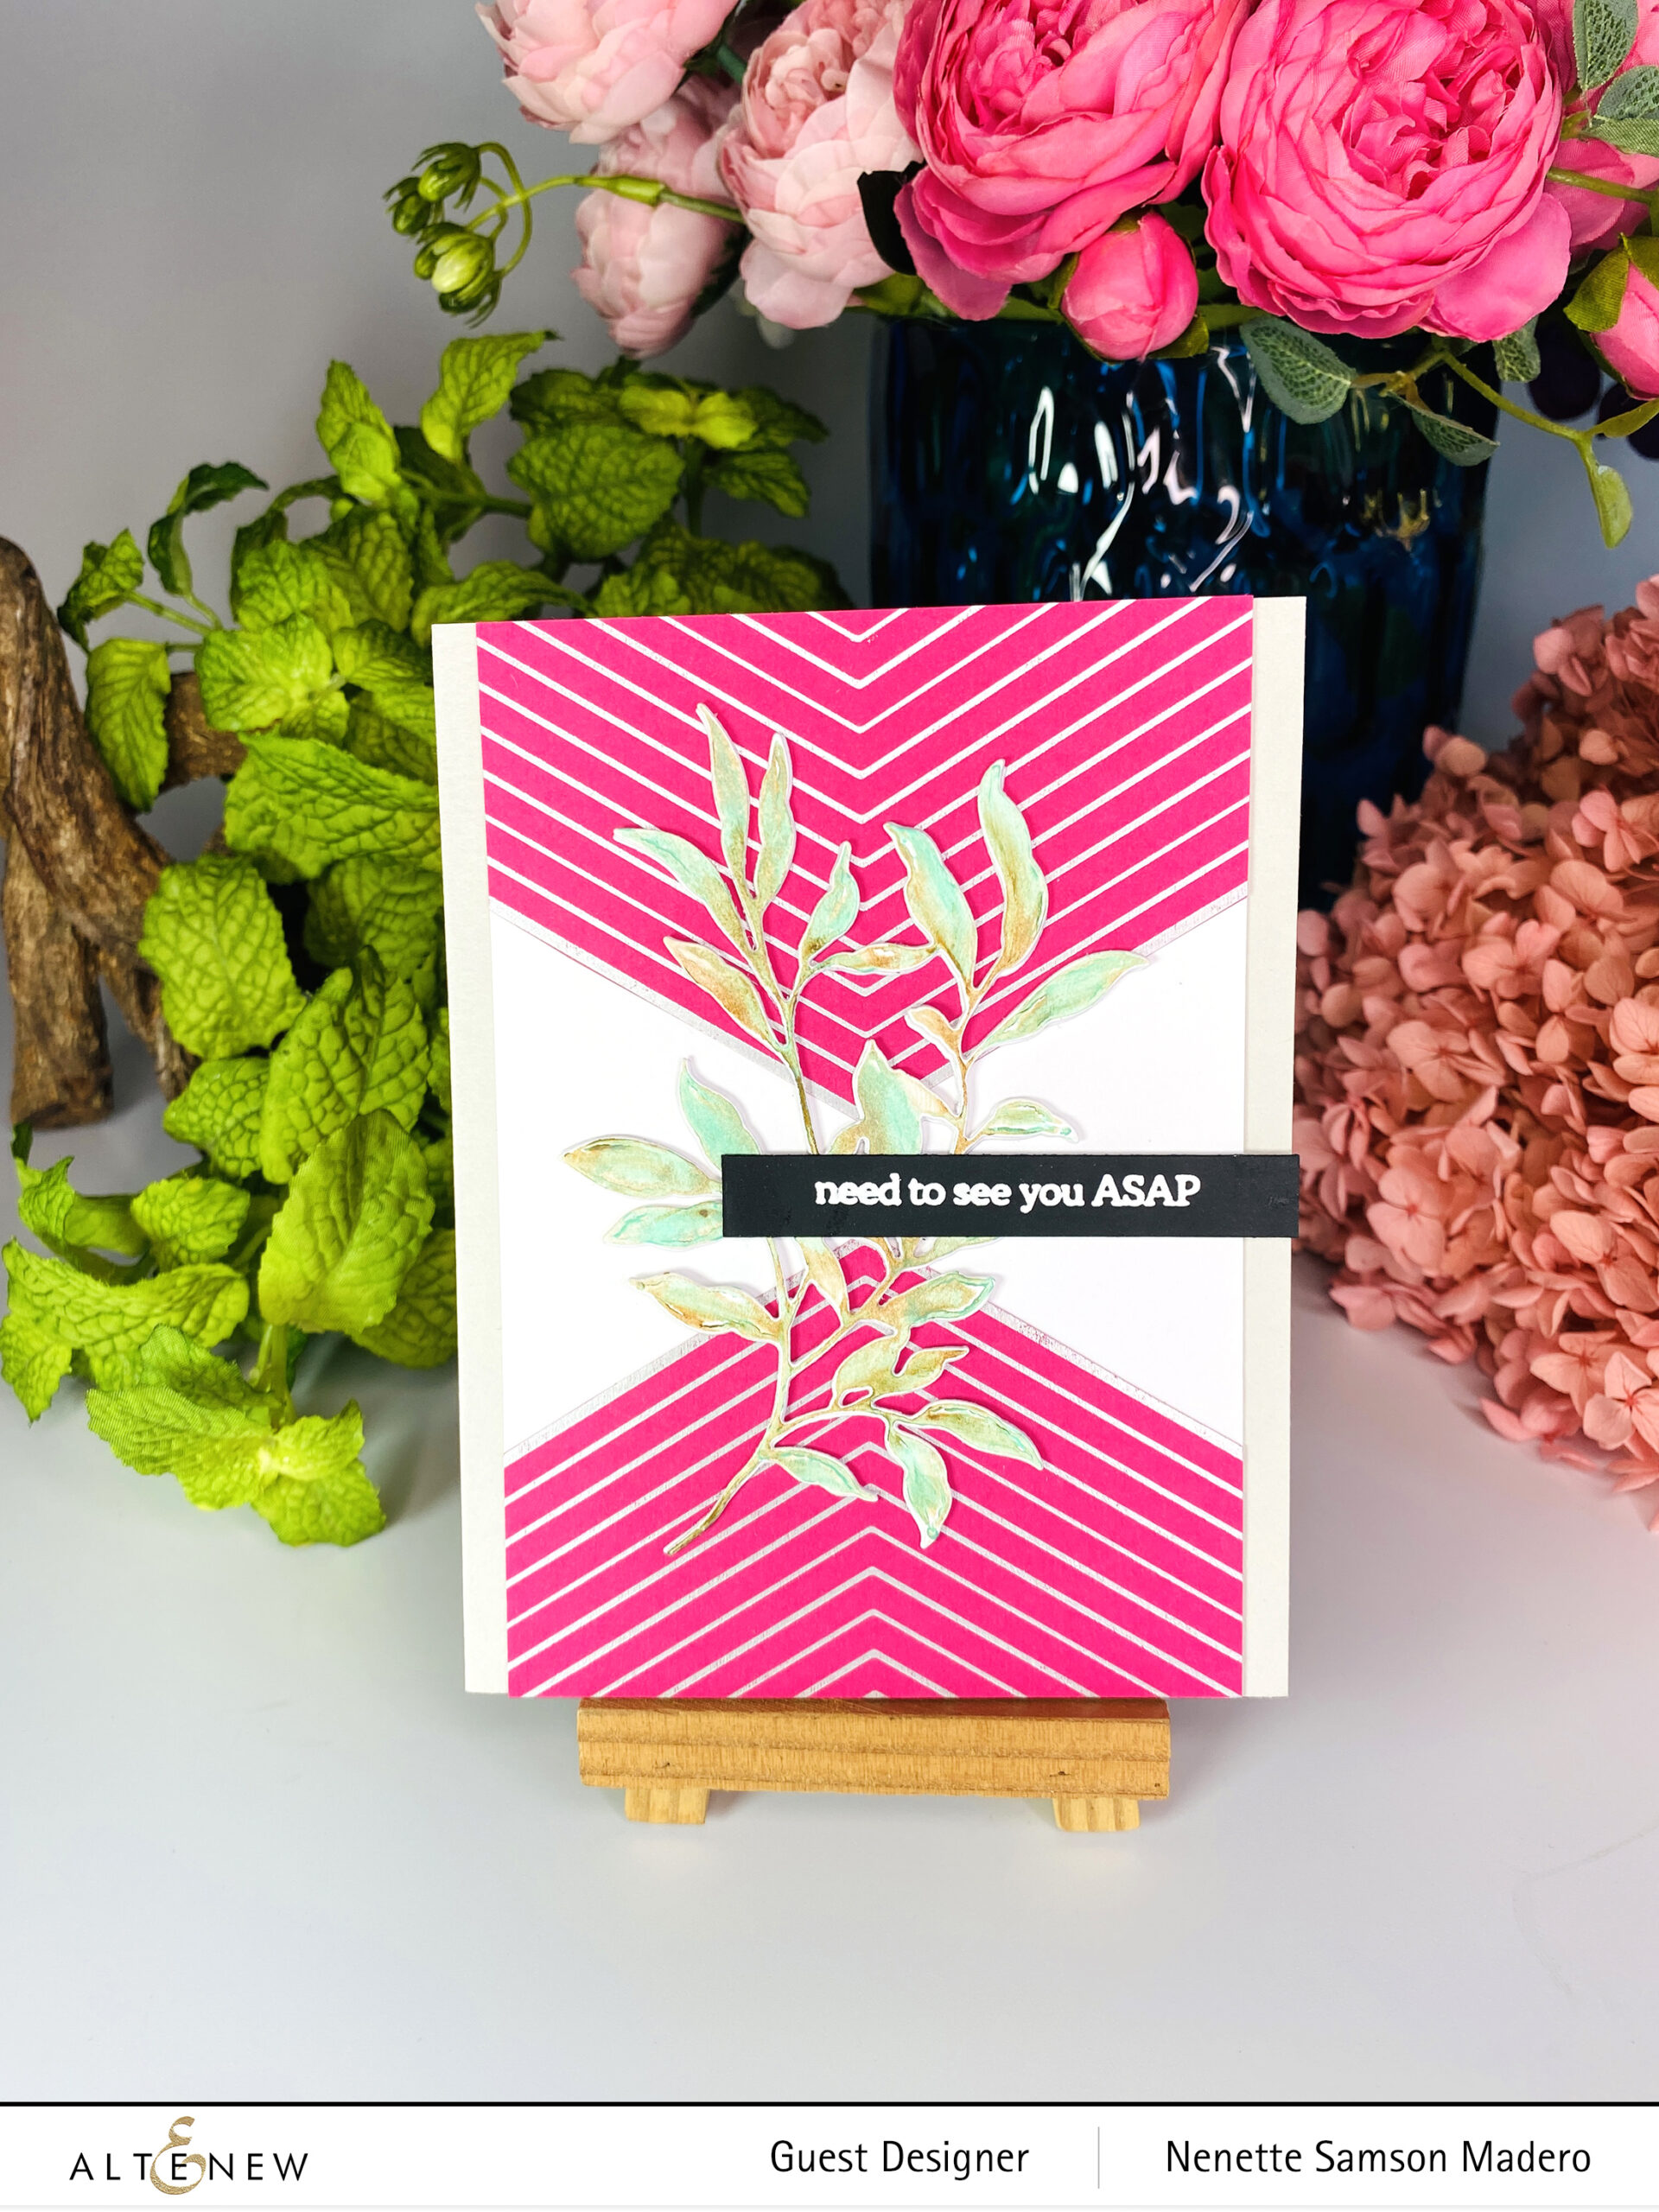
STEPS:
- Hot foil hot pick cardstock with silver foil using the Chevron Background Hot Foil Plate.
- Die cut foliage using the Just Leaves die and color using Distress Crayons and water.
- Emboss the leaves with Distress glaze.
- Stamp and emboss the sentiment with Pure White embossing powder.
- Assemble the card.
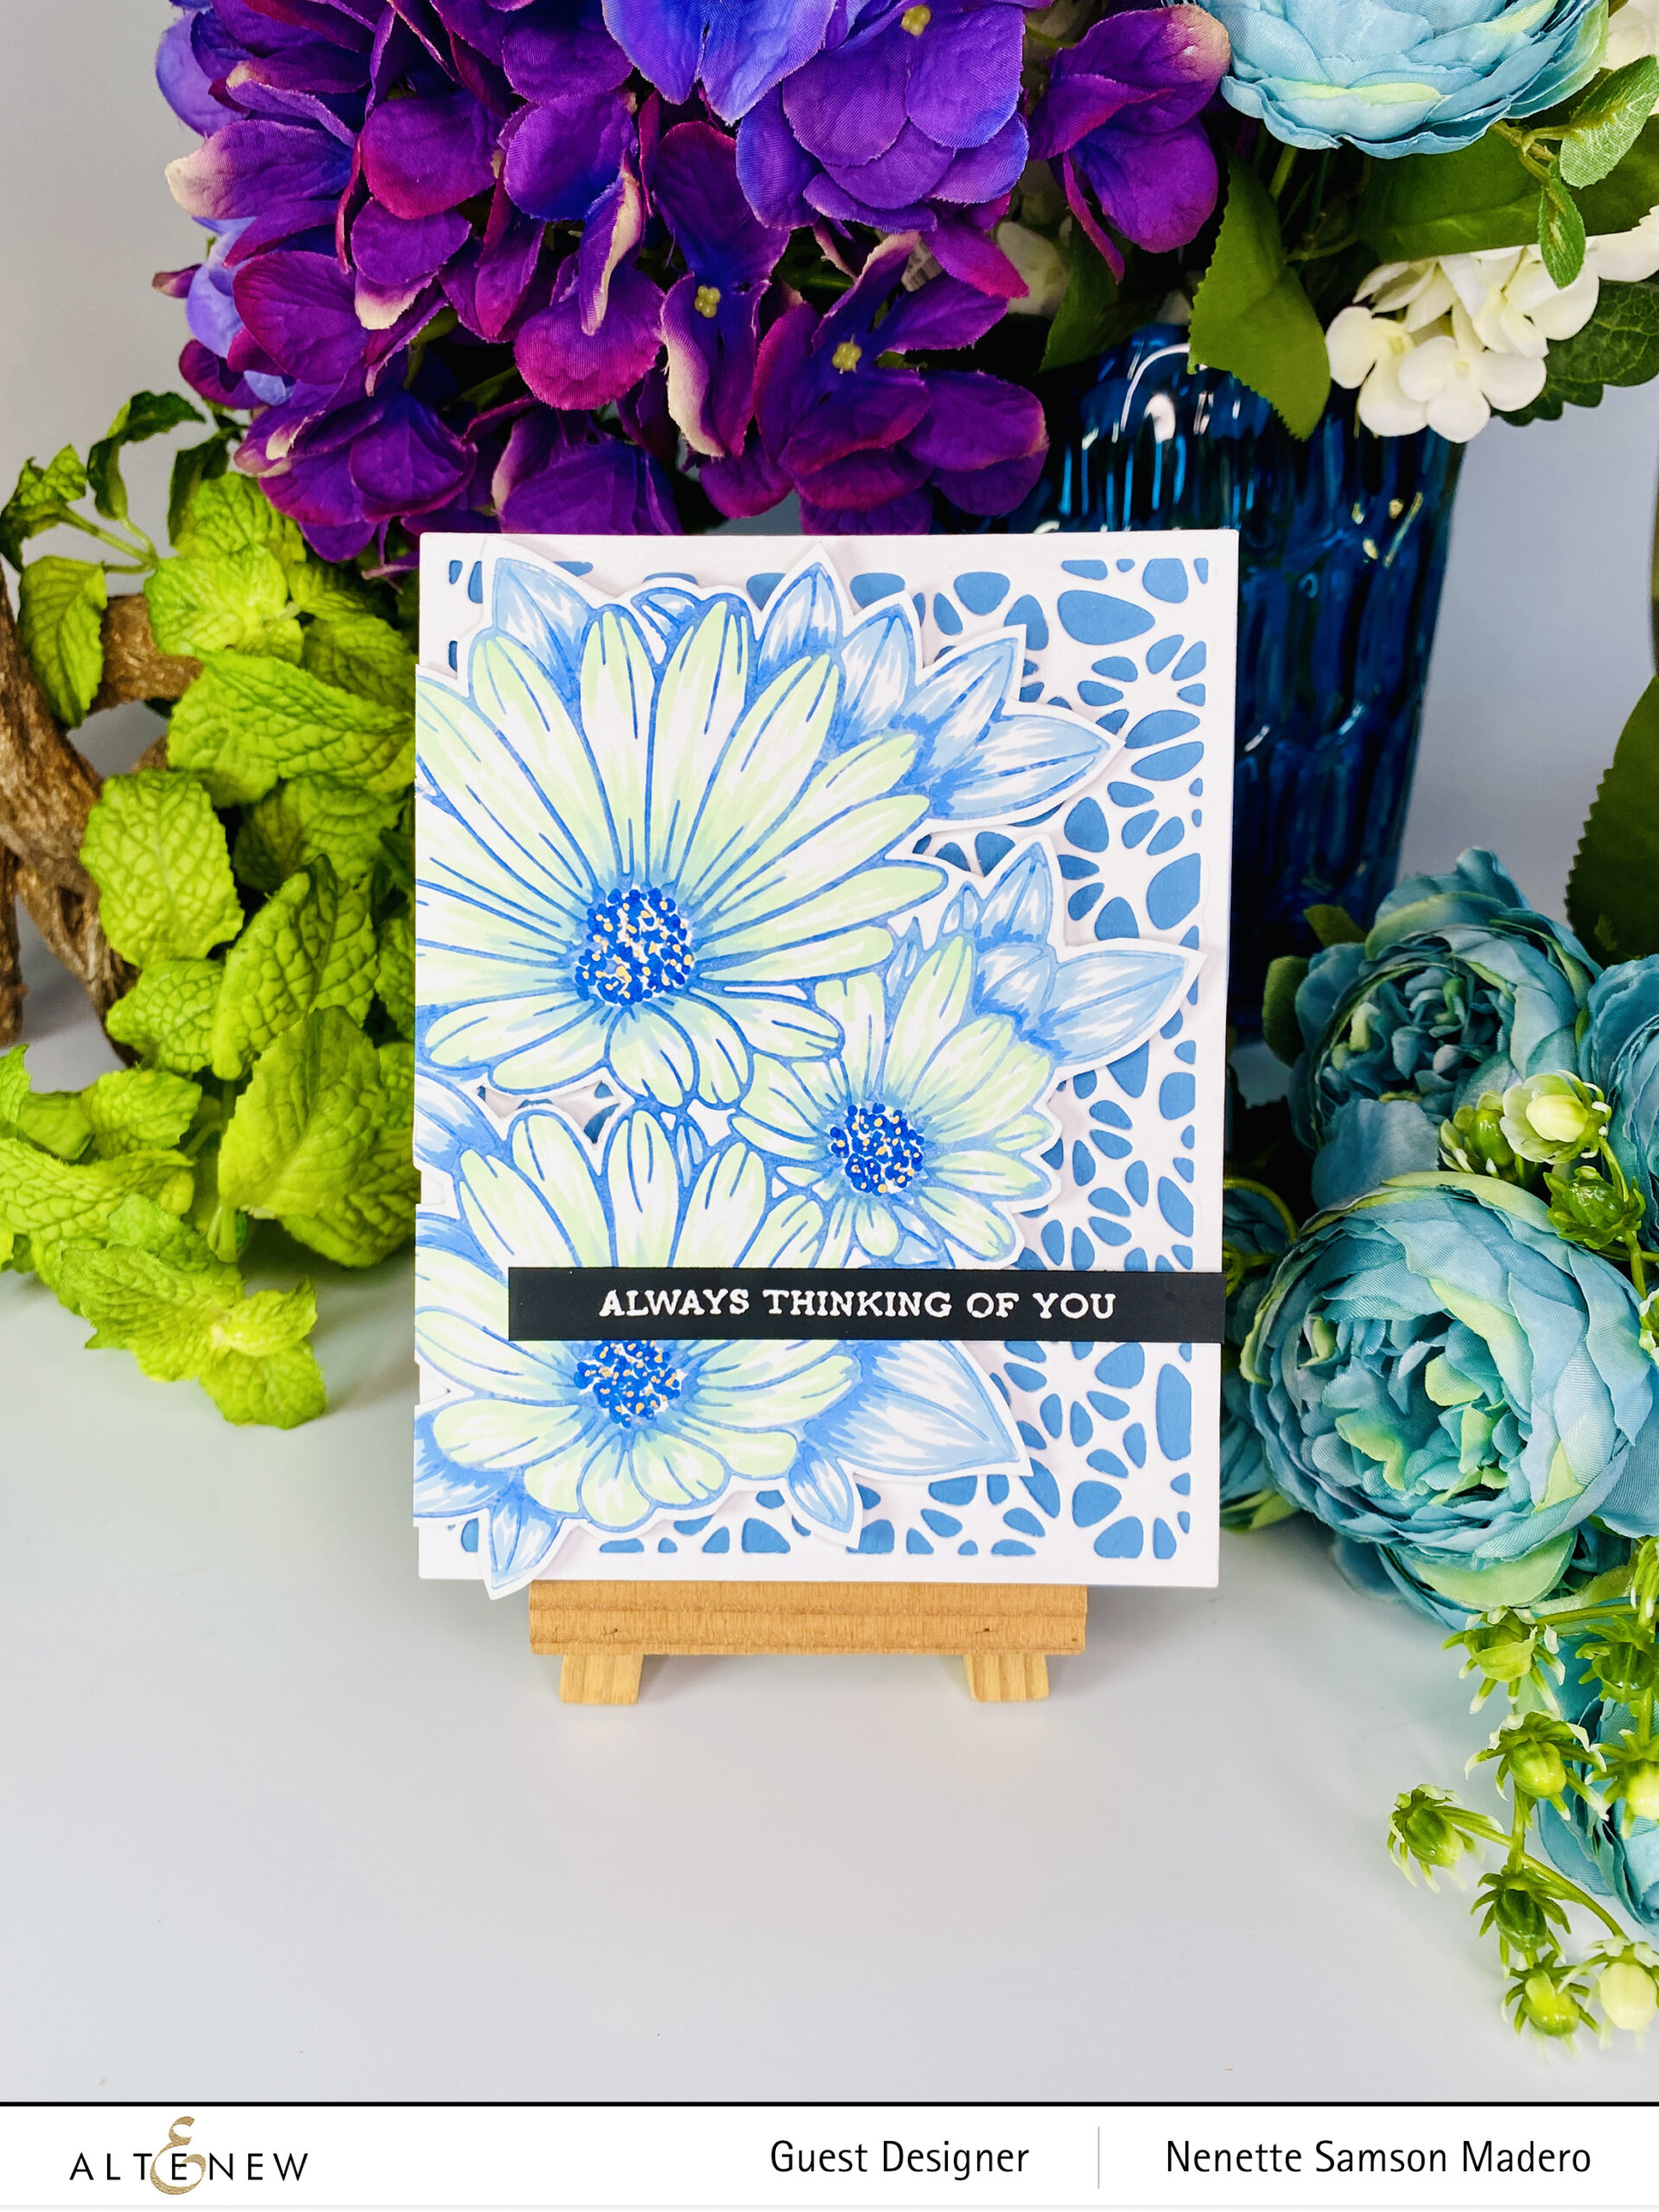
ALWAYS THINKING OF YOU
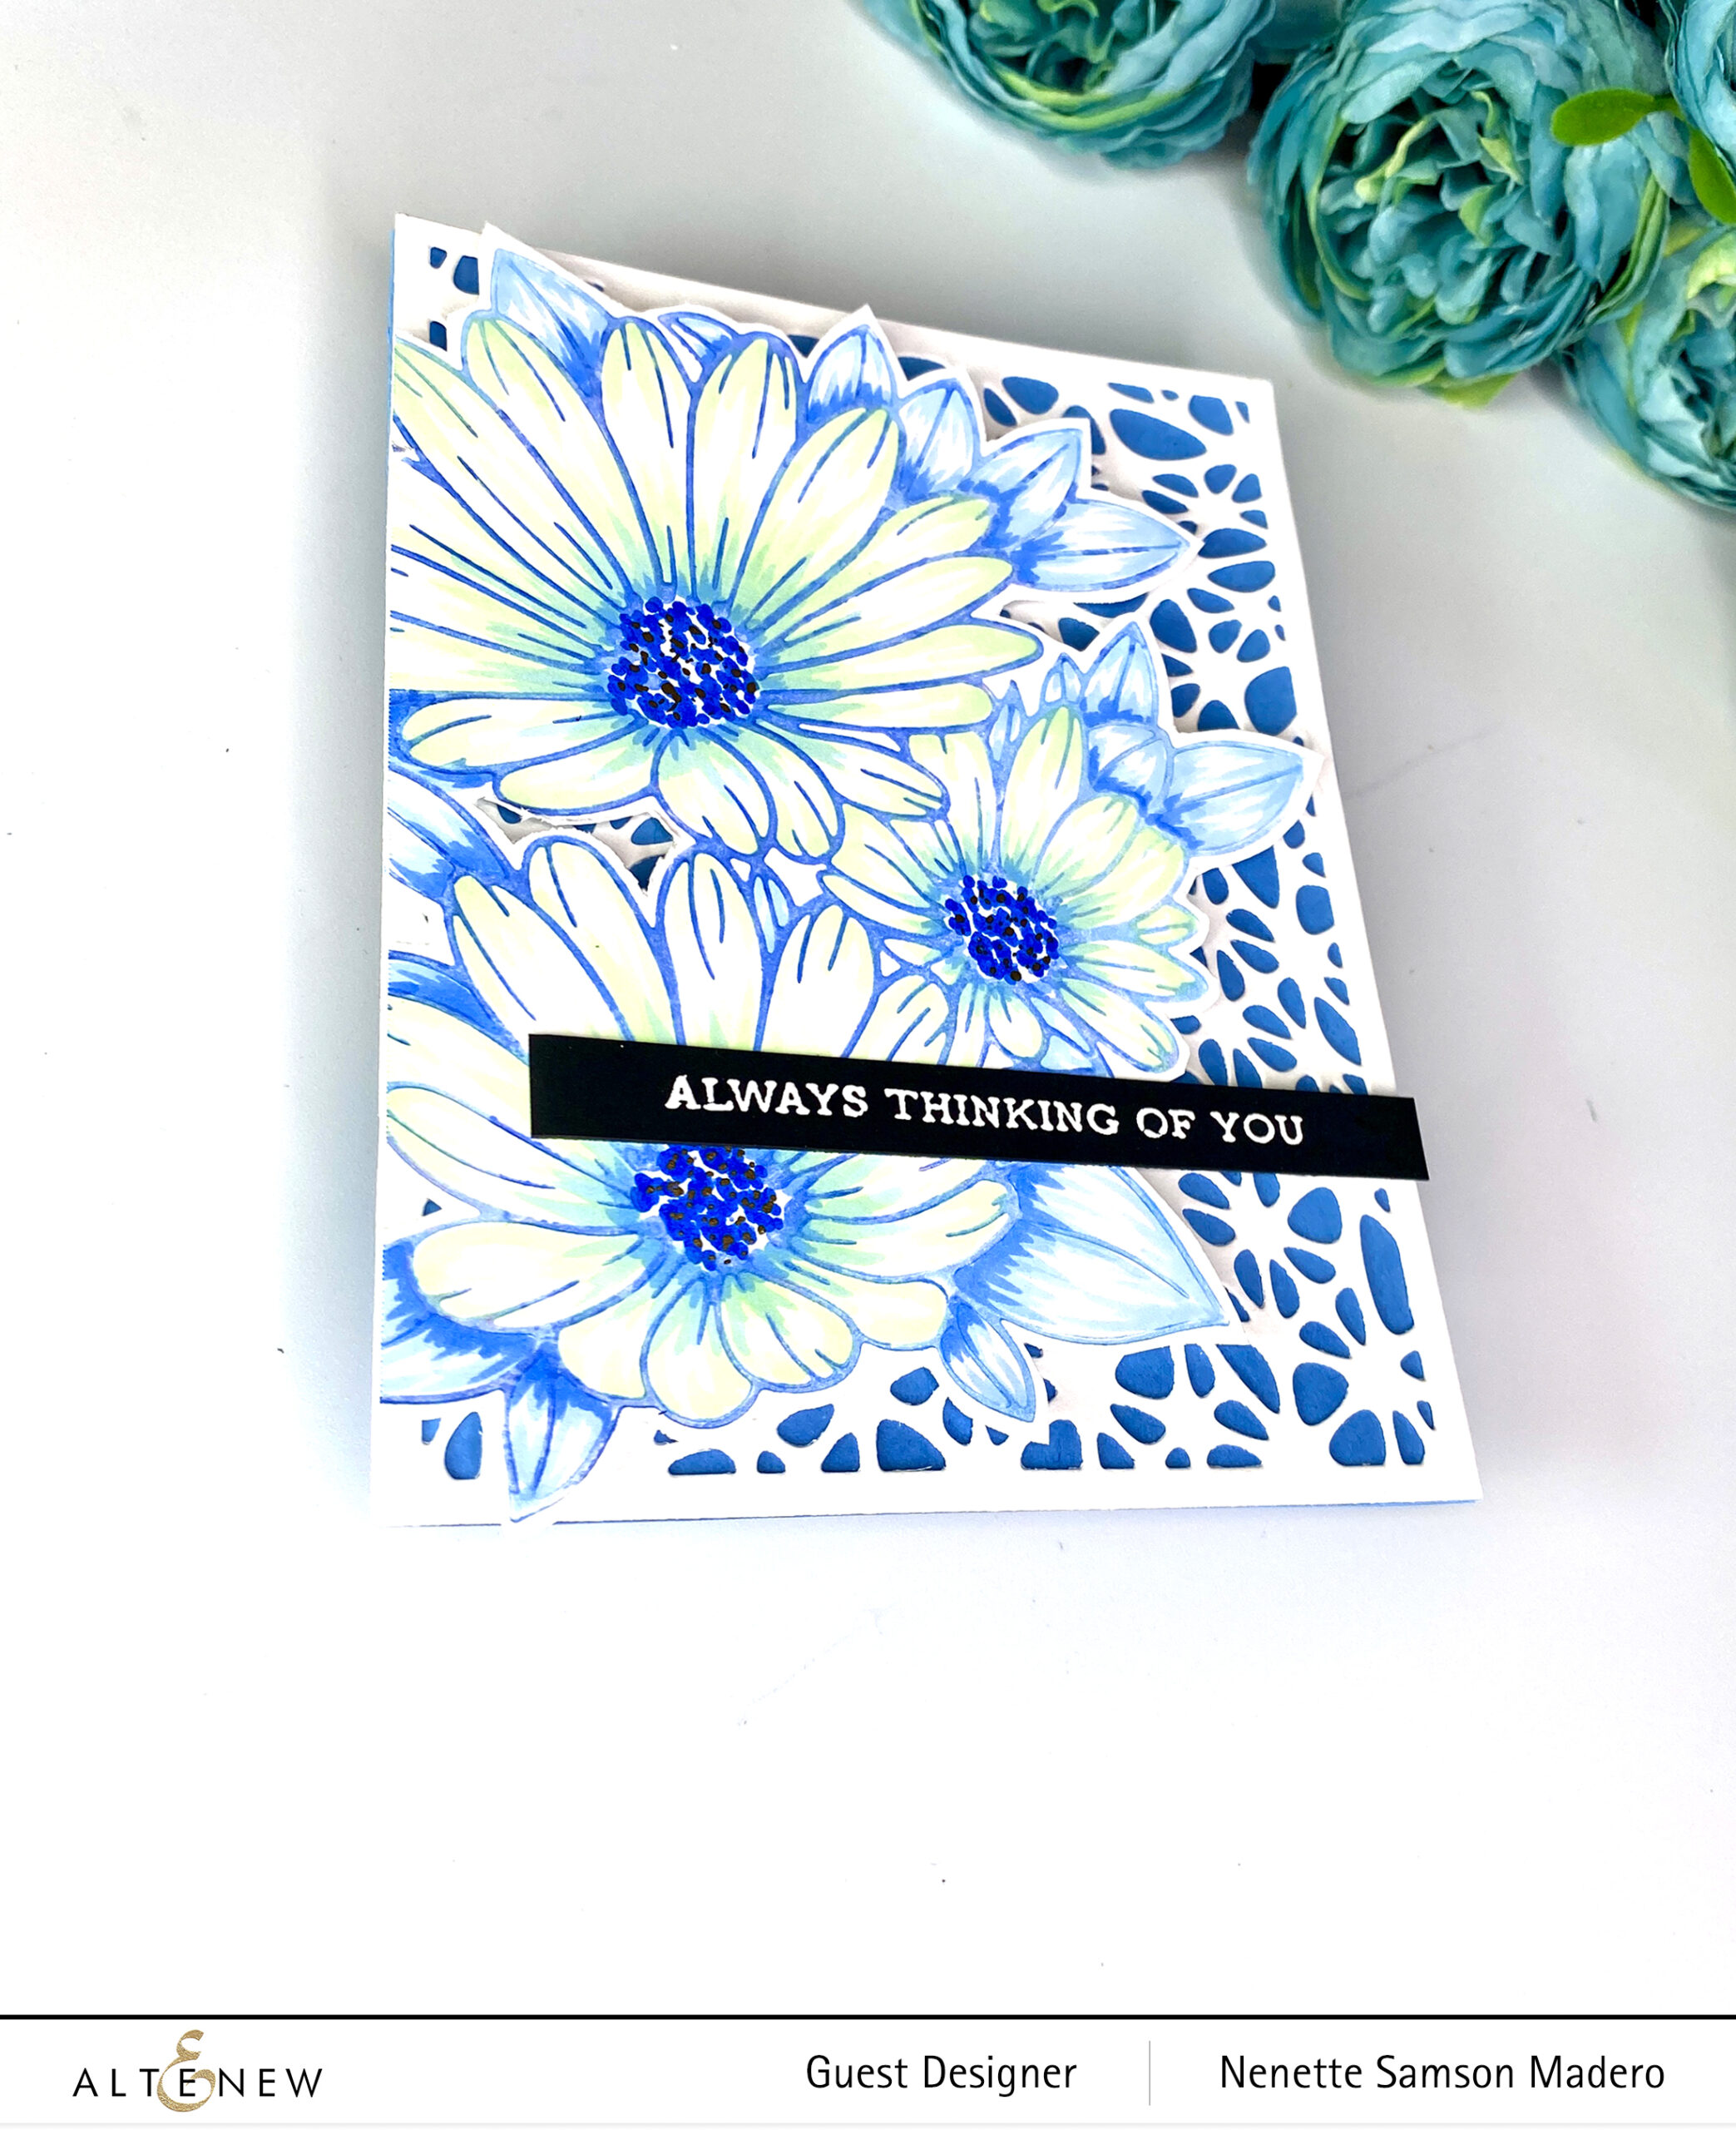
STEPS:
- Brayer Mixed Media Ink on the Vibrant Florals Hot Foil plate and run it through the die cutting machine to print the image onto cardstock.
- Color the image using Alcohol inks.
- Die cut white cardstock using the Detailed Web cover die.
- Stamp and emboss the sentiment with Pure White Embossing powder on black cardstock.
- Assemble card with foam squares and adhesive.
This is another way you can expand the use of your Hot Foil Plates– by using them as a “stamp.” Jennifer Macguire has also used hot foil plates to create a faux letterpress look.
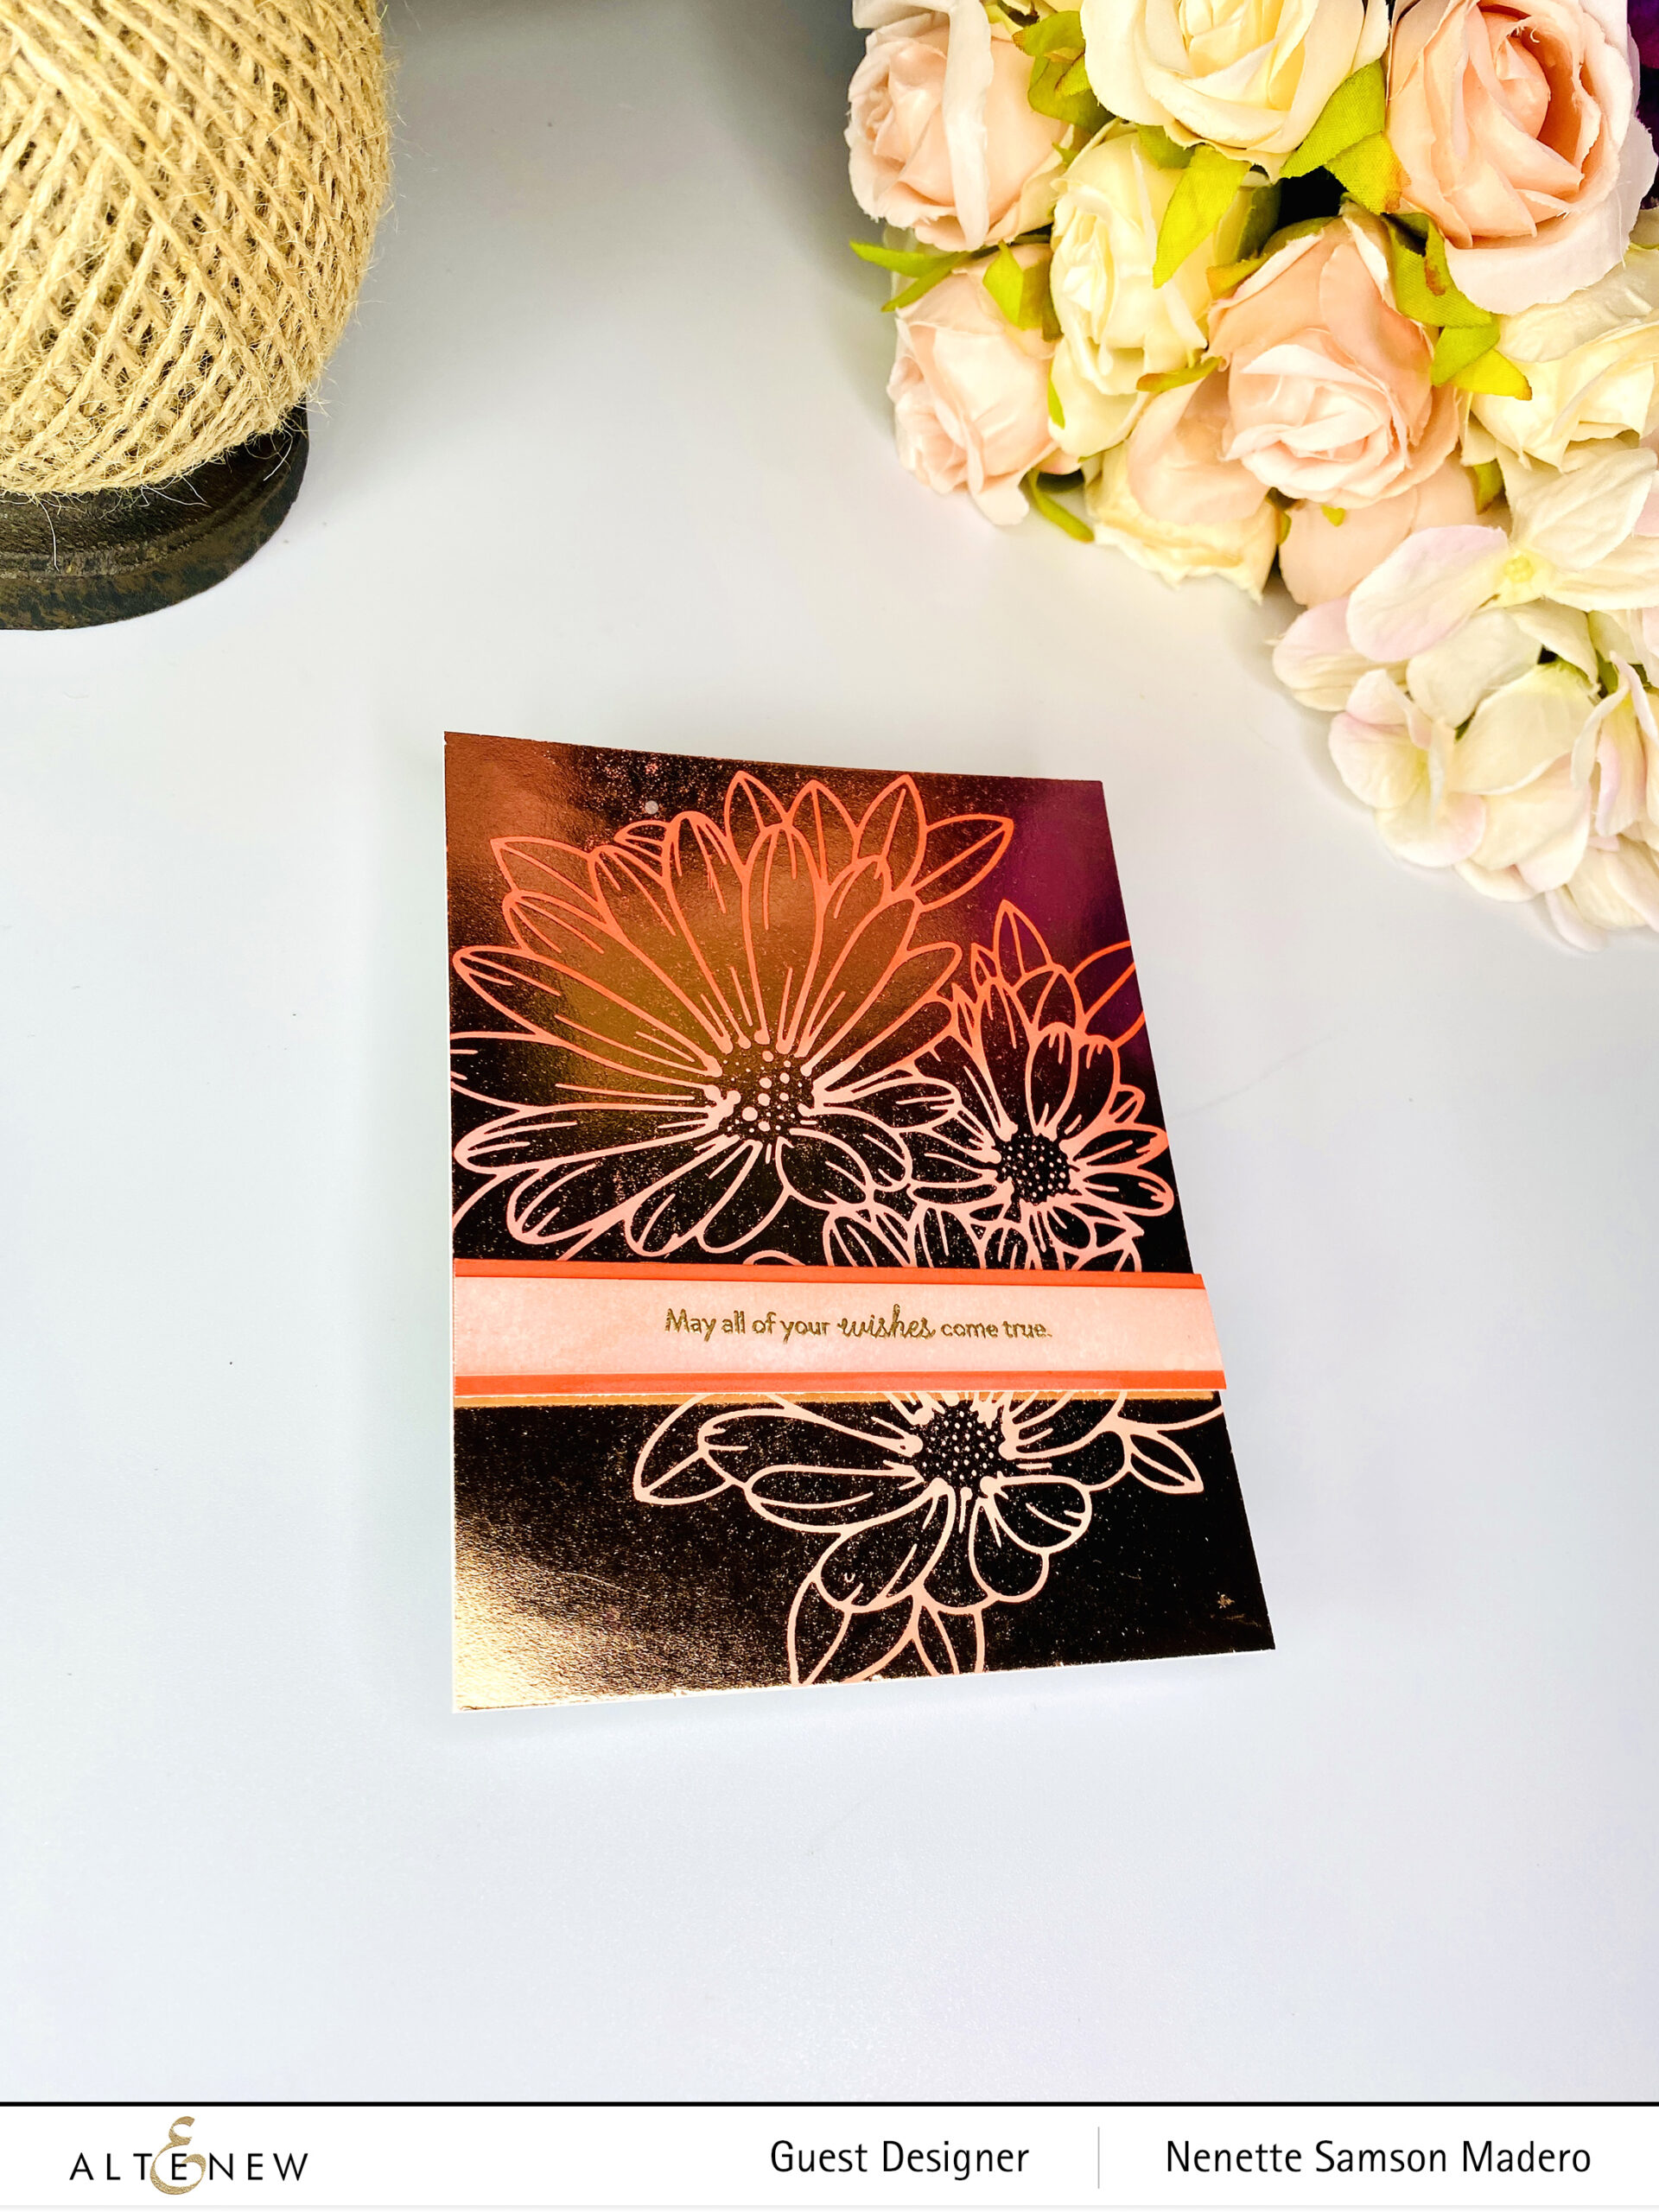
STEPS:
- Hot foil the negative leftover on white cardstock using a solid hot foil plate.
- Color the exposed paper using dye inks from the Tea Party mini dye ink set— Pink Pearl, Coral Bliss and Heart Beat creating an ombre look.
- Stamp the sentiment on paper(which was colored using one of the dye inks) and emboss with Rose gold embossing powder.
- Assemble card using adhesive and foam squares.
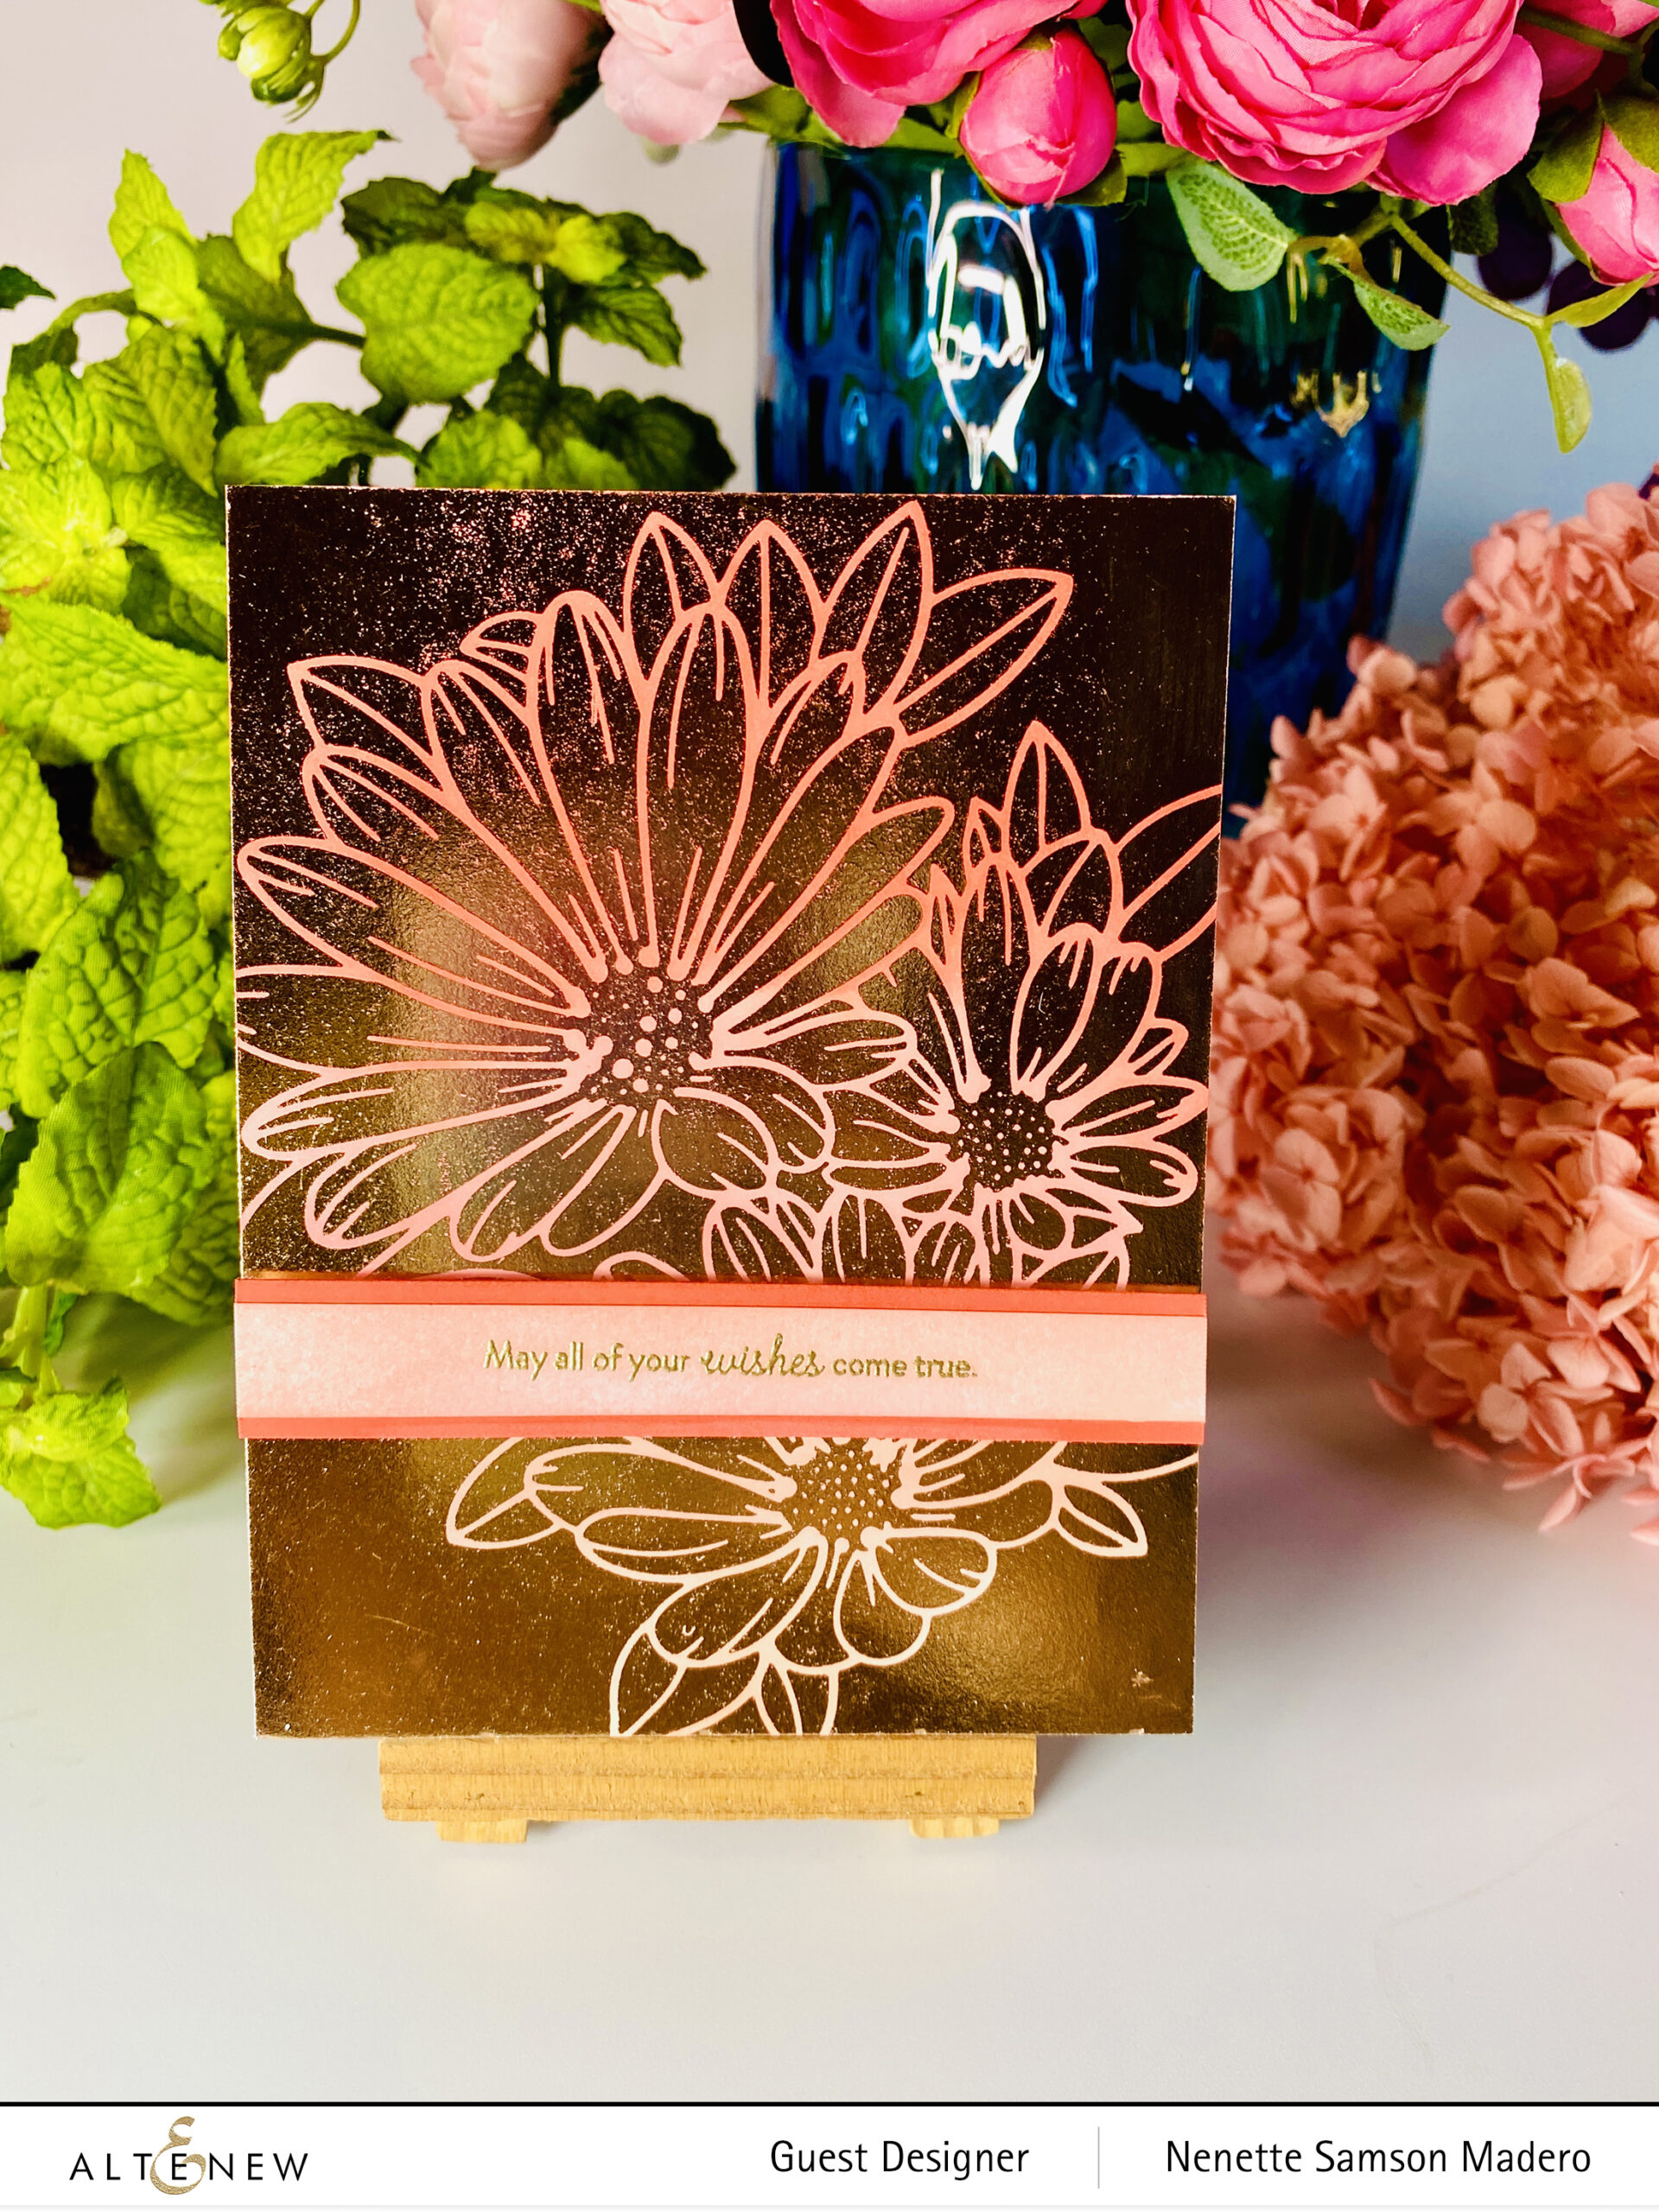
I love how you can still use the negative image on the foil to create a lovely background. Nothing goes to waste! 🙂
The next card is my favorite. 💕 I used the inlay technique.
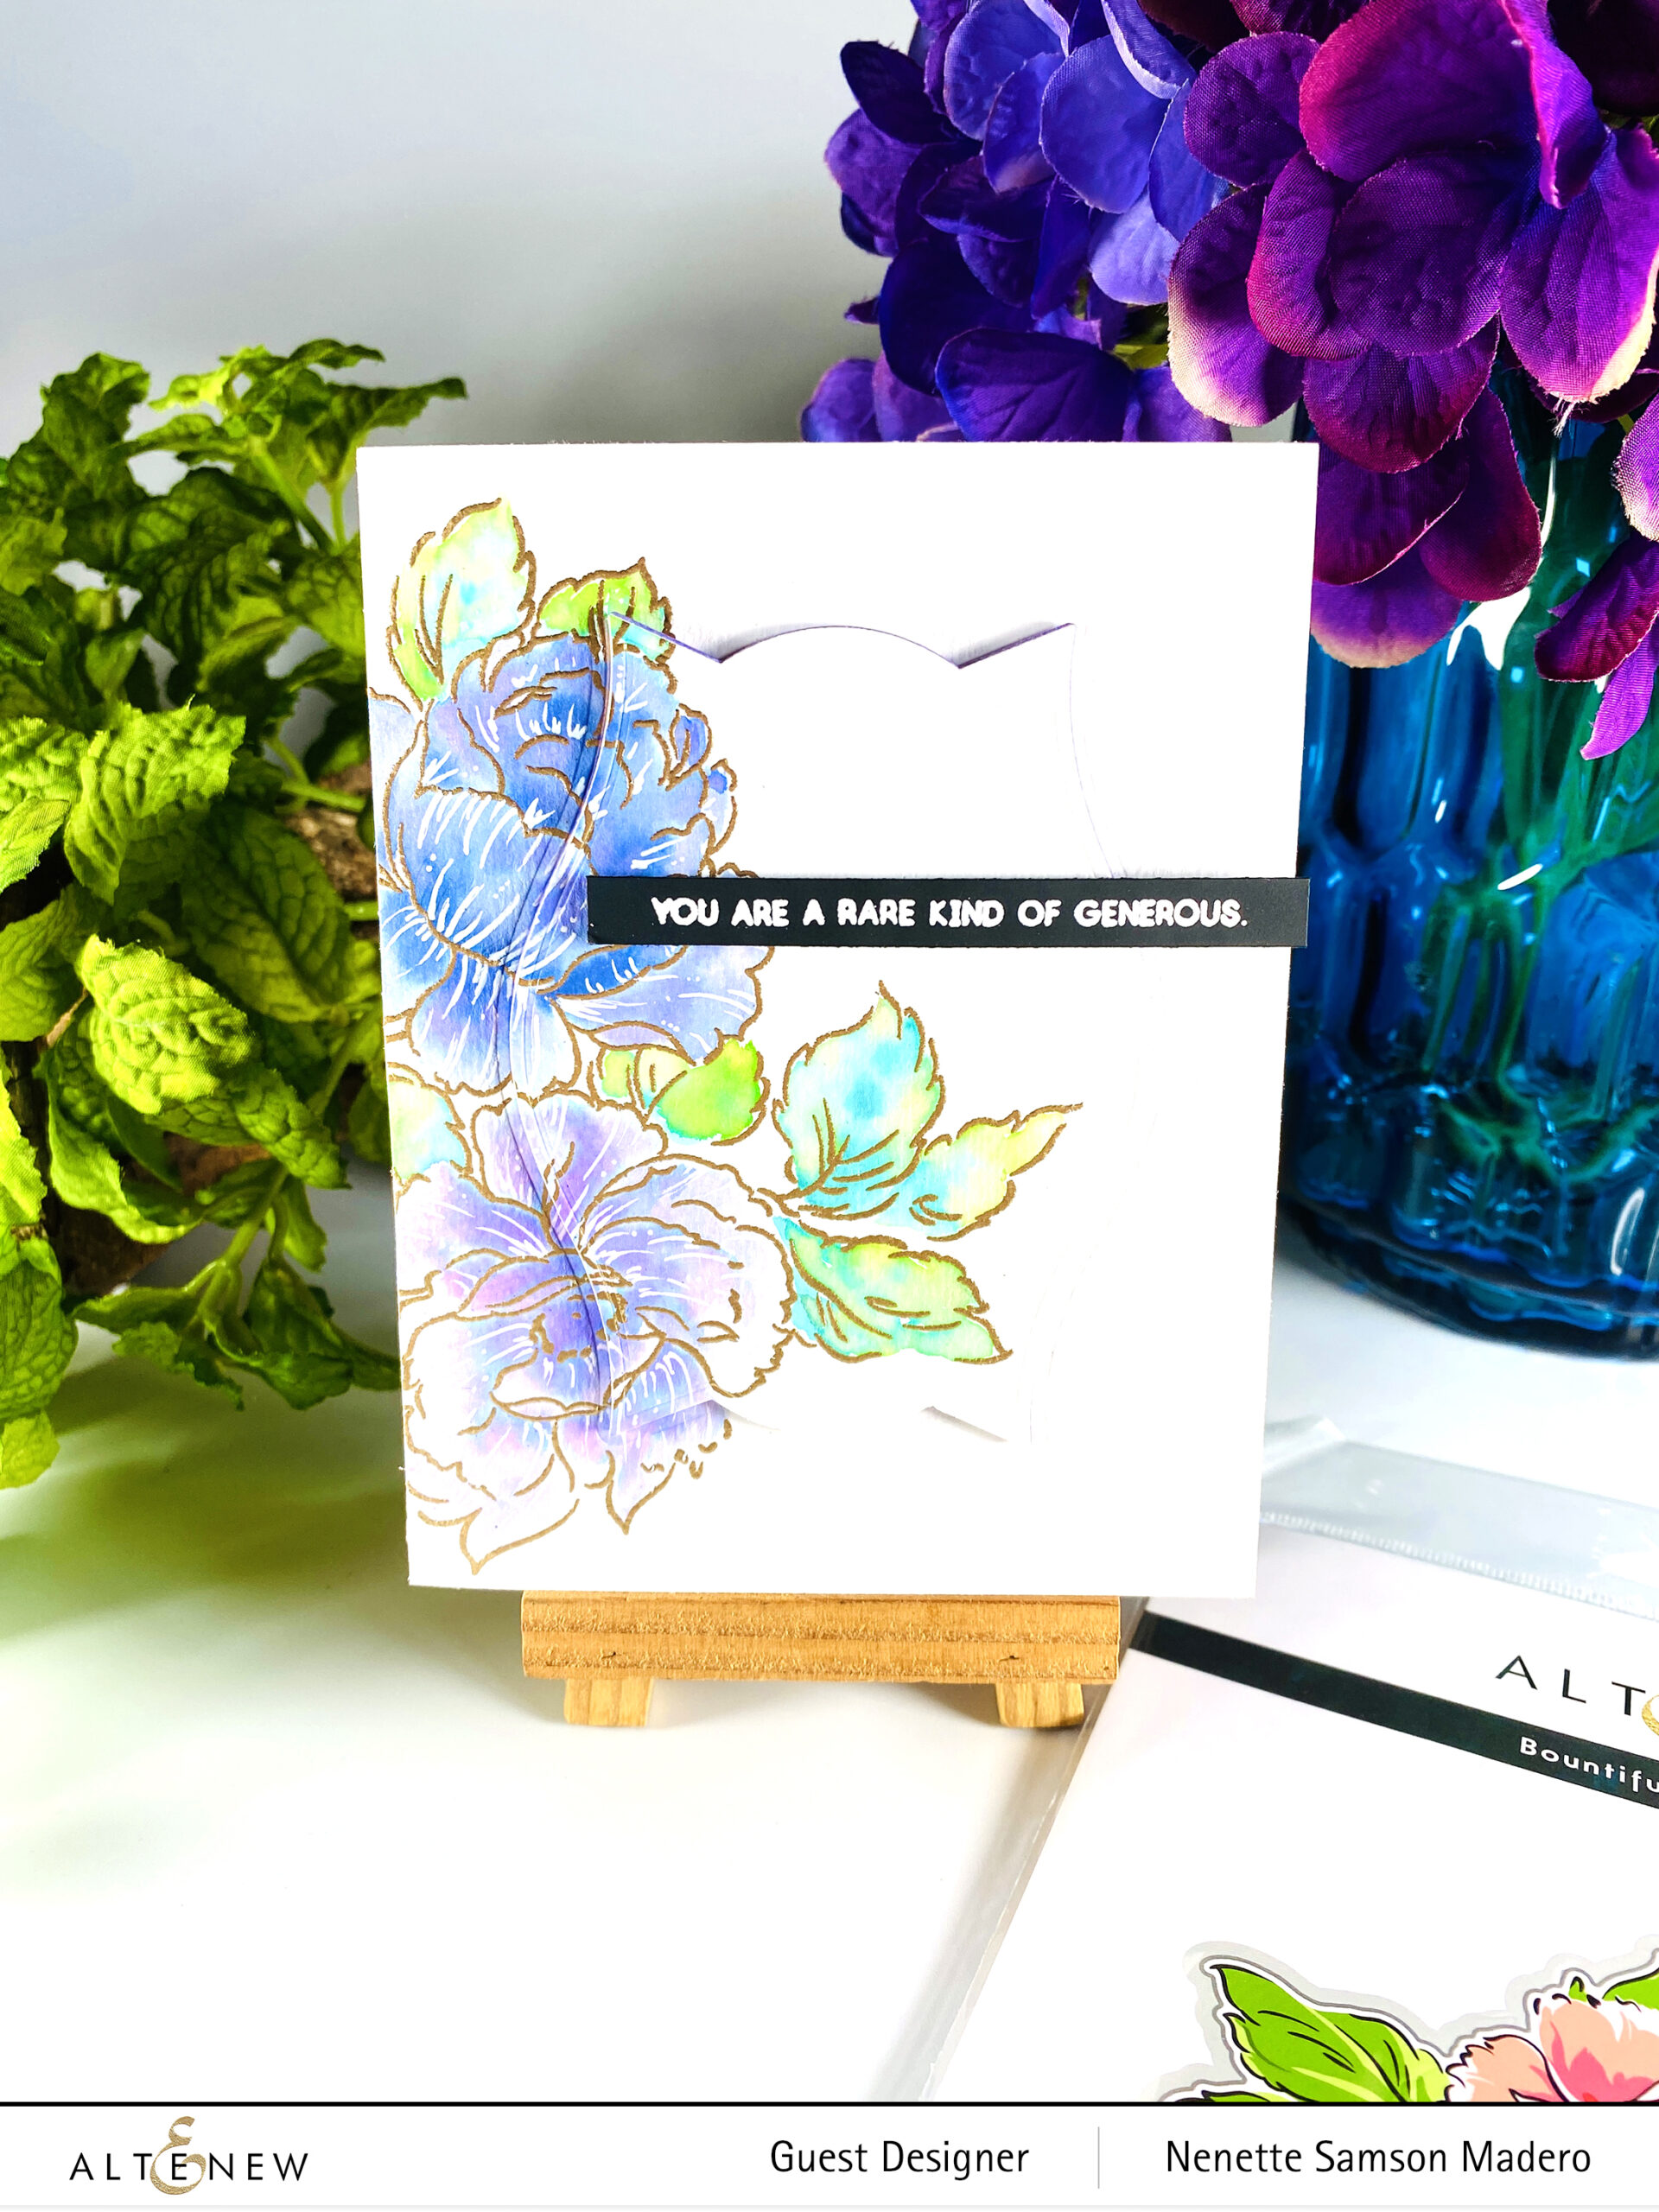
YOU ARE A RARE KIND OF GENEROUS
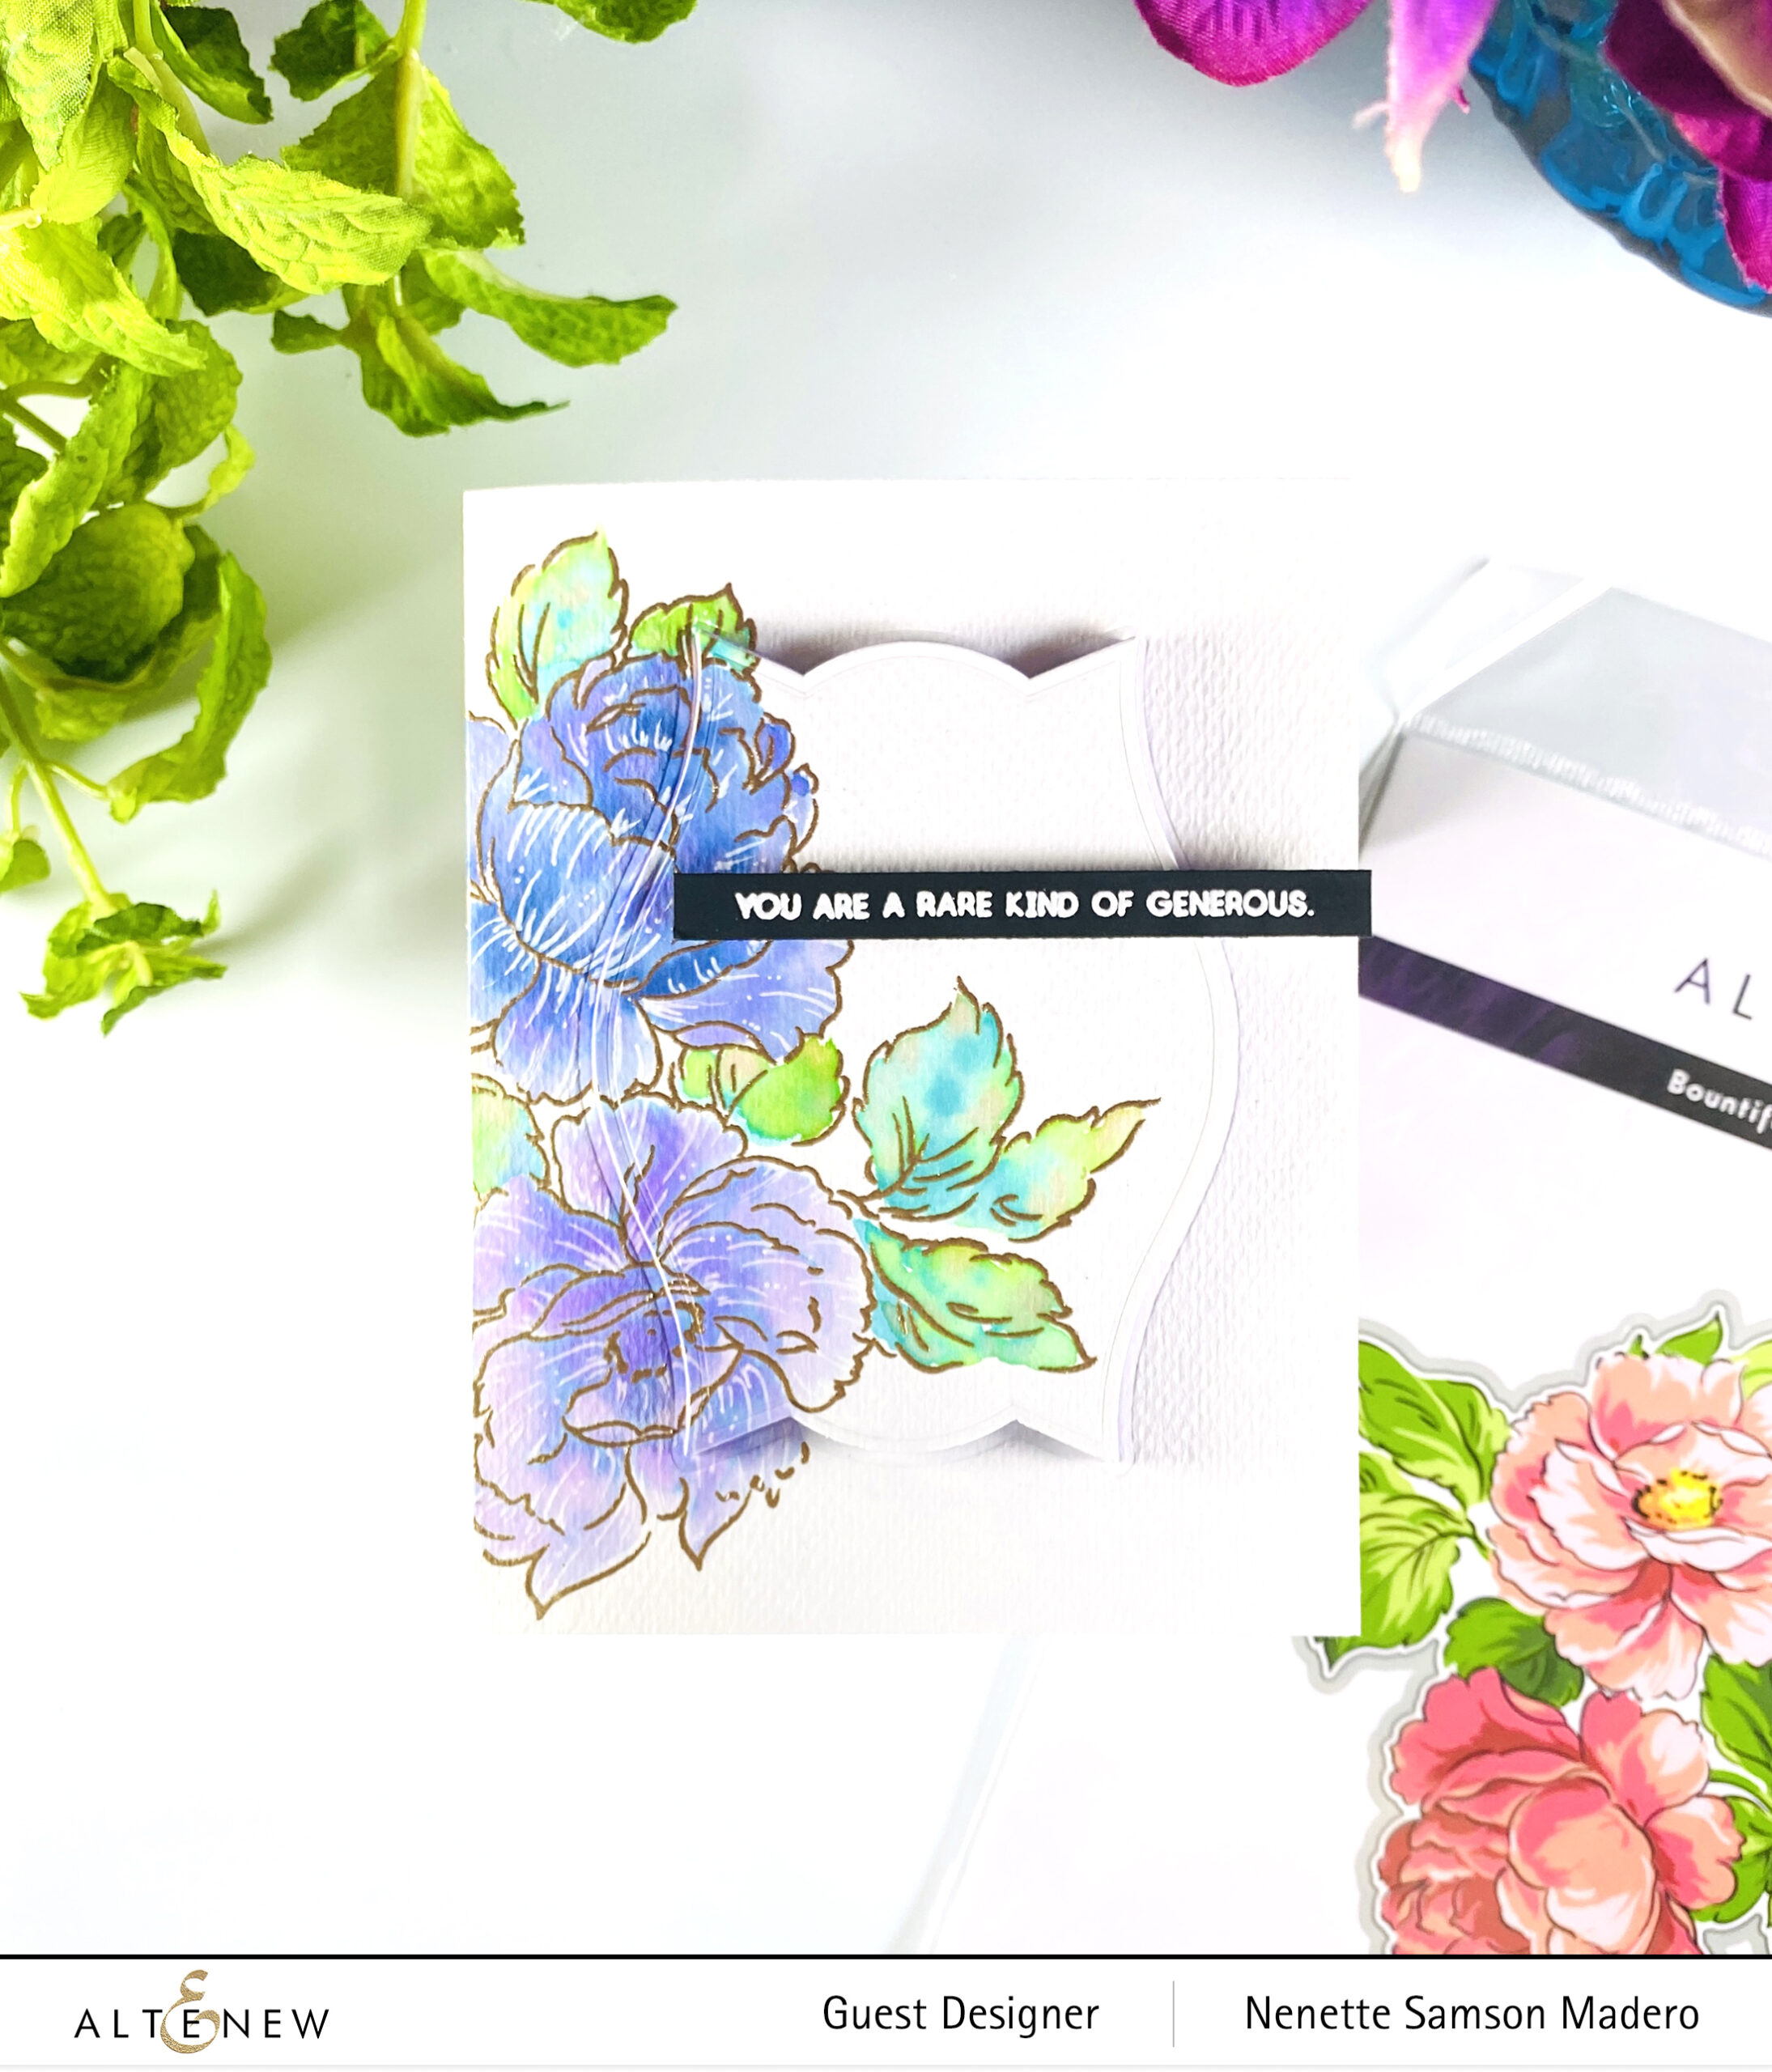
STEPS:
- Stamp image from the Bountiful Bouquet Stamp set onto watercolor paper and embossing using Rose Gold embossing powder.
- Watercolor using dye inks.
- Add details using a white pigment pen.
- Die cut the image using Nesting Frames die.
- Emboss the sentiment.
- Assemble the card.
LOVE YOUR KIND HEART
STEPS:
- Stamp with a light ink using the outline stamp.
- Stamp the other layers of the floral and leaf stamps.
- Die cut the flowers as well as extras for the backing of the flowers.
- Adhere to cardfront using foam squares.
- Stamp sentiment and emboss.
BE HAPPY
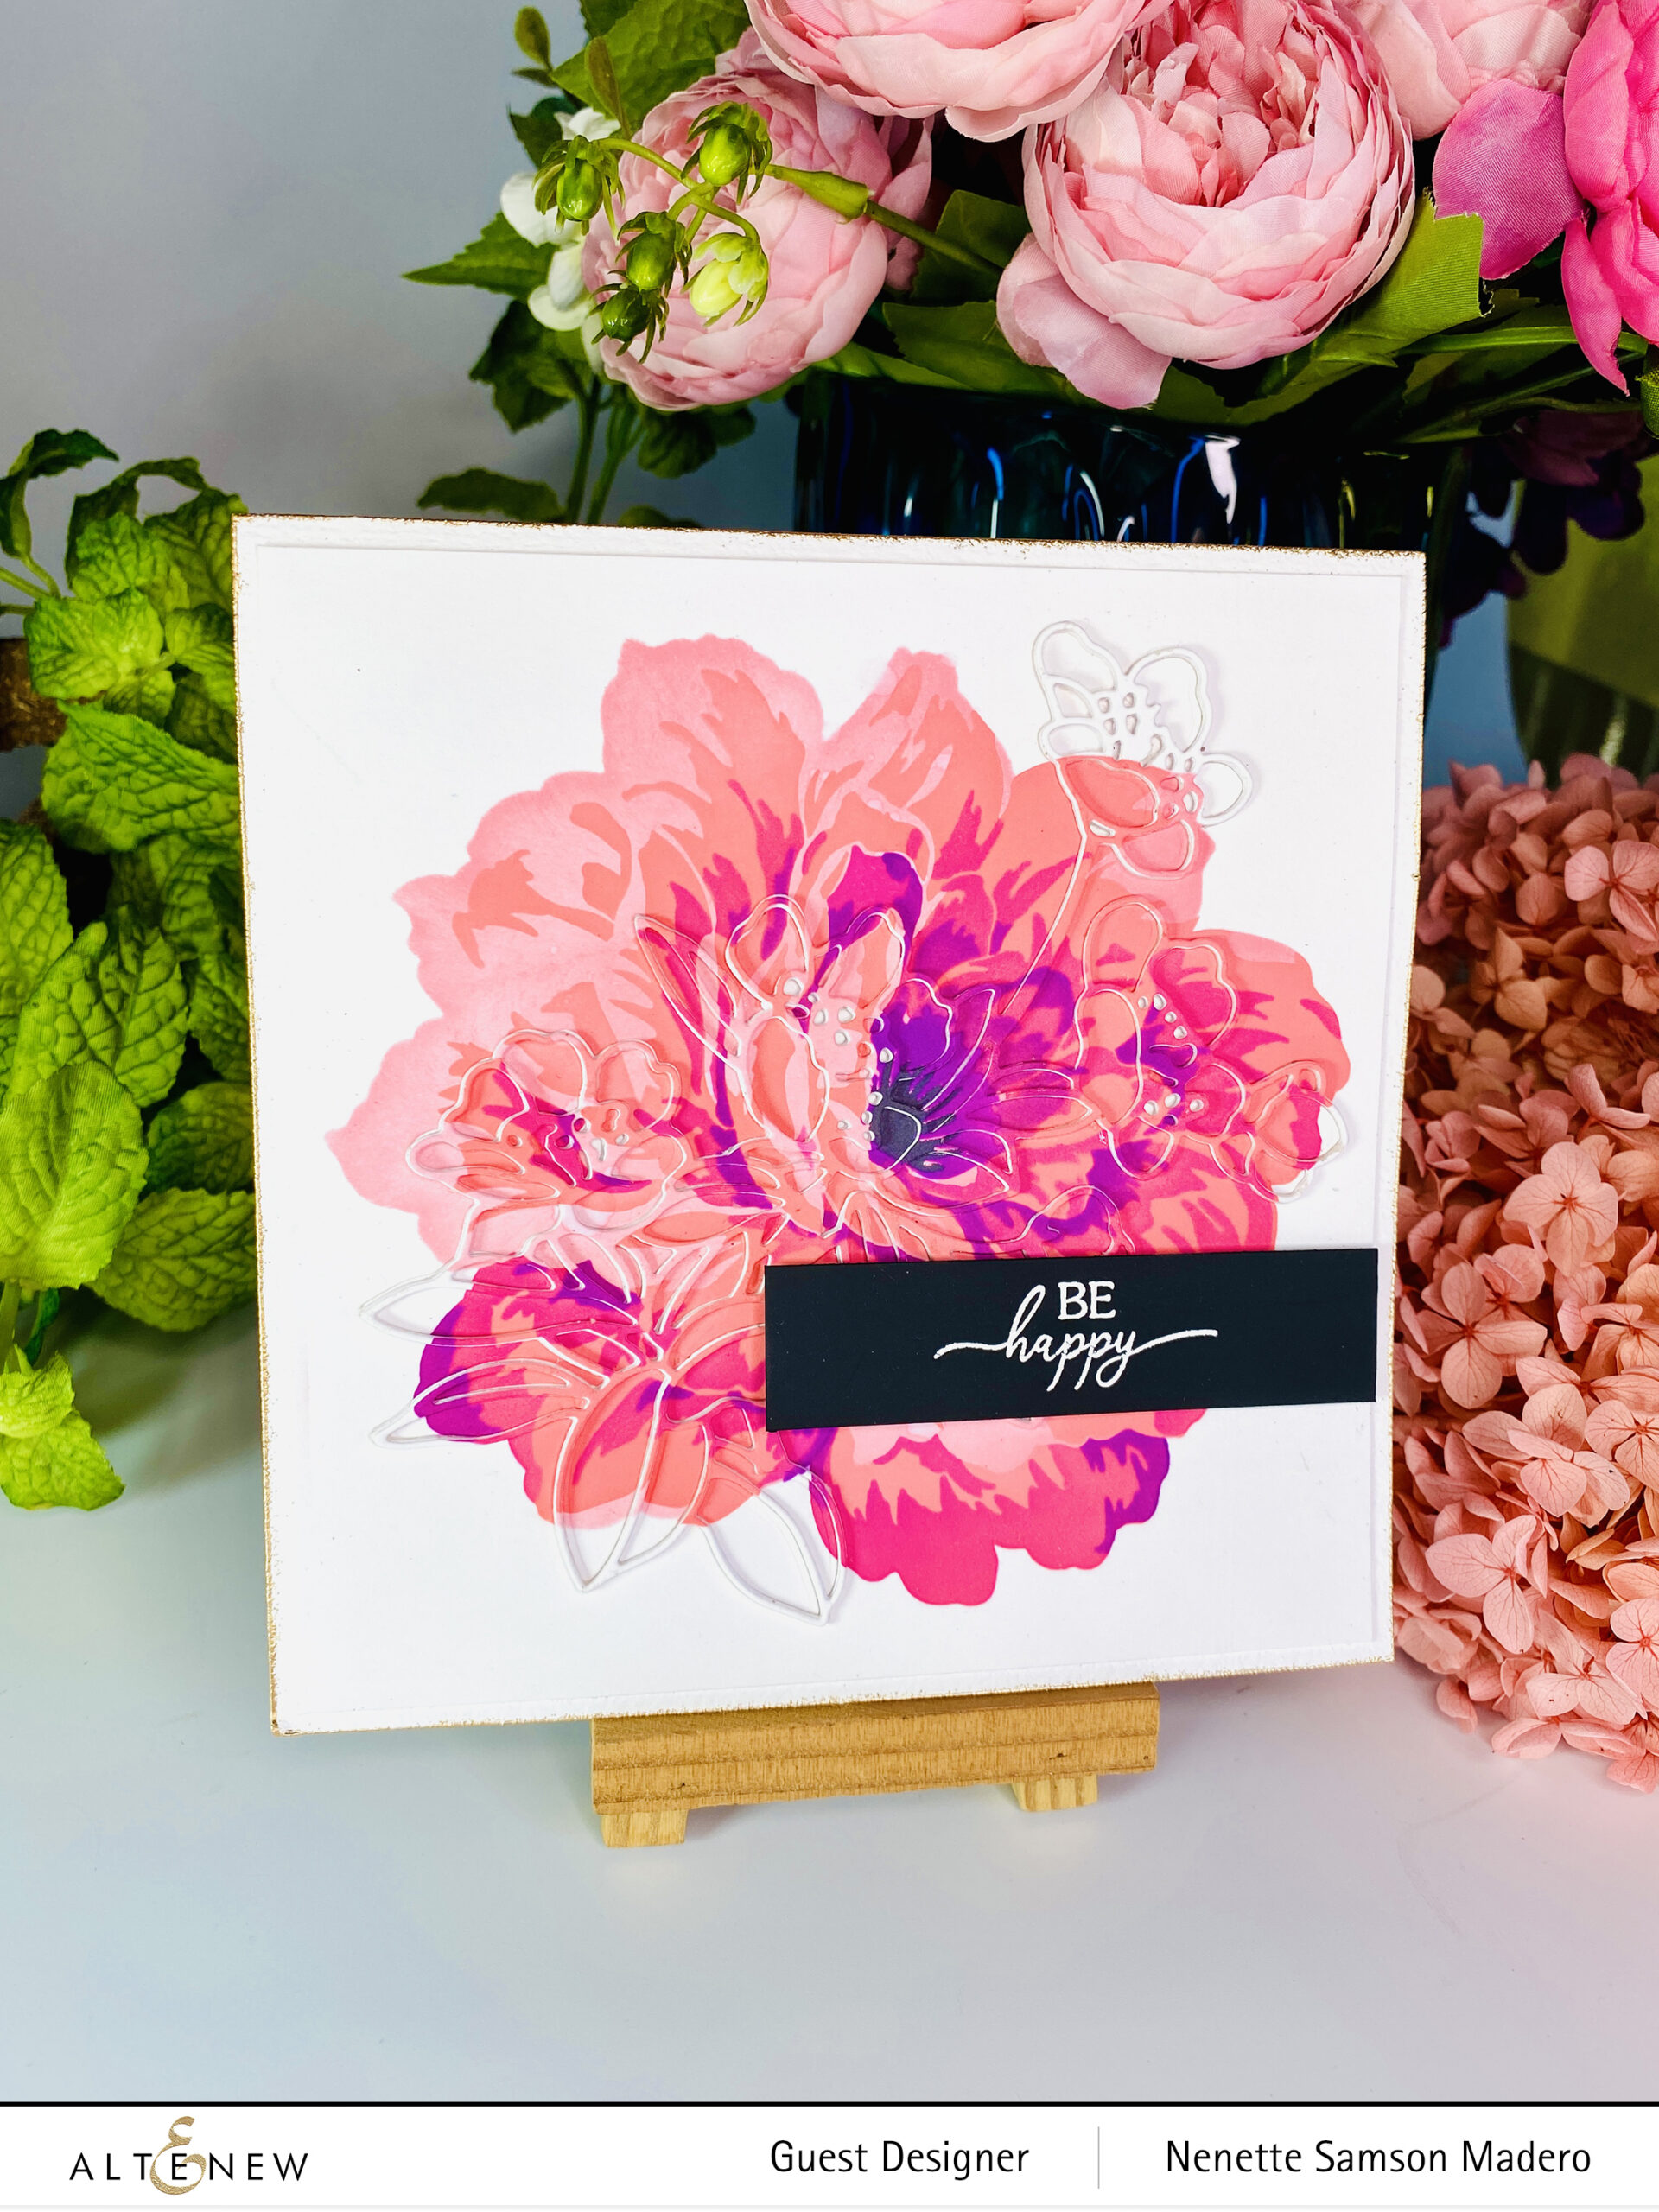
STEPS:
- Create a background using the Golden Days stencils and dye inks.
- Die cut the center using the Antique Blossoms die. Use Press and Seal to pick up all the positive and negative parts of the die cut.
- Die cut 4 more layers using white cardstock and adhere on top of each other. Add the colored layer on top.
- Glue the background panel onto a card base.
- Inlay the die cut and add the negative pieces.
- Emboss the edges of the card using Rose gold embossing powder.
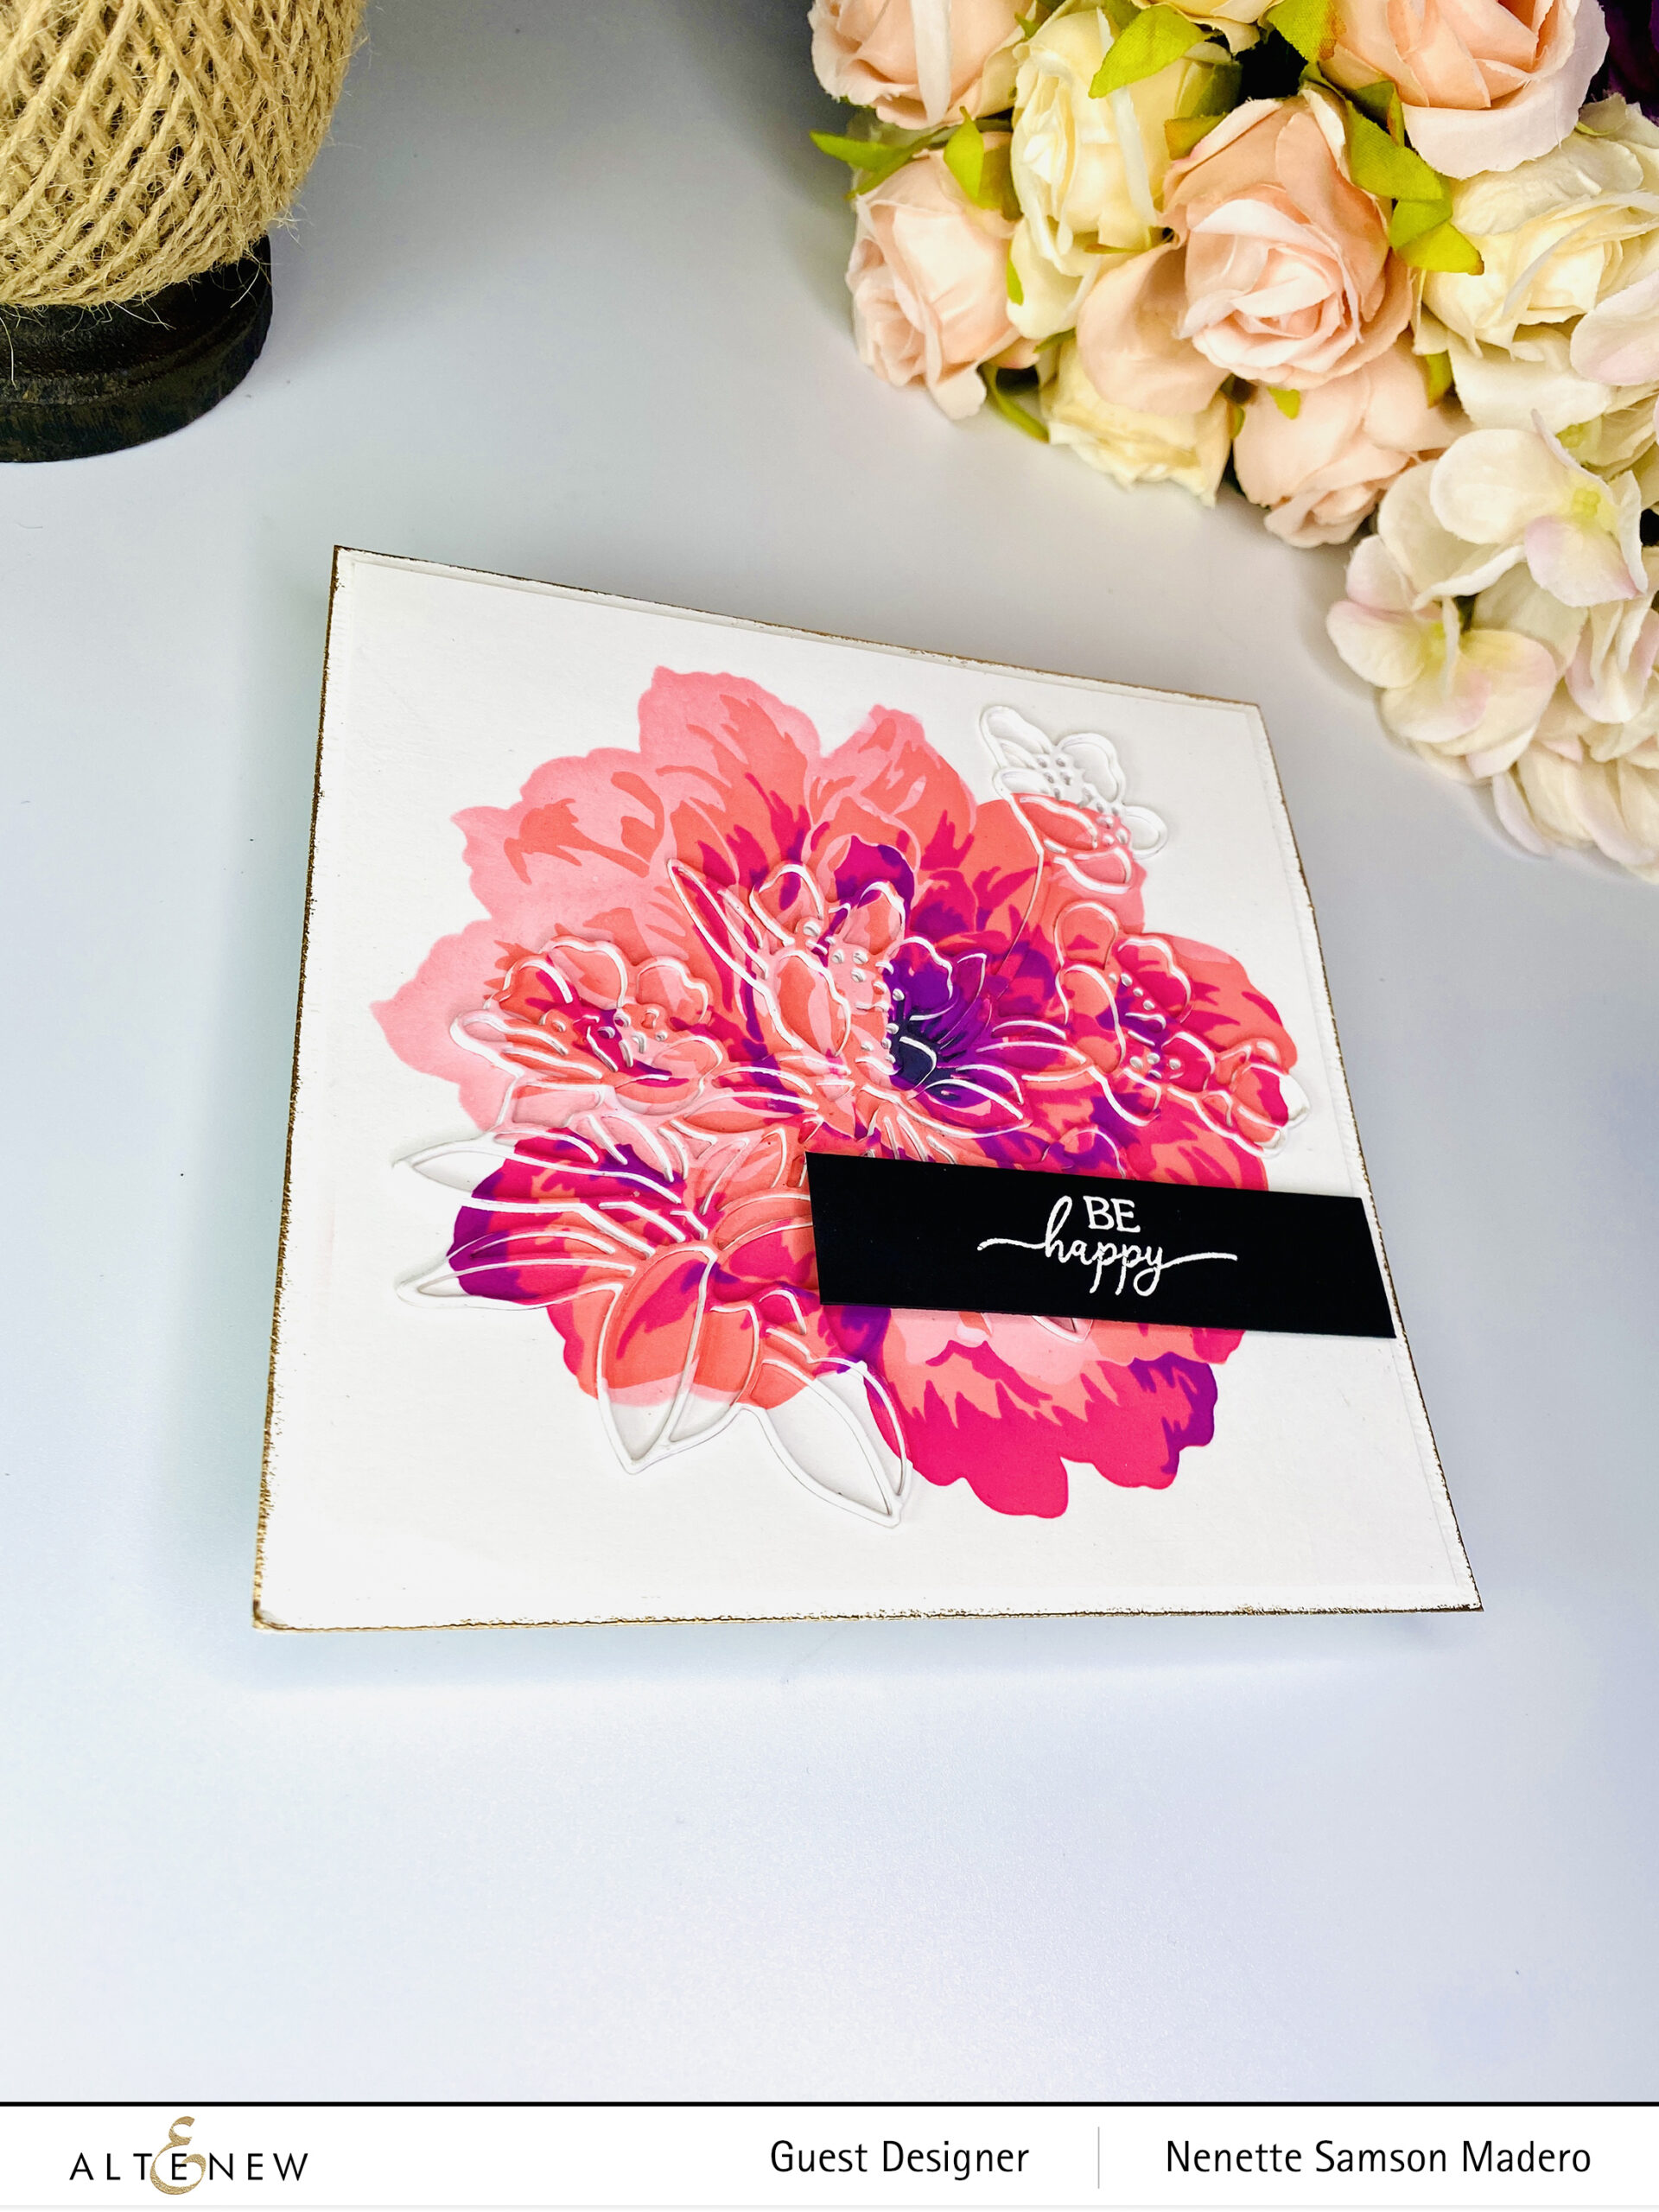
Do you like this card, too? I love how the Antique Blossoms die-cut is somehow hidden, but the die-cut is revealed when you tilt the card. The Golden Days layering stencil is one of my latest favorites of the layering stencils that Altenew offers. It’s such a beauty!!!
GIVEAWAYS
$300 in total prizes! To celebrate this release, Altenew is giving away a $50 gift certificate to 2 lucky winners and a $25 gift certificate to 8 winners! Please leave a comment on the Altenew Card Blog and/or each designer’s blog post on the blog hop list below by 05/01/2022 for a chance to win.
Altenew will draw ten random winners from the comments left on each stop of this blog hop and announce the winners on the Altenew Winners Page on 05/03/2022.
The next stop is Agnieszka Małyszek. Thanks so much for dropping by! Your comments mean so much to me! Let me know which one is your favorite. If you liked what you saw, please subscribe to this blog, and I hope you can follow me on Instagram, Pinterest, and Facebook (links below). Stay safe, everyone, and happy crafting! <3
